the art and science of hair color & texture - las · pdf fileintroduction the aveda...
TRANSCRIPT

The Art and Science of Hair Color & Texture
e d u c ato r r e f e r e n c e g u i d e
aveda beliefs
1. We believe in treating ourselves, each other and the planet with care and respect.
2. We believe social responsibility is our responsibility.
3. We believe ecological and profit goals are mutually achievable.
7. We believe learning never ends.
8. We believe in encouraging innovation and empowered decision-making.
9. We believe our actions, products and services should always embody excellence.
4. We believe our authenticity and experience are our points of difference.
5. We believe in inspiring and educating people to integrate wellness and beauty in their lives.
6. We believe in the power of oneness, from our global image to a focused network.
10. We believe personal and organizational balance is the key to sustainable success.
11. We believe true leadership is delivered with passion and by example.
aveda vision
Connecting beauty, environment and well-being.

Our mission at Aveda is to care for the world we live in, from the products we make to the ways in which we give back to society. At Aveda, we strive to set an example for environmental leadership and responsibility, not just in the world of beauty, but around the world. — horst rechelbacher, founder of aveda


The Art and Science of Hair Color & Texture
e d u c ato r r e f e r e n c e g u i d e

Introduction The Aveda Experience
module 1: The Art and Science of Hair Color
the art and science of hair color
Chapter 1 Understanding Color. . . . . . . . . . . . . . . . . . . . .9 1 Color Theory . . . . . . . . . . . . . . . . . . . . . . . . . . . . . . .10 2 Natural Hair Color . . . . . . . . . . . . . . . . . . . . . . . . . . . 11 3 The Level System . . . . . . . . . . . . . . . . . . . . . . . . . . . 11
Chapter 2 Hair Color Consultation . . . . . . . . . . . . . . . . . 13 1 Guest Natural Attributes. . . . . . . . . . . . . . . . . . . . . .14 2 A Blueprint to Better Hair Coloring . . . . . . . . . . . . . 15 3 How to Perform a Strand Test. . . . . . . . . . . . . . . . . . 15 4 Hair Color Cautions . . . . . . . . . . . . . . . . . . . . . . . . .16
Chapter 3 Hair Color Chemistry, Formulating, Mixing . .19 1 The Evolution of Hair Color . . . . . . . . . . . . . . . . . . . 20 2 Today’s Hair Color Products. . . . . . . . . . . . . . . . . . 20 3 Chemical Actions of Permanent Hair Color . . . . . . .21 4 Formulating and Mixing Permanent Hair Color. . . .21 5 Formulating and Mixing High Lift Color . . . . . . . . . 22
permanent hair color applications
Chapter 4 Full Head Color Application Fundamentals . .25 1 Work Flow . . . . . . . . . . . . . . . . . . . . . . . . . . . . . . . . 26 2 Guest Comfort and Protection . . . . . . . . . . . . . . . . 26 3 Sectioning and Subsectioning. . . . . . . . . . . . . . . . .27 4 Product Application . . . . . . . . . . . . . . . . . . . . . . . . 28 5 Strand Test . . . . . . . . . . . . . . . . . . . . . . . . . . . . . . . 29
Table of Contents
Chapter 5 Permanent Color Applications . . . . . . . . . . . .31 1 Retouch Reestablish Application . . . . . . . . . . . . . . 32 2 Retouch Refresh Application . . . . . . . . . . . . . . . . . .33 3 Virgin Lighter Application . . . . . . . . . . . . . . . . . . . 34 4 Virgin Darker Application. . . . . . . . . . . . . . . . . . . . 34 5 Alternative Virgin Lighter Application . . . . . . . . . . .35 6 Lightening and Toning Application . . . . . . . . . . . . 36
Chapter 6 Freehand Permanent Color Applications. . . .37 1 Comb-On Color Application . . . . . . . . . . . . . . . . . . 38 2 Shoe Shine Application . . . . . . . . . . . . . . . . . . . . . 38
Chapter 7 Advanced Hair Color Applications . . . . . . . . 39 1 Circles Application . . . . . . . . . . . . . . . . . . . . . . . . . 40 2 Color Melting Application . . . . . . . . . . . . . . . . . . . 40
henna, temporary and demi-permanent color
Chapter 8 Henna Hair Color. . . . . . . . . . . . . . . . . . . . . . .41 1 Henna Hair Color Features and Precautions . . . . . 42
Chapter 9 Temporary Hair Color . . . . . . . . . . . . . . . . . . .43 1 Temporary Hair Color Application . . . . . . . . . . . . . 44
Chapter 10 Demi-Permanent Hair Color . . . . . . . . . . . . .45 1 Demi-Permanent Hair Color Application . . . . . . . . 46
dimensional color using foil
Chapter 11 Fundamentals of Applying Dimensional Color Using Foil . . . . . . . . . . . . . . . . . . . . . . . . . . . . . . . . . . . . .47 1 Guest Comfort and Protection . . . . . . . . . . . . . . . . . 51 2 Sectioning. . . . . . . . . . . . . . . . . . . . . . . . . . . . . . . . . 51 3 Subsectioning/Weaving/Slicing . . . . . . . . . . . . . . .52 4 Product and Foil Packet Application . . . . . . . . . . . .53 5 Strand Test . . . . . . . . . . . . . . . . . . . . . . . . . . . . . . . .53
Chapter 12 Classic Foil Applications . . . . . . . . . . . . . . . .55 1 Six Basic Section Full Head Foil Application . . . . . .56 2 Alternative Full Head Foil Application . . . . . . . . . . .56 3 Partial Hair Foil Application . . . . . . . . . . . . . . . . . . .57 4 Short Hair Foil Application . . . . . . . . . . . . . . . . . . . .57 5 Singles Application. . . . . . . . . . . . . . . . . . . . . . . . . 58 6 Tipping Application . . . . . . . . . . . . . . . . . . . . . . . . .59
Chapter 13 Dimensional Color Combination Applications 61 1 Full Head Color with Slices Application . . . . . . . . . 62 2 Back-to-Back Slices Application . . . . . . . . . . . . . . 63
corrective color techniques
Chapter 14 Corrective Color Techniques . . . . . . . . . . . . .65 1 Corrective Color Consultation. . . . . . . . . . . . . . . . . 66 2 Color Cleansing Technique. . . . . . . . . . . . . . . . . . . .67 3 PreColoration Technique . . . . . . . . . . . . . . . . . . . . 68 4 Cautions Correcting Hair Colored with Henna . . . 69
table of contents | © aveda 2006

Table of Contents
the art and science of texture and curl
Chapter 1 Introduction to Texture and Curl . . . . . . . . . .75 1 History and Product Varieties. . . . . . . . . . . . . . . . . .76 2 Chemistry of Permanent Waving . . . . . . . . . . . . . . .77 3 Set Up and Preparation . . . . . . . . . . . . . . . . . . . . . .77 4 All About Rods . . . . . . . . . . . . . . . . . . . . . . . . . . . . .78
Chapter 2 Guest Consultation . . . . . . . . . . . . . . . . . . . . .81 1 Guest Consultation . . . . . . . . . . . . . . . . . . . . . . . . . 82 2 Precautions. . . . . . . . . . . . . . . . . . . . . . . . . . . . . . . 83
permanent wave techniques
Chapter 3 Fundamentals of Basic Permanent Wave Techniques . . . . . . . . . . . . . . . . . . . . . . . . . . . . . . 85 1 Sectioning, Blocking and Wrapping. . . . . . . . . . . . 86 2 Solution Application, Processing and Test Curl . . .87 3 Rinsing, Blotting and Neutralizing . . . . . . . . . . . . 88 4 Review of Procedure. . . . . . . . . . . . . . . . . . . . . . . . 88
Chapter 4 Texture and Curl Techniques . . . . . . . . . . . . 89 1 Alpha Wrap . . . . . . . . . . . . . . . . . . . . . . . . . . . . . . . 90 2 Spiral and Piggy Back Combination Wrap. . . . . . . 90 3 Six Section Wrap. . . . . . . . . . . . . . . . . . . . . . . . . . . .91 4 Weave Wrap . . . . . . . . . . . . . . . . . . . . . . . . . . . . . . 92 5 Bricklay Wrap . . . . . . . . . . . . . . . . . . . . . . . . . . . . . 92 6 Root Wrap . . . . . . . . . . . . . . . . . . . . . . . . . . . . . . . . .93 7 Insertion Wrap . . . . . . . . . . . . . . . . . . . . . . . . . . . . 94 8 Cluster Wrap . . . . . . . . . . . . . . . . . . . . . . . . . . . . . . 94 9 Pony Tail Wrap . . . . . . . . . . . . . . . . . . . . . . . . . . . . .95 10 Stack Wrap . . . . . . . . . . . . . . . . . . . . . . . . . . . . . . .95 11Transfer Wrap . . . . . . . . . . . . . . . . . . . . . . . . . . . . . 96 12 Customized Approach to Wrapping . . . . . . . . . . . .97
Chapter 5 Correcting Permanent Waves . . . . . . . . . . . . 99 1 Reducing Curl . . . . . . . . . . . . . . . . . . . . . . . . . . . . .100 2 Spot Wrap . . . . . . . . . . . . . . . . . . . . . . . . . . . . . . . .100
relaxing hair
Chapter 6 Relaxing Hair. . . . . . . . . . . . . . . . . . . . . . . . . 101 1 Guest Consultation . . . . . . . . . . . . . . . . . . . . . . . . .102 2 Virgin Relaxer Application . . . . . . . . . . . . . . . . . . .104 3 Retouch Relaxer Application . . . . . . . . . . . . . . . . .105 4 Corrective Relaxer Application. . . . . . . . . . . . . . . .105
Chapter 7 Reformation Curl . . . . . . . . . . . . . . . . . . . . . . 107 1 Reformation Curl Procedure . . . . . . . . . . . . . . . . . .108
Planning Tools for Salon Instructors curriculum planning tools for salon instructors . . . . . . . . . . . . . . . . . . . . . . . . . . . . . . . . .109
1 Determine Your Objectives . . . . . . . . . . . . . . . . . . . . . 110 2 Select Time Frame and Dates . . . . . . . . . . . . . . . . . . . 110 3 Choose Your Lessons . . . . . . . . . . . . . . . . . . . . . . . . . 111 4 Logistics . . . . . . . . . . . . . . . . . . . . . . . . . . . . . . . . . . . 113 5 Lesson Plans . . . . . . . . . . . . . . . . . . . . . . . . . . . . . . . . 113 6 Plan Your Next Education Event . . . . . . . . . . . . . . . . . 113
Module 2: The Art and Science of Texture and Curl
© aveda 2006 | table of contentsThe contents of these educational materials are the property of Aveda and may not be copied or distributed without the expressed permission of Aveda.

Technique Guide
This Guide includes step-by-step
application instructions with still
photography and/or graphic
illustrations
The components of the system include:
Educator Reference Guide
This Guide is designed to give the
educator an “at a glance” overview
of the materials availible for
teaching each lesson including:
• brief overview
• top teaching points
• related assessment tools on CD
• answer guides
• related video titles
• visual support images on CD
IntroductionThis Aveda Educational System is a fully-developed package of resources tohelp educators stimulate, educate, and assess their students.
2 introduction | © aveda 2006
attend
conn
ect
image
inform
prac
tice
extend
refine
perform
1r
1l
2r2l3l
3r
4l
4r

Education is not filling a bucket, but lighting a fire.
—William Butler Yeats
Note to Educators:
More specific information
regarding the lessons, applications
and techniques found in this
curriculum can be found in the
Aveda Hair Color Professional
Reference Guide and Hair Color
Systems booklets and the Re-
texturizing System Professional
Reference Guide.
1r Connect
Connect the students directly to
the concept in a personal way.
1l Attend
Guide students to reflection and
analysis of the experience.
2r Image
Use another medium (not reading
or writing) to connect students’
personal knowledge to the
concept (ie: visual arts, music,
movement, etc.)
2l Inform
Provide “acknowledged body of
knowledge” related to the concept.
3l Practice
Provide hands-on activities for
practice and mastery.
3r Extend
Encourage tinkering with ideas,
relationships and connections.
Provide opportunity for students
to design open-ended explora-
tions of the concept.
This learning system is designed
with the 4MAT teaching method in
mind. We encourage you to use it
as support for your lesson plans,
especially in the IMAGE/INFORM
and PRACTICE/EXTEND quadrants
of the learning cycle. Before major
sections of content are introduced,
sample 4MAT lesson plans are
provided. These are examples that
can be changed or customized
by the educator. They serve as a
reminder of the importance of creat-
ing engaging lessons that stimulate
the natural learning process and
facilitate all learning styles.
4l Refine
Give guidance and feedback to
students’ plans, encouraging,
refining and helping them to be
responsible for their own learning.
4r Perform
Support students in learning,
teaching and sharing with
others. Leave students wondering
(creatively) about further
possible applications of the
concept, extending the “what ifs”
into the future.
© aveda 2006 | introduction 3
Introduction
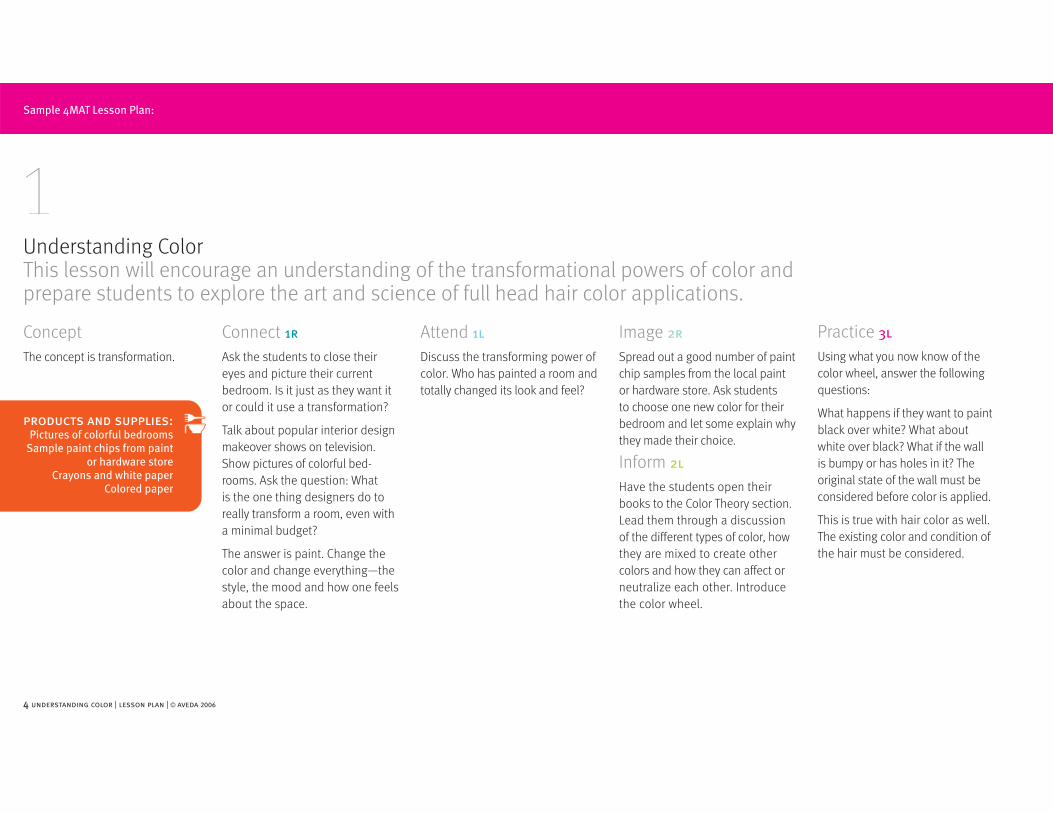
products and supplies:Pictures of colorful bedrooms
Sample paint chips from paint or hardware store
Crayons and white paperColored paper
Concept
The concept is transformation.
Connect 1r
Ask the students to close their
eyes and picture their current
bedroom. Is it just as they want it
or could it use a transformation?
Talk about popular interior design
makeover shows on television.
Show pictures of colorful bed-
rooms. Ask the question: What
is the one thing designers do to
really transform a room, even with
a minimal budget?
The answer is paint. Change the
color and change everything—the
style, the mood and how one feels
about the space.
Attend 1l
Discuss the transforming power of
color. Who has painted a room and
totally changed its look and feel?
Image 2r
Spread out a good number of paint
chip samples from the local paint
or hardware store. Ask students
to choose one new color for their
bedroom and let some explain why
they made their choice.
Inform 2l
Have the students open their
books to the Color Theory section.
Lead them through a discussion
of the different types of color, how
they are mixed to create other
colors and how they can affect or
neutralize each other. Introduce
the color wheel.
Practice 3l
Using what you now know of the
color wheel, answer the following
questions:
What happens if they want to paint
black over white? What about
white over black? What if the wall
is bumpy or has holes in it? The
original state of the wall must be
considered before color is applied.
This is true with hair color as well.
The existing color and condition of
the hair must be considered.
1Understanding ColorThis lesson will encourage an understanding of the transformational powers of color andprepare students to explore the art and science of full head hair color applications.
Sample 4MAT Lesson Plan:
4 understanding color | lesson plan | © aveda 2006

Extend 3r
Have the students pick up their
paint chips and notice the sample
colors go from light to dark.
Essentially the same color has
different “shades” or “levels” de-
pending on how colors are mixed
and how much pigment is used.
Refine 4l
Record tools needed to help you
in the transformation of a guest’s
hair color (i.e. color chart, consul-
tation questions). Have students
share ideas.
Perform 4r
Ask the students, “If you were
going to transform your own
hair color today, what would you
do and why? What would be the
challenges? How might the change
make you feel?”
Have them pair with a partner
and consult with each other about
changing hair color.
Sample 4MAT Lesson Plan:
© aveda 2006 | understanding color | lesson plan 5

Education is not to reform students or amuse them or to make themexpert technicians. It is to unsettle their minds, widen their horizons,inflame their intellects, teach them to think straight, if possible.
—Robert M. Hutchins
Notes:
6 understanding color | © aveda 2006

color and texture | color fundamentals | understanding color 7
Module 1: The Art And Science Of Hair Color Coloring hair is a transforming experience. It’s a process of reinvention that brings hair to life in a new way through chemistry —the way product formulas react with hair. That’s why the application of hair color is both an art and a science that requires imagination, creative expression, intuition, the ability to listen and consult plus technical knowledge and skill. The combination is inspiring, and the possibilities are endless.

8 color and texture | color fundamentals | understanding color8 the art and science of hair color | © aveda 2006

The Art and Science O
f Hair Color

The
Art a
nd S
cien
ce O
f Hai
r Col
or


color and texture | color fundamentals | understanding color 9
Chapter 1: Understanding Color
lesson 1:Color Theory
lesson 2:Natural Hair Color
lesson 3:The Level System
When we view the world around us, we often take for granted the spectrum of color that enhances our environment. Behind those colors is a scientific system that, when understood, can help us succeed at applying hair color effectively and achieving a desired result.
Color surrounds us, interacts with our bodies and energies, affects our moods, and makes things appear warm or cool, exciting or calming.
To understand how hair color formulas react with natural hair, a look at the hair’s structure and natural color is important. Before being able to knowledgeably create hair color formulas, the hair’s natural levels of color need to be understood and recognized.
Natural hair color can be described according to a “level system” that categorizes color from dark to light.
The stages that natural hair goes through as it is being lifted or lightened are referred to as “stages of lightening” or “lifting levels.”
© aveda 2006 | understanding color 9

1Color TheoryColor surrounds us, interacts with our bodies and energies, affects our moods, and makes things appear warmor cool, exciting or calming. It was Sir Isaac Newton who, in the 17th century, discovered that the white lightfrom the sun contains all the colors we see. He proved this by separating the colors of the rainbow througha glass prism. The colors are always arranged in the same order: red, orange, yellow, green, blue indigo andviolet. When we look at anything, including hair color, what we actually see is light reflected from it. A whiteobject reflects most of the light that falls on it. A black object absorbs most of the light falling on it. Like mosteverything in the universe, color is arranged as a system that can be studied and understood. In order to better understand how different hair colors can be used and combined, a study of Color Theory is essential.
Through knowledge of the Color
Wheel, students will gain a basic
understanding of the different
types of color and how they
affect each other. They will begin
to understand how knowledge
about the nature of color relates
to hair color services and gain an
introduction to the concept of
color “levels.”
Objective Top Teaching Points 1. The color wheel
2. Neutralizing and
complementary colors
3. Levels of color
4. Relationship between color
theory and hair color services
10 understanding color | color theory | © aveda 2006

2Natural Hair Color
To understand how hair color formulasreact with natural hair, a look at the hair’sstructure and natural color is important.
Before being able to knowledgeablycreate hair color formulations, the hair’s
natural levels of color need to beunderstood and recognized.
Objective
Students will gain an under-
standing of how hair is naturally
structured and the different types
of natural hair color pigment.
Top Teaching Points
1. Hair structure and terms
2. Types of hair pigment
3. Natural levels
Top Teaching Points
1. The level system
2. Stages of lightening
3. Lifting levels
Objective
This lesson familiarizes students
with both the level system and the
stages of lightening.
3The Level System
Natural hair color can be described according to a“level system” that categorizes color from dark to light.
The stages that natural hair goes through as it isbeing lifted or lightened are referred to as “stages of
lightening” or “lifting levels.”
© aveda 2006 | understanding color | the level system 11

1. Achromatic colors are:
a. colors that absorb color
b. white, black and shades of gray
c. warm colors
d. a & c
2. Chromatic colors are:
a. white, black and shades of gray
b. primarily red
c. the colors of the rainbow
d. none of the above
3. Primary colors are:
a. the colors we see during the day
b. the basic building blocks of all
chromatic colors
c. colors that cannot be created by
mixing other colors
d. b & c
7. Hair color can be described in
two ways:
a. primary and tertiary
b. condition and level
c. level and density
d. level and tone
8. Arrange the level system in its
proper order, 1-10:
9 Very light blonde
4 Light brown
7 Medium blonde
10 Lightest blonde
1 Black
3 Medium brown
8 Light blonde
6 Dark blonde
2 Dark brown
5 Lightest brown
4. Secondary colors are:
a. two primary colors mixed
together in similar proportions
b. two chromatic colors mixed with
two achromatic colors
c. any three colors mixed together
d. none of the above
5. Primary and secondary colors
mixed together in similar
proportions create:
a. third level colors
b. brown
c. warm colors
d. tertiary colors
6. When two complementary
colors (directly across from
each other on the color wheel)
are mixed together:
a. they neutralize each other
b. they brighten each other
c. they go from warm to ash
d. they turn green
9. Tone describes:
a. the warmth or coolness of a color
b. the strength of the hair shaft
c. the amount of melanin in the hair
d. the size of the cuticle
10-15. Choose from this list of
words to fill in the blank below:
Cuticle, Cortex, Medulla,
Eumelanin, Canities,
Pheomelanin
Canities is the absence of
pigment in hair.
The open space in the woven,
basket-like hair shaft is called
the Medulla.
The part of the hair shaft that
consists of a colorless, translucent
casing of overlapping scales with
no natural color is the Cuticle.
Eumelanin (natural black to red)
is larger in size so fewer actual
pigment granules are needed to
color the hair shaft.
The part of the hair shaft that
contains the great bulk of melanin
(color) lodged between its fibers is
called the Cortex.
Pheomelanin (red to pale yellow)
is quite difficult to remove from
the hair shaft.
12 understanding color | © aveda 2006
Educator Answer GuideUnderstanding Color assessment of acquired knowledge
educator support:CD: WorksheetAssessement of Acquired Knowledge

color and texture | color fundamentals | understanding color 13
Chapter #: Chapter name
lesson 1:Corrective Color Consultation
lesson 2:Color Cleansing Technique
lesson 3:Precoloration Technique
lesson 4:Cautions When Correcting Hair
Colored With Henna
lesson 1:Guest Natural Attributes
lesson 2:A Blueprint to Better Hair Coloring
lesson 3:How to Perform a Strand Test
lesson 4:
Hair Color Cautions
Chapter 2: Hair Color Consultation
Your guests depend on you to help them look their best by optimizing their natural color palette. Communicating with them is the first step. You’ll need to talk with your guests about their desired result, observe their natural attributes, analyze the condition of their hair and devise a blueprint plan that will lead to the look they want.
What should I do? Would I look good as a blonde? You’ll be called on to help guests reach an important decision about their hair color. A trained eye, information and experience will help you be a skilled consultant.
A planning tool such as this blueprint should be used as a guide while consulting with a guest. It can also be filed for future reference when they return for the same or similar service.
A strand test enables you to monitor color development and avoid potential problems.
Before performing any hair color service, it’s important that you consult with the guest and reach agreement on the desired outcome. At times, you’ll be called on to make recommendations, both aesthetic and scientific. You may even have to decline service based on the condition of a guest’s hair.
© aveda 2006 | hair color consultation 13

1Guest Natural AttributesWhat do you think? What should I do? Would I look good as ablonde? A redhead? A brunette? You’ll be called on to help guestsreach an important decision about their hair color. A trained eye,information and experience will help you become a skilled consultant.
Objective
Students will gain an understanding
of how a guest’s natural attributes
should be considered when
selecting hair color and service.
Top Teaching Points
1. How the guest’s natural attributes
relate to color selection
2. General guidelines for color
selection
Notes:
14 hair color consultation | guest natural attributes | © aveda 2006

2A Blueprint To Better Hair Coloring
A planning tool such as a blueprint should be used as a guidewhile consulting with a guest. It can also be filed for future
reference when they return for the same or similar service. Whenthe blueprint is carefully filled out, it is a tool that helps you reach
clear agreement on the desired service and outcome. It is also aplan of action for you during color formulation and application.
Objective
Students will learn how to
complete a blueprint to aid in
hair color and service selection
and help gain agreement with
their guests.
Top Teaching Points
1. The importance of consulting
with the guest
2. The importance of creating a
plan before a service
3. How to use a blueprint tool
3How To Perform A Strand Test
A strand test enables you to monitor color development and avoid potential problems.
Objective
Students will learn how to do a
strand test on their guest’s hair to
determine whether a successful
service can be performed.
Top Teaching Points
1. The purpose of a strand test
2. Proper technique for performing
a strand test
© aveda 2006 | hair color consultation | how to perform a strand test 15

4Hair Color CautionsBefore performing any hair color service, it’s important that you consult with the guestand reach agreement on the desired outcome. At times, you’ll be called on to make rec-ommendations, both aesthetic and scientific. With certain guests, your analysis of their hair’s condition will indicate that performing a color service may cause further damage.It is recommended that you perform a strand test prior to proceeding with the color ser-vice.Occasionally, you must decline to perform a service because a strand test indicatesthe service may result in damaging or unsatisfactory results.
Objective
This lesson will teach students how
to determine whether to perform
a hair color service and how to
handle the guest when they must
decline a booked service.
Top Teaching Points
1. General precautions related to
hair color service
2. How to assess hair history
3. How to analyze the hair’s
structure and condition
4. Precautions related to
lightened hair
16 hair color consultation | hair color cautions | © aveda 2006

1. A professional assessment helps
determine whether the hair:
a. will absorb color
b. has been cut recently
c. has been chemically-treated
d. is long enough to color
2.You should analyze the hair’s
structure by taking note of:
a. porosity
b. elasticity
c. texture
d. all of the above
5. When choosing hair color,
consider these natural
attributes:
a. natural hair color
b. complexion and eye color
c. clothing color
d. a & b
6. In general, warm tones tend
toward:
a. golden and reddish tones
b. bluish tones
c. green tones
d. grey tones
7. In general, cool tones tend
toward:
a. bluish tones
b. golden tones
c. reddish tones
d. none of the above
3. Hair treated with ammonium
thio glycerin acid found in
permanent wave lotion, thio
relaxers or reformation curls
is often:
a. very porous
b. not at all porous
c. in great condition
d. none of the above
4. Approach this kind of hair with
extreme caution before a color
service:
a. hair colored with home products
that lift color
b. long hair that has been lifted
chemically or by the sun
c. hair on which hair color product
has been overlapped
d. all of the above
8. Maintenance and upkeep are
important to consider because:
a. some color services need to be
retouched more often
b. cost can be a consideration
c. time commitment can be a
consideration
d. all of the above
9. A blueprint tool helps you:
a. consult with a guest about a
hair color service
b. come to an agreement with a
guest about a hair color service
c. select a hair color product and
formulation
d. all of the above
© aveda 2006 | hair color consultation 17
10. A strand test helps you
monitor color development.
To conduct one, you must:
a. take a strand of hair and apply a
small amount of color
b. wrap the strand in foil and allow
it to process
c. after processing, remove the
color with a towel and assess
the outcome
d. all of the above
Educator Answer GuideHair Color Consultation assessment of acquired knowledge
educator supportCD: WorksheetAssessment of Acquired Knowledge

Notes:
Don’t be proud of what you know, and don’t be self-confident if you arelearned. Be open to advice from the unlearned as well as from the learned.Art knows no limit, and the artists will never achieve perfection.
— Barbara De Angelis, PhD
Notes:
18 hair color consultation | © aveda 2006

color and texture | color fundamentals | understanding color 19
lesson 1:The Evolution of Hair Color
lesson 2:Today’s Hair Color Types
lesson 3:Chemical Actions of
Permanent Hair Color
lesson 4:Formulating and Mixing
Permanent Hair Color
lesson 5:Formulating and Mixing
High Lift Color
Selecting and mixing the optimum hair color product type, level, tone and developer for a guest’s particular hair type and desired outcome is both an art and a science. Knowledge will help get you started and experience will refine your ability to blend chemistry and art.
The desire to change the color of one’s hair dates back to the earliest times when both men and women used a variety of techniques to lighten, darken or enhance their natural hair color.
It’s important to understand the types of hair color products that are available to guests, depending on the desired outcome and how long they want the color to last.
Permanent hair color is the most widely used and the most chemically complex formulation. An understanding of the components and how they color hair is fundamental to its successful use.
Those who are adept at formulating and applying permanent hair color are valuable to their guests and able to create desired outcomes on a consistent basis.
Hair that is blonde in childhood often becomes darker later in life. Dark blonde hair provides the ideal natural base for lightening because the skin tone and eye color often are complementay.
Chapter 3: Hair Color Chemistry, Formulating and Mixing
© aveda 2006 | hair color chemistry, formulating and mixing | the evolution fo hair color 19

Objective
Students will gain an understand-
ing of the different types of hair
color available in the salon today
and their unique characteristics.
This knowledge will help them
consult with their guests and
choose the proper type of color to
create the desired outcome.
2Today’s Hair Color ProductsIt’s important to understand the types of hair color products that are available toguests, depending on the desired outcomeand how long they want the color to last.
Top Teaching Points
1. Categories of hair color products
2. How the types of hair color
influence hair color service
selection
1The Evolution Of Hair Color The desire to change the color of one’s hair dates back to theearliest times when both men and women used a variety of techinques to lighten, darken or enhance their natural hair color.
Objective
Students will gain a basic under-
standing of the history of hair
color development and use.
Top Teaching Points
1. People have desired to change
hair color for hundreds of years
2. Hair color chemistry has
evolved over time
20 hair color chemistry, formulating and mixing | the evolution of hair color | © aveda 2006

3Chemical Actions Of Permanent Hair Color
Permanent hair color is the most widelyused and the most chemically complex
formulation. An understanding of thecomponents and how they color hair is
fundamental to its successful use.
Objective
Students will gain an understanding
of how hair color chemical formulas
work to transform hair color.
Top Teaching Points
1. The chemical components
of hair color
2. Developer and its relationship
to “lift”
3. The oxidation process
4. How pH enables color to
penetrate hair
Objective
Students will gain an understanding
of the different types of hair color
available in the salon today and
their unique characteristics. This
knowledge will help them consult
with their guests and choose the
proper type of color to create the
desired outcome.
Practice
Have students use a blueprint to
consult with other students and
choose product formulations
based on mock desired outcomes.
4Formulating And Mixing Permanent Hair Color
The most frequently requested type of color service involvespermanent hair color. Those who are adept at formulating and
applying this type of color are valuable to their guests and able tocreate desired outcomes on a consistent basis.
products and supplies: Standard Hair Color Set Up (see Technique Guide glossary)
Top Teaching Points
1. Categories of hair color products
2. How the types of hair color
influence hair color service
selection
© aveda 2006 | hair color chemistry, formulating and mixing | formulating and mixing permanent hair color 21
Objective
Students will gain a working under-
standing of how to formulate and
mix high lift color.
5Formulating and Mixing High Lift Color Hair that is blonde in childhood often becomes darker later in life.Dark blonde hair provides the ideal natural base for lighteningbecause the skin tone and eye color often are complementary.
Top Teaching Points
1. Categories of hair color products
2. How the types of hair color influ-
ence hair color service selection
Practice
Have students practice consulting
with other students and choosing
product formulations based on
mock desired outcomes. Have
them practice mixing high lift
color formulations.
products and supplies:Standard Hair Color Set Up (see Technique Guide glossary)
22 hair color chemistry, formulating and mixing | formulating and mixing high lift color | © aveda 2006

© aveda 2006 | hair color chemistry, formulating and mixing 23
1. Match the following types of
hair color with their correct
definition:
C temporary hair color
D semi permanent hair color
A demi-permanent hair color
B permanent hair color
a. an oxidizing, indirect dye that
adds depth and tone
b. an oxidizing, indirect dye that
can lighten, darken, change
tone and deliver maximum grey
coverage
c. a large molecule direct dye that
lodges in the cuticle layer only
and washes out with shampoo
d. a small molecule direct dye that
penetrates the cuticle layer to
add depth and tone
2. The major components of a
permanent hair color
formula are:
a. hydrogen peroxide
b. ammonia
c. dye intermediates
d. all of the above
6. When formulating a guest’s
hair color:
a. determine the color and tone of
the guest’s natural hair
b. look through a portfolio to
determine the color level the
guest desires
c. select the desired tone while
consulting with the guest
d. all of the above
7. When coloring darker than
natural, remember that generally:
a. fine hair accepts color
more easily
b. coarse hair is more resistant
to color
c. porous hair accepts color more
easily than non-porous hair
d. all of the above
3. When added to hydrogen
peroxide, dye intermediates:
a. bond 500 to 2500 dye
intermediates together to form
visible color molecules
b. bond millions of intermediates
together and are colorless
c. help keep the hair healthy
d. bond 1-10 dye intermediates to
help condition the hair
4. Couplers help:
a. bond the dye intermediates
together so they are too large
to escape through the hair’s
cuticle
b. bond the dye intermediates
together so they condition
the hair
c. bond the hydrogen peroxide to
the hair
d. none of the above
5. Developer generally comes in
the following volumes:
a. 10, 30 and 50
b. 10, 20 and 60
c. 10, 20 and 45
d. 10, 20, 30 and 40
8. When permanently coloring
hair, NRP (natural remaining
pigment) will impact the result.
NRP is:
a. the tonal value the hair
contributes as it lightens
b. the level of lightener you
should use
c. the neutralizing color you
should use
d. none of the above
9. To enhance the NRP:
a. use a shade with tonal value
cooler than the NRP
b. use a shade with tonal value
similar to the NRP
c. a & b
d. none of the above
10. To neutralize the NRP:
a. use a shade with a comple-
mentary pigment that is on the
opposite side of the color wheel
b. use a shade with a tonal value
warmer than the NRP
c. use a shade with a tonal value
similar than the NRP
d. none of the above
11. If a guest with level 4 hair
(light brown) wants it lifted to
level 6 (dark blonde), select
a level 6 color and use what
volume developer?
a. 10
b. 20
c. 30
d. 40
12. Put these four steps to
successful hair lightener
formulation in their proper
order:
3 determine the desired
tonal value and select the
appropriate shade
2 determine the guest’s
desired level
4 determine the desired level of
lift and select the appropriate
volume of developer
1 identify the guest’s natural
level using swatches
Educator Answer GuideHair Color Chemistry, Formulating and Mixing assessment of acquired knowledge
educator support:CD: WorksheetHair Color Chemisty, Formulating and Mixing Assessment of Acquired Knowledge

FPONotes:
The mediocre teacher tells.The good teacher explains.The superior teacher demonstrates.The great teacher inspires.
—William Arthur Ward
24 hair color chemistry, formulating and mixing | © aveda 2006
color and texture | color fundamentals | understanding color 25
lesson 1:Work Flow
lesson 2:Guest Comfort and Protection
lesson 3:Sectioning and Subsectioning
lesson 4:Product Application
lesson 5:Strand Test
Chapter 4: Full Head Color Application Fundamentals
Whether you are writing a letter, creating a painting or learning to drive a car, there are fundamental skills which are common to the task. Once you learn those, you can build on them and vary them as you become more experienced and assured. The fundamental skills outlined in this chapter will give you a strong foundation for a successful career as a professional colorist.
Hair color application is a chemical process that requires a neat and organized workspace and logical work flow.
When guests sit in your chair, they trust that you will help protect them from adverse reactions to chemical processes and keep them as comfortable as possible during the service.
Proper sectioning is fundamental to beautiful, professional hair color results. It helps assure a neat, controlled application and balanced color coverage.
Proper sectioning and subsectioning lay the foundation for thorough product application and consistent hair color results.
A visual examination is essential to check level and tone development after color processing. A strand test helps you make sure you’re getting the desired level and tone results and you’re not getting unanticipated results.
© aveda 2006 | full head color application fundamentals 25

1Work FlowHair color application is a chemical processthat requires a neat and organized work-space and logical work flow.
2Guest Comfort and ProtectionWhen guests sit in your chair, they trust that you will help protectthem from adverse reactions to chemical processes and keepthem as comfortable as possible during the service.
Objective
Students will learn how to properly
perform a patch test and help
assure your guest’s comfort and
protection during a color service.
Top Teaching Points
1. How to perform a patch test
2. How to apply protective cream
3. How to apply foil to protect
the neck
4. Proper shampooing technique
Practice
Have students perform patch tests
on each other. Observe them and
encourage questions.
Assessment
Number the following permanenthair color application stepsin their proper order frombeginning to end.
8 Shampoo and condition
4 Mix color
9 Style
5 Apply foil to neck, if needed
12 Future appointment booking
6 Subsection and apply product
11 Home hair care education
1 Drape the guest for a chemical
service
10 Face Color Finishing Touch
2 Section the hair
7 Process according to manufac-
turer’s directions
3 Apply protective cream
Objective
This lesson will help students
understand the fundamental
steps for completing a permanent
hair color application so they can
plan and prepare to work
most efficiently.
Top Teaching Points
1. Full head color application steps
and their proper order
26 full head color application fundamentals | work flow | © aveda 2006
visual support:Still images
Educator Guide
educator support:CD: Worksheet
Assessment of Acquired Knowledge

educator support:CD: Worksheet
Hair Color Application Assessment Checklist
visual support:Still images
Sectioning and SubsectioningProper sectioning is fundamental to beautiful, professional hair color results.It helps assure a neat, controlled application and balanced color coverage.
While there are standard techniques for sectioning hair, each guest is unique.You will learn to be flexible while taking head shape, hair characteristics and
the hair cut into account. The goal is to create control and neatness whilemaking sure the application technique is accommodated.
Objective
Students will gain a working under-
standing of standard sectioning
and subsectioning techniques for
many color applications.
Top Teaching Points
1. Importance of proper
sectioning for good technique
and end results
2. Four-quadrant sectioning
3. Proper subsectioning technique
4. Emphasize that in the “real
world” sectioning techniques
need to accommodate the
guest’s head shape, hair
characteristics, cut and style
Practice
Have students practice sectioning
and subsectioning techniques
on mannequins.
Assessment
Assess students’ progress and
expertise using the Hair Color
Application Assessment Checklist.
© aveda 2006 | full head color application fundamentals | sectioning and subsectioning 27

4Product ApplicationProper sectioning and subsectioning lay the foundation for thorough product application and consistent hair color results.
Overview
You will gain a working under-
standing of how to properly apply
product to all areas of the hair.
Practice
Have students practice applying
product to mannequins after they
have learned to subsection the hair.
Top Teaching Points
1. How to apply color with a
color brush
2. The importance of proper
body position
3. How to “outline” a quadrant
4. How to apply product to
the scalp area
5. How to apply product to
midlengths
6. How and when to apply
product to ends
visual support:Still images
Assess students’ progress and
expertise using the Hair Color
Application Assessment Checklist.
28 full head color application fundamentals | product application | © aveda 2006
educator support:CD: WorksheetHair Color Application Assessment Checklist

5Strand Test
A visual examination is essential to check level and tone development after color processing. A strand test helps you make sure you’re getting the desired level
and tone results and you’re not getting unanticipated results. Highly poroushair may require strand tests during the processing time. Be sure to re-saturate
the strand if you decide to continue processing. Strand tests are also used todetermine whether a color service is an appropriate choice for your guest.
Overview
Students will learn how to
successfully perform a strand
test after product application
processing time.
Top Teaching Points
1. Why perform a strand test?
2. How to perform the strand
test process
Assessment
Assess students’ progress and
expertise using the Hair Color
Application Assessment Checklist.
Practice
Have students perform mock hair
color applications on mannequins
while demonstrating that they
understand each full head color
application fundamental skill.
Observe them and encourage
questions.
© aveda 2006 | full head color application fundamentals | strand test 29
educator support:CD: Worksheet
Hair Color ApplicationAssessment Checklist
visual support:Still images

Notes:
The finest gift you can give anyone is encouragement. Yet, almost no one gets theencouragement they need to grow to their full potential. If everyone received theencouragement they need to grow, the genius in most everyone would blossomand the world would produce abundance beyond our wildest dreams.
—Sidney Madwed
30 full head color application fundamentals | © aveda 2006
color and texture | color fundamentals | understanding color 31
Chapter 5: Permanent Hair Color Applications
lesson 1:Retouch Reestablish Application
lesson 2:Retouch Refresh Application
lesson 3:Virgin Lighter Application
lesson 4:Virgin Darker Application
lesson 5:Alternative Virgin Lighter Application
lesson 6:Lightening And Toning Application
Dark to light, light to dark, or just a subtle transformation. Permanent hair color techniques make it possible for your guest to make the changes they desire.
When a guest has full head color with new growth appearing at the scalp area plus color that has faded 1–2 levels at the midlengths and ends, a Retouch Reestablish application will fully restore color.
When hair color needs a retouch due to new growth, and the midlengths have lost tone and up to one level of color—simply apply product to the new growth, process the color, and then emulsify the color through the midlengths and ends at the shampoo bowl.
The Virgin Lighter full head color application transforms a guest’s naturalhair color to a lighter color.
This full head color application transforms a guest’s natural hair to a darker color.
The Alternative Virgin Lighter application involves mixing and applying one color formula for the scalp area—and the next higher developer formula for the midlengths and ends.
When a guest desires a very light blonde color or more than five levels of lift, lightening and toning is required.
© aveda 2006 | permanent hair color applications 31
Objective
Students will be able to perform
a Retouch Reestablish full head
color application technique.
1Retouch Reestablish ApplicationWhen a guest has full head color with new growth appearing at thescalp area plus color that has faded 1-2 levels at the midlengths andends, a Retouch Reestablish application will fully restore color.
32 permanent hair color applications | retouch reestablish application | © aveda 2006
products and supplies:Standard Hair Color Set Up (see Technique Guide glossary) Mannequin
visual support:Video: Retouch Reestablish Application Still images
educator support:CD: WorksheetHair Color ApplicationAssessment Checklist
Practice
Have students perform mock
Retouch Reestablish applications
on mannequins. Observe them
and encourage questions.
Assessment
Assess students’ progress and
expertise using the Hair Color
Application Assessment Checklist.

2Retouch Refresh Application
When hair color needs a retouch due to new growth, and the midlengths have lost toneand up to one level of color — simply apply product to the new growth, process the
color, and then emulsify the color through the midlengths and ends at the shampoobowl. With a consistent guest, this is typically the most common color balancing service.
Objective
Students will be able to perform a
Retouch Refresh application.
Practice
Have students perform mock
Retouch Refresh applications
on mannequins.
Assessment
Assess students’ progress and
expertise using the Hair Color
Application Assessment Checklist.
products and supplies:Standard Hair Color Set Up
(see Technique Guide glossary) Mannequin
visual support:Video: Retouch Refresh
Application Still images
© aveda 2006 | permanent hair color applications | retouch refresh application 33
educator support:CD: Worksheet
Hair Color ApplicationAssessment Checklist

3Virgin Lighter ApplicationThe Virgin Lighter full head color application transforms a guest’snatural hair color to a lighter color.
4Virgin Darker ApplicationThis full head color application transformsa guest’s natural hair to a darker color.
Objective
Students will be able to perform
a Virgin Lighter full head color
application.
Practice
Have students perform mock
Virgin Lighter applications on
mannequins. Observe them and
encourage questions.
Assessment
Assess students’ progress and
expertise using the Hair Color
Application Assessment Checklist.
Objective
Students will be able to perform
a Virgin Darker full head color
application.
Practice
Have students perform mock
Virgin Darker applications on
mannequins. Observe them and
encourage questions.
Assessment
Assess students’ progress and
expertise using the Hair Color Ap-
plication Assessment Checklist.
products and supplies:Standard Hair Color Set Up (see Technique Guide glossary) Mannequin
visual support:Video: Virgin Darker ApplicationStill images
products and supplies:Standard Hair Color Set Up
(see Technique Guide glossary) Mannequin
visual support:Video: Virgin Lighter Application
Still images
34 permanent hair color applications | virgin lighter application | © aveda 2006
educator support:CD: Worksheet
Hair Color ApplicationAssessment Checklist
educator support:CD: WorksheetHair Color ApplicationAssessment Checklist
Practice
Have students perform mock
Alternative Virgin applications on
mannequins. Observe them and
encourage questions.
Assessment
Assess students’ progress and
expertise using the Hair Color
Application Assessment Checklist.
5Alternative Virgin Lighter Application
The Alternative Virgin Lighter application involves mixing andapplying one color formula for the scalp area—and the next
higher developer formula for the midlengths and ends.
This technique expedites the hair color process since productcan be applied to the whole head at one time.
Objective
Students will gain a working un-
derstanding of how to perform
the Alternative Virgin Lighter
application.
© aveda 2006 | permanent hair color applications | alternative virgin lighter application 35
products and supplies:Standard Hair Color Set Up
(see Technique Guide glossary) Mannequin
visual support:Video: Alternative Virgin
Lighter Application Still images
educator support:CD: Worksheet
Hair Color ApplicationAssessment Checklist

6Lightening and Toning ApplicationWhen a guest desires a very light blonde color or more than five levels of lift, lighteningand toning is required. Guests should understand that this service must be retouchedoften. It’s often referred to as a “double process blonde” service.
This is a two-part process: 1. Apply lightener 2. After shampooing, apply toner
Objective
Students will be able to perform a
lightening and toning application.
36 permanent hair color applications | lightening and toning application | © aveda 2006
Practice
Have students perform mock
Lightening and Toning applica-
tions on mannequins. Observe
them and encourage questions.
Assessment
Assess students’ progress and
expertise using the Hair Color
Application Assessment Checklist.
Stress speed and accuracy and
encourage questions.
products and supplies:Standard Hair Color Set Up
(see Technique Guide glossary) Mannequin
visual support:Video: Lightening and Toning
ApplicationStill images
educator support:CD: Worksheet
Hair Color ApplicationAssessment Checklist
color and texture | color fundamentals | understanding color 37
Sed diam nonummy ni euis mod tincidunt ut laoreet dolore magna aliquam erat volutpat. Ut wisi enim ad minim veniam, quis nostrud exerci tation ul-lamcorper suscipit lobortis nisl ut aliquip ex ea com modo consequat. Duis autem vel eum iriure dolor in hendrerit in vulputate velit esse oles tie con-sequat, vel illum dolore eu feugiat nulla facilisis at vero eros et accumsan et iusto odio dignissim qui blandit praesent luptatum zzril delenit augue duis. Ut wisi enim ad minim veniam,
Quis nostrud exerci tation ullamcorper suscipit lobortis nisl ut aliquip ex ea com modo consequat. Duis autem vel eum iriure dolor in hendrerit in vulpu-tate velit esse molestie consequat, vel illum dolore eu feugiat nulla facilisis. Duis autem vel eum iriure dolor in hendrerit in vulputate velit esse oles tie.
At vero eros et accumsan et iusto odio dignissim qui blandit praesent lupta-tum zzril delenit augue duis dolore te feugait nulla facilisi. Lorem ipsum dolor sit amet, consectetuer adipiscing elit, sed diam nonummy nibh euismod tinc-
Chapter #: Chapter name
lesson 1:Corrective Color Consultation
lesson 2:Color Cleansing Technique
lesson 3:Precoloration Technique
lesson 4:Cautions When Correcting Hair
Colored With Henna
Chapter 6: Freehand Permanent Hair Color Applications
Once fundamental hair color techniques have been mastered, artistic abilities will develop so you can customize color applications to suit your guest’s desired outcome. Freehand hair color techniques are applied as an artist uses a brush and palette, often employing multiple colors and advanced application techniques.
Comb-On color is a freehand technique that is designed for a guest with a short, layered hair cut.
This freehand technique applies color to the ends of short hair.
lesson 1:Comb-On Color Application
lesson 2:Shoe Shine Application
© aveda 2006 | freehand permanent hair color applications 37
Objective
Students will be able to perform a
Shoe Shine application.
Practice
Have students perform Shoe Shine
applications on mannequins.
Observe them and encourage
questions. Have students check
each other’s work.
Assessment
Assess students’ progress and
expertise using the Hair Color
Application Assessment Checklist.
2Shoe Shine ApplicationThis freehand technique appliescolor to the ends of short hair.
1Comb-On Color ApplicationComb-On Color is a freehand technique that is designed for aguest with a short, layered hair cut. Two or more colors may beused. This lesson will demonstrate a three-color technique.
Objective
Students will be able to perform a
Comb-On Color application.
Practice
Have students perform
Comb-On Color applications
on mannequins. Observe them
and encourage questions. Have
students check each other’s work.
Assessment
This chapter will give students a
basic understanding of the
fundamental skills required to
perform the full head color
application techniques taught in
this guide.
38 freehand permanent hair color applications | comb-on color application | © aveda 2006
products and supplies:Standard Hair Color Set Up (see Technique Guide glossary) Mannequin
visual support:Video: Shoe Shine Application Still images
products and supplies:Standard Hair Color Set Up
(see Technique Guide glossary) Mannequin
visual support:Video: Comb-On Color
Application Still images
educator support:CD: Worksheet
Hair Color ApplicationAssessment Checklist
educator support:CD: WorksheetHair Color ApplicationAssessment Checklist
color and texture | color fundamentals | understanding color 39
Chapter 7: Advanced Hair Color Applications
lesson 1:Circles Application
lesson 2:Color Melting Application
Working with the contours of the guest’s head and hair cut, advanced color techniques allow for the sophisticated application of multiple hair colors and a new level of refined outcomes.
The Circles color technique calls for different colors applied in circular layers around the head.
Depending on the size of the head, the density of the hair and the desired effect, you may section into two or more circular sections.
With a Color Melting application, two or more overlapping shades of color are applied to create a blended effect. The product formulas are “melted” together by overlapping them and varying the length of their placement along subsections.
© aveda 2006 | advanced hair color application | circles application 39

2Color Melting ApplicationWith a Color Melting application, two or more overlapping shades of color areapplied to create a blended effect. Theproduct formulas are “melted” together byoverlapping them and varying the lengthof their placement along subsections.
Objective
Students will be able to perform a
Color Melting application.
Practice
Have students perform Color
Melting applications on manne-
quins. Observe them and encour-
age questions. Have students
check each other’s work.
Assessment
Assess students’ progress and
expertise using the Hair Color
Application Assessment Checklist.
1Circles ApplicationThe Circles color application calls for different colorsapplied in circular layers around the head.
Depending on the size of the head, the density of thehair and the desired effect, you may section into twoor more circular sections.
Objective
Students will be able to perform
the Circles application.
Practice
Have students perform Circles
applications on mannequins.
Observe them and encourage
questions. Have students check
each other’s work.
Assessment
Assess students’ progress and
expertise using the Hair Color
Application Assessment Checklist.
products and supplies:Standard Hair Color Set Up (see Technique Guide glossary) Mannequin
visual support:Video: Color Melting ApplicationStill images
products and supplies:Standard Hair Color Set Up
(see Technique Guide glossary) Mannequin
visual support:Video: Circles Application
Still images
40 advanced hair color application | circles application | © aveda 2006
educator support:CD: Worksheet
Hair Color ApplicationAssessment Checklist
educator support:CD: WorksheetHair Color ApplicationAssessment Checklist

Chapter 8: Henna Hair Color
lesson 1:Henna Hair Color Features
and Precautions
The application of henna, a natural formulation that has been used throughout history, has had periods of popularity. Today, henna is incompatible with most modern hair color and texture procedures.
Henna has been used for over 3000 years in the Middle East as a stain for hair, body, fingernails and lips.
Today, the use of henna in most salons is rare. Still, every colorist should have a basic understanding of its characteristics.
© aveda 2006 | henna hair color 41

1Henna Hair Color Features and PrecautionsHenna has been used for over 3000 years in theMiddle East as a stain for hair, body, fingernails and lips.
Today, the use of henna in most salons is rare. Still, every coloristshould have a basic understanding of its characteristics.
Objective
Students will gain an
understanding of henna hair color
and the precautions related to its
application.
Top Teaching Points
1. Features of henna hair color
2. Precautions related to henna
hair color
3. Appropriate guests for henna
service
products and supplies:Standard Hair Color Set Up
(see Technique Guide glossary) Plastic cap
Henna Hair Swatches
1. Henna is a:
a. demi-permanent color
b. permanent
c. temporary
d. none of the above
2. Using henna can cause
problems later if a guest:
a. wants a color service
b. wants a permanent wave
service
c. wants a relaxer service
d. all of the above
3. Discoloration of the hair can
occur when:
a. hair color is applied over henna
b. henna is shampooed
c. highlights are applied over
henna
d. a & c
4. Henna cannot be used to:
a. darken the hair
b. add red tones to hair
c. lighten the hair
d. none of the above
5. Compound henna is a mixture
of henna and:
a. hydrogen peroxide
b. ammonia
c. metallic salts
d. a & b
6. Metallic salts are:
a. not compatible with modern
hair color and texture chemicals
b. not harmful to the hair in any way
c. able to produce shine in hair
d. None of the above
7. Do not apply henna on
guests who:
a. have not had a strand test
b. change hair color often
c. have a high concentration of
grey hair in one area
d. all of the above
42 henna hair color | henna hair color features and precautions | © aveda 2006
educator support:CD: WorksheetHenna Hair ColorAssessment of Acquired Knowledge
Educator Answer GuideHenna Hair Color assessment of acquired knowledge

Chapter 9: Temporary Hair Color
lesson 1: Temporary Hair Color Application
Temporary hair color is a good option for guests who would like a slight change in tone or for those who wish to add subtle hues to their existing color.
Temporary hair color is defined as color that washes out with one shampooing. The color sits as a coating on the hair and does not penetrate beyond the cuticle layer.
© aveda 2006 | temporary hair color 43

1Temporary Hair Color ApplicationTemporary hair color traditionally came in a water rinse form but is now availableas a mousse, gel, shampoo, conditioner or even spray-on color.
It typically washes out with one shampooing, can darken but not lighten naturalcolor and contains pigments that are pre-formed. These are direct dyes sono mixing is required.
The color sits as a coating on the hair and does not penetrate beyond the cuticle layer.
CAUTION! In cases of extreme porosity, temporary color can become longer-lasting.This is especially true at the porous ends.
Objective
Students will be able to apply tem-
porary hair color.
Assessment
Assess students’ progress and
expertise using the Hair Color
Application Assessment Checklist.
Students may gain understanding
by assessing themselves or
each other.
Practice
Have students apply tempo-
rary hair color on mannequins.
Observe them and encourage
questions.
44 temporary hair color | temporary hair color application | © aveda 2006
products and supplies:Standard Hair Color Set Up
(see Technique Guide glossary)Mannequin

color and texture | temporary hair color application 45
Chapter 10: Demi-Permanent Hair Color
Demi-Permanent hair color does not lift natural color from the hair, as permanent hair color does. It simply deposits color molecules in the hair. Each time the hair is shampooed, some of the color molecules wash away and the color gradually fades.
Demi-Permanent color works with a guest’s existing hair color to darken, change tone or blend grey. It does not lighten hair color.
lesson 1: Demi-Permanent Hair
Color Application
© aveda 2006 | demi-permanent hair color 45

1Demi-Permanent Hair Color ApplicationDemi-Permanent hair color works with a guest’s existing hair color to darken, change tone or blend grey. It does not lighten hair color.
Objective
Students will be able to apply
Demi-Permanent hair color.
Practice
Have students perform
Demi-Permanent hair color
applications on mannequins.
Observe them and encourage
questions. Have students check
each other’s work.
Assessment
Assess students’ progress and
expertise using the Hair Color
Application Assessment Checklist.
Students may gain understanding
by assessing themselves or
each other.
products and supplies:Standard Hair Color Set Up (see Technique Guide glossary) Mannequin
46 demi-permanent color | demi-permanent hair color application | © aveda 2006

Chapter 11: Fundamentals of Applying Dimensional Color Using Foil
lesson 1:Guest Comfort and Protection
lesson 2:Sectioning
lesson 3:Subsectioning/Weaving/Slicing
lesson 4:Product and Foil Packet Application
lesson 5:Strand Test
Most natural hair color is affected by the sun and its lightening powers. The result is dimensional color, where different levels of lightness appear, woven in and out of the hair. To create this effect, dimensional color application calls for informed, imaginative decisions based on the guest’s desired result.
Because some people have allergic reactions or hypersensitivity to hair coloring products, a patch test is recommended at least 24 hours before a hair color service.
As with most color applications, proper sectioning before a dimensional hair color application is essential for enabling neatness and consistency.
Dimensional hair color applications allow for a good deal of creativity, depending on the way subsections are taken and the weaving and/or slicing techniques that are used.
Proper placement of foil packets helps control and isolate product to create a desired effect.
A strand test can be used as a “pre-test” to help determine how the hair will react to product application and processing. It’s also useful during processing to help you observe changes in color level and tone.
© aveda 2006 | fundamentals of applying dimensional color using foil 47
Concept
The concept is enhancement.
Connect 1r
Ask the students to choose the
color they used to transform their
bedroom.
Now ask them to take it one step
further. Choose two complemen-
tary colors that would enhance the
room. Choose one for trim such as
moldings and one for accessories
such as pillows and curtains.
Attend 1l
Discuss how their color choices
enhanced the look of the room.
Who chose three colors with high
contrast that would make a bold
statement?
Who chose three softer and more
similar colors that would blend
together and make a more subtle
statement?
Sample 4MAT Lesson Plan:
Sample 4Mat Lesson Plan
products and supplies:Paint chips Crayons (large size) Paper Pens Headsheets
48 fundamentals of applying dimensional color using foil | lesson plan | © aveda 2006

Image 2r
Ask the students to use crayons
to depict their color choices as
closely as possible by drawing
three “swatches” of color side-by-
side on a piece of paper.
Inform 2l
Refer to the Technique Guide on
dimensional color applications.
Demonstrate techniques.
Sample 4MAT Lesson Plan:
© aveda 2006 | fundamentals of applying dimensional color using foil | lesson plan 49

Extend 3r
Using headsheets, have students
diagram ideas on combining
several dimensional color applica-
tions for one guest.
Refine 4l
Ask several students to share their
ideas. Have students discuss what
enhancements they might add.
Perform 4r
Pair up and consult with each
other on what kind of dimensional
color they would like to add to
their own hair. Make sure they use
the decisions they made as a guide
for discussion.
Have the students discuss how
the color might be applied to
achieve enhanced results.
Practice 3l
Have students practice dimen-
sional color applications on man-
nequins.
Sample 4MAT Lesson Plan:
50 fundamentals of applying dimensional color using foil | lesson plan | © aveda 2006

1Guest Comfort and Protection
Because some people have allergic reactions or hypersensitivity to hair coloring products, a patch test is
recommended at least 24 hours before a hair color service.
Objective
Students will be able to perform a
Patch Test.
Practice
Have students perform a patch
test on each other. Observe them
and encourage questions. Have
students check each other’s work.
2Sectioning
As with most color applications, proper sectioning before a dimensional hair
color application is essential forenabling neatness and consistency.
Objective
Students will be able to section
the hair into six basic sections.
Practice
Have students section mannequin
heads into six basic sections.
Observe them and encourage
questions.
Assessment
Assess students’ progress and
expertise using the Dimensional
Color Application Assessment
Checklist.
products and supplies:Standard Hair Color Set Up (see Technique Guide glossary) Mannequin
visual support:Video: Six Basic Section Full Head Foil Application Still images
products and supplies:Standard Hair Color Set Up
(see Technique Guide glossary)
visual support:Still images
© aveda 2006 | fundamentals of applying dimensional color using foil | sectioning 51
educator support:CD: Dimensional Color ApplicationAssessment Checklist

3Subsectioning/Weaving/SlicingDimensional hair color applications allow for a good deal of creativity, depending on the way subsections are taken and theweaving and/or slicing techniques that are used.
Objective
Students will be able to
subsection, weave and slice to
create dimensional hair color.
Practice
Have students take subsections
and practice various types of
weaving and slicing effects.
Observe them and encourage
questions.
Assessment
Assess students’ progress and
expertise using the Dimensional
Color Application Assessment
Checklist.
products and supplies:Standard Hair Color Set Up (see Technique Guide glossary) Mannequin
visual support:Still images
52 fundamentals of applying dimensional color using foil | subsectioning/weaving/slicing | © aveda 2006
educator support:CD: Dimensional Color ApplicationAssessment Checklist

4Product and Foil Packet Application
Proper placement of foil packets help controland isolate product to create a desired effect.
Objective
Students will gain a working
understanding of how to apply
product and how to properly place
and fold a foil packet.
Practice/Extend/Refine
Have students lay foil under
weaves or slices, apply product
and fold foil packets. Observe
them and encourage questions.
Assessment
Assess students’ progress and
expertise using the Dimensional
Color Application Assessment
Checklist.
5Strand Test
A strand test can be used as a “pre-test” to helpdetermine how the hair will react to product application
and processing. It’s also useful during processing tohelp you observe changes in color level and tone.
Objective
Students will be able to perform a
strand test.
Practice
Have students perform a strand
test on a mannequin. Observe
them and encourage questions.
Assessment
Assess students’ progress and
expertise using the Dimensional
Color Application Assessment
Checklist.
products and supplies:Standard Hair Color Set Up
(see Technique Guide glossary) Mannequin
visual support:Still images
© aveda 2006 | fundamentals of applying dimensional color using foil | srand test 53
products and supplies:Standard Hair Color Set Up (see Technique Guide glossary)Mannequin
visual support:Still images
educator support:CD: Dimensional Color
ApplicationAssessment Checklist

Notes:
The whole art of teaching is only the art of awakening the natural curiosity of young mindsfor the purpose of satisfying it afterwards.
—Anatole France
54 fundamentals of applying dimensional color using foil | © aveda 2006

color and texture | color fundamentals | understanding color 55
Chapter 12: Classic Foil Applications
lesson 1:Six Basic Section Full Head
Foil Application
lesson 2:Alternative Full Head Foil Application
lesson 3:Partial Head Foil Application
lesson 4:Short Hair Foil Application
lesson 5:Singles Application
lesson 6:Tipping Application
Subtle to bold outcomes can be achieved through placement of highlights or lowlights in foil packets in the hair. Color selection, the number of foils placed, the thickness of the subsections and weaving or slicing techniques provide an infinite variety of options and results.
The Six Basic Sections are used here for a full head foil application. The effect can be subtle or dramatic, depending on the width of the subsections and the number of weaves taken.
The Alternative Full Head Foil application creates defined, natural-looking highlights that accent the way the hair falls.
A partial highlight or lowlight technique may be the ideal solution when your guest does not desire a full head foil.
The Short Hair Foil Application accents both the length and shape of the hair cut.
The Singles application creates individual, strong-effect highlights or lowlights in the hair. Singles can be used to color the whole head or to emphasize a certain area of a hair cut. They are often used on wavy or curly hair to accent natural movement.
The Tipping Application is a contemporary way to color and “tip” the guest’s hair only at the ends. This application accentuates the lines of the hair cut.
© aveda 2006 | classic foil applications 55

2Alternative Full Head Foil ApplicationThe Alternative Full Head Foil Application creates defined,natural looking highlights that accent the way the hair falls.
Objective
Students will be able to perform an
Alternative Full Head Foil
application.
Practice
Have students perform Alterna-
tive Full Head Foil applications
on mannequins. Observe them
and encourage questions. Have
students check each other’s work.
Assessment
Assess students’ progress and
expertise using the Dimensional
Color Application Assessment
Checklist.
1Six Basic Section Full Head Foil ApplicationThe six basic sections are used here for a fullhead foil application. The effect can be subtleor dramatic, depending on the width of thesubsection and the number of weaves taken.
Objective
Students will be able to perform a
Six Basic Section Full Head Foil
application.
Practice
Have students perform a Six Basic
Section Full Head Foil application
on mannequins. Observe them
and encourage questions.
Assessment
Assess students’ progress and
expertise using the Dimensional
Color Application Assessment
Checklist.
products and supplies:Standard Hair Color Set Up (see Technique Guide glossary) Mannequin
visual support:Video: Alternative Full Head Foil ApplicationStill images
products and supplies:Standard Hair Color Set Up
(see Technique Guide glossary) Mannequin
visual support:Video: Six Basic Section Full
Head Foil ApplicationStill images
educator support:CD: Dimensional Color Application
Assessment Checklist
56 classic foil applications | six basic section full head foil application | © aveda 2006
educator support:CD: Dimensional Color ApplicationAssessment Checklist

3Partial Head Foil Application
A partial highlight or lowlight techniquemay be the ideal solution when your guest
does not desire a full head foil.
products and supplies:Standard Hair Color Set Up
(see Technique Guide glossary) Mannequin
visual support:Video: Partial Head Foil
ApplicationStill images
Objective
Students will be able to perform a
Partial Head Foil application.
Practice
Have students perform Partial
Head Foil applications on
mannequins. Observe them
and encourage questions. Have
students check each other’s work.
Assessment
Assess students’ progress and
expertise using the Dimensional
Color Application Assessment
Checklist.© aveda 2006 | classic foil applications | short hair foil application 57
4Short Hair Foil Application
The Short Hair Foil Application accentsboth the length and shape of the hair cut.
products and suppliesStandard Hair Color Set Up (see Technique Guide glossary) Mannequin
visual supportVideo: Short Hair Foil ApplicationStill images
Objective
Students will be able to perform a
Short Hair Foil application.
Practice
Have students perform Short Hair
Foil applications on mannequins.
Observe them and encourage
questions. Have students check
each other’s work.
Assessment
Assess students’ progress and
expertise using the Dimensional
Color Application Assessment
Checklist. Students may gain
understanding by assessing
themselves or each other.
educator support:CD: Dimensional Color Application
Assessment Checklist
educator support:CD: Dimensional Color ApplicationAssessment Checklist

5Singles ApplicationThe Singles application creates individual, strong-effect highlights or lowlights in thehair. Singles can be placed throughout the entire head to emphasize a certain area of ahair cut. They are often used on wavy or curly hair to accent natural movement.
Objective
Students will be able to perform a
Singles application using
foil packets.
58 classic foil applications | singles application | © aveda 2006
products and supplies:Standard Hair Color Set Up (see Technique Guide glossary) Mannequin
visual support:Video: Singles ApplicationStill images
Practice
Have students perform Singles
applications on mannequins.
Observe them and encourage
questions.
Assessment
Assess students’ progress and
expertise using the Dimensional
Color Application Assessment
Checklist.
educator support:CD: Dimensional Color ApplicationAssessment Checklist

© aveda 2006 | classic foil applications | tipping application 59
Objective
Students will be able to perform
the Tipping application.
Practice
Have students perform Tipping
applications on mannequins.
Observe them and encourage
questions. Have students check
each other’s work.
Tipping ApplicationThe Tipping application is a contemporary way to
color and “tip” the guest’s hair only at the ends. Thisapplication accentuates the lines of the hair cut.
The technique allows for creativity, depending onthe desired effect. The whole head may be tipped, or
areas where you want to add dimension to the hair cut.
products and supplies:Standard Hair Color Set Up
(see Technique Guide glossary) Mannequin
visual support:Video: Tipping Application
Still images
Assessment
Assess students’ progress and
expertise using the Dimensional
Color Application Assessment
Checklist. Students may gain
understanding by assessing
themselves or each other.
Notes:
educator support:CD: Dimensional Color Application
Assessment Checklist

Notes:
A teacher is one who makes himself progressively unnecessary.
—Thomas Carruthers
60 classic foil applications | © aveda 2006

color and texture | color fundamentals | understanding color 61
Chapter 13: Dimensional Color Combination Applications
lesson 1:Full Head Color with Slices Application
lesson 2:Back-to-back Slices Application
Using basic knowledge about color and foil applications, it’s easy to combine these techniques to enhance certain hair cut shapes and retouch new growth or change all-over color while applying highlights or lowlights.
With this application, bold slices of color are applied—with an all-over color added in between the foil packets and on the rest of the hair.
For this guest, the slices are placed to accent the asymmetry of the hair cut.
Back-to-back slices create a bold, dimensional look. The basic technique is to place two or more slices together with no hair in between.
Where you place the back-to-back slices on the head and how many colors you use is determined by the hair cut and the desired effect. The possibilities are endless.
© aveda 2006 | dimensional color combination applications 61
1Full Head Color With Slices ApplicationBold slices of color are applied on the toplayers with another color applied in betweenfoil packets and on the rest of the hair. For this guest, the slices are placed to accent theasymmetry of the hair cut.
Objective
Students will be able to perform
a Full Head Color with Slices
Application.
62 dimensional color combination applications | full head color with slices application | © aveda 2006
products and supplies:Standard Hair Color Set Up (see Technique Guide glossary) Mannequin
visual support:Video: Full Head Color with Slices ApplicationStill images
Practice
Have students perform Color
with Slices applications on
mannequins. Observe them
and encourage questions. Have
students check each other’s work.
Assessment
Assess students’ progress and
expertise using both the Hair Color
Application Assessment Checklist
and the Dimensional Color
Application Assessment Checklist.
Students may gain understanding by
assessing themselves or each other.
educator support:CD: Dimensional Color ApplicationAssessment Checklist

2Back-to-Back Slices Application
Back-to-Back Slices create a bold, dimensional look. The basic techniqueis to place two or more slices together with no hair in between.
Where you place the Back-to-Back Slices on the head and how many colors you useis determined by the hair cut and the desired effect. The possibilities are endless.
Objective
Students will be able to perform
the Back-to-Back Slices application.
© aveda 2006 | dimensional color combination applications | back-to-back slices application 63
products and supplies:Standard Hair Color Set Up
(see Technique Guide glossary) Mannequin
visual support:Video: Back-to-Back Slices
ApplicationStill images
Practice
Have students perform Back-
to-Back Slices applications on
mannequins. Observe them and
encourage questions. Have
students check each other’s work.
Assessment
Assess students’ progress and
expertise using the Dimensional
Color Application Assessment
Checklist. Students may gain
understanding by assessing
themselves or each other.
educator support:CD: Dimensional Color Application
Assessment Checklist

Notes:
I hear and I forget.I see and I believe.I do and I understand.
—Confucius
64 dimensional color combination applications | © aveda 2006
color and texture | color fundamentals | understanding color 65
Chapter 14: Corrective Color Techniques
lesson 1:Corrective Color Consultation
lesson 2:Color Cleansing Technique
lesson 3:PreColoration Technique
lesson 4:Cautions When Correcting Hair
Colored With Henna
Corrective hair coloring is necessary when previously colored hair needs to be altered. The guest may want a lighter or darker shade, there may be hair color build-up or an off-tone color result. Corrective color techniques help you successfully adjust the color balance.
The key to successful corrective hair coloring is a complete consultation with the guest. It’s important to understand what chemical processes the hair has endured and to assess the current porosity of the hair before prescribing color correction. A consultation appointment may be separate from the actual service appointment.
Color cleansing removes artificial color from a guest’s hair.
For this guest, the desired result is two levels lighter than the existing level, therefore a Color Cleansing service is a necessary first step.
PreColoration is essential when the guest desires a color that is three or more levels darker than the existing colored hair. It provides an initial base of color that replaces the Natural Remaining Pigment (NRP).
Because the use of henna and minerals complicates hair color corrections, it’s important to understand the difficulties associated with their use or presence.
© aveda 2006 | corrective color techniques 65

1Corrective Color ConsultationThe key to successful corrective hair coloring is a complete consultation with the guest.It’s important to understand what chemical processes the hair has endured and to assessthe current porosity of the hair before prescribing color correction.
A consultation appointment may be separate from the actual service appointment.
Objective
Students will gain a working
understanding of what questions
to ask and what knowledge needs
to be gained before prescribing a
corrective color technique.
Top Teaching Points:
1. Why analyzing the condition of
the hair is an important first step
2. What questions to ask in a
consultation
3. How to use a strand test to
establish a realistic hair color
4. The importance of establishing
both a price range and time frame
66 corrective color techniques | corrective color consultation | © aveda 2006

2Color Cleansing Technique
Color Cleansing removes artificial color from a guest’s hair.
Because hair color products do not predictably lift the artificial color from hair,lightening is imperative prior to coloring, no matter how subtle the lift desired.
Objective
Students will be able to perform a
Color Cleansing technique.
© aveda 2006 | corrective color techniques | color cleansing technique 67
products and supplies:Standard Hair Color Set Up
(see Technique Guide glossary) Hair swatches
visual support:Video: Color Cleansing
TechniqueStill images
Practice
Have students perform Color
Cleansing technique on hair
swatches. Observe them and
encourage questions. Have
students check each other’s work.
Assessment
Observe and assess students’
ability to perform Color Cleansing
applications using the Color
Cleansing Technique Assessment
Checklist.
educator support:CD: Color Cleansing Technique
Assessment Checklist

3PreColoration TechniquePreColoration is essential when the guest desires a color that is three or more levels darker than the existing colored hair. It provides an initialbase of color that replaces the Natural Remaining Pigment (NRP).
Objective
Students will be able to perform a
PreColoration technique.
68 corrective color techniques | precoloration technique | © aveda 2006
products and supplies:Standard Hair Color Set Up (see Technique Guide glossary) Mannequin
visual support:Video: PreColoration TechniqueStill images
Have students perform PreColor-
ation techniques on mannequins.
Observe them and encourage
questions. Have students check
each other’s work.
Assessment
Observe and assess students’
ability to perform PreColoration
applications using the
PreColoration Assessment
Checklist.
educator support:CD: PreColoration TechniqueAssessment Checklist

4Cautions When Correcting Hair Colored With Henna
Because the use of henna and minerals complicates hair color corrections, it’simportant to understand the difficulties associated with their use or presence.
Objective
Students will learn how to correct
hair that has been unsatisfactorily
colored with henna and minerals.
Top Teaching Points
1. The nature of henna and
corrective color services
2. The nature of mineral deposits
and their effect on hair color
3. The importance of explaining
the difficulties of correcting hair
colored with henna to a guest
4. The importance of a strand
test before proceeding with
color correction on hair treated
with henna
products and supplies:Standard Hair Color Set Up
(see Technique Guide glossary) Henna
Hair Swatches
visual support:Video: Color Cleansing
TechniqueStill images
Practice/Extend/Refine
Have students perform Color
Cleansing applications on hair
swatches colored with henna.
Observe them and encourage
questions. Have students check
each other’s work.
Assessment
Observe and assess students’ abil-
ity to understand the precautions
related to corrective services on
hair treated with henna. Observe
their ability to perform strand tests,
color cleansing and corrective color
services on hair swatches.
© aveda 2006 | corrective color techniques | cautions with henna 69

Educator Answer GuideCorrective Hair Coloring Techniques assessment of acquired knowledge
1. A consultation is vital before
a corrective color service
to determine:
a. what chemical processes the
hair has endured
b. what hair cut the guest desires
c. the current porosity of the hair
d. a & c
3. The goal of a PreColoration
service is to:
a. return a guest’s dark hair to its
naturally lighter color
b. return a guest’s lightened hair
to a darker, even shade
c. return a guest’s lightened hair
to an even, lighter color
d. none of the above
4. Color Cleansing is performed to:
a. lift the unwanted tone or level
from a guest’s previously
colored hair
b. bleach the hair very light
c. cleanse the hair while
brightening the color
d. none of the above
2. Circle any of the following
that are common consultation
steps before a corrective
color service:
a. ask questions
b. establish a price
c. analyze the hair cut
d. formulate the color
e. establish a realistic desired
shade
f. analyze the condition of the hair
g. prescribe products
h. give a scalp massage
i. give the guest a timeframe
j. look at a portfolio
5. When a guest with colored hair
desires a lighter shade:
a. the hair must be colored with a
lighter shade
b. the hair color that is too dark
must be removed
c. the guest should be told this
service is not possible
d. none of the above
6. Neutralization means:
a. changing hair color that is too
cool or too warm to neutral
b. changing hair color that is too
dark to lighter
c. changing hair color that is too
light to darker
d. changing hair color from light
brown to dark brown
7. A common reason to neutralize
hair is:
a. home-colored brown hair is
too dark
b. home-colored hair that is too
orange or yellow
c. green discoloration from
chlorine or other source
d. b & c
70 corrective color techniques | © aveda 2006
educator support:CD: WorksheetCorrective Hair Coloring Techniques Assessment of Acquired Knowledge

The Art and S
cience of Texture and Curl

The
Art
and
Sci
ence
of T
extu
re a
nd C
url


color and texture | corrective color techniques 71
Module 2: The Art And Science of Texture and CurlCurling, straightening or texturizing hair transforms its shape and styling possibilities. It’s a process of reinvention that brings hair to life in a new way through chemistry—the way product formulas react with hair. As with the application of hair color, hair texture services offer you and your guest a virtually unlimited palette of possibilities to consider. Successful application is both an art and a science, requiring creative imagination and the knowledge needed to achieve a beautiful outcome.
72 the art and science of texture and curl | © aveda 2006

Concept
The concept is transformation.
Connect 1r
Ask the students to imagine
different objects in life that
dramatically transform by
changing shape or texture.
S ome examples:
Butterfly
Sponge
Opening flower
Cooked pasta
Put a small sponge in water and
watch it expand. Talk about how it
is an entirely different object now
that it has changed shape.
Attend 1l
Have each student take a length
of curling ribbon. Using a scissors
dragged across it, create curl.
Have students talk about how they
transformed the ribbon into a curl.
Image 2r
Have the students play with the
ribbon again. Ask them to try to
create tight curls and loose curls.
Have them just curl the tips or
the ends, just curl a few but not
all…the different effects that are
possible. Have them combine all
the curls they created and observe
the transformation from straight to
a variety of curls.
1Sample 4Mat Lesson Plan
This lesson will encourage an understanding of the transformational powers of texture and curl andprepare students to explore the art and science of applying various permanent waving techniques.
Sample 4MAT Lesson Plan:
© aveda 2006 | texture fundamentals | lesson plan 73
products and supplies:Curling ribbon
ScissorsSponge
Bowl of waterComb
Perm rodsEnd papers
Pictures of curly hair

Practice 3l
Take out perm rods and pass them
around. Talk about the different
sizes and how they’re used to
create the sizes of curl that are de-
sired. Explain that there are also
different placement techniques
that help determine the desired
outcome.
Have the students practice wrap-
ping end papers and rods on their
mannequins.
Inform 2l
Have the students open their
books to Module 2, Chapter 3:
Fundamentals of Texture and Curl
Application.
Demonstrate the fundamentals of
sectioning and applying end pa-
pers and rods on a mannequin or
live model while they follow along
in the guide.
Sample 4MAT Lesson Plan:
Extend 3r
Look at pictures of different
people with curly hair. How do you
think their look was achieved?
Refine 4l
Record the ideas that would be
useful to you. Share your ideas
with a partner.
Perform 4r
Ask the students, “If you were to
perm your hair today, what would
your desired outcome be?”
Have them pair with a partner
and consult with each other about
perming their hair and make
decisions about size of rods and
possible technique.
74 texture fundamentals | lesson plan | © aveda 2006

color and texture | color fundamentals | understanding color 75
Chapter 1: Introduction to Texture and Curl
Chemical processes that change the formation of the hair to add curl or straighten unwanted curl have been in use for centuries. Knowledge of how chemical formulations affect hair structure and a variety of application techniques make an infinite variety of outcomes possible.
If you look at history books with pictures or illustrations depicting the 18th century, you will often see political and judicial leaders wearing white, curly wigs. In fact, these wigs were “permed” using similar techniques to those employed today.
As you learned by reviewing the history of permanent waving, a chemical process must take place to breakdown and then rebuild the structure of the hair. Depending on what chemical is used, a different chemical action takes place.
Maintaining a neat and hygienic environment and having all the tools needed to perform a permanent wave are critical elements of a professional image and good results.
This lesson provides background information on a few of the many rods used in today’s salon. One of the first steps in performing a permanent wave or reformation curl is choosing a rod size appropriate to the desired effect and the guest’s hair type.
lesson 1:History and Product Varieties
lesson 2:Chemistry of Permanent Waving
lesson 3:Set Up and Preparation
lesson 4:All About Rods
© aveda 2006 | introduction to texture and curl 75

1History and Product VarietiesIf you look at history books with pictures or illustrations depicting the 18th century,you will often see political and judicial leaders wearing white, curly wigs. In fact,these wigs were “permed” using similar techniques to those employed today.
A quick look at the history of permanent waves sets the stage for anunderstanding of the current varieties available in modern salons.
Objective
Students will gain an understanding
of the history of permanent waves
and the different types of products
that are currently available.
Top Teaching Points
1. History of permanent waves
2. Current varieties of permanent
waves
76 introduction to texture and curl | history and product varieties | © aveda 2006

2Chemistry of Permanent Waving
As students learned by reviewing the historyof permanent waving, a chemical process
must take place to breakdown and thenrebuild the structure of the hair. Depending
on what chemical is used, a differentchemical action takes place.
Objective
Students will gain knowledge of
the chemical actions that take
place during permanent waving
or relaxing.
Top Teaching Points
1. Polypeptide Helix Chain
2. Types of crossbonds
3. pH as it relates to perms
4. The function of ammonium
thioglycolate
5. The purpose of rinsing, blotting
and neutralizing
3Set Up and Preparation
Maintaining a neat and hygienic environment and having all thetools needed to perform a permanent wave are critical elements
of a professional image and good results.
Objective
Students will learn how to prepare
their stations prior to a permanent
wave service.
Top teaching points
1. Preparing for guest arrival
2. Greeting and preparing the
guest for a perm
3. Cleanliness at the shampoo bowl
products and supplies:Standard Permanent Wave Set Up (see Technique Guide glossary)
© aveda 2006 | introduction to texture and curl | set up and preparation 77

4All About RodsThis lesson provides background information on a few of themany rods used in today’s salon. One of the first steps in performinga permanent wave or reformation curl is choosing a rod sizeappropriate to the desired effect and these aspects of the hair:
•Density •Texture (fine, medium, coarse) •Length •Natural curl
As you gain experience, considering these factors will becomean automatic process.
Objective Students will learn how to select
the proper rod type and size for
performing the desired permanent
wave. They will also learn how
to wrap on-base, half-on half-
off base, off-base and to create
indentation curls while knowing
when each is appropriate.
Top Teaching Points
1. Types of rods
2. Factors related to rod size selection
3. Rod/blocking relationship to the
base
products and supplies:Standard Permanent Wave Set Up
(see Technique Guide glossary)Variety of perm rods
(including straight, concave, spiral, hoop and foam)
1. The bobbed hair of the 1920’s
brought the croquignole
method of:
a. wrapping hair on the ends only
b. wrapping hair on sticks
c. wrapping hair from the ends to
the scalp
d. none of the above
2. Machine permanent waves
involved:
a. applying intense heat to the
guest’s hair
b. applying a heavy, acidic cream
to the guest’s hair
c. protecting the scalp with felt or
asbestos pads
d. a & c
3. The three current varieties
of permanent waves used in
salons are:
a. alkaline, acid and heat
b. alkaline, acid and exothermic
c. exothermic, heat and machine
d. none of the above
4. A polypeptide helix chain is:
a. a chain of reactions that hap-
pens when hair is permed
b. a spiraling of the hair’s cuticle
c. a spiraling spring-like keratin
protein structure in the hair’s
cortex
d. none of the above
5. Three types of crossbonds link
the polypeptide helix chains:
a. sulfur, hydrogen and salt
b. sulfur, peroxide and salt
c. hydrogen, salt and melanin
d. none of the above
6. To chemically enter the hair
shaft, what is needed to create
permanent waves or relaxers?
a. heat
b. alkalinity
c. hydrogen
d. a or b
78 introduction to texture and curl | all about rods | © aveda 2006
Educator Answer Guide

7. Ammonium thioglycolate is
commonly known in the salon as:
a. ammo
b. thio
c. colate
d. none of the above
8. Ammonium thioglycolate
softens the crossbonds of the
hair so they can:
a. bond together for processing
permanent waves, relaxers and
reformation curls
b. be broken for processing
permanent waves, relaxers and
reformation curls
c. melt together to form curls
d. none of the above
9. Wrapping with excessive
tension could result in:
a. breakage
b. improper processing
c. too much curl
d. a&b
10. Rinsing and blotting perm
solution is critical to:
a. flush out the solution, even out
the porosity and prepare the
hair for the neutralizer
b. flush out the solution and
prepare it for conditioning
c. flush out the solution and
increase the curling action
d. none of the above
11. Neutralizing
a. shrinks the hair shaft
b. closes the cuticle
c. rebonds the new hair
configuration
d. all of the above
12. Choose a rod size based on
the desired outcome and
these aspects of the hair:
a. density, texture and color
b. density, natural curl and color
c. density, texture, length and
natural curl
d. none of the above
13. Label each type of rod:
Concave or straight rods
Spiral rods
Hoop rods
Foam rods
14. The size of the curl is
determined by:
a. the rod’s diameter
b. the rod’s length
c. the length of the hair
d. the rod’s fastener
15. Circle the true statement(s):
a. coarse hair tends to perm closer
to the rod size
b. for fine hair, you may need to
choose a smaller size rod or
alternate rod sizes
c. coarse hair tends to hold curl
longer than fine hair
d. fine hair tends to relax more
quickly
16. An on-base curl is one that:
a. sits right on the base of the hair
and has the least mobility and
the most volume
b. sits just off base and has
medium volume
c. sits dramatically off base and
has no volume
d. none of the above
© aveda 2006 | introduction to texture and curl 79
Educator Answer GuideIntroduction to Texture and Curl assessment of acquired knowledge
educator support:CD: WorksheetIntroduction to Texture and Curl Assessment of Acquired Knowledge
17. The most common permanent
wave curl is:
a. on-base
b. off-base
c. half-on half-off base
d. indentation

Notes:
The principal goal of education… should be creating men and women who are capableof doing new things… men and women who are creative, inventive, and discoverers.
—Jean Piaget
80 introduction to texture and curl | © aveda 2006

color and texture | color fundamentals | understanding color 81
Chapter 2: Guest Consultation
lesson 1:Guest Consultation
lesson 2:Precautions
As with any service in the salon, agreement is the first step toward a beauti-ful outcome. Before beginning a texture service, use a portfolio to understand the guest’s desires and assess the structural integrity of their hair.
It’s always important to begin any service by talking with your guest about expectations and describing realistic outcomes. This is especially important before a texture service which involves strong chemicals and a large variety of applications and possible outcomes.
Because curling or relaxing the hair requires the application of strong chemicals, it’s important that you take caution before recommending or performing these services. Your knowledge and consultation skills can help prevent damage to your guest’s hair.
© aveda 2006 | guest consultation 81

1Guest ConsultationAs with all service consultations, use this time to gather information from your guestto help determine the best product, technique and processing method.
It’s always important to begin any service by talking with your guest about expectationsand describing realistic outcomes. This is especially important before a texture servicewhich involves strong chemicals and a large variety of applications and possible outcomes.
Be realistic when telling the guest what results to expect. If a moderate level of damageis possible, explain it and recommend hair care and products that will help condition thehair.
Objective
Students will be able to analyze
a guest’s hair and select the right
service to achieve the desired
outcome.
Top teaching points
1. Hair analysis considerations
2. Service selection considerations
note: Guests may use theterms “permanent wave” and “body wave” interchangeably. If they want a body wave, be sure you understand what they
mean. Use a portfolio to reachagreement. Body waves are usually permanent waves thatare wrapped on larger rods to produce a looser curl.82 guest consultation | guest consultation | © aveda 2006
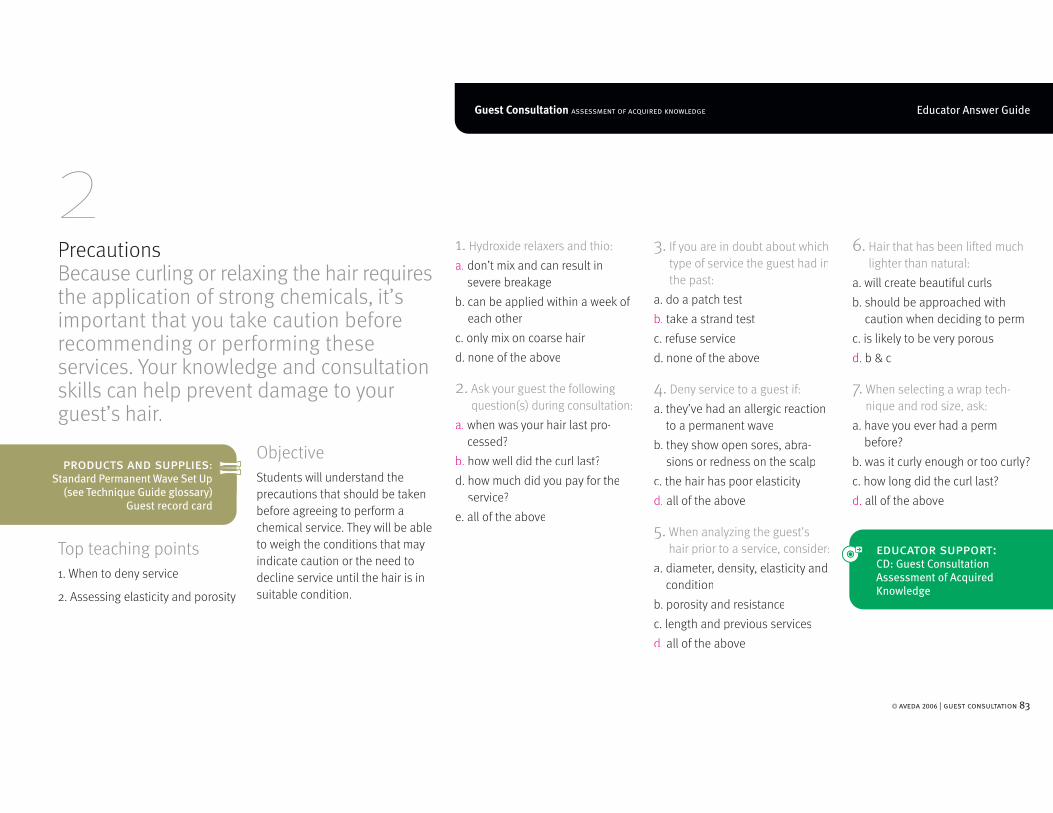
Educator Answer Guide
2PrecautionsBecause curling or relaxing the hair requiresthe application of strong chemicals, it’simportant that you take caution beforerecommending or performing theseservices. Your knowledge and consultationskills can help prevent damage to your guest’s hair.
Objective
Students will understand the
precautions that should be taken
before agreeing to perform a
chemical service. They will be able
to weigh the conditions that may
indicate caution or the need to
decline service until the hair is in
suitable condition.
Top teaching points
1. When to deny service
2. Assessing elasticity and porosity
products and supplies:Standard Permanent Wave Set Up
(see Technique Guide glossary) Guest record card
© aveda 2006 | guest consultation 83
3. If you are in doubt about which
type of service the guest had in
the past:
a. do a patch test
b. take a strand test
c. refuse service
d. none of the above
4. Deny service to a guest if:
a. they’ve had an allergic reaction
to a permanent wave
b. they show open sores, abra-
sions or redness on the scalp
c. the hair has poor elasticity
d. all of the above
5. When analyzing the guest’s
hair prior to a service, consider:
a. diameter, density, elasticity and
condition
b. porosity and resistance
c. length and previous services
d. all of the above
1. Hydroxide relaxers and thio:
a. don’t mix and can result in
severe breakage
b. can be applied within a week of
each other
c. only mix on coarse hair
d. none of the above
2. Ask your guest the following
question(s) during consultation:
a. when was your hair last pro-
cessed?
b. how well did the curl last?
d. how much did you pay for the
service?
e. all of the above
6. Hair that has been lifted much
lighter than natural:
a. will create beautiful curls
b. should be approached with
caution when deciding to perm
c. is likely to be very porous
d. b & c
7. When selecting a wrap tech-
nique and rod size, ask:
a. have you ever had a perm
before?
b. was it curly enough or too curly?
c. how long did the curl last?
d. all of the above
educator support:CD: Guest Consultation Assessment of Acquired Knowledge
Guest Consultation assessment of acquired knowledge

Notes:
A teacher who is attempting to teachwithout inspiring the pupil with a desireto learn is hammering on a cold iron.
—Horace Mann
84 guest consultation | © aveda 2006

color and texture | color fundamentals | understanding color 85
Chapter 3: Fundamentals of Basic Permanent Wave Techniques
lesson 1:Sectioning, Blocking and Wrapping
lesson 2:Solution Application, Processing and
Test Curl
lesson 3:Rinsing, Blotting and Neutralizing
lesson 4:Review of Procedure
Before we walk, we crawl. Before we write, we learn the alphabet. Certain fundamental skills are required as building blocks to growth. With texture and curl application, the same is true. Once the fundamentals are learned, a universe of options is opened for you and your guests.
Proper sectioning and subsectioning (blocking) of the hair is essential to creating the desired outcome through permanent waving. The application of end papers helps assure that the ends of the hair are wrapped smoothly onto the rod and the resulting curl has a nice shape all the way through the ends.
Permanent wave solution starts the chemical action that is required to create curl in the hair. Permanent wave solution can irritate the skin, so it is very important to take steps to protect your guest.
When you have determined that the processing time is complete, rinsing the hair while it is still on rods will help stop the chemical action.
Once you understand the general steps of a basic permanent wave procedure, you can apply this knowledge to a wide variety of techniques and applications.
© aveda 2006 | fundamentals of basic permanent wave techniques 85

1Sectioning, Blocking and WrappingProper sectioning and subsectioning (blocking) of the hair is essential to creating thedesired outcome through permanent waving. The proper application of end papers helpsassure that the ends of the hair are wrapped smoothly onto the rod and the resultingcurl has a nice shape all the way through the ends
Objective
Students will gain a working
understanding of the basic sec-
tioning, blocking and wrapping
techniques required for successful
permanent waving.
Practice
Without using solution, have stu-
dents perform proper sectioning,
blocking and wrapping techniques
on mannequins. Observe them
and encourage questions.
Top teaching points
1. Proper sectioning technique
2. Proper blocking technique
3. End paper application
4. Wrapping technique
5. Pick placement
Assessment
Assess students’ progress and
expertise using the Texture and
Curl Technique Assessment.
visual support:Still images
86 fundamentals of basic permanent wave techniques | sectioning, blocking and wrapping | © aveda 2006
products and supplies:Standard Permanent Wave Set Up (see Technique Guide glossary)Mannequin
educator support:CD: WorksheetsTexture and Curl TechniqueAssessment Checklist

2Solution Application, Processing and Test Curl
Permanent wave solution starts the chemical action that is required to createcurl in the hair. Permanent wave solution can irritate the skin, so it is very
important to take steps to protect your guest.
Depending on the texture of the hair, processing time can vary. It’s veryimportant to follow the directions carefully and test the curl at regular intervals.
Top teaching points
1. Proper solution application
2. Plastic cap application
3. How to examine a test curl
4. Checking for saturated cotton
Objective
Students will be able to properly
apply permanent wave solution
to hair that has been wrapped
on rods. They will also be able to
monitor the processing time dur-
ing a permanent wave application
and perform a test curl to deter-
mine progress.
Practice
Have students apply solution
to hair that has already been
wrapped. Process and take test
curls – the first at 5 minutes.
Assessment
Assess students’ progress and
expertise using the Texture and Curl
Technique Assessment. Students
may gain understanding by
assessing themselves or each other.visual support:Still images
© aveda 2006 | fundamentals of basic permanent wave techniques | solution application, processing and test curl 87
products and supplies:Standard Permanent Wave Set Up
(see Technique Guide glossary)Mannequin
educator support:CD: Worksheets
Texture and Curl TechniqueAssessment Checklist

Objective
Students will gain a working
understanding of how to rinse the
hair and blot each rod while at the
shampoo bowl. They will also learn
how to neutralize the hair as part of
a permanent wave application.
Top teaching points
1. Proper rinsing technique
2. Proper blotting technique
3. Proper application of neutral-
izing solution
4. Proper rinsing of neutralizing
solution
Practice
After processing, have students
perform proper rinsing, blotting
and neutralizing techniques on
mannequins. Observe them and
encourage questions.
Assessment
Assess students’ progress and
expertise using the Texture and
Curl Technique Assessment.
88 fundamentals of basic permanent wave techniques | rinsing, blotting and neutralizing | © aveda 2006
Rinsing, Blotting and NeutralizingWhen you have determined that the processing time is complete,rinsing the hair while it is still on rods will stop the chemical action.
While rinsing the hair and blotting the rods helps stop the chemicalaction taking place on the hair, neutralizing is the step in thepermanent waving process that reforms the disulfide bonds inthe new configuration.
4Review of ProcedureSimply review the steps of theprocedure and have studentsdemonstrate that they can “walk through” them in the proper order.
visual support:Still images
products and supplies:Standard Permanent Wave Set Up
(see Technique Guide glossary)Mannequin products and supplies:
Standard Permanent Wave Set Up (see Technique Guide glossary)Mannequin
educator support:CD: WorksheetsTexture and Curl TechniqueAssessment Checklist
educator support:CD: Worksheets
Texture and Curl TechniqueAssessment Checklist

color and texture | fundamentals of texture and curl application 89
Chapter 4: Texture and Curl Techniques
The length, density and texture of the hair, the size of the rods, the way they are wrapped and the processing time all affect the desired outcome. Large, bouncy curls, small tight ones and everything in between can be created with skill, selection and care.
lesson 1:Alpha Wrap
lesson 2:Spiral and Piggy Back Combination Wrap
lesson 3:Six Section Wrap
lesson 4:Weave Wrap
lesson 5:Bricklay Wrap
lesson 6:Root Wrap
lesson 7:Insertion Wrap
lesson 8:Cluster Wrap
lesson 9:Pony Tail Wrap
lesson 10:Stack Wrap
lesson 11:Transfer Wrap
lesson 12:Customized Approach to Wrapping
© aveda 2006 | texture and curl techniques 89

1Alpha WrapThis traditional permanent wave applicationcreates a natural, even-looking curl.
The previous chapter on
Fundamentals should be learned
before moving on to the Alpha
Wrap.
Objective
Students will be able to perform
an Alpha Wrap.
Practice
Have students perform an Alpha
Wrap on mannequins without
using actual solution or neutral-
izing agents. Observe them and
encourage questions.
Assessment
Assess students’ progress and
expertise using the Texture and
Curl Technique Assessment
Checklist.
2Spiral and Piggy Back Combination WrapSpiral and Piggy Back perm techniques are both designed toaccommodate long hair. Because this technique is timeconsuming, a higher service price is recommended.
It’s important to note that the
effect of a spiral wrap is not
necessarily more “spiral” than
a basic wrap. A spiral wrap is
performed to accommodate long
hair by using small blockings to
evenly distribute hair on the rod.
Objective
Students will be able to perform a
Spiral and Piggy Back combination
wrap technique.
Practice
Have students perform a Spiral
and Piggy Back Combination on
mannequins without using actual
solution or neutralizing agents.
Observe them and encourage
questions.
Assessment
Assess students’ progress and ex-
pertise using the Texture and Curl
Technique Assessment Checklist.
products and supplies:Standard Permanent Wave Set Up (see Technique Guide glossary)Mannequin
visual support:Video: Spiral and Piggy Back WrapStill images
products and suppliesStandard Permanent Wave Set Up
(see Technique Guide glossary)Mannequin
visual supportVideo: Alpha Wrap
Still images
educator supportCD: Worksheet
Texture and Curl TechniqueAssessment Checklist
90 texture and curl techniques | alpha wrap | © aveda 2006
educator support:CD: WorksheetsTexture and Curl TechniqueAssessment Checklist

3Six Section Wrap
Guests who want body and very slight movement are well-suited for a Six SectionWrap, a variation of the body wave that produces a subtle curl. A Six Section Wrap
creates even less “lift” or volume at the scalp than a standard body wave and issuitable for those who like a tousled, soft look. Because large rods and blockings
are used, this wrap produces varied but slight wave patterns.
Objective
Students will be able to perform a
Six Section Wrap.
Practice
Have students perform a Six
Section Wrap on mannequins
without using actual solution or
neutralizing agents. Observe them
and encourage questions.
Assessment
Assess students’ progress and
expertise using the Texture and
Curl Technique Assessment
Checklist.
products and supplies:Standard Permanent Wave Set Up
(see Technique Guide glossary) Mannequin
visual support:Video: Six Section Wrap
Still images
© aveda 2006 | texture and curl techniques | six section wrap 91
educator support:CD: Worksheets
Texture and Curl TechniqueAssessment Checklist

4Weave WrapThis perm uses a weaving technique to separate hair in theblocking so it is not all wrapped onto a rod. This wrap producesa combination of wavy and straight hair for a soft, curly look.
Assessment
Assess students’ progress and ex-
pertise using the Texture and Curl
Technique Assessment Checklist.
Objective
Students will be able to perform
a Weave Wrap.
Practice
Have students perform a Weave
Wrap on mannequins. Observe
them and encourage questions.
Objective
Students will be able to perform
a Bricklay Wrap.
Practice
Have students perform a Bricklay
Wrap on mannequins. Observe
them and encourage questions.
Assessment
Assess students’ progress and ex-
pertise using the Texture and Curl
Technique Assessment Checklist.
products and supplies:Standard Permanent Wave Set Up (see Technique Guide glossary)Mannequin
5Bricklay WrapThis technique, which involves placingrods like bricks in a wall, provides extraassurance that no separations are visiblein the finished style. Use varying rod sizesand wrap off-base to produce a verynatural looking curl.
products and supplies:Standard Permanent Wave Set Up
(see Technique Guide glossary)Mannequin
92 texture and curl techniques | weave wrap | © aveda 2006
educator support:CD: WorksheetsTexture and Curl TechniqueAssessment Checklist
educator support:CD: Worksheet
Texture and Curl TechniqueAssessment Checklist
visual support:Video: Bricklay Wrap Still images

6Root Wrap
Root Wraps are designed to perm only the hair closest to the scalp whileleaving the midlengths and ends in their original condition. A Root Wrap is
ideal for guests who want maximum volume without affecting the ends.
There are two kinds of root perm wraps:
Root Wrap 1: This wrap is used to add volume near the scalp on short to midlength hair, as anenhancement to a hair cut. It’s also appropriate for retouching perms that have grown out when
the condition of the hair makes complete reprocessing undesirable.
Root Wrap 2: This wrap is similar to the Piggy Back technique except that foil or plastic wrap isused on the ends. This wrap is appropriate for retouching a perm on longer, over-processed hair.
Objective
Students will be able to perform
both Root Wraps.
Practice
Have students perform Root
Wraps on mannequins. Observe
them and encourage questions.
Assessment
Assess students’ progress and
expertise using the Texture and
Curl Technique Assessment
Checklist.
products and supplies:Standard Permanent Wave Set Up
(see Technique Guide glossary)Mannequin
© aveda 2006 | texture and curl techniques | root wrap 93
educator support:CD: Worksheet
Texture and Curl TechniqueAssessment Checklist

7Insertion WrapThis wrap is a technique for accommodatingmoderately long hair or very dense hair.
Objective
Students will be able to perform
an Insertion Wrap.
Practice
Have students perform an
Insertion Wrap on mannequins.
Observe them and encourage
questions.
Assessment
Assess students’ progress and ex-
pertise using the Texture and Curl
Technique Assessment Checklist.
products and supplies:Standard Permanent Wave Set Up (see Technique Guide glossary)Mannequin
products and supplies:Standard Permanent Wave Set Up
(see Technique Guide glossary)Mannequin
visual support:Video: Insertion Wrap
Still images
8Cluster WrapThe Cluster Wrap mixes rod sizes and techniquesto create varied curl patterns.
The name of the wrap comes from the way the rodsare rolled in clusters using three tiers of different sizerods wrapped in both Alpha and Spiral techniques.
Objective
Students will be able to perform a
Cluster Wrap.
Practice
Have students perform a Cluster
Wrap on mannequins. Observe
them and encourage questions.
Assessment
Assess students’ progress and
expertise using the Texture and
Curl Technique Assessment
Checklist.
94 texture and curl techniques | insertion wrap | © aveda 2006
educator supportCD: Worksheet
Texture and Curl TechniqueAssessment Checklist
educator support:CD: WorksheetsTexture and Curl TechniqueAssessment Checklist
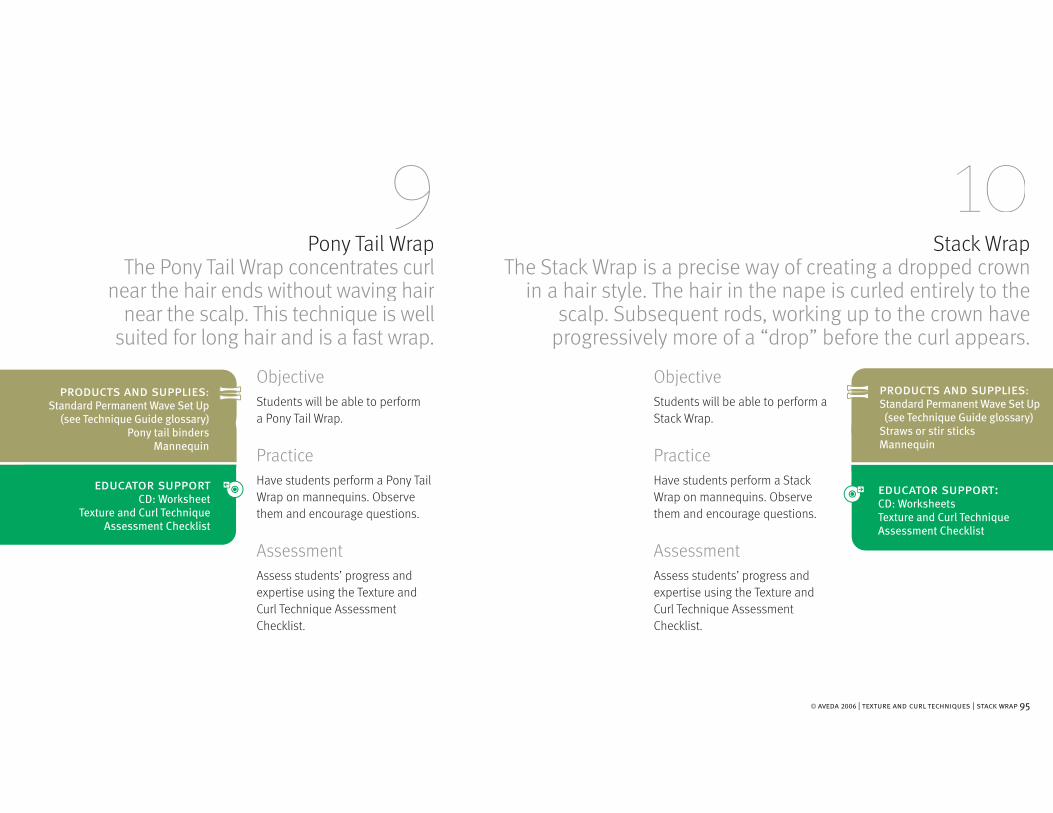
9Pony Tail Wrap
The Pony Tail Wrap concentrates curlnear the hair ends without waving hair
near the scalp. This technique is wellsuited for long hair and is a fast wrap.
Objective
Students will be able to perform
a Pony Tail Wrap.
Practice
Have students perform a Pony Tail
Wrap on mannequins. Observe
them and encourage questions.
Assessment
Assess students’ progress and
expertise using the Texture and
Curl Technique Assessment
Checklist.
products and supplies:Standard Permanent Wave Set Up
(see Technique Guide glossary)Pony tail binders
Mannequin
10Stack Wrap
The Stack Wrap is a precise way of creating a dropped crownin a hair style. The hair in the nape is curled entirely to the
scalp. Subsequent rods, working up to the crown haveprogressively more of a “drop” before the curl appears.
products and supplies:Standard Permanent Wave Set Up (see Technique Guide glossary)Straws or stir sticksMannequin
Objective
Students will be able to perform a
Stack Wrap.
Practice
Have students perform a Stack
Wrap on mannequins. Observe
them and encourage questions.
Assessment
Assess students’ progress and
expertise using the Texture and
Curl Technique Assessment
Checklist.
© aveda 2006 | texture and curl techniques | stack wrap 95
educator supportCD: Worksheet
Texture and Curl TechniqueAssessment Checklist
educator support:CD: WorksheetsTexture and Curl TechniqueAssessment Checklist

11Transfer WrapThe Transfer Wrap, also known as a “rod to roller” perm, is a bodywave technique. The Transfer Wrap is useful for guests with hardto curl hair or hair that perms with a relatively weak curl.
To create a firmer curl, the hair is first wrapped around a small rodthen neutralized around a roller or a large rod.
Practice
Have students perform a Transfer
Wrap on mannequins. Observe
them and encourage questions.
Objective
Students will be able to perform a
Transfer Wrap.
Assessment
Assess students’ progress and
expertise using the Texture and
Curl Technique Assessment
Checklist.
products and supplies:Standard Permanent Wave Set Up (see Technique Guide glossary)RollersPlastic clipsMannequin
96 texture and curl techniques | transfer wrap | © aveda 2006
educator support:CD: WorksheetTexture and Curl TechniqueAssessment Checklist

12Customized Approach To Wrapping
In the age of more casually styled hair, permanent wave patternshave become much more important than when hair was rigidly set.
Directional wrapping is a customized approach in which the hair takes its movement from the direction in which the rods are applied.
Practice
Have students perform a
customized wrap on mannequins.
Observe them and encourage
questions.
Assessment
Assess students’ progress and
expertise using the Texture and
Curl Technique Assessment
Checklist.
This customized approach has two
advantages:
· Ease of styling since the
permanent wave movement
relates directly to the finish
· Personal appeal since the
permanent wave is custom
tailored to the particular guest
Objective
Students will be able to customize
a wrap according to the guest’s
hair style and desired outcome.
products and supplies:Standard Permanent Wave Set Up
(see Technique Guide glossary) Mannequin
© aveda 2006 | texture and curl techniques | customized approach to wrapping 97
educator supportCD: Worksheet
Texture and Curl TechniqueAssessment Checklist

One looks back with appreciation to the brilliant teachers, but with gratitude to thosewho touched our human feelings. The curriculum is so much necessary raw material, butwarmth is the vital element for the growing plant and for the soul of the child.
—Carl Jung
Notes:
98 texture and curl techniques | © aveda 2006

color and texture | color fundamentals | understanding color 99
On some occasions, it’s necessary to correct all or part of a permanent wave by either reducing the curl or adding curl where it did not take. A guest’s hair may take the curl tighter or looser than expected. This lesson covers both re-ducing and adding to the curl of permanently waved hair.
The procedure for slightly reducing curl is similar to the one for removing a stronger curl. Both procedures can be performed the day of the original perm service or later. Another technique discussed in this lesson is re-perming the hair.
A spot wrap curls only a portion of the guest’s hair. It might be needed because: ·The guest may have a short hair cut where only the top is long enough to perm ·A previous perm needs to be partially redone
Chapter 5: Correcting Permanent Waves
lesson 1:Reducing Curl
lesson 2:Spot Wrap
© aveda 2006 | correcting permanent waves 99

1Reducing CurlThe procedure for slightly reducing curl is similar to the one for removing a stronger curl. Both procedures can be performed theday of the original perm service or later. Another techniquediscussed in this lesson is re-perming the hair.
Assessment
Have students demonstrate a Spot
Wrap on mannequins for mid-
length to short hair.
Objective
Students will gain a working
understanding of how to correct
permanent waves that do not
meet the guest’s expectations.
2Spot WrapA Spot Wrap is used when curling only aportion of the guest’s hair. It might beneeded because:
• The guest may have a short hair cut whereonly the top is long enough to perm.• A previous perm needs to be partially redone.
These instructions cover spot perming in thecrown, the most common area, but theyapply to other areas of the head as well.
Objective
Students will gain a working
understanding of how to Spot
Wrap hair.
Assessment
Have students demonstrate
Spot Wrapping techniques on
mannequins for midlength to
short hair and short hair.
100 correcting permanent waves | reducing curl | © aveda 2006
products and supplies:Standard Permanent Wave Set Up
(see Technique Guide glossary)Model
products and supplies:Standard Permanent Wave Set Up
(see Technique Guide glossary)Protective glovesWide tooth comb
Mannequin

color and texture | crrecting permanent waves 101
Chapter 6: Relaxing Hair
lesson 1:Guest Consultation
lesson 2:Virgin Relaxer Application
lesson 3:Retouch Relaxer Application
lesson 4:Corrective Relaxer Application
Many people want to straighten natural curls or relax wavy hair. A relaxer service can be done to achive this straighter look. Hair relaxing is a chemical process during which the basic structure of curly hair is changed into a straighter form. The goal is never 100% straight hair; 80-85% straight is a realistic outcome.
Relaxing hair is the process of chemically breaking the hair bonds to restructure the curl. It’s widely accepted that relaxers were discovered when people noticed that strong lye soap reduced hair curl.
To permanently reduce curl, a chemical service is required. Hair that has never been relaxed before requires a virgin application. The goal is to create hair that is much straighter, but not completely straightened. A slight curl is desirable and many looks can be achieved through styling.
After a virgin relaxer service, as new hair grows in, it needs to be relaxed to maintain a consistent look.
A Corrective Relaxer is needed when a relaxer service did not process well in some areas of the hair. It is often required after a virgin application on longer hair because the warmer scalp areas relax more than the colder midlengths and ends.
© aveda 2006 | relaxing hair 101

1Guest ConsultationRelaxing hair is the process of chemically breaking the hair bonds to restructure the curl. It is widely acceptedthat relaxers were discovered when people noticed that strong lye soap reduced hair curl.
Soap has been used since ancient times for cleansing. Until 1930, when shampoo was created, peoplewashed their hair with soap. Potash (potassium hydroxide) mixed with fat became crude soap thousands of years ago in Babylon.
Soap became stronger over 200 years ago with the discovery of industrial lye. Traditionally, lye (sodiumhydroxide) was made with lime and potash. 200 years later our hydroxide relaxers are essentially a fat andan alkali (most often sodium hydroxide).
Until recently, relaxers were so strongly alkaline that the scalp had to be coated with petroleum jelly beforethe service. Today, “no-base” relaxers have replaced the stronger, older variety. Still, many stylists “base” theguest’s scalp for added protection. Basing can be performed with jojoba oil or another plant-based oil.
Objective
Students will be able to describe
the history of relaxing hair, list the
factors pertaining to hair texture
that are relevant to relaxing hair
and perform a guest consultation
for relaxing hair.
Top teaching points
1. How to consult with a guest
about hair relaxer services
2. How to assess the condition of
the hair and scalp
3. How to assess for previous
chemical services
102 relaxing hair | guest consultation | © aveda 2006

1. Relaxers were most likely dis-
covered when people noticed:
a. sitting in the sun straightened
hair
b. strong lye soap reduced
hair curl
c. shampooing often straightened
hair
d. a & c
2. Before relaxing hair, guests
should not have:
a. irritated their scalp
b. brushed their hair
c. shampooed the day of the
service
d. all of the above
3. Signs of hair weakness that
may prevent a relaxer service
include:
a. prior chemical processing
b. damage from thermal styling
c. hair lightening
d. all of the above
4. The characteristics of the hair
should be assessed, including:
a. texture, density
b. elasticity, degree of curl
c. color, length
d. a & b
5. Hair texture may be defined as:
a. coarse, medium, fine
b. dense, medium dense, not
dense
c. coarse and thick
d. coarse or thin
6. Relaxing thick hair requires:
a. smaller subsectioning
b. lighter application of product
c. heavier application of product
d. more processing time
7. Before relaxing hair you must
determine if the guest has had:
a. previous chemical reformation
service
b. previous deep conditioning
service
c. previous color service
d. a & c
Educator Answer GuideRelaxing Hair assessment of acquired knowledge
Notes:
educator support:CD: WorksheetRelaxing Hair Assessment of Acquired Knowledge
© aveda 2006 | relaxing hair 103

2Virgin Relaxer ApplicationRelaxing hair is the process of reducing curl using a chemical service.
You may be asked to relax hair that has never been relaxed before (virgin service) or torelax newly grown out hair while protecting the rest of the hair (retouch service).
Objective
Students will be able to perform
a Virgin Relaxer Application and
identify resistant and fragile hair.
Assessment
Assess students’ progress and
expertise using the Hair Relaxing
Technique Assessment Checklist.
Students may gain understanding
by assessing themselves or each
other.
products and supplies:Standard Relaxer Set Up (see Technique Guide glossary)
visual support:Video: Virgin Relaxer ApplicationStill images
The work flow for a Virgin Relaxer Application is:
· Consult with the guest· Section the hair for control· Base the scalp· Apply a chemical hair relaxer· Process and smooth the hair· Perform a strand test· Thoroughly rinse the hair· Apply a neutralizing shampoo· Condition and style the hair
educator support:Hair Relaxing TechniqueAssessment Checklist
104 relaxing hair | virgin relaxer application | © aveda 2006

3Retouch Relaxer Application
Relaxed hair has its texture altered. As newhair grows in, it will need to be relaxed if a
consistant look is to be maintained.
Short hair styles are cut more often andtherefore the relaxed hair is removed. The
remaining hair will require a Partial Relaxer Application.
Objective
Students will be able to perform a
Retouch Relaxer Application.
Assessment
Assess students’ progress and
expertise using the Hair Relaxing
Technique Assessment Checklist.
Students may gain understanding
by assessing themselves or each
other.
products and supplies:Standard Relaxer Set Up
(see Technique Guide glossary) Mannequin
visual support:Video: Retouch Relaxer
Still images
4Corrective Relaxer Application
A Corrective Relaxer is needed when a relaxer servicedid not process completely in some areas of the hair.
It is often required after a Virgin Relaxer Applicationon longer hair because the warmer scalp areas relax
more than the colder midlengths and ends.
products and supplies:Standard Relaxer Set Up (see Technique Guide glossary)
Objective
Students will be able perform a
Corrective Relaxer Application.
Assessment
Assess students’ progress and
expertise using the Hair Relaxing
Technique Assessment Checklist.
Students may gain understanding
by assessing themselves or each
other.
© aveda 2006 | relaxing hair | corrective relaxer application 105
educator support:Hair Relaxing Technique
Assessment Checklist
educator support:Hair Relaxing TechniqueAssessment Checklist

Notes:
Don’t try to fix the students, fix ourselves first. The good teacher makes the poor student good and the good student superior.When our students fail, we, as teachers, too, have failed.
—Marva Collins
106 relaxing hair | © aveda 2006

color and texture | color fundamentals | understanding color 107
Chapter 7: Reformation Curl
lesson 1:Reformation Curl Procedure
Guests who want to change the size or appearance of their curls may desire a service which first reduces the curl, then reforms the curl to a larger size.
The reformation curl offers guests an option of curl size. Guests with highly textured or curly hair who want larger waves or curls are processed twice with thio and then neutralized. In essence, a reformation curl is a relaxer service followed by a permanent wave.
© aveda 2006 | reformation curl 107

1Reformation Curl ProcedureGuests with highly textured hair who want to change their curlpattern, are processed twice with thio and then neutralized.
The work flow includes:· Reducing curl· Wrapping rods and processing· Neutralizing
This service, which was introduced around 1970, was extremelypopular in the late 70’s and early 80’s.
In most cases, the reformation curl product comes in bulk con-tainers. The stylist uses a bowl, brush and bottle for application.
Objective
Students will gain a working
knowledge of how to reduce curl
and then reform the curl pattern.
Assessment
Assess students’ progress and
expertise using the Hair Relaxing
Technique Assessment Checklist
and the Texture and Curl Tech-
nique Assessment Checklist.
Students may gain understanding
by assessing themselves or each
other.
products and supplies:Standard Reformation Curl Set Up (see Technique Guide glossary)
108 reformation curl | reformation curl procedure | © aveda 2006
educator support:Hair Relaxing Technique Assessment Checklist Texture and Curl Technique Assessment Checklist

Curriculum Tools for S
alon Instructors

Curr
icul
um T
ools
for S
alon
Inst
ruct
ors


color and texture | color fundamentals | understanding color 109
Sed diam nonummy ni euis mod tincidunt ut laoreet dolore magna aliquam erat volutpat. Ut wisi enim ad minim veniam, quis nostrud exerci tation ul-lamcorper suscipit lobortis nisl ut aliquip ex ea com modo consequat. Duis autem vel eum iriure dolor in hendrerit in vulputate velit esse oles tie con-sequat, vel illum dolore eu feugiat nulla facilisis at vero eros et accumsan et iusto odio dignissim qui blandit praesent luptatum zzril delenit augue duis. Ut wisi enim ad minim veniam,
Quis nostrud exerci tation ullamcorper suscipit lobortis nisl ut aliquip ex ea com modo consequat. Duis autem vel eum iriure dolor in hendrerit in vulpu-tate velit esse molestie consequat, vel illum dolore eu feugiat nulla facilisis. Duis autem vel eum iriure dolor in hendrerit in vulputate velit esse oles tie.
At vero eros et accumsan et iusto odio dignissim qui blandit praesent lupta-tum zzril delenit augue duis dolore te feugait nulla facilisi. Lorem ipsum dolor sit amet, consectetuer adipiscing elit, sed diam nonummy nibh euismod tinc-
Chapter #: Chapter name
lesson 1:Corrective Color Consultation
lesson 2:Color Cleansing Technique
lesson 3:Precoloration Technique
lesson 4:Cautions When Correcting Hair
Colored With Henna
Curriculum Planning Tools for Salon Instructors
note to salon instructors:
This Aveda curriculum gives you the freedom to customize the educational experience that is just right for your salon, your stylists and your guests. Whether you’re looking for dynamic in-salon training or a first-rate Apprentice Program, this is your best resource.
The Art and Science of Hair Color and Texture content, created by Aveda Mas-ter Professionals, includes:
· Text descriptions · Graphic illustrations · Video demonstrations (27 techniques) · Still images · Educator Reference Guide · Assessment tools · Curriculum Design Tool
To help you draw from these resources and deliver the optimum curriculum for your salon, we’ve created the following Curriculum Design tool. It’s a simple, step-by-step approach to helping you plan and execute the ultimate in Aveda education.
More specific information regarding the lessons, applications and techniques found in this curriculum can be found in the Aveda Hair Color Professional Reference Guide and the Retexturizing System Professional Reference Guide.
© aveda 2006 | planning tools 109

110 planning tools | determine your objectives | © aveda 2006
Objective
When you customize your
education programs using
these Aveda Color and Texture
Curriculum resources, start by
setting clear-cut objectives.
Tool: Education Event Objectives
1.__________________________
2.__________________________
3.__________________________
4.__________________________
5.__________________________
Consider:
· What you want participants to be
able to do upon completion
· Where the participants need skill
and/or knowledge improvements
· Where the participants need
to demonstrate consistency of
technique
· What services salon guests are
(or will be) requesting
· The time frame to which you and
the participants can commit
1Determine Your Objectives
Tool: Number of weeks in the program (6 or 12) ____
How many lessons per week (1 or 2) ____
Number of hours per lesson (4 or 8) ____
Total number of hours in the curriculum = ____
Sample:
Number of weeks in the program: 12
How many lessons per week: 1
Number of hours per lesson: 4
Total number of hours in the curriculum = 48
After determining the total num-
ber of hours in the curriculum,
choose a proposed series of dates
for classes (such as every Monday
night for 3 months).
Do a preliminary check to see if
the space you have in mind for
class is available during those
times. Put a hold on the space.
2Select Time Frameand Dates
3Choose YourLessons
Review steps 1 and 2 so you are
clear about your objectives and
your time frame.
From the Technique Guide, choose
the best lessons to meet your
objectives and time allotment.
To help you plan and choose
lessons for your curriculum, we
have divided the Table of Contents
into 4 hour lessons.
educator support:CD: ToolsCurriculum Design Form

Choose Your Lessons
separated into 4 hour lessons
© aveda 2006 | planning tools | choose your lessons 111
Module 1: The Art and Science of Hair Color Chapter 1-Understanding ColorLesson 1: Color TheoryLesson 2: Natural Hair ColorLesson 3: The Level SystemChapter 2-Hair Color ConsultationLesson 1: Guest Natural AttributesLesson 2: Blueprint to Better Hair ColoringLesson 3: How to Perform a Strand TestLesson 4: Hair Color CautionsChapter 3-Hair Color Chemistry, Formulating and MixingLesson 1: The Evolution of Hair ColorLesson 2: Today’s Hair Color TypesLesson 3: Chemical Actions of Permanent Hair ColorLesson 4: Formulating and Mixing Permanent Hair ColorLesson 5: Formulating and Mixing High Lift Color
Chapter 4-Full Head Color Application FundamentalsLesson 1: Work FlowLesson 2: Guest Comfort and ProtectionLesson 3: Sectioning and SubsectioningLesson 4: Product ApplicationLesson 5: Strand TestChapter 5-Permanent Hair Color ApplicationsLesson 1: Retouch Reestablish ApplicationLesson 2: Retouch Refresh Application
Lesson 3: Virgin Lighter Application
Lesson 4: Virgin Darker Application
Lesson 5: Alternative Virgin Application
Lesson 6: Lightening and Toning Application
Chapter 6-Freehand Permanent Hair Color ApplicationsLesson 1: Comb-On Color ApplicationLesson 2: Shoe Shine Application
Chapter 7-Advanced Permanent Hair Color ApplicationsLesson 1: Circles ApplicationLesson 2: Color Melting Application
Chapter 8-Henna Hair ColorLesson 1: Henna Hair Color Features and PrecautionsChapter 9-Temporary Hair ColorLesson 1: Temporary Hair Color ApplicationChapter 10-Demi-Permanent Hair ColorLesson 1: Demi-Permanent Hair Color Application
Chapter 11-Dimensional Hair Color Application Fundamentals Lesson 1: Guest Comfort and ProtectionLesson 2: SectioningLesson 3: Subsectioning/Weaving/SlicingLesson 4: Product and Foil Packet ApplicationLesson 5: Strand TestChapter 12-Classic Foil ApplicationsLesson 1: Six Basic Section Full Head Foil Application
Lesson 2: Alternative Full Head Foil Application
Lesson 3: Partial Head Foil Application
Lesson 4: Singles Application
Lesson 5: Tipping Application
Chapter 13-Dimensional Color Combination ApplicationLesson 1: Full Head Slices with Color ApplicationLesson 2: Back-to-Back Slices Application

Choose Your Lessons
112 planning tools | choose your lessons | © aveda 2006
Chapter 14-Corrective Color TechniquesLesson 1: Corrective Color ConsultationLesson 2: Color Cleansing Technique
Lesson 3: PreColoration TechniqueLesson 4: Correcting Hair Colored with Henna and Minerals
Module 2: The Art and Science of Texture and CurlChapter 1-Introduction to Texture and CurlLesson 1: History and Product VarietiesLesson 2: Chemistry of Permanent WavingLesson 3: Setup and PreparationLesson 4: All About RodsChapter 2-Guest ConsultationLesson 1: PrecautionsLesson 2: Hair Analysis and Service SelectionChapter 3-Fundamentals of Texture and Curl ApplicationLesson 1: Work FlowLesson 2: Sectioning and BlockingLesson 3: End Papers and WrappingLesson 4: Solution ApplicationsLesson 5: Processing and Test CurlLesson 6: Rinsing and BlottingLesson 7: Neutralizing
Chapter 4-Texture and Curl TechniquesLesson 1: Alpha Wrap
Lesson 3: Spiral and Piggy Back Combination Wrap
Lesson 4: Six Section Wrap
Lesson 5: Directional Wrap
Lesson 6: Weave Wrap
Lesson 7: Bricklay Wrap
Lesson 8: Root Wrap
Lesson 9: Insertion Wrap
Lesson 10: Cluster Wrap
Lesson 11: Pony Tail Wrap
Lesson 12: Stack Wrap
Lesson 13: Transfer Wrap
Chapter 5-Correcting Permanent WavesLesson 1: Reducing CurlLesson 2: Spot Wrap
Chapter 6-Relaxing HairLesson 1: Guest ConsultationLesson 2: Virgin Relaxer Application
L esson 3: Retouch Relaxer ApplicationLesson 4: Corrective Relaxer ApplicationChapter 7-Reformation CurlLesson 1: Reformation Curl Procedure

4Logistics
· Invite participants (see template)
· Make sure participants clear their
books for the specified dates and
times
· Reserve and confirm a classroom
or in-salon space for the time
period you need
· Have participants find models
or arrange for mannequins as
needed
· Gather products and supplies
(see Glossary for Standard Set Up
information)
· Make copies of print materials,
if needed (such as assessment
worksheets)
educator support:CD: ToolsInvitation Template / Reminder
5Lesson Plans
· Start with a warm-up exercise
· Give an overview of the lesson
and the objectives (see Educator
Reference Guide for overviews
and objectives)
· Deliver a flip-chart review of
content and/or…
· View DVD (if applicable)
· Demonstrate application while
participants work with models or
mannequins
· Use still images, if applicable, to
emphasize key techniques
· Review top teaching points (as
listed in the Educator Reference
Guide)
· Assess progress (see Educator
Reference Guide for quizzes and
assessment worksheets) tip: Some educators like to have participants watch a chapter of a video application, “pause” it and demonstrate the technique while students prac-tice on models or mannequins, then continue with the next chapter of the DVD, etc.
6Plan Your Next
Education Event
Make education a natural and
ongoing part of your salon
environment. During your last
lesson together, brainstorm about
the next event:
Ask:
What would you like to work on or
learn more about?
What do our guests want?
What’s our salon image? Can we
make it better through education?
What could we offer to really set
us apart?
Compare schedules and decide on
a general timeframe for your next
educational event.
© aveda 2006 | planning tools | plan your next education event 113
· Remind participants of dates,
times and expectations (see
template)
· Set up space for educational
experience (flip-chart, DVD player
and monitor, products and sup-
plies, participant stations, etc)


copyright 2006 aveda