stoppreviousnext vicnet internet training course workbook 7 working with pictures on the internet...
TRANSCRIPT
Stop Previous Next
Vicnet Internet training course
Workbook 7
Working with pictures
on the Internet
Easy English workbook
March 2011

Stop Previous Next
Copyright © State Library of Victoria, 2011
You can
Share – copy it or give it to other people.
Remix – change it.
These are the rules
Attribution – You must write Copyright © State Library of
Victoria.
Non-commercial – You cannot sell it or use it to make money.
Share Alike – If you change it, the new work must have the
same license as this work.
For more information, contact Vicnet at the State Library of Victoria
Phone
Address
Website
(03) 8664 7001
328 Swanston Street, Melbourne VIC 3000
www.vicnet.net.au
This publication is licensed under the Creative Commons Attribution-Non-
Commercial-ShareAlike 2.5 Australia License. To view a copy of this
license, visit http://creativecomms.org/licenses/by-nc-sa/2.5/au/
2
Stop Previous Next
About Vicnet Internet training workbooks
This workbook is part of a series of
workbooks in Easy English. They provide
basic information on how to use the Internet.
You can see all the workbooks on the Vicnet
website: www.vicnet.net.au/publications
The workbooks were written by
Vicnet at the State Library of Victoria
The funding came from Department of
Planning and Community Development
When writing this workbook, Vicnet used
computers with
Microsoft Windows 7 operating system
Internet Explorer version 8
3
Stop Previous Next
How to use this workbook
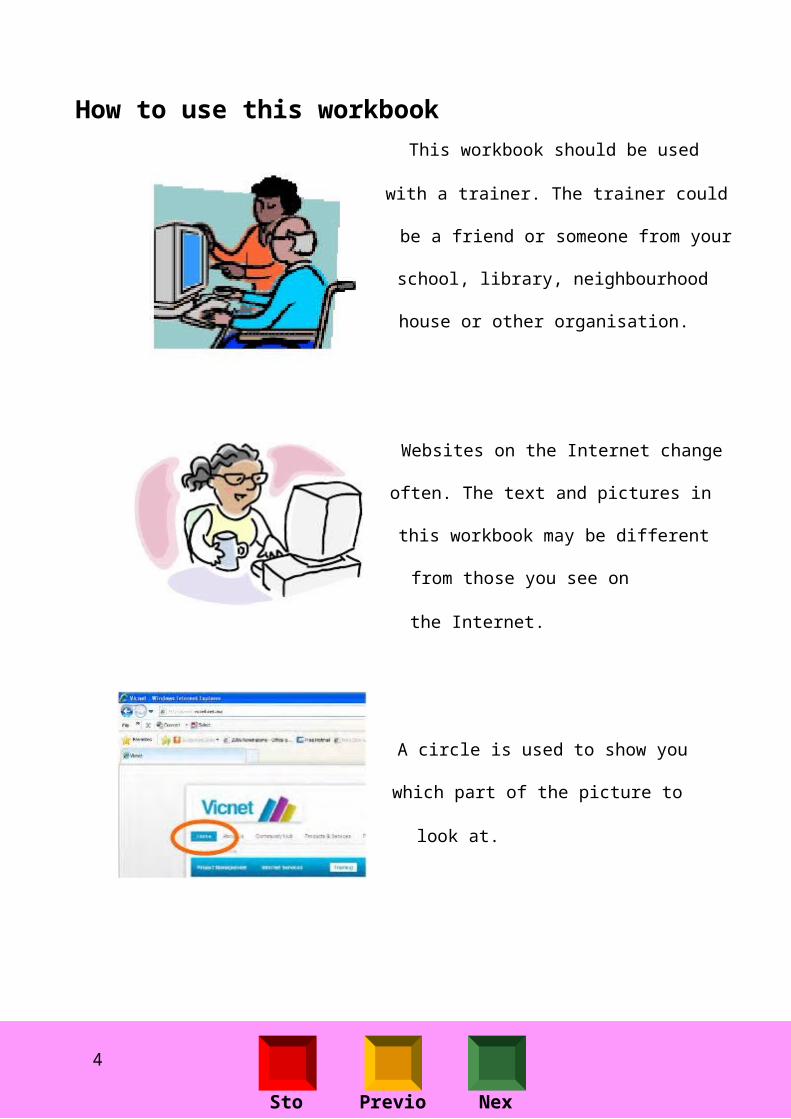
This workbook should be used
with a trainer. The trainer could
be a friend or someone from your
school, library, neighbourhood
house or other organisation.
Websites on the Internet change
often. The text and pictures in
this workbook may be different
from those you see on
the Internet.
A circle is used to show you
which part of the picture to
look at.
4
Stop Previous Next
What is in this Workbook
Introduction ...................................................................... 6
Attach a picture to an email ............................................ 7
Manage your pictures..................................................... 12
Looking at your pictures................................................ 14
Download pictures.......................................................... 17
Rename pictures............................................................ 21
File size.......................................................................... 23
Resize pictures............................................................... 27
Delete pictures............................................................... 35
5

Stop Previous Next
Introduction
Digital images are pictures in an
electronic format. You can take digital
images using a digital camera. The
pictures can be downloaded or copied
onto a computer.
Once the pictures are downloaded onto
a computer, you can
send them as an attachment
on an email
manage them on
your computer
display them in an online
photo album
In this workbook, we will look at how to:
attach a picture to an email
manage your pictures
6
Stop Previous Next
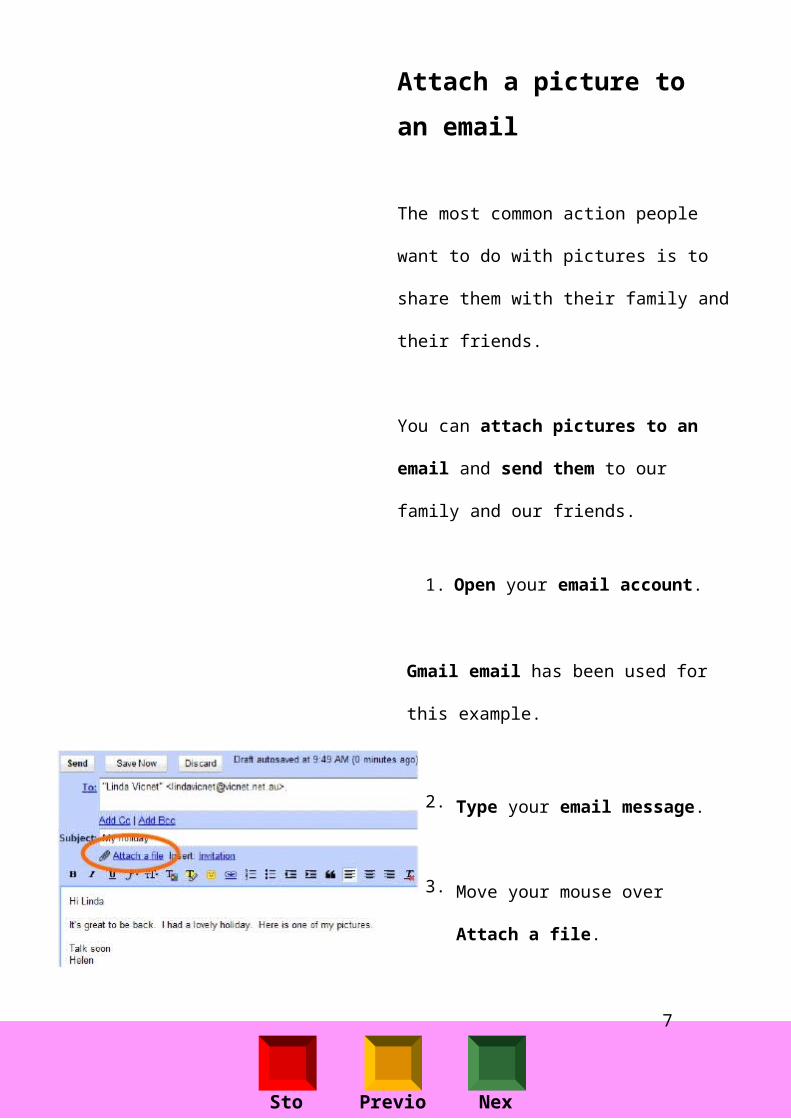
Attach a picture to
an email
The most common action people
want to do with pictures is to
share them with their family and
their friends.
You can attach pictures to an
email and send them to our
family and our friends.
1. Open your email account.
Gmail email has been used for
this example.
2.
3.
Type your email message.
Move your mouse over
Attach a file.
7

Stop Previous Next
4. Do 1 click on
your keyboard.
This box will appear in the middle
of your screen.
5.
6.
Move your mouse over the
folder called Libraries.
Do 2 clicks.
This box will appear.
7.
8.
Move your mouse over the
folder called Pictures.
Do 2 clicks.
The Pictures folder is where your
pictures can be saved and
managed on your computer.
This box will appear.
8
Stop Previous Next
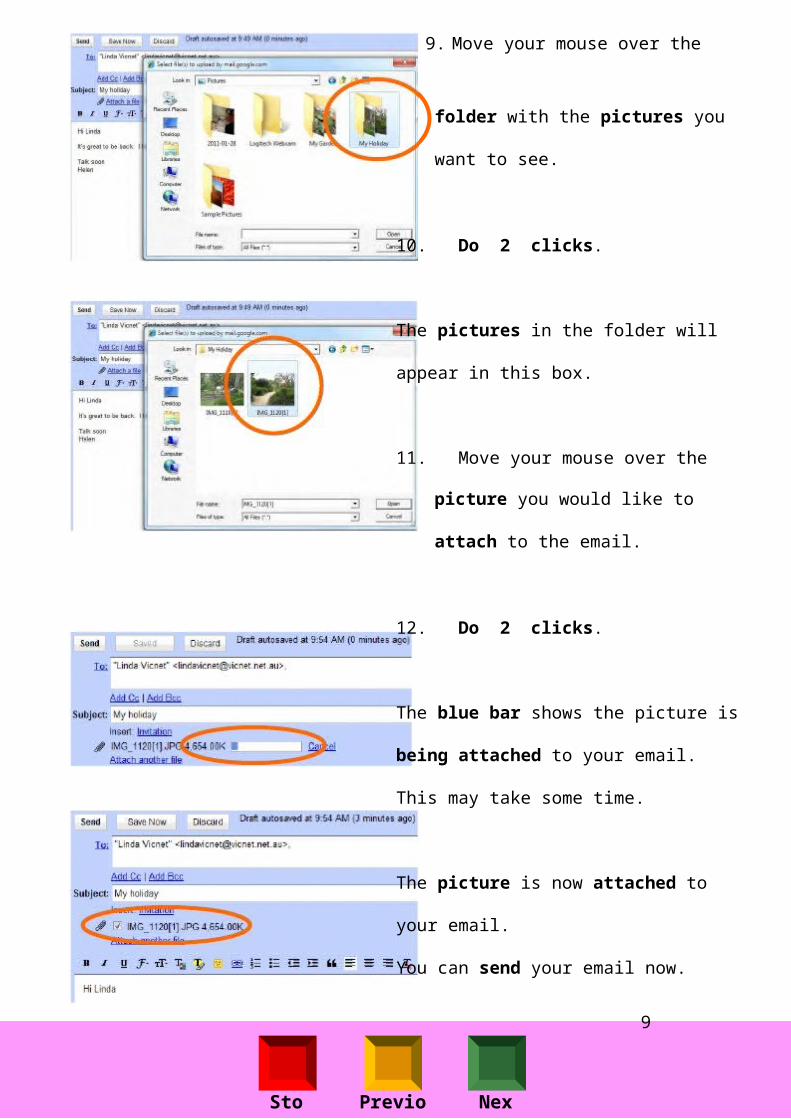
9. Move your mouse over the
folder with the pictures you
want to see.
10. Do 2 clicks.
The pictures in the folder will
appear in this box.
11. Move your mouse over the
picture you would like to
attach to the email.
12. Do 2 clicks.
The blue bar shows the picture is
being attached to your email.
This may take some time.
The picture is now attached to
your email.
You can send your email now.
9
Stop Previous Next
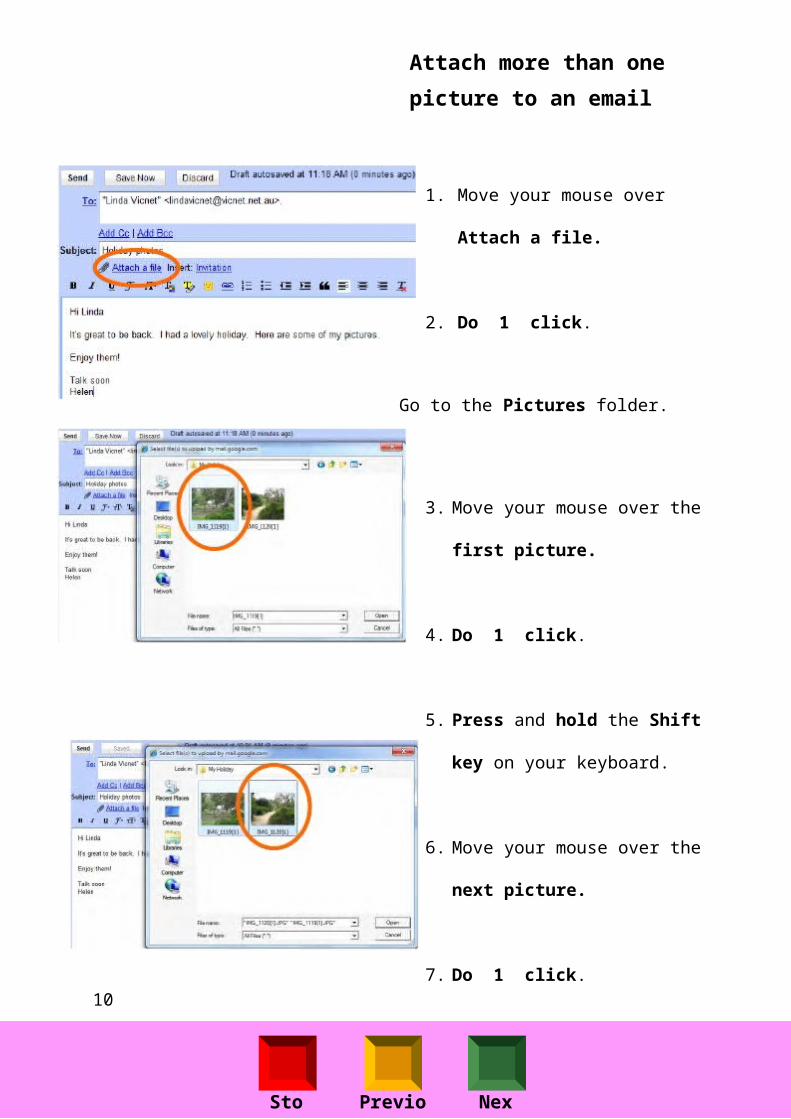
Attach more than one
picture to an email
1.
2.
Move your mouse over
Attach a file.
Do 1 click.
Go to the Pictures folder.
3.
4.
5.
6.
7.
Move your mouse over the
first picture.
Do 1 click.
Press and hold the Shift
key on your keyboard.
Move your mouse over the
next picture.
Do 1 click.
10
Stop Previous Next
8.
9.
10.
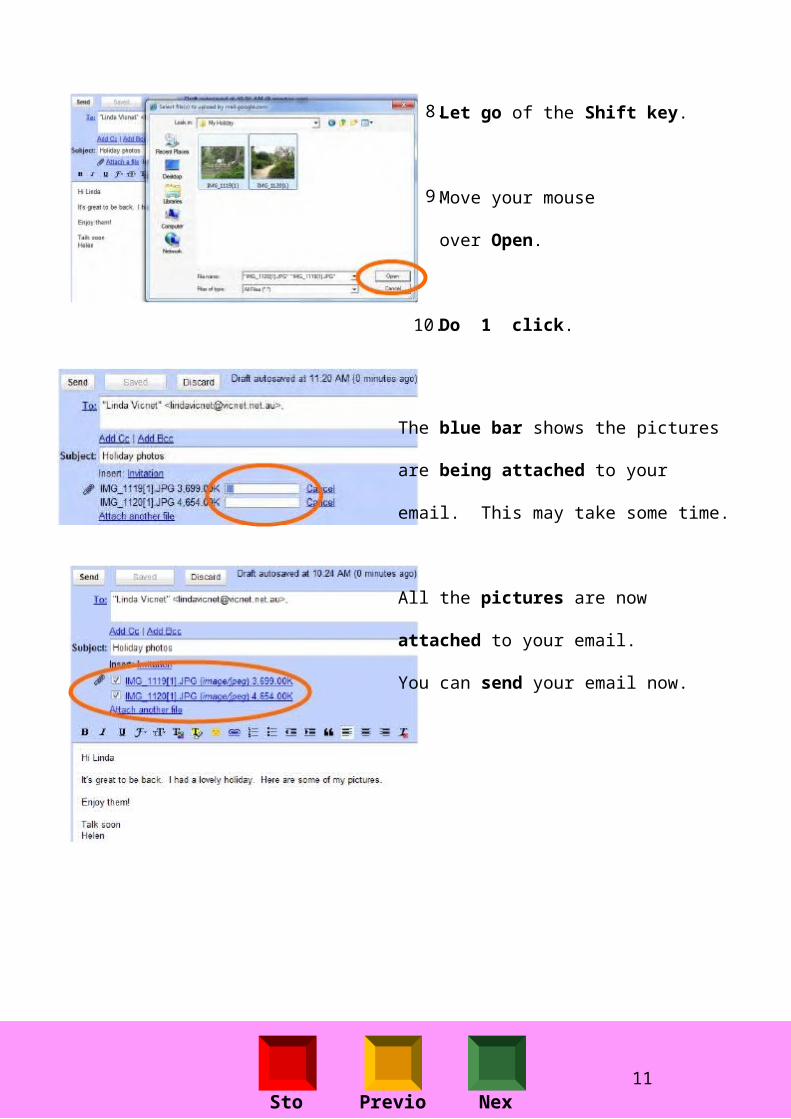
Let go of the Shift key.
Move your mouse
over Open.
Do 1 click.
The blue bar shows the pictures
are being attached to your
email. This may take some time.
All the pictures are now
attached to your email.
You can send your email now.
11
Stop Previous Next
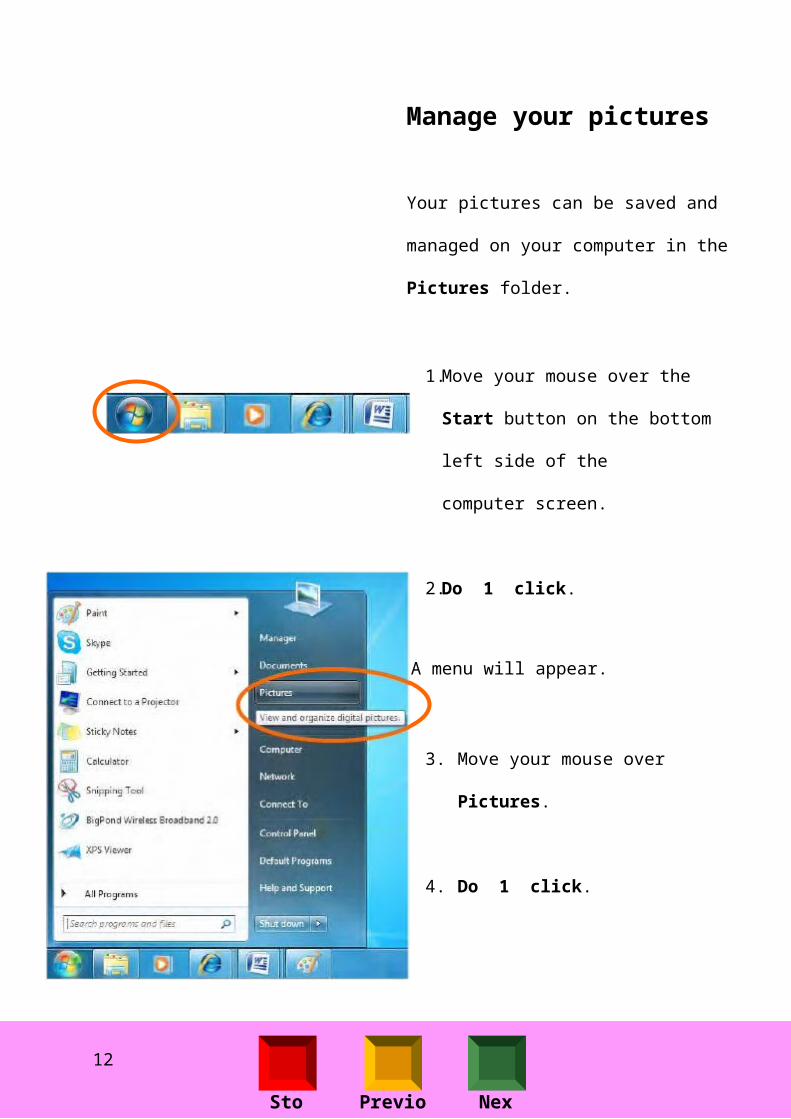
Manage your pictures
Your pictures can be saved and
managed on your computer in the
Pictures folder.
1.
2.
Move your mouse over the
Start button on the bottom
left side of the
computer screen.
Do 1 click.
A menu will appear.
3.
4.
Move your mouse over
Pictures.
Do 1 click.
12
Stop Previous Next
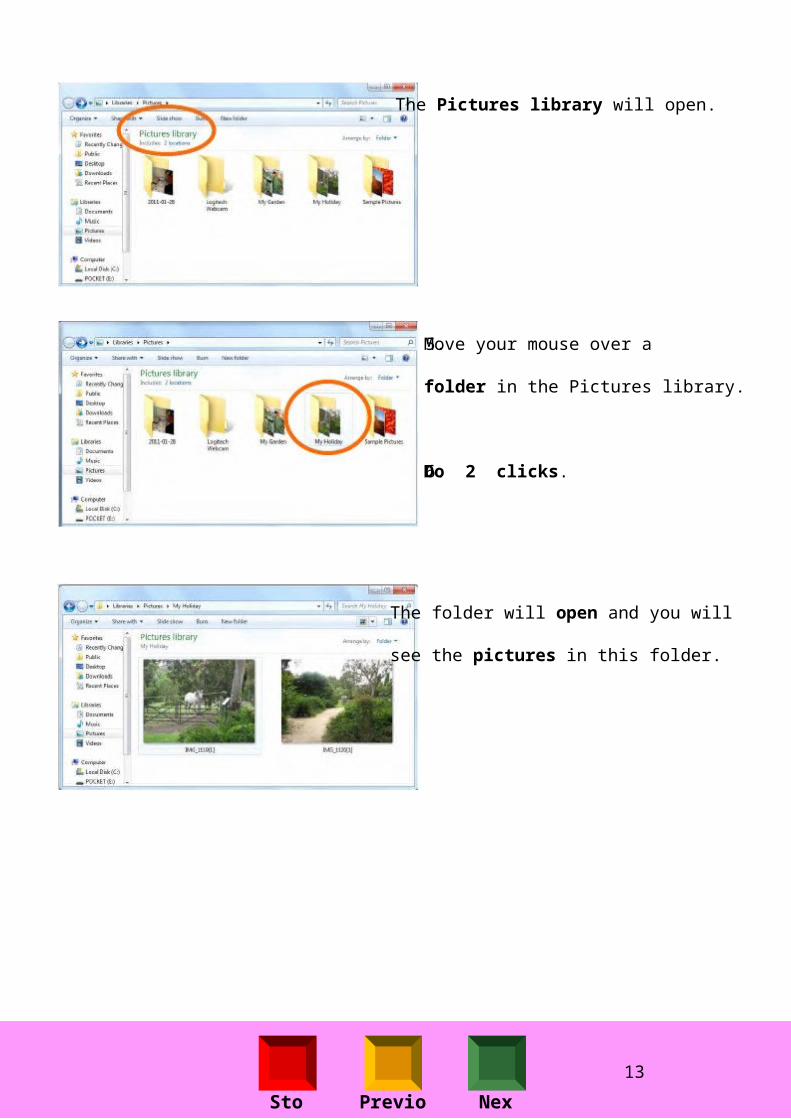
The Pictures library will open.
5.
6.
Move your mouse over a
folder in the Pictures library.
Do 2 clicks.
The folder will open and you will
see the pictures in this folder.
13

Stop Previous Next
Looking at
your pictures
There are three ways you can
look at the pictures
on your computer.
You can look at them:
listed in the folder as
thumbnails or
in the Windows Photo
Viewer or
in a slide show
Look at pictures in the
folder as thumbnails
Thumbnails show the picture
files as small pictures in a folder.
14
Stop Previous Next
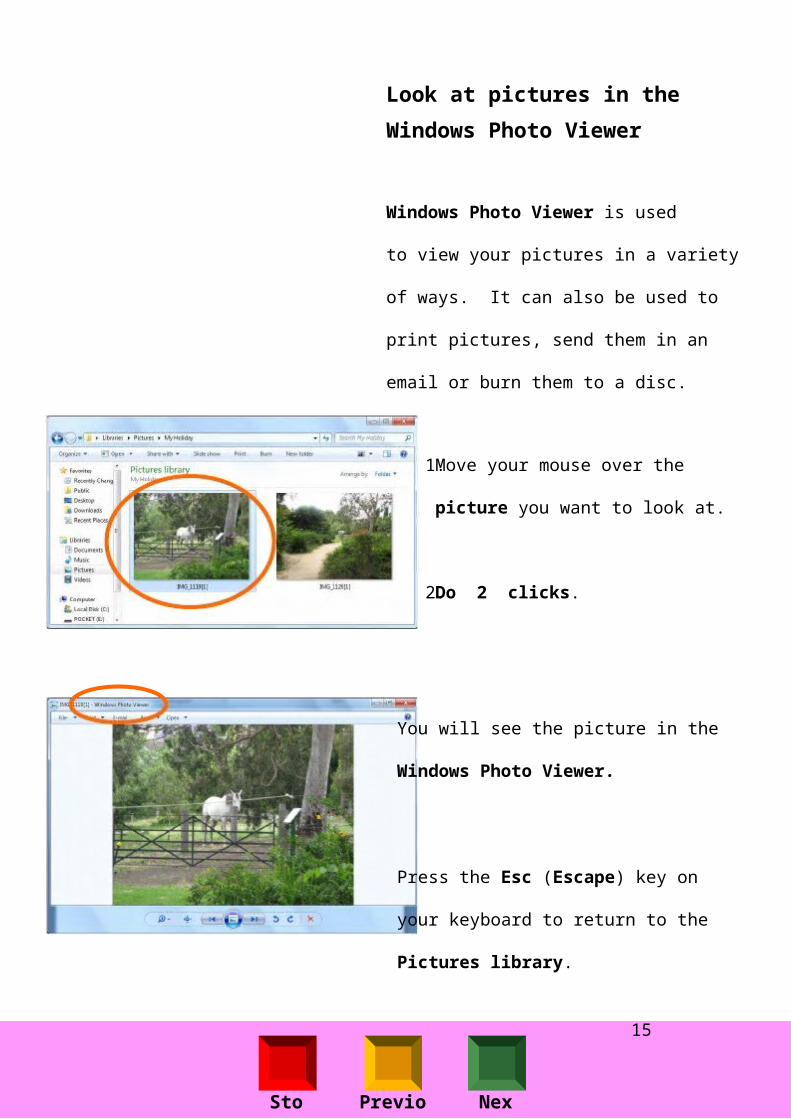
Look at pictures in the
Windows Photo Viewer
Windows Photo Viewer is used
to view your pictures in a variety
of ways. It can also be used to
print pictures, send them in an
email or burn them to a disc.
1.
2.
Move your mouse over the
picture you want to look at.
Do 2 clicks.
You will see the picture in the
Windows Photo Viewer.
Press the Esc (Escape) key on
your keyboard to return to the
Pictures library.
15
Stop Previous Next
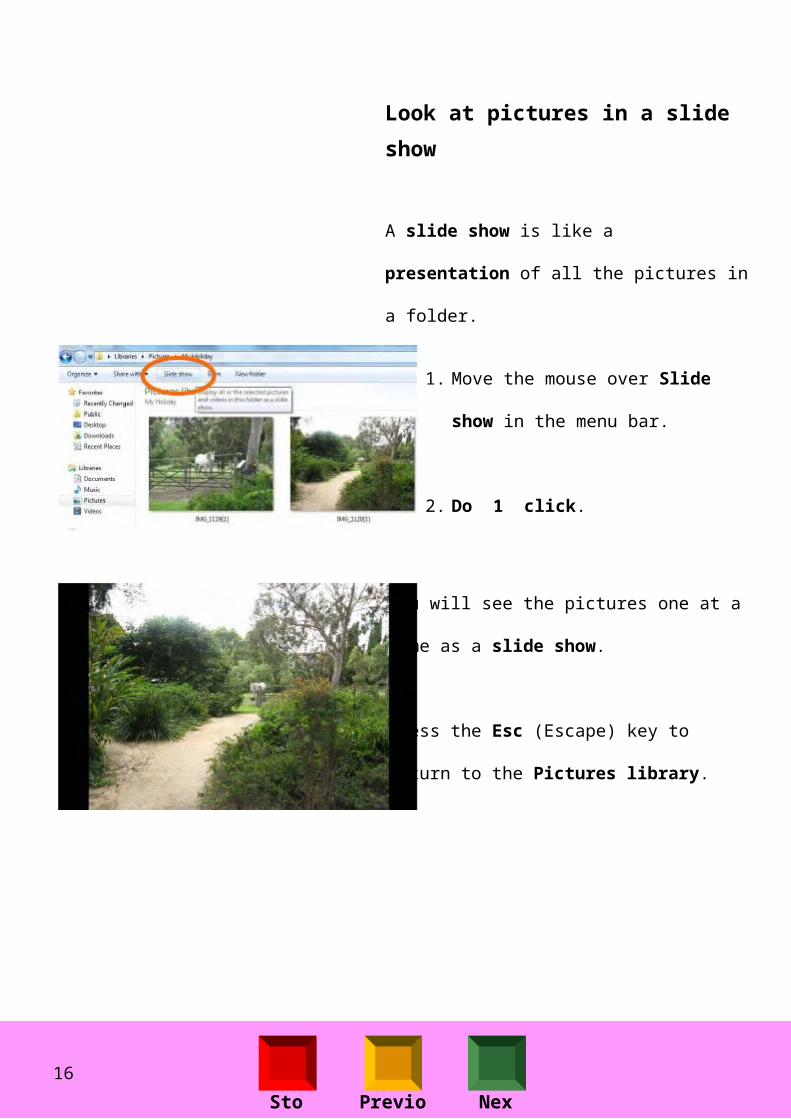
Look at pictures in a slide
show
A slide show is like a
presentation of all the pictures in
a folder.
1.
2.
Move the mouse over Slide
show in the menu bar.
Do 1 click.
You will see the pictures one at a
time as a slide show.
Press the Esc (Escape) key to
return to the Pictures library.
16
Stop Previous Next
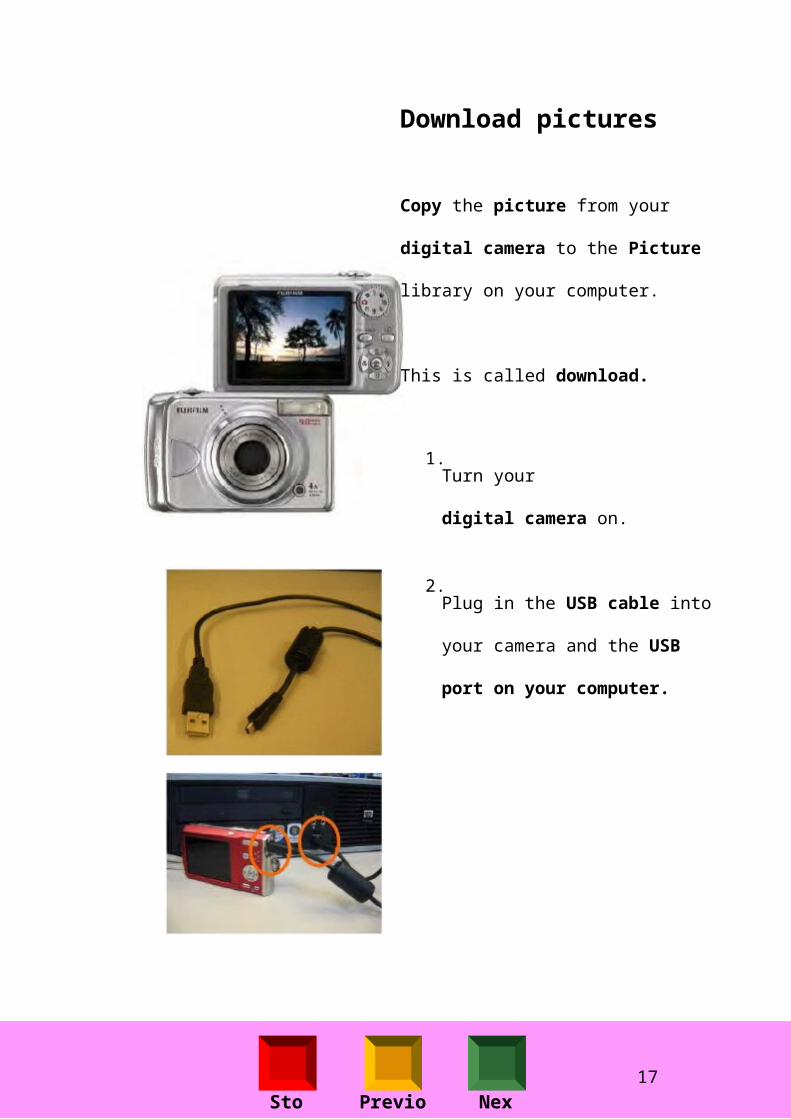
Download pictures
Copy the picture from your
digital camera to the Picture
library on your computer.
This is called download.
1.
2.
Turn your
digital camera on.
Plug in the USB cable into
your camera and the USB
port on your computer.
17
Stop Previous Next
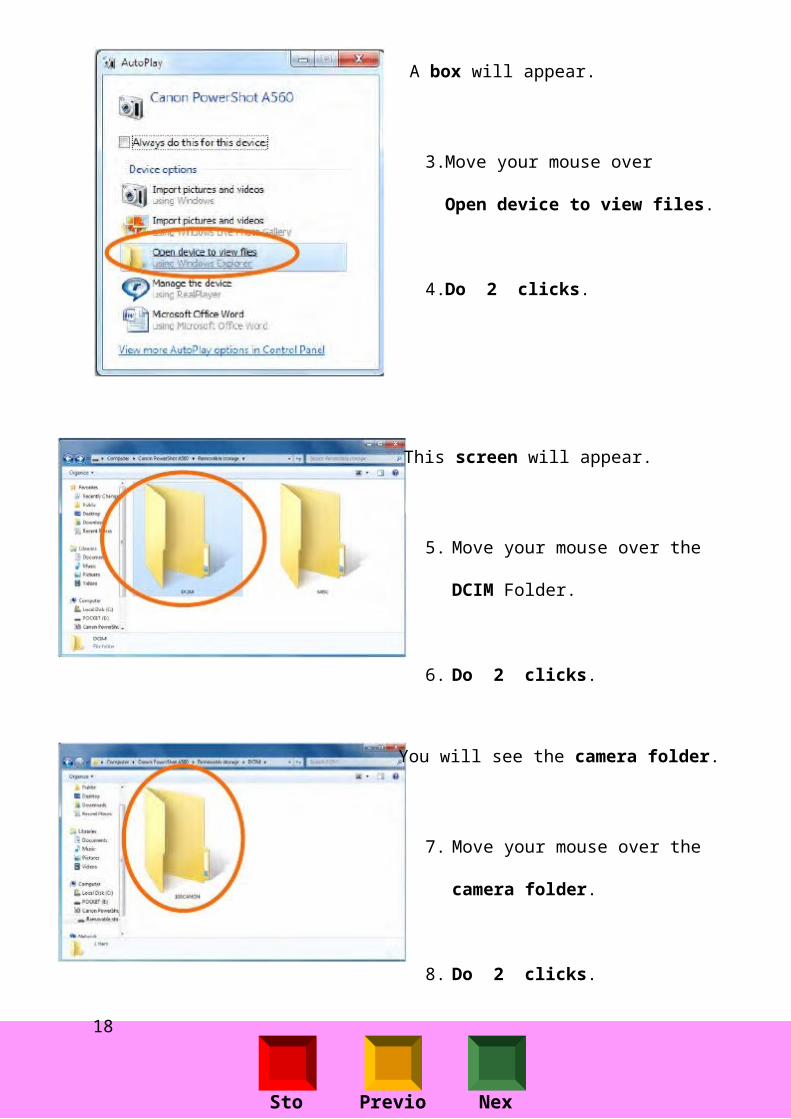
A box will appear.
3.
4.
Move your mouse over
Open device to view files.
Do 2 clicks.
This screen will appear.
5.
6.
Move your mouse over the
DCIM Folder.
Do 2 clicks.
You will see the camera folder.
7.
8.
Move your mouse over the
camera folder.
Do 2 clicks.
18
Stop Previous Next
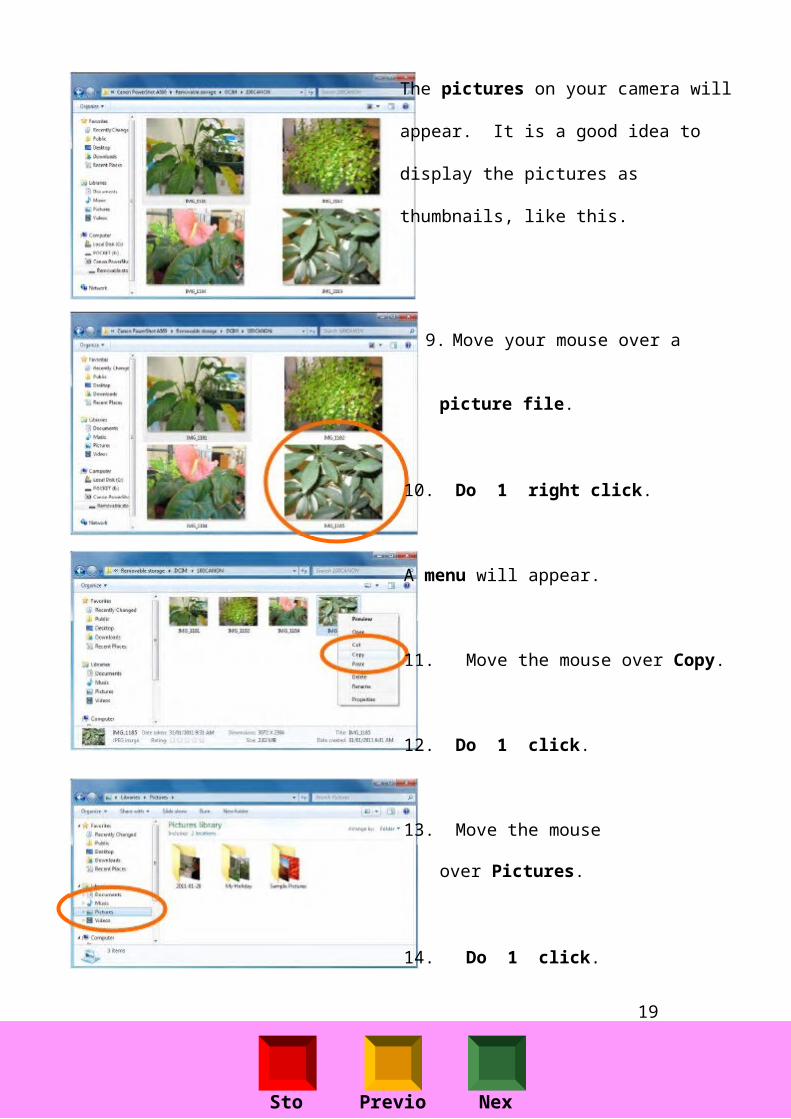
The pictures on your camera will
appear. It is a good idea to
display the pictures as
thumbnails, like this.
9. Move your mouse over a
picture file.
10. Do 1 right click.
A menu will appear.
11. Move the mouse over Copy.
12. Do 1 click.
13. Move the mouse
over Pictures.
14. Do 1 click.
19
Stop Previous Next
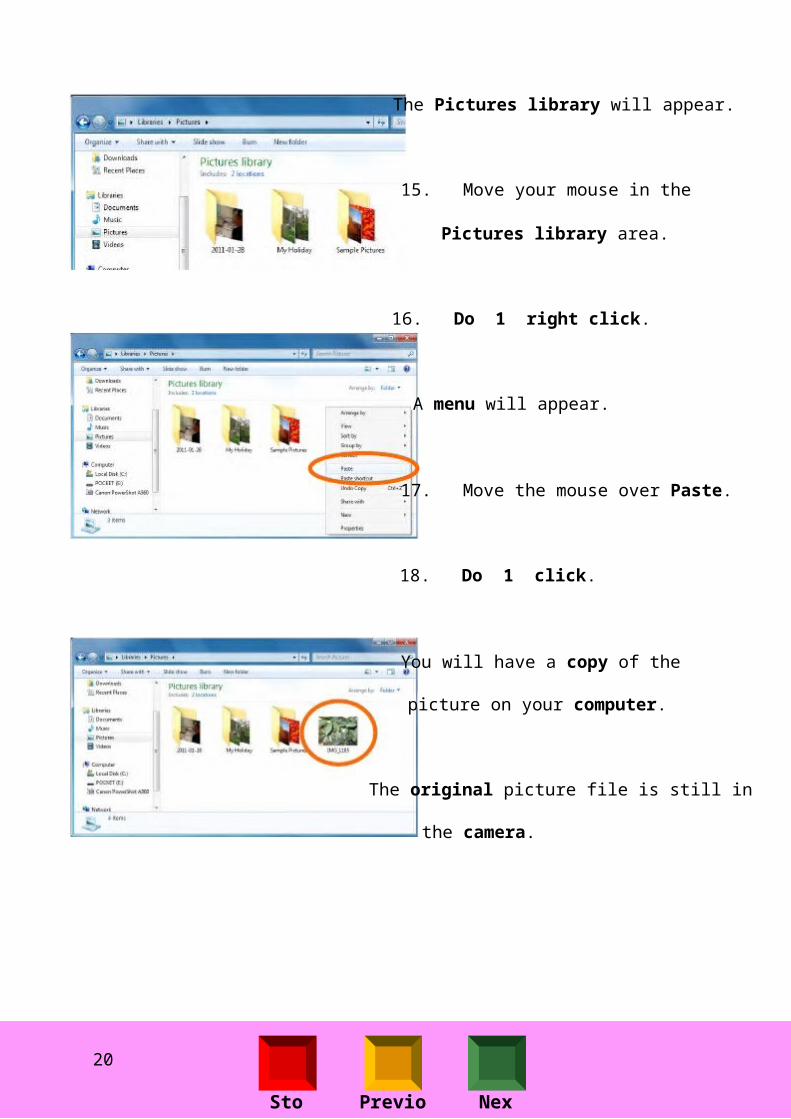
The Pictures library will appear.
15. Move your mouse in the
Pictures library area.
16. Do 1 right click.
A menu will appear.
17. Move the mouse over Paste.
18. Do 1 click.
You will have a copy of the
picture on your computer.
The original picture file is still in
the camera.
20
Stop Previous Next
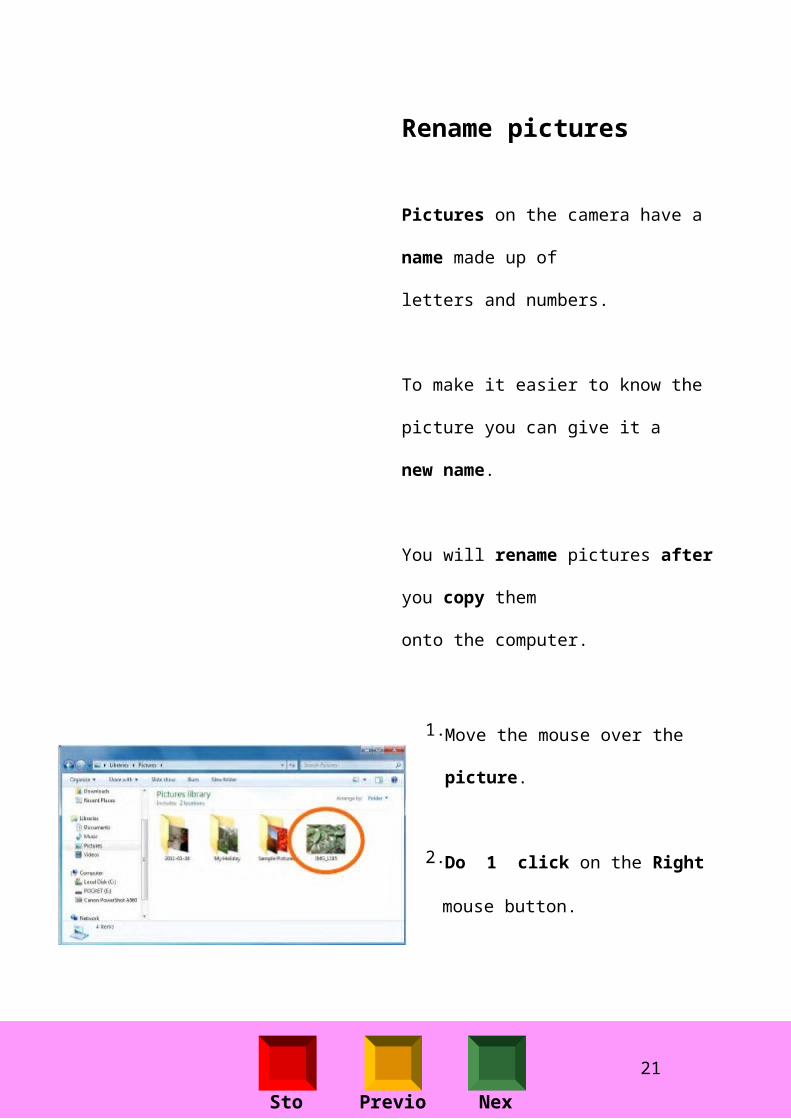
Rename pictures
Pictures on the camera have a
name made up of
letters and numbers.
To make it easier to know the
picture you can give it a
new name.
You will rename pictures after
you copy them
onto the computer.
1.
2.
Move the mouse over the
picture.
Do 1 click on the Right
mouse button.
21
Stop Previous Next
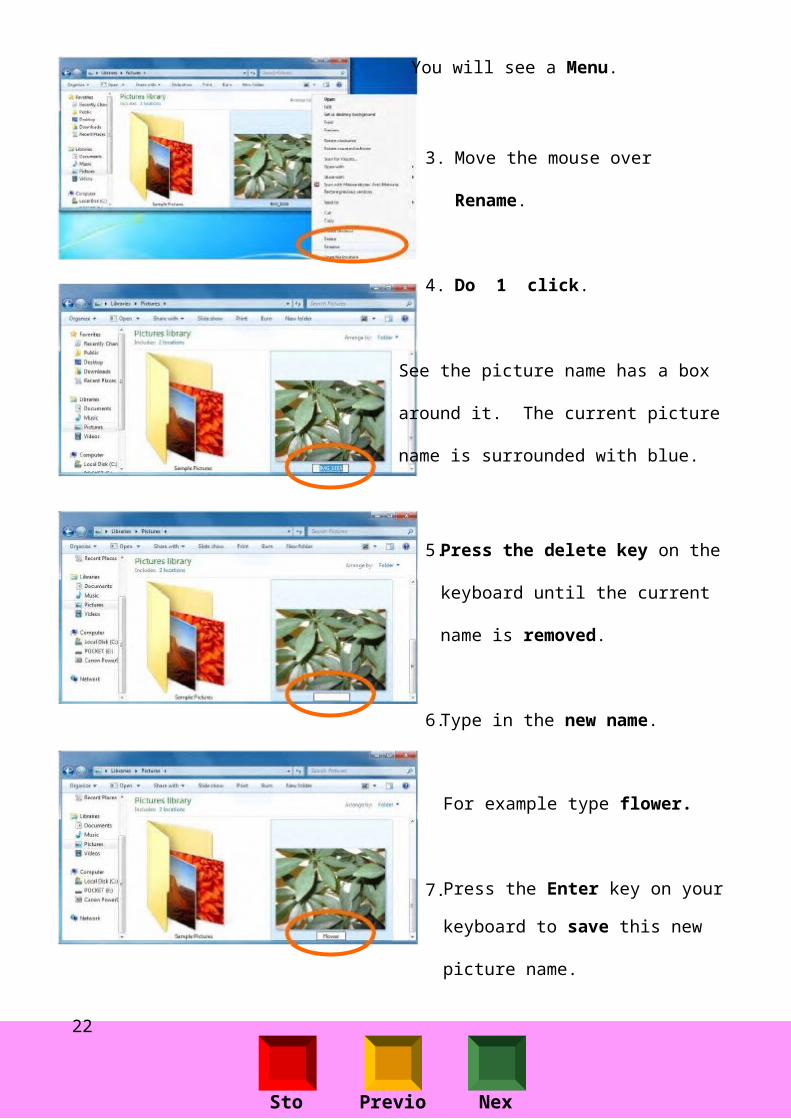
You will see a Menu.
3.
4.
Move the mouse over
Rename.
Do 1 click.
See the picture name has a box
around it. The current picture
name is surrounded with blue.
5.
6.
7.
Press the delete key on the
keyboard until the current
name is removed.
Type in the new name.
For example type flower.
Press the Enter key on your
keyboard to save this new
picture name.
22
Stop Previous Next
File size
It is important to be aware of the
size of the picture file.
If you send large picture files
they may overload the email
inbox of the person you are
sending them to.
Some pictures are very large,
high quality pictures that are
good for printing. While they are
great quality, they may be too
large to email.
Picture can be resized. This
means if the size of a picture is
too large you can make it smaller
and it will be easier to email.
23

Stop Previous Next
File Size
Kilobytes (KBs), megabytes (MBs)
and gigabytes (GBs).
Every file, for example a document or
a picture on your computer or the
Internet, has a file size. These are
measured in ‘data units’ called
kilobytes (KBs), megabytes (MBs),
and gigabytes (GBs)
Data units / file sizes:
8 bits (b) = 1 byte (B)
1000 bytes (B)
= 1 kilobyte (KB)
1000 kilobytes (KB)
= 1 megabyte (MB)
sometimes called a meg
24
Stop Previous Next
1000 megabytes (MB)
= 1 gigabyte (GB)
sometimes called a gig
A megabyte is 1024 kilobytes but
it’s easier to remember a megabyte
as 1000 bytes.
A file or email that is 2567 KB in
size is the same as about 2.5 MB.
File Types and Example
Sizes
Text email can be 2 or 3 KB
HTML email (with colours and
small pictures) can be 50 KB or
80KB
Microsoft Word or Adobe Reader
file (.doc, .pdf) can be 150 KB,
400 KB or 1.4 MB
Photos from digital cameras
(.jpg), depending on the resolution
25
Stop Previous Next
Other picture files have extensions
such as .gif, .bmp, .png, .tiff
The file extension for a music file
can be: mp3, .wma and about 3
or 4 MB in size.
The file extension for a video or a
movie can be:
.avi, .mov, .divx, .mpg and about
700 MB to 1.2 GB in size.
Important: this information is only to
be used as a rough guide to help
explain file sizes to you.
26
Stop Previous Next
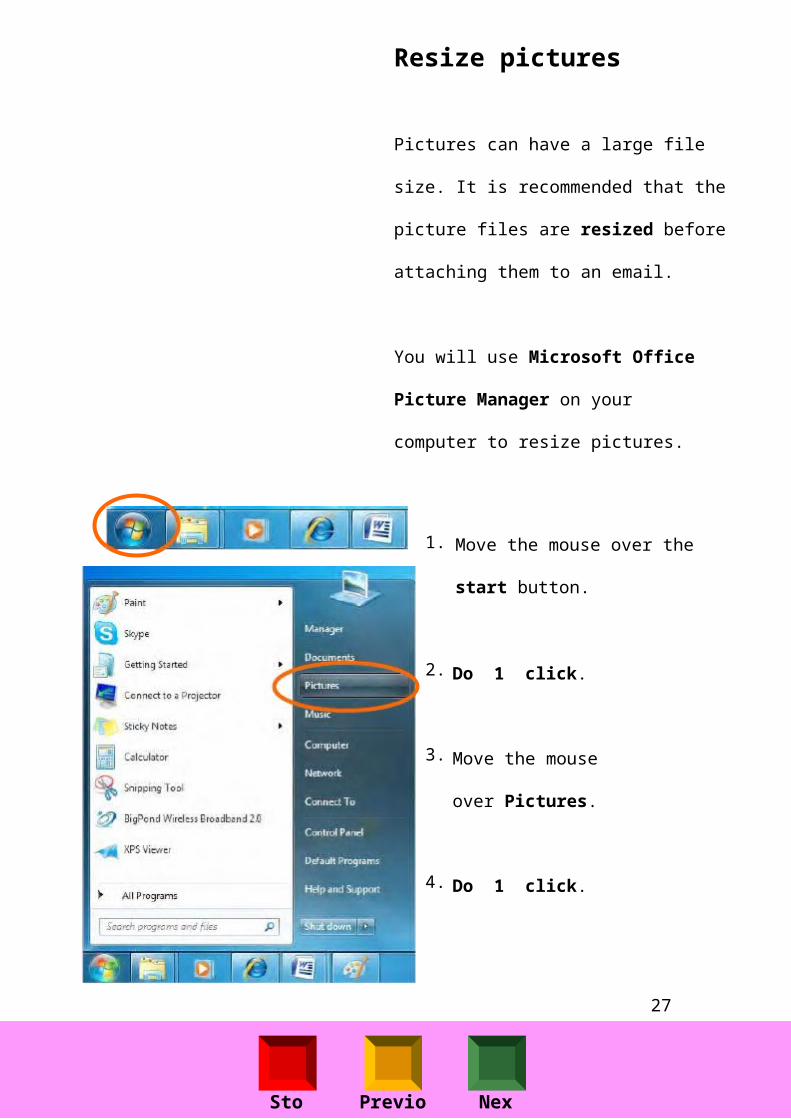
Resize pictures
Pictures can have a large file
size. It is recommended that the
picture files are resized before
attaching them to an email.
You will use Microsoft Office
Picture Manager on your
computer to resize pictures.
1.
2.
3.
4.
Move the mouse over the
start button.
Do 1 click.
Move the mouse
over Pictures.
Do 1 click.
27
Stop Previous Next
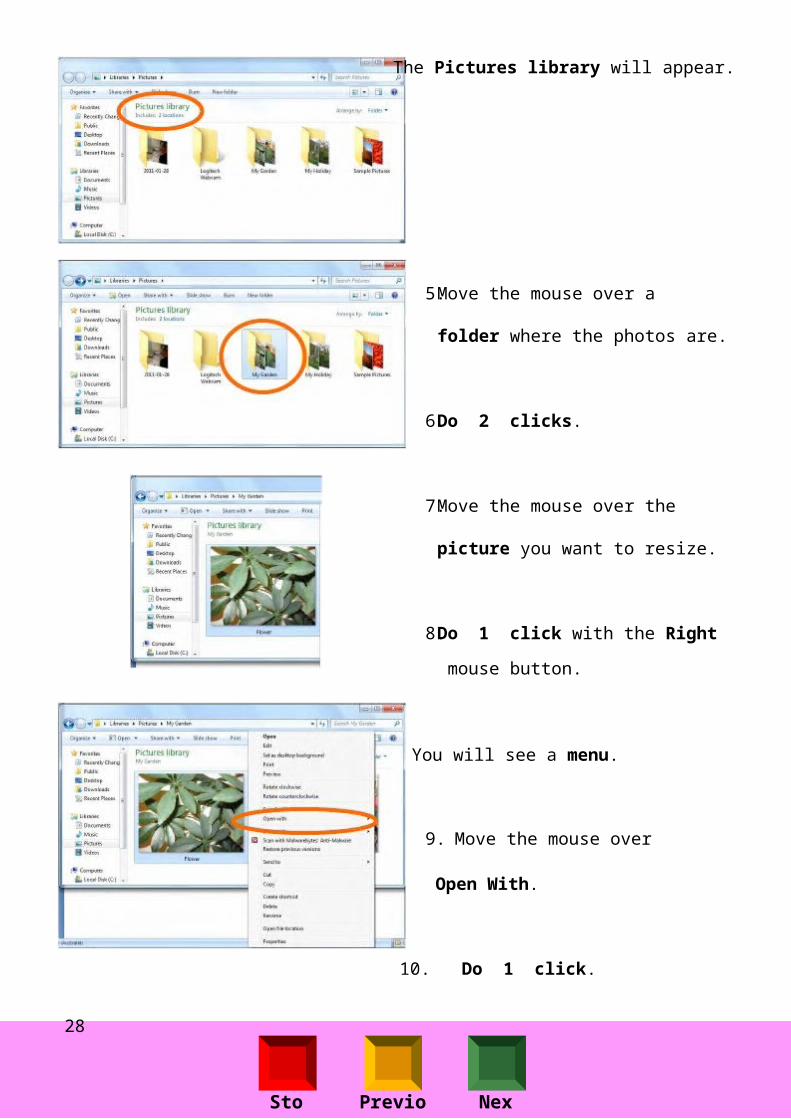
The Pictures library will appear.
5.
6.
7.
8.
Move the mouse over a
folder where the photos are.
Do 2 clicks.
Move the mouse over the
picture you want to resize.
Do 1 click with the Right
mouse button.
You will see a menu.
9. Move the mouse over
Open With.
10. Do 1 click.
28
Stop Previous Next
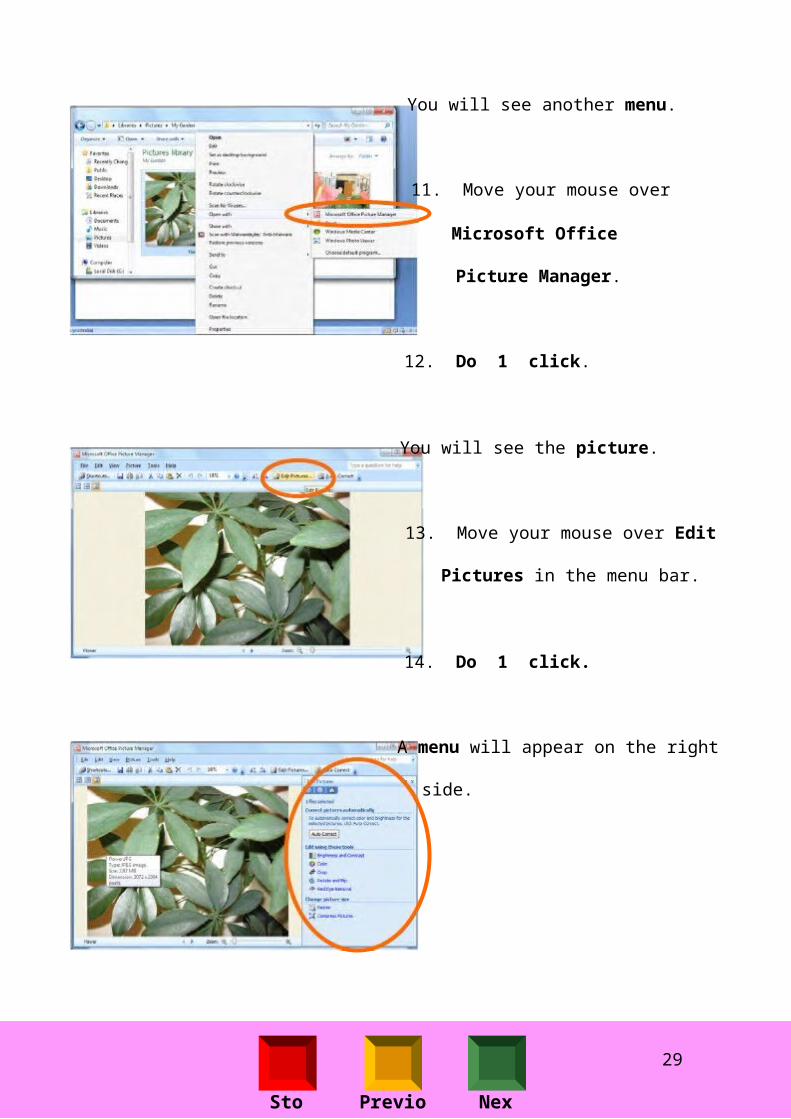
You will see another menu.
11. Move your mouse over
Microsoft Office
Picture Manager.
12. Do 1 click.
You will see the picture.
13. Move your mouse over Edit
Pictures in the menu bar.
14. Do 1 click.
A menu will appear on the right
side.
29

Stop Previous Next
15. Move your mouse over
Resize.
16. Do 1 click.
The Resize settings will appear.
30
Stop Previous Next
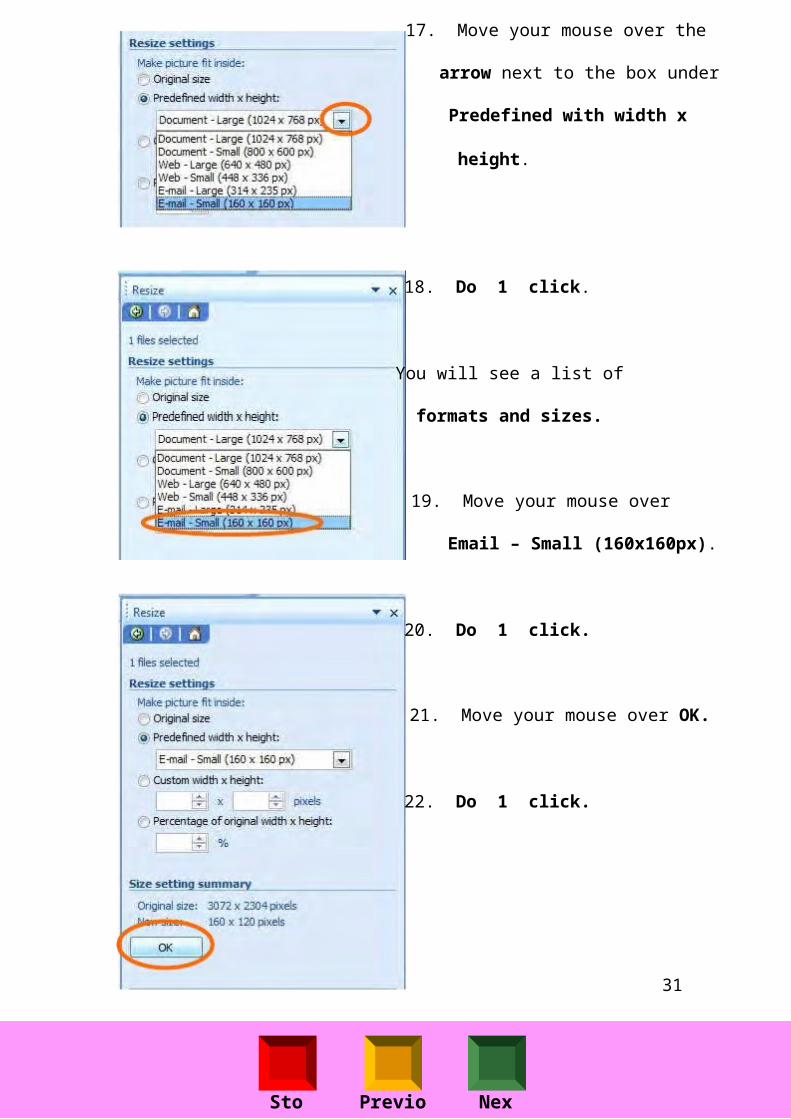
17. Move your mouse over the
arrow next to the box under
Predefined with width x
height.
18. Do 1 click.
You will see a list of
formats and sizes.
19. Move your mouse over
Email – Small (160x160px).
20. Do 1 click.
21. Move your mouse over OK.
22. Do 1 click.
31
Stop Previous Next
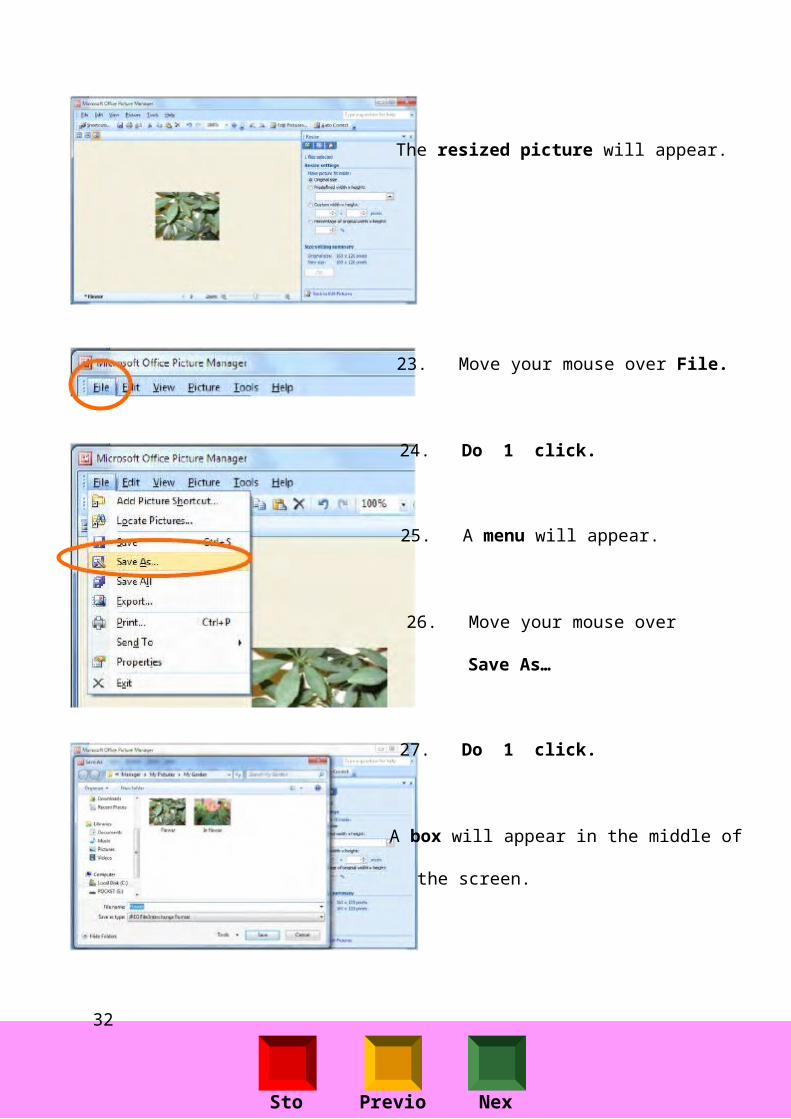
The resized picture will appear.
23. Move your mouse over File.
24. Do 1 click.
25. A menu will appear.
26. Move your mouse over
Save As…
27. Do 1 click.
A box will appear in the middle of
the screen.
32
Stop Previous Next
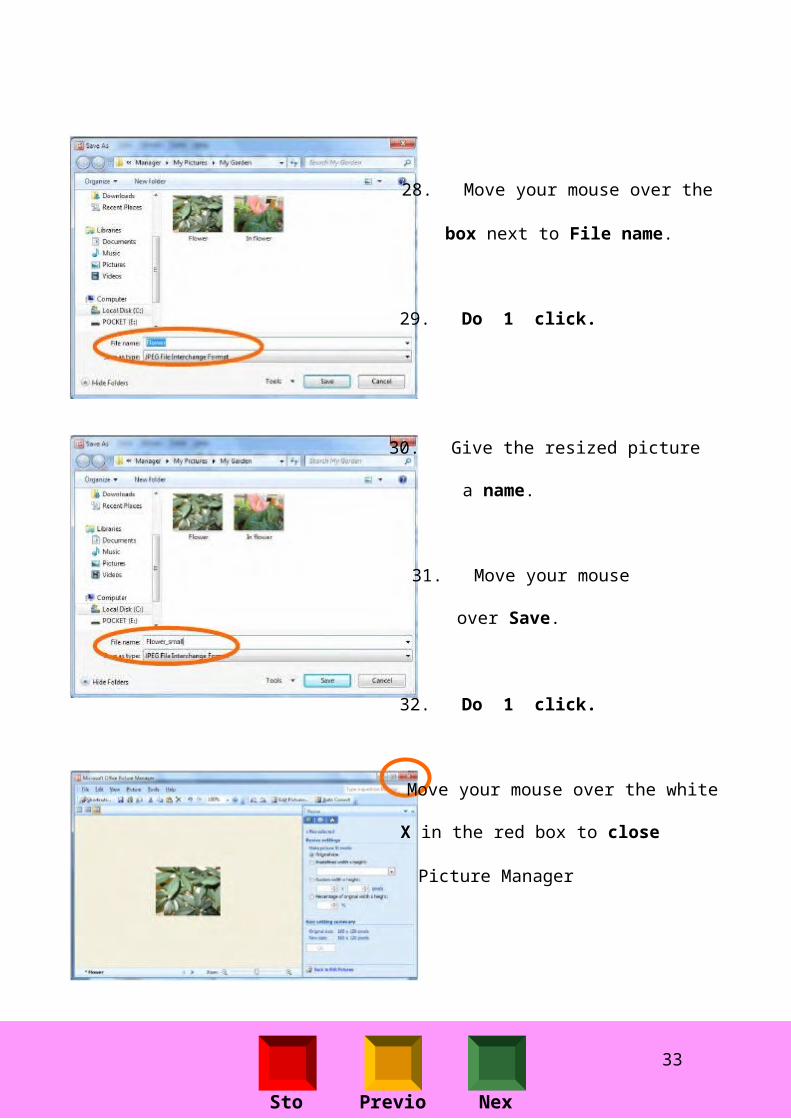
28. Move your mouse over the
box next to File name.
29. Do 1 click.
30. Give the resized picture
a name.
31. Move your mouse
over Save.
32. Do 1 click.
Move your mouse over the white
X in the red box to close
Picture Manager
33
Stop Previous Next
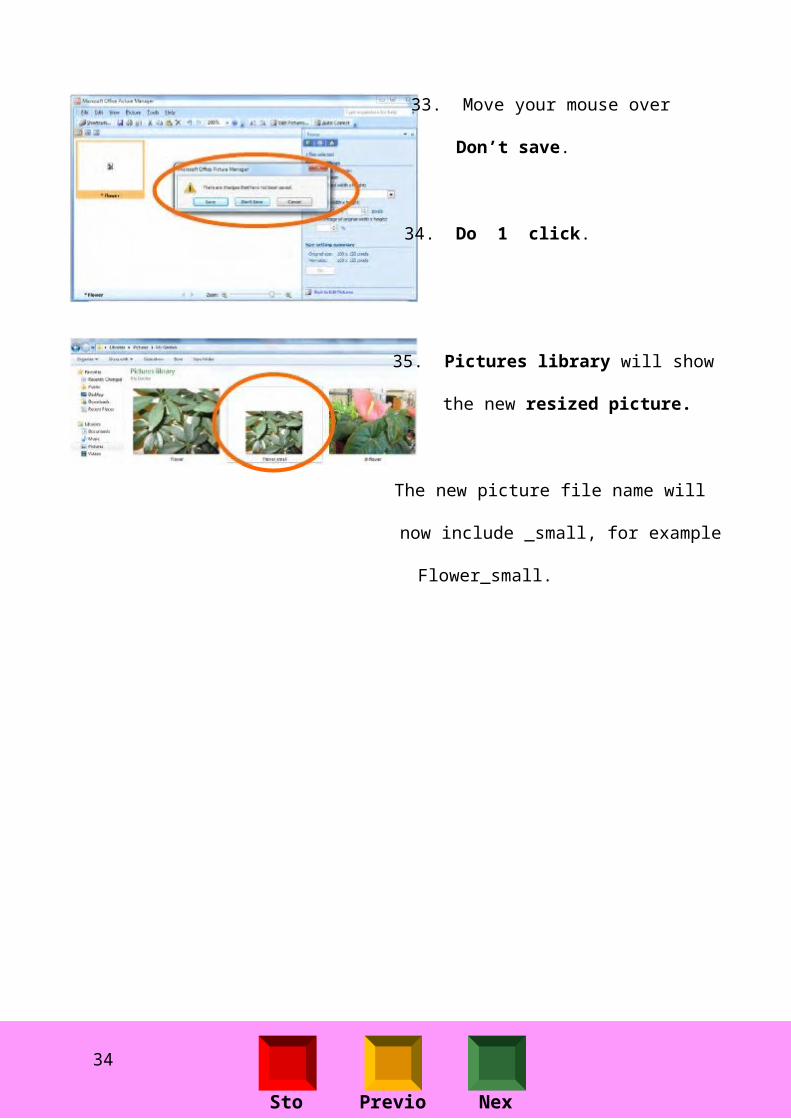
33. Move your mouse over
Don’t save.
34. Do 1 click.
35. Pictures library will show
the new resized picture.
The new picture file name will
now include _small, for example
Flower_small.
34

Stop Previous Next
Delete pictures
If you do not want to keep
pictures on your computer you
can delete them.
1.
2.
Move the mouse over the
picture you want to delete.
Do 1 click on the right
mouse button.
A menu will appear.
3.
4.
Move the mouse
over Delete.
Do 1 click.
35

Stop Previous Next
A box appears in the middle of
the screen.
5.
6.
Move your mouse over Yes
Do 1 click.
The picture has now been
deleted from this folder.
36