starwind native san for hyper-v: getting started
TRANSCRIPT
StarWind Native SAN for Hyper-V: Getting Started January 2013
StarWind Native SAN for Hyper-V: Getting Started
Page | 2
TRADEMARKS
“StarWind”, “StarWind Software” and the StarWind and the StarWind Software logos are trademarks of
StarWind Software which may be registered in some jurisdictions. All other trademarks are owned by their
respective owners.
CHANGES
The material in this document is for information only and is subject to change without notice. While
reasonable efforts have been made in the preparation of this document to assure its accuracy, StarWind
Software assumes no liability resulting from errors or omissions in this document, or from the use of the
information contained herein. StarWind Software reserves the right to make changes in the product design
without reservation and without notification to its users.
TECHNICAL SUPPORT AND SERVICES
If you have questions about installing or using this software, check this and other documents first - you will
find answers to most of your questions on the Technical Papers webpage or in StarWind Forum. If you need
further assistance, please contact us.
Copyright ©2009-2013 StarWind Software Inc.
No part of this publication may be reproduced, stored in a retrieval system, or transmitted in any form or
by any means, electronic, mechanical, photocopying, recording or otherwise, without the prior written
consent of StarWind Software.
StarWind Native SAN for Hyper-V: Getting Started
Page | 3
CONTENTS
INTRODUCTION ................................................................................................................................. 4
DOWNLOADING, INSTALLING, AND REGISTERING THE SOFTWARE ...................................................... 5
CREATING A BASIC VIRTUAL DEVICE ................................................................................................. 12
CONTACTS....................................................................................................................................... 17
StarWind Native SAN for Hyper-V: Getting Started
Page | 4
INTRODUCTION
This guide is intended for experienced Windows system administrators. It provides detailed instructions on
installation, registration, and initial steps with StarWind Native SAN for Hyper-V. StarWind delivers
sophisticated shared storage for VMware and Hyper-V environments. It is a perfect clustering solution for
applications such as MS SQL Server, Exchange, and SharePoint.

StarWind Native SAN for Hyper-V: Getting Started
Page | 5
DOWNLOADING, INSTALLING, AND REGISTERING THE SOFTWARE
1. Download the Starwind setup executable file from our website:
http://www.starwindsoftware.com/products
Note: The setup file is unified for x86 and x64 systems.
2. Launch the downloaded executable setup file on the server that you want to turn into a SAN. The Setup
wizard appears.
3. Click Next to continue.
4. Read and accept the License Agreement.
5. Click Next to continue.
StarWind Native SAN for Hyper-V: Getting Started
Page | 6
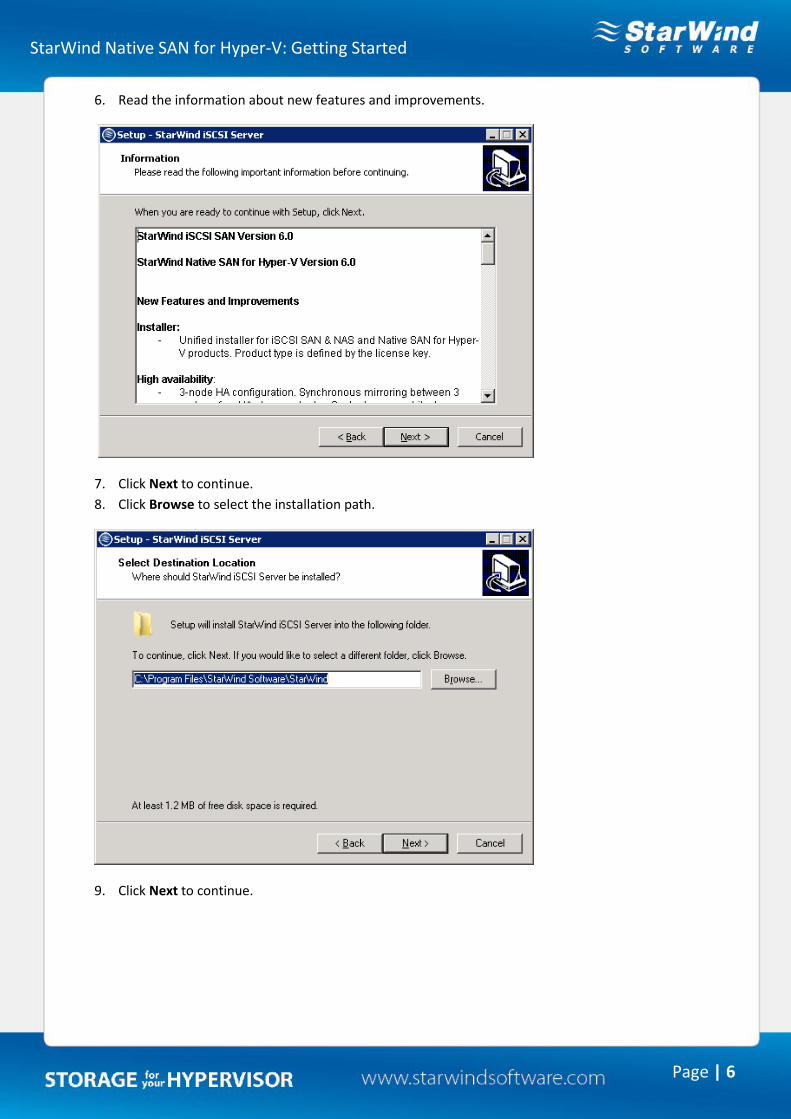
6. Read the information about new features and improvements.
7. Click Next to continue.
8. Click Browse to select the installation path.
9. Click Next to continue.
StarWind Native SAN for Hyper-V: Getting Started
Page | 7
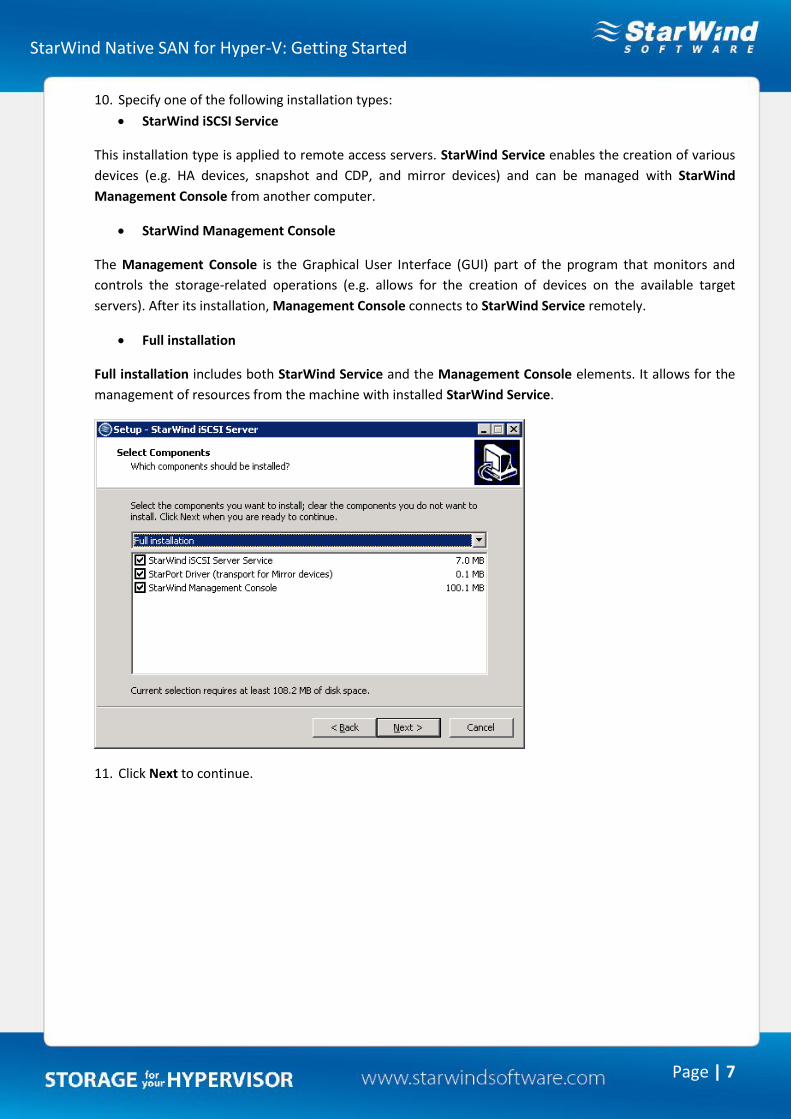
10. Specify one of the following installation types:
StarWind iSCSI Service
This installation type is applied to remote access servers. StarWind Service enables the creation of various
devices (e.g. HA devices, snapshot and CDP, and mirror devices) and can be managed with StarWind
Management Console from another computer.
StarWind Management Console
The Management Console is the Graphical User Interface (GUI) part of the program that monitors and
controls the storage-related operations (e.g. allows for the creation of devices on the available target
servers). After its installation, Management Console connects to StarWind Service remotely.
Full installation
Full installation includes both StarWind Service and the Management Console elements. It allows for the
management of resources from the machine with installed StarWind Service.
11. Click Next to continue.
StarWind Native SAN for Hyper-V: Getting Started
Page | 8
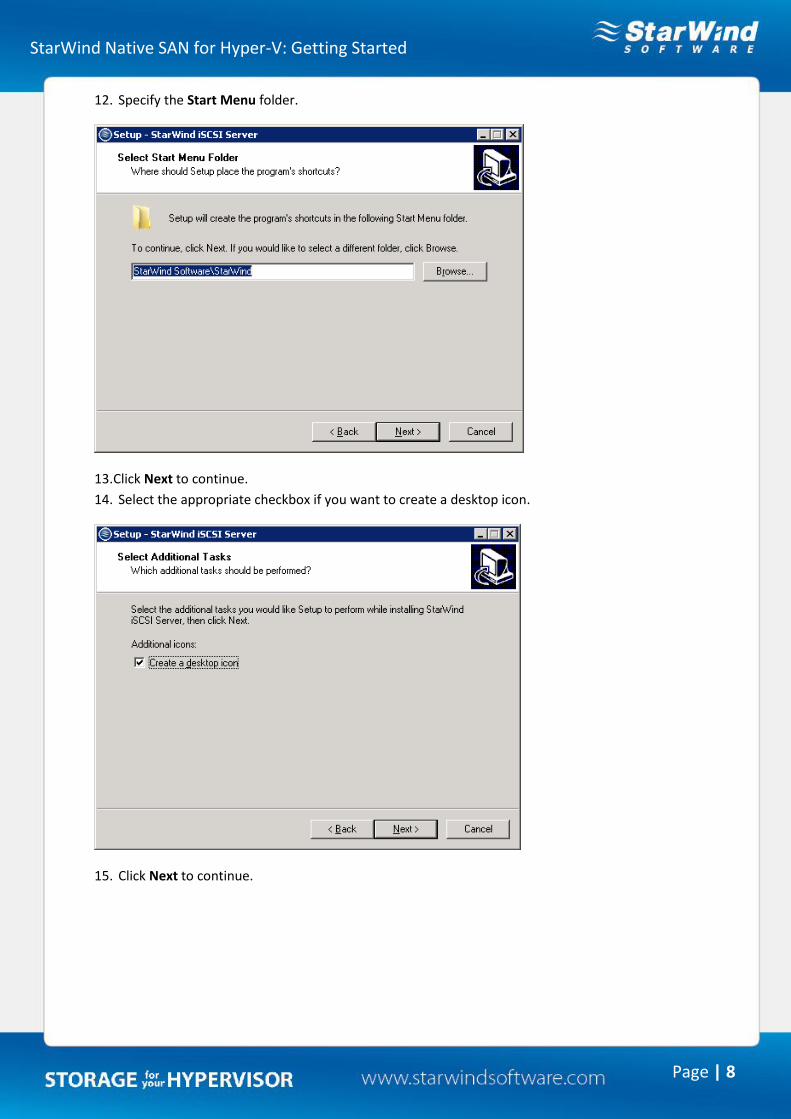
12. Specify the Start Menu folder.
13. Click Next to continue.
14. Select the appropriate checkbox if you want to create a desktop icon.
15. Click Next to continue.
StarWind Native SAN for Hyper-V: Getting Started
Page | 9
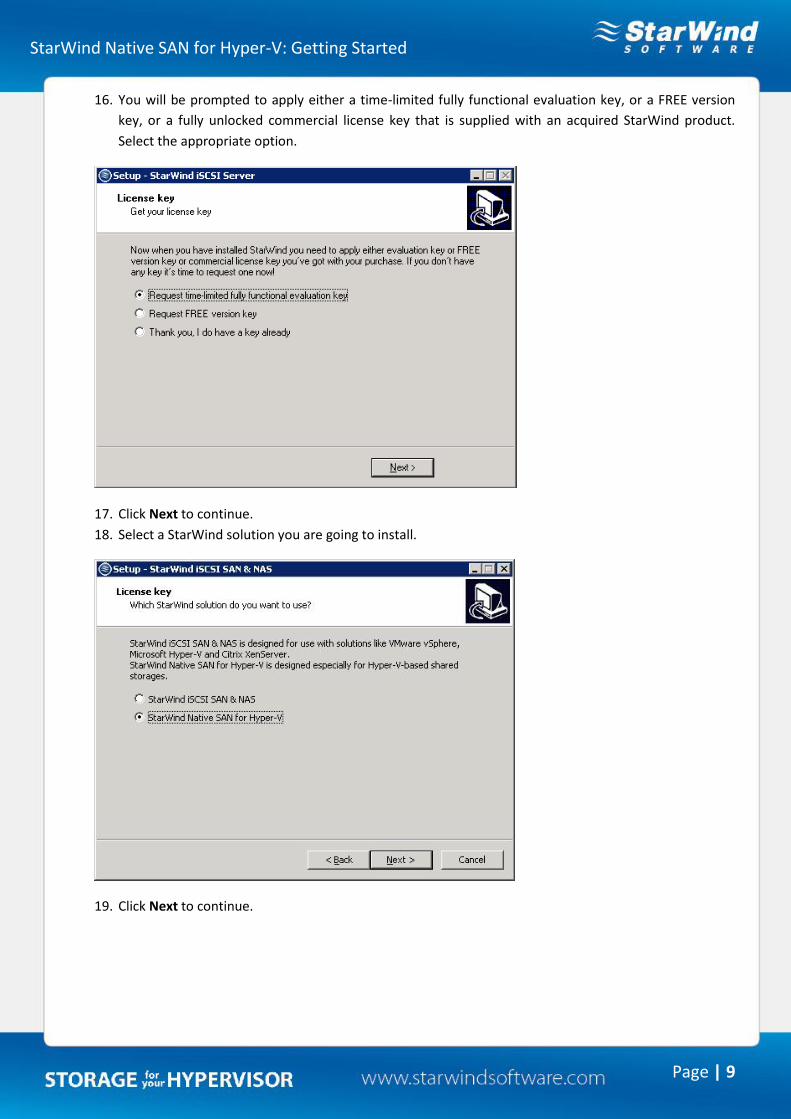
16. You will be prompted to apply either a time-limited fully functional evaluation key, or a FREE version
key, or a fully unlocked commercial license key that is supplied with an acquired StarWind product.
Select the appropriate option.
17. Click Next to continue.
18. Select a StarWind solution you are going to install.
19. Click Next to continue.
StarWind Native SAN for Hyper-V: Getting Started
Page | 10
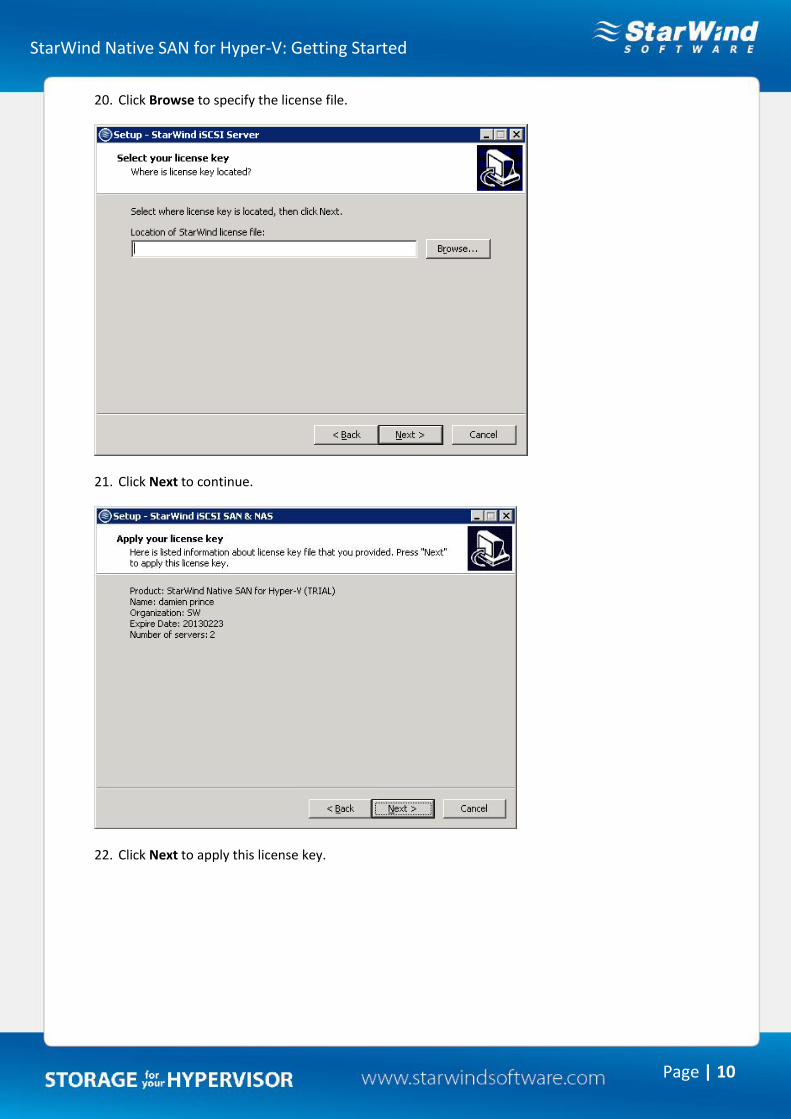
20. Click Browse to specify the license file.
21. Click Next to continue.
22. Click Next to apply this license key.
StarWind Native SAN for Hyper-V: Getting Started
Page | 11
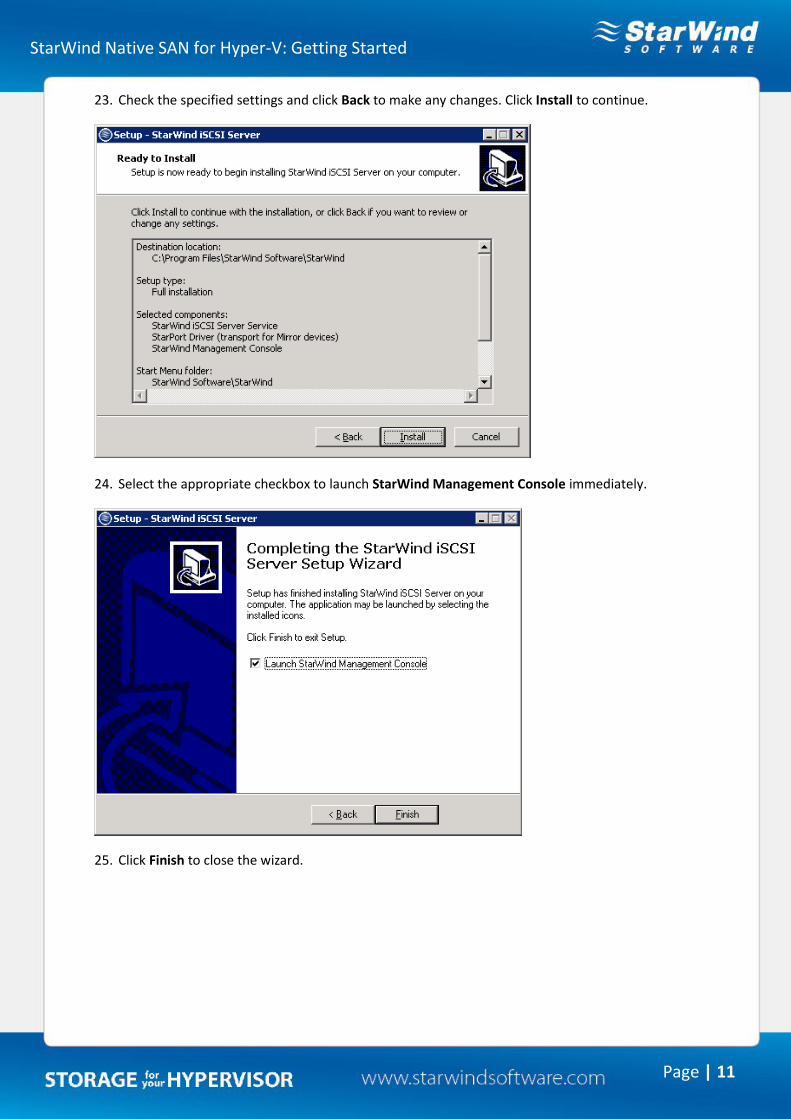
23. Check the specified settings and click Back to make any changes. Click Install to continue.
24. Select the appropriate checkbox to launch StarWind Management Console immediately.
25. Click Finish to close the wizard.
StarWind Native SAN for Hyper-V: Getting Started
Page | 12
CREATING A BASIC VIRTUAL DEVICE
1. Launch StarWind Management Console: double-click the StarWind tray icon.
Note: StarWind Management Console allows for the management of multiple StarWind servers from one
computer.
2. If StarWind Service and Management Console were installed on the same server, the Console will
automatically add the host to the Console tree after the first launch. Then, the Console automatically
connects to the host using the default authentication parameters.
Note: The default login and password are “root” and “starwind”. You can always change them later. It’s
strongly recommended to change the default username/password to protect your StarWind Server from
unauthorized access!
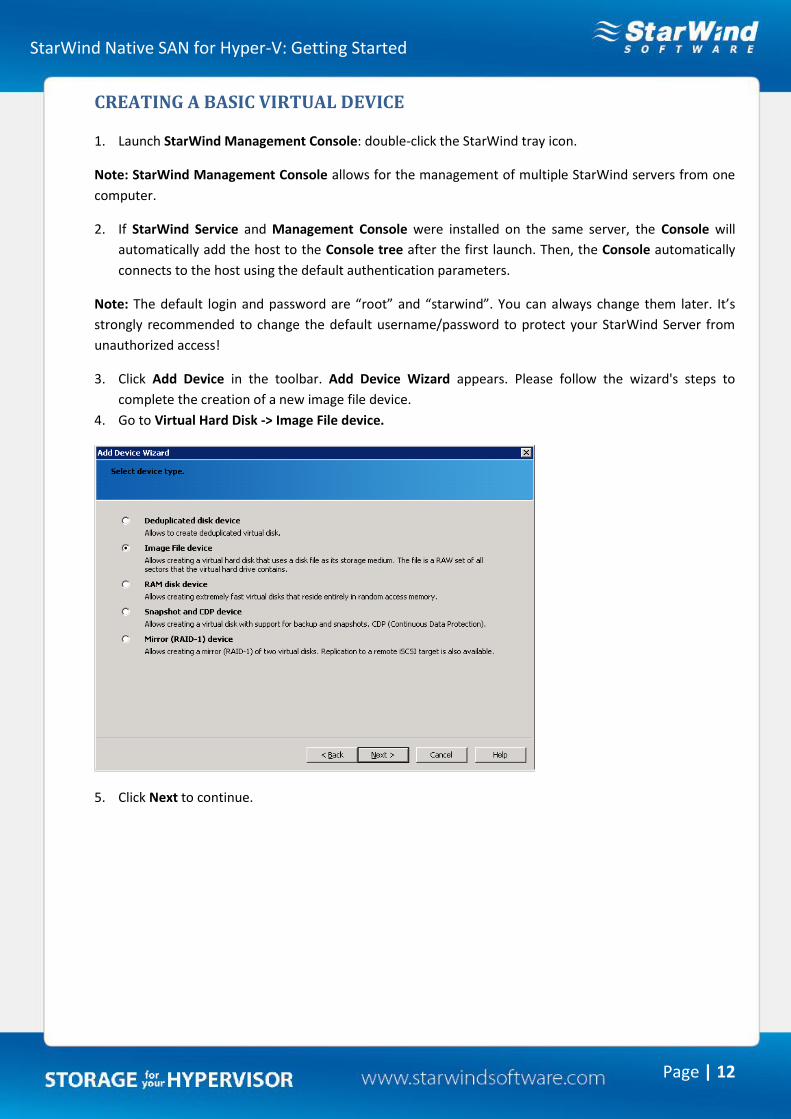
3. Click Add Device in the toolbar. Add Device Wizard appears. Please follow the wizard's steps to
complete the creation of a new image file device.
4. Go to Virtual Hard Disk -> Image File device.
5. Click Next to continue.
StarWind Native SAN for Hyper-V: Getting Started
Page | 13
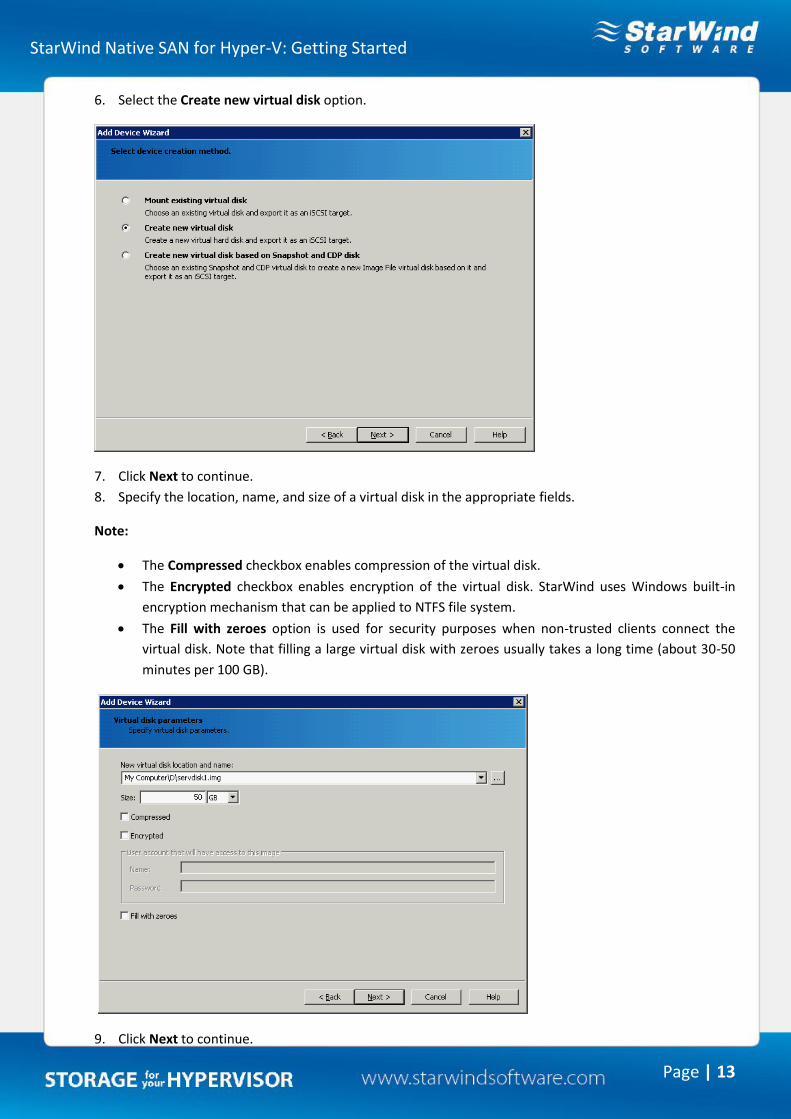
6. Select the Create new virtual disk option.
7. Click Next to continue.
8. Specify the location, name, and size of a virtual disk in the appropriate fields.
Note:
The Compressed checkbox enables compression of the virtual disk.
The Encrypted checkbox enables encryption of the virtual disk. StarWind uses Windows built-in
encryption mechanism that can be applied to NTFS file system.
The Fill with zeroes option is used for security purposes when non-trusted clients connect the
virtual disk. Note that filling a large virtual disk with zeroes usually takes a long time (about 30-50
minutes per 100 GB).
9. Click Next to continue.
StarWind Native SAN for Hyper-V: Getting Started
Page | 14
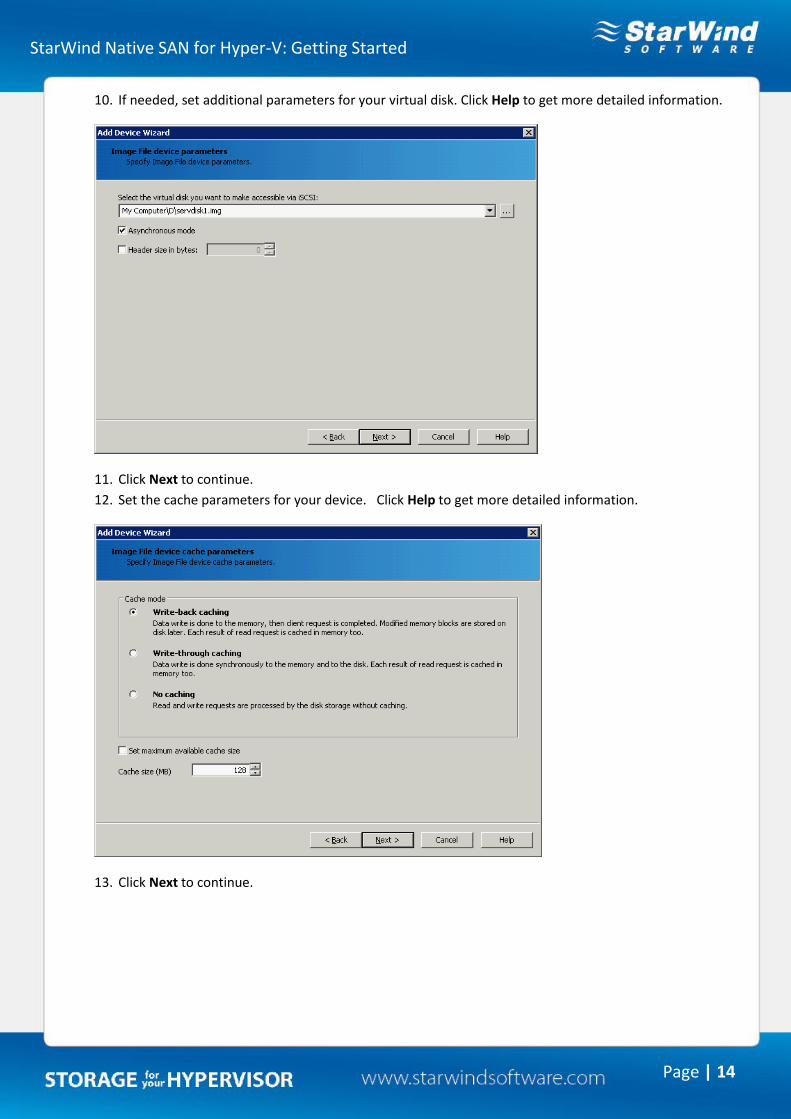
10. If needed, set additional parameters for your virtual disk. Click Help to get more detailed information.
11. Click Next to continue.
12. Set the cache parameters for your device. Click Help to get more detailed information.
13. Click Next to continue.
StarWind Native SAN for Hyper-V: Getting Started
Page | 15
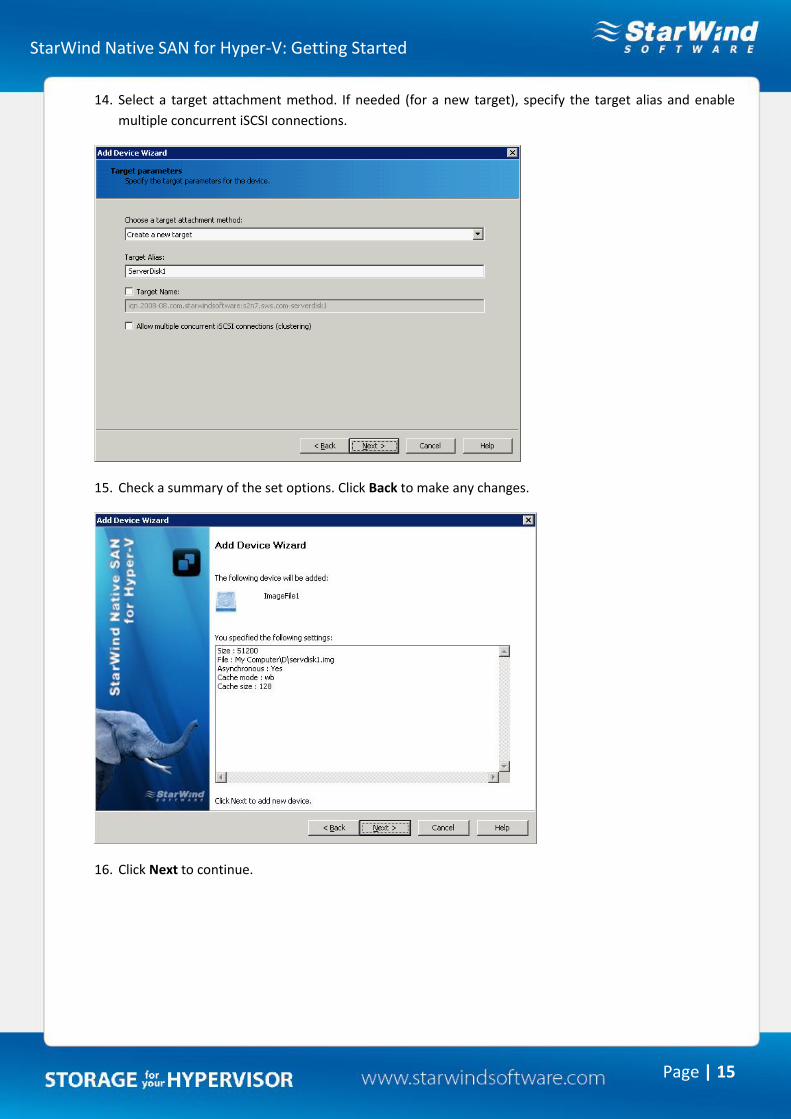
14. Select a target attachment method. If needed (for a new target), specify the target alias and enable
multiple concurrent iSCSI connections.
15. Check a summary of the set options. Click Back to make any changes.
16. Click Next to continue.
StarWind Native SAN for Hyper-V: Getting Started
Page | 16
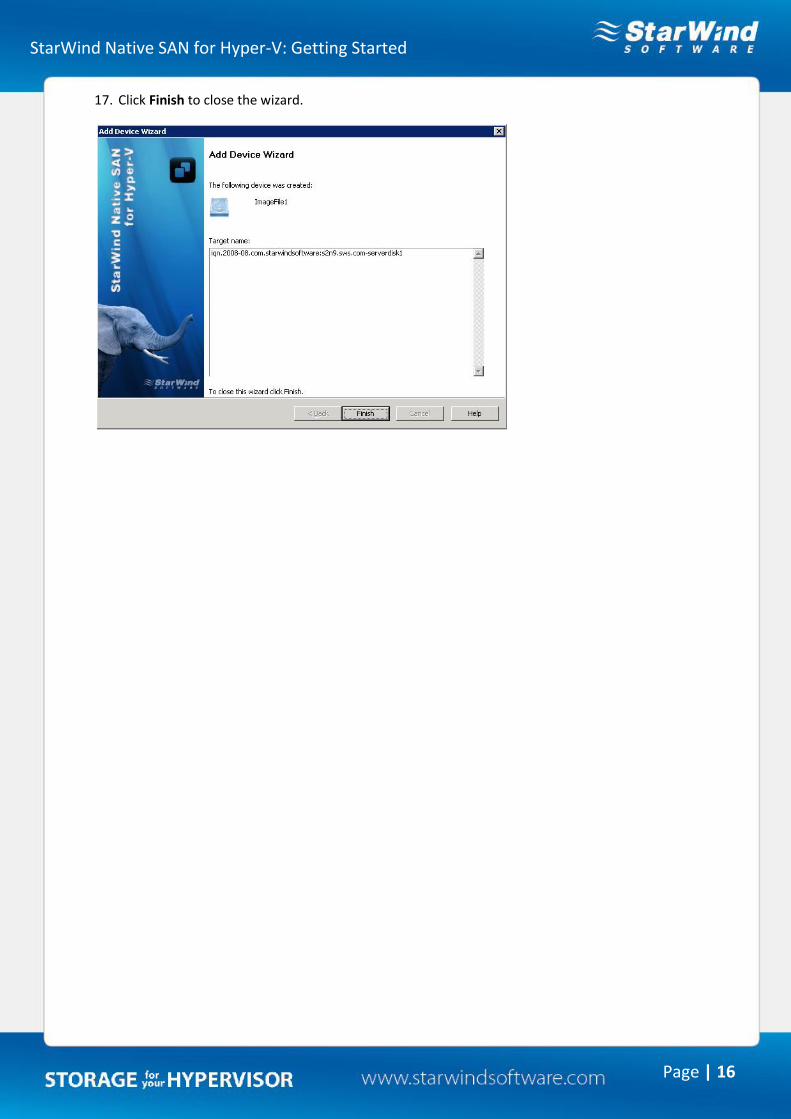
17. Click Finish to close the wizard.
StarWind Native SAN for Hyper-V: Getting Started
Page | 17
CONTACTS
Customer Support Portal: http://www.starwindsoftware.com/support Support Forum: http://www.starwindsoftware.com/forums Sales: [email protected] General Information: [email protected] US Headquarters Phone: 1-617-449-7717 Fax: 1-617-507-5845 EMEA and APAC Phone: +44-0-2071936727
+44-0-2071936350 Voice Mail: 1-866-790-2646
StarWind Software Inc. 301 Edgewater Place, Suite 100,
Wakefield, MA 01880, USA www.starwindsoftware.com