stage i & ii surgery
TRANSCRIPT
Dental Implant Surgery
Stage I & II Procedures
Moustafa El-Ghareeb BDS, MS Associate Clinical Professor Oral & Maxillofacial Surgery
This program of instruction is protected by copyright ©. No portion of this program of instruction may be reproduced, recorded or transferred by any means electronic, digital, photographic, mechanical etc., or by any information storage or retrieval system, without prior permission.

Osseointegration
A direct structural and functional connection between ordered, living bone and the surface of a load-carrying implant (Brånemark, 1985)
Per-Ingvar Brånemark
Cortical bone
Cancellous bone
Osseointegration
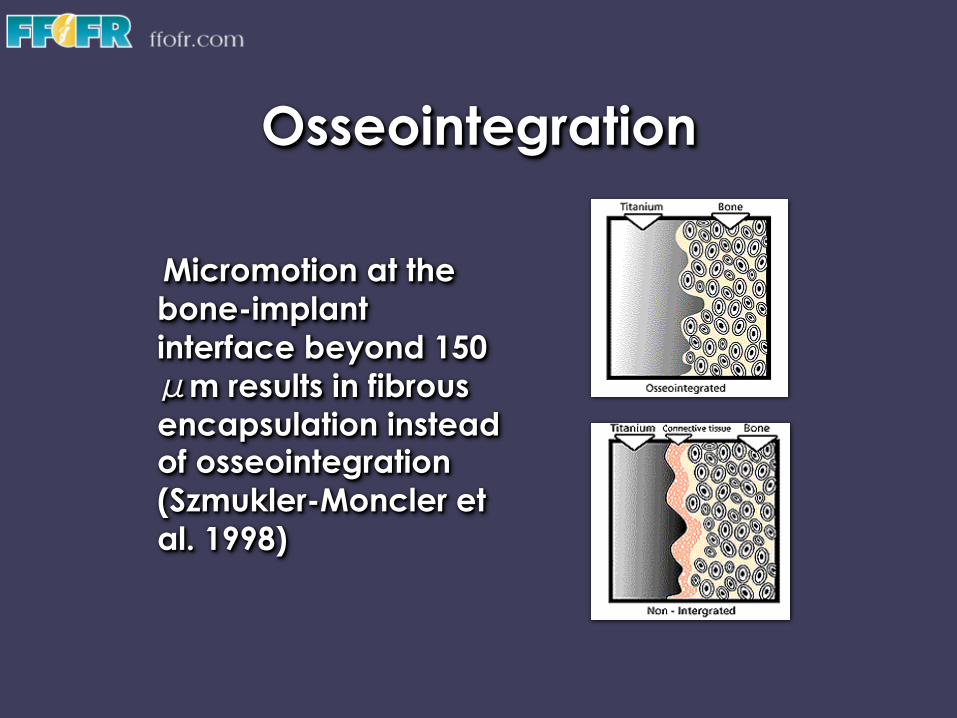
Micromotion at the bone-implant interface beyond 150 μm results in fibrous encapsulation instead of osseointegration (Szmukler-Moncler et al. 1998)

Osseointegration Osseous Healing: • Blood fills gap between implant and
damaged bone surface • Blood clots with fibrin network
formation (Platelets) • Inflammation (PMN’s & Macrophages) • Resorption (Macrophages “ingest
inflammatory debris” & Osteoclasts “resorb damaged bone”)
• Neovascularization (Endothelial cells) • Migration/differentiation/ proliferation (MSC’s, fibroblasts &
osteoblasts) • Osteoid & Woven bone (osteoblasts)
4-6 weeks after surgery • Replacement of woven bone by
lamellar bone (osteoclasts & osteoblasts)
Osteoclast cutting cone: basic remodeling process for bone renewal
Basic multi-cellular unit

Osseointegration
Distant Osteogenesis only
Contact & Distant Osteogenesis
Machined Smooth Surface Rough or Enhanced Surface Improves Cell Attachment
Osseous Healing:
Osseointegration
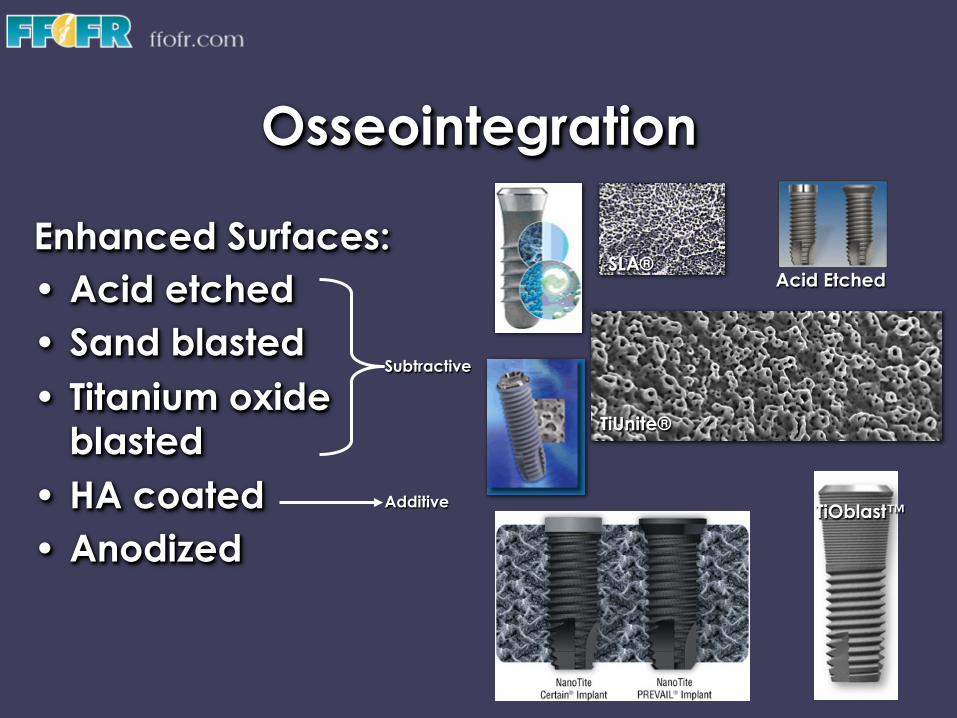
Enhanced Surfaces: • Acid etched • Sand blasted • Titanium oxide
blasted • HA coated • Anodized
Subtractive
Additive
SLA®
TiUnite®
TiOblast™
Acid Etched
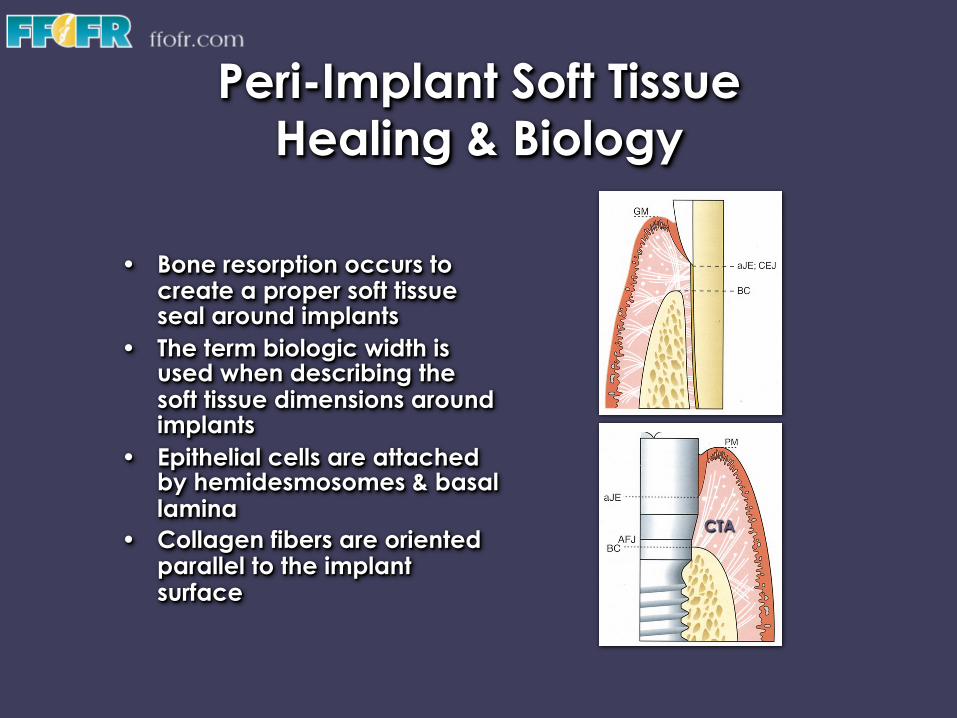
Peri-Implant Soft Tissue Healing & Biology
• Bone resorption occurs to
create a proper soft tissue seal around implants
• The term biologic width is used when describing the soft tissue dimensions around implants
• Epithelial cells are attached by hemidesmosomes & basal lamina
• Collagen fibers are oriented parallel to the implant surface
CTA

Osseointegration Original Brånemark Protocol • Implants must be sterile • Made of highly biocompatible
material such as titanium (covered by a biologically inert TiO2 layer)
• Inserted with atraumatic surgical technique that avoids overheating of bone
• Implants must have good initial stability at the time of placement
• Implants must not be subjected to functional forces during initial healing period
A non-loaded healing period: 1. Anterior MN: 3 m 2. Posterior MN: 4 m 3. Maxilla: 6 m
Submerged & Non-loaded

Traditional Loading
Two-Stage One-Stage
Cover Screw
Stage 1 Surgery
Healing Abutment
Stage 2 Surgery
Final Restoration
Healing Abutment
Final Restoration
Maxilla: 6 months Ant MN: 3 months Post MN: 4 months
Surgical Considerations
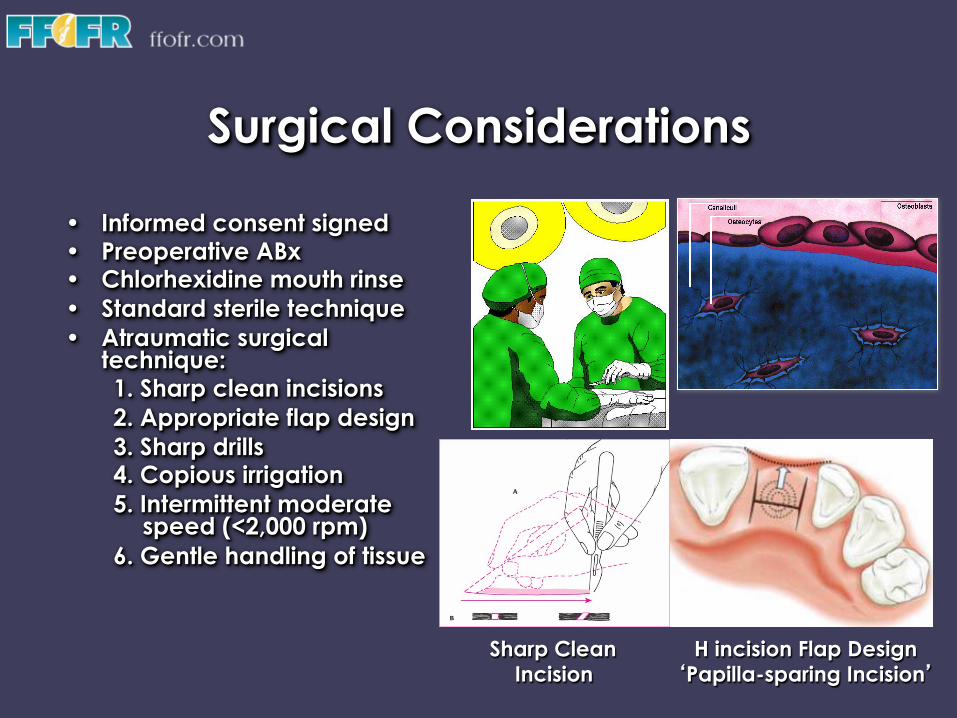
• Informed consent signed • Preoperative ABx • Chlorhexidine mouth rinse • Standard sterile technique • Atraumatic surgical
technique: 1. Sharp clean incisions 2. Appropriate flap design 3. Sharp drills 4. Copious irrigation 5. Intermittent moderate
speed (<2,000 rpm) 6. Gentle handling of tissue
H incision Flap Design ‘Papilla-sparing Incision’
Sharp Clean Incision

Surgical Considerations
• Excessive surgical trauma and thermal injury result in osseonecrosis and fibrous encapsulation
• Temperature over 47 °C for 1 min causes heat necrosis in bone (Eriksson & Albrektsson 1983)
• Heat generation is affected by speed, load placed on drill, drill sharpness and design
• Precise osteotomy preparation by surgeon to achieve good primary stability
• Good primary closure
47 °C Precise osteotomy
preparation
Good Primary Closure
From Larry Peterson, Contemporary Oral
& Maxillofacial Surgery, 3rd Edition

Surgical Considerations
• Primary mechanical stability is provided by implant design, bone quality & precise osteotomy preparation
• The transition from primary mechanical stability to biologic stability takes place during early wound healing & is provided by newly formed bone
Threaded Implant
Cylinder-Type Implant Press-fit
Implant Design
Precise Osteotomy Preparation

Stage One Surgery
• When to tap? • When to
countersink?
• Coolant (copious irrigation) • Sharp drills • Temp over 47 °C for 1 min causes heat necrosis in bone (Eriksson & Albrektsson 1983) • Up & down motion for effective irrigation • Avoid over-torque (Implant over-tightening causes bone micro-fractures/bone necrosis)

Stage One Surgery
• Twist drills are longer than selected implants
• Countersink only in presence of thick cortical layer
• Excessive countersinking in poor quality bone may compromise primary stability
• Tap only in dense bone (most implants are self tapping i.e. self threading)
• Placement torque should not exceed 45 Ncm

Anatomical Considerations
5.0 mm
3 mm
2 mm
Mental Nerve Anterior Looping
IAN Mental Nerve
Mental Nerve exiting without Anterior Looping
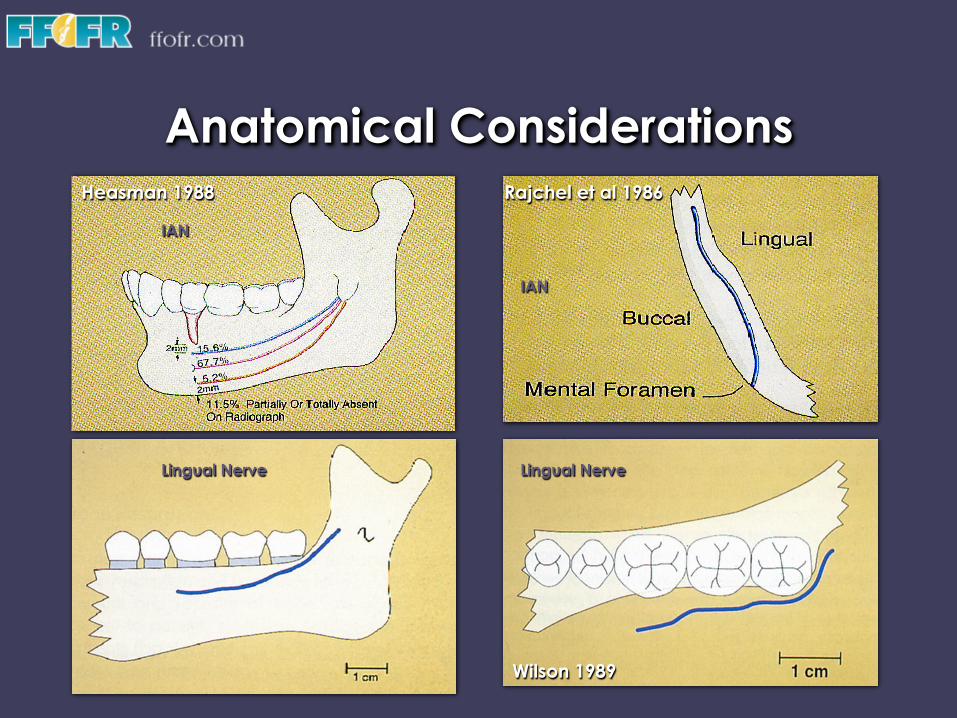
Anatomical Considerations
IAN
IAN
Lingual Nerve Lingual Nerve
Heasman 1988 Rajchel et al 1986
Wilson 1989

Anatomical Considerations
Nasal Cavity & Maxillary Sinus
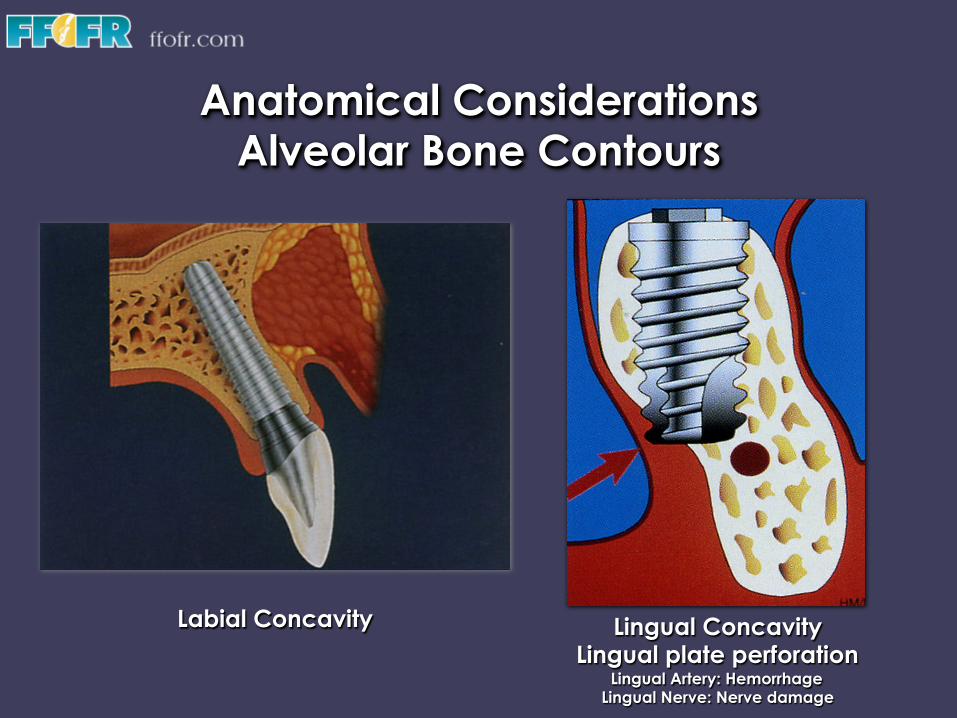
Anatomical Considerations Alveolar Bone Contours
Labial Concavity Lingual Concavity Lingual plate perforation
Lingual Artery: Hemorrhage Lingual Nerve: Nerve damage
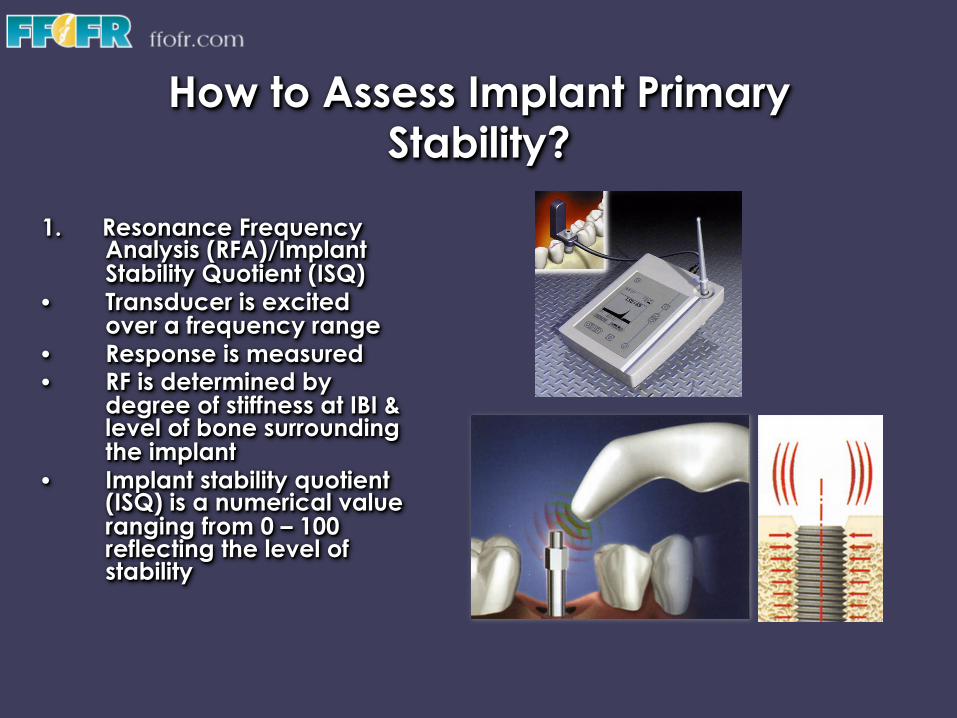
How to Assess Implant Primary Stability?
1. Resonance Frequency
Analysis (RFA)/Implant Stability Quotient (ISQ)
• Transducer is excited over a frequency range
• Response is measured • RF is determined by
degree of stiffness at IBI & level of bone surrounding the implant
• Implant stability quotient (ISQ) is a numerical value ranging from 0 – 100 reflecting the level of stability

How to Assess Implant Primary Stability?
2. Implant insertion torque
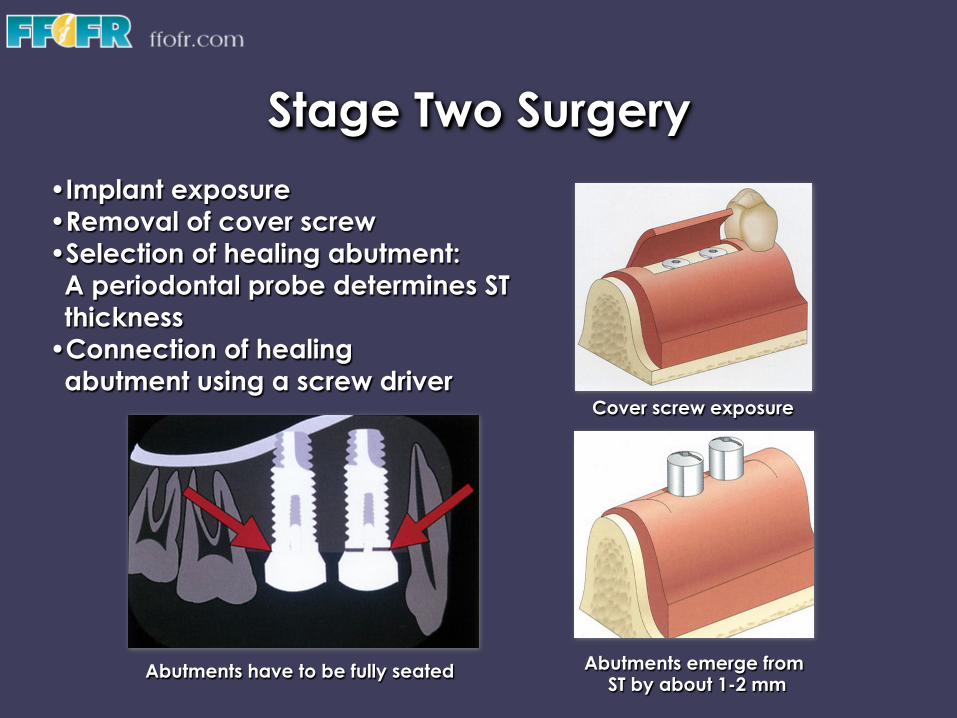
Stage Two Surgery • Implant exposure • Removal of cover screw • Selection of healing abutment: A periodontal probe determines ST thickness • Connection of healing abutment using a screw driver
Abutments emerge from ST by about 1-2 mm
Abutments have to be fully seated
Cover screw exposure
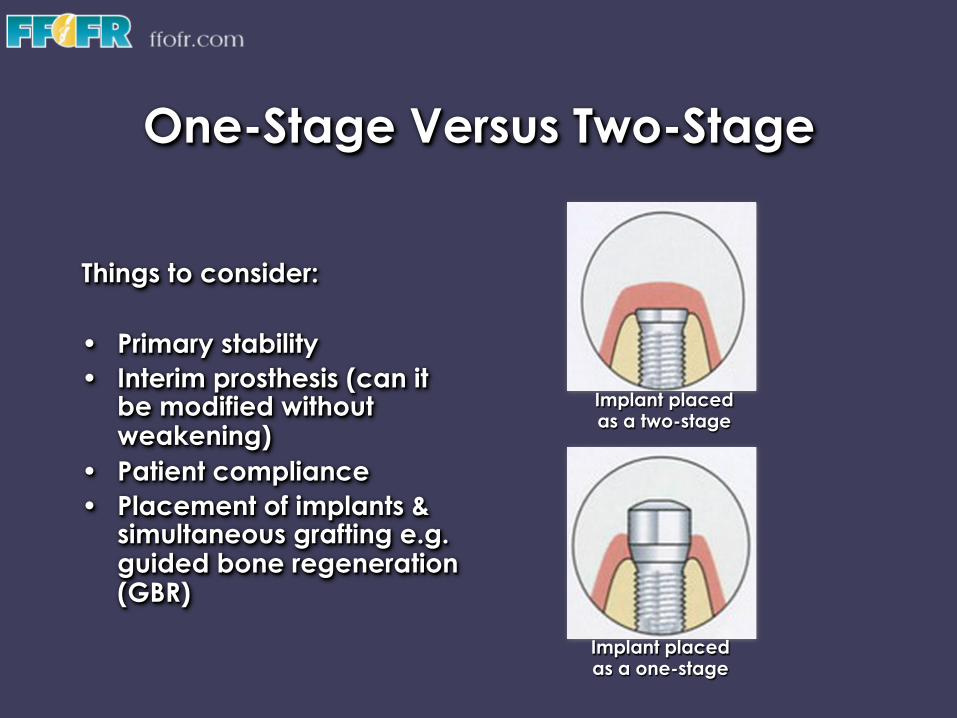
One-Stage Versus Two-Stage
Things to consider: • Primary stability • Interim prosthesis (can it
be modified without weakening)
• Patient compliance • Placement of implants &
simultaneous grafting e.g. guided bone regeneration (GBR)
Implant placed as a one-stage
Implant placed as a two-stage
One-Stage Versus Two-Stage
When to consider one-stage placement? 1. The implant has good primary stability 2. The interim prosthesis can be modified to
accommodate the healing abutment 3. Implant placement is associated with no
grafting or minimal grafting
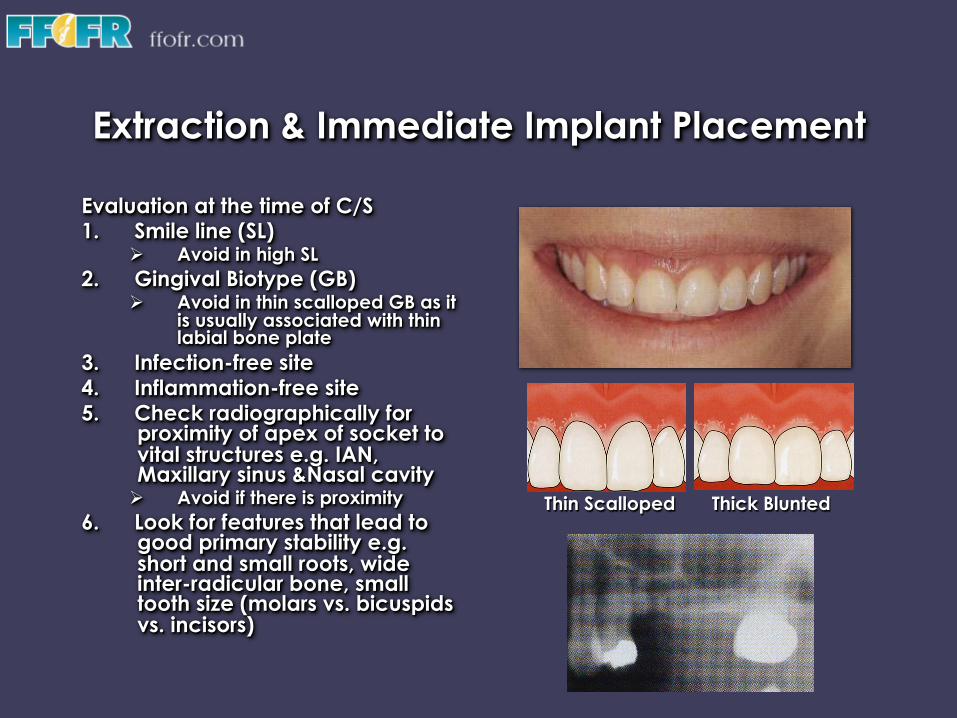
Extraction & Immediate Implant Placement
Evaluation at the time of C/S 1. Smile line (SL)
Ø Avoid in high SL 2. Gingival Biotype (GB)
Ø Avoid in thin scalloped GB as it is usually associated with thin labial bone plate
3. Infection-free site 4. Inflammation-free site 5. Check radiographically for
proximity of apex of socket to vital structures e.g. IAN, Maxillary sinus &Nasal cavity Ø Avoid if there is proximity
6. Look for features that lead to good primary stability e.g. short and small roots, wide inter-radicular bone, small tooth size (molars vs. bicuspids vs. incisors)
Thin Scalloped Thick Blunted
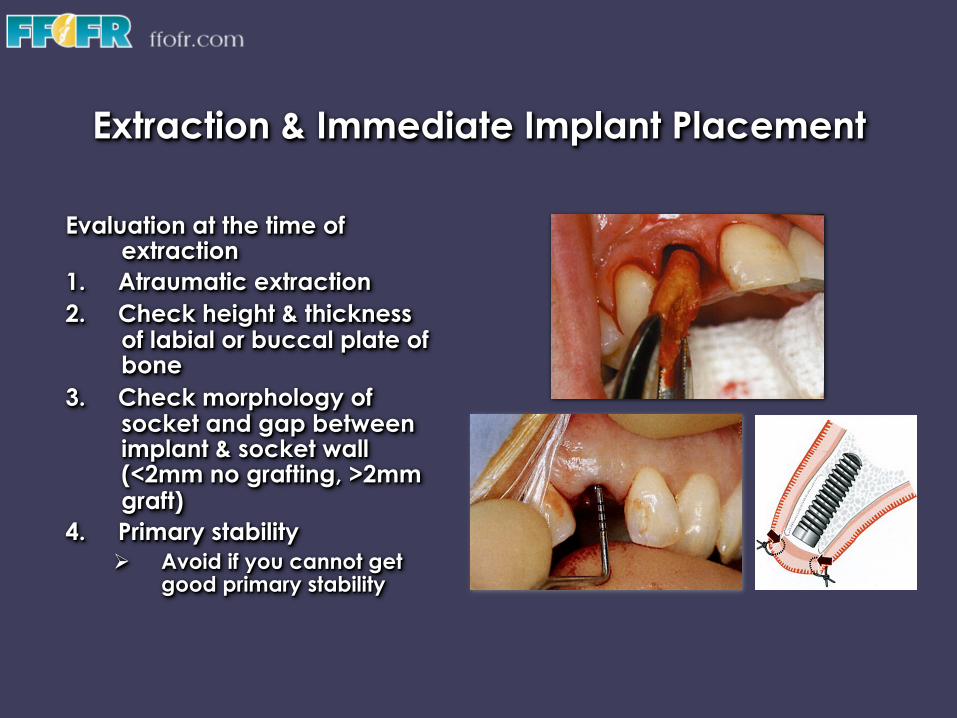
Extraction & Immediate Implant Placement
Evaluation at the time of extraction
1. Atraumatic extraction 2. Check height & thickness
of labial or buccal plate of bone
3. Check morphology of socket and gap between implant & socket wall (<2mm no grafting, >2mm graft)
4. Primary stability Ø Avoid if you cannot get
good primary stability

Thank you
v Visit ffofr.org for hundreds of additional lectures on Complete Dentures, Implant Dentistry, Removable Partial Dentures, Esthetic Dentistry and Maxillofacial Prosthetics.
v The lectures are free. v Our objective is to create the best and most
comprehensive online programs of instruction in Prosthodontics