small office campus lan - juniper networks system configuration ..... 9 7.1 device banner..... 10...
TRANSCRIPT

© 2016 Juniper Networks, Inc.
Small Office Campus LAN
Reference Design
July 2016

Reference Design Small Campus LAN
ii © 2016 Juniper Networks, Inc.
Juniper Networks, Inc. 1133 Innovation Way Sunnyvale, California 94089 USA 408-745-2000 www.juniper.net
Copyright © 2016, Juniper Networks, Inc. All rights reserved.

Reference Design Small Campus LAN
© 2016 Juniper Networks, Inc. iii
Table of Contents
1. Introduction ......................................................................................................................................... 1
2. Design Requirements ......................................................................................................................... 1
3. High Level Network Overview ............................................................................................................ 1
4. Hardware Overview ............................................................................................................................ 3
4.1 Device Types and Roles......................................................................................................................... 3 4.1.1 EX3300 Port Numbering ........................................................................................................................... 3
5. Software Overview ............................................................................................................................. 4
6. Intermediate Distribution Frame – EX3300 Virtual Chassis ............................................................... 5
6.1 EX3300 Virtual Chassis Overview .......................................................................................................... 5 6.2 EX3300 Virtual Chassis .......................................................................................................................... 6
6.2.1 Two-Member EX3300 Virtual Chassis .............................................................................................. 6 6.2.2 Three-Member EX3300 Virtual Chassis ........................................................................................... 7 6.2.3 Four-Member EX3300 Virtual Chassis ............................................................................................. 7 6.2.4 Five-Member EX3300 Virtual Chassis .............................................................................................. 8
7. General System Configuration ........................................................................................................... 9
7.1 Device Banner ...................................................................................................................................... 10 7.2 DNS ...................................................................................................................................................... 10 7.3 Naming Conventions ............................................................................................................................ 10 7.4 Addressing Design ............................................................................................................................... 10
7.4.1 Management Interface (fxp0/vme0) ................................................................................................ 11 7.4.2 Management Addressing - EX3300 Devices ................................................................................ 11 7.4.3 VLAN Standardization efforts ......................................................................................................... 11
7.5 Device Management ............................................................................................................................ 11 7.5.1 SNMP ............................................................................................................................................. 11 7.5.2 SYSLOG ......................................................................................................................................... 12 7.5.3 SSH ................................................................................................................................................ 13 7.5.4 TACACS ......................................................................................................................................... 13 7.5.5 Local User Accounts ....................................................................................................................... 13 7.5.6 System Time Zone ......................................................................................................................... 14 7.5.7 Network Time Protocol (NTP) ......................................................................................................... 14 7.5.8 Graceful Routing Engine Switchover .............................................................................................. 14 7.5.9 Nonstop Bridging ............................................................................................................................ 15 7.5.10 Nonstop Routing ............................................................................................................................. 15
8. Routing and Switching Protocols/Technology .................................................................................. 16
8.1 OSPF.................................................................................................................................................... 16 8.2 Equal Cost Load Balancing .................................................................................................................. 17 8.3 Static Routes ........................................................................................................................................ 18 8.4 Remote Spanning Tree Protocol .......................................................................................................... 18 8.5 BPDU-Guard ........................................................................................................................................ 19 8.6 DHCP Snooping ................................................................................................................................... 19 8.7 DHCP Relay ......................................................................................................................................... 20 8.8 Storm Control ....................................................................................................................................... 20 8.9 RVI interface ......................................................................................................................................... 21 8.10 Bidirectional Forwarding Detection ....................................................................................................... 21 8.11 LLDP and LLDP-MED .......................................................................................................................... 22 8.12 Voice Over IP ....................................................................................................................................... 22 8.13 POE ...................................................................................................................................................... 22
9. Interface Configuration ..................................................................................................................... 23
9.1 Main Distribution Facility (MDF) ........................................................................................................... 23 9.1.1 Access Ports................................................................................................................................... 23 9.1.2 MDF Port Standardization .............................................................................................................. 23 9.1.3 IDF Port Standardization ................................................................................................................ 23

Reference Design Small Campus LAN
iv © 2016 Juniper Networks, Inc.
List of Figures
Figure 1 – EX3300 Virtual Chassis .................................................................................................................................................... 2 Figure 2 – Collapsed Access/Aggregation Layer ................................................................................................................................ 2 Figure 3 – EX3300 Port Numbering ................................................................................................................................................... 3 Figure 4 – EX3300 – Front View ........................................................................................................................................................ 3 Figure 5 – Junos OS Architecture Overview ...................................................................................................................................... 5 Figure 6 – Two-Member EX3300 Virtual Chassis ............................................................................................................................. 6 Figure 7 – Two-Member Virtual Chassis Configuration .................................................................................................................... 6 Figure 8 – Three-Member EX3300 Virtual Chassis ........................................................................................................................... 7 Figure 9 – Three-Member Virtual Chassis Configuration .................................................................................................................. 7 Figure 10 – Four-Member EX3300 Virtual Chassis ........................................................................................................................... 8 Figure 11 – Four-Member Virtual Chassis Configuration .................................................................................................................. 8 Figure 12 – Five-Member EX3300 Virtual Chassis ............................................................................................................................ 9 Figure 13 – Five-Member Virtual Chassis Configuration................................................................................................................... 9 Figure 14 – Banner Configuration .................................................................................................................................................... 10 Figure 15 – DNS Configuration ........................................................................................................................................................ 10 Figure 16 - Hostname configuration ................................................................................................................................................. 10 Figure 17 - SNMP Configuration ...................................................................................................................................................... 12 Figure 18 - SYSLOG Configuration ................................................................................................................................................. 13 Figure 19 - SSH Configuration ......................................................................................................................................................... 13 Figure 20 - TACACS Configuration ................................................................................................................................................. 13 Figure 21 - User Configuration ......................................................................................................................................................... 14 Figure 22 - Time Zone Configuration ............................................................................................................................................... 14 Figure 23 - NTP Configuration ......................................................................................................................................................... 14 Figure 24 – GRES Configuration ...................................................................................................................................................... 15 Figure 25 – NSB Configuration ........................................................................................................................................................ 15 Figure 26 - NSR ................................................................................................................................................................................ 16 Figure 27 – NSR Configuration ........................................................................................................................................................ 16 Figure 28 - OSPF – Small Campus ................................................................................................................................................... 17 Figure 29 – OSPF Configuration – Small Campus ........................................................................................................................... 17 Figure 30 – Equal Cost Load Balancing Configuration .................................................................................................................... 18 Figure 31 - IDF Static Route Configuration ..................................................................................................................................... 18 Figure 32 - IDF RSTP Configuration ............................................................................................................................................... 19 Figure 33 - BPDU-Guard Configuration........................................................................................................................................... 19 Figure 34 - DHCP Snooping Configuration...................................................................................................................................... 20 Figure 35 - DHCP Relay Configuration............................................................................................................................................ 20 Figure 36 - Storm Control Configuration.......................................................................................................................................... 20 Figure 37 - RVI Configuration.......................................................................................................................................................... 21 Figure 38 - BFD Configuration ......................................................................................................................................................... 21 Figure 39 - LLDP/LLDP-MED Configuration ................................................................................................................................. 22 Figure 40 - VoIP Configuration ........................................................................................................................................................ 22 Figure 41 - PoE Configuration .......................................................................................................................................................... 22 Figure 42 - Access Port Configuration ............................................................................................................................................. 23
Reference Design Small Campus LAN
© 2016 Juniper Networks, Inc. 1
1. Introduction
This document provides a reference design for a small office LAN environment. The primary audience for this report is network
design and engineering teams, network operations teams, and any other personnel directly or indirectly involved in designing a
small campus LAN.
2. Design Requirements
The reference design provides a unified, low-latency network that supports multiple services while maintaining traffic
segmentation and lowering the total cost of ownership. The main requirements are:
Cost o TCO Reduction, lower operational and environmental costs o Collapse network layer and reduce the number of managed devices in the network
Performance
o High speed Links o Low latency end-to-end
Reliability
o Highly available o Physical and logical redundancy o Implement features that improve system reliability o Fast recovery capability and fast re-convergence time
Simplicity
o Network should be simple to operate and to troubleshoot o Time to recover decreases with a simpler design
Non-intrusive network growth o Design should provide ability to grow without affecting services o Provide flexible mechanism for expanding existing infrastructure
Connectivity o Provide any-to-any Layer 3 and Layer 2 connectivity o Extensibility for foreign networks
Scalability o Ability to expand the access and core layers
Future-Proof o Utilize the features of the hardware and software to deliver a best of breed network o Position the network to be able to support all future services (IPv6, 802.1x, etc.) o 100G ready and future higher port density
This design addresses the following limitations found in many campus LAN networks:
Poor throughput
Weak devices resulting in blocking architecture
High latency for bandwidth consuming applications used by end users
End-of-life hardware
3. High Level Network Overview
The EX3300 Virtual Chassis provides Layer 3 gateway services for all VLANs, in addition to core network connectivity. In some
cases, the EX3300 Virtual Chassis can also provide services for directly connected site servers. Depending on the needs of

Reference Design Small Campus LAN
2 © 2016 Juniper Networks, Inc.
the individual campus LAN, the Virtual Chassis size can vary in total number of members. The configurations required to
support this design are detailed in later sections of this document. Figure 1 shows a four-member EX3300 Virtual Chassis.
Figure 1 – EX3300 Virtual Chassis
The small campus LAN network design utilizes a single EX3300 Virtual Chassis as the collapsed access/aggregation layer, as
illustrated in Figure 2. The small campus network is designed to support up to 50 users.
ALM
EX3300
1 3 5 7 9 110 2 4 6 8 10
13 15 17 19 21 2312 14 16 18 20 22
25 27 29 31 33 3524 26 28 30 32 34
37 39 41 43 45 4736 38 40 42 44 46
RUNNING JUNOS
0 1 2 3
SYS
MST
ALM
EX3300
1 3 5 7 9 110 2 4 6 8 10
13 15 17 19 21 2312 14 16 18 20 22
25 27 29 31 33 3524 26 28 30 32 34
37 39 41 43 45 4736 38 40 42 44 46
RUNNING JUNOS
0 1 2 3
SYS
MST
Verizon Backup CE
Verizon Primary CE
Member 0
Member 1
Figure 2 – Collapsed Access/Aggregation Layer

Reference Design Small Campus LAN
© 2016 Juniper Networks, Inc. 3
4. Hardware Overview
This section provides outlines components used in the network.
4.1 Device Types and Roles
The main device in this reference design is a Juniper Network EX3300 switch, which provides Layer 2 access and acts as a
Layer 3 gateway.
4.1.1 EX3300 Port Numbering
Figure 3 shows the port numbering used on EX3300 switches. In this figure, the “x” in the port number is the Virtual Chassis
member ID.
Figure 3 – EX3300 Port Numbering
Figure 4 shows the front of the EX3300 switch. Port densities and port types vary depending on which model EX3300 is used.
See Table 1 for EX3300 specifications.
Figure 4 – EX3300 – Front View
Complete EX3300 switch hardware documentation is available at the following link:
http://www.juniper.net/techpubs/en_US/release-independent/junos/information-products/pathway-pages/ex-series/ex3300/ex3300.html
ge-x/0/0
ge-x/0/47
ge-x/0/46
ge-x/0/1
xe-x/1/3
xe-x/1/0
x = VC member id

Reference Design Small Campus LAN
4 © 2016 Juniper Networks, Inc.
4.1.2 EX3300 Specifications
Table 1 shows the EX3300 hardware specifications.
Table 1 – EX3300 Specifications
5. Software Overview
Junos OS is Juniper Network‘s modular operating system software. It consists of a series of system processes that handle the networking device’s management, protocols, and control functions. Junos OS software resides in the control plane, or Routing Engine (RE), and offers the following benefits:
Single image across multiple platforms
One code upgrade path
Regularly scheduled releases for feature set integration
High availability and reliability

Reference Design Small Campus LAN
© 2016 Juniper Networks, Inc. 5
Figure 5 shows an overview of the Junos OS architecture.
Figure 5 – Junos OS Architecture Overview
This reference design uses Junos OS version 12.3R6.6.
6. Intermediate Distribution Frame – EX3300 Virtual Chassis
6.1 EX3300 Virtual Chassis Overview
Juniper Networks Virtual Chassis technology is a feature of the Juniper Networks® line of Ethernet switches that allows the interconnection and operation of switches as a unified, single, high-bandwidth device. Up to 10 EX Series switches may be interconnected using dedicated Virtual Chassis ports (VCPs) on each device. All EX3300 switch models support Virtual Chassis technology. With this technology, a single logical device that supports up to 480 10/100/1000BASE-T ports or 240 100BASE-FX/1000BASE-X ports may be configured. Optional Gigabit Ethernet or 10-Gigabit Ethernet uplink ports can extend the Virtual Chassis configuration over greater distances. Solutions that use the EX3300 switches with Virtual Chassis technology combine the scalability and compact form factor of standalone switches with the high availability, high backplane bandwidth characteristics, and high port densities of traditional chassis-based switches. Virtual Chassis configurations enable economical deployments of switches that deliver network availability in locations where installation might otherwise be cost prohibitive or physically impossible. In a Virtual Chassis configuration, all member switches are managed and monitored as a single logical device. This approach simplifies network operations, allows the separation of placement and logical groupings of physical devices, and provides efficient use of resources. The Virtual Chassis solution offers the same Routing Engine (RE) redundancy features as other Juniper Networks chassis-based switches and routers, including graceful Routing Engine switchover (GRES) for hitless failover.

Reference Design Small Campus LAN
6 © 2016 Juniper Networks, Inc.
For resiliency and redundancy, the Virtual Chassis configuration includes two RE-eligible switch members, both statically assigned as part of the pre-provisioned Virtual Chassis configuration. Remaining Virtual Chassis members are assigned the role of linecard. In addition, the Virtual Chassis configuration uses a single Juniper Networks Junos® operating system image file and a single configuration file. The Junos OS of all member switches in a Virtual Chassis configuration can be upgraded simultaneously from the master switch with a single command.
6.2 EX3300 Virtual Chassis
This reference design uses EX3300 Virtual Chassis deployed in a small campus LAN architecture. The size of the Virtual
Chassis, (number of Virtual Chassis members) is based on the number of access ports required. In this design, the EX3300
Virtual Chassis is connected to customer edge WAN routers. EX3300 Virtual Chassis deployed in the small campus are
running the OSPF dynamic routing protocol with the customer edge WAN routers. All access VLANs are switched at Layer 2
and all inter-VLAN communication is routed accordingly. This is detailed in later sections.
The following sections detail the EX3300 Virtual Chassis cabling and uplink architecture.
6.2.1 Two-Member EX3300 Virtual Chassis
Figure 6 shows a two-member Virtual Chassis and its uplink ports.
Figure 6 – Two-Member EX3300 Virtual Chassis
Figure 7 shows an example configuration for a two-member EX3300 Virtual Chassis.
set virtual-chassis preprovisioned
set virtual-chassis no-split-detection **SEE NOTE
set virtual-chassis member 0 role routing-engine
set virtual-chassis member 0 serial-number <SERIAL-NUMBER>
set virtual-chassis member 1 role routing-engine
set virtual-chassis member 1 serial-number <SERIAL-NUMBER>
Figure 7 – Two-Member Virtual Chassis Configuration
**Juniper Networks recommends that you disable split detection for a two-member Virtual Chassis configuration.
0
1 RE
REMDF
UPLINK
xe-0/1/0
MDF
UPLINK
xe-1/1/0

Reference Design Small Campus LAN
© 2016 Juniper Networks, Inc. 7
6.2.2 Three-Member EX3300 Virtual Chassis
Figure 8 shows a three-member Virtual Chassis and its uplink ports.
Figure 8 – Three-Member EX3300 Virtual Chassis
Figure 9 shows an example configuration for a three-member EX3300 Virtual Chassis.
set virtual-chassis preprovisioned
set virtual-chassis member 0 role line-card
set virtual-chassis member 0 serial-number <SERIAL-NUMBER>
set virtual-chassis member 1 role routing-engine
set virtual-chassis member 1 serial-number <SERIAL-NUMBER>
set virtual-chassis member 2 role routing-engine
set virtual-chassis member 2 serial-number <SERIAL-NUMBER>
Figure 9 – Three-Member Virtual Chassis Configuration
6.2.3 Four-Member EX3300 Virtual Chassis
Figure 10 shows a four-member Virtual Chassis and its uplink ports.
0
1
2
RE
RE
MDF
UPLINK
MDF
UPLINK
LC
xe-0/1/0
xe-2/1/0

Reference Design Small Campus LAN
8 © 2016 Juniper Networks, Inc.
Figure 10 – Four-Member EX3300 Virtual Chassis
Figure 11 shows an example configuration for a four-member EX3300 Virtual Chassis.
set virtual-chassis preprovisioned
set virtual-chassis member 0 role line-card
set virtual-chassis member 0 serial-number <SERIAL-NUMBER>
set virtual-chassis member 1 role routing-engine
set virtual-chassis member 1 serial-number <SERIAL-NUMBER>
set virtual-chassis member 2 role routing-engine
set virtual-chassis member 2 serial-number <SERIAL-NUMBER>
set virtual-chassis member 3 role line-card
set virtual-chassis member 3 serial-number <SERIAL-NUMBER>
Figure 11 – Four-Member Virtual Chassis Configuration
6.2.4 Five-Member EX3300 Virtual Chassis
Figure 12 shows a five-member Virtual Chassis and its uplink ports.
0
1
2
3
RE
RE
MDF
UPLINK
MDF
UPLINK
LC
xe-0/1/0
xe-3/1/0
LC

Reference Design Small Campus LAN
© 2016 Juniper Networks, Inc. 9
Figure 12 – Five-Member EX3300 Virtual Chassis
Figure 13 shows an example configuration for a five-member EX3300 Virtual Chassis.
set virtual-chassis preprovisioned
set virtual-chassis member 0 role line-card
set virtual-chassis member 0 serial-number <SERIAL-NUMBER>
set virtual-chassis member 1 role routing-engine
set virtual-chassis member 1 serial-number <SERIAL-NUMBER>
set virtual-chassis member 2 role routing-engine
set virtual-chassis member 2 serial-number <SERIAL-NUMBER>
set virtual-chassis member 3 role line-card
set virtual-chassis member 3 serial-number <SERIAL-NUMBER>
set virtual-chassis member 4 role line-card
set virtual-chassis member 4 serial-number <SERIAL-NUMBER>
Figure 13 – Five-Member Virtual Chassis Configuration
7. General System Configuration
This section outlines EX Series chassis components and provide details of the Junos OS configuration of used in the reference
design.
0
1
2
3
RE
RE
MDF
UPLINK
MDF
UPLINK
LC
xe-0/1/0
xe-4/1/0
LC
LC
4
Reference Design Small Campus LAN
10 © 2016 Juniper Networks, Inc.
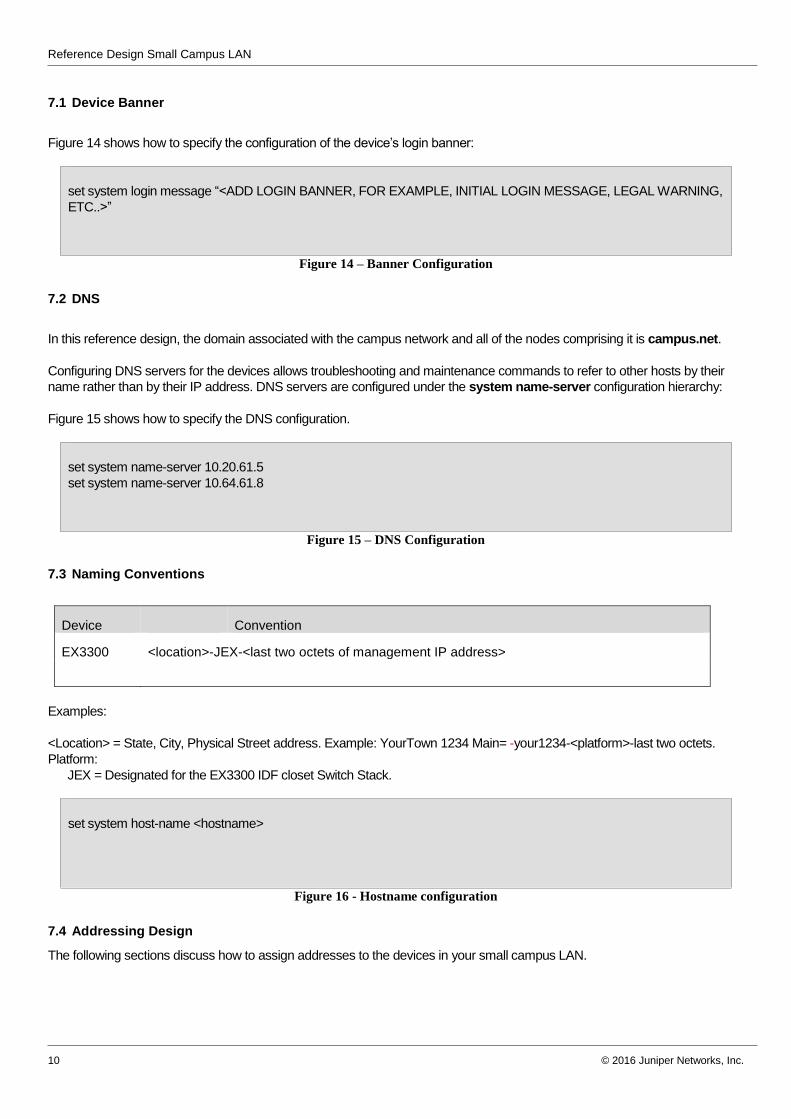
7.1 Device Banner
Figure 14 shows how to specify the configuration of the device’s login banner:
set system login message “<ADD LOGIN BANNER, FOR EXAMPLE, INITIAL LOGIN MESSAGE, LEGAL WARNING,
ETC..>”
Figure 14 – Banner Configuration
7.2 DNS
In this reference design, the domain associated with the campus network and all of the nodes comprising it is campus.net.
Configuring DNS servers for the devices allows troubleshooting and maintenance commands to refer to other hosts by their
name rather than by their IP address. DNS servers are configured under the system name-server configuration hierarchy:
Figure 15 shows how to specify the DNS configuration.
set system name-server 10.20.61.5
set system name-server 10.64.61.8
Figure 15 – DNS Configuration
7.3 Naming Conventions
Device Convention
EX3300 <location>-JEX-<last two octets of management IP address>
Examples:
<Location> = State, City, Physical Street address. Example: YourTown 1234 Main= -your1234-<platform>-last two octets.
Platform:
JEX = Designated for the EX3300 IDF closet Switch Stack.
set system host-name <hostname>
Figure 16 - Hostname configuration
7.4 Addressing Design
The following sections discuss how to assign addresses to the devices in your small campus LAN.

Reference Design Small Campus LAN
© 2016 Juniper Networks, Inc. 11
7.4.1 Management Interface (fxp0/vme0)
Management interfaces are the primary interfaces for accessing the device remotely. Typically, a management interface is not
connected to the in-band network, but is connected instead to the device's internal network. Through a management interface,
you can access the device over the network using utilities, such as ssh and telnet, and you can configure the device from
anywhere, regardless of its physical location. Also, SNMP can use the management interface to gather statistics from the
device.
Before users can access the management interface, you must configure it. Information required to set up the management
interface includes its IP address and prefix.
In many types of Junos OS devices (or recommended configurations), it is not possible to route traffic between the
management interface and the other ports. Therefore, you should select an IP address in a separate (logical) network, with a
separate prefix (netmask).
This campus LAN reference design does not currently utilize an out-of-band IP management network. The information above
is provided for reference purposes.
7.4.2 Management Addressing - EX3300 Devices
EX3300 devices are managed using the address assigned to the RVI interface that is assigned to the primary IDF data VLAN.
7.4.3 VLAN Standardization efforts
The following is an example showing an addressing plan for a small campus LAN:
VLAN’s:
Data – 300-399 and sequential by floor IDF’s
Voice – 400-449 and sequential by floor IDF’s
Wireless users – 450-499 (VLAN 457 reserved for Wireless controllers)
CE’s Transit – 500
7.5 Device Management
The following sections discuss how to manage the devices in your small campus LAN.
7.5.1 SNMP
The Simple Network Management Protocol (SNMP) enables the monitoring of network devices from a central location. The SNMP agent exchanges network management information with the SNMP manager software running on a network management system (NMS) or host. The agent responds to requests for information and actions from the manager. The agent also controls access to the agent’s Management Information Base (MIB), the collection of objects that can be viewed or changed by the SNMP manager. The SNMP manager collects information on network connectivity, activity, and events by polling managed devices. SNMP access to each router is via the following groups:

Reference Design Small Campus LAN
12 © 2016 Juniper Networks, Inc.
Figure 18 shows a sample Junos OS SNMP configuration.
set snmp description <description>
set snmp location <location>
set snmp contact "<PHONE-NUMBER>"
set snmp community "XXXXX” authorization read-only
Figure 17 - SNMP Configuration
7.5.2 SYSLOG
Junos OS will generate system log (syslog) messages to record events that occur on the devices. Each system log message identifies the software process that generated the message and briefly describes the operation or error that occurred. You can direct the messages to several collection locations simultaneously, including local log files, a remote server, another Routing Engine, the console port, and the local terminal session of one or more specific users (or all users) when they are logged in to the local Routing Engine. Each system log message belongs to a facility, which is a group of messages that are either generated by the same software process or concern a similar condition or activity (such as authentication attempts). To log the messages belonging to one or more facilities to a particular destination, specify each facility name as a separate statement within the set of statements for the destination. Table 2 shows the facilities that you can configure in Junos OS.
Table 2 – Junos OS System Logging Facilities
Facility Type of Event or Error any All (messages from all facilities)
authorization Authentication and authorization attempts
change-log Changes to the Junos OS configuration
conflict-log Configuration that is inconsistent with routing platform hardware
daemon Actions performed or errors encountered by various system processes
dfc Events related to dynamic flow capture
firewall Packet filtering actions performed by a firewall filter
ftp Actions performed or errors encountered by the FTP process
interactive-commands Commands issued at the Junos OS command-line interface (CLI) prompt or by a JUNOScript or NETCONF client application
kernel Actions performed or errors encountered by the Junos OS kernel
pfe Actions performed or errors encountered by the Packet Forwarding Engine
user Actions performed or errors encountered by various user-space processes
Each message is also pre-assigned a severity level, which indicates how seriously the triggering event affects routing platform functions. When you configure logging for a facility and destination, you specify a severity level for each facility; messages from the facility that are rated at that level or higher are logged to the destination.
Figure 18 shows a sample SYSLOG configuration.
set system syslog archive size 10m
set system syslog archive files 10
set system syslog host 198.51.100.6 syslog any
set system syslog host 198.51.100.6 log-prefix #{self.hostname}
set system syslog host 198.51.100.7 syslog any
set system syslog host 198.51.100.7 log-prefix #{self.hostname}
set system syslog user * any emergency
set system syslog console any critical
set system syslog file messages any notice

Reference Design Small Campus LAN
© 2016 Juniper Networks, Inc. 13
set system syslog file messages authorization info
set system syslog file interactive-commands interactive-commands any
Figure 18 - SYSLOG Configuration
7.5.3 SSH
Console access can be gained locally at each site by physically connecting a laptop to the router’s console or aux port and utilizing a terminal emulation program configured for 9600 baud and 8N1 (eight data bits, no parity, and one stop bit). SSH access to each router is available from management networks. SSH access is limited to five (5) simultaneous connections per minute at a rate of ten (10) attempts per minute: Figure 19 shows an example of a Junos OS SSH configuration.
set system services ssh protocol-version v2
set system services ssh connection-limit 5
set system services ssh rate-limit 10
Figure 19 - SSH Configuration
7.5.4 TACACS
Authentication, accounting, and authorization (AAA) is provided by TACACS as a method for authenticating users who attempt
to access the router. User groups are defined with varying levels of authorization.
Figure 20 shows an example of a Junos OS TACACS configuration.
set system tacplus-server 10.64.79.23 secret "<SECRET>"
set system tacplus-server 10.64.79.23 timeout 1
set system tacplus-server 10.64.79.23 single-connection
set system tacplus-server 10.20.79.38 secret "<SECRET>"
set system tacplus-server 10.20.79.38 timeout 1
set system tacplus-server 10.20.79.38 single-connection
Figure 20 - TACACS Configuration
7.5.5 Local User Accounts
Local user accounts are configured on all devices. These accounts are intended to provide access in the event the TACACS
system is unavailable. Juniper Networks recommends updating the passwords associated with these accounts on a regular
schedule.
Figure 21 shows an example of a Junos OS user configuration.
set system login retry-options backoff-threshold 3
set system login retry-options backoff-factor 10
set system login retry-options tries-before-disconnect 3
set system login class readonly-local idle-timeout 20
set system login class readonly-local permissions view
set system login class readonly-local permissions view-configuration

Reference Design Small Campus LAN
14 © 2016 Juniper Networks, Inc.
set system login class superuser-local idle-timeout 20
set system login class superuser-local permissions all
set system login user user1-ro-tacacs uid 9998
set system login user user1-ro-tacacs class readonly-local
set system login user user1-rw-tacacs uid 9999
set system login user user1-rw-tacacs class superuser-local
set system login user remote uid 100
set system login user remote class superuser-local
set system login user space uid 2001
set system login user space class superuser-local
set system login user space authentication encrypted-password "<SECRET>"
set system root-authentication encrypted-password "<SECRET>"
Figure 21 - User Configuration
7.5.6 System Time Zone
Juniper Networks recommends standardizing time zones across all deployed devices. In this reference design, the time zone
for the campus LAN deployment is UTC.
Figure 22 shows an example of a Junos OS system time zone configuration.
set system time-zone UTC
Figure 22 - Time Zone Configuration
7.5.7 Network Time Protocol (NTP)
Network Time Protocol (NTP) provides the mechanisms to synchronize time and coordinate time distribution in a large, diverse network. NTP uses a returnable-time design in which a distributed subnet of time servers operating in a self-organizing, hierarchical master-slave configuration synchronizes local clocks within the subnet and to national time standards by means of wire or radio. The servers also can redistribute reference time using local routing algorithms and time daemons.
Figure 23 shows an example of a Junos OS NTP configuration.
set system ntp server 10.20.61.5 prefer
set system ntp server 10.64.61.8
Figure 23 - NTP Configuration
7.5.8 Graceful Routing Engine Switchover
Once a backup Routing Engine is configured, it can be directed to assume mastership automatically if it detects loss of the keepalive signal from the master. Packet forwarding is interrupted when this feature is enabled. To configure a backup Routing Engine to assume mastership automatically without any interruption to packet forwarding, we recommend using Graceful Switchover (GRES). When you enable this feature, the backup Routing Engine automatically synchronizes its configuration and replicates the state for interfaces and forwarding resources with the master Routing Engine. Any update to the master Routing

Reference Design Small Campus LAN
© 2016 Juniper Networks, Inc. 15
Engine state is replicated on the backup Routing Engine. When the backup Routing Engine assumes mastership, the Packet Forwarding Engine deletes its connection with the old master Routing Engine and reconnects with the new master Routing Engine. If the new master Routing Engine detects that the Packet Forwarding Engine state is not up to date, it resends state update messages. The master Routing Engine sends periodic keepalive messages to the backup Routing Engine. If the backup Routing Engine does not receive a keepalive message from the master Routing Engine, it assumes that the master Routing Engine has failed and assumes mastership without interruption to packet forwarding. In summary, Routing Engine redundancy is configured in the following ways:
Automatically synchronizing the configuration file from one Routing Engine to the other
Changing to the backup Routing Engine if it detects loss of the keepalive signal
Changing to the backup Routing Engine if it detects a routing/switching process failure
Changing to the backup Routing Engine if it detects a hard-disk error on the master Routing Engine
Enabling Graceful Routing Engine Switchover
Graceful Routing Engine Switchover is enabled on EX3300 Virtual Chassis.
Figure 24 shows an example of a Junos OS GRES configuration.
set chassis redundancy graceful-switchover
Figure 24 – GRES Configuration
7.5.9 Nonstop Bridging
Nonstop bridging (NSB) operates by synchronizing all protocol information for NSB-supported Layer 2 protocols between the
master and backup Routing Engines. If the switch has a Routing Engine switchover, the NSB-supported Layer 2 protocol
sessions remain active because all session information is already synchronized to the backup Routing Engine. Traffic
disruption for the NSB-supported Layer 2 protocol is minimal or nonexistent as a result of the switchover. The Routing Engine
switchover is transparent to neighbor devices, which do not detect any changes related to the NSB-supported Layer 2 protocol
sessions on the switch.
Nonstop Bridging is enabled on EX3300 Virtual Chassis.
Figure 25 shows an example of a Junos OS NSB configuration.
#EX3300
set ethernet-switching-options nonstop-bridging
Figure 25 – NSB Configuration
7.5.10 Nonstop Routing
Nonstop active routing (NSR) provides high availability for Routing Engines by enabling transparent switchover of the Routing
Engines without requiring restart of supported routing protocols. Both Routing Engines are fully active in processing protocol
sessions, and so each can take over for the other. The switchover is transparent to neighbor routing devices.
Figure 26 illustrates how NSR works.

Reference Design Small Campus LAN
16 © 2016 Juniper Networks, Inc.
Figure 26 - NSR
A fundamental concept in the design of Juniper Networks router hardware is a clear separation of the control plane (the Routing Engine, or RE) and the forwarding plane (the Packet Forwarding Engine, or PFE). Among the many advantages of this design is the fact that the routing protocol daemon (RPD) runs on the RE and populates the forwarding information base (FIB) on the PFE. As a result, it is possible for the RPD or the RE to cease functioning for some period while the FIB remains valid and the PFE continues to forward packets. This separation of control and forwarding planes enables nonstop routing (NSR). Nonstop routing uses the same infrastructure as Graceful Routing Engine Switchover (GRES) to preserve interface and kernel information. Nonstop routing saves routing protocol information by running RPD on the backup RE. By saving this additional information, nonstop routing is self-contained and does not rely on helper routers to assist the routing platform in restoring routing protocol information. As a result of this enhanced functionality, nonstop routing is a natural replacement for graceful restart.
Nonstop Routing is enabled on EX3300 Virtual Chassis.
Figure 27 shows an example of a Junos OS NSR configuration.
set routing-options nonstop-routing
Figure 27 – NSR Configuration
8. Routing and Switching Protocols/Technology
8.1 OSPF
OSPF is an interior gateway protocol (IGP) that routes packets within a single autonomous system (AS). OSPF uses link-state
information to make routing decisions, making route calculations using the shortest-path-first (SPF) algorithm. Each router
running OSPF floods link-state advertisements throughout the AS or area that contain information about that router’s attached
interfaces and routing metrics. Each router uses the information in these link-state advertisements to calculate the least cost
path to each network and create a routing table for the protocol.

Reference Design Small Campus LAN
© 2016 Juniper Networks, Inc. 17
OSPF is the IGP of choice for this reference design document. Interfaces are configured as point-to-point where possible. This
speeds network convergence, as DR Election processes will be skipped during adjacency formation. OSPF provides a method
for tuning protocol timers. Juniper Networks recommends configuring OSPF authentication.
In this design reference, OSPF is configured on an EX3300 Virtual Chassis. VLAN interfaces that are serving as Layer 3
gateways for all IDF VLANs are configured as passive interfaces. All interfaces are configured in OSPF Area 0.
OSPF will be configured for a 3-second hello and a 12-second dead timers.
Figure 28 shows OSPF in a small campus LAN environment.
ALM
EX3300
1 3 5 7 9 110 2 4 6 8 10
13 15 17 19 21 2312 14 16 18 20 22
25 27 29 31 33 3524 26 28 30 32 34
37 39 41 43 45 4736 38 40 42 44 46
RUNNING JUNOS
0 1 2 3
SYS
MST
ALM
EX3300
1 3 5 7 9 110 2 4 6 8 10
13 15 17 19 21 2312 14 16 18 20 22
25 27 29 31 33 3524 26 28 30 32 34
37 39 41 43 45 4736 38 40 42 44 46
RUNNING JUNOS
0 1 2 3
SYS
MST
Verizon Backup CE
Verizon Primary CE
Member 0
Member 1
OSPF Area 0
Figure 28 - OSPF – Small Campus
Figure 29 shows an example of a Junos OS OPSF configuration.
set protocols ospf reference-bandwidth 100g
set protocols ospf area 0.0.0.0 interface vlan.<x>
set protocols ospf area 0.0.0.0 interface <interface> hello-interval 3
set protocols ospf area 0.0.0.0 interface <interface> dead-interval 12
Figure 29 – OSPF Configuration – Small Campus
8.2 Equal Cost Load Balancing
Enable per-prefix or per-flow load balancing so that the router or switch elects a next hop independently of the route selected by other routers or switches.
For the active route, when there are multiple equal-cost paths to the same destination, by default Junos OS chooses in a random fashion one of the next-hop addresses to install into the forwarding table. Whenever the set of next hops for a destination changes in any way, the next-hop address is chosen again, also in a random fashion.
You can configure Junos OS so that, for the active route, all next-hop addresses for a destination are installed in the forwarding table. You can use load balancing to spread traffic across multiple paths between routing devices. This is configured on the EX3300 as “per-packet” load balancing. The command keeps packets for each individual flow on a single interface. To recognize individual flows in the transit traffic, the routing device examines each of the following:
Source IP address
Destination IP address

Reference Design Small Campus LAN
18 © 2016 Juniper Networks, Inc.
Protocol
Source port number
Destination port number
Source interface index
Type of service (ToS)
The routing device recognizes packets in which all of these parameters are identical, and it ensures that these packets are sent out through the same interface. This prevents problems that might otherwise occur with packets arriving at their destination out of their original sequence.
Load balancing is not supported on management and internal Ethernet (fxo) interfaces because this type of interface cannot handle the routing process. On fxp interfaces, you cannot configure multiple next hops and enable load balancing.
Figure 30 shows an example of a Junos OS Equal Cost Load Balancing configuration.
set policy-options policy-statement forwarding-engine-policy then load-balance
per-packet
set routing-options forwarding-table export forwarding-engine-policy
Figure 30 – Equal Cost Load Balancing Configuration
8.3 Static Routes
Routes that are permanent fixtures in the routing and forwarding tables are often configured as static routes. These routes
generally do not change, and often include only one or very few paths to the destination.
To create a static route in the routing table, you must, at minimum, define the route as static and associate a next-hop address
with it. The static route in the routing table is inserted into the forwarding table when the next-hop address is reachable. All
traffic destined for the static route is transmitted to the next-hop address for transit.
You can specify options that define additional information about static routes that are included with the route when it is installed
in the routing table.
Figure 31 shows an example of a Junos OS static route configuration.
set routing-options static route 0.0.0.0/0 next-hop <gw>
set routing-options static route 0.0.0.0/0 no-readvertise
Figure 31 - IDF Static Route Configuration
8.4 Remote Spanning Tree Protocol
Remote Spanning Tree Protocol (RSTP) evolved from the original Spanning Tree Protocol (STP) IEEE 802.1D protocol to
provide faster spanning-tree re-convergence after a switch port, switch, or LAN failure. Where STP took up to 50 seconds to
respond to topology changes, RSTP responds to changes within the timeframe of three hello bridge protocol data units
(BPDUs), or 6 seconds. This is the primary reason that RSTP is the default configuration on EX Series switches.
In this network design, RSTP is deployed as a means of loop prevention on access ports. STP protocols are not supported on
Virtual Chassis interfaces. Access ports are configured as RSTP edge ports. In the event a BPDU is received on an edge port,
the port is disabled.
Figure 32 shows an example of a Junos OS RSTP configuration.

Reference Design Small Campus LAN
© 2016 Juniper Networks, Inc. 19
set protocols rstp interface ae0.0 disable
set protocols rstp interface all edge
set protocols rstp bpdu-block-on-edge
set protocols rstp bridge priority 4k
Figure 32 - IDF RSTP Configuration
8.5 BPDU-Guard
In a spanning-tree topology, if a switch is an access switch, then interfaces on that switch will be connected to end devices—
such as PCs, servers, routers, or hubs—that are not connected to other switches. You configure these interfaces as edge
interfaces because they directly connect to end devices. Interfaces that are configured as edge interfaces can transition to a
forwarding state immediately because they cannot create network loops. A switch detects edge ports by noting the absence of
communication from the end stations. As edge ports are connected to end devices, it is imperative that you configure BPDU
protection on edge ports to protect the switch from outside BPDUs. If BPDU protection is enabled on an edge interface, the
interface shuts down on encountering an outside BPDU, thereby preventing any traffic from passing through the interface.
Figure 33 shows an example of a Junos OS BPDU-Guard configuration.
set protocols layer2-control bpdu-block disable-timeout 60
set protocols rstp bpdu-block-on-edge
Figure 33 - BPDU-Guard Configuration
8.6 DHCP Snooping
Dynamic Host Configuration Protocol (DHCP) snooping allows a switch to monitor and control DHCP messages received from
untrusted devices connected to the switch. When DHCP snooping is enabled, the system snoops the DHCP messages to
view DHCP lease information and build and maintain a database of valid IP address to MAC address (IP-MAC) bindings. This
database is called the DHCP snooping database. Only clients with valid bindings are allowed access to the network.
DHCP allocates IP addresses dynamically, “leasing” addresses to devices so that the addresses can be reused when no
longer needed. Hosts and end devices that require IP addresses obtained through DHCP must communicate with a DHCP
server across the LAN.
DHCP snooping acts as a guardian of network security by keeping track of valid IP addresses assigned to downstream
network devices by a trusted DHCP server (the server is connected to a trusted network port). By default, all trunk ports on the
switch are trusted (dhcp-trusted) and all access ports are untrusted (no-dhcp-trusted) for DHCP snooping. You can modify
these DHCP defaults on each of the switch's interfaces using the dhcp-trusted configuration statement.
When DHCP snooping is enabled, the lease information from the switch (which is a DHCP client) is used to create the DHCP
snooping database, which is a mapping of IP address to VLAN–MAC-address pairs. For each VLAN–MAC-address pair, the
database stores the corresponding IP address.
In this network design, DHCP snooping will be configured on all IDF EX3300 Virtual Chassis devices.
Figure 34 shows an example of a Junos OS DHCP snooping configuration.

Reference Design Small Campus LAN
20 © 2016 Juniper Networks, Inc.
set ethernet-switching-options secure-access-port vlan all examine-dhcp
Figure 34 - DHCP Snooping Configuration
8.7 DHCP Relay
The DHCP relay feature relays a request for an IP address from a remote client to a DHCP server. When the router receives a
DHCP request from an IP client, it forwards the request to the DHCP server and passes the response back to the IP client.
Configuring DHCP relay also enables bootstrap protocol (BOOTP) relay. The router relays any BOOTP requests it receives to
the same set of servers that you configured for DHCP relay. A DHCP server can respond to the BOOTP request only if it is
also a BOOTP server. The router relays any BOOTP responses it receives to the originator of the BOOTP request. If you do
not configure DHCP relay, then BOOTP relay is disabled.
The router must wait for an acknowledgment from the DHCP server that the assigned address has been accepted. The IP
client must accept an IP address from one of the servers. When the DHCP server sends an acknowledgment message back
to the DHCP client through the router, the router updates its routing table with the IP address of the client.
Figure 35 shows an example of a Junos OS DHCP relay configuration.
set forwarding-options helpers bootp server 10.64.61.170
set forwarding-options helpers bootp server 10.20.61.128
set forwarding-options helpers bootp interface vlan.<vlan-id> broadcast
set forwarding-options helpers bootp interface vlan.<vlan-id> broadcast
set forwarding-options helpers bootp interface vlan.<vlan-id> broadcast
Figure 35 - DHCP Relay Configuration
8.8 Storm Control
A traffic storm is generated when messages are broadcast on a network and each message prompts a receiving node to
respond by broadcasting its own messages on the network. This, in turn, prompts further responses, creating a snowball
effect. The LAN is suddenly flooded with packets, creating unnecessary traffic that leads to poor network performance or even
a complete loss of network service. Storm control enables the switch to monitor traffic levels and to drop broadcast, multicast,
and unknown unicast packets when a specified traffic level—called the storm control level—is exceeded, thus preventing
packets from proliferating and degrading the LAN. As an alternative to having the switch drop packets, you can configure it to
shut down interfaces or temporarily disable interfaces (using the action-shutdown statement or the port-error-disable
statement) when the storm control level is exceeded.
The default configuration enables storm control for broadcast and unknown unicast traffic on all switch interfaces, with the
storm control level set to 80 percent of the available bandwidth used by the broadcast and unknown unicast traffic streams.
Figure 36 shows an example of a Junos OS storm control configuration.
set ethernet-switching-options storm-control interface all
Figure 36 - Storm Control Configuration

Reference Design Small Campus LAN
© 2016 Juniper Networks, Inc. 21
8.9 RVI interface
A routed VLAN interface (RVI) is a special type of Layer 3 virtual interface named vlan. Like normal Layer 3 interfaces, the vlan
interface needs a logical unit number with an IP address. In fact, to be useful an RVI needs at least two logical units and two IP
addresses—you must create units with addresses in each of the subnets associated with the VLANs between which you want
traffic to be routed. That is, if you have two VLANs (for example, VLAN red and VLAN blue) with corresponding subnets, your
RVI must have a logical unit with an address in the subnet for red and a logical unit with an address in the subnet for blue. The
switch automatically creates direct routes to these subnets and uses these routes to forward traffic between VLANs.
A single RVI interface is configured on each IDF EX3300 Virtual Chassis for IP management purposes. This interface is
assigned to the primary data VLAN in the IDF closet.
Figure 37 shows an example of a Junos OS RVI configuration.
set interfaces vlan unit <vlan id> family inet address <ip/mask>
set vlans <vlan name> l3-interface vlan.<vlan id>
Figure 37 - RVI Configuration
8.10 Bidirectional Forwarding Detection
The Bidirectional Forwarding Detection (BFD) protocol is a simple hello mechanism that detects failures in a network. BFD
works with a wide variety of network environments and topologies. A pair of routing devices exchange BFD packets. Hello
packets are sent at a specified, regular interval. A neighbor failure is detected when the routing device stops receiving a reply
after a specified interval. The BFD failure detection timers have shorter time limits than the OSPF failure detection
mechanisms, so they provide faster detection.
The BFD failure detection timers are adaptive and can be adjusted to be faster or slower. The lower the BFD failure detection
timer value, the faster the failure detection and vice versa. For example, the timers can adapt to a higher value if the adjacency
fails (that is, the timer detects failures more slowly). Or a neighbor can negotiate a higher value for a timer than the configured
value. The timers adapt to a higher value when a BFD session flap occurs more than three times in a span of 15 seconds. A
back-off algorithm increases the receive (Rx) interval by two if the local BFD instance is the reason for the session flap. The
transmission (Tx) interval is increased by two if the remote BFD instance is the reason for the session flap. You can use the
clear bfd adaptation command to return BFD interval timers to their configured values. The clear bfd adaptation command
is hitless, meaning that the command does not affect traffic flow on the routing device.
BFD is currently configured on select OSPF adjacencies. Juniper Networks recommends configuring BFD where possible for
faster failover performance.
Figure 38 shows an example of a Junos OS BFD configuration.
set protocols ospf area 0.0.0.0 interface ae0.1000 bfd-liveness-detection minimum-
interval 300
set protocols ospf area 0.0.0.0 interface ae30.0 bfd-liveness-detection minimum-
interval 300
Figure 38 - BFD Configuration

Reference Design Small Campus LAN
22 © 2016 Juniper Networks, Inc.
8.11 LLDP and LLDP-MED
Devices use Link Layer Discovery Protocol (LLDP) and Link Layer Discovery Protocol–Media Endpoint Discovery (LLDP-
MED) to learn and distribute device information on network links. The information allows the device to quickly identify a variety
of other devices, resulting in a LAN that interoperates smoothly and efficiently.
Figure 39 shows an example of a Junos OS LLDP/LLDP-MED configuration.
set protocols lldp interface all
set protocols lldp-med interface all
Figure 39 - LLDP/LLDP-MED Configuration
8.12 Voice Over IP
EX Series switches support Voice over IP (VoIP). EX Series switches accommodate implementation scenarios that include an
IP phone and a user’s PC connected to a single switch port. The Voice VLAN feature is used on the EX Series switches for
this purpose. The Voice VLAN enables a single access port to accept untagged data traffic as well as tagged voice traffic and
associate each type of traffic with distinct and separate VLANs. Voice traffic can now be treated differently, generally with
higher priority than common data traffic. VoIP also uses LLDP (Link Layer Discovery Protocol) and LLDP-MED ( Link Layer
Discovery Protocol–Media Endpoint Discovery) protocol information to forward VoIP parameters from the RADIUS server to
the phone, for example VLAN and COS settings.
VoIP devices connected to the campus LAN are varied in capability and configuration. See “VLAN standardization efforts”
above for Voice VLAN designation.
To support some devices that facilitate auto discovery of voice VLANs, the configuration shown in Figure 40 is deployed on the
access ports that may support a VoIP device.
set ethernet-switching-options voip interface <interface> vlan <voice vlan>
Figure 40 - VoIP Configuration
8.13 POE
Power over Ethernet (PoE) permits electric power, along with data, to be passed over a copper Ethernet LAN cable. Powered
devices–such as voice over IP (VoIP) telephones, wireless access points, video cameras, and point-of-sale devices–that
support PoE can receive power safely from the same access ports that are used to connect personal computers to the
network.
In this campus LAN design, POE is enabled on all IDF access ports except for non-standard ports.
Figure 41 shows an example of a Junos OS PoE configuration.
set poe interface all
set poe interface <interface> disable
Figure 41 - PoE Configuration

Reference Design Small Campus LAN
© 2016 Juniper Networks, Inc. 23
9. Interface Configuration
9.1 Main Distribution Facility (MDF)
9.1.1 Access Ports
Figure 42 shows an example of a Junos OS access port configuration.
set interfaces <interface> unit 0 family ethernet-switching port-mode access vlan
members <vlan members>
Figure 42 - Access Port Configuration
9.1.2 MDF Port Standardization
MDF ports can be standardized as follows:
Last port in the lowest line card of the MDF primary switch is used for Primary CE.
Last port in the highest line card of the MDF backup switch is used for the backup CE.
First port of the lowest line card of the MDF primary switch is used for Voice Gateways
9.1.3 IDF Port Standardization
The last four ports on IDF closets are reserved for Wireless. The reserved vlan-id range will be 450-499 with the controller using 457 for guest wireless.

Reference Design Small Campus LAN
24 © 2016 Juniper Networks, Inc.