sheer vertical drape installation instructions - blinds.com
TRANSCRIPT
SHEER VERTICAL BLIND INSTALLATION INSTRUCTIONS
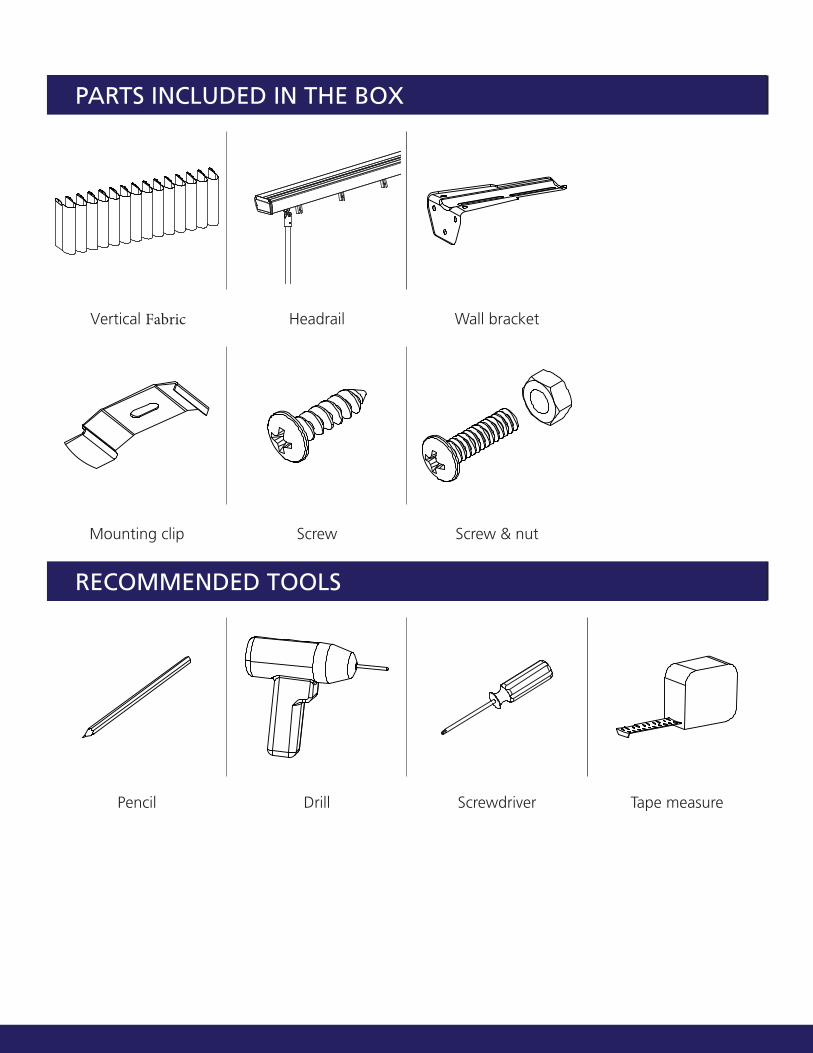
PARTS INCLUDED IN THE BOX
Vertical Fabric Headrail Wall bracket
Mounting clip Screw Screw & nut
RECOMMENDED TOOLS
Pencil Drill Screwdriver Tape measure
1
2
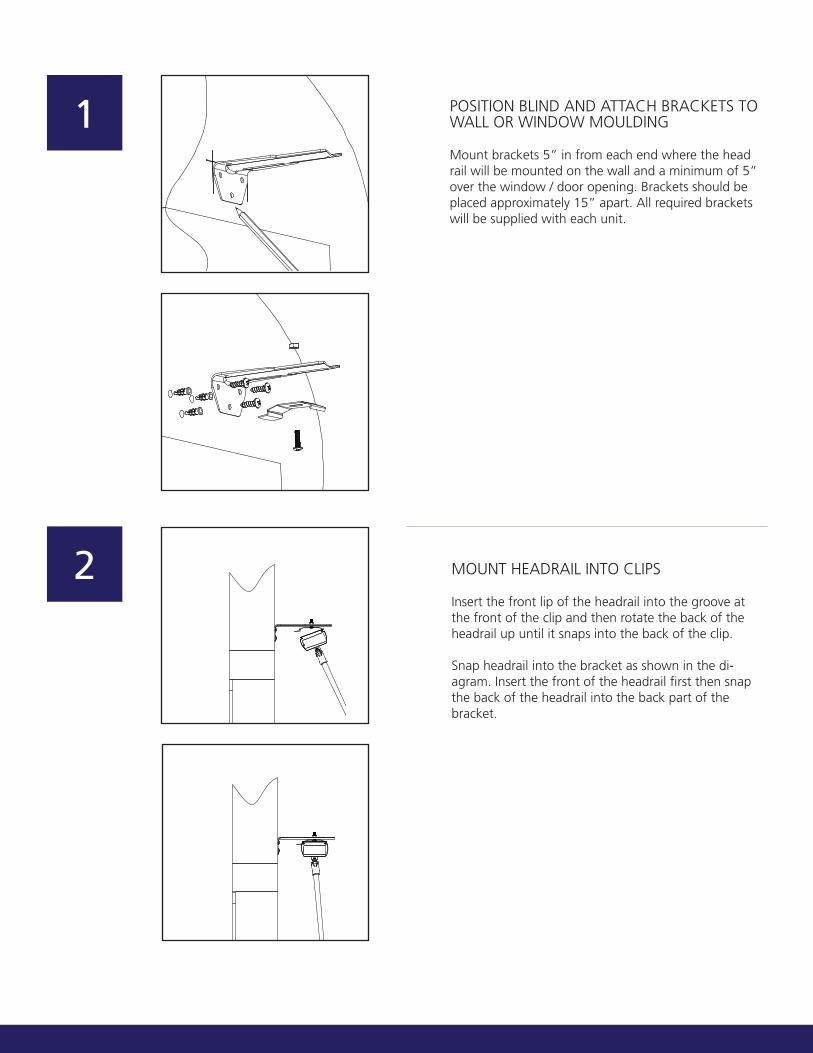
POSITION BLIND AND ATTACH BRACKETS TO WALL OR WINDOW MOULDING
Mount brackets 5” in from each end where the head rail will be mounted on the wall and a minimum of 5” over the window / door opening. Brackets should be placed approximately 15” apart. All required brackets will be supplied with each unit.
MOUNT HEADRAIL INTO CLIPS
Insert the front lip of the headrail into the groove at the front of the clip and then rotate the back of the headrail up until it snaps into the back of the clip.
Snap headrail into the bracket as shown in the di-agram. Insert the front of the headrail first then snap the back of the headrail into the back part of the bracket.
3
4
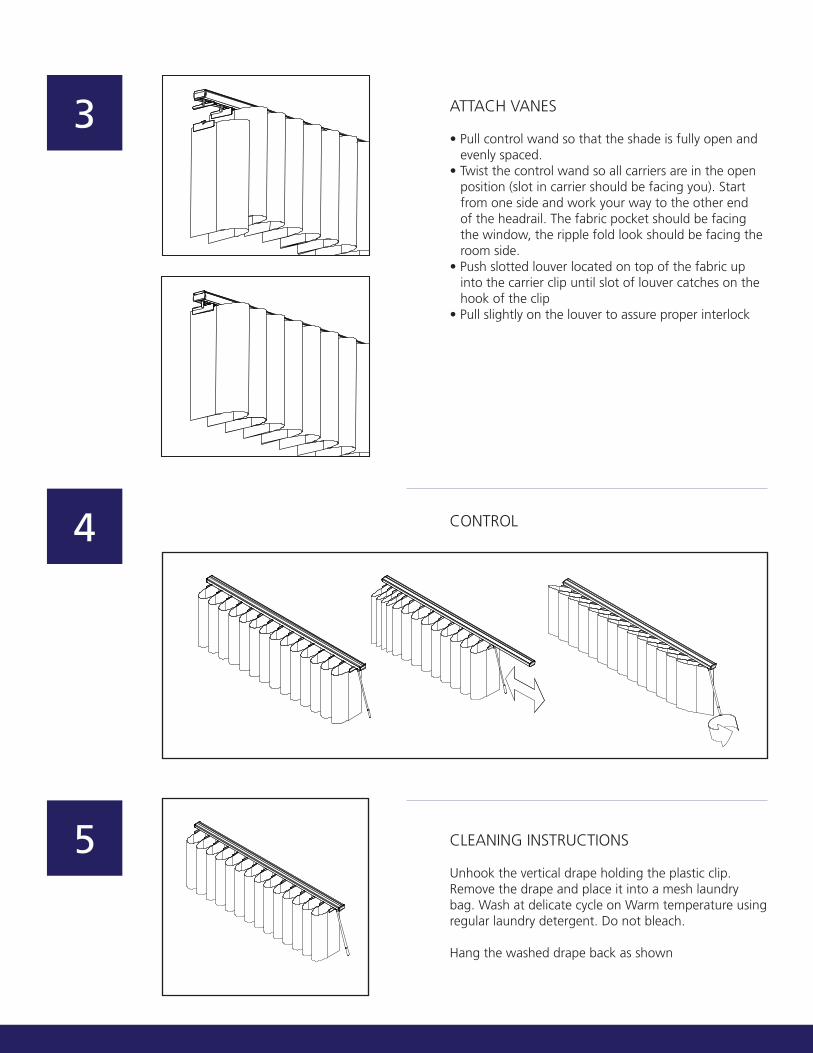
ATTACH VANES
• Pull control wand so that the shade is fully open and evenly spaced.
• Twist the control wand so all carriers are in the open position (slot in carrier should be facing you). Start from one side and work your way to the other end of the headrail. The fabric pocket should be facing the window, the ripple fold look should be facing the room side.
• Push slotted louver located on top of the fabric up into the carrier clip until slot of louver catches on the hook of the clip
• Pull slightly on the louver to assure proper interlock
CONTROL
5 CLEANING INSTRUCTIONS
Unhook the vertical drape holding the plastic clip. Remove the drape and place it into a mesh laundry bag. Wash at delicate cycle on Warm temperature using regular laundry detergent. Do not bleach. Hang the washed drape back as shown