sewing machine cover - usha international...designs number #3 for the sewing machine cover, via the...
TRANSCRIPT

YOU WILL NEED 2 pieces of base fabric - 27 x 17 inches1 piece of lining fabric - 27 x 17 inches1 Fabric for embroidery - 11 x 17 inches1 Fusing – 11 x 17 inches1 Batting* 27 x 17 inches60 inches of Ribbon 3 meters Bias TapeEmbroidery ThreadsSewing ThreadsPins, Thread Clipper & Fabric Cutting Scissors* Batting is a soft layer of material. It is used for stuffing or padding
Besides giving your machine a customized look, Sewing machine covers protect yourmachine from dust when not in use.
MACHINE: Usha Janome Automatic Memory Craft 15000
Skill level: Intermediate
Approx. 1 Hr.
CATEGORY: Quilting
NOTE: The measurements used for this machine cover fits all Usha Janome automatic zig- zag sewing machine models. For Usha Janome Memory Craft series, you can customize the cover size as per your machine measurements.
Sewing Machine Cover

STEP 1: Set up the Memory Craft 15000 (MC15000) for Embroidery: Select design from Monochrome Designs number #3 for the sewing machine cover, via the LCD control panel on your MC 15000 machine.
STEP 2: Place the 11 x 17 size Fused fabric in the SQ23 hoop. Press the start button to embroidery your design on the fabric, using embroidery threads.
STEP 3: Centre the embroidered design and cut the embroidered fabric to measure 7 ½ inches wide and 17 inches long.
17 In
7 ½
In

STEP 5: Next put the batting between the two pieces of base fabrics, keeping their wrong sides together, and pin them all to fix their position.
STEP 4: Turn the embroidered fabric wrong side up and fold the long sides of the fabricby 1 inch. Press the folded edges and keep aside.
*Batting is a soft layer of material. It is used for stuffing or padding.
Wrong side of the main fabric
Batting fabric
Right side of the fabric
1 In
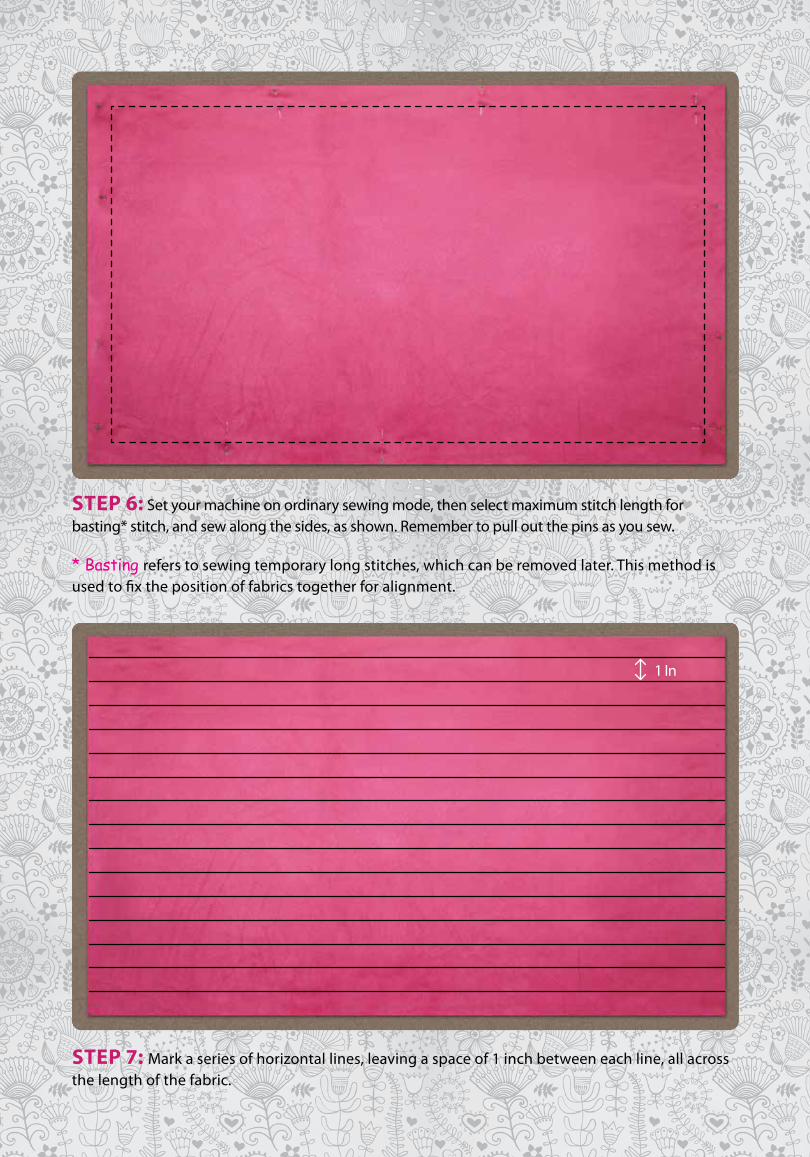
STEP 7: Mark a series of horizontal lines, leaving a space of 1 inch between each line, all across the length of the fabric.
STEP 6: Set your machine on ordinary sewing mode, then select maximum stitch length for basting* stitch, and sew along the sides, as shown. Remember to pull out the pins as you sew.
* Basting refers to sewing temporary long stitches, which can be removed later. This method is used to fix the position of fabrics together for alignment.
1 In

STEP 9: Next place and pin the embroidered fabric, across the breadth of the quilted piece leaving a distance of 3.5 inches from the edge. Stitch along the folded sides, as shown.
STEP 8: Set your machine to standard stitch length (2.5) and sew over the marked lines. This part is called quilting. *
1 In
3.5 In
* Quilting is the process of sewing two or more layers of fabric together to make a thicker padded material, usually to create a quilt or quilted garment.

STEP 11: Baste all around the shape. Remember to select maximum stitch length on your machine for Basting.
STEP 10: Place the right side of the lining fabric over the wrong side of the quilted fabric and cut the four corner into slightly curved shapes, as shown.
Cut
Cut
Cut

STEP 13: Sandwich the sides of the quilted piece with the Bias tape and sew all around it, setting your machine’s stitch length to standard (2.5).
STEP 12: Cut the Ribbon into 4 equal parts and sew each ribbon end along the longer side of the quilted fabric, keeping a distance of 6 inches, as shown.
6 In
6 In
6 In
6 In

Cover your machine and tie the knots!