sewing basics - know your needle plate - janome · sewing basics - know your needle plate ... do...
TRANSCRIPT

www.janome.comPage 1
Sewing Basics - Know Your Needle PlateBy Nancy Fiedler
Janome patented needle plates are designed with etched guides to simplify your sewing.
Do you know how to use the etched markings on your needle plate? Let us show you how these markings can help you sew perfect seams.
Starting Needle Position:• The horizontal line that runs across the needle plate indicates where the needle will drop. When you
start sewing, simply place the edge of the fabric along this line for a neat start.
5/8” Seam:• 5/8” is most often the standard seam allowance for commercial patterns. - When the needle is in the center position, line up the edge of the fabric with this mark to sew a consistent 5/8” seam.

www.janome.comPage 2
- To make a perfect 5/8” pivot, stop sewing when the end of the fabric reaches the mark below. Lift the foot, rotate the fabric lining up the edge with the 5/8” seam mark and sew!
1/4” Seam:• Many craft patterns as well as quilters will use a 1/4” seam allowance. - When the needle is in the center position, line up the edge of the fabric with this mark.
- To start a 1/4” in from the edge, place the fabric at this mark.
Sewing Basics - Know Your Needle Plate

www.janome.comPage 3
- To stop a 1/4” from the end, stop at this mark. Also use this mark to pivot.
Diagonal Placement Lines:• Quilters often use diagonal pieces, the angles used in quilting are 45°, 60°, 90° and 120°.• Machines with a maximum width of 7mm have solid diagonal lines.• Machines with a maximum width of 9mm will have solid and dotted diagonal lines.
• Solid lines are used with a center needle position. Dotted lines are used with the 1/4” stitch found on all 9mm machines.
- Attach 1/4” Foot “O”. - Line up the angled edge with the angle on the needle plate.
Sewing Basics - Know Your Needle Plate
www.janome.comPage 4
- Line up the opposite edge with the guide on the foot. The needle will automatically drop a 1/4” in from the edge. - Use the guide on the foot to stop a 1/4” from the end.
Other Seam Allowances:• There are times you may choose to use a different seam allowance or hem width. -Simplylookattheneedleplatetofindthedesiredwidth. - Your machine came with a quilt guide. Simply insert it in the foot holder and adjust it to the desired width. The maximum width of this guide right of the needle is 2 1/2”.
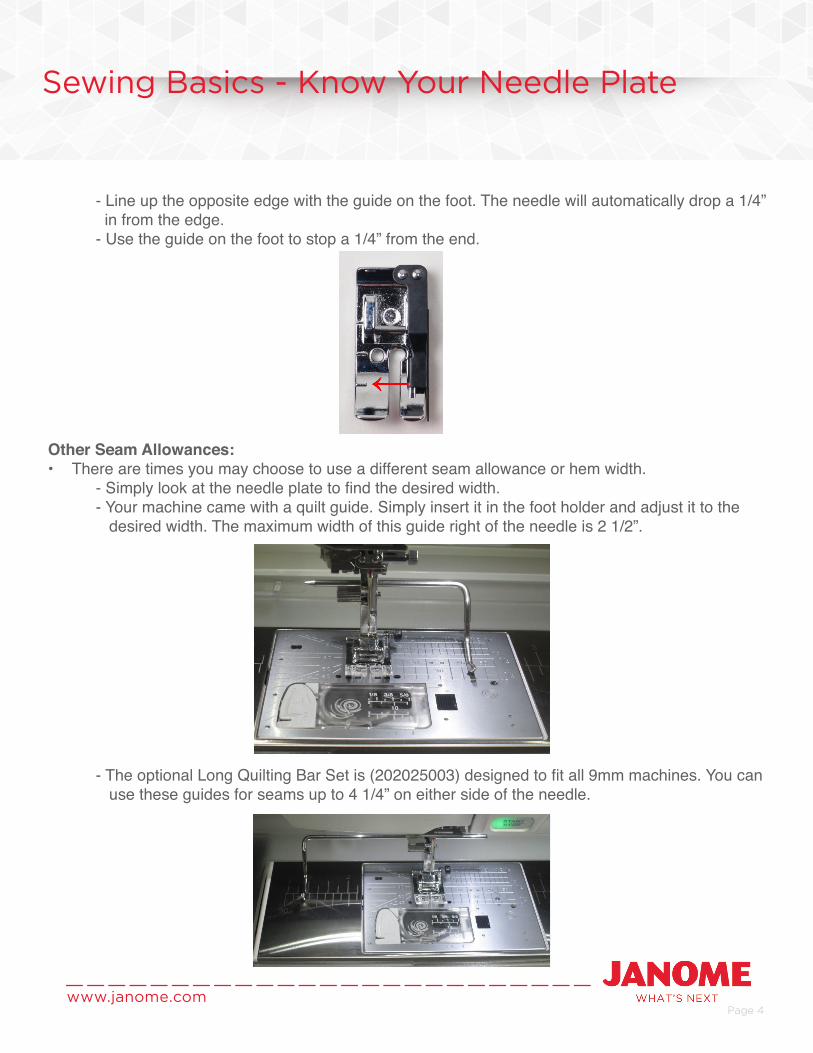
-TheoptionalLongQuiltingBarSetis(202025003)designedtofitall9mmmachines.Youcan use these guides for seams up to 4 1/4” on either side of the needle.
Sewing Basics - Know Your Needle Plate