security in mysql - root-merepository.root-me.org/administration/database/en - security in... ·...
TRANSCRIPT

Security in MySQL

Security in MySQLAbstract
This is the MySQL Security Guide extract from the MySQL !#!amp!#!current-series!#!;!#! Reference Manual.
Document generated on: 2012-02-21 (revision: 29152)
Copyright © 1997, 2012, Oracle and/or its affiliates. All rights reserved.
This software and related documentation are provided under a license agreement containing restrictions on use and disclosure and are protected by intel-lectual property laws. Except as expressly permitted in your license agreement or allowed by law, you may not use, copy, reproduce, translate, broadcast,modify, license, transmit, distribute, exhibit, perform, publish, or display any part, in any form, or by any means. Reverse engineering, disassembly, ordecompilation of this software, unless required by law for interoperability, is prohibited.
The information contained herein is subject to change without notice and is not warranted to be error-free. If you find any errors, please report them to usin writing.
If this software or related documentation is delivered to the U.S. Government or anyone licensing it on behalf of the U.S. Government, the following no-tice is applicable:
U.S. GOVERNMENT RIGHTS Programs, software, databases, and related documentation and technical data delivered to U.S. Government customersare "commercial computer software" or "commercial technical data" pursuant to the applicable Federal Acquisition Regulation and agency-specific sup-plemental regulations. As such, the use, duplication, disclosure, modification, and adaptation shall be subject to the restrictions and license terms setforth in the applicable Government contract, and, to the extent applicable by the terms of the Government contract, the additional rights set forth in FAR52.227-19, Commercial Computer Software License (December 2007). Oracle USA, Inc., 500 Oracle Parkway, Redwood City, CA 94065.
This software is developed for general use in a variety of information management applications. It is not developed or intended for use in any inherentlydangerous applications, including applications which may create a risk of personal injury. If you use this software in dangerous applications, then youshall be responsible to take all appropriate fail-safe, backup, redundancy, and other measures to ensure the safe use of this software. Oracle Corporationand its affiliates disclaim any liability for any damages caused by use of this software in dangerous applications.
Oracle is a registered trademark of Oracle Corporation and/or its affiliates. MySQL is a trademark of Oracle Corporation and/or its affiliates, and shallnot be used without Oracle's express written authorization. Other names may be trademarks of their respective owners.
This software and documentation may provide access to or information on content, products, and services from third parties. Oracle Corporation and itsaffiliates are not responsible for and expressly disclaim all warranties of any kind with respect to third-party content, products, and services. Oracle Cor-poration and its affiliates will not be responsible for any loss, costs, or damages incurred due to your access to or use of third-party content, products, orservices.
This document in any form, software or printed matter, contains proprietary information that is the exclusive property of Oracle. Your access to and useof this material is subject to the terms and conditions of your Oracle Software License and Service Agreement, which has been executed and with whichyou agree to comply. This document and information contained herein may not be disclosed, copied, reproduced, or distributed to anyone outside Oraclewithout prior written consent of Oracle or as specifically provided below. This document is not part of your license agreement nor can it be incorporatedinto any contractual agreement with Oracle or its subsidiaries or affiliates.
This documentation is NOT distributed under a GPL license. Use of this documentation is subject to the following terms:
You may create a printed copy of this documentation solely for your own personal use. Conversion to other formats is allowed as long as the actual con-tent is not altered or edited in any way. You shall not publish or distribute this documentation in any form or on any media, except if you distribute thedocumentation in a manner similar to how Oracle disseminates it (that is, electronically for download on a Web site with the software) or on a CD-ROMor similar medium, provided however that the documentation is disseminated together with the software on the same medium. Any other use, such as anydissemination of printed copies or use of this documentation, in whole or in part, in another publication, requires the prior written consent from an au-thorized representative of Oracle. Oracle and/or its affiliates reserve any and all rights to this documentation not expressly granted above.
For more information on the terms of this license, or for details on how the MySQL documentation is built and produced, please visit MySQL Contact &Questions.
For additional licensing information, including licenses for third-party libraries used by MySQL products, see Preface and Legal Notice.
For help with using MySQL, please visit either the MySQL Forums or MySQL Mailing Lists where you can discuss your issues with other MySQLusers.
For additional documentation on MySQL products, including translations of the documentation into other languages, and downloadable versions in vari-ety of formats, including HTML and PDF formats, see the MySQL Documentation Library.


PrefaceWhen thinking about security within MySQL you should consider a wide range of possible topics and how they might affect the secur-ity of your MySQL server and related applications.
All of the following are issues that you should be aware of:
• Security of the installation itself. The data files, log files, and the all the application files of your installation should be protected toensure that they are not readable or writable by unauthorized parties. For more information, see Chapter 2, Postinstallation Setupand Testing.
• Access control and security within the database system itself, including the users and databases granted with access to the databases,views and stored programs in use within the database. For more information, see Chapter 3, The MySQL Access Privilege System,Chapter 4, MySQL User Account Management.
• Network security of MySQL and your system. The security is related to the grants for individual users, but you may also wish to re-strict MySQL so that is only available locally, or to a limited set of hosts.
• Security of your application to ensure that SQL injections and other corruption of the data does not occur. See Chapter 1, GeneralSecurity Issues.
• Ensure that you have adequate and appropriate backups of your database files, configuration and log files. Also be sure that youhave a recovery solution in place and test that you are able to successfully recover the information from your backups. SeeChapter 5, Backup and Recovery.
iv
Chapter 1. General Security IssuesThis section describes some general security issues to be aware of and what you can do to make your MySQL installation more secureagainst attack or misuse. For information specifically about the access control system that MySQL uses for setting up user accounts andchecking database access, see Chapter 3, The MySQL Access Privilege System.
For answers to some questions that are often asked about MySQL Server security issues, see MySQL 5.5 FAQ: Security.
1.1. General Security GuidelinesAnyone using MySQL on a computer connected to the Internet should read this section to avoid the most common security mistakes.
In discussing security, we emphasize the necessity of fully protecting the entire server host (not just the MySQL server) against all typesof applicable attacks: eavesdropping, altering, playback, and denial of service. We do not cover all aspects of availability and fault toler-ance here.
MySQL uses security based on Access Control Lists (ACLs) for all connections, queries, and other operations that users can attempt toperform. There is also support for SSL-encrypted connections between MySQL clients and servers. Many of the concepts discussedhere are not specific to MySQL at all; the same general ideas apply to almost all applications.
When running MySQL, follow these guidelines whenever possible:
• Do not ever give anyone (except MySQL root accounts) access to the user table in the mysql database! This is critical.
• Learn the MySQL access privilege system. The GRANT and REVOKE statements are used for controlling access to MySQL. Do notgrant more privileges than necessary. Never grant privileges to all hosts.
Checklist:
• Try mysql -u root. If you are able to connect successfully to the server without being asked for a password, anyone canconnect to your MySQL server as the MySQL root user with full privileges! Review the MySQL installation instructions, pay-ing particular attention to the information about setting a root password. See Section 2.2, “Securing the Initial MySQL Ac-counts”.
• Use the SHOW GRANTS statement to check which accounts have access to what. Then use the REVOKE statement to removethose privileges that are not necessary.
• Do not store any plaintext passwords in your database. If your computer becomes compromised, the intruder can take the full list ofpasswords and use them. Instead, use MD5(), SHA1(), or some other one-way hashing function and store the hash value.
• Do not choose passwords from dictionaries. Special programs exist to break passwords. Even passwords like “xfish98” are very bad.Much better is “duag98” which contains the same word “fish” but typed one key to the left on a standard QWERTY keyboard. An-other method is to use a password that is taken from the first characters of each word in a sentence (for example, “Mary had a littlelamb” results in a password of “Mhall”). The password is easy to remember and type, but difficult to guess for someone who doesnot know the sentence.
• Invest in a firewall. This protects you from at least 50% of all types of exploits in any software. Put MySQL behind the firewall orin a demilitarized zone (DMZ).
Checklist:
• Try to scan your ports from the Internet using a tool such as nmap. MySQL uses port 3306 by default. This port should not beaccessible from untrusted hosts. Another simple way to check whether or not your MySQL port is open is to try the followingcommand from some remote machine, where server_host is the host name or IP address of the host on which your MySQLserver runs:
shell> telnet server_host 3306
If you get a connection and some garbage characters, the port is open, and should be closed on your firewall or router, unlessyou really have a good reason to keep it open. If telnet hangs or the connection is refused, the port is blocked, which is howyou want it to be.
• Do not trust any data entered by users of your applications. They can try to trick your code by entering special or escaped character
1
sequences in Web forms, URLs, or whatever application you have built. Be sure that your application remains secure if a user enterssomething like “; DROP DATABASE mysql;”. This is an extreme example, but large security leaks and data loss might occur asa result of hackers using similar techniques, if you do not prepare for them.
A common mistake is to protect only string data values. Remember to check numeric data as well. If an application generates aquery such as SELECT * FROM table WHERE ID=234 when a user enters the value 234, the user can enter the value 234OR 1=1 to cause the application to generate the query SELECT * FROM table WHERE ID=234 OR 1=1. As a result, theserver retrieves every row in the table. This exposes every row and causes excessive server load. The simplest way to protect fromthis type of attack is to use single quotation marks around the numeric constants: SELECT * FROM table WHEREID='234'. If the user enters extra information, it all becomes part of the string. In a numeric context, MySQL automatically con-verts this string to a number and strips any trailing nonnumeric characters from it.
Sometimes people think that if a database contains only publicly available data, it need not be protected. This is incorrect. Even if itis permissible to display any row in the database, you should still protect against denial of service attacks (for example, those thatare based on the technique in the preceding paragraph that causes the server to waste resources). Otherwise, your server becomesunresponsive to legitimate users.
Checklist:
• Try to enter single and double quotation marks (“'” and “"”) in all of your Web forms. If you get any kind of MySQL error, in-vestigate the problem right away.
• Try to modify dynamic URLs by adding %22 (“"”), %23 (“#”), and %27 (“'”) to them.
• Try to modify data types in dynamic URLs from numeric to character types using the characters shown in the previous ex-amples. Your application should be safe against these and similar attacks.
• Try to enter characters, spaces, and special symbols rather than numbers in numeric fields. Your application should remove thembefore passing them to MySQL or else generate an error. Passing unchecked values to MySQL is very dangerous!
• Check the size of data before passing it to MySQL.
• Have your application connect to the database using a user name different from the one you use for administrative purposes. Donot give your applications any access privileges they do not need.
• Many application programming interfaces provide a means of escaping special characters in data values. Properly used, this pre-vents application users from entering values that cause the application to generate statements that have a different effect than you in-tend:
• MySQL C API: Use the mysql_real_escape_string() API call.
• MySQL++: Use the escape and quote modifiers for query streams.
• PHP: Use the mysql_real_escape_string() function (available as of PHP 4.3.0, prior to that PHP version usemysql_escape_string(), and prior to PHP 4.0.3, use addslashes() ). Note that onlymysql_real_escape_string() is character set-aware; the other functions can be “bypassed” when using (invalid) multi-byte character sets. In PHP 5, you can use the mysqli extension, which supports the improved MySQL authentication protocoland passwords, as well as prepared statements with placeholders.
• Perl DBI: Use placeholders or the quote() method.
• Ruby DBI: Use placeholders or the quote() method.
• Java JDBC: Use a PreparedStatement object and placeholders.
Other programming interfaces might have similar capabilities.
• Do not transmit plain (unencrypted) data over the Internet. This information is accessible to everyone who has the time and ability tointercept it and use it for their own purposes. Instead, use an encrypted protocol such as SSL or SSH. MySQL supports internal SSLconnections as of version 4.0. Another technique is to use SSH port-forwarding to create an encrypted (and compressed) tunnel forthe communication.
• Learn to use the tcpdump and strings utilities. In most cases, you can check whether MySQL data streams are unencrypted byissuing a command like the following:
shell> tcpdump -l -i eth0 -w - src or dst port 3306 | strings
General Security Issues
2

This works under Linux and should work with small modifications under other systems.
Warning
If you do not see plaintext data, this does not always mean that the information actually is encrypted. If you need high se-curity, you should consult with a security expert.
1.2. Password Security in MySQLPasswords occur in several contexts within MySQL. The following sections provide guidelines that enable administrators and end usersto keep these passwords secure and avoid exposing them. There is also a discussion of how MySQL uses password hashing internally.
1.2.1. Administrator Guidelines for Password SecurityDatabase administrators should use the following guidelines to keep passwords secure.
MySQL stores passwords for user accounts in the mysql.user table. Access to this table should never be granted to any nonadminis-trative accounts.
A user who has access to modify the plugin directory (the value of the plugin_dir system variable) or the my.cnf file that specifiesthe location of the plugin directory can replace plugins and modify the capabilities provided by plugins.
Passwords can appear as plain text in SQL statements such as CREATE USER, GRANT, and SET PASSWORD, or statements that in-voke the PASSWORD() function. If these statements are logged by the MySQL server, the passwords become available to anyone withaccess to the logs. This applies to the general query log, the slow query log, and the binary log (see MySQL Server Logs). To guardagainst unwarranted exposure to log files, they should be located in a directory that restricts access to only the server and the databaseadministrator. If you log to tables in the mysql database, access to the tables should never be granted to any nonadministrative ac-counts.
Replication slaves store the password for the replication master in the master.info file. Access to this file should be restricted to thedatabase administrator.
Database backups that include tables or log files containing passwords should be protected using a restricted access mode.
1.2.2. End-User Guidelines for Password SecurityMySQL users should use the following guidelines to keep passwords secure.
When you run a client program to connect to the MySQL server, it is inadvisable to specify your password in a way that exposes it todiscovery by other users. The methods you can use to specify your password when you run client programs are listed here, along withan assessment of the risks of each method. In short, the safest methods are to have the client program prompt for the password or to spe-cify the password in a properly protected option file.
• Use a -pyour_pass or --password=your_pass option on the command line. For example:
shell> mysql -u francis -pfrank db_name
This is convenient but insecure, because your password becomes visible to system status programs such as ps that may be invokedby other users to display command lines. MySQL clients typically overwrite the command-line password argument with zeros dur-ing their initialization sequence. However, there is still a brief interval during which the value is visible. Also, on some systems thisoverwriting strategy is ineffective and the password remains visible to ps. (SystemV Unix systems and perhaps others are subject tothis problem.)
If your operating environment is set up to display your current command in the title bar of your terminal window, the password re-mains visible as long as the command is running, even if the command has scrolled out of view in the window content area.
• Use the -p or --password option on the command line with no password value specified. In this case, the client program solicitsthe password interactively:
shell> mysql -u francis -p db_name
General Security Issues
3

Enter password: ********
The “*” characters indicate where you enter your password. The password is not displayed as you enter it.
It is more secure to enter your password this way than to specify it on the command line because it is not visible to other users.However, this method of entering a password is suitable only for programs that you run interactively. If you want to invoke a clientfrom a script that runs noninteractively, there is no opportunity to enter the password from the keyboard. On some systems, you mayeven find that the first line of your script is read and interpreted (incorrectly) as your password.
• Store your password in an option file. For example, on Unix you can list your password in the [client] section of the .my.cnffile in your home directory:
[client]password=your_pass
To keep the password safe, the file should not be accessible to anyone but yourself. To ensure this, set the file access mode to 400or 600. For example:
shell> chmod 600 .my.cnf
To name from the command line a specific option file containing the password, use the --defaults-file=file_name option,where file_name is the full path name to the file. For example:
shell> mysql --defaults-file=/home/francis/mysql-opts
Using Option Files, discusses option files in more detail.
• Store your password in the MYSQL_PWD environment variable. See Environment Variables.
This method of specifying your MySQL password must be considered extremely insecure and should not be used. Some versions ofps include an option to display the environment of running processes. If you set MYSQL_PWD, your password is exposed to anyother user who runs ps. Even on systems without such a version of ps, it is unwise to assume that there are no other methods bywhich users can examine process environments.
On Unix, the mysql client writes a record of executed statements to a history file (see mysql History File). By default, this file isnamed .mysql_history and is created in your home directory. Passwords can appear as plain text in SQL statements such as CRE-ATE USER, GRANT, and SET PASSWORD, so if you use these statements, they are logged in the history file. To keep this file safe, usea restrictive access mode, the same way as described earlier for the .my.cnf file.
If your command interpreter is configured to maintain a history, any file in which the commands are saved will contain MySQL pass-words entered on the command line. For example, bash uses ~/.bash_history. Any such file should have a restrictive accessmode.
1.2.3. Password Hashing in MySQLMySQL user accounts are listed in the user table of the mysql database. Each MySQL account is assigned a password, although whatis stored in the Password column of the user table is not the plaintext version of the password, but a hash value computed from it.Password hash values are computed by the PASSWORD() function.
MySQL uses passwords in two phases of client/server communication:
• When a client attempts to connect to the server, there is an initial authentication step in which the client must present a passwordthat has a hash value matching the hash value stored in the user table for the account that the client wants to use.
• After the client connects, it can (if it has sufficient privileges) set or change the password hashes for accounts listed in the user ta-ble. The client can do this by using the PASSWORD() function to generate a password hash, or by using the GRANT or SETPASSWORD statements.
In other words, the server uses hash values during authentication when a client first attempts to connect. The server generates hash val-ues if a connected client invokes the PASSWORD() function or uses a GRANT or SET PASSWORD statement to set or change a pass-word.
General Security Issues
4
The password hashing mechanism was updated in MySQL 4.1 to provide better security and to reduce the risk of passwords being inter-cepted. However, this new mechanism is understood only by MySQL 4.1 (and newer) servers and clients, which can result in somecompatibility problems. A 4.1 or newer client can connect to a pre-4.1 server, because the client understands both the old and new pass-word hashing mechanisms. However, a pre-4.1 client that attempts to connect to a 4.1 or newer server may run into difficulties. For ex-ample, a 3.23 mysql client that attempts to connect to a 5.1 server may fail with the following error message:
shell> mysql -h localhost -u rootClient does not support authentication protocol requestedby server; consider upgrading MySQL client
Another common example of this phenomenon occurs for attempts to use the older PHP mysql extension after upgrading to MySQL4.1 or newer. (See Common Problems with MySQL and PHP.)
The following discussion describes the differences between the old and new password mechanisms, and what you should do if you up-grade your server but need to maintain backward compatibility with pre-4.1 clients. Additional information can be found in Clientdoes not support authentication protocol. This information is of particular importance to PHP programmers migrat-ing MySQL databases from version 4.0 or lower to version 4.1 or higher.
Note
This discussion contrasts 4.1 behavior with pre-4.1 behavior, but the 4.1 behavior described here actually begins with4.1.1. MySQL 4.1.0 is an “odd” release because it has a slightly different mechanism than that implemented in 4.1.1 andup. Differences between 4.1.0 and more recent versions are described further in MySQL 5.0 Reference Manual.
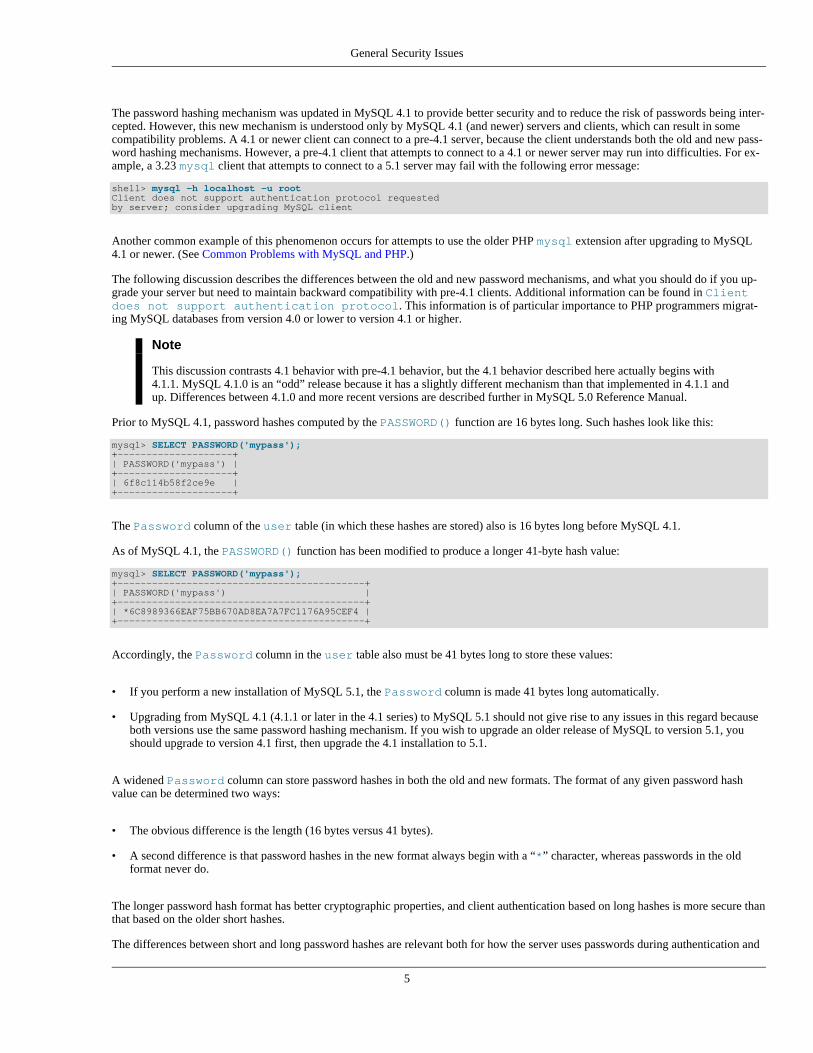
Prior to MySQL 4.1, password hashes computed by the PASSWORD() function are 16 bytes long. Such hashes look like this:
mysql> SELECT PASSWORD('mypass');+--------------------+| PASSWORD('mypass') |+--------------------+| 6f8c114b58f2ce9e |+--------------------+
The Password column of the user table (in which these hashes are stored) also is 16 bytes long before MySQL 4.1.
As of MySQL 4.1, the PASSWORD() function has been modified to produce a longer 41-byte hash value:
mysql> SELECT PASSWORD('mypass');+-------------------------------------------+| PASSWORD('mypass') |+-------------------------------------------+| *6C8989366EAF75BB670AD8EA7A7FC1176A95CEF4 |+-------------------------------------------+
Accordingly, the Password column in the user table also must be 41 bytes long to store these values:
• If you perform a new installation of MySQL 5.1, the Password column is made 41 bytes long automatically.
• Upgrading from MySQL 4.1 (4.1.1 or later in the 4.1 series) to MySQL 5.1 should not give rise to any issues in this regard becauseboth versions use the same password hashing mechanism. If you wish to upgrade an older release of MySQL to version 5.1, youshould upgrade to version 4.1 first, then upgrade the 4.1 installation to 5.1.
A widened Password column can store password hashes in both the old and new formats. The format of any given password hashvalue can be determined two ways:
• The obvious difference is the length (16 bytes versus 41 bytes).
• A second difference is that password hashes in the new format always begin with a “*” character, whereas passwords in the oldformat never do.
The longer password hash format has better cryptographic properties, and client authentication based on long hashes is more secure thanthat based on the older short hashes.
The differences between short and long password hashes are relevant both for how the server uses passwords during authentication and
General Security Issues
5

for how it generates password hashes for connected clients that perform password-changing operations.
The way in which the server uses password hashes during authentication is affected by the width of the Password column:
• If the column is short, only short-hash authentication is used.
• If the column is long, it can hold either short or long hashes, and the server can use either format:
• Pre-4.1 clients can connect, although because they know only about the old hashing mechanism, they can authenticate only us-ing accounts that have short hashes.
• 4.1 and later clients can authenticate using accounts that have short or long hashes.
Even for short-hash accounts, the authentication process is actually a bit more secure for 4.1 and later clients than for older clients. Interms of security, the gradient from least to most secure is:
• Pre-4.1 client authenticating with short password hash
• 4.1 or later client authenticating with short password hash
• 4.1 or later client authenticating with long password hash
The way in which the server generates password hashes for connected clients is affected by the width of the Password column and bythe --old-passwords option. A 4.1 or later server generates long hashes only if certain conditions are met: The Password columnmust be wide enough to hold long values and the --old-passwords option must not be given. These conditions apply as follows:
• The Password column must be wide enough to hold long hashes (41 bytes). If the column has not been updated and still has thepre-4.1 width of 16 bytes, the server notices that long hashes cannot fit into it and generates only short hashes when a client per-forms password-changing operations using PASSWORD(), GRANT, or SET PASSWORD. This is the behavior that occurs if youhave upgraded to 4.1 but have not yet run the mysql_upgrade program to widen the Password column.
• If the Password column is wide, it can store either short or long password hashes. In this case, PASSWORD(), GRANT, and SETPASSWORD generate long hashes unless the server was started with the --old-passwords option. That option forces the serverto generate short password hashes instead.
The purpose of the --old-passwords option is to enable you to maintain backward compatibility with pre-4.1 clients under circum-stances where the server would otherwise generate long password hashes. The option does not affect authentication (4.1 and later clientscan still use accounts that have long password hashes), but it does prevent creation of a long password hash in the user table as the res-ult of a password-changing operation. Were that to occur, the account no longer could be used by pre-4.1 clients. Without the --old-passwords option, the following undesirable scenario is possible:
• An old client connects to an account that has a short password hash.
• The client changes its own password. Without --old-passwords, this results in the account having a long password hash.
• The next time the old client attempts to connect to the account, it cannot, because the account has a long password hash that requiresthe new hashing mechanism during authentication. (Once an account has a long password hash in the user table, only 4.1 and laterclients can authenticate for it, because pre-4.1 clients do not understand long hashes.)
This scenario illustrates that, if you must support older pre-4.1 clients, it is dangerous to run a 4.1 or newer server without using the --old-passwords option. By running the server with --old-passwords, password-changing operations do not generate longpassword hashes and thus do not cause accounts to become inaccessible to older clients. (Those clients cannot inadvertently lock them-selves out by changing their password and ending up with a long password hash.)
The downside of the --old-passwords option is that any passwords you create or change use short hashes, even for 4.1 clients.Thus, you lose the additional security provided by long password hashes. If you want to create an account that has a long hash (for ex-ample, for use by 4.1 clients), you must do so while running the server without --old-passwords.
General Security Issues
6

The following scenarios are possible for running a 4.1 or later server:
Scenario 1: Short Password column in user table:
• Only short hashes can be stored in the Password column.
• The server uses only short hashes during client authentication.
• For connected clients, password hash-generating operations involving PASSWORD(), GRANT, or SET PASSWORD use shorthashes exclusively. Any change to an account's password results in that account having a short password hash.
• The --old-passwords option can be used but is superfluous because with a short Password column, the server generates onlyshort password hashes anyway.
Scenario 2: Long Password column; server not started with --old-passwords option:
• Short or long hashes can be stored in the Password column.
• 4.1 and later clients can authenticate using accounts that have short or long hashes.
• Pre-4.1 clients can authenticate only using accounts that have short hashes.
• For connected clients, password hash-generating operations involving PASSWORD(), GRANT, or SET PASSWORD use long hashesexclusively. A change to an account's password results in that account having a long password hash.
As indicated earlier, a danger in this scenario is that it is possible for accounts that have a short password hash to become inaccessible topre-4.1 clients. A change to such an account's password made using GRANT, PASSWORD(), or SET PASSWORD results in the accountbeing given a long password hash. From that point on, no pre-4.1 client can authenticate to that account until the client upgrades to 4.1.
To deal with this problem, you can change a password in a special way. For example, normally you use SET PASSWORD as follows tochange an account password:
SET PASSWORD FOR 'some_user'@'some_host' = PASSWORD('mypass');
To change the password but create a short hash, use the OLD_PASSWORD() function instead:
SET PASSWORD FOR 'some_user'@'some_host' = OLD_PASSWORD('mypass');
OLD_PASSWORD() is useful for situations in which you explicitly want to generate a short hash.
Scenario 3: Long Password column; 4.1 or newer server started with --old-passwords option:
• Short or long hashes can be stored in the Password column.
• 4.1 and later clients can authenticate for accounts that have short or long hashes (but note that it is possible to create long hashesonly when the server is started without --old-passwords).
• Pre-4.1 clients can authenticate only for accounts that have short hashes.
• For connected clients, password hash-generating operations involving PASSWORD(), GRANT, or SET PASSWORD use shorthashes exclusively. Any change to an account's password results in that account having a short password hash.
In this scenario, you cannot create accounts that have long password hashes, because the --old-passwords option prevents genera-tion of long hashes. Also, if you create an account with a long hash before using the --old-passwords option, changing the ac-count's password while --old-passwords is in effect results in the account being given a short password, causing it to lose the se-curity benefits of a longer hash.
The disadvantages for these scenarios may be summarized as follows:
In scenario 1, you cannot take advantage of longer hashes that provide more secure authentication.
General Security Issues
7
In scenario 2, accounts with short hashes become inaccessible to pre-4.1 clients if you change their passwords without explicitly usingOLD_PASSWORD().
In scenario 3, --old-passwords prevents accounts with short hashes from becoming inaccessible, but password-changing opera-tions cause accounts with long hashes to revert to short hashes, and you cannot change them back to long hashes while --old-passwords is in effect.
1.2.4. Implications of Password Hashing Changes in MySQL 4.1 for ApplicationPrograms
An upgrade to MySQL version 4.1 or later can cause compatibility issues for applications that use PASSWORD() to generate passwordsfor their own purposes. Applications really should not do this, because PASSWORD() should be used only to manage passwords forMySQL accounts. But some applications use PASSWORD() for their own purposes anyway.
If you upgrade to 4.1 or later from a pre-4.1 version of MySQL and run the server under conditions where it generates long passwordhashes, an application using PASSWORD() for its own passwords breaks. The recommended course of action in such cases is to modifythe application to use another function, such as SHA1() or MD5(), to produce hashed values. If that is not possible, you can use theOLD_PASSWORD() function, which is provided for generate short hashes in the old format. However, you should note thatOLD_PASSWORD() may one day no longer be supported.
If the server is running under circumstances where it generates short hashes, OLD_PASSWORD() is available but is equivalent toPASSWORD().
PHP programmers migrating their MySQL databases from version 4.0 or lower to version 4.1 or higher should see MySQL PHP API.
1.3. Making MySQL Secure Against AttackersWhen you connect to a MySQL server, you should use a password. The password is not transmitted in clear text over the connection.Password handling during the client connection sequence was upgraded in MySQL 4.1.1 to be very secure. If you are still using pre-4.1.1-style passwords, the encryption algorithm is not as strong as the newer algorithm. With some effort, a clever attacker who cansniff the traffic between the client and the server can crack the password. (See Section 1.2.3, “Password Hashing in MySQL”, for a dis-cussion of the different password handling methods.)
All other information is transferred as text, and can be read by anyone who is able to watch the connection. If the connection betweenthe client and the server goes through an untrusted network, and you are concerned about this, you can use the compressed protocol tomake traffic much more difficult to decipher. You can also use MySQL's internal SSL support to make the connection even more se-cure. See Section 4.6, “Using SSL for Secure Connections”. Alternatively, use SSH to get an encrypted TCP/IP connection between aMySQL server and a MySQL client. You can find an Open Source SSH client at http://www.openssh.org/, and a commercial SSH clientat http://www.ssh.com/.
To make a MySQL system secure, you should strongly consider the following suggestions:
• Require all MySQL accounts to have a password. A client program does not necessarily know the identity of the person running it.It is common for client/server applications that the user can specify any user name to the client program. For example, anyone canuse the mysql program to connect as any other person simply by invoking it as mysql -u other_user db_name if oth-er_user has no password. If all accounts have a password, connecting using another user's account becomes much more difficult.
For a discussion of methods for setting passwords, see Section 4.5, “Assigning Account Passwords”.
• Never run the MySQL server as the Unix root user. This is extremely dangerous, because any user with the FILE privilege is ableto cause the server to create files as root (for example, ~root/.bashrc). To prevent this, mysqld refuses to run as root un-less that is specified explicitly using the --user=root option.
mysqld can (and should) be run as an ordinary, unprivileged user instead. You can create a separate Unix account named mysqlto make everything even more secure. Use this account only for administering MySQL. To start mysqld as a different Unix user,add a user option that specifies the user name in the [mysqld] group of the my.cnf option file where you specify server op-tions. For example:
[mysqld]user=mysql
This causes the server to start as the designated user whether you start it manually or by using mysqld_safe or mysql.server.
General Security Issues
8
For more details, see Section 1.6, “How to Run MySQL as a Normal User”.
Running mysqld as a Unix user other than root does not mean that you need to change the root user name in the user table.User names for MySQL accounts have nothing to do with user names for Unix accounts.
• Do not permit the use of symlinks to tables. (This capability can be disabled with the --skip-symbolic-links option.) This isespecially important if you run mysqld as root, because anyone that has write access to the server's data directory then could de-lete any file in the system! See Using Symbolic Links for Tables on Unix.
• Make sure that the only Unix user account with read or write privileges in the database directories is the account that is used for run-ning mysqld.
• Do not grant the PROCESS or SUPER privilege to nonadministrative users. The output of mysqladmin processlist andSHOW PROCESSLIST shows the text of any statements currently being executed, so any user who is permitted to see the serverprocess list might be able to see statements issued by other users such as UPDATE user SET pass-word=PASSWORD('not_secure').
mysqld reserves an extra connection for users who have the SUPER privilege, so that a MySQL root user can log in and checkserver activity even if all normal connections are in use.
The SUPER privilege can be used to terminate client connections, change server operation by changing the value of system vari-ables, and control replication servers.
• Do not grant the FILE privilege to nonadministrative users. Any user that has this privilege can write a file anywhere in the file sys-tem with the privileges of the mysqld daemon. To make this a bit safer, files generated with SELECT ... INTO OUTFILE donot overwrite existing files and are writable by everyone.
The FILE privilege may also be used to read any file that is world-readable or accessible to the Unix user that the server runs as.With this privilege, you can read any file into a database table. This could be abused, for example, by using LOAD DATA to load /etc/passwd into a table, which then can be displayed with SELECT.
• Stored programs and views should be written using the security guidelines discussed in Access Control for Stored Programs andViews.
• If you do not trust your DNS, you should use IP addresses rather than host names in the grant tables. In any case, you should be verycareful about creating grant table entries using host name values that contain wildcards.
• If you want to restrict the number of connections permitted to a single account, you can do so by setting themax_user_connections variable in mysqld. The GRANT statement also supports resource control options for limiting the ex-tent of server use permitted to an account. See GRANT Syntax.
• If the plugin directory is writable by the server, it may be possible for a user to write executable code to a file in the directory usingSELECT ... INTO DUMPFILE. This can be prevented by making plugin_dir read only to the server or by setting --secure-file-priv to a directory where SELECT writes can be made safely.
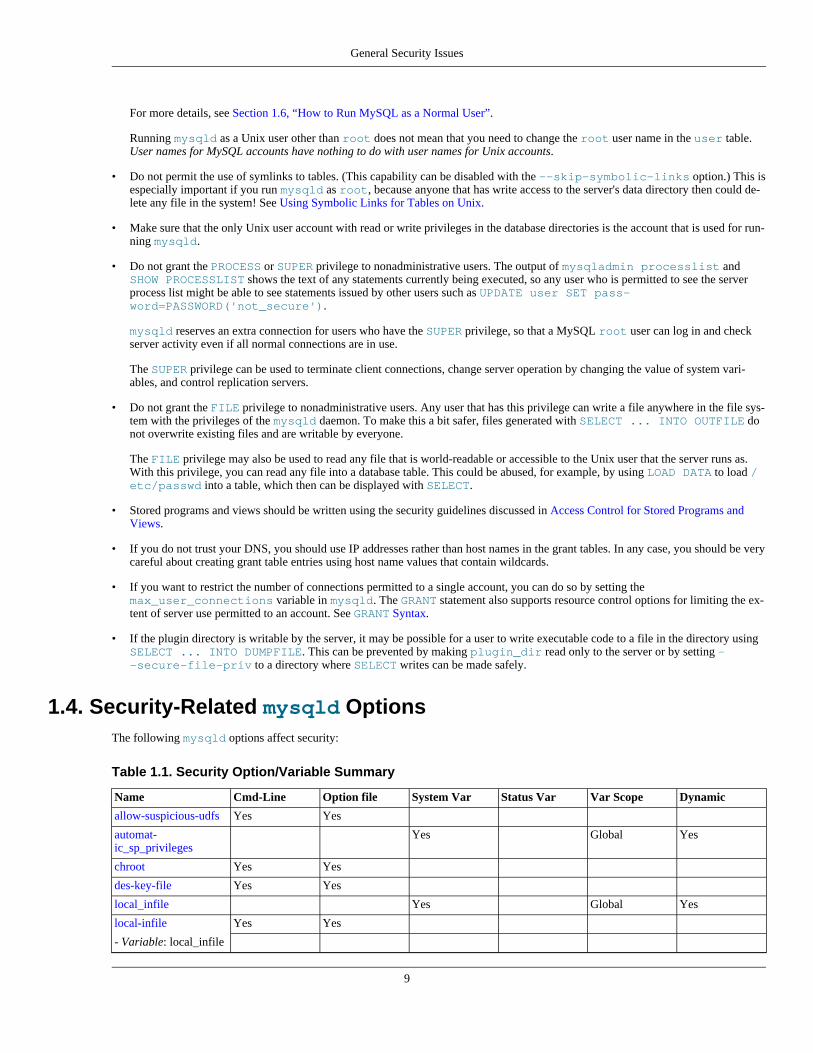
1.4. Security-Related mysqld OptionsThe following mysqld options affect security:
Table 1.1. Security Option/Variable Summary
Name Cmd-Line Option file System Var Status Var Var Scope Dynamic
allow-suspicious-udfs Yes Yes
automat-ic_sp_privileges
Yes Global Yes
chroot Yes Yes
des-key-file Yes Yes
local_infile Yes Global Yes
local-infile Yes Yes
- Variable: local_infile
General Security Issues
9

Name Cmd-Line Option file System Var Status Var Var Scope Dynamic
old-passwords Yes Yes Both Yes
- Variable:old_passwords
Yes Both Yes
safe-show-database Yes Yes Yes Global Yes
safe-user-create Yes Yes
secure-auth Yes Yes Global Yes
- Variable: secure_auth Yes Global Yes
secure-file-priv Yes Yes Global No
- Variable: se-cure_file_priv
Yes Global No
skip-grant-tables Yes Yes
skip-name-resolve Yes Yes Global No
- Variable:skip_name_resolve
Yes Global No
skip-networking Yes Yes Global No
- Variable:skip_networking
Yes Global No
skip-show-database Yes Yes Global No
- Variable:skip_show_database
Yes Global No
• --allow-suspicious-udfs
This option controls whether user-defined functions that have only an xxx symbol for the main function can be loaded. By default,the option is off and only UDFs that have at least one auxiliary symbol can be loaded; this prevents attempts at loading functionsfrom shared object files other than those containing legitimate UDFs. See User-Defined Function Security Precautions.
• --local-infile[={0|1}]
If you start the server with --local-infile=0, clients cannot use LOCAL in LOAD DATA statements. See Section 1.5,“Security Issues with LOAD DATA LOCAL”.
• --old-passwords
Force the server to generate short (pre-4.1) password hashes for new passwords. This is useful for compatibility when the servermust support older client programs. See Section 1.2.3, “Password Hashing in MySQL”.
• --safe-user-create
If this option is enabled, a user cannot create new MySQL users by using the GRANT statement unless the user has the INSERTprivilege for the mysql.user table or any column in the table. If you want a user to have the ability to create new users that havethose privileges that the user has the right to grant, you should grant the user the following privilege:
GRANT INSERT(user) ON mysql.user TO 'user_name'@'host_name';
This ensures that the user cannot change any privilege columns directly, but has to use the GRANT statement to give privileges toother users.
• --secure-auth
Disallow authentication for accounts that have old (pre-4.1) passwords.
The mysql client also has a --secure-auth option, which prevents connections to a server if the server requires a password inold format for the client account.
• --secure-file-priv=path
General Security Issues
10

This option limits the effect of the LOAD_FILE() function and the LOAD DATA and SELECT ... INTO OUTFILE statementsto work only with files in the specified directory.
This option was added in MySQL 5.1.17.
• --skip-grant-tables
This option causes the server to start without using the privilege system at all, which gives anyone with access to the server unres-tricted access to all databases. You can cause a running server to start using the grant tables again by executing mysqladminflush-privileges or mysqladmin reload command from a system shell, or by issuing a MySQL FLUSH PRIVILEGESstatement after connecting to the server. This option also suppresses loading of plugins that were installed with the INSTALLPLUGIN statement, user-defined functions (UDFs), and, beginning with MySQL 5.1.17, scheduled events. To cause plugins to beloaded anyway, use the --plugin-load option.
--skip-grant-tables is unavailable if MySQL was configured with the --disable-grant-options option. SeeMySQL Source-Configuration Options.
• --skip-merge
Disable the MERGE storage engine. This option was added in MySQL 5.1.12 and removed in 5.1.14.
• --skip-name-resolve
Host names are not resolved. All Host column values in the grant tables must be IP addresses or localhost.
• --skip-networking
Do not permit TCP/IP connections over the network. All connections to mysqld must be made using Unix socket files.
• --skip-show-database
With this option, the SHOW DATABASES statement is permitted only to users who have the SHOW DATABASES privilege, and thestatement displays all database names. Without this option, SHOW DATABASES is permitted to all users, but displays each databasename only if the user has the SHOW DATABASES privilege or some privilege for the database. Note that any global privilege is aprivilege for the database.
• --ssl*
Options that begin with --ssl specify whether to permit clients to connect using SSL and indicate where to find SSL keys and cer-tificates. See Section 4.6.3, “SSL Command Options”.
1.5. Security Issues with LOAD DATA LOCALThe LOAD DATA statement can load a file that is located on the server host, or it can load a file that is located on the client host whenthe LOCAL keyword is specified.
There are two potential security issues with supporting the LOCAL version of LOAD DATA statements:
• The transfer of the file from the client host to the server host is initiated by the MySQL server. In theory, a patched server could bebuilt that would tell the client program to transfer a file of the server's choosing rather than the file named by the client in the LOADDATA statement. Such a server could access any file on the client host to which the client user has read access.
• In a Web environment where the clients are connecting from a Web server, a user could use LOAD DATA LOCAL to read any filesthat the Web server process has read access to (assuming that a user could run any command against the SQL server). In this envir-onment, the client with respect to the MySQL server actually is the Web server, not the remote program being run by the user whoconnects to the Web server.
To deal with these problems, we changed how LOAD DATA LOCAL is handled as of MySQL 3.23.49 and MySQL 4.0.2 (4.0.13 onWindows):
• By default, all MySQL clients and libraries in binary distributions are compiled with the --enable-local-infile option, to
General Security Issues
11

be compatible with MySQL 3.23.48 and before.
• If you build MySQL from source but do not invoke configure with the --enable-local-infile option, LOAD DATALOCAL cannot be used by any client unless it is written explicitly to invoke mysql_options(...MYSQL_OPT_LOCAL_INFILE, 0). See mysql_options().
• You can disable all LOAD DATA LOCAL statements from the server side by starting mysqld with the --local-infile=0 op-tion.
• For the mysql command-line client, enable LOAD DATA LOCAL by specifying the --local-infile[=1] option, or disableit with the --local-infile=0 option. For mysqlimport, local data file loading is off by default; enable it with the --localor -L option. In any case, successful use of a local load operation requires that the server permits it.
• If you use LOAD DATA LOCAL in Perl scripts or other programs that read the [client] group from option files, you can add thelocal-infile=1 option to that group. However, to keep this from causing problems for programs that do not understand loc-al-infile, specify it using the loose- prefix:
[client]loose-local-infile=1
• If LOAD DATA LOCAL is disabled, either in the server or the client, a client that attempts to issue such a statement receives the fol-lowing error message:
ERROR 1148: The used command is not allowed with this MySQL version
1.6. How to Run MySQL as a Normal UserOn Windows, you can run the server as a Windows service using a normal user account.
On Unix, the MySQL server mysqld can be started and run by any user. However, you should avoid running the server as the Unixroot user for security reasons. To change mysqld to run as a normal unprivileged Unix user user_name, you must do the follow-ing:
1. Stop the server if it is running (use mysqladmin shutdown).
2. Change the database directories and files so that user_name has privileges to read and write files in them (you might need to dothis as the Unix root user):
shell> chown -R user_name /path/to/mysql/datadir
If you do not do this, the server will not be able to access databases or tables when it runs as user_name.
If directories or files within the MySQL data directory are symbolic links, chown -R might not follow symbolic links for you. Ifit does not, you will also need to follow those links and change the directories and files they point to.
3. Start the server as user user_name. Another alternative is to start mysqld as the Unix root user and use the--user=user_name option. mysqld starts up, then switches to run as the Unix user user_name before accepting any con-nections.
4. To start the server as the given user automatically at system startup time, specify the user name by adding a user option to the[mysqld] group of the /etc/my.cnf option file or the my.cnf option file in the server's data directory. For example:
[mysqld]user=user_name
If your Unix machine itself is not secured, you should assign passwords to the MySQL root accounts in the grant tables. Otherwise,any user with a login account on that machine can run the mysql client with a --user=root option and perform any operation. (It isa good idea to assign passwords to MySQL accounts in any case, but especially so when other login accounts exist on the server host.)See Chapter 2, Postinstallation Setup and Testing.
General Security Issues
12
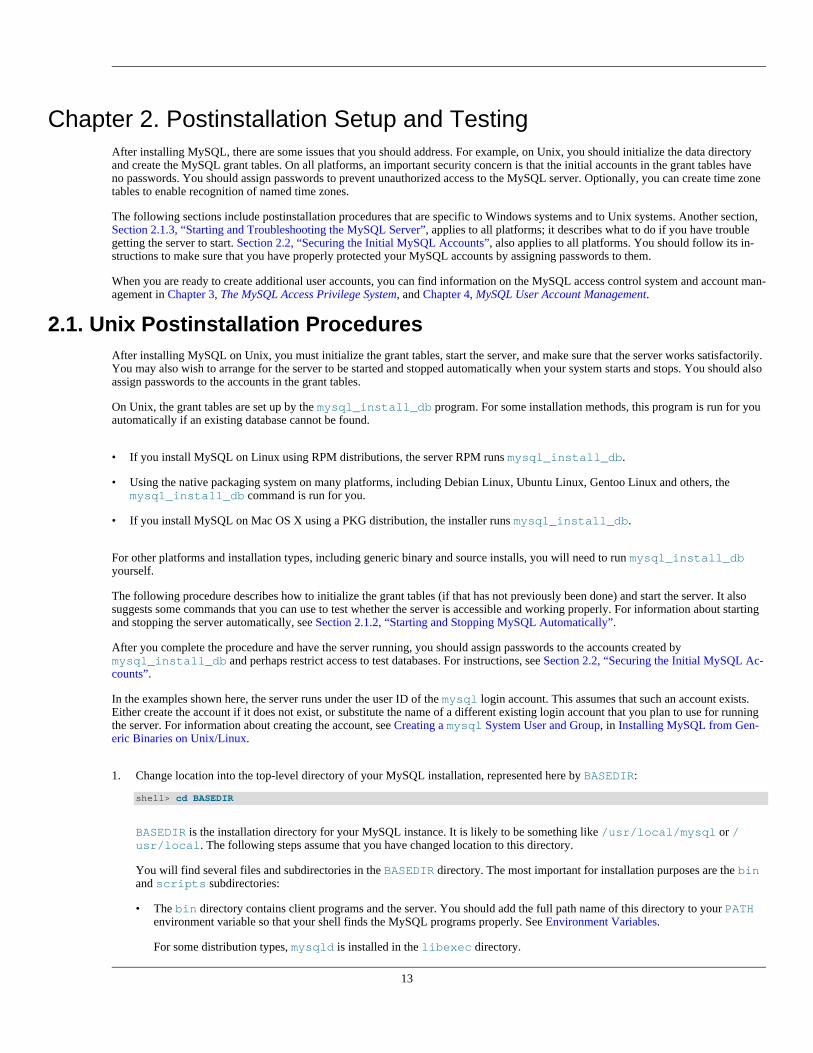
Chapter 2. Postinstallation Setup and TestingAfter installing MySQL, there are some issues that you should address. For example, on Unix, you should initialize the data directoryand create the MySQL grant tables. On all platforms, an important security concern is that the initial accounts in the grant tables haveno passwords. You should assign passwords to prevent unauthorized access to the MySQL server. Optionally, you can create time zonetables to enable recognition of named time zones.
The following sections include postinstallation procedures that are specific to Windows systems and to Unix systems. Another section,Section 2.1.3, “Starting and Troubleshooting the MySQL Server”, applies to all platforms; it describes what to do if you have troublegetting the server to start. Section 2.2, “Securing the Initial MySQL Accounts”, also applies to all platforms. You should follow its in-structions to make sure that you have properly protected your MySQL accounts by assigning passwords to them.
When you are ready to create additional user accounts, you can find information on the MySQL access control system and account man-agement in Chapter 3, The MySQL Access Privilege System, and Chapter 4, MySQL User Account Management.
2.1. Unix Postinstallation ProceduresAfter installing MySQL on Unix, you must initialize the grant tables, start the server, and make sure that the server works satisfactorily.You may also wish to arrange for the server to be started and stopped automatically when your system starts and stops. You should alsoassign passwords to the accounts in the grant tables.
On Unix, the grant tables are set up by the mysql_install_db program. For some installation methods, this program is run for youautomatically if an existing database cannot be found.
• If you install MySQL on Linux using RPM distributions, the server RPM runs mysql_install_db.
• Using the native packaging system on many platforms, including Debian Linux, Ubuntu Linux, Gentoo Linux and others, themysql_install_db command is run for you.
• If you install MySQL on Mac OS X using a PKG distribution, the installer runs mysql_install_db.
For other platforms and installation types, including generic binary and source installs, you will need to run mysql_install_dbyourself.
The following procedure describes how to initialize the grant tables (if that has not previously been done) and start the server. It alsosuggests some commands that you can use to test whether the server is accessible and working properly. For information about startingand stopping the server automatically, see Section 2.1.2, “Starting and Stopping MySQL Automatically”.
After you complete the procedure and have the server running, you should assign passwords to the accounts created bymysql_install_db and perhaps restrict access to test databases. For instructions, see Section 2.2, “Securing the Initial MySQL Ac-counts”.
In the examples shown here, the server runs under the user ID of the mysql login account. This assumes that such an account exists.Either create the account if it does not exist, or substitute the name of a different existing login account that you plan to use for runningthe server. For information about creating the account, see Creating a mysql System User and Group, in Installing MySQL from Gen-eric Binaries on Unix/Linux.
1. Change location into the top-level directory of your MySQL installation, represented here by BASEDIR:
shell> cd BASEDIR
BASEDIR is the installation directory for your MySQL instance. It is likely to be something like /usr/local/mysql or /usr/local. The following steps assume that you have changed location to this directory.
You will find several files and subdirectories in the BASEDIR directory. The most important for installation purposes are the binand scripts subdirectories:
• The bin directory contains client programs and the server. You should add the full path name of this directory to your PATHenvironment variable so that your shell finds the MySQL programs properly. See Environment Variables.
For some distribution types, mysqld is installed in the libexec directory.
13

• The scripts directory contains the mysql_install_db script used to initialize the mysql database containing the granttables that store the server access permissions.
For some distribution types, mysql_install_db is installed in the bin directory.
2. If necessary, ensure that the distribution contents are accessible to mysql. If you installed the distribution as mysql, no furtheraction is required. If you installed the distribution as root, its contents will be owned by root. Change its ownership to mysqlby executing the following commands as root in the installation directory. The first command changes the owner attribute of thefiles to the mysql user. The second changes the group attribute to the mysql group.
shell> chown -R mysql .shell> chgrp -R mysql .
3. If necessary, run the mysql_install_db program to set up the initial MySQL grant tables containing the privileges that de-termine how users are permitted to connect to the server. You will need to do this if you used a distribution type for which the in-stallation procedure does not run the program for you.
Typically, mysql_install_db needs to be run only the first time you install MySQL, so you can skip this step if you are up-grading an existing installation, However, mysql_install_db does not overwrite any existing privilege tables, so it should besafe to run in any circumstances.
The exact location of mysql_install_db depends on the layout for your given installation. To initialize the grant tables, useone of the following commands, depending on whether mysql_install_db is located in the bin or scripts directory:
shell> scripts/mysql_install_db --user=mysqlshell> bin/mysql_install_db --user=mysql
It might be necessary to specify other options such as --basedir or --datadir if mysql_install_db does not identifythe correct locations for the installation directory or data directory. For example:
shell> scripts/mysql_install_db --user=mysql \--basedir=/opt/mysql/mysql \--datadir=/opt/mysql/mysql/data
The mysql_install_db script creates the server's data directory with mysql as the owner. Under the data directory, it createsdirectories for the mysql database that holds the grant tables and the test database that you can use to test MySQL. The scriptalso creates privilege table entries for root and anonymous-user accounts. The accounts have no passwords initially. Section 2.2,“Securing the Initial MySQL Accounts”, describes the initial privileges. Briefly, these privileges permit the MySQL root user todo anything, and permit anybody to create or use databases with a name of test or starting with test_. See Chapter 3, TheMySQL Access Privilege System, for a complete listing and description of the grant tables.
It is important to make sure that the database directories and files are owned by the mysql login account so that the server hasread and write access to them when you run it later. To ensure this if you run mysql_install_db as root, include the --user option as shown. Otherwise, you should execute the script while logged in as mysql, in which case you can omit the --user option from the command.
If you do not want to have the test database, you can remove it after starting the server, using the instructions in Section 2.2,“Securing the Initial MySQL Accounts”.
If you have trouble with mysql_install_db at this point, see Section 2.1.1, “Problems Running mysql_install_db”.
4. Most of the MySQL installation can be owned by root if you like. The exception is that the data directory must be owned bymysql. To accomplish this, run the following commands as root in the installation directory. For some distribution types, thedata directory might be named var rather than data; adjust the second command accordingly.
shell> chown -R root .shell> chown -R mysql data
5. If the plugin directory (the directory named by the plugin_dir system variable) is writable by the server, it may be possible fora user to write executable code to a file in the directory using SELECT ... INTO DUMPFILE. This can be prevented by mak-ing plugin_dir read only to the server or by setting --secure-file-priv to a directory where SELECT writes can bemade safely.
6. If you installed MySQL using a source distribution, you may want to optionally copy one of the provided configuration files from
Postinstallation Setup and Testing
14
the support-files directory into your /etc directory. There are different sample configuration files for different use cases,server types, and CPU and RAM configurations. If you want to use one of these standard files, you should copy it to /etc/my.cnf, or /etc/mysql/my.cnf and edit and check the configuration before starting your MySQL server for the firsttime.
If you do not copy one of the standard configuration files, the MySQL server will be started with the default settings.
If you want MySQL to start automatically when you boot your machine, you can copy support-files/mysql.server tothe location where your system has its startup files. More information can be found in the mysql.server script itself, and inSection 2.1.2, “Starting and Stopping MySQL Automatically”.
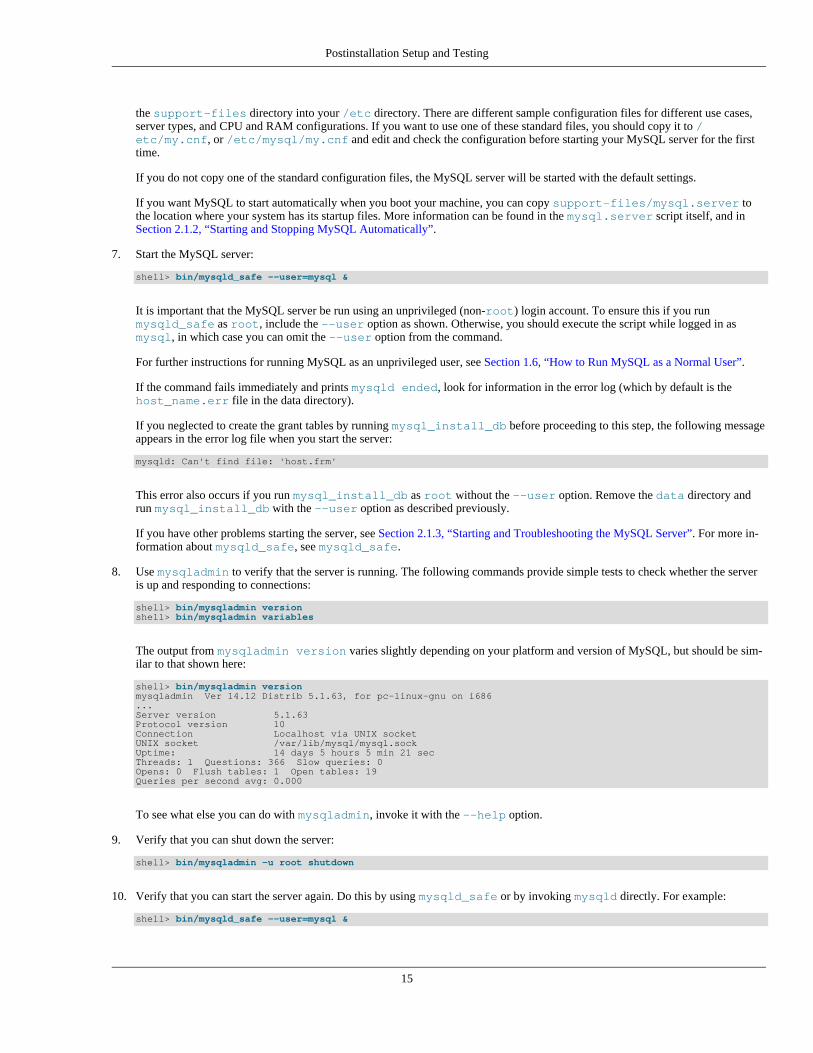
7. Start the MySQL server:
shell> bin/mysqld_safe --user=mysql &
It is important that the MySQL server be run using an unprivileged (non-root) login account. To ensure this if you runmysqld_safe as root, include the --user option as shown. Otherwise, you should execute the script while logged in asmysql, in which case you can omit the --user option from the command.
For further instructions for running MySQL as an unprivileged user, see Section 1.6, “How to Run MySQL as a Normal User”.
If the command fails immediately and prints mysqld ended, look for information in the error log (which by default is thehost_name.err file in the data directory).
If you neglected to create the grant tables by running mysql_install_db before proceeding to this step, the following messageappears in the error log file when you start the server:
mysqld: Can't find file: 'host.frm'
This error also occurs if you run mysql_install_db as root without the --user option. Remove the data directory andrun mysql_install_db with the --user option as described previously.
If you have other problems starting the server, see Section 2.1.3, “Starting and Troubleshooting the MySQL Server”. For more in-formation about mysqld_safe, see mysqld_safe.
8. Use mysqladmin to verify that the server is running. The following commands provide simple tests to check whether the serveris up and responding to connections:
shell> bin/mysqladmin versionshell> bin/mysqladmin variables
The output from mysqladmin version varies slightly depending on your platform and version of MySQL, but should be sim-ilar to that shown here:
shell> bin/mysqladmin versionmysqladmin Ver 14.12 Distrib 5.1.63, for pc-linux-gnu on i686...Server version 5.1.63Protocol version 10Connection Localhost via UNIX socketUNIX socket /var/lib/mysql/mysql.sockUptime: 14 days 5 hours 5 min 21 secThreads: 1 Questions: 366 Slow queries: 0Opens: 0 Flush tables: 1 Open tables: 19Queries per second avg: 0.000
To see what else you can do with mysqladmin, invoke it with the --help option.
9. Verify that you can shut down the server:
shell> bin/mysqladmin -u root shutdown
10. Verify that you can start the server again. Do this by using mysqld_safe or by invoking mysqld directly. For example:
shell> bin/mysqld_safe --user=mysql &
Postinstallation Setup and Testing
15

If mysqld_safe fails, see Section 2.1.3, “Starting and Troubleshooting the MySQL Server”.
11. Run some simple tests to verify that you can retrieve information from the server. The output should be similar to what is shownhere:
shell> bin/mysqlshow+--------------------+| Databases |+--------------------+| information_schema || mysql || test |+--------------------+shell> bin/mysqlshow mysqlDatabase: mysql+---------------------------+| Tables |+---------------------------+| columns_priv || db || event || func || help_category || help_keyword || help_relation || help_topic || host || plugin || proc || procs_priv || servers || tables_priv || time_zone || time_zone_leap_second || time_zone_name || time_zone_transition || time_zone_transition_type || user |+---------------------------+shell> bin/mysql -e "SELECT Host,Db,User FROM db" mysql+------+--------+------+| host | db | user |+------+--------+------+| % | test | || % | test_% | |+------+--------+------+
12. There is a benchmark suite in the sql-bench directory (under the MySQL installation directory) that you can use to comparehow MySQL performs on different platforms. The benchmark suite is written in Perl. It requires the Perl DBI module that providesa database-independent interface to the various databases, and some other additional Perl modules:
DBIDBD::mysqlData::DumperData::ShowTable
These modules can be obtained from CPAN (http://www.cpan.org/). See also Installing Perl on Unix.
The sql-bench/Results directory contains the results from many runs against different databases and platforms. To run alltests, execute these commands:
shell> cd sql-benchshell> perl run-all-tests
If you do not have the sql-bench directory, you probably installed MySQL using RPM files other than the source RPM. (Thesource RPM includes the sql-bench benchmark directory.) In this case, you must first install the benchmark suite before youcan use it. There are separate benchmark RPM files named mysql-bench-VERSION.i386.rpm that contain benchmark codeand data.
If you have a source distribution, there are also tests in its tests subdirectory that you can run. For example, to runauto_increment.tst, execute this command from the top-level directory of your source distribution:
shell> mysql -vvf test < ./tests/auto_increment.tst
The expected result of the test can be found in the ./tests/auto_increment.res file.
Postinstallation Setup and Testing
16

13. At this point, you should have the server running. However, none of the initial MySQL accounts have a password, and the serverpermits permissive access to test databases. To tighten security, follow the instructions in Section 2.2, “Securing the Initial MySQLAccounts”.
The MySQL 5.1 installation procedure creates time zone tables in the mysql database but does not populate them. To do so, use the in-structions in MySQL Server Time Zone Support.
To make it more convenient to invoke programs installed in the bin directory under the installation directory, you can add that direct-ory to your PATH environment variable setting. That enables you to run a program by typing only its name, not its entire path name. SeeSetting Environment Variables.
You can set up new accounts using the bin/mysql_setpermission script if you install the DBI and DBD::mysql Perl modules.See mysql_setpermission. For Perl module installation instructions, see Perl Installation Notes.
If you would like to use mysqlaccess and have the MySQL distribution in some nonstandard location, you must change the locationwhere mysqlaccess expects to find the mysql client. Edit the bin/mysqlaccess script at approximately line 18. Search for aline that looks like this:
$MYSQL = '/usr/local/bin/mysql'; # path to mysql executable
Change the path to reflect the location where mysql actually is stored on your system. If you do not do this, a Broken pipe errorwill occur when you run mysqlaccess.
2.1.1. Problems Running mysql_install_db
The purpose of the mysql_install_db script is to generate new MySQL privilege tables. It does not overwrite existing MySQLprivilege tables, and it does not affect any other data.
If you want to re-create your privilege tables, first stop the mysqld server if it is running. Then rename the mysql directory under thedata directory to save it, and then run mysql_install_db. Suppose that your current directory is the MySQL installation directoryand that mysql_install_db is located in the bin directory and the data directory is named data. To rename the mysql databaseand re-run mysql_install_db, use these commands.
shell> mv data/mysql data/mysql.oldshell> scripts/mysql_install_db --user=mysql
When you run mysql_install_db, you might encounter the following problems:
• mysql_install_db fails to install the grant tables
You may find that mysql_install_db fails to install the grant tables and terminates after displaying the following messages:
Starting mysqld daemon with databases from XXXXXXmysqld ended
In this case, you should examine the error log file very carefully. The log should be located in the directory XXXXXX named by theerror message and should indicate why mysqld did not start. If you do not understand what happened, include the log when youpost a bug report. See How to Report Bugs or Problems.
• There is a mysqld process running
This indicates that the server is running, in which case the grant tables have probably been created already. If so, there is no need torun mysql_install_db at all because it needs to be run only once (when you install MySQL the first time).
• Installing a second mysqld server does not work when one server is running
This can happen when you have an existing MySQL installation, but want to put a new installation in a different location. For ex-ample, you might have a production installation, but you want to create a second installation for testing purposes. Generally theproblem that occurs when you try to run a second server is that it tries to use a network interface that is in use by the first server. Inthis case, you should see one of the following error messages:
Can't start server: Bind on TCP/IP port:Address already in useCan't start server: Bind on unix socket...
Postinstallation Setup and Testing
17
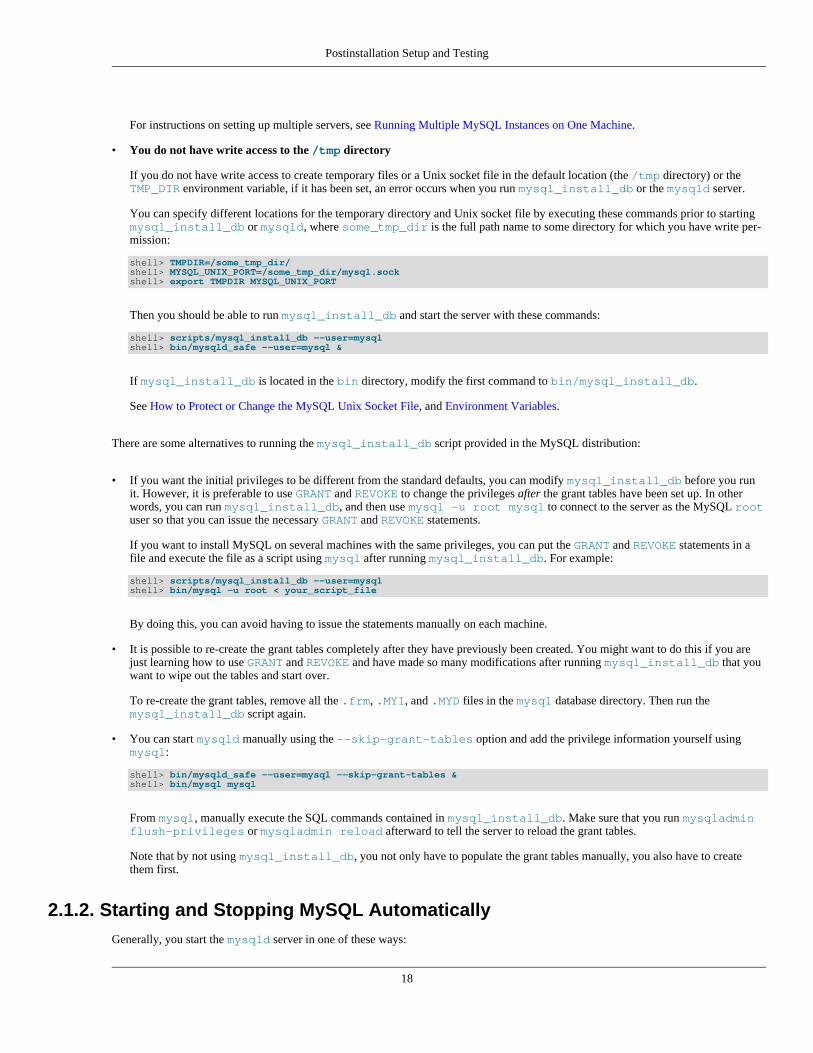
For instructions on setting up multiple servers, see Running Multiple MySQL Instances on One Machine.
• You do not have write access to the /tmp directory
If you do not have write access to create temporary files or a Unix socket file in the default location (the /tmp directory) or theTMP_DIR environment variable, if it has been set, an error occurs when you run mysql_install_db or the mysqld server.
You can specify different locations for the temporary directory and Unix socket file by executing these commands prior to startingmysql_install_db or mysqld, where some_tmp_dir is the full path name to some directory for which you have write per-mission:
shell> TMPDIR=/some_tmp_dir/shell> MYSQL_UNIX_PORT=/some_tmp_dir/mysql.sockshell> export TMPDIR MYSQL_UNIX_PORT
Then you should be able to run mysql_install_db and start the server with these commands:
shell> scripts/mysql_install_db --user=mysqlshell> bin/mysqld_safe --user=mysql &
If mysql_install_db is located in the bin directory, modify the first command to bin/mysql_install_db.
See How to Protect or Change the MySQL Unix Socket File, and Environment Variables.
There are some alternatives to running the mysql_install_db script provided in the MySQL distribution:
• If you want the initial privileges to be different from the standard defaults, you can modify mysql_install_db before you runit. However, it is preferable to use GRANT and REVOKE to change the privileges after the grant tables have been set up. In otherwords, you can run mysql_install_db, and then use mysql -u root mysql to connect to the server as the MySQL rootuser so that you can issue the necessary GRANT and REVOKE statements.
If you want to install MySQL on several machines with the same privileges, you can put the GRANT and REVOKE statements in afile and execute the file as a script using mysql after running mysql_install_db. For example:
shell> scripts/mysql_install_db --user=mysqlshell> bin/mysql -u root < your_script_file
By doing this, you can avoid having to issue the statements manually on each machine.
• It is possible to re-create the grant tables completely after they have previously been created. You might want to do this if you arejust learning how to use GRANT and REVOKE and have made so many modifications after running mysql_install_db that youwant to wipe out the tables and start over.
To re-create the grant tables, remove all the .frm, .MYI, and .MYD files in the mysql database directory. Then run themysql_install_db script again.
• You can start mysqld manually using the --skip-grant-tables option and add the privilege information yourself usingmysql:
shell> bin/mysqld_safe --user=mysql --skip-grant-tables &shell> bin/mysql mysql
From mysql, manually execute the SQL commands contained in mysql_install_db. Make sure that you run mysqladminflush-privileges or mysqladmin reload afterward to tell the server to reload the grant tables.
Note that by not using mysql_install_db, you not only have to populate the grant tables manually, you also have to createthem first.
2.1.2. Starting and Stopping MySQL AutomaticallyGenerally, you start the mysqld server in one of these ways:
Postinstallation Setup and Testing
18

• Invoke mysqld directly. This works on any platform.
• Run the MySQL server as a Windows service. The service can be set to start the server automatically when Windows starts, or as amanual service that you start on request. For instructions, see Starting MySQL as a Windows Service.
• Invoke mysqld_safe, which tries to determine the proper options for mysqld and then runs it with those options. This script isused on Unix and Unix-like systems. See mysqld_safe.
• Invoke mysql.server. This script is used primarily at system startup and shutdown on systems that use System V-style run dir-ectories (that is, /etc/init.d and run-level specific directories), where it usually is installed under the name mysql. Themysql.server script starts the server by invoking mysqld_safe. See mysql.server.
• On Mac OS X, install a separate MySQL Startup Item package to enable the automatic startup of MySQL on system startup. TheStartup Item starts the server by invoking mysql.server. See Installing the MySQL Startup Item, for details. A MySQL Prefer-ence Pane also provides control for starting and stopping MySQL through the System Preferences, see Installing and Using theMySQL Preference Pane.
• Use the Solaris/OpenSolaris service management framework (SMF) system to initiate and control MySQL startup. For more inform-ation, see Installing MySQL on OpenSolaris using IPS.
The mysqld_safe and mysql.server scripts, Windows server, Solaris/OpenSolaris SMF, and the Mac OS X Startup Item (orMySQL Preference Pane) can be used to start the server manually, or automatically at system startup time. mysql.server and theStartup Item also can be used to stop the server.
To start or stop the server manually using the mysql.server script, invoke it with start or stop arguments:
shell> mysql.server startshell> mysql.server stop
Before mysql.server starts the server, it changes location to the MySQL installation directory, and then invokes mysqld_safe. Ifyou want the server to run as some specific user, add an appropriate user option to the [mysqld] group of the /etc/my.cnf op-tion file, as shown later in this section. (It is possible that you will need to edit mysql.server if you've installed a binary distributionof MySQL in a nonstandard location. Modify it to change location into the proper directory before it runs mysqld_safe. If you dothis, your modified version of mysql.server may be overwritten if you upgrade MySQL in the future, so you should make a copy ofyour edited version that you can reinstall.)
mysql.server stop stops the server by sending a signal to it. You can also stop the server manually by executing mysqladminshutdown.
To start and stop MySQL automatically on your server, you need to add start and stop commands to the appropriate places in your /etc/rc* files.
If you use the Linux server RPM package (MySQL-server-VERSION.rpm), or a native Linux package installation, themysql.server script may be installed in the /etc/init.d directory with the name mysql. See Installing MySQL from RPMPackages on Linux, for more information on the Linux RPM packages.
Some vendors provide RPM packages that install a startup script under a different name such as mysqld.
If you install MySQL from a source distribution or using a binary distribution format that does not install mysql.server automatic-ally, you can install it manually. The script can be found in the support-files directory under the MySQL installation directory orin a MySQL source tree.
To install mysql.server manually, copy it to the /etc/init.d directory with the name mysql, and then make it executable. Dothis by changing location into the appropriate directory where mysql.server is located and executing these commands:
shell> cp mysql.server /etc/init.d/mysqlshell> chmod +x /etc/init.d/mysql
Note
Older Red Hat systems use the /etc/rc.d/init.d directory rather than /etc/init.d. Adjust the preceding com-mands accordingly. Alternatively, first create /etc/init.d as a symbolic link that points to /etc/rc.d/init.d:
shell> cd /etcshell> ln -s rc.d/init.d .
Postinstallation Setup and Testing
19
After installing the script, the commands needed to activate it to run at system startup depend on your operating system. On Linux, youcan use chkconfig:
shell> chkconfig --add mysql
On some Linux systems, the following command also seems to be necessary to fully enable the mysql script:
shell> chkconfig --level 345 mysql on
On FreeBSD, startup scripts generally should go in /usr/local/etc/rc.d/. The rc(8) manual page states that scripts in thisdirectory are executed only if their basename matches the *.sh shell file name pattern. Any other files or directories present within thedirectory are silently ignored. In other words, on FreeBSD, you should install the mysql.server script as /usr/local/etc/rc.d/mysql.server.sh to enable automatic startup.
As an alternative to the preceding setup, some operating systems also use /etc/rc.local or /etc/init.d/boot.local tostart additional services on startup. To start up MySQL using this method, you could append a command like the one following to theappropriate startup file:
/bin/sh -c 'cd /usr/local/mysql; ./bin/mysqld_safe --user=mysql &'
For other systems, consult your operating system documentation to see how to install startup scripts.
You can add options for mysql.server in a global /etc/my.cnf file. A typical /etc/my.cnf file might look like this:
[mysqld]datadir=/usr/local/mysql/varsocket=/var/tmp/mysql.sockport=3306user=mysql[mysql.server]basedir=/usr/local/mysql
The mysql.server script supports the following options: basedir, datadir, and pid-file. If specified, they must be placedin an option file, not on the command line. mysql.server supports only start and stop as command-line arguments.
The following table shows which option groups the server and each startup script read from option files.
Table 2.1. MySQL Startup scripts and supported server option groups
Script Option Groups
mysqld [mysqld], [server], [mysqld-major_version]
mysqld_safe [mysqld], [server], [mysqld_safe]
mysql.server [mysqld], [mysql.server], [server]
[mysqld-major_version] means that groups with names like [mysqld-5.0] and [mysqld-5.1] are read by servers havingversions 5.0.x, 5.1.x, and so forth. This feature can be used to specify options that can be read only by servers within a given releaseseries.
For backward compatibility, mysql.server also reads the [mysql_server] group and mysqld_safe also reads the[safe_mysqld] group. However, you should update your option files to use the [mysql.server] and [mysqld_safe]groups instead when using MySQL 5.1.
For more information on MySQL configuration files and their structure and contents, see Using Option Files.
2.1.3. Starting and Troubleshooting the MySQL ServerThis section provides troubleshooting suggestions for problems starting the server on Unix. If you are using Windows, seeTroubleshooting a MySQL Installation Under Windows.
If you have problems starting the server, here are some things to try:
Postinstallation Setup and Testing
20

• Check the error log to see why the server does not start.
• Specify any special options needed by the storage engines you are using.
• Make sure that the server knows where to find the data directory.
• Make sure that the server can access the data directory. The ownership and permissions of the data directory and its contents mustbe set such that the server can read and modify them.
• Verify that the network interfaces the server wants to use are available.
Some storage engines have options that control their behavior. You can create a my.cnf file and specify startup options for the enginesthat you plan to use. If you are going to use storage engines that support transactional tables (InnoDB, NDB), be sure that you havethem configured the way you want before starting the server:
If you are using InnoDB tables, see Configuring InnoDB.
If you are using MySQL Cluster, see MySQL Cluster Configuration.
Storage engines will use default option values if you specify none, but it is recommended that you review the available options and spe-cify explicit values for those for which the defaults are not appropriate for your installation.
When the mysqld server starts, it changes location to the data directory. This is where it expects to find databases and where it expectsto write log files. The server also writes the pid (process ID) file in the data directory.
The data directory location is hardwired in when the server is compiled. This is where the server looks for the data directory by default.If the data directory is located somewhere else on your system, the server will not work properly. You can determine what the defaultpath settings are by invoking mysqld with the --verbose and --help options.
If the default locations do not match the MySQL installation layout on your system, you can override them by specifying options tomysqld or mysqld_safe on the command line or in an option file.
To specify the location of the data directory explicitly, use the --datadir option. However, normally you can tell mysqld the loca-tion of the base directory under which MySQL is installed and it looks for the data directory there. You can do this with the --basedir option.
To check the effect of specifying path options, invoke mysqld with those options followed by the --verbose and --help options.For example, if you change location into the directory where mysqld is installed and then run the following command, it shows the ef-fect of starting the server with a base directory of /usr/local:
shell> ./mysqld --basedir=/usr/local --verbose --help
You can specify other options such as --datadir as well, but --verbose and --help must be the last options.
Once you determine the path settings you want, start the server without --verbose and --help.
If mysqld is currently running, you can find out what path settings it is using by executing this command:
shell> mysqladmin variables
Or:
shell> mysqladmin -h host_name variables
host_name is the name of the MySQL server host.
If you get Errcode 13 (which means Permission denied) when starting mysqld, this means that the privileges of the data dir-ectory or its contents do not permit server access. In this case, you change the permissions for the involved files and directories so thatthe server has the right to use them. You can also start the server as root, but this raises security issues and should be avoided.
On Unix, change location into the data directory and check the ownership of the data directory and its contents to make sure the serverhas access. For example, if the data directory is /usr/local/mysql/var, use this command:
shell> ls -la /usr/local/mysql/var
Postinstallation Setup and Testing
21

If the data directory or its files or subdirectories are not owned by the login account that you use for running the server, change theirownership to that account. If the account is named mysql, use these commands:
shell> chown -R mysql /usr/local/mysql/varshell> chgrp -R mysql /usr/local/mysql/var
If it possible that even with correct ownership, MySQL may fail to start up if there is other security software running on your systemthat manages application access to various parts of the file system. In this case, you may need to reconfigure that software to enablemysqld to access the directories it uses during normal operation.
If the server fails to start up correctly, check the error log. Log files are located in the data directory (typically C:\ProgramFiles\MySQL\MySQL Server 5.1\data on Windows, /usr/local/mysql/data for a Unix binary distribution, and /usr/local/var for a Unix source distribution). Look in the data directory for files with names of the form host_name.err andhost_name.log, where host_name is the name of your server host. Then examine the last few lines of these files. On Unix, youcan use tail to display them:
shell> tail host_name.errshell> tail host_name.log
The error log should contain information that indicates why the server could not start.
If either of the following errors occur, it means that some other program (perhaps another mysqld server) is using the TCP/IP port orUnix socket file that mysqld is trying to use:
Can't start server: Bind on TCP/IP port: Address already in useCan't start server: Bind on unix socket...
Use ps to determine whether you have another mysqld server running. If so, shut down the server before starting mysqld again. (Ifanother server is running, and you really want to run multiple servers, you can find information about how to do so in Running MultipleMySQL Instances on One Machine.)
If no other server is running, try to execute the command telnet your_host_name tcp_ip_port_number. (The defaultMySQL port number is 3306.) Then press Enter a couple of times. If you do not get an error message like telnet: Unable toconnect to remote host: Connection refused, some other program is using the TCP/IP port that mysqld is trying touse. You will need to track down what program this is and disable it, or else tell mysqld to listen to a different port with the --portoption. In this case, you will also need to specify the port number for client programs when connecting to the server using TCP/IP.
Another reason the port might be inaccessible is that you have a firewall running that blocks connections to it. If so, modify the firewallsettings to permit access to the port.
If the server starts but you cannot connect to it, you should make sure that you have an entry in /etc/hosts that looks like this:
127.0.0.1 localhost
If you cannot get mysqld to start, you can try to make a trace file to find the problem by using the --debug option. See MySQL In-ternals: Porting.
2.2. Securing the Initial MySQL AccountsPart of the MySQL installation process is to set up the mysql database that contains the grant tables:
• Windows distributions contain preinitialized grant tables.
• On Unix, the mysql_install_db program populates the grant tables. Some installation methods run this program for you. Oth-ers require that you execute it manually. For details, see Section 2.1, “Unix Postinstallation Procedures”.
The mysql.user grant table defines the initial MySQL user accounts and their access privileges:
• Some accounts have the user name root. These are superuser accounts that have all privileges and can do anything. The initialroot account passwords are empty, so anyone can connect to the MySQL server as root without a password and be granted allprivileges.
Postinstallation Setup and Testing
22

• On Windows, root accounts are created that permit connections from the local host only. Connections can be made by specify-ing the host name localhost or the IP address 127.0.0.1. If the user selects the ENABLE ROOT ACCESS FROM REMOTEMACHINES option during installation, the Windows installer creates another root account that permits connections from anyhost.
• On Unix, each root account permits connections from the local host. Connections can be made by specifying the host namelocalhost, the IP address 127.0.0.1, or the actual host name or IP address.
An attempt to connect to the host 127.0.0.1 normally resolves to the localhost account. However, this fails if the server isrun with the --skip-name-resolve option, so the 127.0.0.1 account is useful in that case.
• Some accounts are for anonymous users. These have an empty user name. The anonymous accounts have no password, so anyonecan use them to connect to the MySQL server.
• On Windows, there is one anonymous account that permits connections from the local host. Connections can be made by spe-cifying a host name of localhost. The account has no global privileges. (Before MySQL 5.1.16, it has all global privileges,just like the root accounts.)
• On Unix, each anonymous account permits connections from the local host. Connections can be made by specifying a host nameof localhost for one of the accounts, or the actual host name or IP address for the other.
To display which accounts exist in the mysql.user table and check whether their passwords are empty, use the following statement:
mysql> SELECT User, Host, Password FROM mysql.user;+------+--------------------+----------+| User | Host | Password |+------+--------------------+----------+| root | localhost | || root | myhost.example.com | || root | 127.0.0.1 | || | localhost | || | myhost.example.com | |+------+--------------------+----------+
This output indicates that there are several root and anonymous-user accounts, none of which have passwords. The output might differon your system, but the presence of accounts with empty passwords means that your MySQL installation is unprotected until you dosomething about it:
• You should assign a password to each MySQL root account.
• If you want to prevent clients from connecting as anonymous users without a password, you should either assign a password to eachanonymous account or else remove the accounts.
In addition, the mysql.db table contains rows that permit all accounts to access the test database and other databases with namesthat start with test_. This is true even for accounts that otherwise have no special privileges such as the default anonymous accounts.This is convenient for testing but inadvisable on production servers. Administrators who want database access restricted only to ac-counts that have permissions granted explicitly for that purpose should remove these mysql.db table rows.
The following instructions describe how to set up passwords for the initial MySQL accounts, first for the root accounts, then for theanonymous accounts. The instructions also cover how to remove the anonymous accounts, should you prefer not to permit anonymousaccess at all, and describe how to remove permissive access to test databases. Replace newpwd in the examples with the password thatyou want to use. Replace host_name with the name of the server host. You can determine this name from the output of the precedingSELECT statement. For the output shown, host_name is myhost.example.com.
Note
For additional information about setting passwords, see Section 4.5, “Assigning Account Passwords”. If you forget yourroot password after setting it, see How to Reset the Root Password.
You might want to defer setting the passwords until later, to avoid the need to specify them while you perform additional setup or test-ing. However, be sure to set them before using your installation for production purposes.
To set up additional accounts, see Section 4.2, “Adding User Accounts”.
Postinstallation Setup and Testing
23

Assigning root Account PasswordsThe root account passwords can be set several ways. The following discussion demonstrates three methods:
• Use the SET PASSWORD statement
• Use the UPDATE statement
• Use the mysqladmin command-line client program
To assign passwords using SET PASSWORD, connect to the server as root and issue a SET PASSWORD statement for each root ac-count listed in the mysql.user table. Be sure to encrypt the password using the PASSWORD() function.
For Windows, do this:
shell> mysql -u rootmysql> SET PASSWORD FOR 'root'@'localhost' = PASSWORD('newpwd');mysql> SET PASSWORD FOR 'root'@'127.0.0.1' = PASSWORD('newpwd');mysql> SET PASSWORD FOR 'root'@'%' = PASSWORD('newpwd');
The last statement is unnecessary if the mysql.user table has no root account with a host value of %.
For Unix, do this:
shell> mysql -u rootmysql> SET PASSWORD FOR 'root'@'localhost' = PASSWORD('newpwd');mysql> SET PASSWORD FOR 'root'@'127.0.0.1' = PASSWORD('newpwd');mysql> SET PASSWORD FOR 'root'@'host_name' = PASSWORD('newpwd');
You can also use a single statement that assigns a password to all root accounts by using UPDATE to modify the mysql.user tabledirectly. This method works on any platform:
shell> mysql -u rootmysql> UPDATE mysql.user SET Password = PASSWORD('newpwd')
-> WHERE User = 'root';mysql> FLUSH PRIVILEGES;
The FLUSH statement causes the server to reread the grant tables. Without it, the password change remains unnoticed by the server untilyou restart it.
To assign passwords to the root accounts using mysqladmin, execute the following commands:
shell> mysqladmin -u root password "newpwd"shell> mysqladmin -u root -h host_name password "newpwd"
Those commands apply both to Windows and to Unix. The double quotation marks around the password are not always necessary, butyou should use them if the password contains spaces or other characters that are special to your command interpreter.
The mysqladmin method of setting the root account passwords does not work for the 'root'@'127.0.0.1' account. Use theSET PASSWORD method shown earlier.
After the root passwords have been set, you must supply the appropriate password whenever you connect as root to the server. Forexample, to shut down the server with mysqladmin, use this command:
shell> mysqladmin -u root -p shutdownEnter password: (enter root password here)
Assigning Anonymous Account PasswordsThe mysql commands in the following instructions include a -p option based on the assumption that you have set the root accountpasswords using the preceding instructions and must specify that password when connecting to the server.
To assign passwords to the anonymous accounts, connect to the server as root, then use either SET PASSWORD or UPDATE. Be sureto encrypt the password using the PASSWORD() function.
Postinstallation Setup and Testing
24

To use SET PASSWORD on Windows, do this:
shell> mysql -u root -pEnter password: (enter root password here)mysql> SET PASSWORD FOR ''@'localhost' = PASSWORD('newpwd');
To use SET PASSWORD on Unix, do this:
shell> mysql -u root -pEnter password: (enter root password here)mysql> SET PASSWORD FOR ''@'localhost' = PASSWORD('newpwd');mysql> SET PASSWORD FOR ''@'host_name' = PASSWORD('newpwd');
To set the anonymous-user account passwords with a single UPDATE statement, do this (on any platform):
shell> mysql -u root -pEnter password: (enter root password here)mysql> UPDATE mysql.user SET Password = PASSWORD('newpwd')
-> WHERE User = '';mysql> FLUSH PRIVILEGES;
The FLUSH statement causes the server to reread the grant tables. Without it, the password change remains unnoticed by the server untilyou restart it.
Removing Anonymous AccountsIf you prefer to remove any anonymous accounts rather than assigning them passwords, do so as follows on Windows:
shell> mysql -u root -pEnter password: (enter root password here)mysql> DROP USER ''@'localhost';
On Unix, remove the anonymous accounts like this:
shell> mysql -u root -pEnter password: (enter root password here)mysql> DROP USER ''@'localhost';mysql> DROP USER ''@'host_name';
Securing Test DatabasesBy default, the mysql.db table contains rows that permit access by any user to the test database and other databases with namesthat start with test_. (These rows have an empty User column value, which for access-checking purposes matches any user name.)This means that such databases can be used even by accounts that otherwise possess no privileges. If you want to remove any-user ac-cess to test databases, do so as follows:
shell> mysql -u root -pEnter password: (enter root password here)mysql> DELETE FROM mysql.db WHERE Db LIKE 'test%';mysql> FLUSH PRIVILEGES;
The FLUSH statement causes the server to reread the grant tables. Without it, the privilege change remains unnoticed by the server untilyou restart it.
With the preceding change, only users who have global database privileges or privileges granted explicitly for the test database canuse it. However, if you do not want the database to exist at all, drop it:
mysql> DROP DATABASE test;
Note
On Windows, you can also perform the process described in this section using the Configuration Wizard (see The SecurityOptions Dialog). On other platforms, the MySQL distribution includes mysql_secure_installation, a command-line utility that automates much of the process of securing a MySQL installation.
Postinstallation Setup and Testing
25

Chapter 3. The MySQL Access Privilege SystemThe primary function of the MySQL privilege system is to authenticate a user who connects from a given host and to associate that userwith privileges on a database such as SELECT, INSERT, UPDATE, and DELETE. Additional functionality includes the ability to haveanonymous users and to grant privileges for MySQL-specific functions such as LOAD DATA INFILE and administrative operations.
There are some things that you cannot do with the MySQL privilege system:
• You cannot explicitly specify that a given user should be denied access. That is, you cannot explicitly match a user and then refusethe connection.
• You cannot specify that a user has privileges to create or drop tables in a database but not to create or drop the database itself.
• A password applies globally to an account. You cannot associate a password with a specific object such as a database, table, orroutine.
The user interface to the MySQL privilege system consists of SQL statements such as CREATE USER, GRANT, and REVOKE. See Ac-count Management Statements.
Internally, the server stores privilege information in the grant tables of the mysql database (that is, in the database named mysql). TheMySQL server reads the contents of these tables into memory when it starts and bases access-control decisions on the in-memory copiesof the grant tables.
The MySQL privilege system ensures that all users may perform only the operations permitted to them. As a user, when you connect toa MySQL server, your identity is determined by the host from which you connect and the user name you specify. When you issue re-quests after connecting, the system grants privileges according to your identity and what you want to do.
MySQL considers both your host name and user name in identifying you because there is no reason to assume that a given user namebelongs to the same person on all hosts. For example, the user joe who connects from office.example.com need not be the sameperson as the user joe who connects from home.example.com. MySQL handles this by enabling you to distinguish users on differ-ent hosts that happen to have the same name: You can grant one set of privileges for connections by joe from of-fice.example.com, and a different set of privileges for connections by joe from home.example.com. To see what privileges agiven account has, use the SHOW GRANTS statement. For example:
SHOW GRANTS FOR 'joe'@'office.example.com';SHOW GRANTS FOR 'joe'@'home.example.com';
MySQL access control involves two stages when you run a client program that connects to the server:
Stage 1: The server accepts or rejects the connection based on your identity and whether you can verify your identity by supplying thecorrect password.
Stage 2: Assuming that you can connect, the server checks each statement you issue to determine whether you have sufficient privilegesto perform it. For example, if you try to select rows from a table in a database or drop a table from the database, the server verifies thatyou have the SELECT privilege for the table or the DROP privilege for the database.
For a more detailed description of what happens during each stage, see Section 3.4, “Access Control, Stage 1: Connection Verification”,and Section 3.5, “Access Control, Stage 2: Request Verification”.
If your privileges are changed (either by yourself or someone else) while you are connected, those changes do not necessarily take effectimmediately for the next statement that you issue. For details about the conditions under which the server reloads the grant tables, seeSection 3.6, “When Privilege Changes Take Effect”.
For general security-related advice, see Chapter 1, General Security Issues. For help in diagnosing privilege-related problems, see Sec-tion 3.7, “Causes of Access-Denied Errors”.
3.1. Privileges Provided by MySQLMySQL provides privileges that apply in different contexts and at different levels of operation:
• Administrative privileges enable users to manage operation of the MySQL server. These privileges are global because they are not
26

specific to a particular database.
• Database privileges apply to a database and to all objects within it. These privileges can be granted for specific databases, or glob-ally so that they apply to all databases.
• Privileges for database objects such as tables, indexes, views, and stored routines can be granted for specific objects within a data-base, for all objects of a given type within a database (for example, all tables in a database), or globally for all objects of a giventype in all databases).
Information about account privileges is stored in the user, db, host, tables_priv, columns_priv, and procs_priv tablesin the mysql database (see Section 3.2, “Privilege System Grant Tables”). The MySQL server reads the contents of these tables intomemory when it starts and reloads them under the circumstances indicated in Section 3.6, “When Privilege Changes Take Effect”. Ac-cess-control decisions are based on the in-memory copies of the grant tables.
Some releases of MySQL introduce changes to the structure of the grant tables to add new access privileges or features. Whenever youupdate to a new version of MySQL, you should update your grant tables to make sure that they have the current structure so that youcan take advantage of any new capabilities. See mysql_upgrade.
The following table shows the privilege names used at the SQL level in the GRANT and REVOKE statements, along with the columnname associated with each privilege in the grant tables and the context in which the privilege applies.
Table 3.1. Permissible Privileges for GRANT and REVOKE
Privilege Column Context
CREATE Create_priv databases, tables, or indexes
DROP Drop_priv databases, tables, or views
GRANT OPTION Grant_priv databases, tables, or stored routines
LOCK TABLES Lock_tables_priv databases
REFERENCES References_priv databases or tables
EVENT Event_priv databases
ALTER Alter_priv tables
DELETE Delete_priv tables
INDEX Index_priv tables
INSERT Insert_priv tables or columns
SELECT Select_priv tables or columns
UPDATE Update_priv tables or columns
CREATE TEMPORARY TABLES Create_tmp_table_priv tables
TRIGGER Trigger_priv tables
CREATE VIEW Create_view_priv views
SHOW VIEW Show_view_priv views
ALTER ROUTINE Alter_routine_priv stored routines
CREATE ROUTINE Create_routine_priv stored routines
EXECUTE Execute_priv stored routines
FILE File_priv file access on server host
CREATE USER Create_user_priv server administration
PROCESS Process_priv server administration
RELOAD Reload_priv server administration
REPLICATION CLIENT Repl_client_priv server administration
REPLICATION SLAVE Repl_slave_priv server administration
SHOW DATABASES Show_db_priv server administration
SHUTDOWN Shutdown_priv server administration
The MySQL Access Privilege System
27
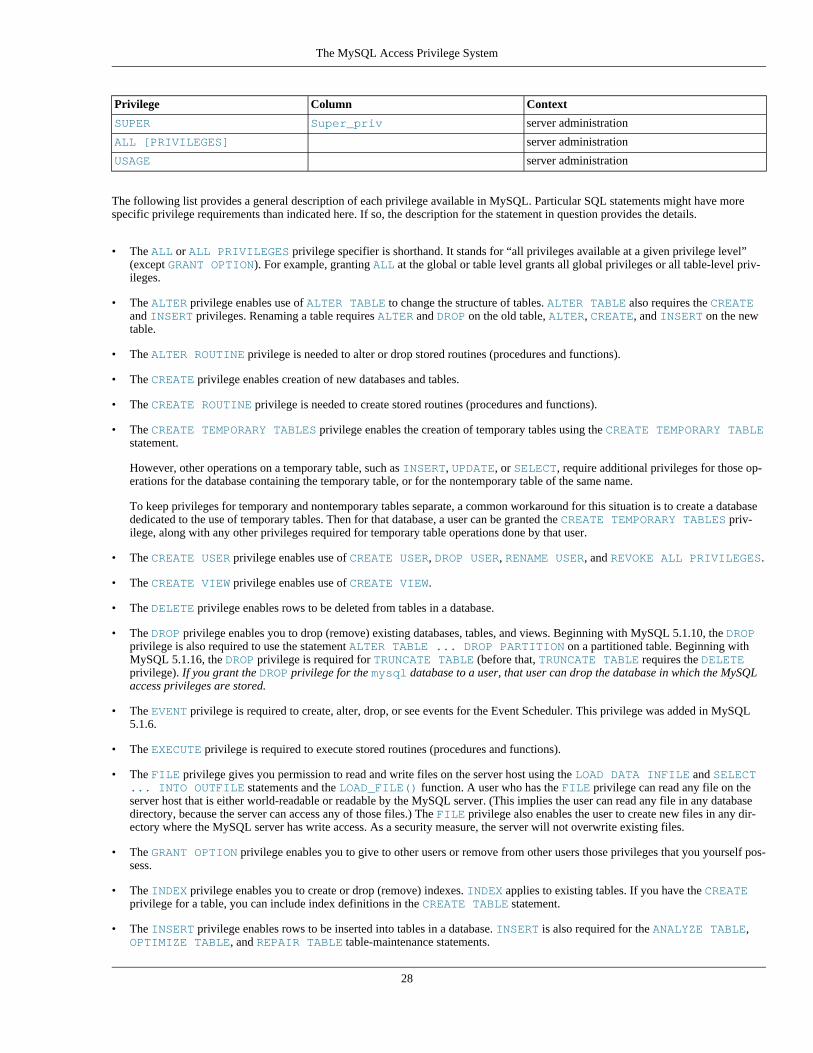
Privilege Column Context
SUPER Super_priv server administration
ALL [PRIVILEGES] server administration
USAGE server administration
The following list provides a general description of each privilege available in MySQL. Particular SQL statements might have morespecific privilege requirements than indicated here. If so, the description for the statement in question provides the details.
• The ALL or ALL PRIVILEGES privilege specifier is shorthand. It stands for “all privileges available at a given privilege level”(except GRANT OPTION). For example, granting ALL at the global or table level grants all global privileges or all table-level priv-ileges.
• The ALTER privilege enables use of ALTER TABLE to change the structure of tables. ALTER TABLE also requires the CREATEand INSERT privileges. Renaming a table requires ALTER and DROP on the old table, ALTER, CREATE, and INSERT on the newtable.
• The ALTER ROUTINE privilege is needed to alter or drop stored routines (procedures and functions).
• The CREATE privilege enables creation of new databases and tables.
• The CREATE ROUTINE privilege is needed to create stored routines (procedures and functions).
• The CREATE TEMPORARY TABLES privilege enables the creation of temporary tables using the CREATE TEMPORARY TABLEstatement.
However, other operations on a temporary table, such as INSERT, UPDATE, or SELECT, require additional privileges for those op-erations for the database containing the temporary table, or for the nontemporary table of the same name.
To keep privileges for temporary and nontemporary tables separate, a common workaround for this situation is to create a databasededicated to the use of temporary tables. Then for that database, a user can be granted the CREATE TEMPORARY TABLES priv-ilege, along with any other privileges required for temporary table operations done by that user.
• The CREATE USER privilege enables use of CREATE USER, DROP USER, RENAME USER, and REVOKE ALL PRIVILEGES.
• The CREATE VIEW privilege enables use of CREATE VIEW.
• The DELETE privilege enables rows to be deleted from tables in a database.
• The DROP privilege enables you to drop (remove) existing databases, tables, and views. Beginning with MySQL 5.1.10, the DROPprivilege is also required to use the statement ALTER TABLE ... DROP PARTITION on a partitioned table. Beginning withMySQL 5.1.16, the DROP privilege is required for TRUNCATE TABLE (before that, TRUNCATE TABLE requires the DELETEprivilege). If you grant the DROP privilege for the mysql database to a user, that user can drop the database in which the MySQLaccess privileges are stored.
• The EVENT privilege is required to create, alter, drop, or see events for the Event Scheduler. This privilege was added in MySQL5.1.6.
• The EXECUTE privilege is required to execute stored routines (procedures and functions).
• The FILE privilege gives you permission to read and write files on the server host using the LOAD DATA INFILE and SELECT... INTO OUTFILE statements and the LOAD_FILE() function. A user who has the FILE privilege can read any file on theserver host that is either world-readable or readable by the MySQL server. (This implies the user can read any file in any databasedirectory, because the server can access any of those files.) The FILE privilege also enables the user to create new files in any dir-ectory where the MySQL server has write access. As a security measure, the server will not overwrite existing files.
• The GRANT OPTION privilege enables you to give to other users or remove from other users those privileges that you yourself pos-sess.
• The INDEX privilege enables you to create or drop (remove) indexes. INDEX applies to existing tables. If you have the CREATEprivilege for a table, you can include index definitions in the CREATE TABLE statement.
• The INSERT privilege enables rows to be inserted into tables in a database. INSERT is also required for the ANALYZE TABLE,OPTIMIZE TABLE, and REPAIR TABLE table-maintenance statements.
The MySQL Access Privilege System
28

• The LOCK TABLES privilege enables the use of explicit LOCK TABLES statements to lock tables for which you have the SELECTprivilege. This includes the use of write locks, which prevents other sessions from reading the locked table.
• The PROCESS privilege pertains to display of information about the threads executing within the server (that is, information aboutthe statements being executed by sessions). The privilege enables use of SHOW PROCESSLIST or mysqladmin process-list to see threads belonging to other accounts; you can always see your own threads.
• The REFERENCES privilege currently is unused.
• The RELOAD privilege enables use of the FLUSH statement. It also enables mysqladmin commands that are equivalent to FLUSHoperations: flush-hosts, flush-logs, flush-privileges, flush-status, flush-tables, flush-threads,refresh, and reload.
The reload command tells the server to reload the grant tables into memory. flush-privileges is a synonym for reload.The refresh command closes and reopens the log files and flushes all tables. The other flush-xxx commands perform func-tions similar to refresh, but are more specific and may be preferable in some instances. For example, if you want to flush just thelog files, flush-logs is a better choice than refresh.
• The REPLICATION CLIENT privilege enables the use of SHOW MASTER STATUS and SHOW SLAVE STATUS.
• The REPLICATION SLAVE privilege should be granted to accounts that are used by slave servers to connect to the current serveras their master. Without this privilege, the slave cannot request updates that have been made to databases on the master server.
• The SELECT privilege enables you to select rows from tables in a database. SELECT statements require the SELECT privilege onlyif they actually retrieve rows from a table. Some SELECT statements do not access tables and can be executed without permissionfor any database. For example, you can use SELECT as a simple calculator to evaluate expressions that make no reference to tables:
SELECT 1+1;SELECT PI()*2;
The SELECT privilege is also needed for other statements that read column values. For example, SELECT is needed for columnsreferenced on the right hand side of col_name=expr assignment in UPDATE statements or for columns named in the WHEREclause of DELETE or UPDATE statements.
• The SHOW DATABASES privilege enables the account to see database names by issuing the SHOW DATABASE statement. Ac-counts that do not have this privilege see only databases for which they have some privileges, and cannot use the statement at all ifthe server was started with the --skip-show-database option. Note that any global privilege is a privilege for the database.
• The SHOW VIEW privilege enables use of SHOW CREATE VIEW.
• The SHUTDOWN privilege enables use of the mysqladmin shutdown command. There is no corresponding SQL statement.
• The SUPER privilege enables an account to use CHANGE MASTER TO, KILL or mysqladmin kill to kill threads belonging toother accounts (you can always kill your own threads), PURGE BINARY LOGS, configuration changes using SET GLOBAL tomodify global system variables, the mysqladmin debug command, enabling or disabling logging, performing updates even ifthe read_only system variable is enabled, starting and stopping replication on slave servers, specification of any account in theDEFINER attribute of stored programs and views, and enables you to connect (once) even if the connection limit controlled by themax_connections system variable is reached.
To create or alter stored functions if binary logging is enabled, you may also need the SUPER privilege, as described in Binary Log-ging of Stored Programs.
• The TRIGGER privilege enables trigger operations. You must have this privilege for a table to create, drop, or execute triggers forthat table. This privilege was added in MySQL 5.1.6. (Prior to MySQL 5.1.6, trigger operations required the SUPER privilege.)
• The UPDATE privilege enables rows to be updated in tables in a database.
• The USAGE privilege specifier stands for “no privileges.” It is used at the global level with GRANT to modify account attributes suchas resource limits or SSL characteristics without affecting existing account privileges.
It is a good idea to grant to an account only those privileges that it needs. You should exercise particular caution in granting the FILEand administrative privileges:
• The FILE privilege can be abused to read into a database table any files that the MySQL server can read on the server host. This in-
The MySQL Access Privilege System
29

cludes all world-readable files and files in the server's data directory. The table can then be accessed using SELECT to transfer itscontents to the client host.
• The GRANT OPTION privilege enables users to give their privileges to other users. Two users that have different privileges andwith the GRANT OPTION privilege are able to combine privileges.
• The ALTER privilege may be used to subvert the privilege system by renaming tables.
• The SHUTDOWN privilege can be abused to deny service to other users entirely by terminating the server.
• The PROCESS privilege can be used to view the plain text of currently executing statements, including statements that set or changepasswords.
• The SUPER privilege can be used to terminate other sessions or change how the server operates.
• Privileges granted for the mysql database itself can be used to change passwords and other access privilege information. Passwordsare stored encrypted, so a malicious user cannot simply read them to know the plain text password. However, a user with write ac-cess to the user table Password column can change an account's password, and then connect to the MySQL server using that ac-count.
3.2. Privilege System Grant TablesNormally, you manipulate the contents of the grant tables in the mysql database indirectly by using statements such as GRANT andREVOKE to set up accounts and control the privileges available to each one. See Account Management Statements. The discussion heredescribes the underlying structure of the grant tables and how the server uses their contents when interacting with clients.
These mysql database tables contain grant information:
• user: Contains user accounts, global privileges, and other non-privilege columns.
• db: Contains database-level privileges.
• host: Obsolete.
• tables_priv: Contains table-level privileges.
• columns_priv: Contains column-level privileges.
• procs_priv: Contains stored procedure and function privileges.
Other tables in the mysql database do not hold grant information and are discussed elsewhere:
• event: Contains information about Event Scheduler events: See Using the Event Scheduler.
• func: Contains information about user-defined functions: See Adding New Functions to MySQL.
• help_xxx: These tables are used for server-side help: See Server-Side Help.
• plugin: Contains information about server plugins: See Installing and Uninstalling Plugins, and The MySQL Plugin API.
• proc: Contains information about stored procedures and functions: See Using Stored Routines (Procedures and Functions).
• servers: Used by the FEDERATED storage engine: See Creating a FEDERATED Table Using CREATE SERVER.
• time_zone_xxx: These tables contain time zone information: See MySQL Server Time Zone Support.
• Tables with _log in their name are used for logging: See MySQL Server Logs.
Each grant table contains scope columns and privilege columns:
The MySQL Access Privilege System
30

• Scope columns determine the scope of each row (entry) in the tables; that is, the context in which the row applies. For example, auser table row with Host and User values of 'thomas.loc.gov' and 'bob' would be used for authenticating connectionsmade to the server from the host thomas.loc.gov by a client that specifies a user name of bob. Similarly, a db table row withHost, User, and Db column values of 'thomas.loc.gov', 'bob' and 'reports' would be used when bob connects fromthe host thomas.loc.gov to access the reports database. The tables_priv and columns_priv tables contain scopecolumns indicating tables or table/column combinations to which each row applies. The procs_priv scope columns indicate thestored routine to which each row applies.
• Privilege columns indicate which privileges are granted by a table row; that is, what operations can be performed. The server com-bines the information in the various grant tables to form a complete description of a user's privileges. Section 3.5, “Access Control,Stage 2: Request Verification”, describes the rules that are used to do this.
The server uses the grant tables in the following manner:
• The user table scope columns determine whether to reject or permit incoming connections. For permitted connections, any priv-ileges granted in the user table indicate the user's global privileges. Any privilege granted in this table applies to all databases onthe server.
Note
Because any global privilege is considered a privilege for all databases, any global privilege enables a user to see all data-base names with SHOW DATABASES or by examining the SCHEMATA table of INFORMATION_SCHEMA.
• The db table scope columns determine which users can access which databases from which hosts. The privilege columns determinewhich operations are permitted. A privilege granted at the database level applies to the database and to all objects in the database,such as tables and stored programs.
• The host table is used in conjunction with the db table when you want a given db table row to apply to several hosts. For ex-ample, if you want a user to be able to use a database from several hosts in your network, leave the Host value empty in the user'sdb table row, then populate the host table with a row for each of those hosts. This mechanism is described more detail in Sec-tion 3.5, “Access Control, Stage 2: Request Verification”.
Note
The host table must be modified directly with statements such as INSERT, UPDATE, and DELETE. It is not affected bystatements such as GRANT and REVOKE that modify the grant tables indirectly. Most MySQL installations need not usethis table at all.
• The tables_priv and columns_priv tables are similar to the db table, but are more fine-grained: They apply at the table andcolumn levels rather than at the database level. A privilege granted at the table level applies to the table and to all its columns. Aprivilege granted at the column level applies only to a specific column.
• The procs_priv table applies to stored routines. A privilege granted at the routine level applies only to a single routine.
The server uses the user, db, and host tables in the mysql database at both the first and second stages of access control (seeChapter 3, The MySQL Access Privilege System). The columns in the user and db tables are shown here. The host table is similar tothe db table but has a specialized use as described in Section 3.5, “Access Control, Stage 2: Request Verification”.
Table 3.2. user and db Table Columns
Table Name user db
Scope columns Host Host
User Db
Password User
Privilege columns Select_priv Select_priv
Insert_priv Insert_priv
Update_priv Update_priv
Delete_priv Delete_priv
The MySQL Access Privilege System
31

Table Name user db
Index_priv Index_priv
Alter_priv Alter_priv
Create_priv Create_priv
Drop_priv Drop_priv
Grant_priv Grant_priv
Create_view_priv Create_view_priv
Show_view_priv Show_view_priv
Create_routine_priv Create_routine_priv
Alter_routine_priv Alter_routine_priv
Execute_priv Execute_priv
Trigger_priv Trigger_priv
Event_priv Event_priv
Create_tmp_table_priv Create_tmp_table_priv
Lock_tables_priv Lock_tables_priv
References_priv References_priv
Reload_priv
Shutdown_priv
Process_priv
File_priv
Show_db_priv
Super_priv
Repl_slave_priv
Repl_client_priv
Create_user_priv
Security columns ssl_type
ssl_cipher
x509_issuer
x509_subject
Resource control columns max_questions
max_updates
max_connections
max_user_connections
The Event_priv and Trigger_priv columns were added in MySQL 5.1.6.
During the second stage of access control, the server performs request verification to make sure that each client has sufficient privilegesfor each request that it issues. In addition to the user, db, and host grant tables, the server may also consult the tables_priv andcolumns_priv tables for requests that involve tables. The latter tables provide finer privilege control at the table and column levels.They have the columns shown in the following table.
Table 3.3. tables_priv and columns_priv Table Columns
Table Name tables_priv columns_priv
Scope columns Host Host
Db Db
User User
Table_name Table_name
The MySQL Access Privilege System
32

Table Name tables_priv columns_priv
Column_name
Privilege columns Table_priv Column_priv
Column_priv
Other columns Timestamp Timestamp
Grantor
The Timestamp and Grantor columns currently are unused and are discussed no further here.
For verification of requests that involve stored routines, the server may consult the procs_priv table, which has the columns shownin the following table.
Table 3.4. procs_priv Table Columns
Table Name procs_priv
Scope columns Host
Db
User
Routine_name
Routine_type
Privilege columns Proc_priv
Other columns Timestamp
Grantor
The Routine_type column is an ENUM column with values of 'FUNCTION' or 'PROCEDURE' to indicate the type of routine therow refers to. This column enables privileges to be granted separately for a function and a procedure with the same name.
The Timestamp and Grantor columns currently are unused and are discussed no further here.
Scope columns in the grant tables contain strings. They are declared as shown here; the default value for each is the empty string.
Table 3.5. Grant Table Scope Column Types
Column Name Type
Host CHAR(60)
User CHAR(16)
Password CHAR(41)
Db CHAR(64)
Table_name CHAR(64)
Column_name CHAR(64)
Routine_name CHAR(64)
For access-checking purposes, comparisons of User, Password, Db, and Table_name values are case sensitive. Comparisons ofHost, Column_name, and Routine_name values are not case sensitive.
In the user, db, and host tables, each privilege is listed in a separate column that is declared as ENUM('N','Y') DEFAULT'N'. In other words, each privilege can be disabled or enabled, with the default being disabled.
In the tables_priv, columns_priv, and procs_priv tables, the privilege columns are declared as SET columns. Values inthese columns can contain any combination of the privileges controlled by the table. Only those privileges listed in the column value areenabled.
The MySQL Access Privilege System
33

Table 3.6. Set-Type Privilege Column Values
Table Name Column Name Possible Set Elements
tables_priv Table_priv 'Select', 'Insert', 'Update', 'Delete', 'Cre-ate', 'Drop', 'Grant', 'References', 'In-dex', 'Alter', 'Create View', 'Show view','Trigger'
tables_priv Column_priv 'Select', 'Insert', 'Update', 'References'
columns_priv Column_priv 'Select', 'Insert', 'Update', 'References'
procs_priv Proc_priv 'Execute', 'Alter Routine', 'Grant'
Administrative privileges (such as RELOAD or SHUTDOWN) are specified only in the user table. Administrative operations are opera-tions on the server itself and are not database-specific, so there is no reason to list these privileges in the other grant tables. Con-sequently, to determine whether you can perform an administrative operation, the server need consult only the user table.
The FILE privilege also is specified only in the user table. It is not an administrative privilege as such, but your ability to read orwrite files on the server host is independent of the database you are accessing.
The mysqld server reads the contents of the grant tables into memory when it starts. You can tell it to reload the tables by issuing aFLUSH PRIVILEGES statement or executing a mysqladmin flush-privileges or mysqladmin reload command.Changes to the grant tables take effect as indicated in Section 3.6, “When Privilege Changes Take Effect”.
When you modify an account's privileges, it is a good idea to verify that the changes set up privileges the way you want. To check theprivileges for a given account, use the SHOW GRANTS statement (see SHOW GRANTS Syntax). For example, to determine the priv-ileges that are granted to an account with user name and host name values of bob and pc84.example.com, use this statement:
SHOW GRANTS FOR 'bob'@'pc84.example.com';
3.3. Specifying Account NamesMySQL account names consist of a user name and a host name. This enables creation of accounts for users with the same name whocan connect from different hosts. This section describes how to write account names, including special values and wildcard rules.
In SQL statements such as CREATE USER, GRANT, and SET PASSWORD, write account names using the following rules:
• Syntax for account names is 'user_name'@'host_name'.
• An account name consisting only of a user name is equivalent to 'user_name'@'%'. For example, 'me' is equivalent to'me'@'%'.
• The user name and host name need not be quoted if they are legal as unquoted identifiers. Quotes are necessary to specify auser_name string containing special characters (such as “-”), or a host_name string containing special characters or wildcardcharacters (such as “%”); for example, 'test-user'@'%.com'.
• Quote user names and host names as identifiers or as strings, using either backticks (“`”), single quotation marks (“'”), or doublequotation marks (“"”).
• The user name and host name parts, if quoted, must be quoted separately. That is, write 'me'@'localhost', not'me@localhost'; the latter is interpreted as 'me@localhost'@'%'.
• A reference to the CURRENT_USER() (or CURRENT_USER) function is equivalent to specifying the current user's name and hostname literally.
MySQL stores account names in grant tables in the mysql database using separate columns for the user name and host name parts:
• The user table contains one row for each account. The User and Host columns store the user name and host name. This tablealso indicates which global privileges the account has.
The MySQL Access Privilege System
34

• Other grant tables indicate privileges an account has for databases and objects within databases. These tables have User and Hostcolumns to store the account name. Each row in these tables associates with the account in the user table that has the same Userand Host values.
For additional detail about grant table structure, see Section 3.2, “Privilege System Grant Tables”.
User names and host names have certain special values or wildcard conventions, as described following.
A user name is either a nonblank value that literally matches the user name for incoming connection attempts, or a blank value (emptystring) that matches any user name. An account with a blank user name is an anonymous user. To specify an anonymous user in SQLstatements, use a quoted empty user name part, such as ''@'localhost'.
The host name part of an account name can take many forms, and wildcards are permitted:
• A host value can be a host name or an IP address. The name 'localhost' indicates the local host. The IP address'127.0.0.1' indicates the loopback interface.
• You can use the wildcard characters “%” and “_” in host values. These have the same meaning as for pattern-matching operationsperformed with the LIKE operator. For example, a host value of '%' matches any host name, whereas a value of'%.mysql.com' matches any host in the mysql.com domain. '192.168.1.%' matches any host in the 192.168.1 class Cnetwork.
Because you can use IP wildcard values in host values (for example, '192.168.1.%' to match every host on a subnet), someonecould try to exploit this capability by naming a host 192.168.1.somewhere.com. To foil such attempts, MySQL disallowsmatching on host names that start with digits and a dot. Thus, if you have a host named something like 1.2.example.com, itsname never matches the host part of account names. An IP wildcard value can match only IP addresses, not host names.
• For a host value specified as an IP address, you can specify a netmask indicating how many address bits to use for the network num-ber. The syntax is host_ip/netmask. For example:
CREATE USER 'david'@'192.58.197.0/255.255.255.0';
This enables david to connect from any client host having an IP address client_ip for which the following condition is true:
client_ip & netmask = host_ip
That is, for the CREATE USER statement just shown:
client_ip & 255.255.255.0 = 192.58.197.0
IP addresses that satisfy this condition and can connect to the MySQL server are those in the range from 192.58.197.0 to192.58.197.255.
The netmask can only be used to tell the server to use 8, 16, 24, or 32 bits of the address. Examples:
• 192.0.0.0/255.0.0.0: Any host on the 192 class A network
• 192.168.0.0/255.255.0.0: Any host on the 192.168 class B network
• 192.168.1.0/255.255.255.0: Any host on the 192.168.1 class C network
• 192.168.1.1: Only the host with this specific IP address
The following netmask will not work because it masks 28 bits, and 28 is not a multiple of 8:
192.168.0.1/255.255.255.240
3.4. Access Control, Stage 1: Connection VerificationWhen you attempt to connect to a MySQL server, the server accepts or rejects the connection based on your identity and whether youcan verify your identity by supplying the correct password. If not, the server denies access to you completely. Otherwise, the server ac-
The MySQL Access Privilege System
35

cepts the connection, and then enters Stage 2 and waits for requests.
Your identity is based on two pieces of information:
• The client host from which you connect
• Your MySQL user name
Identity checking is performed using the three user table scope columns (Host, User, and Password). The server accepts the con-nection only if the Host and User columns in some user table row match the client host name and user name and the client suppliesthe password specified in that row. The rules for permissible Host and User values are given in Section 3.3, “Specifying AccountNames”.
If the User column value is nonblank, the user name in an incoming connection must match exactly. If the User value is blank, itmatches any user name. If the user table row that matches an incoming connection has a blank user name, the user is considered to bean anonymous user with no name, not a user with the name that the client actually specified. This means that a blank user name is usedfor all further access checking for the duration of the connection (that is, during Stage 2).
The Password column can be blank. This is not a wildcard and does not mean that any password matches. It means that the user mustconnect without specifying a password.
Nonblank Password values in the user table represent encrypted passwords. MySQL does not store passwords in plaintext form foranyone to see. Rather, the password supplied by a user who is attempting to connect is encrypted (using the PASSWORD() function).The encrypted password then is used during the connection process when checking whether the password is correct. This is donewithout the encrypted password ever traveling over the connection. See Section 4.1, “User Names and Passwords”.
From MySQL's point of view, the encrypted password is the real password, so you should never give anyone access to it. In particular,do not give nonadministrative users read access to tables in the mysql database.
The following table shows how various combinations of Host and User values in the user table apply to incoming connections.
Host Value User Value Permissible Connections
'thomas.loc.gov' 'fred' fred, connecting from thomas.loc.gov
'thomas.loc.gov' '' Any user, connecting from thomas.loc.gov
'%' 'fred' fred, connecting from any host
'%' '' Any user, connecting from any host
'%.loc.gov' 'fred' fred, connecting from any host in the loc.gov domain
'x.y.%' 'fred' fred, connecting from x.y.net, x.y.com, x.y.edu, and soon; this is probably not useful
'144.155.166.177' 'fred' fred, connecting from the host with IP address144.155.166.177
'144.155.166.%' 'fred' fred, connecting from any host in the 144.155.166 class Csubnet
'144.155.166.0/255.255.255.0' 'fred' Same as previous example
It is possible for the client host name and user name of an incoming connection to match more than one row in the user table. The pre-ceding set of examples demonstrates this: Several of the entries shown match a connection from thomas.loc.gov by fred.
When multiple matches are possible, the server must determine which of them to use. It resolves this issue as follows:
• Whenever the server reads the user table into memory, it sorts the rows.
• When a client attempts to connect, the server looks through the rows in sorted order.
• The server uses the first row that matches the client host name and user name.
The server uses sorting rules that order rows with the most-specific Host values first. Literal host names and IP addresses are the most
The MySQL Access Privilege System
36

specific. (The specificity of a literal IP address is not affected by whether it has a netmask, so 192.168.1.13 and192.168.1.0/255.255.255.0 are considered equally specific.) The pattern '%' means “any host” and is least specific. Theempty string '' also means “any host” but sorts after '%'. Rows with the same Host value are ordered with the most-specific Uservalues first (a blank User value means “any user” and is least specific).
To see how this works, suppose that the user table looks like this:
+-----------+----------+-| Host | User | ...+-----------+----------+-| % | root | ...| % | jeffrey | ...| localhost | root | ...| localhost | | ...+-----------+----------+-
When the server reads the table into memory, it sorts the rows using the rules just described. The result after sorting looks like this:
+-----------+----------+-| Host | User | ...+-----------+----------+-| localhost | root | ...| localhost | | ...| % | jeffrey | ...| % | root | ...+-----------+----------+-
When a client attempts to connect, the server looks through the sorted rows and uses the first match found. For a connection from loc-alhost by jeffrey, two of the rows from the table match: the one with Host and User values of 'localhost' and '', and theone with values of '%' and 'jeffrey'. The 'localhost' row appears first in sorted order, so that is the one the server uses.
Here is another example. Suppose that the user table looks like this:
+----------------+----------+-| Host | User | ...+----------------+----------+-| % | jeffrey | ...| thomas.loc.gov | | ...+----------------+----------+-
The sorted table looks like this:
+----------------+----------+-| Host | User | ...+----------------+----------+-| thomas.loc.gov | | ...| % | jeffrey | ...+----------------+----------+-
A connection by jeffrey from thomas.loc.gov is matched by the first row, whereas a connection by jeffrey from any host ismatched by the second.
Note
It is a common misconception to think that, for a given user name, all rows that explicitly name that user are used firstwhen the server attempts to find a match for the connection. This is not true. The preceding example illustrates this, wherea connection from thomas.loc.gov by jeffrey is first matched not by the row containing 'jeffrey' as theUser column value, but by the row with no user name. As a result, jeffrey is authenticated as an anonymous user,even though he specified a user name when connecting.
If you are able to connect to the server, but your privileges are not what you expect, you probably are being authenticated as some otheraccount. To find out what account the server used to authenticate you, use the CURRENT_USER() function. (See Information Func-tions.) It returns a value in user_name@host_name format that indicates the User and Host values from the matching user tablerow. Suppose that jeffrey connects and issues the following query:
mysql> SELECT CURRENT_USER();+----------------+| CURRENT_USER() |+----------------+| @localhost |+----------------+
The MySQL Access Privilege System
37

The result shown here indicates that the matching user table row had a blank User column value. In other words, the server is treatingjeffrey as an anonymous user.
Another way to diagnose authentication problems is to print out the user table and sort it by hand to see where the first match is beingmade.
3.5. Access Control, Stage 2: Request VerificationAfter you establish a connection, the server enters Stage 2 of access control. For each request that you issue through that connection, theserver determines what operation you want to perform, then checks whether you have sufficient privileges to do so. This is where theprivilege columns in the grant tables come into play. These privileges can come from any of the user, db, host, tables_priv,columns_priv, or procs_priv tables. (You may find it helpful to refer to Section 3.2, “Privilege System Grant Tables”, whichlists the columns present in each of the grant tables.)
The user table grants privileges that are assigned to you on a global basis and that apply no matter what the default database is. For ex-ample, if the user table grants you the DELETE privilege, you can delete rows from any table in any database on the server host! It iswise to grant privileges in the user table only to people who need them, such as database administrators. For other users, you shouldleave all privileges in the user table set to 'N' and grant privileges at more specific levels only. You can grant privileges for particulardatabases, tables, columns, or routines.
The db and host tables grant database-specific privileges. Values in the scope columns of these tables can take the following forms:
• A blank User value in the db table matches the anonymous user. A nonblank value matches literally; there are no wildcards in usernames.
• The wildcard characters “%” and “_” can be used in the Host and Db columns of either table. These have the same meaning as forpattern-matching operations performed with the LIKE operator. If you want to use either character literally when granting priv-ileges, you must escape it with a backslash. For example, to include the underscore character (“_”) as part of a database name, spe-cify it as “\_” in the GRANT statement.
• A '%' Host value in the db table means “any host.” A blank Host value in the db table means “consult the host table for fur-ther information” (a process that is described later in this section).
• A '%' or blank Host value in the host table means “any host.”
• A '%' or blank Db value in either table means “any database.”
The server reads the db and host tables into memory and sorts them at the same time that it reads the user table. The server sorts thedb table based on the Host, Db, and User scope columns, and sorts the host table based on the Host and Db scope columns. Aswith the user table, sorting puts the most-specific values first and least-specific values last, and when the server looks for matchingentries, it uses the first match that it finds.
The tables_priv, columns_priv, and procs_priv tables grant table-specific, column-specific, and routine-specific priv-ileges. Values in the scope columns of these tables can take the following forms:
• The wildcard characters “%” and “_” can be used in the Host column. These have the same meaning as for pattern-matching opera-tions performed with the LIKE operator.
• A '%' or blank Host value means “any host.”
• The Db, Table_name, Column_name, and Routine_name columns cannot contain wildcards or be blank.
The server sorts the tables_priv, columns_priv, and procs_priv tables based on the Host, Db, and User columns. This issimilar to db table sorting, but simpler because only the Host column can contain wildcards.
The server uses the sorted tables to verify each request that it receives. For requests that require administrative privileges such asSHUTDOWN or RELOAD, the server checks only the user table row because that is the only table that specifies administrative priv-ileges. The server grants access if the row permits the requested operation and denies access otherwise. For example, if you want to ex-ecute mysqladmin shutdown but your user table row does not grant the SHUTDOWN privilege to you, the server denies accesswithout even checking the db or host tables. (They contain no Shutdown_priv column, so there is no need to do so.)
The MySQL Access Privilege System
38
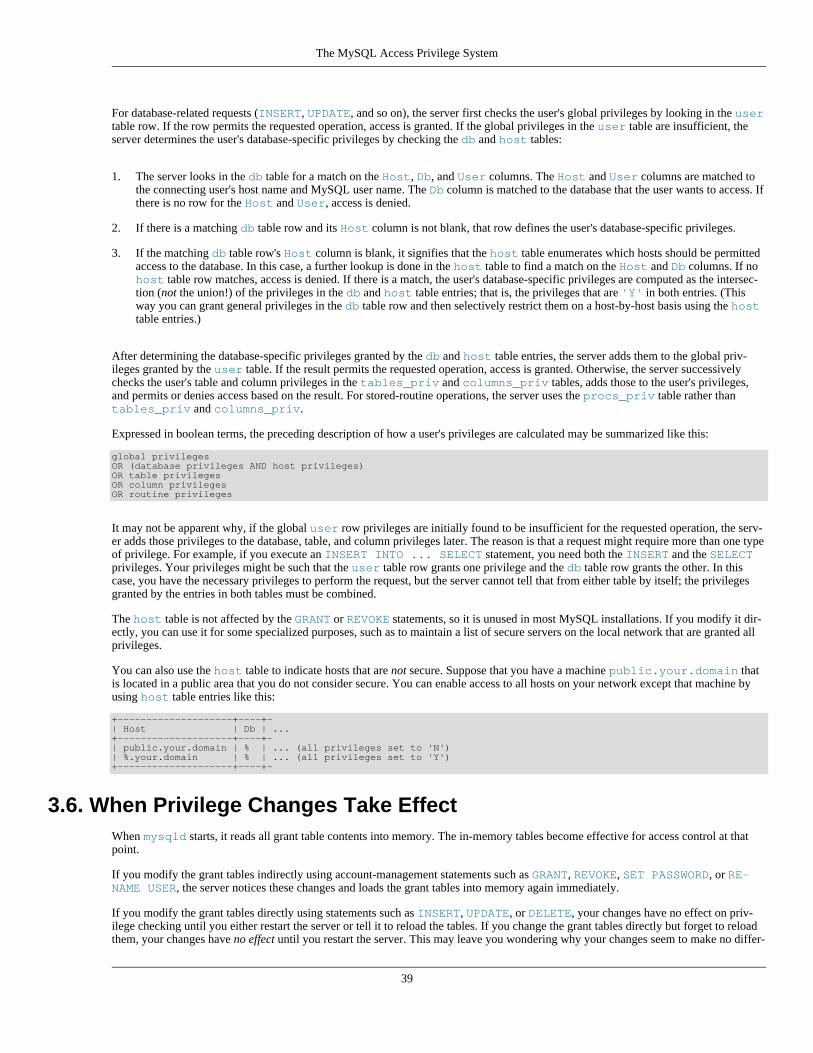
For database-related requests (INSERT, UPDATE, and so on), the server first checks the user's global privileges by looking in the usertable row. If the row permits the requested operation, access is granted. If the global privileges in the user table are insufficient, theserver determines the user's database-specific privileges by checking the db and host tables:
1. The server looks in the db table for a match on the Host, Db, and User columns. The Host and User columns are matched tothe connecting user's host name and MySQL user name. The Db column is matched to the database that the user wants to access. Ifthere is no row for the Host and User, access is denied.
2. If there is a matching db table row and its Host column is not blank, that row defines the user's database-specific privileges.
3. If the matching db table row's Host column is blank, it signifies that the host table enumerates which hosts should be permittedaccess to the database. In this case, a further lookup is done in the host table to find a match on the Host and Db columns. If nohost table row matches, access is denied. If there is a match, the user's database-specific privileges are computed as the intersec-tion (not the union!) of the privileges in the db and host table entries; that is, the privileges that are 'Y' in both entries. (Thisway you can grant general privileges in the db table row and then selectively restrict them on a host-by-host basis using the hosttable entries.)
After determining the database-specific privileges granted by the db and host table entries, the server adds them to the global priv-ileges granted by the user table. If the result permits the requested operation, access is granted. Otherwise, the server successivelychecks the user's table and column privileges in the tables_priv and columns_priv tables, adds those to the user's privileges,and permits or denies access based on the result. For stored-routine operations, the server uses the procs_priv table rather thantables_priv and columns_priv.
Expressed in boolean terms, the preceding description of how a user's privileges are calculated may be summarized like this:
global privilegesOR (database privileges AND host privileges)OR table privilegesOR column privilegesOR routine privileges
It may not be apparent why, if the global user row privileges are initially found to be insufficient for the requested operation, the serv-er adds those privileges to the database, table, and column privileges later. The reason is that a request might require more than one typeof privilege. For example, if you execute an INSERT INTO ... SELECT statement, you need both the INSERT and the SELECTprivileges. Your privileges might be such that the user table row grants one privilege and the db table row grants the other. In thiscase, you have the necessary privileges to perform the request, but the server cannot tell that from either table by itself; the privilegesgranted by the entries in both tables must be combined.
The host table is not affected by the GRANT or REVOKE statements, so it is unused in most MySQL installations. If you modify it dir-ectly, you can use it for some specialized purposes, such as to maintain a list of secure servers on the local network that are granted allprivileges.
You can also use the host table to indicate hosts that are not secure. Suppose that you have a machine public.your.domain thatis located in a public area that you do not consider secure. You can enable access to all hosts on your network except that machine byusing host table entries like this:
+--------------------+----+-| Host | Db | ...+--------------------+----+-| public.your.domain | % | ... (all privileges set to 'N')| %.your.domain | % | ... (all privileges set to 'Y')+--------------------+----+-
3.6. When Privilege Changes Take EffectWhen mysqld starts, it reads all grant table contents into memory. The in-memory tables become effective for access control at thatpoint.
If you modify the grant tables indirectly using account-management statements such as GRANT, REVOKE, SET PASSWORD, or RE-NAME USER, the server notices these changes and loads the grant tables into memory again immediately.
If you modify the grant tables directly using statements such as INSERT, UPDATE, or DELETE, your changes have no effect on priv-ilege checking until you either restart the server or tell it to reload the tables. If you change the grant tables directly but forget to reloadthem, your changes have no effect until you restart the server. This may leave you wondering why your changes seem to make no differ-
The MySQL Access Privilege System
39
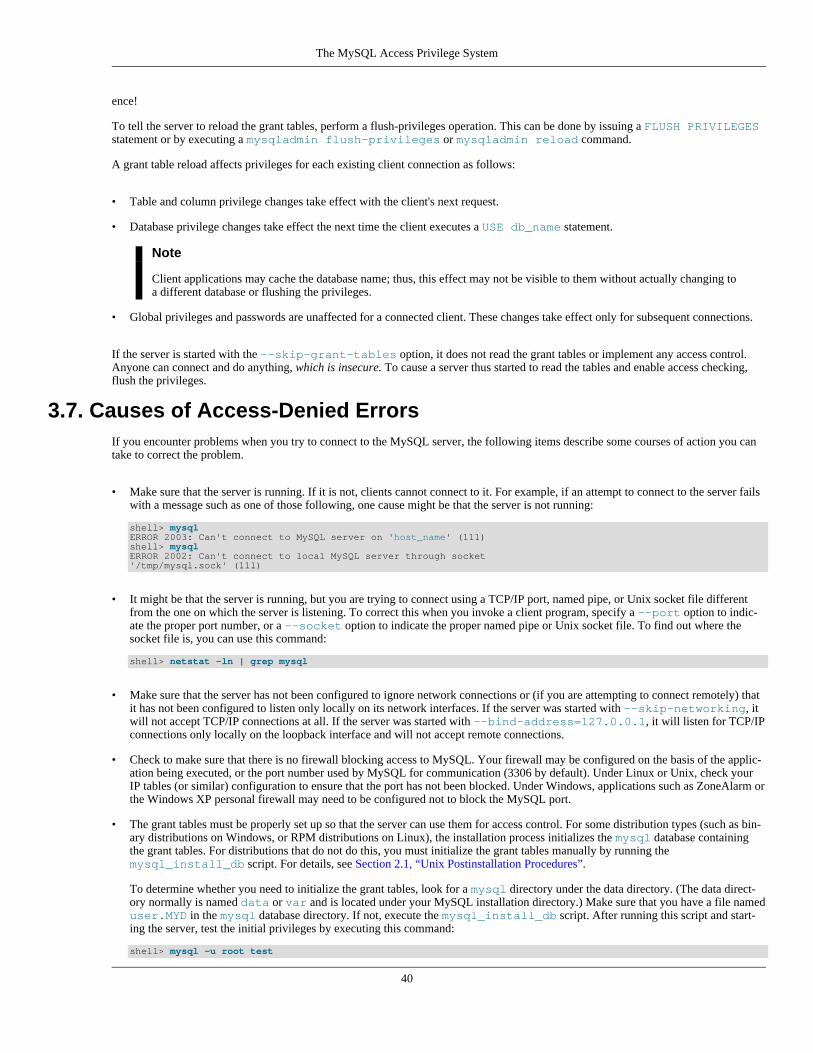
ence!
To tell the server to reload the grant tables, perform a flush-privileges operation. This can be done by issuing a FLUSH PRIVILEGESstatement or by executing a mysqladmin flush-privileges or mysqladmin reload command.
A grant table reload affects privileges for each existing client connection as follows:
• Table and column privilege changes take effect with the client's next request.
• Database privilege changes take effect the next time the client executes a USE db_name statement.
Note
Client applications may cache the database name; thus, this effect may not be visible to them without actually changing toa different database or flushing the privileges.
• Global privileges and passwords are unaffected for a connected client. These changes take effect only for subsequent connections.
If the server is started with the --skip-grant-tables option, it does not read the grant tables or implement any access control.Anyone can connect and do anything, which is insecure. To cause a server thus started to read the tables and enable access checking,flush the privileges.
3.7. Causes of Access-Denied ErrorsIf you encounter problems when you try to connect to the MySQL server, the following items describe some courses of action you cantake to correct the problem.
• Make sure that the server is running. If it is not, clients cannot connect to it. For example, if an attempt to connect to the server failswith a message such as one of those following, one cause might be that the server is not running:
shell> mysqlERROR 2003: Can't connect to MySQL server on 'host_name' (111)shell> mysqlERROR 2002: Can't connect to local MySQL server through socket'/tmp/mysql.sock' (111)
• It might be that the server is running, but you are trying to connect using a TCP/IP port, named pipe, or Unix socket file differentfrom the one on which the server is listening. To correct this when you invoke a client program, specify a --port option to indic-ate the proper port number, or a --socket option to indicate the proper named pipe or Unix socket file. To find out where thesocket file is, you can use this command:
shell> netstat -ln | grep mysql
• Make sure that the server has not been configured to ignore network connections or (if you are attempting to connect remotely) thatit has not been configured to listen only locally on its network interfaces. If the server was started with --skip-networking, itwill not accept TCP/IP connections at all. If the server was started with --bind-address=127.0.0.1, it will listen for TCP/IPconnections only locally on the loopback interface and will not accept remote connections.
• Check to make sure that there is no firewall blocking access to MySQL. Your firewall may be configured on the basis of the applic-ation being executed, or the port number used by MySQL for communication (3306 by default). Under Linux or Unix, check yourIP tables (or similar) configuration to ensure that the port has not been blocked. Under Windows, applications such as ZoneAlarm orthe Windows XP personal firewall may need to be configured not to block the MySQL port.
• The grant tables must be properly set up so that the server can use them for access control. For some distribution types (such as bin-ary distributions on Windows, or RPM distributions on Linux), the installation process initializes the mysql database containingthe grant tables. For distributions that do not do this, you must initialize the grant tables manually by running themysql_install_db script. For details, see Section 2.1, “Unix Postinstallation Procedures”.
To determine whether you need to initialize the grant tables, look for a mysql directory under the data directory. (The data direct-ory normally is named data or var and is located under your MySQL installation directory.) Make sure that you have a file nameduser.MYD in the mysql database directory. If not, execute the mysql_install_db script. After running this script and start-ing the server, test the initial privileges by executing this command:
shell> mysql -u root test
The MySQL Access Privilege System
40

The server should let you connect without error.
• After a fresh installation, you should connect to the server and set up your users and their access permissions:
shell> mysql -u root mysql
The server should let you connect because the MySQL root user has no password initially. That is also a security risk, so settingthe password for the root accounts is something you should do while you're setting up your other MySQL accounts. For instruc-tions on setting the initial passwords, see Section 2.2, “Securing the Initial MySQL Accounts”.
• If you have updated an existing MySQL installation to a newer version, did you run the mysql_upgrade script? If not, do so. Thestructure of the grant tables changes occasionally when new capabilities are added, so after an upgrade you should always make surethat your tables have the current structure. For instructions, see mysql_upgrade.
• If a client program receives the following error message when it tries to connect, it means that the server expects passwords in anewer format than the client is capable of generating:
shell> mysqlClient does not support authentication protocol requestedby server; consider upgrading MySQL client
For information on how to deal with this, see Section 1.2.3, “Password Hashing in MySQL”, and Client does not supportauthentication protocol.
• Remember that client programs use connection parameters specified in option files or environment variables. If a client programseems to be sending incorrect default connection parameters when you have not specified them on the command line, check any ap-plicable option files and your environment. For example, if you get Access denied when you run a client without any options,make sure that you have not specified an old password in any of your option files!
You can suppress the use of option files by a client program by invoking it with the --no-defaults option. For example:
shell> mysqladmin --no-defaults -u root version
The option files that clients use are listed in Using Option Files. Environment variables are listed in Environment Variables.
• If you get the following error, it means that you are using an incorrect root password:
shell> mysqladmin -u root -pxxxx verAccess denied for user 'root'@'localhost' (using password: YES)
If the preceding error occurs even when you have not specified a password, it means that you have an incorrect password listed insome option file. Try the --no-defaults option as described in the previous item.
For information on changing passwords, see Section 4.5, “Assigning Account Passwords”.
If you have lost or forgotten the root password, see How to Reset the Root Password.
• If you change a password by using SET PASSWORD, INSERT, or UPDATE, you must encrypt the password using the PASS-WORD() function. If you do not use PASSWORD() for these statements, the password will not work. For example, the followingstatement assigns a password, but fails to encrypt it, so the user is not able to connect afterward:
SET PASSWORD FOR 'abe'@'host_name' = 'eagle';
Instead, set the password like this:
SET PASSWORD FOR 'abe'@'host_name' = PASSWORD('eagle');
The PASSWORD() function is unnecessary when you specify a password using the CREATE USER or GRANT statements or themysqladmin password command. Each of those automatically uses PASSWORD() to encrypt the password. See Section 4.5,“Assigning Account Passwords”, and CREATE USER Syntax.
• localhost is a synonym for your local host name, and is also the default host to which clients try to connect if you specify no
The MySQL Access Privilege System
41

host explicitly.
To avoid this problem on such systems, you can use a --host=127.0.0.1 option to name the server host explicitly. This willmake a TCP/IP connection to the local mysqld server. You can also use TCP/IP by specifying a --host option that uses the actu-al host name of the local host. In this case, the host name must be specified in a user table row on the server host, even though youare running the client program on the same host as the server.
• The Access denied error message tells you who you are trying to log in as, the client host from which you are trying to connect,and whether you were using a password. Normally, you should have one row in the user table that exactly matches the host nameand user name that were given in the error message. For example, if you get an error message that contains using password:NO, it means that you tried to log in without a password.
• If you get an Access denied error when trying to connect to the database with mysql -u user_name, you may have aproblem with the user table. Check this by executing mysql -u root mysql and issuing this SQL statement:
SELECT * FROM user;
The result should include a row with the Host and User columns matching your client's host name and your MySQL user name.
• If the following error occurs when you try to connect from a host other than the one on which the MySQL server is running, itmeans that there is no row in the user table with a Host value that matches the client host:
Host ... is not allowed to connect to this MySQL server
You can fix this by setting up an account for the combination of client host name and user name that you are using when trying toconnect.
If you do not know the IP address or host name of the machine from which you are connecting, you should put a row with '%' asthe Host column value in the user table. After trying to connect from the client machine, use a SELECT USER() query to seehow you really did connect. Then change the '%' in the user table row to the actual host name that shows up in the log. Other-wise, your system is left insecure because it permits connections from any host for the given user name.
On Linux, another reason that this error might occur is that you are using a binary MySQL version that is compiled with a differentversion of the glibc library than the one you are using. In this case, you should either upgrade your operating system or glibc, ordownload a source distribution of MySQL version and compile it yourself. A source RPM is normally trivial to compile and install,so this is not a big problem.
• If you specify a host name when trying to connect, but get an error message where the host name is not shown or is an IP address, itmeans that the MySQL server got an error when trying to resolve the IP address of the client host to a name:
shell> mysqladmin -u root -pxxxx -h some_hostname verAccess denied for user 'root'@'' (using password: YES)
If you try to connect as root and get the following error, it means that you do not have a row in the user table with a Usercolumn value of 'root' and that mysqld cannot resolve the host name for your client:
Access denied for user ''@'unknown'
These errors indicate a DNS problem. To fix it, execute mysqladmin flush-hosts to reset the internal DNS host name cache.See How MySQL Uses DNS.
Some permanent solutions are:
• Determine what is wrong with your DNS server and fix it.
• Specify IP addresses rather than host names in the MySQL grant tables.
• Put an entry for the client machine name in /etc/hosts on Unix or \windows\hosts on Windows.
• Start mysqld with the --skip-name-resolve option.
• Start mysqld with the --skip-host-cache option.
• On Unix, if you are running the server and the client on the same machine, connect to localhost. Unix connections to loc-
The MySQL Access Privilege System
42
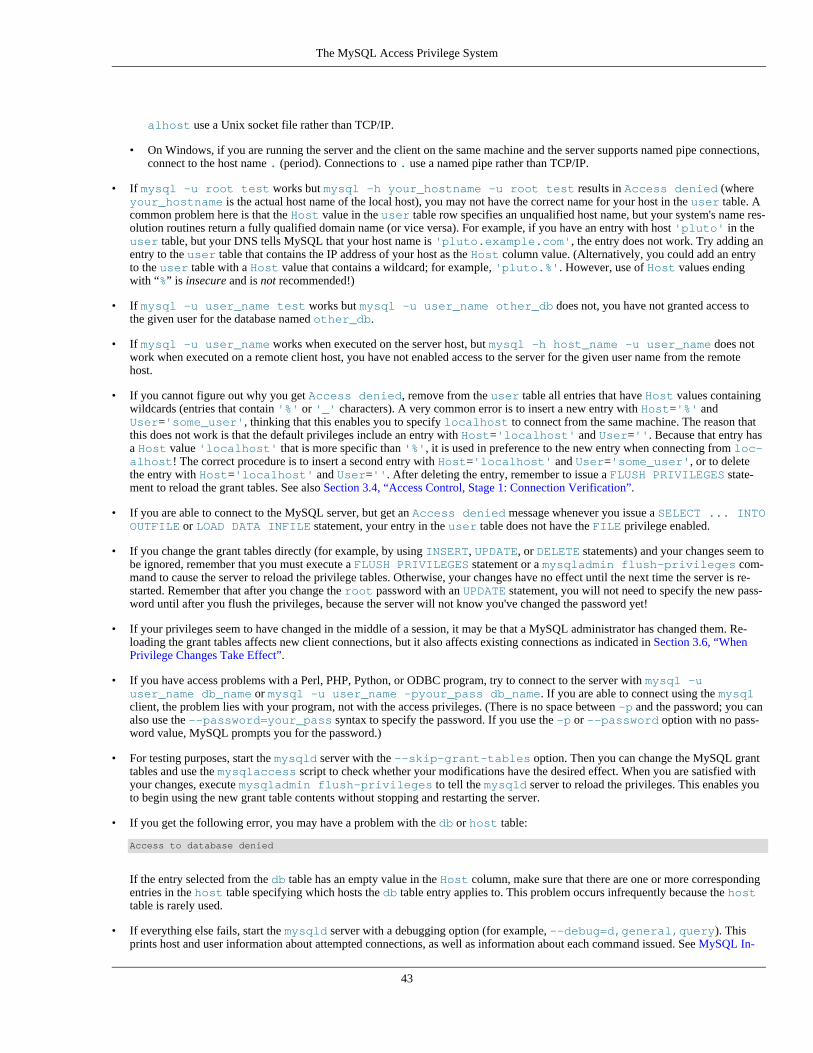
alhost use a Unix socket file rather than TCP/IP.
• On Windows, if you are running the server and the client on the same machine and the server supports named pipe connections,connect to the host name . (period). Connections to . use a named pipe rather than TCP/IP.
• If mysql -u root test works but mysql -h your_hostname -u root test results in Access denied (whereyour_hostname is the actual host name of the local host), you may not have the correct name for your host in the user table. Acommon problem here is that the Host value in the user table row specifies an unqualified host name, but your system's name res-olution routines return a fully qualified domain name (or vice versa). For example, if you have an entry with host 'pluto' in theuser table, but your DNS tells MySQL that your host name is 'pluto.example.com', the entry does not work. Try adding anentry to the user table that contains the IP address of your host as the Host column value. (Alternatively, you could add an entryto the user table with a Host value that contains a wildcard; for example, 'pluto.%'. However, use of Host values endingwith “%” is insecure and is not recommended!)
• If mysql -u user_name test works but mysql -u user_name other_db does not, you have not granted access tothe given user for the database named other_db.
• If mysql -u user_name works when executed on the server host, but mysql -h host_name -u user_name does notwork when executed on a remote client host, you have not enabled access to the server for the given user name from the remotehost.
• If you cannot figure out why you get Access denied, remove from the user table all entries that have Host values containingwildcards (entries that contain '%' or '_' characters). A very common error is to insert a new entry with Host='%' andUser='some_user', thinking that this enables you to specify localhost to connect from the same machine. The reason thatthis does not work is that the default privileges include an entry with Host='localhost' and User=''. Because that entry hasa Host value 'localhost' that is more specific than '%', it is used in preference to the new entry when connecting from loc-alhost! The correct procedure is to insert a second entry with Host='localhost' and User='some_user', or to deletethe entry with Host='localhost' and User=''. After deleting the entry, remember to issue a FLUSH PRIVILEGES state-ment to reload the grant tables. See also Section 3.4, “Access Control, Stage 1: Connection Verification”.
• If you are able to connect to the MySQL server, but get an Access denied message whenever you issue a SELECT ... INTOOUTFILE or LOAD DATA INFILE statement, your entry in the user table does not have the FILE privilege enabled.
• If you change the grant tables directly (for example, by using INSERT, UPDATE, or DELETE statements) and your changes seem tobe ignored, remember that you must execute a FLUSH PRIVILEGES statement or a mysqladmin flush-privileges com-mand to cause the server to reload the privilege tables. Otherwise, your changes have no effect until the next time the server is re-started. Remember that after you change the root password with an UPDATE statement, you will not need to specify the new pass-word until after you flush the privileges, because the server will not know you've changed the password yet!
• If your privileges seem to have changed in the middle of a session, it may be that a MySQL administrator has changed them. Re-loading the grant tables affects new client connections, but it also affects existing connections as indicated in Section 3.6, “WhenPrivilege Changes Take Effect”.
• If you have access problems with a Perl, PHP, Python, or ODBC program, try to connect to the server with mysql -uuser_name db_name or mysql -u user_name -pyour_pass db_name. If you are able to connect using the mysqlclient, the problem lies with your program, not with the access privileges. (There is no space between -p and the password; you canalso use the --password=your_pass syntax to specify the password. If you use the -p or --password option with no pass-word value, MySQL prompts you for the password.)
• For testing purposes, start the mysqld server with the --skip-grant-tables option. Then you can change the MySQL granttables and use the mysqlaccess script to check whether your modifications have the desired effect. When you are satisfied withyour changes, execute mysqladmin flush-privileges to tell the mysqld server to reload the privileges. This enables youto begin using the new grant table contents without stopping and restarting the server.
• If you get the following error, you may have a problem with the db or host table:
Access to database denied
If the entry selected from the db table has an empty value in the Host column, make sure that there are one or more correspondingentries in the host table specifying which hosts the db table entry applies to. This problem occurs infrequently because the hosttable is rarely used.
• If everything else fails, start the mysqld server with a debugging option (for example, --debug=d,general,query). Thisprints host and user information about attempted connections, as well as information about each command issued. See MySQL In-
The MySQL Access Privilege System
43

ternals: Porting.
• If you have any other problems with the MySQL grant tables and feel you must post the problem to the mailing list, always providea dump of the MySQL grant tables. You can dump the tables with the mysqldump mysql command. To file a bug report, see theinstructions at How to Report Bugs or Problems. In some cases, you may need to restart mysqld with --skip-grant-tablesto run mysqldump.
The MySQL Access Privilege System
44

Chapter 4. MySQL User Account ManagementThis section describes how to set up accounts for clients of your MySQL server. It discusses the following topics:
• The meaning of account names and passwords as used in MySQL and how that compares to names and passwords used by your op-erating system
• How to set up new accounts and remove existing accounts
• How to change passwords
• Guidelines for using passwords securely
• How to use secure connections with SSL
See also Account Management Statements, which describes the syntax and use for all user-management SQL statements.
4.1. User Names and PasswordsMySQL stores accounts in the user table of the mysql database. An account is defined in terms of a user name and the client host orhosts from which the user can connect to the server. The account may also have a password. For information about account representa-tion in the user table, see Section 3.2, “Privilege System Grant Tables”.
There are several distinctions between the way user names and passwords are used by MySQL and the way they are used by your oper-ating system:
• User names, as used by MySQL for authentication purposes, have nothing to do with user names (login names) as used by Windowsor Unix. On Unix, most MySQL clients by default try to log in using the current Unix user name as the MySQL user name, but thatis for convenience only. The default can be overridden easily, because client programs permit any user name to be specified with a -u or --user option. Because this means that anyone can attempt to connect to the server using any user name, you cannot make adatabase secure in any way unless all MySQL accounts have passwords. Anyone who specifies a user name for an account that hasno password is able to connect successfully to the server.
• MySQL user names can be up to 16 characters long. Operating system user names, because they are completely unrelated toMySQL user names, may be of a different maximum length. For example, Unix user names typically are limited to eight characters.
Warning
The limit on MySQL user name length is hard-coded in the MySQL servers and clients, and trying to circumvent it bymodifying the definitions of the tables in the mysql database does not work.
You should never alter any of the tables in the mysql database in any manner whatsoever except by means of the proced-ure that is described in mysql_upgrade. Attempting to redefine MySQL's system tables in any other fashion results inundefined (and unsupported!) behavior.
• The server uses MySQL passwords stored in the user table to authenticate client connections using MySQL built-in authentication.These passwords have nothing to do with passwords for logging in to your operating system. There is no necessary connectionbetween the “external” password you use to log in to a Windows or Unix machine and the password you use to access the MySQLserver on that machine.
• MySQL encrypts passwords stored in the user table using its own algorithm. This encryption is the same as that implemented bythe PASSWORD() SQL function but differs from that used during the Unix login process. Unix password encryption is the same asthat implemented by the ENCRYPT() SQL function. See the descriptions of the PASSWORD() and ENCRYPT() functions in En-cryption and Compression Functions.
From version 4.1 on, MySQL employs a stronger authentication method that has better password protection during the connectionprocess than in earlier versions. It is secure even if TCP/IP packets are sniffed or the mysql database is captured. (In earlier ver-sions, even though passwords are stored in encrypted form in the user table, knowledge of the encrypted password value could beused to connect to the MySQL server.) Section 1.2.3, “Password Hashing in MySQL”, discusses password encryption further.
• It is possible to connect to the server regardless of character set settings if the user name and password contain only ASCII charac-
45

ters. To connect when the user name or password contain non-ASCII characters, the client should call the mysql_options() CAPI function with the MYSQL_SET_CHARSET_NAME option and appropriate character set name as arguments. This causes authen-tication to take place using the specified character set. Otherwise, authentication will fail unless the server default character set is thesame as the encoding in the authentication defaults.
Standard MySQL client programs support a --default-character-set option that causes mysql_options() to be calledas just described. For programs that use a connector that is not based on the C API, the connector may provide an equivalent tomysql_options() that can be used instead. Check the connector documentation.
The preceding notes do not apply for ucs2, which is not permitted as a client character set.
When you install MySQL, the grant tables are populated with an initial set of accounts. The names and access privileges for these ac-counts are described in Section 2.2, “Securing the Initial MySQL Accounts”, which also discusses how to assign passwords to them.Thereafter, you normally set up, modify, and remove MySQL accounts using statements such as CREATE USER, GRANT, and RE-VOKE. See Account Management Statements.
When you connect to a MySQL server with a command-line client, specify the user name and password as necessary for the accountthat you want to use:
shell> mysql --user=monty --password=password db_name
If you prefer short options, the command looks like this:
shell> mysql -u monty -ppassword db_name
There must be no space between the -p option and the following password value.
If you omit the password value following the --password or -p option on the command line, the client prompts for one.
Specifying a password on the command line should be considered insecure. See Section 1.2.2, “End-User Guidelines for Password Se-curity”. You can use an option file to avoid giving the password on the command line.
For additional information about specifying user names, passwords, and other connection parameters, see Connecting to the MySQLServer.
4.2. Adding User AccountsYou can create MySQL accounts in two ways:
• By using statements intended for creating accounts, such as CREATE USER or GRANT. These statements cause the server to makeappropriate modifications to the grant tables.
• By manipulating the MySQL grant tables directly with statements such as INSERT, UPDATE, or DELETE.
The preferred method is to use account-creation statements because they are more concise and less error-prone than manipulating thegrant tables directly. CREATE USER and GRANT are described in Account Management Statements.
Another option for creating accounts is to use one of several available third-party programs that offer capabilities for MySQL accountadministration. phpMyAdmin is one such program.
The following examples show how to use the mysql client program to set up new accounts. These examples assume that privilegeshave been set up according to the defaults described in Section 2.2, “Securing the Initial MySQL Accounts”. This means that to makechanges, you must connect to the MySQL server as the MySQL root user, and the root account must have the INSERT privilege forthe mysql database and the RELOAD administrative privilege.
As noted in the examples where appropriate, some of the statements will fail if the server's SQL mode has been set to enable certain re-strictions. In particular, strict mode (STRICT_TRANS_TABLES, STRICT_ALL_TABLES) and NO_AUTO_CREATE_USER will pre-vent the server from accepting some of the statements. Workarounds are indicated for these cases. For more information about SQLmodes and their effect on grant table manipulation, see Server SQL Modes, and GRANT Syntax.
First, use the mysql program to connect to the server as the MySQL root user:
MySQL User Account Management
46

shell> mysql --user=root mysql
If you have assigned a password to the root account, you will also need to supply a --password or -p option, both for this mysqlcommand and for those later in this section.
After connecting to the server as root, you can add new accounts. The following statements use GRANT to set up four new accounts:
mysql> CREATE USER 'monty'@'localhost' IDENTIFIED BY 'some_pass';mysql> GRANT ALL PRIVILEGES ON *.* TO 'monty'@'localhost'
-> WITH GRANT OPTION;mysql> CREATE USER 'monty'@'%' IDENTIFIED BY 'some_pass';mysql> GRANT ALL PRIVILEGES ON *.* TO 'monty'@'%'
-> WITH GRANT OPTION;mysql> CREATE USER 'admin'@'localhost';mysql> GRANT RELOAD,PROCESS ON *.* TO 'admin'@'localhost';mysql> CREATE USER 'dummy'@'localhost';
The accounts created by these statements have the following properties:
• Two of the accounts have a user name of monty and a password of some_pass. Both accounts are superuser accounts with fullprivileges to do anything. The 'monty'@'localhost' account can be used only when connecting from the local host. The'monty'@'%' account uses the '%' wildcard for the host part, so it can be used to connect from any host.
It is necessary to have both accounts for monty to be able to connect from anywhere as monty. Without the localhost account,the anonymous-user account for localhost that is created by mysql_install_db would take precedence when monty con-nects from the local host. As a result, monty would be treated as an anonymous user. The reason for this is that the anonymous-useraccount has a more specific Host column value than the 'monty'@'%' account and thus comes earlier in the user table sort or-der. (user table sorting is discussed in Section 3.4, “Access Control, Stage 1: Connection Verification”.)
• The 'admin'@'localhost' account has no password. This account can be used only by admin to connect from the local host.It is granted the RELOAD and PROCESS administrative privileges. These privileges enable the admin user to execute the mysql-admin reload, mysqladmin refresh, and mysqladmin flush-xxx commands, as well as mysqladmin pro-cesslist . No privileges are granted for accessing any databases. You could add such privileges later by issuing other GRANTstatements.
• The 'dummy'@'localhost' account has no password. This account can be used only to connect from the local host. No priv-ileges are granted. It is assumed that you will grant specific privileges to the account later.
The statements that create accounts with no password will fail if the NO_AUTO_CREATE_USER SQL mode is enabled. To deal withthis, use an IDENTIFIED BY clause that specifies a nonempty password.
To check the privileges for an account, use SHOW GRANTS:
mysql> SHOW GRANTS FOR 'admin'@'localhost';+-----------------------------------------------------+| Grants for admin@localhost |+-----------------------------------------------------+| GRANT RELOAD, PROCESS ON *.* TO 'admin'@'localhost' |+-----------------------------------------------------+
As an alternative to CREATE USER and GRANT, you can create the same accounts directly by issuing INSERT statements and thentelling the server to reload the grant tables using FLUSH PRIVILEGES:
shell> mysql --user=root mysqlmysql> INSERT INTO user
-> VALUES('localhost','monty',PASSWORD('some_pass'),-> 'Y','Y','Y','Y','Y','Y','Y','Y','Y','Y','Y','Y','Y','Y');
mysql> INSERT INTO user-> VALUES('%','monty',PASSWORD('some_pass'),-> 'Y','Y','Y','Y','Y','Y','Y','Y','Y','Y','Y','Y','Y','Y',-> 'Y','Y','Y','Y','Y','Y','Y','Y','Y','Y','Y','Y','Y','Y',-> '','','','',0,0,0,0);
mysql> INSERT INTO user SET Host='localhost',User='admin',-> Reload_priv='Y', Process_priv='Y';
mysql> INSERT INTO user (Host,User,Password)-> VALUES('localhost','dummy','');
mysql> FLUSH PRIVILEGES;
When you create accounts with INSERT, it is necessary to use FLUSH PRIVILEGES to tell the server to reload the grant tables. Oth-
MySQL User Account Management
47

erwise, the changes go unnoticed until you restart the server. With CREATE USER, FLUSH PRIVILEGES is unnecessary.
The reason for using the PASSWORD() function with INSERT is to encrypt the password. The CREATE USER statement encrypts thepassword for you, so PASSWORD() is unnecessary.
The 'Y' values enable privileges for the accounts. Depending on your MySQL version, you may have to use a different number of 'Y'values in the first two INSERT statements. The INSERT statement for the admin account employs the more readable extended IN-SERT syntax using SET.
In the INSERT statement for the dummy account, only the Host, User, and Password columns in the user table row are assignedvalues. None of the privilege columns are set explicitly, so MySQL assigns them all the default value of 'N'. This is equivalent to whatCREATE USER does.
If strict SQL mode is enabled, all columns that have no default value must have a value specified. In this case, INSERT statements mustexplicitly specify values for the ssl_cipher, x509_issuer, and x509_subject columns.
To set up a superuser account, it is necessary only to insert a user table row with all privilege columns set to 'Y'. The user tableprivileges are global, so no entries in any of the other grant tables are needed.
The next examples create three accounts and give them access to specific databases. Each of them has a user name of custom andpassword of obscure.
To create the accounts with CREATE USER and GRANT, use the following statements:
shell> mysql --user=root mysqlmysql> CREATE USER 'custom'@'localhost' IDENTIFIED BY 'obscure';mysql> GRANT SELECT,INSERT,UPDATE,DELETE,CREATE,DROP
-> ON bankaccount.*-> TO 'custom'@'localhost';
mysql> CREATE USER 'custom'@'host47.example.com' IDENTIFIED BY 'obscure';mysql> GRANT SELECT,INSERT,UPDATE,DELETE,CREATE,DROP
-> ON expenses.*-> TO 'custom'@'host47.example.com';
mysql> CREATE USER 'custom'@'server.domain' IDENTIFIED BY 'obscure';mysql> GRANT SELECT,INSERT,UPDATE,DELETE,CREATE,DROP
-> ON customer.*-> TO 'custom'@'server.domain';
The three accounts can be used as follows:
• The first account can access the bankaccount database, but only from the local host.
• The second account can access the expenses database, but only from the host host47.example.com.
• The third account can access the customer database, but only from the host server.domain.
To set up the custom accounts without GRANT, use INSERT statements as follows to modify the grant tables directly:
shell> mysql --user=root mysqlmysql> INSERT INTO user (Host,User,Password)
-> VALUES('localhost','custom',PASSWORD('obscure'));mysql> INSERT INTO user (Host,User,Password)
-> VALUES('host47.example.com','custom',PASSWORD('obscure'));mysql> INSERT INTO user (Host,User,Password)
-> VALUES('server.domain','custom',PASSWORD('obscure'));mysql> INSERT INTO db
-> (Host,Db,User,Select_priv,Insert_priv,-> Update_priv,Delete_priv,Create_priv,Drop_priv)-> VALUES('localhost','bankaccount','custom',-> 'Y','Y','Y','Y','Y','Y');
mysql> INSERT INTO db-> (Host,Db,User,Select_priv,Insert_priv,-> Update_priv,Delete_priv,Create_priv,Drop_priv)-> VALUES('host47.example.com','expenses','custom',-> 'Y','Y','Y','Y','Y','Y');
mysql> INSERT INTO db-> (Host,Db,User,Select_priv,Insert_priv,-> Update_priv,Delete_priv,Create_priv,Drop_priv)-> VALUES('server.domain','customer','custom',-> 'Y','Y','Y','Y','Y','Y');
mysql> FLUSH PRIVILEGES;
The first three INSERT statements add user table entries that permit the user custom to connect from the various hosts with the giv-
MySQL User Account Management
48

en password, but grant no global privileges (all privileges are set to the default value of 'N'). The next three INSERT statements adddb table entries that grant privileges to custom for the bankaccount, expenses, and customer databases, but only when ac-cessed from the proper hosts. As usual when you modify the grant tables directly, you must tell the server to reload them with FLUSHPRIVILEGES so that the privilege changes take effect.
To create a user who has access from all machines in a given domain (for example, mydomain.com), you can use the “%” wildcardcharacter in the host part of the account name:
mysql> CREATE USER 'myname'@'%.mydomain.com' IDENTIFIED BY 'mypass';
To do the same thing by modifying the grant tables directly, do this:
mysql> INSERT INTO user (Host,User,Password,...)-> VALUES('%.mydomain.com','myname',PASSWORD('mypass'),...);
mysql> FLUSH PRIVILEGES;
4.3. Removing User AccountsTo remove an account, use the DROP USER statement, which is described in DROP USER Syntax.
4.4. Setting Account Resource LimitsOne means of limiting use of MySQL server resources is to set the global max_user_connections system variable to a nonzerovalue. This limits the number of simultaneous connections that can be made by any given account, but places no limits on what a clientcan do once connected. In addition, setting max_user_connections does not enable management of individual accounts. Bothtypes of control are of interest to many MySQL administrators, particularly those working for Internet Service Providers.
In MySQL 5.1, you can limit use of the following server resources for individual accounts:
• The number of queries that an account can issue per hour
• The number of updates that an account can issue per hour
• The number of times an account can connect to the server per hour
• The number of simultaneous connections to the server by an account
Any statement that a client can issue counts against the query limit (unless its results are served from the query cache). Only statementsthat modify databases or tables count against the update limit.
An “account” in this context corresponds to a row in the mysql.user table. That is, a connection is assessed against the User andHost values in the user table row that applies to the connection. For example, an account 'usera'@'%.example.com' corres-ponds to a row in the user table that has User and Host values of usera and %.example.com, to permit usera to connect fromany host in the example.com domain. In this case, the server applies resource limits in this row collectively to all connections byusera from any host in the example.com domain because all such connections use the same account.
Before MySQL 5.0.3, an “account” was assessed against the actual host from which a user connects. This older method accounting maybe selected by starting the server with the --old-style-user-limits option. In this case, if usera connects simultaneouslyfrom host1.example.com and host2.example.com, the server applies the account resource limits separately to each connec-tion. If usera connects again from host1.example.com, the server applies the limits for that connection together with the existingconnection from that host.
To set resource limits for an account, use the GRANT statement (see GRANT Syntax). Provide a WITH clause that names each resourceto be limited. The default value for each limit is zero (no limit). For example, to create a new account that can access the customerdatabase, but only in a limited fashion, issue these statements:
mysql> CREATE USER 'francis'@'localhost' IDENTIFIED BY 'frank';mysql> GRANT ALL ON customer.* TO 'francis'@'localhost'
-> WITH MAX_QUERIES_PER_HOUR 20-> MAX_UPDATES_PER_HOUR 10-> MAX_CONNECTIONS_PER_HOUR 5-> MAX_USER_CONNECTIONS 2;
The limit types need not all be named in the WITH clause, but those named can be present in any order. The value for each per-hour
MySQL User Account Management
49
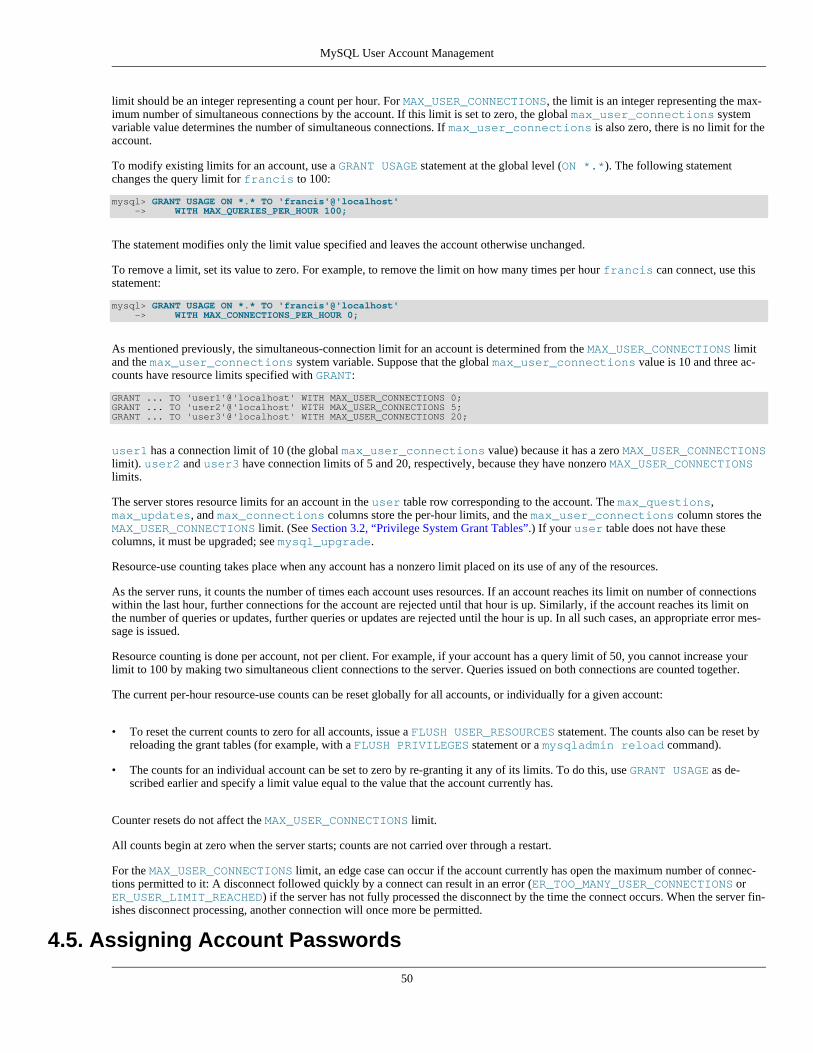
limit should be an integer representing a count per hour. For MAX_USER_CONNECTIONS, the limit is an integer representing the max-imum number of simultaneous connections by the account. If this limit is set to zero, the global max_user_connections systemvariable value determines the number of simultaneous connections. If max_user_connections is also zero, there is no limit for theaccount.
To modify existing limits for an account, use a GRANT USAGE statement at the global level (ON *.*). The following statementchanges the query limit for francis to 100:
mysql> GRANT USAGE ON *.* TO 'francis'@'localhost'-> WITH MAX_QUERIES_PER_HOUR 100;
The statement modifies only the limit value specified and leaves the account otherwise unchanged.
To remove a limit, set its value to zero. For example, to remove the limit on how many times per hour francis can connect, use thisstatement:
mysql> GRANT USAGE ON *.* TO 'francis'@'localhost'-> WITH MAX_CONNECTIONS_PER_HOUR 0;
As mentioned previously, the simultaneous-connection limit for an account is determined from the MAX_USER_CONNECTIONS limitand the max_user_connections system variable. Suppose that the global max_user_connections value is 10 and three ac-counts have resource limits specified with GRANT:
GRANT ... TO 'user1'@'localhost' WITH MAX_USER_CONNECTIONS 0;GRANT ... TO 'user2'@'localhost' WITH MAX_USER_CONNECTIONS 5;GRANT ... TO 'user3'@'localhost' WITH MAX_USER_CONNECTIONS 20;
user1 has a connection limit of 10 (the global max_user_connections value) because it has a zero MAX_USER_CONNECTIONSlimit). user2 and user3 have connection limits of 5 and 20, respectively, because they have nonzero MAX_USER_CONNECTIONSlimits.
The server stores resource limits for an account in the user table row corresponding to the account. The max_questions,max_updates, and max_connections columns store the per-hour limits, and the max_user_connections column stores theMAX_USER_CONNECTIONS limit. (See Section 3.2, “Privilege System Grant Tables”.) If your user table does not have thesecolumns, it must be upgraded; see mysql_upgrade.
Resource-use counting takes place when any account has a nonzero limit placed on its use of any of the resources.
As the server runs, it counts the number of times each account uses resources. If an account reaches its limit on number of connectionswithin the last hour, further connections for the account are rejected until that hour is up. Similarly, if the account reaches its limit onthe number of queries or updates, further queries or updates are rejected until the hour is up. In all such cases, an appropriate error mes-sage is issued.
Resource counting is done per account, not per client. For example, if your account has a query limit of 50, you cannot increase yourlimit to 100 by making two simultaneous client connections to the server. Queries issued on both connections are counted together.
The current per-hour resource-use counts can be reset globally for all accounts, or individually for a given account:
• To reset the current counts to zero for all accounts, issue a FLUSH USER_RESOURCES statement. The counts also can be reset byreloading the grant tables (for example, with a FLUSH PRIVILEGES statement or a mysqladmin reload command).
• The counts for an individual account can be set to zero by re-granting it any of its limits. To do this, use GRANT USAGE as de-scribed earlier and specify a limit value equal to the value that the account currently has.
Counter resets do not affect the MAX_USER_CONNECTIONS limit.
All counts begin at zero when the server starts; counts are not carried over through a restart.
For the MAX_USER_CONNECTIONS limit, an edge case can occur if the account currently has open the maximum number of connec-tions permitted to it: A disconnect followed quickly by a connect can result in an error (ER_TOO_MANY_USER_CONNECTIONS orER_USER_LIMIT_REACHED) if the server has not fully processed the disconnect by the time the connect occurs. When the server fin-ishes disconnect processing, another connection will once more be permitted.
4.5. Assigning Account Passwords
MySQL User Account Management
50

Required credentials for clients that connect to the MySQL server can include a password. This section describes how to assign pass-words for MySQL accounts.
To assign a password when you create a new account with CREATE USER, include an IDENTIFIED BY clause:
mysql> CREATE USER 'jeffrey'@'localhost'-> IDENTIFIED BY 'mypass';
To assign or change a password for an existing account, one way is to issue a SET PASSWORD statement:
mysql> SET PASSWORD FOR-> 'jeffrey'@'localhost' = PASSWORD('mypass');
MySQL stores passwords in the user table in the mysql database. Only users such as root that have update access to the mysqldatabase can change the password for other users. If you are not connected as an anonymous user, you can change your own passwordby omitting the FOR clause:
mysql> SET PASSWORD = PASSWORD('mypass');
You can also use a GRANT USAGE statement at the global level (ON *.*) to assign a password to an account without affecting the ac-count's current privileges:
mysql> GRANT USAGE ON *.* TO 'jeffrey'@'localhost'-> IDENTIFIED BY 'mypass';
To assign a password from the command line, use the mysqladmin command:
shell> mysqladmin -u user_name -h host_name password "newpwd"
The account for which this command sets the password is the one with a user table row that matches user_name in the Usercolumn and the client host from which you connect in the Host column.
It is preferable to assign passwords using one of the preceding methods, but it is also possible to modify the user table directly. In thiscase, you must also use FLUSH PRIVILEGES to cause the server to reread the grant tables. Otherwise, the change remains unnoticedby the server until you restart it.
• To establish a password for a new account, provide a value for the Password column:
mysql> INSERT INTO mysql.user (Host,User,Password)-> VALUES('localhost','jeffrey',PASSWORD('mypass'));
mysql> FLUSH PRIVILEGES;
• To change the password for an existing account, use UPDATE to set the Password column value:
mysql> UPDATE mysql.user SET Password = PASSWORD('bagel')-> WHERE Host = 'localhost' AND User = 'francis';
mysql> FLUSH PRIVILEGES;
During authentication when a client connects to the server, MySQL treats the password in the user table as an encrypted hash value(the value that PASSWORD() would return for the password). When assigning a password to an account, it is important to store an en-crypted value, not the plaintext password. Use the following guidelines:
• When you assign a password using CREATE USER, GRANT with an IDENTIFIED BY clause, or the mysqladmin passwordcommand, they encrypt the password for you. Specify the literal plaintext password:
mysql> CREATE USER 'jeffrey'@'localhost'-> IDENTIFIED BY 'mypass';
• For CREATE USER or GRANT, you can avoid sending the plaintext password if you know the hash value that PASSWORD() wouldreturn for the password. Specify the hash value preceded by the keyword PASSWORD:
mysql> CREATE USER 'jeffrey'@'localhost'
MySQL User Account Management
51

-> IDENTIFIED BY PASSWORD '*90E462C37378CED12064BB3388827D2BA3A9B689';
• When you assign an account a nonempty password using SET PASSWORD, INSERT, or UPDATE, you must use the PASSWORD()function to encrypt the password, otherwise the password is stored as plaintext. Suppose that you assign a password like this:
mysql> SET PASSWORD FOR-> 'jeffrey'@'localhost' = 'mypass';
The result is that the literal value 'mypass' is stored as the password in the user table, not the encrypted value. When jeffreyattempts to connect to the server using this password, the value is encrypted and compared to the value stored in the user table.However, the stored value is the literal string 'mypass', so the comparison fails and the server rejects the connection with an Ac-cess denied error.
In MySQL 5.1, enabling the read_only system variable prevents the use of the SET PASSWORD statement by any user not havingthe SUPER privilege.
Note
PASSWORD() encryption differs from Unix password encryption. See Section 4.1, “User Names and Passwords”.
4.6. Using SSL for Secure ConnectionsMySQL supports secure (encrypted) connections between MySQL clients and the server using the Secure Sockets Layer (SSL) pro-tocol. This section discusses how to use SSL connections. For information on how to require users to use SSL connections, see the dis-cussion of the REQUIRE clause of the GRANT statement in GRANT Syntax.
The standard configuration of MySQL is intended to be as fast as possible, so encrypted connections are not used by default. For applic-ations that require the security provided by encrypted connections, the extra computation to encrypt the data is worthwhile.
MySQL enables encryption on a per-connection basis. You can choose a normal unencrypted connection or a secure encrypted SSLconnection according the requirements of individual applications.
Secure connections are based on the OpenSSL API and are available through the MySQL C API. Replication uses the C API, so secureconnections can be used between master and slave servers.
Another way to connect securely is from within an SSH connection to the MySQL server host. For an example, see Section 4.7,“Connecting to MySQL Remotely from Windows with SSH”.
4.6.1. Basic SSL ConceptsTo understand how MySQL uses SSL, it is necessary to explain some basic SSL and X509 concepts. People who are familiar with thesecan skip this part of the discussion.
By default, MySQL uses unencrypted connections between the client and the server. This means that someone with access to the net-work could watch all your traffic and look at the data being sent or received. They could even change the data while it is in transitbetween client and server. To improve security a little, you can compress client/server traffic by using the --compress option wheninvoking client programs. However, this does not foil a determined attacker.
When you need to move information over a network in a secure fashion, an unencrypted connection is unacceptable. Encryption is theway to make any kind of data unreadable. In fact, today's practice requires many additional security elements from encryption al-gorithms. They should resist many kind of known attacks such as changing the order of encrypted messages or replaying data twice.
SSL is a protocol that uses different encryption algorithms to ensure that data received over a public network can be trusted. It hasmechanisms to detect any data change, loss, or replay. SSL also incorporates algorithms that provide identity verification using theX509 standard.
X509 makes it possible to identify someone on the Internet. It is most commonly used in e-commerce applications. In basic terms, thereshould be some company called a “Certificate Authority” (or CA) that assigns electronic certificates to anyone who needs them. Certi-ficates rely on asymmetric encryption algorithms that have two encryption keys (a public key and a secret key). A certificate owner canshow the certificate to another party as proof of identity. A certificate consists of its owner's public key. Any data encrypted with thispublic key can be decrypted only using the corresponding secret key, which is held by the owner of the certificate.
MySQL User Account Management
52

If you need more information about SSL, X509, or encryption, use your favorite Internet search engine to search for the keywords inwhich you are interested.
4.6.2. Using SSL ConnectionsTo use SSL connections between the MySQL server and client programs, your system must support either OpenSSL or yaSSL and yourversion of MySQL must be built with SSL support.
To make it easier to use secure connections, MySQL is bundled with yaSSL. (MySQL and yaSSL employ the same licensing model,whereas OpenSSL uses an Apache-style license.) yaSSL support initially was available only for a few platforms, but now it is availableon all MySQL platforms supported by Oracle Corporation.
To get secure connections to work with MySQL and SSL, you must do the following:
1. If you are not using a binary (precompiled) version of MySQL that has been built with SSL support, and you are going to useOpenSSL rather than the bundled yaSSL library, install OpenSSL if it has not already been installed. We have tested MySQL withOpenSSL 0.9.6. To obtain OpenSSL, visit http://www.openssl.org.
Building MySQL using OpenSSL requires a shared OpenSSL library, otherwise linker errors occur. Alternatively, build MySQLusing yaSSL.
2. If you are not using a binary (precompiled) version of MySQL that has been built with SSL support, configure a MySQL sourcedistribution to use SSL. When you configure MySQL, invoke the configure script like this:
shell> ./configure --with-ssl
That configures the distribution to use the bundled yaSSL library. To use OpenSSL instead, specify the --with-ssl option withthe path to the directory where the OpenSSL header files and libraries are located:
shell> ./configure --with-ssl=path
Note
On some platforms the full determination of the You may also need to explicitly add the SSL library and header director-ies. You can do this by setting the LDFLAGS, CFLAGS, CPPFLAGS and CXXFLAGS with the full directories. For ex-ample:
shell> LDFLAGS="-L/usr/local/ssl/lib" CFLAGS="-I/usr/local/ssl/include" \CPPFLAGS="-I/usr/local/ssl/include" CXXFLAGS="-I/usr/local/ssl/include" \configure --with-ssl=/usr/local/ssl
Before MySQL 5.1.11, you must use the appropriate option to select the SSL library that you want to use.
For yaSSL:
shell> ./configure --with-yassl
For OpenSSL:
shell> ./configure --with-openssl
Note that yaSSL support on Unix platforms requires that either /dev/urandom or /dev/random be available to retrieve truerandom numbers. For additional information (especially regarding yaSSL on Solaris versions prior to 2.8 and HP-UX), see Bug#13164.
3. Make sure that the user in the mysql database includes the SSL-related columns (beginning with ssl_ and x509_). If youruser table does not have these columns, it must be upgraded; see mysql_upgrade.
4. To check whether a server binary is compiled with SSL support, invoke it with the --ssl option. An error will occur if the serverdoes not support SSL:
shell> mysqld --ssl --help060525 14:18:52 [ERROR] mysqld: unknown option '--ssl'
MySQL User Account Management
53
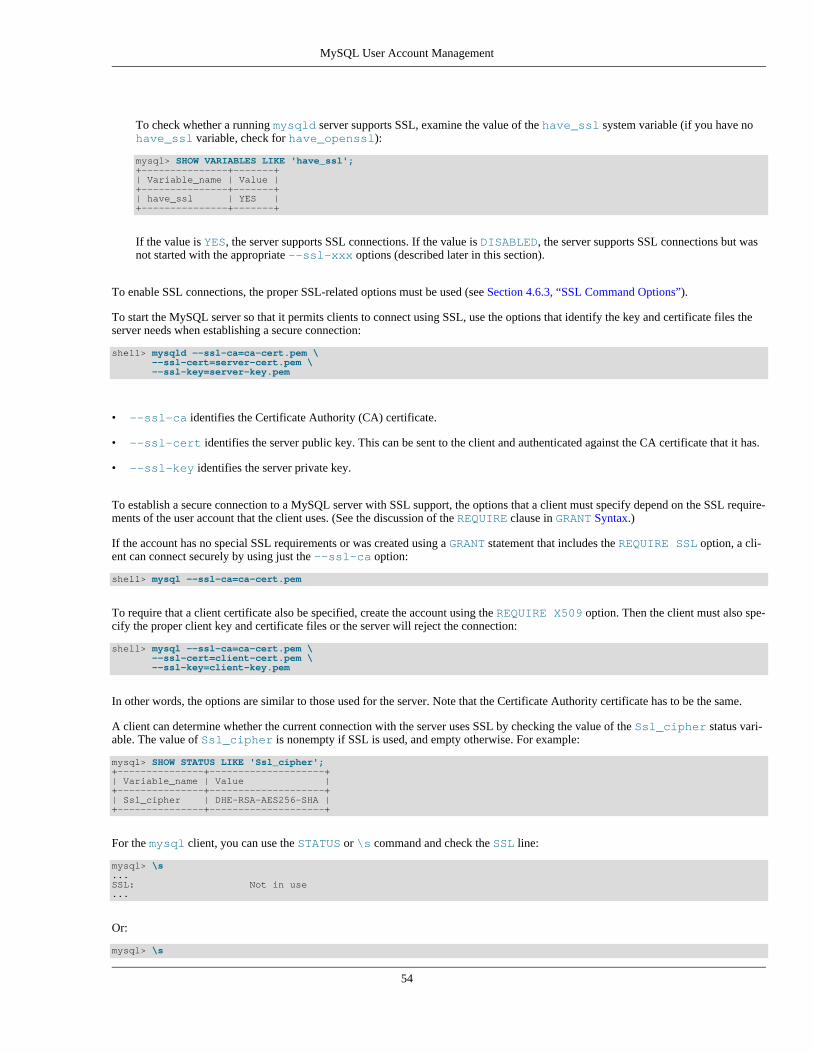
To check whether a running mysqld server supports SSL, examine the value of the have_ssl system variable (if you have nohave_ssl variable, check for have_openssl):
mysql> SHOW VARIABLES LIKE 'have_ssl';+---------------+-------+| Variable_name | Value |+---------------+-------+| have_ssl | YES |+---------------+-------+
If the value is YES, the server supports SSL connections. If the value is DISABLED, the server supports SSL connections but wasnot started with the appropriate --ssl-xxx options (described later in this section).
To enable SSL connections, the proper SSL-related options must be used (see Section 4.6.3, “SSL Command Options”).
To start the MySQL server so that it permits clients to connect using SSL, use the options that identify the key and certificate files theserver needs when establishing a secure connection:
shell> mysqld --ssl-ca=ca-cert.pem \--ssl-cert=server-cert.pem \--ssl-key=server-key.pem
• --ssl-ca identifies the Certificate Authority (CA) certificate.
• --ssl-cert identifies the server public key. This can be sent to the client and authenticated against the CA certificate that it has.
• --ssl-key identifies the server private key.
To establish a secure connection to a MySQL server with SSL support, the options that a client must specify depend on the SSL require-ments of the user account that the client uses. (See the discussion of the REQUIRE clause in GRANT Syntax.)
If the account has no special SSL requirements or was created using a GRANT statement that includes the REQUIRE SSL option, a cli-ent can connect securely by using just the --ssl-ca option:
shell> mysql --ssl-ca=ca-cert.pem
To require that a client certificate also be specified, create the account using the REQUIRE X509 option. Then the client must also spe-cify the proper client key and certificate files or the server will reject the connection:
shell> mysql --ssl-ca=ca-cert.pem \--ssl-cert=client-cert.pem \--ssl-key=client-key.pem
In other words, the options are similar to those used for the server. Note that the Certificate Authority certificate has to be the same.
A client can determine whether the current connection with the server uses SSL by checking the value of the Ssl_cipher status vari-able. The value of Ssl_cipher is nonempty if SSL is used, and empty otherwise. For example:
mysql> SHOW STATUS LIKE 'Ssl_cipher';+---------------+--------------------+| Variable_name | Value |+---------------+--------------------+| Ssl_cipher | DHE-RSA-AES256-SHA |+---------------+--------------------+
For the mysql client, you can use the STATUS or \s command and check the SSL line:
mysql> \s...SSL: Not in use...
Or:
mysql> \s
MySQL User Account Management
54
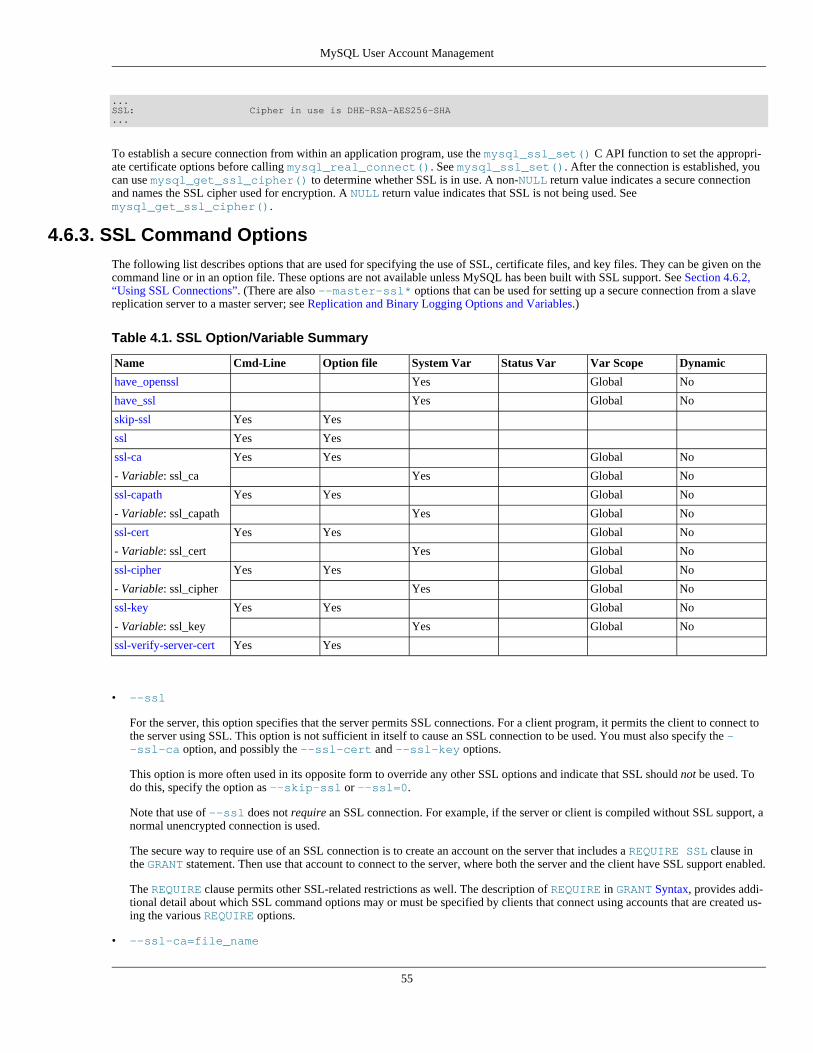
...SSL: Cipher in use is DHE-RSA-AES256-SHA...
To establish a secure connection from within an application program, use the mysql_ssl_set() C API function to set the appropri-ate certificate options before calling mysql_real_connect(). See mysql_ssl_set(). After the connection is established, youcan use mysql_get_ssl_cipher() to determine whether SSL is in use. A non-NULL return value indicates a secure connectionand names the SSL cipher used for encryption. A NULL return value indicates that SSL is not being used. Seemysql_get_ssl_cipher().
4.6.3. SSL Command OptionsThe following list describes options that are used for specifying the use of SSL, certificate files, and key files. They can be given on thecommand line or in an option file. These options are not available unless MySQL has been built with SSL support. See Section 4.6.2,“Using SSL Connections”. (There are also --master-ssl* options that can be used for setting up a secure connection from a slavereplication server to a master server; see Replication and Binary Logging Options and Variables.)
Table 4.1. SSL Option/Variable Summary
Name Cmd-Line Option file System Var Status Var Var Scope Dynamic
have_openssl Yes Global No
have_ssl Yes Global No
skip-ssl Yes Yes
ssl Yes Yes
ssl-ca Yes Yes Global No
- Variable: ssl_ca Yes Global No
ssl-capath Yes Yes Global No
- Variable: ssl_capath Yes Global No
ssl-cert Yes Yes Global No
- Variable: ssl_cert Yes Global No
ssl-cipher Yes Yes Global No
- Variable: ssl_cipher Yes Global No
ssl-key Yes Yes Global No
- Variable: ssl_key Yes Global No
ssl-verify-server-cert Yes Yes
• --ssl
For the server, this option specifies that the server permits SSL connections. For a client program, it permits the client to connect tothe server using SSL. This option is not sufficient in itself to cause an SSL connection to be used. You must also specify the --ssl-ca option, and possibly the --ssl-cert and --ssl-key options.
This option is more often used in its opposite form to override any other SSL options and indicate that SSL should not be used. Todo this, specify the option as --skip-ssl or --ssl=0.
Note that use of --ssl does not require an SSL connection. For example, if the server or client is compiled without SSL support, anormal unencrypted connection is used.
The secure way to require use of an SSL connection is to create an account on the server that includes a REQUIRE SSL clause inthe GRANT statement. Then use that account to connect to the server, where both the server and the client have SSL support enabled.
The REQUIRE clause permits other SSL-related restrictions as well. The description of REQUIRE in GRANT Syntax, provides addi-tional detail about which SSL command options may or must be specified by clients that connect using accounts that are created us-ing the various REQUIRE options.
• --ssl-ca=file_name
MySQL User Account Management
55

The path to a file that contains a list of trusted SSL CAs.
• --ssl-capath=directory_name
The path to a directory that contains trusted SSL CA certificates in PEM format.
• --ssl-cert=file_name
The name of the SSL certificate file to use for establishing a secure connection.
• --ssl-cipher=cipher_list
A list of permissible ciphers to use for SSL encryption. For greatest portability, cipher_list should be a list of one or morecipher names, separated by colons. Examples:
--ssl-cipher=AES128-SHA--ssl-cipher=DHE-RSA-AES256-SHA:AES128-SHA
This format is understood both by OpenSSL and yaSSL. OpenSSL supports a more flexible syntax for specifying ciphers, as de-scribed in the OpenSSL documentation at http://www.openssl.org/docs/apps/ciphers.html. However, this extended syntax will fail ifused with a MySQL installation compiled against yaSSL.
If no cipher in the list is supported, SSL connections will not work.
• --ssl-key=file_name
The name of the SSL key file to use for establishing a secure connection.
If the key file is protected by a passphrase, and the MySQL distribution was built using OpenSSL, the program will prompt the userfor the passphrase. The password must be given interactively; it cannot be stored in a file. If the passphrase is incorrect, the programcontinues as if it could not read the key. An error occurs if the key file is protected by a passphrase for distributions built usingyaSSL.
• --ssl-verify-server-cert
This option is available for client programs only, not the server. It causes the server's Common Name value in the certificate that theserver sends to the client to be verified against the host name that the client uses for connecting to the server, and the connection isrejected if there is a mismatch. This feature can be used to prevent man-in-the-middle attacks. Verification is disabled by default.This option was added in MySQL 5.1.11.
As of MySQL 5.1.18, if you use SSL when establishing a client connection, you can tell the client not to authenticate the server certific-ate by specifying neither --ssl-ca nor --ssl-capath. The server still verifies the client according to any applicable requirementsestablished using GRANT statements for the client, and it still uses any --ssl-ca/--ssl-capath values that were passed to serverat startup time.
4.6.4. Setting Up SSL Certificates for MySQLThis section demonstrates how to set up SSL certificate and key files for use by MySQL servers and clients. The first example shows asimplified procedure such as you might use from the command line. The second shows a script that contains more detail. The first twoexamples are intended for use on Unix and both use the openssl command that is part of OpenSSL. The third example describes howto set up SSL files on Windows.
Following the third example, instructions are given for using the files to test SSL connections. You can also use the files as described inSection 4.6.2, “Using SSL Connections”.
Example 1: Creating SSL Files from the Command Line on Unix
The following example shows a set of commands to create MySQL server and client certificate and key files. You will need to respondto several prompts by the openssl commands. To generate test files, you can press Enter to all prompts. To generate files for produc-tion use, you should provide nonempty responses.
# Create clean environmentshell> rm -rf newcertsshell> mkdir newcerts && cd newcerts
MySQL User Account Management
56

# Create CA certificateshell> openssl genrsa 2048 > ca-key.pemshell> openssl req -new -x509 -nodes -days 1000 \
-key ca-key.pem -out ca-cert.pem# Create server certificate, remove passphrase, and sign itshell> openssl req -newkey rsa:2048 -days 1000 \
-nodes -keyout server-key.pem -out server-req.pemshell> openssl rsa -in server-key.pem -out server-key.pemshell> openssl x509 -req -in server-req.pem -days 1000 \
-CA ca-cert.pem -CAkey ca-key.pem -set_serial 01 -out server-cert.pem# Create client certificate, remove passphrase, and sign itshell> openssl req -newkey rsa:2048 -days 1000 \
-nodes -keyout client-key.pem -out client-req.pemshell> openssl rsa -in client-key.pem -out client-key.pemshell> openssl x509 -req -in client-req.pem -days 1000 \
-CA ca-cert.pem -CAkey ca-key.pem -set_serial 01 -out client-cert.pem
After generating the certificates, verify them:
mysql> openssl verify -CAfile ca-cert.pem server-cert.pem client-cert.pem
Example 2: Creating SSL Files Using a Script on Unix
Here is an example script that shows how to set up SSL certificates for MySQL:
DIR=`pwd`/opensslPRIV=$DIR/privatemkdir $DIR $PRIV $DIR/newcertscp /usr/share/ssl/openssl.cnf $DIRreplace ./demoCA $DIR -- $DIR/openssl.cnf# Create necessary files: $database, $serial and $new_certs_dir# directory (optional)touch $DIR/index.txtecho "01" > $DIR/serial## Generation of Certificate Authority(CA)#openssl req -new -x509 -keyout $PRIV/cakey.pem -out $DIR/ca-cert.pem \
-days 3600 -config $DIR/openssl.cnf# Sample output:# Using configuration from /home/monty/openssl/openssl.cnf# Generating a 1024 bit RSA private key# ................++++++# .........++++++# writing new private key to '/home/monty/openssl/private/cakey.pem'# Enter PEM pass phrase:# Verifying password - Enter PEM pass phrase:# -----# You are about to be asked to enter information that will be# incorporated into your certificate request.# What you are about to enter is what is called a Distinguished Name# or a DN.# There are quite a few fields but you can leave some blank# For some fields there will be a default value,# If you enter '.', the field will be left blank.# -----# Country Name (2 letter code) [AU]:FI# State or Province Name (full name) [Some-State]:.# Locality Name (eg, city) []:# Organization Name (eg, company) [Internet Widgits Pty Ltd]:MySQL AB# Organizational Unit Name (eg, section) []:# Common Name (eg, YOUR name) []:MySQL admin# Email Address []:## Create server request and key#openssl req -new -keyout $DIR/server-key.pem -out \
$DIR/server-req.pem -days 3600 -config $DIR/openssl.cnf# Sample output:# Using configuration from /home/monty/openssl/openssl.cnf# Generating a 1024 bit RSA private key# ..++++++# ..........++++++# writing new private key to '/home/monty/openssl/server-key.pem'# Enter PEM pass phrase:# Verifying password - Enter PEM pass phrase:# -----# You are about to be asked to enter information that will be# incorporated into your certificate request.# What you are about to enter is what is called a Distinguished Name# or a DN.# There are quite a few fields but you can leave some blank# For some fields there will be a default value,# If you enter '.', the field will be left blank.# -----
MySQL User Account Management
57

# Country Name (2 letter code) [AU]:FI# State or Province Name (full name) [Some-State]:.# Locality Name (eg, city) []:# Organization Name (eg, company) [Internet Widgits Pty Ltd]:MySQL AB# Organizational Unit Name (eg, section) []:# Common Name (eg, YOUR name) []:MySQL server# Email Address []:## Please enter the following 'extra' attributes# to be sent with your certificate request# A challenge password []:# An optional company name []:## Remove the passphrase from the key#openssl rsa -in $DIR/server-key.pem -out $DIR/server-key.pem## Sign server cert#openssl ca -policy policy_anything -out $DIR/server-cert.pem \
-config $DIR/openssl.cnf -infiles $DIR/server-req.pem# Sample output:# Using configuration from /home/monty/openssl/openssl.cnf# Enter PEM pass phrase:# Check that the request matches the signature# Signature ok# The Subjects Distinguished Name is as follows# countryName :PRINTABLE:'FI'# organizationName :PRINTABLE:'MySQL AB'# commonName :PRINTABLE:'MySQL admin'# Certificate is to be certified until Sep 13 14:22:46 2003 GMT# (365 days)# Sign the certificate? [y/n]:y### 1 out of 1 certificate requests certified, commit? [y/n]y# Write out database with 1 new entries# Data Base Updated## Create client request and key#openssl req -new -keyout $DIR/client-key.pem -out \
$DIR/client-req.pem -days 3600 -config $DIR/openssl.cnf# Sample output:# Using configuration from /home/monty/openssl/openssl.cnf# Generating a 1024 bit RSA private key# .....................................++++++# .............................................++++++# writing new private key to '/home/monty/openssl/client-key.pem'# Enter PEM pass phrase:# Verifying password - Enter PEM pass phrase:# -----# You are about to be asked to enter information that will be# incorporated into your certificate request.# What you are about to enter is what is called a Distinguished Name# or a DN.# There are quite a few fields but you can leave some blank# For some fields there will be a default value,# If you enter '.', the field will be left blank.# -----# Country Name (2 letter code) [AU]:FI# State or Province Name (full name) [Some-State]:.# Locality Name (eg, city) []:# Organization Name (eg, company) [Internet Widgits Pty Ltd]:MySQL AB# Organizational Unit Name (eg, section) []:# Common Name (eg, YOUR name) []:MySQL user# Email Address []:## Please enter the following 'extra' attributes# to be sent with your certificate request# A challenge password []:# An optional company name []:## Remove the passphrase from the key#openssl rsa -in $DIR/client-key.pem -out $DIR/client-key.pem## Sign client cert#openssl ca -policy policy_anything -out $DIR/client-cert.pem \
-config $DIR/openssl.cnf -infiles $DIR/client-req.pem# Sample output:# Using configuration from /home/monty/openssl/openssl.cnf# Enter PEM pass phrase:# Check that the request matches the signature# Signature ok# The Subjects Distinguished Name is as follows# countryName :PRINTABLE:'FI'# organizationName :PRINTABLE:'MySQL AB'# commonName :PRINTABLE:'MySQL user'
MySQL User Account Management
58

# Certificate is to be certified until Sep 13 16:45:17 2003 GMT# (365 days)# Sign the certificate? [y/n]:y### 1 out of 1 certificate requests certified, commit? [y/n]y# Write out database with 1 new entries# Data Base Updated## Create a my.cnf file that you can use to test the certificates#cnf=""cnf="$cnf [client]"cnf="$cnf ssl-ca=$DIR/ca-cert.pem"cnf="$cnf ssl-cert=$DIR/client-cert.pem"cnf="$cnf ssl-key=$DIR/client-key.pem"cnf="$cnf [mysqld]"cnf="$cnf ssl-ca=$DIR/ca-cert.pem"cnf="$cnf ssl-cert=$DIR/server-cert.pem"cnf="$cnf ssl-key=$DIR/server-key.pem"echo $cnf | replace " " '' > $DIR/my.cnf
Example 3: Creating SSL Files on Windows
Download OpenSSL for Windows. An overview of available packages can be seen here: ht-tp://www.slproweb.com/products/Win32OpenSSL.html Choose the Win32 OpenSSL Light or Win64 OpenSSL Light package, depend-ing on your architecture (32-bit or 64-bit). The default installation location will be C:\OpenSSL-Win32 or C:\OpenSSL-Win64,depending on which package you downloaded. The following instructions assume a default location of C:\OpenSSL-Win32. Modifythis as necessary if you are using the 64-bit package.
if a message occurs during setup indicating '...critical component is missing: Microsoft Visual C++ 2008Redistributables', cancel the setup and download one of the following packages as well, again depending on your architecture(32-bit or 64-bit):
• Visual C++ 2008 Redistributables (x86), available at: ht-tp://www.microsoft.com/downloads/details.aspx?FamilyID=9b2da534-3e03-4391-8a4d-074b9f2bc1bf
• Visual C++ 2008 Redistributables (x64), available at: ht-tp://www.microsoft.com/downloads/details.aspx?familyid=BD2A6171-E2D6-4230-B809-9A8D7548C1B6
After installing the additional package, restart the OpenSSL setup.
During installation, leave the default C:\OpenSSL-Win32 as the install path, and also leave the default option 'Copy OpenSSLDLL files to the Windows system directory' selected.
When the installation has finished, add C:\OpenSSL-Win32\bin to the Windows System Path variable of your server:
1. On the Windows desktop, right-click the My Computer icon, and select Properties.
2. Select the Advanced tab from the SYSTEM PROPERTIES menu that appears, and click the ENVIRONMENT VARIABLES button.
3. Under SYSTEM VARIABLES, select Path, then click the EDIT button. The EDIT SYSTEM VARIABLE dialogue should appear.
4. Add ';C:\OpenSSL-Win32\bin' to the end (notice the semicolon).
5. Press OK 3 times.
6. Check that OpenSSL was correctly integrated into the Path variable by opening a new command console(Start>Run>cmd.exe) and verifying that OpenSSL is available:
Microsoft Windows [Version ...]Copyright (c) 2006 Microsoft Corporation. All rights reserved.C:\Windows\system32>cd \C:\>opensslOpenSSL> exit <<< If you see the OpenSSL prompt, installation was successful.C:\>
MySQL User Account Management
59

Depending on your version of Windows, the preceding instructions might be slightly different.
After OpenSSL has been installed, use instructions similar to those from from Example 1 (shown earlier in this section), with the fol-lowing changes:
• Change the following Unix commands:
# Create clean environmentshell> rm -rf newcertsshell> mkdir newcerts && cd newcerts
On Windows, use these commands instead:
# Create clean environmentshell> md c:\newcertsshell> cd c:\newcerts
• When a '\' character is shown at the end of a command line, this '\' character must be removed and the command lines enteredall on a single line.
Testing SSL Connections
To test SSL connections, start the server as follows, where $DIR is the path name to the directory where the sample my.cnf optionfile (or my.ini on Windows) is located:
shell> mysqld --defaults-file=$DIR/my.cnf &
Then invoke a client program using the same option file:
shell> mysql --defaults-file=$DIR/my.cnf
If you have a MySQL source distribution, you can also test your setup by modifying the preceding my.cnf file to refer to the demon-stration certificate and key files in the mysql-test/std_data directory of the distribution.
4.7. Connecting to MySQL Remotely from Windows with SSHThis section describes how to get a secure connection to a remote MySQL server with SSH. The information was provided by DavidCarlson <[email protected]>.
1. Install an SSH client on your Windows machine. As a user, the best nonfree one I have found is from SecureCRT from ht-tp://www.vandyke.com/. Another option is f-secure from http://www.f-secure.com/. You can also find some free ones onGoogle at http://directory.google.com/Top/Computers/Internet/Protocols/SSH/Clients/Windows/.
2. Start your Windows SSH client. Set Host_Name = yourmysqlserver_URL_or_IP. Set userid=your_userid to login to your server. This userid value might not be the same as the user name of your MySQL account.
3. Set up port forwarding. Either do a remote forward (Set local_port: 3306, remote_host: yourmysqlserver-name_or_ip, remote_port: 3306 ) or a local forward (Set port: 3306, host: localhost, remote port:3306).
4. Save everything, otherwise you will have to redo it the next time.
5. Log in to your server with the SSH session you just created.
6. On your Windows machine, start some ODBC application (such as Access).
7. Create a new file in Windows and link to MySQL using the ODBC driver the same way you normally do, except type in local-host for the MySQL host server, not yourmysqlservername.
At this point, you should have an ODBC connection to MySQL, encrypted using SSH.
MySQL User Account Management
60

4.8. Auditing MySQL Account ActivityApplications can use the following guidelines to perform auditing that ties database activity to MySQL accounts.
MySQL accounts correspond to rows in the mysql.user table. When a client connects successfully, the server authenticates the clientto a particular row in this table. The User and Host column values in this row uniquely identify the account and correspond to the'user_name'@'host_name' format in which account names are written in SQL statements.
The account used to authenticate a client determines which privileges the client has. Normally, the CURRENT_USER() function can beinvoked to determine which account this is for the client user. Its value is constructed from the User and Host columns of the usertable row for the account.
However, there are circumstances under which the CURRENT_USER() value corresponds not to the client user but to a different ac-count. This occurs in contexts when privilege checking is not based the client's account:
• Stored routines (procedures and functions) defined with the SQL SECURITY DEFINER characteristic
• Views defined with the SQL SECURITY DEFINER characteristic (as of MySQL 5.1.12)
• Triggers and events
In those contexts, privilege checking is done against the DEFINER account and CURRENT_USER() refers to that account, not to theaccount for the client who invoked the stored routine or view or who caused the trigger to activate. To determine the invoking user, youcan call the USER() function, which returns a value indicating the actual user name provided by the client and the host from which theclient connected. However, this value does not necessarily correspond directly to an account in the user table, because the USER()value never contains wildcards, whereas account values (as returned by CURRENT_USER()) may contain user name and host namewildcards.
For example, a blank user name matches any user, so an account of ''@'localhost' enables clients to connect as an anonymoususer from the local host with any user name. If this case, if a client connects as user1 from the local host, USER() and CUR-RENT_USER() return different values:
mysql> SELECT USER(), CURRENT_USER();+-----------------+----------------+| USER() | CURRENT_USER() |+-----------------+----------------+| user1@localhost | @localhost |+-----------------+----------------+
The host name part of an account can contain wildcards, too. If the host name contains a '%' or '_' pattern character or uses netmasknotation, the account can be used for clients connecting from multiple hosts and the CURRENT_USER() value will not indicate whichone. For example, the account 'user2'@'%.example.com' can be used by user2 to connect from any host in the ex-ample.com domain. If user2 connects from remote.example.com, USER() and CURRENT_USER() return different values:
mysql> SELECT USER(), CURRENT_USER();+--------------------------+---------------------+| USER() | CURRENT_USER() |+--------------------------+---------------------+| [email protected] | user2@%.example.com |+--------------------------+---------------------+
If an application must invoke USER() for user auditing (for example, if it does auditing from within triggers) but must also be able toassociate the USER() value with an account in the user table, it is necessary to avoid accounts that contain wildcards in the User orHost column. Specifically, do not permit User to be empty (which creates an anonymous-user account), and do not permit patterncharacters or netmask notation in Host values. All accounts must have a nonempty User value and literal Host value.
With respect to the previous examples, the ''@'localhost' and 'user2'@'%.example.com' accounts should be changed notto use wildcards:
RENAME USER ''@'localhost' TO 'user1'@'localhost';RENAME USER 'user2'@'%.example.com' TO 'user2'@'remote.example.com';
If user2 must be able to connect from several hosts in the example.com domain, there should be a separate account for each host.
To extract the user name or host name part from a CURRENT_USER() or USER() value, use the SUBSTRING() function:
MySQL User Account Management
61

mysql> SELECT SUBSTRING_INDEX(CURRENT_USER(),'@',1);+---------------------------------------+| SUBSTRING_INDEX(CURRENT_USER(),'@',1) |+---------------------------------------+| user1 |+---------------------------------------+mysql> SELECT SUBSTRING_INDEX(CURRENT_USER(),'@',-1);+----------------------------------------+| SUBSTRING_INDEX(CURRENT_USER(),'@',-1) |+----------------------------------------+| localhost |+----------------------------------------+
MySQL User Account Management
62

Chapter 5. Backup and RecoveryIt is important to back up your databases so that you can recover your data and be up and running again in case problems occur, such assystem crashes, hardware failures, or users deleting data by mistake. Backups are also essential as a safeguard before upgrading aMySQL installation, and they can be used to transfer a MySQL installation to another system or to set up replication slave servers.
MySQL offers a variety of backup strategies from which you can choose the methods that best suit the requirements for your installa-tion. This chapter discusses several backup and recovery topics with which you should be familiar:
• Types of backups: Logical versus physical, full versus incremental, and so forth.
• Methods for creating backups.
• Recovery methods, including point-in-time recovery.
• Backup scheduling, compression, and encryption.
• Table maintenance, to enable recovery of corrupt tables.
Additional ResourcesResources related to backup or to maintaining data availability include the following:
• Customers of MySQL Enterprise Edition can use the MySQL Enterprise Backup product for backups. For an overview of theMySQL Enterprise Backup product, see MySQL Enterprise Backup.
• A forum dedicated to backup issues is available at http://forums.mysql.com/list.php?93.
• Details for mysqldump, mysqlhotcopy, and other MySQL backup programs can be found in MySQL Programs.
• The syntax of the SQL statements described here is given in SQL Statement Syntax.
• For additional information about InnoDB backup procedures, see Backing Up and Recovering an InnoDB Database.
• Replication enables you to maintain identical data on multiple servers. This has several benefits, such as enabling client query loadto be distributed over servers, availability of data even if a given server is taken offline or fails, and the ability to make backups withno impact on the master by using a slave server. See Replication.
• MySQL Cluster provides a high-availability, high-redundancy version of MySQL adapted for the distributed computing environ-ment. See MySQL Cluster NDB 7.2. For information specifically about MySQL Cluster backup, see Online Backup of MySQLCluster.
• Distributed Replicated Block Device (DRBD) is another high-availability solution. It works by replicating a block device from aprimary server to a secondary server at the block level. See High Availability and Scalability
5.1. Backup and Recovery TypesThis section describes the characteristics of different types of backups.
Physical (Raw) Versus Logical BackupsPhysical backups consist of raw copies of the directories and files that store database contents. This type of backup is suitable for large,important databases that need to be recovered quickly when problems occur.
Logical backups save information represented as logical database structure (CREATE DATABASE, CREATE TABLE statements) andcontent (INSERT statements or delimited-text files). This type of backup is suitable for smaller amounts of data where you might editthe data values or table structure, or recreate the data on a different machine architecture.
Logical backup methods have these characteristics:
63

• The backup is done by querying the MySQL server to obtain database structure and content information.
• Backup is slower than physical methods because the server must access database information and convert it to logical format. If theoutput is written on the client side, the server must also send it to the backup program.
• Output is larger than for physical backup, particularly when saved in text format.
• Backup and restore granularity is available at the server level (all databases), database level (all tables in a particular database), ortable level. This is true regardless of storage engine.
• The backup does not include log or configuration files, or other database-related files that are not part of databases.
• Backups stored in logical format are machine independent and highly portable.
• Logical backups are performed with the MySQL server running. The server is not taken offline.
• Logical backup tools include the mysqldump program and the SELECT ... INTO OUTFILE statement. These work for anystorage engine, even MEMORY.
• To restore logical backups, SQL-format dump files can be processed using the mysql client. To load delimited-text files, use theLOAD DATA INFILE statement or the mysqlimport client.
Physical backup methods have these characteristics:
• The backup consists of exact copies of database directories and files. Typically this is a copy of all or part of the MySQL data dir-ectory. Data from MEMORY tables cannot be backed up this way because their contents are not stored on disk.
• Physical backup methods are faster than logical because they involve only file copying without conversion.
• Output is more compact than for logical backup.
• Backup and restore granularity ranges from the level of the entire data directory down to the level of individual files. This may ormay not provide for table-level granularity, depending on storage engine. (Each MyISAM table corresponds uniquely to a set of files,but an InnoDB table shares file storage with other InnoDB tables.)
• In addition to databases, the backup can include any related files such as log or configuration files.
• Backups are portable only to other machines that have identical or similar hardware characteristics.
• Backups can be performed while the MySQL server is not running. If the server is running, it is necessary to perform appropriatelocking so that the server does not change database contents during the backup.
• Physical backup tools include file system-level commands (such as cp, scp, tar, rsync), mysqlhotcopy for MyISAM tables,ibbackup for InnoDB tables, or START BACKUP for NDB tables.
• For restore, files copied at the file system level or with mysqlhotcopy can be copied back to their original locations with file sys-tem commands; ibbackup restores InnoDB tables, and ndb_restore restores NDB tables.
Online Versus Offline Backups
Online backups take place while the MySQL server is running so that the database information can be obtained from the server. Offlinebackups take place while the server is stopped. This distinction can also be described as “hot” versus “cold” backups; a “warm” backupis one where the server remains running but locked against modifying data while you access database files externally.
Online backup methods have these characteristics:
• The backup is less intrusive to other clients, which can connect to the MySQL server during the backup and may be able to accessdata depending on what operations they need to perform.
• Care must be taken to impose appropriate locking so that data modifications do not take place that would compromise backup integ-rity. The MySQL Enterprise Backup product does such locking automatically.
Backup and Recovery
64

Offline backup methods have these characteristics:
• Clients can be affected adversely because the server is unavailable during backup. For that reason, such backups are often takenfrom a replication slave server that can be taken offline without harming availability.
• The backup procedure is simpler because there is no possibility of interference from client activity.
A similar distinction between online and offline applies for recovery operations, and similar characteristics apply. However, it is morelikely that clients will be affected for online recovery than for online backup because recovery requires stronger locking. Duringbackup, clients might be able to read data while it is being backed up. Recovery modifies data and does not just read it, so clients mustbe prevented from accessing data while it is being restored.
Local Versus Remote BackupsA local backup is performed on the same host where the MySQL server runs, whereas a remote backup is done from a different host.For some types of backups, the backup can be initiated from a remote host even if the output is written locally on the server. host.
• mysqldump can connect to local or remote servers. For SQL output (CREATE and INSERT statements), local or remote dumpscan be done and generate output on the client. For delimited-text output (with the --tab option), data files are created on the serverhost.
• mysqlhotcopy performs only local backups: It connects to the server to lock it against data modifications and then copies localtable files.
• SELECT ... INTO OUTFILE can be initiated from a local or remote client host, but the output file is created on the server host.
• Physical backup methods typically are initiated locally on the MySQL server host so that the server can be taken offline, althoughthe destination for copied files might be remote.
Snapshot BackupsSome file system implementations enable “snapshots” to be taken. These provide logical copies of the file system at a given point intime, without requiring a physical copy of the entire file system. (For example, the implementation may use copy-on-write techniques sothat only parts of the file system modified after the snapshot time need be copied.) MySQL itself does not provide the capability for tak-ing file system snapshots. It is available through third-party solutions such as Veritas, LVM, or ZFS.
Full Versus Incremental BackupsA full backup includes all data managed by a MySQL server at a given point in time. An incremental backup consists of the changesmade to the data during a given time span (from one point in time to another). MySQL has different ways to perform full backups, suchas those described earlier in this section. Incremental backups are made possible by enabling the server's binary log, which the serveruses to record data changes.
Full Versus Point-in-Time (Incremental) RecoveryA full recovery restores all data from a full backup. This restores the server instance to the state that it had when the backup was made.If that state is not sufficiently current, a full recovery can be followed by recovery of incremental backups made since the full backup, tobring the server to a more up-to-date state.
Incremental recovery is recovery of changes made during a given time span. This is also called point-in-time recovery because it makesa server's state current up to a given time. Point-in-time recovery is based on the binary log and typically follows a full recovery fromthe backup files that restores the server to its state when the backup was made. Then the data changes written in the binary log files areapplied as incremental recovery to redo data modifications and bring the server up to the desired point in time.
Table MaintenanceData integrity can be compromised if tables become corrupt. For InnoDB tables, this is not a typical issue. For programs to check My-ISAM tables and repair them if problems are found, see Section 5.6, “MyISAM Table Maintenance and Crash Recovery”.
Backup and Recovery
65

Backup Scheduling, Compression, and EncryptionBackup scheduling is valuable for automating backup procedures. Compression of backup output reduces space requirements, and en-cryption of the output provides better security against unauthorized access of backed-up data. MySQL itself does not provide these cap-abilities. The MySQL Enterprise Backup product can compress InnoDB backups, and compression or encryption of backup output canbe achieved using file system utilities. Other third-party solutions may be available.
5.2. Database Backup MethodsThis section summarizes some general methods for making backups.
Making a Hot Backup with MySQL Enterprise BackupCustomers of MySQL Enterprise Edition can use the MySQL Enterprise Backup product to do physical backups of entire instances orselected databases, tables, or both. This product includes features for incremental and compressed backups. Backing up the physicaldatabase files makes restore much faster than logical techniques such as the mysqldump command. InnoDB tables are copied using ahot backup mechanism. (Ideally, the InnoDB tables should represent a substantial majority of the data.) Tables from other storage en-gines are copied using a warm backup mechanism. For an overview of the MySQL Enterprise Backup product, see MySQL EnterpriseBackup.
Making Backups by Copying Table FilesFor storage engines that represent each table using its own files, tables can be backed up by copying those files. For example, MyISAMtables are stored as files, so it is easy to do a backup by copying files (*.frm, *.MYD, and *.MYI files). To get a consistent backup,stop the server or lock and flush the relevant tables:
LOCK TABLES tbl_list READ;FLUSH TABLES tbl_list;
You need only a read lock; this enables other clients to continue to query the tables while you are making a copy of the files in the data-base directory. The FLUSH TABLES statement is needed to ensure that the all active index pages are written to disk before you startthe backup. See LOCK TABLES and UNLOCK TABLES Syntax, and FLUSH Syntax.
You can also create a binary backup simply by copying all table files, as long as the server isn't updating anything. The mysqlhot-copy script uses this method. (But note that table file copying methods do not work if your database contains InnoDB tables. mysql-hotcopy does not work for InnoDB tables because InnoDB does not necessarily store table contents in database directories. Also,even if the server is not actively updating data, InnoDB may still have modified data cached in memory and not flushed to disk.
Making Delimited-Text File BackupsTo create a text file containing a table's data, you can use SELECT * INTO OUTFILE 'file_name' FROM tbl_name. Thefile is created on the MySQL server host, not the client host. For this statement, the output file cannot already exist because permittingfiles to be overwritten constitutes a security risk. See SELECT Syntax. This method works for any kind of data file, but saves only tabledata, not the table structure.
Another way to create text data files (along with files containing CREATE TABLE statements for the backed up tables) is to usemysqldump with the --tab option. See Section 5.4.3, “Dumping Data in Delimited-Text Format with mysqldump”.
To reload a delimited-text data file, use LOAD DATA INFILE or mysqlimport.
Making Backups with mysqldump or mysqlhotcopyThe mysqldump program and the mysqlhotcopy script can make backups. mysqldump is more general because it can back up allkinds of tables. mysqlhotcopy works only with some storage engines. (See Section 5.4, “Using mysqldump for Backups”, andmysqlhotcopy.)
For InnoDB tables, it is possible to perform an online backup that takes no locks on tables using the --single-transaction op-tion to mysqldump. See Section 5.3.1, “Establishing a Backup Policy”.
Making Incremental Backups by Enabling the Binary LogMySQL supports incremental backups: You must start the server with the --log-bin option to enable binary logging; see The Binary
Backup and Recovery
66

Log. The binary log files provide you with the information you need to replicate changes to the database that are made subsequent to thepoint at which you performed a backup. At the moment you want to make an incremental backup (containing all changes that happenedsince the last full or incremental backup), you should rotate the binary log by using FLUSH LOGS. This done, you need to copy to thebackup location all binary logs which range from the one of the moment of the last full or incremental backup to the last but one. Thesebinary logs are the incremental backup; at restore time, you apply them as explained in Section 5.5, “Point-in-Time (Incremental) Re-covery Using the Binary Log”. The next time you do a full backup, you should also rotate the binary log using FLUSH LOGS, mysql-dump --flush-logs, or mysqlhotcopy --flushlog. See mysqldump, and mysqlhotcopy.
Making Backups Using Replication SlavesIf you have performance problems with your master server while making backups, one strategy that can help is to set up replication andperform backups on the slave rather than on the master. See Using Replication for Backups.
If you are backing up a slave replication server, you should back up its master.info and relay-log.info files when you backup the slave's databases, regardless of the backup method you choose. These information files are always needed to resume replicationafter you restore the slave's data. If your slave is replicating LOAD DATA INFILE statements, you should also back up anySQL_LOAD-* files that exist in the directory that the slave uses for this purpose. The slave needs these files to resume replication ofany interrupted LOAD DATA INFILE operations. The location of this directory is the value of the --slave-load-tmpdir option.If the server was not started with that option, the directory location is the value of the tmpdir system variable.
Recovering Corrupt TablesIf you have to restore MyISAM tables that have become corrupt, try to recover them using REPAIR TABLE or myisamchk -r first.That should work in 99.9% of all cases. If myisamchk fails, see Section 5.6, “MyISAM Table Maintenance and Crash Recovery”.
Making Backups Using a File System SnapshotIf you are using a Veritas file system, you can make a backup like this:
1. From a client program, execute FLUSH TABLES WITH READ LOCK.
2. From another shell, execute mount vxfs snapshot.
3. From the first client, execute UNLOCK TABLES.
4. Copy files from the snapshot.
5. Unmount the snapshot.
Similar snapshot capabilities may be available in other file systems, such as LVM or ZFS.
5.3. Example Backup and Recovery StrategyThis section discusses a procedure for performing backups that enables you to recover data after several types of crashes:
• Operating system crash
• Power failure
• File system crash
• Hardware problem (hard drive, motherboard, and so forth)
The example commands do not include options such as --user and --password for the mysqldump and mysql client programs.You should include such options as necessary to enable client programs to connect to the MySQL server.
Assume that data is stored in the InnoDB storage engine, which has support for transactions and automatic crash recovery. Assumealso that the MySQL server is under load at the time of the crash. If it were not, no recovery would ever be needed.
For cases of operating system crashes or power failures, we can assume that MySQL's disk data is available after a restart. The InnoDBdata files might not contain consistent data due to the crash, but InnoDB reads its logs and finds in them the list of pending committed
Backup and Recovery
67

and noncommitted transactions that have not been flushed to the data files. InnoDB automatically rolls back those transactions thatwere not committed, and flushes to its data files those that were committed. Information about this recovery process is conveyed to theuser through the MySQL error log. The following is an example log excerpt:
InnoDB: Database was not shut down normally.InnoDB: Starting recovery from log files...InnoDB: Starting log scan based on checkpoint atInnoDB: log sequence number 0 13674004InnoDB: Doing recovery: scanned up to log sequence number 0 13739520InnoDB: Doing recovery: scanned up to log sequence number 0 13805056InnoDB: Doing recovery: scanned up to log sequence number 0 13870592InnoDB: Doing recovery: scanned up to log sequence number 0 13936128...InnoDB: Doing recovery: scanned up to log sequence number 0 20555264InnoDB: Doing recovery: scanned up to log sequence number 0 20620800InnoDB: Doing recovery: scanned up to log sequence number 0 20664692InnoDB: 1 uncommitted transaction(s) which must be rolled backInnoDB: Starting rollback of uncommitted transactionsInnoDB: Rolling back trx no 16745InnoDB: Rolling back of trx no 16745 completedInnoDB: Rollback of uncommitted transactions completedInnoDB: Starting an apply batch of log records to the database...InnoDB: Apply batch completedInnoDB: Startedmysqld: ready for connections
For the cases of file system crashes or hardware problems, we can assume that the MySQL disk data is not available after a restart. Thismeans that MySQL fails to start successfully because some blocks of disk data are no longer readable. In this case, it is necessary to re-format the disk, install a new one, or otherwise correct the underlying problem. Then it is necessary to recover our MySQL data frombackups, which means that backups must already have been made. To make sure that is the case, design and implement a backup policy.
5.3.1. Establishing a Backup PolicyTo be useful, backups must be scheduled regularly. A full backup (a snapshot of the data at a point in time) can be done in MySQL withseveral tools. For example, MySQL Enterprise Backup can perform a physical backup of an entire instance, with optimizations to min-imize overhead and avoid disruption when backing up InnoDB data files; mysqldump provides online logical backup. This discussionuses mysqldump.
Assume that we make a full backup of all our InnoDB tables in all databases using the following command on Sunday at 1 p.m., whenload is low:
shell> mysqldump --single-transaction --all-databases > backup_sunday_1_PM.sql
The resulting .sql file produced by mysqldump contains a set of SQL INSERT statements that can be used to reload the dumpedtables at a later time.
This backup operation acquires a global read lock on all tables at the beginning of the dump (using FLUSH TABLES WITH READLOCK). As soon as this lock has been acquired, the binary log coordinates are read and the lock is released. If long updating statementsare running when the FLUSH statement is issued, the backup operation may stall until those statements finish. After that, the dump be-comes lock-free and does not disturb reads and writes on the tables.
It was assumed earlier that the tables to back up are InnoDB tables, so --single-transaction uses a consistent read and guaran-tees that data seen by mysqldump does not change. (Changes made by other clients to InnoDB tables are not seen by the mysql-dump process.) If the backup operation includes nontransactional tables, consistency requires that they do not change during thebackup. For example, for the MyISAM tables in the mysql database, there must be no administrative changes to MySQL accounts dur-ing the backup.
Full backups are necessary, but it is not always convenient to create them. They produce large backup files and take time to generate.They are not optimal in the sense that each successive full backup includes all data, even that part that has not changed since the previ-ous full backup. It is more efficient to make an initial full backup, and then to make incremental backups. The incremental backups aresmaller and take less time to produce. The tradeoff is that, at recovery time, you cannot restore your data just by reloading the fullbackup. You must also process the incremental backups to recover the incremental changes.
To make incremental backups, we need to save the incremental changes. In MySQL, these changes are represented in the binary log, sothe MySQL server should always be started with the --log-bin option to enable that log. With binary logging enabled, the serverwrites each data change into a file while it updates data. Looking at the data directory of a MySQL server that was started with the --log-bin option and that has been running for some days, we find these MySQL binary log files:
-rw-rw---- 1 guilhem guilhem 1277324 Nov 10 23:59 gbichot2-bin.000001-rw-rw---- 1 guilhem guilhem 4 Nov 10 23:59 gbichot2-bin.000002-rw-rw---- 1 guilhem guilhem 79 Nov 11 11:06 gbichot2-bin.000003
Backup and Recovery
68

-rw-rw---- 1 guilhem guilhem 508 Nov 11 11:08 gbichot2-bin.000004-rw-rw---- 1 guilhem guilhem 220047446 Nov 12 16:47 gbichot2-bin.000005-rw-rw---- 1 guilhem guilhem 998412 Nov 14 10:08 gbichot2-bin.000006-rw-rw---- 1 guilhem guilhem 361 Nov 14 10:07 gbichot2-bin.index
Each time it restarts, the MySQL server creates a new binary log file using the next number in the sequence. While the server is run-ning, you can also tell it to close the current binary log file and begin a new one manually by issuing a FLUSH LOGS SQL statement orwith a mysqladmin flush-logs command. mysqldump also has an option to flush the logs. The .index file in the data direct-ory contains the list of all MySQL binary logs in the directory.
The MySQL binary logs are important for recovery because they form the set of incremental backups. If you make sure to flush the logswhen you make your full backup, the binary log files created afterward contain all the data changes made since the backup. Let's modifythe previous mysqldump command a bit so that it flushes the MySQL binary logs at the moment of the full backup, and so that thedump file contains the name of the new current binary log:
shell> mysqldump --single-transaction --flush-logs --master-data=2 \--all-databases > backup_sunday_1_PM.sql
After executing this command, the data directory contains a new binary log file, gbichot2-bin.000007, because the --flush-logs option causes the server to flush its logs. The --master-data option causes mysqldump to write binary log in-formation to its output, so the resulting .sql dump file includes these lines:
-- Position to start replication or point-in-time recovery from-- CHANGE MASTER TO MASTER_LOG_FILE='gbichot2-bin.000007',MASTER_LOG_POS=4;
Because the mysqldump command made a full backup, those lines mean two things:
• The dump file contains all changes made before any changes written to the gbichot2-bin.000007 binary log file or newer.
• All data changes logged after the backup are not present in the dump file, but are present in the gbichot2-bin.000007 binarylog file or newer.
On Monday at 1 p.m., we can create an incremental backup by flushing the logs to begin a new binary log file. For example, executing amysqladmin flush-logs command creates gbichot2-bin.000008. All changes between the Sunday 1 p.m. full backup andMonday 1 p.m. will be in the gbichot2-bin.000007 file. This incremental backup is important, so it is a good idea to copy it to asafe place. (For example, back it up on tape or DVD, or copy it to another machine.) On Tuesday at 1 p.m., execute another mysqlad-min flush-logs command. All changes between Monday 1 p.m. and Tuesday 1 p.m. will be in the gbichot2-bin.000008 file(which also should be copied somewhere safe).
The MySQL binary logs take up disk space. To free up space, purge them from time to time. One way to do this is by deleting the bin-ary logs that are no longer needed, such as when we make a full backup:
shell> mysqldump --single-transaction --flush-logs --master-data=2 \--all-databases --delete-master-logs > backup_sunday_1_PM.sql
Note
Deleting the MySQL binary logs with mysqldump --delete-master-logs can be dangerous if your server is areplication master server, because slave servers might not yet fully have processed the contents of the binary log. The de-scription for the PURGE BINARY LOGS statement explains what should be verified before deleting the MySQL binarylogs. See PURGE BINARY LOGS Syntax.
5.3.2. Using Backups for RecoveryNow, suppose that we have a catastrophic crash on Wednesday at 8 a.m. that requires recovery from backups. To recover, first we re-store the last full backup we have (the one from Sunday 1 p.m.). The full backup file is just a set of SQL statements, so restoring it isvery easy:
shell> mysql < backup_sunday_1_PM.sql
At this point, the data is restored to its state as of Sunday 1 p.m.. To restore the changes made since then, we must use the incrementalbackups; that is, the gbichot2-bin.000007 and gbichot2-bin.000008 binary log files. Fetch the files if necessary from
Backup and Recovery
69

where they were backed up, and then process their contents like this:
shell> mysqlbinlog gbichot2-bin.000007 gbichot2-bin.000008 | mysql
We now have recovered the data to its state as of Tuesday 1 p.m., but still are missing the changes from that date to the date of thecrash. To not lose them, we would have needed to have the MySQL server store its MySQL binary logs into a safe location (RAIDdisks, SAN, ...) different from the place where it stores its data files, so that these logs were not on the destroyed disk. (That is, we canstart the server with a --log-bin option that specifies a location on a different physical device from the one on which the data direct-ory resides. That way, the logs are safe even if the device containing the directory is lost.) If we had done this, we would have the gbi-chot2-bin.000009 file (and any subsequent files) at hand, and we could apply them using mysqlbinlog and mysql to restorethe most recent data changes with no loss up to the moment of the crash:
shell> mysqlbinlog gbichot2-bin.000009 ... | mysql
For more information about using mysqlbinlog to process binary log files, see Section 5.5, “Point-in-Time (Incremental) RecoveryUsing the Binary Log”.
5.3.3. Backup Strategy SummaryIn case of an operating system crash or power failure, InnoDB itself does all the job of recovering data. But to make sure that you cansleep well, observe the following guidelines:
• Always run the MySQL server with the --log-bin option, or even --log-bin=log_name, where the log file name is locatedon some safe media different from the drive on which the data directory is located. If you have such safe media, this technique canalso be good for disk load balancing (which results in a performance improvement).
• Make periodic full backups, using the mysqldump command shown earlier in Section 5.3.1, “Establishing a Backup Policy”, thatmakes an online, nonblocking backup.
• Make periodic incremental backups by flushing the logs with FLUSH LOGS or mysqladmin flush-logs.
5.4. Using mysqldump for BackupsThis section describes how to use mysqldump to produce dump files, and how to reload dump files. A dump file can be used in severalways:
• As a backup to enable data recovery in case of data loss.
• As a source of data for setting up replication slaves.
• As a source of data for experimentation:
• To make a copy of a database that you can use without changing the original data.
• To test potential upgrade incompatibilities.
mysqldump produces two types of output, depending on whether the --tab option is given:
• Without --tab, mysqldump writes SQL statements to the standard output. This output consists of CREATE statements to createdumped objects (databases, tables, stored routines, and so forth), and INSERT statements to load data into tables. The output can besaved in a file and reloaded later using mysql to recreate the dumped objects. Options are available to modify the format of theSQL statements, and to control which objects are dumped.
• With --tab, mysqldump produces two output files for each dumped table. The server writes one file as tab-delimited text, oneline per table row. This file is named tbl_name.txt in the output directory. The server also sends a CREATE TABLE statementfor the table to mysqldump, which writes it as a file named tbl_name.sql in the output directory.
5.4.1. Dumping Data in SQL Format with mysqldump
Backup and Recovery
70

This section describes how to use mysqldump to create SQL-format dump files. For information about reloading such dump files, seeSection 5.4.2, “Reloading SQL-Format Backups”.
By default, mysqldump writes information as SQL statements to the standard output. You can save the output in a file:
shell> mysqldump [arguments] > file_name
To dump all databases, invoke mysqldump with the --all-databases option:
shell> mysqldump --all-databases > dump.sql
To dump only specific databases, name them on the command line and use the --databases option:
shell> mysqldump --databases db1 db2 db3 > dump.sql
The --databases option causes all names on the command line to be treated as database names. Without this option, mysqldumptreats the first name as a database name and those following as table names.
With --all-databases or --databases, mysqldump writes CREATE DATABASE and USE statements prior to the dump out-put for each database. This ensures that when the dump file is reloaded, it creates each database if it does not exist and makes it the de-fault database so database contents are loaded into the same database from which they came. If you want to cause the dump file to forcea drop of each database before recreating it, use the --add-drop-database option as well. In this case, mysqldump writes aDROP DATABASE statement preceding each CREATE DATABASE statement.
To dump a single database, name it on the command line:
shell> mysqldump --databases test > dump.sql
In the single-database case, it is permissible to omit the --databases option:
shell> mysqldump test > dump.sql
The difference between the two preceding commands is that without --databases, the dump output contains no CREATE DATA-BASE or USE statements. This has several implications:
• When you reload the dump file, you must specify a default database name so that the server knows which database to reload.
• For reloading, you can specify a database name different from the original name, which enables you to reload the data into a differ-ent database.
• If the database to be reloaded does not exist, you must create it first.
• Because the output will contain no CREATE DATABASE statement, the --add-drop-database option has no effect. If youuse it, it produces no DROP DATABASE statement.
To dump only specific tables from a database, name them on the command line following the database name:
shell> mysqldump test t1 t3 t7 > dump.sql
5.4.2. Reloading SQL-Format BackupsTo reload a dump file written by mysqldump that consists of SQL statements, use it as input to the mysql client. If the dump file wascreated by mysqldump with the --all-databases or --databases option, it contains CREATE DATABASE and USE state-ments and it is not necessary to specify a default database into which to load the data:
shell> mysql < dump.sql
Alternatively, from within mysql, use a source command:
mysql> source dump.sql
Backup and Recovery
71
If the file is a single-database dump not containing CREATE DATABASE and USE statements, create the database first (if necessary):
shell> mysqladmin create db1
Then specify the database name when you load the dump file:
shell> mysql db1 < dump.sql
Alternatively, from within mysql, create the database, select it as the default database, and load the dump file:
mysql> CREATE DATABASE IF NOT EXISTS db1;mysql> USE db1;mysql> source dump.sql
5.4.3. Dumping Data in Delimited-Text Format with mysqldump
This section describes how to use mysqldump to create delimited-text dump files. For information about reloading such dump files,see Section 5.4.4, “Reloading Delimited-Text Format Backups”.
If you invoke mysqldump with the --tab=dir_name option, it uses dir_name as the output directory and dumps tables individu-ally in that directory using two files for each table. The table name is the basename for these files. For a table named t1, the files arenamed t1.sql and t1.txt. The .sql file contains a CREATE TABLE statement for the table. The .txt file contains the tabledata, one line per table row.
The following command dumps the contents of the db1 database to files in the /tmp database:
shell> mysqldump --tab=/tmp db1
The .txt files containing table data are written by the server, so they are owned by the system account used for running the server. Theserver uses SELECT ... INTO OUTFILE to write the files, so you must have the FILE privilege to perform this operation, and anerror occurs if a given .txt file already exists.
The server sends the CREATE definitions for dumped tables to mysqldump, which writes them to .sql files. These files therefore areowned by the user who executes mysqldump.
It is best that --tab be used only for dumping a local server. If you use it with a remote server, the --tab directory must exist onboth the local and remote hosts, and the .txt files will be written by the server in the remote directory (on the server host), whereas the.sql files will be written by mysqldump in the local directory (on the client host).
For mysqldump --tab, the server by default writes table data to .txt files one line per row with tabs between column values, noquotation marks around column values, and newline as the line terminator. (These are the same defaults as for SELECT ... INTOOUTFILE.)
To enable data files to be written using a different format, mysqldump supports these options:
• --fields-terminated-by=str
The string for separating column values (default: tab).
• --fields-enclosed-by=char
The character within which to enclose column values (default: no character).
• --fields-optionally-enclosed-by=char
The character within which to enclose non-numeric column values (default: no character).
• --fields-escaped-by=char
The character for escaping special characters (default: no escaping).
• --lines-terminated-by=str
Backup and Recovery
72

The line-termination string (default: newline).
Depending on the value you specify for any of these options, it might be necessary on the command line to quote or escape the value ap-propriately for your command interpreter. Alternatively, specify the value using hex notation. Suppose that you want mysqldump toquote column values within double quotation marks. To do so, specify double quote as the value for the --fields-enclosed-byoption. But this character is often special to command interpreters and must be treated specially. For example, on Unix, you can quotethe double quote like this:
--fields-enclosed-by='"'
On any platform, you can specify the value in hex:
--fields-enclosed-by=0x22
It is common to use several of the data-formatting options together. For example, to dump tables in comma-separated values formatwith lines terminated by carriage-return/newline pairs (\r\n), use this command (enter it on a single line):
shell> mysqldump --tab=/tmp --fields-terminated-by=,--fields-enclosed-by='"' --lines-terminated-by=0x0d0a db1
Should you use any of the data-formatting options to dump table data, you will need to specify the same format when you reload datafiles later, to ensure proper interpretation of the file contents.
5.4.4. Reloading Delimited-Text Format BackupsFor backups produced with mysqldump --tab, each table is represented in the output directory by an .sql file containing theCREATE TABLE statement for the table, and a .txt file containing the table data. To reload a table, first change location into the out-put directory. Then process the .sql file with mysql to create an empty table and process the .txt file to load the data into the table:
shell> mysql db1 < t1.sqlshell> mysqlimport db1 t1.txt
An alternative to using mysqlimport to load the data file is to use the LOAD DATA INFILE statement from within the mysql cli-ent:
mysql> USE db1;mysql> LOAD DATA INFILE 't1.txt' INTO TABLE t1;
If you used any data-formatting options with mysqldump when you initially dumped the table, you must use the same options withmysqlimport or LOAD DATA INFILE to ensure proper interpretation of the data file contents:
shell> mysqlimport --fields-terminated-by=,--fields-enclosed-by='"' --lines-terminated-by=0x0d0a db1 t1.txt
Or:
mysql> USE db1;mysql> LOAD DATA INFILE 't1.txt' INTO TABLE t1
-> FIELDS TERMINATED BY ',' FIELDS ENCLOSED BY '"'-> LINES TERMINATED BY '\r\n';
5.4.5. mysqldump TipsThis section surveys techniques that enable you to use mysqldump to solve specific problems:
• How to make a copy a database
• How to copy a database from one server to another
• How to dump stored programs (stored procedures and functions, triggers, and events)
Backup and Recovery
73

• How to dump definitions and data separately
5.4.5.1. Making a Copy of a Databaseshell> mysqldump db1 > dump.sqlshell> mysqladmin create db2shell> mysql db2 < dump.sql
Do not use --databases on the mysqldump command line because that causes USE db1 to be included in the dump file, whichoverrides the effect of naming db2 on the mysql command line.
5.4.5.2. Copy a Database from one Server to Another
On Server 1:
shell> mysqldump --databases db1 > dump.sql
Copy the dump file from Server 1 to Server 2.
On Server 2:
shell> mysql < dump.sql
Use of --databases with the mysqldump command line causes the dump file to include CREATE DATABASE and USE state-ments that create the database if it does exist and make it the default database for the reloaded data.
Alternatively, you can omit --databases from the mysqldump command. Then you will need to create the database on Server 2 (ifnecessary) and specify it as the default database when you reload the dump file.
On Server 1:
shell> mysqldump db1 > dump.sql
On Server 2:
shell> mysqladmin create db1shell> mysql db1 < dump.sql
You can specify a different database name in this case, so omitting --databases from the mysqldump command enables you todump data from one database and load it into another.
5.4.5.3. Dumping Stored Programs
Several options control how mysqldump handles stored programs (stored procedures and functions, triggers, and events):
• --events: Dump Event Scheduler events
• --routines: Dump stored procedures and functions
• --triggers: Dump triggers for tables
The --triggers option is enabled by default so that when tables are dumped, they are accompanied by any triggers they have. Theother options are disabled by default and must be specified explicitly to dump the corresponding objects. To disable any of these optionsexplicitly, use its skip form: --skip-events, --skip-routines, or --skip-triggers.
5.4.5.4. Dumping Table Definitions and Content Separately
The --no-data option tells mysqldump not to dump table data, resulting in the dump file containing only statements to create thetables. Conversely, the --no-create-info option tells mysqldump to suppress CREATE statements from the output, so that thedump file contains only table data.
Backup and Recovery
74

For example, to dump table definitions and data separately for the test database, use these commands:
shell> mysqldump --no-data test > dump-defs.sqlshell> mysqldump --no-create-info test > dump-data.sql
For a definition-only dump, add the --routines and --events options to also include stored routine and event definitions:
shell> mysqldump --no-data --routines --events test > dump-defs.sql
5.4.5.5. Using mysqldump to Test for Upgrade Incompatibilities
When contemplating a MySQL upgrade, it is prudent to install the newer version separately from your current production version. Thenyou can dump the database and database object definitions from the production server and load them into the new server to verify thatthey are handled properly. (This is also useful for testing downgrades.)
On the production server:
shell> mysqldump --all-databases --no-data --routines --events > dump-defs.sql
On the upgraded server:
shell> mysql < dump-defs.sql
Because the dump file does not contain table data, it can be processed quickly. This enables you to spot potential incompatibilitieswithout waiting for lengthy data-loading operations. Look for warnings or errors while the dump file is being processed.
After you have verified that the definitions are handled properly, dump the data and try to load it into the upgraded server.
On the production server:
shell> mysqldump --all-databases --no-create-info > dump-data.sql
On the upgraded server:
shell> mysql < dump-data.sql
Now check the table contents and run some test queries.
5.5. Point-in-Time (Incremental) Recovery Using the Binary LogPoint-in-time recovery refers to recovery of data changes made since a given point in time. Typically, this type of recovery is performedafter restoring a full backup that brings the server to its state as of the time the backup was made. (The full backup can be made in sev-eral ways, such as those listed in Section 5.2, “Database Backup Methods”.) Point-in-time recovery then brings the server up to date in-crementally from the time of the full backup to a more recent time.
Point-in-time recovery is based on these principles:
• The source of information for point-in-time recovery is the set of incremental backups represented by the binary log files generatedsubsequent to the full backup operation. Therefore, the server must be started with the --log-bin option to enable binary logging(see The Binary Log).
To restore data from the binary log, you must know the name and location of the current binary log files. By default, the server cre-ates binary log files in the data directory, but a path name can be specified with the --log-bin option to place the files in a differ-ent location. The Binary Log.
To see a listing of all binary log files, use this statement:
mysql> SHOW BINARY LOGS;
To determine the name of the current binary log file, issue the following statement:
mysql> SHOW MASTER STATUS;
Backup and Recovery
75

• The mysqlbinlog utility converts the events in the binary log files from binary format to text so that they can be executed orviewed. mysqlbinlog has options for selecting sections of the binary log based on event times or position of events within thelog. See mysqlbinlog.
• Executing events from the binary log causes the data modifications they represent to be redone. This enables recovery of datachanges for a given span of time. To execute events from the binary log, process mysqlbinlog output using the mysql client:
shell> mysqlbinlog binlog_files | mysql -u root -p
• Viewing log contents can be useful when you need to determine event times or positions to select partial log contents prior to ex-ecuting events. To view events from the log, send mysqlbinlog output into a paging program:
shell> mysqlbinlog binlog_files | more
Alternatively, save the output in a file and view the file in a text editor:
shell> mysqlbinlog binlog_files > tmpfileshell> ... edit tmpfile ...
• Saving the output in a file is useful as a preliminary to executing the log contents with certain events removed, such as an accidentalDROP DATABASE. You can delete from the file any statements not to be executed before executing its contents. After editing thefile, execute the contents as follows:
shell> mysql -u root -p < tmpfile
If you have more than one binary log to execute on the MySQL server, the safe method is to process them all using a single connectionto the server. Here is an example that demonstrates what may be unsafe:
shell> mysqlbinlog binlog.000001 | mysql -u root -p # DANGER!!shell> mysqlbinlog binlog.000002 | mysql -u root -p # DANGER!!
Processing binary logs this way using different connections to the server causes problems if the first log file contains a CREATE TEM-PORARY TABLE statement and the second log contains a statement that uses the temporary table. When the first mysql process ter-minates, the server drops the temporary table. When the second mysql process attempts to use the table, the server reports “unknowntable.”
To avoid problems like this, use a single connection to execute the contents of all binary logs that you want to process. Here is one wayto do so:
shell> mysqlbinlog binlog.000001 binlog.000002 | mysql -u root -p
Another approach is to write all the logs to a single file and then process the file:
shell> mysqlbinlog binlog.000001 > /tmp/statements.sqlshell> mysqlbinlog binlog.000002 >> /tmp/statements.sqlshell> mysql -u root -p -e "source /tmp/statements.sql"
5.5.1. Point-in-Time Recovery Using Event TimesTo indicate the start and end times for recovery, specify the --start-datetime and --stop-datetime options for mysql-binlog, in DATETIME format. As an example, suppose that exactly at 10:00 a.m. on April 20, 2005 an SQL statement was executedthat deleted a large table. To restore the table and data, you could restore the previous night's backup, and then execute the followingcommand:
shell> mysqlbinlog --stop-datetime="2005-04-20 9:59:59" \/var/log/mysql/bin.123456 | mysql -u root -p
This command recovers all of the data up until the date and time given by the --stop-datetime option. If you did not detect the er-roneous SQL statement that was entered until hours later, you will probably also want to recover the activity that occurred afterward.Based on this, you could run mysqlbinlog again with a start date and time, like so:
Backup and Recovery
76

shell> mysqlbinlog --start-datetime="2005-04-20 10:01:00" \/var/log/mysql/bin.123456 | mysql -u root -p
In this command, the SQL statements logged from 10:01 a.m. on will be re-executed. The combination of restoring of the previousnight's dump file and the two mysqlbinlog commands restores everything up until one second before 10:00 a.m. and everythingfrom 10:01 a.m. on.
To use this method of point-in-time recovery, you should examine the log to be sure of the exact times to specify for the commands. Todisplay the log file contents without executing them, use this command:
shell> mysqlbinlog /var/log/mysql/bin.123456 > /tmp/mysql_restore.sql
Then open the /tmp/mysql_restore.sql file with a text editor to examine it.
Excluding specific changes by specifying times for mysqlbinlog does not work well if multiple statements executed at the sametime as the one to be excluded.
5.5.2. Point-in-Time Recovery Using Event PositionsInstead of specifying dates and times, the --start-position and --stop-position options for mysqlbinlog can be usedfor specifying log positions. They work the same as the start and stop date options, except that you specify log position numbers ratherthan dates. Using positions may enable you to be more precise about which part of the log to recover, especially if many transactionsoccurred around the same time as a damaging SQL statement. To determine the position numbers, run mysqlbinlog for a range oftimes near the time when the unwanted transaction was executed, but redirect the results to a text file for examination. This can be donelike so:
shell> mysqlbinlog --start-datetime="2005-04-20 9:55:00" \--stop-datetime="2005-04-20 10:05:00" \/var/log/mysql/bin.123456 > /tmp/mysql_restore.sql
This command creates a small text file in the /tmp directory that contains the SQL statements around the time that the deleterious SQLstatement was executed. Open this file with a text editor and look for the statement that you do not want to repeat. Determine the posi-tions in the binary log for stopping and resuming the recovery and make note of them. Positions are labeled as log_pos followed by anumber. After restoring the previous backup file, use the position numbers to process the binary log file. For example, you would usecommands something like these:
shell> mysqlbinlog --stop-position=368312 /var/log/mysql/bin.123456 \| mysql -u root -p
shell> mysqlbinlog --start-position=368315 /var/log/mysql/bin.123456 \| mysql -u root -p
The first command recovers all the transactions up until the stop position given. The second command recovers all transactions from thestarting position given until the end of the binary log. Because the output of mysqlbinlog includes SET TIMESTAMP statementsbefore each SQL statement recorded, the recovered data and related MySQL logs will reflect the original times at which the transactionswere executed.
5.6. MyISAM Table Maintenance and Crash RecoveryThis section discusses how to use myisamchk to check or repair MyISAM tables (tables that have .MYD and .MYI files for storingdata and indexes). For general myisamchk background, see myisamchk. Other table-repair information can be found at Rebuildingor Repairing Tables or Indexes.
You can use myisamchk to check, repair, or optimize database tables. The following sections describe how to perform these opera-tions and how to set up a table maintenance schedule. For information about using myisamchk to get information about your tables,see Obtaining Table Information with myisamchk.
Even though table repair with myisamchk is quite secure, it is always a good idea to make a backup before doing a repair or any main-tenance operation that could make a lot of changes to a table.
myisamchk operations that affect indexes can cause FULLTEXT indexes to be rebuilt with full-text parameters that are incompatiblewith the values used by the MySQL server. To avoid this problem, follow the guidelines in myisamchk General Options.
MyISAM table maintenance can also be done using the SQL statements that perform operations similar to what myisamchk can do:
Backup and Recovery
77

• To check MyISAM tables, use CHECK TABLE.
• To repair MyISAM tables, use REPAIR TABLE.
• To optimize MyISAM tables, use OPTIMIZE TABLE.
• To analyze MyISAM tables, use ANALYZE TABLE.
For additional information about these statements, see Table Maintenance Statements.
These statements can be used directly or by means of the mysqlcheck client program. One advantage of these statements over my-isamchk is that the server does all the work. With myisamchk, you must make sure that the server does not use the tables at thesame time so that there is no unwanted interaction between myisamchk and the server.
5.6.1. Using myisamchk for Crash RecoveryThis section describes how to check for and deal with data corruption in MySQL databases. If your tables become corrupted frequently,you should try to find the reason why. See What to Do If MySQL Keeps Crashing.
For an explanation of how MyISAM tables can become corrupted, see MyISAM Table Problems.
If you run mysqld with external locking disabled (which is the default), you cannot reliably use myisamchk to check a table whenmysqld is using the same table. If you can be certain that no one will access the tables through mysqld while you run myisamchk,you only have to execute mysqladmin flush-tables before you start checking the tables. If you cannot guarantee this, you muststop mysqld while you check the tables. If you run myisamchk to check tables that mysqld is updating at the same time, you mayget a warning that a table is corrupt even when it is not.
If the server is run with external locking enabled, you can use myisamchk to check tables at any time. In this case, if the server tries toupdate a table that myisamchk is using, the server will wait for myisamchk to finish before it continues.
If you use myisamchk to repair or optimize tables, you must always ensure that the mysqld server is not using the table (this also ap-plies if external locking is disabled). If you do not stop mysqld, you should at least do a mysqladmin flush-tables before yourun myisamchk. Your tables may become corrupted if the server and myisamchk access the tables simultaneously.
When performing crash recovery, it is important to understand that each MyISAM table tbl_name in a database corresponds to thethree files in the database directory shown in the following table.
File Purpose
tbl_name.frm Definition (format) file
tbl_name.MYD Data file
tbl_name.MYI Index file
Each of these three file types is subject to corruption in various ways, but problems occur most often in data files and index files.
myisamchk works by creating a copy of the .MYD data file row by row. It ends the repair stage by removing the old .MYD file and re-naming the new file to the original file name. If you use --quick, myisamchk does not create a temporary .MYD file, but instead as-sumes that the .MYD file is correct and generates only a new index file without touching the .MYD file. This is safe, because myis-amchk automatically detects whether the .MYD file is corrupt and aborts the repair if it is. You can also specify the --quick optiontwice to myisamchk. In this case, myisamchk does not abort on some errors (such as duplicate-key errors) but instead tries to re-solve them by modifying the .MYD file. Normally the use of two --quick options is useful only if you have too little free disk spaceto perform a normal repair. In this case, you should at least make a backup of the table before running myisamchk.
5.6.2. How to Check MyISAM Tables for ErrorsTo check a MyISAM table, use the following commands:
• myisamchk tbl_name
This finds 99.99% of all errors. What it cannot find is corruption that involves only the data file (which is very unusual). If you wantto check a table, you should normally run myisamchk without options or with the -s (silent) option.
Backup and Recovery
78
• myisamchk -m tbl_name
This finds 99.999% of all errors. It first checks all index entries for errors and then reads through all rows. It calculates a checksumfor all key values in the rows and verifies that the checksum matches the checksum for the keys in the index tree.
• myisamchk -e tbl_name
This does a complete and thorough check of all data (-e means “extended check”). It does a check-read of every key for each rowto verify that they indeed point to the correct row. This may take a long time for a large table that has many indexes. Normally, my-isamchk stops after the first error it finds. If you want to obtain more information, you can add the -v (verbose) option. Thiscauses myisamchk to keep going, up through a maximum of 20 errors.
• myisamchk -e -i tbl_name
This is like the previous command, but the -i option tells myisamchk to print additional statistical information.
In most cases, a simple myisamchk command with no arguments other than the table name is sufficient to check a table.
5.6.3. How to Repair MyISAM TablesThe discussion in this section describes how to use myisamchk on MyISAM tables (extensions .MYI and .MYD).
You can also use the CHECK TABLE and REPAIR TABLE statements to check and repair MyISAM tables. See CHECK TABLE Syn-tax, and REPAIR TABLE Syntax.
Symptoms of corrupted tables include queries that abort unexpectedly and observable errors such as these:
• tbl_name.frm is locked against change
• Can't find file tbl_name.MYI (Errcode: nnn)
• Unexpected end of file
• Record file is crashed
• Got error nnn from table handler
To get more information about the error, run perror nnn, where nnn is the error number. The following example shows how to useperror to find the meanings for the most common error numbers that indicate a problem with a table:
shell> perror 126 127 132 134 135 136 141 144 145MySQL error code 126 = Index file is crashedMySQL error code 127 = Record-file is crashedMySQL error code 132 = Old database fileMySQL error code 134 = Record was already deleted (or record file crashed)MySQL error code 135 = No more room in record fileMySQL error code 136 = No more room in index fileMySQL error code 141 = Duplicate unique key or constraint on write or updateMySQL error code 144 = Table is crashed and last repair failedMySQL error code 145 = Table was marked as crashed and should be repaired
Note that error 135 (no more room in record file) and error 136 (no more room in index file) are not errors that can be fixed by a simplerepair. In this case, you must use ALTER TABLE to increase the MAX_ROWS and AVG_ROW_LENGTH table option values:
ALTER TABLE tbl_name MAX_ROWS=xxx AVG_ROW_LENGTH=yyy;
If you do not know the current table option values, use SHOW CREATE TABLE.
For the other errors, you must repair your tables. myisamchk can usually detect and fix most problems that occur.
The repair process involves up to four stages, described here. Before you begin, you should change location to the database directoryand check the permissions of the table files. On Unix, make sure that they are readable by the user that mysqld runs as (and to you, be-cause you need to access the files you are checking). If it turns out you need to modify files, they must also be writable by you.
Backup and Recovery
79

This section is for the cases where a table check fails (such as those described in Section 5.6.2, “How to Check MyISAM Tables for Er-rors”), or you want to use the extended features that myisamchk provides.
The myisamchk options used for table maintenance with are described in myisamchk. myisamchk also has variables that you canset to control memory allocation that may improve performance. See myisamchk Memory Usage.
If you are going to repair a table from the command line, you must first stop the mysqld server. Note that when you do mysqladminshutdown on a remote server, the mysqld server is still available for a while after mysqladmin returns, until all statement-pro-cessing has stopped and all index changes have been flushed to disk.
Stage 1: Checking your tables
Run myisamchk *.MYI or myisamchk -e *.MYI if you have more time. Use the -s (silent) option to suppress unnecessary in-formation.
If the mysqld server is stopped, you should use the --update-state option to tell myisamchk to mark the table as “checked.”
You have to repair only those tables for which myisamchk announces an error. For such tables, proceed to Stage 2.
If you get unexpected errors when checking (such as out of memory errors), or if myisamchk crashes, go to Stage 3.
Stage 2: Easy safe repair
First, try myisamchk -r -q tbl_name (-r -q means “quick recovery mode”). This attempts to repair the index file withouttouching the data file. If the data file contains everything that it should and the delete links point at the correct locations within the datafile, this should work, and the table is fixed. Start repairing the next table. Otherwise, use the following procedure:
1. Make a backup of the data file before continuing.
2. Use myisamchk -r tbl_name (-r means “recovery mode”). This removes incorrect rows and deleted rows from the data fileand reconstructs the index file.
3. If the preceding step fails, use myisamchk --safe-recover tbl_name. Safe recovery mode uses an old recovery methodthat handles a few cases that regular recovery mode does not (but is slower).
Note
If you want a repair operation to go much faster, you should set the values of the sort_buffer_size andkey_buffer_size variables each to about 25% of your available memory when running myisamchk.
If you get unexpected errors when repairing (such as out of memory errors), or if myisamchk crashes, go to Stage 3.
Stage 3: Difficult repair
You should reach this stage only if the first 16KB block in the index file is destroyed or contains incorrect information, or if the indexfile is missing. In this case, it is necessary to create a new index file. Do so as follows:
1. Move the data file to a safe place.
2. Use the table description file to create new (empty) data and index files:
shell> mysql db_namemysql> SET autocommit=1;mysql> TRUNCATE TABLE tbl_name;mysql> quit
3. Copy the old data file back onto the newly created data file. (Do not just move the old file back onto the new file. You want to re-tain a copy in case something goes wrong.)
Important
If you are using replication, you should stop it prior to performing the above procedure, since it involves file system opera-tions, and these are not logged by MySQL.
Backup and Recovery
80

Go back to Stage 2. myisamchk -r -q should work. (This should not be an endless loop.)
You can also use the REPAIR TABLE tbl_name USE_FRM SQL statement, which performs the whole procedure automatically.There is also no possibility of unwanted interaction between a utility and the server, because the server does all the work when you useREPAIR TABLE. See REPAIR TABLE Syntax.
Stage 4: Very difficult repair
You should reach this stage only if the .frm description file has also crashed. That should never happen, because the description file isnot changed after the table is created:
1. Restore the description file from a backup and go back to Stage 3. You can also restore the index file and go back to Stage 2. In thelatter case, you should start with myisamchk -r.
2. If you do not have a backup but know exactly how the table was created, create a copy of the table in another database. Removethe new data file, and then move the .frm description and .MYI index files from the other database to your crashed database.This gives you new description and index files, but leaves the .MYD data file alone. Go back to Stage 2 and attempt to reconstructthe index file.
5.6.4. MyISAM Table OptimizationTo coalesce fragmented rows and eliminate wasted space that results from deleting or updating rows, run myisamchk in recoverymode:
shell> myisamchk -r tbl_name
You can optimize a table in the same way by using the OPTIMIZE TABLE SQL statement. OPTIMIZE TABLE does a table repairand a key analysis, and also sorts the index tree so that key lookups are faster. There is also no possibility of unwanted interactionbetween a utility and the server, because the server does all the work when you use OPTIMIZE TABLE. See OPTIMIZE TABLE Syn-tax.
myisamchk has a number of other options that you can use to improve the performance of a table:
• --analyze or -a: Perform key distribution analysis. This improves join performance by enabling the join optimizer to betterchoose the order in which to join the tables and which indexes it should use.
• --sort-index or -S: Sort the index blocks. This optimizes seeks and makes table scans that use indexes faster.
• --sort-records=index_num or -R index_num: Sort data rows according to a given index. This makes your data muchmore localized and may speed up range-based SELECT and ORDER BY operations that use this index.
For a full description of all available options, see myisamchk.
5.6.5. Setting Up a MyISAM Table Maintenance ScheduleIt is a good idea to perform table checks on a regular basis rather than waiting for problems to occur. One way to check and repair My-ISAM tables is with the CHECK TABLE and REPAIR TABLE statements. See Table Maintenance Statements.
Another way to check tables is to use myisamchk. For maintenance purposes, you can use myisamchk -s. The -s option (short for--silent) causes myisamchk to run in silent mode, printing messages only when errors occur.
It is also a good idea to enable automatic MyISAM table checking. For example, whenever the machine has done a restart in the middleof an update, you usually need to check each table that could have been affected before it is used further. (These are “expected crashedtables.”) To cause the server to check MyISAM tables automatically, start it with the --myisam-recover option. See Server Com-mand Options.
You should also check your tables regularly during normal system operation. For example, you can run a cron job to check importanttables once a week, using a line like this in a crontab file:
35 0 * * 0 /path/to/myisamchk --fast --silent /path/to/datadir/*/*.MYI
Backup and Recovery
81

This prints out information about crashed tables so that you can examine and repair them as necessary.
To start with, execute myisamchk -s each night on all tables that have been updated during the last 24 hours. As you see that prob-lems occur infrequently, you can back off the checking frequency to once a week or so.
Normally, MySQL tables need little maintenance. If you are performing many updates to MyISAM tables with dynamic-sized rows(tables with VARCHAR, BLOB, or TEXT columns) or have tables with many deleted rows you may want to defragment/reclaim spacefrom the tables from time to time. You can do this by using OPTIMIZE TABLE on the tables in question. Alternatively, if you can stopthe mysqld server for a while, change location into the data directory and use this command while the server is stopped:
shell> myisamchk -r -s --sort-index --sort_buffer_size=16M */*.MYI
Backup and Recovery
82

Chapter 6. Frequently Asked Questions about SecurityQuestions
• 6.1: Where can I find documentation that addresses security issues for MySQL?
• 6.2: Does MySQL 5.1 have native support for SSL?
• 6.3: Is SSL support be built into MySQL binaries, or must I recompile the binary myself to enable it?
• 6.4: Does MySQL 5.1 have built-in authentication against LDAP directories?
• 6.5: Does MySQL 5.1 include support for Roles Based Access Control (RBAC)?
Questions and Answers
6.1: Where can I find documentation that addresses security issues for MySQL?
The best place to start is Chapter 1, General Security Issues.
Other portions of the MySQL Documentation which you may find useful with regard to specific security concerns include the follow-ing:
• Section 1.1, “General Security Guidelines”.
• Section 1.3, “Making MySQL Secure Against Attackers”.
• How to Reset the Root Password.
• Section 1.6, “How to Run MySQL as a Normal User”.
• User-Defined Function Security Precautions.
• Section 1.4, “Security-Related mysqld Options”.
• Section 1.5, “Security Issues with LOAD DATA LOCAL”.
• Chapter 2, Postinstallation Setup and Testing.
• Section 4.6.1, “Basic SSL Concepts”.
6.2: Does MySQL 5.1 have native support for SSL?
Most 5.1 binaries have support for SSL connections between the client and server. We can't currently build with the new YaSSL libraryeverywhere, as it's still quite new and does not compile on all platforms yet. See Section 4.6, “Using SSL for Secure Connections”.
You can also tunnel a connection using SSH, if (for example) the client application doesn't support SSL connections. For an example,see Section 4.7, “Connecting to MySQL Remotely from Windows with SSH”.
6.3: Is SSL support be built into MySQL binaries, or must I recompile the binary myself to enable it?
Most 5.1 binaries have SSL enabled for client/server connections that are secured, authenticated, or both. However, the YaSSL librarycurrently does not compile on all platforms. See Section 4.6, “Using SSL for Secure Connections”, for a complete listing of supportedand unsupported platforms.
6.4: Does MySQL 5.1 have built-in authentication against LDAP directories?
No. Support for external authentication methods is on the MySQL roadmap as a “rolling feature”, which means that we plan to imple-ment it in the future, but we have not yet determined when this will be done.
6.5: Does MySQL 5.1 include support for Roles Based Access Control (RBAC)?
83

No. Support for roles is on the MySQL roadmap as a “rolling feature”, which means that we plan to implement it in the future, but wehave not yet determined when this will be done.
Frequently Asked Questions about Security
84