rendering playblast - fridgemonstersfridgemonsters.com/rendering/playblast/playblast.pdf ·...
TRANSCRIPT

www.Fridgemonsters.com Page 1 Chris Shaw
Rendering Playblast

www.Fridgemonsters.com Page 2 Chris Shaw
Copyright and Terms of Use Please leave all references to “FridgeMonsters” intact in the documentation and code examples. 1. Except as otherwise provided, the contents of these notes shall not be reproduced, republished, uploaded, posted, transmitted or distributed electronically or non-electronically in any way, without FridgeMonsters LLP prior written permission. 2. Modification of any of the contents or use of the contents for any other purpose will be a violation of FridgeMonsters LLP copyright and other intellectual property rights. Graphics and images in these notes are protected by copyright and may not be reproduced or appropriated in any manner without written permission of FridgeMonsters LLP. 3. FridgeMonsters LLP reserves all rights to deny or restrict access to these notes to any particular person or persons, or to block access from a particular Internet address to the FridgeMonsters.com Web Site, at any time, without ascribing any reasons whatsoever. 4. These Terms of Use shall be governed and construed in accordance with laws of the Republic of Singapore. For full details, please view the Terms of Use document at : http://www.FridgeMonsters.com/administration/terms.asp 5. Please report any errors in this tutorial to [email protected] Annotation Shortcut keys are indicated by [].
eg Duplicate = [Ctrl]+[d] Parent = [p]

www.Fridgemonsters.com Page 3 Chris Shaw
Introduction For students and professionals alike, fully rendered animation is not always necessary or required, especially during the development stages of a project. Whether it’s for testing animation, feedback, a rigging showreel or modeling showcase, being able to render the viewport as Playblast has its advantages. However, it has come to our attention that Playblasts are often not rendered to their full potential. This tutorial will cover how to make the most of your Playblasts. It will cover how to setup the viewport, the rendering options available and how to save/output the Playblast with the best settings. Lesson Plan Here are the steps involved to give you improved results when rendering a Playblast.
1. Setting up the viewport 2. Shading Settings 3. Anti-Aliasing 4. Adding Lights 5. Playblast options 6. Codec problems 7. Rendering the Playblast

www.Fridgemonsters.com Page 4 Chris Shaw
Setting up the Viewport First, remove any unnecessary visual clutter, like the Heads Up Display values, ViewCube or Origin Axis.
Next, set the Viewport Shading mode to Smooth Shade All and Wireframe on Shaded.

www.Fridgemonsters.com Page 5 Chris Shaw
This will render the Lights in the scene (low resolution shading, without shadows) and add a Wireframe overlay to the objects, making them more distinguishable in the scene. Then set the Viewport Lighting mode to Use All Lights. This will ensure all the lights in the scene are rendered, which we’ll add later in this tutorial.
Smooth Shade All Smooth Shade All + Wire Frame on Shaded
Note : In the images above, the Lights have already been added to the scene to make the images clearer. We’ll show you how later in this tutorial.

www.Fridgemonsters.com Page 6 Chris Shaw
Improve the Wireframe Quality In the image below, the Wireframe on Shaded line (dark blue) is rendered with a stepped line. It is not smoothed. When you render the Playblast, these stepped lines it will create distracting and visual irregularities – Commonly called “artifacts”.
By default, Wireframe on Shaded has stepped lines, also known as Aliased or Jaggies
Note : These lines (or edges) are stepped because the software draws the line as whole pixels instead of calculating a percentage value for the edge of the object as it intersects the pixels.
Aliasing Anti-Aliasing
So, the next thing you need to do is Smooth Wireframe (Anti-Alias).
Shading > Smooth Wireframe

www.Fridgemonsters.com Page 7 Chris Shaw
As you can see in the image below, the Smooth Wireframe option Anti-Aliases (smooths) the wireframe lines. Compare the image below with the image on the previous page.
Smooth Wireframe Anti-Aliases the Wireframe
www.Fridgemonsters.com Page 8 Chris Shaw
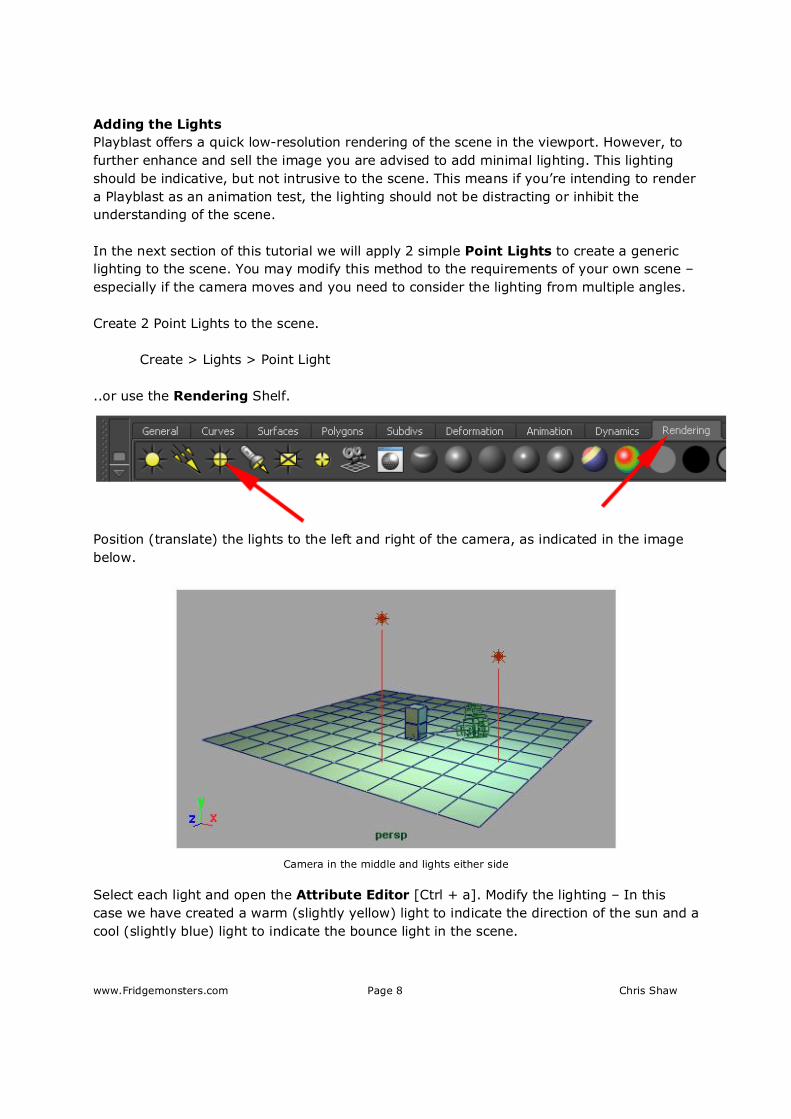
Adding the Lights Playblast offers a quick low-resolution rendering of the scene in the viewport. However, to further enhance and sell the image you are advised to add minimal lighting. This lighting should be indicative, but not intrusive to the scene. This means if you’re intending to render a Playblast as an animation test, the lighting should not be distracting or inhibit the understanding of the scene. In the next section of this tutorial we will apply 2 simple Point Lights to create a generic lighting to the scene. You may modify this method to the requirements of your own scene – especially if the camera moves and you need to consider the lighting from multiple angles. Create 2 Point Lights to the scene.
Create > Lights > Point Light
..or use the Rendering Shelf.
Position (translate) the lights to the left and right of the camera, as indicated in the image below.
Camera in the middle and lights either side
Select each light and open the Attribute Editor [Ctrl + a]. Modify the lighting – In this case we have created a warm (slightly yellow) light to indicate the direction of the sun and a cool (slightly blue) light to indicate the bounce light in the scene.

www.Fridgemonsters.com Page 9 Chris Shaw
Note : Colour values above are exaggerated
Camera view of the scene
www.Fridgemonsters.com Page 10 Chris Shaw
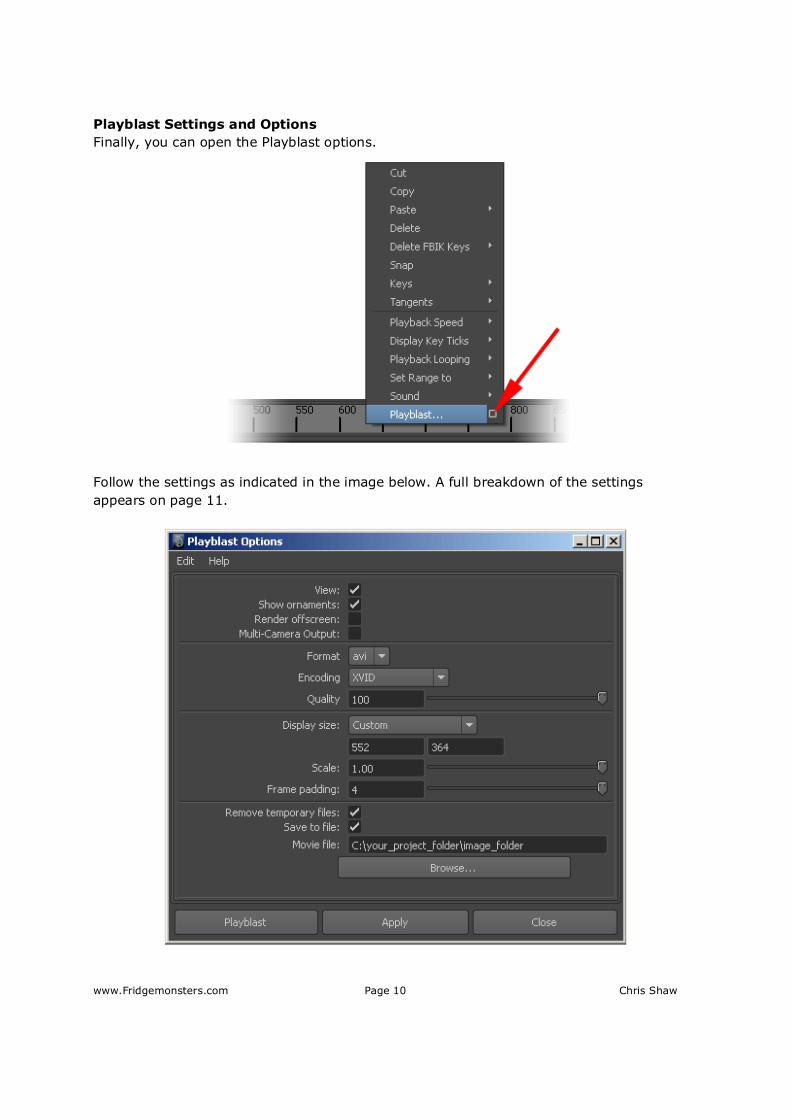
Playblast Settings and Options Finally, you can open the Playblast options.
Follow the settings as indicated in the image below. A full breakdown of the settings appears on page 11.

www.Fridgemonsters.com Page 11 Chris Shaw
Playblast Settings For a standard Playblast, and the purposes of this tutorial, leave all the settings with their default values.
Edit > Reset Settings
Settings which require modifying are indicated below with a * and the value with [xxx] View [ON] This option opens the Playblast in the default movie player after rendering is complete. Show Ornaments [ON] This option displays the camera name and the axes in the bottom left of the viewport. Render Offscreen [OFF] This option allows you to render a Playblast using the script editor without having the Maya scene view open. Multi-Camera Output [OFF] This option allows you to render a stereo camera to capture the output of both the left and right cameras. *Format [AVI] This option allows you to select the format for the movie output. Standard options include are .iff for a sequence of frames and .AVI for a movie file. *Encoding [see Codec Issues on page 13] The Encoding drop-down menu lists the Codec (Compression) options available on your computer. This list updates based on the selected Format above. Selecting the most suitable Codec is essential to producing a good quality rendering. This is explained in detail on page 13. *Quality [100] This option allows you to control the compression value for the movie. The higher the compression, the smaller the file size and the lower the quality. As the results can vary depending on the codec you select in the Encoding drop-down list and Quality value selected, it recommended that you Playblast a small section of the animation to test the settings. For the purposes of this tutorial it is recommended to set the Quality to 100% *Display Size [Custom] The Display Size drop-down menu lists three options for controlling the resolution (size) of the Playblast. For each of these three options, the final size of the image will be further scaled by the amount in the Scale option.
www.Fridgemonsters.com Page 12 Chris Shaw
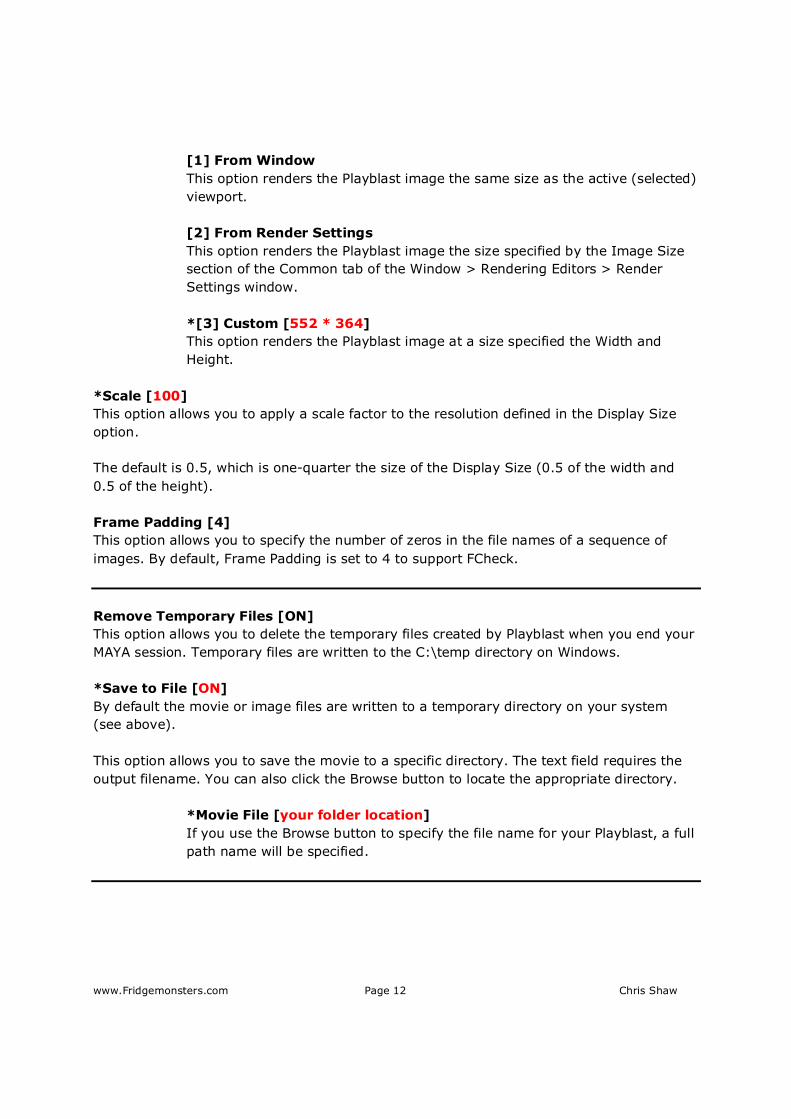
[1] From Window This option renders the Playblast image the same size as the active (selected) viewport. [2] From Render Settings This option renders the Playblast image the size specified by the Image Size section of the Common tab of the Window > Rendering Editors > Render Settings window. *[3] Custom [552 * 364] This option renders the Playblast image at a size specified the Width and Height.
*Scale [100] This option allows you to apply a scale factor to the resolution defined in the Display Size option. The default is 0.5, which is one-quarter the size of the Display Size (0.5 of the width and 0.5 of the height). Frame Padding [4] This option allows you to specify the number of zeros in the file names of a sequence of images. By default, Frame Padding is set to 4 to support FCheck. Remove Temporary Files [ON] This option allows you to delete the temporary files created by Playblast when you end your MAYA session. Temporary files are written to the C:\temp directory on Windows. *Save to File [ON] By default the movie or image files are written to a temporary directory on your system (see above). This option allows you to save the movie to a specific directory. The text field requires the output filename. You can also click the Browse button to locate the appropriate directory.
*Movie File [your folder location] If you use the Browse button to specify the file name for your Playblast, a full path name will be specified.

www.Fridgemonsters.com Page 13 Chris Shaw
Codec (Compression) Issues As you can see so far, rendering a Playblast is a pretty straight forward technical process. To get the best results it will require adjustments in the settings and several short test renders. Determining the best settings is a slightly time consuming and sometimes frustrating exercise. However, as they affect the aesthetic of the Playblast, it is considered a necessary investment of time. Be patient. The most important technical and potentially the most time consuming aspect of rendering a Playblast is selecting the best Codec (Compression). At the time of writing this tutorial we are using MAYA 2012 on a Win 64 bits OS. After extensive testing it is very clear that the default Codecs installed do not produce satisfactory results (artifacts and lagging playback). Several of the Codecs are simply not supported by a 64 bit OS and produce error message, while the others produce unsatisfactory results – see images below.
Colour banding is a form of Compression artifact. This is distracting and should be avoided at all costs.

www.Fridgemonsters.com Page 14 Chris Shaw
Note : A compression artifact is a noticeable distortion of the image, caused by data compression. Data compression involves discarding some of the image’s data so that it becomes simplified enough to reduce the file size. If the compressed version does not contain enough data to reproduce the original image the result is a loss of quality, which causes artifacts (banding in the example above). Codec Problem Solved Our solution to solve this problem was to simply Google “MAYA 2012 Playblast Codec”. In this case we discovered several suggested solutions, but the single common solution was to install the Xvid codec, reboot the computer and launch MAYA. It worked immediately and produced great results, with only minor artifacts.
XVID codec for Windows available here : http://www.xvid.org/Downloads.15.0.html As a word of warning, do not act on the first solution you read on Forums. Check the date of the posting. If it is more than 6 months old, it is out-of-date already. Look for common up-to-date solutions and read the follow-up comments to see the results. …and back-up your work before installing anything. After discovering that the default Codecs in MAYA 2012 did not produce satisfactory results, it took me about 15 minutes of reading on the forums (after a Google search) and 15 minutes to download, install and reboot my system. Time well spent.

www.Fridgemonsters.com Page 15 Chris Shaw
Rendering the Playblast Finally, the viewport is checked, the Shading options are selected, the Codec is installed and you’re ready to render your Playblast. Here are the final points to note
1. Make sure nothing is selected in the viewport. (Otherwise the wireframe will be rendered green).
2. Maximise the viewport. 3. Render the Playblast.