registration of e-demand user guidelines e-demand
TRANSCRIPT
REGISTRATION of e-DEMAND Page 1
Copyright © 2014 Centre for Railway Information Systems
USER GUIDELINES
e-DEMAND REGISTRATION
Steps to follow for registration of e-Demand:
1. Open the following website in the web browser of your computer system
https://www.fois.indianrail.gov.in/
2. Make sure that you are a registered user of the e-Demand Module and have a
valid User Id and Password to access the application (for User registration process,
please refer to the User Registration Manual)
3. Also you have to be authorized by the Organization for registration of e-Demand
4. Login with your registered User Id (as provided) and the valid password created by
you after first login
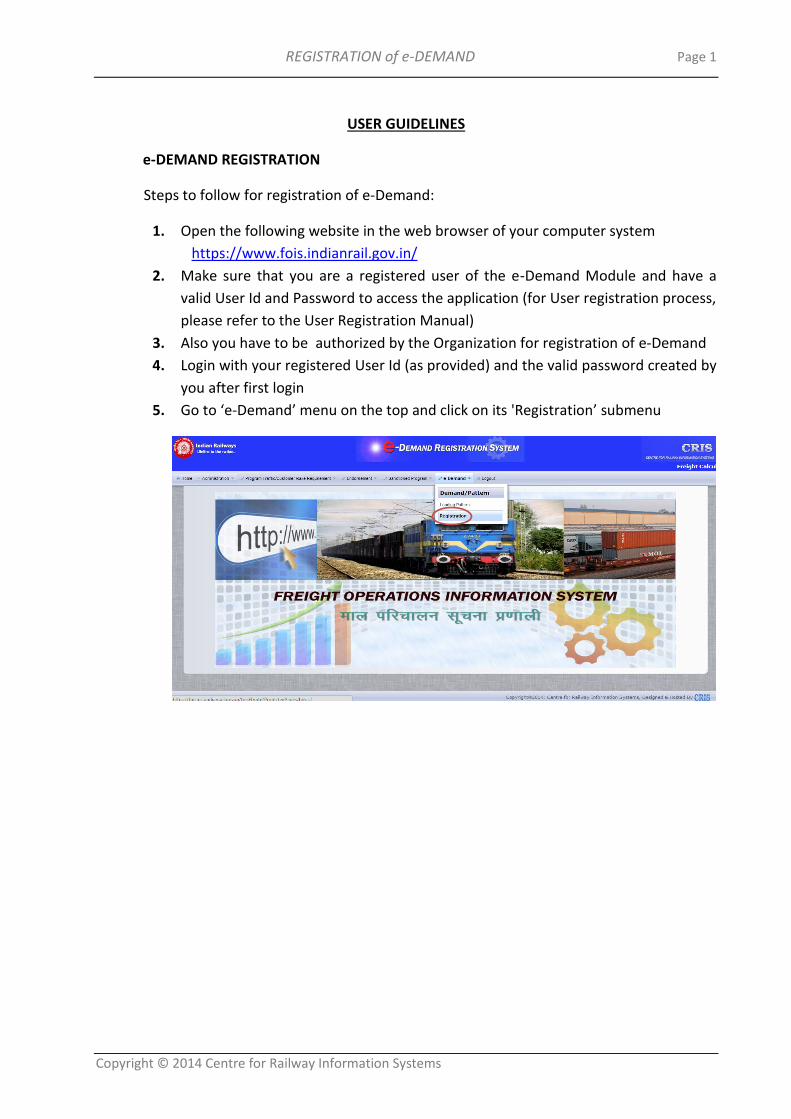
5. Go to ‘e-Demand’ menu on the top and click on its 'Registration’ submenu
REGISTRATION of e-DEMAND Page 2
Copyright © 2014 Centre for Railway Information Systems
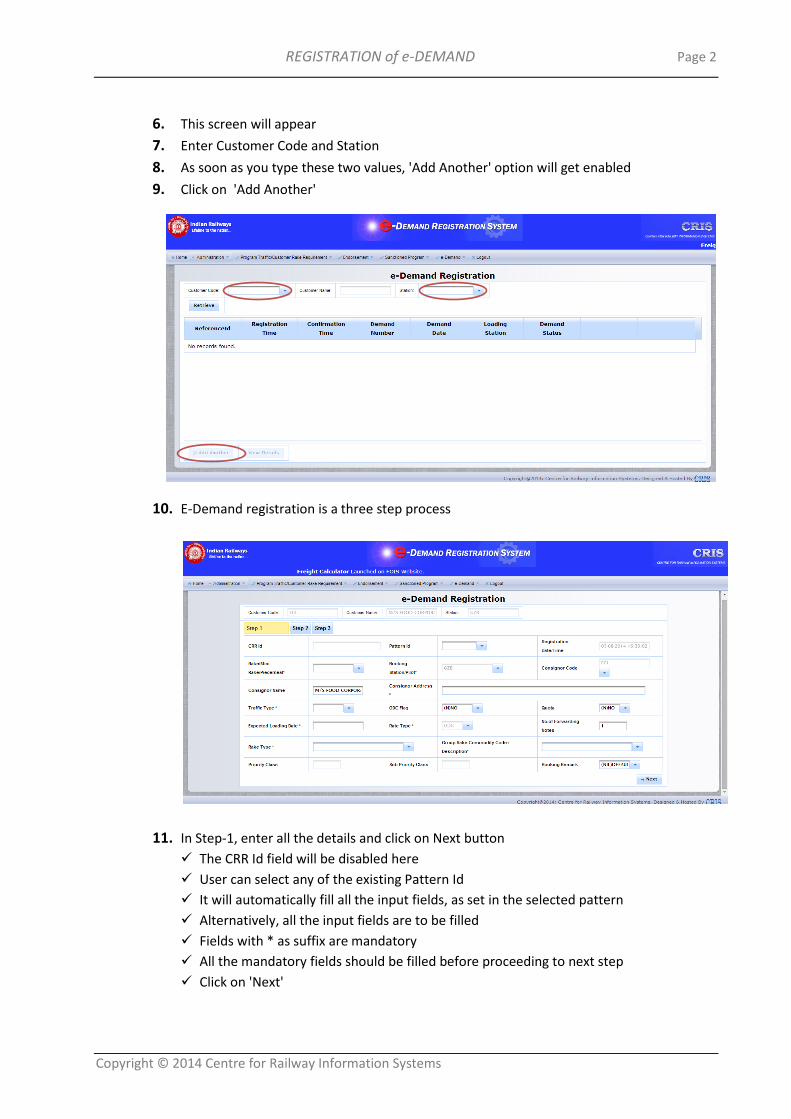
6. This screen will appear
7. Enter Customer Code and Station
8. As soon as you type these two values, 'Add Another' option will get enabled
9. Click on 'Add Another'
10. E-Demand registration is a three step process
11. In Step-1, enter all the details and click on Next button
The CRR Id field will be disabled here
User can select any of the existing Pattern Id
It will automatically fill all the input fields, as set in the selected pattern
Alternatively, all the input fields are to be filled
Fields with * as suffix are mandatory
All the mandatory fields should be filled before proceeding to next step
Click on 'Next'
REGISTRATION of e-DEMAND Page 3
Copyright © 2014 Centre for Railway Information Systems
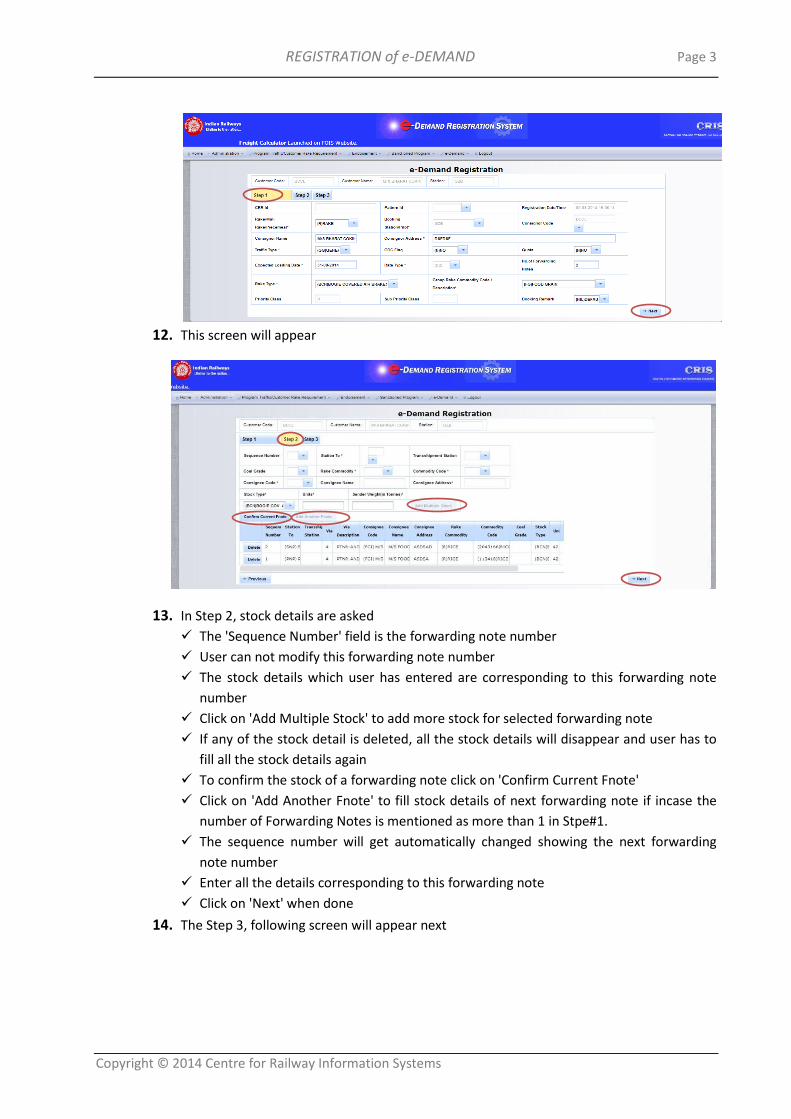
12. This screen will appear
13. In Step 2, stock details are asked
The 'Sequence Number' field is the forwarding note number
User can not modify this forwarding note number
The stock details which user has entered are corresponding to this forwarding note
number
Click on 'Add Multiple Stock' to add more stock for selected forwarding note
If any of the stock detail is deleted, all the stock details will disappear and user has to
fill all the stock details again
To confirm the stock of a forwarding note click on 'Confirm Current Fnote'
Click on 'Add Another Fnote' to fill stock details of next forwarding note if incase the
number of Forwarding Notes is mentioned as more than 1 in Stpe#1.
The sequence number will get automatically changed showing the next forwarding
note number
Enter all the details corresponding to this forwarding note
Click on 'Next' when done
14. The Step 3, following screen will appear next
REGISTRATION of e-DEMAND Page 4
Copyright © 2014 Centre for Railway Information Systems
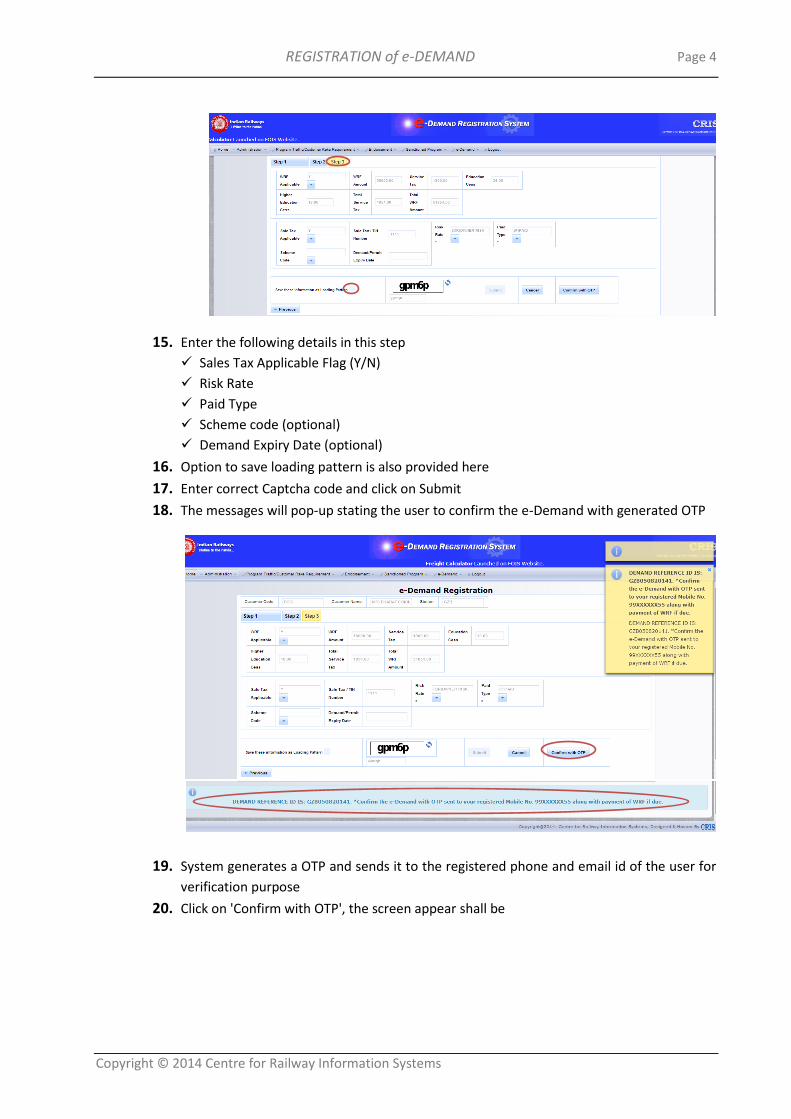
15. Enter the following details in this step
Sales Tax Applicable Flag (Y/N)
Risk Rate
Paid Type
Scheme code (optional)
Demand Expiry Date (optional)
16. Option to save loading pattern is also provided here
17. Enter correct Captcha code and click on Submit
18. The messages will pop-up stating the user to confirm the e-Demand with generated OTP
19. System generates a OTP and sends it to the registered phone and email id of the user for
verification purpose
20. Click on 'Confirm with OTP', the screen appear shall be
REGISTRATION of e-DEMAND Page 5
Copyright © 2014 Centre for Railway Information Systems
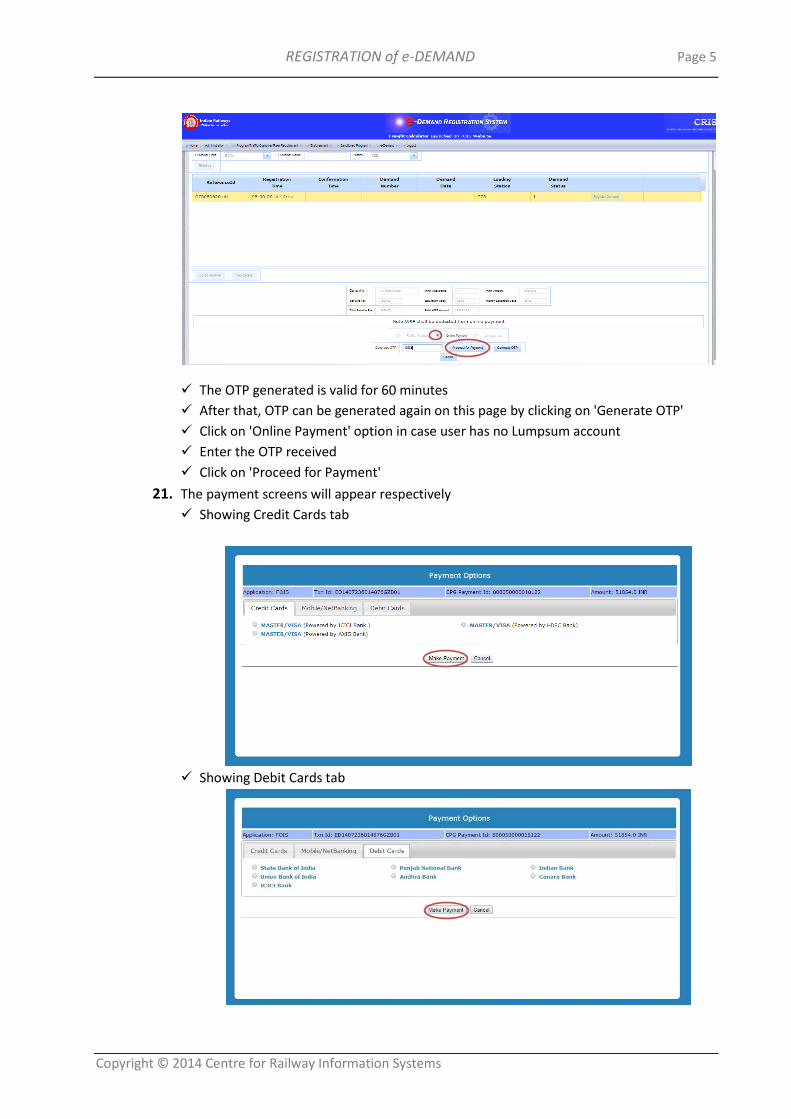
The OTP generated is valid for 60 minutes
After that, OTP can be generated again on this page by clicking on 'Generate OTP'
Click on 'Online Payment' option in case user has no Lumpsum account
Enter the OTP received
Click on 'Proceed for Payment'
21. The payment screens will appear respectively
Showing Credit Cards tab
Showing Debit Cards tab
REGISTRATION of e-DEMAND Page 6
Copyright © 2014 Centre for Railway Information Systems
22. Select the desired payment option and click on 'Make Payment'
23. You will be taken to payment gateway according to the payment option selected
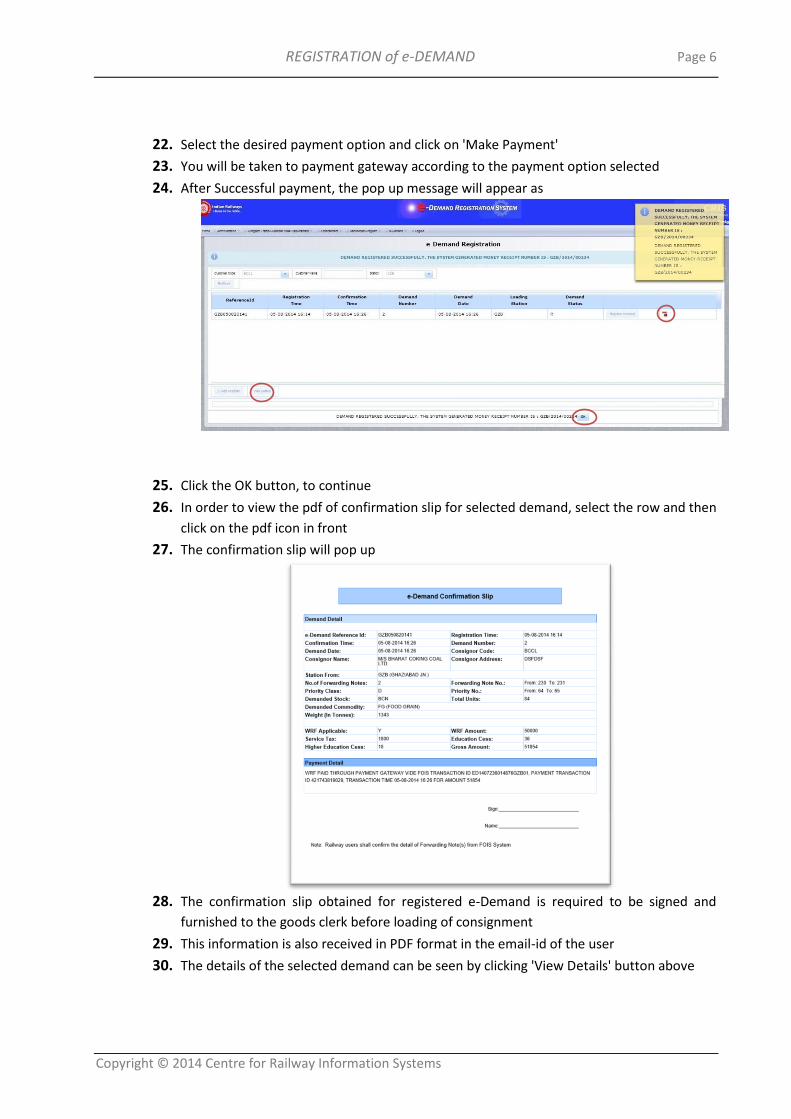
24. After Successful payment, the pop up message will appear as
25. Click the OK button, to continue
26. In order to view the pdf of confirmation slip for selected demand, select the row and then
click on the pdf icon in front
27. The confirmation slip will pop up
28. The confirmation slip obtained for registered e-Demand is required to be signed and
furnished to the goods clerk before loading of consignment
29. This information is also received in PDF format in the email-id of the user
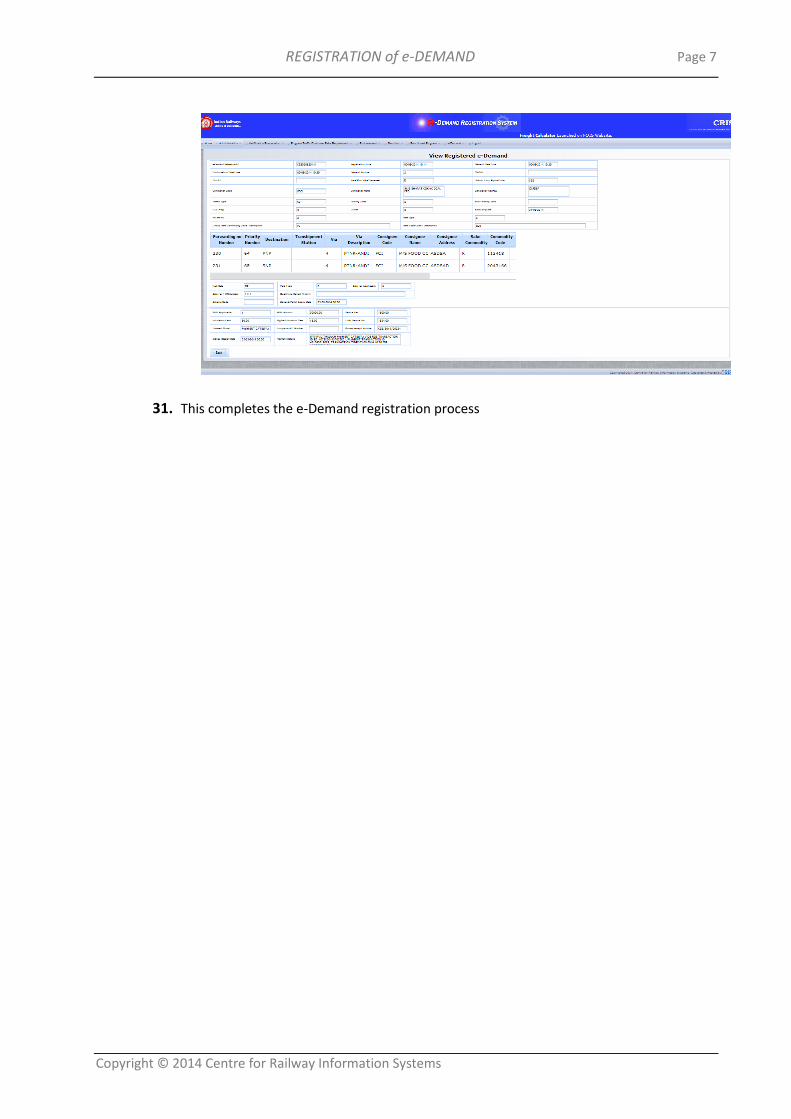
30. The details of the selected demand can be seen by clicking 'View Details' button above
REGISTRATION of e-DEMAND Page 7
Copyright © 2014 Centre for Railway Information Systems
31. This completes the e-Demand registration process