push notifications with dashboard and swift
TRANSCRIPT
back4app.comPush Notifications With Dashboard
and Swift
Push Notifications With Dashboard and Swift
• In this guide, we will show how properly set your app to work with Parse Push notifications and how send a notification from Parse Dashboard.
• You can read the original publication on:• http://docs.back4app.com/docs/ios/push-notifications-with-dashboard-and-
swift/
Step 1: Register your app to receive notification
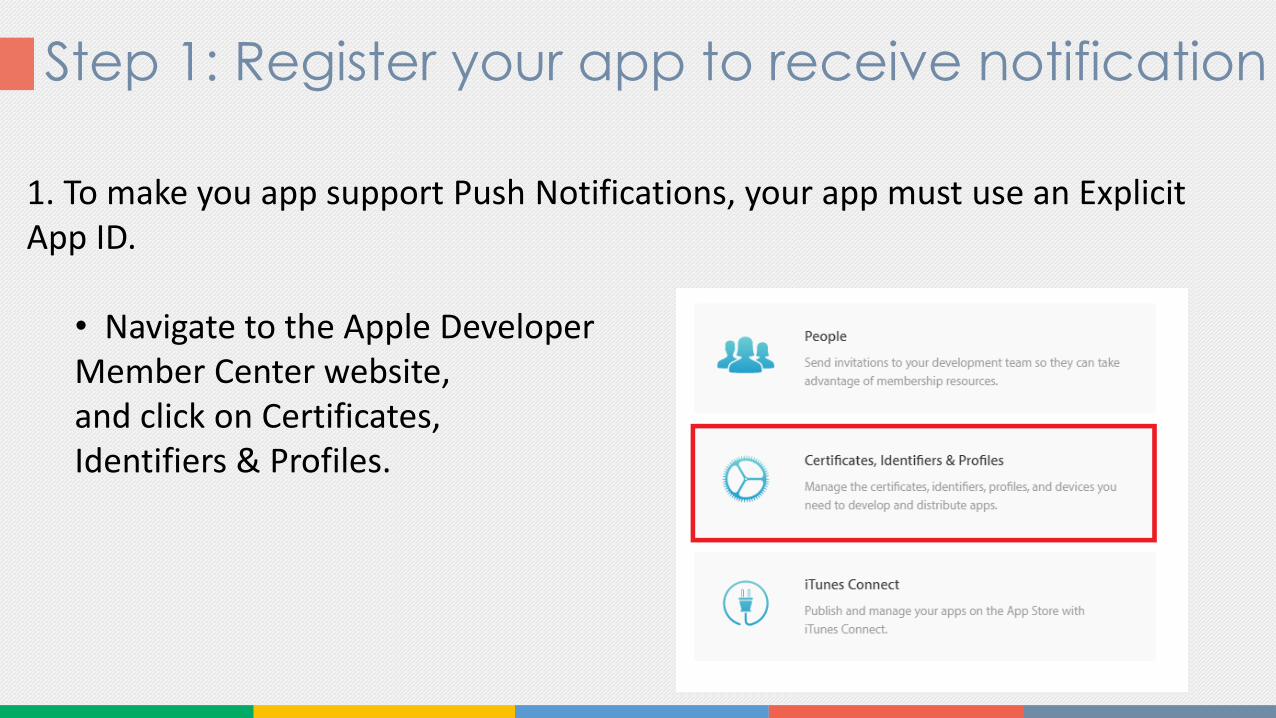
1. To make you app support Push Notifications, your app must use an Explicit App ID.
• Navigate to the Apple DeveloperMember Center website,and click on Certificates,Identifiers & Profiles.
Step 1: Register your app to receive notification
2. Select Identifiers on the iOS Apps section.
3. You will see a list of your App IDs. Click on the + button.
4. Enter a name for your new App ID under App ID Description, choose an App Id Prefix, and under App ID Suffix, select Explicit App ID, enter your iOS app’s Bundle ID, it should match the Bundle Identifier in your Xcode project configuration and in the Info.plist file.
Step 1: Register your app to receive notification
5. Enable Push Notifications under App Services. Enable other services that your app will need.
6. Click on “Continue”, confirm that all values were entered correctly. Click on “Submit”.
Step 1: Register your app to receive notification
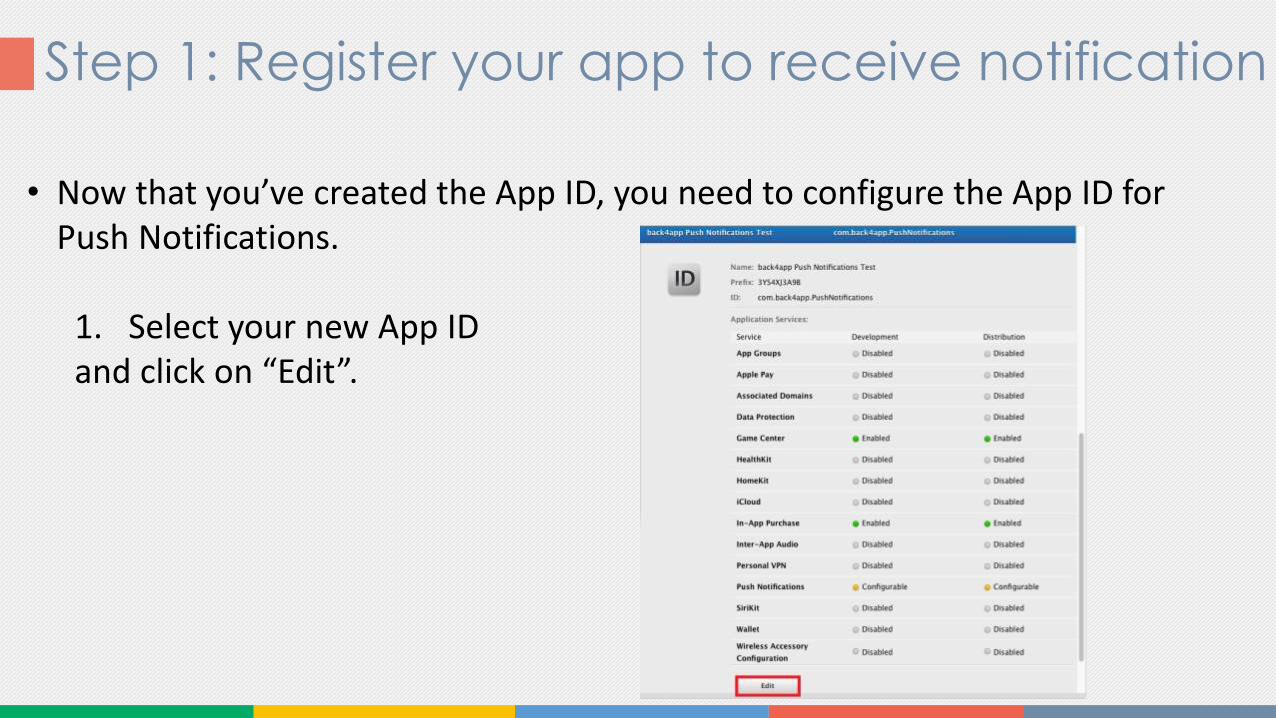
• Now that you’ve created the App ID, you need to configure the App ID for Push Notifications.
1. Select your new App IDand click on “Edit”.
Step 1: Register your app to receive notification
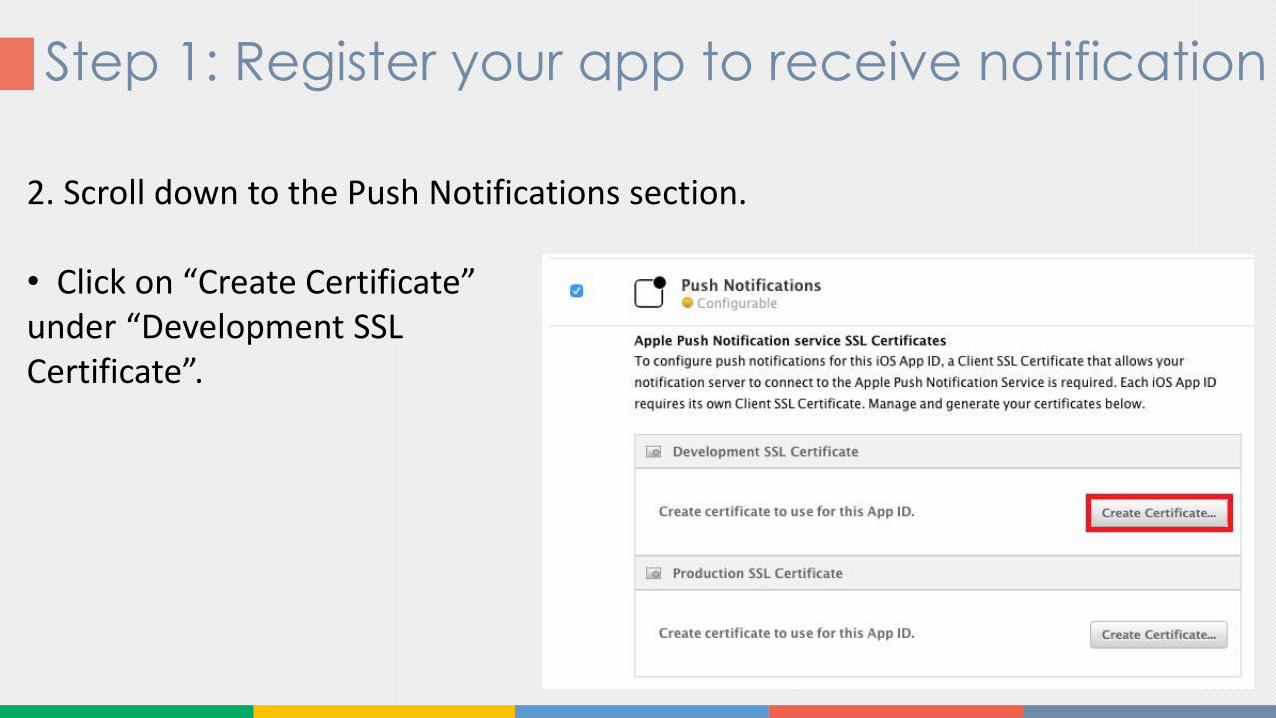
2. Scroll down to the Push Notifications section.
• Click on “Create Certificate”under “Development SSLCertificate”.
Step 1: Register your app to receive notification
3. Follow the instructions in the next screen to create a Certificate Signing Request (CSR) using the Keychain Access utility on your Mac.
• This is needed to authenticate the creation of the SSL certificate.
4. Upload the CSR to Apple’s servers, then click on “Generate”.
Step 1: Register your app to receive notification
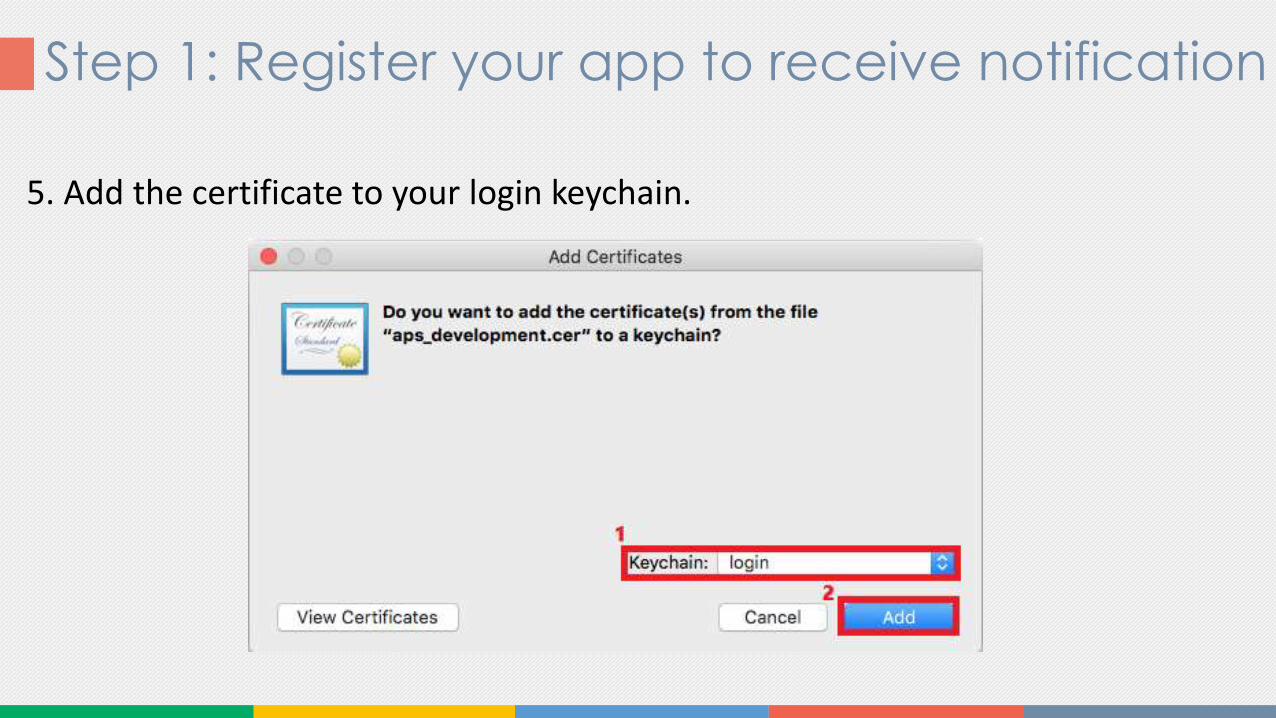
5. Add the certificate to your login keychain.
Step 1: Register your app to receive notification
6. Open the Keychain Access utility, and locate the certificate under “My Certificates”.
It should be called “Apple Development Push Services:”.
Right-click on it, select “Export”, and save it as a .p12 file.
Step 1: Register your app to receive notification
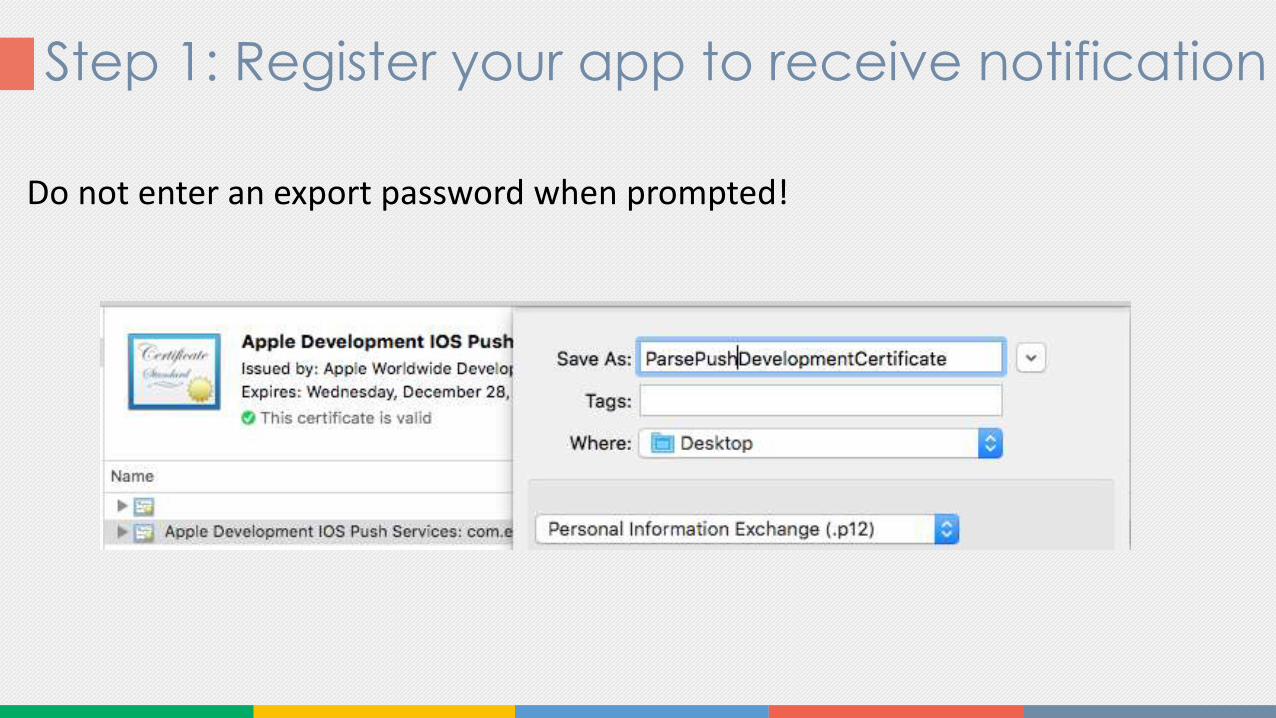
Do not enter an export password when prompted!
Step 1: Register your app to receive notification
• You will need to repeat the process to make the Production SSL Certificate.
• Now we need to configure the Xcode project.
Step 1: Register your app to receive notification
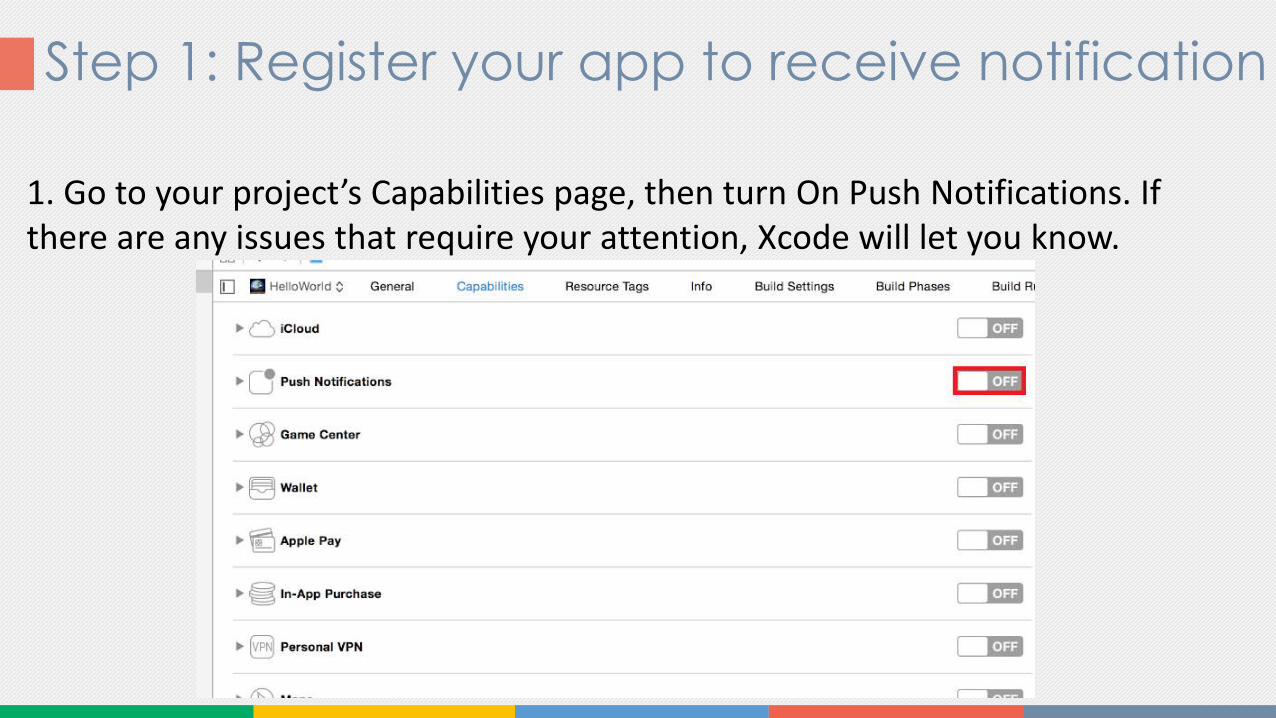
1. Go to your project’s Capabilities page, then turn On Push Notifications. If there are any issues that require your attention, Xcode will let you know.
Step 1: Register your app to receive notification
2. Go to the General page.
• Modify the Bundle Identifier to match your App ID’s Bundle Identifier.
Step 2: Register your app to receive notification
in the back4app Dashboard1. Go to your app back4app Dashboard
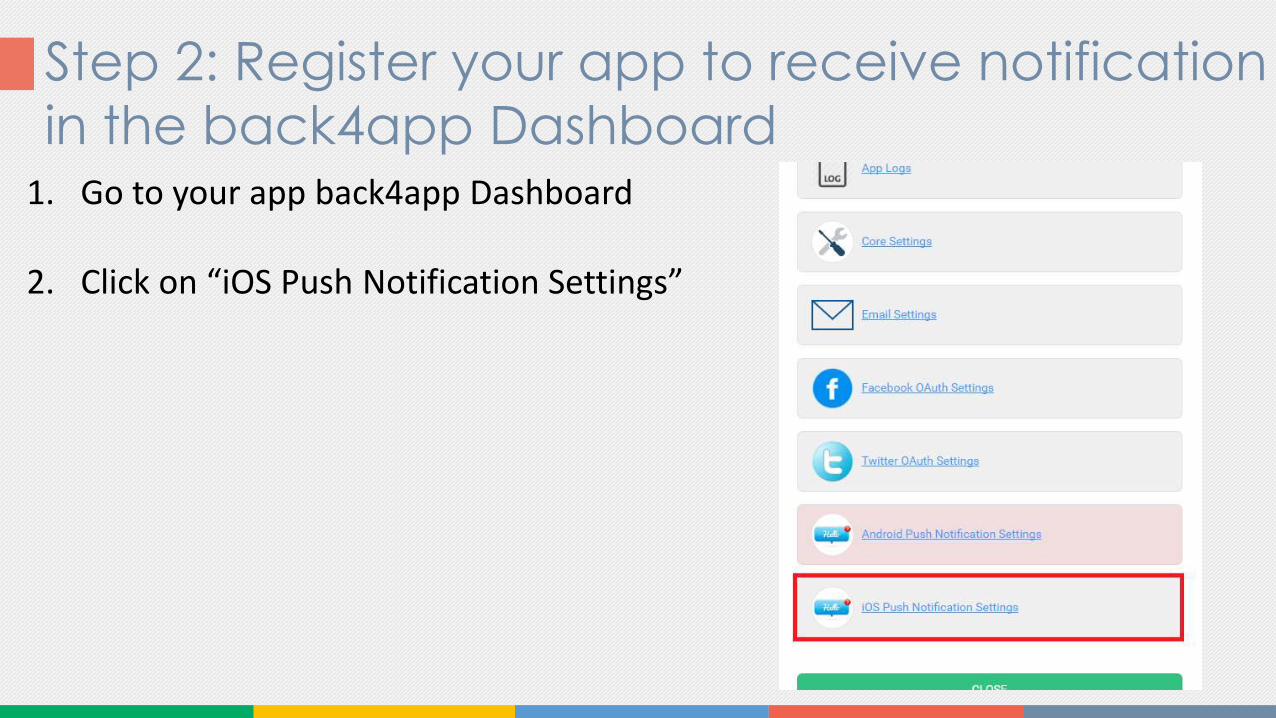
2. Click on “iOS Push Notification Settings”
Step 2: Register your app to receive notification
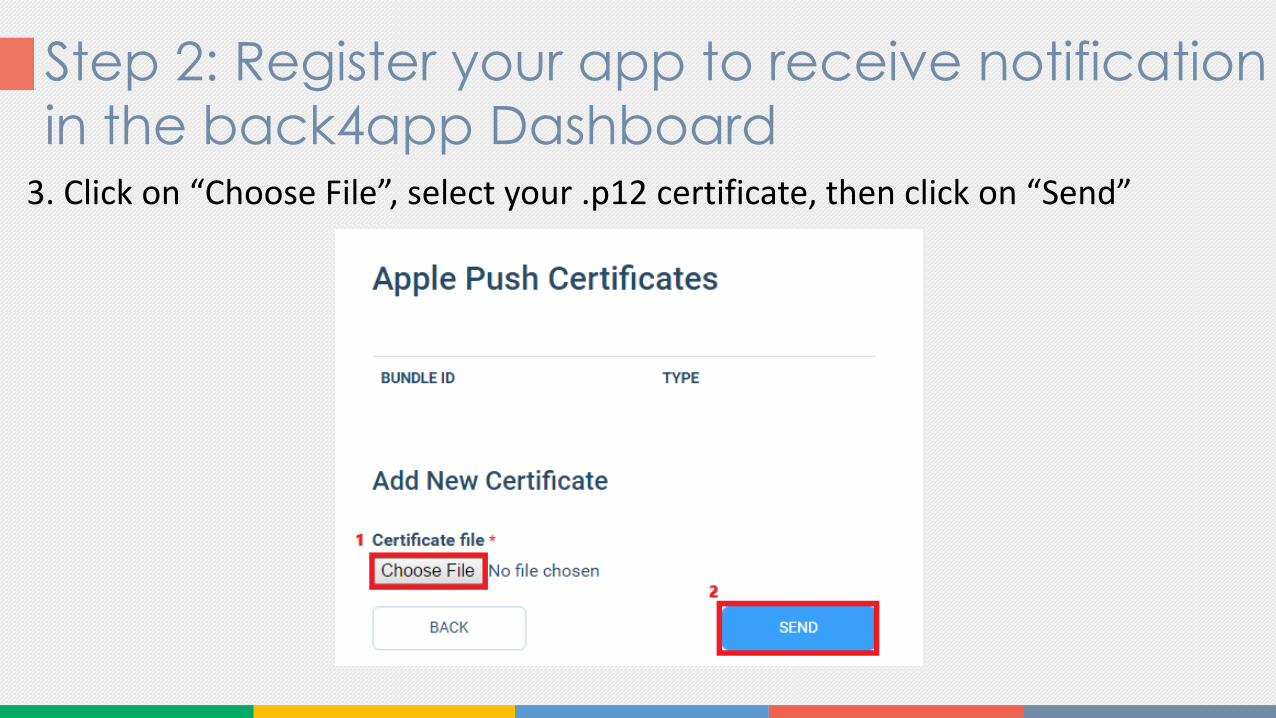
in the back4app Dashboard3. Click on “Choose File”, select your .p12 certificate, then click on “Send”

Step 3: Implement Push Notifications Functions
1. Go to AppDelegate.swift file.
• In the application: didFinishLaunchWithOptions method, insert the following code after the Parse initialization:
• This code are notifications types and settings for the app
Step 3: Implement Push Notifications Functions
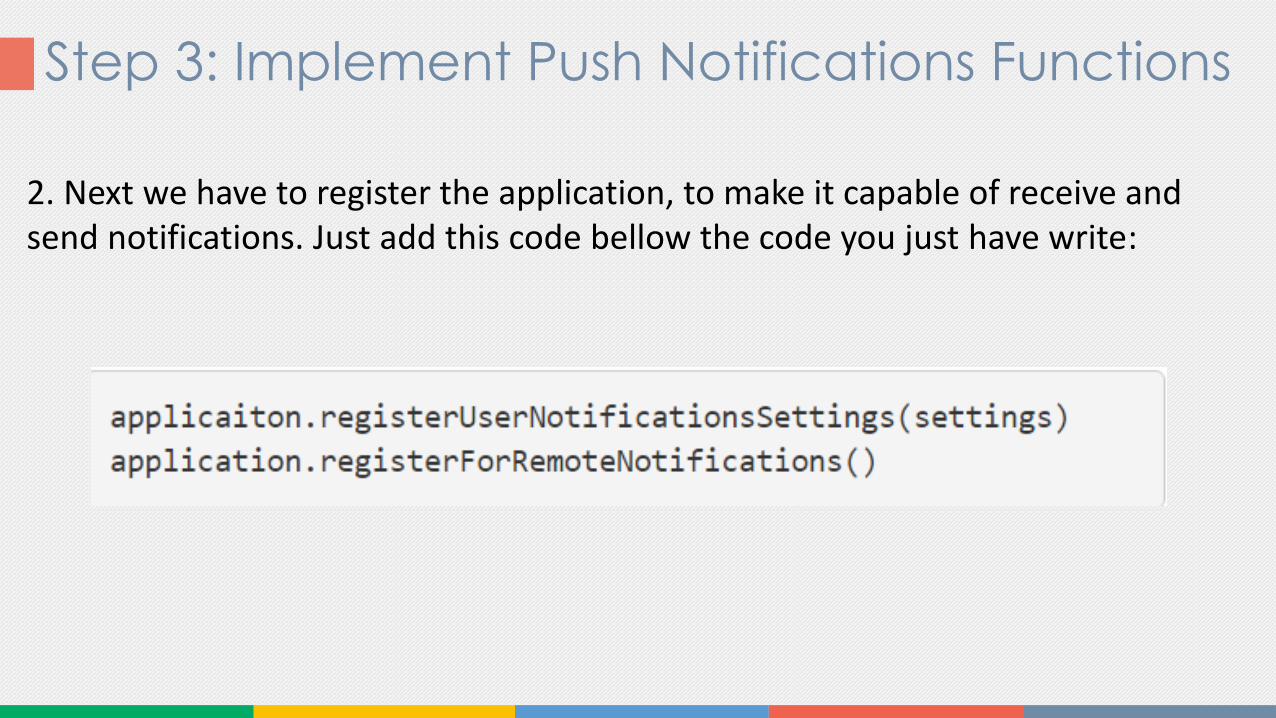
2. Next we have to register the application, to make it capable of receive and send notifications. Just add this code bellow the code you just have write:
Step 3: Implement Push Notifications Functions
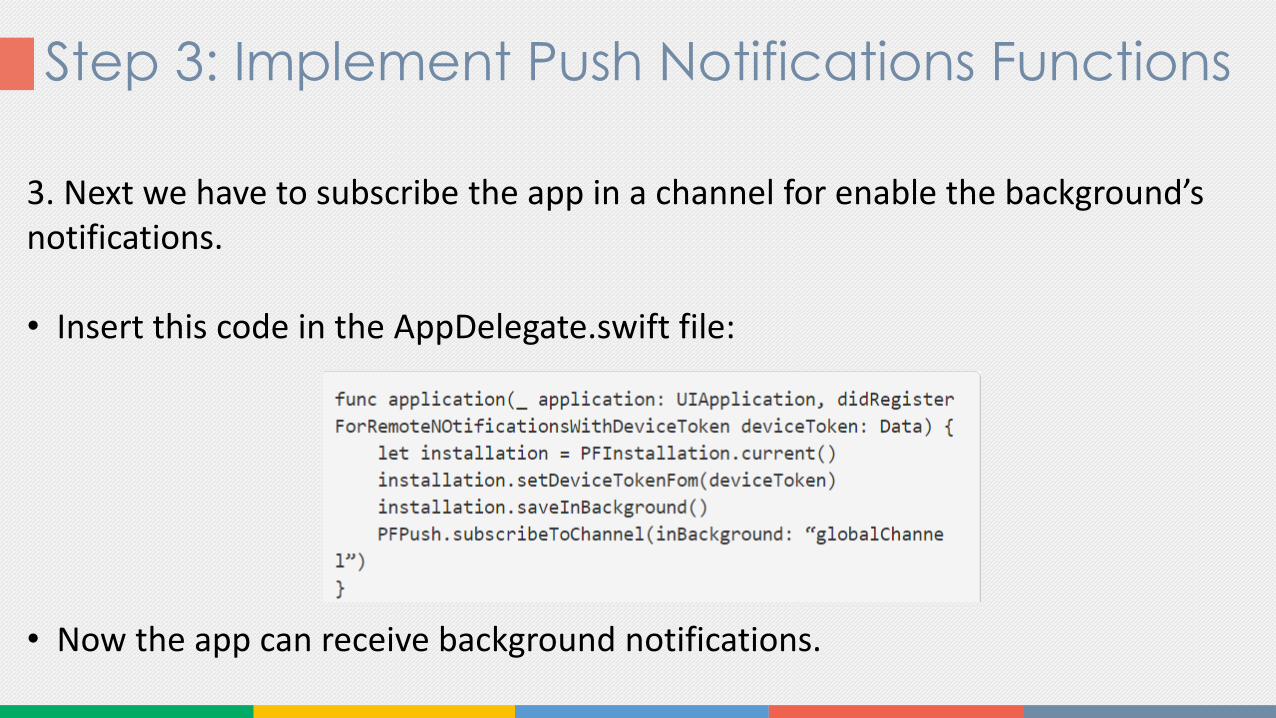
3. Next we have to subscribe the app in a channel for enable the background’s notifications.
• Insert this code in the AppDelegate.swift file:
• Now the app can receive background notifications.
Step 3: Implement Push Notifications Functions
4. It’s also possible to send notifications to just a group of people.
• For this, we have to register the app for the group’s channel.
• When you send a notification to a channel, all the app’s installations that have the channel in the channels field will receive the notification.
Step 3: Implement Push Notifications Functions
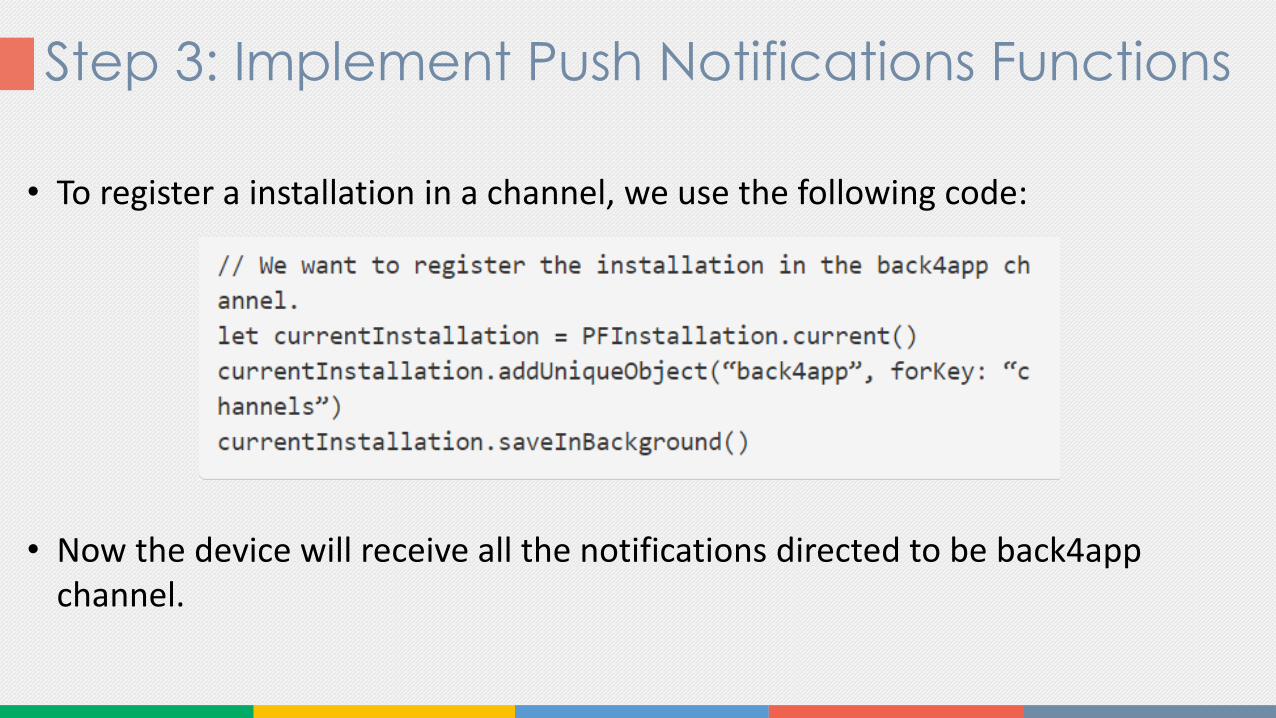
• To register a installation in a channel, we use the following code:
• Now the device will receive all the notifications directed to be back4app channel.
Step 3: Implement Push Notifications Functions
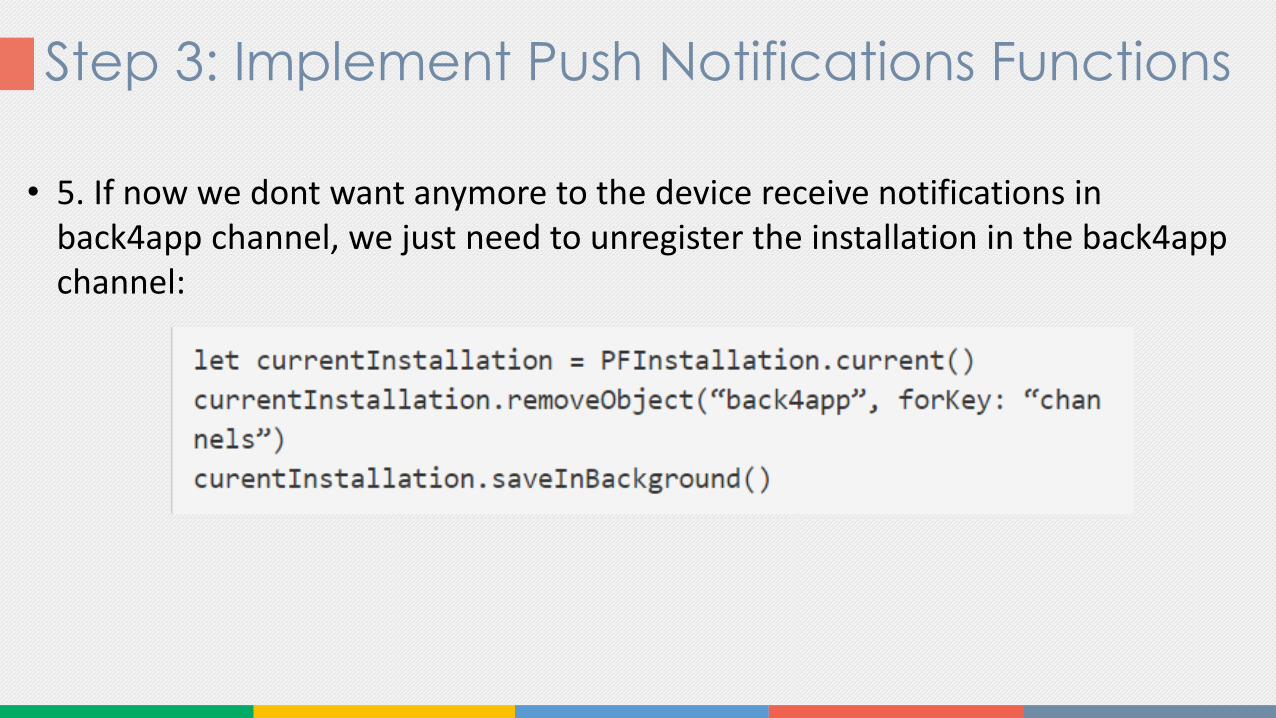
• 5. If now we dont want anymore to the device receive notifications in back4app channel, we just need to unregister the installation in the back4app channel:
Step 3: Implement Push Notifications Functions
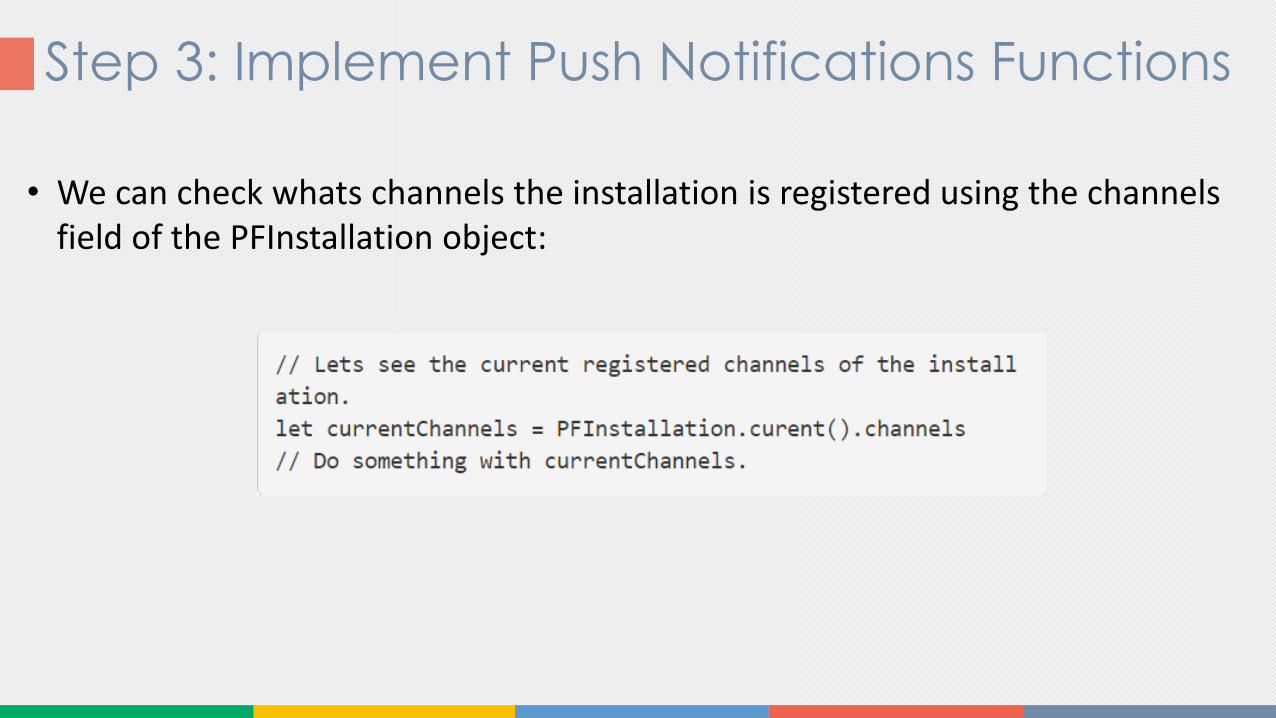
• We can check whats channels the installation is registered using the channels field of the PFInstallation object:
Step 4: Sending notification from Dashboard
1. Go to your app’s Parse Dashboard, and click on Push.
2. Now chose the audience of the notification. You can send notifications to everyone and for a specific platform.
3. Write the notification text, then click on Send Push to send your notification.