pomegranate study
TRANSCRIPT
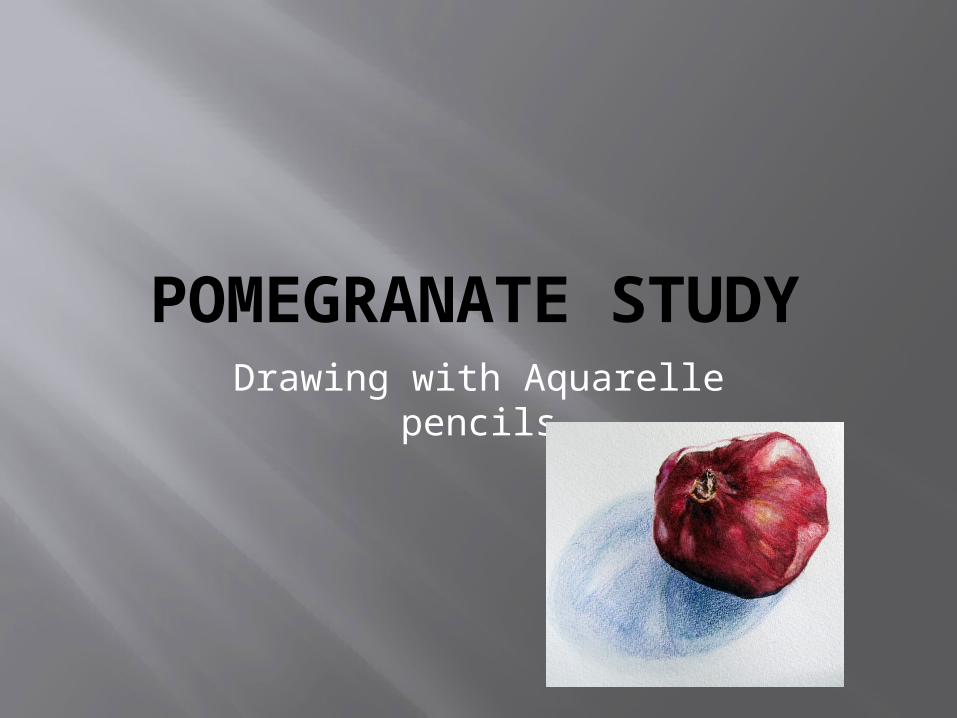
POMEGRANATE STUDYDrawing with Aquarelle pencils
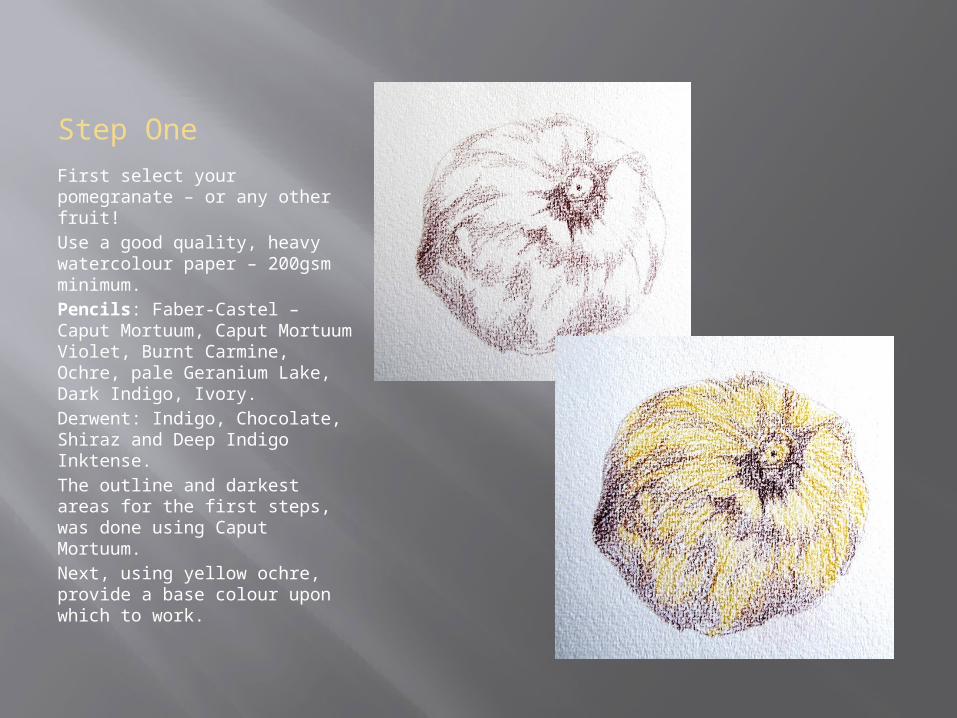
Step One
First select your pomegranate – or any other fruit!Use a good quality, heavy watercolour paper – 200gsm minimum.Pencils: Faber-Castel – Caput Mortuum, Caput Mortuum Violet, Burnt Carmine, Ochre, pale Geranium Lake, Dark Indigo, Ivory.Derwent: Indigo, Chocolate, Shiraz and Deep Indigo Inktense.The outline and darkest areas for the first steps, was done using Caput Mortuum.Next, using yellow ochre, provide a base colour upon which to work.
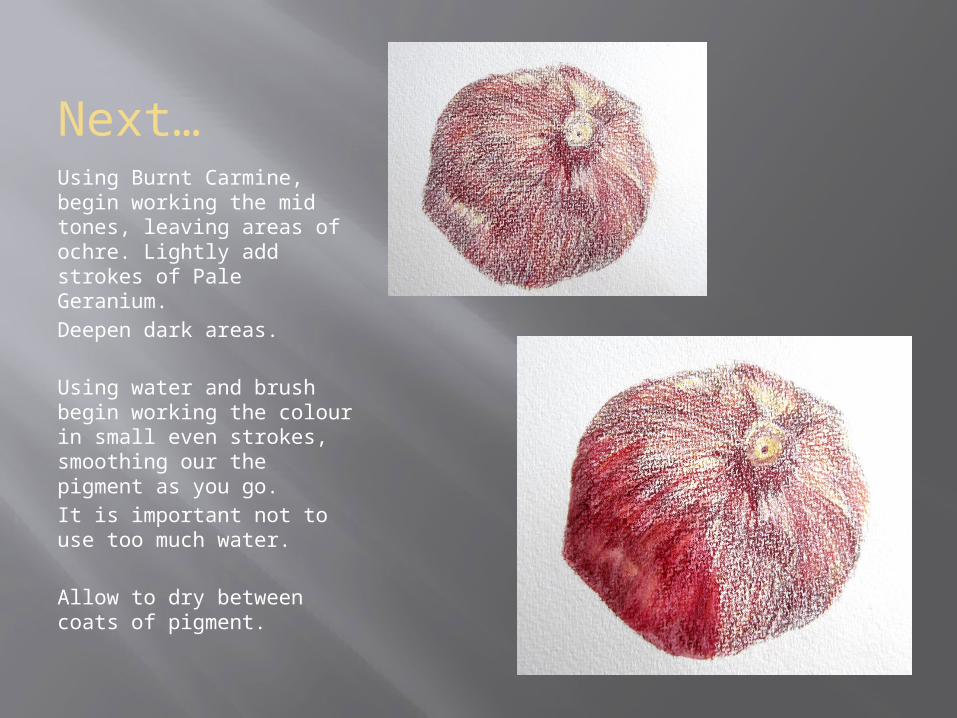
Next…Using Burnt Carmine, begin working the mid tones, leaving areas of ochre. Lightly add strokes of Pale Geranium.Deepen dark areas.
Using water and brush begin working the colour in small even strokes, smoothing our the pigment as you go.It is important not to use too much water.
Allow to dry between coats of pigment.

Now…Using Caput Mortuum Violet work over the dark areas, paying careful attention to the ridges of the fruit’s form.Work in ochre where you need it, to indicate the yellowish areas on the skin.
Work in some more water.Allow to dry then begin working over the dark areas with Indigo and Chocolate, paying attention to the areas which are picking up brown or indigo hued reflections.
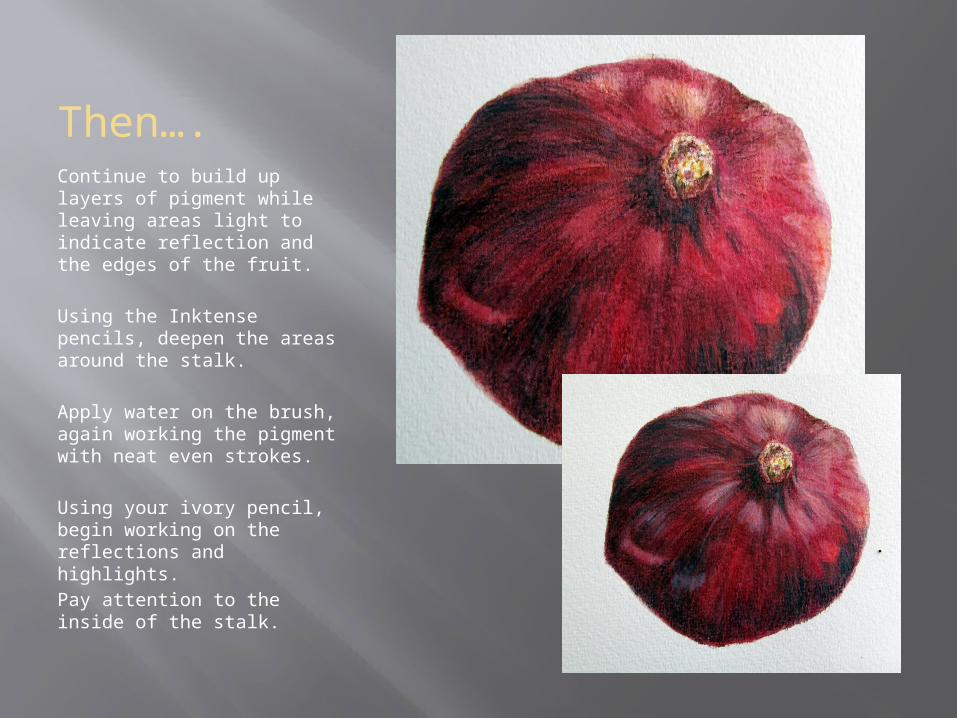
Then….Continue to build up layers of pigment while leaving areas light to indicate reflection and the edges of the fruit.
Using the Inktense pencils, deepen the areas around the stalk.
Apply water on the brush, again working the pigment with neat even strokes.
Using your ivory pencil, begin working on the reflections and highlights. Pay attention to the inside of the stalk.
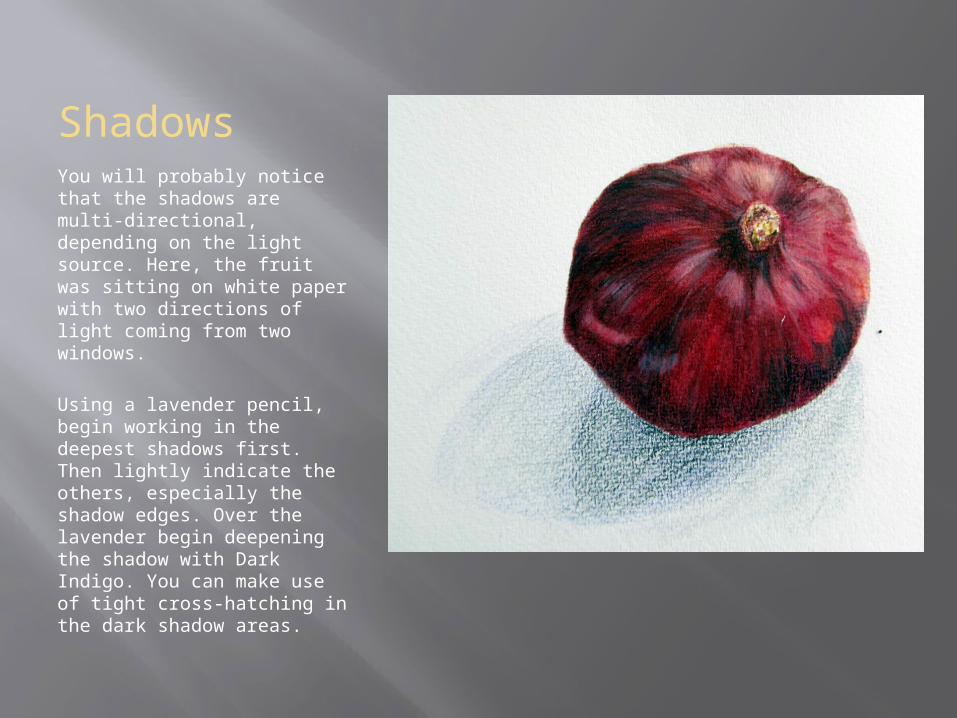
ShadowsYou will probably notice that the shadows are multi-directional, depending on the light source. Here, the fruit was sitting on white paper with two directions of light coming from two windows.
Using a lavender pencil, begin working in the deepest shadows first. Then lightly indicate the others, especially the shadow edges. Over the lavender begin deepening the shadow with Dark Indigo. You can make use of tight cross-hatching in the dark shadow areas.
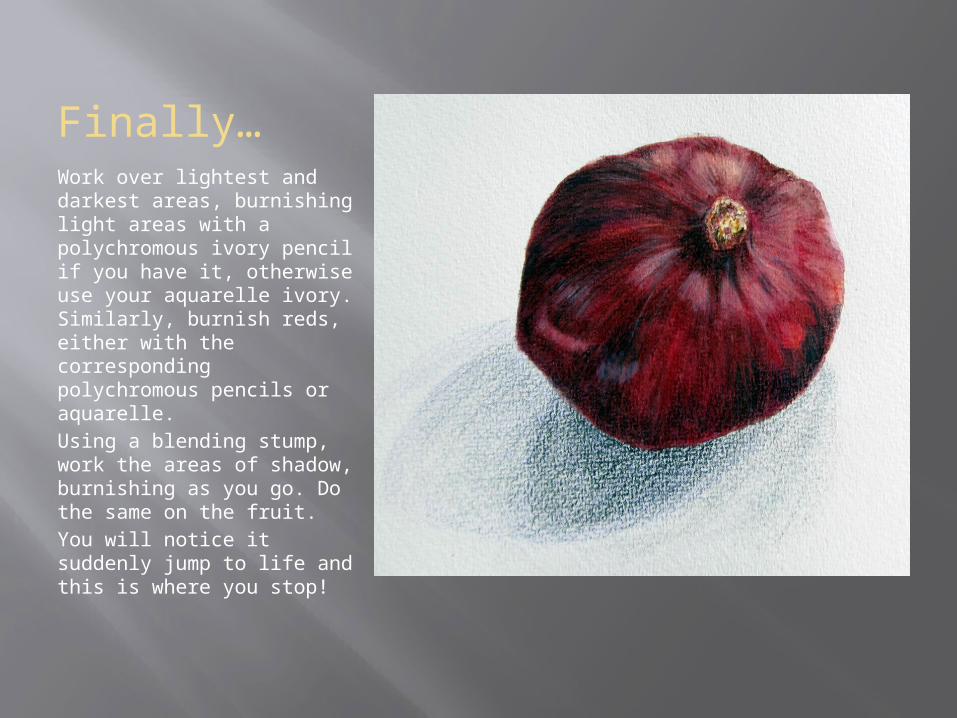
Finally…Work over lightest and darkest areas, burnishing light areas with a polychromous ivory pencil if you have it, otherwise use your aquarelle ivory. Similarly, burnish reds, either with the corresponding polychromous pencils or aquarelle.Using a blending stump, work the areas of shadow, burnishing as you go. Do the same on the fruit.You will notice it suddenly jump to life and this is where you stop!
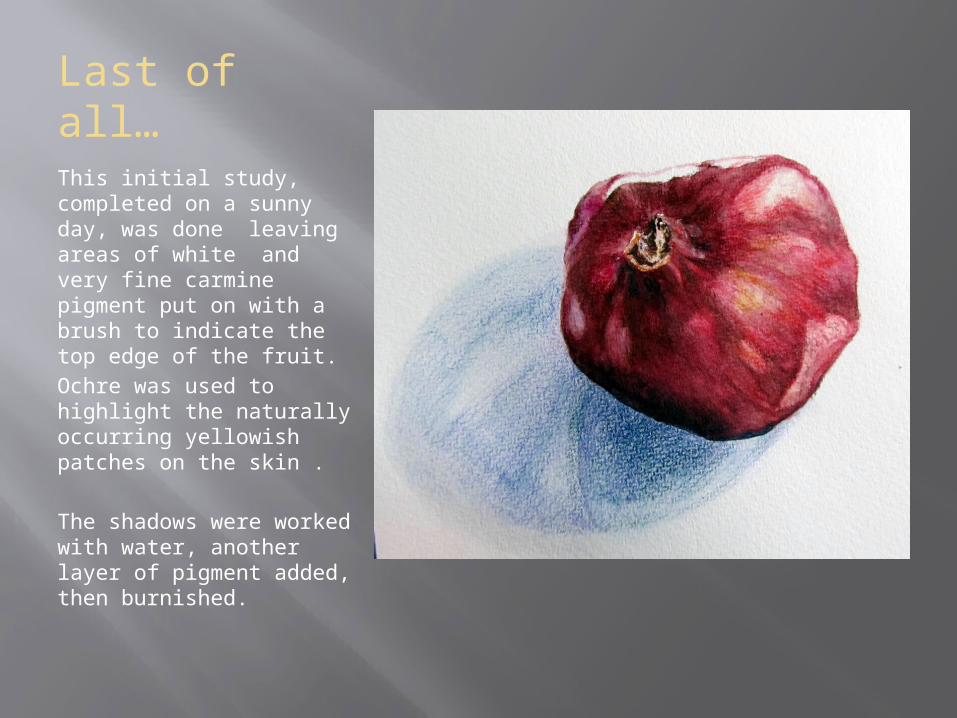
Last of all…This initial study, completed on a sunny day, was done leaving areas of white and very fine carmine pigment put on with a brush to indicate the top edge of the fruit.Ochre was used to highlight the naturally occurring yellowish patches on the skin .
The shadows were worked with water, another layer of pigment added, then burnished.