piper warrior flying guide - barelybadbarelybad.com/fsx/fsximages_downloads/flying guide.pdf ·...
TRANSCRIPT
Flying Guide
Australian Simulation Piper Warrior – Flying Guide 2
Contents 1 – Tutorial Flight :: Warrior II ...................................................................... 1.0
Introduction ......................................................................................... 1.1 Before you begin................................................................................. 1.1 Getting Started.................................................................................... 1.1 Start Up............................................................................................... 1.2 After start ............................................................................................ 1.2 Set Radios and Navigation equipment ............................................... 1.3 Pre Take-off ........................................................................................ 1.4 Take-off............................................................................................... 1.4 Climb / Cruise ..................................................................................... 1.5 Planning our decent / DME................................................................. 1.6 Decent / Approach .............................................................................. 1.7 After Landing ...................................................................................... 1.8 Shutdown............................................................................................ 1.8
2 – Tutorial Flight :: Warrior III ..................................................................... 2.0 Introduction ......................................................................................... 2.1 Before you begin................................................................................. 2.1 Getting Started.................................................................................... 2.1 Start Up............................................................................................... 2.2 After start ............................................................................................ 2.2 Set Radios and Navigation equipment ............................................... 2.3 Set COM1 Memory slots..................................................................... 2.4 Set NAV 1 memory slots..................................................................... 2.5 Recalling NAV / COMM frequencies................................................... 2.7 Take-off............................................................................................... 2.9 Climb / Cruise ................................................................................... 2.10 Setting up the approach.................................................................... 2.11 Decent / Approach ............................................................................ 2.12 After Landing .................................................................................... 2.14 Shutdown.......................................................................................... 2.14
Copyright © 2006-2007 Australian Simulation - All rights reserved.
C
HAPTER
1 – Tutorial Flight :: Warrior II
1
Australian Simulation Piper Warrior – Flying Guide 1.1
Introduction Welcome to your new Piper Warrior for Flight Simulator. This booklet will help get you going straight away by walking you through a short flight from start-up to shut down. In this chapter we will cover the basics of operating the Piper Warrior in a simulated environment. For today’s flight, we are going to take a short hop from Archer Field (Queensland, Australia) to Maroochydore (also in QLD). During the flight we will not only see some beautiful scenery, but also learn about some of the navigation equipment, and general operation of the Piper Warrior II. The Piper Warrior II is generally a training aircraft, it is quite easy to take off, fly and land. This tutorial is designed to get you familiarised with the various instrumentation and equipment installed in this version of the Warrior II. NOTE: This tutorial was developed for Flight Simulator X™, a Flight Simulator-2004™ version may be released with the updated model, however, for all intents and purposes, this flight scenario should work the same in both simulator versions.
Before you begin Before you get going, be sure to have the Piper Warrior installed in the flight simulator and the realism settings set at “difficult” or all sliders to the right. This will ensure the Warrior behaves the way it is intended. There should be no need to load the default flight situation before loading the Piper Warrior.
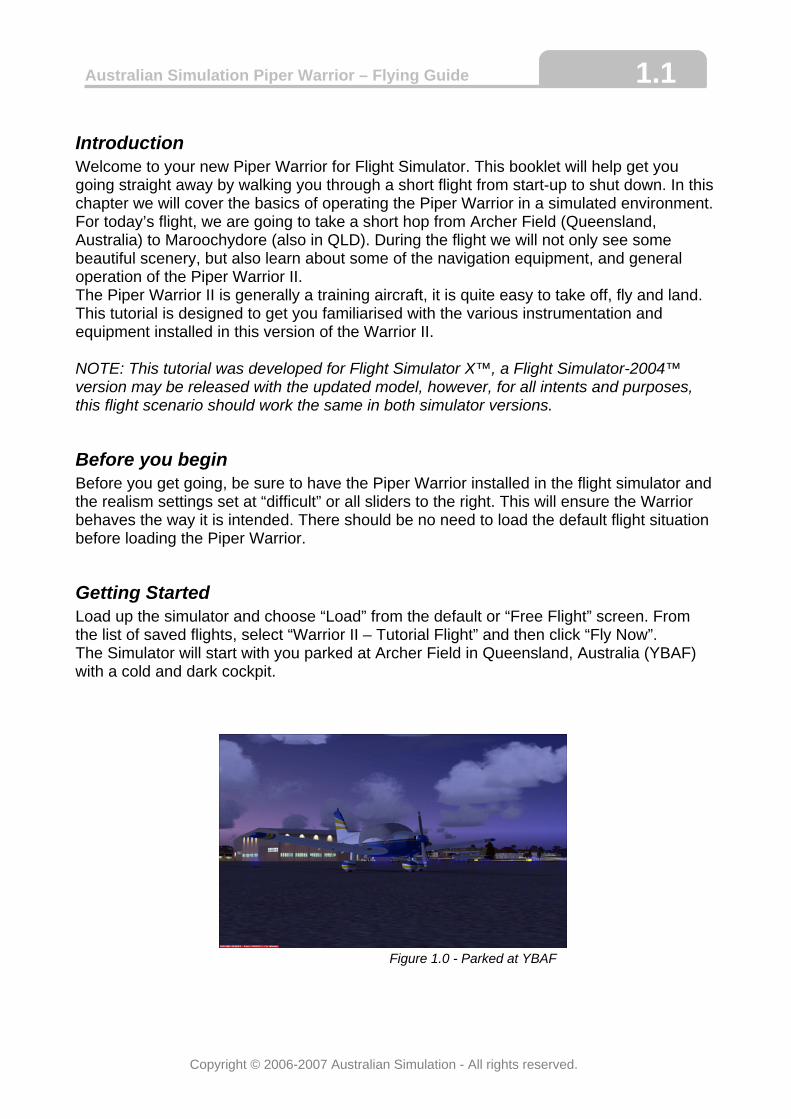
Getting Started Load up the simulator and choose “Load” from the default or “Free Flight” screen. From the list of saved flights, select “Warrior II – Tutorial Flight” and then click “Fly Now”. The Simulator will start with you parked at Archer Field in Queensland, Australia (YBAF) with a cold and dark cockpit.
Figure 1.0 - Parked at YBAF
Copyright © 2006-2007 Australian Simulation - All rights reserved.
Australian Simulation Piper Warrior – Flying Guide 1.2
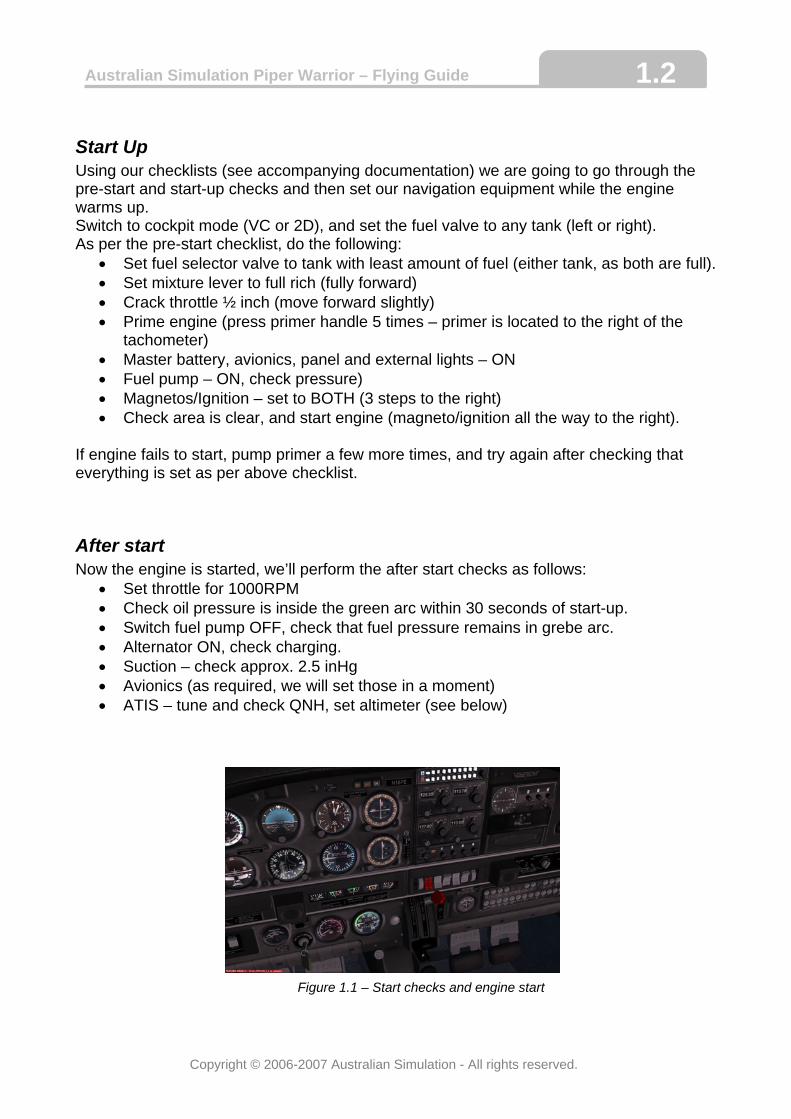
Start Up Using our checklists (see accompanying documentation) we are going to go through the pre-start and start-up checks and then set our navigation equipment while the engine warms up. Switch to cockpit mode (VC or 2D), and set the fuel valve to any tank (left or right). As per the pre-start checklist, do the following:
• Set fuel selector valve to tank with least amount of fuel (either tank, as both are full). • Set mixture lever to full rich (fully forward) • Crack throttle ½ inch (move forward slightly) • Prime engine (press primer handle 5 times – primer is located to the right of the
tachometer) • Master battery, avionics, panel and external lights – ON • Fuel pump – ON, check pressure) • Magnetos/Ignition – set to BOTH (3 steps to the right) • Check area is clear, and start engine (magneto/ignition all the way to the right).
If engine fails to start, pump primer a few more times, and try again after checking that everything is set as per above checklist.
After start Now the engine is started, we’ll perform the after start checks as follows:
• Set throttle for 1000RPM • Check oil pressure is inside the green arc within 30 seconds of start-up. • Switch fuel pump OFF, check that fuel pressure remains in grebe arc. • Alternator ON, check charging. • Suction – check approx. 2.5 inHg • Avionics (as required, we will set those in a moment) • ATIS – tune and check QNH, set altimeter (see below)
Figure 1.1 – Start checks and engine start
Copyright © 2006-2007 Australian Simulation - All rights reserved.
Australian Simulation Piper Warrior – Flying Guide 1.3
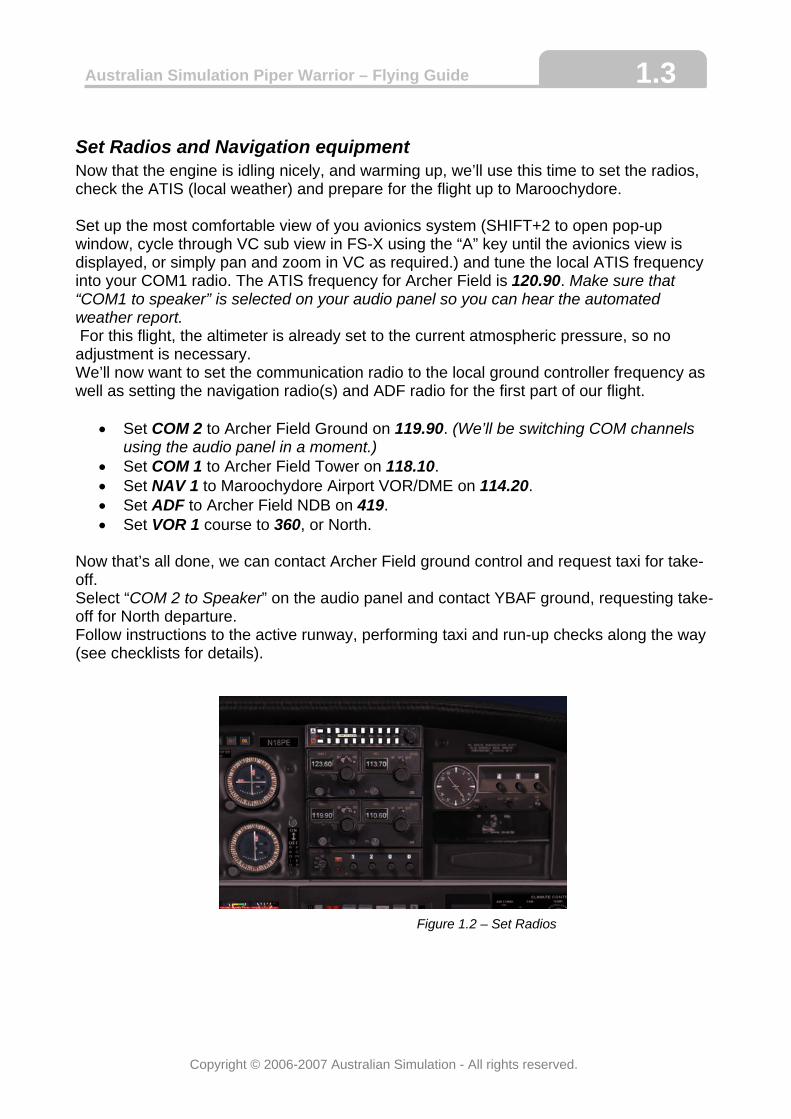
Set Radios and Navigation equipment Now that the engine is idling nicely, and warming up, we’ll use this time to set the radios, check the ATIS (local weather) and prepare for the flight up to Maroochydore. Set up the most comfortable view of you avionics system (SHIFT+2 to open pop-up window, cycle through VC sub view in FS-X using the “A” key until the avionics view is displayed, or simply pan and zoom in VC as required.) and tune the local ATIS frequency into your COM1 radio. The ATIS frequency for Archer Field is 120.90. Make sure that “COM1 to speaker” is selected on your audio panel so you can hear the automated weather report. For this flight, the altimeter is already set to the current atmospheric pressure, so no adjustment is necessary. We’ll now want to set the communication radio to the local ground controller frequency as well as setting the navigation radio(s) and ADF radio for the first part of our flight.
• Set COM 2 to Archer Field Ground on 119.90. (We’ll be switching COM channels using the audio panel in a moment.)
• Set COM 1 to Archer Field Tower on 118.10. • Set NAV 1 to Maroochydore Airport VOR/DME on 114.20. • Set ADF to Archer Field NDB on 419. • Set VOR 1 course to 360, or North.
Now that’s all done, we can contact Archer Field ground control and request taxi for take-off. Select “COM 2 to Speaker” on the audio panel and contact YBAF ground, requesting take-off for North departure. Follow instructions to the active runway, performing taxi and run-up checks along the way (see checklists for details).
Figure 1.2 – Set Radios
Copyright © 2006-2007 Australian Simulation - All rights reserved.
Australian Simulation Piper Warrior – Flying Guide 1.4
Pre Take-off Assuming you made it to the hold short point on runway 4R (this should be the active runway if you are using the default weather for this flight) and have successfully completed your taxi and run-up checks, we can now run through the pre-takeoff checks before we move onto the runway.
• Set trim to either neutral, or slightly nose up (your preference). • Mixture – RICH. • Fuel – check pressure, and switch tanks. • Flaps – check operation and set at zero flap. • Instruments – check and set as required. (nothing required for this flight) • Switches – Battery & Alternator ON, Ignition to BOTH.
When complete, select “COM1 to speaker” on Audio panel and request take-off clearance from YBAF tower. When clearance is granted, move onto the runway and line up for take-off.
Take-off We’re now ready to get going… but only after we complete one final checklist.
• Fuel Pump – ON • Instruments – check • Switches – On as required, external lights ON • Transponder – Set to ALT mode.
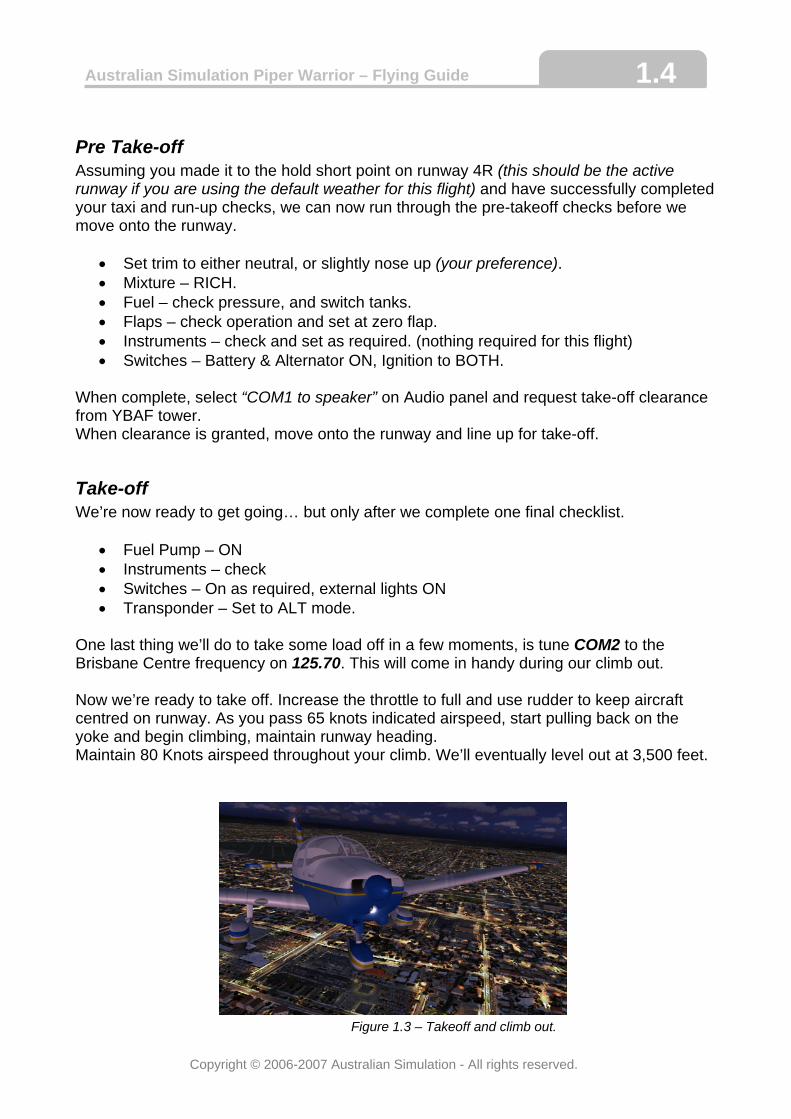
One last thing we’ll do to take some load off in a few moments, is tune COM2 to the Brisbane Centre frequency on 125.70. This will come in handy during our climb out. Now we’re ready to take off. Increase the throttle to full and use rudder to keep aircraft centred on runway. As you pass 65 knots indicated airspeed, start pulling back on the yoke and begin climbing, maintain runway heading. Maintain 80 Knots airspeed throughout your climb. We’ll eventually level out at 3,500 feet.
Figure 1.3 – Takeoff and climb out.
Copyright © 2006-2007 Australian Simulation - All rights reserved.
Australian Simulation Piper Warrior – Flying Guide 1.5
Climb / Cruise While we continue our climb out of Archer Field, we’ll soon be contacted by the Tower, informing us that we’re leaving the YBAF airspace and that a frequency change is approved. When you hear this message, press the “COM 2 to Speaker” button on your audio panel (we pre-tuned this frequency into COM 2 just prior to take-off… I told you it’d come in handy!) As soon as you’ve done this, contact Brisbane Centre and request “C Class transition”. The Brisbane controller will ask you to adjust your transponder code. When prompted, you can either adjust the code manually, or use the built in ATC system to autromatcially adjust your squawk code. After you’re instructed to “maintain own navigation”, make a left turn to a heading of approximately 300. This will take you directly over (or fairly close to) the city of Brisbane. When you’re set up on this course, adjust the heading bug on your directional gyro to a heading of 360 or North. As you approach 3,500 feet on your altimeter, begin levelling out. We want to maintain 3,500 feet for the duration of our cruise. You’ll need to continually adjust your trim until you can maintain straight and level flight at 3,500 feet. Reduce power to around 2550 RPM and maintain straight and level flight. You should be cruising at around 105-110 knots indicated airspeed. By now, you’ll be past Brisbane city, and soon you’ll notice the CDI (course deviation indicator) needle starting to swing towards the centre on the VOR 1 gauge. When you see the needle swinging to the centre, this means that you are approaching the 360 degree radial towards the MC VOR (Maroochydore Variable Omni Range). Begin a right turn to intercept this radial. This will rely entirely on your own judgment as to when to commence your turn, and how steep to bank. If you go past the desired track, you’ll see the CDI needle on VOR 1 swing to the right. In this case, continue smaller left or right turns until the needle remains centred, and you’re on a heading of 360. To make things easier, and to allow you time to appreciate the gorgeous Queensland sunrise, we’ll now engage the autopilot. Locate the “Autocontrol IIIb” autopilot on the lower-left of the panel and switch ON the autopilot master switch (left side switch) followed by the heading hold switch (right-side switch). The autopilot will now maintain the heading bug setting of 360 degrees. You’ll need to maintain level flight manually by adjusting the trim as required, as this autopilot does not control the vertical axis of the aircraft. If you need to adjust your heading to keep the VOR CDI needle centred, adjust the heading bug on the directional gyro, and the autopilot will maintain your heading bug course. Keep trimming to maintain level flight, and take in the view outside.
Copyright © 2006-2007 Australian Simulation - All rights reserved.
Australian Simulation Piper Warrior – Flying Guide 1.6
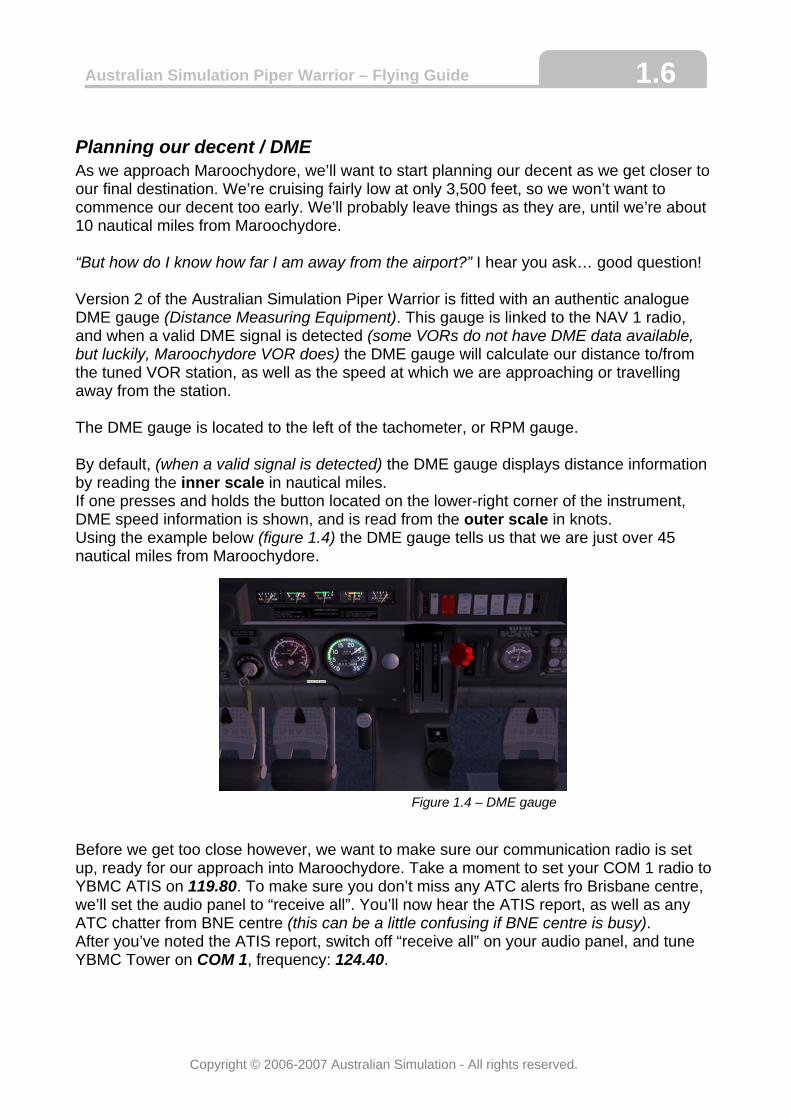
Planning our decent / DME As we approach Maroochydore, we’ll want to start planning our decent as we get closer to our final destination. We’re cruising fairly low at only 3,500 feet, so we won’t want to commence our decent too early. We’ll probably leave things as they are, until we’re about 10 nautical miles from Maroochydore. “But how do I know how far I am away from the airport?” I hear you ask… good question! Version 2 of the Australian Simulation Piper Warrior is fitted with an authentic analogue DME gauge (Distance Measuring Equipment). This gauge is linked to the NAV 1 radio, and when a valid DME signal is detected (some VORs do not have DME data available, but luckily, Maroochydore VOR does) the DME gauge will calculate our distance to/from the tuned VOR station, as well as the speed at which we are approaching or travelling away from the station. The DME gauge is located to the left of the tachometer, or RPM gauge. By default, (when a valid signal is detected) the DME gauge displays distance information by reading the inner scale in nautical miles. If one presses and holds the button located on the lower-right corner of the instrument, DME speed information is shown, and is read from the outer scale in knots. Using the example below (figure 1.4) the DME gauge tells us that we are just over 45 nautical miles from Maroochydore. Figure 1.4 – DME gauge Before we get too close however, we want to make sure our communication radio is set up, ready for our approach into Maroochydore. Take a moment to set your COM 1 radio to YBMC ATIS on 119.80. To make sure you don’t miss any ATC alerts fro Brisbane centre, we’ll set the audio panel to “receive all”. You’ll now hear the ATIS report, as well as any ATC chatter from BNE centre (this can be a little confusing if BNE centre is busy). After you’ve noted the ATIS report, switch off “receive all” on your audio panel, and tune YBMC Tower on COM 1, frequency: 124.40.
Copyright © 2006-2007 Australian Simulation - All rights reserved.
Australian Simulation Piper Warrior – Flying Guide 1.7
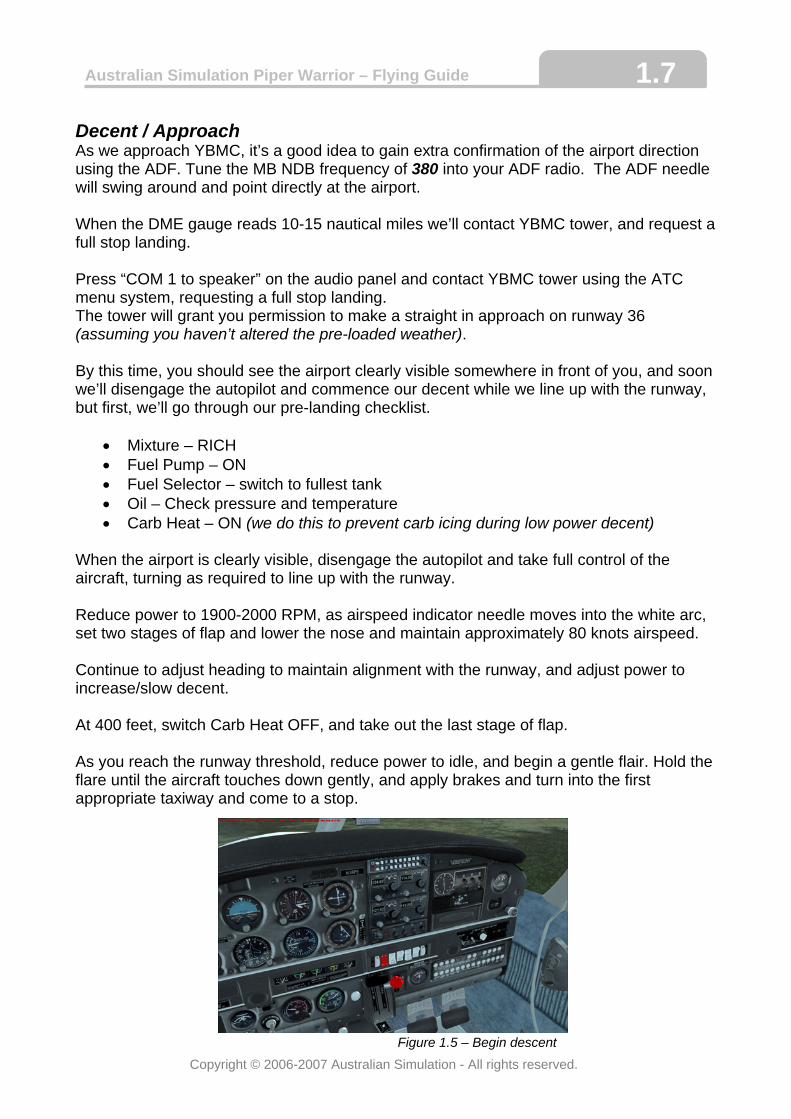
Decent / ApproachAs we approach YBMC, it’s a good idea to gain extra confirmation of the airport direction using the ADF. Tune the MB NDB frequency of 380 into your ADF radio. The ADF needle will swing around and point directly at the airport. When the DME gauge reads 10-15 nautical miles we’ll contact YBMC tower, and request a full stop landing. Press “COM 1 to speaker” on the audio panel and contact YBMC tower using the ATC menu system, requesting a full stop landing. The tower will grant you permission to make a straight in approach on runway 36 (assuming you haven’t altered the pre-loaded weather). By this time, you should see the airport clearly visible somewhere in front of you, and soon we’ll disengage the autopilot and commence our decent while we line up with the runway, but first, we’ll go through our pre-landing checklist.
• Mixture – RICH • Fuel Pump – ON • Fuel Selector – switch to fullest tank • Oil – Check pressure and temperature • Carb Heat – ON (we do this to prevent carb icing during low power decent)
When the airport is clearly visible, disengage the autopilot and take full control of the aircraft, turning as required to line up with the runway. Reduce power to 1900-2000 RPM, as airspeed indicator needle moves into the white arc, set two stages of flap and lower the nose and maintain approximately 80 knots airspeed. Continue to adjust heading to maintain alignment with the runway, and adjust power to increase/slow decent. At 400 feet, switch Carb Heat OFF, and take out the last stage of flap. As you reach the runway threshold, reduce power to idle, and begin a gentle flair. Hold the flare until the aircraft touches down gently, and apply brakes and turn into the first appropriate taxiway and come to a stop.
Figure 1.5 – Begin descent
Copyright © 2006-2007 Australian Simulation - All rights reserved.
Australian Simulation Piper Warrior – Flying Guide 1.8
After Landing Congratulations! You’ve made it to your destination… not much left to do before we head off to the beach for the day. Now we’re stopped on the taxiway just off runway 36 at Maroochydore, we need to perform our after landing checklist.
• Flaps – Retracted • Fuel Pump – OFF • Avionics – Turn off all unnecessary avionics • Radios – Set to YBMC ground (121.10)
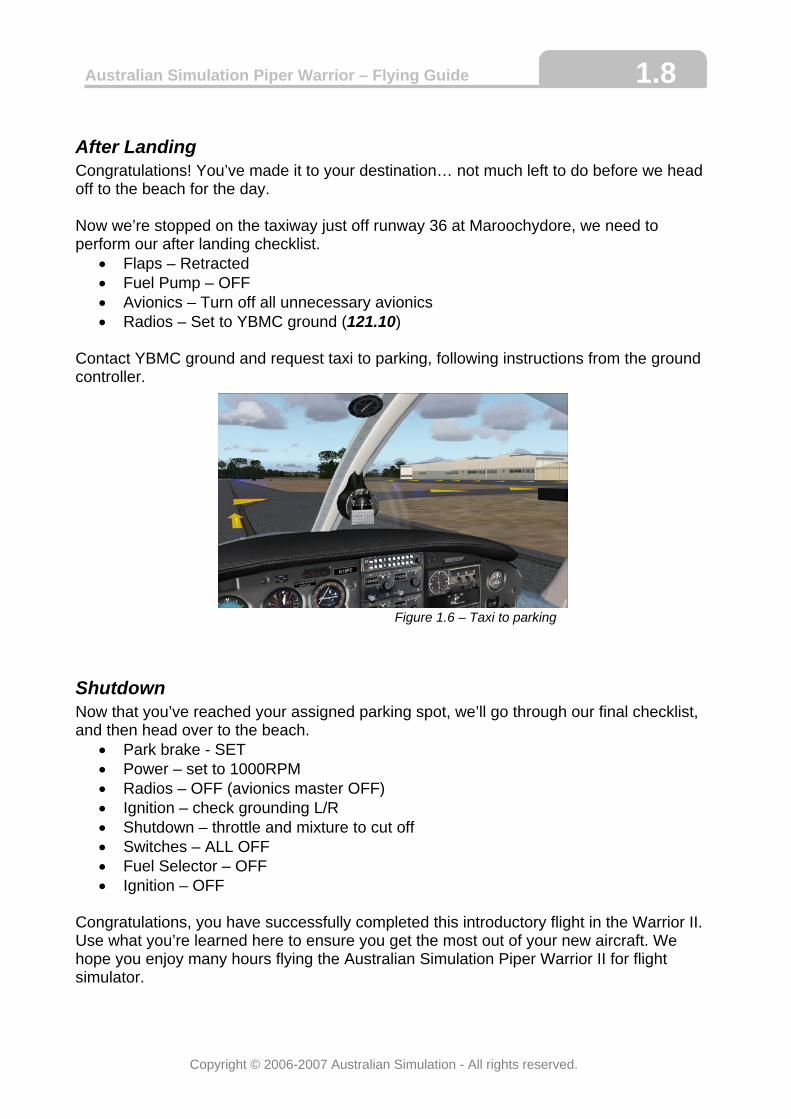
Contact YBMC ground and request taxi to parking, following instructions from the ground controller. Figure 1.6 – Taxi to parking
Shutdown Now that you’ve reached your assigned parking spot, we’ll go through our final checklist, and then head over to the beach.
• Park brake - SET • Power – set to 1000RPM • Radios – OFF (avionics master OFF) • Ignition – check grounding L/R • Shutdown – throttle and mixture to cut off • Switches – ALL OFF • Fuel Selector – OFF • Ignition – OFF
Congratulations, you have successfully completed this introductory flight in the Warrior II. Use what you’re learned here to ensure you get the most out of your new aircraft. We hope you enjoy many hours flying the Australian Simulation Piper Warrior II for flight simulator.
Copyright © 2006-2007 Australian Simulation - All rights reserved.

C
HAPTER
2 – Tutorial Flight :: Warrior III
2
Australian Simulation Piper Warrior – Flying Guide 2.1
Introduction Welcome to your new Piper Warrior for Flight Simulator. This booklet will help get you going straight away by walking you through a short flight from start-up to shut down. In this chapter we will cover the basics of operating the Piper Warrior III in a simulated environment. For today’s flight, we are going to take a short hop from Hobart (Tasmania Australia) to Launceston (also in Tasmania). During the flight we will not only see some beautiful scenery, but also learn about some of the navigation equipment, and general operation of the Piper Warrior III. The Piper Warrior III is generally a training aircraft, it is quite easy to take off, fly and land. This tutorial is designed to get you familiarised with the various instrumentation and equipment installed in this version of the Warrior III. NOTE: This tutorial was developed for Flight Simulator X™, a Flight Simulator-2004™ version may be released with the updated model, however, for all intents and purposes, this flight scenario should work the same in both simulator versions.
Before you begin Before you get going, be sure to have the Piper Warrior installed in the flight simulator and the realism settings set at “difficult” or all sliders to the right. This will ensure the Warrior behaves the way it is intended. There should be no need to load the default flight situation before loading the Piper Warrior.
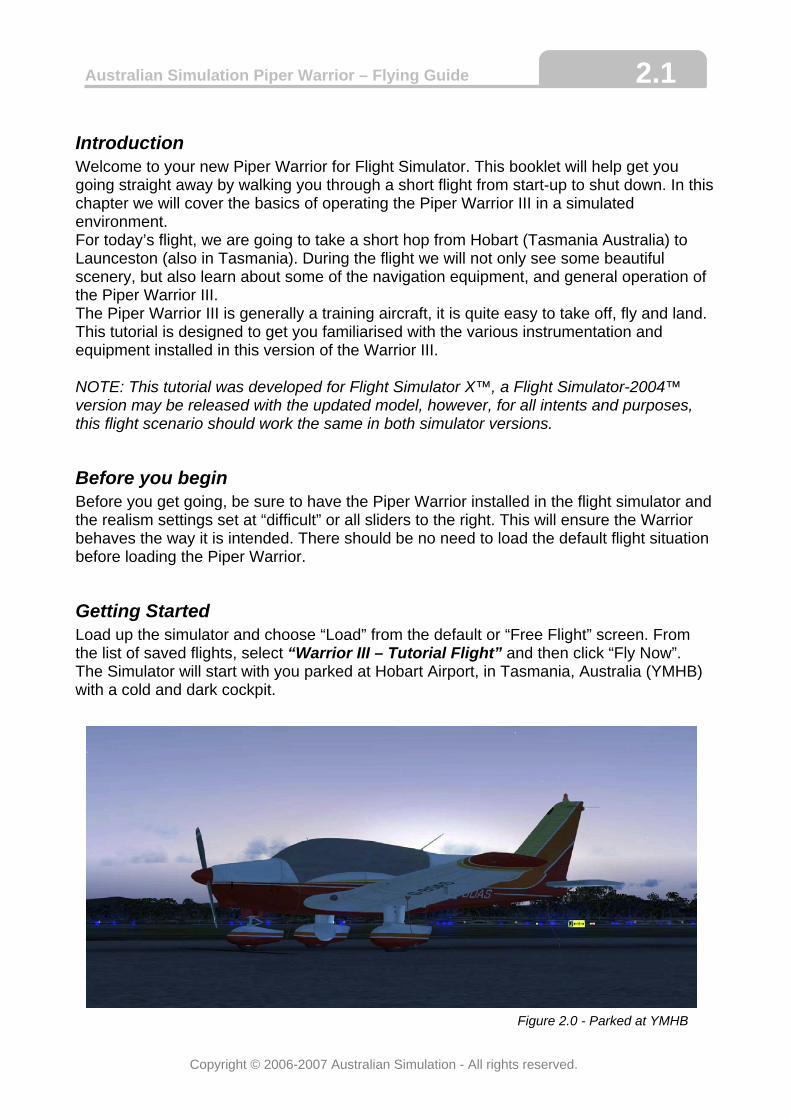
Getting Started Load up the simulator and choose “Load” from the default or “Free Flight” screen. From the list of saved flights, select “Warrior III – Tutorial Flight” and then click “Fly Now”. The Simulator will start with you parked at Hobart Airport, in Tasmania, Australia (YMHB) with a cold and dark cockpit.
Figure 2.0 - Parked at YMHB
Copyright © 2006-2007 Australian Simulation - All rights reserved.
Australian Simulation Piper Warrior – Flying Guide 2.2
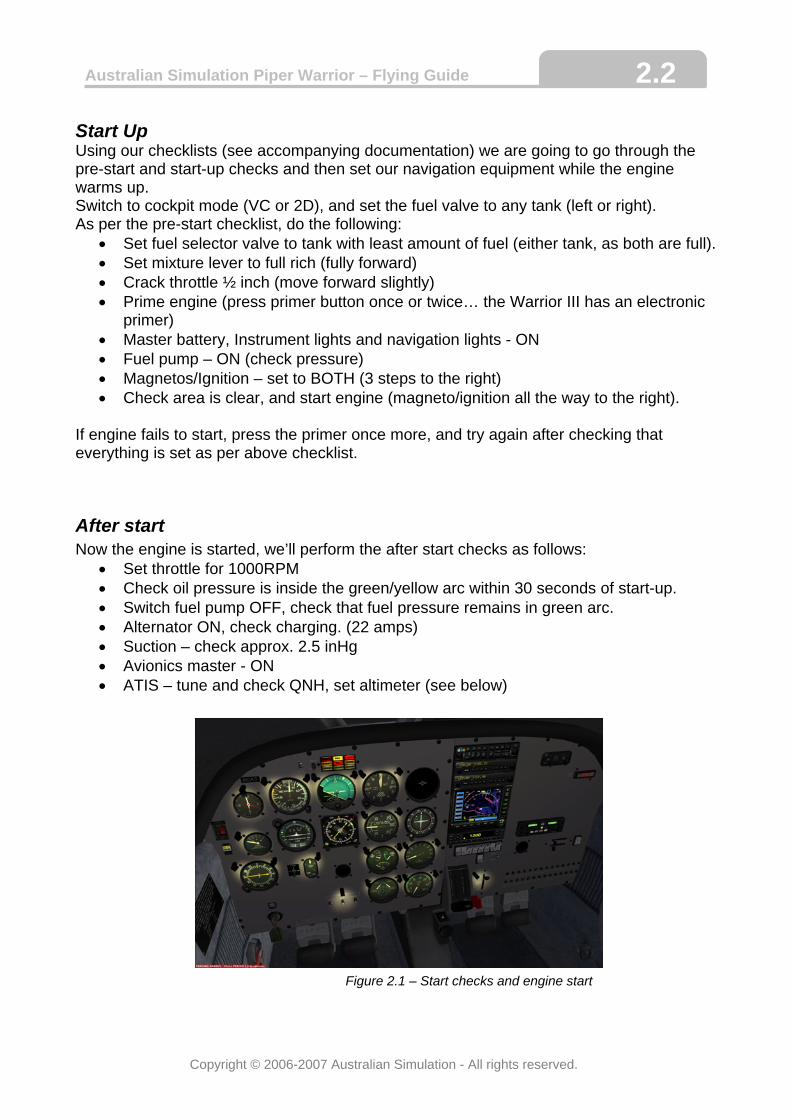
Start UpUsing our checklists (see accompanying documentation) we are going to go through the pre-start and start-up checks and then set our navigation equipment while the engine warms up. Switch to cockpit mode (VC or 2D), and set the fuel valve to any tank (left or right). As per the pre-start checklist, do the following:
• Set fuel selector valve to tank with least amount of fuel (either tank, as both are full). • Set mixture lever to full rich (fully forward) • Crack throttle ½ inch (move forward slightly) • Prime engine (press primer button once or twice… the Warrior III has an electronic
primer) • Master battery, Instrument lights and navigation lights - ON • Fuel pump – ON (check pressure) • Magnetos/Ignition – set to BOTH (3 steps to the right) • Check area is clear, and start engine (magneto/ignition all the way to the right).
If engine fails to start, press the primer once more, and try again after checking that everything is set as per above checklist.
After start Now the engine is started, we’ll perform the after start checks as follows:
• Set throttle for 1000RPM • Check oil pressure is inside the green/yellow arc within 30 seconds of start-up. • Switch fuel pump OFF, check that fuel pressure remains in green arc. • Alternator ON, check charging. (22 amps) • Suction – check approx. 2.5 inHg • Avionics master - ON • ATIS – tune and check QNH, set altimeter (see below)
Figure 2.1 – Start checks and engine start
Copyright © 2006-2007 Australian Simulation - All rights reserved.
Australian Simulation Piper Warrior – Flying Guide 2.3
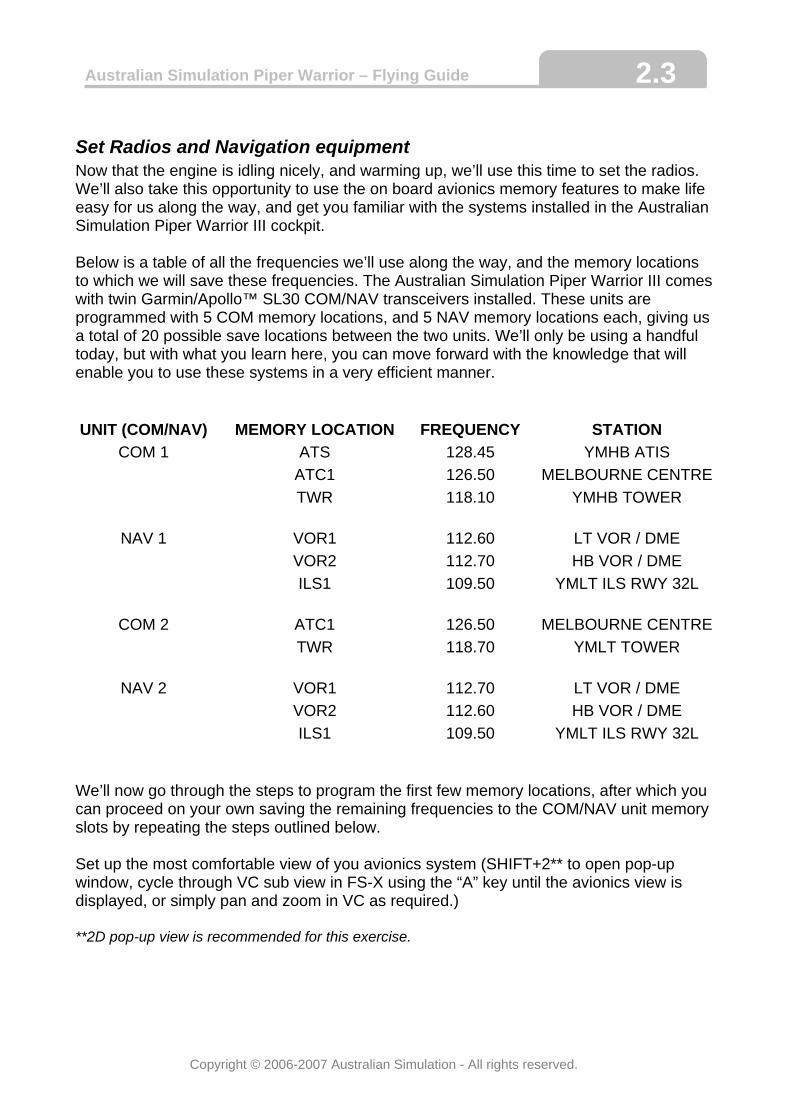
Set Radios and Navigation equipment Now that the engine is idling nicely, and warming up, we’ll use this time to set the radios. We’ll also take this opportunity to use the on board avionics memory features to make life easy for us along the way, and get you familiar with the systems installed in the Australian Simulation Piper Warrior III cockpit. Below is a table of all the frequencies we’ll use along the way, and the memory locations to which we will save these frequencies. The Australian Simulation Piper Warrior III comes with twin Garmin/Apollo™ SL30 COM/NAV transceivers installed. These units are programmed with 5 COM memory locations, and 5 NAV memory locations each, giving us a total of 20 possible save locations between the two units. We’ll only be using a handful today, but with what you learn here, you can move forward with the knowledge that will enable you to use these systems in a very efficient manner. UNIT (COM/NAV) MEMORY LOCATION FREQUENCY STATION
COM 1 ATS 128.45 YMHB ATIS ATC1 126.50 MELBOURNE CENTRE TWR 118.10 YMHB TOWER
NAV 1 VOR1 112.60 LT VOR / DME
VOR2 112.70 HB VOR / DME ILS1 109.50 YMLT ILS RWY 32L
COM 2 ATC1 126.50 MELBOURNE CENTRE
TWR 118.70 YMLT TOWER
NAV 2 VOR1 112.70 LT VOR / DME VOR2 112.60 HB VOR / DME ILS1 109.50 YMLT ILS RWY 32L
We’ll now go through the steps to program the first few memory locations, after which you can proceed on your own saving the remaining frequencies to the COM/NAV unit memory slots by repeating the steps outlined below. Set up the most comfortable view of you avionics system (SHIFT+2** to open pop-up window, cycle through VC sub view in FS-X using the “A” key until the avionics view is displayed, or simply pan and zoom in VC as required.) **2D pop-up view is recommended for this exercise.
Copyright © 2006-2007 Australian Simulation - All rights reserved.
Australian Simulation Piper Warrior – Flying Guide 2.4
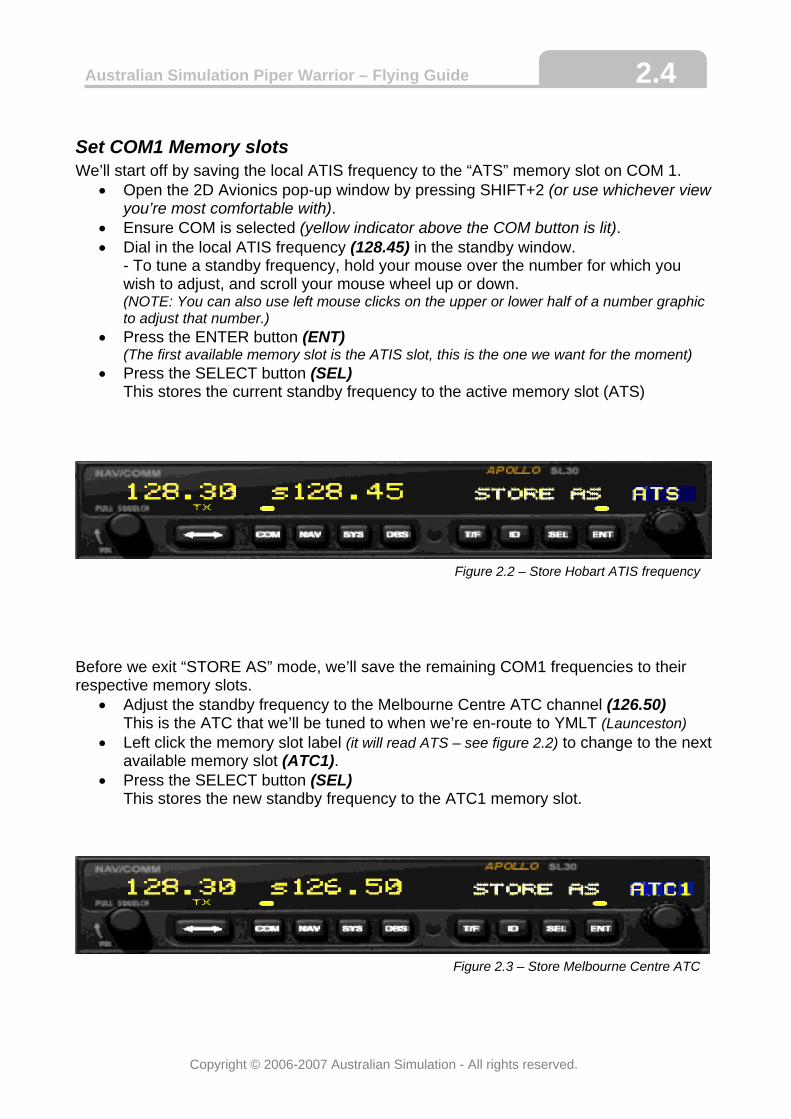
Set COM1 Memory slots We’ll start off by saving the local ATIS frequency to the “ATS” memory slot on COM 1.
• Open the 2D Avionics pop-up window by pressing SHIFT+2 (or use whichever view you’re most comfortable with).
• Ensure COM is selected (yellow indicator above the COM button is lit). • Dial in the local ATIS frequency (128.45) in the standby window.
- To tune a standby frequency, hold your mouse over the number for which you wish to adjust, and scroll your mouse wheel up or down. (NOTE: You can also use left mouse clicks on the upper or lower half of a number graphic to adjust that number.)
• Press the ENTER button (ENT) (The first available memory slot is the ATIS slot, this is the one we want for the moment)
• Press the SELECT button (SEL) This stores the current standby frequency to the active memory slot (ATS)
Figure 2.2 – Store Hobart ATIS frequency
Before we exit “STORE AS” mode, we’ll save the remaining COM1 frequencies to their respective memory slots.
• Adjust the standby frequency to the Melbourne Centre ATC channel (126.50) This is the ATC that we’ll be tuned to when we’re en-route to YMLT (Launceston)
• Left click the memory slot label (it will read ATS – see figure 2.2) to change to the next available memory slot (ATC1).
• Press the SELECT button (SEL) This stores the new standby frequency to the ATC1 memory slot.
Figure 2.3 – Store Melbourne Centre ATC
Copyright © 2006-2007 Australian Simulation - All rights reserved.
Australian Simulation Piper Warrior – Flying Guide 2.5
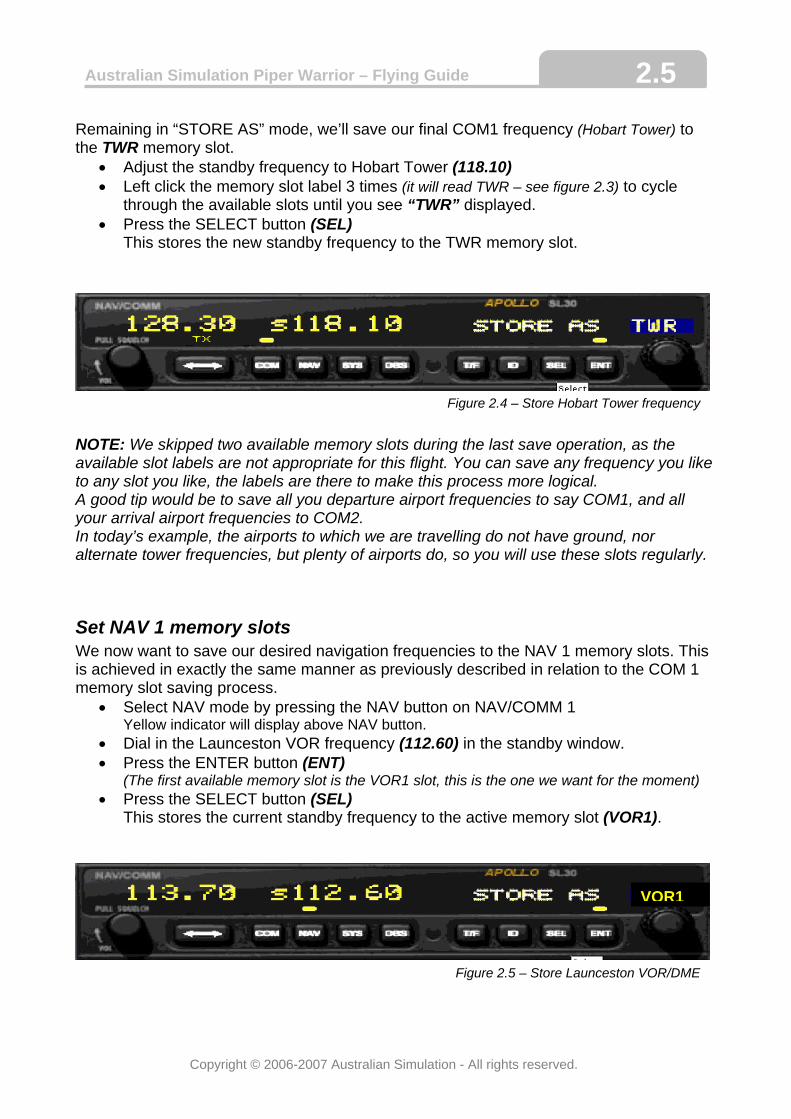
Remaining in “STORE AS” mode, we’ll save our final COM1 frequency (Hobart Tower) to the TWR memory slot.
• Adjust the standby frequency to Hobart Tower (118.10) • Left click the memory slot label 3 times (it will read TWR – see figure 2.3) to cycle
through the available slots until you see “TWR” displayed. • Press the SELECT button (SEL)
This stores the new standby frequency to the TWR memory slot.
Figure 2.4 – Store Hobart Tower frequency
NOTE: We skipped two available memory slots during the last save operation, as the available slot labels are not appropriate for this flight. You can save any frequency you like to any slot you like, the labels are there to make this process more logical. A good tip would be to save all you departure airport frequencies to say COM1, and all your arrival airport frequencies to COM2. In today’s example, the airports to which we are travelling do not have ground, nor alternate tower frequencies, but plenty of airports do, so you will use these slots regularly.
Set NAV 1 memory slots We now want to save our desired navigation frequencies to the NAV 1 memory slots. This is achieved in exactly the same manner as previously described in relation to the COM 1 memory slot saving process.
• Select NAV mode by pressing the NAV button on NAV/COMM 1 Yellow indicator will display above NAV button.
• Dial in the Launceston VOR frequency (112.60) in the standby window. • Press the ENTER button (ENT)
(The first available memory slot is the VOR1 slot, this is the one we want for the moment) • Press the SELECT button (SEL)
This stores the current standby frequency to the active memory slot (VOR1).
VOR1
Figure 2.5 – Store Launceston VOR/DME
Copyright © 2006-2007 Australian Simulation - All rights reserved.
Australian Simulation Piper Warrior – Flying Guide 2.6
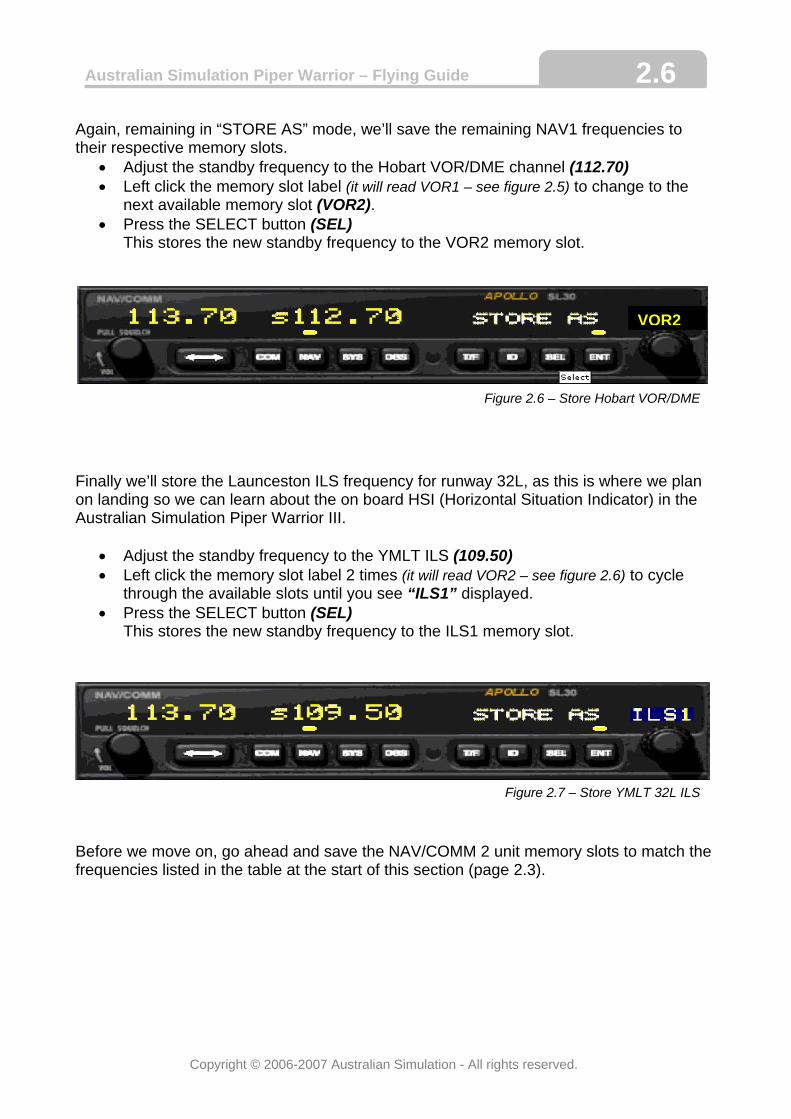
Again, remaining in “STORE AS” mode, we’ll save the remaining NAV1 frequencies to their respective memory slots.
• Adjust the standby frequency to the Hobart VOR/DME channel (112.70) • Left click the memory slot label (it will read VOR1 – see figure 2.5) to change to the
next available memory slot (VOR2). • Press the SELECT button (SEL)
This stores the new standby frequency to the VOR2 memory slot.
VOR2
Figure 2.6 – Store Hobart VOR/DME
Finally we’ll store the Launceston ILS frequency for runway 32L, as this is where we plan on landing so we can learn about the on board HSI (Horizontal Situation Indicator) in the Australian Simulation Piper Warrior III.
• Adjust the standby frequency to the YMLT ILS (109.50) • Left click the memory slot label 2 times (it will read VOR2 – see figure 2.6) to cycle
through the available slots until you see “ILS1” displayed. • Press the SELECT button (SEL)
This stores the new standby frequency to the ILS1 memory slot.
Figure 2.7 – Store YMLT 32L ILS
Before we move on, go ahead and save the NAV/COMM 2 unit memory slots to match the frequencies listed in the table at the start of this section (page 2.3).
Copyright © 2006-2007 Australian Simulation - All rights reserved.
Australian Simulation Piper Warrior – Flying Guide 2.7
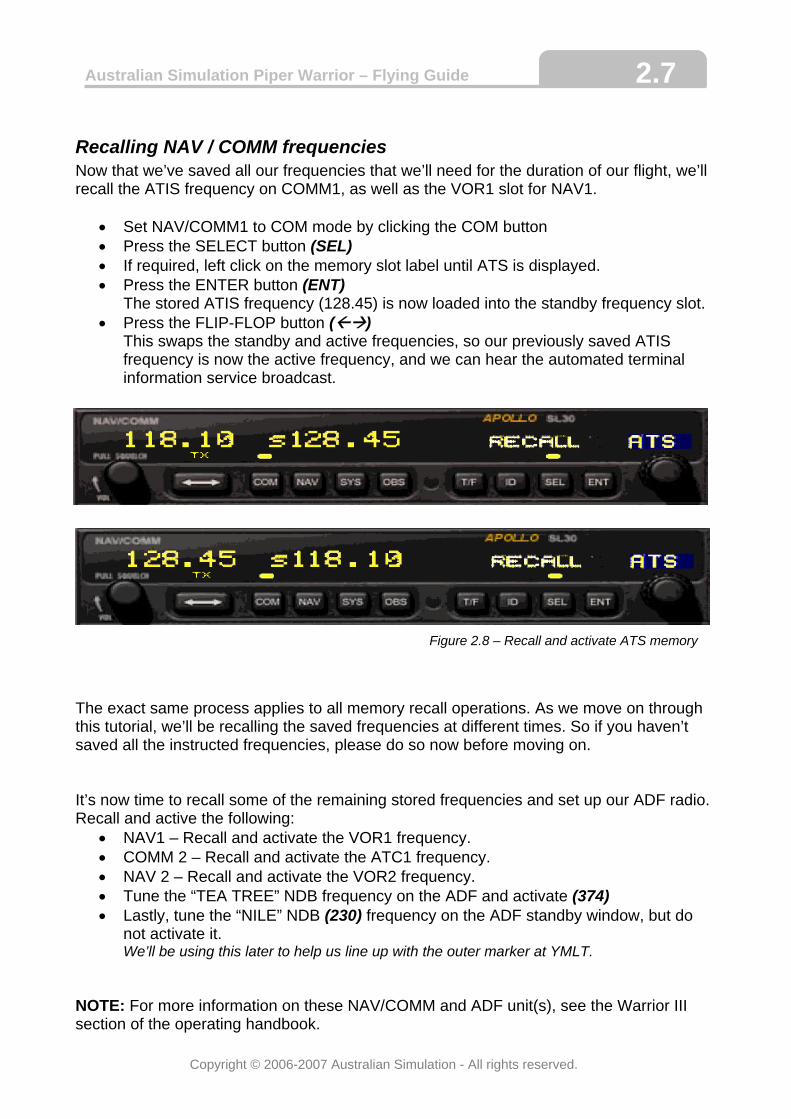
Recalling NAV / COMM frequencies Now that we’ve saved all our frequencies that we’ll need for the duration of our flight, we’ll recall the ATIS frequency on COMM1, as well as the VOR1 slot for NAV1.
• Set NAV/COMM1 to COM mode by clicking the COM button • Press the SELECT button (SEL) • If required, left click on the memory slot label until ATS is displayed. • Press the ENTER button (ENT)
The stored ATIS frequency (128.45) is now loaded into the standby frequency slot. • Press the FLIP-FLOP button ( )
This swaps the standby and active frequencies, so our previously saved ATIS frequency is now the active frequency, and we can hear the automated terminal information service broadcast.
Figure 2.8 – Recall and activate ATS memory The exact same process applies to all memory recall operations. As we move on through this tutorial, we’ll be recalling the saved frequencies at different times. So if you haven’t saved all the instructed frequencies, please do so now before moving on. It’s now time to recall some of the remaining stored frequencies and set up our ADF radio. Recall and active the following:
• NAV1 – Recall and activate the VOR1 frequency. • COMM 2 – Recall and activate the ATC1 frequency. • NAV 2 – Recall and activate the VOR2 frequency. • Tune the “TEA TREE” NDB frequency on the ADF and activate (374) • Lastly, tune the “NILE” NDB (230) frequency on the ADF standby window, but do
not activate it. We’ll be using this later to help us line up with the outer marker at YMLT.
NOTE: For more information on these NAV/COMM and ADF unit(s), see the Warrior III section of the operating handbook.
Copyright © 2006-2007 Australian Simulation - All rights reserved.
Australian Simulation Piper Warrior – Flying Guide 2.8
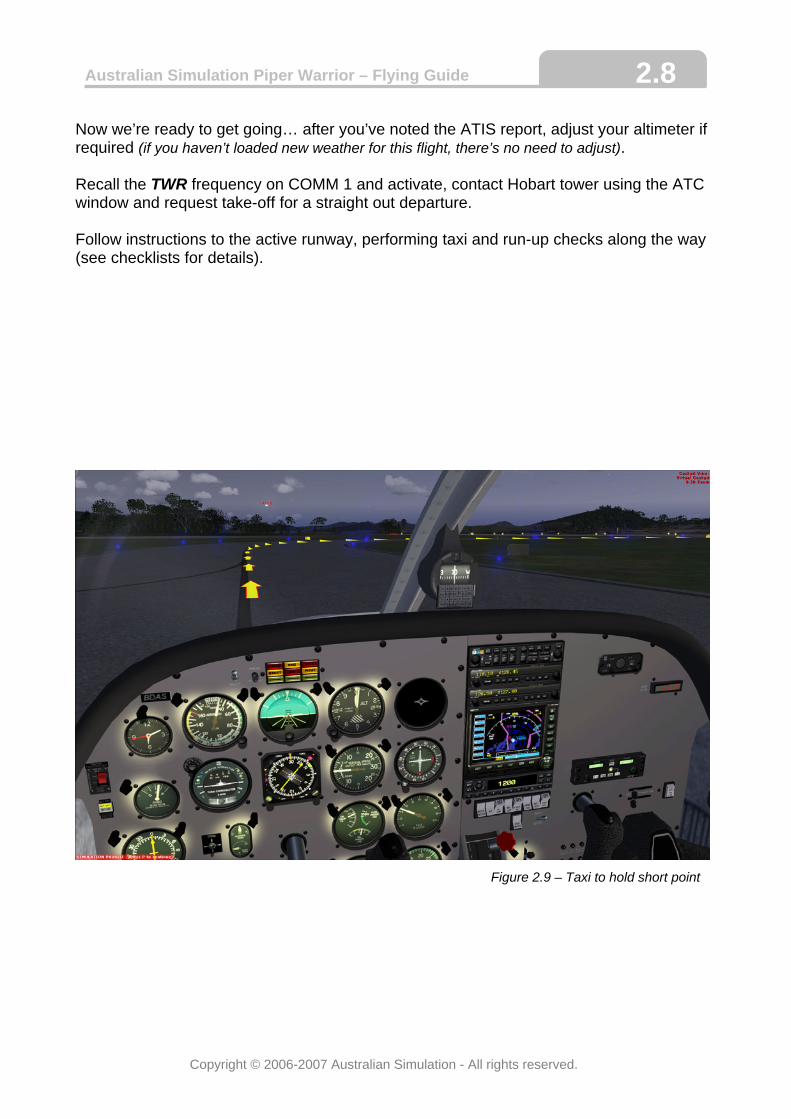
Now we’re ready to get going… after you’ve noted the ATIS report, adjust your altimeter if required (if you haven’t loaded new weather for this flight, there’s no need to adjust). Recall the TWR frequency on COMM 1 and activate, contact Hobart tower using the ATC window and request take-off for a straight out departure. Follow instructions to the active runway, performing taxi and run-up checks along the way (see checklists for details).
Figure 2.9 – Taxi to hold short point
Copyright © 2006-2007 Australian Simulation - All rights reserved.
Australian Simulation Piper Warrior – Flying Guide 2.9
Pre Take-off Assuming you made it to the hold short point on runway 12 (this should be the active runway if you are using the default weather for this flight) and have successfully completed your taxi and run-up checks, we can now run through the pre-takeoff checks before we move onto the runway.
• Set trim to either neutral, or slightly nose up (your preference). • Mixture – RICH. • Fuel – check pressure, and switch tanks. • Flaps – check operation and set at zero flaps. • Instruments – check and set as required. (Set course 350 on HSI, **see below) • Switches – Battery & Alternator ON, Ignition to BOTH.
When complete, request takeoff clearance from YMHB tower. When clearance is granted, move onto the runway and turn right to line up for take-off. There’s no need to taxi down to the end of the runway, as we have plenty of room in front of us. **Set course 350 on HSI – for a digital readout of your course setting, select NAV mode on NAV/COMM 1 and press the OBS button. Adjust CDI knob on HIS until it reads 350.
Take-off We’re now ready to get going… but only after we complete one final checklist.
• Fuel Pump – ON • Instruments – check • Switches – On as required, external lights ON • Transponder – Set to ALT mode.
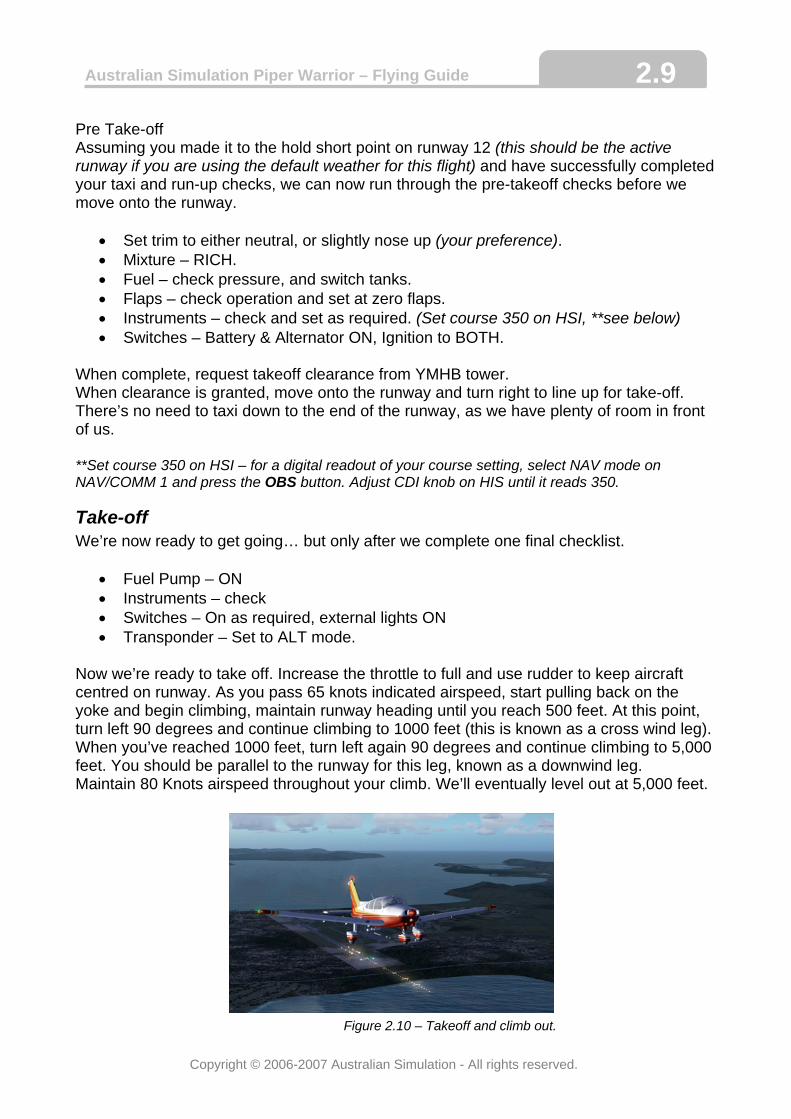
Now we’re ready to take off. Increase the throttle to full and use rudder to keep aircraft centred on runway. As you pass 65 knots indicated airspeed, start pulling back on the yoke and begin climbing, maintain runway heading until you reach 500 feet. At this point, turn left 90 degrees and continue climbing to 1000 feet (this is known as a cross wind leg). When you’ve reached 1000 feet, turn left again 90 degrees and continue climbing to 5,000 feet. You should be parallel to the runway for this leg, known as a downwind leg. Maintain 80 Knots airspeed throughout your climb. We’ll eventually level out at 5,000 feet.
Figure 2.10 – Takeoff and climb out.
Copyright © 2006-2007 Australian Simulation - All rights reserved.
Australian Simulation Piper Warrior – Flying Guide 2.10
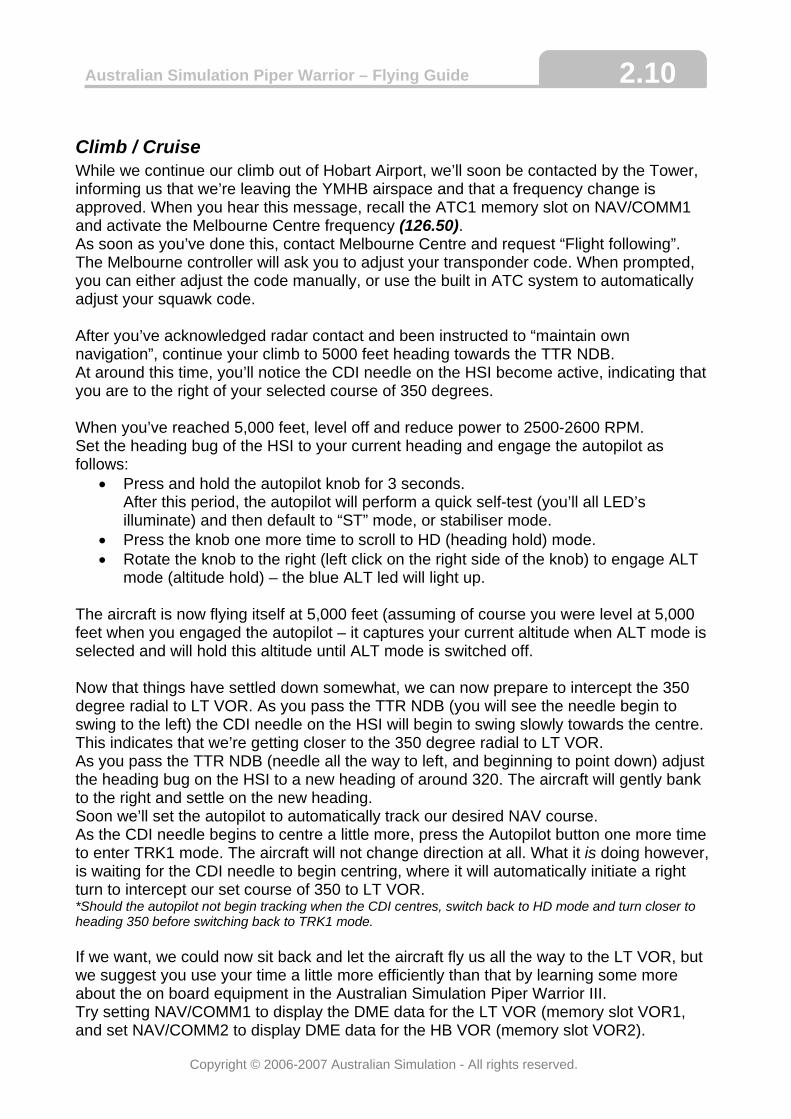
Climb / Cruise While we continue our climb out of Hobart Airport, we’ll soon be contacted by the Tower, informing us that we’re leaving the YMHB airspace and that a frequency change is approved. When you hear this message, recall the ATC1 memory slot on NAV/COMM1 and activate the Melbourne Centre frequency (126.50). As soon as you’ve done this, contact Melbourne Centre and request “Flight following”. The Melbourne controller will ask you to adjust your transponder code. When prompted, you can either adjust the code manually, or use the built in ATC system to automatically adjust your squawk code. After you’ve acknowledged radar contact and been instructed to “maintain own navigation”, continue your climb to 5000 feet heading towards the TTR NDB. At around this time, you’ll notice the CDI needle on the HSI become active, indicating that you are to the right of your selected course of 350 degrees. When you’ve reached 5,000 feet, level off and reduce power to 2500-2600 RPM. Set the heading bug of the HSI to your current heading and engage the autopilot as follows:
• Press and hold the autopilot knob for 3 seconds. After this period, the autopilot will perform a quick self-test (you’ll all LED’s illuminate) and then default to “ST” mode, or stabiliser mode.
• Press the knob one more time to scroll to HD (heading hold) mode. • Rotate the knob to the right (left click on the right side of the knob) to engage ALT
mode (altitude hold) – the blue ALT led will light up. The aircraft is now flying itself at 5,000 feet (assuming of course you were level at 5,000 feet when you engaged the autopilot – it captures your current altitude when ALT mode is selected and will hold this altitude until ALT mode is switched off. Now that things have settled down somewhat, we can now prepare to intercept the 350 degree radial to LT VOR. As you pass the TTR NDB (you will see the needle begin to swing to the left) the CDI needle on the HSI will begin to swing slowly towards the centre. This indicates that we’re getting closer to the 350 degree radial to LT VOR. As you pass the TTR NDB (needle all the way to left, and beginning to point down) adjust the heading bug on the HSI to a new heading of around 320. The aircraft will gently bank to the right and settle on the new heading. Soon we’ll set the autopilot to automatically track our desired NAV course. As the CDI needle begins to centre a little more, press the Autopilot button one more time to enter TRK1 mode. The aircraft will not change direction at all. What it is doing however, is waiting for the CDI needle to begin centring, where it will automatically initiate a right turn to intercept our set course of 350 to LT VOR. *Should the autopilot not begin tracking when the CDI centres, switch back to HD mode and turn closer to heading 350 before switching back to TRK1 mode. If we want, we could now sit back and let the aircraft fly us all the way to the LT VOR, but we suggest you use your time a little more efficiently than that by learning some more about the on board equipment in the Australian Simulation Piper Warrior III. Try setting NAV/COMM1 to display the DME data for the LT VOR (memory slot VOR1, and set NAV/COMM2 to display DME data for the HB VOR (memory slot VOR2).
Copyright © 2006-2007 Australian Simulation - All rights reserved.
Australian Simulation Piper Warrior – Flying Guide 2.11
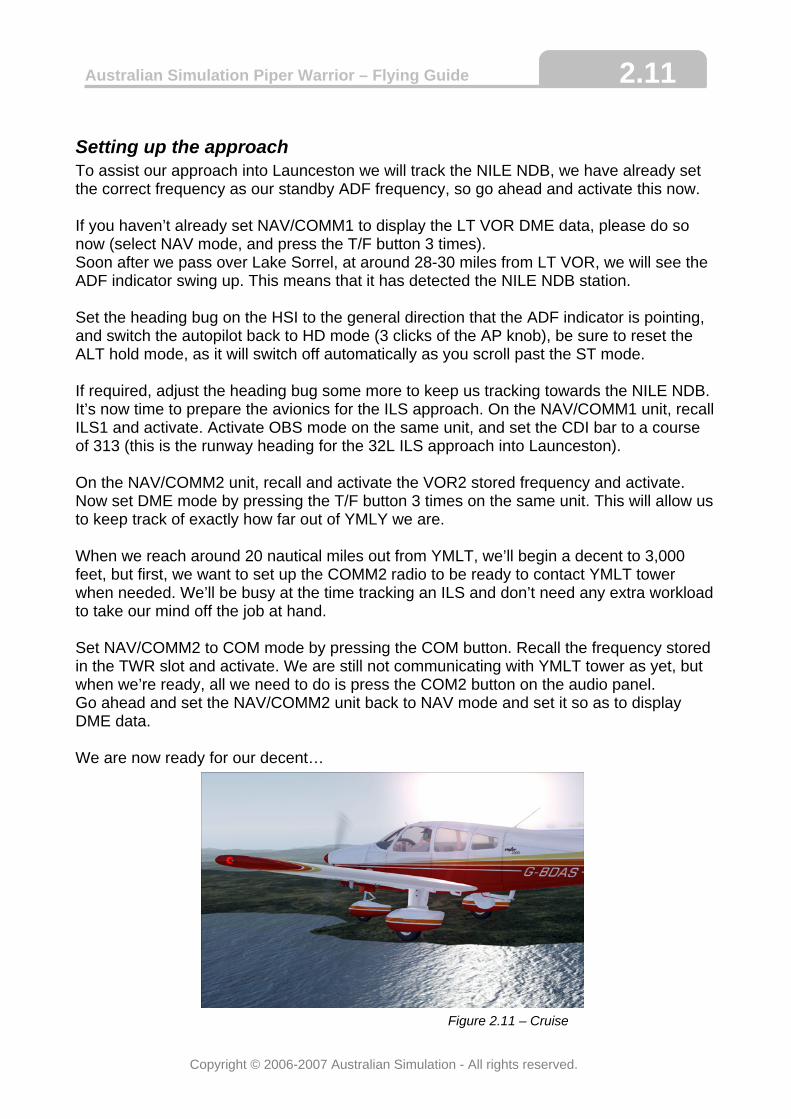
Setting up the approach To assist our approach into Launceston we will track the NILE NDB, we have already set the correct frequency as our standby ADF frequency, so go ahead and activate this now. If you haven’t already set NAV/COMM1 to display the LT VOR DME data, please do so now (select NAV mode, and press the T/F button 3 times). Soon after we pass over Lake Sorrel, at around 28-30 miles from LT VOR, we will see the ADF indicator swing up. This means that it has detected the NILE NDB station. Set the heading bug on the HSI to the general direction that the ADF indicator is pointing, and switch the autopilot back to HD mode (3 clicks of the AP knob), be sure to reset the ALT hold mode, as it will switch off automatically as you scroll past the ST mode. If required, adjust the heading bug some more to keep us tracking towards the NILE NDB. It’s now time to prepare the avionics for the ILS approach. On the NAV/COMM1 unit, recall ILS1 and activate. Activate OBS mode on the same unit, and set the CDI bar to a course of 313 (this is the runway heading for the 32L ILS approach into Launceston). On the NAV/COMM2 unit, recall and activate the VOR2 stored frequency and activate. Now set DME mode by pressing the T/F button 3 times on the same unit. This will allow us to keep track of exactly how far out of YMLY we are. When we reach around 20 nautical miles out from YMLT, we’ll begin a decent to 3,000 feet, but first, we want to set up the COMM2 radio to be ready to contact YMLT tower when needed. We’ll be busy at the time tracking an ILS and don’t need any extra workload to take our mind off the job at hand. Set NAV/COMM2 to COM mode by pressing the COM button. Recall the frequency stored in the TWR slot and activate. We are still not communicating with YMLT tower as yet, but when we’re ready, all we need to do is press the COM2 button on the audio panel. Go ahead and set the NAV/COMM2 unit back to NAV mode and set it so as to display DME data. We are now ready for our decent…
Figure 2.11 – Cruise
Copyright © 2006-2007 Australian Simulation - All rights reserved.
Australian Simulation Piper Warrior – Flying Guide 2.12
Decent / ApproachAt DME 20 miles from Launceston (as displayed on your NAV/COMM2 screen), disengage ALT mode on the autopilot (turn knob to the left by clicking on the left side of the knob, you’ll see the mouse cursor turn into a hand with a minus sign overlayed). Now reduce power to around 2200-2400 RPM and pitch the nose down slightly. Keep trimming and adjusting power as required so the airspeed remains in the green arc. As we descend, we’ll contact YMLT tower and request a full stop landing. Press the COM2 button on the audio panel (this sets the NAV/COMM2 unit to the active communication radio) and contact YMLT tower, requesting a full stop landing. You’ll be instructed to fly a straight in approach to runway 32 left, which is exactly what we planned on! During our decent, by around DME 15 or so, you’ll notice that the HSI has detected the 32L ILS signal. You will notice that the red warning flags are no longer visible. As we reach 3,000 feet, level off and increase power to around 2,500 RPM. You can use ALT hold on the autopilot if you wish. We’re now just about ready to intercept the ILS and fly into YMLT, however, we do need to run through our pre-landing checks first. It’s advisable to do this now, as you’ll be too busy when trying to fly an ILS approach. So, here we go:
• Mixture – RICH • Fuel Pump – ON • Fuel Selector – switch to fullest tank • Oil – Check pressure and temperature • Carb Heat – ON (we do this to prevent carb icing during low power decent)
At around DME 9 miles, you’ll start to see the CDI needle begin swinging to the centre, it’s now time to do some flying on your own. Disengage the autopilot by pressing and holding the autopilot knob for at least 3 seconds. You’ll hear the warning sound, indicating that the autopilot has been disconnected. You are now in control of the aircraft. Using the glide-slope needle and CDI bar on the HSI, begin manually tracking the approach. (the GS needle works in exactly the same way as the CDI needle, except that is operates in the vertical plane.) As you continually keep the two needles centred, you’ll see the airport directly in front of you, continue flying the approach, keeping the needles centred all the time. Adjust pitch and power as required throughout. When you hear a low pitch beeping sound, this means that you are exactly over the outer marker (a vertical facing beacon/signal that indicates that you are lined up on the ILS) reduce airspeed to under 100 knots, and extend 2 stages of flap. Keep adjusting power, pitch and trim to keep those needles centred and hold at around 80 knots airspeed.
Copyright © 2006-2007 Australian Simulation - All rights reserved.
Australian Simulation Piper Warrior – Flying Guide 2.13
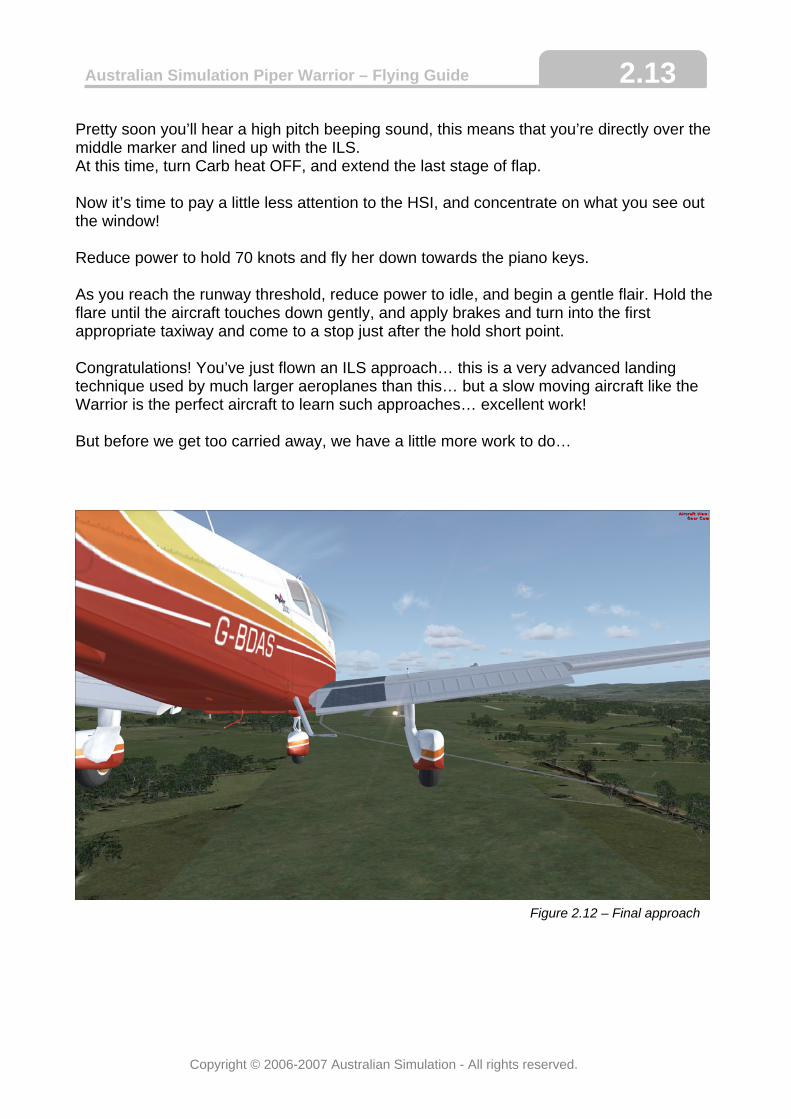
Pretty soon you’ll hear a high pitch beeping sound, this means that you’re directly over the middle marker and lined up with the ILS. At this time, turn Carb heat OFF, and extend the last stage of flap. Now it’s time to pay a little less attention to the HSI, and concentrate on what you see out the window! Reduce power to hold 70 knots and fly her down towards the piano keys. As you reach the runway threshold, reduce power to idle, and begin a gentle flair. Hold the flare until the aircraft touches down gently, and apply brakes and turn into the first appropriate taxiway and come to a stop just after the hold short point. Congratulations! You’ve just flown an ILS approach… this is a very advanced landing technique used by much larger aeroplanes than this… but a slow moving aircraft like the Warrior is the perfect aircraft to learn such approaches… excellent work! But before we get too carried away, we have a little more work to do…
Figure 2.12 – Final approach
Copyright © 2006-2007 Australian Simulation - All rights reserved.
Australian Simulation Piper Warrior – Flying Guide 2.14
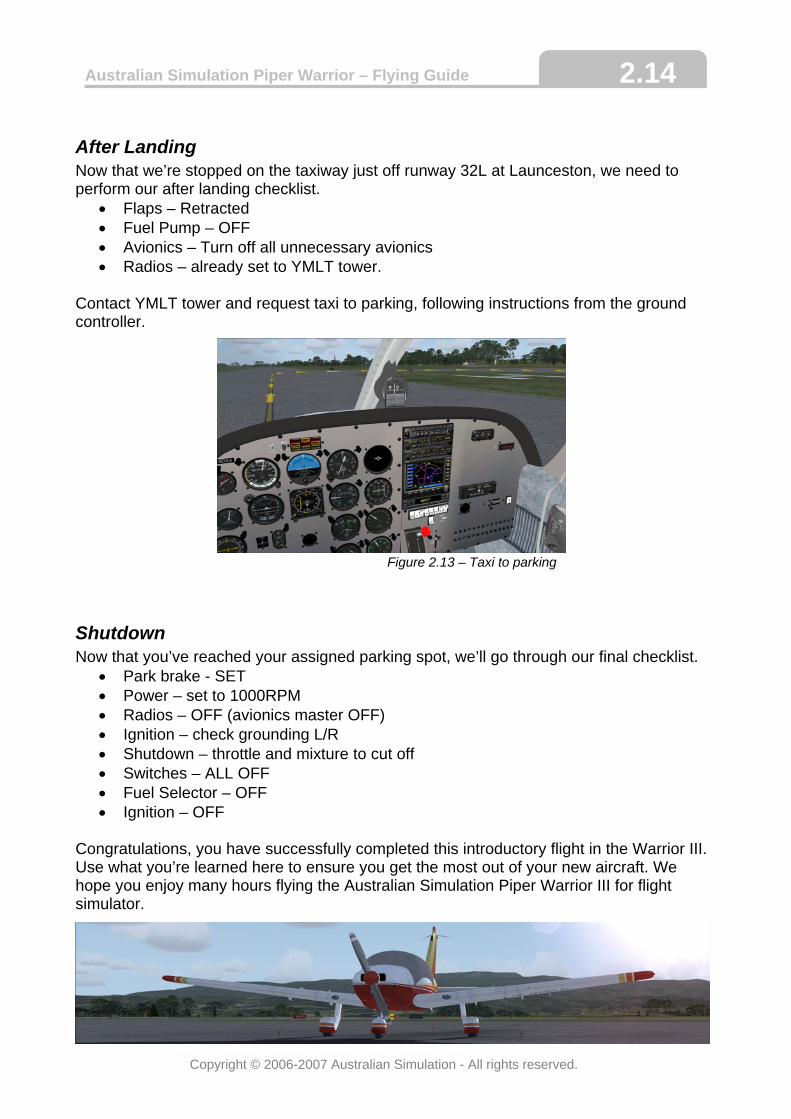
After Landing Now that we’re stopped on the taxiway just off runway 32L at Launceston, we need to perform our after landing checklist.
• Flaps – Retracted • Fuel Pump – OFF • Avionics – Turn off all unnecessary avionics • Radios – already set to YMLT tower.
Contact YMLT tower and request taxi to parking, following instructions from the ground controller. Figure 2.13 – Taxi to parking
Shutdown Now that you’ve reached your assigned parking spot, we’ll go through our final checklist.
• Park brake - SET • Power – set to 1000RPM • Radios – OFF (avionics master OFF) • Ignition – check grounding L/R • Shutdown – throttle and mixture to cut off • Switches – ALL OFF • Fuel Selector – OFF • Ignition – OFF
Congratulations, you have successfully completed this introductory flight in the Warrior III. Use what you’re learned here to ensure you get the most out of your new aircraft. We hope you enjoy many hours flying the Australian Simulation Piper Warrior III for flight simulator.
Copyright © 2006-2007 Australian Simulation - All rights reserved.