pigs on parade. day 1 blow up a balloon tape the end of the balloon place it in a styrofoam bowl...
TRANSCRIPT

Pigs on Parade

Day 1
• Blow up a balloon• Tape the end of the balloon• Place it in a Styrofoam bowl• Bring an empty Styrofoam tray to
your seat and fill it with starch (avoid walking around with starch in a tray)
• Begin paper Mache over your balloon, using two fingers to take off access starch, and ripping the bumps to lay them flat. Make sure your strips of newspaper are not more than an inch wide or they will make bumps
• Try to get at least 1 layer over your entire balloon the 1st day
• Write your name on the last piece of newspaper before cleaning up so you can find your work. They fall off the bowl easily and get mixed with the others.

Day 2 Pig Plan
• After viewing Pigs on Parade and student artworks., begin your original pig plan
• How will your pig feet be arranged?
• What will your nose and ears look like?
• Do you need to make anything else? Hats, shoes, a chair?
• Know all of this before you begin making feet ect.
What are you saving for? 1. Give your pig a theme. _______________________________________________ 2. How can you make that theme recognizable for the audience? _________________ _____________________________________________________________________. 3. List some accessories or objects that might make your theme more believable. Do you need anything from home or is it in the art room? 4. Draw a preliminary sketch and include colors.

Day 3 • Begin making pig feet ,
ears and nose• Remember that if you
want it to turn or bend, cut a notch in it

The Nose Remember to put an end on your nose.Just trace it, cut it out and tape it to the end. The notches make it easier to tape.

Other Parts Other ideas
are encouraged!

Ears

After the parts are attached
• Only attach the ears, nose and legs before you paper Mache over them all. Hats, shoes, etc. should be made separately and attached after they are painted.
• Neatly Paper Mache over the entire pig, making sure you use some long pieces to secure the legs to the form.
• Your ultimate goal is around seven layers.

Dare to be different!

When you are finished with that. Prime your pig!
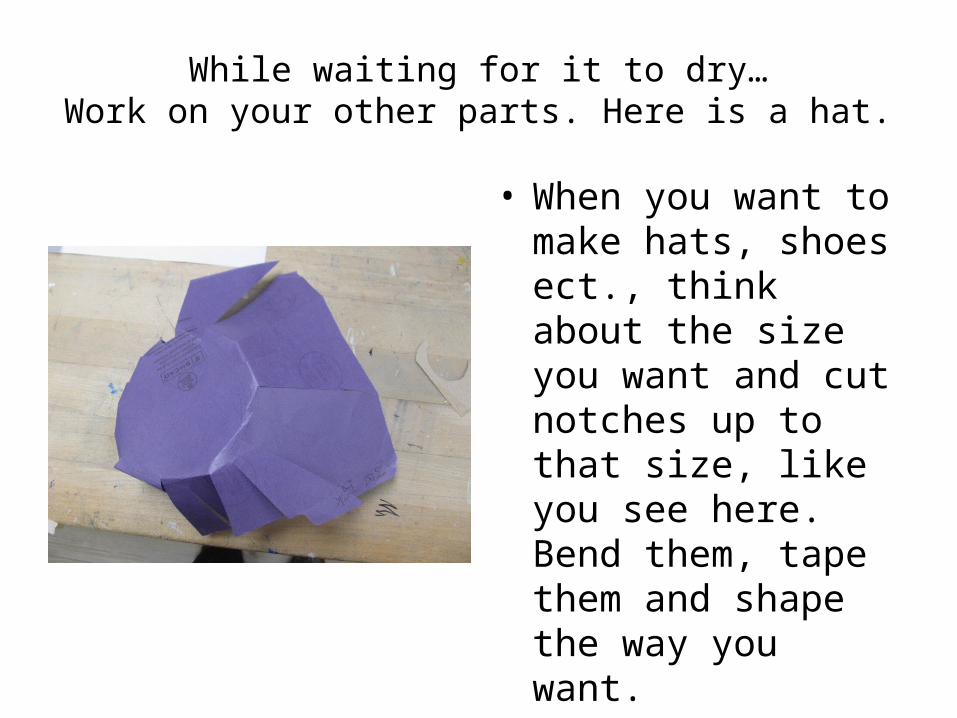
While waiting for it to dry…Work on your other parts. Here is a hat.
• When you want to make hats, shoes ect., think about the size you want and cut notches up to that size, like you see here. Bend them, tape them and shape the way you want.

Cut off any access.

Draw the brim a little bigger than the base of the hat
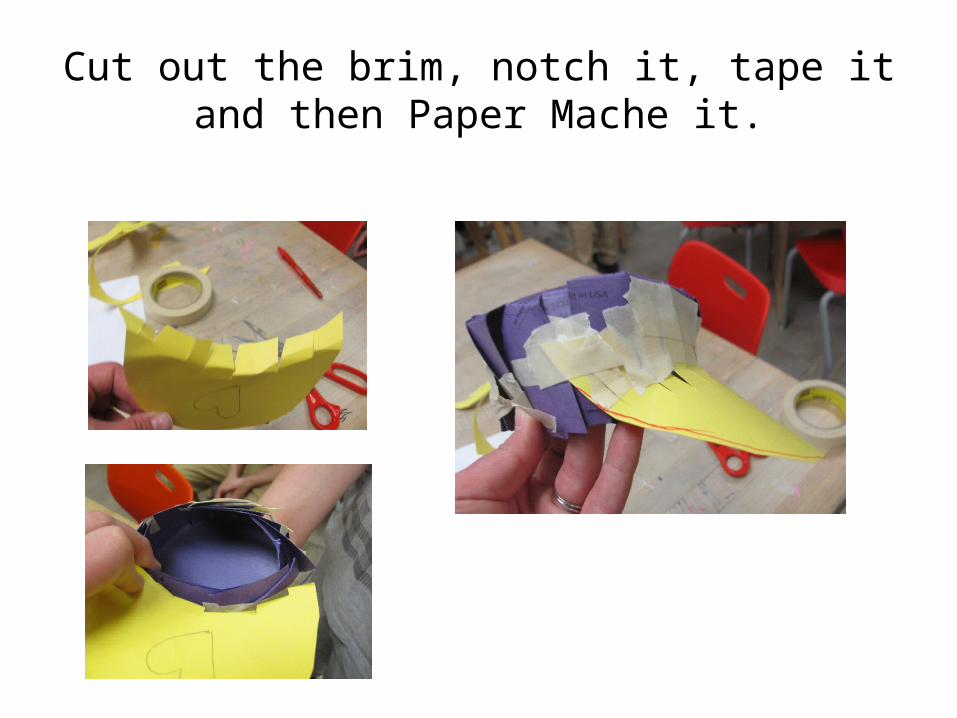
Cut out the brim, notch it, tape itand then Paper Mache it.

Have fun and decorate!