phi prompt text-bsed user interface for arduino -...
TRANSCRIPT

Phi_prompt Text-bsed User Interface for Arduino
Last reviewed on 6/6/2011
John Liu

1. Introduction ................................................................................................................. 3
2. Main features .............................................................................................................. 3 3. Updates ....................................................................................................................... 6 4. Short examples ............................................................................................................ 6
1) Input an integer..................................................................................................... 8 2) Text input with text panel..................................................................................... 8 3) Floating number inputs......................................................................................... 9 4) Interactive lists ................................................................................................... 10 5) Multi-level menu ................................................................................................ 11
6) Text area ............................................................................................................. 14 5. Library struct ............................................................................................................. 14
1) buffer_pointer ptr ............................................................................................... 15 2) four_bytes low .................................................................................................... 16
3) four_bytes high;.................................................................................................. 17 4) four_bytes step; .................................................................................................. 17
5) byte col ............................................................................................................... 17 6) byte row .............................................................................................................. 18
7) byte width ........................................................................................................... 18 8) int option ............................................................................................................ 18 9) void (*update_function)(phi_prompt_struct *) .................................................. 18
6. Library functions ....................................................................................................... 18 1) void init_phi_prompt(LiquidCrystal *l, phi_buttons ** b, int w, int h, char i).. 19
2) void set_indicator(char i); .................................................................................. 19 3) void scroll_text(char * src, char * dst, char dst_len, short pos); ........................ 19 4) void scroll_text_P(PGM_P src, char * dst, char dst_len, short pos); ................. 20
5) void msg_lcd(char* msg_lined); ........................................................................ 21
6) void center_text(char * src); ............................................................................... 21 7) void scroll_bar_v(byte p, byte c, byte r, byte h); ............................................... 21 8) void long_msg_lcd(phi_prompt_struct *para); .................................................. 22
9) void long_msg_lcd_P(phi_prompt_struct *para); .............................................. 22 10) byte render_list(phi_prompt_struct *para); ........................................................ 22
11) int wait_on_escape(int ref_time);....................................................................... 26 12) int ok_dialog(char msg[]); .................................................................................. 27
13) int yn_dialog(char msg[]); .................................................................................. 28 14) int input_integer(phi_prompt_struct *para); ...................................................... 28 15) int input_float(phi_prompt_struct *para); .......................................................... 29 16) int select_list(phi_prompt_struct *para); ........................................................... 30
17) int input_panel(phi_prompt_struct *para);......................................................... 31 18) int text_area(phi_prompt_struct *para); ............................................................. 32 19) int text_area_P(phi_prompt_struct *para);......................................................... 33
20) Customizing your list or menu ........................................................................... 33 7. Future improvement .................................................................................................. 33 8. The legal stuff ........................................................................................................... 33

1. Introduction Phi_prompt is the very first Text-based User interface developed for Arduino using a
character LCD and a set of 6 keys. It offers Arduino project developers the freedom to
focus on projects they intend to develop and leave all interactions to phi_prompt. If you
have programmed before in Java or other visual languages, the phi_prompt is equivalent
to forms that you use to draw up a user interface for various inputs and outputs. Make
phi_prompt the front panel of your project box so you can focus on what happens “inside
the box”!
With the library, you will be able to show lists on the LCD. The user can browse the list
and decide which item to choose. There are many features associated with lists since it is
also used to generate multiple-level menus. You can set up menus of infinite levels. You
can also display text areas like on a windows dialog with scroll bars to the right as an
option. You can display YES/NO or OK dialogs, which automatically scale to fit your
screen. You can also display long messages with scroll bar so the user can read the entire
message by scrolling it up and down. You can also ask the user to enter information such
as integers, floating point numbers, strings, password, etc. entered on the 6-key keypad.
All you have to do as a developer is to call these functions and branch your program
depending on their return values.
2. Main features
Here are the main features of the phi_prompt library:
Supports multiple-level menu. See fig. 2-1. See the menu example code how to
construct a menu from a list of menu items. Use my template to save you time.
Supports lists with a variety of customizable features. See fig. 2-1 and 2-2.
This is the option byte:
Res
erved
0
Scr
oll
ing
bar
Cen
ter
choic
e
Fla
shin
g
curs
or
Auto
scro
ll
Curr
ent
/tota
l
Index
lis
t
1 t
hru
0
Arr
ow
or
dot
128 64 32 16 8 4 2 1
Supports text areas to display long messages. You don‟t have to clip your
messages in small chunks to display on 16X2 or 20X4 displays. Text areas do that
for you. The user can use up/down keys to scroll up and down to read the entire
message. This version has text_area() and text_area_P(), which displays message
from SRAM or PROGMEM to LCD. See fig. 2-3.
Scrolling texts horizontally if you want to display long messages on one line or if
you have a long item on a list that won‟t fit on one line. See fig. 2-4.
Function to display texts automatically center-aligned. No need to count
characters. See top side of fig. 2-1 thru 2-4.

Supports integer entry, floating point number entry, and text entry. Easy to
construct a password panel or ask user to enter a file name. Use my template to
save time. See section 4 for examples and section 6 for function details.
Lists are stored in PROGMEM, saving RAM for variables. Long messages can
also be printed from PROGMEM.
Displays a vertical scroll bar anywhere you want. See fig. 2-1,-23 and 2-4.
Displays yes/no and ok dialog that automatically scales to the size of your screen.
Collect user button presses with wait_on_escape(). You don‟t have to write your
own code anymore. The return value tells you which button was pressed.
Showing off your project with professional-looking interfaces!
Figure 2-1. Menu/list example. 1. Main menu/list area displays 3 items in one column
(can display any rows and columns combination). 2. Indicator of the highlighted item is
the one in the middle (also auto center is enabled so the highlighted item is always
displayed in the center. 3. Scroll bar indicates where you are at in the list. 4. Index style 2
tells the current and total number of menu/list items. The menu/list title is printed with
center_text() so that the title is always in the center.
Figure 2-2. Menu/list example. 1. Main menu/list area displays 3 items in one column
(can display any rows and columns combination). 2. Indicator of the highlighted item is
the bottom one. Auto center is disabled so the menu/list is displayed page after page.
Pressing up/down moves the arrow to the next item. 3. Scroll bar is disabled, saving one
column. 4. Index style 1 tells the current item and a list of all items 1 thru 5. The right
arrow indicates the highlighted item. The menu/list title is printed with center_text() so
that the title is always in the center.
4
2
1 3
4
2
1 3

(a)
(b)
Figure 2-3. Example text area. (a) The text area occupies the 2nd
to the 4th
rows and all
columns with a scroll bar on the right side. (b) The user can scroll up and down to see the
entire text with up and down buttons. The orange boxes enclose the automatically
updated scroll bar as the user scrolls the text. The “credits” was printed with center_text()
so it appears in the middle of the display.
(a)
(b)
(c)
Figure 2-4. Scrolling item. The last item on the menu/list is too long for the limited space.
If auto scroll is enabled, the item will automatically scroll to show the entire list. The (a),
(b), and (c) show the entire item “Show credit See who has spent so much time making it
happen!” The orange boxes show the scrolling item.

3. Updates There have been major updates to this library since the 20110427 version was released.
Most of the updates don‟t affect how the library is invoked but you do want to know what
have I done within the month, right?
The pointers to lcd (.lcd) and buttons (.btns) are removed from the struct
(phi_prompt_struct) and placed in the library as static variables to be shared by all
structs. This simplifies programming so:
msg_lcd(msg_00,&lcd);
wait_on_escape(4000,btns_1);
becomes
msg_lcd(msg_00);
wait_on_escape(4000);
Several static variables are added to the library to store the configuration of the
library. The indicator is the character used in various places to highlight a list item.
static LiquidCrystal * lcd;
static phi_buttons ** btns;
static int lcd_w;
static int lcd_h;
static char indicator;
The list renderers were removed and rewritten into one list renderer, render_list() ,
which has all previous features and a whole zoo of new features.
Added auto scroll feature for lists so if you have tight space and long list items,
enable this feature to see your list item scroll automatically like on your MP3
players.
Added vertical scroll bar. You have the option to display it to the right of your list
or text area. You can also call scroll_bar_v() directly to draw a vertical bar
anywhere you want, although I don‟t know if that is useful.
Added YES/NO and OK dialogs to simplify getting responses from the user.
These dialogs automatically scale to maximal screen size.
4. Short examples
The following are example codes for various tasks you may find yourself up against in
your projects. All the code snippets require proper initialization codes and to reside in the
loop(). The common initialization code is the following:
#define lcd_rows 2
#define lcd_columns 16

//Phi-2 shield buttons
#define btn_u 5
#define btn_d 10
#define btn_l 11
#define btn_r 4
#define btn_b 14
#define btn_a 15
//Phi-2 shield LCD pin setting
#define LCD_RS 8
#define LCD_EN 9
#define LCD_D4 7
#define LCD_D5 6
#define LCD_D6 2
#define LCD_D7 3
#include <LiquidCrystal.h>
#include <WProgram.h>
#include <phi_buttons.h>
#include <phi_prompt.h>
phi_buttons btn_1(btn_u, LOW);
phi_buttons btn_2(btn_d, LOW);
phi_buttons btn_3(btn_l, LOW);
phi_buttons btn_4(btn_r, LOW);
phi_buttons btn_5(btn_b, LOW);
phi_buttons btn_6(btn_a, LOW);
LiquidCrystal lcd(LCD_RS,LCD_EN,LCD_D4,LCD_D5,LCD_D6,LCD_D7); // Create
the lcd object
phi_buttons *btns[]={&btn_1,&btn_2,&btn_3,&btn_4,&btn_5,&btn_6}; // Actual
buttons definitions are in the defs.h
void setup()
{
lcd.begin(lcd_columns, lcd_rows);
init_phi_prompt(&lcd,btns,lcd_columns, lcd_rows, '~'); // Supply the liquid crystal
object and the phi_buttons objects. Also supply the column and row of the lcd, and
indicator as '>'. You can also use '\x7e', which is a right arrow.
}
The above code properly initializes the LCD, all buttons, and the phi_prompt library. You
will need to download phi_buttons library (http://liudr.wordpress.com/phi_buttons/). You
are strongly suggested to obtain a phi-2 shield (http://liudr.wordpress.com/phi-2-shield/)

to run the code. If you intend to run the code on your own hardware instead, please
change the buttons and LCD pin definitions to suit your hardware. In case you don‟t have
6 push buttons, you may use in place of the actual pins to declare a null button, btn_null
which is a dummy. You can afford to assign null to button 2, which is down button, then
button 6 the escape button, then button 5, the enter button. This way you can operate with
3 buttons only, using the right button as enter. Since all lists and inputs wrap around, the
up button is enough.
1) Input an integer
In lots of projects, you would want to interact with Arduino on the fly or in the field by
entering numbers to Arduino, say motor speed, angle, Morse code speed etc. You can use
the input_integer() function. Here is an example: You want a number between 0 and 20
with increment of 2 (basically 0,2,4,6,8, etc.)
Figure 4-1. Sample screen for inputting a number between 0 and 20.
int user_input=10; // This is the storage for the integer
phi_prompt_struct myIntegerInput; // This struct stores information for library functions
myIntegerInput.ptr.i_buffer=&user_input; // Pass the address of user_input to the library.
After library function call, user input will be stored in this variable. Note the use of “&”.
myIntegerInput.low.i=0; // Lower limit. The number wraps to 20 when decreased from 0.
myIntegerInput.high.i=20; // Upper limit. The number wraps to 0 when increased from 20.
myIntegerInput.step.i=2; // Step size. You will get 0, 2, 4, 6, 8, etc if you set it to 2.
myIntegerInput.col=7; // Display the number at column 7
myIntegerInput.row=1; // Display the number at row 1
myIntegerInput.width=2; // The number occupies 2 character space.
myIntegerInput.option=0; // Option 0, space pad right, 1, zero pad left, 2, space pad left.
lcd.clear(); // Clear the lcd.
lcd.print("Number(0-20):"); // Prompt user for input
input_integer(&myIntegerInput); // This calls the library function. The initial number will
be displayed first and the functions waits for the user to press up/down to change the
number and enter to confirm, after which it stores the new number in user_input. Notice
the "&" in front of the myIntegerInput struct.
After the above code is executed, the user‟s final choice of the number resides in the
user_input.
2) Text input with text panel

In some projects, you may want to have a text panel where the user types up a short string
for file names, password etc. You can use the input_panel() to get user input with various
options on what characters are allowed.
Figure 4-2. Sample screen of input panel.
phi_prompt_struct myTextInput; // This struct stores information for library functions.
char file_name[]="AAAAAAAA.TXT"; // This buffer stores the content of the text panel.
myTextInput.ptr.msg=file_name; // Assign the text buffer address
myTextInput.low.c='A'; // Text panel valid input starts with character 'A'.
myTextInput.high.c='Z'; // Text panel valid input ends with character 'Z'.
myTextInput.width=12; // Length of the input panel is 12 characters.
myTextInput.col=2; // Display input panel at column 2
myTextInput.row=1; // Display input panel at row 1
myTextInput.option=1; // Option 1 includes 0-9 as valid characters. Option 0, default.
lcd.clear(); // Clear the lcd
lcd.print("File name:"); // Prompt user for input
input_panel(&myTextInput); // User input is stored in file_name. Notice the “&”.
The user text input is stored in file_name after the function returns.
3) Floating number inputs
Sometimes you need to input some floating point numbers with input_float().I wrote the
floating number input from text input panel, talking about reusing codes. The floating
number input allows you to enter a number with a FIXED number of digits before and
after the decimal point. You may restrict the input to be positive, negative, or both. There
is no step or min/max for floating number input. I found it simply too much work to
implement such limits, which may or may not be useful.
Figure. 4-3 Sample screen for floating point number input.
phi_prompt_struct myFloatInput; // This struct stores information for library functions.
float myFloatNumber=123.45; // Initial value. User input will be stored here afterward.
myFloatInput.ptr.f_buffer=&myFloatNumber; // Notice the “&”.
myFloatInput.step.c_arr[0]=2; // 2 digits after decimal
myFloatInput.step.c_arr[1]=4; // 4 digits before decimal
myFloatInput.col=2; // Display input panel at column 2
myFloatInput.row=1; // Display input panel at row 1

myFloatInput.option=2; // 0: only positive numbers allowed, 1: only negative numbers
allowed, 2: both positive and negative numbers are allowed.
lcd.clear(); // Clear the lcd
lcd.print("Input float:"); // Prompt user for input
input_float(&myFloatInput); // Notice the “&”.
The above code initializes the floating point input and stores the user input in variable
myFloatNumber. The number of digits before decimal includes the negative sign so if
you want 3-digit negative numbers you will allow “4 digits before decimal”.
4) Interactive lists
Interactive lists can be made with select_list().
Figure 4-4. Sample screen of a 2 by 2 list with arrow/dot enabled.
//First, define the complete list in PROGMEM to save RAM. Please follow the example
closely.
PROGMEM prog_char pasta_00[]="Spaghetti";
PROGMEM prog_char pasta_01[]="Rotelle";
PROGMEM prog_char pasta_02[]="Rotini";
PROGMEM prog_char pasta_03[]="Fettuccine";
PROGMEM prog_char pasta_04[]="Lasagne";
PROGMEM prog_char pasta_05[]="Penne";
PROGMEM prog_char pasta_06[]="Rigatoni";
PROGMEM const char *pasta_items[]=
{pasta_00,pasta_01,pasta_02,pasta_03,pasta_04,pasta_05,pasta_06};
int user_choice=0; // This will store the item number (0-6) the user chooses.
phi_prompt_struct myListInput; // This struct stores information for library functions.
myListInput.ptr.list=(char**)&pasta_items; // Please follow closely the syntax..
myListInput.low.i=0; // Default item highlighted on the list is #0, the first item on the list.
myListInput.high.i=6; // Last item on the list is size of the list - 1.
myListInput.width=7; // Width of each list item. Longer items are truncated or scrolled.
myListInput.col=0; // Display the list at column 0
myListInput.row=0; // Display the list at row 0
myListInput.step.c_arr[0]=2; // Display the list as two rows
myListInput.step.c_arr[1]=2; // Display the list as two columns
myListInput.option=1; // See render_list() for details of how to set this option.
PROGMEM prog_char pasta_00[]="Spaghetti";
PROGMEM prog_char pasta_01[]="Rotelle";

PROGMEM prog_char pasta_02[]="Rotini";
PROGMEM prog_char pasta_03[]="Fettuccine";
PROGMEM prog_char pasta_04[]="Lasagne";
PROGMEM prog_char pasta_05[]="Penne";
PROGMEM prog_char pasta_06[]="Rigatoni";
PROGMEM const char *pasta_items[]=
{pasta_00,pasta_01,pasta_02,pasta_03,pasta_04,pasta_05,pasta_06};
Notice that select_list() doesn‟t know the address of user_choice thus it stores the user
choice in low.i for you to retrieve. The struct‟s only pointer is used to point to the list
items. There are many options you can choose to make your list very nice. Lists with
shorter items, such as day of the week, would benefit from multiple-column list, while
lists with many items may use an index display. Lists with long items may enable scroll
to display the entire items. You also may center your choice on the list so the list moves
but the highlighted item is always in the middle. This works nicely on a larger display.
All options are listed under render_list().
5) Multi-level menu
Nothing compares with a nice interactive menu that will make your project just perfect as
a stand-alone project that can take a user through various functions under layers of menus
like an MP3 player. A menu also helps organize your code so they don‟t tangle together
like a bowl of pasta when improperly cooked. You can construct a menu with any
number of levels or layers with select_list(). With a 20X4 display, you can really take
advantage of all the rendering options the library provides.
(a)
(b)
(c)

(d)
Figure 4-5. Sample screens of (a) top menu and (b) a sub menu on a 16X2 display and
screen shots of (c) top menu and (d) a sub menu on a 20X4 display.
This example is more extensive. The complete code is provided with the library
release as phi_prompt_example_menu either 16X2 or 20X4. It is a complete template
for an interactive data logger. The logger has one main menu with the following items:
1. Collect data
2. Upload to PC
3. Set menu style
4. File management (sub menu)
5. Show credit
The sub menu has the following items:
1. Load file
2. Save file
3. Delete file
4. Main menu (return to main menu)
There can be as many level of menus as you like, as long as you follow the example.
This is the main menu:
int menu_pointer_1=0; // This stores the menu choice the user made.
phi_prompt_struct myMenu; // This structure stores the main menu.
select_list(&myMenu); // Use the select_list to ask the user to select an item of the list.
menu_pointer_1=myMenu.low.i; // Get the item number selected by the user.
switch (menu_pointer_1) // See which menu function to run
{
case 0:
top_menu_function_1();
break;
case 1:
top_menu_function_2();
break;

case 2:
top_menu_function_3(&myMenu); // This is the setting function that changes how
menu is rendered
break;
case 3:
sub_menu_1(); // This is actually the sub menu.
break;
case 4:
top_menu_function_5(); // If this were a sub level menu, this last one should return to
previous level by using "return".
break;
}
This is the sub menu:
int menu_pointer_1=0;
phi_prompt_struct myMenu; // This structure stores the sub menu.
select_list(&myMenu);
menu_pointer_1=myMenu.low.i;
switch (menu_pointer_1)
{
case 0:
sub_menu_1_function_1();
break;
case 1:
sub_menu_1_function_2();
break;
case 2:
sub_menu_1_function_3();
break;
case 3: // This option returns to previous level.
lcd.clear();
return; // This returns to previous menu level. Only sub menus should have this unless
the top level menu also returns to something.
break;
}

6) Text area
A lot of times you will need to display long messages such as introduction, instruction,
and credit to a user on limited display space. The easiest way to display long messages is
to use a text area. The text area automatically wraps text and lets user scroll text up and
down. Two versions exist, one displays long messages in SRAM, one displays long
messages in PROGMEM. There is an example:
PROGMEM prog_char long_msg_p[]="Developed by: Dr.Liu 05/23/11
http://liudr.wordpress.com This is just a mock-up of an actual data acquisition system ";
phi_prompt_struct myLongMsg;
myLongMsg.ptr.msg=long_msg_p; // Assign the address of the text string to the pointer.
myLongMsg.low.i=0; // Text starts at position 0.
myLongMsg.high.i=strlen_P(long_msg_p);
myLongMsg.step.c_arr[0]=3; // Text area spans 3 rows
myLongMsg.step.c_arr[1]=19; // Text area spans 19 columns
myLongMsg.col=0; // Display the text area starting at column 0
myLongMsg.row=1; // Display the text area starting at row 1
myLongMsg.option=1; // Option 0, no scroll bar, option 1, scroll bar on right.
text_area_P(&myLongMsg);
Figure 4-6. Text area occupying 19 columns and 3 rows. The top line doesn‟t belong to
the text area.
5. Library struct The struct phi_prompt_struct is used to pass parameters to library functions in order to
tell the library function where to display what with which options. It is defined as the
following:
union buffer_pointer
{
int *i_buffer;
float * f_buffer;
char ** list;
char* msg;
PGM_P msg_P;
};

union four_bytes
{
int i;
long l;
float f;
byte b;
char c;
char c_arr[4];
};
struct phi_prompt_struct
{
buffer_pointer ptr;
four_bytes low;
four_bytes high;
four_bytes step;
byte col;
byte row;
byte width;
int option;
void (*update_function)(phi_prompt_struct *);
};
The two unions are defined to save memory. You don‟t have to be concerned with how to
use them. They‟re not used outside the struct.
1) buffer_pointer ptr
This is the pointer to various things, such as strings to display in text areas, or list index,
or integer value for an integer entry. If this is for number entries, such as floating point
numbers, the returned value is stored in the address it points to.
If you intend to use the struct to call input_float, assign the address of the floating point
number to ptr.f_buffer. Eg.
float x=1.5;
phi_prompt_struct floatInput;
floatInput.ptr.f_buffer=&x;
Note the “&” is necessary to extract the memory address of x.
If you want to display an interactive list, you should do this:
PROGMEM prog_char pasta_00[]="Spaghetti";
PROGMEM prog_char pasta_01[]="Rotelle";
PROGMEM prog_char pasta_02[]="Rotini";

PROGMEM prog_char pasta_03[]="Fettuccine";
PROGMEM prog_char pasta_04[]="Lasagne";
PROGMEM prog_char pasta_05[]="Penne";
PROGMEM prog_char pasta_06[]="Rigatoni";
PROGMEM const char *pasta_items[]=
{pasta_00,pasta_01,pasta_02,pasta_03,pasta_04,pasta_05,pasta_06};
phi_prompt_struct myListInput;
myListInput.ptr.list=(char**)&pasta_items;
Note the “&” is necessary to extract the memory address of pasta_items.
2) four_bytes low
This normally stores the lower limit of an input entry of the default list/menu item when
the list/menu is first displayed. It is also used to store the user‟s final list/menu choice. In
the following examples, assume a struct called myStruct is already defined.
You will store lower limit for text panel‟s allowed character.
Eg. myStruct.low.c=‟A‟;
It sets the lower limit of allowed character to „A‟.
You will store lower limit for integer entry.
Eg. myStruct.low.i=5;
It sets lower limit of an integer entry to be 5.
You will store the index of the initial highlighted item for your list.
Eg. myStruct.low.i=0;
It sets the first or zeroth list/menu item on highlight. Every time up/down is pressed, this
number changes and the list/menu is repainted. When the user has made a decision, this
value contains the item‟s index the user finally decides.
Eg.
if (select_list(&myStruct)!=-1) user_choice= myStruct.low.i;
If the user didn't press escape (return -1) then the user choice is stored in myStruct.low.i
so we can assign its value to user_choice, which we will use to make decisions.
You will store the index of the first character to be displayed in your text area.
Eg.
myStruct.low.i=80;
text_area(&myStruct);

It sets the first character to be displayed in the text area to be the 80th
characters so the
first 80 characters don‟t get displayed. If you have a long string, you can display parts of
the string by manipulating the value low.i.
3) four_bytes high;
This value stores upper limit for text panel (.c), integers (.i) and floats (.f) and last item
for list (.i). Note that if you have 5 items in a list, the last is the 4th
, counting from zero.
You will store upper limit for text panel‟s allowed character.
Eg. myStruct.high.c=‟Z‟;
It sets the upper limit of allowed character to „Z‟. With the previous command
myStruct.low.c=‟A‟; you will have an input panel that has valid inputs of capitalized
letters.
4) four_bytes step;
This determines the increment of various inputs. Say if you want an integer input that
increments 5 every time the user presses up, you can do : myStruct.step.i=5;
Same goes with input panel but it is most appropriate to set them to 1.
This field is also used by the list renderer render_list(). Since a list should always have
increment of 1, this field is split in four bytes, each storing things other than increment.
myStruct.step.c_arr[0]=1;//rows
myStruct.step.c_arr[1]=2;//cols
myStruct.step.c_arr[2]=0;//y2
myStruct.step.c_arr[3]=12;//x2
The rows and columns store the size in row and column of the list so if you want a list
with two columns and two rows like the following, you want them to be both 2.
Figure 5-1. A two row by two column list.
The x2 and y2 are coordinates for additional features used in list rendering. The list index
currently uses this coordinates so if you specify 12 column and 0 row, you will get an
index at that location. See render_list() for more information.
5) byte col

This is the location (column) of the item to be displayed, be it integer entry or list.
6) byte row
This is the location (row) of the item to be displayed, be it integer entry or list.
7) byte width
This indicates how many characters an integer or float or text entry needs. If you want
your integers between 0 and 99, you need width to be 2 as there will be as many as 2
digits. If you want 0 to 100, then 3 for width. This also determines the width of each
column of a list. If you have a 16X2 display and want to display a list that is 1 column
and 2 rows with an arrow indicator in the front, then you are left with 15 columns (16-1
for arrow). You will set this to 15. If you want 2 columns and 2 row of list, then you
should use 7 as width and enable the arrow indicator.
8) int option
This is the option for each library functions. You will find detailed explanation in each
library function that uses this field.
9) void (*update_function)(phi_prompt_struct *)
This is not being used in this version but reserved for future releases. Essentially if you
have an entry, you can use this function to make some updates while the user changes the
value. Say if the user is changing the orientation of a motor with an integer entry, then
every time the user changes the value with up/down keys, a function can be called to
rotate the motor real time, instead of rotating it after the user finishes making a decision.
If you have used an old version of MS Word you might know this. Pulling on the scroll
bar doesn‟t change the page until you let go of your mouse. While in newer versions, if
you pull the scroll bar, the page changes as you pull. The update function is going to do
this in future releases.
6. Library functions
The following are functions featured in the library. Some functions are only meant to be
called by other library functions so they are not explained here.

1) void init_phi_prompt(LiquidCrystal *l, phi_buttons ** b, int w, int h, char i)
Parameters:
This is required before you can use any functions from the library. The l and b are just
liquid crystals and phi_buttons array. The w and h are width and height of the display.
The character i is the indicator character. I normally use the right arrow.
Eg.:
LiquidCrystal lcd(LCD_RS,LCD_EN,LCD_D4,LCD_D5,LCD_D6,LCD_D7);
phi_buttons btn_1(btn_u, LOW);
phi_buttons btn_2(btn_d, LOW);
phi_buttons btn_3(btn_l, LOW);
phi_buttons btn_4(btn_r, LOW);
phi_buttons btn_5(btn_b, LOW);
phi_buttons btn_6(btn_a, LOW);
phi_buttons *btns[]={&btn_1,&btn_2,&btn_3,&btn_4,&btn_5,&btn_6};
void setup()
{
lcd.begin(lcd_columns, lcd_rows);
init_phi_prompt(&lcd,btns,lcd_columns, lcd_rows, '~');
}
The above code is minimal to start the library. Notice lots of names such as LCD_RS,
btn_u etc. are not given. You can use my code if you have a phi-2 shield or replace them
with pins corresponding to your hardware setup. Also notice there is “&” in front of the
lcd but not in front of the btns. The „~‟ actually looks like a right arrow on the HD44780
display.
2) void set_indicator(char i);
Parameters:
This function sets the indicator character to i. Any subsequent list/menu rendering will
use that character to indicate highlighted item. You can use things like „>‟, „#‟ or „*‟ if
you like them better.
3) void scroll_text(char * src, char * dst, char dst_len, short pos);

You can use this function to animate a line of text. If you have a long message and you
want to animate it by scrolling it, you can call this function.
The src points to the source char array. The dst is the buffer that will be filled by the
string cut from the source starting at position pos with length dst_len. So your dst char
array should be at least dst_len+1 long.
Eg.
void horizontal_scroll_demo()
{
char thankyou[]="Thank you for using phi_prompt!";
char buffer[15];
lcd.clear();
for (byte i=0;i<47;i++)
{
scroll_text(thankyou,buffer,14,i-14);
lcd.setCursor(1,1);
lcd.print(buffer);
wait_on_escape(250);
}
}
The above function scrolls the char array thankyou and displays it on the LCD as an
animation. Notice that when i<14, the position is negative, corresponding to amount of
blank spaces before the first character. This helps the animation.
4) void scroll_text_P(PGM_P src, char * dst, char dst_len, short pos);
This is the same as the last function, only differs on the src points to a PROGMEM space.
Eg.
PROGMEM prog_char thankyou[]="Thank you for using phi_prompt!";
void horizontal_scroll_demo()
{
char buffer[15];
lcd.clear();
for (byte i=0;i<47;i++)
{
scroll_text_P(thankyou,buffer,14,i-14);
lcd.setCursor(1,1);
lcd.print(buffer);
wait_on_escape(250);
}
}

The above animates a message stored in PROGMEM. This saves the SRAM.
5) void msg_lcd(char* msg_lined);
This displays a PROGMEM char array msg_lined at the current lcd cursor location. It is a
basic function and provides no scrolling or clipping.
6) void center_text(char * src);
Parameters:
Char * src is pointing to a char array.
This displays char array src at the center of the top LCD line, automatically considering
the size of the display, a good way to present a title. See fig. 6-1.
Eg. center_text("Top Menu");
(a)
(b)
Figure 6-1. center_text auto scales on different displays. (a) On a 16X2 display. (b) On a
20X4 display. The „>‟ and „<‟ are automatically filled to emphasize the title.
7) void scroll_bar_v(byte p, byte c, byte r, byte h);
Parameters:
This renders a vertical scroll bar at column and row (c,r), with height h rows and
percentage of p.
This is used to render text area and list/menu when the scroll bar option is enabled. To
render a scroll bar representing 30% of the position at column, row of (15,0) and a height
of 4 rows on a 20X4 display, do the following:
scroll_bar_v(30, 15, 0, 4);
It makes very little sense to draw scroll bar on a 2-row display such as 16X2, 20X2 or
40X2.

8) void long_msg_lcd(phi_prompt_struct *para);
This displays a long message, stored in SRAM, depending on the setting of the para. See
parameters explained in text_area().
9) void long_msg_lcd_P(phi_prompt_struct *para);
This displays a long message, stored in PROGMEM, depending on the setting of the para.
See text_area_P().
10) byte render_list(phi_prompt_struct *para);
This function actually renders a static list instead of an interactive list so unless you just
want to render a static list you want to use select_list() to render an interactive list for
your user to interact with.
Parameters:
para->ptr.list=(char**)&list_item_array;
The list_item_array is a PROGMEM prog_char * array that stores the address of all list
items. The following is an example of such an array:
PROGMEM prog_char pasta_00[]="Spaghetti";
PROGMEM prog_char pasta_01[]="Rotelle";
PROGMEM prog_char pasta_02[]="Rotini";
PROGMEM prog_char pasta_03[]="Fettuccine";
PROGMEM const char *pasta_items[]= {pasta_00,pasta_01,pasta_02,pasta_03};
para->low.i=high_lighted_item;
This is the highlighted item. If you enable the arrow/dot or flash cursor options, the arrow
and flashing cursor will be on this item. The select_list() manipulates this value when the
user presses up and down so different items will be highlighted.
para->high.i=last_list_item;
This indicates the last item on the list so the rendering program knows which item is the
last item to render.
para->width=column_width;

This is the width of each column in characters. This width doesn‟t include arrow/dot or
scroll bar spaces if these options are selected. It doesn‟t include the blank space between
columns of items either. If you want a two column list with arrow/dot to occupy all space
on a 16X2 display, then set this to 7. So each column is 7+1(arrow/dot) and two columns
take all 16 spaces. If you disable arrow/dot, then you use 2*7 for both columns and 1 for
space between the columns.
para->col=col;
para->row=row;
This is where the list starts, or its top left corner.
para->step.c_arr[0]=number_rows;
para->step.c_arr[1]=number_columns;
These are number of columns and rows a list has. This is different from width, which is
the width of one column.
para->step.c_arr[2]=y2;
para->step.c_arr[3]=x2;
These are the positions of a list index if the index is enabled by the option.
para->option=option;
Below is the option byte:
Res
erved
0
Scr
oll
ing
bar
Cen
ter
choic
e
Fla
shin
g
curs
or
Auto
scro
ll
Curr
ent
/tota
l
Index
lis
t
1 t
hru
0
Arr
ow
or
dot
128 64 32 16 8 4 2 1
Bit 0 – Arrow or dot. The first column of the list is a dot if it is not highlighted or an
arrow (customizable) if it is highlighted. This is very useful if you display more than one
item on your list and show which item is being highlighted. This is displayed to the left of
the list so the list will be one column wider than what you would expect so plan
accordingly
Bit 1 – index list 1 thru 0. The index looks like 123>567890 if 4 is highlighted. This is
drawn at column and row, encoded in step.c_arr[3] as column and step.c_arr[2] as row.
Eg. If you want to display this index at (col,row)=(12,0), you do step.c_arr[3]=12 as
column and step.c_arr[2]=0. The highlighted item is indicated on the index as a special
character, customizable. Read set_indicator(). Setting this bit disables the next index type.
Bit 2 – an index current/total, such as 5/12. This is drawn at column and row, encoded in
step.c_arr[3] as column and step.c_arr[2] as row. Eg. If you want to display this index at

(col,row)=(12,0), you do step.c_arr[3]=12 as column and step.c_arr[2]=0. The
highlighted item is the number before the slash while the total list item is after the slash.
This index is only displayed if the previous index is disabled since they use the same
coordinates for locations.
Bit 3 – auto scroll. This enables auto scrolling of list items that are too long to fit within
given display width by width.i. Not enabling this option results in truncated items.
Bit 4 – flashing cursor. This turns on a flashing black box enabled by the HD44780-
comptaible display. The cursor is at the beginning of the list item highlighted. You can
save a column of your display by enabling this option and disabling the arrow/dot option.
Bit 5 – Center choice. The highlighted item will always be centered in the display when
possible (odd number of rows to display and plenty of items before and after the
highlighted item). The list will scroll automatically to center the choice you might make.
If this is disabled, the highlighted item goes from top to bottom of the list and you will
flip to the next page with highlighted item on top of the next page. It works nicely with a
long list and 3 rows of room to display it. Some people like this way better than flipping
pages and pages of items instead.
Bit 6 – Scrolling bar. This displays a scrolling bar on the right side of the list. It looks like
a DOS editor and is only useful for multi-line of list items. This will increase the width of
your list by one column. Make sure that you don't have anything immediately to the right
of the list or run out of screen space.
Bit 7 – Reserved. This is reserved for future options and should not be used. A future
porting of this library to GLCD may use this bit for inverting text on highlighted item.
You can use almost any combinations of the above options.
A few typical choices:
0 – Classic list with no features. This is used for simple static display of list or display
one item (maybe after the user chooses it) from a list instead of asking the user to choose
from the list.
1 – Classic list with arrow/dot indicator. This is used for simple display of list or display
of chosen list item. It renders the list with arrow/dot indicator for user to see which item
is highlighted. This is good enough as an interactive list. You may consider adding auto
scroll to handle long items.
9 – Classic list with arrow/dot indicator and auto scroll the highlighted item if it is too
long. This is used for simple display of list or display of chosen list item. It renders the
list with arrow/dot indicator for user to see which item is highlighted. This is good
enough as an interactive list. Everything else is cosmetic.
16 – Classic list with blinking box indicating the item highlighted.

24 – Above list with auto scroll of longer items.
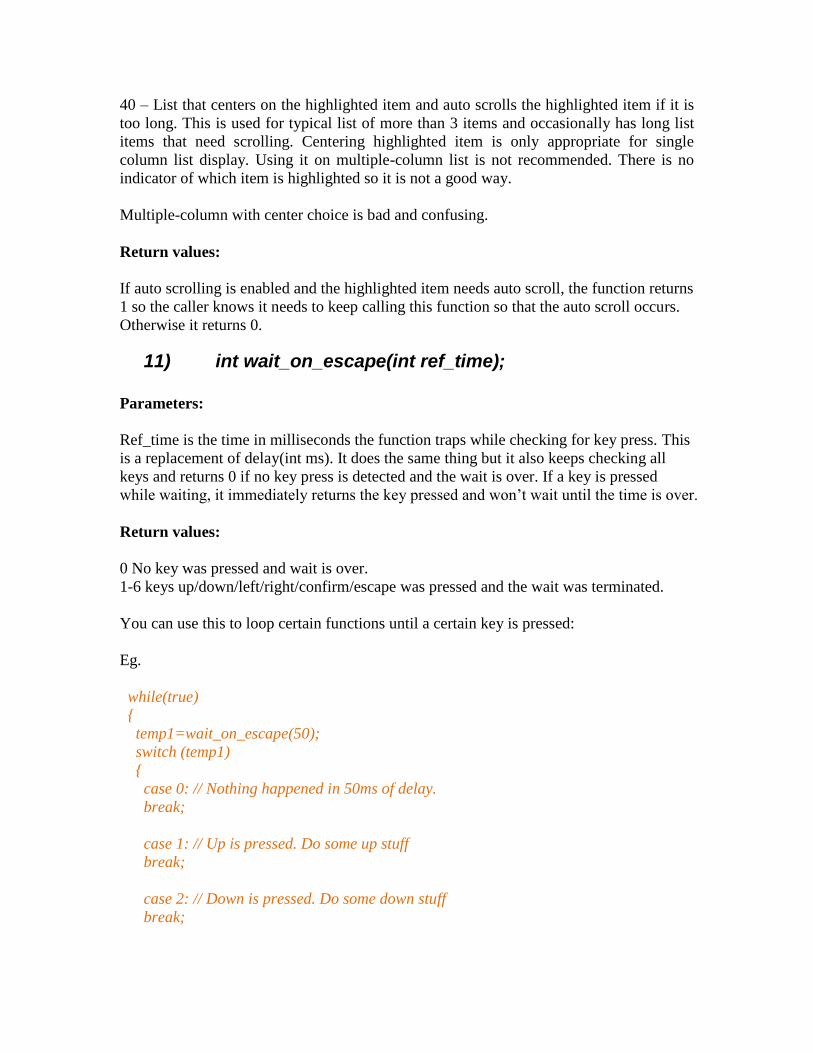
33 – List that centers around highlighted item with arrow/dot indicator. This is used for
typical list of more than 3 items. Centering highlighted item is only appropriate for single
column list display. Using it on multiple-column list is not recommended.
41 – List that centers on the highlighted item with arrow/dot indicator, and auto scrolls
the highlighted item if it is too long. This is used for typical list of more than 3 items and
occasionally has long list items that need scrolling. Centering highlighted item is only
appropriate for single column list display. Using it on multiple-column list is not
recommended.
56 – Classic list with blinking box indicating the item highlighted and center choice and
auto scroll long items.
73 – Classic list with auto scroll, scroll bar to the right, and arrow/dot option
80 – Classic list with scroll bar to the right and flashing cursor.
88 – Classic list with scroll bar to the right, auto scroll and flashing cursor.
105 – Classic list with center choice, auto scroll, scroll bar to the right, and arrow/dot
option
112 – Classic list with center choice, scroll bar to the right and flashing cursor.
120 – Classic list with center choice, auto scroll, scroll bar to the right and flashing cursor.
121 – Classic list with center choice, auto scroll, scroll bar to the right, with arrow/dot
option and flashing cursor.
OK combinations:
Auto scroll with flashing cursor makes the cursor flash
Bad combinations:
8 – Classic list with auto scroll the highlighted item if it is too long. This is used for
simple display of list or display of chosen list item. Since only long items scroll, it‟s not a
good way to indicate which item is highlighted by simply looking at which item is
scrolling, unless all items are long.
32 – List that centers around highlighted item. This is used for typical list of more than 3
items. Centering highlighted item is only appropriate for single column list display. Using
it on multiple-column list is not recommended. There is no indicator of which item is
highlighted so it is not a good way.
40 – List that centers on the highlighted item and auto scrolls the highlighted item if it is
too long. This is used for typical list of more than 3 items and occasionally has long list
items that need scrolling. Centering highlighted item is only appropriate for single
column list display. Using it on multiple-column list is not recommended. There is no
indicator of which item is highlighted so it is not a good way.
Multiple-column with center choice is bad and confusing.
Return values:
If auto scrolling is enabled and the highlighted item needs auto scroll, the function returns
1 so the caller knows it needs to keep calling this function so that the auto scroll occurs.
Otherwise it returns 0.
11) int wait_on_escape(int ref_time);
Parameters:
Ref_time is the time in milliseconds the function traps while checking for key press. This
is a replacement of delay(int ms). It does the same thing but it also keeps checking all
keys and returns 0 if no key press is detected and the wait is over. If a key is pressed
while waiting, it immediately returns the key pressed and won‟t wait until the time is over.
Return values:
0 No key was pressed and wait is over.
1-6 keys up/down/left/right/confirm/escape was pressed and the wait was terminated.
You can use this to loop certain functions until a certain key is pressed:
Eg.
while(true)
{
temp1=wait_on_escape(50);
switch (temp1)
{
case 0: // Nothing happened in 50ms of delay.
break;
case 1: // Up is pressed. Do some up stuff
break;
case 2: // Down is pressed. Do some down stuff
break;

case 3: // Left is pressed. Do some left stuff
break;
case 4: // Right is pressed. Do some right stuff
break;
case 5: // Enter is pressed. Do some enter stuff
break;
case 6: // Escape is pressed. Let’s just quit.
return;
break;
default:
break;
}
}
The above loop monitors the key press and responses to different key press with different
codes. It also escapes when escape is pressed.
12) int ok_dialog(char msg[]);
Parameters:
This renders an OK dialog. Primarily you want to show the user a message and the user
needs to press a key to continue. Otherwise the function keeps waiting. It doesn‟t actually
return a value. The return value type is there to be consistent with the YES/NO dialog
and any future dialog functions. The OK dialog just needs the char array that has the
message to show to the user. The message will be truncated if there is not enough space.
The dialog auto scales to occupy the entire display so you don‟t have to specify you have
a 20X4 display or 16*2 display. See fig. 6-2 below.
Eg. ok_dialog(“Death ray was engaged. Annihilation in progress...”);
(a)
(b)

Figure 6-2. OK dialog auto scales on 16X2 and 20X4 displays. (a) 16X2 display. (b)
20X4 display. Intended message was “Death ray was engaged. Annihilation in
progress...”. The text is automatically wrapped to occupy multiple lines. The message on
a 16X2 display is clipped the so that it could fit.
13) int yn_dialog(char msg[]);
Parameters:
This renders a YES/NO dialog so the user can choose YES or NO.
Return values:
1 for YES and 0 for NO so the program can decide what to do in case of YES and NO.
The dialog auto scales to occupy the entire display so you don‟t have to specify you have
a 20X4 display or 16*2 display. See fig. 6-3 below.
Eg. int choice=yn_dialog(“Engage death ray now?”);
(a)
(b)
Figure 6-3. YES/NO dialog auto scales on 16X2 and 20X4 displays. (a) 16X2 display. (b)
20X4 display. Intended message was “Engage death ray now?”. The text is automatically
wrapped to occupy multiple lines. The message will be clipped if it doesn‟t fit on a
smaller display.
14) int input_integer(phi_prompt_struct *para);
Parameters:
para->ptr.i_buffer=&input_buffer;
This stores the address of the integer variable intpu_buffer. The initial value of the input
panel is taken from this input_buffer. The returned value is also stored to this variable.
Notice the “&” is needed.
para->low.i=lower_limt;

para->high.i=upper_limit;
para->step.i=step_size;
These set up the allowed numbers and how much is increased if up is pressed. Right now
negative numbers are not supported. Use input_float() if you need negative numbers.
para->col=col;
para->row=row;
para->width=width;
These set up where to display the number and how many characters in width it occupies.
With such pin-point accuracy, you can compact something like “adjust date” on one
16X2 screen with multiple integer inputs and select lists in series:
Figure 6-4. Sample screen for “adjust date”.
para->option=option;
Option 0: space pad right; 1: zero pad left; 2: space pad left.
Actions:
It traps execution. It monitors the key pad input and changes the number as the user
interacts with the keypad. When the user makes the choice, it stores the number in the
input_buffer set up in the parameters and returns the key pressed so that the program can
decide what to do next.
Return values:
Left key was pressed (-3)
Right key was pressed (-4)
Enter was pressed (1)
Escape was pressed (-1)
You may use left and right key to programmatically navigate among different entries or
fields or treat them all as confirm except for -1.
15) int input_float(phi_prompt_struct *para);
Parameters:
para->ptr.i_buffer=&input_buffer;
This stores the address of the floating point variable intpu_buffer. The initial value of the
input panel is taken from this input_buffer. The returned value is also stored to this
variable. Notice the “&” is needed.
para->step.c_arr[0]=dig_after_decimal; // digits after decimal
para->step.c_arr[1]=dig_before_decimal; // digits before decimal
These set up the allowed number of digits after and before the decimal point. I have not
implemented steps, upper and lower limits on float input. If you need a generic number
entry that takes both positive and negative numbers with or without digits after the
decimal point, use this one instead of input_integer().
para->col=col;
para->row=row;
These set up where to display the number. How many characters in width it occupies is
derived from digits before and after decimal.
para->option=option;
Option 0: only positive numbers allowed, 1: only negative numbers allowed, 2: both
positive and negative numbers are allowed.
Actions:
It traps execution. It monitors the key pad input and changes the number as the user
interacts with the keypad. The user can move the cursor to any digit and change it and
move to any other digits. When the user makes the choice, it stores the number in the
input_buffer set up in the parameters and returns the key pressed so that the program can
decide what to do next.
Return values:
Left key was pressed (-3)
Right key was pressed (-4)
Enter was pressed (1)
Escape was pressed (-1)
You may use left and right key to programmatically navigate among different entries or
fields or treat them all as confirm except for -1.
16) int select_list(phi_prompt_struct *para);
If you want to present a list to the user to select (say day of the week or type of pasta), or
you want a menu, you can use select_list(). The options of this function is exactly the
same as the static list rendering program render_list(), except that it contains interactive
code that changes which list item is highlighted. All parameters are kept the same and
passed to render_list().

17) int input_panel(phi_prompt_struct *para);
Parameters:
para->ptr. ptr.msg =input_buffer;
This char array input_buffer is the buffer of the input panel. Its content will be printed out
as the default content. Make the initial value close enough to what you expect from the
user will save the user‟s time. The user input will be stored back to this array when done.
para->low.i=char_lower_limt;
para->high.i=char_upper_limit;
The above determines the range of valid input characters. You can assign „A‟ and „Z‟ to
the limits to restrict to A to Z or use „ „ and „~‟ to include every character as valid inputs.
There are cases where you only want say alphanumerical inputs for a password panel.
Then you use „A‟ and „Z‟ and enable 0-9 input in the option. If you just want numbers
then you can use „0‟ and „9‟. Notice that if the buffer initially has characters not allowed
by the rule, then those characters won‟t be allowed to change. This is nice to have. Say if
you want the user to enter a file name then you can have “AAAAAAAA.TXT” in the
buffer and only allow A to Z with 09 option. Then the dot in the file name won‟t be able
to change. You can also construct something like “800-244-1111” and only allow 0-9
input. Then the „-‟ won‟t be able to change and the user can change other digits to
complete their phone number entry.
para->width=panel_width
para->col=col;
para->row=row;
These set up the total length in characters of the input panel and where to display the
panel. You should not make this longer than the size of the screen. I have not
implemented any scroll input panel yet.
para->option=option;
Option 0, default, option 1 includes 0-9 as valid characters besides those indicated in
upper and lower limits.
Actions:
It traps execution. It monitors the key pad input and changes cursor position and each
character from keypad input. The user can move the cursor to any character and change it
and move to any other character. The content of the buffer is modified every time the
user changes any characters so if you want a backup, you should do so before passing the
buffer to the function. When the user makes the choice, it returns the key pressed so that
the program can decide what to do next.
Return values:
Left key was pressed (-3)

Right key was pressed (-4)
Enter was pressed (1)
Escape was pressed (-1)
You may use left and right key to programmatically navigate among different entries or
fields or treat them all as confirm except for -1.
18) int text_area(phi_prompt_struct *para);
Parameters:
para->ptr. ptr.msg =input_buffer;
This char array input_buffer has the content to be displayed in the text area, which is an
area that displays text with wrapping and scrolling on up/down keys and optional scroll
bar. Changing the content of the buffer is doable but not suggested as the alignment of
the text can be messed up. The purpose of this function is to show long texts such as
credits and instructions. A later revision has enabled “new line” with the „\n‟ character so
the text area will start a new line every time a „\n‟ is found. This greatly improves
readability and portability of your message across different-sized displays.
para->low.i=char_lower_limt;
para->high.i=char_upper_limit;
The above determines the range of the message to be displayed. Currently the upper limit
of the message is automatically set to the end of the char array.
para->col=col;
para->row=row;
These set up the total width in characters of the text area and the top left corner of the
area.
para->step.c_arr[0]=row;
para->step.c_arr[1]=col;
The above gives the size in columns and rows of the text area. If scroll bar is enabled in
the option, expect the text area to be one character wider than this width in columns.
para->option=option;
Option 0: display classic message; option 1: display message with scroll bar on right.
Actions:
It traps execution. It monitors the key pad input and changes message position with up
and down keys. When the user presses any of the (left/right/enter/escape) key, it returns
the key pressed so that the program can decide what to do next.

Return values:
Left key was pressed (-3)
Right key was pressed (-4)
Enter was pressed (1)
Escape was pressed (-1)
You may use left and right key to programmatically navigate among different entries or
fields or treat them all as confirm except for -1.
19) int text_area_P(phi_prompt_struct *para);
This has the same functionality except that the char array is stored in PROGMEM so that
the following parameter is different from the original version:
para->ptr. ptr.msg =input_buffer;
The input buffer is the array name of a PROGMEM prog_char array, where the message
is stored. This method is preferred over text_area() to preserve SRAM.
20) Customizing your list or menu
Since I included example codes for menus, you can load it to your Arduino and go
through the “set menu style” exercise to find your favorite menu style and copy it down.
A 20X4 display will take full advantage of the library‟s various rendering functions.
7. Future improvement
I would pounder on the following in the future:
Feedback from Arduino fans like you can help me a lot. Visit
http://liudr.wordpress.com and leave your feedback under Phi_prompt
I will consider a maximize function to easily set up a text area to occupy all LCD
space.
I will also consider implementing the update_function() to run every time the user
value is updated to make number entries into a real-time adjustment.
8. The legal stuff
The software is free to personal and educational uses only. If you intend to incorporate it
in your commercial product, Contact me at http://liudr.wordpress.com. The developer
assumes no responsibility for personal injuries or property damages if you use the library.