quick start - texthelp 3 2. toolbar read&write will appear at the top of your screen. you can...
TRANSCRIPT

Quick Start
April 2017

Free Professional training for
everyone via our Learning Portal
At Texthelp we’re famous for our innovative, high quality assistive software that
helps all kinds of learners communicate with more confidence.
Technology can be the spark for wonderful things. But its real value comes from
empowering users whenever and wherever they need help – in the workplace, at
school or at home. To get the most out of our products we offer in-person and
web based expert training tailored to the needs of individual users, small groups
and larger organisations.
You’ll find many short courses that bring together strategies and best practice
from leading educators. Each course comes complete with simple instructions,
videos, and great examples to help you become experts in our software. You
can gain achievements along the way.
https://training.texthelp.com/
Simply log in with your Google mail account.

Contents
1. Introduction ..................................................................................................................... 2
2. Toolbar .............................................................................................................................. 3
Exercise 1 Starting Read&Write .......................................................................................... 3
Positioning the toolbar ...................................................................................... 3
Exercise 2 Understanding the toolbar ............................................................................... 3
3. Speech ............................................................................................................................... 4
Exercise 1 Reading text in documents ............................................................................... 4
Exercise 2 Changing the voice ............................................................................................. 5
4. Read the Web ................................................................................................................... 6
Exercise 1 Reading webpages in Internet Explorer ......................................................... 6
Exercise 2 Reading webpages in Firefox ........................................................................... 6
Exercise 3 Reading webpages in Chrome ......................................................................... 6
5. Screenshot Reader .......................................................................................................... 7
Exercise 1 Using the Screenshot Reader ........................................................................... 7
6. Scan .................................................................................................................................... 8
Exercise 1 Performing a scan to Word .............................................................................. 8
Exercise 2 Scanning from a Smartphone .......................................................................... 8
7. Dictionary ....................................................................................................................... 10
Exercise 1 Using the Dictionary ........................................................................................ 10
8. Picture Dictionary ......................................................................................................... 12
Exercise 1 Using the Picture Dictionary ........................................................................... 12
9. Highlighters .................................................................................................................... 13
Exercise 1 Collecting text for your studies ...................................................................... 13
10. Vocabulary List .............................................................................................................. 15
Exercise 1 Creating a vocabulary list for your studies .................................................. 15
11. Spell Checker .................................................................................................................. 16
Exercise 1 Using the Spell Checker................................................................................... 16
12. Prediction ........................................................................................................................ 18
Exercise 1 Using Prediction................................................................................................ 18
1. Introduction This is a very quick introduction to using Read&Write for Windows. For further
information on using the software please refer to:
The Read&Write for Windows Training Guide
The Read&Write Help
The Read&Write videos
The “What else can you do” sections lists the various options that are in the
software. If any of these interest, you please see the video for that feature.

Page 3
2. Toolbar Read&Write will appear at the top of your screen. You can move the Read&Write
toolbar around the screen and position it where you wish.
Exercise 1 Starting Read&Write
1. Read&Write is set up to start as soon as you start your computer.
2. You will see the Show/Hide icon in the top right of your screen:
3. Click on the Show/Hide.
4. If you can’t see the Show/Hide you can start Read&Write from the Windows Start
menu.
The toolbar will open.
Positioning the toolbar
The toolbar is docked to the top of your screen but you can position the toolbar
anywhere on the screen. You can also dock it to side of the screen if you wish.
1. Click on the title bar of the toolbar and then drag and drop it onto any position on
your screen. This is how you move the toolbar.
2. Click on the title bar of the toolbar again and then drag and drop it the far right
side of your screen. The toolbar docks to the side of the screen.
3. Click on the title bar of the toolbar again and then drag and drop it onto the very
top of your screen. The toolbar is docked at the top of your screen. This is where
most people choose to keep the toolbar.
Exercise 2 Understanding the toolbar
1. Hover your mouse over the . You will see the tooltip ‘Play. Hover your mouse
over the . You will see the tooltip ‘Dictionary’. From now on, if you have
difficulty remembering what an icon does, hover your mouse over it to see the
tooltip.
2. Click on the , then Show more settings and then Show More. This will open
all the settings. From here you can change how the features work.
3. Click on the X to close the Settings.
What else can you do:
Change how the icons look.
Page 4
3. Speech Text-to-speech is one of the most important support features in Read&Write. Text can
be read as you type or from any document. It will read each word, sentence, paragraph
or selected text. There is a choice of different voices which can be adjusted to suit you
by altering the pitch, speed, and volume. You can choose the way text is displayed or
highlighted during speech.
By hearing your work read you will be able to identify mistakes in punctuation, spelling
and meaning. Having documents read to you will also increase your recognition of
words and understanding of the text.
Exercise 1 Reading text in documents
Open a Word document with some text in it or type the following text into a blank
Microsoft Word document:
A volcano tends to occur where tectonic plates meet. The earth is made up of
about 8 big tectonic plates. When volcanoes erupt they can throw out lava, ash
and gases. An example of a volcano is Mount Rinjani. This volcano is found on the
island of Lombok. It has a long history of eruptions and erupted in 1994 and more
recently in May 2010. Volcanoes can cause major destruction.
Note: It is recommended that you save this document as you will use it later in the
guide.
Remember to check that your sound is enabled!
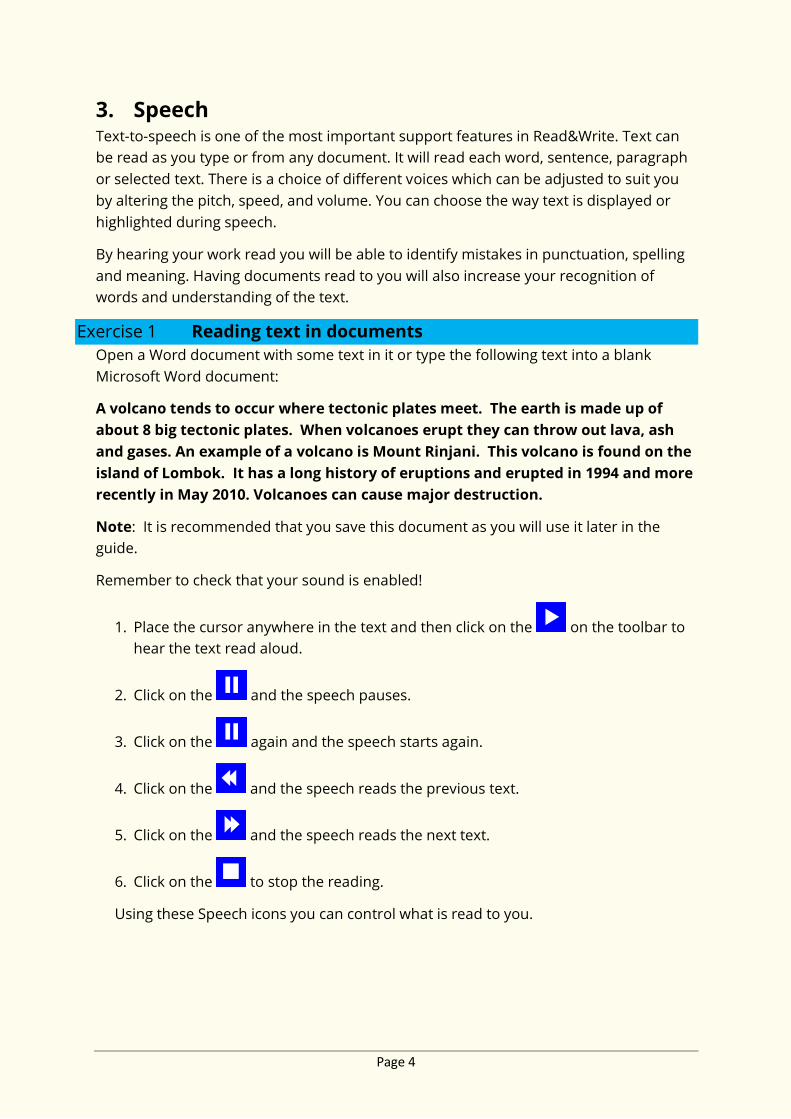
1. Place the cursor anywhere in the text and then click on the on the toolbar to
hear the text read aloud.
2. Click on the and the speech pauses.
3. Click on the again and the speech starts again.
4. Click on the and the speech reads the previous text.
5. Click on the and the speech reads the next text.
6. Click on the to stop the reading.
Using these Speech icons you can control what is read to you.

Page 5
Exercise 2 Changing the voice
If you are not happy with the voice that is used to read the text you can change it. To do
this:
1. Click on the , then Show more settings and then click on Speech.
You will see the Speech tab of the Settings window:
2. Select a different voice from the Voice drop down list.
3. Click on the Test voice button to hear the new voice read aloud. If you don’t like
the voice, select another.
4. You can change the Speed and Pitch of the voice if you need to by dragging and
dropping the Voice speed or Voice pitch track bars.
Notice that the Use arrow keys to change speed is switched on. This will allow
you to use the Up () and Down () keys on your keyboard to change the voice
speed when it is reading.
5. When you are happy with the voice close the Settings window.
Note: Other voices can be downloaded from the Read&Write Essentials website.
What else can you do:
Change how words are pronounced.
Have the text read as you type.
Have the software read buttons and menus.
Change how the text is highlighted.

Page 6
4. Read the Web You can have Read&Write read webpages in Internet Explorer, Firefox or Chrome.
Exercise 1 Reading webpages in Internet Explorer
1. Click on the and switch on the Read the web option.
2. Open a website e.g. www.texthelp.com.
3. Hover your mouse over an area of text until you see it highlighted. You will hear
the text read aloud.
4. Move your mouse to another area of text until you see it highlighted. You will
again hear the text read aloud. Read&Write will read aloud any of the text that is
under your mouse.
5. To turn the Read the web off click on the and switch off the Read the web
option.
Exercise 2 Reading webpages in Firefox
1. Open your Firefox browser.
2. Click on Yes when prompted to install the plug-in and restart Firefox.
3. After the plug-in has been installed follow Exercise 1 above.
Exercise 3 Reading webpages in Chrome
1. Open Google Chrome.
2. Click on Install Now when prompted to install.
3. Click on Add.
4. Restart Chrome.
5. After the extension has been installed follow Exercise 1 above.

Page 7
5. Screenshot Reader
In most cases simply using the or the Read the web option will enable the text in a
document or webpage to be read to you. However, there are some programs where
the text is inaccessible. For example: inaccessible Flash, locked PDF documents and text
in images. When you want to have text read in these applications you will need to use
the Screenshot Reader.
Exercise 1 Using the Screenshot Reader
In this exercise you will learn how to use the Screenshot Reader to read aloud text in
pictures.
Note: The Screenshot Reader can be used with inaccessible Flash and locked PDF
documents as well as pictures.
1. Open Google and search for “picture with text in it”.
2. Click on one of the pictures.
3. Click on the . Your cursor now looks like this +.
4. Click and hold your left mouse button on the top left-hand corner of the picture,
then drag and drop the rectangle to the bottom right-hand corner. After a
moment Read&Write reads the text aloud:
If you wish the text re-read click on the button that has appeared within the
picture.
5. Click on the to close the Screenshot Reader window.
What else can you do:
Screenshot to Microsoft Word
Change the Screenshot Reader options.

Page 8
6. Scan Read&Write allows you to scan any paper document into PDF, Word, HTML or ePub. Not
only can the scanning function be used with a scanner, but you can use it with a
smartphone or digital camera. For example, you could take a picture of a poster while
you are out, and then use Read&Write to read it aloud for you at home.
Note: To complete this section, you must ensure that you have set up your scanner
correctly and have two A4 coloured documents containing text and pictures.
Exercise 1 Performing a scan to Word
In this exercise you will learn how to scan a single page into PDF or Microsoft Word.
1. Place a page into your scanner.
2. Click on the .
3. You will see the Scan window. In the Make me a area select Word Doc:
4. Click on Scan.
5. Once the scan is complete click you will see the Save As window displayed.
6. Type My Scan to Word in the File Name field, find a location in which to save the
scan, and then click on the Save button.
You will see the scanned image displayed in Microsoft Word. This type of scan is
recommended if you want to edit the scanned document.
Exercise 2 Scanning from a Smartphone
In this exercise you will learn how to scan from a photo you have taken with your
Smartphone. This is useful if you don’t have access to a scanner.
1. Place an A4 page of paper containing text on your desk and take a photo of it.
2. Connect your phone to your computer using your USB cable.
3. Make sure you allow this device to access to your photos.

Page 9
4. Click on the .
5. When the Scan window appears select your phone:
5. Click on Scan.
6. The Which picture do you want to copy? window will appear:
7. Select the photo you have just taken and then click on the Get Picture button.
8. You will see the Save As window displayed.
9. Type My Picture Scan in the File Name field, find a location in which to save the
scan.
10. Click Save.
11. The image is scanned and saved where you wanted it.
When your document is displayed you can use the features in Read&Write to read aloud
the text in the way that you want.
What else can you do:
Scan to PDF, ePub or HTML
Scan multiple pages
Scan a file such as a PDF into Word
Change the settings for the Image Capture.
Change the Advanced settings for scanning.
Page 10
7. Dictionary Read&Write has a Dictionary to improve your word comprehension. It allows you to find
alternative suggestions for words and provides audible definitions and sample sentence
for each selected word.
By providing a dictionary with descriptions and sample sentences that can be read to
aid understanding, Read&Write provides the means to increase vocabulary and
understanding.
Type the following text onto a new line in your document:
The earth revolves around the sun.
Exercise 1 Using the Dictionary
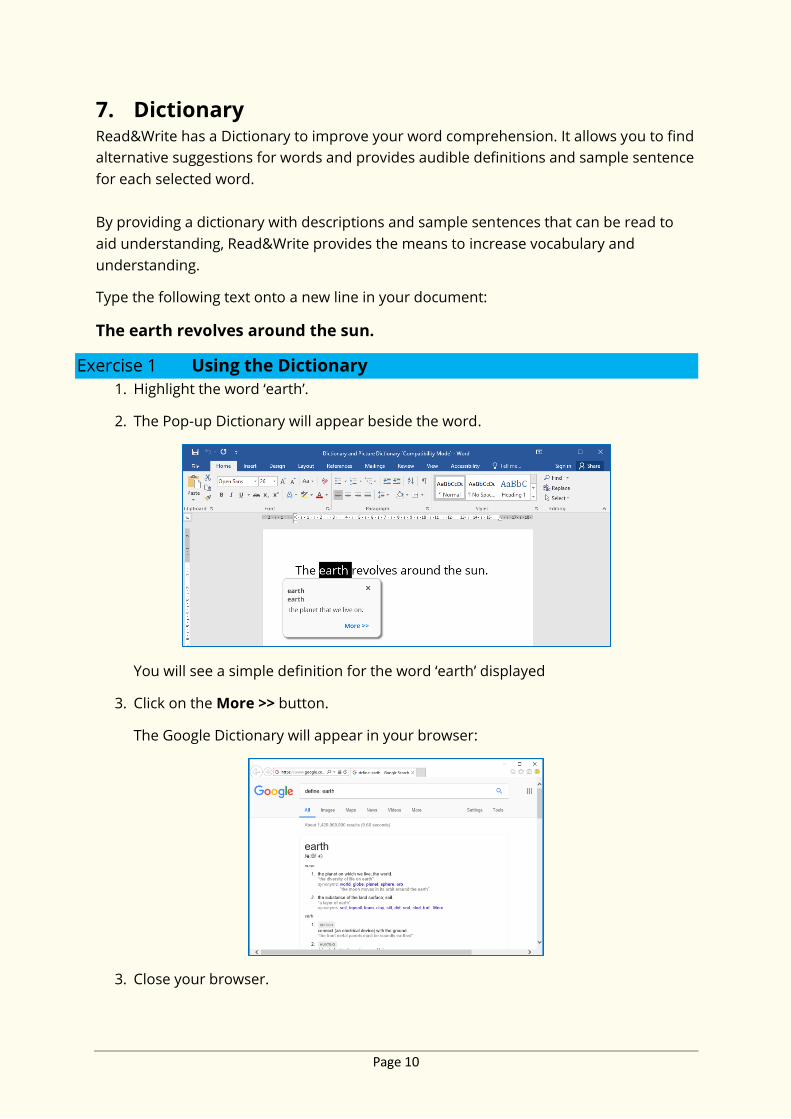
1. Highlight the word ‘earth’.
2. The Pop-up Dictionary will appear beside the word.
You will see a simple definition for the word ‘earth’ displayed
3. Click on the More >> button.
The Google Dictionary will appear in your browser:
3. Close your browser.
Page 11
4. Click on the to close the Pop-up Dictionary.
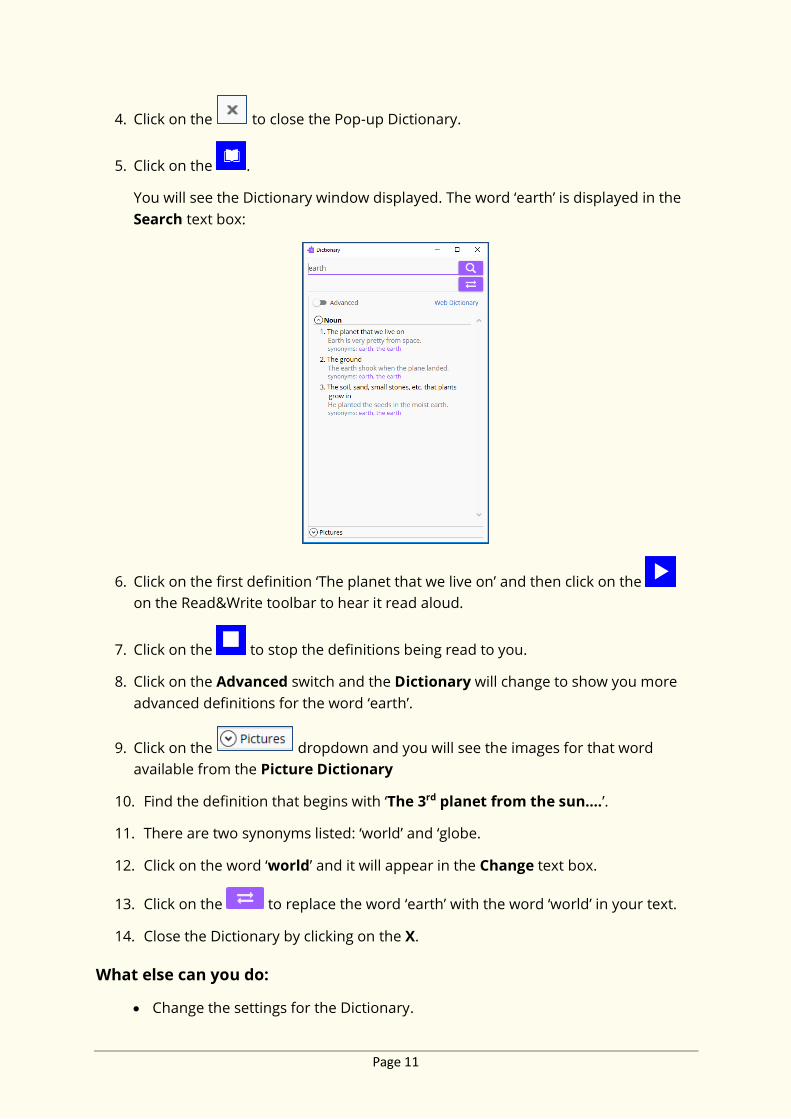
5. Click on the .
You will see the Dictionary window displayed. The word ‘earth’ is displayed in the
Search text box:
6. Click on the first definition ‘The planet that we live on’ and then click on the
on the Read&Write toolbar to hear it read aloud.
7. Click on the to stop the definitions being read to you.
8. Click on the Advanced switch and the Dictionary will change to show you more
advanced definitions for the word ‘earth’.
9. Click on the dropdown and you will see the images for that word
available from the Picture Dictionary
10. Find the definition that begins with ‘The 3rd planet from the sun….’.
11. There are two synonyms listed: ‘world’ and ‘globe.
12. Click on the word ‘world’ and it will appear in the Change text box.
13. Click on the to replace the word ‘earth’ with the word ‘world’ in your text.
14. Close the Dictionary by clicking on the X.
What else can you do:
Change the settings for the Dictionary.

Page 12
8. Picture Dictionary Read&Write has a Picture Dictionary to improve your word comprehension. It shows
you images for any word you select.
Note: You must be online in order to use the Picture Dictionary.
Exercise 1 Using the Picture Dictionary
1. Click on the . Highlight the word ‘world’.
You will see the Picture Dictionary window displayed:
2. Highlight the word ‘revolve’ in your document.
The Picture Dictionary window displays a picture representing the word revolve.
3. Click on the ‘revolve’ hyperlink. This will open the Dictionary.
4. Close the Dictionary.
Note: You can highlight words in any of the Read&Write facilities to display pictures
in the Picture Dictionary window.
5. Click on the button on the top right-hand corner of the Picture Dictionary
window to close it.
Page 13
9. Highlighters Often when reading notes, books or journals we use coloured markers to highlight
pieces of text, which are of particular relevance to the subject we are studying. With the
Highlighters in Read&Write this same ability is brought to the computer.
You can use Highlighters to highlight text in Microsoft Word, Internet Explorer, Firefox
and Chrome using different colours. You can then collect the highlighted text and insert
it into a new document.
This is particularly useful when you have a large piece of text with multiple themes or
categories that are important. You can give each category a different colour and collate
each colour’s information later.
Exercise 1 Collecting text for your studies
In this exercise you will learn how to collect different types of text and then insert them
into a new document in the order in which you want them displayed.
1. Open your Internet browser window and then open one of your favourite
websites.
Alternatively, open a Microsoft Word document of your choice.
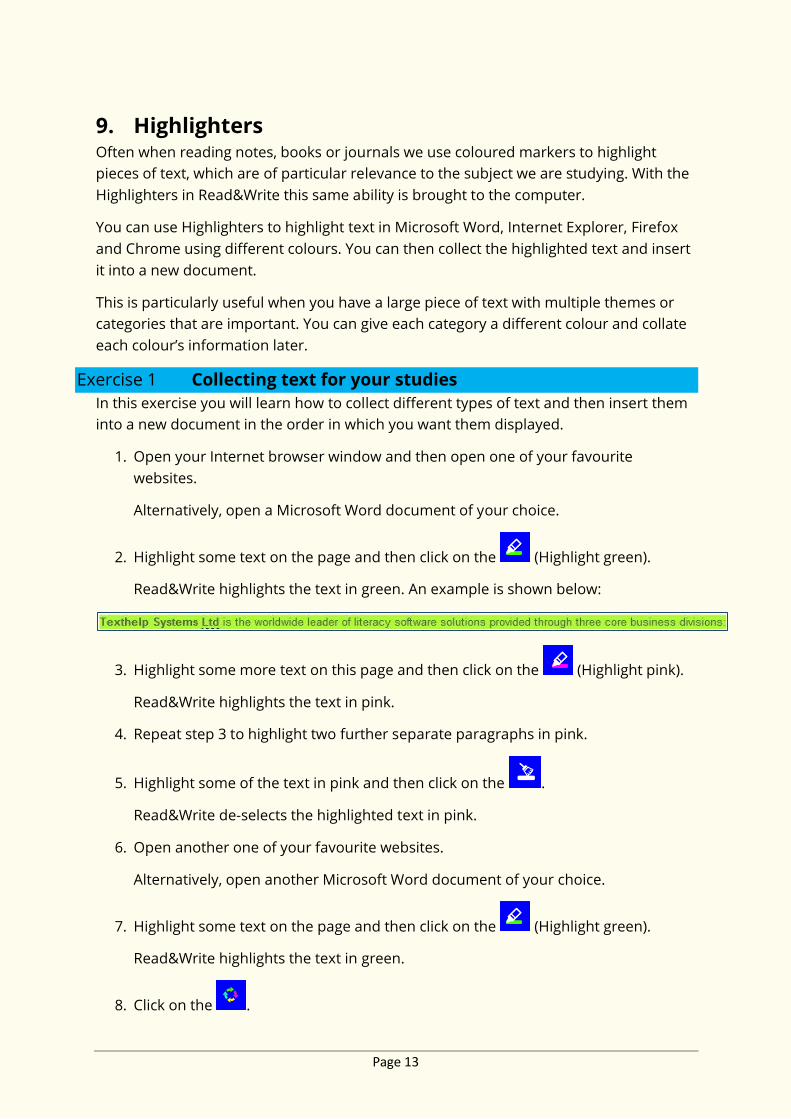
2. Highlight some text on the page and then click on the (Highlight green).
Read&Write highlights the text in green. An example is shown below:
3. Highlight some more text on this page and then click on the (Highlight pink).
Read&Write highlights the text in pink.
4. Repeat step 3 to highlight two further separate paragraphs in pink.
5. Highlight some of the text in pink and then click on the .
Read&Write de-selects the highlighted text in pink.
6. Open another one of your favourite websites.
Alternatively, open another Microsoft Word document of your choice.
7. Highlight some text on the page and then click on the (Highlight green).
Read&Write highlights the text in green.
8. Click on the .

Page 14
9. Read&Write collects the highlighted text from both of the webpages (or Word
documents) and inserts it into a new Microsoft Word document. It also inserts a
bibliography at the bottom of the page.
What else can you do:
Change the settings for the Highlighters.

Page 15
10. Vocabulary List You can use Vocabulary List feature to highlight words in Microsoft Word and in Internet
Explorer using different colours. You can then collect the highlighted words and insert it
into a new document with the Dictionary definitions and Picture Dictionary definitions.
Exercise 1 Creating a vocabulary list for your studies
1. Open your Internet browser window and then a website of your choice.
Alternatively, open a Microsoft Word document of your choice.
2. Highlight a word on the page and then click on the (Highlight green). Repeat
this step until you have several words highlighted.
Note: You can use any highlighter with the Vocabulary List.
3. Click on the on the toolbar.
4. Your Vocabulary List is displayed in Microsoft Word, complete with definitions
and explanatory images. It will look something like this:
Your selected words are listed in the Word column. There is the definition for the
words in the Definition column and an image for the word in the Picture column.
5. In the Notes column you can add your own text.
6. Close the Word document and save it if you wish.
What else can you do:
Change the settings for the Vocabulary List.

Page 16
11. Spell Checker Read&Write has an advanced Spell Checker to analyse and correct even the most
complex spelling mistakes. You can choose to spell check as you type or check your
completed work. Any spelling mistake will be identified and the Spellchecker window
will provide a list of suggested corrections.
The Spell Checker allows you to work independently and increase the accuracy of your
work
Type the following text into a blank Microsoft Word document:
Note: There are deliberate spelling mistakes in the text that you must enter letter for
letter. They are underlined. You do not need to underline these spelling mistakes in
your document.
A volcaneo tends to occur where tectronic plates meet. The earth is made
up of about 8 big tectronic plates. When volcanoes erupt they can throw
out lava, ash and gases. An example of a volcano is Mount Rinjani. This
volcano is found on the iland of Lombok. It has a long history of eraptions
and erupted in 1994 and more recently in May 2010.
Exercise 1 Using the Spell Checker
1. Click on the on the toolbar. You will see the Spell Check window displayed:
The first mis-spelt word in your document is highlighted in red.
2. Hover your mouse over the word ‘Vulcan’. It will be read for you.
3. Hover your mouse over the word ‘volcano’ and this will be read for you.
Note: If you still aren’t sure which word to use to correct the spelling mistake you
can always open the Dictionary and select the suggestion to get a definition.

Page 17
4. You can use the following buttons to correct your spellings:
Change button – select a word from the list of suggested corrections and then
click on this button to change the spelling mistake to the selected word. Use
this to correct ‘volcaneo’ to ‘volcano’.
Change all button – select a word from the list of suggested corrections and
then click on this button to change all instances of the volcano throughout your
document. Use this to correct ‘tectronic’ to ‘tectonic’.
Ignore button – select this button when the Spell Check comes to the word
‘Rinjani’. This is the correct spelling but as it doesn’t appear in the Dictionary it
has been flagged as a possible spelling mistake.
Correct the rest of the document.
The Spell Check window closes as soon as it is complete and a panel will appear
saying that Spell check is completed.
What else can you do:
Change how the Spell Check window behaves.
Change the vocabulary that the Spell Check uses.
Page 18
12. Prediction Prediction can help you finish sentences. As you type, a list of suggestions will appear in
the Prediction Panel. Prediction learns your style of writing and will predict words even
if you start to spell the word incorrectly.
Prediction will allow you to produce high quality work and reduce the time it takes to do
so.
Exercise 1 Using Prediction
In this exercise you will learn how to use Prediction to help you finish sentences. It will
access a list of words that will complete the one that you are currently typing and will
also try to predict your next word as you finish typing a word.
1. Open a new blank document in Microsoft Word and then click on the on the
toolbar to display the Prediction window.
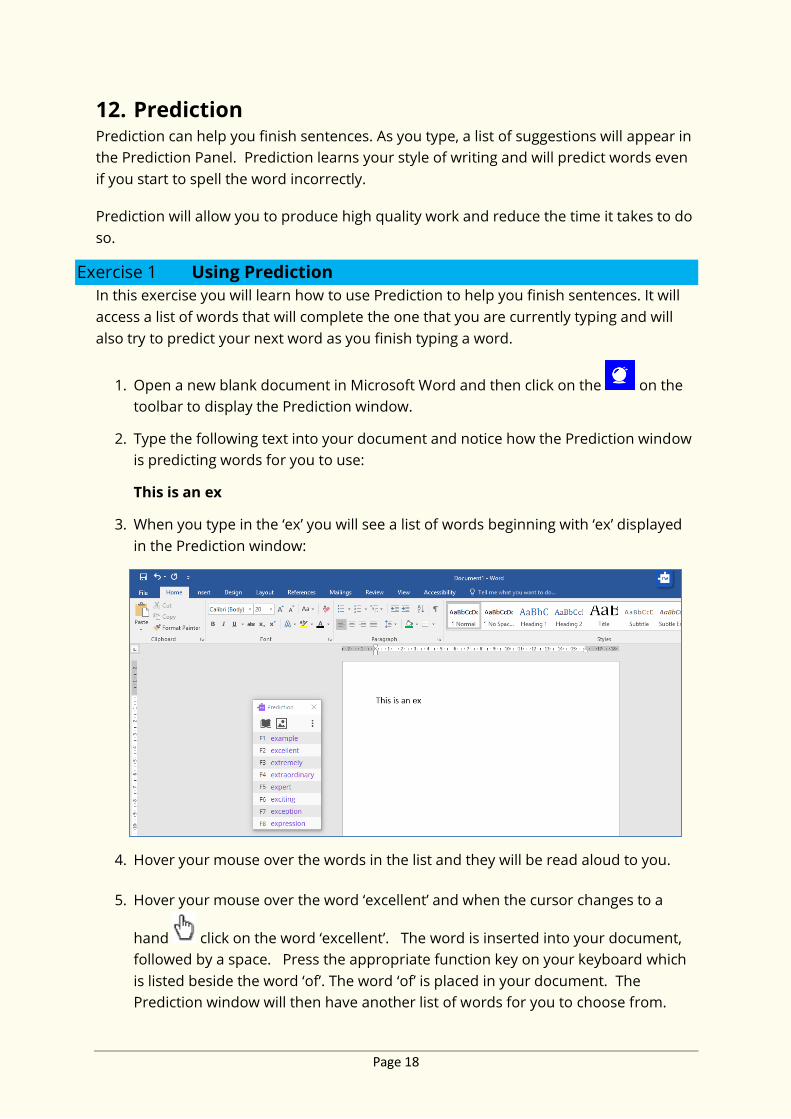
2. Type the following text into your document and notice how the Prediction window
is predicting words for you to use:
This is an ex
3. When you type in the ‘ex’ you will see a list of words beginning with ‘ex’ displayed
in the Prediction window:
4. Hover your mouse over the words in the list and they will be read aloud to you.
5. Hover your mouse over the word ‘excellent’ and when the cursor changes to a
hand click on the word ‘excellent’. The word is inserted into your document,
followed by a space. Press the appropriate function key on your keyboard which
is listed beside the word ‘of’. The word ‘of’ is placed in your document. The
Prediction window will then have another list of words for you to choose from.

Page 19
6. If you are unsure what a word means. Click on the button in the Prediction
panel.
7. You will see the Dictionary displayed. Something like this:
8. Click on the line that the word appears on to see the definition for that word.
Note: Make sure you don’t click on the word when the appears otherwise the
word will go into your document rather than be looked up in the Dictionary.
9. You can read the definition in the Dictionary and decide if it is the word you are
looking for. Click on the button on the top right-hand corner of the Dictionary
window to close it.
10. Use Prediction to write a few sentences and watch how Prediction provides the
type of vocabulary you are likely to want to type.
11. Close Prediction by clicking on the .
What else can you do:
Create your own Word Bank to be used by Prediction.
Download more words to use with Prediction.
Change how the Prediction window looks and acts.
Have the suggested words read for you.
Altering how Prediction learns new words.
