owner’s manual cp-500 - home - classé audio€™s manual cp-500 preamplifier 2 notice all of us...
TRANSCRIPT

Owner’s ManualCP-500
Preamplifier

2
NOTICE
All of us at Classé take extreme care to ensure that your purchase will remain a prized investment. We are proud to inform you that all Classé components have been officially approved for the European Community (CE) mark.
This means that your Classé product was subjected to the most rigorous manufacturing and safety tests in the world. The CE mark certifies that your purchase meets or exceeds all European Community requirements for unit-to-unit consistency and consumer safety.
This equipment has been tested and found to comply with the limits for a Class B digital device, pursuant to Part 15 of the FCC Rules. These limits are designed to provide reasonable protection against harmful interference in a residential installation. This equipment gener-ates, uses and can radiate radio frequency energy and, if not installed and used in accordance with the instructions, may cause harmful interference to radio communications. However, there is no guarantee that interference will not occur in a particular installation. If this equipment does cause interference to radio or television reception, which can be determined by turning the equipment on and off, the user is encouraged to try to correct the interference by one or more of the following measures:
• Reorientorrelocatethereceivingantenna;• Increasetheseparationbetweentheequipmentandthereceiver;• Connecttheequipmentintoanoutletonacircuitdifferentfromthattowhichthereceiverisconnected;• Consultthedealeroranexperiencedradio/TVtechnicianforhelp.
CAUTION:Changesormodificationstothisequipmentnotexpresslyapprovedbythemanufacturercouldvoidtheuser’sauthoritytooperate the equipment.
This product incorporates copyright protection technology that is protected by U.S. patents ad other intellectual property rights. Use of this copyright protection technology must be authorized by Macrovision, and is intended for home and other limited viewing uses otherwise authorized by Macrovision. Reverse engineering or disassembly is prohibited.
The information contained in the manual is subject to change without notice. The most current version of this manual will be posted on ourwebsiteathttp://www.classeaudio.com.
CAUTIONRISK OF ELECTRIC SHOCK
DO NOT OPEN
CAUTION: TO REDUCE THE RISK OF ELECTRICAL SHOCK, DO NOT REMOVE COVER. NO USER-SERVICEABLE PARTS INSIDE. REFER SERVICING TO QUALIFIED PERSONNEL.
WARNING: TO REDUCE THE RISK OF FIRE OR ELECTRIC SHOCK, DO NOT EXPOSE THIS APPLIANCE TO RAIN OR MOISTURE.
Marking by the “CE” symbol (shown left) indicates compliance of this device with the EMC (ElectromagneticCompatibility)andLVD(LowVoltageDirective)standardsoftheEuropeanCommunity.
Classé products are designed to comply with international directives on the Restriction of Hazardous Substances (RoHS) in electrical and electronic equipment and the disposal of Waste Electrical and Electronic Equipment (WEEE). The crossed wheelie bin symbol indicates compliance and that the products must be appropriately recycled or processed in accordance with these directives.
Thisdevicecomplieswithpart15oftheFCCRules.Operationissubjecttothefollowingtwoconditions:(1)Thisdevicemaynotcauseharmful interference, and (2) This device must accept any interference received, including interference that may cause undesired operation.

3
Important Safety Instructions
1. Read these instructions.
2. Keep these instructions.
3. Heed all warnings.
4. Follow all instructions.
5. Donotusethisapparatusnearwater.
6. Clean only with dry cloth.
7. Donotblockanyventilationopenings.Installinaccordancewiththemanufacturer’sinstructions.
8. Donotinstallnearanyheatsourcessuchasradiators,heatregisters,stoves,orotherapparatus(includingamplifiers) that produce heat.
9. Donotdefeatthesafetypurposeofthepolarizedorgrounding-typeplug.Apolarizedplughastwobladeswith one wider than the other. A grounding type plug has two blades and a third grounding prong. The wide blade or the third prong are provided for your safety. If the provided plug does not fit into your outlet, consult an electrician for replacement of the obsolete outlet.
10. Protect the power cord from being walked on or pinched particularly at plugs, convenience receptacles, and the point where they exit from the apparatus.
11. Onlyuseattachments/accessoriesspecifiedbythemanufacturer.
12. Use only with the cart, stand, tripod, bracket, or table specified by the manufacturer,orsoldwiththeapparatus.Whenacartisused,usecautionwhenmovingthecart/apparatus combination to avoid injury from tip-over.
13. Unplug this apparatus during lightning storms or when unused for long periods of time.
14. Refer all servicing to qualified service personnel. Servicing is required when the apparatus has been damaged in any way, such as power-supply cord or plug is damaged, liquid has been spilled or objects have fallen into the apparatus, the apparatus has been exposed to rain or moisture, does not operate normally, or has been dropped.
15. Donotexposethisapparatustodrippingorsplashingandensurethatnoobjectsfilledwithliquids,suchasvases, are placed on the apparatus.
16. TocompletelydisconnectthisapparatusfromtheACMains,disconnectthepowersupplycordplugfromthe AC receptacle.
17. The mains plug of the power supply cord shall remain readily operable.
18. Donotexposebatteriestoexcessiveheatsuchassunshine,fireorthelike.
The lightning flash with arrowhead symbol within an equilateral triangle is intended to alert the user tothepresenceofuninsulated“dangerousvoltage“withintheproduct’senclosurethatmaybeofsufficient magnitude to constitute a risk of electric shock to persons.
The exclamation point within an equilateral triangle is intended to alert the user to the presence of important operating and maintenance (servicing) instructions in the literature accompanying the product.
WARNING:Toreducetheriskoffireorelectricshock,donotexposethisapparatustorainormoisture.

4
Contents
Welcome to the Classé family ..........................................................................6a word about installation .......................................................................... 6
Unpacking and Placement ...............................................................................7unpacking your preamplifier .................................................................... 7placement ................................................................................................ 7ventilation ................................................................................................ 7custom installations .................................................................................. 7operating voltage ..................................................................................... 8warm up/break-in period .......................................................................... 9please read this manual… ........................................................................ 9
Special Design Features .................................................................................10flexible graphicaluser interface ............................................................... 10customizable volume control ................................................................. 10highly refined circuit design ................................................................... 10extensive listening tests ...........................................................................11extraordinary longevity ...........................................................................11
Front Panel ....................................................................................................12Rear Panel .....................................................................................................15
optional phono preamp ................................................................... 15The Remote Control .......................................................................................20The Menu System ..........................................................................................22
operational menu ................................................................................... 22input selection ................................................................................. 22tape loop ......................................................................................... 22
main menu system ................................................................................ 23system setup ........................................................................................... 23
Volume Set Up ................................................................................ 24rotary ............................................................................................... 24max volume ..................................................................................... 26startup volume ................................................................................. 26mute setup ....................................................................................... 27input ................................................................................................ 27phono gain ...................................................................................... 29triggers ............................................................................................ 29
teach IR .................................................................................................. 29display setup .......................................................................................... 30
brightness ........................................................................................ 30timeout ............................................................................................ 30language .......................................................................................... 31colors .............................................................................................. 31volume ............................................................................................ 31
main balance ......................................................................................... 31remote Fkeys .......................................................................................... 32
cautionary note on Fkey use ............................................................ 32
5
status ...................................................................................................... 32version info ...................................................................................... 33sensors ............................................................................................. 33
CAN-Bus ................................................................................................ 33features .......................................................................................... 33hardware setup .............................................................................. 33using CAN-Bus ................................................................................ 34
CAN-Bus shared features ....................................................................... 35configuration ................................................................................... 35operate ............................................................................................ 35AC status ......................................................................................... 35status ............................................................................................... 35name ............................................................................................... 36global brightness .............................................................................. 36global standby ................................................................................. 36
CAN-Bus model specific features ........................................................... 36PlayLink ........................................................................................... 36amp info .......................................................................................... 37event log .......................................................................................... 37
Troubleshooting .............................................................................................38Care and Maintenance ...................................................................................41
cleaning the cabinet ............................................................................... 41cleaning theLCD touchscreen ................................................................ 41installing theremote control batteries ...................................................... 41
Specifications ................................................................................................42Dimensions ...................................................................................................43

6
Welcome to the Classé family
Congratulations on your purchase of a Classé product. It is the result of many years of continuous refinement, and we are sure that you will enjoy it for many years to come.
Classé values the relationships with our customers and intend on supplying the highest level of support along with our product. Registering your product will allow us to keep in touch and will ensure that you are notified regarding any future updates or options which become available. Furthermore, in the unlikely event that your product needs service support, a product that is already registereddoesn’tneedyouroriginalsalesslipforproofofwarranty.
You can register online at www.classeaudio.com or complete and mail the registration card located in the separate warranty booklet.
Please take a few moments now to register your new Classé Product and record your serial number here for future reference.
Serial #: _______________________________________________________
a word about installation Every effort has been made to make the Classé CP-500 simple and straightforward to install and use.
Still, we have no way to evaluate many other variables such as the size and shape of your room, its acoustics, and the associated equipment you have chosen to use with your preamplifier. All of these factors influence the ultimate performance of your system.
For this reason, we strongly encourage you to have your system installed and calibrated by your dealer, whose experience, training, and specialized equipment can make a profound difference in the final performance of the system.

7
Unpacking and Placement
unpacking your preamplifier
Carefully unpack your preamplifier according to the supplied instructions, and remove all accessories from the carton.
Important! Keep all packing materials for future transport of your Classé product. Shipping your new component in anything other than its purpose-designed packing material may result in damage that is not covered by the warranty.
placement As with any preamplifier, it is best to place the CP-500 centrally within your system, since it is the hub to which all other components are connected. It should also be located at a convenient height for both visibility and use, since you generally interact with your preamplifier more than any other component (changing inputs, adjusting volume, etc.).
Note that adequate clearance for the AC cord and connecting cables must be left behind the CP-500. We suggest leaving eight inches (20 cm) of free space behind your preamplifier to allow all cables sufficient room to bend without crimping or undue strain.
Classé recommends that the unit not be placed directly on the top surface of a power amplifier (or any other heat source).
ventilation Your Classé preamplifier generates a certain amount of heat in the course of normal operation. Be sure to allow three inches of clearance above it and three inches to each side to allow heat dissipation through air circulation. Avoid placement on soft surfaces that would restrict airflow (such as plush carpeting).
custom installations Drawingsareincludedinthismanualtofacilitatespecialinstallationsandcustom cabinetry (see the section Dimensions). An optional, purpose-designed rack mount kit is available for this product. Contact your Classé dealer for more information.

8
operating voltage TheCP-500preamplifierissetatthefactoryfor100V,120V,220V,230V,or240VACmainsoperation,asappropriateforthecountryinwhichitistobesold (230V only in European Union countries, in compliance with CE regulations). The voltage setting may not be changed by the user.
Make sure that the label on the rear panel of your preamplifier indicates the correct AC operating voltage for your location. Attempting to operate your preamplifier at an incorrect voltage may damage the unit.
Warning: The voltage setting of your power amplifier may not be changed by the user. There are no user-serviceable parts within the unit. Please refer any problems to an authorized Classé service center.
If the AC mains voltage indicated on your preamplifier is incorrect, please contact your local, authorized Classé dealer or distributor.
The CP-500 can easily be powered by a normal 15-ampere AC mains line. If other devices are also powered from the same AC line, their additional power consumption should be taken into account.
The CP-500 includes protection circuitry that will prevent the preamplifier from operating at dangerously high or low voltages.
• At startup: the AC mains voltage must be within a range of approximately -15% to +10% of its nominal value at startup, orthepreamplifierwillnotturnon.Forexample,a120VunitrequirestheACmainstobebetweenapproximately95V–135Vinorder to turn on.
• Over-voltage during operation: if the AC mains voltage surges by roughly 10% or more during operation, the preamplifier will enter protection mode and shut down. The Standby LED will flash to indicate the protection mode has been engaged.
• Under-voltage during operation: if the AC mains voltage sags by 15% or more, the preamplifier will continue to play (since this does not present a particular danger to the unit), but note that it may not be able to achieve its usual standard of performance under these compromised conditions. The Standby LED will flash to indicate the condition.

9
warm up/break-in period Your new Classé power preamplifier will deliver outstanding performance immediately. However, you should expect to hear it improve somewhat as it reaches its normal operating temperatures and its various components “break-in.” It has been our experience that the greatest changes occur within the first 300 hours, as the preamplifier reaches thermal equilibrium and the capacitors fully form. After this initial break-in period, the performance of your new product should remain quite consistent for years to come.
The only exception to this rule is if the unit is unplugged for an extended period oftime,allowingittocooldown.Dependingonthedegreeofcoolinginvolved,youshouldexpectabriefwarm-upperiodbeforethepreamplifier’ssoundqualityis at its best. Unless your preamplifier was allowed to become quite chilled, subsequent thermal re-stabilization should not take long. Fortunately, you should never have to repeat the initial 300 hour break-in period.
please read this manual… Please take a few minutes to review this manual, and to familiarize yourself with your new preamplifier. We understand that you are anxious to plug everything in and get started. However, reading this manual and following the advice it gives will ensure that you get all the benefits you deserve from having purchased such a fine piece of equipment .

10
Special Design Features
flexible graphical user interface
TheLCDtouchscreenonthefrontpanelofyournewcomponentsupportsanextremelyflexibleandversatilegraphicaluserinterface(GUI)whilemaintaininga clean, uncluttered appearance. The CP-500 provides a range of controls that might otherwise require dozens of buttons and knobs on the front panel. Despitethispowerandflexibility,itremainssimpletooperateinday-to-dayuse.
In fact, in some ways it is even simpler to operate than a more conventional design might be. For example, if you are not using one or more of the inputs on your CP-500, you can delete the unnecessary buttons from the operational menu.Doingsopreventsanyonefromtryingtoselectanon-existentsourcecomponent, with the resulting confusion stemming from the lack of any sound. (Of course, you can easily restore the button if you subsequently add another source component and need that input.)
customizable volume control
The volume control on your new Classé preamplifier is controlled by sophisticated software that allows you to fine-tune its response to suit your preferences.
Ideally, a volume control would allow you to reach the volume you desire quickly, and would also provide extremely fine control once you are close to the “perfect”volume.Ofcourse,thesecharacteristicsareinconflictwitheachother:one requires the volume to change by quite a lot for a given amount of turning of the knob, while the other requires small, incremental changes for the same turn of the knob.
The volume control system on your CP-500 solves this problem by responding differently based on the specific circumstances (e.g. how quickly you are turning the knob and where in the volume range you are). After extensive testing, we feel we have created factory default settings that most people will find intuitive and a real pleasure to use. However, if you feel you would like to fine-tune its performance further in order to suit your particular preference, you may easily do so.
highly refined circuit design
All Classé analog amplification stages are based on circuits that have been extensively optimized over many years of continuous development.
By starting with excellent circuit designs and working with them over the years, we are able to discover the many small refinements that add up to superlative performance, in a variety of applications. Altering a voltage here, or using a slightly different part there, may make all the difference between solid and absolutely outstanding performance.
This level of refinement only comes with a great deal of experience, and is not available to those who flit from one trendy notion to the next. It accounts in no small measure for both the consistency of sonic performance among Classé products (as they are all based on similar analog gain stages), and for the consistently excellent reviews these products receive from owners and reviewers alike.

11
extensive listening tests Excellent measured performance is to be expected in world-class products, and Classé products deliver that performance. However, experience has shown that technical excellence alone is insufficient to guarantee subjectively musical results.
For this reason, all Classé products are laboriously fine-tuned during the developmentprocessbycarefullycontrolledlisteningtests.Ourearsarestillsome of the finest laboratory test instruments available, and nicely complement more traditional engineering test equipment. In the course of optimizing the circuitry for a product, hundreds of decisions are made based on the subjective impression given by substituting one high quality part for another.
As an example, we may listen to half a dozen 0.1% tolerance film resistor components of the same value, from several different companies. Standard tests may show them all to provide identical results in terms of noise, distortion, and so forth. Yet, almost invariably, one selection yields some small improvement in the subjective reaction to the performance of the product under development. Less often, even a single such change can result in a surprisingly large improvement.
Multiply those various improvements by the dozens or even hundreds of such decisions that must be made before the product can be finalized for production, andyouhavearemarkableimprovement,indeed–allbasedoncarefullisteningtests, which we view as a necessary complement to the solid engineering you might rightly expect from Classé.
extraordinary longevity Another benefit of having worked with highly refined circuit designs so extensively over many years is that we have vast experience in what works well over the long term.
By using only the highest quality parts to begin with, and then using them in an informed way as a result of both accelerated aging experiments and actual long-term experience, we are able to design and manufacture products which we are confident will stand the test of time.
We are confident that your new Classé preamplifier will give you many years of trouble-free reliability and musical enjoyment, just as previous Classé products have given their owners.

12
Front Panel
1 Standby button & LED indicatorThe front panel Standby button will toggle the preamplifier between operate, its fully operational state, and a standby mode that leaves the preamplifier off, yet ready to respond to system commands via any of the supportedcontroloptions(e.g.IRinput,DCtrigger,CAN-Bus,or RS-232).
The current state of the preamplifier is indicated by the LED indicator in the center of the standby button. When the unit is powered and switched on,thestateofthisLEDindicatesthefollowing:
• on = standby• flashing(on power-up) = initialization• off = operate• on(dim) = display timeout• flashing(after power-up) = AC mains voltage out of range
If you are planning not to use the preamplifier for an extended period of time, e.g. vacation or other travel, we suggest you disconnect it from the AC mains. Please be certain that the preamplifier is turned off prior to disconnecting it from the AC mains.
Also, it is a good practice to physically disconnect any and all valuable electronics from the AC mains during electrical storms, as a lightning strike anywhere near your home can put a tremendous surge on the AC mains that can damage any piece of electronic equipment, no matter how well designed and protected. The best protection in the case of severe electrical storms is simply to remove the electronics from any connection with the power grid.

13
2 Menu buttonPressing the front panel Menu button will call up the main menu system, replacingthenormaloperationalmenuandstatusdisplayintheLCDtouchscreen.
3 LCD touchscreenMuch of your interaction with the CP-500 will be via the LCD touchscreen(andtheCP-500’ssuppliedremotecontrol).Itwillusuallydisplay the various input selection buttons you would use in day-to-day operation, along with access to the tape button.
By pressing the Menu button, you can also call up the menu system of the CP-500, which gives you control over many of the operational details of the preamplifier, including system setup options, various display options (including the language in which the menu system itself displays), and several custom-installation capabilities that allow superior integration of the CP-500 into complex systems.
For more information, see the section The Menu System later in this manual.
4 Mute buttonThe front panel Mute button reduces the volume of the preamplifier to zero at the touch of a button. Pressing the button a second time restores the volume to its previous setting.
However, if you increase the volume manually (using either the volume knob or the remote control) while the Mute button is engaged, the mute control will disengage and the volume will be set to zero. This approach is a safety measure, to avoid situations in which the volume might be adjusted up while muted, only to then have the system un-muted to an unexpectedly high volume.
5 IR windowThe infrared (IR) receiver and transmitter are located behind this window.Ordinarily,yourClasséCP-500mustbeableto“see”theremote control from this window in order to respond to remote control commands.
If your preamplifier will be located behind closed doors, or for any other reason will not be able to “see” the remote control during normal operation, you may use the rear panel IR input and output mini-jacks and an IR repeater system to solve the problem. For more information about using an infrared repeater system to route signals to and from the CP-500, refer to the section Rear Panel later in this manual, or contact your local Classé dealer.

14
In addition to receiving IR commands, the CP-500 can also transmit IR commands so they may be learned by third-party learning remote controls. The CP-500 includes a comprehensive list of discrete IR commands to facilitate the creation of reliable macros. Specifically, there are discrete codes for all commands that normally operate as toggle functions (e.g. separate operate and standby commands in addition to the normal command that toggles between the two states).
6 Volume KnobThe large knob on the right side of the front panel of the CP-500 is used to control the volume of the system.
The volume is raised or lowered in precise 0.5dB increments throughout the range of the control most likely to be used while listening to music.
At extremely low volumes, the step size is increased somewhat to make it easier to move quickly between extremely low and normal listening levels.

15
Rear Panel
1 Tape InputConnect the analog outputs of any recording device (analog tape recorder, digitaltaperecorder,CDrecorder,etc.)youmayhavetothesesingle-endedRCA connectors. You may select to hear the output of your recording device by touching the tape button on the main operational screen of the CP-500.
2 Single-ended (RCA) inputsThese RCA jacks accept right-channel and left-channel (single-ended) inputsfromline-levelsourceequipmentsuchastuners,CDplayers,and tape decks. Any of these inputs may be selected by touching the corresponding button on the main operational screen of the front panel touchscreen.
Toachievethebestpossibleresults,wesuggestthatyouuseonlyhigh-quality shielded interconnect cables. Please consult with your local Classé dealer for advice on the best cables for use in your system.
optional phono preamp If you have a turntable you would like to use with the system, an optional phonopreamplifiermoduleisavailablefromyourClassédealer.Onceinstalled in your preamplifier, the Line 1 input connectors become your phono inputs, and the phono gain control in the menu system becomes active, allowing you to select either low gain for all moving-magnet (MM) and high-output moving-coil (MC) cartridges, or high gain for standard output MC cartridges. (See the section The Menu System for more information.)
3 Ground terminalThe ground terminal on your integrated amplifier is most often used for the ground wire of a turntable, assuming you have the optional phono module installed (see your authorized Classé dealer for more information on this option if you are interested). Connecting the ground wire from yourturntable’stonearmtothisscrewterminalusuallyminimizesanyhumor buzzing to which the turntable might otherwise be susceptible. Your authorized Classé dealer can assist you in handling this problem if it should arise.

16
4 Balanced (XLR) inputsThese XLR jacks accept right-channel and left-channel balanced signals from source equipment with balanced outputs. Either of these inputs may be selected by touching the corresponding button on the main operational screenoftheLCDtouchscreen.
The pin assignments of the XLR-type female input connectors are:
Pin 1: Signal ground Pin 2: Signal + (non-inverting) Pin3:Signal–(inverting) Connector ground lug: chassis ground
Refer to the operating manuals of your balanced-output line-level sources to verify that the pin assignments of their output connectors correspond to the CP-500. If not, wire the cables so that the appropriate output pin connects to the equivalent input pin.
Toachievethebestpossibleresults,wesuggestthatyouuseonlyhigh-quality interconnect cables. Please consult with your local Classé dealer for advice on the best cables for use in your system.
5 Tape outputConnect these RCA jacks to the right-channel and left-channel recording inputs of your recorder.
These single-ended RCA outputs are unaffected by the volume control on the front panel, or by whether you choose to monitor the source or the recorder (by having the “tape” button on the front panel’s touchscreen deselected or selected, respectively). The record outputs will be disconnected when the preamplifier is placed into standby, however.
6 Single-ended (RCA) main outputsSingle-ended cables using RCA connectors are the most common form of analog connection used in consumer electronics. When implemented carefully and used with high quality interconnect cables, this standard can provide excellent performance.
Classé has gone to extraordinary effort to ensure that the single-ended (RCA) outputs of your preamplifier are as good as possible. However, this connection standard cannot offer the immunity from interference that balancedinterconnectiondoes–henceourrecommendationtousethebalanced outputs whenever possible.
If you are not using balanced analog interconnection, then connect these single-endedoutputstoyourpreamplifier/processorusinghigh-qualityshielded RCA-terminated cables. Your Classé dealer can advise you on the selection of cables suitable for your system.

17
7 Balanced (XLR) main outputsThese XLR outputs provide a high quality, balanced stereo analog signal to your power amplifier. Connect them to corresponding balanced inputs on your power amplifier, using shielded high-quality balanced interconnects. Your Classé dealer can provide assistance in selecting appropriate balanced cables for your system.
Balanced audio interconnections were originally developed in the professional audio world for preserving the delicate nuances of extremely small microphone-level signals. For many years now, they have also been used by performance-oriented consumer companies like Classé to preserve every nuance of the finest audio performances in your collection.
Technically,balancedaudiointerconnectionsprovidetwodistinctbenefits:theydoublethesignal’sstrengthasittravelsfromonecomponenttothenext,increasingthepotentialsignal-to-noiseratioby6dB;theyalsodoanexcellent job of rejecting noise and interference that might otherwise be picked up between the components, due to either EMI (electromagnetic interference) or RFI (radio frequency interference). In the world of wireless telecommunications, there is more potential interference around than ever before—it makes sense to keep it out of music and movie soundtracks.
For this reason, we strongly recommend using balanced analog interconnects between your Classé components wherever possible, especially if you plan to use long interconnect cables between your preamplifier and the power amplifier(s) in order to minimize the length of the speaker wires.
The pin assignments of these XLR output connectors are:
Pin 1: Signal ground Pin 2: Signal + (non-inverting) Pin3:Signal–(inverting) Connector ground lug: chassis ground
These pin assignments are consistent with the standard adopted by the Audio Engineering Society (AES14-1992).
If you are using your Classé preamplifier with a Classé power amplifier, you’reallset–justtakestandardbalancedinterconnectcablesandplugthem in.
If you are using another brand of power amplifier, please refer to the operating manual of your amplifier to verify that the pin assignments of its input connectors correspond to those of the CP-500. If not, have your dealer wire the cables so that the appropriate output pin connects to the equivalent input pin.

18
8 RS-232 Control PortThis DB-9 connector has two purposes:
• downloadingnewoperatingsoftwareintoyourpreamplifier(should new features ever be added, for example)
• externalcontrolofyourpreamplifierbycontrolsystemssuchasi-Command™, AMX® and Crestron™
For more information, please contact your dealer and ask about home automation systems.
9 Classé CAN-Bus Control PortsThese RJ-45 connectors are reserved for future control and communication applicationsusingClasséAudio’simplementationoftheControllerAreaNetwork(CAN)Busspecification.
10 IR Input and OutputYourClassépreamplifierincludestwo1/8th-inchmini mono-jacks in order to support the infrared (IR) remote controls that are ubiquitous today. Infrared commands exist (for example) for toggling the preamplifier between operate and standby, in addition to discrete command codes for either operate or standby. These codes may be used in “macros” for sophisticated remote control systems, facilitating the control of the preamplifier in the larger context of a complete system.
The list of commands available is quite extensive, enabling even complex macros (chains of commands strung together) to operate flawlessly. If this capability is of interest to you, we strongly recommend discussing it with your authorized Classé dealer.
NotethatIR Input and Output is a bit of a misnomer: the input and output of these plugs is electrical in nature, not infrared. They are used with standard IR receivers, distribution amplifiers, and emitters (available fromyourdealer)totranslatetheremote’sIRsignaltoanelectricalsignaland vice versa. The big advantages here include being able to easily route the signals anywhere they might need to go and the reliability of a solid electrical connection.
Since an IR distribution system such as your dealer may design for you usually must control many products, your preamplifier includes both an IR input (for the control of this product) and an IR output (so as to pass along the same signal to the next product). This allows you to “daisy chain” your control wires from one product to the next.
ThepreamplifierisdesignedtorespondtoIRcommandsof5VoltsDC,with the tip of the mini-plug defined to be positive relative to the shank of the plug.
19
11 DC Trigger Input and OutputManyaudio/videocomponentscansupplyaDCcontrolvoltagetoassociated equipment in order to induce desired behavior. Your Classé preamplifier can take advantage of these capabilities in order to be switched between operate and standbyautomatically,usuallyinconcertwiththeA/Vpreamp itself.
The1/8th-inchminimono-jackTrigger In provides for remote-controlled turn-on (that is, toggling between operate and standby) of the preamplifier.
Two1/8th-inchminimono-jacksprovideindividuallycontrollableDCtrigger outputs which can be used for any of a number of purposes, as described in The Menu System. For example, your dealer can program Trigger Out1 to toggle your Classé power amplifier between operate and standby with your CP-500.
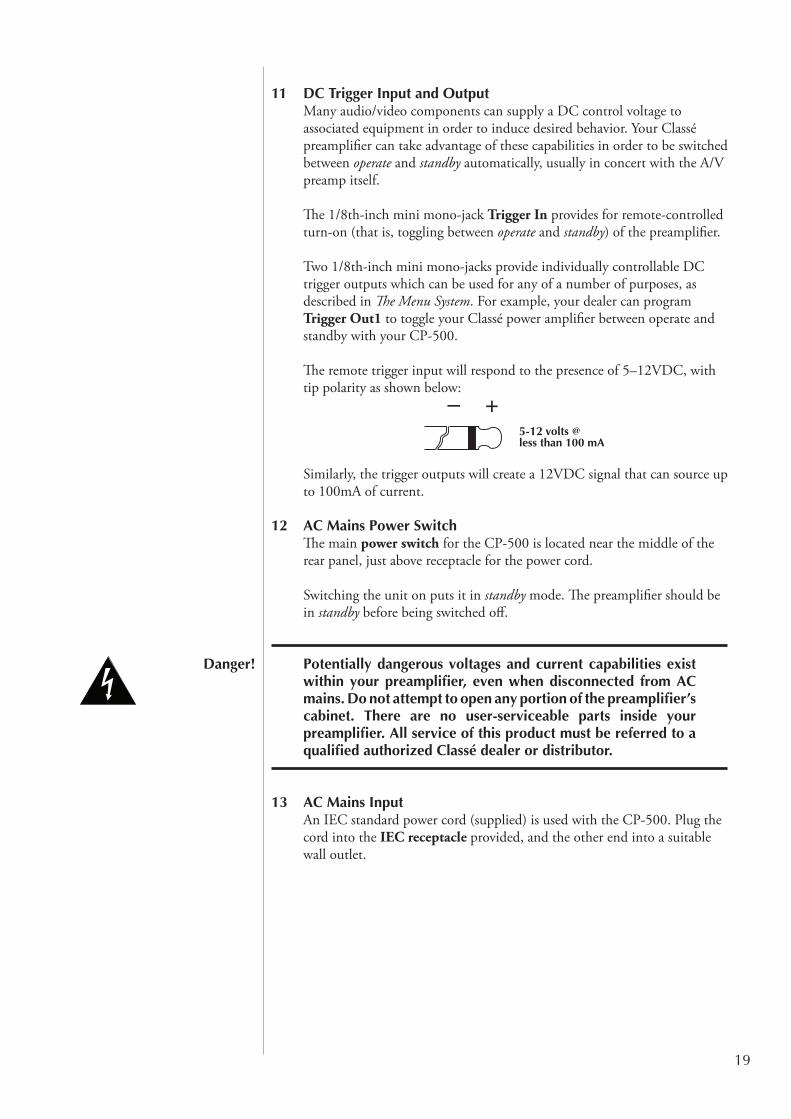
Theremotetriggerinputwillrespondtothepresenceof5–12VDC,withtip polarity as shown below:
Similarly,thetriggeroutputswillcreatea12VDCsignalthatcansourceupto 100mA of current.
12 AC Mains Power SwitchThe main power switch for the CP-500 is located near the middle of the rear panel, just above receptacle for the power cord.
Switching the unit on puts it in standby mode. The preamplifier should be in standby before being switched off.
Danger! Potentially dangerous voltages and current capabilities exist within your preamplifier, even when disconnected from AC mains. Do not attempt to open any portion of the preamplifier’s cabinet. There are no user-serviceable parts inside your preamplifier. All service of this product must be referred to a qualified authorized Classé dealer or distributor.
13 AC Mains InputAn IEC standard power cord (supplied) is used with the CP-500. Plug the cord into the IEC receptacle provided, and the other end into a suitable wall outlet.

20
The Remote Control
Your new preamplifier comes with a versatile remote control which can control both the CP-500 itself and several aspects of the rest of a Classé-based system. The buttons are arranged in logical groups according to their functions.
1 Basic FunctionsThis section along the top of the remote control groups four functions that control your basic interactions with the CP-500.
• Light switches the backlighting of the remote control on, for better visibility under low-light conditions. After a few moments of inactivity, the backlight switches off automatically.
• InfotakesyoudirectlytothestatusscreenintheLCDmenusystem, displaying several items of information about the CP-500 and its current operational status.
• Display cycles through the three brightness settings of the screen display.
• Standby toggles the CP-500 between standby and operate.
2 Input Selection and VolumeThe Up and Down arrow keys on the left side of the remote control will cycle through the active inputs on your CP-500.
If you have inputs you are not using, we suggest deactivating them in order to provide faster, easier access to the inputs you are actually using. (See the section The Menu System for information on how to do this.)
The Up and Down arrow keys on the right side of the remote control willraiseandlowervolume;thesquarekeybetweenthemwillactivatethe MutefunctionoftheCP-500(asdefinedinthemenusystem;seeThe Menu System for more on your mute options).
The Tape key allows you to easily toggle between listening to the selected source and listening to the output of your recording device. If you have a recording device (such as a three-head tape deck) which can play back a recording while it is being made, you will be able to compare the original signal to the recording while you are making it.
3 Navigation KeysThe central section of the remote control contains the navigation keys. This array of buttons is similar to what you may have seen on remote controls forDVDplayers,andisusedfornavigationofthemenusystemofthe CP-500.
• Home returns you to the normal input selection controls normallyshownontheLCDscreenonthefrontpanelofthe CP-500. This provides a quick way to get back to normal operation, regardless of how deep you might be in the menu system.

21
• Menu serves two functions: it calls up the menu system when youneeditinordertoadjustsomethingtoyourpreference;once within the menu system, pressing Menu returns you to the previous level of the menu system. If you press Menu when at the top level of the menu system, it will take you back out of the menu system to the normal display.
• TheBal (balance) key takes you directly to the balance screen inthemenusystem;oncethere,youcanusethenavigationkeyson the remote to select either the left or right buttons on the LCDtouchscreen,dependingonwhichwayyouwishtomovethe balance. Adjust the relative left-right balance of the system by using the Enter key on the remote to “press” the appropriate button on the display.
• Up/Down/Left/Right keys allow you to move within a particularmenuscreen,changingthehighlighteditemup/down/left/rightasyoulike,fromthecomfortofyourlisteningposition.
• TheEnter key allows you to select the highlighted item, having thesameeffectasifyouhadpressedthebuttonontheLCDtouchscreen.
4 Fkey ControlsThe CP-500 remote control can also control user-defined functions as well. The F1/F2/F3/F4 keys are available for controlling aspects of the CP-500 not covered by the other buttons on the remote control.
You are able to choose what the CP-500 should do in response to receiving the infrared signal that a particular Fkey has been pressed. The list of possible functions is quite extensive, and is found in the menu system (see the next section in this manual, entitled The Menu System).
Note: The Fkeys on all Classé remote controls issue the same infrared commands. This saves you from having to be sure you have picked up the proper remote, since all your Classé remotes will perform the same function for each Fkey.

22
The Menu System
Your CP-500 includes a versatile LCD touchscreen which supports both an attractive information display and a flexible menu system. While its use is quite intuitive,itisalsoquiteextensive.Thissectionoftheowner’smanualoutlinesthe many capabilities found in the menu system.
operational menu
The operational menu provides easy access to the most basic functions of the preamplifier: input selection and tape monitor. It also provides both a numeric and a graphic depiction of the current volume setting.
input selection Pressing any of the input buttons on the touchscreen will switch to the appropriate input. You may have as many as three line inputs (meaning single-ended connections using RCA connectors) and two bal inputs (balanced connections using XLR connectors). If you do not have this many sources in yoursystem,youcanelecttodeactivatetheunusedinputs.Doingsoremovestheir associated buttons from the touchscreen, reducing confusion for occasional users of the system.
tape loop In addition, the CP-500 has a dedicated tape loop for use with sources that can both record and play back, bringing the total number of sources you can connect to the CP-500 to six (four single-ended and two balanced).
When you touch the tape button to highlight it, you will notice that the previously selected input remains highlighted. Whenever any input is selected forlistening,itisalsoselectedforpossiblerecording;acopyofitssignalissentto the recording device connected to the tape output. You may record it or not as you please.
When you select the tape button, you are asking the CP-500 to continue with this recording feed (whether or not it is being used), while switching to monitor theoutputofthetapedeck(orCDrecorder,orwhateverelseyoumighthaveconnected to the record loop). In this way, you can monitor the result of your recording while you are making it, in real time. (This assumes that your recording device supports this capability, as do three-head tape decks.)

23
main menu system
Pressing the front panel Menu button to the left of the LCD touchscreen brings up a comprehensive main menu system, the top two levels of which are shown above. This menu provides access to many installation-specific features that let you customize how the CP-500 works within the context of your particular system.
system setup
The first button on the control menu takes you to a series of submenus that collectively provide a great deal of control over your system setup. Here, you can:
• customizethebehaviorofyourvolumecontrol• tailoryourinputstoyourparticularsourcecomponents• adjustthegainoftheoptionalphonomodule• programthebehavioroftheCP-500’sDCtriggers

24
Volume Set Up Touching the Volume option from the System Setup menu opens the Volume Setup page, as shown below.
The options on this menu page allow you to:
• customizethebehaviorofyourvolumecontrol• setamaximumvolumelevel• controlthevolumelevelofthesystemwhenitisturnedon• customizethebehaviorofthemutecontrol
rotary The rotary knob on the front panel does not directly control the volume. Instead, it controls circuitry that does so with greater fidelity and precision than traditional volume potentiometers could ever achieve.
Since the volume control circuitry is under software control, it is possible to customizeitsbehaviorundervariousconditions.Tobetterunderstandwhythisis so valuable, consider two scenarios:
Person A places a high value on precision in achieving exactly the volume setting that makes the music most realistic; being able to easily change volume setting by a fraction of a decibel is critical to his enjoyment of the system.
Person B just wants to jump easily from low volumes to a reasonable listening level, and is less concerned with the finer points of precision than with getting what he wants with a quick twist of the knob.
You can see the problem in these scenarios: Person A wants extremely fine gradations on the volume control, which will require many rotations to go from extremelylowsettingtonormallisteninglevels;PersonBwantstogetfromoneto the other with a “quick twist” of the knob, requiring coarse gradations in order to cover so much range in so little space. What happens when Persons A andBliveinthesamehouse?OrifPersonCwantstohaveboth,dependingontheir mood at the moment? (In fact, most of us are probably like Person C.)
Classé solves this dilemma by altering the response of the volume control, based on several factors.
Since it is rare to listen at extremely low (barely audible) volumes, the low range adjustment of the volume control allows for faster response to knob input when the volume setting values are low. When activated, you will get from extremely low to middle volume control settings a bit faster than you would otherwise. This effect can be subtle, and may not even be desirable when the speakers used have extremely high sensitivity (since this results in using the lowest part of the range more than you would otherwise).
25
The most significant factor in the perceived responsiveness of the volume control is the speed at which the knob is being turned. We all naturally tend to move volume knobs more quickly when we need to make a bigger change, and we tend to slow down as we approach our desired volume. Thus, if the CP-500 sees the knob moving relatively quickly, it uses coarse steps to effectively accelerate the action of the circuitry. As the knob begins to turn more slowly, the CP-500 will actually increase the resolution of the steps, which slows down the action of the volume control and yields greater precision in choosing an appropriate setting.
Ofcourse,itispossibletobumpintotheknobbyaccident,whichmightresult in its spinning very quickly indeed. Rather than increasing the volume uncontrollably under these conditions, the CP-500 actually slows everything down again as a safety measure against accidentally blowing your speakers. In fact, if you like you may establish a speed limit beyond which the knob will simply be ignored.
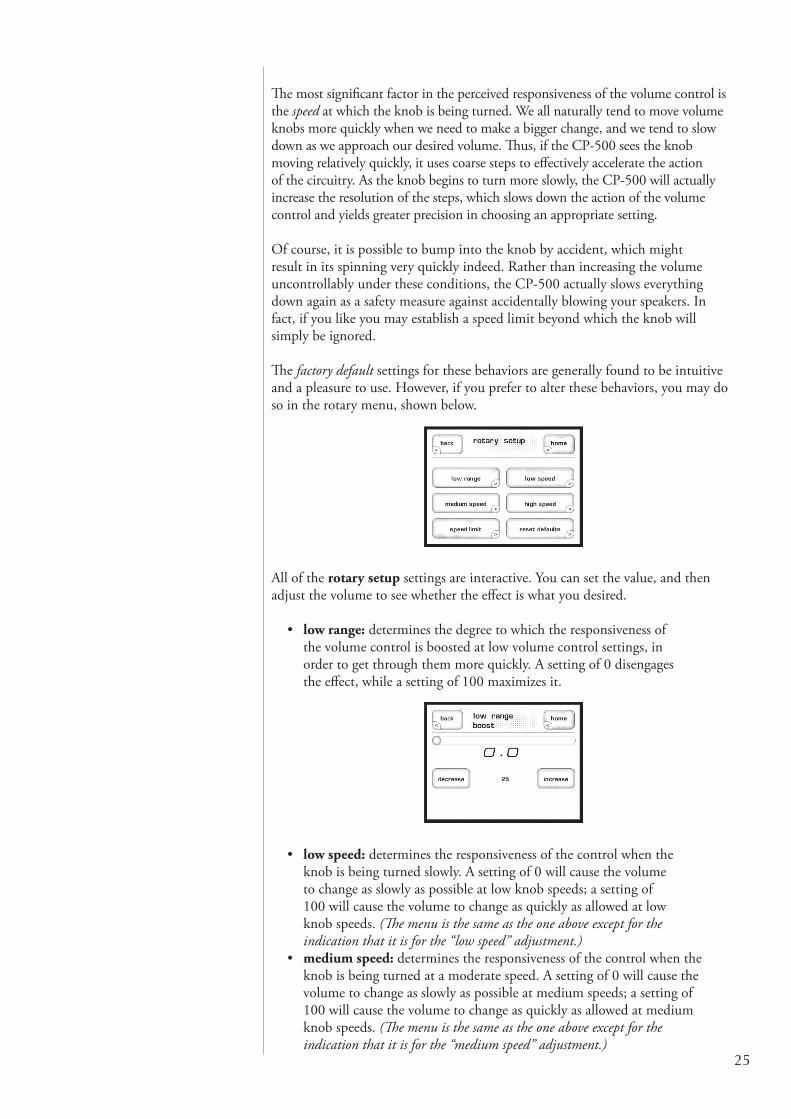
The factory default settings for these behaviors are generally found to be intuitive and a pleasure to use. However, if you prefer to alter these behaviors, you may do so in the rotary menu, shown below.
All of the rotary setup settings are interactive. You can set the value, and then adjust the volume to see whether the effect is what you desired.
• low range: determines the degree to which the responsiveness of the volume control is boosted at low volume control settings, in order to get through them more quickly. A setting of 0 disengages the effect, while a setting of 100 maximizes it.
• low speed: determines the responsiveness of the control when the knob is being turned slowly. A setting of 0 will cause the volume tochangeasslowlyaspossibleatlowknobspeeds;asettingof100 will cause the volume to change as quickly as allowed at low knob speeds. (The menu is the same as the one above except for the indication that it is for the “low speed” adjustment.)
• medium speed: determines the responsiveness of the control when the knob is being turned at a moderate speed. A setting of 0 will cause the volumetochangeasslowlyaspossibleatmediumspeeds;asettingof100 will cause the volume to change as quickly as allowed at medium knob speeds. (The menu is the same as the one above except for the indication that it is for the “medium speed” adjustment.)

26
• high speed: determines the responsiveness of the control when the knob is being turned rapidly. A setting of 0 will cause the volume tochangeasslowlyaspossibleathighknobspeeds;asettingof100 will cause the volume to change as quickly as allowed at high knob speeds. (The menu is the same as the one above except for the indication that it is for the “high speed” adjustment.)
• speed limit: establishes a maximum rotary speed, beyond which therewillbenochangeinvolumewhatsoever;theknob’sinputwill be ignored completely until it is first stopped, and then rotated at a slower speed.
• reset defaults: if after experimenting with various settings you decide you prefer it the way it operated as it came from the factory, pressing this button will restore the factory default settings. So feel freetoexperiment–youcanalwaysreturntotheoriginalsettings.
max volume TheMaxVolumepageallowsyoutoestablishamaximumvolumesettingforyour system. This scale runs from 0 to 100, with 100 indicating that you do not want any artificial limit placed on the maximum gain. This setting is interactive. You can set the value to something less than 100, and then adjust the volume to see whether it is appropriate.
NOTE: The volume knob itself does not set the maximum volume; you must set the maximum volume level in this Max Volume setup menu.
startup volume TouchingtheStartup Volume option allows you to set up a preferred volume level for when the CP-500 wakes out of standby. This starting volume level can be configured in two ways:
• theLast Volume option sets the starting volume to the last level selected before the unit was powered down. The mute setting is also remembered.
• theSpecific option allows you to set a specific volume level with the mute control on or off.

27
mute setup The Mute Setup page allows you to choose how the mute button functions. The options for mute control are:
• classic - completely mutes all audio so that when the Mute button is pressed, no audio is heard.
• specific - allows you to select the exact value to which the volume is attenuated. If the current volume is already below that level when muting is engaged, the volume remains unchanged.
• damping - reduces the current listening level by a specified amount..
The Specific and Damping options are especially useful in situations where you still want to hear the audio source but need to reduce the volume level temporarily.Forexample,let’ssayyouarelisteningtomusicandthephonerings. You need to take the call but would still like music in the background. Pressing the Mute button,whileit’ssetforspecificanddamping,providesasimple solution.
input Each input on your preamplifier can be customized in several ways to enhance either the performance or the ease of use of the system. A quick look at the input menu and submenus gives you an overview of what is possible:
28
• in use determines whether the selected input is displayed on the main input selection screen, and whether it is included in the rotationofinputscycledthroughfromtheremotecontrol’sinputselection buttons.
• name provides a way to customize the names of the inputs as displayed on the main input selection screen. For example, you might want to name your Bal 1input“CDP-102”or“CDP-202”fortheClasséCDplayeryoumighthaveconnectedtothatinput.Todoso,usethefourbuttonsalongthebottomoftheinput name menu to change the default name of any given input to something more specific to your system.
• Thet button acts like the backspace key on a computer keyboard, moving the cursor to the left and eliminating any characters along the way.
• Theu button moves the cursor to the right, adding characters along the way. (Change each character to what you want as you go along, using the + and – buttons.)
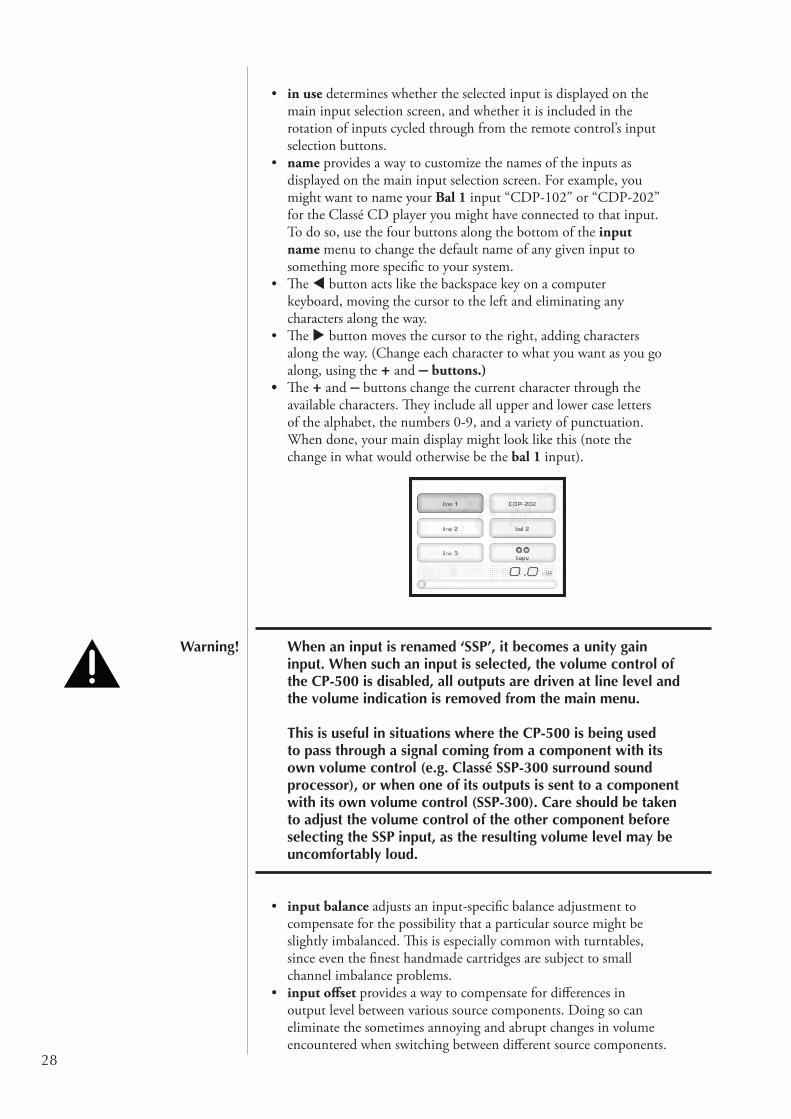
• The + and – buttons change the current character through the available characters. They include all upper and lower case letters of the alphabet, the numbers 0-9, and a variety of punctuation. When done, your main display might look like this (note the change in what would otherwise be the bal 1 input).
Warning! When an input is renamed ‘SSP’, it becomes a unity gain input. When such an input is selected, the volume control of the CP-500 is disabled, all outputs are driven at line level and the volume indication is removed from the main menu. This is useful in situations where the CP-500 is being used to pass through a signal coming from a component with its own volume control (e.g. Classé SSP-300 surround sound processor), or when one of its outputs is sent to a component with its own volume control (SSP-300). Care should be taken to adjust the volume control of the other component before selecting the SSP input, as the resulting volume level may be uncomfortably loud.
• input balance adjusts an input-specific balance adjustment to compensate for the possibility that a particular source might be slightly imbalanced. This is especially common with turntables, since even the finest handmade cartridges are subject to small channel imbalance problems.
• input offset provides a way to compensate for differences in outputlevelbetweenvarioussourcecomponents.Doingsocaneliminate the sometimes annoying and abrupt changes in volume encountered when switching between different source components.

29
phono gain
The phono gain menu is only active if the optional phono moduleisinstalled;otherwise it is grayed out. When it is installed, the CP-500 will automatically recognize it, rename the line 1 input to phono, and activate the input on the main menu.
Setting the phono gain is simple enough: choose low gain for most moving magnetcartridges,andforhighoutputmovingcoilcartridges;choosehigh gain for low output moving coil cartridges. Your Classé dealer can assist you in determining what type of cartridge you have, and which setting is most appropriate.
triggers EachoftheCP-500’strigger outputs may be programmed as to its “logic level,” which is to say, whether its voltage is low(essentially0V),orhigh (approximately 12V)whenthetriggerisactivated.Theabilitytochangethelogiclevelofatrigger’s“on”statecansolveinstallation-specificproblemsthatotherwiserequireexternal devices that add to both the cost and complexity of your system.
Ifthisseemsanobscurepoint,that’sokay.Itisafeaturedesignedtosolveproblems you may not even have, but your installation professional appreciates being able to easily solve such problems when they occur.
teach IR
The CP-500 provides discrete infrared (IR) command codes for all its functions, a list that extends far beyond what is required by normal remote controls. However, many of these functions are critical if you plan to create a customized remote control with macros that take command of your entire system. Without these discrete codes, many of the macros you might want to create will simply not work reliably.
The teach IR screen provides a scrolling list of all the available IR codes in the CP-500. By scrolling to the command you need to learn into your macro-capable remote, and then pressing the send IR code button, the CP-500 will sendtheappropriatecommandcodeoutitsfrontpanel–whereitcanbelearnedby your third-party remote control.
For more information on such control systems, we recommend you speak with your authorized Classé dealer.
30
display setup
This button brings up the display setup menu. It allows you to configure theCP-500’sLCDscreenbrightness, the display timeout, and the language used in the touchscreen and menu system. It also determines the color of the touchscreen, and how volume settings are displayed on your system.
brightness The brightness setting of the CP-500 has three possible values: low, medium, and high. Select the appropriate setting based on the level of ambient light typically found in your listening room while using the system. A high brightness settingusuallyworksbestinbrightly-litrooms;youmayfindthatalowersettingis less visually intrusive under more subdued lighting conditions.
timeout If you prefer listening to music in a dimly-lit or darkened room, you may find even the low brightness setting of the display somewhat distracting. If so, you can vary the timeout of the backlighting so as to turn it off entirely after a period of inactivity you select.
In this context, activity refers to any use of the user interface. This includes hard buttons,theLCDtouchscreen,andtheremotecontrol.
For example, if you reduce the timeout to its minimum setting, the backlighting will illuminate the display as soon as you interact with any of the CP-500 controls,andstayonforonlythreeseconds–justlongenoughforyoutocheckon something. If you continue to use any of the controls (at least once every three seconds), the display will remain lit. It will then extinguish itself after three seconds of inactivity on your part.
If you prefer the display of the CP-500 to remain on whenever not in standby, choose the nevertimeoutsetting.ThelampintheLCDdisplaywasdesigned for harsh automotive environments and will give you many years of reliable operation. If you plan to leave the unit on continuously, however, we recommendthatyoukeepthetimeoutdelaysettolessthanoneminute.(Notethat setting the brightness to a lower setting does not increase the life of the lamp.)

31
language The language menu offers you any of the different languages supported by theCP-500GUI.Classéhasprovidedourinternationaldistributorswithasoftware tool that makes it possible for them to customize the translations to suittheirlocalcustomsandterminology,inanefforttoensurethattheCP-500’soperation is as intuitive to use in every country as it is in our home country of Canada.
colors The Colors menu page gives you the ability to customize the color of the touchscreen. Besides the default blue, the screen may be shown in silver, red, or green. If a different color is chosen, the change takes place immediately so you can view the colors before leaving the menu page.
volume There are two common ways of displaying the volume information in a multi-channel system: absolute and relative.
The absolute system refers to the notion that most people think of the number 0 as meaning nothing, e.g., no sound at all. In this system, 0 means “sound off ” andlargernumbersindicatehighvolumes.Whilethismethodisintuitive,there’sreally no reference for how loud a particular setting is except through prior experience.
In the relative system, there is a calibrated, reference volume referred to as 0dB. This reference volume is the same level at which movies are played in theaters. Regardless of how large or how small the theater, a setting of 0dB is always the same, known volume. Changes from that volume level are shown as either positive (louder) or negative (quieter). People who have spent any time making recordings will recognize that this is similar to the notion of 0dB on a record level meter.
In any event, the CP-500 offers both systems so that you may choose what makes the most sense to you personally.
IfyouEnableLargeVolumethevolumelevelwillbemagnifiedonthetouchscreen during volume adjustments.
main balance
The main balance control gives you both a numeric and a graphical indication of the current balance setting for the CP-500.
Some recordings are not balanced particularly well between the left and right channels. If the image presented by a particular recording seems heavily weighted to the left (for example), you can restore a more natural perspective with the balancecontrol.Toshifttheimagetotheright,touchtheright>> button one or more times as needed to correct the perceived imbalance.

32
remote Fkeys
The remote control supplied with the CP-500 has four function keys (Fkeys) that allow you to have instant, easy access to specific system functions that might otherwise be buried in a menu somewhere.
For example, if you use the balance control frequently, you may want to consider programming one of the Fkeystotakeyoustraighttothatscreen.Doingsowillsave you having to access the control menu, followed by pressing the balance button (which might be hard to see from across the room).
The remote Fkey menu has four buttons, one each for the four Fkeys on your remotecontrol.PressinganyofthesebuttonsontheLCDtouchscreentakesyouto a subordinate, scrolling list of possible functions for that particular Fkey.
Selecting the one you want is as simple as scrolling through the list (by touching either the up or down arrows on the right), and then touching the specific function in the list that you want that Fkey to perform.
cautionary note on Fkey use NotethatallClasséremotecontrolsprovidethesesamefourFkeys, so that you need not worry about which remote you happen to pick up. Thus F1 on the preamplifier’sremotecontrolsendsthesameinfraredsignalasF1ontheCDplayer’sremotecontrol.
While this is intended to minimize confusion amongst different remotes (since this aspect of them will all perform identically), you should take care when assigning different functions on different components to the same Fkey.Doingso would result in two components doing two different things at once, in response to a single press of a button on the remote control. This can sometimes be useful. As an example, F1 could set the preamplifier to the CD input, and alsosettheCDplayertoPlay, both from the press of a single Fkey.
status
The status screen provides several items of information about the current operation status of the CP-500, as well as access to information on the software used in and the internal sensors of the CP-500.

33
version info The version info button on the status screen takes you to the version information screen, which displays information on various pieces of software used by your CP-500. If you ever have occasion to call our technical support people to ask a question not covered in this manual, they may want to know precisely what version of software your unit is running. Having this information available will help enable them to give you the best possible service.
sensors The sensors button on the status screen takes you to the sensors screen, which displays information about several internal sensors within the CP-500. It is unlikely you might ever need the sensor information, unless directed to do so by a customer service representative at Classé in order to help troubleshoot some unexpected problem.
CAN-Bus Classé’sControllerAreaNetwork,orCAN-Bus,opensthewaytoanewlevelofinteractionbetweenourDeltarangeofamplifiers,preamps,processorsandsourcecomponents.WhentheCP-500isconnectedwithCAN-Bus,thedifferentelementsofaDeltaseriessystemareinconstantcommunication,creating a “global” network that delivers system wide status information and shared operational features, all through the touchscreen display.
features CAN-BuswillallowasingleDeltaseriestouchscreento:
• Displaystatusinformationforeveryconnectedunit,includingamplifiers which do not have a touchscreen display.
• Createa“PlayLink”thatallowsanSSPorPreamptoautomaticallyswitchtothecorrectinputwhenaDeltaseriessourcecomponentstarts playback.
• Adjusttheglobalsystembrightness.• Configuretheentiresystemtogoinandoutofstandbyatthe
touch of a button and also bring individual components in and out of standby.
• Muteanyconnectedunit.
hardware setup 1 Classé Delta Series ProductsTwoormoreClasséDeltaseriesproductsarerequired,atleastoneofwhichmust have a touchscreen display.
2 Category 5 Network CablesThese are ordinary network cables, commonly used for broadband Internet connections. They should be typical “straight through” cables not the “crossed over” type, and the total required will be one less than the total number of Deltaseriescomponentsinyoursystem.
3 CAN-Bus TerminatorAsingleCAN-BusTerminatormayberequired.ItisinsertedintotheCAN-BusOUTconnectorofthelastcomponentintheCAN-Busdaisychain.OneisincludedintheboxwithyourCP-500.They are also available free of charge from your nearest Classé Customer Support Centre http://www.Classeaudio.com/support/service.htm

34
4 SSP-300 & 600 CAN-Bus Interface BoxSystems that include an SSP-600 or SSP-300 will also require anSSP-300/600CAN-BusInterfaceBox.Theseareincludedwiththeproductsoravailable free of charge from your nearest Classé Customer Support Centre http://www.Classeaudio.com/support/service.htm
ThediagramsbelowillustratehowtoconnecttheCAN-Bushardware.
Any combination of models in any order without SSP-300 or SSP-600.
OUTCAN-BUSIN
OUTCAN-BUSIN
OUTCAN-BUSIN
OUTCAN-BUSIN
Any combination of models in any order with SSP-300 or SSP-600.
OUTCAN-BUSIN
OUTCAN-BUSIN
OUTCAN-BUSIN
OUTCAN-BUSIN
NOTE:DaisychainmayneedtobeterminatedwithCAN-BusTerminator.
using CAN-Bus CAN-BusiscontrolledviathetouchscreenofanyDeltaseriescomponent.Thereisnomastercomponent,soDeltaseriessystemswheretwoormoreunitshavea touchscreen can be controlled through any of the touchscreens. However, it is probablyeasiesttostartusingCAN-Busthroughjustone.
CAN-Busisaccessedbypressingthemenu button on the face of the unit or remote, then the status button, followed by the more button.

35
The touchscreen will then display the CAN-Bus devices screen, which lists connectedDeltaseriescomponentsbymodel&serialnumber.
Highlighting aunitontheCAN-Busdevicesscreenidentifiesitasthetarget unit.ThefrontpanelLEDsofthetargetunitwillstartflashing(unlessyouhighlighttheunitthatyouareusingtoaccessCAN-Bus).
Onceyouhavechosenthetargetunitpressselect.Thetargetunit’sLEDswillstopflashingandthetouchscreenwilllisttheCAN-Busfeaturesavailabletoit.SomeCAN-Busfeaturesaresharedbyallmodels,somearespecifictoindividualmodels.
CAN-Bus shared features ThefollowingCAN-Busfeaturesaresharedbyallmodels.
configuration Selecting configuration will present the CAN-Bus configuration screen allowing access to name, global brightness, and global standby features.
operate The operate settings allow you to bring the target unit in and out of standby, or mute. This key will be disabled for the unit whose touchscreen you are using to accessCAN-Bus.
AC status The AC status screendisplaysinformationfromthetargetunit’selectricalsupplysensors.Twoscreensareavailable,withthesecondaccessedbyselectingmore.
status The status screen is the simplest way to access essential information about thetargetunit.Itdisplaysthetargetunit’smodelnumber,softwareversion,operational status and serial number.
36
name Allows you to set the name that this component will be listed under in the CAN-Busdevicesscreen.Thenamewillappearnexttotheunitmodelandserialnumber, and facilitate the identification of units in large systems.
global brightness By setting all your components to global brightness you can adjust the touchscreenandLEDbrightnessforyourentiresystembychangingthebrightnessofasingletouchscreen.AllCAN-BussoftwareupdatesautomaticallysettheupdatedunittoGlobalBrightness.IfyouwantaparticularunittobeexcludedfromGlobalBrightness,deselectGlobalBrightnessforthatunit.
global standby By setting all your components to global standby you can bring your entire system in and out of standby by pressing the standby button of any unit or remote.AllCAN-Bussoftwareupdatesautomaticallysettheupdatedunittoglobal standby. If you want a particular unit to be excluded from global standby, deselect global standby for that unit.
CAN-Bus modelspecific features
ThefollowingCAN-Busfeaturesaremodelspecific.
PlayLink ThisfeatureisexclusivetoDeltaseriesdiscplayersandwillonlyfunctionifthediscplayerisconnectedtoaCAN-Busenabledpreamporsurroundsoundprocessor.
When PlayLink is active, pressing play on the disc player will also automatically switchthepreamp/processortoaspecifiedinput.ThismeansthatyoucanlistentoaCDorwatchaDVDliterallyatthetouchofabutton.
The first step in using PlayLink is to choose the input you wish to be selected when play is pressed on the disc player. Press the PlayLink icon, then select the correct input from the list.
Onceyouhaveselectedtheinputpressback, then select configuration.PlayLinkisactivatedanddisabledthroughthePlayLinkiconontheCAN-Busconfiguration screen.
PlayLink is automatically active after a software update, and the PlayLink icon willonlyappearontheCAN-BusconfigurationscreenofaDeltaseriesdiscplayer.

37
PlayLink can only select a single input per disc player. It is therefore not designed for users who regularly play both CDs and DVDs through different inputs from a single disc player. When PlayLink is active the disc player will default to the same input every time play is pressed, regardless of whether it is playing CD or DVD.
amp info Available for amplifiers only, this screen displays the data provided by the heatsink and AC Module temperature sensors.
NOTE:Thisfeatureisonlyaccessiblewhenthetargetamplifierison.
event log Reserved for amplifiers, this feature is a protection circuitry event log which can only be accessed when the target amplifier is in standby. The protection circuit shuts down the amplifier or channel if it overheats or if its output could damage your speakers. The event log details the circumstances surrounding the amp going into protection and should be referred to in situations that require the intervention of your dealer or Classé customer support.
The log can report the following events interpreted as follows:
• +ve slow blo trip & -ve slow blo trip — The average current has reached the safe operating limit.
• +ve fast blo trip & -ve fast blo trip — The peak current has reached the safe operating limit.
• over temperature trip — The unit temperature has reached the safe operating limit.
• DC protection trip — TheDCoutputlevelhasreachedthesafeoperating limit.
• Communication failure — There has been a loss of communicationbetweentheamp’ssystemmonitoringsensors.
• AC line trip — The power supply has reached the limits of the amp’ssafeoperatingrange.
These events are rare and generally occur due to issues that are external to the amp.Theyshouldbeinterpretedpositively.Theampisdoingwhatit’sdesignedto do.

38
Troubleshooting
In general, you should refer any service problems to your Classé dealer. Before contacting your dealer, check to see if the problem is listed here. If it is, try the suggested solutions. If none of these solves the problem, contact your Classé dealer.
1. Everything appears to be on, but there is no sound.• Adjustthevolumecontroltoamoderatelevel(onethatshould
be audible but is not excessive).• Makesurethesourcecomponentforwhichtheinputhasbeen
selected is switched on and is out of its standby mode.• Makesuretheproperinputhasbeenselectedforthesource
being used.• Checkthatthepreamplifierisnotinmute mode. This is
indicated by the operational menu icon in the form of a speaker with a bar through it. Press Mute to disengage.
• Ensurethatthepoweramplifierispoweredupandoutofstandby mode.
• Checkifthetapemonitorisenabled.Ifitisengagedandtherecorderisoff,youwillnotheartheselectedsource.Disengageby pressing Tape, unless you wish to monitor the recording.
• Iftheproblemoccursonlywithaparticularinput,checktheinterconnect cables between that source and the preamplifier.
• Iftheproblemoccurswithallinputs,checkthecablesbetweenthe preamplifier and the power amplifier. If no fault is found there, check the speaker wires for secure connections.
Important! Check that the power amplifier is off before checking any connections between the preamplifier and power amplifier, or between the power amplifier and the speakers.
2. There is no sound and the Standby LED is not lit. • EnsurethepreamplifierispluggedintotheACmainsand
switched on, and that the AC mains are operating normally. The unit will automatically attempt to protect itself from improper AC mains voltages by not powering up. Make sure your power amplifier is off (if the amplifier is already connected to the preamp) before plugging your preamplifier into the AC mains and powering it up.
• Ifyourpreamplifierwaspluggedinproperly,trythefollowing:put it in standby, switch off the main power switch in the back, and unplug the unit for at least thirty seconds before trying to power it up again. (Sometimes a brownout of short-term loss of power might require a restart.)
Important! Make sure to power down your power amplifier BEFORE doing the restart.

39
• Ifnoneofthesesolutionswork,pleaseconsultyourClassédealerforassistance.Neverattempttoreplaceaninternalfuse.Thereare no user-serviceable parts inside your unit.
3. Only one speaker seems to be playing.• CheckthemainbalancecontrolsettingoftheCP-500by
pressing the Menu button, followed by the balance button (or simply press Bal on the remote control).
• Doestheproblemoccurwithallinputs?Ifso,checktheinterconnect cables between the preamp and the power amp. If no fault is found there, check the speaker wires for secure connections.
Important! Be certain that the power amplifier is off before checking any connections between the preamplifier and power amplifier, or between the speakers and the power amplifier.
• Iftheproblemoccursonlywithaparticularinput,checktheinput balance control setting of that particular input: Menu•system setup•input•input name•balance where input name is the particular input in question.
• Iftheinputbalanceappearstobecorrect,checktheinterconnectcables between the corresponding source component and the CP-500.
4. The IR remote control seems not to function.• EnsurethattherearenoobstaclesbetweentheIRremoteandthe
IR sensor (located to the right of the Mute button).• Ifthebatteriesareweak,replacethemwithfreshones.
5. There is a hum coming out of the speakers.• Ifyouarerunningsingle-endedinterconnects,makesurethey
are not running alongside any AC power cords.• Ifyouarerunningsingle-endedinterconnects,makesurethey
are not too long. Long runs of single-ended interconnects have a natural tendency to pick up noise even if they are shielded.
• IfanysourcecomponentsconnectedtoyourpreamplifierhasacableTVhookeduptoit,trydisconnectingthecabletelevisionline from the source. If the hum goes away, you will need an isolation device between your cable and that particular source. Refer to your Classé dealer for one of these inexpensive devices.
• Ifyouhavetheoptionalphonomoduleinyourpreamplifier,make sure that the ground wire of the tonearm is secured properly to the ground lug on the back of your preamp.
• Ifthehumexistsonlyonthephonoinput,makesuretheturntable/tonearmassemblyisnottooclosetoothercomponents. There should be at least 12 inches (30cm) clearance from the other components. The more clearance you provide, the better (as long as the tonearm cable is not stretching).
• Makesurethetonearmcableisnottouchingorrunningalongside an AC cable.

40
• Makesureyouhavetheproperloadingforyourphonocartridge.If you are in doubt, consult your authorized Classé dealer.
6. There is a mechanical hum coming from the unit.• Thissymptomsuggestsyouhavealotofelectricalnoiseonyour
ACmainsline.TryconnectingtoanotherACcircuit(notmerelya different plug, but a different circuit).
• Checktoseeifyouhaveanyhalogenlightingordimmersonthesame circuit as the preamplifier, as they can be the cause of hum in power supply transformers.
7. There is a noticeable change in volume between one input and another, even though the volume was not adjusted.• Youmayneedtoadjusttheinputoffsetsettingtocompensate
for differences in output level between source components. Conversely, the input offset setting may have been adjusted inappropriately. Either way, you can correct the problem by going to the following location in the menu system: Menu•system setup•input•input name•offset where input name is the input which needs to be adjusted.
• Iftheinputthatseemsincorrectisthephonoinput,makesureyou are using the proper gain setting for the type of cartridge you are using. If in doubt, consult with your authorized Classé dealer.
41
Care and Maintenance
cleaning the cabinet Toremovedustfromthecabinetofyourpreamplifier,useafeatherdusterorasoft,lint-freecloth.Toremovedirtandfingerprints,werecommendisopropylalcoholandasoftcloth.Dampentheclothwithalcoholfirstandthenlightlycleanthesurfaceofthepreamplifierwiththecloth.Donotuseexcessiveamounts of alcohol that might drip off the cloth and into the preamplifier.
Caution! At no time should liquid cleaners be applied directly to the surface of the preamplifier, as direct application of liquids may result in damage to electronic components within the unit.
cleaning the LCD touchscreen
TocleantheLCDtouchscreen,useamicrofibereyeglasswipeorsoft,lint-freecloth,togetherwithacleaningsolutiondesignedforplasticeyeglassesorLCDcomputermonitors/televisions.
Important! Spray the solution onto the cloth or tissue – never directly onto the touch screen.
installing the remote control batteries
The battery compartment is situated at the base of the remote control. Remove the two screws holding the base plate in place, taking care not to lose them. Insert the two AA batteries (supplied), ensuring that the polarity is the same as that indicated on the inner surface of the remote control.

42
Specifications
All specifications are accurate at the time of printing. Classé reserves the right to adjust specifications without notice.
n Frequency response DC–200kHz±0.1dBn Distortion (THD + noise) 0.003%n Maximum input voltage (single-ended) 5Vrmsn Maximum input voltage (balanced) 10Vrmsn Maximum output voltage (single-ended) 10Vrmsn Maximum output voltage (balanced) 20Vrmsn Gain range -100dB to +14dBn Input Impedance (balanced) 200kWn Input Impedance (single-ended) 100kWn Output Impedance (main output) 100Wn Signal to noise ratio (unweighted) 20Hz to 500kHz 100dBn Channel separation better than 110dBn Crosstalk (any input to any output) better than -120dB @ 1kHzn Rated power consumption 30Wn Idle power consumption 29Wn Mains voltage determined by the needs of country for which
theunitwasmanufactured; cannot be reset by dealer or user
n Overall dimensions Width: 17.5” (445mm) Depth:16.5”(419mm) Height: 4.75” (121mm)n Net weight 26lbs (12kg)n Shipping weight 33lbs (15kg)
For more information, see your Classé dealer, or contact:
Classé Audio 5070 François Cusson Lachine, Quebec CanadaH8T1B3 Telephone +1(514)636-6384 FAX +1 (514) 636-1428 Internet: http://www.classeaudio.com email: [email protected]
Classé and the Classé logo are trademarks of Classé Audio Inc. of Lachine, Canada. All rights reserved.
i-Command™ is a trademark of Equity International, Inc. All rights reserved.
AMX®isaregisteredtrademarkofAMXCorporationofRichardson,TX.Allrightsreserved.
Crestron™isatrademarkofCrestronElectronics,Inc.ofRockleigh,NJ.Allrightsreserved.

43
Dimensions

Copyright © 2007 Classé Audio, Inc. Printed in Canada.
V2.8 100107
Classé Audio 5070 François Cusson
Lachine, Quebec CanadaH8T1B3
+1 (514) 636-6384 +1 (514) 636-1428 (fax)
http://www.classeaudio.com
email: [email protected]
NorthAmerica:18003703740email: [email protected]
Europe: 44 (0) 1903 221 700email: [email protected]
Asia: (852) 2790 8903email: [email protected]
AllOthers:+15146366394email: [email protected]