operation guide 5208 - support.casio.com · purchase, be sure to read this manual carefully. keep...
TRANSCRIPT
Operation Guide 5208MO1106-EA
E-1
Getting AcquaintedCongratulations upon your selection of this CASIO watch. To get the most out of yourpurchase, be sure to read this manual carefully.
Keep the watch exposed to bright lightThe electricity generated by the solar cell of the watch isstored by a built-in battery. Leaving or using the watchwhere it is not exposed to light causes the battery to rundown. Make sure the watch is exposed to light as much aspossible.• When you are not wearing the watch on your wrist,
position the face so it is pointed at a source of brightlight.
• You should try to keep the watch outside of your sleeveas much as possible. Charging is reduced significantly ifthe face is only partially covered.
lllllllllll
Bright Light
Solar cell
E-2
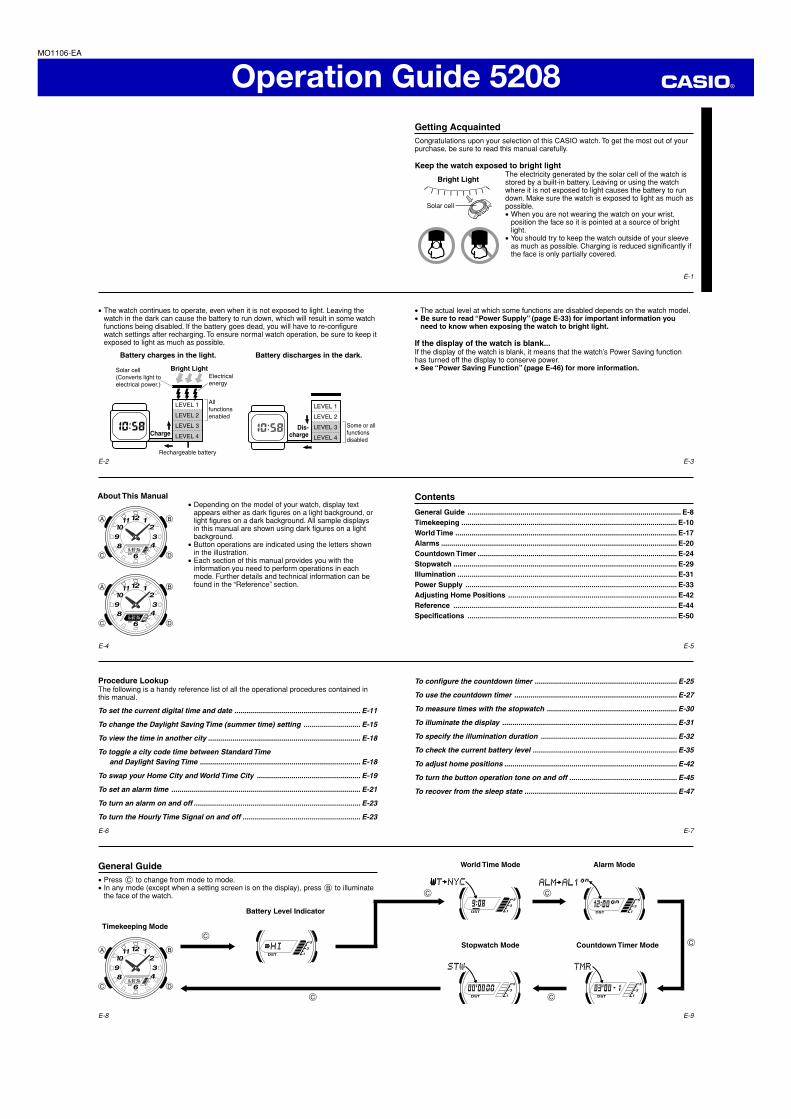
Battery charges in the light. Battery discharges in the dark.
Allfunctionsenabled
LEVEL 1
LEVEL 2
LEVEL 3
LEVEL 4Charge
Rechargeable battery
Bright LightElectrical energy
Solar cell(Converts light to electrical power.)
LEVEL 1
LEVEL 2
LEVEL 3
LEVEL 4
Some or allfunctionsdisabled
Dis-charge
• The watch continues to operate, even when it is not exposed to light. Leaving thewatch in the dark can cause the battery to run down, which will result in some watchfunctions being disabled. If the battery goes dead, you will have to re-configurewatch settings after recharging. To ensure normal watch operation, be sure to keep itexposed to light as much as possible.
E-3
• The actual level at which some functions are disabled depends on the watch model.• Be sure to read “Power Supply” (page E-33) for important information you
need to know when exposing the watch to bright light.
If the display of the watch is blank...If the display of the watch is blank, it means that the watch’s Power Saving functionhas turned off the display to conserve power.• See “Power Saving Function” (page E-46) for more information.
E-4
About This Manual• Depending on the model of your watch, display text
appears either as dark figures on a light background, orlight figures on a dark background. All sample displaysin this manual are shown using dark figures on a lightbackground.
• Button operations are indicated using the letters shownin the illustration.
• Each section of this manual provides you with theinformation you need to perform operations in eachmode. Further details and technical information can befound in the “Reference” section.
E-5
Contents
General Guide ......................................................................................................... E-8Timekeeping .......................................................................................................... E-10World Time ............................................................................................................. E-17Alarms .................................................................................................................... E-20Countdown Timer .................................................................................................. E-24Stopwatch .............................................................................................................. E-29Illumination ............................................................................................................ E-31Power Supply ........................................................................................................ E-33Adjusting Home Positions ................................................................................... E-42Reference .............................................................................................................. E-44Specifications ....................................................................................................... E-50
E-6
Procedure LookupThe following is a handy reference list of all the operational procedures contained inthis manual.
To set the current digital time and date .............................................................. E-11
To change the Daylight Saving Time (summer time) setting ............................ E-15
To view the time in another city ........................................................................... E-18
To toggle a city code time between Standard Timeand Daylight Saving Time ............................................................................... E-18
To swap your Home City and World Time City ................................................... E-19
To set an alarm time ............................................................................................. E-21
To turn an alarm on and off .................................................................................. E-23
To turn the Hourly Time Signal on and off .......................................................... E-23
E-7
To configure the countdown timer ...................................................................... E-25
To use the countdown timer ................................................................................ E-27
To measure times with the stopwatch ................................................................ E-30
To illuminate the display ...................................................................................... E-31
To specify the illumination duration ................................................................... E-32
To check the current battery level ....................................................................... E-35
To adjust home positions ..................................................................................... E-42
To turn the button operation tone on and off ..................................................... E-45
To recover from the sleep state ........................................................................... E-47
E-8
Timekeeping ModeC
▲
General Guide• Press C to change from mode to mode.• In any mode (except when a setting screen is on the display), press B to illuminate
the face of the watch.
Battery Level Indicator
C
▲
E-9
Stopwatch Mode Countdown Timer Mode
Alarm Mode
▲
World Time Mode
C
C
▲
▲
C C ▲

Operation Guide 5208
E-10
• All of the operations in this section are performed in the Timekeeping Mode, whichyou can enter by pressing C (page E-8).
TimekeepingUse the Timekeeping Mode to set and view the current time and date.• When setting the time, you can also configure settings for the 12/24-hour format.• Each press of D cycles the digital display in the sequence shown below.
D
Day Day of week
D
D
▲ ▲
PM indicatorHour : Minute
SecondSecond Second
Month
▲
E-11
City code
Setting the Digital Time and DateMake sure you select your Home City code before you change the current time anddate settings. World Time Mode times are all displayed in accordance with theTimekeeping Mode settings. Because of this, World Time Mode times will not becorrect if you do not select the proper Home City code before setting the time anddate in the Timekeeping Mode.
To set the current digital time and date1. In the Timekeeping Mode, hold down A for about two
seconds, until “ADJ” appears on the display.• Your current Home City code will be flashing on the
screen.2. Press C to move the flashing in the sequence shown
below to select other settings.
E-12
3. While the setting you want to change is flashing, use D and B to change it asexplained below.
Screen: To do this:Change the city code
Toggle between Daylight Saving Time(ON) and Standard Time (OFF).Toggle between 12-hour (12H) and24-hour (24H) timekeepingReset the seconds to 00
Do this:Press D (east) and B (west).
Press D.
Press D.
Press D.
City Code
Language IlluminationDuration Day Month Year
DST 12/24-HourFormat Seconds Hour Minutes
Button OperationTone
E-13
To do this:Change the hour or minutes
Change the year
Change the month or day
Toggle the button operation tonebetween (on) and (off)Toggle the illumination duration betweenLT1 (approximately 1.5 seconds) andLT3 (approximately 3 seconds).Change the day of the week languageENG: English POR: PortugueseESP: Spanish FRA: FrenchDEU: German ITA : Italian
Screen: Do this:Use D (+) and B (–).
Press D.
Press D.
Use D (+) and B (–).
• See “City Code Table” at the back of this manual for a complete list of availablecity codes.
E-14
4. Press A to exit the setting screen.• The day of the week is automatically displayed in accordance with the date (year,
month, and day) settings.
12-hour and 24-hour timekeeping• With the 12-hour format, the P (PM) indicator appears to the left of the hour digits for
times in the range of noon to 11:59 p.m. and no indicator appears for times in therange of midnight to 11:59 a.m.
• With the 24-hour format, times are displayed in the range of 0:00 to 23:59, withoutany indicator.
• The 12-hour/24-hour timekeeping format you select in the Timekeeping Mode isapplied in all other modes.
Daylight Saving Time (DST)Daylight Saving Time (summer time) advances the time setting by one hour fromStandard Time. Remember that not all countries or even local areas use DaylightSaving Time.
E-15
To change the Daylight Saving Time (summer time) setting1. In the Timekeeping Mode, hold down A for about two seconds, until “ADJ” appears
on the display.• Your current Home City code will be flashing on the screen.
2. Press C once to display the DST setting screen.3. Press D to toggle between Daylight Saving Time (ON displayed) and Standard
Time (OFF displayed).4. When the setting you want is selected, press A to exit the setting screen.• The DST indicator appears on the display to indicate that Daylight Saving Time is
turned on.
E-16
Analog TimekeepingThe analog time of this watch is synchronized with the digital time. The analog timesetting is adjusted automatically whenever you change the digital time.
Note• The hands for the analog timepiece move to adjust to a new setting whenever any of
the following occurs.When you change the digital time settingWhen you change the Home City code and/or DST setting
• If the analog time does not match the digital time for any reason, use the proceduredescribed under “To adjust home positions” (page E-42) to match the analog settingto the digital setting.
• Whenever you need to adjust both the digital and the analog time settings, makesure you adjust the digital setting first.
• Depending on how much the hands have to move in order to synchronize to thedigital time, it may take some time before they stop moving.
E-17
World TimeThe World Time Mode digitally displays the current time in48 cities (31 time zones) around the world.• If the current time shown for a city is wrong, check your
Home City time settings and make the necessarychanges (page E-11).
• After you press C to enter the World Time Mode, yourcurrently selected World Time City code will appear onthe digital display for about two seconds. After that, thecurrent time in that city will appear.
• All of the operations in this section are performed in theWorld Time Mode, which you enter by pressing C(page E-9).
City code
Current time inselected city
E-18
To view the time in another cityIf you press D while in the World Time Mode, your currently selected World Time Citycode will appear on the digital display for about two seconds. After that, the currenttime in that city will appear. Pressing D again while the World Time City code isdisplayed will scroll to the next city code.• For full information on city codes, see the “City Code Table” at the back of this
manual.
To toggle a city code time between Standard Time and Daylight Saving Time1. In the World Time Mode, use D to display the city code
(time zone) whose Standard Time/Daylight Saving Timesetting you want to change.
2. Hold down A to toggle Daylight Saving Time (DSTindicator displayed) and Standard Time (DST indicatornot displayed).
• The DST indicator will appear on the display wheneveryou display a city code for which Daylight Saving Time isturned on.
DST indicator
E-19
• Note that the DST/Standard Time setting affects only the currently displayed citycode. Other city codes are not affected.
Swapping your Home City and World Time CityYou can use the procedure below to swap your Home City and World Time City. Thischanges your Home City to your World Time City, and your World Time City to yourHome City. This capability can come in handy when you frequently travel between twocities in different time zones.
To swap your Home City and World Time City1. In the World Time Mode, use D to select the World Time City you want.2. Hold down A and B until the watch beeps.• This will make the World Time City you selected in step 1 your Home City, and cause
the hour and minute hands to move to the current time in that city. At the same time,it will change the Home City you had selected prior to step 2 your World Time City.
• After swapping the Home City and World Time City, the watch stays in the WorldTime Mode with the city that was selected as the Home City prior to step 2 nowdisplayed as the World Time City.
Operation Guide 5208
E-20
AlarmsThe Alarm Mode lets you configure five daily alarms. Youalso can use it to turn the Hourly Time Signal on or off.• The watch beeps for about 10 seconds when an alarm
time is reached.• Turning on the Hourly Time Signal causes the watch to
beep on the hour every hour.• All of the operations in this section are performed in the
Alarm Mode, which you enter by pressing C (pageE-9).
Alarm time(Hour : Minutes)
E-21
To set an alarm time
1. In the Alarm Mode, use D to scroll through the alarm screens until the one whosetime you want to set is displayed.
AL1 AL2 AL3
SIG AL5 AL4• The alarm screens are AL1, AL2, AL3, AL4, and AL5.
About 2 seconds
Alarm timeAlarm number
▲▲
E-22
2. After you select an alarm, hold down A for about two seconds until the hour settingof the alarm time starts to flash. This is the setting mode.• This operation turns on the alarm automatically.
3. Press C to move the flashing between the hour and minute settings.4. While a setting is flashing, use D (+) and B (–) to change it.5. Press A to exit the setting mode.
Alarm OperationThe alarm tone sounds at the preset time for 10 seconds, regardless of the mode thewatch is in.• Alarm and Hourly Time Signal operations are performed in accordance with the
Timekeeping Mode time.• To stop the alarm tone after it starts to sound, press any button.
E-23
To turn an alarm on and off1. In the Alarm Mode, use D to select an alarm.2. Press A to toggle it on and off.
To turn the Hourly Time Signal on and off1. In the Alarm Mode, use D to select the Hourly Time
Signal (SIG) (page E-21).2. Press A to toggle it on and off.
Hourly time signalon indicator
Alarm on indicator
E-24
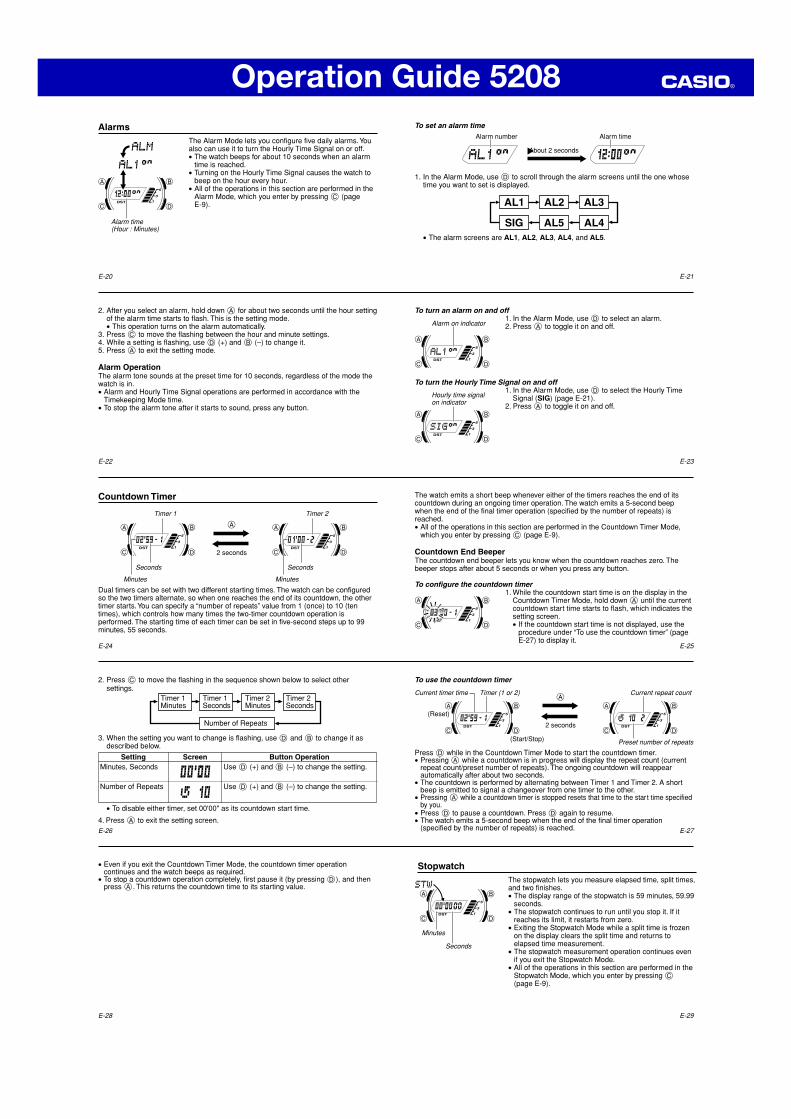
Countdown Timer
Seconds
Minutes
Timer 1
Dual timers can be set with two different starting times. The watch can be configuredso the two timers alternate, so when one reaches the end of its countdown, the othertimer starts. You can specify a “number of repeats” value from 1 (once) to 10 (tentimes), which controls how many times the two-timer countdown operation isperformed. The starting time of each timer can be set in five-second steps up to 99minutes, 55 seconds.
A ▲
▲
2 seconds
Seconds
Minutes
Timer 2
E-25
The watch emits a short beep whenever either of the timers reaches the end of itscountdown during an ongoing timer operation. The watch emits a 5-second beepwhen the end of the final timer operation (specified by the number of repeats) isreached.• All of the operations in this section are performed in the Countdown Timer Mode,
which you enter by pressing C (page E-9).
Countdown End BeeperThe countdown end beeper lets you know when the countdown reaches zero. Thebeeper stops after about 5 seconds or when you press any button.
To configure the countdown timer1. While the countdown start time is on the display in the
Countdown Timer Mode, hold down A until the currentcountdown start time starts to flash, which indicates thesetting screen.• If the countdown start time is not displayed, use the
procedure under “To use the countdown timer” (pageE-27) to display it.
E-26
• To disable either timer, set 00'00" as its countdown start time.
4. Press A to exit the setting screen.
Button OperationUse D (+) and B (–) to change the setting.
Use D (+) and B (–) to change the setting.
SettingMinutes, Seconds
Number of Repeats
Screen
2. Press C to move the flashing in the sequence shown below to select othersettings.
Timer 1Minutes
Timer 1Seconds
Timer 2Seconds
Timer 2Minutes
Number of Repeats
3. When the setting you want to change is flashing, use D and B to change it asdescribed below.
E-27
To use the countdown timer
Press D while in the Countdown Timer Mode to start the countdown timer.• Pressing A while a countdown is in progress will display the repeat count (current
repeat count/preset number of repeats). The ongoing countdown will reappearautomatically after about two seconds.
• The countdown is performed by alternating between Timer 1 and Timer 2. A shortbeep is emitted to signal a changeover from one timer to the other.
• Pressing A while a countdown timer is stopped resets that time to the start time specifiedby you.
• Press D to pause a countdown. Press D again to resume.• The watch emits a 5-second beep when the end of the final timer operation
(specified by the number of repeats) is reached.
Current timer time
Preset number of repeats
Current repeat countTimer (1 or 2)
(Reset)
(Start/Stop)
A ▲
▲
2 seconds
E-28
• Even if you exit the Countdown Timer Mode, the countdown timer operationcontinues and the watch beeps as required.
• To stop a countdown operation completely, first pause it (by pressing D), and thenpress A. This returns the countdown time to its starting value.
E-29
StopwatchThe stopwatch lets you measure elapsed time, split times,and two finishes.• The display range of the stopwatch is 59 minutes, 59.99
seconds.• The stopwatch continues to run until you stop it. If it
reaches its limit, it restarts from zero.• Exiting the Stopwatch Mode while a split time is frozen
on the display clears the split time and returns toelapsed time measurement.
• The stopwatch measurement operation continues evenif you exit the Stopwatch Mode.
• All of the operations in this section are performed in theStopwatch Mode, which you enter by pressing C(page E-9).
Minutes
Seconds
Operation Guide 5208
E-30
DStart Stop
Elapsed Time➤
Re-start ClearD ➤
StopD ➤D ➤A
Split TimeDStart Split
➤
Split release ClearA ➤
StopA ➤D ➤A
Two FinishesDStart Split
➤
Stop ClearA ➤
Split releaseD ➤A ➤A
First runner finishes.Display time of firstrunner.
Second runnerfinishes.
Display time ofsecond runner.
To measure times with the stopwatch
• The split time screen alternates between a split indicator (SPL) and the split time attwo-second intervals.
E-31
IlluminationAn LED (light-emitting diode) illuminate the display foreasy reading in the dark.
To illuminate the displayIn any mode (except when a setting screen is on thedisplay), press B to turn on illumination.• You can use the procedure below to select either 1.5
seconds or 3 seconds as the illumination duration. Whenyou press B, the illumination will remain on for about1.5 seconds or 3 seconds, depending on the currentillumination duration setting.
l l l l llllllllllll l l
l
E-32
To specify the illumination duration1. In the Timekeeping Mode, hold down A until the
display contents start to flash. This is the setting screen.2. Press C 10 times until the current illumination duration
setting (LT1 or LT3) appears.3. Press D to toggle the setting between LT1
(approximately 1.5 seconds) and LT3 (approximately 3seconds).
4. Press A to exit the setting screen.
E-33
Power SupplyThis watch is equipped with a solar cell and a rechargeable battery that is charged bythe electrical power produced by the solar cell. The illustration shown below showshow you should position the watch for charging.
Example: Orient the watch so its face ispointing at a light source.
• The illustration shows how to position awatch with a resin band.
• Note that charging efficiency drops whenany part of the solar cell is blocked byclothing, etc.
• You should try to keep the watch outside ofyour sleeve as much as possible. Chargingis reduced significantly if the face iscovered only partially.
Solar cell
E-34
Important!• Storing the watch for long periods in an area where there is no light or wearing it in
such a way that it is blocked from exposure to light can cause rechargeable batterypower to run down. Be sure that the watch is exposed to bright light wheneverpossible.
• This watch uses a rechargeable battery to store power produced by the solar cell, soregular battery replacement is not required. However, after very long use, therechargeable battery may lose its ability to achieve a full charge. If you experienceproblems getting the rechargeable battery to charge fully, contact your dealer orCASIO distributor about having it replaced.
• Never try to remove or replace the watch’s rechargeable battery yourself. Use of thewrong type of battery can damage the watch.
• The current time and all other settings return to their initial factory defaults wheneverbattery power drops to Level 5 (pages E-36 and E-37) and when you have thebattery replaced.
• Turn on the watch’s Power Saving function (page E-46) and keep it in an areanormally exposed to bright light when storing it for long periods. This helps to keepthe rechargeable battery from going dead.
E-35
To check the current battery levelWhen the battery level is at Level 1 (HI) or Level 2 (MID), the corresponding batterylevel indicator (HI or MID, page E-8) will appear only if you press C in theTimekeeping Mode. For other battery levels, the applicable indicator appearsautomatically.
Battery level indicator
E-36
Function Status
All functions enabled.
All functions enabled.
Key operation tone, alarm, Hourly TimeSignal, and illumination disabled.
All hands stop at 12 o’clock. All operationsdisabled.
All functions, including timekeeping,disabled and initialized.
Level
1
2
3
4
5
Battery Level Indicator
(Charge Soon Alert)
• The battery level indicator shows the current power level of the rechargeable battery.
E-37
• The indicator at Level 3 tells you that battery power is very low, and thatexposure to bright light for charging is required as soon as possible.
• At Level 5, all functions are disabled and settings return to their initial factorydefaults. Once the battery reaches Level 2 after falling to Level 5, reconfigure thecurrent time, date, and other settings.
• Display indicators reappear as soon as the battery is charged from Level 5 to Level 2.• Leaving the watch exposed to direct sunlight or some other very strong light source
can cause the battery power indicator to show a reading temporarily that is higherthan the actual battery level. The correct battery level should be indicated after a fewminutes.
E-38
• Performing illumination, or beeper operations during ashort period may cause (recover) to appear on thedisplay.After some time, battery power will recover and (recover) will disappear, indicating that the abovefunctions are enabled again.
• If (recover) appears frequently, it probably meansthat remaining battery power is low. Leave the watch inbright light to allow it to charge.
Recover indicator
E-39
Charging PrecautionsCertain charging conditions can cause the watch to become very hot. Avoid leavingthe watch in the areas described below whenever charging its rechargeable battery.Also note that allowing the watch to become very hot can cause its liquid crystaldisplay to black out. The appearance of the LCD should become normal again whenthe watch returns to a lower temperature.
Warning!Leaving the watch in bright light to charge its rechargeable battery can cause itto become quite hot. Take care when handling the watch to avoid burn injury.The watch can become particularly hot when exposed to the followingconditions for long periods.• On the dashboard of a car parked in direct sunlight• Too close to an incandescent lamp• Under direct sunlight

Operation Guide 5208
E-40
Charging GuideThe following table shows the amount of time the watch needs to be exposed to lighteach day in order to generate enough power for normal daily operations.
Exposure Level (Brightness)
Outdoor Sunlight (50,000 lux)Sunlight Through a Window (10,000 lux)Daylight Through a Window on a Cloudy Day (5,000 lux)Indoor Fluorescent Lighting (500 lux)
ApproximateExposure Time
8 minutes30 minutes48 minutes8 hours
• For details about the battery operating time and daily operating conditions, see the“Power Supply” section of the Specifications (page E-52).
• Stable operation is promoted by frequent exposure to light.
E-41
Recovery TimesThe table below shows the amount exposure that is required to take the battery fromone level to the next.
Approximate Exposure TimeLevel 5 Level 4 Level 3 Level 2 Level 1
3 hours 35 hours 10 hours
10 hours 133 hours 36 hours
16 hours 216 hours 58 hours
194 hours - - - - - - - - - - - - - - - -
Exposure Level(Brightness)
Outdoor Sunlight(50,000 lux)Sunlight Through aWindow (10,000 lux)Daylight Through aWindow on a CloudyDay (5,000 lux)Indoor FluorescentLighting (500 lux)
▲ ▲ ▲
• The above exposure time values are all for reference only. Actual required exposuretimes depend on lighting conditions.
E-42
Adjusting Home PositionsStrong magnetism or impact can cause the hands of the watch to be off. If thishappens, perform the applicable home position adjustment procedures in this section.• Hand home position adjustment is not required if the analog time and digital time are
the same in the Timekeeping Mode.
To adjust home positions1. In the Timekeeping Mode, hold down A for about five seconds. You can release the
button after “H.SET” appears on the display.• Though “ADJ” will appear on the display after about two seconds, do not release
the button yet. Keep it depressed until “H.SET” appears.
E-43
Correct hour andminute hand positions
• The hour and minute hands should move to 12 o’clock(their home position), and “0:00” will flash on thedisplay.
• If the hour and minute hands are not at 12 o’clock,use D (+) and B (–) to move them there.
• Holding down either button will cause the hands tomove at high speed. Once started, high-speed handmovement will continue even if you release the button.To stop high-speed hand movement, press any button.High-speed hand movement started with the D (+)button will stop automatically after 12 revolutions ofthe minute hand. If started with the B (–) button, itwill stop after one revolution of the minute hand.
2. After everything is the way you want, press A to return to the Timekeeping Mode.• After performing home position adjustment, enter the Timekeeping Mode and check
to make sure that the analog hands and the digital display indicate the same time. Ifthey do not, perform home position adjustment again.
E-44
ReferenceThis section contains more detailed and technical information about watch operation.It also contains important precautions and notes about the various features andfunctions of this watch.
Button Operation ToneThe button operation tone sounds any time you press one of the watch’s buttons. Youcan turn the button operation tone on or off as desired.• Even if you turn off the button operation tone, alarms, the Hourly Time Signal, and
other beepers all operate normally.
E-45
To turn the button operation tone on and off1. In the Timekeeping Mode, hold down A for about two
seconds, until “ADJ” appears on the display.• Your current Home City code will be flashing on the
screen.2. Press C nine times until the current button operation
tone setting ( or ) appears.3. Press D to toggle the setting between (tone on)
and (tone off).4. Press A to exit the setting screen.
E-46
Power Saving FunctionThe Power Saving function enters a sleep stateautomatically whenever the watch is left in an area for acertain period where it is dark (except if the watch is in theStopwatch or Timer mode). The table below shows howwatch functions are affected by the Power Savingfunction.
E-47
Elapsed Time in Dark60 to 70 minutes
6 or 7 days
DisplayBlank
OperationAll functions enabled, except for the display
•Beeper tone, illumination, and display disabled•Analog timekeeping stopped at 12 o’clock
• Wearing the watch inside the sleeve of clothing can cause it to enter the sleep state.• The watch will not enter the sleep state between 6:00 AM and 9:59 PM. If the watch
is already in the sleep state when 6:00 AM arrives, however, it will remain in thesleep state.
To recover from the sleep statePerform any one of the following operations.• Move the watch to a well-lit area.• Press any button.
E-48
Auto Return Features• If you leave the watch in the Alarm Mode, or with the battery level indicator displayed
for two or three minutes without performing any operation, it automatically returns tothe Timekeeping Mode.
• If you leave the watch with a flashing setting on the display for two or three minuteswithout performing any operation, the watch automatically exits the setting screen.
ScrollingThe B and D buttons are used in various modes and setting screens to scrollthrough data on the display. In most cases, holding down these buttons during a scrolloperation scrolls through the data at high speed.
Initial ScreensWhen you enter the World Time Mode or Alarm Mode, the data you were viewingwhen you last exited the mode appears first.
E-49
Timekeeping• Resetting the seconds to 00 while the current count is in the range of 30 to 59
causes the minutes to be increased by 1. In the range of 00 to 29, the seconds arereset to 00 without changing the minutes.
• The year can be set in the range of 2000 to 2099.• The watch’s built-in full automatic calendar makes allowances for different month
lengths and leap years. Once you set the date, there should be no reason to changeit except after you have the watch’s battery replaced or when battery power drops toLevel 5.
• The current time for all city codes in the Timekeeping Mode and World Time Mode iscalculated in accordance with the Coordinated Universal Time (UTC) for each city,based on your Home City time setting.
Illumination Precautions• Illumination may be hard to see when viewed under direct sunlight.• Illumination automatically dims if it is lit and an alarm or time up alarm sounds.• Frequent use of illumination runs down the battery.
Operation Guide 5208
E-50
SpecificationsAccuracy at normal temperature: ± 30 seconds a monthDigital Timekeeping: Hour, minutes, seconds, p.m. (P), month, day, day of the week
Time system: Switchable between 12-hour and 24-hour formatsCalendar system: Full Auto-calendar pre-programmed from the year
2000 to 2099Other: Home city code (can be assigned one of 48 city codes); Daylight
Saving Time (summer time)/Standard TimeAnalog Timekeeping: Hour, minutes (hand moves every 20 seconds)World Time: 48 cities (31 time zones)
Other: Standard Time/Daylight Saving Time (summer time)Alarms: 5 daily alarms; Hourly Time Signal
E-51
Countdown Timer:Number of timers: 2 (one set)Setting unit: 5 secondsRange: 99 minutes 55 seconds each timerCountdown unit: 1 secondNumber of repeats: 1 to 10Other: 5-second time up beeper
Stopwatch:Measuring unit: 1/100 secondMeasuring capacity: 59' 59.99''Measuring modes: Elapsed time, split time, two finishes
Illumination: LED (light-emitting diode); Selectable illumination durationOther: Battery level indicator; Power Saving; Button operation tone on/off;
6 languages for day of the week
E-52
Power Supply: Solar cell and a rechargeable batteryApproximate Battery Operating Time
10 months (from full charge to Level 4 when the watch is not exposed to light)under the following conditions:• Display on 18 hours per day, sleep state 6 hours per day• 1 illumination operation (1.5 seconds) per day• 10 seconds of alarm operation per day
Frequent use of illumination can shorten battery operating time.
L
City Code Table
Pago PagoHonolulu
AnchorageVancouver
Los AngelesEdmonton
DenverMexico City
ChicagoNew YorkSantiagoHalifax
St. Johns
–11–10–9
–8
–7
–6
–5
–4
–3.5
PPGHNLANCYVRLAXYEADENMEXCHINYCSCLYHZYYT
City UTC Offset/GMT Differential
CityCode
City UTC Offset/GMT Differential
CityCodeRIOFENRAIUTCLISLONMADPARROMBERSTOATHCAIJRS
Rio De JaneiroFernando de Noronha
Praia
LisbonLondonMadridParisRomeBerlin
StockholmAthensCairo
Jerusalem
–3–2–1
0
+1
+2
L-1
City UTC Offset/GMT Differential
CityCode
• Based on data as of December 2010.• The rules governing global times (UTC offset and GMT differential) and summer
time are determined by each individual country.
City UTC Offset/GMT Differential
CityCode
MOWJEDTHRDXBKBLKHIDELKTMDACRGNBKK
MoscowJeddahTehranDubaiKabul
KarachiDelhi
KathmanduDhakaYangonBangkok
+3
+3.5+4+4.5+5+5.5+5.75+6+6.5+7
SINHKGBJSTPESELTYOADLGUMSYDNOUWLG
SingaporeHong Kong
BeijingTaipeiSeoulTokyo
AdelaideGuam
SydneyNoumea
Wellington
+8
+9
+9.5
+10
+11+12