nuc box 3000/3050/3150 - bitgravityasrock.pc.cdn.bitgravity.com/manual/n3150-nuc ipc.pdf · nuc box...
TRANSCRIPT
NUC BOX 3000/3050/3150
User Manual
Version 1.0Published September 2015
Important Safety Instructions
Pay close attention to the following safety instructions before performing any of the operation. Basic safety precautions should be followed to protect yourself from harm and the product from damage:
• Operation of the product should be carried out by suitably trained, qualified, and certified personnel only to avoid risk of injury from electrical shock or energy hazard.
• Disconnect the power cord from the wall outlet when installing or removing main system components, such as the motherboard and power supply unit.
• Place the system on a stable and flat surface.• Use extreme caution when working with high-voltage components. • When handling parts, use a grounded wrist strap designed to prevent static discharge.• Keep the area around the system clean and clutter-free.• Keep all components and printed circuit boards (PCBs) in their antistatic bags when
not in use.• Handle a board by its edges only; do not touch its components, peripheral chips,
memory modules or contacts.

The terms HDMI™ and HDMI High-Definition Multimedia Interface, and the HDMI logo are trademarks or registered trademarks of HDMI Licensing LLC in the United States and other countries.
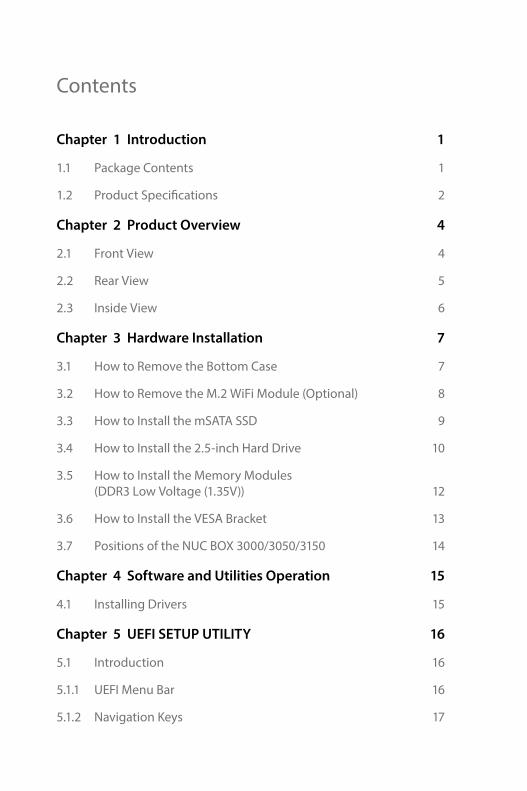
Contents
Chapter 1 Introduction 1
1.1 Package Contents 1
1.2 Product Specifications 2
Chapter 2 Product Overview 4
2.1 Front View 4
2.2 Rear View 5
2.3 Inside View 6
Chapter 3 Hardware Installation 7
3.1 How to Remove the Bottom Case 7
3.2 How to Remove the M.2 WiFi Module (Optional) 8
3.3 How to Install the mSATA SSD 9
3.4 How to Install the 2.5-inch Hard Drive 10
3.5 How to Install the Memory Modules (DDR3 Low Voltage (1.35V)) 12
3.6 How to Install the VESA Bracket 13
3.7 Positions of the NUC BOX 3000/3050/3150 14
Chapter 4 Software and Utilities Operation 15
4.1 Installing Drivers 15
Chapter 5 UEFI SETUP UTILITY 16
5.1 Introduction 16
5.1.1 UEFI Menu Bar 16
5.1.2 Navigation Keys 17
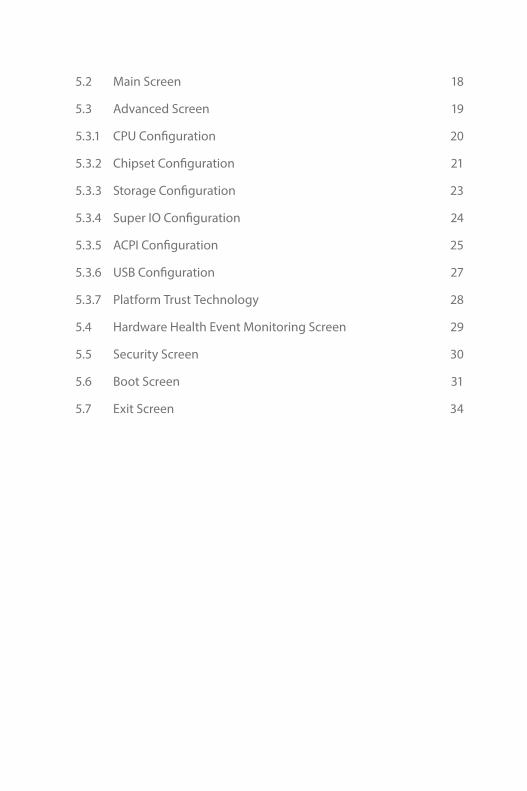
5.2 Main Screen 18
5.3 Advanced Screen 19
5.3.1 CPU Configuration 20
5.3.2 Chipset Configuration 21
5.3.3 Storage Configuration 23
5.3.4 Super IO Configuration 24
5.3.5 ACPI Configuration 25
5.3.6 USB Configuration 27
5.3.7 Platform Trust Technology 28
5.4 Hardware Health Event Monitoring Screen 29
5.5 Security Screen 30
5.6 Boot Screen 31
5.7 Exit Screen 34
NUC BOX 3000/3050/3150
PB 1
Engl
ish
Chapter 1 Introduction
1.1 Package Contents• NUC BOX 3000/3050/3150 Barebone System with:
NUC BOX 3000/3050/3150 Chassis Motherboard (pre-installed)M.2 WiFi Module (Optional)*The barebone system does not include memory, hard drive and mSATA SSD.
• Power Adapter (36W/12V) & Power Plug• SATA Data and Power Cable• mSATA Screw• VESA Mount Bracket & Screw Package• Support CD• Quick Installation Guide
Because the hardware specifications might be updated, the content of this documentation will be subject to change without notice.
If any items are missing or appear damaged, contact your authorized dealer.
NUC BOX 3000/3050/3150
PB 2
Engl
ish
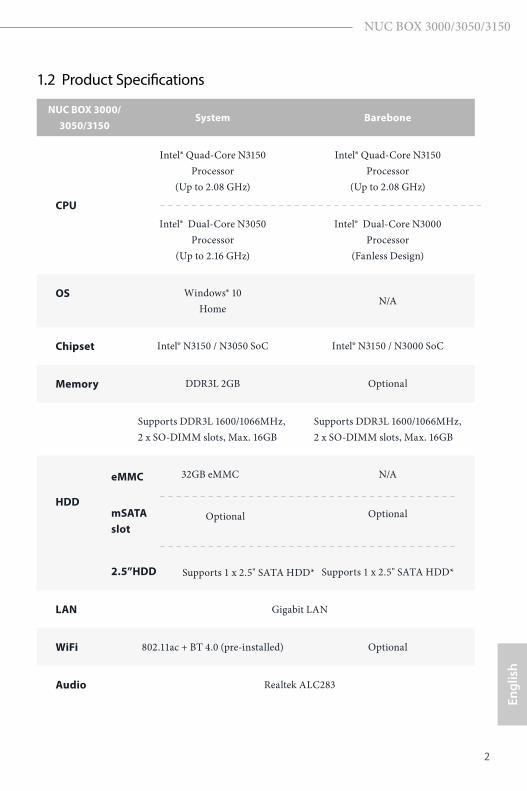
1.2 Product Specifications
NUC BOX 3000/ 3050/3150
System Barebone
CPU
Intel® Quad-Core N3150 Processor
(Up to 2.08 GHz)
Intel® Quad-Core N3150 Processor
(Up to 2.08 GHz)
Intel® Dual-Core N3050 Processor
(Up to 2.16 GHz)
Intel® Dual-Core N3000 Processor
(Fanless Design)
OS Windows® 10Home
N/A
Chipset Intel® N3150 / N3050 SoC Intel® N3150 / N3000 SoC
Memory DDR3L 2GB Optional
Supports DDR3L 1600/1066MHz, 2 x SO-DIMM slots, Max. 16GB
Supports DDR3L 1600/1066MHz, 2 x SO-DIMM slots, Max. 16GB
HDD
32GB eMMC N/A
Optional
Supports 1 x 2.5" SATA HDD*
LAN Gigabit LAN
WiFi 802.11ac + BT 4.0 (pre-installed) Optional
Audio Realtek ALC283
eMMC
mSATA slot
2.5”HDD
Optional
Supports 1 x 2.5" SATA HDD*
3 4
English
Front I/O 1 x USB 3.0, 1 x USB 3.0 (Type C), 1 x Audio-out with MIC-In
Rear I/O 2 x HDMI, 1 x DP, 2 x USB 3.0, 1 x LAN, 1 x Kensington lock
Power Unit 36W/12V Adapter
Dimension 110mm (W) x 46mm (H) x 118.5mm (L)
VESA Bracket included , supports 75 x 75 and 100 x 100 mm
Volume (Liters)
0.6L
Operating Tempera-ture
0°C~40°C
Other OS Linux: Ubuntu 14.04.3 LTS / Ubuntu 15.04 / Ubuntu 15.10 / Fedora 23 / Zorin OS 10 / Arch Linux 2015.10.01 / clonezilla-live-20150915-wily-amd64 / Android-x86-4.4-r3 compliant
* For Beebox N3000 series, it is not recommended to install 2.5” HDD. If you install the 2.5” HDD, please keep the NUC BOX in a vertical position to ensure better cooling performance.
NUC BOX 3000/3050/3150
3 4
Engl
ish
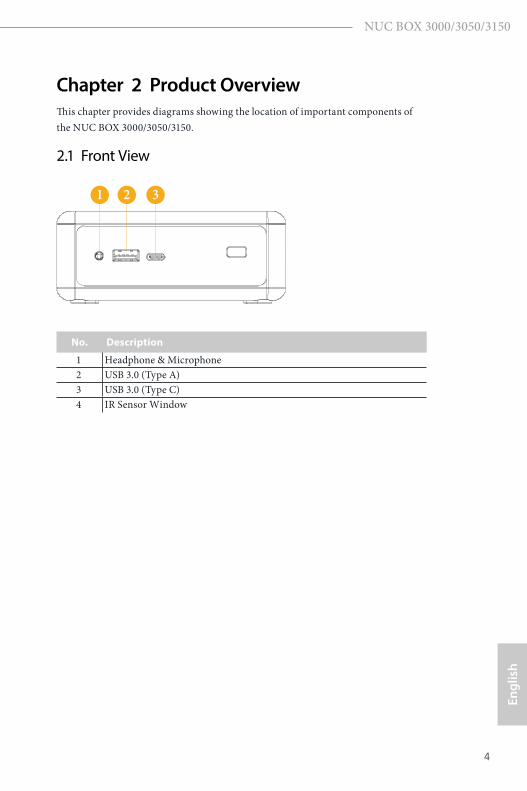
Chapter 2 Product OverviewThis chapter provides diagrams showing the location of important components of the NUC BOX 3000/3050/3150.
2.1 Front View
No. Description
1 Headphone & Microphone2 USB 3.0 (Type A)3 USB 3.0 (Type C)4 IR Sensor Window
1 2 3
5 6
English
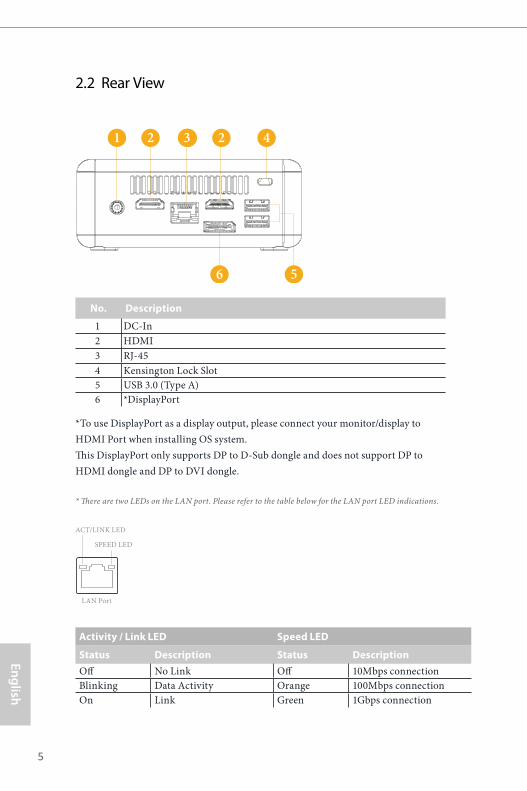
2.2 Rear View
No. Description
1 DC-In2 HDMI3 RJ-454 Kensington Lock Slot5 USB 3.0 (Type A)6 *DisplayPort
*To use DisplayPort as a display output, please connect your monitor/display to HDMI Port when installing OS system. This DisplayPort only supports DP to D-Sub dongle and does not support DP to HDMI dongle and DP to DVI dongle.
* There are two LEDs on the LAN port. Please refer to the table below for the LAN port LED indications.
Activity / Link LED Speed LED
Status Description Status DescriptionOff No Link Off 10Mbps connectionBlinking Data Activity Orange 100Mbps connectionOn Link Green 1Gbps connection
ACT/LINK LED
SPEED LED
LAN Port
1 2 33 2 4
56
NUC BOX 3000/3050/3150
5 6
Engl
ish
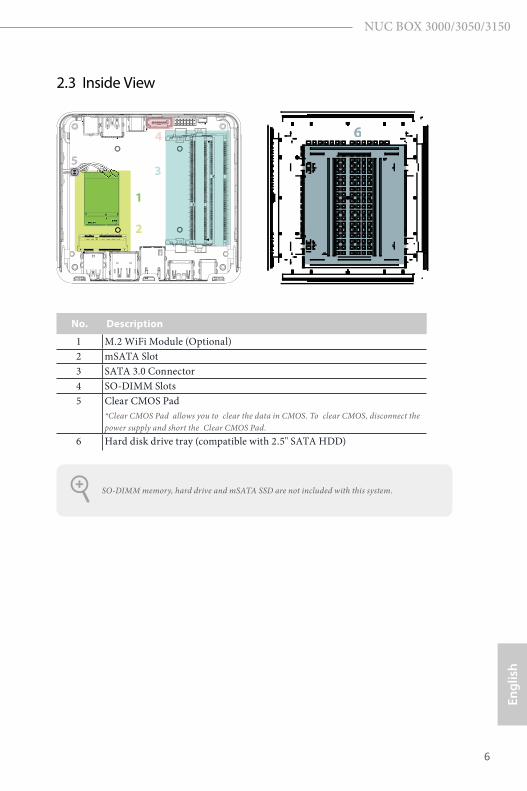
2.3 Inside View
No. Description
1 M.2 WiFi Module (Optional)2 mSATA Slot 3 SATA 3.0 Connector4 SO-DIMM Slots5 Clear CMOS Pad
*Clear CMOS Pad allows you to clear the data in CMOS. To clear CMOS, disconnect the power supply and short the Clear CMOS Pad.
6 Hard disk drive tray (compatible with 2.5" SATA HDD)
SO-DIMM memory, hard drive and mSATA SSD are not included with this system.
6
2
3
4
1
5
NUC BOX 3000/3050/3150
PB 7
Engl
ish
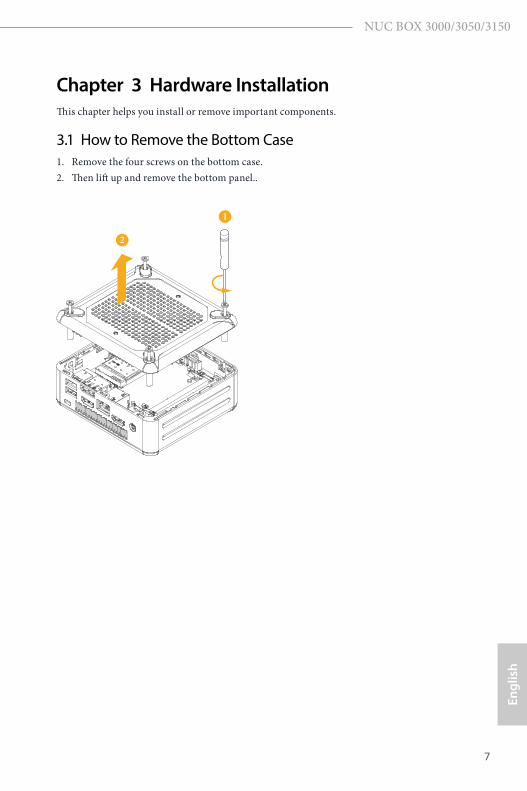
Chapter 3 Hardware InstallationThis chapter helps you install or remove important components.
3.1 How to Remove the Bottom Case1. Remove the four screws on the bottom case.2. Then lift up and remove the bottom panel..
2
1
8 9
English
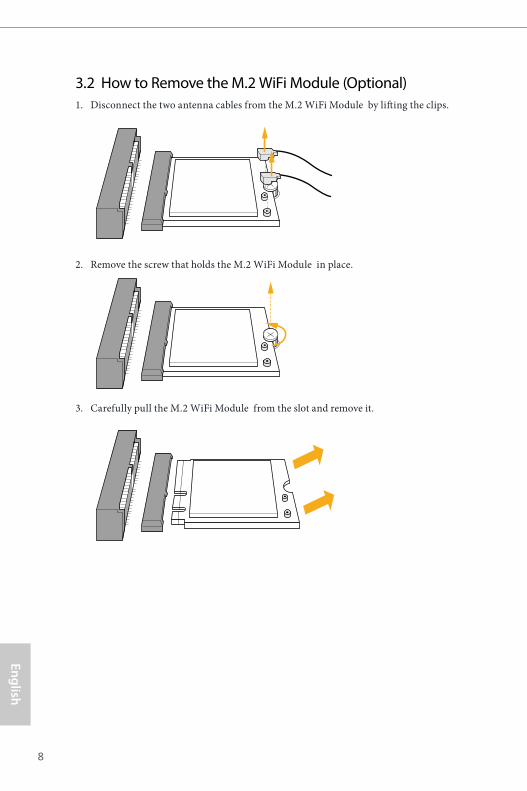
3.2 How to Remove the M.2 WiFi Module (Optional)1. Disconnect the two antenna cables from the M.2 WiFi Module by lifting the clips.
2. Remove the screw that holds the M.2 WiFi Module in place.
3. Carefully pull the M.2 WiFi Module from the slot and remove it.
NUC BOX 3000/3050/3150
8 9
Engl
ish
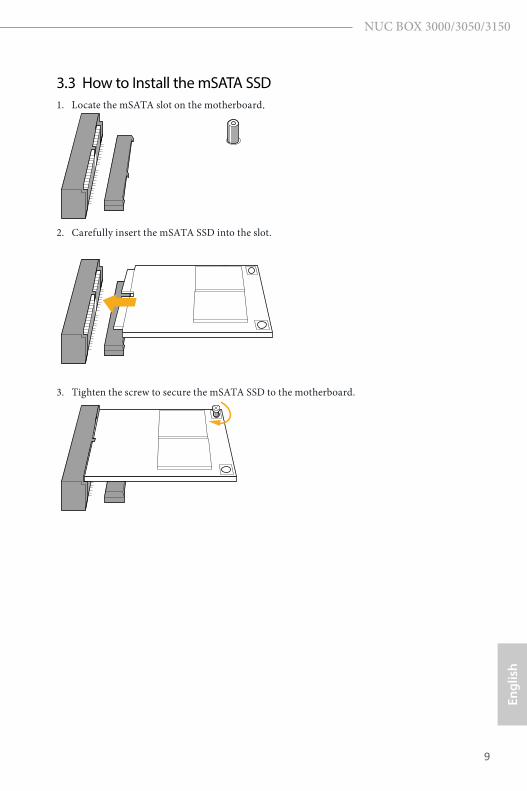
3.3 How to Install the mSATA SSD1. Locate the mSATA slot on the motherboard.
2. Carefully insert the mSATA SSD into the slot.
3. Tighten the screw to secure the mSATA SSD to the motherboard.

10 11
English
3.4 How to Install the 2.5-inch Hard Drive1. Remove the four screws on the bottom case. Then lift up and remove the bottom panel.
2. Unscrew the four screws that hold the HDD cage in place.
3. Install the HDD in the cage using the four screws. Then connect the SATA cable to the HDD.
NUC BOX 3000/3050/3150
10 11
Engl
ish
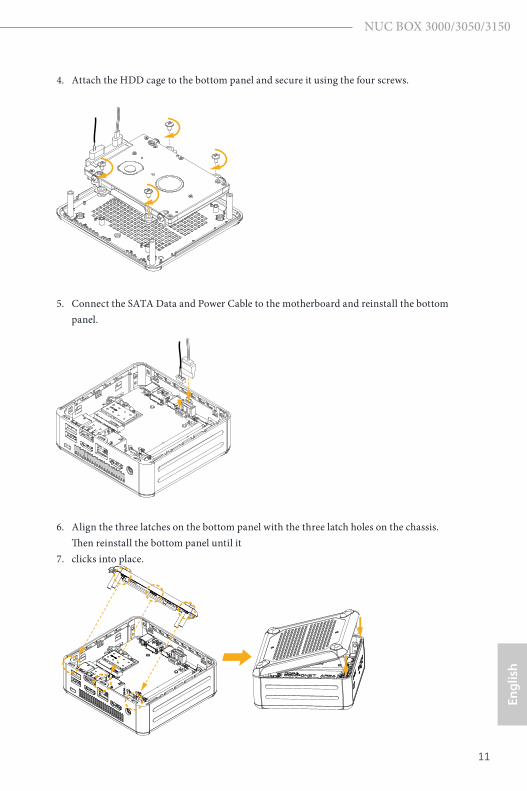
4. Attach the HDD cage to the bottom panel and secure it using the four screws.
5. Connect the SATA Data and Power Cable to the motherboard and reinstall the bottom panel.
6. Align the three latches on the bottom panel with the three latch holes on the chassis. Then reinstall the bottom panel until it
7. clicks into place.
12 13
English
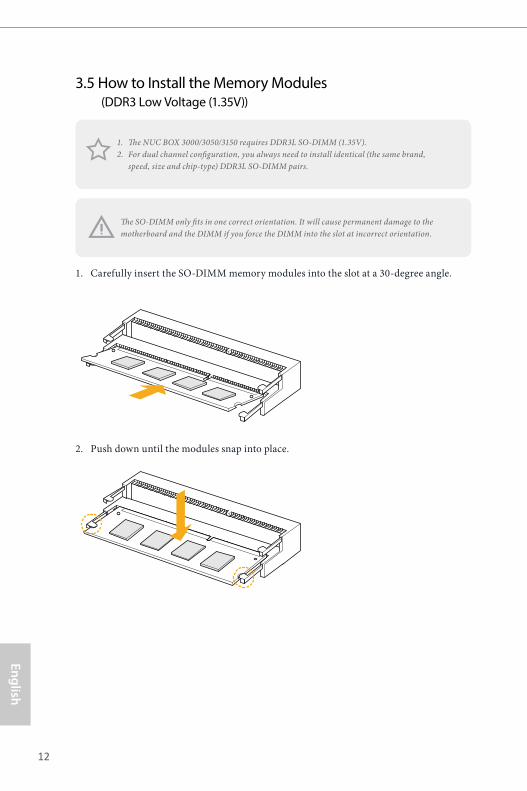
3.5 How to Install the Memory Modules (DDR3 Low Voltage (1.35V))
1. Carefully insert the SO-DIMM memory modules into the slot at a 30-degree angle.
2. Push down until the modules snap into place.
1. The NUC BOX 3000/3050/3150 requires DDR3L SO-DIMM (1.35V).2. For dual channel configuration, you always need to install identical (the same brand,
speed, size and chip-type) DDR3L SO-DIMM pairs.
The SO-DIMM only fits in one correct orientation. It will cause permanent damage to the motherboard and the DIMM if you force the DIMM into the slot at incorrect orientation.

NUC BOX 3000/3050/3150
12 13
Engl
ish
3.6 How to Install the VESA Bracket1. Attach the two screws to the base of the NUC BOX 3000/3050/3150.
2. 2. Attach the VESA Bracket to the rear of a compatible display using the four screws. *Choose mounting holes depending on the mounting hole pattern of your LCD screen (75 mm × 75 mm or 100 mm × 100 mm).
3. Mount the NUC BOX 3000/3050/3150 by sliding it into place.
14 15
English
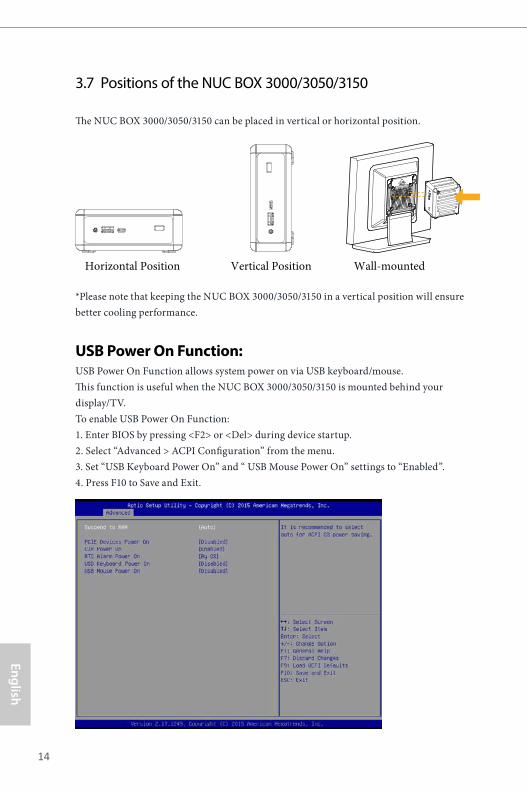
3.7 Positions of the NUC BOX 3000/3050/3150
The NUC BOX 3000/3050/3150 can be placed in vertical or horizontal position.
*Please note that keeping the NUC BOX 3000/3050/3150 in a vertical position will ensure better cooling performance.
USB Power On Function:USB Power On Function allows system power on via USB keyboard/mouse. This function is useful when the NUC BOX 3000/3050/3150 is mounted behind your display/TV.To enable USB Power On Function:1. Enter BIOS by pressing <F2> or <Del> during device startup.2. Select “Advanced > ACPI Configuration” from the menu.3. Set “USB Keyboard Power On” and “ USB Mouse Power On” settings to “Enabled”.4. Press F10 to Save and Exit.
Vertical Position Wall-mountedHorizontal Position
NUC BOX 3000/3050/3150
14 15
Engl
ish
Chapter 4 Software and Utilities Operation 4.1 Installing DriversThe Support CD that comes with the motherboard contains necessary drivers and useful utilities that enhance the motherboard’s features.
Running The Support CD
To begin using the support CD, insert the CD into your CD-ROM drive. The CD automatically displays the Main Menu if “AUTORUN” is enabled in your computer. If the Main Menu does not appear automatically, locate and double click on the file “ASRSETUP.EXE” in the Support CD to display the menu.
Drivers Menu
The drivers compatible to your system will be auto-detected and listed on the support CD driver page. Please click Install All or follow the order from top to bottom to install those required drivers. Therefore, the drivers you install can work properly.
Utilities Menu
The Utilities Menu shows the application software that the motherboard supports. Click on a specific item then follow the installation wizard to install it.
To improve Windows 7 compatibility, please download and install the following hot fix provided by Microsoft. “KB2720599”: http://support.microsoft.com/kb/2720599/en-us
16 17
English
Chapter 5 UEFI SETUP UTILITY
5.1 IntroductionThis section explains how to use the UEFI SETUP UTILITY to configure your system. You may run the UEFI SETUP UTILITY by pressing <F2> or <Del> right after you power on the computer, otherwise, the Power-On-Self-Test (POST) will continue with its test routines. If you wish to enter the UEFI SETUP UTILITY after POST, restart the system by pressing <Ctl> + <Alt> + <Delete>, or by pressing the reset button on the system chassis. You may also restart by turning the system off and then back on.
5.1.1 UEFI Menu Bar
The top of the screen has a menu bar with the following selections:
Main For setting system time/date information
Advanced For advanced system configurations
Tool Useful tools
H/W Monitor Displays current hardware status
Security For security settings
Boot For configuring boot settings and boot priority
Exit Exit the current screen or the UEFI Setup Utility
Because the UEFI software is constantly being updated, the following UEFI setup screens and descriptions are for reference purpose only, and they may not exactly match what you see on your screen.
NUC BOX 3000/3050/3150
16 17
Engl
ish
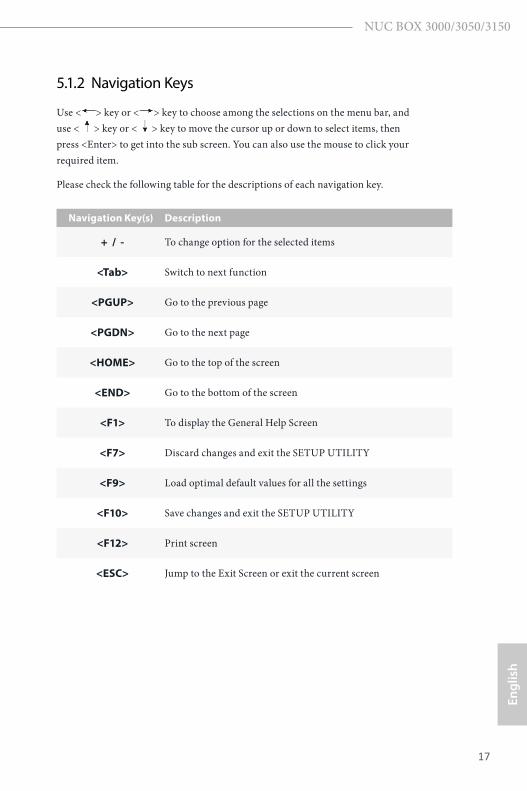
5.1.2 Navigation Keys
Use < > key or < > key to choose among the selections on the menu bar, and use < > key or < > key to move the cursor up or down to select items, then press <Enter> to get into the sub screen. You can also use the mouse to click your required item.
Please check the following table for the descriptions of each navigation key.
Navigation Key(s) Description
+ / - To change option for the selected items
<Tab> Switch to next function
<PGUP> Go to the previous page
<PGDN> Go to the next page
<HOME> Go to the top of the screen
<END> Go to the bottom of the screen
<F1> To display the General Help Screen
<F7> Discard changes and exit the SETUP UTILITY
<F9> Load optimal default values for all the settings
<F10> Save changes and exit the SETUP UTILITY
<F12> Print screen
<ESC> Jump to the Exit Screen or exit the current screen
18 19
English
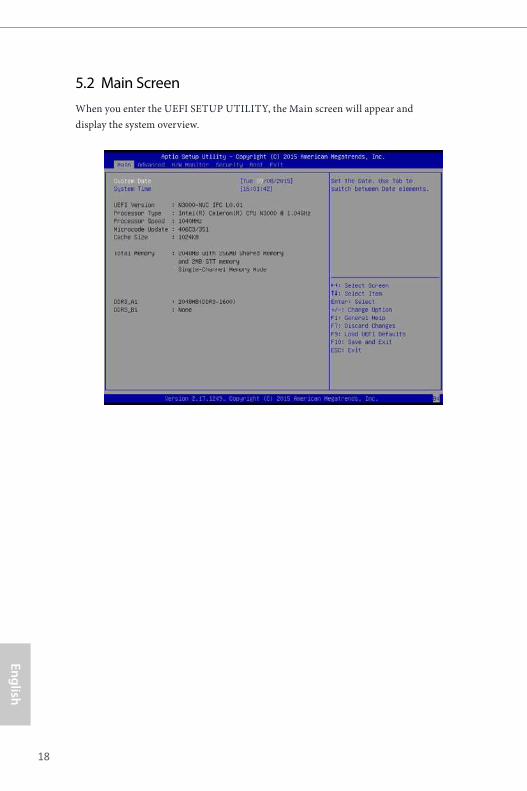
5.2 Main ScreenWhen you enter the UEFI SETUP UTILITY, the Main screen will appear and display the system overview.
NUC BOX 3000/3050/3150
18 19
Engl
ish
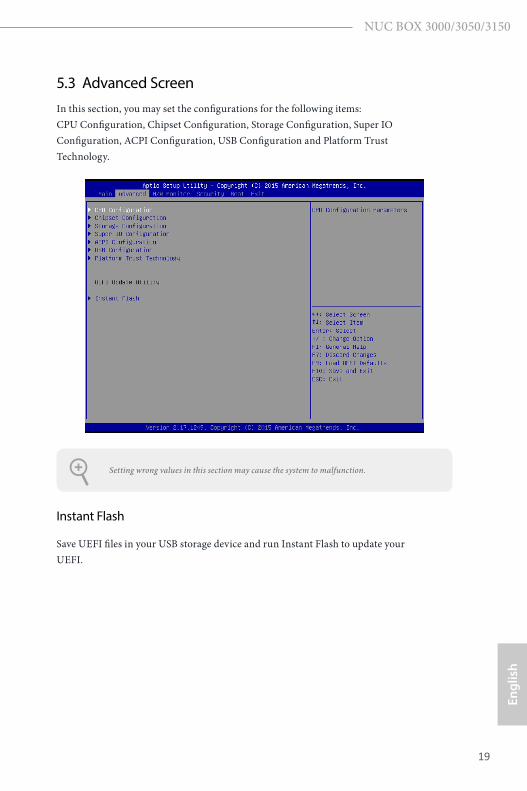
5.3 Advanced ScreenIn this section, you may set the configurations for the following items: CPU Configuration, Chipset Configuration, Storage Configuration, Super IO Configuration, ACPI Configuration, USB Configuration and Platform Trust Technology.
Instant Flash
Save UEFI files in your USB storage device and run Instant Flash to update your UEFI.
Setting wrong values in this section may cause the system to malfunction.
20 21
English
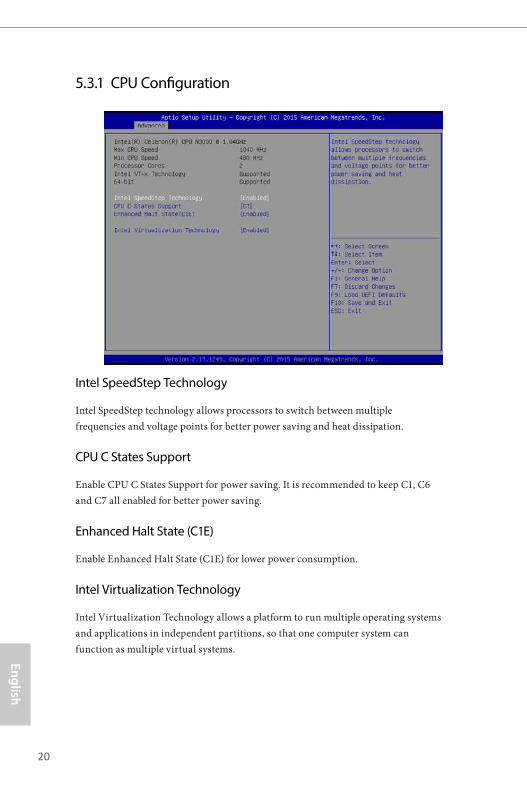
5.3.1 CPU Configuration
Intel SpeedStep Technology
Intel SpeedStep technology allows processors to switch between multiple frequencies and voltage points for better power saving and heat dissipation.
CPU C States Support
Enable CPU C States Support for power saving. It is recommended to keep C1, C6 and C7 all enabled for better power saving.
Enhanced Halt State (C1E)
Enable Enhanced Halt State (C1E) for lower power consumption.
Intel Virtualization Technology
Intel Virtualization Technology allows a platform to run multiple operating systems and applications in independent partitions, so that one computer system can function as multiple virtual systems.
NUC BOX 3000/3050/3150
20 21
Engl
ish
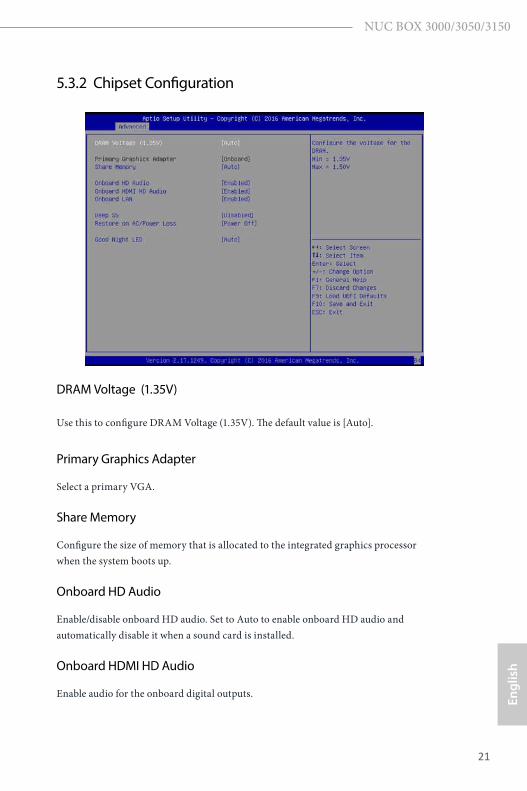
5.3.2 Chipset Configuration
DRAM Voltage (1.35V)
Use this to configure DRAM Voltage (1.35V). The default value is [Auto].
Primary Graphics Adapter
Select a primary VGA.
Share Memory
Configure the size of memory that is allocated to the integrated graphics processor when the system boots up.
Onboard HD Audio
Enable/disable onboard HD audio. Set to Auto to enable onboard HD audio and automatically disable it when a sound card is installed.
Onboard HDMI HD Audio
Enable audio for the onboard digital outputs.
22 23
English
Onboard LAN
Enable or disable the onboard network interface controller.
Deep S5
Configure deep sleep mode for power saving when the computer is shut down.
Restore on AC/Power Loss
Select the power state after a power failure. If [Power Off] is selected, the power will remain off when the power recovers. If [Power On] is selected, the system will start to boot up when the power recovers.
Good Night LED
By enabling Good Night LED, the Power/HDD LEDs will be switched off when the system is on. It will also automatically switch off the Power and Keyboard LEDs when the system enters into Standby/Hibernation mode.
NUC BOX 3000/3050/3150
22 23
Engl
ish
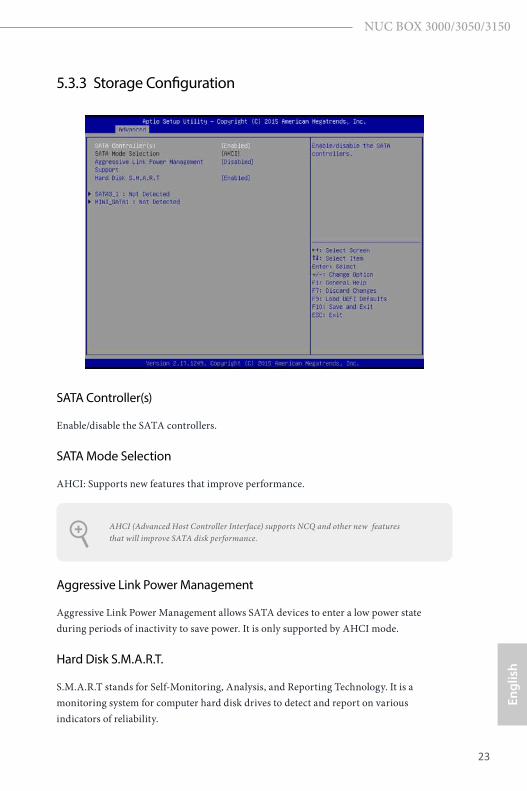
5.3.3 Storage Configuration
SATA Controller(s)
Enable/disable the SATA controllers.
SATA Mode Selection
AHCI: Supports new features that improve performance.
Aggressive Link Power Management
Aggressive Link Power Management allows SATA devices to enter a low power state during periods of inactivity to save power. It is only supported by AHCI mode.
Hard Disk S.M.A.R.T.
S.M.A.R.T stands for Self-Monitoring, Analysis, and Reporting Technology. It is a monitoring system for computer hard disk drives to detect and report on various indicators of reliability.
AHCI (Advanced Host Controller Interface) supports NCQ and other new features that will improve SATA disk performance.
24 25
English
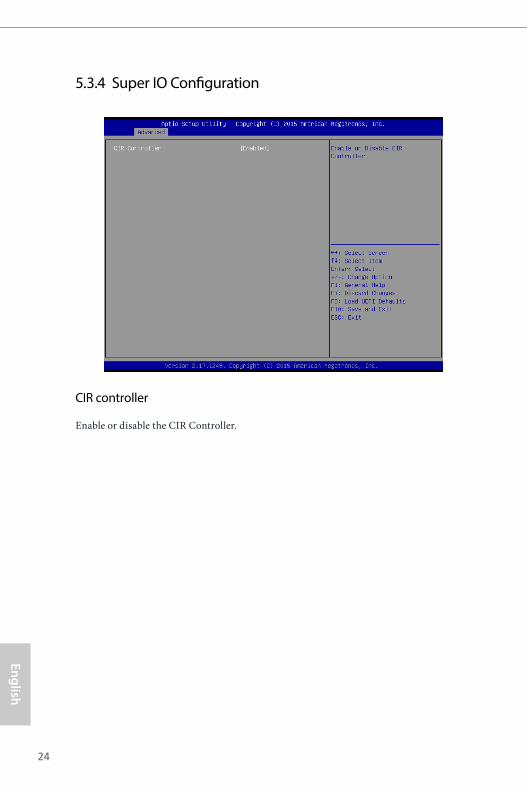
5.3.4 Super IO Configuration
CIR controller
Enable or disable the CIR Controller.
NUC BOX 3000/3050/3150
24 25
Engl
ish
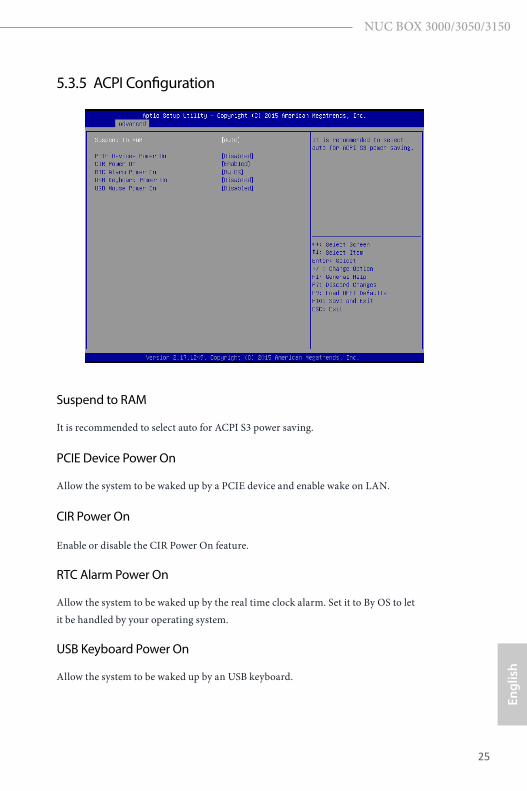
5.3.5 ACPI Configuration
Suspend to RAM
It is recommended to select auto for ACPI S3 power saving.
PCIE Device Power On
Allow the system to be waked up by a PCIE device and enable wake on LAN.
CIR Power On
Enable or disable the CIR Power On feature.
RTC Alarm Power On
Allow the system to be waked up by the real time clock alarm. Set it to By OS to let it be handled by your operating system.
USB Keyboard Power On
Allow the system to be waked up by an USB keyboard.
26 27
English
USB Mouse Power On
Allow the system to be waked up by an USB mouse.
NUC BOX 3000/3050/3150
26 27
Engl
ish
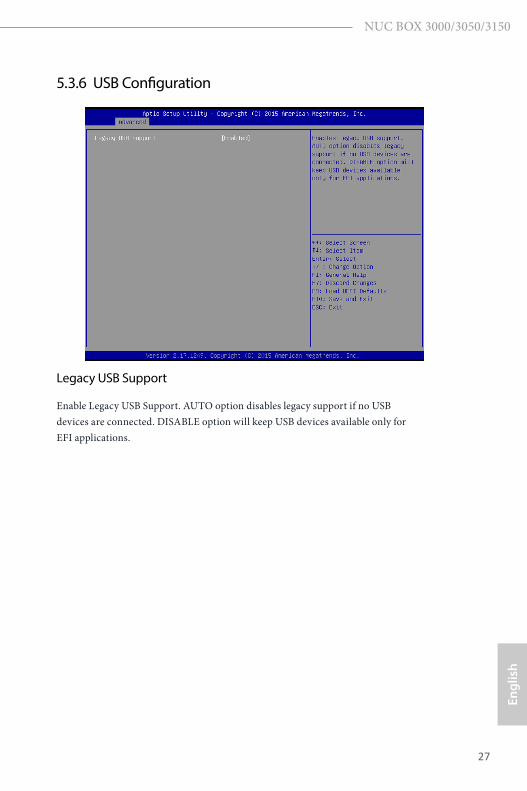
5.3.6 USB Configuration
Legacy USB Support
Enable Legacy USB Support. AUTO option disables legacy support if no USB devices are connected. DISABLE option will keep USB devices available only for EFI applications.
28 29
English
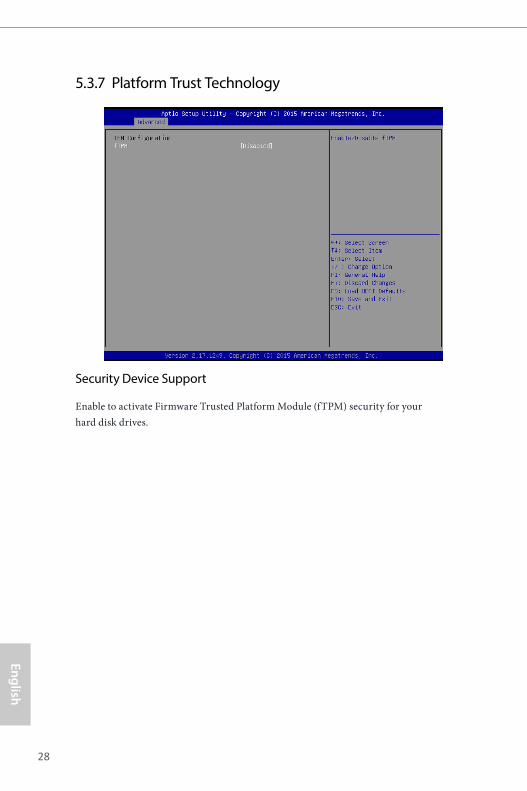
5.3.7 Platform Trust Technology
Security Device Support
Enable to activate Firmware Trusted Platform Module (fTPM) security for your hard disk drives.

NUC BOX 3000/3050/3150
28 29
Engl
ish
5.4 Hardware Health Event Monitoring ScreenThis section allows you to monitor the status of the hardware on your system, including the parameters of the CPU temperature, motherboard temperature, fan speed and voltage.
CPU Fan 1 Setting
Select a fan mode for CPU Fans 1, or choose Customize to set 5 CPU temperatures and assign a respective fan speed for each temperature.
30 31
English
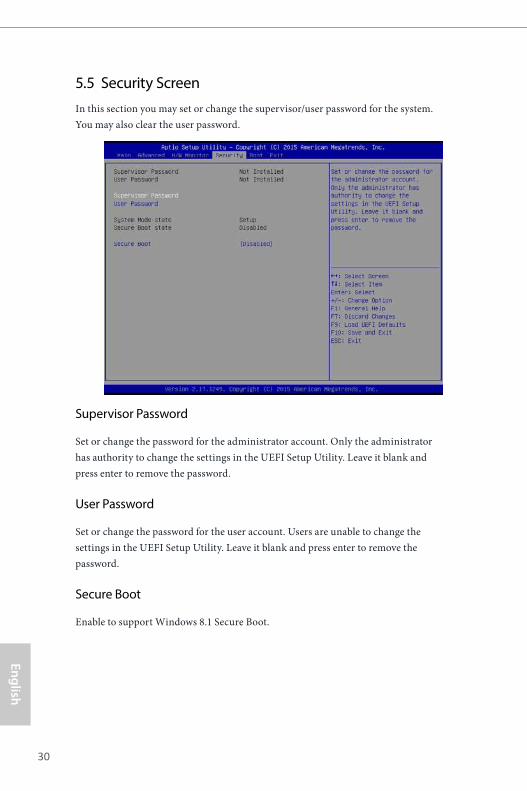
5.5 Security ScreenIn this section you may set or change the supervisor/user password for the system. You may also clear the user password.
Supervisor Password
Set or change the password for the administrator account. Only the administrator has authority to change the settings in the UEFI Setup Utility. Leave it blank and press enter to remove the password.
User Password
Set or change the password for the user account. Users are unable to change the settings in the UEFI Setup Utility. Leave it blank and press enter to remove the password.
Secure Boot
Enable to support Windows 8.1 Secure Boot.
NUC BOX 3000/3050/3150
30 31
Engl
ish
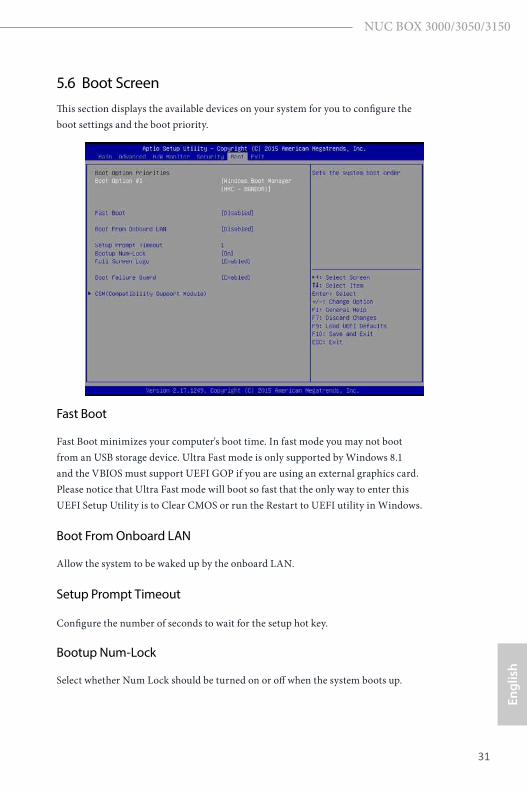
5.6 Boot ScreenThis section displays the available devices on your system for you to configure the boot settings and the boot priority.
Fast Boot
Fast Boot minimizes your computer's boot time. In fast mode you may not boot from an USB storage device. Ultra Fast mode is only supported by Windows 8.1 and the VBIOS must support UEFI GOP if you are using an external graphics card. Please notice that Ultra Fast mode will boot so fast that the only way to enter this UEFI Setup Utility is to Clear CMOS or run the Restart to UEFI utility in Windows.
Boot From Onboard LAN
Allow the system to be waked up by the onboard LAN.
Setup Prompt Timeout
Configure the number of seconds to wait for the setup hot key.
Bootup Num-Lock
Select whether Num Lock should be turned on or off when the system boots up.
32 33
English
Full Screen Logo
Enable to display the boot logo or disable to show normal POST messages.
AddOn ROM Display
Enable AddOn ROM Display to see the AddOn ROM messages or configure the AddOn ROM if you've enabled Full Screen Logo. Disable for faster boot speed.
Boot Failure Guard
If the computer fails to boot for a number of times the system automatically restores the default settings.
NUC BOX 3000/3050/3150
32 33
Engl
ish
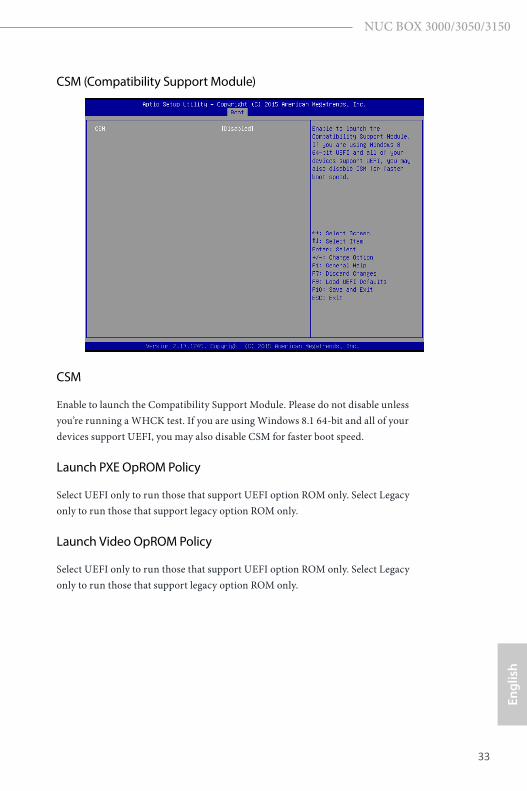
CSM (Compatibility Support Module)
CSM
Enable to launch the Compatibility Support Module. Please do not disable unless you’re running a WHCK test. If you are using Windows 8.1 64-bit and all of your devices support UEFI, you may also disable CSM for faster boot speed.
Launch PXE OpROM Policy
Select UEFI only to run those that support UEFI option ROM only. Select Legacy only to run those that support legacy option ROM only.
Launch Video OpROM Policy
Select UEFI only to run those that support UEFI option ROM only. Select Legacy only to run those that support legacy option ROM only.
34 PB
English
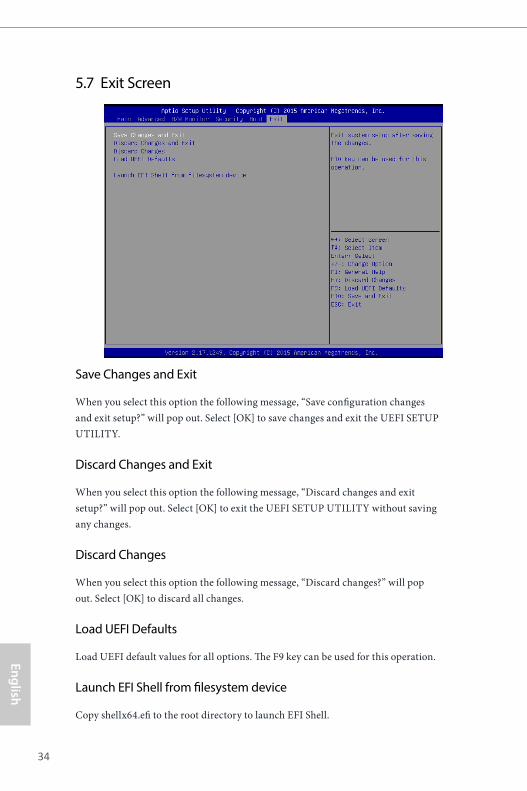
5.7 Exit Screen
Save Changes and Exit
When you select this option the following message, “Save configuration changes and exit setup?” will pop out. Select [OK] to save changes and exit the UEFI SETUP UTILITY.
Discard Changes and Exit
When you select this option the following message, “Discard changes and exit setup?” will pop out. Select [OK] to exit the UEFI SETUP UTILITY without saving any changes.
Discard Changes
When you select this option the following message, “Discard changes?” will pop out. Select [OK] to discard all changes.
Load UEFI Defaults
Load UEFI default values for all options. The F9 key can be used for this operation.
Launch EFI Shell from filesystem device
Copy shellx64.efi to the root directory to launch EFI Shell.