north coast wood turners n e w s l e t t e r turned the finial section of the box first. after some...
TRANSCRIPT

Inside this issue:
Cindy Drozda
Demo
1-2
President’s Turn
Meeting Minutes
Turn & Learn
3-4
5-6
7
LET Class
Something to Think
About
Show and Tell
Club Updates
Bead of Courage
Beginner’s Corner
Meeting Schedule
8
9
10-
11
12
13
14-
16
17
Cindy Drozda Demo
NORTH COAST WOOD TURNERS
October, 2014 - NCWT’s 28th Year as an AAW Chapter
N E W S L E T T E R
Today’s long awaited demonstrator
was Cindy Drozda. Cindy showed us
how to make a small lidded box with one
of her signature finials. She also showed
us how she sharpens her tools using a
CBN wheel on our grinder. More about
that later.
Cindy started out by showing us how
to make various cuts with several differ-
ent tools. All these cuts would be used in
making the lidded box. She went into
great detail on design elements and had
some nice drawings to reinforce what she
talked about. Many of the design ele-
ments are related to scale, basic shapes,
and some common sense.
I am not going to try and write a step-
by-step article about her demo. There
was simply too much information she
conveyed. I’ll try and hit some of the
high points along with pictures so you
get the general idea.
Cindy turned the finial section of the
box first. After some initial shaping, she
started at the very top of the finial and
worked her way down. The top is the
thinnest part, and
once you turn a
section down that
far, you don’t go
back. So take
your time, be sure
you are in control
of your tool, and think before you cut.
Cindy broke down the finial into sec-
tions and showed us how to shape each
one. She would finish each detail before
moving on.
After Cindy parted off the finial, she
took a small
block of coco-
bolo to use as
an insert which
would become
a contrasting detail to the inside of
the opening to the lidded box. It is
the red piece shown in the drawing
here. The small base on the bottom
of the drawing is also taken out of
the same
piece of coco-
bolo. Nothing is wasted.
Several steps later, this is
what the insert is starting
to look like.
Using some specially
ground tools, Cindy has
the insert almost to final
shape. The fine edge
shown here is what will
surround the finial when
the piece
is fin-
ished. She
makes is
look very easy.
Next it was time to start
shaping the box itself. This
didn’t really take too long
at all. When dealing with
small turnings, it is a good
idea to have all your steps in
the proper order and thinks 3
or 4 steps ahead.

Cindy Drozda Demo (con’t.)
Page 2
NORTH COAST WOOD TURNERS
Cindy reversed the piece at
this point and used a jamb
chuck to hold it in place. After
removing some waste from the
bottom, she
started
shaping the leftover
piece of cocobolo from
the insert. A little final
sanding and here’s the
finished product. Very
nice.
Here’s a picture of the CBN grinding
wheel that Cindy used to sharpen her tools.
They come in a number of different grits,
this one happened to be 180. After setting
the initial angle of the tool rest, she did
everything else freehand. These CBN
wheels are very intriguing. They are ma-
chined from steel, so they run true and are
balanced. They tend to absorb any heat
from the sharpening process so as not to
overheat the tool. They are available in
different grits and are supposed to last a
very long time before they wear down.
Cindy has these available for sale on her
website, which is listed below. I was very
impressed with how sharp and smooth a
finish the CBN wheel left on the tool. She
made it look very quick and simple to do.
But suffice to say, she has had plenty of
practice.
Cindy put on a very good demo, if you
missed it, try and catch her some time at
one of the symposiums. She really knows
her tools and turning techniques, and is a
fine instructor also.
Website address:
Cindydrozda.com
President’s Turn
Page 3
NORTH COAST WOOD TURNERS
An Opportunity to Experi-
ence a Symposium The 2015 AAW Annual Interna-tional Symposium will be held in Pittsburgh next June. It will begin Thursday, June
25th and close Sunday the 28
th and
will be my first experience at a woodturning symposium. I’ve heard through several of our club mem-bers that these events are not to be missed, but I haven’t even made it to a regional one such as the Ohio Guild’s near Cincinnati, or the To-tally Turning event in Sarasota Springs, New York. Next year it will be different.
For our members who are new to the club, and possibly even new to turning, the main attractions are the international professional woodturners who demonstrate, the galleries of turned objects displayed to view or to purchase, and the ven-dors, some of whom will demon-strate in their own booth. The pros turn in rotations through the week-end and you choose who you will watch and when. In between demos, you can check out the gal-leries, exhibitions, showcases, and the vendor areas.
Since Pittsburgh is relatively close, and it will be an opportunity
for me to see more well-known pro-fessional turners during one week-end than I normally see in a year, I’m planning on going. I don’t know what the exact cost of this adven-ture will be, and the pro turners who will demo are to be named later, but I’ll start saving some funds and look forward to seeing at least a couple of my fantasy league turners. One of our guys is planning on going to three symposia next year, so I should be able to justify going to one of them, right?
I’ll have another bit of incen-tive to attend next year, and so will you. Since the AAW considers clubs within a couple hundred miles or so to be something akin to “local hosts”, we will be asked to help make the 2015 event a success. Not just by attending, but by volun-teering to help with the several dozen different functions that are part of an international symposium. Think of the logistics involved in bringing a slew of pro turners and vendors into a convention hall to meet with several thousand wood-turning enthusiasts and maybe fam-ily and friends. It sounds like quite an effort.
The Pittsburgh AAW chapter, Turners Anonymous, is already working on this since their club meets only a mile away from the David L. Lawrence Convention Center where all the action will take place. As a matter of fact, one of their members will visit us on Octo-

President’s Turn
Page 4
NORTH COAST WOOD TURNERS
ber 4th to help get the ball rolling.
David Dudney, the Symposium Liai-son Chairman, will make a short presentation to us, explain what has to be accomplished, answer our questions, and of course, enlist our help. He attended the 2014 Phoenix Symposium so he will be up to date on how the AAW currently handles this huge event.
Dave told me that they will need about 250 volunteers. As you can imagine, they’ll need people to stuff and hand out informational packets, help with registration, AAW product sales, the Instant and Auc-tion Galleries, the demonstration rooms, the areas for teaching young turners, and entertaining our spouses. There will also be open-ings for us to assist with the video systems, equipment and tool func-tions, grinder set-up, local wood procurement, and demonstrator and vendor assistance.
I’ve seen a PowerPoint pres-entation that describes all of the various functions in more detail and addresses the timing requirements. For example, people who help with the handling of inbound shipments or room set-up may even be asked to start on Wednesday the 24
th.
Dave will no doubt share all of the information he has, and will answer your questions on the particulars. If you’d like, I can email the PPP to you.
From what little I know, the Instant Gallery is a chance for every
registered attendee to bring a few pieces to the show that would be displayed, photographed, and pos-sibly sold! There are other opportu-nities including a silent auction, sev-eral exhibitions or showcases, and numerous chances to learn or win something. They will need volun-teers to staff these functions, so maybe you can see them from both sides.
So for those of you who will also jump at the opportunity to see some world class turners, several galleries filled with incredible pieces, and vendors that you have-n’t been able to see easily (read Robust lathes, CBN wheels, and out-of-state wood sources), now is the chance to start planning and saving for it. For those who have gone to multiple symposia, it would be great if in the months to come, you would share your thoughts with our members who might need a push toward Pittsburgh. Let’s do it!
Happy and safe turning, Rick Weinbrenner

Meeting Minutes
Page 5
By Ken Nuzum
NORTH COAST WOOD TURNERS
President, Rick Weinbrenner called the meeting to order at 9:30 and made the following general an-nouncements: Rick welcomed guests and indi-cated that there was a fee of $25 for visitors today since there was a pro-fessional demonstrator. He pointed out Don Wilhelm and the visitor signup sheet. Rick reminded members of the up-coming McCardel equipment, tool, and wood tag sale. An email will be sent with information and a map Rick encouraged members to con-sider running for one of the open board positions, Vice President, Newsletter Editor, and at-large board member. The club officer and board positions will be open for nominations in October and elec-tions to be held in November. Vice President, Dan Maloney re-ported on upcoming demos and ac-tivities. October meeting will be mini demonstrations including finishing, spindle turning, and butterfly patches. Newsletter Editor, Mike Hawkins acknowledged members who have made Beads of Courage boxes. He also announced that demonstrators are needed for the November 15
th
Woodcraft demo day from noon un-til four.
There were no secretary or treas-urer reports. Treasurer did indicate that the fol-lowing people were added to the roster: Bob Stone, Megan Caine, Carl Kudrna, Greg James, John Ryan, Jim Shuster, Penni Shuster, and Joe Smith. The abbreviated business meeting was adjourned. Dan Maloney intro-duced the professional turner, Cindy Drozda who demonstrated turning a finial box with insert. Name Tag and the Show and Tell drawing winners were drawn at the midmorning break

Meeting Minutes (con’t.)
Page 6
The Sunshine Guy John Dilling is the Club’s Sunshine
person. If you know of a club member
who is ill or needs some cheering up,
call John and he will be happy to send a
nice card on the Club’s behalf. John’s
number and email are:
(330)-887-1227
NORTH COAST WOOD TURNERS

Turn & Learn
Page 7
NORTH COAST WOOD TURNERS
The Show & Tell raffle winner
I didn’t get the Show and Tell
winner, sorry.
The Show & Tell unusual piece
award was given to Mohammed
Youseffi. Mo turned a vessel with
a nicely carved exterior. Nice
work Mo.
Nametag Winner: The winner of
the nametag drawing was Tom
Sasalar. Tom won a nice blank
donated by King Heiple.
There was no Turn & Learn con-
test today.
TURN & LEARN PROJECT
FOR September-
The Turn & Learn project for Oc-
tober is a Cheese Platter and knife
based on the Brian Becker demo.
Platter can be any type of wood.
.

Cindy Drozda Sunday Class
Page 8
NORTH COAST WOOD TURNERS
Looks like everyone was busy in
Cindy’s class on Sunday.
Something to think about...
Page 9
By Ken Nuzum
NORTH COAST WOOD TURNERS
If any of you have ever had to be an
executor of an estate or handle disposal
of the possessions of a family member,
you will understand what I have experi-
enced in the last couple of years. After
handling all the legal hassles comes the
real hassle: figuring how to dispose of
that deceased person’s possessions. I
think my experiences are typical; no
idea of what promises may have been
made to other relatives and no idea
what might be the value of many of the
items. You realize that no matter how
well you thought you knew the wishes
of that relative, you know only that you
are guessing too much about what that
relative would really want you to
do.
With this recent experience still
clearly in my mind, my wife and I both
decided we wanted to direct the dis-
posal of our assets and make it easier
on my son who would be our executor.
We are both heavily involved in craft
hobbies - a lot of material and tools that
would need to be disposed. We just
didn’t like the idea of strangers
“pawing through our stuff” at some
auction or garage sale. What we would
most want is for our things to go to
people who would treasure them just
like we had. We simply wrote our son a
directive. First, let our close relatives
take what they want, and then give the
remainder to our craft organization to
sell or use as they see fit.
It is so much easier on our son to
know that as he does his job as execu-
tor he is making decisions with which
we would be pleased. And it is com-
forting for us to imagine the tools or
wood that I loved will continue to bring
enjoyment to fellow woodturners.
I guess the primary reason I am
writing this is the hope that others will
have also thought what they want to
happen and communicate those wishes
to whomever will handle your estate.
Write down your specific wishes and
then give those instructions to your ex-
ecutor. Our organization is able and
willing to assist your executor as long
as there is no restriction on the disposi-
tion other than that the benefit will go
to North Coast Woodturners. Believe
me, your executor will appreciate your
preparedness and thoughtfulness.
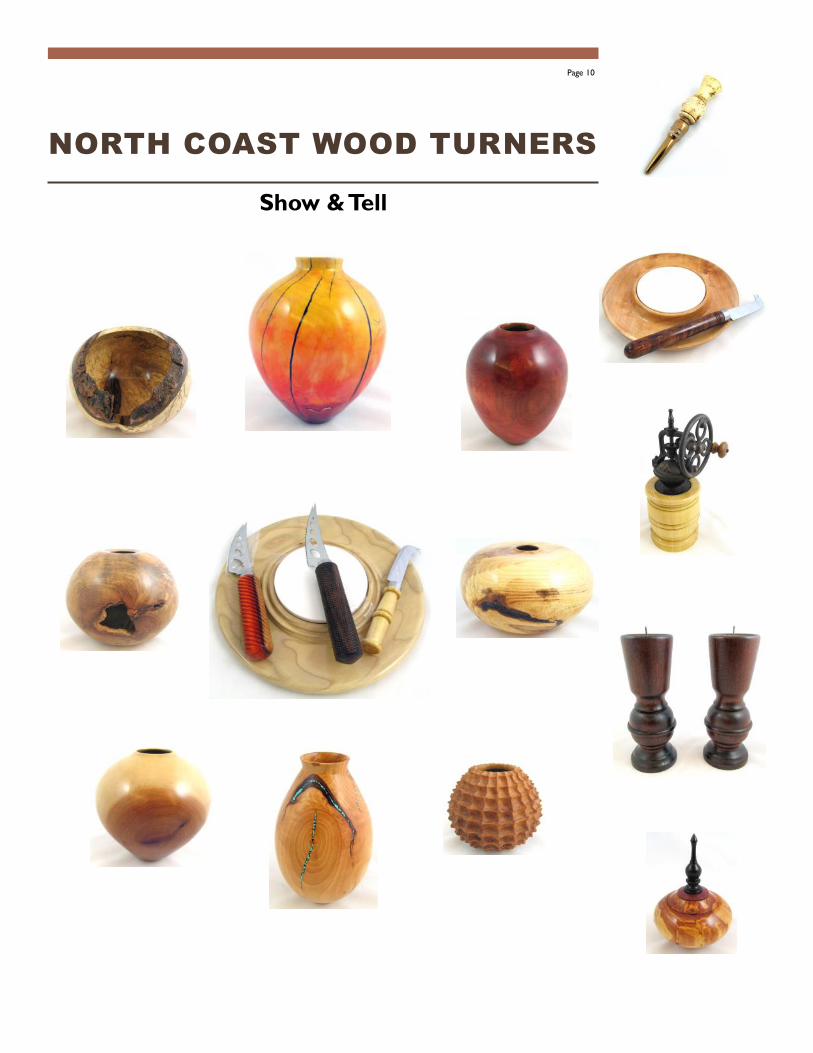
Show & Tell
Page 10
NORTH COAST WOOD TURNERS

Show & Tell (con’t.)
Page 11
NORTH COAST WOOD TURNERS
Page 12
NORTH COAST WOOD TURNERS
Club Updates
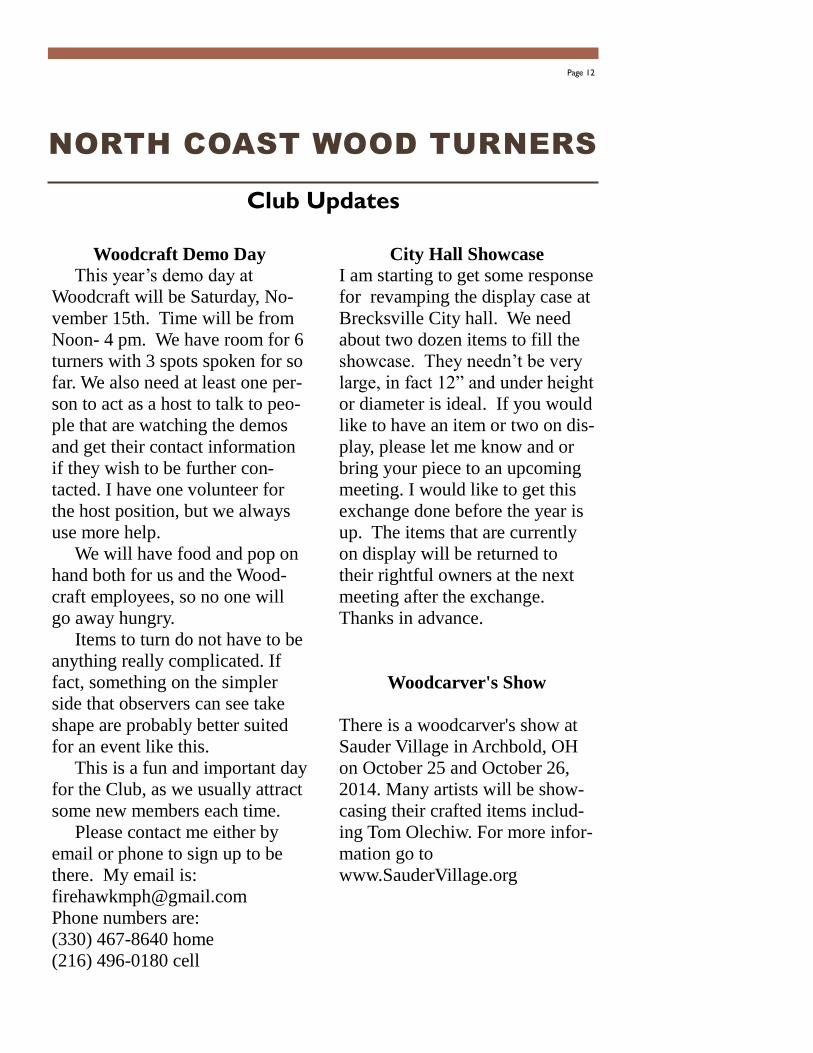
Woodcraft Demo Day
This year’s demo day at
Woodcraft will be Saturday, No-
vember 15th. Time will be from
Noon- 4 pm. We have room for 6
turners with 3 spots spoken for so
far. We also need at least one per-
son to act as a host to talk to peo-
ple that are watching the demos
and get their contact information
if they wish to be further con-
tacted. I have one volunteer for
the host position, but we always
use more help.
We will have food and pop on
hand both for us and the Wood-
craft employees, so no one will
go away hungry.
Items to turn do not have to be
anything really complicated. If
fact, something on the simpler
side that observers can see take
shape are probably better suited
for an event like this.
This is a fun and important day
for the Club, as we usually attract
some new members each time.
Please contact me either by
email or phone to sign up to be
there. My email is:
Phone numbers are:
(330) 467-8640 home
(216) 496-0180 cell
City Hall Showcase
I am starting to get some response
for revamping the display case at
Brecksville City hall. We need
about two dozen items to fill the
showcase. They needn’t be very
large, in fact 12” and under height
or diameter is ideal. If you would
like to have an item or two on dis-
play, please let me know and or
bring your piece to an upcoming
meeting. I would like to get this
exchange done before the year is
up. The items that are currently
on display will be returned to
their rightful owners at the next
meeting after the exchange.
Thanks in advance.
Woodcarver's Show
There is a woodcarver's show at
Sauder Village in Archbold, OH
on October 25 and October 26,
2014. Many artists will be show-
casing their crafted items includ-
ing Tom Olechiw. For more infor-
mation go to
www.SauderVillage.org
Club Updates (con’t.)
Page 13
NORTH COAST WOOD TURNERS
Beads of Courage
Lidded boxes for the Beads of
Courage project will be collected
each month. See Mike Hawkins at
any of the meetings. Boxes
should be around 5-6” in diameter
and about 4” tall with an easy- to-
grab finial on top. The Beads of
Courage beads are available
through the club. See Ron Sieloff
for those. Please only take them
as needed. These beads are pur-
chased through the Beads of
Courage website.
Please Note: Boxes can be lar-
ger than 5-6” in diameter, in fact
larger is probably better. When I
went to look at some articles on
their site, a lot of these kids ac-
quire numerous strings of beads
and could really use a little larger
box to store them in.
One more thing that may make
this project easier is to use dried
flat stock lumber for your blank.
Cut a number of squares for lay-
ers and glue them together. This
way you’ll have a dry blank that
shouldn’t be subject to move-
ment, and its usually less expen-
sive to use flat stock lumber.
If you have any questions, feel
free to call me. (Mike Hawkins)
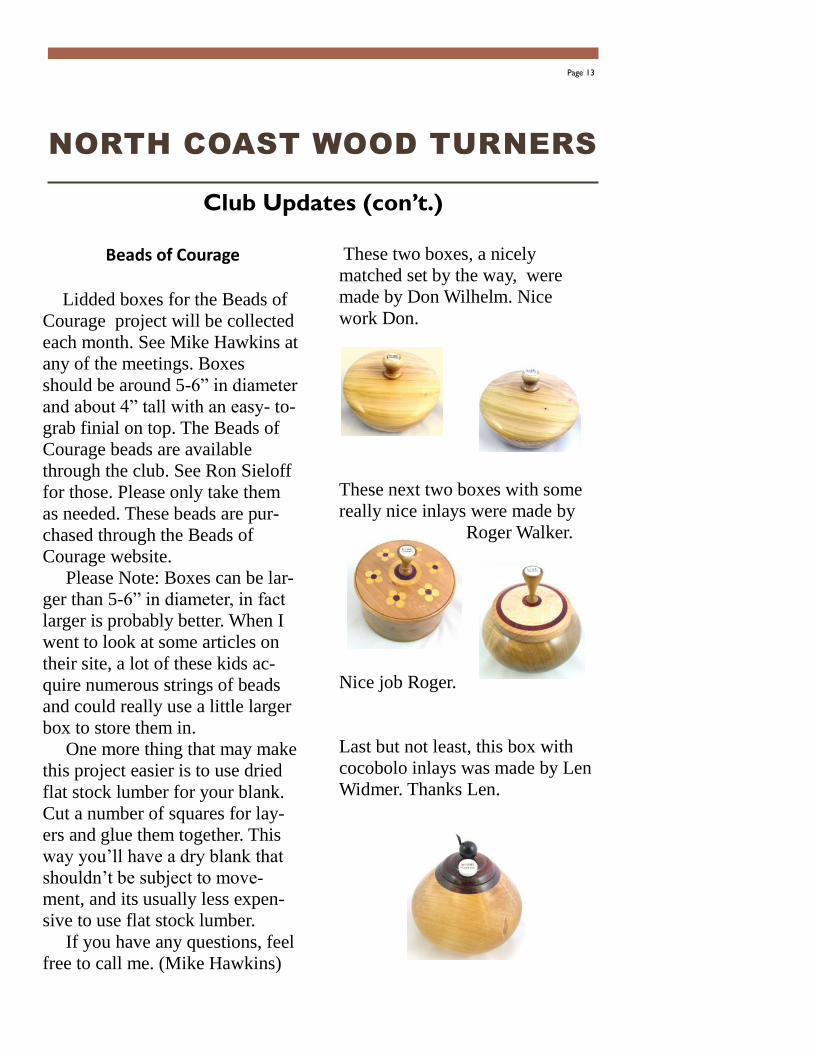
These two boxes, a nicely
matched set by the way, were
made by Don Wilhelm. Nice
work Don.
These next two boxes with some
really nice inlays were made by
Roger Walker.
Nice job Roger.
Last but not least, this box with
cocobolo inlays was made by Len
Widmer. Thanks Len.
Page 14
“Why I like Woodturning…”
NORTH COAST WOOD TURNERS
Beginner’s Corner
I figured out the other day why I like
woodturning so much. A little while
back, I got the foolish idea to build some
Adirondack chairs, out of real wood no
less. While the chairs are turning out to
be very nice, the project itself kept get-
ting bigger and bigger.
It all started one day while visiting
the local Woodcraft store. I happened to
talk to Mike Novak to get his opinion on
what would be a good specie of wood to
use for outdoor furniture. I didn’t want
soft woods like cedar or redwood. I was
initially thinking cypress until I looked
at the price. Mike told me that white oak
is an excellent rot resistant wood to use.
And to top it off, he just so happened to
have a delivery due in the next few days
that was going to be half price. That set-
tled it. I patiently sat at home and
awaited the call that the shipment had
arrived.
A few short days later, there I was,
picking through the pile with another
fellow. We each took about 100 board
feet. I also bought a set of plans that had
paper templates for making a single
chair and also a double chair with a
small table in between. The double chair
was all one unit when done.
First step was to swipe a good pair of
my wife’s scissors, luckily she wasn’t
home at the time. It took me a couple of
hours to carefully cut out all the pat-
terns. Next I looked around the shop and
found some leftover pieces of 1/2” furni-
ture grade plywood to trace the patterns
onto. I spent the rest of the afternoon
cutting out all the wooden templates on
the bandsaw. When I was finished cut-
ting, I fine tuned them on a disc sander
and some hand sanding. That was the
easy part.
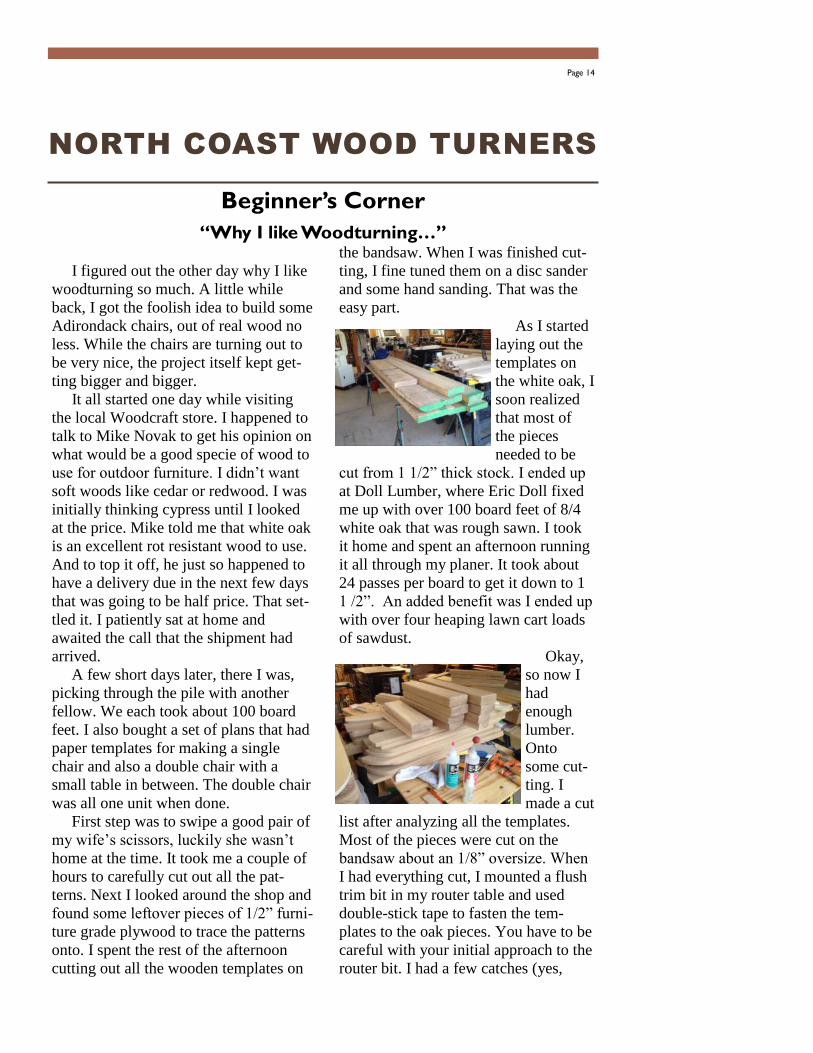
As I started
laying out the
templates on
the white oak, I
soon realized
that most of
the pieces
needed to be
cut from 1 1/2” thick stock. I ended up
at Doll Lumber, where Eric Doll fixed
me up with over 100 board feet of 8/4
white oak that was rough sawn. I took
it home and spent an afternoon running
it all through my planer. It took about
24 passes per board to get it down to 1
1 /2”. An added benefit was I ended up
with over four heaping lawn cart loads
of sawdust.
Okay,
so now I
had
enough
lumber.
Onto
some cut-
ting. I
made a cut
list after analyzing all the templates.
Most of the pieces were cut on the
bandsaw about an 1/8” oversize. When
I had everything cut, I mounted a flush
trim bit in my router table and used
double-stick tape to fasten the tem-
plates to the oak pieces. You have to be
careful with your initial approach to the
router bit. I had a few catches (yes,

Page 15
“Why I like Woodturning…”
NORTH COAST WOOD TURNERS
Beginner’s Corner (con’t.)
router tables are related to the skew)
and quickly destroyed my light duty
flush trim bit.
So back up to Woodcraft. I bought a
White brand, 1/2”shank, heavy duty bit
this time. Carefully, I was able to trim
all the pieces. However this left sharp
edges on everything. Back to the router
table. Using a 1/4” rounding over bit on
the thick stock, and an 1/8” rounding
over bit on the 3/4” stock, I put a nice
radius on all the edges.
But wait, they’re not ready to go to-
gether yet. I sanded all the piece with
my orbital sander with 100 grit discs. I
know that sounds rough, but it was like
sanding granite. A disc would last for 4
or 5 pieces. I went through 20 discs be-
fore I thought I was done.
Finally
it was as-
sembly
time. I used
the exten-
sion table
on my table
saw for a
work plat-
form, as it is nice and flat, and I don’t
have to bend over. This is when I dis-
covered how poorly written the small
instruction pamphlet was. So as I made
my way through it, using many clamps,
double checking measurements, even
pulling out my Starrett square to make
sure everything was the proper angle, I
got the first chair together.
This is when I discovered that I did-
n’t make enough parts for the second
chair. So I took inventory of all the
pieces once again, marking templates
with a piece of blue tape with the quan-
tity needed. So it was back to square
one and using every machine in the
shop once again.
As I was assembling the first chair, I
forgot to mention that I bought all
stainless steel hardware from a local
wholesale company. The screws have
self drilling tips, but all the laws of
physics cease to exist with white oak. I
had to use three different drill bits for
each screw I put in. If I didn’t, they
would snap off before seating them-
selves. I decided to countersink them
also. So back up to
Woodcraft to buy
some tapered plugs to
fill the holes. I de-
cided on walnut, for a
nice contrast. There’s
almost a hundred
holes in each chair,
so I took the two hundred they had, and
ordered another two hundred. Gluing them
in and sanding off the remainder sticking
up went pretty quick. Orbital sander
worked well here.
There were a couple of turned items on
each chair. I had to turn a 1” x 19” long
dowel for each. The backs of the chairs are
adjustable
and needed
the dowel for
that part.
Turning a
piece that
long and the
same dimen-
sion is good
practice. I used a parting tool to cut a di-

Page 16
“Why I like Woodturning…”
NORTH COAST WOOD TURNERS
Beginner’s Corner (con’t.)
ameter every two inches that was about a
1/16” bigger than finish size. I then took
very fine cuts to get down to 1”. I was able
to get within 1/64” all the way across. When
I installed the dowels, I drilled through the
mounting piece at each end and partially
into the dowel. Then I turned some small
dowels out of ebony that I glued in and
sanded off flush.
As I type this, I have the two single
chairs assembled awaiting a finish. I am
going to make one of the double units. I
have all the pieces cut out and just about
ready for assembly. The single chairs are
too heavy to lift by myself. I am guessing
about 150+ pounds each. I think they are
going to stay in my shop. I may turn a pair
of wheels for each to mount on the rear
support arms to make them easy to move.
The double unit will stay up on the deck in
the good weather with a cover on it. In the
fall I’ll bring it in, probably have to arrange
for a fork lift then.
I bought a clear satin finish upon Mike
Novak’s recommendation. It is made by
General Finishes and is a water born exte-
rior finish. It can be sprayed, 2-3 three coats
being necessary. For renewing down the
road, a light scuffing with a white scotch
brite pad is all that’s necessary before re-
spraying. Most of the other finishes I look at
including marine spar varnish, required
sanding down to bare wood and starting all
over again.
So, what does this have to do with why I
like woodturning so much? I think you
probably realize that this type of project I
just described takes a lot of time, a lot of
energy, a lot of lumber, a lot of machinery,
and a lot of patience. Plus it hogs up a lot of
valuable shop space. Woodturning on the
other hand requires a small chunk of wood,
a small space in the shop, many time just an
afternoon or evening, and not much cuss-
ing.
Sometimes I can be a glutton for pun-
ishment. What started out as a nice idea
turned into a much bigger project than I
had imagined. Oh, and I forgot to mention
the handful of mistakes I found in the ini-
tial templates, as the paper ones were
poorly drawn and far from accurate. I
fixed my wooden templates as I discovered
the mistakes. I had several friends and
relatives ready to order a few chairs each
until I told them I would have to charge
about $800 a piece, and even at that, I
would probably be down to about $5/hour
labor. They cancelled their orders quickly.
So very shortly, I can finally get back to
some fun turning projects…...

Page 17
NORTH COAST WOOD TURNERS
Blossom Hill
4450 Oakes Road
Brecksville, OH 44141
President
Rick Weinbrenner
(440)808-8876
Vice-President
Dan Maloney
(440) 871-4129 [email protected]
Secretary
Ken Nuzum
(330) 466-3457
Treasurer
Ron Sieloff
Member-At-Large
Jim Pugh
(440) 458-6224 [email protected] Member-At-Large
Tom Wisnieski
440-233-6486
Newsletter Editor
Mike Hawkins
330-467-8640
Publicity and Community Rela-
tions Director
Tom Nero
(440) 526-4138
Date Topic
January 4
Tom Olechiw smoking snowman demo, Show & Tell, Turn & Learn - Christmas tree ornament per Denny Watson demo, Wood Raffle, Nametag drawing
February 1 Spalted wood themed day, Video of Sara Robinson
webinar, Show & Tell, Turn & Learn- turned piece us-ing spalted wood, Wood Raffle, Nametag drawing
March 1 Pro Turner Brad Sears demo- Practical pieces, Hands-on Class Sunday, Show & Tell, Turn & Learn- Smok-ing snowman per Tom Olechiw demo, Nametag Draw-ing. NO wood raffle
April 5
April 6
Adam Alloway resin casting demo, Show & Tell, Turn & Learn- turning from a 2” x 6” x 12” construction grade, Wood Raffle, Nametag Drawing
Pro Turner Nick Agar, all day Sunday demo.
May 3 Pro Turner Kurt Hertzog all day demo on multiple topics, Hands-on Class Sunday, Show & Tell, Turn & Learn– pepper grinder or vase based on Brad Sears
demo, Nametag Drawing, NO wood raffle
June 7 Mike Hawkins banksia pod candlestick demo, Show & Tell, Turn & Learn- Item based on resin casting per the Adam Alloway demo and/or an item based on the Nick Agar demo, Wood Raffle, Nametag Drawing, LET
Class on turning banksias pods.
July 12 Tips & Tricks demo, Top spin off contest, Show & Tell, Turn & Learn–Item based on Kurt Hertzog demo , Wood Raffle, Nametag drawing.
August 2 Brian Becker cheese platter demo , Show & Tell, Turn & Learn-banksias pod turning, Wood Raffle, Nametag Drawing
September 6 Pro Turner Cindy Drozda all day demo, Hands-on
Class Sunday, Show & Tell, Turn & Learn- TBA, Name-tag Drawing
October 4 Club Member demo TBA, Show & Tell, Turn & Learn- cheese platter, Wood Raffle, Nametag Drawing
November 1 Officer Elections, Denny Watson hollow globe orna-ment demo, Show & Tell, Turn & Learn- Item based on Cindy Drozda demo, Wood Raffle, Nametag Draw-ing, LET class on hollow globe ornaments
December 6 Annual Auction
Meetings- First Saturday of the Month unless otherwise noted
Doors open 9:00 AM, Meeting begins 9:30 AM