nas-e35hd - sony uk | latest technology & news ... nas-e35hd.gb.3-292-247-11(1) table of...
TRANSCRIPT

NAS-E35HD.GB.3-292-247-12(1)
3-292-247-12(1)
© 2008 Sony Corporation
NAS-E35HD
HDD Audio SystemOperating Instructions
Getting started
Importing and transferring audio data
Playing audio data
Editing tracks in the HDD Jukebox
Other settings
Troubleshooting
Precautions/Specifications
�GB
NAS-E35HD.GB.3-292-247-11(1)
WARNING
To reduce the risk of fire or electric shock, do not expose this apparatus to rain or moisture.To reduce the risk of fire, do not cover the ventilation opening of the apparatus with newspapers, tablecloths, curtains, etc. Do not place the naked flame sources such as lighted candles on the apparatus.
To reduce the risk of fire or electric shock, do not expose this apparatus to dripping or splashing, and do not place objects filled with liquids, such as vases, on the apparatus.
The unit is not disconnected from AC power source (mains) as long as it is connected to the wall socket, even if the unit itself has been turned off.
As the main plug is used to disconnect the unit from the mains, connect the unit to an easily accessible AC outlet. Should you notice an abnormality in the unit, disconnect the main plug from the AC outlet immediately.
Do not install the appliance in a confined space, such as a bookcase or built-in cabinet.
Do not expose batteries or apparatus with battery-installed to excessive heat such as sunshine fire or the like.
CAUTIONThe use of optical instruments with this product will increase eye hazard.
This appliance is classified as a CLASS 1 LASER product. This marking is located on the rear exterior.
European model onlyExcessive sound pressure from earphones and headphones can cause hearing loss.
Notice for the customer in the countries applying EU Directives The manufacturer of this product is Sony Corporation, 1-7-1 Konan, Minato-ku, Tokyo, 108-0075 Japan.The Authorized Representative for EMC and product safety is Sony Deutschland GmbH, Hedelfinger Strasse 61, 70327 Stuttgart, Germany.For any service or guarantee matters please refer to the addresses given in separate service or guarantee documents.
Disposal of Old Electrical & Electronic Equipment (Applicable in
the European Union and other European countries with separate collection systems)This symbol on the product or on its packaging indicates that this product shall not be treated as household waste. Instead it shall be handed over to the applicable collection point for the recycling of electrical and electronic equipment. By ensuring this product is disposed of correctly, you will help prevent potential negative consequences for the environment and human health, which could otherwise be caused by inappropriate waste handling of this product. The recycling of materials will help to conserve natural resources. For more detailed information about recycling of this product, please contact your local Civic Office, your household waste disposal service or the shop where you purchased the product. Applicable accessories: Remote control
3GB
NAS-E35HD.GB.3-292-247-11(1)
Disposal of waste batteries (applicable in the European Union and other European countries with separate collection systems)This symbol on the battery or on the packaging indicates that the battery provided with this product shall not be treated as household waste. By ensuring these batteries are disposed of correctly, you will help prevent potentially negative consequences for the environment and human health which could otherwise be caused by inappropriate waste handling of the battery. The recycling of the materials will help to conserve natural resources.In case of products that for safety, performance or data integrity reasons require a permanent connection with an incorporated battery, this battery should be replaced by qualified service staff only.To ensure that the battery will be treated properly, hand over the product at end-of-life to the applicable collection point for the recycling of electrical and electronic equipment.For all other batteries, please view the section on how to remove the battery from the product safely. Hand the battery over to the applicable collection point for the recycling of waste batteries.
For more detailed information about recycling of this product or battery, please contact your local Civic Office, your household waste disposal service or the shop where you purchased the product.
Note on DualDiscsA DualDisc is a two sided disc product which mates DVD recorded material on one side with digital audio material on the other side. However, since the audio material side does not conform to the Compact Disc (CD) standard, playback on this product is not guaranteed.
Music discs encoded with copyright protection technologiesThis product is designed to playback discs that conform to the Compact Disc (CD) standard. Recently, various music discs encoded with copyright protection technologies are marketed by some record companies. Please be aware that among those discs, there are some that do not conform to the CD standard and may not be playable by this product.
�GB
NAS-E35HD.GB.3-292-247-11(1)
About the hard disk driveThe hard disk drive is easily damaged by shock and vibration, so be sure to observe the following precautions. See page 66 for details.Do not subject the unit to strong shocks.Do not move the unit while the power cord is
connected to the wall outlet.Do not use the unit in a location subject to vibrations
or in an unstable location.Do not move the unit or disconnect the power cord
while the unit is recording or playing.Do not attempt to replace or upgrade the hard disk
drive by yourself, as this may result in a malfunction.
Any data that is lost due to a malfunction in the hard disk drive cannot be recovered.
Data recorded to the hard disk drive may be damaged during ordinary operations.Sony cannot provide compensation for any destruction of data caused by a damaged hard disk drive.
On recordingMake a trial recording before making the actual
recording, especially when recording important material.
Sony cannot provide compensation for any failure in recording caused by a malfunction in this unit.
Malfunctions that occur during the normal use of the unit will be repaired by Sony in accordance with the conditions defined in the limited warranty for this unit. However, Sony will not be liable for any consequences arising from a failure to record or play caused by a damaged or malfunctioning unit.
How to use this manualThis manual explains how to operate the unit mainly using the remote control. Buttons and controls on the main unit with the same or similar name as that on the remote control can be used to perform the same operations.
Illustrations used in this manual are based on the model other than the UK model.
Before operating the unit

5GB
NAS-E35HD.GB.3-292-247-11(1)

�GB
NAS-E35HD.GB.3-292-247-11(1)
Table of Contents
Before operating the unit ...................................................... 4
Features on this unit ................................................................ 8
Checking the supplied accessories ..................................10
Guide to parts and controls ................................................11Remote control ...............................................................................11Top of the main unit .....................................................................14Front of the main unit ..................................................................15Display ...............................................................................................16
Connecting the speakers and antennas ........................18
Setting the clock .....................................................................21
Importing and transferring audio data
About importing and transferring audio data .............22
Importing/Recording audio data to the HDD Jukebox ..................................................................................23
Recording from an audio CD .....................................................23Importing audio data from an MP3 disc or a USB
device ...........................................................................................24Recording from a radio broadcast, DAB service*, or
externally connected device ................................................25Recording programmed tracks .................................................25
Transferring audio data from the HDD Jukebox .........26Transferring audio data to a USB device ...............................26Transferring programmed tracks .............................................27
Erasing tracks on the USB device ......................................28
Getting started
Playing audio data Playing the HDD Jukebox ....................................................29
Playing a CD .............................................................................30
Listening to the radio or DAB services ............................32Selecting a radio station or a DAB service* ..........................32Presetting radio stations or DAB services* .........................33
Listening to music of a USB device ..................................34
Connecting an external component (AUDIO IN) ........36
Connecting a digital music player to the DMPORT....37

�GB
NAS-E35HD.GB.3-292-247-11(1)
Editing tracks in the HDD Jukebox
Obtaining title information ................................................41Exporting album information to a USB storage
device ...........................................................................................43Searching for album information on the computer..........43Importing the latest album information to the unit .........45Re-labeling titles ............................................................................45
Editing ........................................................................................47Changing titles ...............................................................................47Erasing recordings .........................................................................47
Entering text.............................................................................49Entering text ....................................................................................49
Other settings Using the Sleep Timer ...........................................................50
Using the Play Timer ..............................................................51
Using the Recording Timer .................................................52
Changing the unit’s settings ..............................................53Changing the display ...................................................................53Selecting the text mode ..............................................................53
Formatting the system .........................................................54
Repeat play · Shuffle play · Program play .......................38Setting the play mode .................................................................38Setting repeat play ........................................................................39Creating your own program (Program play) ........................39
Searching for a track ..............................................................40Searching for a track in the HDD Jukebox ............................40Searching for a track on a CD or a USB device ....................40
Troubleshooting Troubleshooting .....................................................................55Messages ..........................................................................................63
Precautions/Specifications
Precautions ...............................................................................66About CDs ........................................................................................68
Specifications ...........................................................................69
USB devices supported by this unit .................................71
Glossary .....................................................................................72
Index ...........................................................................................73
* For the UK model only

�GB
NAS-E35HD.GB.3-292-247-11(1)
Features on this unit
You can store audio data from audio CDs, radio broadcasts, USB devices, etc. to the HDD Jukebox.
You can listen to the audio data in various play mode, such as program play, shuffle play, etc.
Store
Listen
Hard disk drive (HDD)
Shuffle playProgram play
Repeat play
�GB
NAS-E35HD.GB.3-292-247-11(1)
Transfer
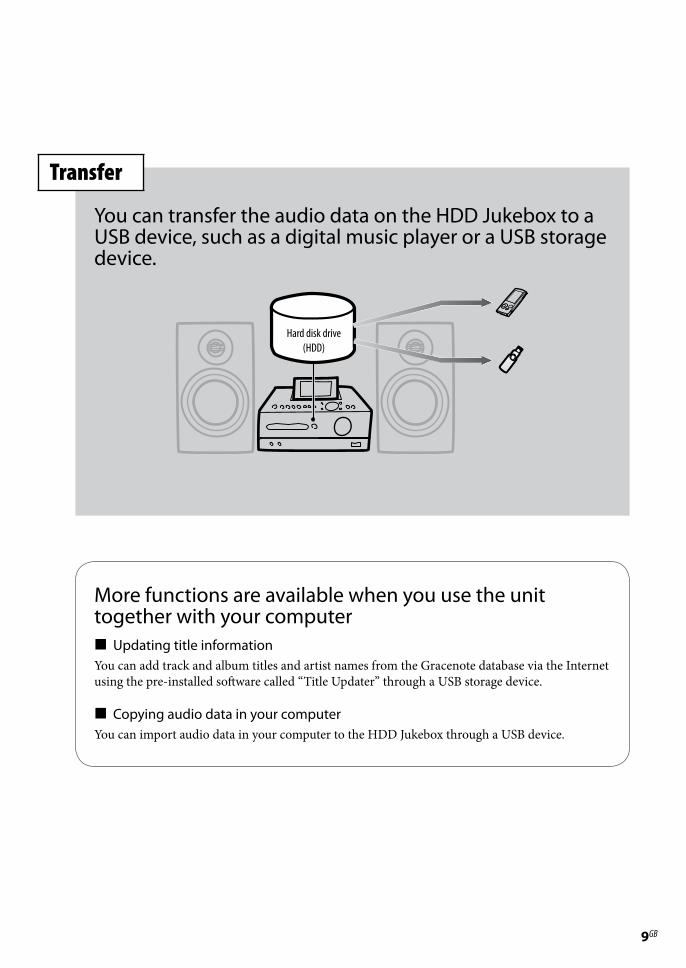
You can transfer the audio data on the HDD Jukebox to a USB device, such as a digital music player or a USB storage device.
More functions are available when you use the unit together with your computerUpdating title informationYou can add track and album titles and artist names from the Gracenote database via the Internet using the pre-installed software called “Title Updater” through a USB storage device.
Copying audio data in your computerYou can import audio data in your computer to the HDD Jukebox through a USB device.
Hard disk drive (HDD)

10GB
NAS-E35HD.GB.3-292-247-11(1)
Getting started
Checking the supplied accessories
If you find any accessories missing or damaged, please contact your nearest Sony dealer.
AM loop antenna (1)
FM lead antenna (1) One of the following two antennas is supplied.
or
DAB lead antenna (1) (for the UK model only)One of the following two antennas is supplied.
or
Speaker cords (�)
Speaker pads (�) (for the Latin American model only)
Remote control (1)
R� (size AA) batteries (�)
DIGITAL MEDIA PORT adapter (TDM-iP10 (M) ) (1) (for the European model only)
iPod Dock Adapters (1 set) (for the European model only)
Operating Instructions (this manual; provided in each language)

11GB
NAS-E35HD.GB.3-292-247-11(1)
Remote control
Guide to parts and controls
SLEEP buttonUse to make or confirm the sleep timer setting (page 50).
Playback buttonsUse to select the function directly and start playback at the same time.HDD button (page 29)USB button (page 34)CD button (page 30)TUNER/BAND button (page 32)DMPORT button (page 37)AUDIO IN button (page 36)
DSGX and EQ buttons
DSGX button Use to generate a more dynamic sound (Dynamic Sound Generator X-tra). Each press of the button switches the DSGX function “ON” or “OFF”. This function is factory set to “ON”.
EQ (equalizer) button Use to adjust the bass and treble. Press this button to display “BASS”, and then press or to adjust the bass. After adjusting the bass sound, press this button again to display “TREBLE”, and then press or to adjust the treble.
VOLUME+* and VOLUME– buttonsUse to adjust the volume.
An asterisk (*) indicates buttons that have a tactile dot (the VOLUME + button).
1�GB
NAS-E35HD.GB.3-292-247-11(1)
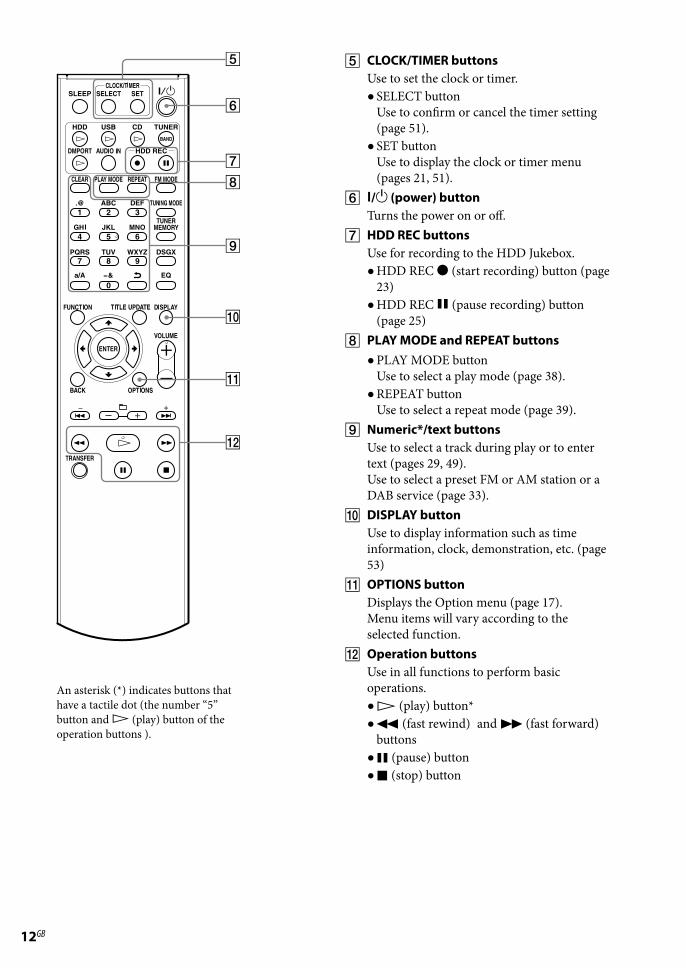
CLOCK/TIMER buttonsUse to set the clock or timer.SELECT button
Use to confirm or cancel the timer setting (page 51).
SET button Use to display the clock or timer menu (pages 21, 51).
/ (power) buttonTurns the power on or off.
HDD REC buttonsUse for recording to the HDD Jukebox.HDD REC (start recording) button (page
23)HDD REC (pause recording) button
(page 25) PLAY MODE and REPEAT buttons
PLAY MODE button Use to select a play mode (page 38).
REPEAT button Use to select a repeat mode (page 39).
Numeric*/text buttonsUse to select a track during play or to enter text (pages 29, 49).Use to select a preset FM or AM station or a DAB service (page 33).
DISPLAY buttonUse to display information such as time information, clock, demonstration, etc. (page 53)
OPTIONS buttonDisplays the Option menu (page 17).Menu items will vary according to the selected function.
Operation buttons Use in all functions to perform basic operations. (play) button* (fast rewind)and (fast forward)
buttons (pause) button (stop) button
An asterisk (*) indicates buttons that have a tactile dot (the number “5” button and (play) button of the operation buttons ).

13GB
NAS-E35HD.GB.3-292-247-11(1)
FM MODE buttonUse to select stereo or monaural while listening to an FM broadcast (page 33).
TUNING MODE buttonUse to select the tuning mode (page 32).
TUNER MEMORY buttonUse to preset a radio station or DAB service (UK model only) (page 33).
FUNCTION buttonUse to select a function (page 17).
TITLE UPDATE buttonUse to display the Title Update menu (page 43).
Menu operation buttonsUse to select menu items and enter menu settings (page 17)., , and buttons
Use to select a menu item or to change a setting.
ENTER button Use to enter a setting.
BACK buttonUse to go back to the previous display (page 16).
+ • –, • and + • – buttons
+ and – buttons Use to adjust the tuning frequency (page 32).
and buttons Cues the beginning of a track (page 29).
+ and – buttons Use to select an album or a folder (page 29).
TRANSFER buttonUse to transfer tracks to a USB device (page 26).

1�GB
NAS-E35HD.GB.3-292-247-11(1)
Top of the main unit
FUNCTION buttonUse to select a function (page 17).
Playback buttonsUse to select the function directly and start playback at the same time.HDD button (page 29)USB button (page 34)CD button (page 30)TUNER/BAND button (page 32)
/ (power) button and STANDBY indicator
(power) button Turns the power on or off.
STANDBY indicator Lights up when the unit is turned off.
(stop) buttonUse in each function to stop an operation.
• , • , and TUNE+ • TUNE– buttons
and buttons Cues the beginning of a track.
and buttons Fast rewind and fast forward the playback.
TUNE + and TUNE – buttons Use to adjust the tuning frequency (page 32).
Menu operation buttonsUse to select menu items and enter menu settings (page 17)., , and buttons
Use to select a menu item or to change a setting.
ENTER button Use to enter a setting.
TITLE UPDATE buttonUse to display the Title Update menu (page 43).
For the UK model TITLE UPDATE/DAB AUTO SCAN button
DAB AUTO SCAN button Use to scan DAB services automatically while the unit is in the DAB function (page 20).
TRANSFER buttonUse to transfer tracks to a USB device (page 26).
15GB
NAS-E35HD.GB.3-292-247-11(1)
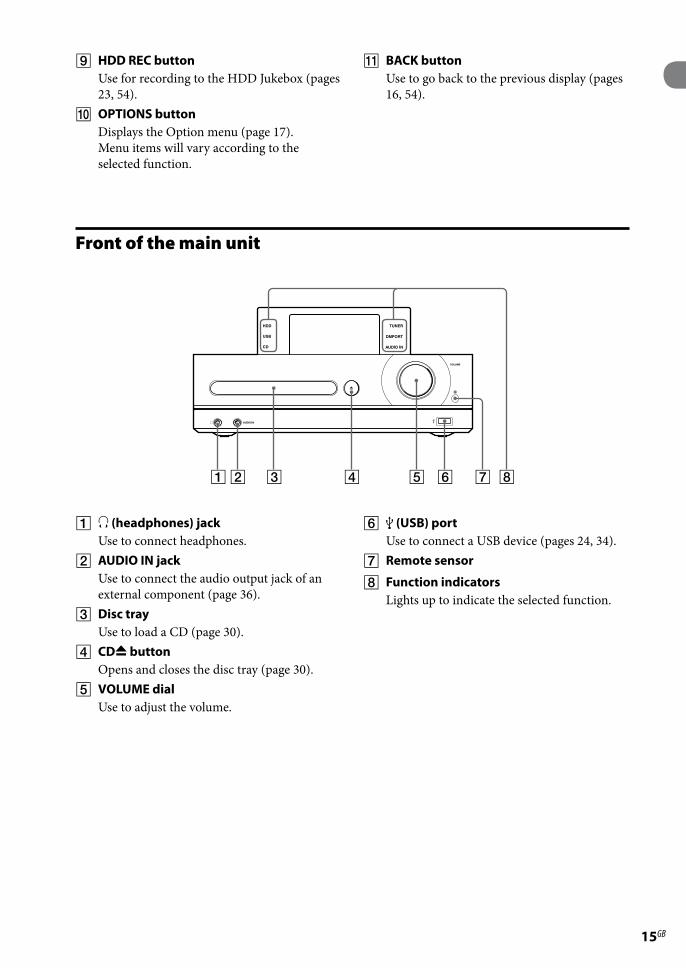
(headphones) jackUse to connect headphones.
AUDIO IN jackUse to connect the audio output jack of an external component (page 36).
Disc trayUse to load a CD (page 30).
CD buttonOpens and closes the disc tray (page 30).
VOLUME dialUse to adjust the volume.
Front of the main unit
(USB) portUse to connect a USB device (pages 24, 34).
Remote sensor
Function indicatorsLights up to indicate the selected function.
HDD REC buttonUse for recording to the HDD Jukebox (pages 23, 54).
OPTIONS buttonDisplays the Option menu (page 17).Menu items will vary according to the selected function.
BACK buttonUse to go back to the previous display (pages 16, 54).
1�GB
NAS-E35HD.GB.3-292-247-11(1)
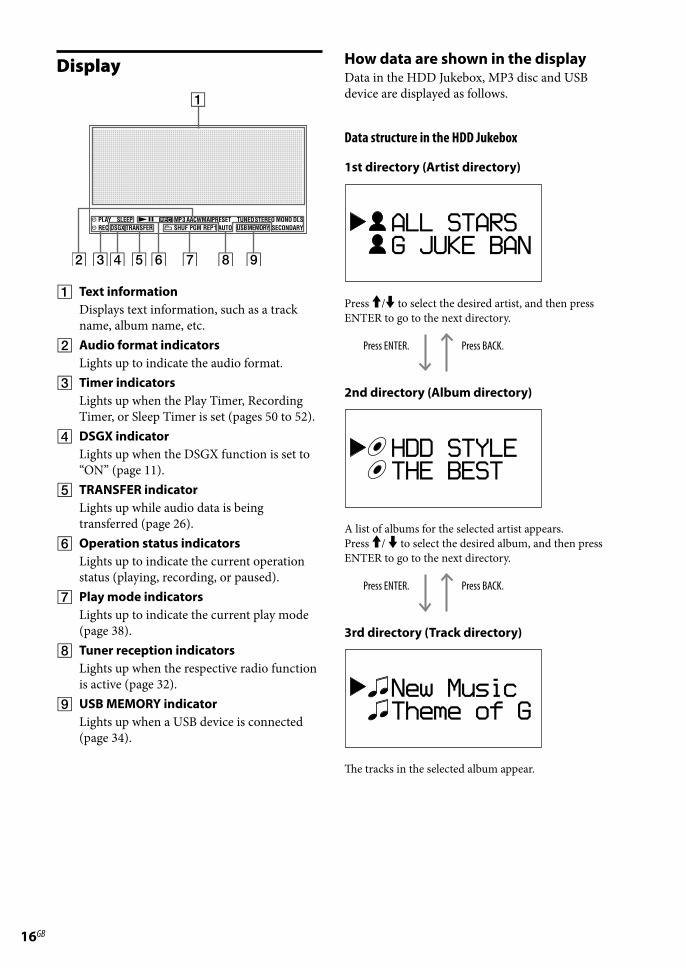
Display
Text informationDisplays text information, such as a track name, album name, etc.
Audio format indicatorsLights up to indicate the audio format.
Timer indicatorsLights up when the Play Timer, Recording Timer, or Sleep Timer is set (pages 50 to 52).
DSGX indicatorLights up when the DSGX function is set to “ON” (page 11).
TRANSFER indicatorLights up while audio data is being transferred (page 26).
Operation status indicatorsLights up to indicate the current operation status (playing, recording, or paused).
Play mode indicatorsLights up to indicate the current play mode (page 38).
Tuner reception indicatorsLights up when the respective radio function is active (page 32).
USB MEMORY indicatorLights up when a USB device is connected (page 34).
How data are shown in the displayData in the HDD Jukebox, MP3 disc and USB device are displayed as follows.
Data structure in the HDD Jukebox
1st directory (Artist directory)
Press / to select the desired artist, and then press ENTER to go to the next directory.
Press ENTER. Press BACK.
�nd directory (Album directory)
A list of albums for the selected artist appears.Press / to select the desired album, and then press ENTER to go to the next directory.
Press ENTER. Press BACK.
3rd directory (Track directory)
The tracks in the selected album appear.

1�GB
NAS-E35HD.GB.3-292-247-11(1)
Data structure on an MP3 disc or a USB device
1st directory (Folder directory)
Press / to select the desired folder, and then press ENTER to go to the next directory.
Press ENTER. Press BACK.
�nd directory (Track directory)
The tracks in the selected folder appear.
To select the functionPress the FUNCTION button.Each press of the button changes the function as follows.TUNER DMPORT AUDIO IN HDD USB CD TUNER ...
How to operate the Option menu
1 Press OPTIONS.The unit enters the Option menu.
2 Press / to select the desired item.
3 Press ENTER.

18GB
NAS-E35HD.GB.3-292-247-12(1)
Connect brown side
or
Connecting the speakers and antennas
Power cordConnect the power cord to a wall outlet after all other connections have been made.If the plug does not fit the wall socket, detach the supplied plug adaptor (only for models supplied with an adaptor).
Make sure to match the projections on the SPEAKER terminals and the speaker cords, and insert the cords firmly to the SPEAKER terminals.
NoteDo not connect speakers other than those supplied with this unit.
AUDIO OUT jack (for the Asian and Oceanian models only)Use to connect the optional audio component (such as a cassette deck) through an audio connecting cord (optional).
NoteThere is no audio output from these jacks while the AUDIO IN function is selected.
DAB lead antenna (for the UK model only)
Connect white side
or
With a DAB external antenna (optional), you can obtain a higher DAB broadcast sound quality. We recommend that you use the supplied DAB lead antenna only temporarily until you install a DAB external antenna.75 coaxial cable with F male type connector will be needed to install the DAB external antenna (optional).
Speaker cordsPress down on the tab below the terminal and insert the appropriate speaker cord.Make sure the metal leads (not the part covered with vinyl insulation) are securely inserted into the speaker terminals.Insert the end of the cord marked with a red line into the + terminal and the cord with no marking into the – terminal.

1�GB
NAS-E35HD.GB.3-292-247-11(1)
Connect brown side
or
VOLTAGE SELECTORFor models with a voltage selector, set VOLTAGE SELECTOR to the local power line voltage.* Brazilian model: 127 V or 220 V
DMPORT (DIGITAL MEDIA PORT)Use to connect the DIGITAL MEDIA PORT adapter to listen to the playback of a digital audio player (optional) (page 37).
AM loop antennaFind a location and an orientation that provide good reception, and then set up the antenna.
FM lead antennaFind a location and an orientation that provide good reception, and then set up the antenna.
The model shown in the illustration may differ from the model for your region.
NoteKeep the FM and AM antennas away from the speaker cords, the power cord and a USB cable to avoid picking up noise.

�0GB
NAS-E35HD.GB.3-292-247-11(1)
When carrying this unit
1 Remove a disc from the disc tray to protect the CD mechanism.
2 Press FUNCTION repeatedly to select “CD”.
3 Press and hold OPTIONS on the main unit, and then press (power) on the main unit until “STANDBY” appears in the display.
4 After “LOCK” appears, disconnect the power cord.
To insert the batteries into the remote controlSlide and remove the battery compartment lid, and then insert the two supplied R6 (size AA) batteries ( end first) matching the polarities as shown below.When the remote control is no longer able to operate the unit, replace both batteries with new ones.
NotesWith normal use, the battery should last for six
months.Do not mix an old battery with new one or mix
different types of batteries.If you do not use the remote control for a long period
of time, remove the batteries to avoid damage from battery leakage and corrosion.
To run the DAB Automatic ScanWhen you turn on the unit for the first time after you purchase the unit, DAB Automatic Scan starts automatically and creates a list of available services. If you want to run the DAB Automatic Scan again, perform the procedure below.This function is available on the UK model only.
1 Press DAB AUTO SCAN on the main unit.“Auto Scan?” and “Push ENTER” appear in the display.
2 Press ENTER.Scanning starts. “Auto Scan” appears.Depending on the DAB services available in your area, scanning may take a few minutes.When scanning is completed, a list of available services is created.
NotesIf your region does not support DAB broadcast, “No
Service” appears.Do not press any button on the unit or the remote
control during DAB Automatic Scan. Scanning is interrupted and service list may not be created properly. In this case, run the DAB Automatic Scan again.
If you move to another area, repeat this procedure to store the stations for your new area.
This procedure clears all previously stored presets.Before unplugging the DAB antenna, make sure the
unit is turned off to preserve your own DAB settings.This tuner does not support data services.
To attach the speaker pads (for the Latin American model only)Attach the supplied speaker pads to the bottom corner of the speakers to stabilize the speakers and to prevent them from slipping.
�1GB
NAS-E35HD.GB.3-292-247-11(1)
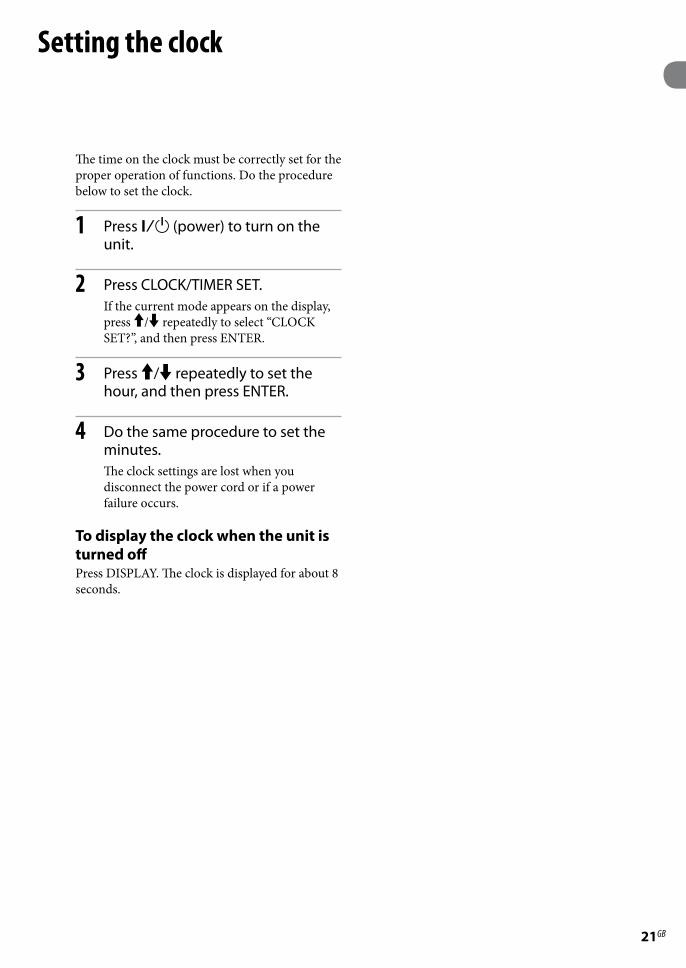
The time on the clock must be correctly set for the proper operation of functions. Do the procedure below to set the clock.
1 Press (power) to turn on the unit.
2 Press CLOCK/TIMER SET.If the current mode appears on the display, press / repeatedly to select “CLOCK SET?”, and then press ENTER.
3 Press / repeatedly to set the hour, and then press ENTER.
4 Do the same procedure to set the minutes.The clock settings are lost when you disconnect the power cord or if a power failure occurs.
To display the clock when the unit is turned offPress DISPLAY. The clock is displayed for about 8 seconds.
Setting the clock

��GB
NAS-E35HD.GB.3-292-247-11(1)
Importing and transferring audio data
About importing and transferring audio data
This unit allows you to import audio data to the HDD Jukebox from various sources and to manage the data.You can also transfer audio data to a USB device (digital music player or USB storage device).Please note that you cannot transfer audio data directly from a CD or the radio to the USB device. To do this, you must first import or record the audio data to the HDD Jukebox, and then transfer the data from the HDD Jukebox to the USB device.For details on which USB devices are compatible, see page 71.
Import/record audio data to the HDD Jukebox
Transfer audio data from the HDD Jukebox
Audio CDs
FM/AM/DAB*
USB device
Digital music player (DMPORT)
USB storage device
Digital music player
Hard disk drive(HDD)
* For the UK model only
External component (AUDIO IN)
USB devices
�3GB
NAS-E35HD.GB.3-292-247-11(1)
Importing/Recording audio data to the HDD Jukebox
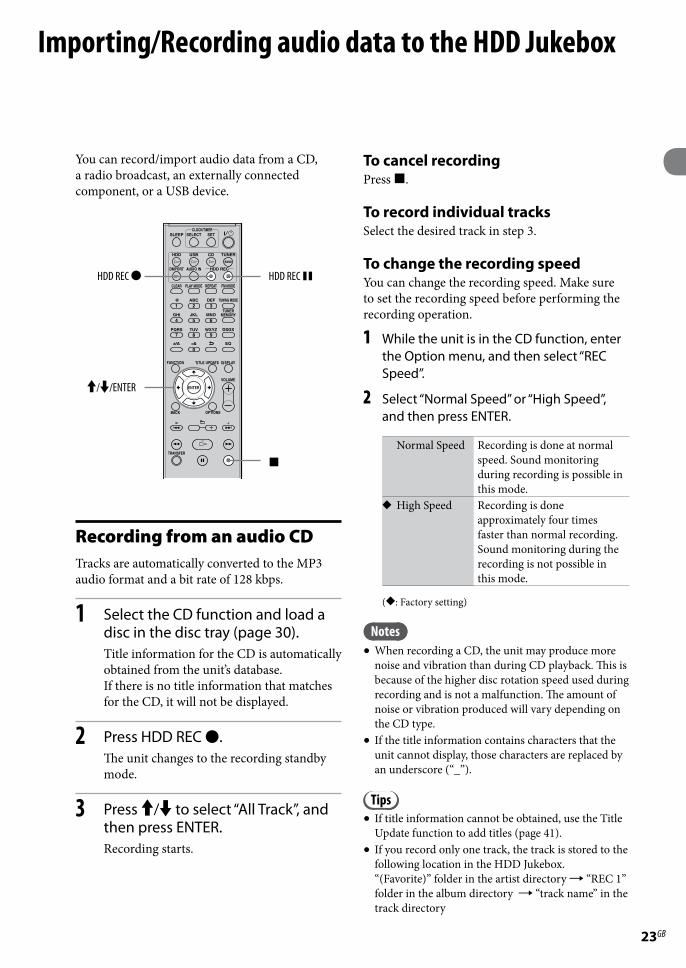
You can record/import audio data from a CD, a radio broadcast, an externally connected component, or a USB device.
HDD REC
//ENTER
HDD REC
Recording from an audio CDTracks are automatically converted to the MP3 audio format and a bit rate of 128 kbps.
1 Select the CD function and load a disc in the disc tray (page 30).Title information for the CD is automatically obtained from the unit’s database.If there is no title information that matches for the CD, it will not be displayed.
2 Press HDD REC .The unit changes to the recording standby mode.
3 Press / to select “All Track”, and then press ENTER.Recording starts.
To cancel recordingPress .
To record individual tracksSelect the desired track in step 3.
To change the recording speedYou can change the recording speed. Make sure to set the recording speed before performing the recording operation.
1 While the unit is in the CD function, enter the Option menu, and then select “REC Speed”.
2 Select “Normal Speed” or “High Speed”, and then press ENTER.
Normal Speed Recording is done at normal speed. Sound monitoring during recording is possible in this mode.
High Speed Recording is done approximately four times faster than normal recording. Sound monitoring during the recording is not possible in this mode.
(: Factory setting)
NotesWhen recording a CD, the unit may produce more
noise and vibration than during CD playback. This is because of the higher disc rotation speed used during recording and is not a malfunction. The amount of noise or vibration produced will vary depending on the CD type.
If the title information contains characters that the unit cannot display, those characters are replaced by an underscore (“_”).
TipsIf title information cannot be obtained, use the Title
Update function to add titles (page 41).If you record only one track, the track is stored to the
following location in the HDD Jukebox. “(Favorite)” folder in the artist directory “REC 1” folder in the album directory “track name” in the track directory
��GB
NAS-E35HD.GB.3-292-247-11(1)
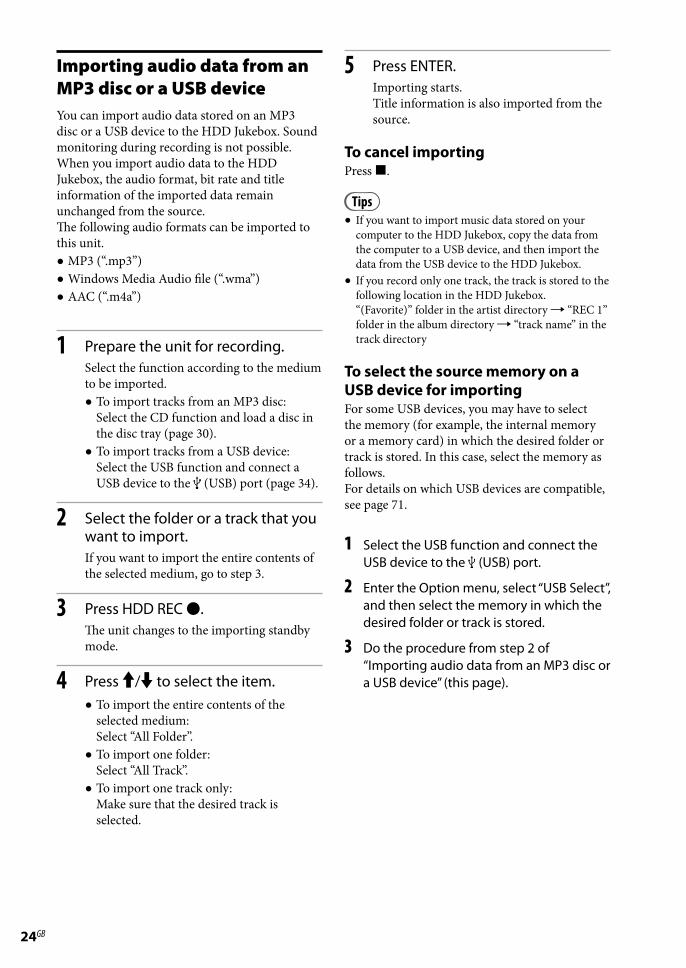
Importing audio data from an MP3 disc or a USB deviceYou can import audio data stored on an MP3 disc or a USB device to the HDD Jukebox. Sound monitoring during recording is not possible.When you import audio data to the HDD Jukebox, the audio format, bit rate and title information of the imported data remain unchanged from the source.The following audio formats can be imported to this unit.MP3 (“.mp3”)Windows Media Audio file (“.wma”)AAC (“.m4a”)
1 Prepare the unit for recording.Select the function according to the medium to be imported.To import tracks from an MP3 disc:
Select the CD function and load a disc in the disc tray (page 30).
To import tracks from a USB device: Select the USB function and connect a USB device to the (USB) port (page 34).
2 Select the folder or a track that you want to import.If you want to import the entire contents of the selected medium, go to step 3.
3 Press HDD REC .The unit changes to the importing standby mode.
4 Press / to select the item.
To import the entire contents of the selected medium: Select “All Folder”.
To import one folder: Select “All Track”.
To import one track only: Make sure that the desired track is selected.
5 Press ENTER.Importing starts.Title information is also imported from the source.
To cancel importingPress .
TipsIf you want to import music data stored on your
computer to the HDD Jukebox, copy the data from the computer to a USB device, and then import the data from the USB device to the HDD Jukebox.
If you record only one track, the track is stored to the following location in the HDD Jukebox. “(Favorite)” folder in the artist directory “REC 1” folder in the album directory “track name” in the track directory
To select the source memory on a USB device for importingFor some USB devices, you may have to select the memory (for example, the internal memory or a memory card) in which the desired folder or track is stored. In this case, select the memory as follows.For details on which USB devices are compatible, see page 71.
1 Select the USB function and connect the USB device to the (USB) port.
2 Enter the Option menu, select “USB Select”, and then select the memory in which the desired folder or track is stored.
3 Do the procedure from step 2 of “Importing audio data from an MP3 disc or a USB device” (this page).

�5GB
NAS-E35HD.GB.3-292-247-11(1)
Recording from a radio broadcast, DAB service*, or externally connected deviceYou can record a radio broadcast, a DAB service*, or from an external device. Tracks are automatically recorded and stored in the MP3 audio format and at a bit rate of 128 kbps.* For the UK model only
1 Prepare the unit for recording.Select the function according to the item to be recorded.To record a radio broadcast or DAB
service*: Tune in the desired radio program or DAB service (page 32 or 33).
* For the UK model only
To record from an external device (AUDIO IN): Select the AUDIO IN function, and then connect an external device to the AUDIO IN jack (page 36).
To record from an external device (DMPORT): Select the DMPORT function, and then connect an external device to the DMPORT (page 37).
2 Press HDD REC .Recording starts.The unit automatically adds a track mark at 60-minute intervals.
To cancel recordingPress .
To pause recordingPress HDD REC .
TipsA track mark is added whenever you press the HDD
REC button. Track marks can only be added for tracks with a minimum length of 4 seconds.
The recorded data are named as follows in the HDD Jukebox.
Recording source
Artist directory
Album directory*1
Track directory*1
FM (TUNER FM)
FM0001 Track01
AM (TUNER AM)
AM0001 Track01
DAB*2 (TUNER DAB)
DAB0001 Track01
AUDIO IN (AUDIO) AUDIO 0001
Track01
DMPORT (DMPORT) DMPORT 0001
Track01
*1 The number added to a title depends on how many times recordings have been made from the given recording source.
*2 For the UK model only
Recording programmed tracksWhen the play mode is set to “PGM” (program) with the CD or USB function active, you can record a program to the HDD Jukebox (page 39).
1 With the unit stopped, program play set, and the respective function active, press HDD REC .
2 Press / to select “All Step”, and then press ENTER.Recording starts.

��GB
NAS-E35HD.GB.3-292-247-11(1)
You can transfer audio data in the HDD Jukebox to a device connected to the (USB) port. For details on which USB devices are compatible, see page 71.
NotesIf the AC power adaptor is supplied with the
connected device, it is recommended that you operate the device on house current. When operating the device on batteries, make sure the remaining battery power is sufficient. We do not guarantee against malfunctions, transfer failures, or destruction of audio data caused by shortages in battery power.
Make sure that you do not disconnect the USB cable during transfer. If you do, the unit or the connected device may malfunction.
//ENTER
TRANSFER
Transferring audio data to a USB device
1 Connect a USB device to the (USB) port on the unit.Refer also to the operating manual of the USB device.
2 Select the HDD function.
3 Select an item (album or track) that you want to transfer.If you want to transfer the entire contents of the HDD Jukebox, go to step 4.
4 Press TRANSFER.The unit enters standby mode.
5 Press / to select the item you want to transfer.
To transfer all tracks for the selected album: Select “All Track”.
To transfer the selected track only: Make sure the desired track is selected.
6 Press ENTER.Transfer starts.
Transferring audio data from the HDD Jukebox
��GB
NAS-E35HD.GB.3-292-247-11(1)
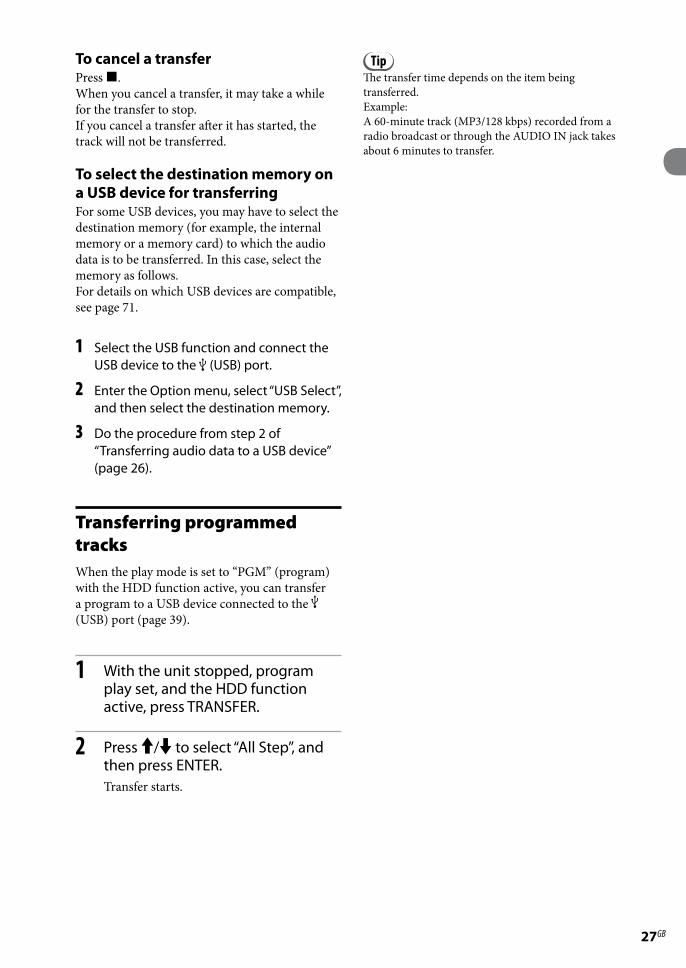
To cancel a transferPress .When you cancel a transfer, it may take a while for the transfer to stop.If you cancel a transfer after it has started, the track will not be transferred.
To select the destination memory on a USB device for transferringFor some USB devices, you may have to select the destination memory (for example, the internal memory or a memory card) to which the audio data is to be transferred. In this case, select the memory as follows.For details on which USB devices are compatible, see page 71.
1 Select the USB function and connect the USB device to the (USB) port.
2 Enter the Option menu, select “USB Select”, and then select the destination memory.
3 Do the procedure from step 2 of “Transferring audio data to a USB device” (page 26).
Transferring programmed tracksWhen the play mode is set to “PGM” (program) with the HDD function active, you can transfer a program to a USB device connected to the (USB) port (page 39).
1 With the unit stopped, program play set, and the HDD function active, press TRANSFER.
2 Press / to select “All Step”, and then press ENTER.Transfer starts.
TipThe transfer time depends on the item being transferred.Example:A 60-minute track (MP3/128 kbps) recorded from a radio broadcast or through the AUDIO IN jack takes about 6 minutes to transfer.

��GB
NAS-E35HD.GB.3-292-247-11(1)
You can erase tracks on a connected USB device from this unit.
NoteMake sure not to disconnect the USB device or turn the power off until the erasing has completed.
1 Select the USB function and connect the USB device with the tracks you want to erase.
2 Enter the Option menu, and then select “Erase”.
3 Press / to select the item to be erased, and then press ENTER.
To erase the entire contents of the USB device: Select “All Erase”.
To erase a folder: Select the folder, and then select “All Track”.
To erase one track only: Select the folder that contains the track you want to erase, and then select the track.
4 Press / to select “OK?”, and then press ENTER.
To cancel erasingPress .It may take a while for the cancellation to take effect.
Erasing tracks on the USB device
��GB
NAS-E35HD.GB.3-292-247-11(1)
Playing audio data
Playing the HDD Jukebox
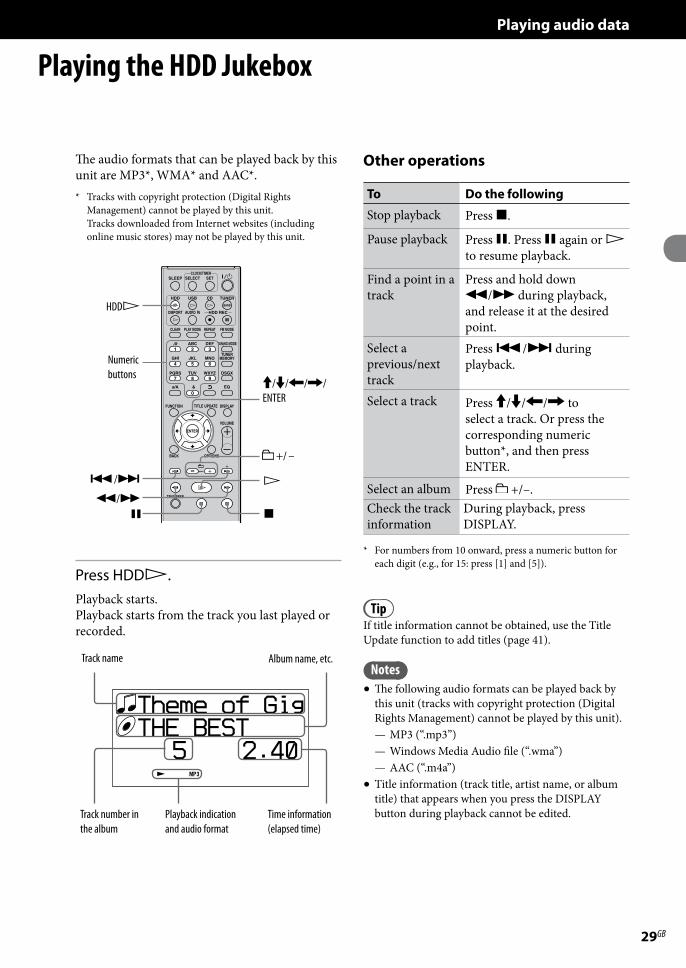
The audio formats that can be played back by this unit are MP3*, WMA* and AAC*.* Tracks with copyright protection (Digital Rights
Management) cannot be played by this unit. Tracks downloaded from Internet websites (including online music stores) may not be played by this unit.
HDD
////ENTER
/
+/ –
/
Numeric buttons
Press HDD.Playback starts.Playback starts from the track you last played or recorded.
Track name
Playback indication and audio format
Time information (elapsed time)
Track number in the album
Album name, etc.
Other operations
To Do the following
Stop playback Press .
Pause playback Press . Press again or to resume playback.
Find a point in a track
Press and hold down / during playback, and release it at the desired point.
Select a previous/next track
Press / during playback.
Select a track Press /// to select a track. Or press the corresponding numeric button*, and then press ENTER.
Select an album Press +/–.Check the track information
During playback, press DISPLAY.
* For numbers from 10 onward, press a numeric button for each digit (e.g., for 15: press [1] and [5]).
TipIf title information cannot be obtained, use the Title Update function to add titles (page 41).
NotesThe following audio formats can be played back by
this unit (tracks with copyright protection (Digital Rights Management) cannot be played by this unit).— MP3 (“.mp3”)— Windows Media Audio file (“.wma”)— AAC (“.m4a”)
Title information (track title, artist name, or album title) that appears when you press the DISPLAY button during playback cannot be edited.
30GB
NAS-E35HD.GB.3-292-247-11(1)
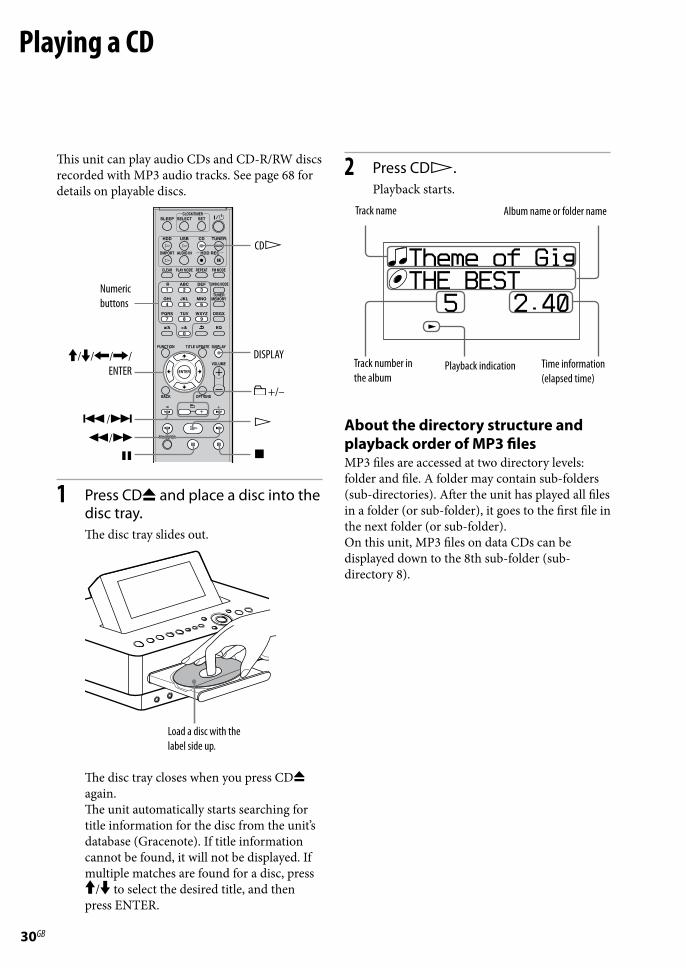
This unit can play audio CDs and CD-R/RW discs recorded with MP3 audio tracks. See page 68 for details on playable discs.
Numeric buttons
CD
DISPLAY////ENTER
/
+/–
/
1 Press CD and place a disc into the disc tray.The disc tray slides out.
Load a disc with the label side up.
The disc tray closes when you press CD again.The unit automatically starts searching for title information for the disc from the unit’s database (Gracenote). If title information cannot be found, it will not be displayed. If multiple matches are found for a disc, press / to select the desired title, and then press ENTER.
2 Press CD.Playback starts.
Track name
Playback indication Time information (elapsed time)
Track number in the album
Album name or folder name
About the directory structure and playback order of MP3 filesMP3 files are accessed at two directory levels: folder and file. A folder may contain sub-folders (sub-directories). After the unit has played all files in a folder (or sub-folder), it goes to the first file in the next folder (or sub-folder).On this unit, MP3 files on data CDs can be displayed down to the 8th sub-folder (sub-directory 8).
Playing a CD

31GB
NAS-E35HD.GB.3-292-247-11(1)
Other operations
To Do the followingStop playback Press .Pause playback Press . Press again or
to resume playback.Find a point in a track
Press and hold down / during playback, and release it at the desired point.
Select the previous/next track
Press / during playback.
Select a track Press /// to select a track. Or press the corresponding numeric button*1, and then press ENTER.
Select a folder (MP3 disc only)
Press +/– to select a folder.
Switch the time information display (audio CD only)
During playback, press DISPLAY repeatedly. Each press changes the time information as follows.Elapsed time remaining time of a track remaining time on a disc*2
Check the track information
During playback, press DISPLAY.
Remove the disc Press CD on the main unit.
*1 For numbers from 10 onward, press a numeric button for each digit (e.g., for 124: press [1], [2] and [4]).
*2 The remaining time on a disc cannot be displayed during shuffle play or program play.
TipsIf title information cannot be obtained, use the Title
Update function to add titles (page 41).To select another title for a disc for which multiple
matches were found in the unit’s database (step 1 on page 30), press OPTIONS, press / to select “CD Info”, and then select the title.
Notes on playing MP3 discDo not save other types of files or unnecessary
folders on a disc that has MP3 files.Folders that have no MP3 files are skipped.MP3 files are played back in alphabetical order.The unit can only play MP3 files that have a file
extension of “.mp3”.If there are files on the disc that have the “.MP3” file
extension, but that are not MP3 files, the unit may produce noise or may malfunction.
The maximum number of :— MP3 folders is 255 (including the root folder).— MP3 files is 511.— MP3 files and folders that can be contained on a
single disc is 512.— folder levels (the tree structure of files) is 8.
Compatibility with all MP3 encoding/writing software, recording device, and recording media cannot be guaranteed. Incompatible MP3 discs may produce noise or interrupted audio or may not play at all.
Notes on playing multisession discsIf the disc begins with a CD-DA (or MP3) session, it
is recognized as a CD-DA (or MP3) disc, and other sessions are not played back.
A disc with a mixed CD format is recognized as a CD-DA (audio) disc.

3�GB
NAS-E35HD.GB.3-292-247-11(1)
You can tune in radio stations or DAB services either manually or automatically. Pre-setting stations or services in advance allows you to recall them up by number.DAB services can be received with the UK model only.
TUNER/BAND
ENTER
FM MODE
+/–
TUNING MODE
TUNER MEMORY
Selecting a radio station or a DAB service*Before you can receive DAB services, the broadcast components (service components) must first be registered by conducting a DAB Automatic Scan (see “To run the DAB Automatic Scan” on page 20).** For the UK model only
1 Press TUNER/BAND repeatedly to select “DAB”, “FM”, or “AM”.
2 Press TUNING MODE repeatedly until “AUTO” appears in the display.
3 Tune in the desired station or service.Press +/– (TUNE +/– on the main unit). Scanning stops automatically when a station is turned in, and then “TUNED” and “STEREO” (for stereo program only) appear in the display. To cancel scanning, press .
Frequency Tuning mode FM mode
Function
When you tune in an FM station or a DAB service that provides RDS (Radio Data System) services, the station name or service name appears in the display (on European models only).
To tune in a station with a weak signal (FM or AM reception only)If “TUNED” does not appear and scanning does not stop, press TUNING MODE repeatedly until “AUTO” or “PRESET” disappears, and then press +/– (TUNE +/– on the main unit) repeatedly to tune in the desired station.
Listening to the radio or DAB services
33GB
NAS-E35HD.GB.3-292-247-11(1)
To reduce static noise during reception of a weak FM stereo stationPress FM MODE repeatedly until “MONO” appears in the display to switch the stereo reception to monaural.
To change the AM tuning intervalThe AM tuning interval is factory set to 9 kHz (or 10 kHz for some areas; this function is not available on the European model).
1 Tune in any AM station, and then press to turn off the unit.
2 Press DISPLAY to display the clock.
3 While pressing and holding TUNE + on the main unit, press on the main unit.All the preset AM stations are erased. To reset the interval to the factory setting, do the same procedure.
Notes on listening to the DAB serviceWhen tuning in a DAB service, it may take a few
seconds before you hear any sound.Primary service is automatically received when
secondary service ends.
Presetting radio stations or DAB services* By presetting FM stations, AM stations or DAB services*, you can easily tune them in later merely by selecting the corresponding preset number. You can preset up to 20 FM stations or DAB services and up to 10 AM stations.* For the UK model only
1 Turn in the desired radio station or DAB service (“Selecting a radio station or a DAB service” on page 32).
2 Press TUNER MEMORY.
3 Press +/– to select a preset number, and then press ENTER.
4 Repeat steps 1 to 3 to store other stations or services.The preset stations or services are retained for about half a day even if you disconnect the power cord or if a power failure occurs.
To listen to the preset station or service
1 Press TUNER/BAND repeatedly to select “DAB”, “FM”, or “AM”.
2 Press TUNING MODE repeatedly until “PRESET” appears in the display.
3 Press +/– to select the preset station.
TipYou can select the preset station using the numeric buttons on the remote control.For example, when you select the station which preset number is 15, press 1 and 5, and then press ENTER.If you enter unavailable preset number, “––” appears in the display and you cannot select the station.
3�GB
NAS-E35HD.GB.3-292-247-11(1)
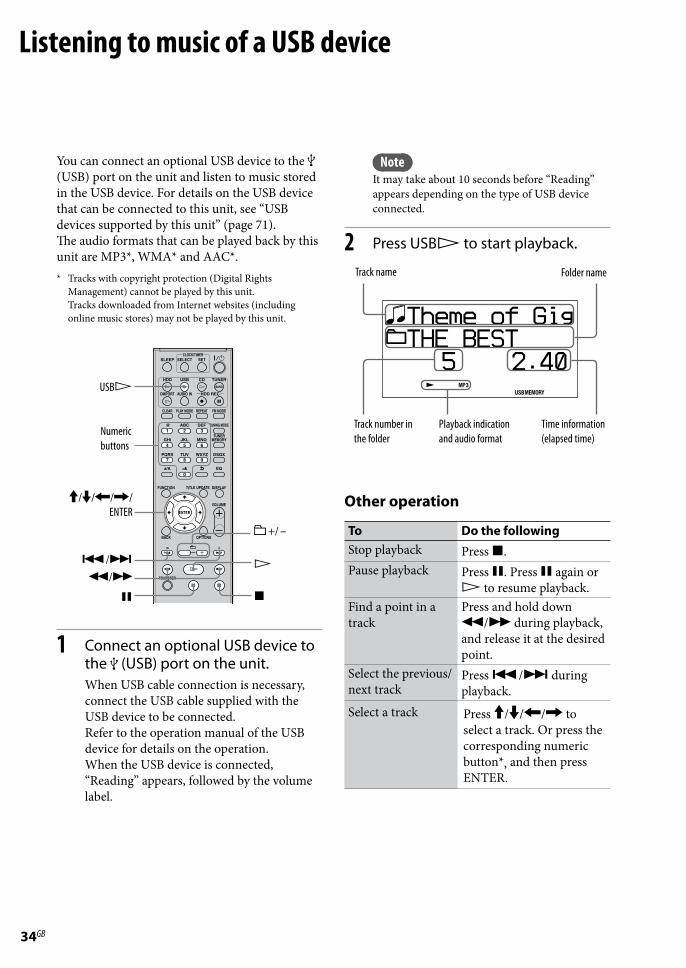
You can connect an optional USB device to the (USB) port on the unit and listen to music stored in the USB device. For details on the USB device that can be connected to this unit, see “USB devices supported by this unit” (page 71).The audio formats that can be played back by this unit are MP3*, WMA* and AAC*.* Tracks with copyright protection (Digital Rights
Management) cannot be played by this unit. Tracks downloaded from Internet websites (including online music stores) may not be played by this unit.
Numeric buttons
USB
////ENTER
/
+/ –
/
1 Connect an optional USB device to the (USB) port on the unit.When USB cable connection is necessary, connect the USB cable supplied with the USB device to be connected.Refer to the operation manual of the USB device for details on the operation.When the USB device is connected, “Reading” appears, followed by the volume label.
NoteIt may take about 10 seconds before “Reading” appears depending on the type of USB device connected.
2 Press USB to start playback.
Track name
Playback indication and audio format
Time information (elapsed time)
Track number in the folder
Folder name
Other operation
To Do the followingStop playback Press .Pause playback Press . Press again or
to resume playback.Find a point in a track
Press and hold down / during playback, and release it at the desired point.
Select the previous/next track
Press / during playback.
Select a track Press /// to select a track. Or press the corresponding numeric button*, and then press ENTER.
Listening to music of a USB device

35GB
NAS-E35HD.GB.3-292-247-11(1)
To Do the followingSelect a folder Press +/– to select an
folder.Check the track information
During playback, press DISPLAY.
Remove the USB device
While the unit is stopped, press and hold until “Device Stop” appears, and then remove the USB device.
* For numbers from 10 onward, press a numeric button for each digit (e.g., for 124: press [1], [2] and [4]).
Notes on the USB deviceWith some connected USB devices, after an
operation is performed, there may be a delay before it is performed by the unit.
This unit does not necessarily support all the functions provided in a connected USB device.
Music files are played back in alphabetical order.Always press and make sure that “Device Stop”
appears before removing the USB device. Removing the USB device while “Device Stop” is not displayed may corrupt the data on it or damage the USB device itself.
Do not save other types of files or unnecessary folders on an USB device that has audio files.
Folders that have no audio files are skipped.The maximum numbers of folders and files that can
be contained on a single USB device are as follows:— 999 folders (including the root folder)— 999 filesThe maximum number of files and folders may vary depending on the file and folder structure.
The following audio formats can be played back by this unit (files with copyright protection (Digital Rights Management) cannot be played by this unit).— MP3 (“.mp3”)— Windows Media Audio file (“.wma”)— AAC (“.m4a”)Note that even when file names have the above file extensions, if the actual file differs, the unit may produce noise or may malfunction.
Compatibility with all encoding/writing software, recording devices, and recording media may produce noise, interrupted audio, or may not play at all.
3�GB
NAS-E35HD.GB.3-292-247-11(1)
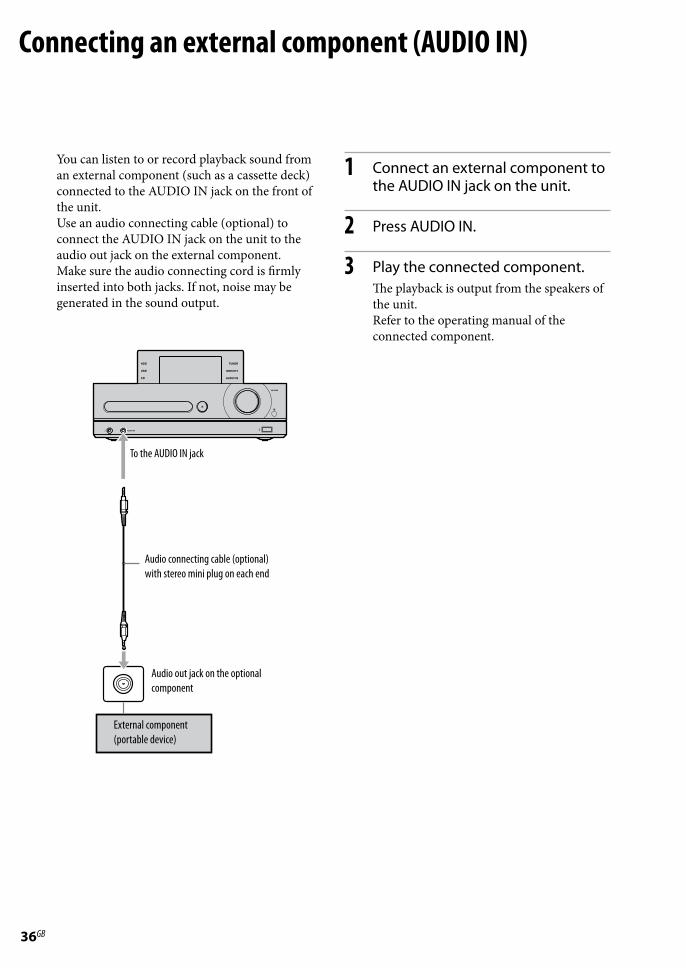
You can listen to or record playback sound from an external component (such as a cassette deck) connected to the AUDIO IN jack on the front of the unit.Use an audio connecting cable (optional) to connect the AUDIO IN jack on the unit to the audio out jack on the external component.Make sure the audio connecting cord is firmly inserted into both jacks. If not, noise may be generated in the sound output.
To the AUDIO IN jack
Audio connecting cable (optional) with stereo mini plug on each end
Audio out jack on the optional component
External component (portable device)
1 Connect an external component to the AUDIO IN jack on the unit.
2 Press AUDIO IN.
3 Play the connected component.The playback is output from the speakers of the unit.Refer to the operating manual of the connected component.
Connecting an external component (AUDIO IN)

3�GB
NAS-E35HD.GB.3-292-247-11(1)
1 Connect the DIGITAL MEDIA PORT adapter to the DMPORT on the unit and to the external digital music player (optional).
2 Press DMPORT .The playback is output from the speakers of the unit.Refer to the operating manual of the connected digital music player (optional).
NotesDepending on the type of DIGITAL MEDIA PORT
adapter, you may be able to operate the connected digital music player using either the buttons on the remote or the unit.
Available DIGITAL MEDIA PORT adapters vary in each area.
Do not connect an adapter other than the DIGITAL MEDIA PORT adapter.
Do not connect or disconnect the DIGITAL MEDIA PORT adapter to/from the DMPORT while the unit is on.
When using a DIGITAL MEDIA PORT adapter that has video output function, connect the adapter directly to the TV.
You can listen to or record playback sound from an optional digital music player (such as a portable audio player, etc.) that is compatible to DMPORT connection.Connect the DIGITAL MEDIA PORT adapter to the unit and the digital music player.
To DMPORT
DIGITAL MEDIA PORT adapter
Digital music player
Connecting a digital music player to the DMPORT
3�GB
NAS-E35HD.GB.3-292-247-11(1)
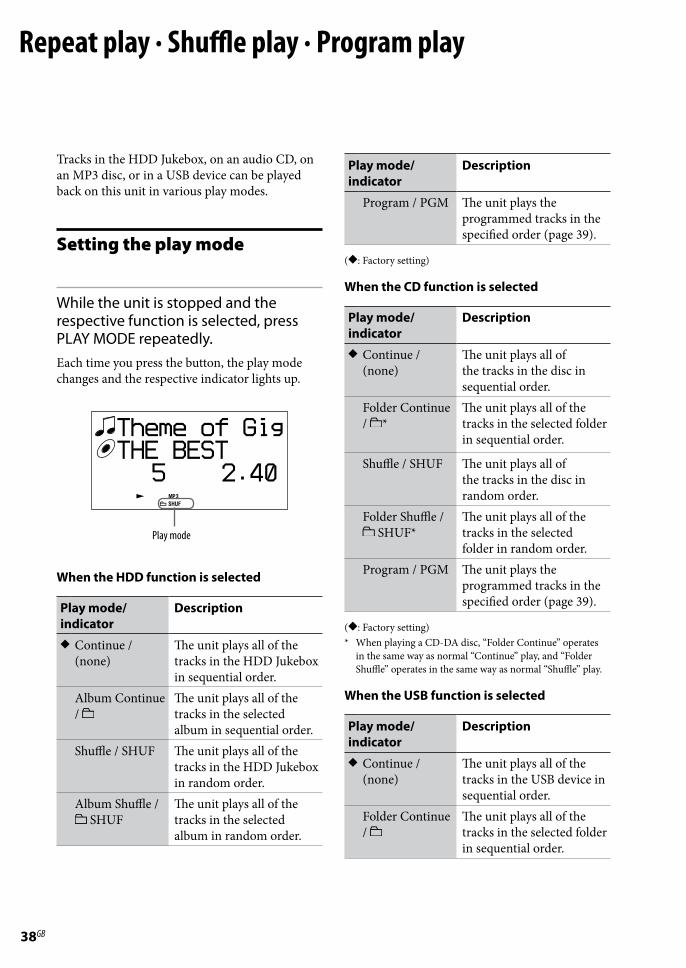
Tracks in the HDD Jukebox, on an audio CD, on an MP3 disc, or in a USB device can be played back on this unit in various play modes.
Setting the play mode
While the unit is stopped and the respective function is selected, press PLAY MODE repeatedly.Each time you press the button, the play mode changes and the respective indicator lights up.
Play mode
When the HDD function is selected
Play mode/indicator
Description
Continue / (none)
The unit plays all of the tracks in the HDD Jukebox in sequential order.
Album Continue /
The unit plays all of the tracks in the selected album in sequential order.
Shuffle / SHUF The unit plays all of the tracks in the HDD Jukebox in random order.
Album Shuffle / SHUF
The unit plays all of the tracks in the selected album in random order.
Play mode/indicator
Description
Program / PGM The unit plays the programmed tracks in the specified order (page 39).
(: Factory setting)
When the CD function is selected
Play mode/indicator
Description
Continue / (none)
The unit plays all of the tracks in the disc in sequential order.
Folder Continue / *
The unit plays all of the tracks in the selected folder in sequential order.
Shuffle / SHUF The unit plays all of the tracks in the disc in random order.
Folder Shuffle / SHUF*
The unit plays all of the tracks in the selected folder in random order.
Program / PGM The unit plays the programmed tracks in the specified order (page 39).
(: Factory setting)* When playing a CD-DA disc, “Folder Continue” operates
in the same way as normal “Continue” play, and “Folder Shuffle” operates in the same way as normal “Shuffle” play.
When the USB function is selected
Play mode/indicator
Description
Continue / (none)
The unit plays all of the tracks in the USB device in sequential order.
Folder Continue /
The unit plays all of the tracks in the selected folder in sequential order.
Repeat play · Shuffle play · Program play

3�GB
NAS-E35HD.GB.3-292-247-11(1)
Play mode/indicator
Description
Shuffle / SHUF The unit plays all of the tracks in the USB device in random order.
Folder Shuffle / SHUF
The unit plays all of the tracks in the selected folder in random order.
Program / PGM The unit plays the programmed tracks in the specified order (this page).
(: Factory setting)
TipYou can set the play mode from the Option menu as well. To set the play mode, enter the Option menu, select “Play Mode”, and then select the item.
Setting repeat playRepeated playback can be specified for the selected play mode
Press REPEAT repeatedly to select “REP” or “REP1”.Each press of the button changes the repeat mode and the respective indicator lights up.
Repeat mode/indicator
Description
Repeat Off / (none)
Repeat play is off.
Repeat All / REP The unit plays all of the tracks repeatedly in the selected play mode.
Repeat 1 / REP1 The unit plays the selected track repeatedly.
(: Factory setting)
NoteWhen “Repeat All” has been set for CD playback, all tracks on a disc are played back repeatedly up to five times.
TipYou can set the repeat mode from the Option menu as well. To set the repeat mode, enter the Option menu, select “Repeat”, and then select the item.
Creating your own program (Program play)You can create a program of selected tracks while the HDD, CD, or USB function is selected on the unit.Up to 25 tracks can be placed in a program.
1 While the unit is stopped and the respective function is selected, press PLAY MODE repeatedly until “PGM” lights up in the display.
2 Press / to select the desired track.Press +/– to select the desired album or folder, and then select the desired track.
3 Press ENTER to add the track to the program.
4 Repeat steps 2 and 3 to program other tracks.
5 Press to play your program.The program remains available until you open the disc tray or remove the USB device.
To cancel program playWhile the unit is stopped, press PLAY MODE repeatedly until the “PGM” indicator disappears.
To delete the last track of the programWhile the unit is stopped, press CLEAR.

�0GB
NAS-E35HD.GB.3-292-247-11(1)
You can search for a track in the HDD Jukebox, CD, or USB device.
Searching for a track in the HDD Jukebox
1 While the unit is stopped and no track or album is selected, press ///.The unit enters search mode and the artist directory appears.
2 Press / to select the desired artist, and then press ENTER.The album directory appears.
3 Press / to select the desired album, and then press ENTER.The track directory appears.
4 Press / to select the desired track, and then press ENTER.Playback starts.
Searching for a track on a CD or a USB device
1 Press / to select the desired folder, and then press ENTER.The track directory appears.
2 Press / to select the desired track, and then press ENTER.Playback starts.
To cancel searchingPress .
To switch back to the previous directoryPress BACK.
TipWith the unit in search mode, press to cause the cursor to jump to the first artist name or album/folder name for the next letter of the alphabet.
Searching for a track
�1GB
NAS-E35HD.GB.3-292-247-11(1)
Editing tracks in the HDD Jukebox
Obtaining title information
The database in this unit contains a certain amount of CD information provided by the Gracenote® Music Recognition Service. This allows you to search for titles and add them to albums or tracks whenever a CD is loaded.If a particular title cannot be found, you can try to obtain it by updating the database with the Title Update function.
NotesWhen using Title Updater, use the USB storage device (page 71).Be sure to close Virtual Expander (MICROVAULT software) before using Title Updater with MICROVAULT
(page 71).
About “Title Updater”Title Updater is a pre-installed application that allows you to search the Web for title information not contained in the unit’s database. Information such as album names, artist names, and track titles is provided by the Gracenote® Music Recognition Service.
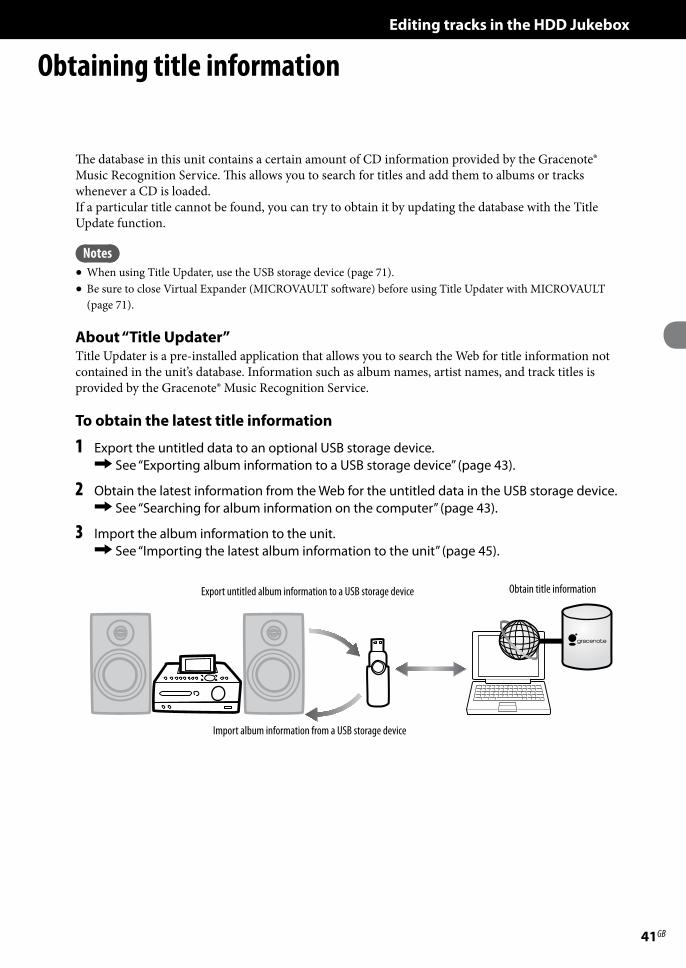
To obtain the latest title information
1 Export the untitled data to an optional USB storage device. See “Exporting album information to a USB storage device” (page 43).
2 Obtain the latest information from the Web for the untitled data in the USB storage device. See “Searching for album information on the computer” (page 43).
3 Import the album information to the unit. See “Importing the latest album information to the unit” (page 45).
Export untitled album information to a USB storage device
Import album information from a USB storage device
Obtain title information
��GB
NAS-E35HD.GB.3-292-247-11(1)
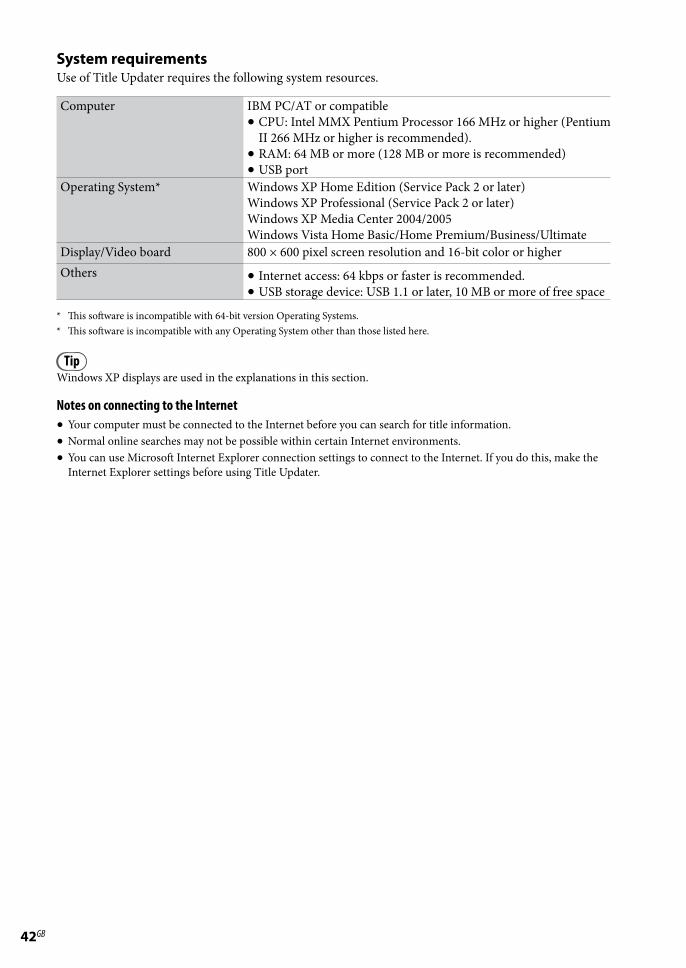
System requirementsUse of Title Updater requires the following system resources.
Computer IBM PC/AT or compatibleCPU: Intel MMX Pentium Processor 166 MHz or higher (Pentium
II 266 MHz or higher is recommended).RAM: 64 MB or more (128 MB or more is recommended)USB port
Operating System* Windows XP Home Edition (Service Pack 2 or later)Windows XP Professional (Service Pack 2 or later)Windows XP Media Center 2004/2005Windows Vista Home Basic/Home Premium/Business/Ultimate
Display/Video board 800 × 600 pixel screen resolution and 16-bit color or higherOthers Internet access: 64 kbps or faster is recommended.
USB storage device: USB 1.1 or later, 10 MB or more of free space
* This software is incompatible with 64-bit version Operating Systems.* This software is incompatible with any Operating System other than those listed here.
TipWindows XP displays are used in the explanations in this section.
Notes on connecting to the InternetYour computer must be connected to the Internet before you can search for title information.Normal online searches may not be possible within certain Internet environments.You can use Microsoft Internet Explorer connection settings to connect to the Internet. If you do this, make the
Internet Explorer settings before using Title Updater.
�3GB
NAS-E35HD.GB.3-292-247-11(1)
Exporting album information to a USB storage deviceThis section explains how to export album information for which you have no title information to a USB storage device. When you perform this function for the first time, the application (Title Updater) will be automatically exported to the USB storage device as well.
1 Connect the USB storage device to the (USB) port on the unit.
2 Select the HDD function and press TITLE UPDATE.The title update menu appears.
3 Press / to select “Export” and press ENTER.The export menu appears.
4 Press / to select “AllNonTitled” and press ENTER.All album information that has no title information (“export.dat”) is exported to the USB storage device. Title Updater (“TitleUpdater.exe”) is automatically exported at this time as well.
NoteTo disconnect the USB storage device from the unit, select the USB function and press and hold while the unit is stopped, making sure “Device Stop” appears in the display before disconnecting the USB storage device.
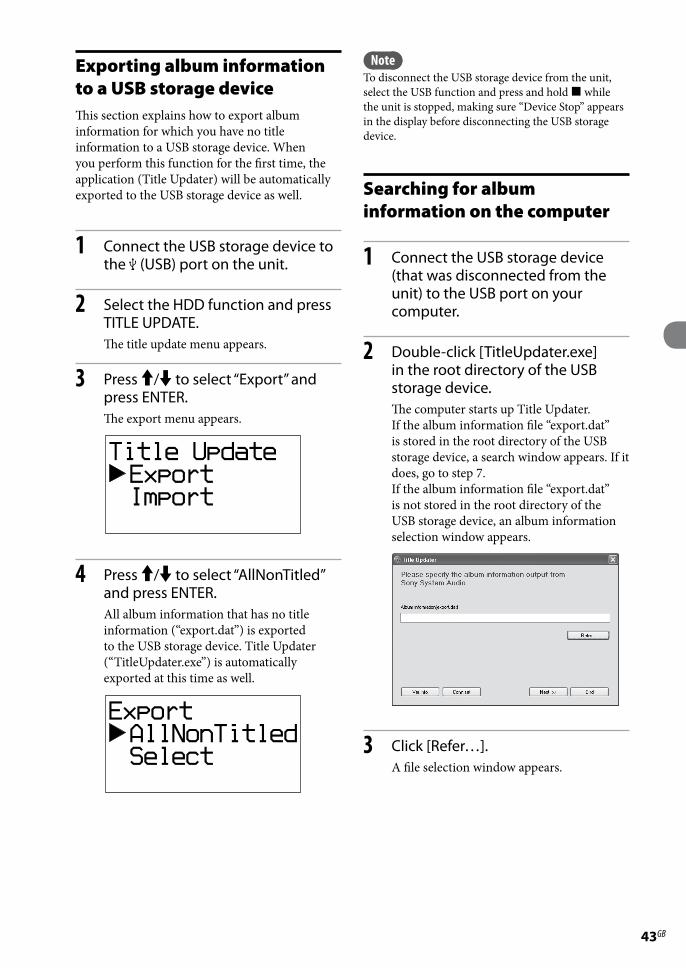
Searching for album information on the computer
1 Connect the USB storage device (that was disconnected from the unit) to the USB port on your computer.
2 Double-click [TitleUpdater.exe] in the root directory of the USB storage device.The computer starts up Title Updater.If the album information file “export.dat” is stored in the root directory of the USB storage device, a search window appears. If it does, go to step 7.If the album information file “export.dat” is not stored in the root directory of the USB storage device, an album information selection window appears.
3 Click [Refer…].A file selection window appears.

��GB
NAS-E35HD.GB.3-292-247-11(1)
4 Open the root folder of the connected USB storage device and select [export.dat] file.
5 Click [Open].The selected file appears in the album information selection window.
6 Click [Next >>].A search window appears.
7 Click [Search].The computer automatically starts searching for title information.
The search results for albums and artists appear in the order in which the match is made.To cancel the search, click [Cancel].When album selection window appearsIf multiple matches are found for an album, an album selection window appears. Select one of the items from the search results.
When the search completes, a list of albums for which matches were made appears and the information is automatically stored to the USB storage device.
�5GB
NAS-E35HD.GB.3-292-247-11(1)
NotesIf you cannot access the Gracenote® database, see
“To set up a network connection on your computer” (page 46) to make the proper network settings.
The title information that is obtained is stored as “import.dat” on the USB storage device. Make sure not to disconnect the USB storage device from the computer until saving of the file has completed.
If you click [Search] again after saving information to the USB storage device, another search is initiated and the saved file (“import.dat”) is deleted from the USB storage device. The file will be saved again after the new search has completed.
If “import.dat” file is not saved automatically, click [Save].
Importing the latest album information to the unit
1 Connect the USB storage device (that was disconnected from the computer) to the (USB) port of the unit.
2 Select the HDD function and press TITLE UPDATE.The title update menu appears.
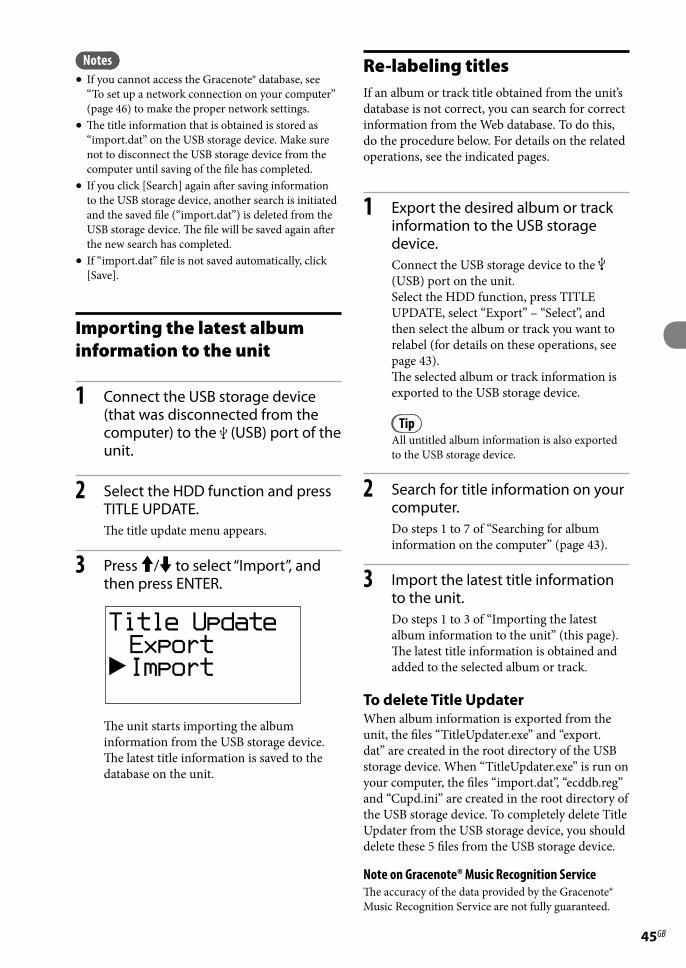
3 Press / to select “Import”, and then press ENTER.
The unit starts importing the album information from the USB storage device. The latest title information is saved to the database on the unit.
Re-labeling titlesIf an album or track title obtained from the unit’s database is not correct, you can search for correct information from the Web database. To do this, do the procedure below. For details on the related operations, see the indicated pages.
1 Export the desired album or track information to the USB storage device.Connect the USB storage device to the (USB) port on the unit.Select the HDD function, press TITLE UPDATE, select “Export” – “Select”, and then select the album or track you want to relabel (for details on these operations, see page 43).The selected album or track information is exported to the USB storage device.
TipAll untitled album information is also exported to the USB storage device.
2 Search for title information on your computer.Do steps 1 to 7 of “Searching for album information on the computer” (page 43).
3 Import the latest title information to the unit.Do steps 1 to 3 of “Importing the latest album information to the unit” (this page).The latest title information is obtained and added to the selected album or track.
To delete Title UpdaterWhen album information is exported from the unit, the files “TitleUpdater.exe” and “export.dat” are created in the root directory of the USB storage device. When “TitleUpdater.exe” is run on your computer, the files “import.dat”, “ecddb.reg” and “Cupd.ini” are created in the root directory of the USB storage device. To completely delete Title Updater from the USB storage device, you should delete these 5 files from the USB storage device.
Note on Gracenote® Music Recognition ServiceThe accuracy of the data provided by the Gracenote® Music Recognition Service are not fully guaranteed.

��GB
NAS-E35HD.GB.3-292-247-11(1)
To set up a network connection on your computer
1 Double-click [TitleUpdater.exe] in the root directory of the USB storage device.Title Updater starts.
2 Click [Conn.set].The network connection setup display appears.
When using Internet ExplorerCheck [Use settings of Internet Explorer] and click [Setting].Title Updater connects to the Internet using the Internet Explorer settings. (There is no need to make any further settings.)
When using another browserUncheck [Use settings of Internet Explorer] and do the following.
To select the connection method You can select either a LAN ([Use LAN connection]) or dial-up ([Use Dial up connection]) connection to search online for title information. For a dial-up connection, select the access point (Internet service provider node) in the combo box. If you check [Auto end connection upon title retrieval], the connection is automatically ended after title information is obtained from the Web.
When using a proxy server Check [Use proxy server] and make the settings below.— [Server]
Enter the proxy server address. (e.g., 190.225.254.22)
— [Port No.] Enter the port number of the proxy server. (e.g., 8080)
NoteIf you make any changes to the proxy server settings, restart Title Updater.
When using a dial-up connectionWhen you select [Use Dial up connection] and start the online search, a dial up connection setting window appears. Make the following settings.
[Con.dest.] Select the destination remote host (Internet service provider node) from the combo box.
[User name] Enter the user name for connecting to the remote host.
[Password] Enter the password for connecting to the remote host.
Click [Connect] to make the dial-up connection.

��GB
NAS-E35HD.GB.3-292-247-11(1)
Changing titlesYou can change names of artists, albums and tracks.This unit can display languages other than English; however, only English text can be entered.Because items are listed in alphabetical order, whenever you change the name of an artist, album, or track, the order of the item is automatically changed.
1 While the unit is in the HDD function, enter the Option menu, and then select “Name Edit”.
2 Press / to select the item whose title you want to change, and then press ENTER.Do one of the following.To change an artist name:
Select the artist whose name you want to change, and then select “Artist?”.
To change an album name: Select the artist whose album name you want to change, select the album, and then select “Album?”.
To change a track name: Select the artist whose track name you want to change, select the album that contains the track, and then select the track.
3 Enter the title.For details on entering text, see “Entering text” (page 49).
4 Press ENTER.
To cancel changing a titlePress .
Erasing recordingsYou can erase albums or tracks in the HDD Jukebox.Note that once a recorded item has been erased, it cannot be recovered.When you erase a track, all tracks following the erased one are renumbered. For example, if you erase track 2, the following track 3 will be renumbered as track 2.
Example: When erasing track B
Track numberOriginal tracks
After deletion
Erase track 2
To erase tracks on a USB deviceFor details, see “Erasing tracks on the USB device” (page 28).
1 While the unit is in the HDD function, enter the Option menu, and then select “Erase”.
Editing
��GB
NAS-E35HD.GB.3-292-247-11(1)
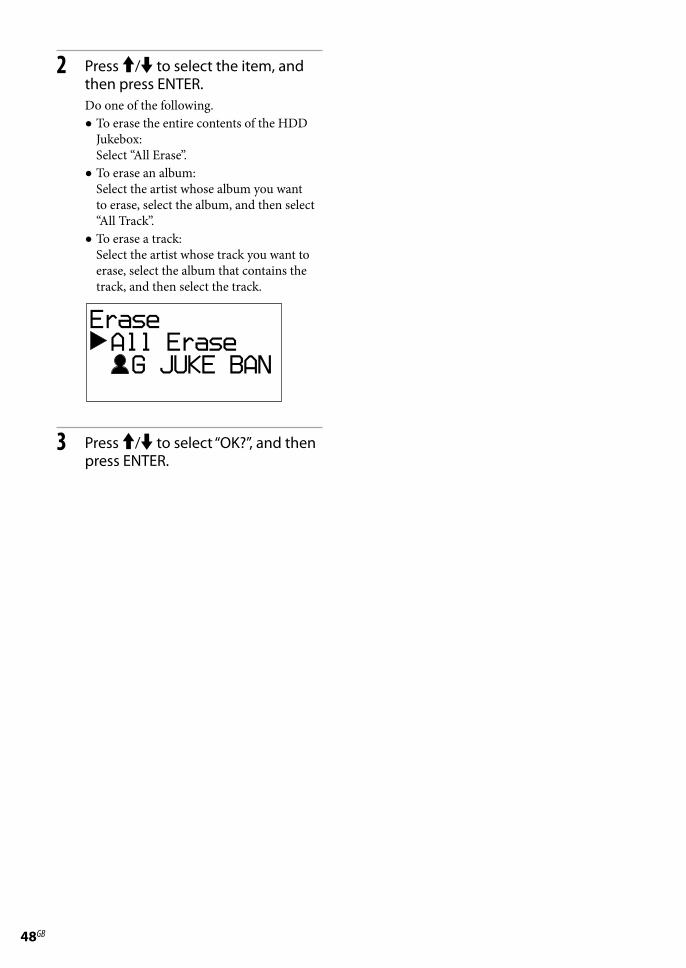
2 Press / to select the item, and then press ENTER.Do one of the following.To erase the entire contents of the HDD
Jukebox: Select “All Erase”.
To erase an album: Select the artist whose album you want to erase, select the album, and then select “All Track”.
To erase a track: Select the artist whose track you want to erase, select the album that contains the track, and then select the track.
3 Press / to select “OK?”, and then press ENTER.

��GB
NAS-E35HD.GB.3-292-247-11(1)
Entering text
You can enter text using the supplied remote control, as you would with your mobile phone.
CLEAR buttonPress this button to erase a letter that was just entered.
Numeric/text buttonsPress the button with the desired letter (ABC, DEF, etc.). Press repeatedly until the desired letter appears.
a/A buttonPress this button to switch between lowercase and uppercase letters.
buttonPress this button to go to the previous character.
/// buttons/ buttons
Press the button to move the cursor to the beginning of the text string and then the button to move the cursor to the end of the text string.
/ buttons Use these buttons to move the cursor.
Entering text
1 Press the corresponding numeric/text buttons to enter the desired characters.
2 Press to move the cursor to the next letter.
3 Repeat steps 1 and 2 to input the text string.
Other operations
To Do the followingMove the cursor Press /.
Enter uppercase/lowercase letters (“A” or “a”)
Press a/A, or press the corresponding numeric/text button repeatedly.
Switch the characters (uppercase letters and lowercase letters)
Press a/A.
NoteOn the unit, an underscore (“_”) will replace a space or a period (“ . ”) at the beginning of a track title, artist name, or album title, and a space or a period (“ . ”) at the end of an artist name or album title.
50GB
NAS-E35HD.GB.3-292-247-11(1)
Other settings
Using the Sleep Timer
You can set the Sleep Timer to turn off the unit after a certain period on time in 10-minute units.This function is convenient when you want to fall asleep to music or when going out.
Press SLEEP.Each time you press the button, the duration display changes cyclically in 10-minute unit.If you select “AUTO”, the unit automatically turns off in 100 minutes. If during the next 100 minutes the playback of the disc, HDD Jukebox, or USB device ends, then the unit will automatically turn off at the same time.The pop-up menu for the Sleep Timer appears.
AUTO 90min 80min 70min ... 10min OFF AUTO…
The Sleep Timer setting is completed simply by displaying the desired duration.The “SLEEP” indicator flashes when the Sleep Timer is active.
51GB
NAS-E35HD.GB.3-292-247-11(1)
You can set the timer to automatically turn the unit on and off at a specified time. The unit starts playing the HDD Jukebox, CD, tuner, DAB*, or USB device automatically when it turns on. Make sure the clock is correctly set beforehand (page 21).* For the UK model only
1 Prepare the sound source.Prepare the sound source and press VOLUME +/– to adjust the volume.To start from a specific track, create your own program (page 39).
2 Press CLOCK/TIMER SET repeatedly until “PLAY SET?” appears, and then press ENTER.“ON” appears and the hour indication flashes.
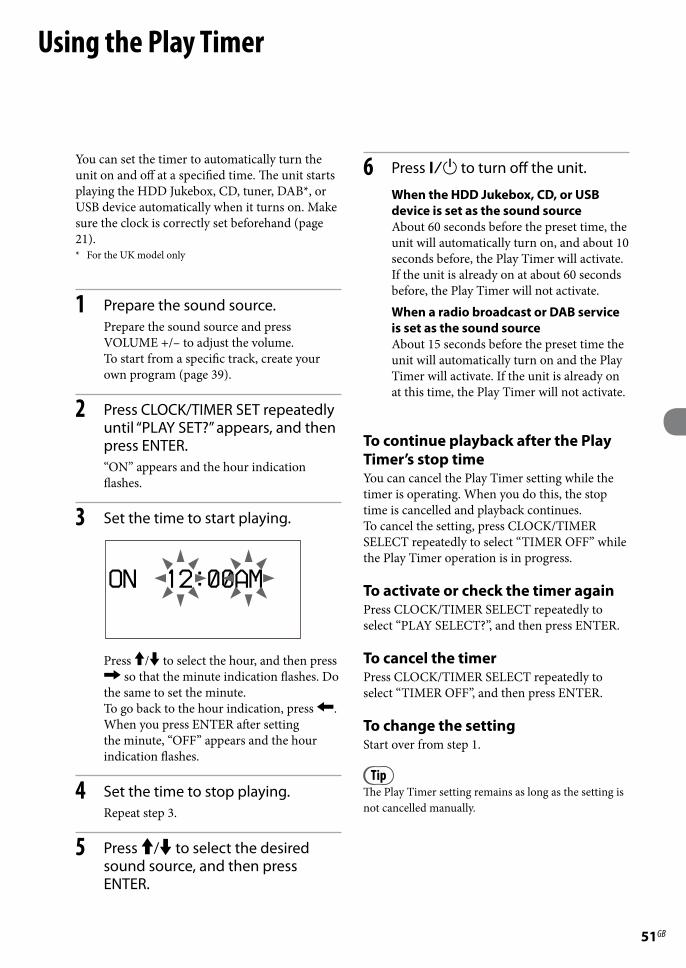
3 Set the time to start playing.
Press / to select the hour, and then press so that the minute indication flashes. Do the same to set the minute.To go back to the hour indication, press .When you press ENTER after setting the minute, “OFF” appears and the hour indication flashes.
4 Set the time to stop playing.Repeat step 3.
5 Press / to select the desired sound source, and then press ENTER.
Using the Play Timer
6 Press to turn off the unit.
When the HDD Jukebox, CD, or USB device is set as the sound sourceAbout 60 seconds before the preset time, the unit will automatically turn on, and about 10 seconds before, the Play Timer will activate. If the unit is already on at about 60 seconds before, the Play Timer will not activate. When a radio broadcast or DAB service is set as the sound sourceAbout 15 seconds before the preset time the unit will automatically turn on and the Play Timer will activate. If the unit is already on at this time, the Play Timer will not activate.
To continue playback after the Play Timer’s stop timeYou can cancel the Play Timer setting while the timer is operating. When you do this, the stop time is cancelled and playback continues.To cancel the setting, press CLOCK/TIMER SELECT repeatedly to select “TIMER OFF” while the Play Timer operation is in progress.
To activate or check the timer againPress CLOCK/TIMER SELECT repeatedly to select “PLAY SELECT?”, and then press ENTER.
To cancel the timerPress CLOCK/TIMER SELECT repeatedly to select “TIMER OFF”, and then press ENTER.
To change the settingStart over from step 1.
TipThe Play Timer setting remains as long as the setting is not cancelled manually.
5�GB
NAS-E35HD.GB.3-292-247-11(1)
You can set the timer to automatically turn the unit on and off at a specified time. The unit starts recording a radio program or a DAB service* automatically when it turns on. Make sure the clock (page 21), the radio station (page 32), or the DAB service* (page 32) must be set beforehand.* For the UK model only
1 Prepare the sound source.Tune in the desired radio station or DAB service.
2 Press CLOCK/TIMER SET repeatedly until “REC SET?” appears, and then press ENTER.“ON” appears and the hour indication flashes.
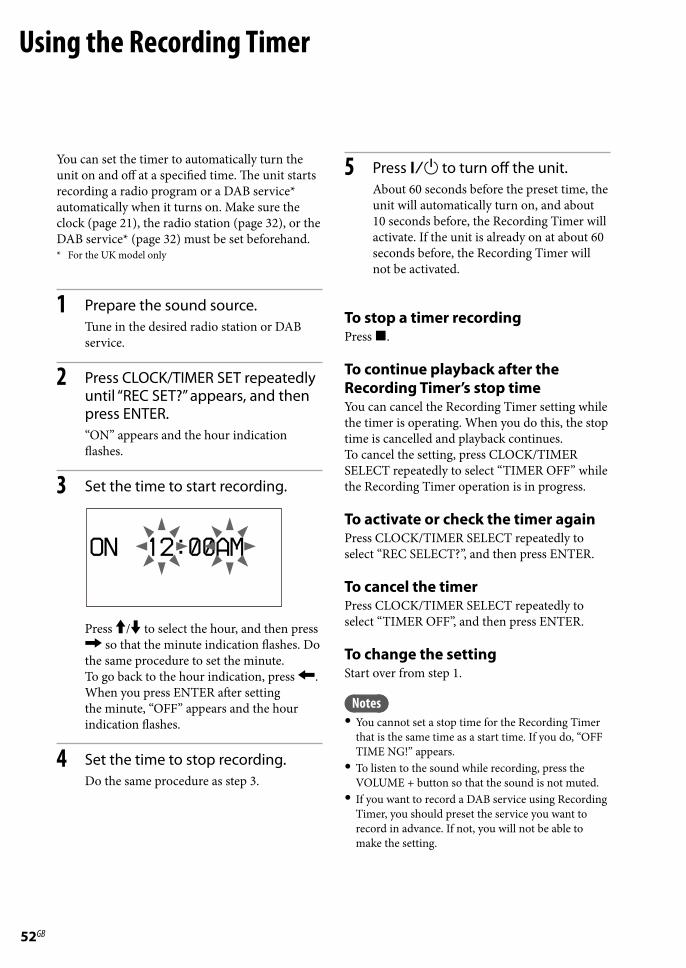
3 Set the time to start recording.
Press / to select the hour, and then press so that the minute indication flashes. Do the same procedure to set the minute.To go back to the hour indication, press .When you press ENTER after setting the minute, “OFF” appears and the hour indication flashes.
4 Set the time to stop recording.Do the same procedure as step 3.
Using the Recording Timer
5 Press to turn off the unit.About 60 seconds before the preset time, the unit will automatically turn on, and about 10 seconds before, the Recording Timer will activate. If the unit is already on at about 60 seconds before, the Recording Timer will not be activated.
To stop a timer recordingPress .
To continue playback after the Recording Timer’s stop timeYou can cancel the Recording Timer setting while the timer is operating. When you do this, the stop time is cancelled and playback continues.To cancel the setting, press CLOCK/TIMER SELECT repeatedly to select “TIMER OFF” while the Recording Timer operation is in progress.
To activate or check the timer againPress CLOCK/TIMER SELECT repeatedly to select “REC SELECT?”, and then press ENTER.
To cancel the timerPress CLOCK/TIMER SELECT repeatedly to select “TIMER OFF”, and then press ENTER.
To change the settingStart over from step 1.
NotesYou cannot set a stop time for the Recording Timer
that is the same time as a start time. If you do, “OFF TIME NG!” appears.
To listen to the sound while recording, press the VOLUME + button so that the sound is not muted.
If you want to record a DAB service using Recording Timer, you should preset the service you want to record in advance. If not, you will not be able to make the setting.
53GB
NAS-E35HD.GB.3-292-247-11(1)
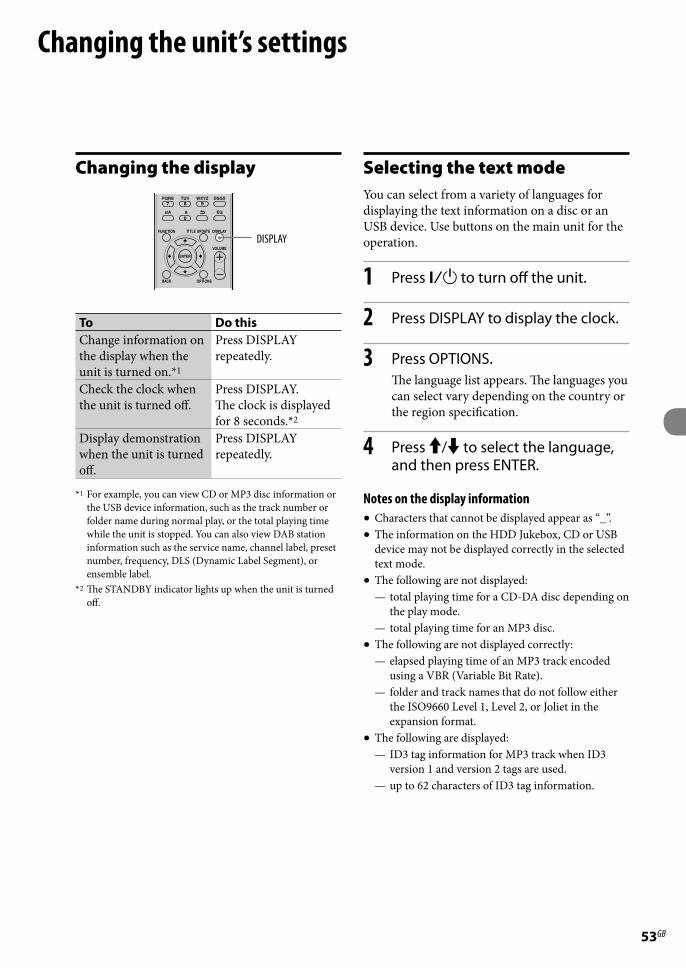
Changing the display
DISPLAY
To Do thisChange information on the display when the unit is turned on.*1
Press DISPLAY repeatedly.
Check the clock when the unit is turned off.
Press DISPLAY.The clock is displayed for 8 seconds.*2
Display demonstration when the unit is turned off.
Press DISPLAY repeatedly.
*1 For example, you can view CD or MP3 disc information or the USB device information, such as the track number or folder name during normal play, or the total playing time while the unit is stopped. You can also view DAB station information such as the service name, channel label, preset number, frequency, DLS (Dynamic Label Segment), or ensemble label.
*2 The STANDBY indicator lights up when the unit is turned off.
Changing the unit’s settings
Selecting the text modeYou can select from a variety of languages for displaying the text information on a disc or an USB device. Use buttons on the main unit for the operation.
1 Press to turn off the unit.
2 Press DISPLAY to display the clock.
3 Press OPTIONS.The language list appears. The languages you can select vary depending on the country or the region specification.
4 Press / to select the language, and then press ENTER.
Notes on the display informationCharacters that cannot be displayed appear as “_”.The information on the HDD Jukebox, CD or USB
device may not be displayed correctly in the selected text mode.
The following are not displayed:— total playing time for a CD-DA disc depending on
the play mode.— total playing time for an MP3 disc.
The following are not displayed correctly:— elapsed playing time of an MP3 track encoded
using a VBR (Variable Bit Rate).— folder and track names that do not follow either
the ISO9660 Level 1, Level 2, or Joliet in the expansion format.
The following are displayed:— ID3 tag information for MP3 track when ID3
version 1 and version 2 tags are used.— up to 62 characters of ID3 tag information.

5�GB
NAS-E35HD.GB.3-292-247-11(1)
This function formats the unit and restores it to the condition it was in at the time of purchase. Note that this process deletes all settings and information (e.g., audio data recorded or imported in the HDD Jukebox, clock setting, etc.). Factory-installed sample data (Demo Tracks) in the HDD Jukebox will be deleted as well.You cannot format the unit to factory setting while the unit is turned off to conserve power.This function can be performed only with the buttons on the main unit.
HDD REC
BACK ENTER
1 Disconnect and reconnect the power cord, and then turn on the unit.
2 Select the HDD function.
3 Press and BACK together with HDD REC.“HDD Format” appears in the display.
4 Press / to select “OK?”, and then press ENTER.Formatting starts.When formatting completes, the unit turns itself off.All user-configured settings, such as preset radio stations, timer settings, and the clock settings are initialized.
Formatting the system
NoteYou should never turn off the unit or disconnect the power cord during the formatting of the system.

55GB
NAS-E35HD.GB.3-292-247-11(1)
Troubleshooting
Troubleshooting
If a problem occurs while operating the unit, follow the steps described below before consulting the nearest Sony dealer.
1 Check to see if the problem is listed in this “Troubleshooting” section.
2 Check the customer support site.For customers in Europe:<http://support.sony-europe.com/>For customers in Latin America:<http://www.sony-latin.com/index.crp>For customers in Asia and Oceania:<http://www.sony-asia.com/support>You will find the latest support information and a FAQ at the web site.
3 If after steps 1 and 2 you still cannot solve the problem, consult your nearest Sony dealer.If the problem persists after doing all of the above, consult your nearest Sony dealer.
How to reset the unitIt is usually unnecessary to reset this unit. However, on rare occasions, the unit enters an abnormal state and stops responding to button or on-screen operations. In this case, reset the unit by pressing the buttons on the main unit. To reset the unit, press the button and the ENTER button together with the / (power) button on the main unit. All user-configured settings, such as preset radio stations, timer settings, and the clock settings are initialized.
If the STANDBY indicator flashesImmediately unplug the power cord, and check the following items.If your unit has a voltage selector, is the
voltage selector set to the correct voltage?Are you using only the supplied speakers?Is anything blocking the ventilation holes on
the back of the unit?Is there a problem with the device connected
to DMPORT or the connecting cable?After the STANDBY indicator stops flashing, reconnect the power cord, and turn on the unit. If the issue persists, contact your nearest Sony dealer.
Power
The unit does not turn on.
Connect the power cord to the wall outlet firmly.
Disconnect the power cord from the wall outlet. After about a minute, reconnect the power cord and press the (power) button to turn on the unit.
It takes a while for the unit to turn off while “STANDBY” is displayed.
If the unit’s HDD has a large amount of recorded data, it will take a while before the unit turns off.
The unit does not turn off.
The (power) button may not respond while the unit is starting up.
If you disconnect the power cord from a wall outlet while the STANDBY indicator is lit up, the indicator may remain lit for a little while longer.

5�GB
NAS-E35HD.GB.3-292-247-11(1)
Display
The display starts flashing as soon as you plug in the power cord even though you have not turned on the unit.
Press DISPLAY while the unit is off. The demonstration disappears.
Sound output
There is no sound.
Press the VOLUME +/– buttons to cancel muting. Sound is muted while Recording Timer is in progress.
Cancel pause.Confirm that nothing is connected to the
(headphones) jack.Check the connections of the external
component.Connect the speaker cords firmly.
The right-left sound balance is bad or reversed.
Connect the speakers and other devices correctly.
Place the speakers as symmetrically as possible.
Connect only the supplied speakers.
The sound has no depth and seems to be monaural.
Connect the speakers and other devices correctly.
There is severe humming or noise in the sound.
Connect the speakers and other devices correctly.
Move the audio connecting cord away from any display, fluorescent light, or other electrical devices.
Move the unit away from any display or TV.If plugs or jacks are dirty, wipe them with a
cloth slightly moistened with alcohol.The inserted disc is scratched or dirty.Connect the unit to a different wall socket.Install a noise filter (available separately) to
the power cord.
HDD Jukebox
The unit cannot record a CD.
The disc is not compatible with any of the supported audio CD standards.
The disc may be scratched or dirty.
The unit cannot import tracks.
The following audio formats can be imported to this unit.
MP3 (“.mp3”)Windows Media Audio file (“.wma”)AAC (“.m4a”)
The unit cannot start importing/recording audio data to the HDD Jukebox.
The following problems may have occurred.
The HDD Jukebox is full.The number of tracks and albums on the
HDD Jukebox has reached the upper limit.
5�GB
NAS-E35HD.GB.3-292-247-11(1)
The unit cannot connect to the externally connected portable device.
Reconnect the USB cable.
While transferring audio data to the USB device, the entire name of a folder cannot be transferred.
For a USB device, the maximum size for a folder name is 128 bytes.
The unit cannot play MP3 tracks.
The MP3 tracks are recorded in a format that is not supported.
The title information cannot be edited.
Title information (track title, artist name, or album title) that appears when you press the DISPLAY button during playback cannot be edited.
An editing operation takes a long time.
The time it takes for an editing operation depends on the number of albums or tracks that are stored in the HDD Jukebox.
Title information cannot be obtained.
The unit’s database does not contain any information that corresponds with the disc. Try the Title Update function (page 41).
It may not be possible to obtain title information for tracks that have been poorly recorded; for example, tracks that are not recorded from their beginning.
Information cannot be obtained for tracks with a length of 15 seconds or less.
CD
Playback does not start.
Confirm that a disc is inserted.Insert the disc with the label side up (page 30).If the disc does not lay flat in the tray, reset it
so that it is correctly inserted.The inserted disc is of a kind not supported by
the unit (page 68).There is condensation in the disc tray.
Remove the disc, turn off the unit for about 30 minutes, and then insert the disc again (page 66).
The sound skips, or the disc will not play.
Wipe the disc clean, and replace it.Move the unit to a location away from
vibration (for example, on top of a stable stand).
Move the speakers away from the unit, or place them on separate stands. At high volume, speaker vibration may cause the sound to skip.
Play does not start from the first track.
Press PLAY MODE repeatedly until both “PGM” and “SHUF” disappear to return to normal play (page 38).
Starting playback takes more time than usual.
The following discs take a longer time to start playback.
a disc recorded with a complicated tree structure.
a disc recorded in multisession mode.
a disc that has not been finalized (a disc to which data can be added).
a disc that has many folders.
5�GB
NAS-E35HD.GB.3-292-247-11(1)
Playback cannot be performed. The sound skips.
The disc does not conform to the audio CD standard.
The inserted disc is scratched or dirty.
Some tracks cannot be played.
If you are using a multisession disc with an audio CD format, only tracks recorded in the first session can be played.
MP3 tracks cannot be played.
MP3 files that do not conform with the ISO 9660 Level 1, 2, or Joliet standard are recorded on the disc.
Files without the MP3 extension cannot be played. If a file on a disc is not an MP3 file but has an .MP3 extension, the unit tries to play that file and it may cause noise in the sound or the unit to malfunction.
The files have the MP3 extension, but they are in a format other than MPEG-1 Audio Layer 3.
Title information cannot be obtained.
A disc is not inserted.The unit’s database does not contain any
information that corresponds with the disc. Try the Title Update function (page 41).
FM/AM and DAB*1
Radio broadcasts cannot be received or there is severe hum or noise.
Connect the antennas correctly (pages 18 and 19).
Adjust the antenna position.Use an external antenna.Keep the antennas away from the speaker
cords, the power cord and the USB cable to avoid picking up noise.
Connect a commercially available external antenna.
Consult your nearest Sony dealer if the supplied AM antenna has come off the plastic stand.
Turn off nearby electrical equipment.
RDS is not working.*2
Make sure that you tune in an FM station.
DAB broadcast cannot be received.*1
Check all aerial connections, then perform the DAB Automatic Scan procedure (page 20).
The current DAB service is not available. Press +/– (TUNE +/– on the main unit) to select a different service.
If you have moved to another area, some services/frequencies may have changed and you may not be able to tune into your usual broadcast. Perform the DAB Automatic Scan procedure to re-register the contents of broadcast (page 20). (Performing this procedure clears all previously stored presets.)
*1 For the UK model only
*2 For the European model only

5�GB
NAS-E35HD.GB.3-292-247-11(1)
USB device
The unit cannot start transferring audio data to a USB device.
The following problems may have occurred.
The USB device is full.
The number of tracks and folders on the USB device has reached the upper limit.
The USB device is write-protected.
The unit stops the transfer before it is finished.
You are using an unsupported USB device. See “USB devices supported by this unit” (page 71) for the supported USB devices.
The USB device is not formatted correctly. Refer to the operating manual of the USB device for the formatting operation.
Turn off the unit and disconnect the USB device. If the USB device has a power switch, turn off the USB device, and turn it on again after you disconnected it from the unit. Then perform the transfer operation again.
If the transfer and erase operations are done repeatedly, the file structure within the USB device becomes complex. Refer to the operating manual of the USB device for how to deal with this problem. If the problem persists, contact your nearest Sony dealer.
Transferring to a USB device results in an error.
You are using an unsupported USB device. See “USB devices supported by this unit” (page 71) for the supported USB devices.
Turn off the unit and disconnect the USB device. If the USB device has a power switch, turn off the USB device, and turn it on again after you disconnected it from the unit. Then perform the transfer operation again.
The USB device was disconnected or the power was turned off during transfer. Delete the partially-transferred track and transfer it again. If this does not solve the problem, the USB device may be damaged. Refer to the operating manual of the USB device for how to deal with this problem. If the problem persists, contact your nearest Sony dealer.
Tracks or folder on the USB device cannot be erased.
Check if the USB device is write-protected.The USB device was disconnected or the
power was turned off during erase operation. Delete the partially-erased track. If this does not solve the problem, the USB device may be damaged. Refer to the operating manual of the USB device for how to deal with this problem. If the problem persists, contact your nearest Sony dealer.
USB function does not work correctly.
You are using an unsupported USB device. If you connect an unsupported USB device, the following problems may occur. See “USB devices supported by this unit” (page 71) for the supported USB device types.
The USB device is not recognized.
Track or folder names are not displayed on this unit.
Playback is not possible.
The sound skips.
There is noise.
A distorted sound is output.
Importing or transferring stops before it is finished.
�0GB
NAS-E35HD.GB.3-292-247-11(1)
“Over Current” appears.
A problem has been detected with the level of electrical current from the (USB) port. Turn off the unit and remove the USB device from the (USB) port. Make sure there is no problem with the USB device. If this display pattern persists, contact your nearest Sony dealer.
There is no sound.
The USB device is not connected correctly. Turn off the unit, turn on the unit again, and then reconnect the USB device. Make sure that “USB MEMORY” lights up in the display.
There is noise, sound skipping, or distorted sound.
Turn off the unit, then reconnect the USB device.
The music data itself contains noise. Noise may have been introduced when creating music data due to the conditions of the computer. Create the music data again.
The USB device cannot be connected into the (USB) port.
The USB device is being connected backwards. Connect the USB device in the correct orientation.
“Reading” is displayed for an extended time, or it takes a long time before playback starts.
The reading process can take a long time in the following cases.
There are many folders or files on the USB device.
The file structure is extremely complex.
The memory capacity is excessive.
The internal memory is fragmented.
Thus, we recommend following these guidelines.
Total folders on USB device: 100 or less
Total files per folder: 100 or less
Erroneous display
Transfer the track to the USB device again, as the data stored in the USB device may have been corrupted.
The character codes that can be displayed by this unit are numbers and alphabet only. Other characters are not displayed correctly.
The USB device is not recognized.
Turn off the unit and reconnect the USB device, and then turn on the unit.
Connect the supported USB device (page 71).The USB device does not work properly. Refer
to the operating manual of the USB device for how to deal with this problem. If the problem persists, contact your nearest Sony dealer.
Playback does not start.
Turn off the unit, then reconnect the USB device, and the turn on the unit.
Connect the supported USB device (page 71).Press USB to start playback.
Play does not start from the first track.
Set the play mode to Normal Play mode.

�1GB
NAS-E35HD.GB.3-292-247-11(1)
Tracks cannot be played back.
Only tracks in the MP3 (“.mp3”), WMA (“.wma”) and AAC (“.m4a”) format can be played on this unit. Tracks in other formats cannot be played (page 35).
USB device formatted with file systems other than FAT16 or FAT32 are unsupported.*1
If you use partitioned USB device, only MP3, WMA and AAC tracks on the first partition can be played.
Playback is possible up to 8 levels.The number of folders has exceeded 999.The number of tracks has exceeded 999.Files that are encrypted or protected by
passwords, etc. cannot be played back.
*1 This unit supports FAT16 and FAT32, but some USB device may not support all of these FAT. For details, see the operation manual of each USB device or contact the manufacturer.
Timer
The Play Timer or Recording Timer does not work.
Set the clock correctly (page 21).A power failure occurred while the timer
setting was in standby mode or the power cord was disconnected.
The unit is being subjected to shocks or vibrations. Place the unit at a stable location.
The contents recorded by the Recording Timer is not complete. Some of the material at the beginning or in the middle are missing.
Set the clock correctly (page 21).A power failure occurred while the timer
setting was in standby mode or the power cord was disconnected.
The unit was subjected to shocks or vibrations. Place the unit at a stable location.
Title Update
Title Updater cannot be used on the computer.
Use a USB storage device supported by the unit (page 71).
An error occurs when you run Title Updater on the computer.
Close Virtual Expander (MICROVAULT software) first, and then run “TitleUpdater.exe” again.
“export.dat” file cannot be exported.
Only album information (audio data) recorded from audio CDs can be exported.
Album information that has been imported using the Title Updater cannot be exported.
Make sure that the USB storage device is connected firmly to the unit.
You have disconnected the USB storage device before “Device Stop” appears on the unit’s display.
The USB storage device or Title Updater is not recognized by the computer.
Disconnect the USB storage device, and then reconnect it correctly.
The “import.dat” file cannot be saved.
The USB storage device is full. Delete unnecessary data from the USB storage device.
The USB storage device is write-protected. Undo the write-protection.

��GB
NAS-E35HD.GB.3-292-247-11(1)
Others
The unit works poorly.
The unit may be under the influence of static electricity or other factors. In this case, restart the unit. If the unit still works poorly, reset the unit (page 55).
If any warning message appears, do as the message says.
The remote control does not work.
The batteries are weak.There are no batteries inside.Point the remote control at the remote sensor
of the unit (page 15).An inverter circuit for a fluorescent light is
near the unit. Move the unit away from the circuit.
Remove any obstacles between the remote and the remote sensor on the unit, and position the unit away from fluorescent lights.
Move the remote closer to the unit.
The unit vibrates or noise is heard from the ventilation hole.
The vibration is caused by the fast rotation of the hard disk and the noise by the cooling fan. These are normal and not malfunctions.
Vibration or noise in the unit increases during recording of a CD.
The hard disk rotates faster during CD recording than during CD playback, so the increase in vibration or noise is not a malfunction. The amount of vibration or noise produced depends on the CD type.
To improve tuner receptionTurn off CD player power by using the CD power management function. CD power is factory set to on.
1 Select the CD function, and then turn off the unit.
2 After “STANDBY” stops flashing, press DISPLAY to display the clock.
3 Press together with on the main unit.“CD POWER OFF” appears. With CD player power turned off, disc access time is increased. To turn on CD player power, repeat the procedure until “CD POWER ON” appears.
About repairing the hard disk driveThe contents of the hard disk drive may be
checked in case of repair or inspection during a malfunction or modification. However, the contents will not be backed up or saved by Sony.
If the hard disk needs to be formatted or replaced, it will be done at the discretion of Sony. All contents of the hard disk drive will be erased, including contents that violate copyright laws.

�3GB
NAS-E35HD.GB.3-292-247-11(1)
Messages
HDD Jukebox
Album Full!The number of albums that can be recorded has reached the limit.
Complete!The operation has been successfully completed.
Data Error!You tried to play a track that is not playable.
Export Error!There is no album information that can be exported, the selected album information (audio data) cannot be exported, or the export of album information has failed.
HDD Error!A malfunction has occurred and the unit cannot recognize the HDD Jukebox.
HDD Full!There is no remaining space on the HDD Jukebox.
Import Error!There is no album information that can be imported or the import of album information has failed.
Name NG!The album title, artist name, or track title cannot be registered as the same title or name already exists. You have erased the registered title information and no title is registered.
No StepAll programmed tracks have been erased.
Not in UseThe operation that you performed is invalid or currently prohibited.
No TrackThere is no track that the unit can play.
Over Current!A surge current has been detected in the unit.
Push STOP!You tried to perform an operation that can be performed only when the unit is stopped (e.g., you pressed PLAY MODE during playback).
ReadingThe unit is reading information from the HDD Jukebox. Some buttons are inoperative during this time.
REC Error!Importing/recording did not start, stopped partway, or otherwise could not be performed.
Step Full!You tried to program more than 26 tracks (steps).
Track Full!The number of tracks that can be stored in the HDD Jukebox has reached the limit.

��GB
NAS-E35HD.GB.3-292-247-11(1)
CD/Tuner/DAB
Accessing Gracenote DatabaseThe unit is accessing the unit’s database to obtain title information.
Complete!The presetting of an FM/AM station or DAB service has been successfully completed.
LOCKEDThe unit cannot eject the disc. Contact your nearest Sony dealer.
No DiscThere is no disc in the unit, or you have loaded a disc that cannot be played.
No MatchThe unit’s database does not contain title information for the album or track.
No PresetYou have not preset any DAB services.
No ServiceThere is no DAB service available.
No StepAll programmed tracks have been erased.
No TextThe currently tuned-in DAB service does not provide text information.
Not in UseThe operation that you performed is invalid or currently prohibited.
Push STOP!You tried to perform an operation that can be performed only when the unit is stopped (e.g., you pressed PLAY MODE during playback).
ReadingThe unit is reading information from a disc. Some buttons are inoperative during this time.
Step Full!You tried to program more than 26 tracks (steps).
USB device
Complete!The operation has been successfully completed.
Data Error!You tried to play a file that is not playable.
Device ErrorThe USB device could not be recognized or a USB device that is not supported by this unit is connected.
Device Full!There is no remaining space on the USB device.
Device StopThe USB device has been stopped.
Fatal Error!The USB device has been disconnected while transferring to or erasing audio files or folders on the USB device.
Folder Full!The number of folders that can be stored on the USB device has reached the limit.
No DeviceNo USB device is connected.
No StepAll programmed tracks have been erased.
Not in UseThe operation that you performed is invalid or currently prohibited.
No TrackThere is no track that the unit can play.
Not SupportedAn unsupported USB device is connected.
Over Current!A surge current has been detected in the unit.
�5GB
NAS-E35HD.GB.3-292-247-11(1)
ProtectedThe USB device is write-protected.
Push POWER!Some abnormalities were detected in the unit. Press (power) immediately to turn off the unit.
Push STOP!You tried to perform an operation that can be performed only when the unit is stopped (e.g., you pressed PLAY MODE during playback).
ReadingThe unit is reading information from a USB device. Some buttons are inoperative during this time.
RemovedA USB device has been removed.
Step Full!You tried to program more than 26 tracks (steps).
Track Full!The number of tracks that can be stored on the USB device has reached the limit
Transfer Error!Transferring audio data to a USB device did not start, stopped partway, or otherwise could not be performed (page 59).
Clock/Timer
OFF TIME NG!The ending time that you tried to set for the Play Timer or Recording Timer is the same time as the starting time.
Push SELECT!You pressed CLOCK/TIMER SET while the timer is operating.
SET CLOCK!You tried to select the timer without first setting the clock.
SET TIMER!You tried to select the timer without first setting the timer.
��GB
NAS-E35HD.GB.3-292-247-11(1)
Precautions/Specifications
Precautions
On safetyCompletely disconnect the
power cord (mains lead) from the wall socket (mains) if it is not going to be used for an extended period of time. When unplugging the unit, always grip the plug. Never pull the cord itself.
Should any solid object or liquid get into the unit, unplug the unit, and have it checked by qualified personnel before operating it again.
The AC power cord can be changed only by a qualified service facility.
On placementDo not place the unit in an
inclined position or in locations that are extremely hot, cold, dusty, dirty, or humid or lacking adequate ventilation, or subject to vibration, direct sunlight or a bright light.
Be careful when placing the unit or speakers on surfaces that have been specially treated (for example, with wax, oil, polish) as staining or discoloration of the surface may result.
If the unit is brought directly from a cold to a warm location or is placed in a very damp room, moisture may condense on the lens inside the CD player, and cause the unit to malfunction. In this situation, remove the disc, and leave the unit turned on for about an hour until the moisture evaporates.
On heat buildup Heat buildup on the unit during
operation is normal and is not cause for alarm.
Do not touch the cabinet if it has been used continuously at a high volume because the cabinet may have become hot.
Do not block the ventilation holes on the bottom of this unit. Doing so will prevent the heat produced by the unit’s amplifier to build up, which may cause the unit to malfunction. Make sure these holes are free from any obstruction.
When moving the unitDo not move the unit while a CD is inserted. Doing so may damage the CD.
On the speaker systemThis speaker system is not magnetically shielded, and the picture on nearby TV sets may become magnetically distorted. In this situation, turn off the TV, wait 15 to 30 minutes, and turn it back on. If there is no improvement, move the speakers far away from the TV.
On volume adjustmentCDs reproduce sound with considerably less noise than vinyl records. For this reason, if you raise the volume while listening to a segment containing only noise (as you might do in the case of a vinyl record), a sudden output of high-volume sound may cause damage to the speakers. Make sure to lower the volume before the start of playback.
Consideration for othersKeep the volume at a moderate level out of consideration of your neighbors, especially at night.
About the Hard Disk DriveBecause of its high storage density, the hard disk can read and write data a very high speeds. It is, however, easily damaged by mechanical vibration, shock, or dust. Although the hard disk is equipped with safety mechanisms to prevent the lost of data due to these factors, the following precautions should be taken during the handling of the unit.Do not subject the unit to strong
shocks or vibrations.Do not place the unit in a
location subject to mechanical vibration or at an unstable location.
Do not move the unit while the power cord is connected to a wall outlet.
Do not disconnect the power cord while the unit is recording or playing a track.
Do not use the unit in a place subject to extreme changes in temperature (a temperature gradient greater than 18°F (10°C)/hour).
Do not attempt to replace or upgrade the hard disk drive by yourself, as this may cause the unit to malfunction.
Sony cannot provide compensation for any loss of data caused by a damaged hard disk drive.
��GB
NAS-E35HD.GB.3-292-247-11(1)
Cleaning the cabinet Clean this unit with a soft cloth slightly moistened with a mild detergent solution. Do not use any type of abrasive pad, scouring powder, or solvent, such as thinner, benzine, or alcohol.
Note on the power cordBefore you unplug the power cord from the wall outlet, make sure that the unit is turned off. If you unplug the power cord while the unit is operating, data that was recorded may be lost or the unit may malfunction.
Notes on CDsDo not scratch or attach stickers
to the surface of the disc.CDs with non-standard shapes
(e.g., a star, heart, or square) cannot be played on this unit. Attempting to do so may damage the unit.
When cleaning the disc, use a cleaning cloth and wipe the disc from the center out to the edge. If the disc is extremely dirty, wipe the disc with a slightly moistened cloth, followed by a dry cloth. Do not clean a disc with a benzine thinner, commercial cleaners or anti-static sprays intended for vinyl LPs.
Do not place discs in hot places, including places exposed to direct sunlight, near heat sources such as hot air ducts, or inside parked cars.
Do not use a rental or second-hand disc on which glue that spread from under the label attached to it. If you do, there is a chance that the disc may become stuck to parts within the unit, causing it to malfunction.
Do not use a commercial cleaning disc as it may cause the unit to malfunction.
Music discs encoded with copyright protection technologiesThis product is designed to playback discs that conform to the Compact Disc (CD) standard. Recently, various music discs encoded with copyright protection technologies are marketed by some record companies. Please be aware that among those discs, there are some that do not conform to the CD standard and may not be playable by this product.
Note on DualDiscsA DualDisc is a two sided disc product which mates DVD recorded material on one side with digital audio material on the other side. However, since the audio material side does not conform to the Compact Disc (CD) standard, playback on this product is not guaranteed.
Note on MP3/WMA/AAC filesCompatibility with all MP3/WMA/AAC encoding/writing software, recording device, and recording media cannot be guaranteed. Incompatible MP3/WMA/AAC files may produce noise or interrupted audio or may not play at all.
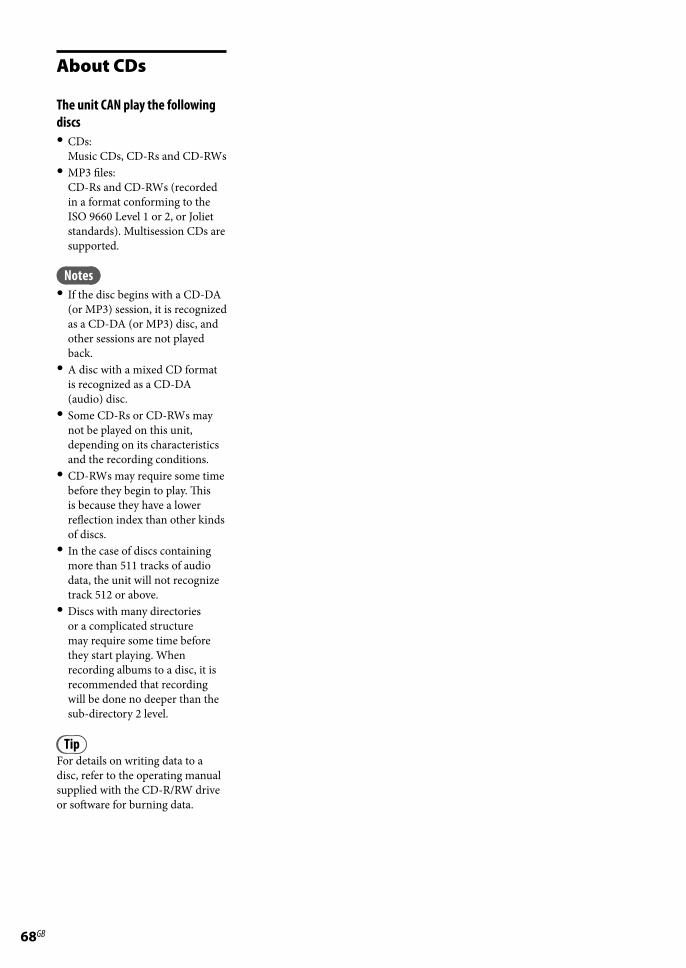
��GB
NAS-E35HD.GB.3-292-247-11(1)
About CDs
The unit CAN play the following discsCDs:
Music CDs, CD-Rs and CD-RWsMP3 files:
CD-Rs and CD-RWs (recorded in a format conforming to the ISO 9660 Level 1 or 2, or Joliet standards). Multisession CDs are supported.
NotesIf the disc begins with a CD-DA
(or MP3) session, it is recognized as a CD-DA (or MP3) disc, and other sessions are not played back.
A disc with a mixed CD format is recognized as a CD-DA (audio) disc.
Some CD-Rs or CD-RWs may not be played on this unit, depending on its characteristics and the recording conditions.
CD-RWs may require some time before they begin to play. This is because they have a lower reflection index than other kinds of discs.
In the case of discs containing more than 511 tracks of audio data, the unit will not recognize track 512 or above.
Discs with many directories or a complicated structure may require some time before they start playing. When recording albums to a disc, it is recommended that recording will be done no deeper than the sub-directory 2 level.
TipFor details on writing data to a disc, refer to the operating manual supplied with the CD-R/RW drive or software for burning data.
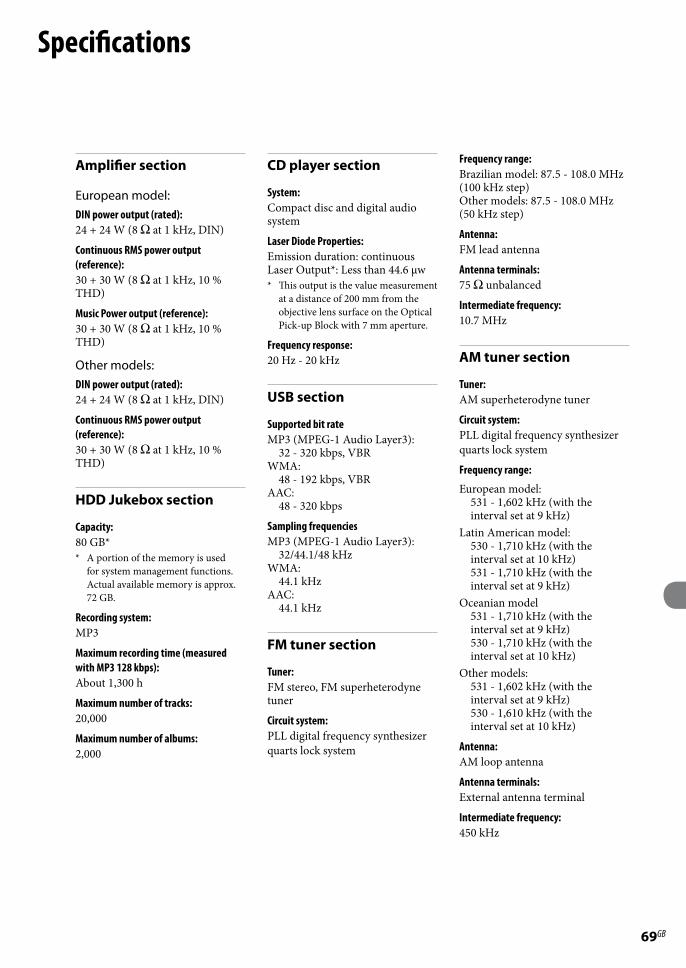
��GB
NAS-E35HD.GB.3-292-247-11(1)
Amplifier section
European model:DIN power output (rated):24 + 24 W (8 at 1 kHz, DIN)
Continuous RMS power output (reference):30 + 30 W (8 at 1 kHz, 10 % THD)
Music Power output (reference):30 + 30 W (8 at 1 kHz, 10 % THD)
Other models:DIN power output (rated):24 + 24 W (8 at 1 kHz, DIN)
Continuous RMS power output (reference):30 + 30 W (8 at 1 kHz, 10 % THD)
HDD Jukebox section
Capacity:80 GB** A portion of the memory is used
for system management functions. Actual available memory is approx. 72 GB.
Recording system:MP3
Maximum recording time (measured with MP3 128 kbps):About 1,300 h
Maximum number of tracks:20,000
Maximum number of albums:2,000
CD player section
System:Compact disc and digital audio system
Laser Diode Properties:Emission duration: continuousLaser Output*: Less than 44.6 µw* This output is the value measurement
at a distance of 200 mm from the objective lens surface on the Optical Pick-up Block with 7 mm aperture.
Frequency response:20 Hz - 20 kHz
USB section
Supported bit rateMP3 (MPEG-1 Audio Layer3):
32 - 320 kbps, VBRWMA:
48 - 192 kbps, VBRAAC:
48 - 320 kbps
Sampling frequenciesMP3 (MPEG-1 Audio Layer3):
32/44.1/48 kHzWMA:
44.1 kHzAAC:
44.1 kHz
FM tuner section
Tuner:FM stereo, FM superheterodyne tuner
Circuit system:PLL digital frequency synthesizer quarts lock system
Frequency range:Brazilian model: 87.5 - 108.0 MHz (100 kHz step)Other models: 87.5 - 108.0 MHz (50 kHz step)
Antenna:FM lead antenna
Antenna terminals:75 unbalanced
Intermediate frequency:10.7 MHz
AM tuner section
Tuner:AM superheterodyne tuner
Circuit system:PLL digital frequency synthesizer quarts lock system
Frequency range:
European model:531 - 1,602 kHz (with the interval set at 9 kHz)
Latin American model:530 - 1,710 kHz (with the interval set at 10 kHz)531 - 1,710 kHz (with the interval set at 9 kHz)
Oceanian model531 - 1,710 kHz (with the interval set at 9 kHz)530 - 1,710 kHz (with the interval set at 10 kHz)
Other models:531 - 1,602 kHz (with the interval set at 9 kHz)530 - 1,610 kHz (with the interval set at 10 kHz)
Antenna:AM loop antenna
Antenna terminals:External antenna terminal
Intermediate frequency:450 kHz
Specifications

70GB
NAS-E35HD.GB.3-292-247-12(1)
DAB tuner section (UK model only)
Tuner:DAB stereo tuner
Antenna: DAB lead antenna
Frequency range:Band-III: 174.928 (5A) – 239.200 (13F) MHz
DAB frequency table (Band-III):
Frequency Label174.928 MHz 5A176.640 MHz 5B178.352 MHz 5C180.064 MHz 5D181.936 MHz 6A183.648 MHz 6B185.360 MHz 6C187.072 MHz 6D188.928 MHz 7A190.640 MHz 7B192.352 MHz 7C194.064 MHz 7D195.936 MHz 8A197.648 MHz 8B199.360 MHz 8C201.072 MHz 8D202.928 MHz 9A204.640 MHz 9B206.352 MHz 9C208.064 MHz 9D209.936 MHz 10A211.648 MHz 10B213.360 MHz 10C215.072 MHz 10D216.928 MHz 11A218.640 MHz 11B220.352 MHz 11C222.064 MHz 11D223.936 MHz 12A225.648 MHz 12B227.360 MHz 12C229.072 MHz 12D230.784 MHz 13A232.496 MHz 13B234.208 MHz 13C235.776 MHz 13D237.488 MHz 13E239.200 MHz 13F
Inputs/Outputs
AUDIO IN (stereo mini jack):Voltage 0.8 V, impedance 22 k
(USB) port:USB type A, Full speed USB
DMPORT:For connecting a DIGITAL MEDIA PORT adapter
(headphones) jack (stereo mini jack):Accepts headphones of 8 or more
Asian and Oceanian models:AUDIO OUT (phono jacks):Voltage 0.5 V, impedance 1 k
Speaker
Latin American model: Speaker system:2-way, bass-reflex type
Speaker units:Woofer: 120 mm, cone typeTweeter: 25 mm, soft dome type
Nominal impedance:8
Dimensions (w/h/d)Approx. 140 × 284 × 240 mm
MassApprox. 2.7 kg net per speaker
Other models:Speaker system:2-way, bass-reflex type
Speaker units:Woofer: 120 mm, cone typeTweeter: 40 mm, cone type
Nominal impedance:8
Dimensions (w/h/d)Approx. 140 × 250 × 210 mm
MassApprox. 2.0 kg net per speaker
General
Power requirements:
Mexican model:120 V AC, 60 Hz
Taiwan model:120 V AC, 50/60 Hz
Brazilian model:127 or 220 V AC, 50/60 Hz (adjustable with voltage selector)
Latin American model (except for the Mexican, Argentine and Brazilian models):
110 - 120 or 220 - 240 V AC, 50/60 Hz (adjustable with voltage selector)
Other models:220 - 240 V AC, 50/60 Hz
Power consumption:45 W
Dimensions (w/h/d):UK model:
Approx. 285 × 130 × 319 mm incl. projecting parts and controls
Other models:Approx. 285 × 130 × 312 mm incl. projecting parts and controls
Mass:Approx. 4.0 kg
Operating temperature:+5 C (+41 F) to +35 C (+95 F)
Operating humidity:25 % to 80 %
Supplied accessories:See page 10.
Design and specifications are subject to change without notice.
Standby power consumption : 0.5 W
Halogenated flame retardants are not used in the certain printed wiring boards.
Halogenated flame retardants are not used in cabinets.
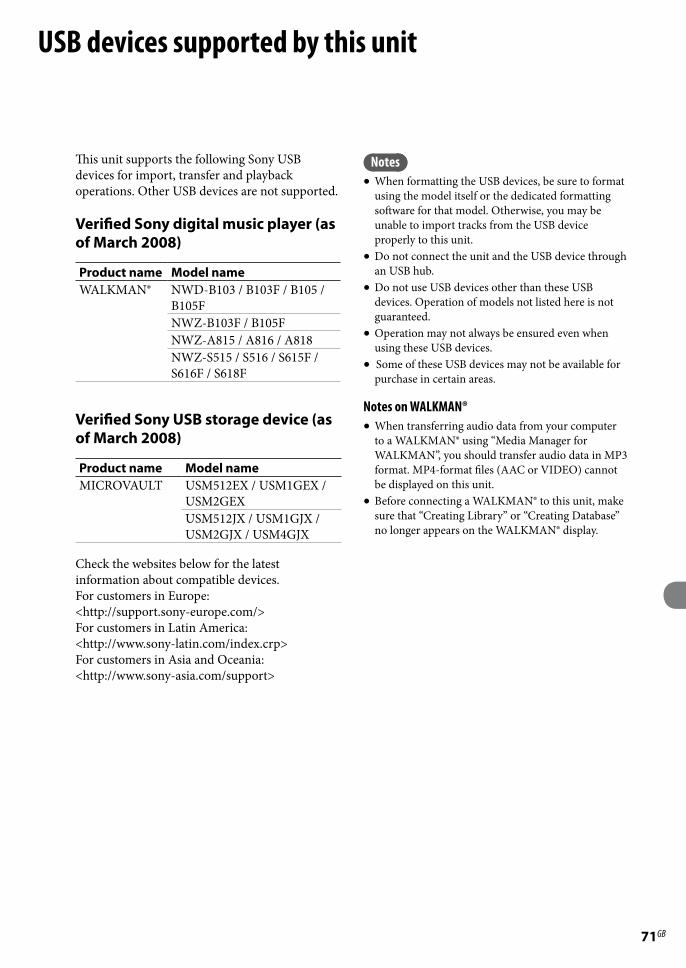
�1GB
NAS-E35HD.GB.3-292-247-11(1)
This unit supports the following Sony USB devices for import, transfer and playback operations. Other USB devices are not supported.
Verified Sony digital music player (as of March �00�)
Product name Model nameWALKMAN® NWD-B103 / B103F / B105 /
B105FNWZ-B103F / B105FNWZ-A815 / A816 / A818NWZ-S515 / S516 / S615F / S616F / S618F
Verified Sony USB storage device (as of March �00�)
Product name Model nameMICROVAULT USM512EX / USM1GEX /
USM2GEXUSM512JX / USM1GJX / USM2GJX / USM4GJX
Check the websites below for the latest information about compatible devices.For customers in Europe:<http://support.sony-europe.com/>For customers in Latin America:<http://www.sony-latin.com/index.crp>For customers in Asia and Oceania:<http://www.sony-asia.com/support>
NotesWhen formatting the USB devices, be sure to format
using the model itself or the dedicated formatting software for that model. Otherwise, you may be unable to import tracks from the USB device properly to this unit.
Do not connect the unit and the USB device through an USB hub.
Do not use USB devices other than these USB devices. Operation of models not listed here is not guaranteed.
Operation may not always be ensured even when using these USB devices.
Some of these USB devices may not be available for purchase in certain areas.
Notes on WALKMAN®When transferring audio data from your computer
to a WALKMAN® using “Media Manager for WALKMAN”, you should transfer audio data in MP3 format. MP4-format files (AAC or VIDEO) cannot be displayed on this unit.
Before connecting a WALKMAN® to this unit, make sure that “Creating Library” or “Creating Database” no longer appears on the WALKMAN® display.
USB devices supported by this unit

��GB
NAS-E35HD.GB.3-292-247-11(1)
Bit rateThe bit rate is a measure of data volume expressed in bits per second (bps).
ByteOne of the fundamental units used to express digitized data in computers. Digitized data is commonly expressed in binary digits (zeros and ones). A single unit of data is one bit. One byte consists of eight bits.
CondensationCondensation occurs inside the unit during where there is a quick rise in temperature, as when a heater is turned on. If condensation occurs, keep the unit turned off until the moisture evaporates.
Hard DiskA high-volume, digitally encoded storage device used in computers and other digital devices. By combining a magnetic disk and drive mechanism into an integrated unit, hard disks are capable of very fast data writing and reading and boast superb data search capabilities.
ID3ID3 is information (such as the track name or artist name) that is recorded in an MP3 file. The ID3 tag is used by this unit to display track information for MP3 files.
ISO9660A standard of the International Organization for Standardization (ISO) that defines the file system of CD-ROM media.
MP3Abbreviation of MPEG-1 Audio Layer3. It is a standard for audio file compression determined by the MPEG (Motion Picture Experts Group), an ISO (International Organization for Standardization) working group. It enables compression of audio files to about 1/10 of the data size of a standard compact disc. Since the MP3 encoding algorithm is disclosed, there are various encoders/decoders that are compliant with this standard. The MP3 standard is therefore widely used in the computer field.
Sampling frequencyWhen audio sources are converted from analog to digital data, they must be changed into numbers (digitized). This process is called sampling, and the sampling frequency refers to the number of times per second that the signals are measured for the recording.Music CDs are sampled at 44,100 times per second, so the sampling frequency is expressed as 44.1 kHz. Generally, the higher the sampling frequency, the higher the fidelity of the recording.
DAB (Digital Audio Broadcasting)-related terms (UK model only)
Dynamic label segmentThe text data transmitted for each channel or service.
Ensemble labelIn DAB, multiple digital radio channels are transmitted using a single radio transmission or frequency. A group of channels sent this way is called an “ensemble” and “ensemble label” is the name of such a group.
Service labelThe name of an individual digital radio channel or service.
List of input charactersA B C D E F G H I J K L M N O P Q R S T U V W X Y Z a b c d e f g h i j k l m n o p q r s t u v w x y z 0 1 2 3 4 5 6 7 8 9 . ‚ ! @ ' ` ; ( ) [ ] { } - ~ = _ + # $ % & ^
(space)
Glossary
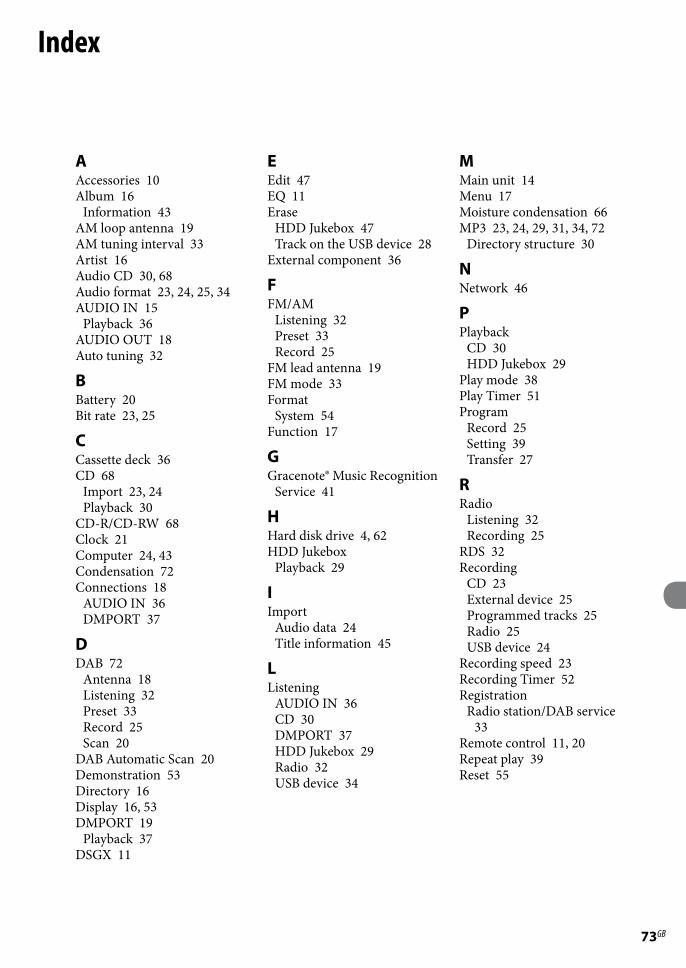
�3GB
NAS-E35HD.GB.3-292-247-11(1)
Index
AAccessories 10Album 16
Information 43AM loop antenna 19AM tuning interval 33Artist 16Audio CD 30, 68Audio format 23, 24, 25, 34AUDIO IN 15
Playback 36AUDIO OUT 18Auto tuning 32
BBattery 20Bit rate 23, 25
CCassette deck 36CD 68
Import 23, 24Playback 30
CD-R/CD-RW 68Clock 21Computer 24, 43Condensation 72Connections 18
AUDIO IN 36DMPORT 37
DDAB 72
Antenna 18Listening 32Preset 33Record 25Scan 20
DAB Automatic Scan 20Demonstration 53Directory 16Display 16, 53DMPORT 19
Playback 37DSGX 11
EEdit 47EQ 11Erase
HDD Jukebox 47Track on the USB device 28
External component 36
FFM/AM
Listening 32Preset 33Record 25
FM lead antenna 19FM mode 33Format
System 54Function 17
GGracenote® Music Recognition
Service 41
HHard disk drive 4, 62HDD Jukebox
Playback 29
IImport
Audio data 24Title information 45
LListening
AUDIO IN 36CD 30DMPORT 37HDD Jukebox 29Radio 32USB device 34
MMain unit 14Menu 17Moisture condensation 66MP3 23, 24, 29, 31, 34, 72
Directory structure 30
NNetwork 46
PPlayback
CD 30HDD Jukebox 29
Play mode 38Play Timer 51Program
Record 25Setting 39Transfer 27
RRadio
Listening 32Recording 25
RDS 32Recording
CD 23External device 25Programmed tracks 25Radio 25USB device 24
Recording speed 23Recording Timer 52Registration
Radio station/DAB service 33
Remote control 11, 20Repeat play 39Reset 55

��GB
NAS-E35HD.GB.3-292-247-11(1)
SSearch 40, 41Shuffle play 38Sleep Timer 50Sound effect 11Speakers 18STANDBY indicator 55System requirements 42
TText editing 47Title Update
Export 43Import 45
Title Updater 41Track
Adding title 41Audio format 23, 24, 25, 29,
34Erase 28
Track mark 25Track number 29Transfer 26
Program 27USB device 26
Tuner (Radio) 32
UUSB device
Import 24Transfer 26
USB port 15
VVoltage Selector 19
WWindows Media Audio 24
�5GB
NAS-E35HD.GB.3-292-247-11(1)
Trademarks, etc.“GIGA JUKE” and its logo are trademarks of Sony
Corporation.Title Updater is a trademark of Sony Corporation.“WALKMAN”, and are
registered trademarks of Sony Corporation.MICROVAULT is a trademark of Sony Corporation.MPEG Layer-3 audio coding technology and patents
licensed from Fraunhofer IIS and Thomson.Microsoft, Windows, Windows Vista and Windows
Media are trademarks or registered trademarks of Microsoft Corporation in the United States and/or other countries.
This product is protected by certain intellectual property rights of Microsoft Corporation. Use or distribution of such technology outside of this product is prohibited without a license from Microsoft or an authorized Microsoft subsidiary.
Built with Linter Database. Copyright © 2006-2007, Brycen Corp., Ltd. Copyright © 1990-2003, Relex, Inc., All rights reserved.
Music recognition technology and related data are provided by Gracenote®. Gracenote is the industry standard in music recognition technology and related content delivery. For more information, please visit www.gracenote.com. CD and music-related data from Gracenote, Inc., copyright © 2000-2008 Gracenote. Gracenote Software, copyright © 2000-2008 Gracenote. This product and service may practice one or more of the following U.S. Patents: #5,987,525; #6,061,680; #6,154,773, #6,161,132, #6,230,192, #6,230,207, #6,240,459, #6,330,593, and other patents issued or pending. Some services supplied under license from Open Globe, Inc. for U.S. Patent: #6,304,523. Gracenote and CDDB are registered trademarks of Gracenote. The Gracenote logo and logotype, and the “Powered by Gracenote” logo are trademarks of Gracenote.
Gracenote® End User License AgreementThis application or device contains software from Gracenote, Inc. of Emeryville, California (“Gracenote”). The software from Gracenote (the “Gracenote Software”) enables this application to perform disc and/or file identification and obtain music-related information, including name, artist, track, and title information (“Gracenote Data”) from online servers or embedded databases (collectively, “Gracenote Servers”) and to perform other functions. You may use Gracenote Data only by means of the intended End-User functions of this application or device.
You agree that you will use Gracenote Data, the Gracenote Software, and Gracenote Servers for your own personal non-commercial use only. You agree not to assign, copy, transfer or transmit the Gracenote Software or any Gracenote Data to any third party. YOU AGREE NOT TO USE OR EXPLOIT GRACENOTE DATA, THE GRACENOTE SOFTWARE, OR GRACENOTE SERVERS, EXCEPT AS EXPRESSLY PERMITTED HEREIN.
You agree that your non-exclusive license to use the Gracenote Data, the Gracenote Software, and Gracenote Servers will terminate if you violate these restrictions. If your license terminates, you agree to cease any and all use of the Gracenote Data, the Gracenote Software, and Gracenote Servers. Gracenote reserves all rights in Gracenote Data, the Gracenote Software, and the Gracenote Servers, including all ownership rights. Under no circumstances will Gracenote become liable for any payment to you for any information that you provide. You agree that Gracenote, Inc. may enforce its rights under this Agreement against you directly in its own name.The Gracenote service uses a unique identifier to track queries for statistical purposes. The purpose of a randomly assigned numeric identifier is to allow the Gracenote service to count queries without knowing anything about who you are. For more information, see the web page for the Gracenote Privacy Policy for the Gracenote service.The Gracenote Software and each item of Gracenote Data are licensed to you “AS IS.” Gracenote makes no representations or warranties, express or implied, regarding the accuracy of any Gracenote Data from in the Gracenote Servers. Gracenote reserves the right to delete data from the Gracenote Servers or to change data categories for any cause that Gracenote deems sufficient. No warranty is made that the Gracenote Software or Gracenote Servers are error-free or that functioning of Gracenote Software or Gracenote Servers will be uninterrupted. Gracenote is not obligated to provide you with new enhanced or additional data types or categories that Gracenote may provide in the future and is free to discontinue its services at any time.
GRACENOTE DISCLAIMS ALL WARRANTIES EXPRESS OR IMPLIED, INCLUDING, BUT NOT LIMITED TO, IMPLIED WARRANTIES OF MERCHANTABILITY, FITNESS FOR A PARTICULAR PURPOSE, TITLE, AND NON-INFRINGEMENT. GRACENOTE DOES NOT WARRANT THE RESULTS THAT WILL BE OBTAINED BY YOUR USE OF THE GRACENOTE SOFTWARE OR ANY GRACENOTE SERVER. IN NO CASE WILL GRACENOTE BE LIABLE FOR ANY CONSEQUENTIAL OR INCIDENTAL DAMAGES OR FOR ANY LOST PROFITS OR LOST REVENUES.
The system names and product names indicated in this manual are generally the trademarks or registered trademarks of the manufacturer. and marks are omitted in this manual.

NAS-E35HD.GB.3-292-247-11(1)
Printed in China