n vsphere 6 - docs.vmware.com · introduction to vsphere upgrade 2 vsphere 6.7 provides many...
TRANSCRIPT

VMware ESXi Upgrade17 APR 2018VMware vSphere 6.7VMware ESXi 6.7

VMware ESXi Upgrade
VMware, Inc. 2
You can find the most up-to-date technical documentation on the VMware website at:
https://docs.vmware.com/
If you have comments about this documentation, submit your feedback to
Copyright © 2018 VMware, Inc. All rights reserved. Copyright and trademark information.
VMware, Inc.3401 Hillview Ave.Palo Alto, CA 94304www.vmware.com

Contents
1 About VMware ESXi Upgrade 4
2 Introduction to vSphere Upgrade 5
Overview of the vSphere Upgrade Process 5
3 Upgrading ESXi Hosts 10
ESXi Requirements 10
Before Upgrading ESXi Hosts 20
Upgrade Hosts Interactively 33
Installing or Upgrading Hosts by Using a Script 34
PXE Booting the ESXi Installer 49
Upgrading Hosts by Using esxcli Commands 56
After You Upgrade ESXi Hosts 69
4 Using vSphere Auto Deploy to Reprovision Hosts 74
Introduction to vSphere Auto Deploy 74
Preparing for vSphere Auto Deploy 77
Reprovisioning Hosts 83
5 Collect Logs to Troubleshoot ESXi Hosts 89
VMware, Inc. 3

About VMware ESXi Upgrade 1VMware ESXi Upgrade describes how to upgrade VMware ESXi™ to the current version.
Intended AudienceVMware ESXi Upgrade is for anyone who needs to upgrade from earlier versions of ESXi. These topicsare for experienced Microsoft Windows or Linux system administrators who are familiar with virtualmachine technology and data center operations.
vSphere Web Client and vSphere ClientTask instructions in this guide are based on the vSphere Web Client. You can also perform most of thetasks in this guide by using the new vSphere Client. The new vSphere Client user interface terminology,topology, and workflow are closely aligned with the same aspects and elements of thevSphere Web Client user interface. You can apply the vSphere Web Client instructions to the newvSphere Client unless otherwise instructed.
Note In vSphere 6.7, most of the vSphere Web Client functionality is implemented in the vSphere Client.For an up-to-date list of the unsupported functionality, see Functionality Updates for the vSphere Client.
VMware Technical Publications GlossaryVMware Technical Publications provides a glossary of terms that might be unfamiliar to you. Fordefinitions of terms as they are used in VMware technical documentation, go to http://www.vmware.com/support/pubs.
VMware, Inc. 4

Introduction to vSphereUpgrade 2vSphere 6.7 provides many options for upgrading your vSphere deployment. For a successful vSphereupgrade, you must understand the upgrade options, the configuration details that impact the upgradeprocess, and the sequence of tasks.
The two core components of vSphere are VMware ESXi™ and VMware vCenter Server™. ESXi is thevirtualization platform on which you can create and run virtual machines and virtual appliances.vCenter Server is a service that acts as a central administrator for ESXi hosts connected in a network.You use the vCenter Server system to pool and manage the resources of multiple hosts.vCenter Server Appliance is a preconfigured Linux OS--based virtual machine optimized for running thevCenter Server system and the vCenter Server components.
Starting with vSphere 6.0, important required services for running vCenter Server and the vCenter Servercomponents are included in the Platform Services Controller.
Based on your existing vCenter Server configuration details, you can upgrade to one of the followingdeployment types:
Overview of the vSphere Upgrade ProcessvSphere is a sophisticated product with multiple components to upgrade. Understanding the requiredsequence of tasks is vital for a successful vSphere upgrade.
VMware, Inc. 5

Figure 2‑1. Overview of High-Level vSphere Upgrade Tasks
Start vSphere upgrade
Upgrade to vSphere 6.7 complete
Back up your configuration
Upgrade vCenter Server
Upgrade ESXi hosts
Upgrade virtual machines and virtual appliances
Upgrading vSphere includes the following tasks:
1 Read the vSphere release notes.
2 Verify that you have backed up your configuration.
3 If your vSphere system includes VMware solutions or plug-ins, verify that they are compatible with thevCenter Server or vCenter Server Appliance version to which you are upgrading. See VMwareProduct Interoperability Matrix at http://www.vmware.com/resources/compatibility/sim/interop_matrix.php
4 Upgrade vCenter Server.
For detailed instructions, see vCenter Server Upgrade
5 If you are using vSphere Update Manager, upgrade it. Refer to theVMware vSphere Update Manager documentation.
6 Upgrade your ESXi hosts. See Overview of the ESXi Host Upgrade Process.
7 To ensure sufficient disk storage for log files, consider setting up a syslog server for remote logging.Setting up logging on a remote host is especially important for hosts with limited local storage.
See Required Free Space for System Logging and Configure Syslog on ESXi Hosts.
8 Upgrade your VMs and virtual appliances, manually or by using vSphere Update Manager, to performan orchestrated upgrade.
See Upgrading Virtual Machines and VMware Tools
VMware ESXi Upgrade
VMware, Inc. 6

Overview of the ESXi Host Upgrade ProcessVMware provides several ways to upgrade ESXi version 6.0.x and version 6.5.x hosts toESXi 6.7.
The details and level of support for an upgrade to ESXi 6.7 depend on the host to be upgraded and theupgrade method that you use. Verify support for the upgrade path from your current version of ESXi to theversion to which you are upgrading. See VMware Product Interoperability Matrixes at http://www.vmware.com/resources/compatibility/sim/interop_matrix.php.
You can upgrade a ESXi 6.0.x host or 6.5.x host, asynchronously released driver or other third-partycustomizations, interactive upgrade from CD or DVD, scripted upgrade, or upgrade withvSphere Update Manager. When you upgrade an ESXi 6.0.x host or 6.5.x host that has custom VIBs toversion 6.7, the custom VIBs are migrated. See Upgrading Hosts That Have Third-Party Custom VIBs.
Figure 2‑2. Overview of the ESXi Host Upgrade Process
Start ESXi upgrade
Choose your
upgrade method
Verify requirements are met
Prepare for ESXI host upgrade with Auto Deploy
Prepare for ESXi host upgradewith vSphere Update ManagerPrepare for ESXi host upgrade
Upgrade ESXi hosts using Auto Deploy
Upgrade ESXi hosts using vSphere Update Manager
Upgrade ESXi hosts usingthe GUI, script, or CLI
Perform post-upgrade tasks
Upgrade to ESXi 6.7 complete
VMware ESXi Upgrade
VMware, Inc. 7

High level steps for upgrading ESXi:
1 Verify that your system meets the upgrade requirements. See ESXi Requirements.
2 Prepare your environment before upgrading. See Before Upgrading ESXi Hosts.
3 Determine where you want to locate and boot the ESXi installer. See Media Options for Booting theESXi Installer. If you are PXE-booting the installer, verify that your network PXE infrastructure isproperly set up. See PXE Booting the ESXi Installer.
4 Upgrade ESXi. See Chapter 3 Upgrading ESXi Hosts
5 After upgrading ESXi hosts, you must reconnect the hosts to the vCenter Server and reapply thelicenses. See After You Upgrade ESXi Hosts.
Methods supported for direct upgrade to ESXi 6.7 are:
n Use the interactive graphical user interface (GUI) installer from CD, DVD, or USB drive.
n Scripted upgrade.
n Use the esxcli command line interface (CLI).
n vSphere Auto Deploy. If the ESXi host was deployed by using vSphere Auto Deploy, you can usevSphere Auto Deploy to reprovision the host with a 6.7 image.
n vSphere Update Manager.
Graphical UserInterface (GUI) Installer
Upgrade interactively by using an ESXi installer ISO image on CD/DVD orUSB flash drive. You can run the ESXi 6.7 installer from a CD/DVD or USBflash drive to do an interactive upgrade. This method is appropriate fordeployments with a small number of hosts. The installer works the same asfor a fresh installation, but if you select a target disk that already containsan ESXi installation, the installer upgrades the host to 6.7. The installer alsogives you the option to migrate some existing host settings andconfiguration files and to preserve the existing VMFS datastore. See Upgrade Hosts Interactively.
Perform a ScriptedUpgrade
You can upgrade hosts from ESXi 6.0.x and ESXi 6.5.x to ESXi 6.7 byrunning an update script for an efficient, unattended upgrade. Scriptedupgrades provide an efficient way to deploy multiple hosts. You can use ascript to upgrade ESXi from a CD, DVD, or USB flash drive, or byspecifying a preboot execution environment (PXE) for the installer. You canalso call a script from an interactive installation. See Installing or UpgradingHosts by Using a Script.
esxcli Command LineInterface
You can use the esxcli command-line utility for ESXi to upgrade ESXi6.0.x hosts or ESXi 6.5.x hosts to ESXi 6.7 hosts. See Upgrading Hosts byUsing esxcli Commands.
VMware ESXi Upgrade
VMware, Inc. 8
vSphere Auto Deploy If an ESXi host is deployed with vSphere Auto Deploy, you can usevSphere Auto Deploy to reprovision the host and reboot it with a new imageprofile. This profile contains an ESXi upgrade or patch, a host configurationprofile, and optionally, third-party drivers or management agents that areprovided by VMware partners. You can build custom images by usingvSphere ESXi Image Builder CLI. See Chapter 4 Using vSphere AutoDeploy to Reprovision Hosts.
vSphere UpdateManager
vSphere Update Manager is software for upgrading, migrating, updating,and patching clustered hosts, virtual machines, and guest operatingsystems. vSphere Update Manager orchestrates host and virtual machineupgrades. If your site uses vSphere Update Manager, VMwarerecommends that you use vSphere Update Manager. For instructions aboutperforming an orchestrated virtual machine upgrade, see theInstalling andAdministering VMware vSphere Update Manager documentation.
The esxupdate and vihostupdate utilities are not supported for ESXi 6.7 upgrades.
Upgrading Virtual Machines and VMware ToolsAfter you upgrade ESXi hosts, you can upgrade the virtual machines on the host to take advantage ofnew features.
VMware offers the following tools for upgrading virtual machines:
vSphere Web Client Requires you to perform the virtual machine upgrade one step at a time,but does not require vSphere Update Manager. See the information aboutupgrading virtual machines in the vSphere Virtual Machine Administrationdocumentation.
vSphere UpdateManager
Automates the process of upgrading and patching virtual machines, therebyensuring that the steps occur in the correct order. You can use UpdateManager to directly upgrade the virtual machine hardware version andVMware Tools. See the Installing and Administering VMware vSphereUpdate Manager documentation.
VMware ESXi Upgrade
VMware, Inc. 9

Upgrading ESXi Hosts 3After you upgrade vCenter Serverand vSphere Update Manager, upgrade ESXi hosts. You can upgradeESXi 6.0.x and 6.5.x hosts directly to ESXi 6.7.
To upgrade hosts, you can use the tools and methods that are described in Overview of the ESXi HostUpgrade Process.
Caution If you upgrade hosts managed by vCenter Server, you must upgrade to vCenter Server beforeyou upgrade ESXi. If you do not upgrade in the correct order, you can lose data and lose access toservers.
This chapter includes the following topics:
n ESXi Requirements
n Before Upgrading ESXi Hosts
n Upgrade Hosts Interactively
n Installing or Upgrading Hosts by Using a Script
n PXE Booting the ESXi Installer
n Upgrading Hosts by Using esxcli Commands
n After You Upgrade ESXi Hosts
ESXi RequirementsTo install or upgrade ESXi, your system must meet specific hardware and software requirements.
ESXi Hardware RequirementsMake sure the host meets the minimum hardware configurations supported by ESXi6.7.
Hardware and System ResourcesTo install or upgrade ESXi, your hardware and system resources must meet the following requirements:
n Supported server platform. For a list of supported platforms, see the VMware Compatibility Guide at http://www.vmware.com/resources/compatibility.
VMware, Inc. 10

n ESXi 6.7 requires a host machine with at least two CPU cores.
n ESXi 6.7 supports 64-bit x86 processors released after September 2006. This includes a broad rangeof multi-core processors. For a complete list of supported processors, see the VMware compatibilityguide at http://www.vmware.com/resources/compatibility.
n ESXi 6.7 requires the NX/XD bit to be enabled for the CPU in the BIOS.
n ESXi 6.7 requires a minimum of 4 GB of physical RAM. It is recommended to provide at least 8 GB ofRAM to run virtual machines in typical production environments.
n To support 64-bit virtual machines, support for hardware virtualization (Intel VT-x or AMD RVI) mustbe enabled on x64 CPUs.
n One or more Gigabit or faster Ethernet controllers. For a list of supported network adapter models,see the VMware Compatibility Guide at http://www.vmware.com/resources/compatibility.
n SCSI disk or a local, non-network, RAID LUN with unpartitioned space for the virtual machines.
n For Serial ATA (SATA), a disk connected through supported SAS controllers or supported on-boardSATA controllers. SATA disks are considered remote, not local. These disks are not used as a scratchpartition by default because they are seen as remote.
Note You cannot connect a SATA CD-ROM device to a virtual machine on an ESXi 6.7 host. To usethe SATA CD-ROM device, you must use IDE emulation mode.
Storage SystemsFor a list of supported storage systems, see the VMware Compatibility Guide at http://www.vmware.com/resources/compatibility. For Software Fibre Channel over Ethernet (FCoE), see Installing and Booting ESXi with Software FCoE.
ESXi Booting RequirementsvSphere 6.7 supports booting ESXi hosts from the Unified Extensible Firmware Interface (UEFI). WithUEFI, you can boot systems from hard drives, CD-ROM drives, or USB media.
Starting with vSphere 6.7, VMware Auto Deploy supports network booting and provisioning of ESXi hostswith UEFI.
ESXi can boot from a disk larger than 2 TB if the system firmware and the firmware on any add-in cardthat you are using support it. See the vendor documentation.
Note Changing the boot type from legacy BIOS to UEFI after you install ESXi 6.7 might cause the hostto fail to boot. In this case, the host displays an error message similar to Not a VMware boot bank.Changing the host boot type between legacy BIOS and UEFI is not supported after you install ESXi 6.7.
VMware ESXi Upgrade
VMware, Inc. 11

Storage Requirements for ESXi 6.7 Installation or UpgradeInstalling ESXi 6.7 or upgrading to ESXi 6.7 requires a boot device that is a minimum of 1 GB. Whenbooting from a local disk, SAN or iSCSI LUN, a 5.2-GB disk is required to allow for the creation of theVMFS volume and a 4-GB scratch partition on the boot device. If a smaller disk or LUN is used, theinstaller attempts to allocate a scratch region on a separate local disk. If a local disk cannot be found thescratch partition, /scratch, is on the ESXi host ramdisk, linked to /tmp/scratch. You canreconfigure /scratch to use a separate disk or LUN. For best performance and memory optimization, donot leave /scratch on the ESXi host ramdisk.
To reconfigure /scratch, see the topic "Set the Scratch Partition from the vSphere Web Client" in thevCenter Server Installation and Setup documentation.
Due to the I/O sensitivity of USB and SD devices, the installer does not create a scratch partition on thesedevices. When installing or upgrading on USB or SD devices, the installer attempts to allocate a scratchregion on an available local disk or datastore. If no local disk or datastore is found, /scratch is placed onthe ramdisk. After the installation or upgrade, you should reconfigure /scratch to use a persistentdatastore. Although a 1GB USB or SD device suffices for a minimal installation, you should use a 4GB orlarger device. The extra space is used for an expanded coredump partition on the USB/SD device. Use ahigh-quality USB flash drive of 16 GB or larger so that the extra flash cells can prolong the life of the bootmedia, but high-quality drives of 4 GB or larger are sufficient to hold the extended coredump partition.See Knowledge Base article http://kb.vmware.com/kb/2004784.
In Auto Deploy installations, the installer attempts to allocate a scratch region on an available local disk ordatastore. If no local disk or datastore is found, /scratch is placed on ramdisk. You shouldreconfigure /scratch to use a persistent datastore following the installation.
For environments that boot from a SAN or use Auto Deploy, you need not allocate a separate LUN foreach ESXi host. You can co-locate the scratch regions for many ESXi hosts onto a single LUN. Thenumber of hosts assigned to any single LUN should be weighed against the LUN size and the I/Obehavior of the virtual machines.
ESXi 6.7 Installation on M.2 and other Non-USB Low-end Flash MediaUnlike USB flash devices, the ESXi installer creates a VMFS datastore on M.2 and other non-USB low-end flash media. If you deploy a virtual machine or migrate a virtual machine to this boot devicedatastore, the boot device can be worn out quickly depending on the endurance of the flash device andthe characteristics of the workload. Even read-only workloads can cause problems on low-end flashdevices.
Important If you install ESXi on M.2 or other non-USB low-end flash media, delete the VMFS datastoreon the device immediately after installation. See vSphere Storage for more information on removingVMFS datastores.
VMware ESXi Upgrade
VMware, Inc. 12

Supported Remote Management Server Models and FirmwareVersionsYou can use remote management applications to install or upgrade ESXi, or to manage hosts remotely.
Table 3‑1. Supported Remote Management Server Models and Minimum Firmware Versions
Remote Management ServerModel Firmware Version Java
Dell DRAC 7 1.30.30 (Build 43) 1.7.0_60-b19
Dell DRAC 6 1.54 (Build 15), 1.70 (Build 21) 1.6.0_24
Dell DRAC 5 1.0, 1.45, 1.51 1.6.0_20,1.6.0_203
Dell DRAC 4 1.75 1.6.0_23
HP ILO 1.81, 1.92 1.6.0_22, 1.6.0_23
HP ILO 2 1.8, 1.81 1.6.0_20, 1.6.0_23
HP ILO 3 1.28 1.7.0_60-b19
HP ILO 4 1.13 1.7.0_60-b19
IBM RSA 2 1.03, 1.2 1.6.0_22
Recommendations for Enhanced ESXi PerformanceTo enhance performance, install or upgrade ESXi on a robust system with more RAM than the minimumrequired and with multiple physical disks.
For ESXi system requirements, see ESXi Hardware Requirements.
VMware ESXi Upgrade
VMware, Inc. 13

Table 3‑2. Recommendations for Enhanced Performance
System Element Recommendation
RAM ESXi hosts require more RAM than typical servers. Provide atleast 8GB of RAM to take full advantage of ESXi features andrun virtual machines in typical production environments. AnESXi host must have sufficient RAM to run concurrent virtualmachines. The following examples are provided to help youcalculate the RAM required by the virtual machines running onthe ESXi host.
Operating four virtual machines with Red Hat Enterprise Linuxor Windows XP requires at least 3GB of RAM for baselineperformance. This figure includes approximately 1024MB forthe virtual machines, 256MB minimum for each operatingsystem as recommended by vendors.
Running these four virtual machines with 512MB RAM requiresthat the ESXi host have approximately 4GB RAM, whichincludes 2048MB for the virtual machines.
These calculations do not take into account possible memorysavings from using variable overhead memory for each virtualmachine. See vSphere Resource Management.
Dedicated Fast Ethernet adapters for virtual machines Place the management network and virtual machine networkson different physical network cards. Dedicated Gigabit Ethernetcards for virtual machines, such as Intel PRO 1000 adapters,improve throughput to virtual machines with high networktraffic.
Disk location Place all data that your virtual machines use on physical disksallocated specifically to virtual machines. Performance is betterwhen you do not place your virtual machines on the diskcontaining the ESXi boot image. Use physical disks that arelarge enough to hold disk images that all the virtual machinesuse.
VMFS5 partitioning The ESXi installer creates the initial VMFS volumes on the firstblank local disk found. To add disks or modify the originalconfiguration, use the vSphere Web Client. This practiceensures that the starting sectors of partitions are 64K-aligned,which improves storage performance.
Note For SAS-only environments, the installer might notformat the disks. For some SAS disks, it is not possible toidentify whether the disks are local or remote. After theinstallation, you can use the vSphere Web Client to set upVMFS.
Processors Faster processors improve ESXi performance. For certainworkloads, larger caches improve ESXi performance.
Hardware compatibility Use devices in your server that are supported by ESXi 6.7drivers. See the Hardware Compatibility Guide at http://www.vmware.com/resources/compatibility.
VMware ESXi Upgrade
VMware, Inc. 14

Incoming and Outgoing Firewall Ports for ESXi HostsThe vSphere Web Client and the VMware Host Client allow you to open and close firewall ports for eachservice or to allow traffic from selected IP addresses.
The following table lists the firewalls for services that are installed by default. If you install other VIBs onyour host, additional services and firewall ports might become available. The information is primarily forservices that are visible in the vSphere Web Client but the table includes some other ports as well.
Table 3‑3. Incoming Firewall Connections
PortProtocol Service Description
5988 TCP CIM Server Server for CIM (Common Information Model).
5989 TCP CIM Secure Server Secure server for CIM.
427 TCP,UDP
CIM SLP The CIM client uses the Service Location Protocol, version 2 (SLPv2) to findCIM servers.
546 DHCPv6 DHCP client for IPv6.
8301, 8302 UDP DVSSync DVSSync ports are used for synchronizing states of distributed virtual portsbetween hosts that have VMware FT record/replay enabled. Only hosts thatrun primary or backup virtual machines must have these ports open. Onhosts that are not using VMware FT these ports do not have to be open.
902 TCP NFC Network File Copy (NFC) provides a file-type-aware FTP service for vSpherecomponents. ESXi uses NFC for operations such as copying and movingdata between datastores by default.
12345, 23451 UDP vSANClusteringService
VMware vSAN Cluster Monitoring and Membership Directory Service. UsesUDP-based IP multicast to establish cluster members and distribute vSANmetadata to all cluster members. If disabled, vSAN does not work.
68 UDP DHCP Client DHCP client for IPv4.
53 UDP DNS Client DNS client.
8200, 8100,8300
TCP,UDP
Fault Tolerance Traffic between hosts for vSphere Fault Tolerance (FT).
6999 UDP NSX DistributedLogical RouterService
NSX Virtual Distributed Router service. The firewall port associated with thisservice is opened when NSX VIBs are installed and the VDR module iscreated. If no VDR instances are associated with the host, the port does nothave to be open.
This service was called NSX Distributed Logical Router in earlier versions ofthe product.
2233 TCP vSAN Transport vSAN reliable datagram transport. Uses TCP and is used for vSAN storageIO. If disabled, vSAN does not work.
161 UDP SNMP Server Allows the host to connect to an SNMP server.
22 TCP SSH Server Required for SSH access.
8000 TCP vMotion Required for virtual machine migration with vMotion. ESXi hosts listen onport 8000 for TCP connections from remote ESXi hosts for vMotion traffic.
902, 443 TCP vSphere Web Client Client connections
VMware ESXi Upgrade
VMware, Inc. 15

Table 3‑3. Incoming Firewall Connections (Continued)
PortProtocol Service Description
8080 TCP vsanvp vSAN VASA Vendor Provider. Used by the Storage Management Service(SMS) that is part of vCenter to access information about vSAN storageprofiles, capabilities, and compliance. If disabled, vSAN Storage ProfileBased Management (SPBM) does not work.
80 TCP vSphere Web Access Welcome page, with download links for different interfaces.
5900 -5964 TCP RFB protocol
80, 9000 TCP vSphere UpdateManager
Table 3‑4. Outgoing Firewall Connections
Port Protocol Service Description
427 TCP, UDP CIM SLP The CIM client uses the Service Location Protocol, version 2(SLPv2) to find CIM servers.
547 TCP, UDP DHCPv6 DHCP client for IPv6.
8301, 8302 UDP DVSSync DVSSync ports are used for synchronizing states of distributedvirtual ports between hosts that have VMware FT record/replayenabled. Only hosts that run primary or backup virtual machinesmust have these ports open. On hosts that are not usingVMware FT these ports do not have to be open.
44046, 31031 TCP HBR Used for ongoing replication traffic by vSphere Replication andVMware Site Recovery Manager.
902 TCP NFC Network File Copy (NFC) provides a file-type-aware FTP servicefor vSphere components. ESXi uses NFC for operations such ascopying and moving data between datastores by default.
9 UDP WOL Used by Wake on LAN.
12345 23451 UDP vSAN ClusteringService
Cluster Monitoring, Membership, and Directory Service used byvSAN.
68 UDP DHCP Client DHCP client.
53 TCP, UDP DNS Client DNS client.
80, 8200, 8100, 8300 TCP, UDP Fault Tolerance Supports VMware Fault Tolerance.
3260 TCP Software iSCSI Client Supports software iSCSI.
6999 UDP NSX DistributedLogical RouterService
The firewall port associated with this service is opened whenNSX VIBs are installed and the VDR module is created. If noVDR instances are associated with the host, the port does nothave to be open.
VMware ESXi Upgrade
VMware, Inc. 16

Table 3‑4. Outgoing Firewall Connections (Continued)
Port Protocol Service Description
5671 TCP rabbitmqproxy A proxy running on the ESXi host. This proxy allows applicationsthat are running inside virtual machines to communicate with theAMQP brokers that are running in the vCenter network domain.
The virtual machine does not have to be on the network, that is,no NIC is required. Ensure that outgoing connection IPaddresses include at least the brokers in use or future. You canadd brokers later to scale up.
2233 TCP vSAN Transport Used for RDT traffic (Unicast peer to peer communication)between vSAN nodes.
8000 TCP vMotion Required for virtual machine migration with vMotion.
902 UDP VMware vCenterAgent
vCenter Server agent.
8080 TCP vsanvp Used for vSAN Vendor Provider traffic.
9080 TCP I/O Filter Service Used by the I/O Filters storage feature
Table 3‑5. Firewall Ports for Services That Are Not Visible in the UI by Default
PortProtocol Service Comment
5900 -5964 TCP RFB protocol The RFB protocol is a simple protocol for remote access to graphical userinterfaces.
8889 TCP OpenWSMANDaemon
Web Services Management (WS-Management is a DMTF open standard forthe management of servers, devices, applications, and Web services.
Required Free Space for System LoggingIf you used Auto Deploy to install your ESXi 6.7 host, or if you set up a log directory separate from thedefault location in a scratch directory on the VMFS volume, you might need to change your current logsize and rotation settings to ensure that enough space is available for system logging .
All vSphere components use this infrastructure. The default values for log capacity in this infrastructurevary, depending on the amount of storage available and on how you have configured system logging.Hosts that are deployed with Auto Deploy store logs on a RAM disk, which means that the amount ofspace available for logs is small.
If your host is deployed with Auto Deploy, reconfigure your log storage in one of the following ways:
n Redirect logs over the network to a remote collector.
n Redirect logs to a NAS or NFS store.
If you redirect logs to non-default storage, such as a NAS or NFS store, you might also want toreconfigure log sizing and rotations for hosts that are installed to disk.
You do not need to reconfigure log storage for ESXi hosts that use the default configuration, which storeslogs in a scratch directory on the VMFS volume. For these hosts, ESXi 6.7 configures logs to best suityour installation, and provides enough space to accommodate log messages.
VMware ESXi Upgrade
VMware, Inc. 17

Table 3‑6. Recommended Minimum Size and Rotation Configuration for hostd, vpxa, andfdm Logs
Log Maximum Log File SizeNumber of Rotations toPreserve Minimum Disk Space Required
Management Agent (hostd) 10 MB 10 100 MB
VirtualCenter Agent (vpxa) 5 MB 10 50 MB
vSphere HA agent (FaultDomain Manager, fdm)
5 MB 10 50 MB
For information about setting up and configuring syslog and a syslog server and installing vSphere SyslogCollector, see the vCenter Server Installation and Setup documentation.
VMware Host Client System RequirementsMake sure that your browser supports the VMware Host Client.
The following guest operating systems and Web browser versions are supported for theVMware Host Client.
Supported Browsers Mac OS Windows Linux
Google Chrome 50+ 50+ 50+
Mozilla Firefox 45+ 45+ 45+
Microsoft Internet Explorer N/A 11+ N/A
Microsoft Edge N/A 38+ N/A
Safari 9.0+ N/A N/A
ESXi Passwords and Account LockoutFor ESXi hosts, you have to use a password with predefined requirements. You can change the requiredlength and character class requirement or allow pass phrases using theSecurity.PasswordQualityControl advanced option.
ESXi uses the Linux PAM module pam_passwdqc for password management and control. See the manpage for pam_passwdqc for detailed information.
Note The default requirements for ESXi passwords can change from one release to the next. You cancheck and change the default password restrictions using the Security.PasswordQualityControladvanced option.
VMware ESXi Upgrade
VMware, Inc. 18

ESXi PasswordsESXi enforces password requirements for access from the Direct Console User Interface, the ESXi Shell,SSH, or the VMware Host Client.
n By default, you have to include a mix of characters from four character classes: lowercase letters,uppercase letters, numbers, and special characters such as underscore or dash when you create apassword.
n By default, password length is more than 7 and less than 40.
n Passwords cannot contain a dictionary word or part of a dictionary word.
Note An uppercase character that begins a password does not count toward the number of characterclasses used. A number that ends a password does not count toward the number of character classesused.
Example ESXi PasswordsThe following password candidates illustrate potential passwords if the option is set as follows.
retry=3 min=disabled,disabled,disabled,7,7
With this setting, passwords with one or two character classes and pass phrases are not allowed,because the first three items are disabled. Passwords from three- and four-character classes requireseven characters. See the pam_passwdqc man page for details.
With these settings, the following passwords are allowed.
n xQaTEhb!: Contains eight characters from three character classes.
n xQaT3#A: Contains seven characters from four character classes.
The following password candidates do not meet requirements.
n Xqat3hi: Begins with an uppercase character, reducing the effective number of character classes totwo. The minimum number of required character classes is three.
n xQaTEh2: Ends with a number, reducing the effective number of character classes to two. Theminimum number of required character classes is three.
ESXi Pass PhraseInstead of a password, you can also use a pass phrase; however, pass phrases are disabled by default.You can change this default or other settings, by using the Security.PasswordQualityControladvanced option from the vSphere Web Client.
For example, you can change the option to the following.
retry=3 min=disabled,disabled,16,7,7
This example allows pass phrases of at least 16 characters and at least 3 words, separated by spaces.
VMware ESXi Upgrade
VMware, Inc. 19

For legacy hosts, changing the /etc/pamd/passwd file is still supported, but changing the file isdeprecated for future releases. Use the Security.PasswordQualityControl advanced option instead.
Changing Default Password RestrictionsYou can change the default restriction on passwords or pass phrases by using theSecurity.PasswordQualityControl advanced option for your ESXi host. See the vCenter Server andHost Management documentation for information on setting ESXi advanced options.
You can change the default, for example, to require a minimum of 15 characters and a minimum numberof four words, as follows:
retry=3 min=disabled,disabled,15,7,7 passphrase=4
See the man page for pam_passwdqc for details.
Note Not all possible combinations of the options for pam_passwdqc have been tested. Performadditional testing after you change the default password settings.
ESXi Account Lockout BehaviorStarting with vSphere 6.0, account locking is supported for access through SSH and through the vSphereWeb Services SDK. The Direct Console Interface (DCUI) and the ESXi Shell do not support accountlockout. By default, a maximum of ten failed attempts is allowed before the account is locked. Theaccount is unlocked after two minutes by default.
Configuring Login BehaviorYou can configure the login behavior for your ESXi host with the following advanced options:
n Security.AccountLockFailures. Maximum number of failed login attempts before a user'saccount is locked. Zero disables account locking.
n Security.AccountUnlockTime. Number of seconds that a user is locked out.
See the vCenter Server and Host Management documentation for information on setting ESXi advancedoptions.
Before Upgrading ESXi HostsFor a successful upgrade of your ESXi hosts, understand and prepare for the changes that are involved.
For a successful ESXi upgrade, follow these best practices:
1 Make sure that you understand the ESXi upgrade process, the effect of that process on your existingdeployment, and the preparation required for the upgrade.
n If your vSphere system includes VMware solutions or plug-ins, make sure they are compatiblewith the vCenter Server version that you are upgrading to. See the VMware ProductInteroperability Matrix at http://www.vmware.com/resources/compatibility/sim/interop_matrix.php.
VMware ESXi Upgrade
VMware, Inc. 20

n Read Overview of the ESXi Host Upgrade Process to understand the upgrade scenarios that aresupported, and the options and tools that are available to perform the upgrade.
n Read the VMware vSphere Release Notes for known installation issues.
2 Prepare the system for the upgrade.
n Make sure that the current ESXi version is supported for the upgrade. See Overview of the ESXiHost Upgrade Process.
n Make sure that the system hardware complies with ESXi requirements. See ESXi Requirementsand VMware Compatibility Guide at http://www.vmware.com/resources/compatibility/search.php.Check for system compatibility, I/O compatibility with network and host bus adapter (HBA) cards,storage compatibility, and backup software compatibility.
n Make sure that sufficient disk space is available on the host for the upgrade.
n If a SAN is connected to the host, detach the Fibre Channel system before continuing with theupgrade. Do not disable HBA cards in the BIOS.
3 Back up the host before performing an upgrade. If the upgrade fails, you can restore the host.
4 If you are using Auto Deploy to provision hosts, the user who is running the process must have localadministrator privileges on the ESXi host that is being provisioned. By default the installation processhas these privileges and certificate provisioning happens as expected. However, if you are usinganother method than the installer, you must run it as a user who has the local administrator privileges.
5 Depending on the upgrade option you choose, you might need to migrate or power off all virtualmachines on the host. See the instructions for your upgrade method.
n For an interactive upgrade from CD, DVD, or USB drive: see Upgrade Hosts Interactively.
n For a scripted upgrade: see Installing or Upgrading Hosts by Using a Script.
n For vSphere Auto Deploy: see Chapter 4 Using vSphere Auto Deploy to Reprovision Hosts. If theESXi 6.0x or 6.5.x host was deployed by using vSphere Auto Deploy, you can usevSphere Auto Deploy to reprovision the host with a 6.7 image.
n For the esxcli command method: see Upgrading Hosts by Using esxcli Commands.
6 Plan for the tasks that must be performed after the ESXi host upgrade:
n Test the system to ensure that the upgrade completed successfully.
n Apply a host's licenses. See Licensing ESXi Hosts After Upgrade.
n Consider setting up a syslog server for remote logging, to ensure sufficient disk storage for logfiles. Setting up logging on a remote host is especially important for hosts with limited localstorage. vSphere Syslog Collector is included as a service in vCenter Server 6.0 and can be usedto collect logs from all hosts. See Required Free Space for System Logging. For informationabout setting up and configuring syslog and a syslog server, setting up syslog from the hostprofiles interface, and installing vSphere Syslog Collector, see the vCenter Server Installation andSetup documentation.
7 If the upgrade was unsuccessful and you backed up the host, you can restore the host.
VMware ESXi Upgrade
VMware, Inc. 21

Upgrading Hosts That Have Third-Party Custom VIBsA host can have custom vSphere installation bundles (VIBs) installed, for example, for third-party driversor management agents. When you upgrade an ESXi host to 6.7, all supported custom VIBs are migrated,regardless of whether the VIBs are included in the installer ISO.
If the host or the installer ISO image contains a VIB that creates a conflict and prevents the upgrade, anerror message identifies the VIB that created the conflict. To upgrade the host, take one of the followingactions:
n Remove the VIB that created the conflict from the host and retry the upgrade. If you are usingvSphere Update Manager, select the option to remove third-party software modules during theremediation process. For more information, see the Installing and Administering VMware vSphereUpdate Manager documentation. You can also remove the VIB that created the conflict from the hostby using esxcli commands. For more information, see Remove VIBs from a Host.
n Use the vSphere ESXi Image Builder CLI to create a custom installer ISO image that resolves theconflict. For more information about vSphere ESXi Image Builder CLI installation and usage, see thevCenter Server Installation and Setup documentation.
Media Options for Booting the ESXi InstallerThe ESXi installer must be accessible to the system on which you are installing ESXi.
The following boot media are supported for the ESXi installer:
n Boot from a CD/DVD. See Download and Burn the ESXi Installer ISO Image to a CD or DVD.
n Boot from a USB flash drive. See Format a USB Flash Drive to Boot the ESXi Installation or Upgrade.
n PXE boot from the network. PXE Booting the ESXi Installer
n Boot from a remote location using a remote management application. See Using RemoteManagement Applications
Download and Burn the ESXi Installer ISO Image to a CD or DVDIf you do not have an ESXi installation CD/DVD, you can create one.
You can also create an installer ISO image that includes a custom installation script. See Create anInstaller ISO Image with a Custom Installation or Upgrade Script.
Procedure
1 Download the ESXi installer from the VMware Web site at https://my.vmware.com/web/vmware/downloads.
ESXi is listed under Datacenter & Cloud Infrastructure.
2 Confirm that the md5sum is correct.
See the VMware Web site topic Using MD5 Checksums at http://www.vmware.com/download/md5.html.
VMware ESXi Upgrade
VMware, Inc. 22

3 Burn the ISO image to a CD or DVD.
Format a USB Flash Drive to Boot the ESXi Installation or UpgradeYou can format a USB flash drive to boot the ESXi installation or upgrade.
The instructions in this procedure assume that the USB flash drive is detected as /dev/sdb.
Note The ks.cfg file that contains the installation script cannot be located on the same USB flash drivethat you are using to boot the installation or upgrade.
Prerequisites
n Linux machine with superuser access to it
n USB flash drive that can be detected by the Linux machine
n The ESXi ISO image, VMware-VMvisor-Installer-version_number-build_number.x86_64.iso, which includes the isolinux.cfg file
n Syslinux package
Procedure
1 If your USB flash drive is not detected as /dev/sdb, or you are not sure how your USB flash drive isdetected, determine how it is detected.
a At the command line, run the command for displaying the current log messages.
tail -f /var/log/messages
b Plug in your USB flash drive.
You see several messages that identify the USB flash drive in a format similar to the followingmessage.
Oct 25 13:25:23 ubuntu kernel: [ 712.447080] sd 3:0:0:0: [sdb] Attached SCSI removable disk
In this example, sdb identifies the USB device. If your device is identified differently, use thatidentification, in place of sdb.
2 Create a partition table on the USB flash device.
/sbin/fdisk /dev/sdb
a Enter d to delete partitions until they are all deleted.
b Enter n to create a primary partition 1 that extends over the entire disk.
c Enter t to set the type to an appropriate setting for the FAT32 file system, such as c.
d Enter a to set the active flag on partition 1.
VMware ESXi Upgrade
VMware, Inc. 23

e Enter p to print the partition table.
The result should be similar to the following message.
Disk /dev/sdb: 2004 MB, 2004877312 bytes
255 heads, 63 sectors/track, 243 cylinders
Units = cylinders of 16065 * 512 = 8225280 bytes
Device Boot Start End Blocks Id System
/dev/sdb1 1 243 1951866 c W95 FAT32 (LBA)
f Enter w to write the partition table and exit the program.
3 Format the USB flash drive with the Fat32 file system.
/sbin/mkfs.vfat -F 32 -n USB /dev/sdb1
4 Install the Syslinux bootloader on the USB flash drive.
The locations of the Syslinux executable file and the mbr.bin file might vary for the different Syslinuxversions. For example, if you downloaded Syslinux 6.02, run the following commands.
/usr/bin/syslinux /dev/sdb1
cat /usr/lib/syslinux/mbr/mbr.bin > /dev/sdb
5 Create a destination directory and mount the USB flash drive to it.
mkdir /usbdisk
mount /dev/sdb1 /usbdisk
6 Create a destination directory and mount the ESXi installer ISO image to it.
mkdir /esxi_cdrom
mount -o loop VMware-VMvisor-Installer-6.x.x-XXXXXX.x86_64.iso /esxi_cdrom
7 Copy the contents of the ISO image to the USB flash drive.
cp -r /esxi_cdrom/* /usbdisk
8 Rename the isolinux.cfg file to syslinux.cfg.
mv /usbdisk/isolinux.cfg /usbdisk/syslinux.cfg
9 In the /usbdisk/syslinux.cfg file, edit the APPEND -c boot.cfg line to APPEND -c boot.cfg -p1.
10 Unmount the USB flash drive.
umount /usbdisk
VMware ESXi Upgrade
VMware, Inc. 24

11 Unmount the installer ISO image.
umount /esxi_cdrom
The USB flash drive can boot the ESXi installer.
Create a USB Flash Drive to Store the ESXi Installation Script or UpgradeScriptYou can use a USB flash drive to store the ESXi installation script or upgrade script that is used duringscripted installation or upgrade of ESXi.
When multiple USB flash drives are present on the installation machine, the installation softwaresearches for the installation or upgrade script on all attached USB flash drives.
The instructions in this procedure assume that the USB flash drive is detected as /dev/sdb.
Note Do not store the ks file containing the installation or upgrade script on the same USB flash drivethat you are using to boot the installation or upgrade.
Prerequisites
n Linux machine
n ESXi installation or upgrade script, the ks.cfg kickstart file
n USB flash drive
Procedure
1 Attach the USB flash drive to a Linux machine that has access to the installation or upgrade script.
2 Create a partition table.
/sbin/fdisk /dev/sdb
a Type d to delete partitions until they are all deleted.
b Type n to create primary partition 1 that extends over the entire disk.
c Type t to set the type to an appropriate setting for the FAT32 file system, such as c.
d Type p to print the partition table.
The result should be similar to the following text:
Disk /dev/sdb: 2004 MB, 2004877312 bytes
255 heads, 63 sectors/track, 243 cylinders
Units = cylinders of 16065 * 512 = 8225280 bytes
Device Boot Start End Blocks Id System
/dev/sdb1 1 243 1951866 c W95 FAT32 (LBA)
e Type w to write the partition table and quit.
VMware ESXi Upgrade
VMware, Inc. 25

3 Format the USB flash drive with the Fat32 file system.
/sbin/mkfs.vfat -F 32 -n USB /dev/sdb1
4 Mount the USB flash drive.
mount /dev/sdb1 /usbdisk
5 Copy the ESXi installation script to the USB flash drive.
cp ks.cfg /usbdisk
6 Unmount the USB flash drive.
The USB flash drive contains the installation or upgrade script for ESXi.
What to do next
When you boot the ESXi installer, point to the location of the USB flash drive for the installation orupgrade script. See Enter Boot Options to Start an Installation or Upgrade Script and PXELINUXConfiguration Files.
Create an Installer ISO Image with a Custom Installation or Upgrade ScriptYou can customize the standard ESXi installer ISO image with your own installation or upgrade script.This customization enables you to perform a scripted, unattended installation or upgrade when you bootthe resulting installer ISO image.
See also About Installation and Upgrade Scripts and About the boot.cfg File.
Prerequisites
n Linux machine
n The ESXi ISO image VMware-VMvisor-Installer-6.x.x-XXXXXX.x86_64.iso,where 6.x.x is theversion of ESXi you are installing, and XXXXXX is the build number of the installer ISO image
n Your custom installation or upgrade script, the ks_cust.cfg kickstart file
Procedure
1 Download the ESXi ISO image from the VMware Web site.
2 Mount the ISO image in a folder:
mount -o loop VMware-VMvisor-Installer-6.x.x-XXXXXX.x86_64.iso /esxi_cdrom_mount
XXXXXX is the ESXi build number for the version that you are installing or upgrading to.
3 Copy the contents of cdrom to another folder:
cp -r /esxi_cdrom_mount /esxi_cdrom
4 Copy the kickstart file to /esxi_cdrom.
cp ks_cust.cfg /esxi_cdrom
VMware ESXi Upgrade
VMware, Inc. 26

5 (Optional) Modify the boot.cfg file to specify the location of the installation or upgrade script byusing the kernelopt option.
You must use uppercase characters to provide the path of the script, for example,
kernelopt=runweasel ks=cdrom:/KS_CUST.CFG
The installation or upgrade becomes completely automatic, without the need to specify the kickstartfile during the installation or upgrade.
6 Recreate the ISO image using the mkisofs or the genisoimage command.
Command Syntax
mkisofs mkisofs -relaxed-filenames -J -R -o custom_esxi.iso -b
isolinux.bin -c boot.cat -no-emul-boot -boot-load-size 4 -boot-
info-table -eltorito-alt-boot -eltorito-platform efi -b
efiboot.img -no-emul-boot /esxi_cdrom
genisoimage genisoimage -relaxed-filenames -J -R -o custom_esxi.iso -b
isolinux.bin -c boot.cat -no-emul-boot -boot-load-size 4 -boot-
info-table -eltorito-alt-boot -e efiboot.img -no-emul-
boot /esxi_cdrom
You can use this ISO image for regular boot or UEFI secure boot.
The ISO image includes your custom installation or upgrade script.
What to do next
Install ESXi from the ISO image.
PXE Booting the ESXi InstallerYou can use the preboot execution environment (PXE) to boot a host. Starting with vSphere 6.0, you canPXE boot the ESXi installer from a network interface on hosts with legacy BIOS or using UEFI.
ESXi is distributed in an ISO format that is designed to install to flash memory or to a local hard drive. Youcan extract the files and boot by using PXE.
PXE uses Dynamic Host Configuration Protocol (DHCP) and Trivial File Transfer Protocol (TFTP) to bootan operating system over a network.
PXE booting requires some network infrastructure and a machine with a PXE-capable network adapter.Most machines that can run ESXi have network adapters that can PXE boot.
Note PXE booting with legacy BIOS firmware is possible only over IPv4. PXE booting with UEFIfirmware is possible with either IPv4 or IPv6.
Sample DHCP Configurations
To PXE boot the ESXi installer, the DHCP server must send the address of the TFTP server and thefilename of the initial boot loader to the ESXi host.
VMware ESXi Upgrade
VMware, Inc. 27

When the target machine first boots, it broadcasts a packet across the network requesting information toboot itself. The DHCP server responds. The DHCP server must be able to determine whether the targetmachine is allowed to boot and the location of the initial boot loader binary, typically a file on a TFTPserver.
Caution Do not set up a second DHCP server if your network already has one. If multiple DHCP serversrespond to DHCP requests, machines can obtain incorrect or conflicting IP addresses, or can fail toreceive the proper boot information. Talk to a network administrator before setting up a DHCP server. Forsupport on configuring DHCP, contact your DHCP server vendor.
Many DHCP servers can PXE boot hosts. If you are using a version of DHCP for Microsoft Windows, seethe DHCP server documentation to determine how to pass the next-server and filename arguments tothe target machine.
Example of Booting Using TFTP with IPv4
This example shows how to configure an ISC DHCP server to boot ESXi using a TFTP server at IPv4address xxx.xxx.xxx.xxx.
#
# ISC DHCP server configuration file snippet. This is not a complete
# configuration file; see the ISC server documentation for details on
# how to configure the DHCP server.
#
allow booting;
allow bootp;
option client-system-arch code 93 = unsigned integer 16;
class "pxeclients" {
match if substring(option vendor-class-identifier, 0, 9) = "PXEClient";
next-server xxx.xxx.xxx.xxx;
if option client-system-arch = 00:07 or option client-system-arch = 00:09 {
filename = "mboot.efi";
} else {
filename = "pxelinux.0";
}
}
When a machine attempts to PXE boot, the DHCP server provides an IP address and the location of thepxelinux.0 or mboot.efi binary file on the TFTP server.
Example of Booting Using TFTP with IPv6
This example shows how to configure an ISC DHCPv6 server to boot ESXi using a TFTP server at IPv6address xxxx:xxxx:xxxx:xxxx::xxxx.
#
# ISC DHCPv6 server configuration file snippet. This is not a complete
# configuration file; see the ISC server documentation for details on
# how to configure the DHCP server.
#
VMware ESXi Upgrade
VMware, Inc. 28

allow booting;
allow bootp;
option dhcp6.bootfile-url code 59 = string;
option dhcp6.bootfile-url "tftp://[xxxx:xxxx:xxxx:xxxx::xxxx]/mboot.efi";
When a machine attempts to PXE boot, the DHCP server provides an IP address and the location of themboot.efi binary file on the TFTP server.
Example of Booting Using HTTP with IPv4
This example shows how to configure an ISC DHCP server to boot ESXi using a Web server at IPv4address xxx.xxx.xxx.xxx. The example uses gPXELINUX for legacy BIOS hosts and iPXE for UEFI hosts.
#
# ISC DHCPv6 server configuration file snippet. This is not a complete
# configuration file; see the ISC server documentation for details on
# how to configure the DHCP server.
#
allow booting;
allow bootp;
option client-system-arch code 93 = unsigned integer 16;
class "pxeclients" {
match if substring(option vendor-class-identifier, 0, 9) = "PXEClient";
next-server xxx.xxx.xxx.xxx;
if option client-system-arch = 00:07 or option client-system-arch = 00:09 {
if exists user-class and option user-class = "iPXE" {
# Instruct iPXE to load mboot.efi as secondary bootloader
filename = "mboot.efi";
} else {
# Load the snponly.efi configuration of iPXE as initial bootloader
filename = "snponly.efi";
}
} else {
filename "gpxelinux.0";
}
}
When a machine attempts to PXE boot, the DHCP server provides an IP address and the location of thegpxelinux.0 or snponly.efi binary file on the TFTP server. In the UEFI case, iPXE then asks theDHCP server for the next file to load, and this time the server returns mboot.efi as the filename.
Example of Booting Using HTTP with IPv6
This example shows how to configure an ISC DHCPv6 server to boot ESXi using a TFTP server at IPv6address xxxx:xxxx:xxxx:xxxx::xxxx.
#
# ISC DHCPv6 server configuration file snippet. This is not a complete
# configuration file; see the ISC server documentation for details on
# how to configure the DHCP server.
#
allow booting;
allow bootp;
VMware ESXi Upgrade
VMware, Inc. 29

option dhcp6.bootfile-url code 59 = string;
if exists user-class and option user-class = "iPXE" {
# Instruct iPXE to load mboot.efi as secondary bootloader
option dhcp6.bootfile-url "tftp://[xxxx:xxxx:xxxx:xxxx::xxxx]/mboot.efi";
} else {
# Load the snponly.efi configuration of iPXE as initial bootloader
option dhcp6.bootfile-url "tftp://[xxxx:xxxx:xxxx:xxxx::xxxx]/snponly.efi";
}
When a machine attempts to PXE boot, the DHCP server provides an IP address and the location of thesnponly.efi (iPXE) binary file on the TFTP server. iPXE then asks the DHCP server for the next file toload, and this time the server returns mboot.efi as the filename.
PXELINUX Configuration Files
You need a PXELINUX configuration file to boot the ESXi installer on a legacy BIOS system. Theconfiguration file defines the menu displayed to the target ESXi host as it boots up and contacts the TFTPserver for all SYSLINUX configurations, including PXELINUX and gPXELINUX.
This section gives general information about PXELINUX configuration files. For examples, see SampleDHCP Configurations.
For syntax details, see the SYSLINUX web site at http://www.syslinux.org/.
Required Files
In the PXE configuration file, you must include paths to the following files:
n mboot.c32 is the boot loader.
n boot.cfg is the boot loader configuration file.
See About the boot.cfg File
File Name for the PXE Configuration File
For the file name of the PXE configuration file, select one of the following options:
n 01-mac_address_of_target_ESXi_host. For example, 01-23-45-67-89-0a-bc
n The target ESXi host IP address in hexadecimal notation.
n default
The initial boot file, pxelinux.0 or gpxelinux.0, tries to load a PXE configuration file in the followingorder:
1 It tries with the MAC address of the target ESXi host, prefixed with its ARP type code, which is 01 forEthernet.
2 If that attempt fails, it tries with the hexadecimal notation of target ESXi system IP address.
3 Ultimately, it tries to load a file named default.
VMware ESXi Upgrade
VMware, Inc. 30

File Location for the PXE Configuration File
Save the file in /tftpboot/pxelinux.cfg/ on the TFTP server.
For example, you might save the file on the TFTP server at /tftpboot/pxelinux.cfg/01-00-21-5a-ce-40-f6. The MAC address of the network adapter on the target ESXi host is 00-21-5a-ce-40-f6.
PXE Boot Background Information
Understanding the PXE boot process can help you during troubleshooting.
TFTP Server
Trivial File Transfer Protocol (TFTP) is similar to the FTP service, and is typically used only for networkbooting systems or loading firmware on network devices such as routers. TFTP is available on Linux andWindows.
n Most Linux distributions include a copy of the tftp-hpa server. If you require a supported solution,purchase a supported TFTP server from your vendor of choice. You can also acquire a TFTP serverfrom one of the packaged appliances on the VMware Marketplace.
n If your TFTP server will run on a Microsoft Windows host, use tftpd32 version 2.11 or later. See http://tftpd32.jounin.net/.
SYSLINUX, PXELINUX, and gPXELINUX
If you are using PXE in a legacy BIOS environment, you need to understand the different bootenvironments.
n SYSLINUX is an open source boot environment for machines that run legacy BIOS firmware. TheESXi boot loader for BIOS systems, mbootc.32, runs as a SYSLINUX plugin. You can configureSYSLINUX to boot from several types of media, including disk, ISO image, and network. You can findthe SYSLINUX package at http://www.kernel.org/pub/linux/utils/boot/syslinux/.
n PXELINUX is a SYSXLINUX configuration for booting from a TFTP server according to the PXEstandard. If you use PXELINUX to boot the ESXi installer, the pxelinux.0 binary file, mboot.c32,the configuration file, the kernel, and other files are all transferred by TFTP.
n gPXELINUX is a hybrid configuration that includes both PXELINUX and gPXE and supports bootingfrom a Web server. gPXELINUX is part of the SYSLINUX package. If you use gPXELINUX to boot theESXi installer, only the gpxelinux.0 binary file, mboot.c32, and the configuration file are transferredvia TFTP. The remaining files are transferred via HTTP. HTTP is typically faster and more reliablethan TFTP, especially for transferring large amounts of data on a heavily loaded network.
Note VMware currently builds the mboot.c32 plugin to work with SYSLINUX version 3.86 and tests PXEbooting only with that version. Other versions are likely to be incompatible. This is not a statement oflimited support. For support of third-party agents that you use to set up your PXE booting infrastructure,contact the vendor.
VMware ESXi Upgrade
VMware, Inc. 31
UEFI PXE and iPXE
Most UEFI firmware natively includes PXE support that allows booting from a TFTP server. The firmwarecan directly load the ESXi boot loader for UEFI systems, mboot.efi. Additional software such asPXELINUX is not required.
iPXE can also be useful for UEFI systems that do not include PXE in firmware and for older UEFI systemswith bugs in their PXE support. For such cases you can try installing iPXE on a USB flash drive andbooting from there.
Note Apple Macintosh products do not include PXE boot support. They include support for networkbooting via an Apple-specific protocol instead.
Alternative Approaches to PXE Booting
Alternative approaches to PXE booting different software on different hosts are also possible, forexample:n Configuring the DHCP server to provide different initial boot loader filenames to different hosts
depending on MAC address or other criteria. See your DCHP server's documentation.
n Approaches using iPXE as the initial bootloader with an iPXE configuration file that selects the nextbootloader based on the MAC address or other criteria.
Installing and Booting ESXi with Software FCoEYou can install and boot ESXi from an FCoE LUN using VMware software FCoE adapters and networkadapters with FCoE offload capabilities. Your host does not require a dedicated FCoE HBA.
See the vSphere Storage documentation for information about installing and booting ESXi with softwareFCoE.
Using Remote Management ApplicationsRemote management applications allow you to install ESXi on servers that are in remote locations.
Remote management applications supported for installation include HP Integrated Lights-Out (iLO), DellRemote Access Card (DRAC), IBM management module (MM), and Remote Supervisor Adapter II (RSAII). For a list of currently supported server models and remote management firmware versions, see Supported Remote Management Server Models and Firmware Versions. For support on remotemanagement applications, contact the vendor.
You can use remote management applications to do both interactive and scripted installations of ESXiremotely.
If you use remote management applications to install ESXi, the virtual CD might encounter corruptionproblems with systems or networks operating at peak capacity. If a remote installation from an ISO imagefails, complete the installation from the physical CD media.
Download the ESXi InstallerDownload the installer for ESXi.
VMware ESXi Upgrade
VMware, Inc. 32

Prerequisites
Create a My VMware account at https://my.vmware.com/web/vmware/.
Procedure
1 Download the ESXi installer from the VMware Web site at https://my.vmware.com/web/vmware/downloads.
ESXi is listed under Datacenter & Cloud Infrastructure.
2 Confirm that the md5sum is correct.
See the VMware Web site topic Using MD5 Checksums at http://www.vmware.com/download/md5.html.
Upgrade Hosts InteractivelyTo upgrade ESXi 6.0 hosts or ESXi 6.5 hosts to ESXi 6.7, you can boot the ESXi installer from a CD,DVD, or USB flash drive.
Before upgrading, consider disconnecting the network storage. This action decreases the time it takes theinstaller to search for available disk drives. When you disconnect network storage, any files on thedisconnected disks are unavailable at installation. Do not disconnect a LUN that contains an existingESXi installation.
Prerequisites
n Verify that the ESXi installer ISO in one of the following locations.
n On CD or DVD. If you do not have the installation CD or DVD, you can create one. See Downloadand Burn the ESXi Installer ISO Image to a CD or DVD
n On a USB flash drive. See Format a USB Flash Drive to Boot the ESXi Installation or Upgrade
Note You can also use PXE to boot the ESXi installer to run an interactive installation or a scriptedinstallation. See PXE Booting the ESXi Installer.
n Verify that the server hardware clock is set to UTC. This setting is in the system BIOS.
n ESXi Embedded must not be on the host. ESXi Installable and ESXi Embedded cannot exist on thesame host.
n If you are upgrading an ESXi host, supported custom VIBs that are not included in the ESXi installerISO are migrated. See Upgrading Hosts That Have Third-Party Custom VIBs
n See your hardware vendor documentation for information about changing the boot order.
Procedure
1 Insert the ESXi installer CD or DVD in the CD-ROM or DVD-ROM drive, or attach the Installer USBflash drive and restart the machine.
2 Set the BIOS to boot from the CD-ROM device or the USB flash drive.
VMware ESXi Upgrade
VMware, Inc. 33

3 In the Select a Disk panel, select the drive on which to install or upgrade ESXi and press Enter.
Press F1 for information about the selected disk.
Note Do not rely on the disk order in the list to select a disk. The disk order is determined by theBIOS. On systems where drives are continuously being added and removed, they might be out oforder.
4 Upgrade or install ESXi if the installer finds an existing ESXi installation and VMFS datastore.
If an existing VMFS datastore cannot be preserved, you can choose only to install ESXi and overwritethe existing VMFS datastore, or to cancel the installation. If you choose to overwrite the existingVMFS datastore, back up the datastore first.
5 Press F11 to confirm and start the upgrade.
6 Remove the installation CD or DVD or USB flash drive when the upgrade is complete.
7 Press Enter to reboot the host.
8 Set the first boot device to be the drive which you selected previously when you upgraded ESXi.
Installing or Upgrading Hosts by Using a ScriptYou can quickly deploy ESXi hosts by using scripted, unattended installations or upgrades. Scriptedinstallations or upgrades provide an efficient way to deploy multiple hosts.
The installation or upgrade script contains the installation settings for ESXi. You can apply the script to allhosts that you want to have a similar configuration.
For a scripted installation or upgrade, you must use the supported commands to create a script. You canedit the script to change settings that are unique for each host.
The installation or upgrade script can reside in one of the following locations:
n FTP server
n HTTP/HTTPS server
n NFS server
n USB flash drive
n CD-ROM drive
Enter Boot Options to Start an Installation or Upgrade ScriptYou can start an installation or upgrade script by typing boot options at the ESXi installer boot commandline.
At boot time you might need to specify options to access the kickstart file. You can enter boot options bypressing Shift+O in the boot loader. For a PXE boot installation, you can pass options through thekernelopts line of the boot.cfg file. See About the boot.cfg File and PXE Booting the ESXi Installer.
VMware ESXi Upgrade
VMware, Inc. 34

To specify the location of the installation script, set the ks=filepath option, where filepath is indicatesthe location of your Kickstart file. Otherwise, a scripted installation or upgrade cannot start. Ifks=filepath is omitted, the text installer is run.
Supported boot options are listed in Boot Options.
Procedure
1 Start the host.
2 When the ESXi installer window appears, press Shift+O to edit boot options.
3 At the runweasel command prompt, typeks=location of installation script plus boot command-line options.
Example: Boot OptionYou type the following boot options:
ks=http://00.00.00.00/kickstart/ks-osdc-pdp101.cfg nameserver=00.00.0.0 ip=00.00.00.000
netmask=255.255.255.0 gateway=00.00.00.000
Boot OptionsWhen you perform a scripted installation, you might need to specify options at boot time to access thekickstart file.
Supported Boot OptionsTable 3‑7. Boot Options for ESXi Installation
Boot Option Description
BOOTIF=hwtype-MAC address Similar to the netdevice option, except in the PXELINUXformat as described in the IPAPPEND option under SYSLINUXat the syslinux.zytor.com site.
gateway=ip address Sets this network gateway as the default gateway to be used fordownloading the installation script and installation media.
VMware ESXi Upgrade
VMware, Inc. 35

Table 3‑7. Boot Options for ESXi Installation (Continued)
Boot Option Description
ip=ip address Sets up a static IP address to be used for downloading theinstallation script and the installation media. Note: thePXELINUX format for this option is also supported. See theIPAPPEND option under SYSLINUX at the syslinux.zytor.comsite.
ks=cdrom:/path Performs a scripted installation with the script at path, whichresides on the CD in the CD-ROM drive. Each CDROM ismounted and checked until the file that matches the path isfound.
Important If you have created an installer ISO image with acustom installation or upgrade script, you must use uppercasecharacters to provide the path of the script, for example,ks=cdrom:/KS_CUST.CFG.
ks=file://path Performs a scripted installation with the script at path.
ks=protocol://serverpath Performs a scripted installation with a script located on thenetwork at the given URL. protocol can be http, https, ftp, ornfs. An example using nfs protocol isks=nfs://host/porturl-path. The format of an NFS URL isspecified in RFC 2224.
ks=usb Performs a scripted installation, accessing the script from anattached USB drive. Searches for a file named ks.cfg. The filemust be located in the root directory of the drive. If multiple USBflash drives are attached, they are searched until the ks.cfg fileis found. Only FAT16 and FAT32 file systems are supported.
ks=usb:/path Performs a scripted installation with the script file at thespecified path, which resides on USB.
ksdevice=device Tries to use a network adapter device when looking for aninstallation script and installation media. Specify as a MACaddress, for example, 00:50:56:C0:00:01. This location can alsobe a vmnicNN name. If not specified and files need to beretrieved over the network, the installer defaults to the firstdiscovered network adapter that is plugged in.
nameserver=ip address Specifies a domain name server to be used for downloading theinstallation script and installation media.
netdevice=device Tries to use a network adapter device when looking for aninstallation script and installation media. Specify as a MACaddress, for example, 00:50:56:C0:00:01. This location can alsobe a vmnicNN name. If not specified and files need to beretrieved over the network, the installer defaults to the firstdiscovered network adapter that is plugged in.
netmask=subnet mask Specifies subnet mask for the network interface that downloadsthe installation script and the installation media.
vlanid=vlanid Configure the network card to be on the specified VLAN.
VMware ESXi Upgrade
VMware, Inc. 36

About Installation and Upgrade ScriptsThe installation/upgrade script is a text file, for example ks.cfg, that contains supported commands.
The command section of the script contains the ESXi installation options. This section is required andmust appear first in the script.
Locations Supported for Installation or Upgrade ScriptsIn scripted installations and upgrades, the ESXi installer can access the installation or upgrade script,also called the kickstart file, from several locations.
The following locations are supported for the installation or upgrade script:
n CD/DVD. See Create an Installer ISO Image with a Custom Installation or Upgrade Script.
n USB Flash drive. See Create a USB Flash Drive to Store the ESXi Installation Script or UpgradeScript.
n A network location accessible through the following protocols: NFS, HTTP, HTTPS, FTP
Path to the Installation or Upgrade ScriptYou can specify the path to an installation or upgrade script.
ks=http://XXX.XXX.XXX.XXX/kickstart/KS.CFG is the path to the ESXi installation script, whereXXX.XXX.XXX.XXX is the IP address of the machine where the script resides. See About Installation andUpgrade Scripts.
To start an installation script from an interactive installation, you enter the ks= option manually. See EnterBoot Options to Start an Installation or Upgrade Script.
Installation and Upgrade Script CommandsTo modify the default installation or upgrade script or to create your own script, use supported commands.Use supported commands in the installation script, which you specify with a boot command when youboot the installer.
To determine which disk to install or upgrade ESXi on, the installation script requires one of the followingcommands: install, upgrade, or installorupgrade. The install command creates the defaultpartitions, including a VMFS datastore that occupies all available space after the other partitions arecreated.
accepteula or vmaccepteula (required)
Accepts the ESXi license agreement.
VMware ESXi Upgrade
VMware, Inc. 37

clearpart (optional)
Clears any existing partitions on the disk. Requires the install command to be specified. Carefully editthe clearpart command in your existing scripts.
--drives= Remove partitions on the specified drives.
--alldrives Ignores the --drives= requirement and allows clearing of partitions onevery drive.
--ignoredrives= Removes partitions on all drives except those specified. Required unlessthe --drives= or --alldrives flag is specified.
--overwritevmfs Allows overwriting of VMFS partitions on the specified drives. By default,overwriting VMFS partitions is not allowed.
--firstdisk=
disk-type1
[disk-type2,...]
Partitions the first eligible disk found. By default, the eligible disks are set tothe following order:
1 Locally attached storage (local)
2 Network storage (remote)
3 USB disks (usb)
You can change the order of the disks by using a comma-separated listappended to the argument. If you provide a filter list, the default settings areoverridden. You can combine filters to specify a particular disk, includingesx for the first disk with ESXi installed on it, model and vendor information,or the name of the VMkernel device driver. For example, to prefer a diskwith the model name ST3120814A and any disk that uses the mptsasdriver rather than a normal local disk, the argument is--firstdisk=ST3120814A,mptsas,local. You can use localesx forlocal storage that contains ESXi image or remoteesx for remote storagethat contains ESXi image.
dryrun (optional)
Parses and checks the installation script. Does not perform the installation.
install
Specifies that this is a fresh installation. Replaces the deprecated autopart command used for ESXi 4.1scripted installations. Either the install, upgrade, or installorupgrade command is required todetermine which disk to install or upgrade ESXi on.
--disk= or --drive= Specifies the disk to partition. In the command --disk=diskname, thediskname can be in any of the forms shown in the following examples:
n Path: --disk=/vmfs/devices/disks/mpx.vmhba1:C0:T0:L0
n MPX name: --disk=mpx.vmhba1:C0:T0:L0
VMware ESXi Upgrade
VMware, Inc. 38

n VML name: --disk=vml.000000034211234
n vmkLUN UID: --disk=vmkLUN_UID
For accepted disk name formats, see Disk Device Names.
--firstdisk=
disk-type1,
[disk-type2,...]
Partitions the first eligible disk found. By default, the eligible disks are set tothe following order:
1 Locally attached storage (local)
2 Network storage (remote)
3 USB disks (usb)
You can change the order of the disks by using a comma-separated listappended to the argument. If you provide a filter list, the default settings areoverridden. You can combine filters to specify a particular disk, includingesx for the first disk with ESX installed on it, model and vendor information,or the name of the vmkernel device driver. For example, to prefer a diskwith the model name ST3120814A and any disk that uses the mptsasdriver rather than a normal local disk, the argument is--firstdisk=ST3120814A,mptsas,local. You can use localesx forlocal storage that contains ESXi image or remoteesx for remote storagethat contains ESXi image.
--ignoressd Excludes solid-state disks from eligibility for partitioning. This option can beused with the install command and the --firstdisk option. This optiontakes precedence over the --firstdisk option. This option is invalid withthe --drive or --disk options and with the upgrade andinstallorupgrade commands. See the vSphere Storage documentationfor more information about preventing SSD formatting during auto-partitioning.
--overwritevsan You must use the --overwritevsan option when you install ESXi on adisk, either SSD or HDD (magnetic), that is in a vSAN disk group. If youuse this option and no vSAN partition is on the selected disk, theinstallation will fail. When you install ESXi on a disk that is in vSAN diskgroup, the result depends on the disk that you select:
n If you select an SSD, the SSD and all underlying HDDs in the samedisk group will be wiped.
n If you select an HDD, and the disk group size is greater than two, onlythe selected HDD will be wiped.
VMware ESXi Upgrade
VMware, Inc. 39

n If you select an HDD disk, and the disk group size is two or less, theSSD and the selected HDD will be wiped.
For more information about managing vSAN disk groups, see the vSphereStorage documentation.
--overwritevmfs Required to overwrite an existing VMFS datastore on the disk beforeinstallation.
--preservevmfs Preserves an existing VMFS datastore on the disk during installation.
--novmfsondisk Prevents a VMFS partition from being created on this disk. Must be usedwith --overwritevmfs if a VMFS partition already exists on the disk.
installorupgrade
Either the install, upgrade, or installorupgrade command is required to determine which disk toinstall or upgrade ESXi on.
--disk= or --drive= Specifies the disk to partition. In the command --disk=diskname, thediskname can be in any of the forms shown in the following examples:
n Path: --disk=/vmfs/devices/disks/mpx.vmhba1:C0:T0:L0
n MPX name: --disk=mpx.vmhba1:C0:T0:L0
n VML name: --disk=vml.000000034211234
n vmkLUN UID: --disk=vmkLUN_UID
For accepted disk name formats, see Disk Device Names.
--firstdisk=
disk-type1,
[disk-type2,...]
Partitions the first eligible disk found. By default, the eligible disks are set tothe following order:
1 Locally attached storage (local)
2 Network storage (remote)
3 USB disks (usb)
You can change the order of the disks by using a comma-separated listappended to the argument. If you provide a filter list, the default settings areoverridden. You can combine filters to specify a particular disk, includingesx for the first disk with ESX installed on it, model and vendor information,or the name of the vmkernel device driver. For example, to prefer a diskwith the model name ST3120814A and any disk that uses the mptsasdriver rather than a normal local disk, the argument is--firstdisk=ST3120814A,mptsas,local. You can use localesx forlocal storage that contains ESXi image or remoteesx for remote storagethat contains ESXi image.
VMware ESXi Upgrade
VMware, Inc. 40

--overwritevsan You must use the --overwritevsan option when you install ESXi on adisk, either SSD or HDD (magnetic), that is in a vSAN disk group. If youuse this option and no vSAN partition is on the selected disk, theinstallation will fail. When you install ESXi on a disk that is in a vSAN diskgroup, the result depends on the disk that you select:
n If you select an SSD, the SSD and all underlying HDDs in the samedisk group will be wiped.
n If you select an HDD, and the disk group size is greater than two, onlythe selected HDD will be wiped.
n If you select an HDD disk, and the disk group size is two or less, theSSD and the selected HDD will be wiped.
For more information about managing vSAN disk groups, see the vSphereStorage documentation.
--overwritevmfs Install ESXi if a VMFS partition exists on the disk, but no ESX or ESXiinstallation exists. Unless this option is present, the installer will fail if aVMFS partition exists on the disk, but no ESX or ESXi installation exists.
keyboard (optional)
Sets the keyboard type for the system.
keyboardType Specifies the keyboard map for the selected keyboard type. keyboardTypemust be one of the following types.
n Belgian
n Brazilian
n Croatian
n Czechoslovakian
n Danish
n Estonian
n Finnish
n French
n German
n Greek
n Icelandic
n Italian
n Japanese
n Latin American
VMware ESXi Upgrade
VMware, Inc. 41

n Norwegian
n Polish
n Portuguese
n Russian
n Slovenian
n Spanish
n Swedish
n Swiss French
n Swiss German
n Turkish
n Ukrainian
n United Kingdom
n US Default
n US Dvorak
serialnum or vmserialnum (optional)
Deprecated in ESXi 5.0.x. Supported in ESXi 5.1 and later. Configures licensing. If not included, ESXiinstalls in evaluation mode.
--esx=<license-key> Specifies the vSphere license key to use. The format is 5 five-charactergroups (XXXXX-XXXXX-XXXXX-XXXXX-XXXXX).
network (optional)
Specifies a network address for the system.
--bootproto=[dhcp|static] Specifies whether to obtain the network settings from DHCP or set themmanually.
--device= Specifies either the MAC address of the network card or the device name,in the form vmnicNN, as in vmnic0. This options refers to the uplink devicefor the virtual switch.
--ip= Sets an IP address for the machine to be installed, in the formxxx.xxx.xxx.xxx. Required with the --bootproto=static option andignored otherwise.
--gateway= Designates the default gateway as an IP address, in the formxxx.xxx.xxx.xxx. Used with the --bootproto=static option.
VMware ESXi Upgrade
VMware, Inc. 42

--nameserver= Designates the primary name server as an IP address. Used with the --bootproto=static option. Omit this option if you do not intend to useDNS.
The --nameserver option can accept two IP addresses. For example: --nameserver="10.126.87.104[,10.126.87.120]"
--netmask= Specifies the subnet mask for the installed system, in the form255.xxx.xxx.xxx. Used with the --bootproto=static option.
--hostname= Specifies the host name for the installed system.
--vlanid= vlanid Specifies which VLAN the system is on. Used with either the--bootproto=dhcp or --bootproto=static option. Set to an integer from1 to 4096.
--addvmportgroup=(0|1) Specifies whether to add the VM Network port group, which is used byvirtual machines. The default value is 1.
paranoid (optional)
Causes warning messages to interrupt the installation. If you omit this command, warning messages arelogged.
part or partition (optional)
Creates an additional VMFS datastore on the system. Only one datastore per disk can be created.Cannot be used on the same disk as the install command. Only one partition can be specified per diskand it can only be a VMFS partition.
datastore name Specifies where the partition is to be mounted.
--ondisk= or --ondrive= Specifies the disk or drive where the partition is created.
--firstdisk=
disk-type1,
[disk-type2,...]
Partitions the first eligible disk found. By default, the eligible disks are set tothe following order:
1 Locally attached storage (local)
2 Network storage (remote)
3 USB disks (usb)
You can change the order of the disks by using a comma-separated listappended to the argument. If you provide a filter list, the default settings areoverridden. You can combine filters to specify a particular disk, includingesx for the first disk with ESX installed on it, model and vendor information,or the name of the vmkernel device driver. For example, to prefer a diskwith the model name ST3120814A and any disk that uses the mptsas
VMware ESXi Upgrade
VMware, Inc. 43

driver rather than a normal local disk, the argument is--firstdisk=ST3120814A,mptsas,local. You can use localesx forlocal storage that contains ESXi image or remoteesx for remote storagethat contains ESXi image.
reboot (optional)
Reboots the machine after the scripted installation is complete.
<--noeject> The CD is not ejected after the installation.
rootpw (required)
Sets the root password for the system.
--iscrypted Specifies that the password is encrypted.
password Specifies the password value.
upgrade
Either the install, upgrade, or installorupgrade command is required to determine which disk toinstall or upgrade ESXi on.
--disk= or --drive= Specifies the disk to partition. In the command --disk=diskname, thediskname can be in any of the forms shown in the following examples:
n Path: --disk=/vmfs/devices/disks/mpx.vmhba1:C0:T0:L0
n MPX name: --disk=mpx.vmhba1:C0:T0:L0
n VML name: --disk=vml.000000034211234
n vmkLUN UID:--disk=vmkLUN_UID
For accepted disk name formats, see Disk Device Names.
--firstdisk=
disk-type1,
[disk-type2,...]
Partitions the first eligible disk found. By default, the eligible disks are set tothe following order:
1 Locally attached storage (local)
2 Network storage (remote)
3 USB disks (usb)
You can change the order of the disks by using a comma-separated listappended to the argument. If you provide a filter list, the default settings areoverridden. You can combine filters to specify a particular disk, includingesx for the first disk with ESX installed on it, model and vendor information,or the name of the vmkernel device driver. For example, to prefer a diskwith the model name ST3120814A and any disk that uses the mptsas
VMware ESXi Upgrade
VMware, Inc. 44

driver rather than a normal local disk, the argument is--firstdisk=ST3120814A,mptsas,local. You can use localesx forlocal storage that contains ESXi image or remoteesx for remote storagethat contains ESXi image.
%include or include (optional)
Specifies another installation script to parse. This command is treated similarly to a multiline command,but takes only one argument.
filename For example: %include part.cfg
%pre (optional)
Specifies a script to run before the kickstart configuration is evaluated. For example, you can use it togenerate files for the kickstart file to include.
--interpreter
=[python|busybox]
Specifies an interpreter to use. The default is busybox.
%post (optional)
Runs the specified script after package installation is complete. If you specify multiple %post sections,they run in the order that they appear in the installation script.
--interpreter
=[python|busybox]
Specifies an interpreter to use. The default is busybox.
--timeout=secs Specifies a timeout for running the script. If the script is not finished whenthe timeout expires, the script is forcefully terminated.
--ignorefailure
=[true|false]
If true, the installation is considered a success even if the %post scriptterminated with an error.
%firstboot
Creates an init script that runs only during the first boot. The script has no effect on subsequent boots. Ifmultiple %firstboot sections are specified, they run in the order that they appear in the kickstart file.
Note You cannot check the semantics of %firstboot scripts until the system is booting for the first time.A %firstboot script might contain potentially catastrophic errors that are not exposed until after theinstallation is complete.
Important The %firstboot script does not run, if secure boot is enabled on the ESXi host.
--interpreter Specifies an interpreter to use. The default is busybox.
VMware ESXi Upgrade
VMware, Inc. 45

=[python|busybox]
Note You cannot check the semantics of the %firstboot script until the system boots for the first time.If the script contains errors, they are not exposed until after the installation is complete.
Disk Device NamesThe install, upgrade, and installorupgrade installation script commands require the use of diskdevice names.
Table 3‑8. Disk Device Names
Format Example Description
VML vml.00025261 The device name as reported by theVMkernel
MPX mpx.vmhba0:C0:T0:L0 The device name
About the boot.cfg FileThe boot loader configuration file boot.cfg specifies the kernel, the kernel options, and the boot modulesthat the mboot.c32 or mboot.efi boot loader uses in an ESXi installation.
The boot.cfg file is provided in the ESXi installer. You can modify the kernelopt line of the boot.cfgfile to specify the location of an installation script or to pass other boot options.
The boot.cfg file has the following syntax:
# boot.cfg -- mboot configuration file
#
# Any line preceded with '#' is a comment.
title=STRING
prefix=DIRPATH
kernel=FILEPATH
kernelopt=STRING
modules=FILEPATH1 --- FILEPATH2... --- FILEPATHn
# Any other line must remain unchanged.
The commands in boot.cfg configure the boot loader.
Table 3‑9. Commands in boot.cfg .
Command Description
title=STRING Sets the boot loader title to STRING.
prefix=STRING (Optional) AddsDIRPATH/ in front of every FILEPATH in thekernel= and modules= commands that do not already startwith / or with http://.
kernel=FILEPATH Sets the kernel path to FILEPATH.
VMware ESXi Upgrade
VMware, Inc. 46

Table 3‑9. Commands in boot.cfg . (Continued)
Command Description
kernelopt=STRING Appends STRING to the kernel boot options.
modules=FILEPATH1 --- FILEPATH2... --- FILEPATHn Lists the modules to be loaded, separated by three hyphens(---).
See Create an Installer ISO Image with a Custom Installation or Upgrade Script and PXE Booting theESXi Installer.
Install or Upgrade ESXi from a CD or DVD by Using a ScriptYou can install or upgrade ESXi from a CD-ROM or DVD-ROM drive by using a script that specifies theinstallation or upgrade options.
You can start the installation or upgrade script by entering a boot option when you start the host. You canalso create an installer ISO image that includes the installation script. With an installer ISO image, youcan perform a scripted, unattended installation when you boot the resulting installer ISO image. See Create an Installer ISO Image with a Custom Installation or Upgrade Script.
Prerequisites
Before you run the scripted installation or upgrade, verify that the following prerequisites are met:
n The system on which you are installing or upgrading meets the hardware requirements. See ESXiHardware Requirements.
n You have the ESXi installer ISO on an installation CD or DVD . See Download and Burn the ESXiInstaller ISO Image to a CD or DVD.
n The default installation or upgrade script (ks.cfg) or a custom installation or upgrade script isaccessible to the system. See About Installation and Upgrade Scripts.
n You have selected a boot command to run the scripted installation or upgrade. See Enter BootOptions to Start an Installation or Upgrade Script. For a complete list of boot commands, see BootOptions.
Procedure
1 Boot the ESXi installer from the local CD-ROM or DVD-ROM drive.
VMware ESXi Upgrade
VMware, Inc. 47

2 When the ESXi installer window appears, press Shift+O to edit boot options.
3 Type a boot option that calls the default installation or upgrade script or an installation or upgradescript file that you created.
The boot option has the form ks=.
4 Press Enter.
The installation, upgrade, or migration runs, using the options that you specified.
Install or Upgrade ESXi from a USB Flash Drive by Using a ScriptYou can install or upgrade ESXi from a USB flash drive by using a script that specifies the installation orupgrade options.
Supported boot options are listed in Boot Options.
Prerequisites
Before running the scripted installation or upgrade, verify that the following prerequisites are met:
n The system that you are installing or upgrading to ESXi meets the hardware requirements for theinstallation or upgrade. See ESXi Hardware Requirements.
n You have the ESXi installer ISO on a bootable USB flash drive. See Format a USB Flash Drive toBoot the ESXi Installation or Upgrade.
n The default installation or upgrade script (ks.cfg) or a custom installation or upgrade script isaccessible to the system. See About Installation and Upgrade Scripts.
n You have selected a boot option to run the scripted installation, upgrade, or migration. See Enter BootOptions to Start an Installation or Upgrade Script.
Procedure
1 Boot the ESXi installer from the USB flash drive.
VMware ESXi Upgrade
VMware, Inc. 48

2 When the ESXi installer window appears, press Shift+O to edit boot options.
3 Type a boot option that calls the default installation or upgrade script or an installation or upgradescript file that you created.
The boot option has the form ks=.
4 Press Enter.
The installation, upgrade, or migration runs, using the options that you specified.
Performing a Scripted Installation or Upgrade of ESXi by UsingPXE to Boot the InstallerESXi 6.7 provides many options for using PXE to boot the installer and using an installation or upgradescript.
n For information about setting up a PXE infrastructure, see PXE Booting the ESXi Installer.
n For information about creating and locating an installation script, see About Installation and UpgradeScripts.
n For specific procedures to use PXE to boot the ESXi installer and use an installation script, see oneof the following topics:n PXE Boot the ESXi Installer Using a Web Server
n PXE Boot the ESXi Installer Using TFTP
n For information about using vSphere Auto Deploy to perform a scripted upgrade by using PXE toboot, see Chapter 4 Using vSphere Auto Deploy to Reprovision Hosts.
PXE Booting the ESXi InstallerYou can use the preboot execution environment (PXE) to boot a host. Starting with vSphere 6.0, you canPXE boot the ESXi installer from a network interface on hosts with legacy BIOS or using UEFI.
ESXi is distributed in an ISO format that is designed to install to flash memory or to a local hard drive. Youcan extract the files and boot by using PXE.
PXE uses Dynamic Host Configuration Protocol (DHCP) and Trivial File Transfer Protocol (TFTP) to bootan operating system over a network.
VMware ESXi Upgrade
VMware, Inc. 49

PXE booting requires some network infrastructure and a machine with a PXE-capable network adapter.Most machines that can run ESXi have network adapters that can PXE boot.
Note PXE booting with legacy BIOS firmware is possible only over IPv4. PXE booting with UEFIfirmware is possible with either IPv4 or IPv6.
Overview of the PXE Boot Installation ProcessSome of the details of the PXE boot process vary depending on whether the target host is using legacyBIOS or UEFI firmware, and whether the boot process uses TFTP only or TFTP plus HTTP.
When you boot the target host, it interacts with the different servers in the environment to get the networkadapter, boot loader, kernel, IP address for the kernel, and finally the installation script. When allcomponents are in place, installation starts, as shown in the following illustration.
Figure 3‑1. Overview of PXE Boot Installation Process
ESXi target host
DHCP server
TFTP server
Web server orTFTP server
DHCP server
script depot
ESXi host
Installerstarts
TCP
ks.cfg
Give me aninstallation script
UDP
IP
Give me an IPfor the kernel
TCP or UDP
kernel
Give methe kernel
UDP
mboot and supporting files
Give me thenetwork boot loader
UDP
IP & TFTP server
Give me anIP for the
network adapter
VMware ESXi Upgrade
VMware, Inc. 50

The interaction between the ESXi host and other servers proceeds as follows:
1 The user boots the target ESXi host.
2 The target ESXi host makes a DHCP request.
3 The DHCP server responds with the IP information and the location of the TFTP server.
4 The ESXi host contacts the TFTP server and requests the file that the DHCP server specified.
5 The TFTP server sends the network boot loader, and the ESXi host executes it. The initial boot loadermight load additional boot loader components from the TFTP server.
6 The boot loader searches for a configuration file on the TFTP server, downloads the kernel and otherESXi components from the HTTP server or the TFTP server and boots the kernel on the ESXi host.
7 The installer runs interactively or using a kickstart script, as specified in the configuration file.
PXE Boot the ESXi Installer Using TFTPYou can use a TFTP server to PXE boot the ESXi installer. The process differs slightly depending onwhether you use UEFI or boot from a legacy BIOS. Because most environments include ESXi hosts thatsupport UEFI boot and hosts that support only legacy BIOS, this topic discusses prerequisites and stepsfor both types of hosts.
n For legacy BIOS machines, the procedure supports booting multiple different versions of the ESXiinstaller by using the same pxelinux.0 or gpxelinux.0 initial boot loader for all target machines,but potentially different PXELINUX configuration files depending on the target machine's MACaddress.
n For UEFI machines, the procedure supports booting multiple different versions of the ESXi installer byusing the same mboot.efi initial boot loader for all target machines, but potentially differentboot.cfg files depending on the target machine's MAC address.
Prerequisites
Verify that your environment meets the following prerequisites.
n ESXi installer ISO image, downloaded from the VMware Web site.
n Target host with a hardware configuration that is supported for your version of ESXi. See the VMwareCompatibility Guide.
n Network adapter with PXE support on the target ESXi host.
n DHCP server configured for PXE booting. See Sample DHCP Configurations.
n TFTP server.
n Network security policies to allow TFTP traffic (UDP port 69).
n For legacy BIOS, you can use only IPv4 networking. For UEFI PXE boot, you can use IPv4 or IPv6networking.
n (Optional) Installation script (kickstart file).
VMware ESXi Upgrade
VMware, Inc. 51
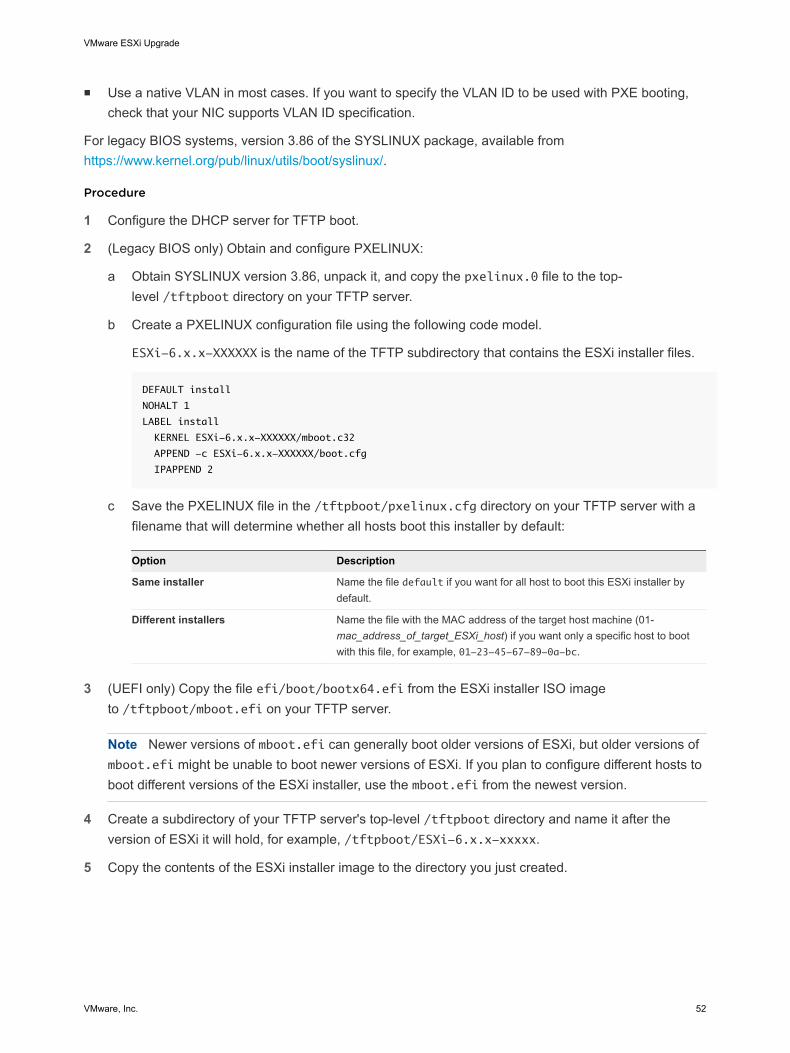
n Use a native VLAN in most cases. If you want to specify the VLAN ID to be used with PXE booting,check that your NIC supports VLAN ID specification.
For legacy BIOS systems, version 3.86 of the SYSLINUX package, available from https://www.kernel.org/pub/linux/utils/boot/syslinux/.
Procedure
1 Configure the DHCP server for TFTP boot.
2 (Legacy BIOS only) Obtain and configure PXELINUX:
a Obtain SYSLINUX version 3.86, unpack it, and copy the pxelinux.0 file to the top-level /tftpboot directory on your TFTP server.
b Create a PXELINUX configuration file using the following code model.
ESXi-6.x.x-XXXXXX is the name of the TFTP subdirectory that contains the ESXi installer files.
DEFAULT install
NOHALT 1
LABEL install
KERNEL ESXi-6.x.x-XXXXXX/mboot.c32
APPEND -c ESXi-6.x.x-XXXXXX/boot.cfg
IPAPPEND 2
c Save the PXELINUX file in the /tftpboot/pxelinux.cfg directory on your TFTP server with afilename that will determine whether all hosts boot this installer by default:
Option Description
Same installer Name the file default if you want for all host to boot this ESXi installer bydefault.
Different installers Name the file with the MAC address of the target host machine (01-mac_address_of_target_ESXi_host) if you want only a specific host to bootwith this file, for example, 01-23-45-67-89-0a-bc.
3 (UEFI only) Copy the file efi/boot/bootx64.efi from the ESXi installer ISO image
to /tftpboot/mboot.efi on your TFTP server.
Note Newer versions of mboot.efi can generally boot older versions of ESXi, but older versions ofmboot.efi might be unable to boot newer versions of ESXi. If you plan to configure different hosts toboot different versions of the ESXi installer, use the mboot.efi from the newest version.
4 Create a subdirectory of your TFTP server's top-level /tftpboot directory and name it after theversion of ESXi it will hold, for example, /tftpboot/ESXi-6.x.x-xxxxx.
5 Copy the contents of the ESXi installer image to the directory you just created.
VMware ESXi Upgrade
VMware, Inc. 52

6 Modify the boot.cfg file
a Add the following line:
prefix=ESXi-6.x.x-xxxxxx
Here, ESXi-6.x.x-xxxxxx is the pathname of the installer files relative to the TFTP server's rootdirectory.
b If the filenames in the kernel= and modules= lines begin with a forward slash (/) character,delete that character.
7 (Optional) For a scripted installation, in the boot.cfg file, add the kernelopt option to the line afterthe kernel command, to specify the location of the installation script.
Use the following code as a model, where XXX.XXX.XXX.XXX is the IP address of the server wherethe installation script resides, and esxi_ksFiles is the directory that contains the ks.cfg file.
kernelopt=ks=http://XXX.XXX.XXX.XXX/esxi_ksFiles/ks.cfg
8 (UEFI only) Specify whether you want for all UEFI hosts to boot the same installer.
Option Description
Same installer Copy or link the boot.cfg file to /tftpboot/boot.cfg
Different installers a Create a subdirectory of /tftpboot named after the MAC address of thetarget host machine (01-mac_address_of_target_ESXi_host), for example,01-23-45-67-89-0a-bc.
b Place a copy of (or a link to) the host's boot.cfg file in that directory, forexample, /tftpboot/01-23-45-67-89-0a-bc/boot.cfg.
PXE Boot the ESXi Installer Using a Web ServerYou can use a Web server to PXE boot the ESXi installer. Because most environments include ESXihosts that support UEFI boot and hosts that support only legacy BIOS, this topic discusses prerequisitesand steps for both types of hosts.
n For legacy BIOS machines, the procedure supports booting multiple different versions of the ESXiinstaller by using the same pxelinux.0 or gpxelinux.0 initial boot loader for all target machines,but potentially different PXELINUX configuration files depending on the target machine's MACaddress.
n For UEFI machines, the procedure supports booting multiple different versions of the ESXi installer byusing the same mboot.efi initial boot loader for all target machines, but potentially differentboot.cfg files depending on the target machine's MAC address.
Prerequisites
Verify that your environment has the following components:
n ESXi installer ISO image, downloaded from the VMware Web site.
VMware ESXi Upgrade
VMware, Inc. 53

n Target host with a hardware configuration that is supported for your version of ESXi. See the VMwareCompatibility Guide.
n Network adapter with PXE support on the target ESXi host.
n DHCP server configured for PXE booting. See Sample DHCP Configurations.
n TFTP server.
n Network security policies to allow TFTP traffic (UDP port 69).
n For legacy BIOS, you can use only IPv4 networking. For UEFI PXE boot, you can use IPv4 or IPv6networking.
n (Optional) Installation script (kickstart file).
n Use a native VLAN in most cases. If you want to specify the VLAN ID to be used with PXE booting,check that your NIC supports VLAN ID specification.
Verify that your environment also meets the following prerequisites required for PXE boot using a WebServer:
n Verify that the HTTP Web server is accessible by your target ESXi hosts.
n (UEFI) Obtain iPXE, available at http://ipxe.org.
n (Legacy BIOS) Obtain version 3.86 of the SYSLINUX package, available from https://www.kernel.org/pub/linux/utils/boot/syslinux/.
Procedure
1 Configure the DHCP server for HTTP boot.
2 (UEFI only) Obtain and configure iPXE:
a Obtain the iPXE source code, as described at http://ipxe.org/download.
b Follow the instructions on that page, but use the following make command:
make bin-x86_64-efi/snponly.efi
c Copy the resulting file snponly.efi to /tftpboot directory on your TFTP server.
3 (UEFI only) Copy the file efi/boot/bootx64.efi from the ESXi installer ISO imageto /tftpboot/mboot.efi on your TFTP server.
Note Newer versions of mboot.efi can generally boot older versions of ESXi, but older versions ofmboot.efi might be unable to boot newer versions of ESXi. If you plan to configure different hosts toboot different versions of the ESXi installer, use the mboot.efi from the newest version.
VMware ESXi Upgrade
VMware, Inc. 54

4 (Legacy BIOS only) Obtain and configure PXELINUX:
a Obtain SYSLINUX version 3.86, unpack it, and copy the gpxelinux.0 file to the top-level /tftpboot directory on your TFTP server.
b Create a PXELINUX configuration file using the following code model.
ESXi-6.x.x-XXXXXX is the name of the TFTP subdirectory that contains the ESXi installer files.
DEFAULT install
NOHALT 1
LABEL install
KERNEL ESXi-6.x.x-XXXXXX/mboot.c32
APPEND -c ESXi-6.x.x-XXXXXX/boot.cfg
IPAPPEND 2
c Save the PXELINUX file in the /tftpboot/pxelinux.cfg directory on your TFTP server with afilename that will determine whether all hosts boot this installer by default:
Option Description
Same installer Name the file default if you want for all host to boot this ESXi installer bydefault.
Different installers Name the file with the MAC address of the target host machine (01-mac_address_of_target_ESXi_host) if you want only a specific host to bootwith this file, for example, 01-23-45-67-89-0a-bc.
5 Create a directory on your HTTP server named for the version of ESXi it will hold, for
example, /var/www/html/ESXi-6.x.x-XXXXXX.
6 Copy the contents of the ESXi installer image to the directory you just created.
7 Modify the boot.cfg file
a Add the following line:
prefix=http://XXX.XXX.XXX.XXX/ESXi-6.x.x-XXXXXX
where http://XXX.XXX.XXX.XXX/ESXi-6.x.x-XXXXXX is the location of the installer files onthe HTTP server.
b If the filenames in the kernel= and modules= lines begin with a forward slash (/) character,delete that character.
8 (Optional) For a scripted installation, in the boot.cfg file, add the kernelopt option to the line afterthe kernel command, to specify the location of the installation script.
Use the following code as a model, where XXX.XXX.XXX.XXX is the IP address of the server wherethe installation script resides, and esxi_ksFiles is the directory that contains the ks.cfg file.
kernelopt=ks=http://XXX.XXX.XXX.XXX/esxi_ksFiles/ks.cfg
VMware ESXi Upgrade
VMware, Inc. 55

9 (UEFI only) Specify whether you want for all UEFI hosts to boot the same installer.
Option Description
Same installer Copy or link the boot.cfg file to /tftpboot/boot.cfg
Different installers a Create a subdirectory of /tftpboot named after the MAC address of thetarget host machine (01-mac_address_of_target_ESXi_host), for example,01-23-45-67-89-0a-bc.
b Place a copy of (or a link to) the host's boot.cfg file in that directory, forexample, /tftpboot/01-23-45-67-89-0a-bc/boot.cfg.
Upgrading Hosts by Using esxcli CommandsBy using vSphere CLI, you can upgrade a ESXi 6.0 host or ESXi 6.5 host to version 6.7 and update orpatch ESXi 6.0, ESXi 6.5, and ESXi 6.7 hosts.
To use esxcli commands for vCLI , you must install vSphere CLI (vCLI). For more information aboutinstalling and using the vCLI, see the following documents:
n Getting Started with vSphere Command-Line Interfaces
n vSphere Command-Line Interface Concepts and Examples
n vSphere Command-Line Interface Reference is a reference to vicfg- and related vCLI commands.
Note If you press Ctrl+C while an esxcli command is running, the command-line interface exits to anew prompt without displaying a message. However, the command continues to run to completion.
For ESXi hosts deployed with vSphere Auto Deploy, the tools VIB must be part of the base booting imageused for the initial Auto Deploy installation. The tools VIB cannot be added separately later.
VIBs, Image Profiles, and Software DepotsUpgrading ESXi with esxcli commands requires an understanding of VIBs, image profiles, and softwaredepots.
VMware ESXi Upgrade
VMware, Inc. 56

The following technical terms are used throughout the vSphere documentation set in discussions ofinstallation and upgrade tasks.
VIB A VIB is an ESXi software package. VMware and its partners packagesolutions, drivers, CIM providers, and applications that extend the ESXiplatform as VIBs. VIBs are available in software depots. You can use VIBsto create and customize ISO images or to upgrade ESXi hosts by installingVIBs asynchronously onto the hosts.
Image Profile An image profile defines an ESXi image and consists of VIBs. An imageprofile always includes a base VIB, and might include more VIBs. Youexamine and define an image profile by using vSphere ESXi Image Builder.
Software Depot A software depot is a collection of VIBs and image profiles. The softwaredepot is a hierarchy of files and folders and can be available through anHTTP URL (online depot) or a ZIP file (offline depot). VMware and VMwarepartners make depots available. Companies with large VMwareinstallations might create internal depots to provision ESXi hosts withvSphere Auto Deploy, or to export an ISO for ESXi installation.
Understanding Acceptance Levels for VIBS and HostsEach VIB is released with an acceptance level that cannot be changed. The host acceptance leveldetermines which VIBs can be installed to a host.
The acceptance level applies to individual VIBs installed by using the esxcli software vib installand esxcli software vib update commands, to VIBs installed using vSphere Update Manager, andto VIBs in image profiles.
The acceptance level of all VIBs on a host must be at least as high as the host acceptance level. Forexample, if the host acceptance level is VMwareAccepted, you can install VIBs with acceptance levels ofVMwareCertified and VMwareAccepted, but you cannot install VIBs with acceptance levels ofPartnerSupported or CommunitySupported. To install a VIB with a less restrictive acceptance level thanthat of the host, you can change the acceptance level of the host by using the vSphere Web Client or byrunning esxcli software acceptance commands.
Setting host acceptance levels is a best practice that allows you to specify which VIBs can be installed ona host and used with an image profile, and the level of support you can expect for a VIB. For example,you would probably set a more restrictive acceptance level for hosts in a production environment than forhosts in a testing environment.
VMware ESXi Upgrade
VMware, Inc. 57

VMware supports the following acceptance levels.
VMwareCertified The VMwareCertified acceptance level has the most stringentrequirements. VIBs with this level go through thorough testing fullyequivalent to VMware in-house Quality Assurance testing for the sametechnology. Today, only I/O Vendor Program (IOVP) program drivers arepublished at this level. VMware takes support calls for VIBs with thisacceptance level.
VMwareAccepted VIBs with this acceptance level go through verification testing, but the testsdo not fully test every function of the software. The partner runs the testsand VMware verifies the result. Today, CIM providers and PSA plug-ins areamong the VIBs published at this level. VMware directs support calls forVIBs with this acceptance level to the partner's support organization.
PartnerSupported VIBs with the PartnerSupported acceptance level are published by apartner that VMware trusts. The partner performs all testing. VMware doesnot verify the results. This level is used for a new or nonmainstreamtechnology that partners want to enable for VMware systems. Today, driverVIB technologies such as Infiniband, ATAoE, and SSD are at this level withnonstandard hardware drivers. VMware directs support calls for VIBs withthis acceptance level to the partner's support organization.
CommunitySupported The CommunitySupported acceptance level is for VIBs created byindividuals or companies outside of VMware partner programs. VIBs at thislevel have not gone through any VMware-approved testing program andare not supported by VMware Technical Support or by a VMware partner.
Table 3‑10. VIB Acceptance Levels Required to Install on Hosts
Host AcceptanceLevel VMwareCertified VIB VMwareAccepted VIB PartnerSupported VIB
CommunitySupported VIB
VMwareCertified x
VMwareAccepted x x
PartnerSupported x x x
CommunitySupported x x x x
Match a Host Acceptance Level with an Update Acceptance LevelYou can change the host acceptance level to match the acceptance level for a VIB or image profile thatyou want to install. The acceptance level of all VIBs on a host must be at least as high as the hostacceptance level.
Use this procedure to determine the acceptance levels of the host and the VIB or image profile to install,and to change the acceptance level of the host, if necessary for the update.
VMware ESXi Upgrade
VMware, Inc. 58

When you specify a target server by using --server=server_name, the server prompts you for a username and password. Other connection options, such as a configuration file or session file, are supported.For a list of connection options, see Getting Started with vSphere Command-Line Interfaces, or runesxcli --help at the vCLI command prompt.
Prerequisites
Install vCLI or deploy the vSphere Management Assistant (vMA) virtual machine. See Getting Started withvSphere Command-Line Interfaces. For troubleshooting, run esxcli commands in the ESXi Shell.
Procedure
1 Retrieve the acceptance level for the VIB or image profile.
Option Description
List information for all VIBs esxcli --server=server_name software sources vib list --
depot=depot_URL
List information for a specified VIB esxcli --server=server_name software sources vib list --
viburl=vib_URL
List information for all image profiles esxcli --server=server_name software sources profile list --
depot=depot_URL
List information for a specified imageprofile
esxcli --server=server_name software sources profile get --
depot=depot_URL --profile=profile_name
2 Retrieve the host acceptance level.
esxcli --server=server_name software acceptance get
3 (Optional) If the acceptance level of the VIB is more restrictive than the acceptance level of the host,change the acceptance level of the host.
esxcli --server=server_name software acceptance set --level=acceptance_level
The acceptance_level can be VMwareCertified, VMwareAccepted, PartnerSupported, orCommunitySupported. The values for acceptance_level are case-sensitive.
Note You can use the --force option for the esxcli software vib or esxcli softwareprofile command to add a VIB or image profile with a lower acceptance level than the host. Awarning will appear. Because your setup is no longer consistent, the warning is repeated when youinstall VIBs, remove VIBs, and perform certain other operations on the host.
Determine Whether an Update Requires the Host to Be inMaintenance Mode or to Be RebootedVIBs that you can install with live install do not require the host to be rebooted, but might require the hostto be placed in maintenance mode. Other VIBs and profiles might require the host to be rebooted afterthe installation or update.
VMware ESXi Upgrade
VMware, Inc. 59

When you specify a target server by using --server=server_name, the server prompts you for a username and password. Other connection options, such as a configuration file or session file, are supported.For a list of connection options, see Getting Started with vSphere Command-Line Interfaces, or runesxcli --help at the vCLI command prompt.
Prerequisites
Install vCLI or deploy the vSphere Management Assistant (vMA) virtual machine. See Getting Started withvSphere Command-Line Interfaces. For troubleshooting, run esxcli commands in the ESXi Shell.
Procedure
1 Check whether the VIB or image profile that you want to install requires the host to be placed inmaintenance mode or to be rebooted after the installation or update.
Run one of the following commands.
Option Description
Check the VIB esxcli --server=server_name software sources vib get -v
absolute_path_to_vib
Check the VIBs in a depot esxcli --server=server_name software sources vib get --
depot=depot_name
Check the image profile in a depot esxcli --server=server_name software sources profile get --
depot=depot_name
2 Review the return values.
The return values, which are read from the VIB metadata, indicate whether the host must be inmaintenance mode before installing the VIB or image profile, and whether installing the VIB or profilerequires the host to be rebooted.
Note vSphere Update Manager relies on the esxupdate/esxcli scan result to determine whethermaintenance mode is required or not. When you install a VIB on a live system, if the value for Live-Install-Allowed is set to false, the installation result will instruct Update Manager to reboot thehost. When you remove a VIB from a live system, if the value for Live-Remove-Allowed is set tofalse, the removal result will instruct Update Manager to reboot the host. In either case, during thereboot, Update Manager will automatically put the host into maintenance mode.
What to do next
If necessary, place the host in maintenance mode. See Place a Host in Maintenance Mode. If a reboot isrequired, and if the host belongs to a VMware HA cluster, remove the host from the cluster or disable HAon the cluster before the installation or update.
Place a Host in Maintenance ModeSome installation and update operations that use live install require the host to be in maintenance mode.
VMware ESXi Upgrade
VMware, Inc. 60

To determine whether an upgrade operation requires the host to be in maintenance mode, see DetermineWhether an Update Requires the Host to Be in Maintenance Mode or to Be Rebooted
Note If the host is a member of a vSAN cluster, and any virtual machine object on the host uses the"Number of failures to tolerate=0" setting in its storage policy, the host might experience unusual delayswhen entering maintenance mode. The delay occurs because vSAN has to evacuate this object from thehost for the maintenance operation to complete successfully.
When you specify a target server by using --server=server_name, the server prompts you for a username and password. Other connection options, such as a configuration file or session file, are supported.For a list of connection options, see Getting Started with vSphere Command-Line Interfaces, or runesxcli --help at the vCLI command prompt.
Prerequisites
Install vCLI or deploy the vSphere Management Assistant (vMA) virtual machine. See Getting Started withvSphere Command-Line Interfaces. For troubleshooting, run esxcli commands in the ESXi Shell.
Procedure
1 Check whether the host is in maintenance mode.
vicfg-hostops --server=server_name --operation info
2 Power off each virtual machine running on the ESXi host.
Option Command
To shut down the guest operatingsystem and then power off the virtualmachine
vmware-cmd --server=server_name path_to_vm stop soft
To force the power off operation vmware-cmd --server=server_name path_to_vm stop hard
Alternatively, to avoid powering off virtual machines, you can migrate them to another host. See thetopic Migrating Virtual Machines in the vCenter Server and Host Management documentation.
3 Place the host in maintenance mode.
vicfg-hostops --server=server_name --operation enter
4 Verify that the host is in maintenance mode.
vicfg-hostops --server=server_name --operation info
Update a Host with Individual VIBsYou can update a host with VIBs stored in a software depot that is accessible through a URL or in anoffline ZIP depot.
Important If you are updating ESXi from a zip bundle in a VMware-supplied depot, either online fromthe VMware Web site or downloaded locally, VMware supports only the update method specified forVMware-supplied depots in the topic Upgrade or Update a Host with Image Profiles.
VMware ESXi Upgrade
VMware, Inc. 61

When you specify a target server by using --server=server_name, the server prompts you for a username and password. Other connection options, such as a configuration file or session file, are supported.For a list of connection options, see Getting Started with vSphere Command-Line Interfaces, or runesxcli --help at the vCLI command prompt.
Prerequisites
n Install vCLI or deploy the vSphere Management Assistant (vMA) virtual machine. See Getting Startedwith vSphere Command-Line Interfaces. For troubleshooting, run esxcli commands in theESXi Shell.
n Determine whether the update requires the host to be in maintenance mode or to be rebooted. Ifnecessary, place the host in maintenance mode.
See Determine Whether an Update Requires the Host to Be in Maintenance Mode or to BeRebooted. See Place a Host in Maintenance Mode.
n If the update requires a reboot, and if the host belongs to a VMware HA cluster, remove the host fromthe cluster or disable HA on the cluster.
Procedure
1 Determine which VIBs are installed on the host.
esxcli --server=server_name software vib list
2 Find out which VIBs are available in the depot.
Option Description
from a depot accessible by URL esxcli --server=server_name software sources vib list --
depot=http://web_server/depot_name
from a local depot ZIP file esxcli --server=server_name software sources vib list --
depot=absolute_path_to_depot_zip_file
You can specify a proxy server by using the --proxy argument.
3 Update the existing VIBs to include the VIBs in the depot or install new VIBs.
Option Description
Update VIBs from a depot accessibleby URL
esxcli --server=server_name software vib update --
depot=http://web_server/depot_name
Update VIBs from a local depot ZIP file esxcli --server=server_name software vib update --
depot=absolute_path_to_depot_ZIP_file
Install all VIBs from a ZIP file on aspecified offline depot (includes bothVMware VIBs and partner-suppliedVIBs)
esxcli --server=server_name software vib install --depot
path_to_VMware_vib_ZIP_file\VMware_vib_ZIP_file --depot
path_to_partner_vib_ZIP_file\partner_vib_ZIP_file
Options for the update and install commands allow you to perform a dry run, to specify a specificVIB, to bypass acceptance level verification, and so on. Do not bypass verification on productionsystems. See the esxcli Reference at http://www.vmware.com/support/developer/vcli/.
VMware ESXi Upgrade
VMware, Inc. 62

4 Verify that the VIBs are installed on your ESXi host.
esxcli --server=server_name software vib list
Upgrade or Update a Host with Image ProfilesYou can upgrade or update a host with image profiles stored in a software depot that is accessiblethrough a URL or in an offline ZIP depot.
You can use the esxcli software profile update or esxcli software profile installcommand to upgrade or update an ESXi host.
When you upgrade or update a host, the esxcli software profile update oresxcli software profile install command applies a higher version (major or minor) of a full imageprofile onto the host. After this operation and a reboot, the host can join a vCenter Server environment ofthe same or higher version.
The esxcli software profile update command brings the entire content of the ESXi host image tothe same level as the corresponding upgrade method using an ISO installer. However, the ISO installerperforms a pre-upgrade check for potential problems, such as insufficient memory or unsupporteddevices. The esxcli upgrade method only performs such checks when upgrading from ESXi 6.7 Update1 or later to a newer version.
For more about the ESXi upgrade process and methods, see Overview of the ESXi Host UpgradeProcess.
Important If you are upgrading or updating ESXi from a zip bundle in a VMware-supplied depot, eitheronline from the VMware website or downloaded locally, VMware supports only the update commandesxcli software profile update --depot=depot_location --profile=profile_name.
When you specify a target server by using --server=server_name, the server prompts you for a username and password. Other connection options, such as a configuration file or session file, are supported.For a list of connection options, see Getting Started with vSphere Command-Line Interfaces, or runesxcli --help at the vCLI command prompt.
Note Options to the update and install commands allow you to perform a dry run, to bypassacceptance level verification, to ignore hardware compatibility check warnings, and so on. The option tobypass hardware compatibility check warnings is only available for ESXi 6.7 Update 1 or later. Do notbypass verification on production systems.
For options help, type esxcli software profile install --help or esxcli software profileupdate --help. For the complete listing of available command-line options, see the vSphere Command-Line Interface Reference.
Prerequisites
n Install vCLI. See Getting Started with vSphere Command-Line Interfaces. For troubleshooting, runesxcli commands in the ESXi Shell.
VMware ESXi Upgrade
VMware, Inc. 63

n Determine whether the update requires the host to be in maintenance mode or to be rebooted. Ifnecessary, place the host in maintenance mode.
See Determine Whether an Update Requires the Host to Be in Maintenance Mode or to BeRebooted. See Place a Host in Maintenance Mode.
n If the update requires a reboot, and if the host belongs to a VMware HA cluster, remove the host fromthe cluster or disable HA on the cluster.
Procedure
1 Determine which VIBs are installed on the host.
esxcli --server=server_name software vib list
2 Determine which image profiles are available in the depot.
esxcli --server=server_name software sources profile list --
depot=http://webserver/depot_name
You can specify a proxy server by using the --proxy argument.
3 Update the existing image profile to include the VIBs or install new VIBs.
Important The software profile update command updates existing VIBs with thecorresponding VIBs from the specified profile, but does not affect other VIBs installed on the targetserver. The software profile install command installs the VIBs present in the depot imageprofile, and removes any other VIBS installed on the target server.
Option Description
Update the image profile from aVMware-supplied zip bundle, in adepot, accessible online from theVMware Web site or downloaded to alocal depot
esxcli software profile update --depot=depot_location --
profile=profile_name
Important This is the only update method that VMware supports for zip bundlessupplied by VMware.
VMware-supplied zip bundle names take the form:VMware-ESXi-version_number-build_number-depot.zip
The profile name for VMware-supplied zip bundles takes one of the followingforms.n ESXi-version_number-build_number-standard
n ESXi-version_number-build_number-notools (does not include VMwareTools)
Update the image profile from a depotaccessible by URL
esxcli --server=server_name software profile update --
depot=http://webserver/depot_name --profile=profile_name
Update the image profile from ZIP filestored locally on the target server
esxcli --server=server_name software profile update --
depot=file:///<path_to_profile_ZIP_file>/<profile_ZIP_file> --
profile=profile_name
Update the image profile from a ZIP fileon the target server, copied into adatastore
esxcli --server=server_name software profile update --
depot=“[datastore_name]profile_ZIP_file" --profile=profile_name
VMware ESXi Upgrade
VMware, Inc. 64

Option Description
Update the image profile from a ZIP filecopied locally and applied on thetarget server
esxcli --server=server_name software profile update --
depot=/root_dir/path_to_profile_ZIP_file/profile_ZIP_file --
profile=profile_name
Install all new VIBs in a specifiedprofile accessible by URL
esxcli --server=server_name software profile install --
depot=http://webserver/depot_name --profile=profile_name
Install all new VIBs in a specifiedprofile from a ZIP file stored locally onthe target.
esxcli --server=server_name software profile install --
depot=file:///<path_to_profile_ZIP_file>/<profile_ZIP_file> --
profile=profile_name
Install all new VIBs from a ZIP file onthe target server, copied into adatastore
esxcli --server=server_name software profile install --
depot=“[datastore_name]profile_ZIP_file" --profile=profile_name
Install all new VIBs from a ZIP filecopied locally and applied on thetarget server
esxcli --server=server_name software profile install --
depot=/root_dir/path_to_profile_ZIP_file/profile_ZIP_file --
profile=profile_name
4 Verify that the VIBs are installed on your ESXi host.
esxcli --server=server_name software vib list
Update ESXi Hosts by Using Zip FilesYou can update hosts with VIBs or image profiles by downloading a ZIP file of a depot.
VMware partners prepare third-party VIBs to provide management agents or asynchronously releaseddrivers.
Important If you are updating ESXi from a zip bundle in a VMware-supplied depot, either online fromthe VMware Web site or downloaded locally, VMware supports only the update method specified forVMware-supplied depots in the topic Upgrade or Update a Host with Image Profiles.
When you specify a target server by using --server=server_name, the server prompts you for a username and password. Other connection options, such as a configuration file or session file, are supported.For a list of connection options, see Getting Started with vSphere Command-Line Interfaces, or runesxcli --help at the vCLI command prompt.
Prerequisites
n Install vCLI or deploy the vSphere Management Assistant (vMA) virtual machine. See Getting Startedwith vSphere Command-Line Interfaces. For troubleshooting, run esxcli commands in theESXi Shell.
n Download the ZIP file of a depot bundle from a third-party VMware partner.
n Determine whether the update requires the host to be in maintenance mode or to be rebooted. Ifnecessary, place the host in maintenance mode.
See Determine Whether an Update Requires the Host to Be in Maintenance Mode or to BeRebooted. See Place a Host in Maintenance Mode.
VMware ESXi Upgrade
VMware, Inc. 65
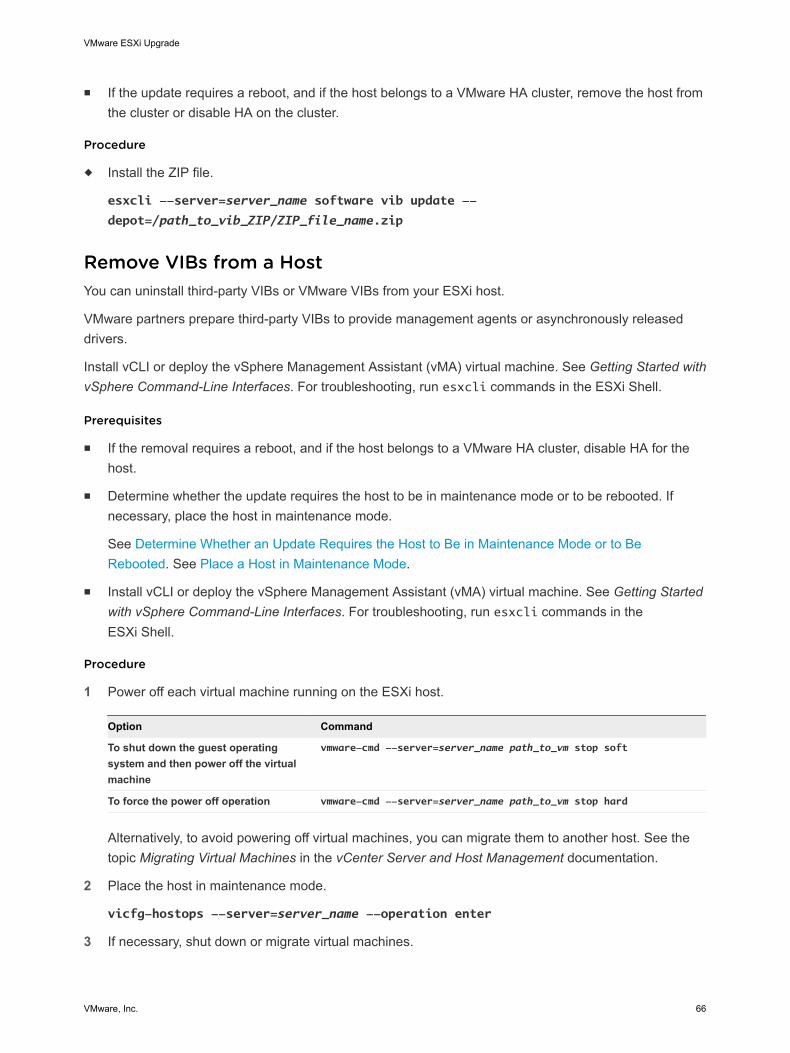
n If the update requires a reboot, and if the host belongs to a VMware HA cluster, remove the host fromthe cluster or disable HA on the cluster.
Procedure
u Install the ZIP file.
esxcli --server=server_name software vib update --
depot=/path_to_vib_ZIP/ZIP_file_name.zip
Remove VIBs from a HostYou can uninstall third-party VIBs or VMware VIBs from your ESXi host.
VMware partners prepare third-party VIBs to provide management agents or asynchronously releaseddrivers.
Install vCLI or deploy the vSphere Management Assistant (vMA) virtual machine. See Getting Started withvSphere Command-Line Interfaces. For troubleshooting, run esxcli commands in the ESXi Shell.
Prerequisites
n If the removal requires a reboot, and if the host belongs to a VMware HA cluster, disable HA for thehost.
n Determine whether the update requires the host to be in maintenance mode or to be rebooted. Ifnecessary, place the host in maintenance mode.
See Determine Whether an Update Requires the Host to Be in Maintenance Mode or to BeRebooted. See Place a Host in Maintenance Mode.
n Install vCLI or deploy the vSphere Management Assistant (vMA) virtual machine. See Getting Startedwith vSphere Command-Line Interfaces. For troubleshooting, run esxcli commands in theESXi Shell.
Procedure
1 Power off each virtual machine running on the ESXi host.
Option Command
To shut down the guest operatingsystem and then power off the virtualmachine
vmware-cmd --server=server_name path_to_vm stop soft
To force the power off operation vmware-cmd --server=server_name path_to_vm stop hard
Alternatively, to avoid powering off virtual machines, you can migrate them to another host. See thetopic Migrating Virtual Machines in the vCenter Server and Host Management documentation.
2 Place the host in maintenance mode.
vicfg-hostops --server=server_name --operation enter
3 If necessary, shut down or migrate virtual machines.
VMware ESXi Upgrade
VMware, Inc. 66

4 Determine which VIBs are installed on the host.
esxcli --server=server_name software vib list
5 Remove the VIB.
esxcli --server=server_name software vib remove --vibname=name
Specify one or more VIBs to remove in one of the following forms:
n name
n name:version
n vendor:name
n vendor:name:version
For example, the command to remove a VIB specified by vendor, name and version would take thisform:
esxcli –-server myEsxiHost software vib remove --vibname=PatchVendor:patch42:version3
Note The remove command supports several more options. See the vSphere Command-LineInterface Reference.
Adding Third-Party Extensions to Hosts with an esxcli CommandYou can use the esxcli software vib command to add to the system a third-party extension releasedas a VIB package. When you use this command, the VIB system updates the firewall rule set andrefreshes the host daemon after you reboot the system.
Otherwise, you can use a firewall configuration file to specify port rules for host services to enable for theextension. The vSphere Security documentation discusses how to add, apply, and refresh a firewall ruleset and lists the esxcli network firewall commands.
Perform a Dry Run of an esxcli Installation or UpgradeYou can use the --dry-run option to preview the results of an installation or upgrade operation. A dryrun of the installation or update procedure does not make any changes, but reports the VIB-leveloperations that will be performed if you run the command without the --dry-run option.
When you specify a target server by using --server=server_name, the server prompts you for a username and password. Other connection options, such as a configuration file or session file, are supported.For a list of connection options, see Getting Started with vSphere Command-Line Interfaces, or runesxcli --help at the vCLI command prompt.
Prerequisites
Install vCLI or deploy the vSphere Management Assistant (vMA) virtual machine. See Getting Started withvSphere Command-Line Interfaces. For troubleshooting, run esxcli commands in the ESXi Shell.
VMware ESXi Upgrade
VMware, Inc. 67

Procedure
1 Enter the installation or upgrade command, adding the --dry-run option.
n esxcli --server=server_name software vib install --dry-run
n esxcli --server=server_name software vib update --dry-run
n esxcli --server=server_name software profile install --dry-run
n esxcli --server=server_name software profile update --dry-run
2 Review the output that is returned.
The output shows which VIBs will be installed or removed and whether the installation or updaterequires a reboot.
Display the Installed VIBs and Profiles That Will Be Active Afterthe Next Host RebootYou can use the --rebooting-image option to list the VIBs and profiles that are installed on the host andwill be active after the next host reboot.
When you specify a target server by using --server=server_name, the server prompts you for a username and password. Other connection options, such as a configuration file or session file, are supported.For a list of connection options, see Getting Started with vSphere Command-Line Interfaces, or runesxcli --help at the vCLI command prompt.
Prerequisites
Install vCLI or deploy the vSphere Management Assistant (vMA) virtual machine. See Getting Started withvSphere Command-Line Interfaces. For troubleshooting, run esxcli commands in the ESXi Shell.
Procedure
1 Enter one of the following commands.
Option Description
For VIBs esxcli --server=server_name software vib list --rebooting-image
For Profiles esxcli --server=server_name software profile get --rebooting-
image
2 Review the output that is returned.
The output displays information for the ESXi image that will become active after the next reboot. If thepending-reboot image has not been created, the output returns nothing.
Display the Image Profile and Acceptance Level of the HostYou can use the software profile get command to display the currently installed image profile andacceptance level for the specified host.
This command also shows details of the installed image profile history, including profile modifications.
VMware ESXi Upgrade
VMware, Inc. 68

When you specify a target server by using --server=server_name, the server prompts you for a username and password. Other connection options, such as a configuration file or session file, are supported.For a list of connection options, see Getting Started with vSphere Command-Line Interfaces, or runesxcli --help at the vCLI command prompt.
Prerequisites
Install vCLI or deploy the vSphere Management Assistant (vMA) virtual machine. See Getting Started withvSphere Command-Line Interfaces. For troubleshooting, run esxcli commands in the ESXi Shell.
Procedure
1 Enter the following command.
esxcli --server=server_name software profile get
2 Review the output.
After You Upgrade ESXi HostsTo complete a host upgrade, you ensure that the host is reconnected to its managing vCenter Serversystem and reconfigured if necessary. You also check that the host is licensed correctly.
After you upgrade an ESXi host, take the following actions:
n View the upgrade logs. You can use the vSphere Web Client to export the log files.
n If a vCenter Server system manages the host, you must reconnect the host to vCenter Server byright-clicking the host in the vCenter Server inventory and selecting Connect.
n When the upgrade is complete, the ESXi host is in evaluation mode. The evaluation period is 60days. You must assign a vSphere 6.7 license before the evaluation period expires. You can upgradeexisting licenses or acquire new ones from My VMware. Use the vSphere Web Client to configure thelicensing for the hosts in your environment. See the vCenter Server and Host Managementdocumentation for details about managing licenses in vSphere.
n The host sdX devices might be renumbered after the upgrade. If necessary, update any scripts thatreference sdX devices.
n Upgrade virtual machines on the host. See Upgrading Virtual Machines and VMware Tools.
n Set up the vSphere Authentication Proxy service. Earlier versions of the vSphere AuthenticationProxy are not compatible with vSphere 6.7. See the vSphere Security documentation for details aboutconfiguring the vSphere Authentication Proxy service.
About ESXi Evaluation and Licensed ModesYou can use evaluation mode to explore the entire set of features for ESXi hosts. The evaluation modeprovides the set of features equal to a vSphere Enterprise Plus license. Before the evaluation modeexpires, you must assign to your hosts a license that supports all the features in use.
VMware ESXi Upgrade
VMware, Inc. 69

For example, in evaluation mode, you can use vSphere vMotion technology, the vSphere HA feature, thevSphere DRS feature, and other features. If you want to continue using these features, you must assign alicense that supports them.
The installable version of ESXi hosts is always installed in evaluation mode. ESXi Embedded ispreinstalled on an internal storage device by your hardware vendor. It might be in evaluation mode orprelicensed.
The evaluation period is 60 days and begins when you turn on the ESXi host. At any time during the 60-day evaluation period, you can convert from licensed mode to evaluation mode. The time available in theevaluation period is decreased by the time already used.
For example, suppose that you use an ESXi host in evaluation mode for 20 days and then assign avSphere Standard Edition license key to the host. If you set the host back in evaluation mode, you canexplore the entire set of features for the host for the remaining evaluation period of 40 days.
For information about managing licensing for ESXi hosts, see the vCenter Server and Host Managementdocumentation.
Licensing ESXi Hosts After UpgradeAfter you upgrade to ESXi 6.7, you must apply a vSphere 6.x license.
If you upgrade an ESXi host to a version that starts with the same number, you do not need to replace theexisting license with a new one. For example, if you upgrade a host from ESXi 6.5 to 6.7, you can use thesame license for the host.
If you upgrade an ESXi host to a version that starts with a different number, you must apply a newlicense. For example, if you upgrade an ESXi host from 5.x to 6.x, you need to license the host with avSphere 6 license.
When you upgrade ESXi 6.0 or ESXi 6.5 hosts to ESXi 6.7 hosts, the hosts are in a 60-day evaluationmode period until you apply the correct vSphere 6.0 licenses. See About ESXi Evaluation and LicensedModes.
You can acquire vSphere 6.x licenses from My VMware. After you have vSphere 6.x licenses, you mustassign them to all upgraded ESXi 6.7 hosts by using the license management functionality in thevSphere Web Client. See the vCenter Server and Host Management documentation for details. If you usethe scripted method to upgrade to ESXi 6.7, you can provide the license key in the kickstart (ks) file.
Run the Secure Boot Validation Script on an Upgraded ESXi HostAfter you upgrade an ESXi host from an older version of ESXi that did not support UEFI secure boot, youmay be able to enable secure boot. Whether you can enable secure boot depends on how you performedthe upgrade and whether the upgrade replaced all of the existing VIBs or left some VIBs unchanged. Youcan run a validation script after you perform the upgrade to determine whether the upgraded installationsupports secure boot.
For secure boot to succeed, the signature of every installed VIB must be available on the system. Olderversions of ESXi do not save the signatures when installing VIBs.
VMware ESXi Upgrade
VMware, Inc. 70

UEFI secure boot requires that the original VIB signatures are persisted. Older versions of ESXi do notpersist the signatures, but the upgrade process updates the VIB signatures.
n If you upgrade using ESXCLI commands, upgraded VIBs do not have persisted signatures. In thatcase, you cannot perform a secure boot on that system.
n If you upgrade using the ISO the upgrade process saves the signatures of all new VIBs. This alsoapplies to upgrades of vSphere Update Manager that use the ISO.
If any old VIBs remain on the system the signatures of those VIBs still are not available and secure bootis not possible.
For example, if the system uses a 3rd-party driver, and the VMware upgrade does not include a newversion of the driver VIB, then the old VIB remains on the system after the upgrade. In rare casesVMware may drop ongoing development of a specific VIB without providing a new VIB that replaces orobsoletes it, so the old VIB remains on the system after upgrade.
Note
UEFI secure boot also requires an up-to-date bootloader. This script does not check for an up-to-datebootloader.
Prerequisites
n Verify that the hardware supports UEFI secure boot.
n Verify that all VIBs are signed with an acceptance level of at least PartnerSupported. If you includeVIBs at the CommunitySupported level, you cannot use secure boot.
Procedure
1 Upgrade the ESXi and run the following command.
/usr/lib/vmware/secureboot/bin/secureBoot.py -c
2 Check the output.
The output either includes Secure boot can be enabled or Secure boot CANNOT be enabled.
Required Free Space for System LoggingIf you used Auto Deploy to install your ESXi 6.7 host, or if you set up a log directory separate from thedefault location in a scratch directory on the VMFS volume, you might need to change your current logsize and rotation settings to ensure that enough space is available for system logging .
All vSphere components use this infrastructure. The default values for log capacity in this infrastructurevary, depending on the amount of storage available and on how you have configured system logging.Hosts that are deployed with Auto Deploy store logs on a RAM disk, which means that the amount ofspace available for logs is small.
VMware ESXi Upgrade
VMware, Inc. 71

If your host is deployed with Auto Deploy, reconfigure your log storage in one of the following ways:
n Redirect logs over the network to a remote collector.
n Redirect logs to a NAS or NFS store.
If you redirect logs to non-default storage, such as a NAS or NFS store, you might also want toreconfigure log sizing and rotations for hosts that are installed to disk.
You do not need to reconfigure log storage for ESXi hosts that use the default configuration, which storeslogs in a scratch directory on the VMFS volume. For these hosts, ESXi 6.7 configures logs to best suityour installation, and provides enough space to accommodate log messages.
Table 3‑11. Recommended Minimum Size and Rotation Configuration for hostd, vpxa, andfdm Logs
Log Maximum Log File SizeNumber of Rotations toPreserve Minimum Disk Space Required
Management Agent (hostd) 10 MB 10 100 MB
VirtualCenter Agent (vpxa) 5 MB 10 50 MB
vSphere HA agent (FaultDomain Manager, fdm)
5 MB 10 50 MB
For information about setting up and configuring syslog and a syslog server and installing vSphere SyslogCollector, see the vCenter Server Installation and Setup documentation.
Configure Syslog on ESXi HostsYou can use the vSphere Web Client or the esxcli system syslog vCLI command to configure thesyslog service.
For information about using the esxcli system syslog command and other vCLI commands, seeGetting Started with vSphere Command-Line Interfaces.
Procedure
1 In the vSphere Web Client inventory, select the host.
2 Click Configure.
3 Under System, click Advanced System Settings.
4 Filter for syslog.
5 To set up logging globally, select the setting to change and click Edit.
Option Description
Syslog.global.defaultRotate Maximum number of archives to keep. You can set this number globally and forindividual subloggers.
Syslog.global.defaultSize Default size of the log, in KB, before the system rotates logs. You can set thisnumber globally and for individual subloggers.
VMware ESXi Upgrade
VMware, Inc. 72

Option Description
Syslog.global.LogDir Directory where logs are stored. The directory can be located on mounted NFS orVMFS volumes. Only the /scratch directory on the local file system is persistentacross reboots. Specify the directory as [datastorename] path_to_file, where thepath is relative to the root of the volume backing the datastore. For example, thepath [storage1] /systemlogs maps to thepath /vmfs/volumes/storage1/systemlogs.
Syslog.global.logDirUnique Selecting this option creates a subdirectory with the name of the ESXi host underthe directory specified by Syslog.global.LogDir. A unique directory is useful ifthe same NFS directory is used by multiple ESXi hosts.
Syslog.global.LogHost Remote host to which syslog messages are forwarded and port on which theremote host receives syslog messages. You can include the protocol and the port,for example, ssl://hostName1:1514. UDP (default), TCP, and SSL aresupported. The remote host must have syslog installed and correctly configuredto receive the forwarded syslog messages. See the documentation for the syslogservice installed on the remote host for information on configuration.
6 (Optional) To overwrite the default log size and log rotation for any of the logs.
a Click the name of the log that you want to customize.
b Click Edit and enter the number of rotations and the log size you want.
7 Click OK.
Changes to the syslog options take effect immediately.
VMware ESXi Upgrade
VMware, Inc. 73

Using vSphere Auto Deploy toReprovision Hosts 4If a host was deployed using vSphere Auto Deploy, you can use vSphere Auto Deploy to reprovision thehost with a new image profile that contains a different version of ESXi. You can use vSphere ESXi ImageBuilder to create and manage image profiles.
Note If you upgrade the host to use an ESXi 6.0 or later image, the vSphere Auto Deploy serverprovisions the ESXi host with certificates that are signed by VMCA. If you are currently using customcertificates, you can set up the host to use the custom certificates after the upgrade. See vSphereSecurity.
The vSphere Auto Deploy server is automatically upgraded if you upgrade the correspondingvCenter Server system. Starting with version 6.0, the vSphere Auto Deploy server is always on the samemanagement node as the vCenter Server system.
This chapter includes the following topics:n Introduction to vSphere Auto Deploy
n Preparing for vSphere Auto Deploy
n Reprovisioning Hosts
Introduction to vSphere Auto DeployWhen you start a physical host that is set up for vSphere Auto Deploy, vSphere Auto Deploy uses PXEboot infrastructure in conjunction with vSphere host profiles to provision and customize that host. No stateis stored on the host itself. Instead, the vSphere Auto Deploy server manages state information for eachhost.
State Information for ESXi HostsvSphere Auto Deploy stores the information for the ESXi hosts to be provisioned in different locations.Information about the location of image profiles and host profiles is initially specified in the rules that mapmachines to image profiles and host profiles.
VMware, Inc. 74

Table 4‑1. vSphere Auto Deploy Stores Information for Deployment
Information Type Description Source of Information
Image state The executable software to run on an ESXi host. Image profile, created with vSphere ESXi ImageBuilder.
Configurationstate
The configurable settings that determine how thehost is configured, for example, virtual switches andtheir settings, driver settings, boot parameters, andso on.
Host profile, created by using the host profile UI.Often comes from a template host.
Dynamic state The runtime state that is generated by the runningsoftware, for example, generated private keys orruntime databases.
Host memory, lost during reboot.
Virtual machinestate
The virtual machines stored on a host and virtualmachine autostart information (subsequent bootsonly).
Virtual machine information sent by vCenter Serverto vSphere Auto Deploy must be available to supplyvirtual machine information to vSphere Auto Deploy.
User input State that is based on user input, for example, an IPaddress that the user provides when the systemstarts up, cannot automatically be included in thehost profile.
Host customization information, stored byvCenter Server during first boot.
You can create a host profile that requires user inputfor certain values.
When vSphere Auto Deploy applies a host profilethat requires user provided information, the host isplaced in maintenance mode. Use the host profileUI to check the host profile compliance, andrespond to the prompt to customize the host.
vSphere Auto Deploy ArchitectureThe vSphere Auto Deploy infrastructure consists of several components.
For more information, watch the video "Auto Deploy Architecture":Auto Deploy Architecture (http://link.brightcove.com/services/player/bcpid2296383276001?bctid=ref:video_auto_deploy_architecture)
VMware ESXi Upgrade
VMware, Inc. 75
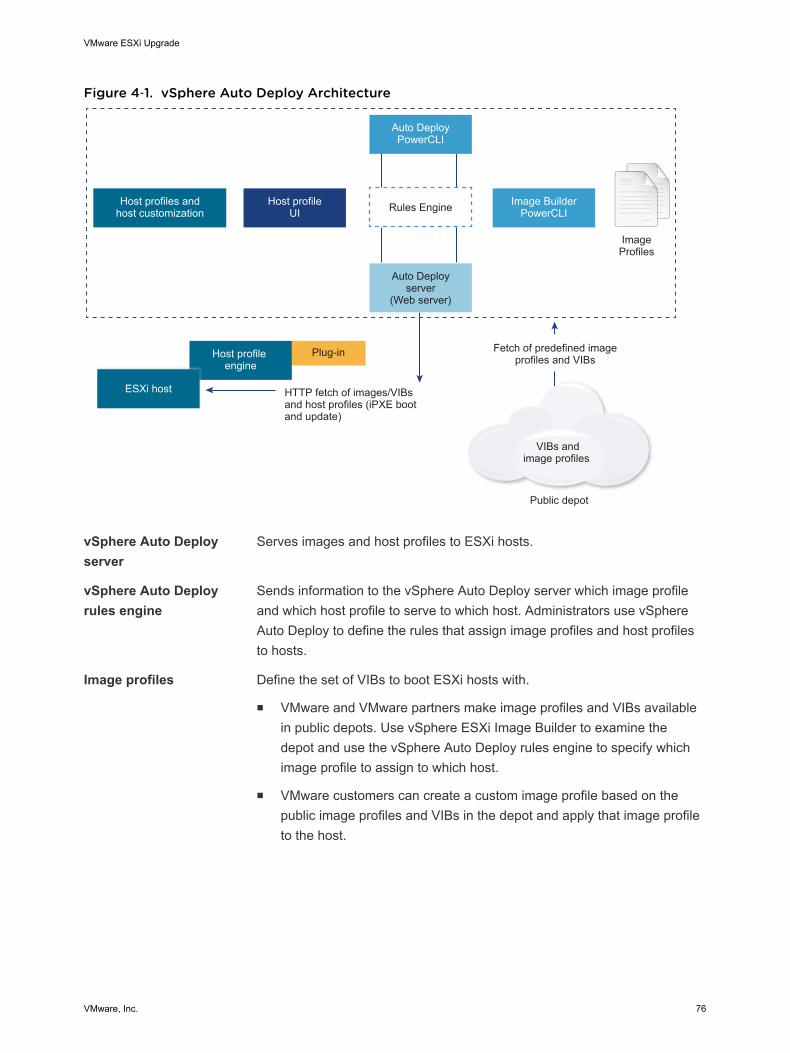
Figure 4‑1. vSphere Auto Deploy Architecture
HTTP fetch of images/VIBsand host profiles (iPXE bootand update)
Host profileUI
Host profiles andhost customization
Host profile engine
ESXi host
Plug-in
VIBs andimage profiles
Public depot
Fetch of predefined imageprofiles and VIBs
Auto DeployPowerCLI
ImageProfiles
Rules Engine Image BuilderPowerCLI
Auto Deployserver
(Web server)
vSphere Auto Deployserver
Serves images and host profiles to ESXi hosts.
vSphere Auto Deployrules engine
Sends information to the vSphere Auto Deploy server which image profileand which host profile to serve to which host. Administrators use vSphereAuto Deploy to define the rules that assign image profiles and host profilesto hosts.
Image profiles Define the set of VIBs to boot ESXi hosts with.
n VMware and VMware partners make image profiles and VIBs availablein public depots. Use vSphere ESXi Image Builder to examine thedepot and use the vSphere Auto Deploy rules engine to specify whichimage profile to assign to which host.
n VMware customers can create a custom image profile based on thepublic image profiles and VIBs in the depot and apply that image profileto the host.
VMware ESXi Upgrade
VMware, Inc. 76

Host profiles Define machine-specific configuration such as networking or storage setup.Use the host profile UI to create host profiles. You can create a host profilefor a reference host and apply that host profile to other hosts in yourenvironment for a consistent configuration.
Host customization Stores information that the user provides when host profiles are applied tothe host. Host customization might contain an IP address or otherinformation that the user supplied for that host. For more information abouthost customizations, see the vSphere Host Profiles documentation.
Host customization was called answer file in earlier releases of vSphereAuto Deploy.
Preparing for vSphere Auto DeployBefore you can start using vSphere Auto Deploy, you must prepare your environment. You start withserver setup and hardware preparation. You must configure the vSphere Auto Deploy service startup typein the vCenter Server system that you plan to use for managing the hosts you provision, and installPowerCLI.
n Prepare Your System for vSphere Auto Deploy
Before you can PXE boot an ESXi host with vSphere Auto Deploy, you must install prerequisitesoftware and set up the DHCP and TFTP servers that vSphere Auto Deploy interacts with.
n Using vSphere Auto Deploy Cmdlets
vSphere Auto Deploy cmdlets are implemented as Microsoft PowerShell cmdlets and included inPowerCLI. Users of vSphere Auto Deploy cmdlets can take advantage of all PowerCLI features.
n Set Up Bulk Licensing
You can use the vSphere Web Client or ESXi Shell to specify individual license keys, or you can setup bulk licensing by using PowerCLI cmdlets. Bulk licensing works for all ESXi hosts, but isespecially useful for hosts provisioned with vSphere Auto Deploy.
Prepare Your System for vSphere Auto DeployBefore you can PXE boot an ESXi host with vSphere Auto Deploy, you must install prerequisite softwareand set up the DHCP and TFTP servers that vSphere Auto Deploy interacts with.
For detailed steps and information about preparing your system for vSphere Auto Deploy, see vSphereInstallation and Setup.
Prerequisites
n Verify that the hosts that you plan to provision with vSphere Auto Deploy meet the hardwarerequirements for ESXi. See ESXi Hardware Requirements.
n Verify that the ESXi hosts have network connectivity to vCenter Server and that all port requirementsare met. See vCenter Server Upgrade.
VMware ESXi Upgrade
VMware, Inc. 77

n If you want to use VLANs in your vSphere Auto Deploy environment, you must set up the end to endnetworking properly. When the host is PXE booting, the firmware driver must be set up to tag theframes with proper VLAN IDs. You must do this set up manually by making the correct changes in theUEFI/BIOS interface. You must also correctly configure the ESXi port groups with the correct VLANIDs. Ask your network administrator how VLAN IDs are used in your environment.
n Verify that you have enough storage for the vSphere Auto Deploy repository. The vSphere AutoDeploy server uses the repository to store data it needs, including the rules and rule sets you createand the VIBs and image profiles that you specify in your rules.
Best practice is to allocate 2 GB to have enough room for four image profiles and some extra space.Each image profile requires approximately 350 MB. Determine how much space to reserve for thevSphere Auto Deploy repository by considering how many image profiles you expect to use.
n Obtain administrative privileges to the DHCP server that manages the network segment you want toboot from. You can use a DHCP server already in your environment, or install a DHCP server. Foryour vSphere Auto Deploy setup, replace the gpxelinux.0 file name with snponly64.efi.vmw-hardwired for UEFI or undionly.kpxe.vmw-hardwired for BIOS. For more information on DHCPconfigurations, see Sample DHCP Configurations.
n Secure your network as you would for any other PXE-based deployment method. vSphere AutoDeploy transfers data over SSL to prevent casual interference and snooping. However, theauthenticity of the client or the vSphere Auto Deploy server is not checked during a PXE boot.
n If you want to manage vSphere Auto Deploy with PowerCLI cmdlets, verify that Microsoft .NETFramework 4.5 or 4.5.x and Windows PowerShell 3.0 or 4.0 are installed on a Windows machine. Youcan install PowerCLI on the Windows system on which vCenter Server is installed or on a differentWindows system. See the vSphere PowerCLI User's Guide.
n Set up a remote Syslog server. See the vCenter Server and Host Management documentation forSyslog server configuration information. Configure the first host you boot to use the remote Syslogserver and apply that host's host profile to all other target hosts. Optionally, install and use thevSphere Syslog Collector, a vCenter Server support tool that provides a unified architecture forsystem logging and enables network logging and combining of logs from multiple hosts.
n Install ESXi Dump Collector, set up your first host so that all core dumps are directed to ESXi DumpCollector, and apply the host profile from that host to all other hosts.
n If the hosts that you plan to provision with vSphere Auto Deploy are with legacy BIOS, verify that thevSphere Auto Deploy server has an IPv4 address. PXE booting with legacy BIOS firmware is possibleonly over IPv4. PXE booting with UEFI firmware is possible with either IPv4 or IPv6.
Procedure
1 Install vCenter Server or deploy the vCenter Server Appliance.
The vSphere Auto Deploy server is included with the management node.
VMware ESXi Upgrade
VMware, Inc. 78

2 Configure the vSphere Auto Deploy service startup type.
a Log in to your vCenter Server system by using the vSphere Web Client.
b On the vSphere Web Client Home page, click Administration.
c Under System Configuration click Services.
d Select Auto Deploy, click the Actions menu, and select Edit Startup Type.
n On Windows, the vSphere Auto Deploy service is disabled. In the Edit Startup Type window,select Manual or Automatic to enable vSphere Auto Deploy.
n On the vCenter Server Appliance, the vSphere Auto Deploy service by default is set toManual. If you want the vSphere Auto Deploy service to start automatically upon OS startup,select Automatic.
3 (Optional) If you want to manage vSphere Auto Deploy with the vSphere Web Client, configure thevSphere ESXi Image Builder service startup type.
a Repeat Step 2a through Step 2c.
b Select ImageBuilder Service, click the Actions menu, and select Edit Startup Type.
n On Windows, the vSphere ESXi Image Builder service is disabled. In the Edit Startup Typewindow, select Manual or Automatic to enable the service.
n On the vCenter Server Appliance, the vSphere Auto Deploy service by default is set toManual. If you want the vSphere ESXi Image Builder service to start automatically upon OSstartup, select Automatic.
c Log out of the vSphere Web Client and log in again.
The Auto Deploy icon is visible on the Home page of the vSphere Web Client.
4 (Optional) If you want to manage vSphere Auto Deploy with PowerCLI cmdlets, install PowerCLI.
a Download the latest version of PowerCLI from the VMware Web site.
b Navigate to the folder that contains the PowerCLI file you downloaded and double-click theexecutable file.
If the installation wizard detects an earlier version of PowerCLI on your system, it will attempt toupgrade your existing installation
c Follow the prompts in the wizard to complete the installation.
5 Configure the TFTP server.
a In a vSphere Web Client connected to the vCenter Server system, go to the inventory list andselect the vCenter Server system.
b Click the Manage tab, select Settings, and click Auto Deploy.
c Click Download TFTP Boot Zip to download the TFTP configuration file and unzip the file to thedirectory in which your TFTP server stores files.
VMware ESXi Upgrade
VMware, Inc. 79

6 Set up your DHCP server to point to the TFTP server on which the TFTP ZIP file is located.
a Specify the TFTP Server's IP address in DHCP option 66, frequently called next-server.
b Specify the boot file name, which is snponly64.efi.vmw-hardwired for UEFI orundionly.kpxe.vmw-hardwired for BIOS in the DHCP option 67, frequently called boot-filename.
7 Set each host you want to provision with vSphere Auto Deploy to network boot or PXE boot, followingthe manufacturer's instructions.
8 (Optional) If you set up your environment to use Thumbprint mode, you can use your own CertificateAuthority (CA) by replacing the OpenSSL certificate rbd-ca.crt and the OpenSSL private key rbd-ca.key with your own certificate and key file.
n On Windows, the files are in the SSL subfolder of the vSphere Auto Deploy installation directory.For example, on Windows 7 the default is C:\ProgramData\VMware\VMware vSphere AutoDeploy\ssl.
n On the vCenter Server Appliance, the files are in /etc/vmware-rbd/ssl/.
By default, vCenter Server 6.0 and later uses VMware Certificate Authority (VMCA).
When you start a host that is set up for vSphere Auto Deploy, the host contacts the DHCP server and isdirected to the vSphere Auto Deploy server, which provisions the host with the image profile specified inthe active rule set.
What to do next
n Define a rule that assigns an image profile and optional host profile, host location or script bundle tothe host.
n (Optional) Configure the first host that you provision as a reference host. Use the storage, networking,and other settings you want for your target hosts to share. Create a host profile for the reference hostand write a rule that assigns both the already tested image profile and the host profile to target hosts.
n (Optional) If you want to have vSphere Auto Deploy overwrite existing partitions, set up a referencehost to do auto partitioning and apply the host profile of the reference host to other hosts.
n (Optional) If you have to configure host-specific information, set up the host profile of the referencehost to prompt for user input. For more information about host customizations, see the vSphere HostProfiles documentation.
Using vSphere Auto Deploy CmdletsvSphere Auto Deploy cmdlets are implemented as Microsoft PowerShell cmdlets and included inPowerCLI. Users of vSphere Auto Deploy cmdlets can take advantage of all PowerCLI features.
Experienced PowerShell users can use vSphere Auto Deploy cmdlets just like other PowerShell cmdlets.If you are new to PowerShell and PowerCLI, the following tips might be helpful.
VMware ESXi Upgrade
VMware, Inc. 80

You can type cmdlets, parameters, and parameter values in the PowerCLI shell.
n Get help for any cmdlet by running Get-Helpcmdlet_name.
n Remember that PowerShell is not case sensitive.
n Use tab completion for cmdlet names and parameter names.
n Format any variable and cmdlet output by using Format-List or Format-Table, or their short formsfl or ft. For more information, run the Get-Help Format-List cmdlet.
Passing Parameters by NameYou can pass in parameters by name in most cases and surround parameter values that contain spacesor special characters with double quotes.
Copy-DeployRule -DeployRule testrule -ReplaceItem MyNewProfile
Most examples in the vCenter Server Installation and Setup documentation pass in parameters by name.
Passing Parameters as ObjectsYou can pass parameters as objects if you want to perform scripting and automation. Passing inparameters as objects is useful with cmdlets that return multiple objects and with cmdlets that return asingle object. Consider the following example.
1 Bind the object that encapsulates rule set compliance information for a host to a variable.
$tr = Test-DeployRuleSetCompliance MyEsxi42
2 View the itemlist property of the object to see the difference between what is in the rule set andwhat the host is currently using.
$tr.itemlist
3 Remediate the host to use the revised rule set by using the Repair-DeployRuleSetCompliancecmdlet with the variable.
Repair-DeployRuleSetCompliance $tr
The example remediates the host the next time you boot the host.
Set Up Bulk LicensingYou can use the vSphere Web Client or ESXi Shell to specify individual license keys, or you can set upbulk licensing by using PowerCLI cmdlets. Bulk licensing works for all ESXi hosts, but is especially usefulfor hosts provisioned with vSphere Auto Deploy.
VMware ESXi Upgrade
VMware, Inc. 81

Assigning license keys through the vSphere Web Client and assigning licensing by using PowerCLIcmdlets function differently.
Assign license keyswith thevSphere Web Client
You can assign license keys to a host when you add the host to thevCenter Server system or when the host is managed by a vCenter Serversystem.
Assign license keyswithLicenseDataManagerPowerCLI
You can specify a set of license keys to be added to a set of hosts. Thelicense keys are added to the vCenter Server database. Each time a host isadded to the vCenter Server system or reconnects to it, the host isassigned a license key. A license key that is assigned through PowerCLI istreated as a default license key. When an unlicensed host is added orreconnected, it is assigned the default license key. If a host is alreadylicensed, it keeps its license key.
The following example assigns licenses to all hosts in a data center. You can also associate licenses withhosts and clusters.
The following example is for advanced PowerCLI users who know how to use PowerShell variables.
Prerequisites
Prepare Your System for vSphere Auto Deploy.
Procedure
1 In a PowerCLI session, connect to the vCenter Server system you want to use and bind theassociated license manager to a variable.
Connect-VIServer -Server 192.XXX.X.XX -User username -Password password
$licenseDataManager = Get-LicenseDataManager
2 Run a cmdlet that retrieves the datacenter in which the hosts for which you want to use the bulklicensing feature are located.
$hostContainer = Get-Datacenter -Name Datacenter-X
You can also run a cmdlet that retrieves a cluster to use bulk licensing for all hosts in a cluster, orretrieves a folder to use bulk licensing for all hosts in a folder.
3 Create a new LicenseData object and a LicenseKeyEntry object with associated type ID andlicense key.
$licenseData = New-Object VMware.VimAutomation.License.Types.LicenseData
$licenseKeyEntry = New-Object Vmware.VimAutomation.License.Types.LicenseKeyEntry
$licenseKeyEntry.TypeId = "vmware-vsphere”
$licenseKeyEntry.LicenseKey = "XXXXX-XXXXX-XXXXX-XXXXX-XXXXX"
4 Associate the LicenseKeys attribute of the LicenseData object you created in step 3 with theLicenseKeyEntry object.
$licenseData.LicenseKeys += $licenseKeyEntry
VMware ESXi Upgrade
VMware, Inc. 82

5 Update the license data for the data center with the LicenseData object and verify that the license isassociated with the host container.
$licenseDataManager.UpdateAssociatedLicenseData($hostContainer.Uid, $licenseData)
$licenseDataManager.QueryAssociatedLicenseData($hostContainer.Uid)
6 Provision one or more hosts with vSphere Auto Deploy and assign them to the data center or to thecluster that you assigned the license data to.
7 You can use the vSphere Web Client to verify that the host is successfully assigned to the defaultlicense XXXXX-XXXXX-XXXXX-XXXXX-XXXXX.
All hosts that you assigned to the data center are now licensed automatically.
Reprovisioning HostsvSphere Auto Deploy supports multiple reprovisioning options. You can perform a simple reboot orreprovision with a different image profile or a different host profile.
A first boot using vSphere Auto Deploy requires that you set up your environment and add rules to therule set. See the topic "Preparing for vSphere Auto Deploy" in the vSphere installation and Setupdocumentation.
The following reprovisioning operations are available.
n Simple reboot.
n Reboot of hosts for which the user answered questions during the boot operation.
n Reprovision with a different image profile.
n Reprovision with a different host profile.
Reprovision Hosts with Simple Reboot OperationsA simple reboot of a host that is provisioned with vSphere Auto Deploy requires only that all prerequisitesare still met. The process uses the previously assigned image profile, host profile, custom script, andvCenter Server location.
Prerequisites
n Verify that the setup you performed during the first boot operation is in place.
n Verify that all associated items like are available. An item can be an image profile, host profile,custom script or vCenter Server inventory location.
n Verify that the host has the identifying information (asset tag, IP address) it had during previous bootoperations.
VMware ESXi Upgrade
VMware, Inc. 83

Procedure
1 Place the host in maintenance mode.
Host Type Action
Host is part of a DRS cluster VMware DRS migrates virtual machines to appropriate hosts when you place thehost in maintenance mode.
Host is not part of a DRS cluster You must migrate all virtual machines to different hosts and place each host inmaintenance mode.
2 Reboot the host.
The host shuts down. When the host reboots, it uses the image profile that the vSphere Auto Deployserver provides. The vSphere Auto Deploy server also applies the host profile stored on thevCenter Server system.
Reprovision a Host with a New Image Profile by Using PowerCLIYou can use vSphere Auto Deploy to reprovision a host with a new image profile in a PowerCLI sessionby changing the rule for the host and performing a test and repair compliance operation.
Several options for reprovisioning hosts exist.
n If the VIBs that you want to use support live update, you can use an esxcli software vibcommand. In that case, you must also update the rule set to use an image profile that includes thenew VIBs.
n During testing, you can apply an image profile to an individual host with the Apply-EsxImageProfile cmdlet and reboot the host so the change takes effect. The Apply-EsxImageProfile cmdlet updates the association between the host and the image profile but doesnot install VIBs on the host.
n In all other cases, use this procedure.
Prerequisites
n Verify that the image profile you want to use to reprovision the host is available. Use vSphere ESXiImage Builder in a PowerCLI session. See "Using vSphere ESXi Image Builder CLI" in the vSphereInstallation and Setup documentation.
n Verify that the setup you performed during the first boot operation is in place.
Procedure
1 At the PowerShell prompt, run the Connect-VIServer PowerCLI cmdlet to connect to thevCenter Server system that vSphere Auto Deploy is registered with.
Connect-VIServer ipv4_or_ipv6_address
The cmdlet might return a server certificate warning. In a production environment, make sure noserver certificate warnings result. In a development environment, you can ignore the warning.
VMware ESXi Upgrade
VMware, Inc. 84

2 Determine the location of a public software depot that contains the image profile that you want to use,or define a custom image profile with vSphere ESXi Image Builder.
3 Run Add-EsxSoftwareDepot to add the software depot that contains the image profile to thePowerCLI session.
Depot Type Cmdlet
Remote depot Run Add-EsxSoftwareDepot depot_url.
ZIP file a Download the ZIP file to a local file path or create a mount point local to thePowerCLI machine.
b Run Add-EsxSoftwareDepot C:\file_path\my_offline_depot.zip.
4 Run Get-EsxImageProfile to see a list of image profiles, and decide which profile you want to use.
5 Run Copy-DeployRule and specify the ReplaceItem parameter to change the rule that assigns animage profile to hosts.
The following cmdlet replaces the current image profile that the rule assigns to the host with themy_new_imageprofile profile. After the cmdlet completes, myrule assigns the new image profile tohosts. The old version of myrule is renamed and hidden.
Copy-DeployRule myrule -ReplaceItem my_new_imageprofile
6 Test the rule compliance for each host that you want to deploy the image to.
a Verify that you can access the host for which you want to test rule set compliance.
Get-VMHost -Name ESXi_hostname
b Run the cmdlet that tests rule set compliance for the host, and bind the return value to a variablefor later use.
$tr = Test-DeployRuleSetCompliance ESXi_hostname
c Examine the differences between the contents of the rule set and configuration of the host.
$tr.itemlist
The system returns a table of current and expected items if the host for which you want to test thenew rule set compliance is compliant with the active rule set.
CurrentItem ExpectedItem
----------- ------------
my_old_imageprofile my_new_imageprofile
d Remediate the host to use the revised rule set the next time you boot the host.
Repair-DeployRuleSetCompliance $tr
VMware ESXi Upgrade
VMware, Inc. 85

7 Reboot the host to provision it with the new image profile.
Write a Rule and Assign a Host Profile to HostsvSphere Auto Deploy can assign a host profile to one or more hosts. The host profile might includeinformation about storage configuration, network configuration, or other characteristics of the host. If youadd a host to a cluster, that cluster's host profile is used.
In many cases, you assign a host to a cluster instead of specifying a host profile explicitly. The host usesthe host profile of the cluster.
Prerequisites
n Install PowerCLI and all prerequisite software. For information see vCenter Server Installation andSetup.
n Export the host profile that you want to use.
Procedure
1 In a PowerCLI session, run the Connect-VIServer cmdlet to connect to the vCenter Server systemthat vSphere Auto Deploy is registered with.
Connect-VIServer ipv4_or_ipv6_address
The cmdlet might return a server certificate warning. In a production environment, make sure noserver certificate warnings result. In a development environment, you can ignore the warning.
2 Using the vSphere Web Client, set up a host with the settings you want to use and create a hostprofile from that host.
3 Find the name of the host profile by running Get-VMhostProfile PowerCLI cmdlet, passing in theESXi host from which you create a host profile.
4 At the PowerCLI prompt, define a rule in which host profiles are assigned to hosts with certainattributes, for example a range of IP addresses.
New-DeployRule -Name "testrule2" -Item my_host_profile -Pattern "vendor=Acme,Zven", "ipv4=192.XXX.
1.10-192.XXX.1.20"
The specified item is assigned to all hosts with the specified attributes. This example specifies a rulenamed testrule2. The rule assigns the specified host profile my_host_profile to all hosts with an IPaddress inside the specified range and with a manufacturer of Acme or Zven.
5 Add the rule to the rule set.
Add-DeployRule testrule2
By default, the working rule set becomes the active rule set, and any changes to the rule set becomeactive when you add a rule. If you use the NoActivate parameter, the working rule set does notbecome the active rule set.
VMware ESXi Upgrade
VMware, Inc. 86

What to do next
n Assign a host already provisioned with vSphere Auto Deploy to the new host profile by performingcompliance test and repair operations on those hosts. For more information, see Test and RepairRule Compliance.
n Power on unprovisioned hosts to provision them with the host profile.
Test and Repair Rule ComplianceWhen you add a rule to the vSphere Auto Deploy rule set or make changes to one or more rules, hostsare not updated automatically. vSphere Auto Deploy applies the new rules only when you test their rulecompliance and perform remediation.
Prerequisites
n Prepare Your System for vSphere Auto Deploy
n Verify that your infrastructure includes one or more ESXi hosts provisioned with vSphere Auto Deploy,and that the host on which you installed PowerCLI can access those ESXi hosts.
Procedure
1 In a PowerCLI session, run the Connect-VIServer cmdlet to connect to the vCenter Server systemthat vSphere Auto Deploy is registered with.
Connect-VIServer ipv4_or_ipv6_address
The cmdlet might return a server certificate warning. In a production environment, make sure noserver certificate warnings result. In a development environment, you can ignore the warning.
2 Use PowerCLI to check which vSphere Auto Deploy rules are currently available.
Get-DeployRule
The system returns the rules and the associated items and patterns.
3 Make a change to one of the available rules.
For example, you can change the image profile and the name of the rule.
Copy-DeployRule -DeployRule testrule -ReplaceItem MyNewProfile
You cannot edit a rule already added to the active rule set. Instead, you can copy the rule and replacethe item or pattern you want to change.
4 Verify that you can access the host for which you want to test rule set compliance.
Get-VMHost -Name MyEsxi42
VMware ESXi Upgrade
VMware, Inc. 87

5 Run the cmdlet that tests rule set compliance for the host, and bind the return value to a variable forlater use.
$tr = Test-DeployRuleSetCompliance MyEsxi42
6 Examine the differences between the contents of the rule set and configuration of the host.
$tr.itemlist
The system returns a table of current and expected items if the host for which you want to test thenew rule set compliance is compliant with the active rule set.
CurrentItem ExpectedItem
----------- ------------
My Profile 25 MyNewProfile
7 Remediate the host to use the revised rule set the next time you boot the host.
Repair-DeployRuleSetCompliance $tr
What to do next
If the rule you changed specified the inventory location, the change takes effect when you repaircompliance. For all other changes, reboot your host to have vSphere Auto Deploy apply the new rule andto achieve compliance between the rule set and the host.
VMware ESXi Upgrade
VMware, Inc. 88

Collect Logs to TroubleshootESXi Hosts 5You can collect installation or upgrade log files for ESXi. If an installation or upgrade fails, checking thelog files can help you identify the source of the failure.Solution
1 Enter the vm-support command in the ESXi Shell or through SSH.
2 Navigate to the /var/tmp/ directory.
3 Retrieve the log files from the .tgz file.
VMware, Inc. 89