mototrbo™ sl series portables user guide
TRANSCRIPT
PROFESSIONAL DIGITAL TWO-WAY RADIO
MOTOTRBO™ SL Series PORTABLES USER GUIDE

ContentsDeclaration of Conformity....................... 10Important Safety Information.................. 12
Software Version............................13
Computer Software Copyrights....14
Handling Precautions....................15
Introduction....................................16
Basic Operations........................... 17Charging the Battery......................................17Attaching the Battery..................................... 17Removing the Battery.................................... 18Powering Up the Radio..................................18
Adjusting the Volume.....................................19
Radio Controls............................... 20Using the Keypad.......................................... 21
Capacity Max Operations..............23
Capacity Max Operations...... 24Programmable Buttons....................... 24
Push-To-Talk (PTT) Button......24Assignable Radio Functions.....24Assignable Settings or Utility
Functions............................ 26Accessing Programmed
Functions............................ 27Status Indicators................................. 27
Icons.........................................27Tones....................................... 34
Registration.........................................35Zone and Channel Selections.............36
Selecting Zones....................... 36Selecting a Call Type............... 37Selecting a Site........................ 37
Contents
1
English

Roam Request......................... 37Site Restriction.........................37Site Trunking ...........................38
Calls....................................................38Group Calls.............................. 39Broadcast Call..........................43Private Call...............................45All Calls.................................... 51Phone Calls..............................54Call Preemption........................60Voice Interrupt..........................60
Advanced Features.............................61Home Channel Reminder.........61Call Queue............................... 62Talkgroup Scan........................63Remote Monitor .......................63Contacts Settings.....................65Call Indicator Settings.............. 68Call Log Features.....................70Call Alert Operation..................73Emergency Operation.............. 75Text Messaging........................81Privacy..................................... 87Multi-Site Controls....................87Stun..........................................89Lone Worker.............................89Password Lock Features..........90
Bluetooth..................................91Indoor Location........................ 96Notification List.........................98Over-the-Air Programming ......99Wi-Fi Operation........................99Utilities....................................104
Connect Plus Operations............113
Additional Radio Controlsin Connect Plus Mode...... 114
Push-To-Talk (PTT) Button...............114Programmable Buttons..................... 114
Assignable Radio Functions...115Assignable Settings or Utility
Functions.......................... 116Identifying Status Indicators in
Connect Plus Mode..................... 117Display Icons..........................117Call Icons............................... 120Sent Item Icons ..................... 121LED Indicator......................... 121Indicator Tones...................... 122Alert Tones.............................123
Con
tent
s
2
English
Switching Between Connect Plusand Non-Connect Plus Modes.....123
Making and Receiving Callsin Connect Plus Mode...... 124
Selecting a Site.................................124Roam Request....................... 124Site Lock On/Off.....................124Site Restriction.......................124
Selecting a Zone...............................125Using Multiple Networks................... 125Selecting a Call Type........................126Receiving and Responding to a
Radio Call.................................... 126Receiving and Responding
to a Group Call..................127Receiving and Responding
to a Private Call.................127Receiving a Site All Call.........128Receiving an Inbound
Private Phone Call............ 128Receiving an Inbound
Phone Talkgroup Call....... 129Inbound Phone Multi-Group
Call....................................130
Making a Radio Call..........................130Making a Call ........................ 130Making a Private Call with a
One Touch Call Button......133Making a Call with the
Programmable ManualDial Button........................ 133
Making an Outbound PrivatePhone Call with theProgrammable ManualDial Button........................ 134
Making an Outbound PrivatePhone Call via the PhoneMenu................................. 135
Making an Outbound PrivatePhone Call from Contacts. 135
Waiting for the ChannelGrant in an OutboundPrivate Phone Call............ 136
Making a Buffered Over-Dialin a ConnectedOutbound Private PhoneCall....................................137
Making a Live Over-Dial in aConnected OutboundPrivate Phone Call............ 137
Contents
3
English
Advanced Features inConnect Plus Mode.......... 138
Home Channel Reminder................. 138Muting the Home Channel
Reminder.......................... 138Setting a New Home
Channel.............................138Auto Fallback.................................... 139
Indications of Auto FallbackMode................................. 139
Making/Receiving Calls inFallback Mode...................139
Returning to NormalOperation.......................... 140
Radio Check..................................... 140Sending a Radio Check......... 141
Remote Monitor................................ 141Initiating Remote Monitor....... 142
Scan..................................................143Starting and Stopping Scan... 143Responding to a
Transmission During aScan..................................143
User Configurable Scan....................144
Turning Scan On or Off.....................144Editing the Scan List......................... 145Add or Delete a Group via the Add
Members Menu............................146Understanding Scan Operation.........148Scan Talkback.................................. 149Editing Priority for a Talkgroup..........149Contacts Settings..............................150
Making a Private Call fromContacts............................151
Making a Call Alias Search.... 151Adding a New Contact........... 152
Call Indicator Settings.......................153Activating and Deactivating
Call Ringers for Call Alert .153Activating and Deactivating
Call Ringers for PrivateCalls.................................. 153
Activating and DeactivatingCall Ringers for TextMessage........................... 154
Selecting a Ring Alert Type....154Configuring Vibrate Style....... 155Escalating Alarm Tone
Volume..............................156Call Log Features..............................156
Viewing Recent Calls............. 156
Con
tent
s
4
English
Deleting a Call from a CallList.................................... 157
Viewing Details from a CallList.................................... 157
Call Alert Operation...........................158Responding to Call Alerts.......158Making a Call Alert from the
Contact List....................... 158Making a Call Alert with the
One Touch AccessButton................................159
Emergency Operation.......................159Initiating an Emergency Call.. 161Initiating an Emergency Call
with Voice to Follow.......... 162Initiating an Emergency Alert. 162Receiving an Incoming
Emergency........................163Saving the Emergency
Details to the Alarm List.... 163Deleting the Emergency
Details............................... 164Responding to an
Emergency Call.................164Responding to an
Emergency Alert............... 165
Ignore Emergency RevertCall....................................165
Exiting Emergency Mode....... 165Text Message Features.................... 166
Writing and Sending a TextMessage........................... 166
Sending a Quick TextMessage........................... 167
Sending a Quick TextMessage with the OneTouch Access Button........ 169
Accessing the Drafts Folder...169Managing Fail-to-Send Text
Messages..........................171Managing Sent Text
Messages..........................173Receiving a Text Message.....177Reading a Text Message....... 177Managing Received Text
Messages..........................177Privacy.............................................. 180
Making a Privacy-Enabled(Scrambled) Call............... 181
Covert Mode..................................... 182Entering Covert Mode............ 182Exiting Covert Mode...............182
Security.............................................182
Contents
5
English

Radio Disable.........................182Radio Enable..........................184
Password Lock Features.................. 185Accessing the Radio from
Password.......................... 185Turning the Password Lock
On or Off........................... 186Unlocking the Radio from
Locked State..................... 186Changing the Password.........186
Bluetooth Operation..........................187Turning Bluetooth On and
Off..................................... 188Finding and Connecting to a
Bluetooth Device...............189Finding and Connecting
from a Bluetooth Device(Discoverable Mode).........189
Disconnecting from aBluetooth Device...............190
Switching Audio Routebetween Internal RadioSpeaker and BluetoothDevice............................... 190
Viewing Device Details...........191Editing Device Name..............191Deleting Device Name........... 191
Bluetooth Mic Gain.................192Permanent Bluetooth
Discoverable Mode........... 192Indoor Location................................. 192
Turning Indoor Location Onor Off................................. 193
Accessing Indoor LocationBeacons Information......... 194
Notification List..................................194Accessing the Notification
List.................................... 194Wi-Fi Operation.................................195
Turning Wi-Fi On or Off..........195Connecting to a Network
Access Point..................... 196Refreshing the Network List...197Adding a Network...................197Viewing Details of Network
Access Points................... 198Removing Network Access
Points................................ 198Utilities.............................................. 199
Turning the Radio Tones/Alerts On or Off................. 199
Turning Keypad Tones Onor Off................................. 199
Con
tent
s
6
English

Setting the Tone AlertVolume Offset Level..........200
Turning the Talk PermitTone On or Off.................. 201
Setting the Power Level......... 201Changing the Display Mode...202Adjusting the Display
Brightness......................... 202Setting the Display Backlight
Timer.................................203Locking and Unlocking the
Keypad..............................204Language............................... 204Turning the LED Indicator
On or Off........................... 205Identifying Cable Type........... 205Voice Announcement.............205Setting the Text-to-Speech
Feature..............................206Wallpaper Mode.....................207Screen Saver Mode............... 207Audio Accessory.................... 208Auto Keypad Lock..................208Digital Mic AGC (Mic AGC-
D)...................................... 208Intelligent Audio......................209
Turning the AcousticFeedback SuppressorFeature On or Off..............210
Text Entry Configuration........ 211Accessing General Radio
Information........................ 216
Other Systems..............................226
Other Systems......................227Push-To-Talk (PTT) Button...............227Programmable Buttons..................... 227
Assignable Radio Functions...227Assignable Settings or Utility
Functions.......................... 231Accessing Programmed
Functions.......................... 231Status Indicators............................... 231
Icons.......................................231Tones..................................... 238
IP Site Connect.................................239Capacity Plus....................................239
Capacity Plus--Single Site......239Capacity Plus--Multi-Site........240
Contents
7
English
Zone and Channel Selections...........241Selecting Zones..................... 241Selecting Channels................ 242
Calls..................................................242Group Calls............................ 243Private Calls ..........................246All Calls.................................. 251Phone Calls ...........................253Stopping Radio Calls .............260
Advanced Features...........................260Talkaround............................. 260Monitor Feature......................261Home Channel Reminder.......262Radio Check ..........................263Remote Monitor .....................265Scan Lists...............................267Scan.......................................271Contacts Settings...................273Call Indicator Settings............ 282Call Log Features...................288Call Alert Operation................290Emergency Operation............ 292Man Down..............................298Text Messaging Features ......299Job Tickets ............................309Privacy .................................. 312Multi-Site Controls..................313
Security ................................. 314Password Lock Features........316Bluetooth................................318Indoor Location...................... 323Notification List.......................325Over-the-Air Programming ....325Transmit Inhibit.......................326Wi-Fi Operation......................327Utilities....................................331General Radio Information.....350
Authorized Accessories List.......353
Authorized AccessoriesList..................................... 354
Antennas...........................................354Batteries............................................354Cables...............................................354Carry Devices................................... 354Chargers........................................... 354Miscellaneous Accessories...............355
Limited Warranty....................................356MOTOROLA COMMUNICATION
PRODUCTS........................................... 356
Con
tent
s
8
English

I. WHAT THIS WARRANTY COVERSAND FOR HOW LONG:......................... 356
II. GENERAL PROVISIONS........................ 357III. STATE LAW RIGHTS:............................357IV. HOW TO GET WARRANTY SERVICE..357V. WHAT THIS WARRANTY DOES NOT
COVER...................................................358VI. PATENT AND SOFTWARE
PROVISIONS......................................... 358VII. GOVERNING LAW................................360
Contents
9
English

Declaration of ConformityThis declaration is applicable to your radio only if your radio is labeled with the FCC logo shown below.
Declaration of Conformity
Per FCC CFR 47 Part 2 Section 2.1077(a)
Responsible Party
Name: Motorola Solutions, Inc.
Address: 1303 East Algonquin Road, Schaumburg, IL 60196-1078, U.S.A.
Phone Number: 1-800-927-2744
Hereby declares that the product:
Model Name: SL7550/ SL7580/SL7590/SL7550e/ SL7580e/SL7590e
conforms to the following regulations:
FCC Part 15, subpart B, section 15.107(a), 15.107(d) and section 15.109(a)
Dec
lara
tion
of C
onfo
rmity
10
English

Class B Digital Device
As a personal computer peripheral, this device complies with Part 15 of the FCC Rules. This device complies withIndustry Canada licence-exempt RSS standard(s). Operation is subject to the following two conditions:
1 This device may not cause harmful interference, and2 This device must accept any interference received, including interference that may cause undesired operation.
Note:This equipment has been tested and found to comply with the limits for a Class B digital device, pursuantto part 15 of the FCC Rules. These limits are designed to provide reasonable protection against harmfulinterference in a residential installation. This equipment generates, uses and can radiate radio frequencyenergy and, if not installed and used in accordance with the instructions, may cause harmful interferenceto radio communications. However, there is no guarantee that interference will not occur in a particular in-stallation.
If this equipment does cause harmful interference to radio or television reception, which can be determinedby turning the equipment off and on, the user is encouraged to try to correct the interference by one ormore of the following measures:
• Reorient or relocate the receiving antenna.• Increase the separation between the equipment and receiver.• Connect the equipment into an outlet on a circuit different from that to which the receiver is connected.• Consult the dealer or an experienced radio or TV technician for help.
Declaration of C
onformity
11
English
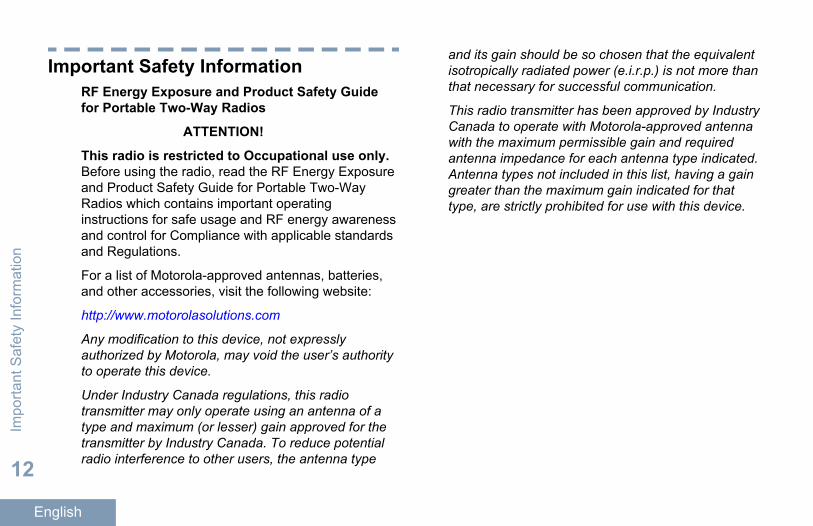
Important Safety InformationRF Energy Exposure and Product Safety Guidefor Portable Two-Way Radios
ATTENTION!
This radio is restricted to Occupational use only.Before using the radio, read the RF Energy Exposureand Product Safety Guide for Portable Two-WayRadios which contains important operatinginstructions for safe usage and RF energy awarenessand control for Compliance with applicable standardsand Regulations.
For a list of Motorola-approved antennas, batteries,and other accessories, visit the following website:
http://www.motorolasolutions.com
Any modification to this device, not expresslyauthorized by Motorola, may void the user’s authorityto operate this device.
Under Industry Canada regulations, this radiotransmitter may only operate using an antenna of atype and maximum (or lesser) gain approved for thetransmitter by Industry Canada. To reduce potentialradio interference to other users, the antenna type
and its gain should be so chosen that the equivalentisotropically radiated power (e.i.r.p.) is not more thanthat necessary for successful communication.
This radio transmitter has been approved by IndustryCanada to operate with Motorola-approved antennawith the maximum permissible gain and requiredantenna impedance for each antenna type indicated.Antenna types not included in this list, having a gaingreater than the maximum gain indicated for thattype, are strictly prohibited for use with this device.
Impo
rtant
Saf
ety
Info
rmat
ion
12
English

Software VersionAll the features described in the following sections aresupported by the software version R02.50.10 or later.
See Checking Firmware and Codeplug Versions onpage 112 to determine the software version of yourradio.
Check with your dealer or system administrator formore information.
Softw
are Version
13
English

Computer Software CopyrightsThe Motorola products described in this manual mayinclude copyrighted Motorola computer programsstored in semiconductor memories or other media.Laws in the United States and other countriespreserve for Motorola certain exclusive rights forcopyrighted computer programs including, but notlimited to, the exclusive right to copy or reproduce inany form the copyrighted computer program.Accordingly, any copyrighted Motorola computerprograms contained in the Motorola productsdescribed in this manual may not be copied,reproduced, modified, reverse-engineered, ordistributed in any manner without the express writtenpermission of Motorola. Furthermore, the purchase ofMotorola products shall not be deemed to grant eitherdirectly or by implication, estoppel, or otherwise, anylicense under the copyrights, patents or patentapplications of Motorola, except for the normal non-exclusive license to use that arises by operation oflaw in the sale of a product.
The AMBE+2™ voice coding Technology embodied inthis product is protected by intellectual property rights
including patent rights, copyrights and trade secretsof Digital Voice Systems, Inc.
This voice coding Technology is licensed solely foruse within this Communications Equipment. The userof this Technology is explicitly prohibited fromattempting to decompile, reverse engineer, ordisassemble the Object Code, or in any other wayconvert the Object Code into a human-readable form.
U.S. Pat. Nos. #5,870,405, #5,826,222, #5,754,974,#5,701,390, #5,715,365, #5,649,050, #5,630,011,#5,581,656, #5,517,511, #5,491,772, #5,247,579,#5,226,084 and #5,195,166.
Com
pute
r Sof
twar
e C
opyr
ight
s
14
English
Handling PrecautionsThe MOTOTRBO Series Digital Portable radio meetsIP54 specifications, allowing the radio to withstandadverse field conditions such as being exposed towater or dust.
• Keep your radio clean and exposure to watershould be avoided to help ensure properfunctionality and performance.
• To clean the exterior surfaces of the radio, use adiluted solution of mild dishwashing detergent andfresh water (example, one teaspoon of detergentto one gallon of water).
• These surfaces should be cleaned whenever aperiodic visual inspection reveals the presence ofsmudges, grease, and/or grime.
Caution:The effects of certain chemicals and theirvapors can have harmful results on certainplastics. Avoid using aerosol sprays, tunercleaners and other chemicals.
Handling P
recautions
15
English

IntroductionThis user guide covers the operation of theMOTOTRBO radios.
Your dealer or system administrator may havecustomized your radio for your specific needs. Checkwith your dealer or system administrator for moreinformation.
You can consult your dealer or system administratorabout the following:
• Is your radio programmed with any presetconventional channels?
• Which buttons have been programmed to accessother features?
• What optional accessories may suit your needs?• What are the best radio usage practices for
effective communication?• What maintenance procedures will help promote
longer radio life?
Intro
duct
ion
16
English

Basic OperationsThis chapter explains the operations to get youstarted on using the radio.
Charging the BatteryYour radio is powered by a Lithium-Ion (Li-lon)battery.
• To avoid damage and comply with warranty terms,charge the battery using a Motorola chargerexactly as described in the charger user guide.All chargers can charge only Motorola authorizedbatteries. Other batteries may not charge. It isrecommended your radio remains powered offwhile charging.
• Charge your IMPRES battery with an IMPREScharger for optimized battery life and valuablebattery data. IMPRES batteries chargedexclusively with IMPRES chargers receive a 6-month capacity warranty extension over thestandard Motorola Premium battery warrantyduration.
• Charge a new battery 14 to 16 hours before initialuse for best performance. Prior to charging abattery with the radio, it is recommended to turnthe radio off. Batteries charge best at roomtemperature.
Attaching the BatteryFollow the procedure to attach the battery to yourradio.
1 Fit the battery into the slots at the bottom of theradio.
12
2 Push the top of the battery down until the latchsnaps into place.
Basic O
perations
17
English
1
2
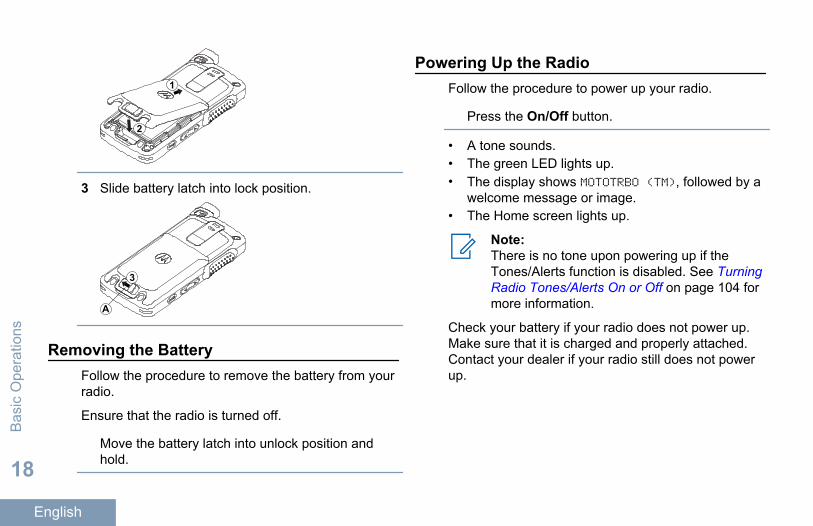
3 Slide battery latch into lock position.
A
3
Removing the BatteryFollow the procedure to remove the battery from yourradio.
Ensure that the radio is turned off.
Move the battery latch into unlock position andhold.
Powering Up the RadioFollow the procedure to power up your radio.
Press the On/Off button.
• A tone sounds.• The green LED lights up.• The display shows MOTOTRBO (TM), followed by a
welcome message or image.• The Home screen lights up.
Note:There is no tone upon powering up if theTones/Alerts function is disabled. See TurningRadio Tones/Alerts On or Off on page 104 formore information.
Check your battery if your radio does not power up.Make sure that it is charged and properly attached.Contact your dealer if your radio still does not powerup.
Bas
ic O
pera
tions
18
English
Adjusting the VolumeFollow the procedure to change the volume level ofyour radio.
Do one of the following:
• Press the Volume Up button to increase thevolume.
• Press the Volume Down button to decreasethe volume.
Note:Your radio can be programmed to have aminimum volume offset where the volumelevel cannot be lowered past theprogrammed minimum volume. Check withyour dealer or system administrator formore information.
Basic O
perations
19
English
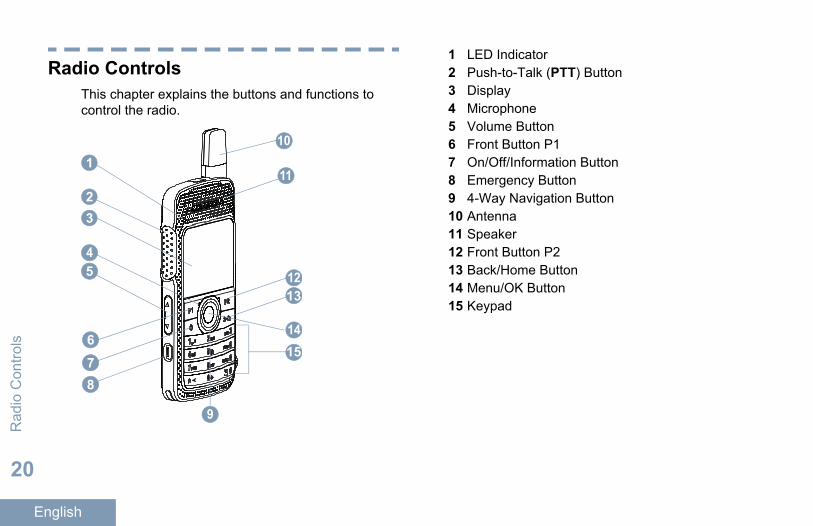
Radio ControlsThis chapter explains the buttons and functions tocontrol the radio.
5
9
4
3
78
2
1
15
11
12
10
614
13
1 LED Indicator2 Push-to-Talk (PTT) Button3 Display4 Microphone5 Volume Button6 Front Button P17 On/Off/Information Button8 Emergency Button9 4-Way Navigation Button10 Antenna11 Speaker12 Front Button P213 Back/Home Button14 Menu/OK Button15 Keypad
Rad
io C
ontro
ls
20
English
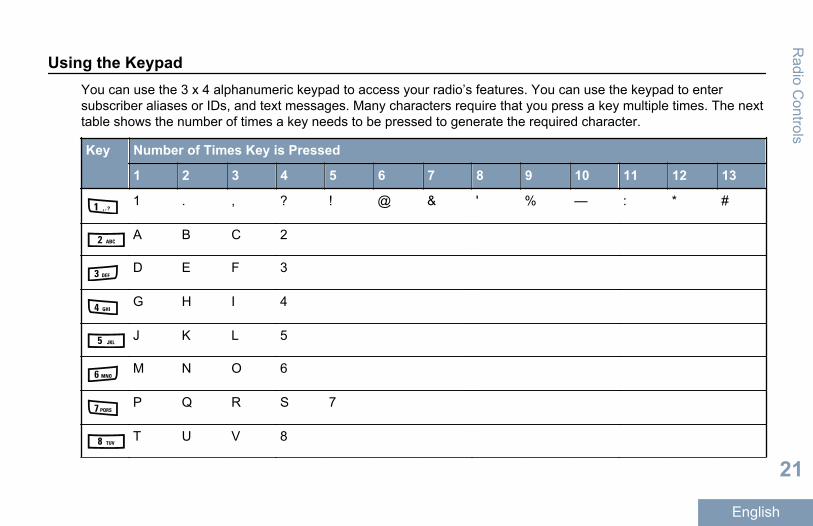
Using the KeypadYou can use the 3 x 4 alphanumeric keypad to access your radio’s features. You can use the keypad to entersubscriber aliases or IDs, and text messages. Many characters require that you press a key multiple times. The nexttable shows the number of times a key needs to be pressed to generate the required character.
Key Number of Times Key is Pressed
1 2 3 4 5 6 7 8 9 10 11 12 13
1 . , ? ! @ & ' % — : * #
A B C 2
D E F 3
G H I 4
J K L 5
M N O 6
P Q R S 7
T U V 8
Radio C
ontrols
21
English
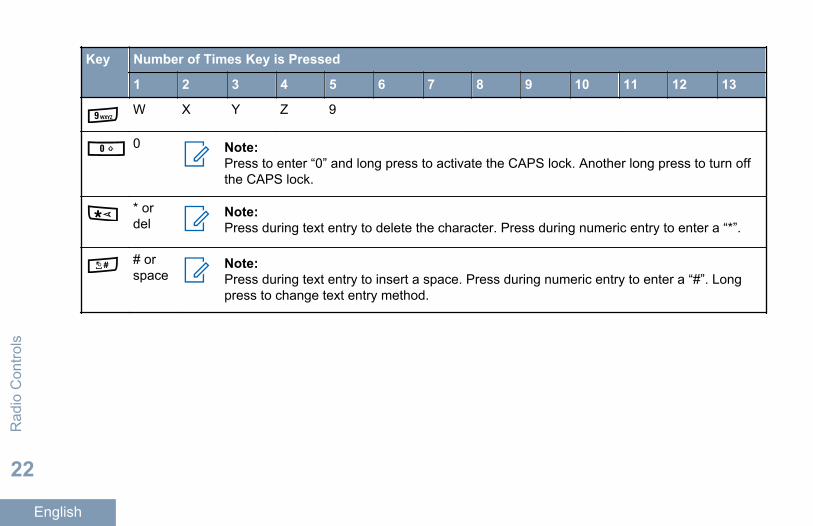
Key Number of Times Key is Pressed
1 2 3 4 5 6 7 8 9 10 11 12 13
W X Y Z 9
0 Note:Press to enter “0” and long press to activate the CAPS lock. Another long press to turn offthe CAPS lock.
* ordel
Note:Press during text entry to delete the character. Press during numeric entry to enter a “*”.
# orspace
Note:Press during text entry to insert a space. Press during numeric entry to enter a “#”. Longpress to change text entry method.
Rad
io C
ontro
ls
22
English

Capacity Max Operations
Capacity M
ax Operations
23
English

Capacity Max Operations
Programmable ButtonsDepending on the duration of a button press, yourdealer can program the programmable buttons asshortcuts to radio functions.
Short press Pressing and releasing rapidly.
Long press Pressing and holding for theprogrammed duration.
Note:See Emergency Operation on page 292 formore information on the programmed durationof the Emergency button.
Push-To-Talk (PTT) ButtonThe PTT button serves two basic purposes.
• While a call is in progress, the PTT button allowsthe radio to transmit to other radios in the call. Themicrophone is activated when the PTT button ispressed.
• While a call is not in progress, the PTT button isused to make a new call.
You hear a continuous Talk Prohibit Tone if your callis interrupted, for example when the radio receives anEmergency call. You should release the PTT button.
Assignable Radio FunctionsThe following radio functions can be assigned to theprogrammable buttons by your dealer or systemadministrator.
Actions A programmable button toaccess a RM programmableaction list.
Audio Ambience Allows the user to select anenvironment the radio isoperating in.
Audio Profiles Allows the user to select thepreferred audio profile.
Audio Routing Toggles audio routingbetween internal and externalspeakers.
Audio Toggle Toggles audio routingbetween the internal radio
Cap
acity
Max
Ope
ratio
ns
24
English

speaker and the speaker ofwired accessory.
Bluetooth® AudioSwitch
Toggles audio routingbetween internal radiospeaker and externalBluetooth-enabled accessory.
Contacts Provides direct access to theContacts list.
Call Alert Provides direct access to thecontacts list for you to select acontact to whom a Call Alertcan be sent.
Call Log Selects the call log list.
ChannelAnnouncement
Plays zone and channelannouncement voicemessages for the currentchannel.
Display RadioAlias
Displays the name of theradio.
Emergency Depending on theprogramming, initiates orcancels an emergency.
Indoor Location Toggles Indoor Location on oroff.
Intelligent Audio Toggles intelligent audio on oroff.
Manual Dial Initiates a Private Call bykeying in any subscriber ID.
Manual Site Roam Starts the manual site search.
Mic AGC Toggles the internalmicrophone automatic gaincontrol (AGC) on or off.
Notifications Provides direct access to theNotifications list.
One Touch Access Directly initiates a predefinedBroadcast, Private, Phone orGroup Call, a Call Alert or aQuick Text message.
Option BoardFeature
Toggles option boardfeature(s) on or off for optionboard-enabled channels.
Phone Provides direct access to thePhone Contacts list.
Capacity M
ax Operations
25
English

Power BatteryIndicator
Displays the current status ofthe battery level.
Privacy Toggles privacy on or off.
Radio Alias and ID Provides radio alias and ID.
Remote Monitor Turns on the microphone of atarget radio without it givingany indicators.
Reset HomeChannel
Sets a new home channel.
Silence HomeChannel Reminder
Mutes the Home ChannelReminder.
Ring Alert Type Provides access to the RingAlert Type Setting.
Site Info Displays the current CapacityMax site name and ID.Plays site announcementvoice messages for thecurrent site when VoiceAnnouncement is enabled.
Site Lock When toggled on, the radiosearches the current site only.When toggled off, the radio
searches other sites inaddition to the current site.
Telemetry Control Controls the Output Pin on alocal or remote radio.
Text Message Selects the text messagemenu.
Trill Enhancement Toggles trill enhancement onor off.
Unassigned Unassigned programmablebutton.
VoiceAnnouncement
Toggles voice announcementon or off.
Wi-Fi Toggles Wi-Fi on or off.
Zone Selection Allows selection from a list ofzones.
Assignable Settings or Utility FunctionsThe following radio settings or utility functions can beassigned to the programmable buttons.
Tones/Alerts Toggles all tones and alerts on oroff.
Cap
acity
Max
Ope
ratio
ns
26
English
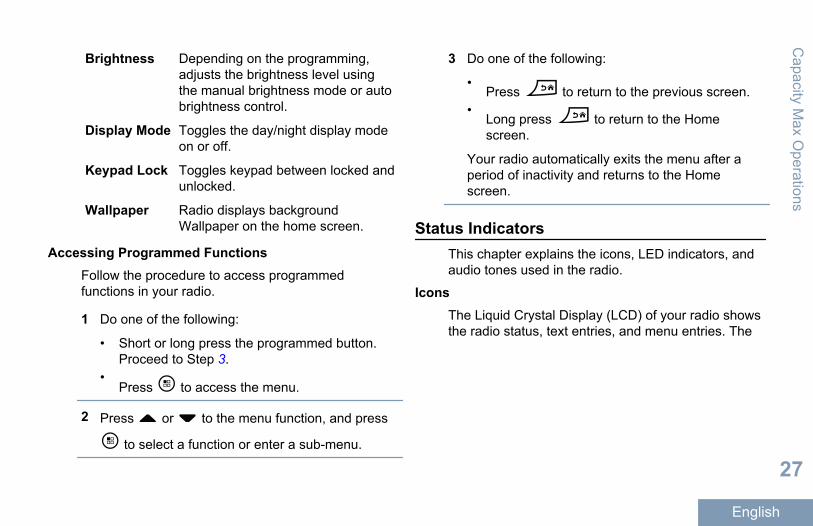
Brightness Depending on the programming,adjusts the brightness level usingthe manual brightness mode or autobrightness control.
Display Mode Toggles the day/night display modeon or off.
Keypad Lock Toggles keypad between locked andunlocked.
Wallpaper Radio displays backgroundWallpaper on the home screen.
Accessing Programmed FunctionsFollow the procedure to access programmedfunctions in your radio.
1 Do one of the following:
• Short or long press the programmed button.Proceed to Step 3.
•Press to access the menu.
2 Press or to the menu function, and press
to select a function or enter a sub-menu.
3 Do one of the following:
•Press to return to the previous screen.
•Long press to return to the Homescreen.
Your radio automatically exits the menu after aperiod of inactivity and returns to the Homescreen.
Status IndicatorsThis chapter explains the icons, LED indicators, andaudio tones used in the radio.
IconsThe Liquid Crystal Display (LCD) of your radio showsthe radio status, text entries, and menu entries. The
Capacity M
ax Operations
27
English
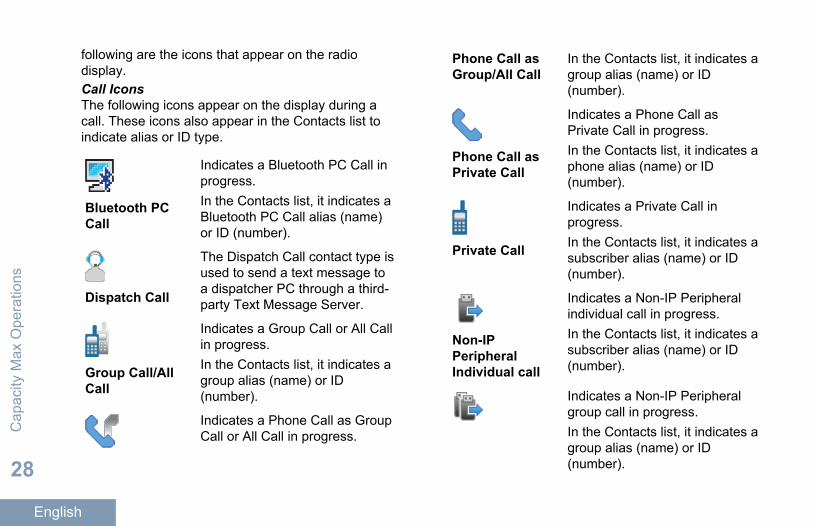
following are the icons that appear on the radiodisplay.Call IconsThe following icons appear on the display during acall. These icons also appear in the Contacts list toindicate alias or ID type.
Bluetooth PCCall
Indicates a Bluetooth PC Call inprogress.In the Contacts list, it indicates aBluetooth PC Call alias (name)or ID (number).
Dispatch Call
The Dispatch Call contact type isused to send a text message toa dispatcher PC through a third-party Text Message Server.
Group Call/AllCall
Indicates a Group Call or All Callin progress.In the Contacts list, it indicates agroup alias (name) or ID(number).
Indicates a Phone Call as GroupCall or All Call in progress.
Phone Call asGroup/All Call
In the Contacts list, it indicates agroup alias (name) or ID(number).
Phone Call asPrivate Call
Indicates a Phone Call asPrivate Call in progress.In the Contacts list, it indicates aphone alias (name) or ID(number).
Private Call
Indicates a Private Call inprogress.In the Contacts list, it indicates asubscriber alias (name) or ID(number).
Non-IPPeripheralIndividual call
Indicates a Non-IP Peripheralindividual call in progress.In the Contacts list, it indicates asubscriber alias (name) or ID(number).
Indicates a Non-IP Peripheralgroup call in progress.In the Contacts list, it indicates agroup alias (name) or ID(number).
Cap
acity
Max
Ope
ratio
ns
28
English

Non-IPPeripheralGroup call
Option BoardIndividual Call
Indicates an Option Boardindividual call in progress.In the Contacts list, it indicates asubscriber alias (name) or ID(number).
Option BoardGroup Call
Indicates an Option Board groupcall in progress.In the Contacts list, it indicates agroup alias (name) or ID(number).
Display IconsThe following icons appear on the status bar at thetop of the radio display. The icons are arranged leftmost in order of appearance or usage, and arechannel-specific.
All Tones Disabled
No ring tones available.
Battery
The number of bars (0 – 4)shown indicates the chargeremaining in the battery.Blinks when the battery islow.
Battery ChargingStatus
Shows battery chargingstatus.
Bluetooth Connected
The Bluetooth feature isenabled. The icon stays litwhen a remote Bluetoothdevice is connected.
Bluetooth NotConnected
The Bluetooth feature isenabled but there is noremote Bluetooth deviceconnected.
Emergency
Radio is in Emergencymode.
Capacity M
ax Operations
29
English

High Volume Data
Radio is receiving highvolume data and channel isbusy.
Indoor LocationAvailable[2]
Indoor location status is onand available.
Indoor LocationUnavailable[2]
Indoor location status is onbut unavailable due toBluetooth disabled orBeacons Scan suspendedby Bluetooth.
Notification
Notification List has one ormore missed events.
Option Board
The Option Board isenabled. (Option boardenabled models only)
The Option Board isdisabled.
Option Board Non-Function
Over-the-AirProgramming DelayTimer
Indicates time left beforeautomatic restart of radio.
Received SignalStrength Indicator(RSSI)
The number of barsdisplayed represents theradio signal strength. Fourbars indicate the strongestsignal. This icon is onlydisplayed while receiving.
Ring Only
Ringing mode is enabled.
Secure
The Privacy feature isenabled.
Silent ring mode is enabled.Cap
acity
Max
Ope
ratio
ns
30
English
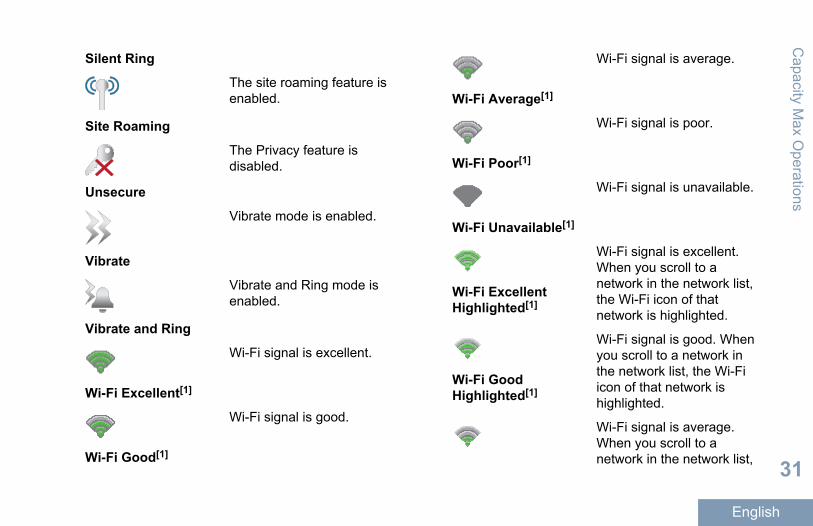
Silent Ring
Site Roaming
The site roaming feature isenabled.
Unsecure
The Privacy feature isdisabled.
Vibrate
Vibrate mode is enabled.
Vibrate and Ring
Vibrate and Ring mode isenabled.
Wi-Fi Excellent[1]
Wi-Fi signal is excellent.
Wi-Fi Good[1]
Wi-Fi signal is good.
Wi-Fi Average[1]
Wi-Fi signal is average.
Wi-Fi Poor[1]
Wi-Fi signal is poor.
Wi-Fi Unavailable[1]
Wi-Fi signal is unavailable.
Wi-Fi ExcellentHighlighted[1]
Wi-Fi signal is excellent.When you scroll to anetwork in the network list,the Wi-Fi icon of thatnetwork is highlighted.
Wi-Fi GoodHighlighted[1]
Wi-Fi signal is good. Whenyou scroll to a network inthe network list, the Wi-Fiicon of that network ishighlighted.
Wi-Fi signal is average.When you scroll to anetwork in the network list,
Capacity M
ax Operations
31
English

Wi-Fi AverageHighlighted[1]
the Wi-Fi icon of thatnetwork is highlighted.
Wi-Fi PoorHighlighted[1]
Wi-Fi signal is poor. Whenyou scroll to a network inthe network list, the Wi-Fiicon of that network ishighlighted.
Wi-Fi UnavailableHighlighted[1]
Wi-Fi signal is unavailable.When you scroll to anetwork in the network list,the Wi-Fi icon of thatnetwork is highlighted.
Mini Notice IconsThe following icons appear momentarily on thedisplay after an action to perform a task is taken.
Failed action taken.
Failed Transmission(Negative)
SuccessfulTransmission (Positive)
Successful action taken.
Transmission inProgress (Transitional)
Transmitting. This isseen before indication forSuccessful Transmissionor Failed Transmission.
Sent Item IconsThe following icons appear at the top right corner ofthe display in the Sent Items folder.
or In Progress
The text message to asubscriber alias or ID ispending transmission,followed by waiting foracknowledgement.
1 Only applicable for SL7550e/SL7590e/SL7580e2 Only applicable for models with the latest software and hardware.
Cap
acity
Max
Ope
ratio
ns
32
English
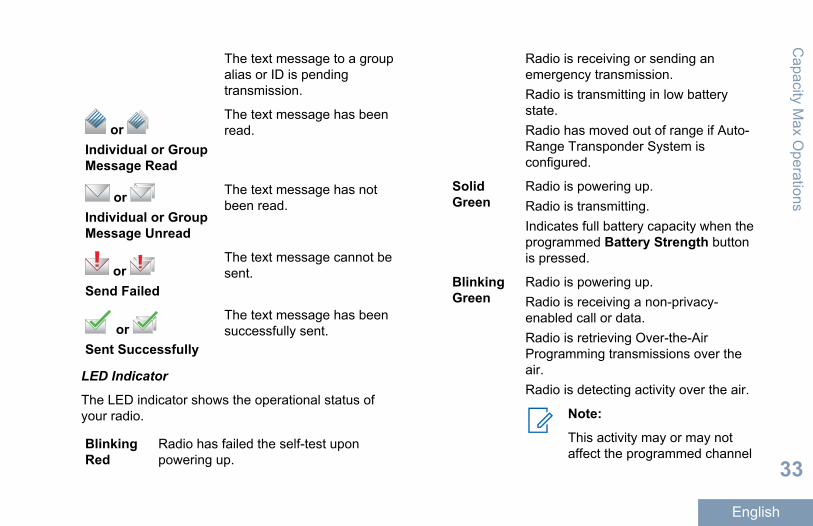
The text message to a groupalias or ID is pendingtransmission.
or Individual or GroupMessage Read
The text message has beenread.
or Individual or GroupMessage Unread
The text message has notbeen read.
or Send Failed
The text message cannot besent.
or Sent Successfully
The text message has beensuccessfully sent.
LED Indicator
The LED indicator shows the operational status ofyour radio.
BlinkingRed
Radio has failed the self-test uponpowering up.
Radio is receiving or sending anemergency transmission.Radio is transmitting in low batterystate.Radio has moved out of range if Auto-Range Transponder System isconfigured.
SolidGreen
Radio is powering up.Radio is transmitting.Indicates full battery capacity when theprogrammed Battery Strength buttonis pressed.
BlinkingGreen
Radio is powering up.Radio is receiving a non-privacy-enabled call or data.Radio is retrieving Over-the-AirProgramming transmissions over theair.Radio is detecting activity over the air.
Note:
This activity may or may notaffect the programmed channel
Capacity M
ax Operations
33
English

of the radio due to the nature ofthe digital protocol.
DoubleBlinkingGreen
Radio is receiving a privacy-enabledcall or data.
SolidYellow
Radio is in Bluetooth DiscoverableMode.Indicates fair battery capacity when theprogrammed Battery Strength buttonis pressed.
BlinkingYellow
Radio is receiving a Call Alert.
DoubleBlinkingYellow
Radio has Auto Roaming enabled.Radio is actively searching for a newsite.Radio has yet to respond to a GroupCall Alert.Radio is locked.Radio is not connected to the system.
TonesThe following are the tones that sound through on theradio speaker.
High Pitched Tone
Low Pitched Tone
Audio TonesAudio tones provide you with audible indications ofthe status, or response to data received on the radio.
Continuous Tone
A monotone sound. Soundscontinuously until termination.
Periodic Tone
Sounds periodically dependingon the duration set by the radio.Tone starts, stops, and repeatsitself.
Repetitive Tone
A single tone that repeats itselfuntil it is terminated by the user.
Momentary Tone
Sounds only once for a durationset by the radio.C
apac
ity M
ax O
pera
tions
34
English
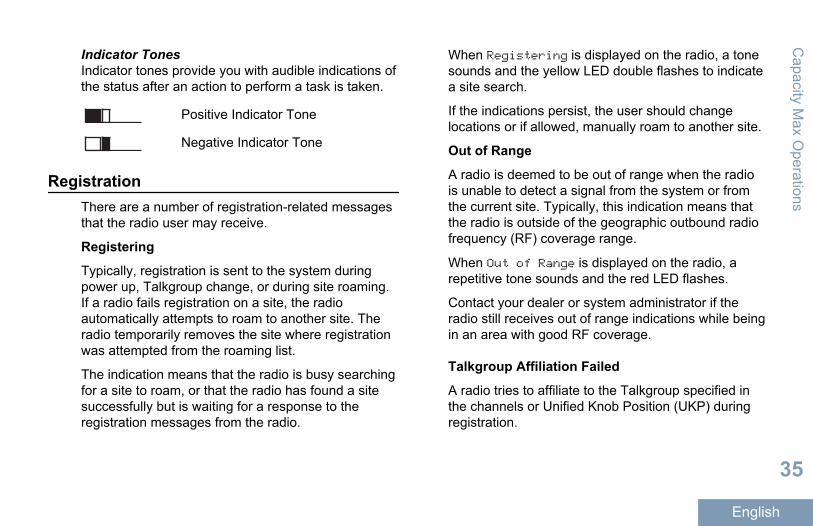
Indicator TonesIndicator tones provide you with audible indications ofthe status after an action to perform a task is taken.
Positive Indicator Tone
Negative Indicator Tone
RegistrationThere are a number of registration-related messagesthat the radio user may receive.
Registering
Typically, registration is sent to the system duringpower up, Talkgroup change, or during site roaming.If a radio fails registration on a site, the radioautomatically attempts to roam to another site. Theradio temporarily removes the site where registrationwas attempted from the roaming list.
The indication means that the radio is busy searchingfor a site to roam, or that the radio has found a sitesuccessfully but is waiting for a response to theregistration messages from the radio.
When Registering is displayed on the radio, a tonesounds and the yellow LED double flashes to indicatea site search.
If the indications persist, the user should changelocations or if allowed, manually roam to another site.
Out of Range
A radio is deemed to be out of range when the radiois unable to detect a signal from the system or fromthe current site. Typically, this indication means thatthe radio is outside of the geographic outbound radiofrequency (RF) coverage range.
When Out of Range is displayed on the radio, arepetitive tone sounds and the red LED flashes.
Contact your dealer or system administrator if theradio still receives out of range indications while beingin an area with good RF coverage.
Talkgroup Affiliation Failed
A radio tries to affiliate to the Talkgroup specified inthe channels or Unified Knob Position (UKP) duringregistration.
Capacity M
ax Operations
35
English

A radio that is in affiliation fail state is unable to makeor receive calls from the Talkgroup that the radio istrying to affiliate to.
When a radio fails to affiliate with a Talkgroup, UKPAlias is displayed in the home screen with ahighlighted background.
Contact your dealer or system administrator if theradio receives affiliation failure indications.
Register Denied
Registration denied indicators are received when theregistration with the system is not accepted.
The radio does not indicate to the radio user thespecific reason the registration was denied. Normally,a registration is denied when the system operator hasdisabled the access of the radio to the system.
When a radio is denied registration, RegisterDeniedis displayed on the radio and the yellow LED doubleflashes to indicate a site search.
Zone and Channel SelectionsThis chapter explains the operations to select a zoneor channel on your radio.
The radio can be programmed with a maximum of250 Capacity Max Zones with a maximum of 160Channels per zone.
Selecting ZonesFollow the procedure to select the required zone onyour radio.
1 Do one of the following:
• Press the programmed Zone Selection button.Proceed to Step 3.
•Press to access the menu.
2Press or to Zone. Press to select.The display shows and the current zone.
3Press or to the required zone. Press to select.The display shows <Zone> Selectedmomentarily and returns to the selected zonescreen.
Cap
acity
Max
Ope
ratio
ns
36
English

Selecting a Call Type
Use the 4–Way Navigation Disc to select a call type.This can be a Group Call, Broadcast Call, All Call, orPrivate Call, depending on how your radio isprogrammed. If you navigate with the 4–WayNavigation Disc to a different Call Type this causesthe radio to re-register with the Capacity Max System.The radio registers with the Talkgroup ID that hasbeen programmed for the new call type.
Your radio does not operate when selected to anunprogrammed channel, use the 4–Way NavigationDisc to select a programmed channel instead.
Once the required zone is displayed (if you havemultiple zones in your radio), use the 4–WayNavigation Disc to select the call type.
Selecting a Site
A site provides coverage for a specific area. In amulti-site network, the Capacity Max radio willautomatically search for a new site when the signal
level from the current site drops to an unacceptablelevel.
Roam Request
A Roam Request tells the radio to search for adifferent site, even if the signal from the current site isacceptable.
If there are no sites available,
• The radio display shows Searching andcontinues to search through the list of sites.
• The radio will return to the previous site, if theprevious site is still available.
Note:This is programmed by your dealer.
Press the programmed Manual Site Roam button.You hear a tone, indicating the radio has switchedto a new site. The display shows Site ID <SiteNumber>.
Site Restriction
In Capacity Max system, your radio administrator hasthe ability to decide which network sites your radio isand is not allowed to use. The radio does not have tobe reprogrammed to change the list of allowed and
Capacity M
ax Operations
37
English
disallowed sites. If your radio attempts to register at adisallowed site, your radio receives indication that thesite is denied. The radio then searches for a differentnetwork site.
When experiencing site restrictions, your radiodisplays RegisterDenied and the yellow LED doubleflashes to indicate a site search.
Site TrunkingA site must be able to communicate with the TrunkController to be considered as System Trunking. Ifthe site cannot communicate with the Trunk Controllerin the system, a radio enters Site Trunking mode.While in Site Trunking, the radio provides a periodicaudible and visual indication to the user to inform theuser of their limited functionality.
When a radio is in Site Trunking, the radio displaysSite Trunking and a repetitive tone sounds.
The radios in Site Trunking are still able to makegroup and individual voice calls as well as send textmessages to other radios within the same site. Voiceconsoles, logging recorders, phone gateways, anddata applications cannot communicate to the radiosat the site.
Once in Site Trunking, a radio that is involved in callsacross multiple sites will only be able to communicatewith other radios within the same site. Communicationto and from other sites would be lost.
Note:If there are multiple sites that cover the currentlocation of the radio and one of the sitesenters Site Trunking, the radios roam toanother site if within coverage.
CallsThis chapter explains the operations to receive,respond to, make, and stop calls.
You can select a subscriber alias or ID, or group aliasor ID after you have selected a channel by using oneof these features:
Alias Search This method is used for Group,Private and All Calls only with akeypad microphone
Contacts List This method provides directaccess to the Contacts list.C
apac
ity M
ax O
pera
tions
38
English
Manual Dial (viaContacts)
This method is used for Privateand Phone Calls only with akeypad microphone.
ProgrammedNumber Keys
This method is used for Group,Private, and All Calls only with akeypad microphone.
Note:You can only have onealias or ID assigned to anumber key, but you canhave more than onenumber key associatedto an alias or ID. All thenumber keys on akeypad microphone canbe assigned. See Assigning Entries toProgrammable NumberKeys on page 66 formore information.
ProgrammedOne TouchAccess Button
This method is used for Group,Private, and Phone Calls only.
Note:You can only have oneID assigned to a OneTouch Access buttonwith a short or longprogrammable buttonpress. Your radio canhave multiple OneTouch Access buttonsprogrammed.
ProgrammableButton
This method is used for PhoneCalls only.
Group CallsYour radio must be configured as part of a group toreceive a call from or make a call to the group ofusers.Making Group CallsFollow the procedure to make Group Calls on yourradio.
1 Do one of the following:
• Select a channel with the active group alias orID. See Selecting a Call Type on page 37.
Capacity M
ax Operations
39
English

• Press the programmed One Touch Accessbutton.
2 Press the PTT button to make the call.The green LED lights up. The first text line showsthe Group Call icon and alias.
3 Wait for the Talk Permit Tone to end and speakclearly into the microphone if enabled.
4 Release the PTT button to listen.The green LED lights up when the target radioresponds. The display shows the Group Call icon,and alias or ID, and the transmitting radio alias orID.
5 If the Channel Free Indication feature is enabled,you hear a short alert tone the moment thetransmitting radio releases the PTT button,indicating the channel is free for you to respond.Press the PTT button to respond to the call.The call ends when there is no voice activity for apredetermined period.
The call initiator can press to end a GroupCall.
Making Group Calls by Using the Contacts ListFollow the procedure to make Group Calls on yourradio by using the Contacts list.
1Press to access the menu.
2Press or to Contacts. Press to select.
3 Press or to the required alias or ID. Press
to select.
4 Press the PTT button to make the call.The green LED lights up.
The first line displays the subscriber alias or ID.The second line displays Group Call and theGroup Call icon.
5 Wait for the Talk Permit Tone to end and speakclearly into the microphone if enabled.
6 Release the PTT button to listen.The green LED lights up when the target radioresponds. The display shows the transmitting userID.
Cap
acity
Max
Ope
ratio
ns
40
English

7 If the Channel Free Indication feature is enabled,you hear a short alert tone the moment thetransmitting radio releases the PTT button,indicating the channel is free for you to respond.Press the PTT button to respond to the call.The call ends when there is no voice activity for apredetermined period.
The call initiator can press to end the GroupCall.
You hear a short tone. The display shows CallEnded.
Making Group Calls by Using the ProgrammableNumber KeyFollow the procedure to make Group Calls on yourradio by using the programmable number key.
1 Long press the programmed number key to thepredefined alias or ID when you are on the Homescreen.If a number key is assigned to an entry in aparticular mode, this feature is not supported whenyou long press the number key in another mode.
A negative indicator tone sounds if the number keyis not associated to an entry.
2 Press the PTT button to make the call.The green LED lights up. The display shows theGroup Call icon at the top right corner. The firsttext line shows the caller alias.The second text linedisplays the call status for Group Call.
3 Wait for the Talk Permit Tone to end and speakclearly into the microphone if enabled.
4 Release the PTT button to listen.The green LED lights up when the target radioresponds. The display shows the destination alias.
5 If the Channel Free Indication feature is enabled,you hear a short alert tone the moment thetransmitting radio releases the PTT button,indicating the channel is free for you to respond.Press the PTT button to respond to the call.The call ends when there is no voice activity for apredetermined period. The radio returns to thescreen you were on before initiating the call.
Capacity M
ax Operations
41
English

The call initiator can press to end the GroupCall.
See Assigning Entries to Programmable NumberKeys on page 66 for more information.Making Group Calls by Using the Alias Search You can also use alias or alphanumeric search toretrieve the required subscriber alias. This feature isonly applicable while in Contacts. If the target radio isnot available, you hear a short tone and see PartyNot Available on the display; the radio returns tothe menu prior to initiating the radio presence check.Follow the procedure to make All Calls on your radioby using the alias search.
Note:
Press button or to exit alias search.
1Press to access the menu.
2Press or to Contacts. Press to select.The display shows the entries in alphabeticalorder.
3 Enter the first character of the required alias.
The display shows a blinking cursor.
4 Enter the rest of the characters of the requiredalias.The alias search is case-insensitive. If there aretwo or more entries with the same name, thedisplay shows the entry listed first in the list.The first text line shows the characters youentered. The following text lines show theshortlisted search results.
5 Press the PTT button to make the call.The green LED lights up. The display shows thedestination ID, call type, and Group Call icon.
6 Wait for the Talk Permit Tone to end and speakclearly into the microphone if enabled.
7 Release the PTT button to listen.The green LED blinks when the target radioresponds.
8 If the Channel Free Indication feature is enabled,you hear a short alert tone the moment thetransmitting radio releases the PTT button,indicating the channel is free for you to respond.Press the PTT button to respond to the call.
Cap
acity
Max
Ope
ratio
ns
42
English
The call ends when there is no voice activity for apredetermined period. A tone sounds. The displayshows Call Ended.
The call initiator can press to end the GroupCall.
Responding to Group CallsFollow the procedure to respond to Group Calls onyour radio.
When you receive a Group Call:
• The green LED blinks.• The first line of the display shows the caller alias
and the RSSI icon.• The second line displays the group alias and the
Group Call icon (in Digital mode only).• Your radio unmutes and the incoming call sounds
through the speaker.
1 Do one of the following:
• If the Channel Free Indication feature isenabled, you hear a short alert tone themoment the transmitting radio releases thePTT button, indicating the channel is free for
you to respond. Press the PTT button torespond to the call.
• If the Voice Interrupt feature is enabled, pressthe PTT button to interrupt the audio from thetransmitting radio and free the channel for youto respond.
The green LED lights up.
2 Wait for the Talk Permit Tone to end and speakclearly into the microphone if enabled.
3 Release the PTT button to listen.The call ends when there is no voice activity for apredetermined period.
Broadcast CallA Broadcast Call is a one-way voice call from anyuser to an entire talkgroup.
The Broadcast Call feature allows only the callinitiating user to transmit to the talkgroup, while therecipients of the call cannot respond.
The broadcast initiator can also end the broadcastcall. To receive a call from a group of users, or to calla group of users, the radio must be configured as partof a group.
Capacity M
ax Operations
43
English

Making Broadcast CallsFollow the procedure to make Broadcast Calls onyour radio.
1 Do one of the following:
• Select a channel with the active group alias orID. See Selecting a Call Type on page 37.
• Press the programmed One Touch Accessbutton.
2 Press the PTT button to make the call.The green LED lights up.The displays shows theGroup Call icon and alias.
3 Wait for the Talk Permit Tone to end and speakclearly into the microphone if enabled.
The call initiator can press to end theBroadcast Call.
Making Broadcast Calls Using the Contact ListFollow the procedure to make Broadcast Calls onyour radio using the Contacts list.
1Press to access the menu.
2Press or to Contacts. Press to select.
3 Press or to the required alias or ID. Press
to select.
4 Press the PTT button to make the call.The green LED blinks.
The first line displays the subscriber alias or ID.The second line displays Group Call and theGroup Call icon.
5 Wait for the Talk Permit Tone to end and speakclearly into the microphone if enabled.
The call initiator can press to end theBroadcast Call.
Making Broadcast Calls Using the ProgrammableNumber KeyFollow the procedure to make Broadcast Calls onyour radio using the programmable number key.
1 Long press the programmed number key to thepredefined alias or ID when you are on the Homescreen.
Cap
acity
Max
Ope
ratio
ns
44
English
If a number key is assigned to an entry in aparticular mode, this feature is not supported whenyou long press the number key in another mode.A negative indicator tone sounds if the number keyis not associated to an entry.
2 Press the PTT button to make the call.The green LED lights up.The display shows theGroup Call icon at the top right corner. The firsttext line shows the caller alias.
3 Wait for the Talk Permit Tone to end and speakclearly into the microphone if enabled.
The call initiator can press to end theBroadcast Call.
Receiving Broadcast CallsFollow the procedure to receive a Broadcast Call onyour radio.
When you receive a Broadcast Call:
• The green LED blinks.• The first line of the display shows the caller alias
and the RSSI icon.• The second line displays the group alias and the
Group Call icon.
• Your radio unmutes and the incoming call soundsthrough the speaker.
Note:Recipient users are not allowed to Talkbackduring a Broadcast Call. The display showsTalkback Prohibit. The Talkback ProhibitTone will sound momentarily if the PTT buttonis pressed during a Broadcast Call.
Private CallA Private Call is a call from an individual radio toanother individual radio.
There are two ways to set up a Private Call.
• The first call type is called Off Air Call Set-Up(OACSU). OACSU sets up the call afterperforming a radio presence check and completesthe call automatically.
• The second type is called Full Off Air Call Set-Up(FOACSU). FOACSU also sets up the call afterperforming a radio presence check. However,FOACSU calls require user acknowledgement tocomplete the call and allows the user to eitherAccept or Decline the call.
Capacity M
ax Operations
45
English

The type of call is configured by the systemadministrator.
If the target radio is not available prior to setting upthe Private Call, the following occur:
• A tone sounds.• The display shows a negative mini notice.• The radio returns to the menu prior to initiating the
radio presence check.
Note:Both the call initiator and recipient are able toterminate an on-going Private Call by pressing
.
Making Private CallsYour radio must be programmed for you to initiate aPrivate Call. You hear a negative indicator tone whenyou initiate the call if this feature is not enabled.If thetarget radio is not available, you hear a short toneand see Party Not Available on the display.Follow the procedure to make Private Calls on yourradio.
1 Do one of the following:
• Select a channel with the active subscriberalias or ID. See Selecting a Call Type on page37.
• Press the programmed One Touch Accessbutton.
2 Hold the radio vertically 1 to 2 inches (2.5 to 5.0cm) from your mouth.
3 Press the PTT button to make the call.The green LED lights up.The display shows thePrivate Call icon, the subscriber alias, and callstatus.
4 Wait for the Talk Permit Tone to end and speakclearly into the microphone if enabled.
5 Release the PTT button to listen.The green LED lights up when the target radioresponds.
6 The call ends when there is no voice activity for apredetermined period. The display shows CallEnded.
Cap
acity
Max
Ope
ratio
ns
46
English
Both the call initiator and recipient are able toterminate an on-going Private Call by pressing
.
Making Private Calls by Using the ProgrammableNumber KeyFollow the procedure to make Private Calls on yourradio by using the programmable number key.
1 Long press the programmed number key to thepredefined alias or ID when you are on the Homescreen.If a number key is assigned to an entry in aparticular mode, this feature is not supported whenyou long press the number key in another mode.A negative indicator tone sounds if the number keyis not associated to an entry.
2 Press the PTT button to make the call.The green LED lights up. The display shows thePrivate Call icon at the top right corner. The firsttext line shows the caller alias. The second textline shows the call status.
3 Wait for the Talk Permit Tone to end and speakclearly into the microphone if enabled.
4 Release the PTT button to listen.The green LED blinks when the target radioresponds. The display shows the destination alias.
5 The call ends when there is no voice activity for apredetermined period. The display shows CallEnded.Both the call initiator and recipient are able toterminate an on-going Private Call by pressing
.
See Assigning Entries to Programmable NumberKeys on page 66 for more information.Making Private Calls by Using the Alias SearchYou can also use alias or alphanumeric search toretrieve the required subscriber alias. This feature isonly applicable while in Contacts. Follow theprocedure to make Private Calls on your radio byusing the alias search.
Note:
Press button or to exit alias search.
1Press to access the menu.
Capacity M
ax Operations
47
English

2Press or to Contacts. Press to select.The display shows the entries in alphabeticalorder.
3 Enter the first character of the required alias.The display shows a blinking cursor.
4 Enter the rest of the characters of the requiredalias.The alias search is case-insensitive. If there aretwo or more entries with the same name, thedisplay shows the entry listed first in the list.The first text line shows the characters youentered. The following text lines show theshortlisted search results.
5 Press the PTT button to make the call.The green LED lights up. The display shows thedestination ID, call type, and Private Call icon.
6 Wait for the Talk Permit Tone to end and speakclearly into the microphone if enabled.
7 Release the PTT button to listen.The green LED blinks when the target radioresponds.
8 The call ends when there is no voice activity for apredetermined period. The display shows CallEnded.Both the call initiator and recipient are able toterminate an on-going Private Call by pressing
.
Making a Private Call with a One Touch CallButton
The One Touch Call feature allows you to easilymake a Private Call to a pre-defined Private Call aliasor ID. This feature can be assigned to a short or longprogrammable button press.
You can ONLY have one alias or ID assigned to aOne Touch Call button. Your radio can have multipleOne Touch Call buttons programmed.
1 Press the programmed One Touch Call button tomake a Private Call to the pre-defined Private Callalias or ID.
2 Hold the radio vertically 1 to 2 inches (2.5 to 5.0cm) from your mouth.
3 Press the PTT button to make the call.
Cap
acity
Max
Ope
ratio
ns
48
English

The LED lights up solid green.
The display shows the Private Call alias or ID.
4 Wait for the Talk Permit Tone to finish (if enabled)and speak clearly into the microphone.
5 Release the PTT button to listen.When the target radio responds, the LED blinksgreen.If there is no voice activity for a predeterminedperiod of time, the call ends.Both the call initiator and recipient are able toterminate an on-going Private Call by pressing
.
Making Private Calls by Using the Manual DialFollow the procedure to make Private Calls on yourradio by using the manual dial.
1Press to access the menu.
2Press or to Contacts. Press to select.
3Press or to Manual Dial. Press toselect.
4Press or to Radio Number. Press toselect.
5 Do one of the following:
•Enter the subscriber ID, and press toproceed.
• Edit the previously dialed subscriber ID, and
press to proceed.
6 Press the PTT button to make the call.The green LED lights up. The display shows thedestination alias.
7 Wait for the Talk Permit Tone to end and speakclearly into the microphone if enabled.
8 Release the PTT button to listen.The green LED lights up when the target radioresponds. The display shows the transmitting useralias or ID.
Capacity M
ax Operations
49
English
9 If the Channel Free Indication feature is enabled,you hear a short alert tone the moment thetransmitting radio releases the PTT button,indicating the channel is free for you to respond.Press the PTT button to respond to the call.The call ends when there is no voice activity for apredetermined period. A tone sounds. The displayshows Call Ended.Both the call initiator and recipient are able toterminate an on-going Private Call by pressing
.
Responding to Private Calls
When you receive a Private Call:
• The green LED blinks.• The first line shows the subscriber alias or ID, and
the RSSI icon.• The second line displays Private Call and the
Private Call icon.• Your radio unmutes and the incoming call sounds
through the speaker.
Note:Depending on how your radio is configured,either Off Air Call Set-Up (OACSU) or Full OffAir Call Set-Up (FOACSU), responding toPrivate Calls may or may not require useracknowledgement.
For the OACSU configuration, your radiounmutes and the call connects automatically.
The following are methods on how to respond toPrivate Calls configured as FOACSU.
• To decline a Private Call, do one of the following:
•Press or to Reject and press todecline a Private Call.
•Press to decline a Private Call.
• To accept a Private Call, do one of the following:
•Press or to Accept and press toanswer a Private Call.
• Press the PTT button on any entry.
• The green LED lights up.
Cap
acity
Max
Ope
ratio
ns
50
English

• Wait for the Talk Permit Tone to end and speakclearly into the microphone if enabled.
• Release the PTT button to listen.The call ends when there is no voice activity for apredetermined period. A tone sounds.The displayshows Call Ended.
Note:Both the call initiator and recipient are ableto terminate an on-going Private Call by
pressing .
All CallsAn All Call is a call from an individual radio to everyradio on the site or every radio at a group of sites,depending on system configuration. An All Call isused to make important announcements, requiring fullattention from the user. The users on the systemcannot respond to an All Call.
Capacity Max supports Site All Call and Multi-site AllCall. The system administrator may configure one orboth of these in your radio.
Note:Subscribers can support System-Wide AllCalls but Motorola infrastructure does notsupport System-Wide All Calls.
Receiving All Calls
When you receive an All Call:
• A tone sounds.• The green LED blinks.• The display shows the caller ID information and
RSSI icon at the top right corner.• The first text line shows the Group Call icon and
either All Call, Site All Call, or MultiSite Call depending on the type ofconfiguration.
• Your radio unmutes and the incoming call soundsthrough the speaker.
The radio returns to the screen before receiving theAll Call when the call ends.
If the Channel Free Indication feature is enabled, youhear a short alert tone when the transmitting radioreleases the PTT button, indicating the channel isfree for you to use. You cannot respond to an All Call.
Capacity M
ax Operations
51
English

Note:The radio stops receiving the All Call if youswitch to a different channel while receivingthe call. You are not able to continue with anymenu navigation or editing until the call endsduring an All Call.
Making All Calls
Your radio must be programmed for you to make anAll Call. Follow the procedure to make All Calls onyour radio.
1 Select a channel with the active All Call groupalias or ID. See Selecting a Call Type on page 37.
2 Press the PTT button to make the call.The green LED lights up. The display shows theGroup Call icon and either All Call, Site AllCall, or Multi Site Call depending on thetype of configuration.
3 Wait for the Talk Permit Tone to end and speakclearly into the microphone if enabled.Users on the channel cannot respond to the AllCall.
The call initiator can press to end the AllCall.
Making All Calls by Using the ProgrammableNumber KeyFollow the procedure to make All Calls on your radioby using the programmable number key.
1 Long press the programmed number key assignedto the predefined alias or ID when you are on theHome screen.If a number key is assigned to an entry in aparticular mode, this feature is not supported whenyou long press the number key in another mode.A negative indicator tone sounds if the number keyis not associated to an entry.
2 Press the PTT button to make the call.The green LED lights up.The display shows theGroup Call icon and either All Call, Site AllCall, or Multi Site Call depending on thetype of configuration.
3 Wait for the Talk Permit Tone to end and speakclearly into the microphone if enabled.
Cap
acity
Max
Ope
ratio
ns
52
English

The call initiator can press to end the AllCall.
See Assigning Entries to Programmable NumberKeys on page 66 for more information.Making All Calls by Using the Alias Search You can use alias or alphanumeric search to retrievethe required subscriber alias. This feature is onlyapplicable while in Contacts. Follow the procedure tomake All Calls on your radio by using the aliassearch.
Note:
Press button or to exit alias search.
1Press to access the menu.
2Press or to Contacts. Press to select.The display shows the entries in alphabeticalorder.
3 Enter the first character of the required alias.The display shows a blinking cursor.
4 Enter the rest of the characters of the requiredalias.The alias search is case-insensitive. If there aretwo or more entries with the same name, thedisplay shows the entry listed first in the list.The first text line shows the characters youentered. The following text lines show theshortlisted search results.
5 Press the PTT button to make the call.The green LED lights up. The display shows thedestination ID, call type, and Group Call icon.
6 Wait for the Talk Permit Tone to end and speakclearly into the microphone if enabled.
Note:
The call initiator can press to end the AllCall.
Capacity M
ax Operations
53
English
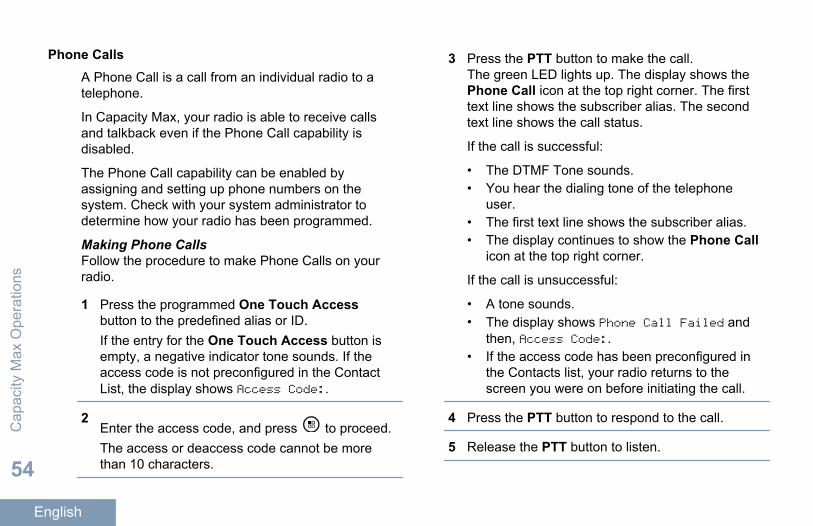
Phone CallsA Phone Call is a call from an individual radio to atelephone.
In Capacity Max, your radio is able to receive callsand talkback even if the Phone Call capability isdisabled.
The Phone Call capability can be enabled byassigning and setting up phone numbers on thesystem. Check with your system administrator todetermine how your radio has been programmed.
Making Phone Calls Follow the procedure to make Phone Calls on yourradio.
1 Press the programmed One Touch Accessbutton to the predefined alias or ID.If the entry for the One Touch Access button isempty, a negative indicator tone sounds. If theaccess code is not preconfigured in the ContactList, the display shows Access Code:.
2Enter the access code, and press to proceed.The access or deaccess code cannot be morethan 10 characters.
3 Press the PTT button to make the call.The green LED lights up. The display shows thePhone Call icon at the top right corner. The firsttext line shows the subscriber alias. The secondtext line shows the call status.
If the call is successful:
• The DTMF Tone sounds.• You hear the dialing tone of the telephone
user.• The first text line shows the subscriber alias.• The display continues to show the Phone Call
icon at the top right corner.
If the call is unsuccessful:
• A tone sounds.• The display shows Phone Call Failed and
then, Access Code:.• If the access code has been preconfigured in
the Contacts list, your radio returns to thescreen you were on before initiating the call.
4 Press the PTT button to respond to the call.
5 Release the PTT button to listen.
Cap
acity
Max
Ope
ratio
ns
54
English

6 Enter extra digits with the keypad if requested by
the call, and press to proceed.If the call ends while you are entering the extradigits requested by the call, your radio returns tothe screen you were on before initiating the call.The DTMF Tone sounds. Your radio returns to theprevious screen.
7Press to end the call.
8 Do one of the following:
• If the deaccess code was not preconfigured,enter the deaccess code when the display
shows De-Access Code:, and press toproceed.
The radio returns to the previous screen.
• Press the programmed One Touch Accessbutton.
If the entry for the One Touch Access buttonis empty, a negative indicator tone sounds.
The DTMF Tone sounds and the display showsEnding Phone Call.
If the call ends successfully:
• A tone sounds.• The display shows Call Ended.
If the call fails to end, the radio returns to thePhone Call screen. Repeat the last two steps orwait for the telephone user to end the call.
When the telephone user ends the call, a tonesounds and the display shows Call Ended.
Making Phone Calls by Using the Contacts ListFollow the procedure to make Phone Calls on yourradio by using the Contacts list.
1Press to access the menu.
2Press or to Contacts. Press to select.The display shows the entries in alphabeticalorder.
3 Press or to the required alias or ID. Press
to select.When you press the PTT button while on thePhone Contacts screen:
Capacity M
ax Operations
55
English

• A negative indicator tone sounds.• The display shows Press OK to Place
Phone Call.
If the selected entry is empty:
• A negative indicator tone sounds.• The display shows Phone Call Invalid #.
4Press or to Call Phone. Press toselect.The display shows Access Code: if the accesscode was not preconfigured.
5Enter the access code, and press to proceed.The access or deaccess code cannot be morethan 10 characters.The first text line shows Calling. The second textline shows the subscriber alias or ID, and thePhone Call icon.
If the call is successful:
• The DTMF Tone sounds.• You hear the dialing tone of the telephone
user.
• The first text line shows the subscriber alias orID, and the RSSI icon.
• The second text line shows Phone Call, andthe Phone Call icon.
If the call is unsuccessful:
• A tone sounds.• The display shows Phone Call Failed and
then, Access Code:.• Your radio returns to the screen you were on
prior to initiating the call if the access code hasbeen preconfigured in the Contacts list.
6 Press the PTT button to respond to the call.The RSSI icon disappears.
7 Release the PTT button to listen.
8 Enter extra digits with the keypad if requested by
the call, and press to proceed.If the call ends while you are entering the extradigits requested by the call, your radio returns tothe screen you were on prior to initiating the call.The DTMF Tone sounds. Your radio returns to theprevious screen.
Cap
acity
Max
Ope
ratio
ns
56
English

9Press to end the call.
10 If the deaccess code was not preconfigured, enterthe deaccess code when the display shows De-
Access Code:, and press to proceed.The radio returns to the previous screen. TheDTMF Tone sounds and the display showsEnding Phone Call.
If the call ends successfully:
• A tone sounds.• The display shows Call Ended.
If the call fails to end, the radio returns to thePhone Call screen. Repeat Step 9 and Step 10, orwait for the telephone user to end the call. Whenyou press the PTT button while in the PhoneContacts screen, as tone sounds and the displayshows Press OK to Place Phone Call.
When the telephone user ends the call, a tonesounds and the display shows Phone CallEnded.
If the call ends while you are entering the extradigits requested by the Phone Call, your radio
returns to the screen you were on prior to initiatingthe call.
Making Phone Calls by Using the Alias SearchYou can also use alias or alphanumeric search toretrieve the required subscriber alias. This feature isonly applicable while in Contacts. Follow theprocedure to make Phone Calls on your radio byusing the alias search.
Note:
Press button or to exit alias search.
1Press to access the menu.
2Press or to Contacts. Press to select.The display shows the entries in alphabeticalorder.
3 Enter the first character of the required alias.The display shows a blinking cursor.
4 Enter the rest of the characters of the requiredalias.
Capacity M
ax Operations
57
English

The alias search is case-insensitive. If there aretwo or more entries with the same name, thedisplay shows the entry listed first in the list.The first text line shows the characters youentered. The following text lines show theshortlisted search results.
5 Press the PTT button to make the call.The green LED lights up. The display shows thedestination ID, call type, and Phone Call icon.
6 Wait for the Talk Permit Tone to end and speakclearly into the microphone if enabled.
7 Release the PTT button to listen.The green LED blinks when the target radioresponds.
8 If the Channel Free Indication feature is enabled,you hear a short alert tone the moment thetransmitting radio releases the PTT button,indicating the channel is free for you to respond.Press the PTT button to respond to the call.The call ends when there is no voice activity for apredetermined period. A tone sounds. The displayshows Call Ended.
Dual Tone Multi FrequencyThe Dual Tone Multi Frequency (DTMF) featureallows the radio to operate in a radio system with aninterface to the telephone systems.
You can turn off the DTMF tone by disabling all radiotones and alerts. See Turning Radio Tones/Alerts Onor Off on page 104 for more information.
Responding to Phone Calls as Group CallsFollow the procedure to respond to Phone Calls asGroup Calls on your radio.
When you receive a Phone Call as a Group Call:
• The display shows the Phone Call icon at the topright corner.
• The display shows Phone Call.• The green LED blinks.• Your radio unmutes and the incoming call sounds
through the speaker.
1 Press the PTT button to respond to the call.
2 Release the PTT button to listen.
3Press to end the call.The display shows Ending Phone Call.
Cap
acity
Max
Ope
ratio
ns
58
English

Note:If Phone Call capability is not enabled inyour radio, the radio is not able toterminate a phone call as a group call. Thetelephone user must end the call. Therecipient user is only allowed to talkbackduring the call.
If the call ends successfully:
• A tone sounds.• The display shows Call Ended.
If the call fails to end, the radio returns to thePhone Call screen. Repeat Step 3 or wait for thetelephone user to end the call.
Responding to Phone Calls as All CallsWhen you receive a Phone Call as an All Call, thereceiving radio is unable to talkback or respond. Therecipient user is also not allowed to end the All Call.
When you receive a Phone Call as an All Call:
• The display shows the Phone Call icon at the topright corner.
• The display shows either All Call, Site AllCall, or Multi Site Call depending on thetype of configuration and Phone Call.
• The green LED blinks.• Your radio unmutes and the incoming call sounds
through the speaker.
Responding to Phone Calls as Private CallsFollow the procedure to respond to Phone Calls asPrivate Calls on your radio.
When you receive a Phone Call as a Private Call:
• The display shows the Phone Call icon at the topright corner.
• The display shows Phone Call.• The green LED blinks.• Your radio unmutes and the incoming call sounds
through the speaker.
1 Press the PTT button to respond to the call.
2 Release the PTT button to listen.
3Press to end the call.The display shows Ending Phone Call.
Note:If Phone Call capability is not enabled inyour radio, the radio is not able toterminate a phone call as a private call.
Capacity M
ax Operations
59
English

The telephone user must end the call. Therecipient user is only allowed to talkbackduring the call.
If the call ends successfully:
• A tone sounds.• The display shows Call Ended.
If the call fails to end, the radio returns to thePhone Call screen. Repeat Step 3 or wait for thetelephone user to end the call.
Call PreemptionCall Preemption allows a radio to stop any in-progress voice transmission and initiate a prioritytransmission.
With the Call Preemption feature, the systeminterrupts and preempts ongoing calls in instanceswhere trunked channels are unavailable.
Higher priority calls such as an Emergency Call or anAll Call preempt the transmitting radio toaccommodate the higher priority call. If no otherRadio Frequency (RF) channels are available, anEmergency Call preempts an All Call as well.
Voice InterruptVoice Interrupt allows the user to shut down an in-progress voice transmission.
This feature uses reverse channel signaling to stopthe in-progress voice transmission of a radio, if theinterrupting radio is configured to Voice Interrupt, andthe transmitting radio is configured to be Voice CallInterruptible. The interrupting radio is then allowed tomake a voice transmission to the participant in thestopped call.
The Voice Interrupt feature significantly improves theprobability of successfully delivering a newtransmission to the intended parties when a call is inprogress.
Voice Interrupt is accessible to the user only if thisfeature has been set up in the radio. Check with yourdealer or system administrator for more information.
Enabling Voice InterruptFollow the procedure to initiate Voice Interrupt onyour radio.
Your radio must be programmed to allow you to usethis feature. Check with your dealer or systemadministrator for more information.
Cap
acity
Max
Ope
ratio
ns
60
English

1 Press the PTT button during an on-going call tointerrupt the transmission.On the interrupted radio, the display shows CallInterrupted. The radio sounds a negativeindicator tone until the PTT button is released.
2 Wait for acknowledgement.If successful:
• A positive indicator tone sounds.
If unsuccessful:
• A negative indicator tone sounds.
3 Wait for the Talk Permit Tone to end and speakclearly into the microphone if enabled.
Advanced FeaturesThis chapter explains the operations of the featuresavailable in your radio.
Note:Your dealer or system administrator may havecustomized your radio for your specific needs.Check with your dealer or systemadministrator for more information.
Home Channel ReminderThis feature provides a reminder when the radio isnot set to the home channel for a period of time.
If this feature is enabled when your radio is not set tothe home channel for a period of time, the followingoccurs periodically:
• The Home Channel Reminder tone andannouncement sound.
• The first line of the display shows Non.• The second line shows Home Channel.
Muting the Home Channel ReminderWhen the Home Channel Reminder occurs, you cantemporarily mute the reminder.
Press the Silence Home Channel Reminderprogrammable button.The first line of the display shows HCR and thesecond line shows Silenced.
Setting New Home ChannelsWhen the Home Channel Reminder occurs, you canset a new home channel.
1 Do one of the following:
Capacity M
ax Operations
61
English

• Press the Reset Home Channelprogrammable button to set the currentchannel as the new Home Channel. Skip thefollowing steps.
The first line of the display shows the channelalias and the second line shows New Home Ch.
•Press to access the menu.
2Press or to Utilities. Press toselect.
3Press or to Radio Settings. Press to select.
4Press or to Home Channel. Press toselect.
5 Press or to the desired new home channel
alias. Press to select.The display shows beside the selected homechannel alias.
Call QueueWhen there are no resources available to process acall, Call Queue enables the call request to be placedin the system queue for the next available resources.
You hear a Call Queue Tone after pressing the PTTbutton indicating that the radio has entered CallQueue State. The PTT button may be released oncethe Call Queue Tone is heard.
If the call setup is successful, the following occur:
• The green LED blinks.• If enabled, the Talk Permit Tone sounds.• The display shows the call type icon, ID or alias.• The radio user has up to 4 seconds to press the
PTT button to begin voice transmission.
If the call setup is unsuccessful, the following occur:
• If enabled, the Reject Tone sounds.• The display shows the failure notice screen
momentarily.• The call is terminated and the radio exits the call
setup.
Cap
acity
Max
Ope
ratio
ns
62
English

Talkgroup ScanThis feature allows your radio to monitor and join callsfor groups defined by a Digital Receive Group List.The Digital Receive Group List is programmed by thesystem administrator. When the radio detects a call inprogress on one of these talkgroups, the radio playsthe transmission. User can then push the PTT buttonand reply to that Talkgroup.
Your radio is only allowed to join a Talkgroup scancall at the site where another radio has alreadyregistered with using that Talkgroup, at the desiredsite.
Note:Check with your system administrator todetermine how your radio has beenprogrammed.
Remote MonitorThis feature is used to turn on the microphone of atarget radio with a subscriber alias or ID. You can usethis feature to remotely monitor any audible activitysurrounding the target radio.
Both your radio and the target radio must beprogrammed to allow you to use this feature.
If initiated, the green LED blinks once on the targetradio. This feature automatically stops after aprogrammed duration or when there is any useroperation on the target radio.
Initiating Remote MonitorsFollow the procedure to initiate Remote Monitor onyour radio.
1 Press the programmed Remote Monitor button.
2 Press or to the required alias or ID. Press
to select.The display shows a transitional mini notice,indicating the request is in progress. The greenLED lights up.
3 Wait for acknowledgment.If successful:
• A positive indicator tone sounds.• The display shows a positive mini notice.• The audio from the monitored radio starts
playing for a programmed duration, and thedisplay shows Rem. Monitor. Once the timerexpires, an alert tone sounds, and the LEDturns off.
Capacity M
ax Operations
63
English

If unsuccessful:
• A negative indicator tone sounds.• The display shows a negative mini notice.
Initiating Remote Monitors by Using the ContactsListFollow the procedure to initiate Remote Monitor onyour radio by using the Contacts list.
1Press to access the menu.
2Press or to Contacts. Press to select.
3 Press or to the required alias or ID. Press
to select.
4Press or to Remote Mon.. Press toselect.The display shows a transitional mini notice,indicating the request is in progress. The greenLED lights up.
5 Wait for acknowledgment.If successful:
• A positive indicator tone sounds.• The display shows a positive mini notice.• The audio from the monitored radio starts
playing for a programmed duration, and thedisplay shows Rem. Monitor. Once the timerexpires, an alert tone sounds, and the LEDturns off.
If unsuccessful:
• A negative indicator tone sounds.• The display shows a negative mini notice.
Initiating Remote Monitors by Using the ManualDialFollow the procedure to initiate Remote Monitor onyour radio by using the manual dial.
1Press to access the menu.
2Press or to Contacts. Press to select.
3Press or to Manual Dial. Press toselect.C
apac
ity M
ax O
pera
tions
64
English

4Press or to Radio Number. Press toselect.
5 Do one of the following:
•Enter the subscriber alias or ID, and press to proceed.
•Edit the previously dialed ID, and press toproceed.
6Press or to Remote Mon.. Press toselect.The display shows a transitional mini notice,indicating the request is in progress. The greenLED lights up.
7 Wait for acknowledgment.If successful:
• A positive indicator tone sounds.• The display shows a positive mini notice.• The audio from the monitored radio starts
playing for a programmed duration, and thedisplay shows Rem. Monitor. Once the timer
expires, an alert tone sounds, and the LEDturns off.
If unsuccessful:
• A negative indicator tone sounds.• The display shows a negative mini notice.
Contacts SettingsContacts provides address book capabilities on yourradio. Each entry corresponds to an alias or ID thatyou use to initiate a call. The entries arealphabetically sorted.
Each entry, depending on context, associates withthe different call types: Group Call, Private Call,Broadcast Call, Site All Call, Multi-site All Call, PCCall or Dispatch Call.
PC Call and Dispatch Call are data-related. They areonly available with the applications. Refer to the dataapplications documentation for further details.
Additionally, Contacts menu allows you to assigneach entry to a programmable number key or moreon a keypad microphone. If an entry is assigned to anumber key, your radio can perform a quick dial onthe entry.
Capacity M
ax Operations
65
English

Note:You see a checkmark before each number keythat is assigned to an entry. If the checkmarkis before Empty, you have not assign anumber key to the entry.
Your radio supports a maximum of 1,000 Contact listmembers.
Each entry within Contacts displays the followinginformation:
• Call Type• Call Alias• Call ID
Note:
You can add, or edit subscriber IDs for theDigital Contacts list. Deleting subscriber IDscan only be performed by your dealer.
If the Privacy feature is enabled on a channel,you can make privacy-enabled Group Calls,Private Calls, All Calls, and Phone Calls onthat channel. Only target radios with the samePrivacy Key, or the same Key Value and KeyID as your radio will be able to decrypt thetransmission.
Assigning Entries to Programmable Number Keys
Follow the procedure to assign entries toprogrammable number keys on your radio.
1Press to access the menu.
2Press or to Contacts. Press to select.
3 Press or to the required alias or ID. Press
to select.
4Press or to Program Key. Press toselect.
5 Do one of the following:
• If the desired number key has not beenassigned to an entry, press or to the
desired number key. Press to select.• If the desired number key has been assigned
to an entry, the display shows The Key isAlready Assigned and then, the first text lineshows Overwrite?. Do one of the following:
Cap
acity
Max
Ope
ratio
ns
66
English
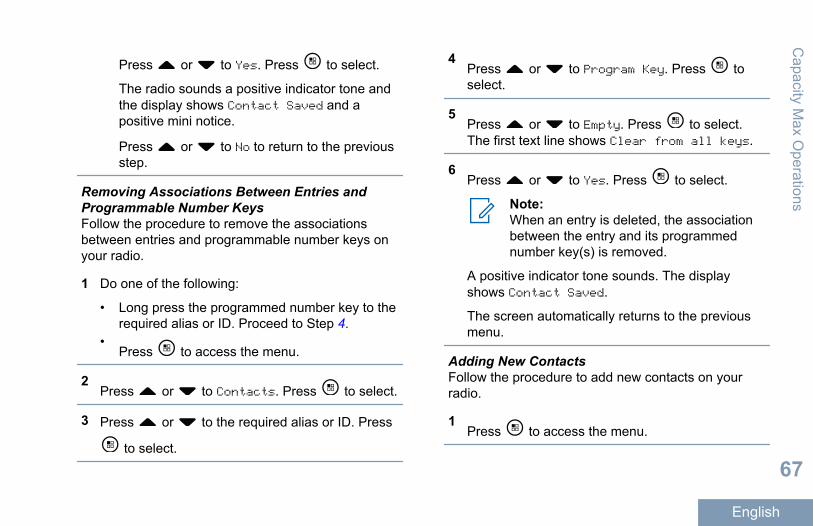
Press or to Yes. Press to select.
The radio sounds a positive indicator tone andthe display shows Contact Saved and apositive mini notice.
Press or to No to return to the previousstep.
Removing Associations Between Entries andProgrammable Number Keys Follow the procedure to remove the associationsbetween entries and programmable number keys onyour radio.
1 Do one of the following:
• Long press the programmed number key to therequired alias or ID. Proceed to Step 4.
•Press to access the menu.
2Press or to Contacts. Press to select.
3 Press or to the required alias or ID. Press
to select.
4Press or to Program Key. Press toselect.
5Press or to Empty. Press to select.The first text line shows Clear from all keys.
6Press or to Yes. Press to select.
Note:When an entry is deleted, the associationbetween the entry and its programmednumber key(s) is removed.
A positive indicator tone sounds. The displayshows Contact Saved.
The screen automatically returns to the previousmenu.
Adding New ContactsFollow the procedure to add new contacts on yourradio.
1Press to access the menu.
Capacity M
ax Operations
67
English

2Press or to Contacts. Press to select.
3Press or to New Contact. Press toselect.
4 Press or to select contact type Radio
Contact or Phone Contact. Press to select.
5 Enter the contact number with the keypad, and
press to proceed.
6 Enter the contact name with the keypad, and
press to proceed.
7 Press or to the required ringer type. Press
to select.A positive indicator tone sounds. The displayshows a positive mini notice.
Call Indicator SettingsActivating or Deactivating Call Ringers for PrivateCalls Follow the procedure to activate or deactivate callringers for Private Calls on your radio.
1Press to access the menu.
2Press or to Utilities. Press toselect.
3Press or to Radio Settings. Press to select.
4Press or to Tones/Alerts. Press toselect.
5Press or to Call Ringers. Press toselect.
6Press or to Private Call. Press toselect.
Cap
acity
Max
Ope
ratio
ns
68
English

7 Do one of the following:
• Press or to the required tone. Press
to select.
The display shows and the selected tone.•
Press or to Off. Press to select.
If the ringing tones were earlier enabled, thedisplay shows beside Off.
If the ringing tones were earlier disabled, thedisplay does not show beside Off.
Activating or Deactivating Call Ringers for TextMessages Follow the procedure to activate or deactivate callringers for text messages on your radio.
1Press to access the menu.
2Press or to Utilities. Press toselect.
3Press or to Radio Settings. Press to select.
4Press or to Tones/Alerts. Press toselect.
5Press or to Call Ringers. Press toselect.
6Press or to Text Message. Press toselect.The display shows and the current tone.
7 Do one of the following:
• Press or to the required tone. Press
to select.
The display shows and the selected tone.•
Press or to Off. Press to select.
If the ringing tones were earlier enabled, thedisplay shows beside Off.
Capacity M
ax Operations
69
English

If the ringing tones were earlier disabled, thedisplay does not show beside Off.
Activating or Deactivating Call Ringers for CallAlertsFollow the procedure to activate or deactivate callringers for Call Alerts on your radio.
1Press to access the menu.
2Press or to Utilities. Press toselect.
3Press or to Radio Settings. Press to select.
4Press or to Tones/Alert. Press toselect.
5Press or to Call Ringers. Press toselect.
6Press or to Call Alert. Press toselect.
7 Do one of the following:
• Press or to the required tone. Press
to select.
The display shows and the selected tone.•
Press or to Off. Press to select.
If the ringing tones were earlier enabled, thedisplay shows beside Off.
If the ringing tones were earlier disabled, thedisplay does not show beside Off.
Call Log FeaturesYour radio keeps track of all recent outgoing,answered, and missed Private Calls. The call logfeature is used to view and manage recent calls.
Missed Call Alerts may be included in the call logs,depending on the system configuration on your radio.You can perform the following tasks in each of yourcall lists:
• Store Alias or ID to Contacts• Delete Call• Delete All Calls
Cap
acity
Max
Ope
ratio
ns
70
English

• View Details
Viewing Recent CallsFollow the procedure to view recent calls on yourradio.
1Press to access the menu.
2Press or to Call Log. Press to select.
3Press or to the preferred list. Press toselect.The options are Missed, Answered, and Outgoinglists.The display shows the most recent entry.
4 Press or to view the list.You can start a Private Call with the alias or ID thedisplay is currently showing by pressing the PTTbutton.
Storing Aliases or IDs from the Call List Follow the procedure to store aliases or IDs on yourradio from the Call list.
1Press to access the menu.
2Press or to Call Log. Press to select.
3Press or to the required list. Press toselect.
4 Press or to the required alias or ID. Press
to select.
5Press or to Store. Press to select.The display shows a blinking cursor.
6 Enter the rest of the characters of the required
alias. Press to select.You can store an ID without an alias.The display shows a positive mini notice.
Capacity M
ax Operations
71
English

Deleting Calls from the Call ListFollow the procedure to delete calls on your radiofrom the Call list.
1Press to access the menu.
2Press or to Call Log. Press to select.
3Press or to the required list. Press toselect.If the list is empty:
• A tone sounds.• The display shows List Empty.
4 Press or to the required alias or ID. Press
to select.
5Press or to Delete Entry?. Press toselect.
6 Do one of the following:
•Press to select Yes to delete the entry.
The display shows Entry Deleted.•
Press or to No. Press to select.
The radio returns to the previous screen.
Viewing Details from the Call List Follow the procedure to view details on your radiofrom the Call list.
1Press to access the menu.
2Press or to Call Log. Press to select.
3Press or to the required list. Press toselect.
4 Press or to the required alias or ID. Press
to select.
5Press or to View Details. Press toselect.The display shows the details.C
apac
ity M
ax O
pera
tions
72
English

Call Alert OperationCall Alert paging enables you to alert a specific radiouser to call you back when they are able to do so.
This feature is applicable for subscriber aliases or IDsonly and is accessible through the menu viaContacts, manual dial, or a programmed One TouchAccess button.
In Capacity Max, the Call Alert feature allows a radiouser or a dispatcher to send an alert to another radiouser requesting the radio user to call back theinitiating radio user when available. Voicecommunication is not involved in this feature.
The Call Alert Operation can be configured by thedealer or the system administrator in two ways:
• The radio is configured to allow the user to pressthe PTT button to respond directly to the callinitiator by making a Private Call.
• The radio is configured to allow the user to pressthe PTT button and continue with other Talkgroupcommunication. Pressing the PTT button on thecall alert entry will not allow the user to respond tothe call initiator. The user must navigate to theMissed Call Log option at the Call Log menu andrespond to the Call Alert from there.
An Off Air Call Set-Up (OACSU) private call allowsthe user to respond immediately while an Full Off AirCall Set-Up (FOACSU) private call requires useracknowledgement for the call. OACSU type calls aretherefore, recommended to be used for the call alertfeature. See Private Call on page 45.
Responding to Call AlertsFollow the procedure to respond to Call Alerts onyour radio.
When you receive a Call Alert:
• A repetitive tone sounds.• The yellow LED blinks.• The display shows the notification list listing a Call
Alert with the alias or ID of the calling radio.
Depending on the configuration by your dealer orsystem administrator, you can respond to a CallAlert by doing one of the following:
• Press the PTT button and respond with aPrivate Call directly to the caller.
• Press the PTT button to continue normaltalkgroup communication.
Capacity M
ax Operations
73
English

The Call Alert is moved to the Missed Calloption at the Call Log menu. You can respondto the caller from the Missed Called log.
See Notification List on page 98 and Call LogFeatures on page 70 for more information.Making Call AlertsFollow the procedure to make Call Alerts on yourradio.
1 Press the programmed One Touch Accessbutton.The display shows Call Alert and thesubscriber alias or ID. The green LED lights up.
2 Wait for acknowledgment.If the Call Alert acknowledgment is received, thedisplay shows a positive mini notice.
If the Call Alert acknowledgment is not received,the display shows a negative mini notice.
Making Call Alerts by Using the Contacts ListFollow the procedure to make Call Alerts on yourradio by using the Contacts list.
1Press to access the menu.
2Press or to Contacts. Press to select.
3 Do one of the following:
• Select the subscriber alias or ID directly
Press or to the required alias or ID.
Press to select.• Use the Manual Dial menu
Press or to Manual Dial . Press
to select.Press or to Radio Contact . Press
to select.The display shows Radio Number: and ablinking cursor. Enter the subscriber ID you
want to page. Press to select.
4Press or to Call Alert. Press toselect.The display shows Call Alert and thesubscriber alias or ID. The green LED lights up.
5 Wait for acknowledgment.
Cap
acity
Max
Ope
ratio
ns
74
English
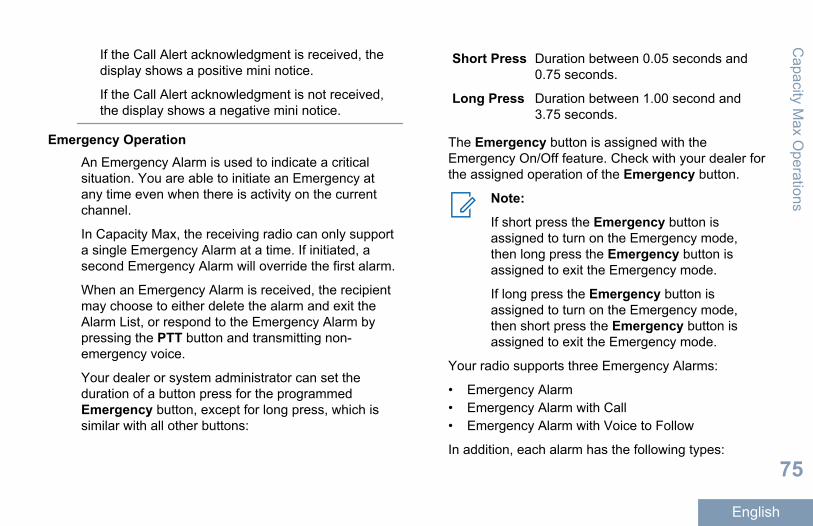
If the Call Alert acknowledgment is received, thedisplay shows a positive mini notice.
If the Call Alert acknowledgment is not received,the display shows a negative mini notice.
Emergency OperationAn Emergency Alarm is used to indicate a criticalsituation. You are able to initiate an Emergency atany time even when there is activity on the currentchannel.
In Capacity Max, the receiving radio can only supporta single Emergency Alarm at a time. If initiated, asecond Emergency Alarm will override the first alarm.
When an Emergency Alarm is received, the recipientmay choose to either delete the alarm and exit theAlarm List, or respond to the Emergency Alarm bypressing the PTT button and transmitting non-emergency voice.
Your dealer or system administrator can set theduration of a button press for the programmedEmergency button, except for long press, which issimilar with all other buttons:
Short Press Duration between 0.05 seconds and0.75 seconds.
Long Press Duration between 1.00 second and3.75 seconds.
The Emergency button is assigned with theEmergency On/Off feature. Check with your dealer forthe assigned operation of the Emergency button.
Note:
If short press the Emergency button isassigned to turn on the Emergency mode,then long press the Emergency button isassigned to exit the Emergency mode.
If long press the Emergency button isassigned to turn on the Emergency mode,then short press the Emergency button isassigned to exit the Emergency mode.
Your radio supports three Emergency Alarms:
• Emergency Alarm• Emergency Alarm with Call• Emergency Alarm with Voice to Follow
In addition, each alarm has the following types:
Capacity M
ax Operations
75
English

Regular Radio transmits an alarm signal andshows audio and/or visual indicators.
Silent Radio transmits an alarm signal withoutany audio or visual indicators. Radioreceives calls without any sound throughthe speaker, until the programmed hotmic transmission period is over and/oryou press the PTT button.
SilentwithVoice
Radio transmits an alarm signal withoutany audio or visual indicators, but allowincoming calls to sound through thespeaker. If hot mic is enabled, theincoming calls sound through thespeaker after the programmed hot mictransmission period is over. Theindicators only appear once you pressthe PTT button.
Note:Only one of the Emergency Alarms above canbe assigned to the programmed Emergencybutton.
Sending Emergency AlarmsThis feature allows you to send an Emergency Alarm,a non-voice signal, which triggers an alert indication
on a group of radios. Follow the procedure to sendEmergency Alarms on your radio.
Your radio does not display any audio or visualindicators during Emergency mode when it is set toSilent.
1 Press the programmed Emergency On button.You see the following:
• The display shows Tx Alarms and thedestination alias.
The green LED lights up. The Emergency iconappears.
Note:If programmed, the Emergency Searchtone sounds. This tone is muted when theradio transmits or receives voice, and stopswhen the radio exits Emergency mode.The Emergency Search tone can beprogrammed by the dealer or systemadministrator.
2 Wait for acknowledgment.If successful:
• The Emergency tone sounds.
Cap
acity
Max
Ope
ratio
ns
76
English
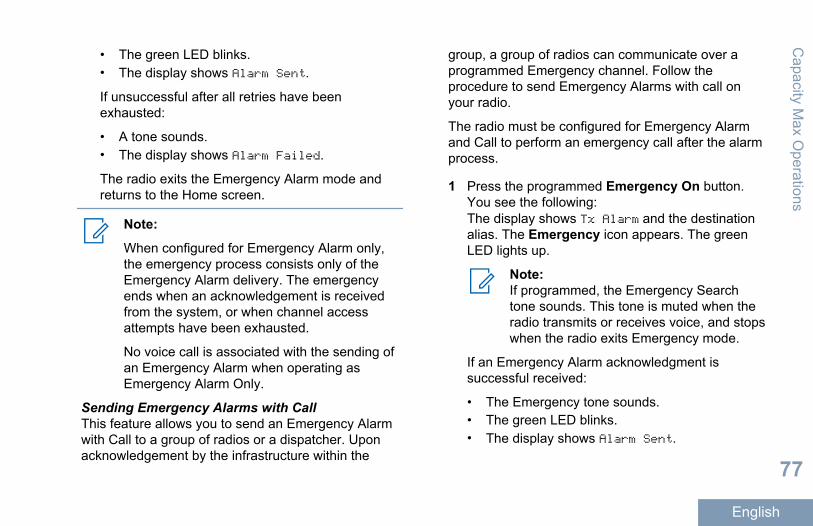
• The green LED blinks.• The display shows Alarm Sent.
If unsuccessful after all retries have beenexhausted:
• A tone sounds.• The display shows Alarm Failed.
The radio exits the Emergency Alarm mode andreturns to the Home screen.
Note:
When configured for Emergency Alarm only,the emergency process consists only of theEmergency Alarm delivery. The emergencyends when an acknowledgement is receivedfrom the system, or when channel accessattempts have been exhausted.
No voice call is associated with the sending ofan Emergency Alarm when operating asEmergency Alarm Only.
Sending Emergency Alarms with CallThis feature allows you to send an Emergency Alarmwith Call to a group of radios or a dispatcher. Uponacknowledgement by the infrastructure within the
group, a group of radios can communicate over aprogrammed Emergency channel. Follow theprocedure to send Emergency Alarms with call onyour radio.
The radio must be configured for Emergency Alarmand Call to perform an emergency call after the alarmprocess.
1 Press the programmed Emergency On button.You see the following:The display shows Tx Alarm and the destinationalias. The Emergency icon appears. The greenLED lights up.
Note:If programmed, the Emergency Searchtone sounds. This tone is muted when theradio transmits or receives voice, and stopswhen the radio exits Emergency mode.
If an Emergency Alarm acknowledgment issuccessful received:
• The Emergency tone sounds.• The green LED blinks.• The display shows Alarm Sent.
Capacity M
ax Operations
77
English

If an Emergency Alarm acknowledgment is notsuccessfully received:
• All retries are exhausted.• A low-pitched tone sounds.• The display shows Alarm Failed.• The radio exits the Emergency Alarm mode.
2 Press the PTT button to initiate a voicetransmission.The green LED lights up.The display shows theGroup Call icon.
3 Wait for the Talk Permit Tone to end and speakclearly into the microphone if enabled.
4 Release the PTT button to listen.The display shows the caller and group aliases.
5 If the Channel Free Indication feature is enabled,you hear a short alert tone the moment thetransmitting radio releases the PTT button,indicating the channel is free for you to respond.Press the PTT button to respond to the call.
6 Press the Emergency Off button to exit theEmergency mode.
The radio returns to the Home screen.
Note:Depending on how your radio isprogrammed, you may or may not hear aTalk Permit tone. Your radio dealer orsystem administrator can provide moreinformation on how your radio has beenprogrammed for Emergency.
Note:The Emergency Call initiator may press
to end an on-going emergency call.The radio returns to a call idle state but theemergency call screen remains open.
Sending Emergency Alarms with Voice to FollowThis feature allows you to send an Emergency Alarmwith Voice to Follow to a group of radios. Your radiomicrophone is automatically activated, allowing you tocommunicate with the group of radios withoutpressing the PTT button. This activated microphonestate is also known as hot mic.
If your radio has Emergency Cycle Mode enabled,repetitions of hot mic and receiving period are madefor a programmed duration. During Emergency CycleMode, received calls sound through the speaker.
Cap
acity
Max
Ope
ratio
ns
78
English

If you press the PTT button during the programmedreceiving period, you hear a prohibit tone, indicatingthat you should release the PTT button. The radioignores the PTT button press and remains inEmergency mode.
If you press the PTT button during hot mic, andcontinue to press it after the hot mic duration expires,the radio continues to transmit until you release thePTT button.
If the Emergency Alarm request fails, the radio doesnot retry to send the request, and enters the hot micstate directly.
Note:Some accessories may not support hot mic.Check with your dealer or systemadministrator for more information.
Follow the procedure to send Emergency Alarms withvoice to follow on your radio.
1 Press the programmed Emergency On button.You see the following:
• The display shows Tx Alarm and thedestination alias.
The green LED lights up. The Emergency iconappears.
2 Once the display shows Alarm Sent, speakclearly into the microphone.
The radio automatically stops transmitting when:
• The cycling duration between hot mic andreceiving calls expires, if Emergency CycleMode is enabled.
• The hot mic duration expires, if EmergencyCycle Mode is disabled.
Receiving Emergency AlarmsThe receiving radio can only support a singleEmergency Alarm at a time. If initiated, a secondEmergency Alarm will override the first alarm. Followthe procedure to receive and view Emergency Alarmson your radio.
When you receive an Emergency Alarm:
• A tone sounds.• The red LED blinks.• The display shows the Emergency Alarm List, the
Emergency Talkgroup ID or alias, and the ID oralias of the transmitting radio.
Capacity M
ax Operations
79
English
1Press to view the alarm.
2Press to view the action options and details ofthe entry in the Alarm List.
3Press and select Yes to exit the Alarm list.The radio returns to the home screen with anEmergency Icon displayed at the top, indicatingthe unresolved Emergency Alarm. TheEmergency Icon disappears once the entry in theAlarm List is deleted.
4Press to access the menu.
5 Select Alarm List to revisit the Alarm list.
Responding to Emergency AlarmsWhen an Emergency Alarm is received, the recipientmay choose to either delete the alarm and exit theAlarm List, or respond to the Emergency Alarm bypressing the PTT button and transmitting non-emergency voice. Follow the procedure to respond toEmergency Alarms on your radio.
1 If the Emergency Alarm Indication is enabled, theEmergency Alarm List appears when the radioreceives an Emergency Alarm. Press or tothe required alias or ID.
2 If the Channel Free Indication feature is enabled,you hear a short alert tone the moment thetransmitting radio releases the PTT button,indicating the channel is free for you to respond.Press the PTT button to transmit non-emergencyvoice to the same group the Emergency Alarmtargeted.The green LED lights up.
3 Wait for the Talk Permit Tone to end and speakclearly into the microphone if enabled.
4 Release the PTT button to listen.When the emergency initiating radio responds:
• The red LED blinks.• The display shows the Emergency Call icon,
the Emergency Talkgroup ID or alias, and theID or alias of the transmitting radio.
Note:If the Emergency Call Indication is notenabled, the display shows the Group Call
Cap
acity
Max
Ope
ratio
ns
80
English

icon, Emergency Talkgroup ID or alias, andthe ID or alias of the transmitting radio.
Responding to Emergency Alarms with CallFollow the procedure to respond to EmergencyAlarms with Call on your radio.
When you receive an Emergency Call:
• The Emergency Call Tone sounds if theEmergency Call Indication and Emergency CallDecode Tone is enabled. The Emergency CallTone will not sound if only the Emergency CallIndication is enabled.
• The display shows the Emergency Call icon,Emergency Talkgroup ID or alias, and the ID oralias of the transmitting radio.
• Your radio unmutes and the incoming call soundsthrough the speaker.
1 If the Channel Free Indication feature is enabled,you hear a short alert tone the moment thetransmitting radio releases the PTT button,indicating the channel is free for you to respond.Press the PTT button to respond to the call.The green LED lights up.
2 Wait for the Talk Permit Tone to end and speakclearly into the microphone if enabled.
3 Release the PTT button to listen.When the emergency initiating radio responds:
• The red LED blinks.• The display shows the Emergency Call icon,
the Emergency Talkgroup ID or alias, and theID or alias of the transmitting radio.
Note:If the Emergency Call Indication is notenabled, the display shows the Group Callicon, Emergency Talkgroup ID or alias, andthe ID or alias of the transmitting radio.
Text Messaging
Your radio is able to receive data, for example a textmessage, from another radio or a text messageapplication.
There are 2 types of text messages, DMR Short TextMessage and text message.
The maximum length of characters when you sendand receive a text message is 280 characters whichincludes the subject line. You see the subject line
Capacity M
ax Operations
81
English

when you receive messages from e-mail applications.The maximum length of 280 characters is applicableonly for models with the latest software andhardware. Check with your dealer or systemadministrator for more information.
For DMR Short Text Message, the maximum length is23 characters.
The radio exits the current screen once the inactivitytimer expires.
Note:
Long press at any time to return to theHome screen.
Sending Quick Text MessagesFollow the procedure to send predefined Quick Textmessages on your radio to a predefined alias.
1 Do one of the following:
• Press the programmed Text Message button.Proceed to Step 3.
•Press to access the menu.
2Press or to Messages. Press to select.
3Press or to Quick Text. Press toselect.
4 Press or to the required Quick Text
message. Press to select.If required, use the keypad to edit the message.
5Press once the message is composed.
6 Do the following to select the recipient and sendthe message.a) Press or to the required alias or ID.
Press to select.b)
Press or to Manual Dial. Press toselect.The first line of the display shows RadioNumber: and the second line shows a blinkingcursor.
c)Key in the subscriber alias or ID and press .
The display shows a transitional mini notice,confirming that your message is being sent.
Cap
acity
Max
Ope
ratio
ns
82
English
7 Wait for acknowledgment.If successful:
• A positive indicator tone sounds.• The display shows a positive mini notice.
If unsuccessful:
• A negative indicator tone sounds.• The display shows a negative mini notice.
Resending Text MessagesFollow the procedure to resend text messages onyour radio.
When you are at the Resend option screen:
Press to resend the same message to thesame subscriber or group alias or ID.If successful:
• A tone sounds.• The display shows a positive mini notice.
If unsuccessful:
• A tone sounds.• The display shows a negative mini notice.• The radio returns to the Resend option screen.
Forwarding Text Messages Follow the procedure to forward text messages onyour radio.
When you are at the Resend option screen:
1Press or to Forward, and press tosend the same message to another subscriber orgroup alias or ID.
2 Do the following to select the message recipient.a) Press or to the required alias or ID.
Press to select.b)
Press or to Manual Dial. Press toselect.The first line of the display shows RadioNumber: and the second line shows a blinkingcursor.
c)Key in the subscriber alias or ID and press .
The displays shows TextMessage:<Subscriber/Group Alias or ID>,confirming that your message is being sent.
3 Wait for acknowledgment.
Capacity M
ax Operations
83
English

If successful:
• A tone sounds.• The display shows a positive mini notice.
If unsuccessful:
• A tone sounds.• The display shows a negative mini notice.
Editing Text Messages
Select Edit to edit the message.
Note:If a subject line is present (for messagesreceived from an e-mail application), youcannot edit it.
1Press or to Edit. Press to select.The display shows a blinking cursor.
2 Use the keypad to edit your message.
•Press to move one space to the left.
•Press or to move one space to theright.
•Press to delete any unwantedcharacters.
•Long press to change text entry method.
3Press once message is composed.
4 Do one of the following:
•Press or to Send and press to sendthe message.
•Press or to Save and press to savethe message to the Drafts folder.
•Press to edit the message.
•Press to choose between deleting themessage or saving it to the Drafts folder.
Responding to Text Messages Follow the procedure to respond to text messages onyour radio.
When you receive a text message:
• The display shows the Notification list with thealias or ID of the sender.
Cap
acity
Max
Ope
ratio
ns
84
English

• The display shows the Message icon.
Note:The radio exits the Text Message alert screenand sets up a Private or Group Call to thesender of the message if the PTT button ispressed.
1 Do one of the following:
•Press or to Read. Press to select.
The display shows the text message. Thedisplay shows a subject line if the message isfrom an e-mail application.
•Press or to Read Later. Press toselect.
The radio returns to the screen you were onprior to receiving the text message.
•Press or to Delete. Press toselect.
2Press to return to the Inbox.
Viewing Text MessagesFollow the procedure to view text messages on yourradio.
1Press to access the menu.
2Press or to Messages. Press to select.
3Press or to Inbox. Press to select.If the Inbox is empty:
• The display shows List Empty.• A tone sounds, if the Keypad Tone is turned
on.
4 Press or to the required message. Press
to select.The display shows a subject line if the message isfrom an e-mail application.
Deleting Text Messages from the InboxFollow the procedure to delete text messages fromthe Inbox on your radio.
1 Do one of the following:
Capacity M
ax Operations
85
English

• Press the programmed Text Message button.Proceed to Step 3.
•Press to access the menu.
2Press or to Messages. Press to select.
3Press or to Inbox. Press to select.If the Inbox is empty:
• The display shows List Empty.• A tone sounds.
4 Press or to the required message. Press
to select.The display shows a subject line if the message isfrom an e-mail application.
5Press to access the sub-menu.
6Press or to Delete. Press to select.
7Press or to Yes. Press to select.
The display shows a positive mini notice. Thescreen returns to the Inbox.
Deleting All Text Messages from the Inbox Follow the procedure to delete all text messages fromthe Inbox on your radio.
1 Do one of the following:
• Press the programmed Text Message button.Proceed to Step 3.
•Press to access the menu.
2Press or to Messages. Press to select.
3Press or to Inbox. Press to select.If the Inbox is empty:
• The display shows List Empty.• A tone sounds.
4Press or to Delete All. Press toselect.
5Press or to Yes. Press to select.
Cap
acity
Max
Ope
ratio
ns
86
English

The display shows a positive mini notice.
PrivacyThis feature helps to prevent eavesdropping byunauthorized users on a channel by the use of asoftware-based scrambling solution. The signalingand user identification portions of a transmission arenot scrambled.
Your radio must have privacy enabled on the channelto send a privacy-enabled transmission, although thisis not a necessary requirement for receiving atransmission. While on a privacy-enabled channel,the radio is still able to receive clear or unscrambledtransmissions.
Your radio only supports Enhanced Privacy. Tounscramble a privacy-enabled call or datatransmission, your radio must be programmed tohave the same Key Value and Key ID for EnhancedPrivacy as the transmitting radio.
If your radio receives a scrambled call that is of adifferent Key Value and Key ID, you will hear nothingat all for Enhanced Privacy.
If the radio has privacy assigned, the Home Screenshows the Secure or Unsecure icon, except when the
radio is sending or receiving an Emergency call oralarm.
The green LED lights up when the radio istransmitting, and blinks rapidly when the radio isreceiving an ongoing privacy-enabled transmission.
Note:Some radio models may not offer this Privacyfeature, or may have a different configuration.Check with your dealer or systemadministrator for more information.
Multi-Site ControlsStarting Manual Site SearchFollow the procedure to start manual site searchwhen the received signal strength is poor in order toattempt to find a site with better signal.
1 Do one of the following:
• Press the programmed Manual Site Roambutton. Skip the following steps.
•Press to access the menu.
2Press or to Utilities. Press toselect.
Capacity M
ax Operations
87
English
3Press or to Radio Settings. Press to select.
4Press or to Site Roaming. Press toselect.
5Press or to Active Search. Press toselect.A tone sounds. The green LED blinks. The displayshows Finding Site.
If the radio finds a new site:
• A positive indicator tone sounds.• The LED turns off.• The display shows Site <Alias> Found.
If the radio fails to find a new site:
• A negative indicator tone sounds.• The LED turns off.• The display shows Out of Range.
If a new site is within range, but the radio is unable toconnect to it:
• A negative indicator tone sounds.
• The LED turns off.• The display shows Channel Busy.
Site Lock On/Off
When toggled on, the radio searches the current siteonly. When toggled off, the radio searches other sitesin addition to the current site.
Press the programmed Site Lock button.
If the Site Lock function is toggled on:
• You hear a positive indicator tone, indicatingthe radio has locked to the current site.
• The display shows Site Locked.
If the Site Lock function is toggled off:
• You hear a negative indicator tone, indicatingthe radio is unlocked.
• The display shows Site Unlocked.
Accessing Neighbor Sites ListThis feature allows the user to check the adjacentsites list of the current home site. Follow theprocedure to access the Neighbor Sites List:
1Press to access the menu.
Cap
acity
Max
Ope
ratio
ns
88
English
2Press or to Utilities.Press toselect.
3Press or to Radio Info. Press toselect.
4Press or to Neighbor Sites. Press toselect.
StunYour radio can be disabled (stunned) or enabled(revived) in the system from the console. Forexample, you may want to disable a stolen radio toprevent unauthorized users from using it, and enablethe radio when it is recovered.
When a radio is stunned, the radio cannot request norreceive any user initiated services on the system thatperformed the Stun procedure. However, the radiocan switch to another system. The radio continues tosend GPS location reports and can be remotemonitored when it was stunned.
Note:Check with your dealer or systemadministrator for more information.
Lone WorkerThis feature prompts an emergency to be raised ifthere is no user activity, such as any radio buttonpress or activation of the channel selector, for apredefined time.
Following no user activity for a programmed duration,the radio pre-warns the user via an audio indicatoronce the inactivity timer expires.
If there is still no acknowledgment by the user beforethe predefined reminder timer expires, the radioinitiates an emergency condition as programmed bythe dealer or system administrator.
See Emergency Operation on page 75 for moreinformation.
Note:Check with your dealer or systemadministrator for more information.
Capacity M
ax Operations
89
English

Password Lock FeaturesThis feature allows you to restrict access to the radioby asking for a password when the device is turnedonAccessing Radios by Using PasswordsFollow the procedure to access your radio by using apassword.
1 Enter the current four-digit password.
• Press or to edit the numeric value of
each digit, and press to enter and move tothe next digit.
2Press to enter the password.If successful, the radio powers up.
If unsuccessful:
• After the first and second attempt, the displayshows Wrong Password. Repeat Step 1.
• After the third attempt, the display showsWrong Password and then, Radio Locked. Atone sounds. The yellow LED double blinks.Your radio enters into locked state for 15minutes.
Note:In locked state, your radio responds toinputs from On/Off/Volume Control Knoband programmed Backlight button only.
Unlocking Radios in Locked StateYour radio is unable to receive any call, includingemergency calls, in locked state. Follow theprocedure to unlock your radio in locked state.
1 Power up the radio.Your radio restarts the 15-minutes timer for lockedstate.
2 Wait for 15 minutes.Your radio responds only to On/Off button inlocked state.
3 Repeat the steps in Accessing Radios by UsingPasswords on page 90 to access the radio.
Changing PasswordsFollow the procedure to change passwords on yourradio.
1Press to access the menu.
Cap
acity
Max
Ope
ratio
ns
90
English

2Press or to Utilities. Press toselect.
3Press or to Radio Settings. Press to select.
4Press or to Passwd Lock. Press toselect.
5 Enter the current four-digit password, and press
to proceed.If the password is incorrect, the display showsWrong Password and automatically returns to theprevious menu.
6Press or to Change PWD. Press toselect.
7Enter a new four-digit password, and press toproceed.
8 Re-enter the new four-digit password, and press
to proceed.If successful, the display shows PasswordChanged.
If unsuccessful, the display shows Passwords DoNot Match.
The screen automatically returns to the previousmenu.
BluetoothThis feature allows you to use your radio with aBluetooth-enabled device (accessory) via a Bluetoothconnection. Your radio supports both Motorola andCOTS (Commercially available Off-The-Shelf)Bluetooth-enabled devices.
Bluetooth operates within a range of 10 meters (32feet) line of sight. This is an unobstructed pathbetween your radio and your Bluetooth-enableddevice. It is not recommended that you leave yourradio behind and expect your Bluetooth-enableddevice to work with a high degree of reliability whenthey are separated.
Capacity M
ax Operations
91
English

At the fringe areas of reception, both voice and tonequality will start to sound "garbled" or "broken". Tocorrect this problem, simply position your radio andBluetooth-enabled device closer to each other (withinthe 10-meter defined range) to re-establish clearaudio reception. The Bluetooth function of your radiohas a maximum power of 2.5 mW (4 dBm) at the 10-meter range.
Your radio can support up to three simultaneousBluetooth connections with Bluetooth-enableddevices of unique types. For example, a headset, ascanner, and a PTT-Only Device (POD). Multipleconnections with Bluetooth-enabled devices of thesame type are not supported.
Refer to the user manual of your respectiveBluetooth-enabled device for more details on the fullcapabilities of your Bluetooth-enabled device.
Your radio connects to the Bluetooth-enabled devicewithin range with either the strongest signal strength,or to one which it has connected to before in a priorsession. Do not turn off your Bluetooth-enabled
device or press the home back button duringthe finding and connecting operation as this cancelsthe operation.
Turning Bluetooth On and Off
1Press to access the menu.
2Press or to Bluetooth. Press toselect.
3Press or to My Status. Press toselect.The display shows On and Off. The current statusis indicated by a .
4 Do one of the following:
•Press or to On. Press to select. Thedisplay shows beside On.
•Press or to Off. Press to select.The display shows beside Off.
Connecting to Bluetooth Devices
Turn on your Bluetooth-enabled device and place it inpairing mode.C
apac
ity M
ax O
pera
tions
92
English

1Press to access the menu.
2Press or to Bluetooth. Press toselect.
3Press or to Devices. Press to select.
4 Do one of the following:
• Press or to the required device. Press
to select.• Press or to Find Devices to locate
available devices. Press or to the
required device. Press to select.
5Press or to Connect. Press to select.Your Bluetooth-enabled device may requireadditional steps to complete the pairing. Refer tothe user manual of your Bluetooth-enabled device.The display shows Connecting to <Device>.
Wait for acknowledgment.
If successful:
• A positive indicator tone sounds.• The display shows <Device> Connected and the
Bluetooth Connected icon.• The display shows beside the connected device.
If unsuccessful:
• A negative indicator tone sounds.• The display shows Connecting Failed.
Connecting to Bluetooth Devices in DiscoverableMode
Turn on your Bluetooth-enabled device and place it inpairing mode.
1Press to access the menu.
2Press or to Bluetooth. Press toselect.
3Press or to Find Me. Press to select.The radio can now be found by other Bluetooth-enabled devices for a programmed duration. Thisis called Discoverable Mode.
Capacity M
ax Operations
93
English

Wait for acknowledgment.
If successful:
• A positive indicator tone sounds.• The display shows <Device> Connected and the
Bluetooth Connected icon.• The display shows beside the connected device.
If unsuccessful:
• A negative indicator tone sounds.• The display shows Connecting Failed.
Disconnecting from Bluetooth Devices
1Press to access the menu.
2Press or to Bluetooth. Press toselect.
3Press or to Devices. Press to select.
4Press or to the required device. Press to select.
5Press or to Disconnect. Press toselect.The display shows Disconnecting from<Device>.
Wait for acknowledgment.
• A tone sounds.• The display shows <Device> Disconnected and
the Bluetooth Connected icon disappears.• The disappears beside the connected device.
Switching Audio Route between Internal RadioSpeaker and Bluetooth DeviceFollow the procedure to toggle audio routing betweeninternal radio speaker and external Bluetooth device.
Press the programmed Bluetooth Audio Switchbutton.
The display shows one of the following results:
• A tone sounds. The display shows Route Audioto Radio.
• A tone sounds. The display shows Route Audioto Bluetooth.
Cap
acity
Max
Ope
ratio
ns
94
English
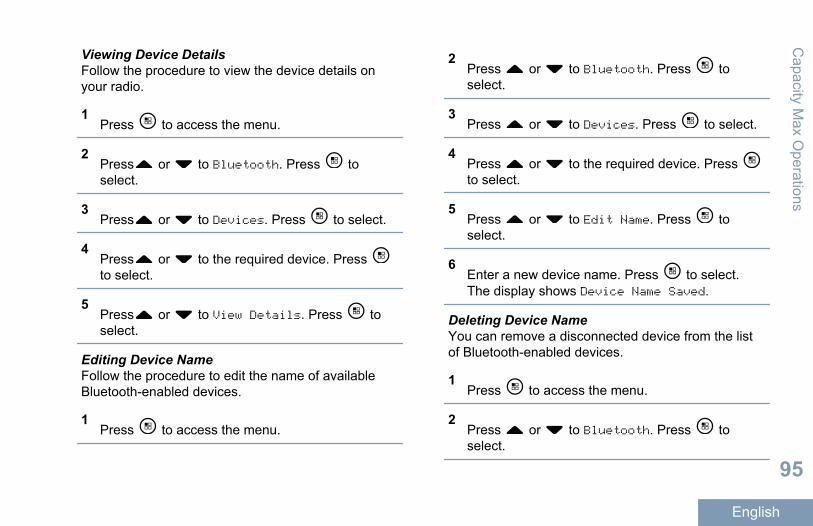
Viewing Device DetailsFollow the procedure to view the device details onyour radio.
1Press to access the menu.
2Press or to Bluetooth. Press toselect.
3Press or to Devices. Press to select.
4Press or to the required device. Press to select.
5Press or to View Details. Press toselect.
Editing Device NameFollow the procedure to edit the name of availableBluetooth-enabled devices.
1Press to access the menu.
2Press or to Bluetooth. Press toselect.
3Press or to Devices. Press to select.
4Press or to the required device. Press to select.
5Press or to Edit Name. Press toselect.
6Enter a new device name. Press to select.The display shows Device Name Saved.
Deleting Device NameYou can remove a disconnected device from the listof Bluetooth-enabled devices.
1Press to access the menu.
2Press or to Bluetooth. Press toselect.
Capacity M
ax Operations
95
English

3Press or to Devices. Press to select.
4Press or to the required device. Press to select.
5Press or to Delete. Press to select.The display shows Device Deleted.
Adjusting Bluetooth Mic Gain ValuesAllows control of microphone gain value in connectedBluetooth-enabled devices.
1Press to access the menu.
2Press or to Bluetooth. Press toselect.
3Press or to BT Mic Gain. Press toselect.
4 Press or to the BT Mic Gain type and the
current values. To edit values, press to select.
5 Press or to increase or to decrease values.
Press to select.
Permanent Bluetooth Discoverable Mode
Note:The Permanent Bluetooth Discoverable Modemust be enabled by the dealer or systemadministrator. If enabled, Bluetooth is notdisplayed in the Menu and you cannot use anyBluetooth programmable button features.
Other Bluetooth-enabled devices can locate yourradio, but the devices cannot connect to the radio.The Permanent Bluetooth Discoverable Modeenables dedicated devices to use your radio positionin the process of Bluetooth-based location.
Indoor Location
Note:Indoor Location feature is applicable formodels with the latest software and hardware.Check with your dealer or systemadministrator for more information.
Indoor Location can be used to keep track of radiousers location while indoors. When Indoor Location is
Cap
acity
Max
Ope
ratio
ns
96
English
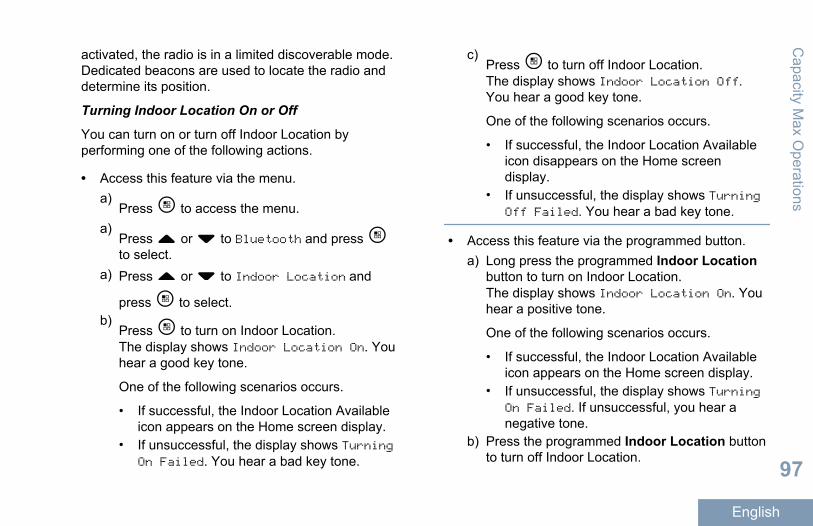
activated, the radio is in a limited discoverable mode.Dedicated beacons are used to locate the radio anddetermine its position.
Turning Indoor Location On or Off
You can turn on or turn off Indoor Location byperforming one of the following actions.
• Access this feature via the menu.a)
Press to access the menu.a)
Press or to Bluetooth and press to select.
a) Press or to Indoor Location and
press to select.b)
Press to turn on Indoor Location.The display shows Indoor Location On. Youhear a good key tone.
One of the following scenarios occurs.
• If successful, the Indoor Location Availableicon appears on the Home screen display.
• If unsuccessful, the display shows TurningOn Failed. You hear a bad key tone.
c)Press to turn off Indoor Location.The display shows Indoor Location Off.You hear a good key tone.
One of the following scenarios occurs.
• If successful, the Indoor Location Availableicon disappears on the Home screendisplay.
• If unsuccessful, the display shows TurningOff Failed. You hear a bad key tone.
• Access this feature via the programmed button.a) Long press the programmed Indoor Location
button to turn on Indoor Location.The display shows Indoor Location On. Youhear a positive tone.
One of the following scenarios occurs.
• If successful, the Indoor Location Availableicon appears on the Home screen display.
• If unsuccessful, the display shows TurningOn Failed. If unsuccessful, you hear anegative tone.
b) Press the programmed Indoor Location buttonto turn off Indoor Location.
Capacity M
ax Operations
97
English
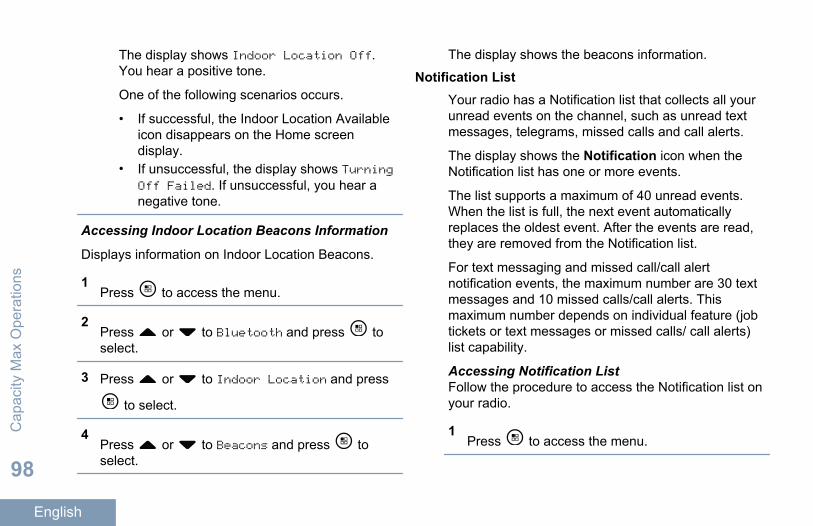
The display shows Indoor Location Off.You hear a positive tone.
One of the following scenarios occurs.
• If successful, the Indoor Location Availableicon disappears on the Home screendisplay.
• If unsuccessful, the display shows TurningOff Failed. If unsuccessful, you hear anegative tone.
Accessing Indoor Location Beacons Information
Displays information on Indoor Location Beacons.
1Press to access the menu.
2Press or to Bluetooth and press toselect.
3 Press or to Indoor Location and press
to select.
4Press or to Beacons and press toselect.
The display shows the beacons information.
Notification ListYour radio has a Notification list that collects all yourunread events on the channel, such as unread textmessages, telegrams, missed calls and call alerts.
The display shows the Notification icon when theNotification list has one or more events.
The list supports a maximum of 40 unread events.When the list is full, the next event automaticallyreplaces the oldest event. After the events are read,they are removed from the Notification list.
For text messaging and missed call/call alertnotification events, the maximum number are 30 textmessages and 10 missed calls/call alerts. Thismaximum number depends on individual feature (jobtickets or text messages or missed calls/ call alerts)list capability.
Accessing Notification ListFollow the procedure to access the Notification list onyour radio.
1Press to access the menu.
Cap
acity
Max
Ope
ratio
ns
98
English
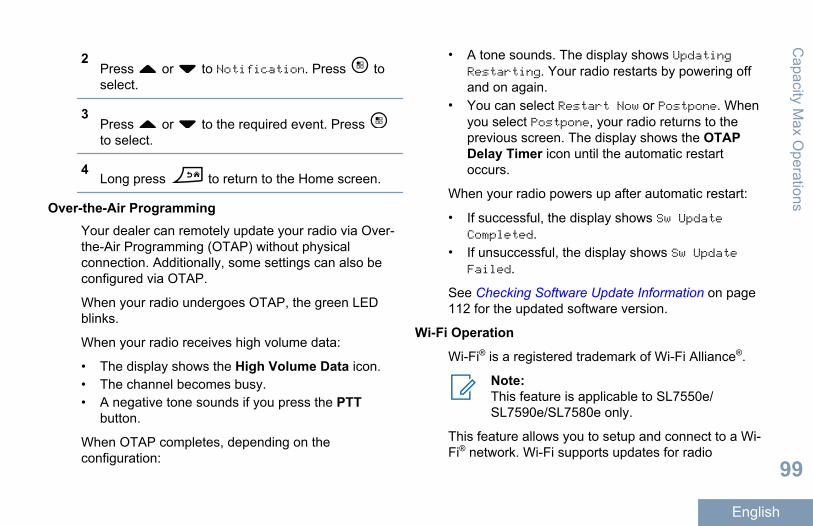
2Press or to Notification. Press toselect.
3Press or to the required event. Press to select.
4Long press to return to the Home screen.
Over-the-Air Programming Your dealer can remotely update your radio via Over-the-Air Programming (OTAP) without physicalconnection. Additionally, some settings can also beconfigured via OTAP.
When your radio undergoes OTAP, the green LEDblinks.
When your radio receives high volume data:
• The display shows the High Volume Data icon.• The channel becomes busy.• A negative tone sounds if you press the PTT
button.
When OTAP completes, depending on theconfiguration:
• A tone sounds. The display shows UpdatingRestarting. Your radio restarts by powering offand on again.
• You can select Restart Now or Postpone. Whenyou select Postpone, your radio returns to theprevious screen. The display shows the OTAPDelay Timer icon until the automatic restartoccurs.
When your radio powers up after automatic restart:
• If successful, the display shows Sw UpdateCompleted.
• If unsuccessful, the display shows Sw UpdateFailed.
See Checking Software Update Information on page112 for the updated software version.
Wi-Fi Operation
Wi-Fi® is a registered trademark of Wi-Fi Alliance®.
Note:This feature is applicable to SL7550e/SL7590e/SL7580e only.
This feature allows you to setup and connect to a Wi-Fi® network. Wi-Fi supports updates for radio
Capacity M
ax Operations
99
English

firmware, codeplug, and resources such as languagepacks and voice announcement.
Turning Wi-Fi On or Off
Note:This feature is applicable to SL7550e/SL7590e/SL7580e only.
The programmed Wi-Fi On or Off button isassigned by your dealer or systemadministrator. Check with your dealer orsystem administrator to determine how yourradio has been programmed.
You can turn on or turn off Wi-Fi® by performing oneof the following actions.
• Press the programmed Wi-Fi On or Off button.Voice Announcement sounds Turning On Wi-Fi orTurning Off Wi-Fi.
• Access this feature via the menu.a)
Press to access the menu.b)
Press or to WiFi and press toselect.
c) Press or to WiFi Status and press
to select.
Press to turn on Wi-Fi. The display shows beside Enabled.
Press to turn off Wi-Fi. The disappearsfrom beside Enabled.
If Wi-Fi is enabled and a low capacity battery is used,an alert screen is displayed upon power up with thefollowing notice.
• Low Capacity Battery!
• Tx power restricted to 2W and Wi-Fidisabled.
• Use a compatible battery to liftrestriction.
•Press to continue.
Lift the restriction to enable 3W operation and Wi-Fiby performing the following action. Power off the radioand change to a compatible battery such as Lithium-Ion 1800 mAh Battery Pack (HKNN4013_), Lithium-Ion 2200 mAh Battery Pack (PMNN4459_) or Lithium-Ion 2300mAh Battery Pack (PMNN4468_).
Cap
acity
Max
Ope
ratio
ns
100
English

If Wi-Fi is disabled and a low capacity battery is used,the transmit power is restricted to 2W.
Connecting to a Network Access Point
Note:This feature is applicable to SL7550e/SL7590e/SL7580e only.
When you turn on Wi-Fi®, the radio scans andconnects to a network access point.
You can also connect to a network access point viathe menu.
1Press to access the menu.
2Press or to WiFi and press to select.
3Press or to Networks and press toselect.
4 Press or to a network access point and
press to select.
5Press or to Connect and press toselect.
6Enter the password and press .When the connection is successful, the radiodisplays a notice and the network access point issaved into the profile list.
Refreshing the Network List
Note:This feature is applicable to SL7550e/SL7590e/SL7580e only.
• Perform the following actions to refresh thenetwork list.a)
Press to access the menu.b)
Press or to WiFi and press toselect.
c)Press or to Networks and press toselect.When you enter the Networks menu, the radioautomatically refreshes the network list.
Capacity M
ax Operations
101
English

• If you are already in the Networks menu, performthe following action to refresh the network list.a)
Press or to Refresh and press toselect.
The radio refreshes and displays the latestnetwork list.
Adding a Network
Note:This feature is applicable to SL7550e/SL7590e/SL7580e only.
If a preferred network is not in the available networklist, perform the following actions to add a network.
1Press to access the menu.
2Press or to WiFi and press to select.
3Press or to Networks and press toselect.
4Press or to Add Network and press toselect.
5 Enter the Service Set Identifier (SSID) and press
.
6Press or to Open and press to select.
7Enter the password and press .The radio displays to indicate that the networkis successfully saved.
Viewing Details of Network Access Points
Note:This feature is applicable to SL7550e/SL7590e/SL7580e only.
Perform the following actions to view details ofnetwork access points.
1Press to access the menu.
2Press or to WiFi and press to select.
Cap
acity
Max
Ope
ratio
ns
102
English

3Press or to Networks and press toselect.
4 Press or to a network access point and
press to select.
5Press or to View Details and press to select.
For a connected network access point, the ServiceSet Identifier (SSID), Security Mode, MediaAccess Control (MAC) address, and InternetProtocol (IP) address are displayed.
For a non-connected network access point, theService Set Identifier (SSID) and Security Modeare displayed.
Removing Network Access Points
Note:This feature is applicable to SL7550e/SL7590e/SL7580e only. Enterprise networkaccess points that are added via CPS can onlybe removed via CPS.
Perform the following actions to remove networkaccess points from the profile list.
1Press to access the menu.
2Press or to WiFi and press to select.
3Press or to Networks and press toselect.
4 Press or to the selected network access
point and press to select.
5Press or to Remove and press toselect.
6Press or to Yes and press to select.The radio displays to indicate that the selectednetwork access point is successfully removed.
Capacity M
ax Operations
103
English

UtilitiesThis chapter explains the operations of the utilityfunctions available in your radio.Turning Radio Tones/Alerts On or OffYou can enable and disable all radio tones and alerts,if needed, except for incoming Emergency alert tone.Follow the procedure to turn tones and alerts on or offon your radio.
1 Do one of the following:
• Press the programmed Tones/Alerts button.Skip the steps below.
•Press to access the menu.
2Press or to Utilities. Press toselect.
3Press or to Radio Settings. Press to select.
4Press or to Tones/Alerts. Press toselect.
5Press or to All Tones. Press toselect.
6Press to enable or disable all tones and alerts.If enabled, appears besides Enabled.
If disabled, disappears beside Enabled.
Turning LED Indicators On or OffFollow the procedure to turn the LED indicators on oroff on your radio.
1Press to access the menu.
2Press or to Utilities. Press toselect.
3Press or to Radio Settings. Press to select.
4Press or to LED Indicator. Press toselect.C
apac
ity M
ax O
pera
tions
104
English

5Press to enable or disable the LED indicator.The display shows one of the following results:
• If enabled, appears besides Enabled.• If disabled, disappears beside Enabled.
Identifying Cable Type
Do the following steps to select the type of cable yourradio uses.
1Press to access the menu.
2Press or to Utilities. Press toselect.
3Press or to Radio Settings. Press to select.
4Press or to Cable Type. Press toselect.
5 Press or to change the selected option.The current cable type is indicated by a .
Turning Voice Announcement On or OffThis feature enables the radio to audibly indicate thecurrent zone or channel the user has just assigned, orthe programmable button the user has just pressed.This is typically useful when the user has difficultyreading the content shown on the display. This audioindicator can be customized according to customerrequirements. Follow the procedure to turn VoiceAnnouncement on or off on your radio.
1 Do one of the following:
• Press the programmed Voice Announcementbutton. Skip the following steps.
•Press to access the menu.
2Press or to Utilities. Press toselect.
3Press or to Radio Settings. Press to select.
4 Press or to Voice Announcement. Press
to select.
Capacity M
ax Operations
105
English

5Press to enable or disable VoiceAnnouncement.
• If enabled, appears besides Enabled.• If disabled, disappears beside Enabled.
Text-to-SpeechThe Text-to-Speech feature can only be enabled byyour dealer or system administrator. If Text-to-Speechis enabled, the Voice Announcement feature isautomatically disabled. If Voice Announcement isenabled, then the Text-to-Speech feature isautomatically disabled.
This audio indicator can be customized per customerrequirements. This feature is typically useful when theuser is in a difficult condition to read the contentshown on the display.
Setting Text-to-SpeechFollow the procedure to set the Text-to-Speechfeature.
1Press to access the menu.
2Press or to Utilities. Press toselect.
3Press or to Radio Settings. Press to select.
4 Press or to Voice Announcement. Press
to select.
5 Press or to any of the following features.
Press to select.The available features are as follows:
• All
• Messages
• Job Tickets
• Channel
• Zone
• Program Button
appears beside the selected setting.
Cap
acity
Max
Ope
ratio
ns
106
English

Enabling or Disabling Word PredictWord Predict: Your radio can learn common wordsequences that you often enter. It then predicts thenext word you may want to use after you enter thefirst word of a common word sequence into the texteditor.
1Press to access the menu.
2Press or to Utilities. Press toselect.
3Press or to Radio Settings. Press to select.
4Press or to Text Entry. Press toselect.
5Press or to Word Predict. Press toselect.
6 Do one of the following:
•Press or to Text Entry. Press toselect.
• Press to enable the Word Predict. If enabled, appears besides Enabled.
• Press to disable the Word Predict. If disabled, disappears beside Enabled.
Turning Digital Microphone AGC On or OffThe Digital Microphone Automatic Gain Control(AGC) controls the microphone gain of the radioautomatically while transmitting on a digital system.This feature suppresses loud audio or boosts softaudio to a preset value in order to provide aconsistent level of audio. Follow the procedure to turnDigital Microphone AGC on or off on your radio.
1Press to access the menu.
2Press or to Utilities. Press toselect.
3Press or to Radio Settings. Press to select.
Capacity M
ax Operations
107
English

4Press or to Mic AGC-D. Press toselect.
5Press to enable or disable Digital MicrophoneAGC.The display shows one of the following results:
• If enabled, appears besides Enabled.• If disabled, disappears beside Enabled.
Turning Intelligent Audio On or OffYour radio automatically adjusts the audio volume toovercome current background noise in theenvironment, inclusive of both stationary and non-stationary noise sources. This is a receive-onlyfeature and does not affect transmission audio.Follow the procedure to turn Intelligent Audio on or offon your radio.
Note:This feature is not applicable during aBluetooth session.
1 Do one of the following:
• Press the programmed Intelligent Audiobutton. Skip the steps below.
•Press to access the menu.
2Press or to Utilities. Press toselect.
3 Press or to Intelligent Audio. Press
to select.
4 Do one of the following:
•Press or to On. Press to select. Thedisplay shows beside On.
•Press or to Off. Press to select.The display shows beside Off.
Turning Trill Enhancement On or OffYou can enable this feature when you are speaking ina language that contains many words with alveolartrill (rolling “R”) pronunciations. Follow the procedureto turn Trill Enhancement on or off on your radio.
1 Do one of the following:
• Press the programmed Trill Enhancementbutton. Skip the steps below.
Cap
acity
Max
Ope
ratio
ns
108
English
•Press to access the menu.
2Press or to Utilities. Press toselect.
3Press or to Radio Settings. Press to select.
4Press or to Trill Enhance. Press toselect.
5 Do one of the following:
•Press or to On. Press to select. Thedisplay shows beside On.
•Press or to Off. Press to select.The display shows beside Off.
Setting Audio AmbienceFollow the procedure to set the audio ambience onyour radio according to your environment.
1Press to access the menu.
2Press or to Utilities. Press toselect.
3Press or to Radio Settings. Press to select.
4Press or to Audio Ambience. Press to select.
5Press or to the required setting. Press to select.The settings are as follows.
• Choose Default for the default factorysettings.
• Choose Loud to increase speaker loudnesswhen using in noisy surroundings.
• Choose Work Group to reduce acousticfeedback when using with a group of radiosthat are near to each other.
The display shows beside the selected setting.
Capacity M
ax Operations
109
English
Setting Audio ProfilesFollow the procedure to set audio profiles on yourradio.
1Press to access the menu.
2Press or to Utilities. Press toselect.
3Press or to Radio Settings. Press to select.
4Press or to Audio Profiles. Press to select.
5Press or to the required setting. Press to select.The settings are as follows.
• Choose Default to disable the previouslyselected audio profile and return to the defaultfactory settings.
• Choose Level 1, Level 2, or Level 3 foraudio profiles intended to compensate for
noise-induced hearing loss that is typical foradults over 40 years of age.
• Choose Treble Boost, Mid Boost, or BassBoost for audio profiles that align with yourpreference for tinnier, more nasal, or deepersounds.
• Default
• Level 1, Level 2, or Level 3• Treble Boost, Mid Boost, or Bass Boost
The display shows beside the selected setting.
Received Signal Strength IndicatorThis feature allows you to view the Received SignalStrength Indicator (RSSI) values.
The display shows the RSSI icon at the top rightcorner. See Display Icons on page 233 for moreinformation on the RSSI icon.
Viewing RSSI ValuesFollow the procedure to view RSSI values on yourradio.
When you are at the Home screen:Cap
acity
Max
Ope
ratio
ns
110
English

1Press three times and immediately press , allin five seconds.The display shows the current Received SignalStrength Indicator (RSSI) values.
2Long press to return to the Home screen.
General Radio InformationYour radio contains information on various generalparameters.
The general information of your radio are as follows.
• Battery information.• Radio alias and ID.• Firmware and Codeplug versions.• Software update.• Open-Source Software information• Site information.• Received Signal Strength Indicator
Note:You return to the previous screen when you
press , and to the Home screen when
you long press , at any time. The radio
exits the current screen once the inactivitytimer expires.
Checking Radio Alias and IDFollow the procedure to check the radio alias and IDon your radio.
1 Do one of the following:
• Press the programmed Radio Alias and IDbutton. Skip the steps below.
A positive indicator tone sounds.•
Press to access the menu.
You can press the programmed Radio Alias andID button to return to the previous screen.
2Press or to Utilities. Press toselect.
3Press or to Radio Info. Press toselect.
4Press or to My ID. Press to select.
Capacity M
ax Operations
111
English

The first text line shows the radio alias. Thesecond text line shows the radio ID.
Checking Firmware and Codeplug VersionsFollow the procedure to check the firmware andcodeplug versions on your radio.
1Press to access the menu.
2Press or to Utilities. Press toselect.
3Press or to Radio Info. Press toselect.
4Press or to Versions. Press to select.The display shows the current firmware andcodeplug versions.
Checking Software Update InformationThis feature shows the date and time of the latestsoftware update carried out via OTAP or Wi-Fi. Followthe procedure to check the software updateinformation on your radio.
1Press to access the menu.
2Press or to Utilities. Press toselect.
3Press or to Radio Info. Press toselect.
4Press or to SW Update. Press toselect.The display shows the date and time of the latestsoftware update.
Software Update menu is only available after at leastone successful OTAP or Wi-Fi session. See Over-the-Air Programming on page 99 for more information.
Cap
acity
Max
Ope
ratio
ns
112
English

Connect Plus Operations
Connect P
lus Operations
113
English
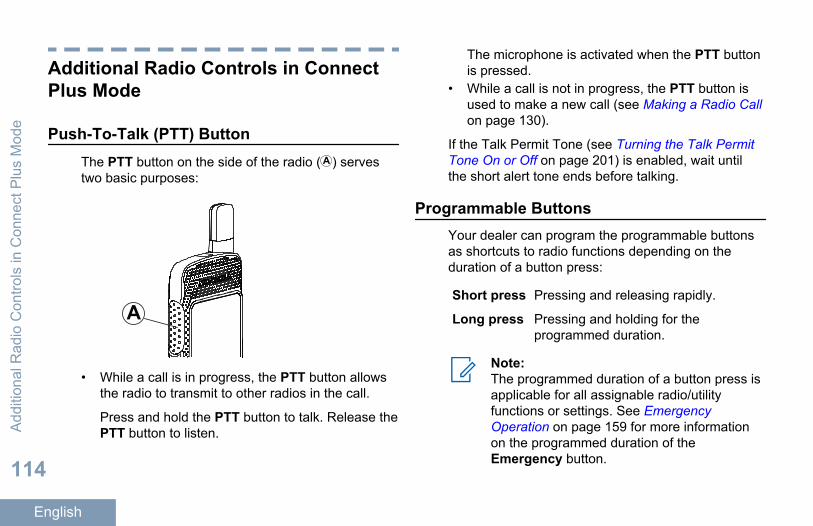
Additional Radio Controls in ConnectPlus Mode
Push-To-Talk (PTT) ButtonThe PTT button on the side of the radio ( ) servestwo basic purposes:
A
• While a call is in progress, the PTT button allowsthe radio to transmit to other radios in the call.
Press and hold the PTT button to talk. Release thePTT button to listen.
The microphone is activated when the PTT buttonis pressed.
• While a call is not in progress, the PTT button isused to make a new call (see Making a Radio Callon page 130).
If the Talk Permit Tone (see Turning the Talk PermitTone On or Off on page 201) is enabled, wait untilthe short alert tone ends before talking.
Programmable ButtonsYour dealer can program the programmable buttonsas shortcuts to radio functions depending on theduration of a button press:
Short press Pressing and releasing rapidly.
Long press Pressing and holding for theprogrammed duration.
Note:The programmed duration of a button press isapplicable for all assignable radio/utilityfunctions or settings. See EmergencyOperation on page 159 for more informationon the programmed duration of theEmergency button.
Add
ition
al R
adio
Con
trols
in C
onne
ct P
lus
Mod
e
114
English

Assignable Radio Functions
Actions A programmable button toaccess a CPS programmableaction list.
Bluetooth® AudioSwitch
Toggles audio routingbetween internal radiospeaker and externalBluetooth-enabled accessory.
Busy QueueCancellation
Exits the busy mode when anon-Emergency call in theBusy Queue was initiated.Emergency calls, onceaccepted into the BusyQueue, cannot be cancelled.
Call Log Selects the call log list.
Contacts Provides direct access to theContacts list.
ChannelAnnouncement
Plays zone and channelannouncement voicemessages for the currentchannel.
Emergency On/Off Depending on theprogramming, initiates orcancels an emergency.
Ring Alert Type Provides direct access to theRing Alert Type Setting.
Reset HomeChannel
Sets a new home channel.
Silence HomeChannel Reminder
Mutes the Home ChannelReminder.
Indoor Location Toggles Indoor Location on oroff.
Intelligent Audio Toggles intelligent audio on oroff.
Manual Dial Depending on theprogramming, initiates aPrivate or Phone Call bykeying in any subscriber ID orphone number.
One Touch Access Directly initiates a predefinedPrivate Call, a Call Alert or aQuick Text message.
Privacy Toggles privacy on or off.
Additional R
adio Controls in C
onnect Plus M
ode
115
English

Radio Check Determines if a radio is activein a system.
Radio Enable Allows a target radio to beremotely enabled.
Radio Disable Allows a target radio to beremotely disabled.
Remote Monitor Turns on the microphone of atarget radio without it givingany indicators.
Roam Request Requests to search for adifferent site.
Scan Toggles scan on or off.
Site Lock On/Off When toggled on, the radiosearches the current site only.When toggled off, the radiosearches other sites inaddition to the current site.
Text Message Selects the text messagemenu.
Vibrate Style Configures the vibrate style.
VoiceAnnouncementOn/Off
Toggles voice announcementon or off.
Wi-Fi Toggles Wi-Fi on or off.
Zone Allows selection from a list ofzones.
Assignable Settings or Utility Functions
AF Suppressor Toggles the Acoustic FeedbackSuppressor feature on or off.
All Tones/Alerts Toggles all tones and alerts on oroff.
Backlight Toggles display backlight on oroff.
Brightness Allows brightness to be set viathe manual brightness mode orauto brightness control via theradio’s photo sensor.
Display Mode Toggles the day/night displaymode on or off.
Keypad Lock Toggles keypad between lockedand unlocked.
Add
ition
al R
adio
Con
trols
in C
onne
ct P
lus
Mod
e
116
English

Unassigned Indicates that the button functionhas not yet been assigned.
Wallpaper Displayed on home screen.
Identifying Status Indicators in Connect PlusModeDisplay Icons
Your radio has a 2 inch landscape display with QVGA(Quarter Video Graphics Array) 16-bit colorresolution.
The following are icons that appear on the display ofthe radio. Icons are displayed arranged left-most inorder of appearance/usage.
Received Signal Strength Indicator(RSSI)
The number of bars displayed repre-sents the radio signal strength. Fourbars indicate the strongest signal. Thisicon is only displayed while receiving.
Bluetooth Not Connected
The Bluetooth feature is enabled butthere is no remote Bluetooth device con-nected.
Bluetooth Connected
The Bluetooth feature is enabled. Theicon stays lit when a remote Bluetoothdevice is connected.
High Volume Data
Radio is receiving high volume data andchannel is busy.
Indoor Location Available[4]
Indoor location status is on and availa-ble.
Indoor Location Unavailable[4]
Indoor location status is on but unavaila-ble due to Bluetooth disabled or Bea-cons Scan suspended by Bluetooth.
Notification List has items to review.
Additional R
adio Controls in C
onnect Plus M
ode
117
English

Option Board
The Option Board is enabled. (Optionboard enabled models only)
Option Board Non-Function
The Option Board is disabled.
Scan
Scan feature is enabled.
Emergency
Radio is in Emergency mode.
Secure
The Privacy feature is enabled.
Unsecure
The Privacy feature is disabled.
Site Roaming
The site roaming feature is enabled.
Battery
The number of bars (0 – 4) shown indi-cates the charge remaining in the bat-tery. Blinks when the battery is low.
Battery Charging Status
Shows battery charging status.
All Tones Disabled
No ring tones available.
Call Log
Radio call log.
Contact
Radio contact is available.
Message
Incoming message.
Silent Ring
Silent ring mode is enabled.
Add
ition
al R
adio
Con
trols
in C
onne
ct P
lus
Mod
e
118
English

Ring Only
Ringing mode is enabled.
Vibrate
Vibrate mode is enabled.
Vibrate and Ring
Vibrate and Ring mode is enabled.
Wi-Fi Excellent[3]
Wi-Fi signal is excellent.
Wi-Fi Good[3]
Wi-Fi signal is good.
Wi-Fi Average[3]
Wi-Fi signal is average.
Wi-Fi Poor[3]
Wi-Fi signal is poor.
Wi-Fi Unavailable[3]
Wi-Fi signal is unavailable.
Wi-Fi Excellent Highlighted[3]
Wi-Fi signal is excellent. When youscroll to a network in the network list, theWi-Fi icon of that network is highlighted.
Wi-Fi Good Highlighted[3]
Wi-Fi signal is good. When you scroll toa network in the network list, the Wi-Fiicon of that network is highlighted.
Wi-Fi Average Highlighted[3]
Wi-Fi signal is average. When you scrollto a network in the network list, the Wi-Fiicon of that network is highlighted.
Wi-Fi Poor Highlighted[3]
Wi-Fi signal is poor. When you scroll toa network in the network list, the Wi-Fiicon of that network is highlighted.
Additional R
adio Controls in C
onnect Plus M
ode
119
English

Wi-Fi Unavailable Highlighted[3]
Wi-Fi signal is unavailable. When youscroll to a network in the network list, theWi-Fi icon of that network is highlighted.
.
Call Icons
The following icons appear on the radio’s displayduring a call. These icons also appear in the Contactslist to indicate ID type.
Private Call
Indicates a Private Call in progress.
Group Call/Site All Call
Indicates a Group Call or Site All Callin progress.
Phone Call as Private Call
Indicates a Phone Call as Private Callin progress.
Bluetooth PC Call
Indicates a Bluetooth PC Call in prog-ress.
In the Contacts list, it indicates a Blue-tooth PC Call alias (name) or ID (num-ber).
Dispatch Call
The Dispatch Call contact type is usedto send a text message to a dispatch-er PC through a third-party Text Mes-sage Server.
Option Board Individual Call
Indicates an Option Board individualcall in progress.
3 Only applicable for SL7550e/SL7590e/SL7580e4 Only applicable for models with the latest software and hardware.
Add
ition
al R
adio
Con
trols
in C
onne
ct P
lus
Mod
e
120
English

Option Board Group Call
Indicates an Option Board group callin progress.
Sent Item Icons
The following icons appear at the top right corner ofthe radio’s display in the Sent Items folder.
or
In Progress
The text message to a subscriber alias or IDis pending transmission, followed by waitingfor acknowledgement.
The text message to a group alias or ID ispending transmission.
OR
Sent Successfully
The text message is sent successfully.
OR
Individual or Group Message Read
The text message has been read.
ORIndividual or Group Message Unread
The text message has not been read.
OR
Send Failed
The text message has not been sent.
LED Indicator
The LED indicator ( ) shows the operational status ofyour radio.
Additional R
adio Controls in C
onnect Plus M
ode
121
English

A
Blinking red Radio is transmitting at low batterycondition, receiving an emergencytransmission or has failed the self-test upon powering up.
Rapidlyblinking red
Radio is receiving over-the-air filetransfer (Option Board firmware file,Network Frequency file or OptionBoard Codeplug file) or upgrading toa new Option Board firmware file.
Blinkinggreen andyellow
Radio is receiving a Call Alert, re-ceived a text message or Scan is en-abled and is receiving activity.
Solid yellow Radio is in Bluetooth DiscoverableMode. Also indicates fair batterycharge when programmable buttonis pressed.
Doubleblinking yel-low
Radio is actively searching for a newsite.
Blinking yel-low
Radio is receiving a Call Alert orScan is enabled and is idle (radio willremain muted to any activity).
Solid green Radio is powering up or transmitting.Also indicates full charge of the bat-tery when the programmable buttonis pressed.
Blinkinggreen
Radio is powering up, receiving anon-privacy- enabled call or data.
Rapidlyblinkinggreen
Radio is receiving a privacy-enabledcall.
Indicator Tones
High pitched tone Low pitched tone
Add
ition
al R
adio
Con
trols
in C
onne
ct P
lus
Mod
e
122
English

Positive Indicator Tone
Negative Indicator Tone
Alert Tones
Alert tones provide you with audible indications of thestatus, or response to data received on the radio.
Continuous Tone A monotone sound.Sounds continuously un-til termination.
Periodic Tone Sounds periodically de-pending on the durationset by the radio. Tonestarts, stops, and repeatsitself.
Repetitive Tone A single tone that re-peats itself until it is ter-minated by the user.
Momentary Tone Sounds only once for ashort period of time de-fined by the radio.
Switching Between Connect Plus and Non-Connect Plus Modes
To switch to a non-Connect Plus mode, you mustchange to another zone, if programmed by yourdealer or system administrator. Check with yourdealer or system administrator to see if your radio hasbeen programmed with non-Connect Plus zones, andwhat features are available while operating in non-Connect Plus zones.
Additional R
adio Controls in C
onnect Plus M
ode
123
English

Making and Receiving Calls in ConnectPlus Mode
Selecting a SiteA site provides coverage for a specific area. AConnect Plus site has a site controller and amaximum of 15 repeaters. In a multi-site network, theConnect Plus radio will automatically search for a newsite when the signal level from the current site dropsto an unacceptable level.
Roam Request
A Roam Request tells the radio to search for adifferent site, even if the signal from the current site isacceptable.
If there are no sites available,
• The radio display shows Searching andcontinues to search through the list of sites.
• The radio will return to the previous site, if theprevious site is still available.
Note:This is programmed by your dealer.
Press the programmed Roam Request button.You hear a tone, indicating the radio has switchedto a new site. The display shows Site ID <SiteNumber>.
Site Lock On/Off
When toggled on, the radio searches the current siteonly. When toggled off, the radio searches other sitesin addition to the current site.
Press the programmed Site Lock button.
If the Site Lock function is toggled on:
• You hear a positive indicator tone, indicatingthe radio has locked to the current site.
• The display shows Site Locked.
If the Site Lock function is toggled off:
• You hear a negative indicator tone, indicatingthe radio is unlocked.
• The display shows Site Unlocked.
Site Restriction
Your Connect Plus radio system administrator has theability to decide which network sites your radio is and
Mak
ing
and
Rec
eivi
ng C
alls
in C
onne
ct P
lus
Mod
e
124
English

is not allowed to use. Your radio does not need to bereprogrammed to change the list of allowed anddisallowed sites. If your radio attempts to register at adisallowed site, you see a brief message stating:Site <number given> Not Allowed. The radiothen searches for a different network site.
Selecting a ZoneThe radio can be programmed with a maximum of 16Connect Plus Zones and each Connect Plus zonecontains a maximum of 16 assignable positions.
Each assignable position can be used to start one ofthe following voice call types:
• Group Call• Multigroup Call• Site All Call• Private Call
1 Access the Zone feature by performing one of thefollowing actions:Radio Controls Steps
ProgrammedZone Selectionbutton
Press the programmed ZoneSelection button.
Radio Controls Steps
Radio menu 1 to access the menu.
2 or to Zone and
press to select.
The current zone is displayed and indicated by a.
2 Select the required zone.Radio Control Steps
or or and scroll to the re-quired zone.
3Press to select.The display shows <Zone> Selectedmomentarily and returns to the selected zonescreen.
Using Multiple NetworksIf your radio has been programmed to use multipleConnect Plus networks, you can select a different
Making and R
eceiving Calls in C
onnect Plus M
ode
125
English

network by switching to the Connect Plus zone that isassigned to the desired network. These network-to-zone assignments are configured by your dealerthrough radio programming.
Selecting a Call TypeUse the 4–Way Navigation Disc to select a call type.This can be a Group Call, Multi-group Call, Site AllCall or Private Call, depending on how your radio isprogrammed. If you navigate with the 4–WayNavigation Disc to a different Call Type this causesthe radio to re-register with the Connect Plus site.The radio registers with the Registration Group IDthat has been programmed for the new call type.
If you select a position that has no call type assignedto it, your radio sounds a continuous tone and thedisplay shows Unprogrammed. Your radio does notoperate when selected to an unprogrammed channel,use the 4–Way Navigation Disc to select aprogrammed channel instead.
Once the required zone is displayed (if you havemultiple zones in your radio), use the 4–WayNavigation Disc to select the call type.
Receiving and Responding to a Radio CallOnce the channel, subscriber ID or call type isdisplayed, you can proceed to receive and respond tocalls.
The LED lights up solid green while the radio istransmitting and blinks green when the radio isreceiving.
Note:The LED lights up solid green while the radiois transmitting and blinks green rapidly whenthe radio is receiving a privacy-enabled call.To unscramble a privacy-enabled call, yourradio must have the same Privacy Key, ORthe same Key Value and Key ID (programmedby your dealer), as the transmitting radio (theradio you are receiving the call from).
Note:See Privacy on page 180 for moreinformation.
Mak
ing
and
Rec
eivi
ng C
alls
in C
onne
ct P
lus
Mod
e
126
English
Receiving and Responding to a Group Call
To receive a call from a group of users, your radiomust be configured as part of that group.
When you receive a Group Call (while on the Homescreen), the LED blinks green.The first line of thedisplay shows the RSSI icon. The second linedisplays the Group Call icon. The third line displaysthe Group Alias. The fourth line shows the CallerAlias. Your radio unmutes and the incoming callsounds through the radio's speaker.
1 Hold the radio vertically 1 to 2 inches (2.5 to 5.0cm) from your mouth.The LED lights up solid green.
2 Wait for one of the Talk Permit Tone to finish (ifenabled), and speak clearly into the microphone.
3 Release the PTT button to listen.If there is no voice activity for a predeterminedperiod of time, the call ends.
Note:See Making a Group Call on page 130 fordetails on making a Group Call.
If the radio receives a Group Call while not onthe Home screen, it remains on its currentscreen prior to answering the call.
Long press the button to go to theHome screen to view the caller alias beforereplying.
Receiving and Responding to a Private Call
A Private Call is a call from an individual radio toanother individual radio.
When you receive a Private Call, the LED blinksgreen. The first line of the display shows the RSSIicon. The second line displays the Private Callicon.The third line shows the Caller Alias. Your radiounmutes and the incoming call sounds through thespeaker of the radio.
1 Hold the radio vertically 1 to 2 inches (2.5 to 5.0cm) from your mouth.
2 Press the PTT button to respond to the call.The LED lights up solid green.
3 Wait for the Talk Permit Tone to finish (if enabled),and speak clearly into the microphone.
Making and R
eceiving Calls in C
onnect Plus M
ode
127
English

4 Release the PTT button to listen.
If there is no voice activity for a predetermined periodof time, the call ends.
The display shows Call Ended.
See Making a Private Call on page 131 for details onmaking a Private Call.
Receiving a Site All Call
A Site All Call is a call from an individual radio toevery radio on the site. It is used to make importantannouncements requiring the user’s full attention.
When you receive an Site All Call, a tone sounds andthe LED blinks green.
The first line of the display shows the RSSI icon. Thesecond line displays the Site All Call icon.The thirdline displays Site All Call. The fourth line displaysthe Caller Alias. Your radio unmutes and theincoming call sounds through the radio speaker.
Once the Site All Call ends, the radio returns to theprevious screen before receiving the call. A Site AllCall does not wait for a predetermined period of timebefore ending.
You cannot respond to an Site All Call.
Note:See Making a Site All Call on page 132 fordetails on making a Site All Call.
Note:The radio stops receiving the Site All Call ifyou switch to a different channel whilereceiving the call. During a Site All Call, youwill not be able to use any programmed buttonfunctions until the call ends.
Receiving an Inbound Private Phone Call
When you receive an Inbound Private Phone Call, thePhone Call as Private Call icon appears in the topright corner. The first text line shows Phone Call.
1 Press and hold the PTT button to answer and talk.Release the PTT button to listen.
2Long press to end the call.The first line of the display shows Ending. Thesecond line of the display shows Phone Call....The display returns to the Phone Call screen.
The display shows Phone Call Ended.
Mak
ing
and
Rec
eivi
ng C
alls
in C
onne
ct P
lus
Mod
e
128
English

Making a Buffered Over-Dial in an Inbound PhonePrivate Call
During the call, the Phone Call as Private Call iconappears in the top right corner. The first text line ofthe display shows Phone Call.
1 Use the keypad to enter the digits and press the
button.
Press followed by within 2 seconds toinsert a pause. The P replaces * and # on thedisplay.The Phone Call as Private Call icon appears in thetop right corner. The first text line of the displayshows the entered digits.
2Long press to end the call.
The first line of the display shows Ending. Thesecond line of the display shows Phone Call....The display returns to the Phone Call screen.
The display shows Phone Call Ended.
Making a Live Over-Dial in an Inbound PhonePrivate Call
During the call, the Phone Call as Private Call iconappears in the top right corner. The first text line ofthe display shows Phone Call.
1 Press the PTT button and use the keypad to enterthe digits.The Phone Call as Private Call icon appears in thetop right corner. The first text line of the displayshows the Live Dial digits.
2Long press to end the call.
The first line of the display shows Ending. Thesecond line of the display shows Phone Call....The display returns to the Phone Call screen.
The display shows Phone Call Ended.
Receiving an Inbound Phone Talkgroup Call
When you receive an Inbound Phone Talkgroup Call,the Group Call icon appears in the top right corner.The first text line shows Call1.
Making and R
eceiving Calls in C
onnect Plus M
ode
129
English

Press the PTT button to talk and release it tolisten.
Inbound Phone Multi-Group Call
When you receive an Inbound Phone Multi-GroupCall, the Group Call icon appears in the top rightcorner. The first text line shows Multigroup Call.The radio unmutes and the incoming multi-group callsounds through the radio's speaker.
Making a Radio CallAfter selecting your channel, you can select asubscriber alias or ID, or group alias or ID by using:
• The PTT button.• A programmed One Touch Access button – The
One Touch Access feature allows you to make aPrivate Call to a predefined ID easily. This featurecan be assigned to a short or long programmablebutton press. You can ONLY have one IDassigned to a One Touch Access button. Yourradio can have multiple One Touch Accessbuttons programmed.
• The Contacts list (see Contacts Settings on page150).
Note:Your radio must have the Privacy featureenabled on the channel to send a privacy-enabled transmission. Only target radios withthe same Key Value and Key ID as your radiowill be able to unscramble the transmission.
Note:See Privacy on page 180 for moreinformation.
Making a Call
Making a Group Call
To make a call to a group of users, your radio mustbe configured as part of that group.
1 Select the channel with the active group alias orID. See Selecting a Call Type on page 126.
2 Hold the radio vertically 1 to 2 inches (2.5 to 5.0cm) from your mouth.
3 Press the PTT button to make the call.The LED lights up solid green. The Group Callicon appears in the top right corner. The first textline shows the group call alias.
Mak
ing
and
Rec
eivi
ng C
alls
in C
onne
ct P
lus
Mod
e
130
English
4 Wait for the Talk Permit Tone to finish (if enabled),and speak clearly into the microphone.
5 Release the PTT button to listen.When the target radio responds, the LED blinksgreen, the radio unmutes and the responsesounds through the radio’s speaker. You see theGroup Call icon, the group alias or ID, andtransmitting radio alias or ID on your display.If there is no voice activity for a predeterminedperiod of time, the call ends. Radio returns to thescreen you were on prior to initiating the call.
Making a Private Call
While you can receive and/or respond to a PrivateCall initiated by an authorized individual radio, yourradio must be programmed for you to initiate a PrivateCall.
You will hear a negative indicator tone, when youmake a Private Call via the Contacts list, Call Log,One Touch Access button, if this feature is notenabled.
Use the Text Message or Call Alert features tocontact an individual radio. See Text Message
Features on page 166 or Call Alert Operation onpage 158 for more information.
1 Do one of the following.
• Select the channel with the active subscriberalias or ID. See Selecting a Call Type on page126.
• Press the programmed One Touch Accessbutton.
2 Hold the radio vertically 1 to 2 inches (2.5 to 5.0cm) from your mouth.
3 Press the PTT button to make the call.If you release the PTT button while the radio issetting up the call, it exits without any indicationand returns to the previous screen.The LED lights up solid green, the radio unmutesand the response sounds through the radio’sspeaker. The Private Call icon appears on the topright corner. The first text line shows the targetsubscriber alias. The second text line displays thecall status.
4 Wait for the Talk Permit Tone to finish (if enabled),and speak clearly into the microphone.
Making and R
eceiving Calls in C
onnect Plus M
ode
131
English

5 Release the PTT button to listen.When the target radio responds, the LED blinksgreen, the radio unmutes and the responsesounds through the radio's speaker.If there is no voice activity for a predeterminedperiod of time, the call ends. You hear a shorttone. The display shows Call Ended.
Your radio may be programmed to perform a radiopresence check prior to setting up the Private Call. Ifthe target radio is not available, you hear a short toneand see negative mini notice on the display.Making a Site All Call
This feature allows you to transmit to all users on thesite that are currently not engaged in another call.Your radio must be programmed to allow you to usethis feature.
Users on the channel/site cannot respond to an SiteAll Call.
1 Select the channel with the active Site All Callgroup alias. See Selecting a Call Type on page126.
2 Hold the radio vertically 1 to 2 inches (2.5 to 5.0cm) from your mouth.
3 Press the PTT button to make the call.The LED lights up solid green. The Group Callicon appears in the top right corner. The first textline shows Site All Call.
4 Wait for the Talk Permit Tone to finish (if enabled),and speak clearly into the microphone.
Making a Multi-group Call
This feature allows you to transmit to all users onmultiple groups. Your radio must be programmed toallow you to use this feature.
Note:Users on the groups cannot respond to aMulti-group Call.
1 Select the channel with the active Multi-group aliasor ID. See Selecting Channels on page 242.
2 Press the PTT button to make the call.
The LED lights up solid green. The display showsthe Multi-group alias or ID.
Mak
ing
and
Rec
eivi
ng C
alls
in C
onne
ct P
lus
Mod
e
132
English

Wait for the Talk Permit Tone to finish (if enabled)and speak clearly into the microphone.
Making a Private Call with a One Touch Call Button
Note:Programmable buttons press must be initiatedfrom the Home screen.
The One Touch Call feature allows you to easilymake a Private Call to a pre-defined Private Call aliasor ID. This feature can be assigned to a short or longprogrammable button press.
You can ONLY have one alias or ID assigned to aOne Touch Call button. Your radio can have multipleOne Touch Call buttons programmed.
1 Press the programmed One Touch Call button tomake a Private Call to the pre-defined Private Callalias or ID.
2 Hold the radio vertically 1 to 2 inches (2.5 to 5.0cm) from your mouth.
3 Press the PTT button to make the call.
The LED lights up solid green.
The display shows the Private Call alias or ID.
4 Wait for the Talk Permit Tone to finish (if enabled)and speak clearly into the microphone.
5 Release the PTT button to listen.When the target radio responds, the LED blinksgreen.If there is no voice activity for a predeterminedperiod of time, the call ends.
Making a Call with the Programmable Manual DialButton
Making a Private Call
1 Press the programmed Manual Dial button toenter into the Manual Dial screen.The display shows Number:.
2 Use the keypad to enter a subscriber alias orPrivate ID.
3 Hold the radio vertically 1 to 2 inches (2.5 to 5.0cm) from your mouth.
4 Press the PTT button to make the call.
Making and R
eceiving Calls in C
onnect Plus M
ode
133
English

The LED lights up solid green. The Private Callicon appears in the top right corner. The first textline shows the subscriber alias. The second textline displays the call status.
5 Wait for the Talk Permit Tone to finish (if enabled)and speak clearly into the microphone.
6 Release the PTT button to listen.When the target radio responds, the LED blinksgreen.If there is no voice activity for a predeterminedperiod of time, the call ends. You hear a shorttone. The display shows Call Ended.
Making an Outbound Private Phone Call with theProgrammable Manual Dial Button
1 Press the programmed Manual Dial button toenter into the Manual Dial screen.The display shows Number:.
2 Use the keypad to enter a telephone number, and
press to place a call to the entered number.
Press to delete any unwanted characters. Press
followed by within 2 seconds to inserta pause. The P replaces * and # on the display.
If successful, the first line of the display showsPhone Call. The second line of the display showsthe dialed telephone number.
If an invalid telephone number is selected, thedisplay shows a negative mini notice, Phone CallFailed, Resource Not Available, or InvalidPermissions.
If is pressed with no telephone numberentered, the radio sounds a positive indicator tonethen a negative indicator tone. The displayremains the same.
3Long press to end the call.
The first line of the display shows Ending. Thesecond line of the display shows Phone Call....
The display shows Phone Call Ended.Mak
ing
and
Rec
eivi
ng C
alls
in C
onne
ct P
lus
Mod
e
134
English
Making an Outbound Private Phone Call via the PhoneMenu
1 to access the menu.
2 or to Phone and press to select.
3Press to select Manual Dial.The first line of the display shows Number, thesecond line of the display shows a blinking cursor.
4 Use the keypad to enter a telephone number, and
press to place a call to the entered number.
Press to delete any unwanted characters. Press
followed by within 2 seconds to inserta pause. The P replaces * and # on the display.
If successful, the first line of the display showsPhone Call. The second line of the display showsthe dialed telephone number.
If an invalid telephone number is selected, thedisplay shows a negative mini notice, Phone Call
Failed, Resource Not Available, or InvalidPermissions.
If is pressed with no telephone numberentered, the radio sounds a positive indicator tonethen a negative indicator tone. The displayremains the same.
5Long press to end the call.
The first line of the display shows Ending. Thesecond line of the display shows Phone Call....
The display shows Phone Call Ended.
Making an Outbound Private Phone Call from Contacts
Note:If the Phone Manual Dial is disabled inMOTOTRBO Connect Plus Option BoardCPS, the Phone Number item will not bedisplayed in the Menu.
1 to access the menu.
2 or to Contacts and press to select.
Making and R
eceiving Calls in C
onnect Plus M
ode
135
English

3 or to Manual Dial and press to
select.
4 or to Phone Number and press to
select.The first line of the display shows Number, thesecond line of the display shows a blinking cursor.
5 Use the keypad to enter a telephone number, and
press to place a call to the entered number.
If the PTT button is pressed, the display shows anegative mini notice, Press OK to Send andreturns to the previous screen.
Press to delete any unwanted characters. Press
followed by within 2 seconds to inserta pause. The P replaces * and # on the display.
If successful, the first line of the display showsPhone Call. The second line of the display showsthe dialed telephone number.
If is pressed with no telephone numberentered, the radio sounds a positive indicator tone
then a negative indicator tone. The displayremains the same.
6Long press to end the call.
The first line of the display shows Ending. Thesecond line of the display shows Phone Call....
The display shows Phone Call Ended.
Waiting for the Channel Grant in an Outbound PrivatePhone Call
When you make a Private Phone Call, the first line ofthe display shows Phone Call. The second line ofthe display shows the dialed telephone number.
When the call is connected, the Phone Call as PrivateCall icon appears in the top right corner. The first lineof the display shows the telephone number.
If unsuccessful, the display shows a negative mininotice, Phone Call Failed, Resource NotAvailable, or Invalid Permissions.
Long press to end the call.
The display returns to the previous screen.
Mak
ing
and
Rec
eivi
ng C
alls
in C
onne
ct P
lus
Mod
e
136
English

Making a Buffered Over-Dial in a Connected OutboundPrivate Phone Call
During the call, the Phone Call as Private Call iconappears in the top right corner. The first text line ofthe display shows the telephone number.
1 Use the keypad to enter the digits.
Press to delete any unwanted characters. Press
followed by within 2 seconds to inserta pause. The P replaces * and # on the display.The first text line of the display shows ExtraDigits, the second text line of the display showsthe entered extra digits.
2Press the button.If the PTT button is pressed, the display shows anegative mini notice, Press OK to Send andreturns to the previous screen.The Phone Call as Private Call icon appears in thetop right corner. The first text line of the displayshows the telephone number with the over-dialdigits appended.
3 Do one of the following.
•Press to return to the Phone Call screen.
•Long press to end the call.
Making a Live Over-Dial in a Connected OutboundPrivate Phone Call
During the call, the Phone Call as Private Call iconappears in the top right corner. The first text line ofthe display shows the telephone number.
1 Press the PTT button and use the keypad to enterthe digits.The Phone Call as Private Call icon appears in thetop right corner. The first text line of the displayshows the telephone number with the over-dialdigits appended.
2Long press to end the call.
The first line of the display shows Ending. Thesecond line of the display shows Phone Call....
The display shows Phone Call Ended.
Making and R
eceiving Calls in C
onnect Plus M
ode
137
English

Advanced Features in Connect PlusMode
Home Channel ReminderThis feature provides a reminder when the radio isnot set to the home channel for a period of time.
If this feature is enabled via the CPS, the HomeChannel Reminder tone and announcement sound,the first line of the display shows Non and the secondline shows Home Channel periodically when the radiois not set to the home channel for a period of time.
You can respond to the reminder by performing oneof the following actions:
• Return to the home channel.• Mute the reminder temporarily via the
programmable button.• Set a new home channel via the programmable
button.
Muting the Home Channel Reminder
When the Home Channel Reminder occurs, you cantemporarily mute the reminder by performing thefollowing action.
Press the Silence Home Channel Reminderprogrammable button.The first line of the display shows HCR and thesecond line shows Silenced.
Setting a New Home Channel
When the Home Channel Reminder occurs, you canset a new home channel by performing one of thefollowing actions:
• Press the Reset Home Channel programmablebutton.The first line of the display shows the channelalias and the second line shows New Home Ch.
• Set a new home channel via the menu:a)
to access the menu.b)
or to Utilities and press toselect.
Adv
ance
d Fe
atur
es in
Con
nect
Plu
s M
ode
138
English
c) or to Radio Settings and press
to select.d)
or to Home Channel and press toselect.
e) Select from the list of valid channels.The display shows beside the selected homechannel alias.
Auto FallbackAuto Fallback is a system feature that allows you tocontinue to make and receive non-emergency callson the selected Group Contact in the event of certaintypes of Connect Plus system failures.
If one of these failures occurs, your radio attempts toroam to a different Connect Plus site. This searchprocess may result in your radio finding an operableConnect Plus site, or it may result in your radio findinga “Fallback Channel” (if your radio is enabled for AutoFallback). A Fallback Channel is a repeater that isnormally part of an operable Connect Plus site, but iscurrently unable to communicate with either its sitecontroller or the Connect Plus network. In Fallbackmode, the repeater operates as a single digital
repeater. Auto Fallback Mode supports non-emergency Group Calls only. No other call types aresupported in Fallback Mode.
Indications of Auto Fallback Mode
When your radio is using a Fallback channel, youhear the intermittent “Fallback Tone” approximatelyonce every 15 seconds (except while transmitting).The display periodically shows a brief message,“Fallback Channel”. Your radio only permits PTT onthe selected Group Contact (Group Call, MultigroupCall, or Site All Call). It does not allow you to makeother types of calls.
Making/Receiving Calls in Fallback Mode
Note:Calls are heard only by radios that aremonitoring the same Fallback channel andselected to the same Group. Calls are notnetworked to other sites or other repeaters.
Emergency voice calls or Emergency Alertsare not available in Fallback mode. If youpress the emergency button in Fallback mode,the radio provides an invalid key press tone.Display-equipped radios also show themessage, “Feature not available”.
Advanced Features in C
onnect Plus M
ode
139
English

Private (radio to radio) and Phone calls are notavailable in Fallback mode. If you attempt acall to a private contact, you will receive adenial tone. At this point you should select adesired group contact. Other non-supportedcalls include Remote Monitor, Call Alert, RadioCheck, Radio Enable, Radio Disable, Textmessaging, Location Updates, and packetdata calls.
Enhanced Traffic Channel Access (ETCA) isnot supported in Auto Fallback mode. If two ormore radio users press PTT at the same time(or at almost the same time), it is possible thatboth radios transmit until PTT is released. Inthis event, it is possible that none of thetransmissions will be understood by receivingradios.
Making calls in Fallback mode is similar to normalfunctioning. Simply select the group contact you wishto use (using the radio’s normal channel selectionmethod), and then press the PTT to start your call. Itis possible that the channel may be in use already byanother group. If the channel is in use, you receive abusy tone and the display will say “Channel Busy”.You may select Group, Multi-group or Site All Callcontacts using your radio’s normal channel selection
method. While the radio is operating on the FallbackChannel, the Multigroup operates just like otherGroups. It is only heard by radios that are currentlyselected to the same Multi-group.
Returning to Normal Operation
If the site returns to normal trunking operation whileyou are in range of your Fallback repeater, your radioautomatically exits Auto Fallback mode. You hear aregistration “beep” when the radio successfullyregisters. If you are in the range of an operable site(that is not in Fallback mode), you may press theRoam Request button (if programmed for your radio)to force your radio to search for and register on anavailable site. If no other site is available, your radioreturns to Auto Fallback mode after searching iscomplete. If you drive out of coverage of yourFallback repeater, your radio enters Search mode(display indicates “Searching”).
Radio CheckIf enabled, this feature allows you to determine ifanother radio is active in a system without disturbingthe user of that radio. No audible or visual notificationis shown on the target radio.
Adv
ance
d Fe
atur
es in
Con
nect
Plu
s M
ode
140
English

Sending a Radio Check
1 Access the Radio Check feature.RadioControl
Steps
Program-med Ra-dio Checkbutton
1 Press the programmed RadioCheck button.
2 or to the required sub-
scriber alias or ID and press to select.
Menu 1 to access the menu.
2 or to Contacts and press
to select.3 or to the required sub-
scriber alias or ID and press to select.
4 or to Radio Check and
press to select.
The display shows the Target Alias, indicating therequest is in progress. The LED lights up solidgreen.
2 Wait for acknowledgement.
If the target radio is active in the system, a tonesounds and the display briefly shows TargetRadio Available.
If the target radio is not active in the system, atone sounds and the display briefly shows TargetRadio Not Available.
Radio returns to the subscriber alias or ID screenwhen initiated via Menu.
Radio returns to the Home Screen if initiated viathe programmable button.
Remote MonitorUse the Remote Monitor feature to turn on themicrophone of a target radio (subscriber alias or IDsonly). The green LED will blink once on the targetsubscriber. You can use this feature to monitor,remotely, any audible activity surrounding the targetradio.
Advanced Features in C
onnect Plus M
ode
141
English
Your radio must be programmed to allow you to usethis feature.
Initiating Remote Monitor
Note:Remote Monitor automatically stops after aprogrammed duration or when there is anyattempt to initiate transmission, changechannels or power down the radio.
1 Access the Remote Monitor feature.RadioControl
Steps
Program-med Re-moteMonitorButton
1 Press the programmed RemoteMonitor button.
2 or to the required sub-
scriber alias or ID and press toselect.
Menu 1 to access the menu.
2 or to Contacts and press
to select.
RadioControl
Steps
3 or to the required sub-
scriber alias or ID and press toselect.
4 or to Manual Dial and
press to select.5 or to Remote Mon. and
press to select.
The first text line shows Rem. Monitor. Thesecond text line displays the Target Alias,indicating the request is in progress. The LEDlights up blinking green.
2 Wait for acknowledgement.
If successful, a positive indicator tone sounds andthe display momentarily shows Rem. MonitorSuccessful. Your radio starts playing audio fromthe monitored radio for a programmed durationand display shows Rem. Monitor, followed by
Adv
ance
d Fe
atur
es in
Con
nect
Plu
s M
ode
142
English
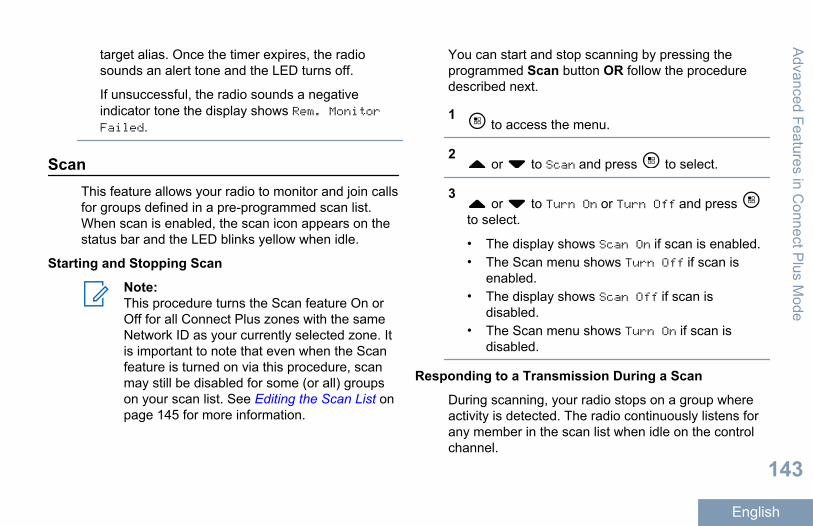
target alias. Once the timer expires, the radiosounds an alert tone and the LED turns off.
If unsuccessful, the radio sounds a negativeindicator tone the display shows Rem. MonitorFailed.
ScanThis feature allows your radio to monitor and join callsfor groups defined in a pre-programmed scan list.When scan is enabled, the scan icon appears on thestatus bar and the LED blinks yellow when idle.
Starting and Stopping Scan
Note:This procedure turns the Scan feature On orOff for all Connect Plus zones with the sameNetwork ID as your currently selected zone. Itis important to note that even when the Scanfeature is turned on via this procedure, scanmay still be disabled for some (or all) groupson your scan list. See Editing the Scan List onpage 145 for more information.
You can start and stop scanning by pressing theprogrammed Scan button OR follow the proceduredescribed next.
1 to access the menu.
2 or to Scan and press to select.
3 or to Turn On or Turn Off and press
to select.
• The display shows Scan On if scan is enabled.• The Scan menu shows Turn Off if scan is
enabled.• The display shows Scan Off if scan is
disabled.• The Scan menu shows Turn On if scan is
disabled.
Responding to a Transmission During a Scan
During scanning, your radio stops on a group whereactivity is detected. The radio continuously listens forany member in the scan list when idle on the controlchannel.
Advanced Features in C
onnect Plus M
ode
143
English

1 Hold the radio vertically 1 to 2 inches (2.5 to 5.0cm) from your mouth.
2 Press the PTT button during hang time.The LED lights up solid green.
3 Wait for the Talk Permit Tone to finish (if enabled),and speak clearly into the microphone.
4 Release the PTT button to listen.If you do not respond within the hang time, theradio returns to scanning other groups.
User Configurable ScanIf the Edit List menu is enabled, a user is able to Addand Remove the scan members from the AddMember menu. A Scan List member must be aregular Group Contact (i.e. not Multi-group or Site AllCall/Network Wide All Call) that is currently assignedto a Channel Selector position in a Connect PlusZone with the same Network ID as the currentlyselected Zone. The Talkgroup alias must not matchany Talkgroup that has been included in the currentZone's Scan List.
Scan can be turned on or off from the menu or bypressing a programmed Scan On/Off button.
This feature functions only when the radio is notcurrently involved in a call. If you are presentlylistening to a call, your radio cannot scan for othergroup calls, and is therefore unaware they are inprogress. Once your call is finished, your radioreturns to the control channel time slot and is able toscan for groups that are in the scan list.
Turning Scan On or OffNote:This procedure turns the Scan feature On orOff for all zones with the same Network ID asyour currently selected zone. It is important tonote that even when the Scan feature isturned on via this procedure, scan may still bedisabled for some (or all) groups on your scanlist. See the next section for more information.
If Scan is turned on, the Scan icon appears on yourdisplay. When Scan is on and you are notparticipating in a call, the LED blinks green andyellow.A
dvan
ced
Feat
ures
in C
onne
ct P
lus
Mod
e
144
English

The procedure for turning Scan on or off depends onhow your radio is programmed. If programmed with aScan On/Off button, use the button to toggle thefeature on or off. If your radio has been programmedso that Scan can be turned on or off via the menu,follow the procedure described next.
1 to access the menu.
2 or to Scan and press to select.
3 or to Turn On or Turn Off and press
to select.
• The display shows Scan On momentarily ifscan is disabled.
• The display shows Scan Off momentarily ifscan is enabled.
Editing the Scan ListNote:If the scan list entry happens to be the radio’scurrently selected group, the radio listens foractivity on this group regardless of whether the
list entry currently shows a check mark or not.Whenever a radio is not in a call, the radiolistens for activity on its Selected Group,Multigroup, the Site All Call, and its DefaultEmergency Revert Group (if configured forone). This operation cannot be disabled. IfScan is enabled the radio will also listen foractivity on enabled Zone Scan List members.
Your scan list determines which groups can bescanned. The list is created when your radio isprogrammed. If your radio has been programmed toallow you to edit the scan list, you can,
• Enable/disable scan for individual groups on thelist.
• Add and Remove the scan members from the AddMember menu. Refer to Add or Delete a Group viathe Add Members Menu on page 146.
Note:A Scan List member must be a regular GroupContact (i.e. not Multigroup or Site All Call/Network Wide All Call) that is currentlyassigned to a Channel Selector position in aConnect Plus Zone with the same Network IDas the currently selected Zone.
Advanced Features in C
onnect Plus M
ode
145
English

The Talkgroup alias must not match anyTalkgroup that has been included in thecurrent Zone's Scan List.
1 to access the menu.
2 or to View/Edit List and press to
select.
3 or to the desired Group name.
If a check mark precedes the Group name, thenscan is currently enabled for this Group.
If there is no check mark preceding the Groupname, then scan is currently disabled for thisGroup.
4 to select the desired Group.
The display shows Enable if scan is currentlydisabled for the Group.
The display shows Disable if scan is currentlyenabled for the Group.
5 Select the displayed option (Enable or Disable)
and press to select.Depending on which option was selected, theradio momentarily displays Scan Enabled or ScanDisabled as confirmation.
The radio displays the Zone scan list again. If scanwas enabled for the Group, the check mark displaysbefore the Group name. If scan was disabled for theGroup, the check mark is removed before the Groupname.
Add or Delete a Group via the Add MembersMenu
The Connect Plus radio does not allow a duplicategroup number or a duplicate group alias to be placedon a zone scan list (or to be shown as a “scancandidate”). Thus, the list of “scan candidates”described in steps 6 and 7 sometimes changes afteradding or deleting a group from the zone scan list.
If your radio has been programmed to allow you toedit the scan list, you can use the Add Membersmenu to add a group to the scan list of the currently
Adv
ance
d Fe
atur
es in
Con
nect
Plu
s M
ode
146
English

selected zone, or to delete a group from the san list ofthe currently selected zone.
1 to access the menu.
2 or to Scan option and press to select.
3 or to <Add Members> and press to
select.The display shows “Add Members from Zone n” (n= the Connect Plus zone number of the firstConnect Plus zone in your radio with the sameNetwork ID as your currently selected zone).
4 Do one of the following.
• If the group you want to add to the scan list isassigned to a channel selector position in thatzone, go to step 6.
• If the group you want to add to the scan list isassigned to a channel selector position in adifferent Connect Plus zone, go to step 5.
5 or to scroll a list of Connect Plus zonesthat have the same Network ID as the currentlyselected zone.
6 After locating the Connect Plus zone where thedesired group is assigned to a channel selector
position, press to select.
Your radio displays the first entry in a list of groupsassigned to a channel position in that zone. Thegroups on the list are called “scan candidates”,because they can be added to the scan list of yourcurrently selected zone (or they are already on thezone scan list).
If the zone does not have any groups that can beadded to the scan list, the radio displays NoCandidates.
7 or to scroll through the list of candidategroups.
If a plus sign (+) is displayed immediately beforethe group alias, this indicates the group iscurrently on the scan list for the selected zone.
Advanced Features in C
onnect Plus M
ode
147
English
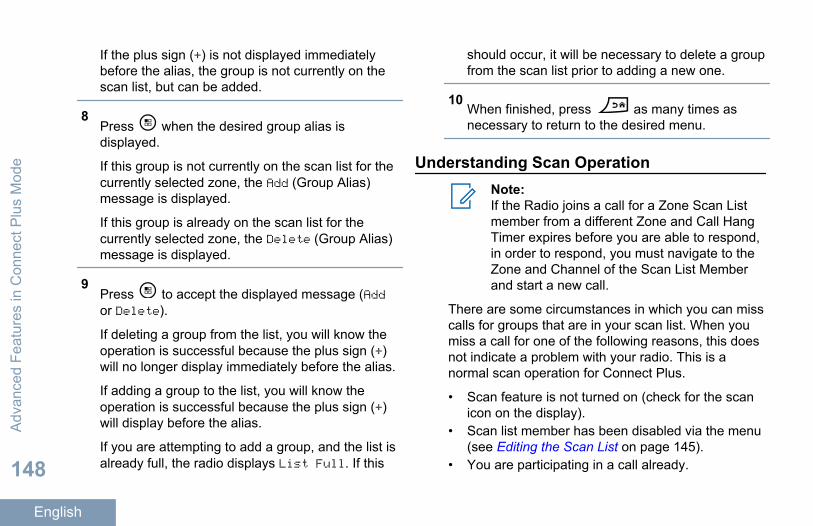
If the plus sign (+) is not displayed immediatelybefore the alias, the group is not currently on thescan list, but can be added.
8Press when the desired group alias isdisplayed.
If this group is not currently on the scan list for thecurrently selected zone, the Add (Group Alias)message is displayed.
If this group is already on the scan list for thecurrently selected zone, the Delete (Group Alias)message is displayed.
9Press to accept the displayed message (Addor Delete).
If deleting a group from the list, you will know theoperation is successful because the plus sign (+)will no longer display immediately before the alias.
If adding a group to the list, you will know theoperation is successful because the plus sign (+)will display before the alias.
If you are attempting to add a group, and the list isalready full, the radio displays List Full. If this
should occur, it will be necessary to delete a groupfrom the scan list prior to adding a new one.
10When finished, press as many times asnecessary to return to the desired menu.
Understanding Scan OperationNote:If the Radio joins a call for a Zone Scan Listmember from a different Zone and Call HangTimer expires before you are able to respond,in order to respond, you must navigate to theZone and Channel of the Scan List Memberand start a new call.
There are some circumstances in which you can misscalls for groups that are in your scan list. When youmiss a call for one of the following reasons, this doesnot indicate a problem with your radio. This is anormal scan operation for Connect Plus.
• Scan feature is not turned on (check for the scanicon on the display).
• Scan list member has been disabled via the menu(see Editing the Scan List on page 145).
• You are participating in a call already.
Adv
ance
d Fe
atur
es in
Con
nect
Plu
s M
ode
148
English

• No member of the scanned group is registered atyour site (Multisite systems only).
Scan TalkbackIf your radio scans into a call from the selectablegroup scan list, and if the PTT button is pressedduring the scanned call, the operation of the radiodepends on whether Scan Talkback was enabled ordisabled during radio programming. For moreinformation on how your radio is programmed,contact your radio dealer (or your radio systemadministrator).
ScanTalkbackDisabled
The radio leaves the scanned call andattempts to transmit on the contact forthe currently selected channelposition. After the Call Hang Time onthe currently selected contact expires,the radio returns to the home channeland starts the Scan Hang Time Timer.The radio resumes group scan after itsScan Hang Time Timer expires.
ScanTalkbackEnabled
If the PTT button is pressed during theGroup Hang Time of the scanned call,
the radio attempts to transmit to thescanned group.
Note:If you scan into a call for a group that is notassigned to a channel position in the currentlyselected zone and you miss the Hang Time ofthe call, switch to the proper zone and thenselect the channel position of the group to talkback to that group.
Editing Priority for a TalkgroupThe Priority Monitor feature allows the radio toautomatically receive transmission from the talkgroupwith higher priority when it is in another call. A tonesounds when the radio switches to the call with higherpriority.
There are two levels of priority for the talkgroups: P1and P2. P1 has higher priority than P2.
Note:If Default Emergency Revert Group ID isconfigured in MOTOTRBO Connect PlusOption Board CPS, there are three levels ofpriority for talkgroups: P0, P1 and P2. P0 is
Advanced Features in C
onnect Plus M
ode
149
English
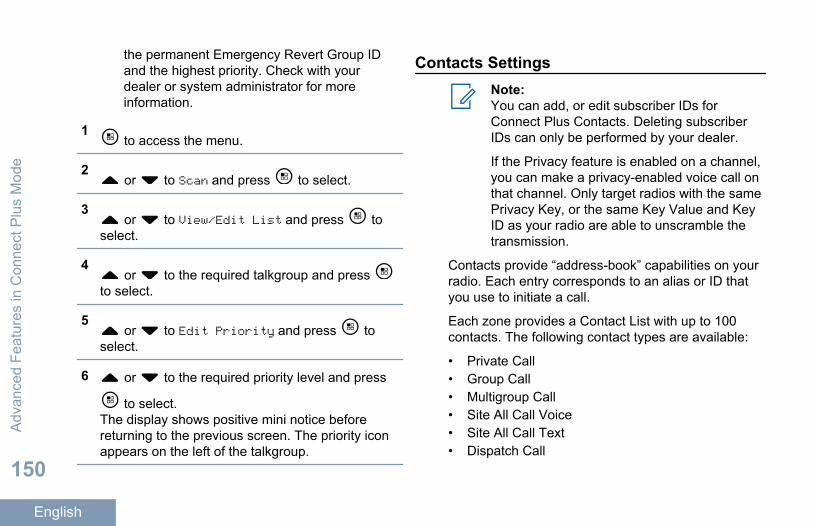
the permanent Emergency Revert Group IDand the highest priority. Check with yourdealer or system administrator for moreinformation.
1 to access the menu.
2 or to Scan and press to select.
3 or to View/Edit List and press to
select.
4 or to the required talkgroup and press
to select.
5 or to Edit Priority and press to
select.
6 or to the required priority level and press
to select.The display shows positive mini notice beforereturning to the previous screen. The priority iconappears on the left of the talkgroup.
Contacts SettingsNote:You can add, or edit subscriber IDs forConnect Plus Contacts. Deleting subscriberIDs can only be performed by your dealer.
If the Privacy feature is enabled on a channel,you can make a privacy-enabled voice call onthat channel. Only target radios with the samePrivacy Key, or the same Key Value and KeyID as your radio are able to unscramble thetransmission.
Contacts provide “address-book” capabilities on yourradio. Each entry corresponds to an alias or ID thatyou use to initiate a call.
Each zone provides a Contact List with up to 100contacts. The following contact types are available:
• Private Call• Group Call• Multigroup Call• Site All Call Voice• Site All Call Text• Dispatch Call
Adv
ance
d Fe
atur
es in
Con
nect
Plu
s M
ode
150
English

The Dispatch Call contact type is used to send a textmessage to a dispatcher PC through a third-partyText Message Server.
Making a Private Call from Contacts
1 to access the menu.
2 or to Contacts and press to select.
The entries are alphabetically sorted.
3 Use one of the steps described next to select therequired subscriber alias:
• Select the subscriber alias directly.
• or to the required subscriber alias orID.
• Use the Manual Dial menu.
• or to Manual Dial and press to
select.• If there was previously dialed ID, the ID
appears along with a blinking cursor. Use
the keypad to edit/enter the ID. Press toselect.
4 Hold the radio vertically 1 to 2 inches (2.5 to 5.0cm) from your mouth.
5 Press the PTT button to make the call.The LED lights up solid green.
6 Wait for the Talk Permit Tone to finish (if enabled),and speak clearly into the microphone.
7 Release the PTT button to listen.
When the target radio responds, the LED blinksgreen and the display shows the transmittinguser's ID.
If there is no voice activity for a predeterminedperiod of time, the call ends.
You hear a short tone. The display shows CallEnded.
Making a Call Alias Search
You can also use alias or alphanumeric search toretrieve the required subscriber alias.
This feature is only applicable while in Contacts.
1 to access the menu.
Advanced Features in C
onnect Plus M
ode
151
English
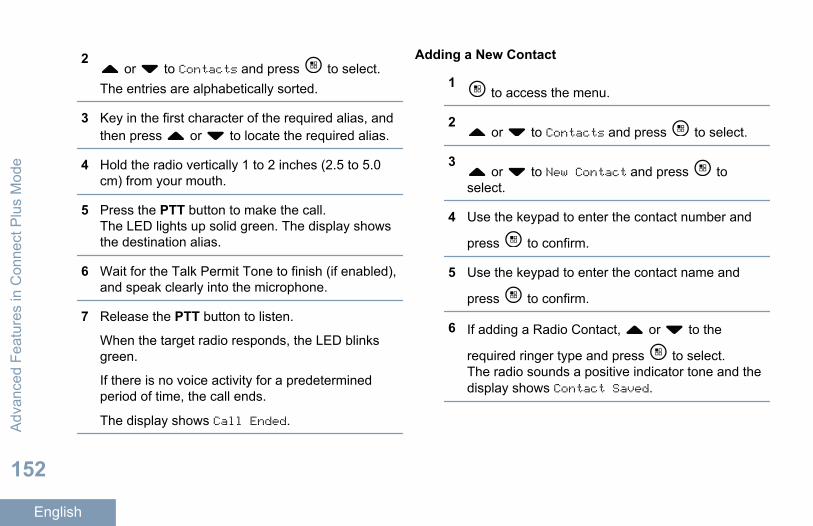
2 or to Contacts and press to select.
The entries are alphabetically sorted.
3 Key in the first character of the required alias, andthen press or to locate the required alias.
4 Hold the radio vertically 1 to 2 inches (2.5 to 5.0cm) from your mouth.
5 Press the PTT button to make the call.The LED lights up solid green. The display showsthe destination alias.
6 Wait for the Talk Permit Tone to finish (if enabled),and speak clearly into the microphone.
7 Release the PTT button to listen.
When the target radio responds, the LED blinksgreen.
If there is no voice activity for a predeterminedperiod of time, the call ends.
The display shows Call Ended.
Adding a New Contact
1 to access the menu.
2 or to Contacts and press to select.
3 or to New Contact and press to
select.
4 Use the keypad to enter the contact number and
press to confirm.
5 Use the keypad to enter the contact name and
press to confirm.
6 If adding a Radio Contact, or to the
required ringer type and press to select.The radio sounds a positive indicator tone and thedisplay shows Contact Saved.
Adv
ance
d Fe
atur
es in
Con
nect
Plu
s M
ode
152
English
Call Indicator SettingsActivating and Deactivating Call Ringers for Call Alert
You can select, or turn on or off ringing tones for areceived Call Alert.
1Press to access the menu.
2Press or to Utilities and press toselect.
3 Press or to Radio Settings and press
to select.
4Press or to Tones/Alert and press toselect.
5Press or to Call Ringers and press to select.
6Press or to Call Alert and press toselect.
The current tone is indicated by a .
7 Press or to the required tone and press
to select.
appears beside selected tone.
Activating and Deactivating Call Ringers for PrivateCalls
You can turn on or off the ringing tones for a receivedPrivate Call.
1 to access the menu.
2 or to Utilities and press to select.
3 or to Radio Settings and press to
select.
4 or to Tones/Alerts and press to
select.
Advanced Features in C
onnect Plus M
ode
153
English

5 or to Call Ringers and press to
select.
6 or to Private Call and press to
select.
7Press to enable/disable the Private Callringing tones.
The display shows beside Enabled, if PrivateCall ringing tones are enabled.
The is not displayed when Private Call ringingtones are disabled.
Activating and Deactivating Call Ringers for TextMessage
You can turn on or off the ringing tones for a receivedText Message.
1 to access the menu.
2 or to Utilities and press to select.
3 or to Radio Settings and press to
select.
4 or to Tones/Alerts and press to
select.
5 or to Call Ringers and press to
select.
6 or to Text Message and press to
select.The current tone is indicated by a .
7 or to the required tone and press to
select. appears beside selected tone.
Selecting a Ring Alert Type
Note:The programmed Ring Alert Type button isassigned by your dealer or systemadministrator. Check with your dealer or
Adv
ance
d Fe
atur
es in
Con
nect
Plu
s M
ode
154
English

system administrator to determine how yourradio has been programmed.
You can program the radio calls to onepredetermined vibrate call. If All Tones status isdisabled, the radio displays the All Tone Mute icon. IfAll Tones status is enabled, the related ring alert typeis displayed.
The radio sounds one vibration if it is a momentaryring style. The radio vibrates repetitively if it is arepetitive ring style. When set to Ring and Vibrate,the radio sounds a specific ring tone if there is anyincoming radio transaction (for example, Call Alert orMessage). It sounds like a good key tone or missedcall. If the notification list is not empty, the radiorepeats a vibration every 5 minutes.
You can select a Ring Alert Type by performing oneof the following actions.
• Press the programmed Ring Alert Type button toaccess the Ring Alert Type menu.a) Press or to Ring, Vibrate, Ring &
Vibrate or Silent and press to select.
• Access this feature via the menu.
a)Press to access the menu.
b)Press or to Utilities and press to select.
c) Press or to Radio Settings and
press to select.d) Press or to Tones/Alerts and press
to select.e) Press or to Ring Alert Type and
press to select.f) Press or to Ring, Vibrate, Ring &
Vibrate or Silent and press to select.
Configuring Vibrate Style
Note:The programmed Vibrate Style button isassigned by your dealer or systemadministrator. Check with your dealer orsystem administrator to determine how yourradio has been programmed.
You can configure the vibrate style by performing oneof the following actions.
Advanced Features in C
onnect Plus M
ode
155
English

• Press the programmed Vibrate Style button toaccess the Vibrate Style menu.a) Press or to Short, Medium, or Long
and press to select.
• Access this feature via the menu.a)
Press to access the menu.b)
Press or to Utilities and press to select.
c) Press or to Radio Settings and
press to select.d) Press or to Tones/Alerts and press
to select.e) Press or to Vibrate Style and press
to select.f) Press or to Short, Medium, or Long
and press to select.
Escalating Alarm Tone Volume
You can program your radio to continually alert youwhen a radio call remains unanswered. This is doneby automatically increasing the alarm tone volumeover time. This feature is known as Escalert.
Call Log FeaturesYour radio keeps track of all recent outgoing,answered, and missed Private Calls. Use the call logfeature to view and manage recent calls.
You can perform the following tasks in each of yourcall lists:
• Delete• View Details
Viewing Recent Calls
The lists are Missed, Answered, and Outgoing.
1 to access the menu.
2 or to Call Log and press to select.
3 or to preferred list and press to select.
Adv
ance
d Fe
atur
es in
Con
nect
Plu
s M
ode
156
English

The display shows the most recent entry at the topof the list.
4 or to view the list.Press the PTT button to start a Private Call withthe current selected alias or ID.
Deleting a Call from a Call List
1 to access the menu.
2 or to Call Log and press to select.
3 or to the required list and press to
select.When you select a call list and it contains noentries, the display shows List Empty, andsounds a low tone if Keypad Tones are turned on.
4 or to the required alias or ID and press
to select.
5 or to Delete and press to select.
6 Do one of the following:
•Press to select Yes to delete the entry. Thedisplay shows Entry Deleted.
• or to No, and press the button to
return to the previous screen.
Viewing Details from a Call List
1 to access the menu.
2 or to Call Log and press to select.
3 or to the required list and press to
select.
4 or to the required alias or ID and press
to select.
5 or to View Details and press to
select.Display shows details.
Advanced Features in C
onnect Plus M
ode
157
English
Call Alert OperationCall Alert paging enables you to alert a specific radiouser to call you back when they are able to do so.
This feature is accessible through the menu viaContacts, manual dial or a programmed One TouchAccess button.
Responding to Call AlertsFollow the procedure to respond to Call Alerts onyour radio.
When you receive a Call Alert:
• A repetitive tone sounds.• The yellow LED blinks.• The display shows the notification list listing a Call
Alert with the alias or ID of the calling radio.
Depending on the configuration by your dealer orsystem administrator, you can respond to a CallAlert by doing one of the following:
• Press the PTT button and respond with aPrivate Call directly to the caller.
• Press the PTT button to continue normaltalkgroup communication.
The Call Alert is moved to the Missed Calloption at the Call Log menu. You can respondto the caller from the Missed Called log.
See Notification List on page 98 and Call LogFeatures on page 70 for more information.
Making a Call Alert from the Contact List
1 to access the menu.
2 or to Contacts and press to select.
3 Use one of the steps described next to select therequired subscriber alias or ID:
• select the subscriber alias directly
• or to the required subscriber alias
and press to select.• use the Manual Dial menu
• or to Manual Dial and press to
select.Adv
ance
d Fe
atur
es in
Con
nect
Plu
s M
ode
158
English

• The Manual Dial text entry screen shall bedisplayed. Enter the Subscriber ID and
press .
4 or to Call Alert and press to select.
The display shows Call Alert: <SubscriberAlias or ID>Call Alert and the subscriberalias or ID, indicating that the Call Alert has beensent.
The LED lights up solid green when your radio issending the Call Alert.
If the Call Alert acknowledgement is received, thedisplay shows Call Alert Successful.
If the Call Alert acknowledgement is not received,the display shows Call Alert Failed.
Making a Call Alert with the One Touch Access Button
Press the programmed One Touch Accessbutton to make a Call Alert to the predefined alias.The display shows Call Alert and thesubscriber alias or ID, indicating that the Call Alerthas been sent.
The LED lights up solid green when your radio issending the Call Alert.
If the Call Alert acknowledgement is received, thedisplay shows Call Alert Successful.
If the Call Alert acknowledgement is not received,the display shows Call Alert Failed.
Emergency OperationNote:If your radio is programmed for Silent or Silentwith Voice emergency initiation, in most casesit automatically exits silent operation after theEmergency Call or Emergency Alert isfinished. The exception to this rule is whenEmergency Alert is the configured EmergencyMode and Silent is the configured EmergencyType. If your radio is programmed in thismanner, the silent operation continues untilyou cancel silent operation by pressing PTT orthe button configured for Emergency Off.
Emergency voice calls and Emergency Alertsare not supported when operating in ConnectPlus Auto Fallback mode. For more
Advanced Features in C
onnect Plus M
ode
159
English
information see the Auto Fallback on page139.
An Emergency Alert is used to indicate a criticalsituation. You can initiate an Emergency at any timeon any screen display, even when there is activity onthe current channel. Pressing the Emergency buttoninitiates the programmed Emergency mode. Theprogrammed Emergency mode may also be initiatedby triggering the optional Man Down feature. TheEmergency feature may be disabled in your radio.
Your dealer can set the duration of a button press forthe programmed Emergency button, except for longpress, which is similar with all other buttons:
Short press Between 0.05 seconds and 0.75seconds.
Long press Between 1.00 second and 3.75seconds.
The Emergency button is assigned with theEmergency On/Off feature. Check with your dealer forthe assigned operation of the Emergency button.
• If the short press for the Emergency button isassigned to turn on the Emergency mode, then the
long press for the Emergency button is assignedto exit the Emergency mode.
• If the long press for the Emergency button isassigned to turn on the Emergency mode, then theshort press for the Emergency button is assignedto exit the Emergency mode.
When your radio is selected to a Connect Plus zone,it supports three Emergency modes:
EmergencyCall
You must press the PTT button totalk on the assigned emergency timeslot.
EmergencyCall withVoice toFollow
For the first transmission on theassigned emergency time slot, themicrophone is automaticallyunmuted and you may talk withoutpressing the PTT button. Themicrophone stays “hot” in thisfashion for a time periodprogrammed into the radio. Forsubsequent transmissions in thesame Emergency call, you mustpress the PTT button.
EmergencyAlert
An Emergency Alert is not a voicecall. It is an emergency notification
Adv
ance
d Fe
atur
es in
Con
nect
Plu
s M
ode
160
English

that is sent to radios that areconfigured to receive these alerts.The radio sends an emergency alertvia the control channel of thecurrently registered site. TheEmergency Alert is received byradios in the Connect Plus networkthat are programmed to receivethem (no matter which network sitethey are registered to).
Only one of the Emergency Modes can be assignedto the Emergency button per zone. In addition, eachEmergency mode has the following types:
Regular Radio initiates an Emergency andshows audio and/or visual indicators.
Silent Radio initiates an Emergency withoutany audio or visual indicators. The radiosuppresses all audio or visualindications of the Emergency until youpress the PTT button to start a voicetransmission.
SilentwithVoice
The same as Silent operation, exceptthat the radio also unmutes for somevoice transmissions.
Initiating an Emergency Call
Note:If your radio is set to Silent, it does not displayany audio or visual indicators duringEmergency mode until you press the PTTbutton to initiate a voice transmission.
If your radio is set to Silent with Voice, it doesnot initially display any audio or visualindicators that the radio is in Emergencymode. However, your radio unmutes for thetransmissions of radios responding to youremergency. The emergency indicators onlyappear once you press the PTT button toinitiate a voice transmission from your radio.
For both “Silent” and “Silent with Voice”operation, the radio automatically exits silentoperation after the Emergency Call is finished.
1 Press the programmed Emergency button.
2 Hold the radio vertically 1 to 2 inches (2.5 to 5.0cm) from your mouth.
3 Press the PTT button to initiate a voicetransmission on the Emergency group.
Advanced Features in C
onnect Plus M
ode
161
English

When you release the PTT button, the Emergencycall continues for the time allotted for theEmergency Call Hang Time.
If you press the PTT button during this time, theEmergency call continues.
Initiating an Emergency Call with Voice to Follow
Your radio must be programmed for this type ofoperation.
When enabled for this operation, when you press theprogrammed Emergency button, and when yourradio receives the time slot assignment, themicrophone is automatically activated withoutpressing the PTT button. This activated microphonestate is also known as “hot mic”. The “hot mic” appliesto the first voice transmission from your radio duringthe Emergency call. For subsequent transmissions inthe same Emergency call, you must press the PTTbutton.
1 Press the programmed Emergency button.
2 Hold the radio vertically 1 to 2 inches (2.5 to 5.0cm) from your mouth.
3 The microphone remains active for the “hot mic”time specified in your radio's codeplugprogramming.During this time, the LED lights up green.
4 Press and hold the PTT button to talk longer thanthe programmed duration.
Initiating an Emergency Alert
Note:If your radio is programmed for “Silent” or“Silent with Voice”, it will not provide any audioor visual indications that it is sending anEmergency Alert. If programmed for “Silent”,the silent operation continues indefinitely untilyou press PTT or the button configured for“Emergency Off”. If programmed for “Silentwith Voice”, the radio automatically cancelssilent operation when the site controllerbroadcasts the Emergency Alert.
Press the orange Emergency button.Upon transmitting the Emergency Alert to the sitecontroller, the radio’s display shows theEmergency icon, the Group contact used for theEmergency Alert, and TX Alarm.
Adv
ance
d Fe
atur
es in
Con
nect
Plu
s M
ode
162
English
Once the Emergency Alert is successfully sent and isbeing broadcast for other radios to hear, a positiveindicator tone sounds and the radio’s display showsAlarm Sent. If the Emergency Alert is unsuccessful,a negative indicator tone sounds and the radiodisplays Alarm Failed.
Receiving an Incoming Emergency
Your radio may be programmed to sound an alerttone and also display information about the incomingEmergency. If so programmed, upon receiving theincoming Emergency, the display shows theEmergency Details screen with the emergency icon,the Alias or ID of the radio that requested theEmergency, the Group Contact being used for theEmergency, and one additional line of information.The additional information is the name of the zonethat contains the Group Contact.
At the present time, the radio displays only the mostrecently decoded Emergency. If a new Emergency isreceived before the prior Emergency is cleared, thedetails for the new Emergency replace the details ofthe previous Emergency.
Depending on how your radio has been programmed,the Emergency Details screen (or Alarm List screen)
will stay on your radio’s display even after theEmergency ends. You can save the emergencydetails to the Alarm List, or you can delete theemergency details as described in the followingsections.
Saving the Emergency Details to the Alarm List
Saving the emergency details to the Alarm List allowsyou to view the details again at a later time byselecting Alarm List from the Main Menu.
1 While the Emergency Details (or Alarm List)
screen is displayed, press .The Exit Alarm List screen displays.
2 Perform one of the following actions:
•Select Yes and press to save theemergency details to the Alarm List, and to exitthe Emergency Details (or Alarm List) screen.
•Select No and press to return to theEmergency Details (or Alarm List) screen.
Advanced Features in C
onnect Plus M
ode
163
English

Deleting the Emergency Details
1 While the Emergency Details screen is displayed,
press .The Delete screen displays.
2 Perform one of the following actions:
•Select Yes and press to delete theemergency details.
•Select No and press to return to theEmergency Details screen.
Responding to an Emergency Call
Note:If you do not respond to the Emergency Callwithin the time allotted for the Emergency CallHang Time, the Emergency call will end. If youwant to speak to the group after theEmergency Call Hang Time expires, you mustfirst select the channel position assigned tothe group (if not already selected). Then,press PTT to start a non-Emergency Call tothe group.
1 When receiving an Emergency Call, press anybutton to stop all Emergency Call receivedindications.
2 Hold the radio vertically 1 to 2 inches (2.5 to 5.0cm) from your mouth.
3 Press the PTT button to initiate a voicetransmission on the Emergency group.All radios that are monitoring this group hear yourtransmission.
4 Wait for the Talk Permit Tone to finish (if enabled)and speak clearly into the microphone.The LED lights up green.
5 Release the PTT button to listen.When the emergency initiating radio responds, theLED blinks green, the LED blinks green, the radiounmutes and the response sounds through theradio's speaker. You see the Group Call icon, thegroup ID, and transmitting radio ID on yourdisplay.
Adv
ance
d Fe
atur
es in
Con
nect
Plu
s M
ode
164
English

Responding to an Emergency Alert
Note:The Group contact used for the EmergencyAlert should not be used for voicecommunication. This could prevent otherradios from sending and receiving EmergencyAlerts on the same group.
An Emergency Alert from a radio indicates that theuser is in an urgent situation. You may respond to thealert by initiating a private call to the radio whodeclared the emergency, initiating a group call to adesignated talk group, sending the radio a Call Alert,initiating a Remote Monitor of that radio, etc. Theproper response is determined by your organizationand the individual situation.
Ignore Emergency Revert CallThis feature enhancement is to provide an option forthe radio to ignore an active Emergency Revert Call.
To enable Ignore Emergency Revert Call, the radiomust be configured at the Connect Plus CustomerProgramming Software (CPCPS).
When the feature is enabled, the radio does notdisplay Emergency Call indications and does not
receive any audio on the default Emergency RevertGroup ID.
Check with your dealer or system administrator formore information.
Exiting Emergency Mode
Note:If the Emergency call ends due to theexpiration of the Emergency Hang Time, butthe emergency condition is not over, press theEmergency button again to restart theprocess.
If you initiate an Emergency Alert by pressing theprogrammed Emergency button, your radioautomatically exits Emergency mode after receiving aresponse from the Connect Plus system.
If you initiate an Emergency call by pressing theprogrammed Emergency button, your radio will beassigned a channel automatically when one becomesavailable. Once your radio has transmitted amessage indicating the emergency, you cannotcancel your Emergency call. However, if you pressedthe button by accident or the emergency no longerexists, you may wish to say this over the assignedchannel. When you release the PTT button, the
Advanced Features in C
onnect Plus M
ode
165
English
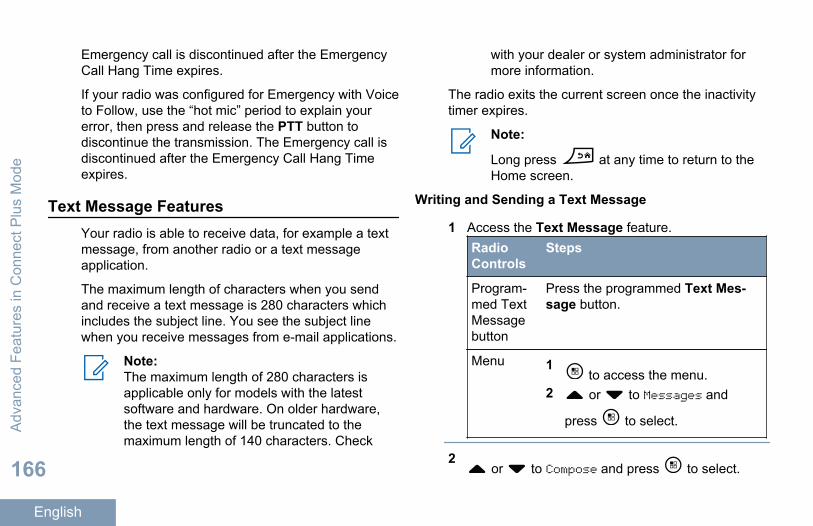
Emergency call is discontinued after the EmergencyCall Hang Time expires.
If your radio was configured for Emergency with Voiceto Follow, use the “hot mic” period to explain yourerror, then press and release the PTT button todiscontinue the transmission. The Emergency call isdiscontinued after the Emergency Call Hang Timeexpires.
Text Message FeaturesYour radio is able to receive data, for example a textmessage, from another radio or a text messageapplication.
The maximum length of characters when you sendand receive a text message is 280 characters whichincludes the subject line. You see the subject linewhen you receive messages from e-mail applications.
Note:The maximum length of 280 characters isapplicable only for models with the latestsoftware and hardware. On older hardware,the text message will be truncated to themaximum length of 140 characters. Check
with your dealer or system administrator formore information.
The radio exits the current screen once the inactivitytimer expires.
Note:
Long press at any time to return to theHome screen.
Writing and Sending a Text Message
1 Access the Text Message feature.RadioControls
Steps
Program-med TextMessagebutton
Press the programmed Text Mes-sage button.
Menu 1 to access the menu.
2 or to Messages and
press to select.
2 or to Compose and press to select.
Adv
ance
d Fe
atur
es in
Con
nect
Plu
s M
ode
166
English
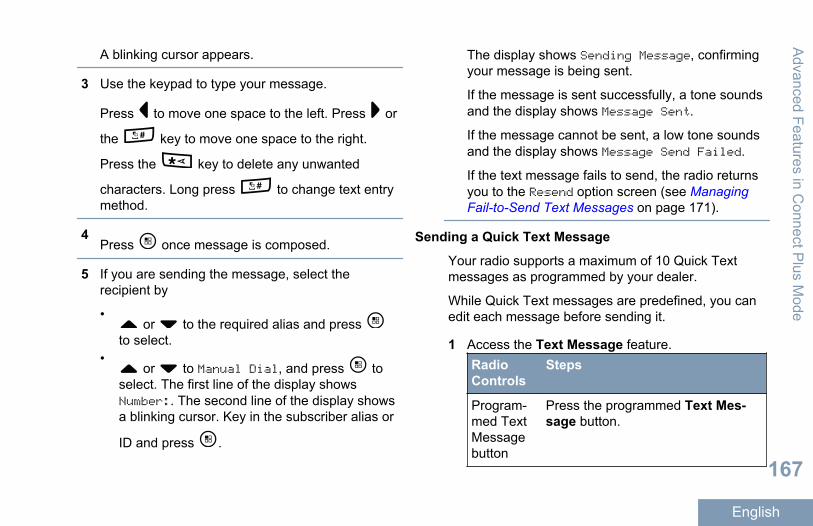
A blinking cursor appears.
3 Use the keypad to type your message.
Press to move one space to the left. Press or
the key to move one space to the right.
Press the key to delete any unwanted
characters. Long press to change text entrymethod.
4Press once message is composed.
5 If you are sending the message, select therecipient by
• or to the required alias and press
to select.•
or to Manual Dial, and press toselect. The first line of the display showsNumber:. The second line of the display showsa blinking cursor. Key in the subscriber alias or
ID and press .
The display shows Sending Message, confirmingyour message is being sent.
If the message is sent successfully, a tone soundsand the display shows Message Sent.
If the message cannot be sent, a low tone soundsand the display shows Message Send Failed.
If the text message fails to send, the radio returnsyou to the Resend option screen (see ManagingFail-to-Send Text Messages on page 171).
Sending a Quick Text Message
Your radio supports a maximum of 10 Quick Textmessages as programmed by your dealer.
While Quick Text messages are predefined, you canedit each message before sending it.
1 Access the Text Message feature.RadioControls
Steps
Program-med TextMessagebutton
Press the programmed Text Mes-sage button.
Advanced Features in C
onnect Plus M
ode
167
English

RadioControls
Steps
Menu 1 to access the menu.
2 or to Messages and
press to select.
2 or to Quick Text and press to select.
3 or to the required Quick Text and press
to select.A blinking cursor appears.
4 Use the keypad to edit the message, if required.
Press to move one space to the left. Press or
the key to move one space to the right.
Press the key to delete any unwanted
characters. Long press to change the textentry method.
5Press once message is composed.
6 Depending on whether you want to send, save, re-edit, or delete the newly composed message, doone of the following.
• or to Send, and press to send the
message.•
or to Save, and press to save themessage to the Drafts folder.
• to edit the message.
• again to choose between deleting the
message or saving it to the Drafts folder.
7 If you are sending the message, select therecipient by
• or to the required alias and press
to select.•
or to Manual Dial, and press toselect. The first line of the display showsNumber:. The second line of the display shows
Adv
ance
d Fe
atur
es in
Con
nect
Plu
s M
ode
168
English
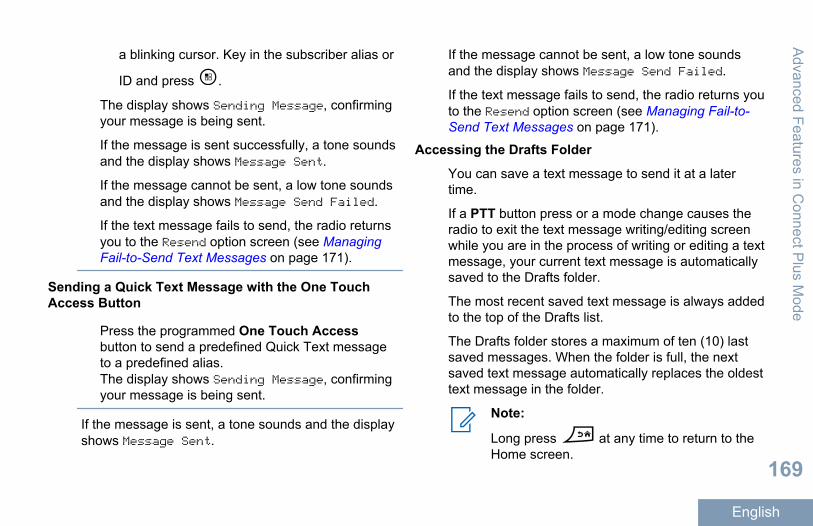
a blinking cursor. Key in the subscriber alias or
ID and press .
The display shows Sending Message, confirmingyour message is being sent.
If the message is sent successfully, a tone soundsand the display shows Message Sent.
If the message cannot be sent, a low tone soundsand the display shows Message Send Failed.
If the text message fails to send, the radio returnsyou to the Resend option screen (see ManagingFail-to-Send Text Messages on page 171).
Sending a Quick Text Message with the One TouchAccess Button
Press the programmed One Touch Accessbutton to send a predefined Quick Text messageto a predefined alias.The display shows Sending Message, confirmingyour message is being sent.
If the message is sent, a tone sounds and the displayshows Message Sent.
If the message cannot be sent, a low tone soundsand the display shows Message Send Failed.
If the text message fails to send, the radio returns youto the Resend option screen (see Managing Fail-to-Send Text Messages on page 171).
Accessing the Drafts Folder
You can save a text message to send it at a latertime.
If a PTT button press or a mode change causes theradio to exit the text message writing/editing screenwhile you are in the process of writing or editing a textmessage, your current text message is automaticallysaved to the Drafts folder.
The most recent saved text message is always addedto the top of the Drafts list.
The Drafts folder stores a maximum of ten (10) lastsaved messages. When the folder is full, the nextsaved text message automatically replaces the oldesttext message in the folder.
Note:
Long press at any time to return to theHome screen.
Advanced Features in C
onnect Plus M
ode
169
English
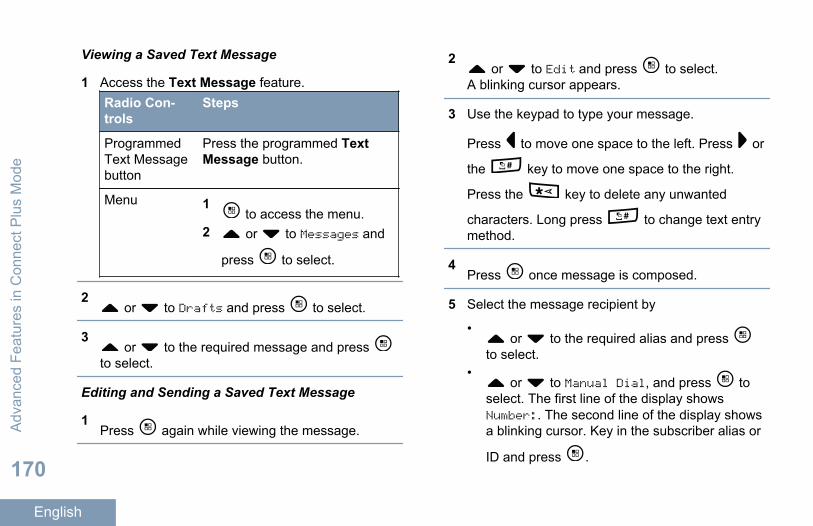
Viewing a Saved Text Message
1 Access the Text Message feature.Radio Con-trols
Steps
ProgrammedText Messagebutton
Press the programmed TextMessage button.
Menu 1 to access the menu.
2 or to Messages and
press to select.
2 or to Drafts and press to select.
3 or to the required message and press
to select.
Editing and Sending a Saved Text Message
1Press again while viewing the message.
2 or to Edit and press to select.
A blinking cursor appears.
3 Use the keypad to type your message.
Press to move one space to the left. Press or
the key to move one space to the right.
Press the key to delete any unwanted
characters. Long press to change text entrymethod.
4Press once message is composed.
5 Select the message recipient by
• or to the required alias and press
to select.•
or to Manual Dial, and press toselect. The first line of the display showsNumber:. The second line of the display showsa blinking cursor. Key in the subscriber alias or
ID and press .
Adv
ance
d Fe
atur
es in
Con
nect
Plu
s M
ode
170
English
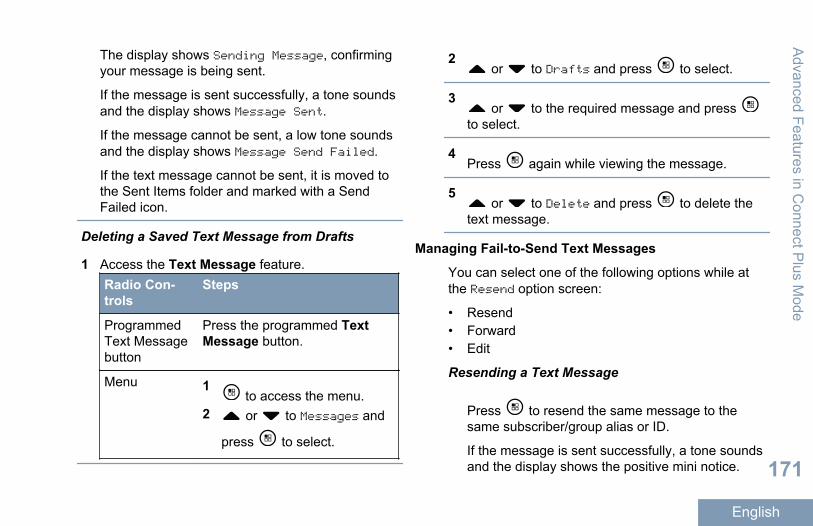
The display shows Sending Message, confirmingyour message is being sent.
If the message is sent successfully, a tone soundsand the display shows Message Sent.
If the message cannot be sent, a low tone soundsand the display shows Message Send Failed.
If the text message cannot be sent, it is moved tothe Sent Items folder and marked with a SendFailed icon.
Deleting a Saved Text Message from Drafts
1 Access the Text Message feature.Radio Con-trols
Steps
ProgrammedText Messagebutton
Press the programmed TextMessage button.
Menu 1 to access the menu.
2 or to Messages and
press to select.
2 or to Drafts and press to select.
3 or to the required message and press
to select.
4Press again while viewing the message.
5 or to Delete and press to delete the
text message.
Managing Fail-to-Send Text Messages
You can select one of the following options while atthe Resend option screen:
• Resend• Forward• Edit
Resending a Text Message
Press to resend the same message to thesame subscriber/group alias or ID.
If the message is sent successfully, a tone soundsand the display shows the positive mini notice.
Advanced Features in C
onnect Plus M
ode
171
English

If the message cannot be sent, the display showsthe negative mini notice.
Forwarding a Text Message
Select Forward to send the message to anothersubscriber/group alias or ID.
1 or to Forward and press to select.
2 Select the message recipient by
• or to the required alias or ID and press
to select.•
or to Manual Dial, and press toselect. The first line of the display showsNumber:. The second line of the display showsa blinking cursor. Key in the subscriber alias or
ID and press .
The display shows Sending Message, confirmingyour message is being sent.
If the message is sent successfully, a tone soundsand the display shows Message Sent.
If the message cannot be sent, a low tone soundsand the display shows Message Send Failed.
Editing a Text Message
Select Edit to edit the message before sending it.
1 or to Edit and press to select.
A blinking cursor appears.
2 Use the keypad to edit your message.
Press to move one space to the left. Press or
the key to move one space to the right.
Press the key to delete any unwanted
characters. Long press to change text entrymethod.
3Press once message is composed.
4 Depending on whether you want to send, save, re-edit, or delete the newly composed message, doone of the following.A
dvan
ced
Feat
ures
in C
onne
ct P
lus
Mod
e
172
English
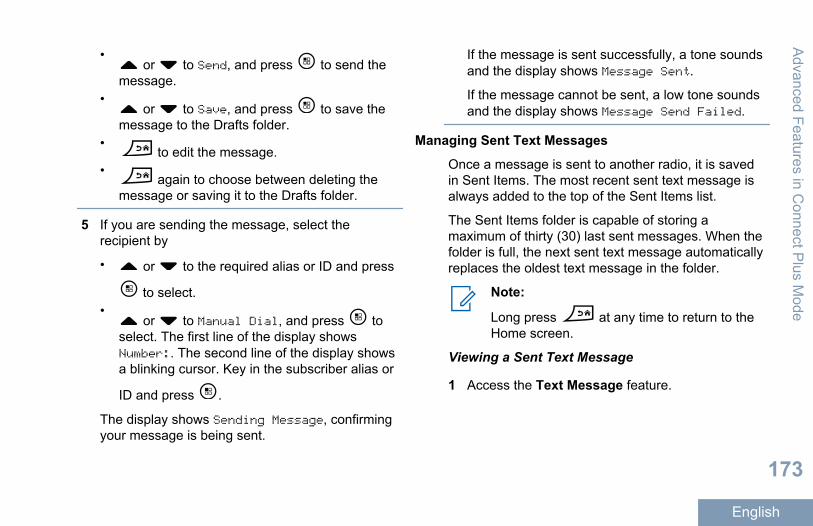
• or to Send, and press to send the
message.•
or to Save, and press to save themessage to the Drafts folder.
• to edit the message.
• again to choose between deleting the
message or saving it to the Drafts folder.
5 If you are sending the message, select therecipient by
• or to the required alias or ID and press
to select.•
or to Manual Dial, and press toselect. The first line of the display showsNumber:. The second line of the display showsa blinking cursor. Key in the subscriber alias or
ID and press .
The display shows Sending Message, confirmingyour message is being sent.
If the message is sent successfully, a tone soundsand the display shows Message Sent.
If the message cannot be sent, a low tone soundsand the display shows Message Send Failed.
Managing Sent Text Messages
Once a message is sent to another radio, it is savedin Sent Items. The most recent sent text message isalways added to the top of the Sent Items list.
The Sent Items folder is capable of storing amaximum of thirty (30) last sent messages. When thefolder is full, the next sent text message automaticallyreplaces the oldest text message in the folder.
Note:
Long press at any time to return to theHome screen.
Viewing a Sent Text Message
1 Access the Text Message feature.
Advanced Features in C
onnect Plus M
ode
173
English
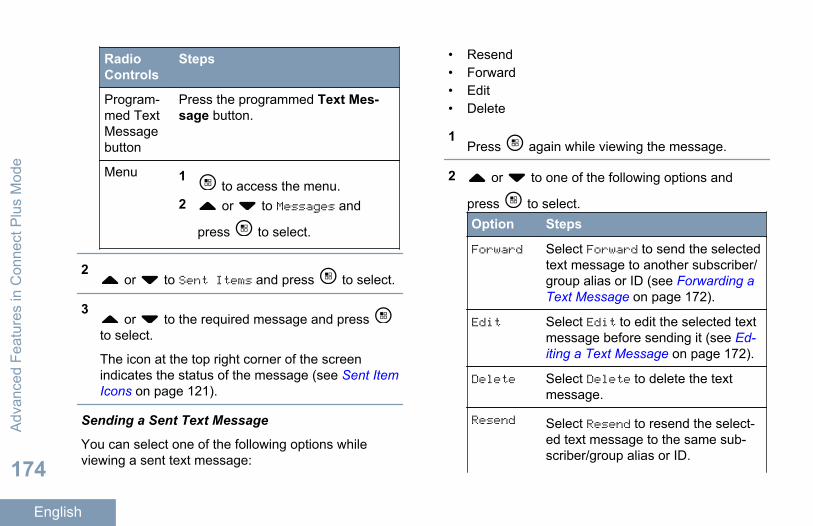
RadioControls
Steps
Program-med TextMessagebutton
Press the programmed Text Mes-sage button.
Menu 1 to access the menu.
2 or to Messages and
press to select.
2 or to Sent Items and press to select.
3 or to the required message and press
to select.
The icon at the top right corner of the screenindicates the status of the message (see Sent ItemIcons on page 121).
Sending a Sent Text Message
You can select one of the following options whileviewing a sent text message:
• Resend• Forward• Edit• Delete
1Press again while viewing the message.
2 or to one of the following options and
press to select.Option Steps
Forward Select Forward to send the selectedtext message to another subscriber/group alias or ID (see Forwarding aText Message on page 172).
Edit Select Edit to edit the selected textmessage before sending it (see Ed-iting a Text Message on page 172).
Delete Select Delete to delete the textmessage.
Resend Select Resend to resend the select-ed text message to the same sub-scriber/group alias or ID.
Adv
ance
d Fe
atur
es in
Con
nect
Plu
s M
ode
174
English
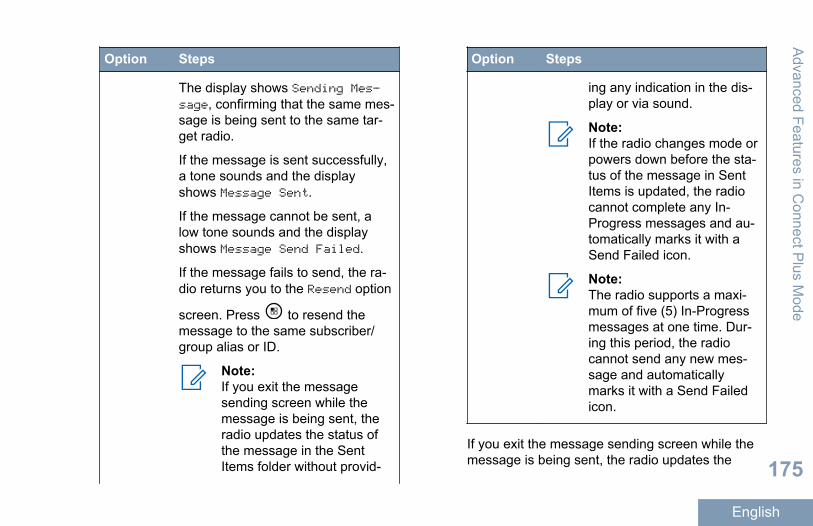
Option Steps
The display shows Sending Mes‐sage, confirming that the same mes-sage is being sent to the same tar-get radio.
If the message is sent successfully,a tone sounds and the displayshows Message Sent.
If the message cannot be sent, alow tone sounds and the displayshows Message Send Failed.
If the message fails to send, the ra-dio returns you to the Resend option
screen. Press to resend themessage to the same subscriber/group alias or ID.
Note:If you exit the messagesending screen while themessage is being sent, theradio updates the status ofthe message in the SentItems folder without provid-
Option Steps
ing any indication in the dis-play or via sound.
Note:If the radio changes mode orpowers down before the sta-tus of the message in SentItems is updated, the radiocannot complete any In-Progress messages and au-tomatically marks it with aSend Failed icon.
Note:The radio supports a maxi-mum of five (5) In-Progressmessages at one time. Dur-ing this period, the radiocannot send any new mes-sage and automaticallymarks it with a Send Failedicon.
If you exit the message sending screen while themessage is being sent, the radio updates the
Advanced Features in C
onnect Plus M
ode
175
English

status of the message in the Sent Items folderwithout providing any indication in the display orvia sound.
If the radio changes mode or powers down beforethe status of the message in Sent Items isupdated, the radio cannot complete any In-Progress messages and automatically marks itwith a Send Failed icon.
The radio supports a maximum of five (5) In-Progress messages at one time. During thisperiod, the radio cannot send any new messageand automatically marks it with a Send Failed icon.
Deleting All Sent Text Messages from Sent Items
1 Access the Text Message feature by performingone of the following actions:Radio Con-trols
Steps
ProgrammedText Messagebutton
Press the programmed TextMessage button.
Menu 1 to access the menu.
Radio Con-trols
Steps
2 or to Messages and
press to select.
2 or to Sent Items and press to select.
When you select Sent Items and it contains notext messages, the display shows List Empty,and sounds a low tone if Keypad Tones are turnedon..
3 or to Delete All and press to select.
4 Choose one of the following.
• or to Yes and press to select. The
display shows positive mini notice.•
or to No and press to return to theprevious screen.
Adv
ance
d Fe
atur
es in
Con
nect
Plu
s M
ode
176
English

Receiving a Text Message
When your radio receives a message, the displayshows the Notification List with the alias or ID of thesender and the Message icon.
You can select one of the following options whenreceiving a text message:
• Read• Read Later• Delete
Reading a Text Message
1 or to Read? and press to select.
Selected message in the Inbox opens.
2 Do one of the following:
•Press to return to the Inbox.
•Press a second time to reply, forward, ordelete the text message.
Managing Received Text Messages
Use the Inbox to manage your text messages. TheInbox is capable of storing a maximum of 30messages.
Text messages in the Inbox are sorted according tothe most recently received.
Your radio supports the following options for textmessages:
• Reply• Forward• Delete• Delete All
Note:If the channel type is not a match, you canonly forward, delete, or delete all Receivedmessages.
Long press at any time to return to theHome screen.
Viewing a Text Message from the Inbox
1 to access the menu.
Advanced Features in C
onnect Plus M
ode
177
English

2 or to Messages and press to select.
3 or to Inbox and press to select.
4 or to view the messages.
5 Do one of the following:
•Press to select the current message, and
press again to reply, quick reply, forward,or delete that message.
•Long press to return to the Homescreen.
Replying to a Text Message from the Inbox
1 Access the Text Message feature.RadioControls
Steps
Program-med TextMessagebutton
Press the programmed Text Mes-sage button.
RadioControls
Steps
Menu 1 to access the menu.
2 or to Messages and
press to select.
2 or to Inbox and press to select.
3 or to the required message and press
to select.
4Press once more to access the sub-menu.
5 Do one of the following:
• or to Reply and press to select.
• or to Quick Reply and press to
select.
A blinking cursor appears.
6 Use your keypad to write/edit your message.
Adv
ance
d Fe
atur
es in
Con
nect
Plu
s M
ode
178
English
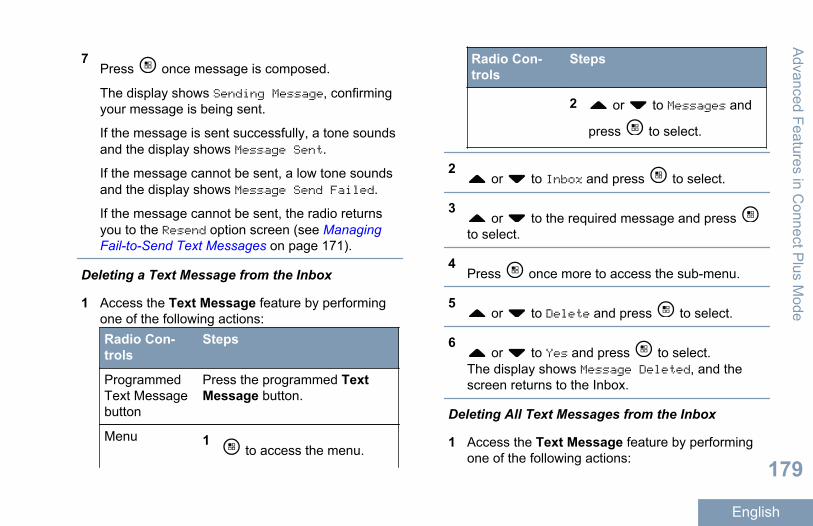
7Press once message is composed.
The display shows Sending Message, confirmingyour message is being sent.
If the message is sent successfully, a tone soundsand the display shows Message Sent.
If the message cannot be sent, a low tone soundsand the display shows Message Send Failed.
If the message cannot be sent, the radio returnsyou to the Resend option screen (see ManagingFail-to-Send Text Messages on page 171).
Deleting a Text Message from the Inbox
1 Access the Text Message feature by performingone of the following actions:Radio Con-trols
Steps
ProgrammedText Messagebutton
Press the programmed TextMessage button.
Menu 1 to access the menu.
Radio Con-trols
Steps
2 or to Messages and
press to select.
2 or to Inbox and press to select.
3 or to the required message and press
to select.
4Press once more to access the sub-menu.
5 or to Delete and press to select.
6 or to Yes and press to select.
The display shows Message Deleted, and thescreen returns to the Inbox.
Deleting All Text Messages from the Inbox
1 Access the Text Message feature by performingone of the following actions:
Advanced Features in C
onnect Plus M
ode
179
English
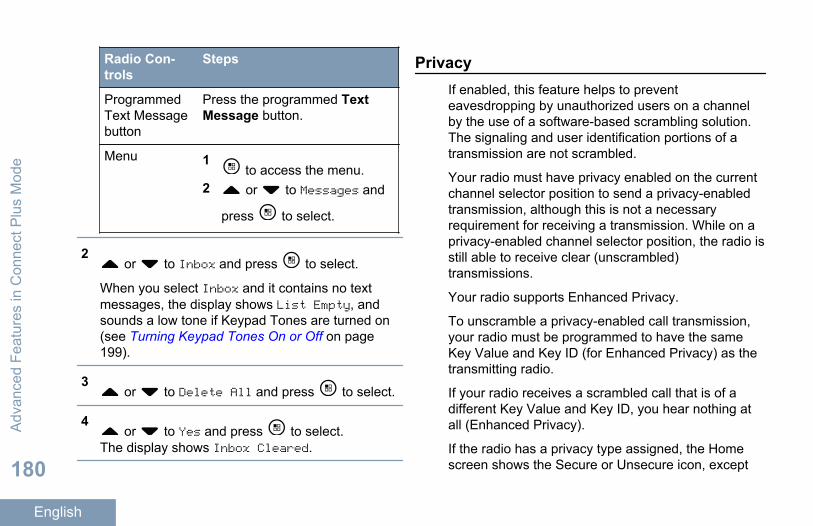
Radio Con-trols
Steps
ProgrammedText Messagebutton
Press the programmed TextMessage button.
Menu 1 to access the menu.
2 or to Messages and
press to select.
2 or to Inbox and press to select.
When you select Inbox and it contains no textmessages, the display shows List Empty, andsounds a low tone if Keypad Tones are turned on(see Turning Keypad Tones On or Off on page199).
3 or to Delete All and press to select.
4 or to Yes and press to select.
The display shows Inbox Cleared.
PrivacyIf enabled, this feature helps to preventeavesdropping by unauthorized users on a channelby the use of a software-based scrambling solution.The signaling and user identification portions of atransmission are not scrambled.
Your radio must have privacy enabled on the currentchannel selector position to send a privacy-enabledtransmission, although this is not a necessaryrequirement for receiving a transmission. While on aprivacy-enabled channel selector position, the radio isstill able to receive clear (unscrambled)transmissions.
Your radio supports Enhanced Privacy.
To unscramble a privacy-enabled call transmission,your radio must be programmed to have the sameKey Value and Key ID (for Enhanced Privacy) as thetransmitting radio.
If your radio receives a scrambled call that is of adifferent Key Value and Key ID, you hear nothing atall (Enhanced Privacy).
If the radio has a privacy type assigned, the Homescreen shows the Secure or Unsecure icon, except
Adv
ance
d Fe
atur
es in
Con
nect
Plu
s M
ode
180
English
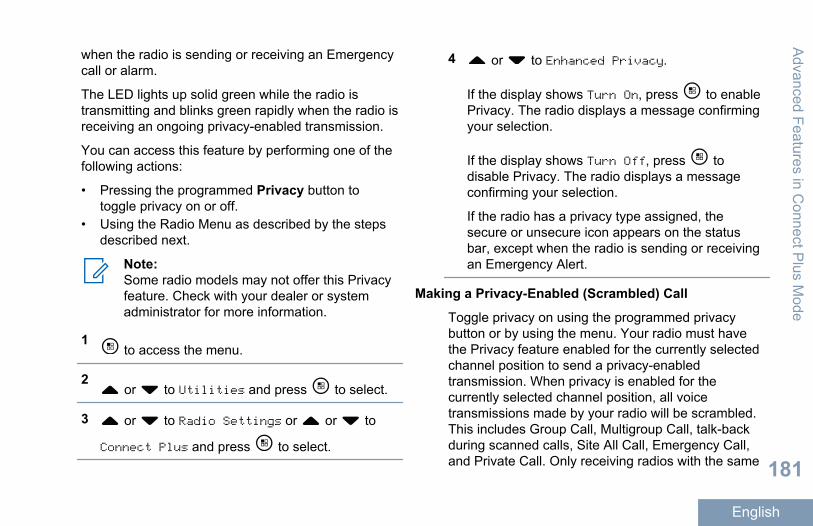
when the radio is sending or receiving an Emergencycall or alarm.
The LED lights up solid green while the radio istransmitting and blinks green rapidly when the radio isreceiving an ongoing privacy-enabled transmission.
You can access this feature by performing one of thefollowing actions:
• Pressing the programmed Privacy button totoggle privacy on or off.
• Using the Radio Menu as described by the stepsdescribed next.
Note:Some radio models may not offer this Privacyfeature. Check with your dealer or systemadministrator for more information.
1 to access the menu.
2 or to Utilities and press to select.
3 or to Radio Settings or or to
Connect Plus and press to select.
4 or to Enhanced Privacy.
If the display shows Turn On, press to enablePrivacy. The radio displays a message confirmingyour selection.
If the display shows Turn Off, press todisable Privacy. The radio displays a messageconfirming your selection.
If the radio has a privacy type assigned, thesecure or unsecure icon appears on the statusbar, except when the radio is sending or receivingan Emergency Alert.
Making a Privacy-Enabled (Scrambled) Call
Toggle privacy on using the programmed privacybutton or by using the menu. Your radio must havethe Privacy feature enabled for the currently selectedchannel position to send a privacy-enabledtransmission. When privacy is enabled for thecurrently selected channel position, all voicetransmissions made by your radio will be scrambled.This includes Group Call, Multigroup Call, talk-backduring scanned calls, Site All Call, Emergency Call,and Private Call. Only receiving radios with the same
Advanced Features in C
onnect Plus M
ode
181
English

Key Value and Key ID as your radio will be able tounscramble the transmission.
Covert ModeYour radio is capable of Covert Mode. During covertmode, all keypad and programmed button access areblocked. When enabled, all visual indications (display,LED's and backlight) are disabled.
This feature allows audio or tone only via a wiredaccessory or a Bluetooth accessory.
Entering Covert Mode
Press the button followed by the 2, 5, and 8numeric keys in tandem in home screen.
Exiting Covert Mode
To exit Covert Mode, do one of the following:
•Press the button followed by the 2, 5, and 8numeric keys in tandem. Radio will go back tonormal mode.
• Power cycle the radio via the On/Off button.
SecurityYou can enable or disable any radio in the system.For example, you might want to disable a stolenradio, to prevent the thief from using it, and enablethat radio, when it is recovered.
Note:Performing Radio Disable and Enable islimited to radios with these functions enabled.Check with your dealer or systemadministrator for more information.
Radio Disable
1 Access this feature byRadioControls
Steps
Radio Dis-able but-ton
1 Press the programmed RadioDisable button.
2 or to the required alias or
ID and press to select.
Radiomenu
1 to access the menu.
Adv
ance
d Fe
atur
es in
Con
nect
Plu
s M
ode
182
English
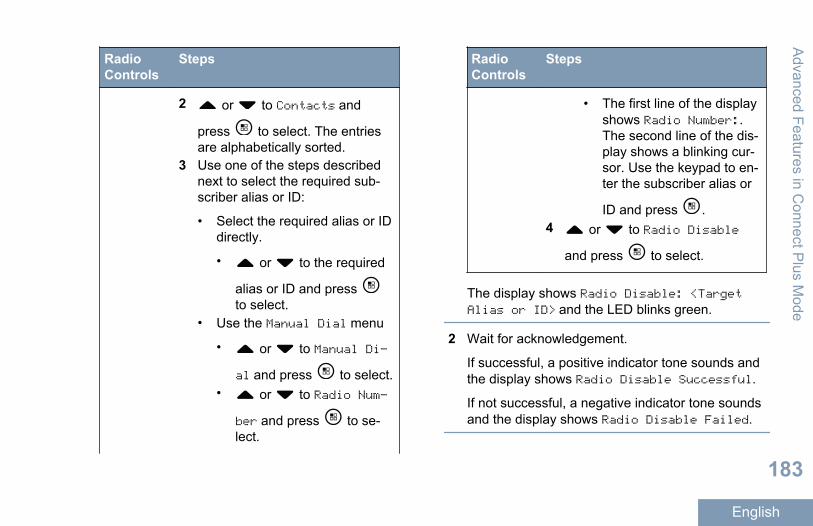
RadioControls
Steps
2 or to Contacts and
press to select. The entriesare alphabetically sorted.
3 Use one of the steps describednext to select the required sub-scriber alias or ID:
• Select the required alias or IDdirectly.
• or to the required
alias or ID and press to select.
• Use the Manual Dial menu
• or to Manual Di‐
al and press to select.• or to Radio Num‐
ber and press to se-lect.
RadioControls
Steps
• The first line of the displayshows Radio Number:.The second line of the dis-play shows a blinking cur-sor. Use the keypad to en-ter the subscriber alias or
ID and press .4 or to Radio Disable
and press to select.
The display shows Radio Disable: <TargetAlias or ID> and the LED blinks green.
2 Wait for acknowledgement.
If successful, a positive indicator tone sounds andthe display shows Radio Disable Successful.
If not successful, a negative indicator tone soundsand the display shows Radio Disable Failed.
Advanced Features in C
onnect Plus M
ode
183
English

Radio Enable
1 Access this feature byRadioCon-trols
Steps
RadioEnablebutton
1 Press the programmed Radio Ena-ble button.
2 or to the required alias or ID
and press to select.
Radiomenu
1 to access the menu.
2 or to Contacts and press
to select. The entries are alpha-betically sorted.
3 Use one of the steps described nextto select the required subscriberalias or ID
• Select the required alias or ID di-rectly.
RadioCon-trols
Steps
• or to the required
alias or ID and press toselect.
• Use the Manual Dial menu
• or to Manual Dial
and press to select.• or to Radio Number
and press to select.• The first line of the display
shows Radio Number:. Thesecond line of the displayshows a blinking cursor. Usethe keypad to enter the sub-scriber alias or ID and press
.4 or to Radio Enable and
press to select.
Adv
ance
d Fe
atur
es in
Con
nect
Plu
s M
ode
184
English

The display shows Radio Enable: <SubscriberAlias or ID> and the LED lights up solid green.
2 Wait for acknowledgement.
If successful, a positive indicator tone sounds andthe display shows Radio Enable Successful.
If not successful, a negative indicator tone soundsand the display shows Radio Enable Failed.
Password Lock FeaturesIf enabled, this feature only allows you access yourradio if the correct password is entered uponpowering up.
Accessing the Radio from Password
1 Power up the radio.The radio sounds a continuous tone.
2 Do one of the following:
• Enter your current four-digit password with theradio’s keypad. The display shows . Press
to proceed.
• Enter your current four-digit password. Press or to edit each digit’s numeric value.
Each digit changes to . Press to move to
next digit. Press to confirm your selection.
You hear a positive indicator tone for every digit
entered. Press to remove each on thedisplay. The radio sounds a negative indicator
tone, if you press when the line is empty, or ifyou press more than four digits.
If the password is correct, the radio proceeds topower up. See Powering Up the Radio on page18.
If the password is incorrect, the display showsWrong Password. Repeat Step 2.
After the third incorrect password, the displayshows Wrong Password and then, shows RadioLocked. A tone sounds and the LED double blinksyellow.
Note:The radio is unable to receive any call,including emergency calls, in locked state.
Advanced Features in C
onnect Plus M
ode
185
English

Turning the Password Lock On or Off
1 to access the menu.
2 or to Utilities and press to select.
3 or to Radio Settings and press to
select.
4 or to Passwd Lock and press to
select.
5 Enter the four-digit password.See Step 2 in Accessing the Radio from Passwordon page 185.
6Press to proceed.
If the password is incorrect, the display showsWrong Password, and automatically returns to theprevious menu.
7 If the password entered in the previous step is
correct, press to enable/disable passwordlock.
The display shows beside Enabled.
The disappears from beside Enabled.
Unlocking the Radio from Locked State
1 If your radio was powered down after being in thelocked state, power up the radio.A tone sounds and the LED double blinks yellow.The display shows Radio Locked.
2 Wait for 15 minutes.Your radio restarts the 15 minutes timer for lockedstate when you power up.
3 Repeat Steps 1 and 2 in Accessing the Radio fromPassword on page 185.
Changing the Password
1 to access the menu.A
dvan
ced
Feat
ures
in C
onne
ct P
lus
Mod
e
186
English
2 or to Utilities and press to select.
3 or to Radio Settings and press to
select.
4 or to Passwd Lock and press to
select.
5 Enter the four-digit password.See Step 2 in Accessing the Radio from Passwordon page 185.
6Press to proceed.If the password is incorrect, the display showsWrong Password, and automatically returns to theprevious menu.
7 If the password entered in the previous step is
correct, or to Change Pwd and press to select.
8 Enter a new four-digit password.
See Step 2 in Accessing the Radio from Passwordon page 185.
9 Reenter the previously entered four-digitpassword. See Step 2 in Accessing the Radiofrom Password on page 185.
10Press to proceed.
If the reentered password matches the newpassword entered earlier, the display showsPassword Changed.
If the reentered password does NOT match thenew password entered earlier, the display showsPasswords Do Not Match.
The screen automatically returns to the previousmenu.
Bluetooth OperationNote:If disabled via the CPS, all Bluetooth-relatedfeatures are disabled and the Bluetooth devicedatabase is erased.
Advanced Features in C
onnect Plus M
ode
187
English
This feature allows you to use your radio with aBluetooth-enabled device (accessory) via a wirelessBluetooth connection. Your radio supports bothMotorola and COTS (Commercially available Off-The-Shelf) Bluetooth-enabled devices.
Bluetooth operates within a range of 10 meters (32feet) line of sight. This is an unobstructed pathbetween your radio and your Bluetooth-enableddevice.
It is not recommended that you leave your radiobehind and expect your Bluetooth-enabled device towork with a high degree of reliability when they areseparated.
At the fringe areas of reception, both voice and tonequality will start to sound “garbled” or “broken”. Tocorrect this problem, simply position your radio andBluetooth-enabled device closer to each other (withinthe 10-meter/32 feet defined range) to re-establishclear audio reception. Your radio’s Bluetooth functionhas a maximum power of 2.5 mW (4 dBm) at the 10-meter/32 feet range.
Your radio can support up to 4 simultaneousBluetooth connections with Bluetooth-enableddevices of unique types. For example, a headset, anda PTT-Only Device (POD). Multiple connections with
Bluetooth-enabled devices of the same type are notsupported.
Refer to your respective Bluetooth-enabled device’suser manual for more details on your Bluetooth-enabled device’s full capabilities.
Turning Bluetooth On and Off
1 to access the menu.
2 or to Bluetooth and press to select.
3 or to My Status and press to select.
The display shows On and Off. The current statusis indicated by a .
4 Do one of the following:
• or to On and press to select. The
display shows On and a appears left of theselected status.
• or to Off and press to select. The
display shows Off and a appears left of theselected status.
Adv
ance
d Fe
atur
es in
Con
nect
Plu
s M
ode
188
English
Finding and Connecting to a Bluetooth Device
Do not turn off your Bluetooth-enabled device or
press during the finding and connectingoperation as this cancels the operation.
1 Turn on your Bluetooth-enabled device and placeit in pairing mode. Refer to respective Bluetooth-enabled device’s user manual.
2On your radio, press to access the menu.
3 or to Bluetooth and press to select.
4 or to Devices and press to select.
5 Do one of the following:
• or to the required device and press
to select.• or to Find Devices to locate available
devices. or to the required device and
press to select.
6 or to Connect and press to select.
Display shows Connecting to <Device>. YourBluetooth-enabled device may require additionalsteps to complete the pairing. Refer to respectiveBluetooth-enabled device’s user manual.
If successful, the radio display shows<Device>Connected. A tone sounds and appearsbesides the connected device. The BluetoothConnected icon appears on the status bar.
If unsuccessful, the radio display shows ConnectingFailed.
Finding and Connecting from a Bluetooth Device(Discoverable Mode)
Do not turn off your Bluetooth or your radio during thefinding and connecting operation as this may cancelthe operation.
1 Turn Bluetooth On.See Turning Bluetooth On and Off on page 188.
2 to access the menu.
Advanced Features in C
onnect Plus M
ode
189
English

3 or to Bluetooth and press to select.
4 or to Find Me and press to select.
Your radio can now be found by other Bluetooth-enabled devices for a programmed duration. Thisis called Discoverable Mode.
5 Turn on your Bluetooth-enabled device and pair itwith your radio.Refer to respective Bluetooth-enabled device’suser manual.
Disconnecting from a Bluetooth Device
1On your radio, press to access the menu.
2 or to Bluetooth and press to select.
3 or to Devices and press to select.
4 or to the required device and press to
select.
5 or to Disconnect and press to select.
Display shows Disconnecting from <Device>.Your Bluetooth-enabled device may requireadditional steps to disconnect. Refer to respectiveBluetooth-enabled device’s user manual.
The radio display shows <Device> Disconnected. Apositive indicator tone sounds and disappearsbeside the connected device. The BluetoothConnected icon disappears on the status bar.
Switching Audio Route between Internal Radio Speakerand Bluetooth Device
You can toggle audio routing between internal radiospeaker and external Bluetooth-enabled accessory.
Press the programmed Bluetooth Audio Switchbutton.
• A tone sounds and display shows Route Audioto Radio.
• A tone sounds and display shows Route Audioto Bluetooth.
Adv
ance
d Fe
atur
es in
Con
nect
Plu
s M
ode
190
English

Viewing Device Details
1 to access the menu.
2 or to Bluetooth and press to select.
3 or to Devices and press to select.
4 or to the required device and press to
select.
5 or to View Details and press to
select.
Editing Device Name
You can edit the name of available Bluetooth-enableddevices.
1 to access the menu.
2 or to Bluetooth and press to select.
3 or to Devices and press to select.
4 or to the required device and press to
select.
5 or to Edit Name and press to select.
6Press to move one space to the left. Press to
move one space to the right. Press to delete
any unwanted characters. Long press tochange text entry method.A blinking cursor appears. Use the keypad to typethe required zone.
7 The display shows Device Name Saved.
Deleting Device Name
You can remove a disconnected device from the listof Bluetooth-enabled devices.
1 to access the menu.
Advanced Features in C
onnect Plus M
ode
191
English

2 or to Bluetooth and press to select.
3 or to Devices and press to select.
4 or to the required device and press to
select.
5 or to Delete and press to select.
The display shows Device Deleted.
Bluetooth Mic Gain
Allows control of the connected Bluetooth-enableddevice’s microphone gain value.
1 to access the menu.
2 or to Bluetooth and press to select.
3 or to BT Mic Gain and press to
select.
4 or to the BT Mic Gain type and the currentvalues.
To edit values, press to select.
5 or to increase or to decrease values and
press to select.
Permanent Bluetooth Discoverable Mode
Note:The Permanent Bluetooth Discoverable Modecan only be enabled via the MOTOTRBOCPS. If enabled, the Bluetooth item will notbe displayed in the Menu and you will not beable to use any Bluetooth programmablebutton features.
Other Bluetooth-enabled devices can locate yourradio, but the devices cannot connect to the radio. Itenables dedicated devices to use your radio positionin the process of Bluetooth-based location.
Indoor LocationNote:Indoor Location feature is applicable formodels with the latest software and hardware.Check with your dealer or systemadministrator for more information.
Adv
ance
d Fe
atur
es in
Con
nect
Plu
s M
ode
192
English
Indoor Location can be used to keep track of radiousers location while indoors. When Indoor Location isactivated, the radio is in a limited discoverable mode.Dedicated beacons are used to locate the radio anddetermine its position.
Turning Indoor Location On or Off
You can turn on or turn off Indoor Location byperforming one of the following actions.
• Access this feature via the menu.a)
Press to access the menu.a)
Press or to Bluetooth and press to select.
a) Press or to Indoor Location and
press to select.b)
Press to turn on Indoor Location.The display shows Indoor Location On. Youhear a good key tone.
One of the following scenarios occurs.
• If successful, the Indoor Location Availableicon appears on the Home screen display.
• If unsuccessful, the display shows TurningOn Failed. You hear a bad key tone.
c)Press to turn off Indoor Location.The display shows Indoor Location Off.You hear a good key tone.
One of the following scenarios occurs.
• If successful, the Indoor Location Availableicon disappears on the Home screendisplay.
• If unsuccessful, the display shows TurningOff Failed. You hear a bad key tone.
• Access this feature via the programmed button.a) Long press the programmed Indoor Location
button to turn on Indoor Location.The display shows Indoor Location On. Youhear a positive tone.
One of the following scenarios occurs.
• If successful, the Indoor Location Availableicon appears on the Home screen display.
• If unsuccessful, the display shows TurningOn Failed. If unsuccessful, you hear anegative tone.
Advanced Features in C
onnect Plus M
ode
193
English
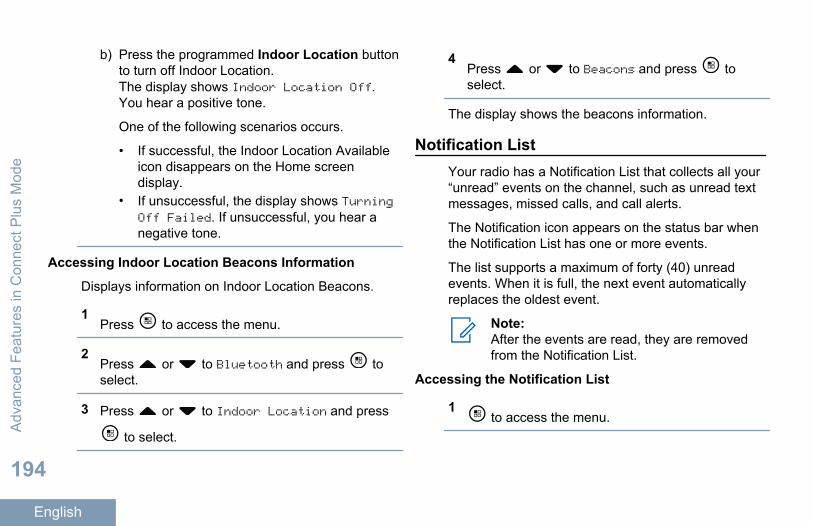
b) Press the programmed Indoor Location buttonto turn off Indoor Location.The display shows Indoor Location Off.You hear a positive tone.
One of the following scenarios occurs.
• If successful, the Indoor Location Availableicon disappears on the Home screendisplay.
• If unsuccessful, the display shows TurningOff Failed. If unsuccessful, you hear anegative tone.
Accessing Indoor Location Beacons Information
Displays information on Indoor Location Beacons.
1Press to access the menu.
2Press or to Bluetooth and press toselect.
3 Press or to Indoor Location and press
to select.
4Press or to Beacons and press toselect.
The display shows the beacons information.
Notification ListYour radio has a Notification List that collects all your“unread” events on the channel, such as unread textmessages, missed calls, and call alerts.
The Notification icon appears on the status bar whenthe Notification List has one or more events.
The list supports a maximum of forty (40) unreadevents. When it is full, the next event automaticallyreplaces the oldest event.
Note:After the events are read, they are removedfrom the Notification List.
Accessing the Notification List
1 to access the menu.
Adv
ance
d Fe
atur
es in
Con
nect
Plu
s M
ode
194
English

2 or to Notification and press to
select.
3 or to the required event and press to
select.
Long press to return to the Home Screen.
Wi-Fi OperationWi-Fi® is a registered trademark of Wi-Fi Alliance®.
Note:This feature is applicable to SL7550e/SL7590e/SL7580e only.
This feature allows you to setup and connect to a Wi-Fi® network. Wi-Fi supports updates for radiofirmware, codeplug, and resources such as languagepacks and voice announcement.
Turning Wi-Fi On or Off
Note:This feature is applicable to SL7550e/SL7590e/SL7580e only.
The programmed Wi-Fi On or Off button isassigned by your dealer or systemadministrator. Check with your dealer orsystem administrator to determine how yourradio has been programmed.
You can turn on or turn off Wi-Fi® by performing oneof the following actions.
• Press the programmed Wi-Fi On or Off button.Voice Announcement sounds Turning On Wi-Fi orTurning Off Wi-Fi.
• Access this feature via the menu.a)
Press to access the menu.b)
Press or to WiFi and press toselect.
c) Press or to WiFi Status and press
to select.
Press to turn on Wi-Fi. The display shows beside Enabled.
Press to turn off Wi-Fi. The disappearsfrom beside Enabled.
Advanced Features in C
onnect Plus M
ode
195
English
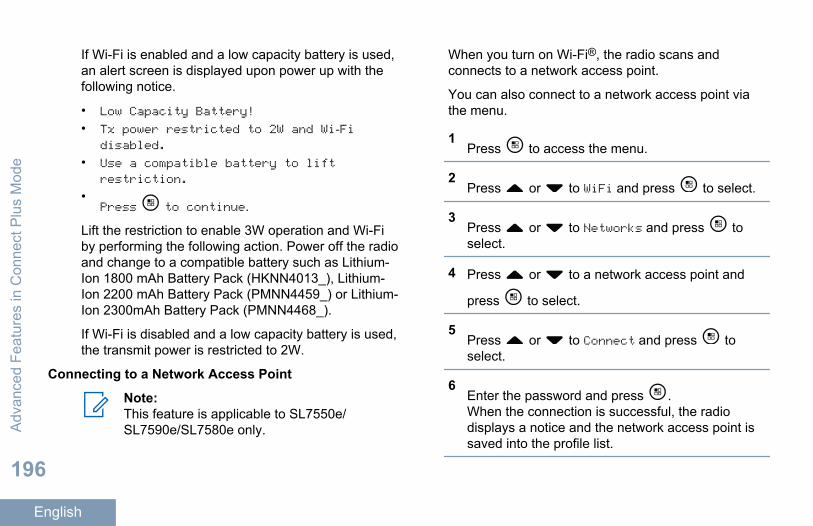
If Wi-Fi is enabled and a low capacity battery is used,an alert screen is displayed upon power up with thefollowing notice.
• Low Capacity Battery!
• Tx power restricted to 2W and Wi-Fidisabled.
• Use a compatible battery to liftrestriction.
•Press to continue.
Lift the restriction to enable 3W operation and Wi-Fiby performing the following action. Power off the radioand change to a compatible battery such as Lithium-Ion 1800 mAh Battery Pack (HKNN4013_), Lithium-Ion 2200 mAh Battery Pack (PMNN4459_) or Lithium-Ion 2300mAh Battery Pack (PMNN4468_).
If Wi-Fi is disabled and a low capacity battery is used,the transmit power is restricted to 2W.
Connecting to a Network Access Point
Note:This feature is applicable to SL7550e/SL7590e/SL7580e only.
When you turn on Wi-Fi®, the radio scans andconnects to a network access point.
You can also connect to a network access point viathe menu.
1Press to access the menu.
2Press or to WiFi and press to select.
3Press or to Networks and press toselect.
4 Press or to a network access point and
press to select.
5Press or to Connect and press toselect.
6Enter the password and press .When the connection is successful, the radiodisplays a notice and the network access point issaved into the profile list.
Adv
ance
d Fe
atur
es in
Con
nect
Plu
s M
ode
196
English

Refreshing the Network List
Note:This feature is applicable to SL7550e/SL7590e/SL7580e only.
• Perform the following actions to refresh thenetwork list.a)
Press to access the menu.b)
Press or to WiFi and press toselect.
c)Press or to Networks and press toselect.When you enter the Networks menu, the radioautomatically refreshes the network list.
• If you are already in the Networks menu, performthe following action to refresh the network list.a)
Press or to Refresh and press toselect.
The radio refreshes and displays the latestnetwork list.
Adding a Network
Note:This feature is applicable to SL7550e/SL7590e/SL7580e only.
If a preferred network is not in the available networklist, perform the following actions to add a network.
1Press to access the menu.
2Press or to WiFi and press to select.
3Press or to Networks and press toselect.
4Press or to Add Network and press toselect.
5 Enter the Service Set Identifier (SSID) and press
.
6Press or to Open and press to select.
Advanced Features in C
onnect Plus M
ode
197
English

7Enter the password and press .The radio displays to indicate that the networkis successfully saved.
Viewing Details of Network Access Points
Note:This feature is applicable to SL7550e/SL7590e/SL7580e only.
Perform the following actions to view details ofnetwork access points.
1Press to access the menu.
2Press or to WiFi and press to select.
3Press or to Networks and press toselect.
4 Press or to a network access point and
press to select.
5Press or to View Details and press to select.
For a connected network access point, the ServiceSet Identifier (SSID), Security Mode, MediaAccess Control (MAC) address, and InternetProtocol (IP) address are displayed.
For a non-connected network access point, theService Set Identifier (SSID) and Security Modeare displayed.
Removing Network Access Points
Note:This feature is applicable to SL7550e/SL7590e/SL7580e only. Enterprise networkaccess points that are added via CPS can onlybe removed via CPS.
Perform the following actions to remove networkaccess points from the profile list.
1Press to access the menu.
2Press or to WiFi and press to select.
Adv
ance
d Fe
atur
es in
Con
nect
Plu
s M
ode
198
English

3Press or to Networks and press toselect.
4 Press or to the selected network access
point and press to select.
5Press or to Remove and press toselect.
6Press or to Yes and press to select.The radio displays to indicate that the selectednetwork access point is successfully removed.
Utilities
Turning the Radio Tones/Alerts On or Off
You can enable and disable all radio tones and alerts(except for the incoming Emergency alert tone) ifneeded.
Press the programmed All Tones/Alerts button totoggle all tones on or off, or follow the procedure
described next to access this feature via the radiomenu.
1 to access the menu.
2 or to Utilities and press to select.
3 or to Radio Settings and press to
select.
4 or to Tones/Alerts and press to
select.
5 or to All Tones and press to select.
6Press to enable/disable all tones and alerts.
The display shows beside Enabled.
The disappears from beside Enabled.
Turning Keypad Tones On or Off
You can enable and disable keypad tones if needed.
Advanced Features in C
onnect Plus M
ode
199
English

1 to access the menu.
2 or to Utilities and press to select.
3 or to Radio Settings and press to
select.
4 or to Tones/Alerts and press to
select.
5 or to Keypad Tones and press to
select.
You can also use or to change the selectedoption.
6Press to enable/disable keypad tones.
The display shows beside Enabled.
The disappears from beside Enabled.
Setting the Tone Alert Volume Offset Level
You can adjust the Tone Alert Volume Offset level ifneeded. This feature adjusts the volume of the tones/alerts, allowing it to be higher or lower than the voicevolume.
1 to access the menu.
2 or to Utilities and press to select.
3 or to Radio Settings and press to
select.
4 or to Tones/Alerts and press to
select.
5 or to Vol. Offset and press to
select.
6 or to the required volume value.The radio sounds a feedback tone with eachcorresponding volume value.
7 Do one of the following:
Adv
ance
d Fe
atur
es in
Con
nect
Plu
s M
ode
200
English

•Press to keep the required displayedvolume value.
•Press to exit without changing thecurrent volume offset settings.
• Repeat Step 6 to select another volume value.
Turning the Talk Permit Tone On or Off
You can enable and disable the Talk Permit Tone ifneeded.
1 to access the menu.
2 or to Utilities and press to select.
3 or to Radio Settings and press to
select.
4 or to Tones/Alerts and press to
select.
5 or to Talk Permit and press to
select.
You can also use or to change the selectedoption.
6Press to enable/disable the Talk Permit Tone.
The display shows beside Enabled.
The disappears from beside Enabled.
Setting the Power Level
Note:This feature is applicable to SL7550e/SL7590e/SL7580e only with a frequency bandwidth of 403MHz–470MHz or470.000005MHz–527MHz. Select the value ofhigh transmit power in CPS. Check with yourdealer or system administrator to determinehow your radio has been programmed.
You can customize your radio’s power setting to highor low for each Connect Plus zone.
High enables communication with tower sites inConnect Plus mode located at a considerabledistance from you. Low enables communication withtower sites in Connect Plus mode in closer proximity.
Advanced Features in C
onnect Plus M
ode
201
English

Follow the procedure described next to access thisfeature via the radio menu.
1Press to access the menu.
2Press or to Utilities and press toselect.
3 Press or to Radio Settings and press
to select.
4Press or to Power and press to select.
5 Press or to the required setting and press
to select. appears beside selected setting. At any time,
long press to return to the Home screen.Screen returns to the previous menu.
Changing the Display Mode
You can change radio’s display mode between Dayor Night, as needed. This affects the color palette ofthe display.
1 to access the menu.
2 or to Utilities and press to select.
3 or to Radio Settings and press to
select.
4 or to Display and press to select.
The display shows Day Mode and Night Mode.
Note:
or to change the selected option.
5 or to the required setting and press to
enable. appears besides selected setting.
Adjusting the Display Brightness
You can adjust the display brightness of the radio asneeded.
Note:Display brightness cannot be adjusted whenAuto Brightness is enabled.
Adv
ance
d Fe
atur
es in
Con
nect
Plu
s M
ode
202
English
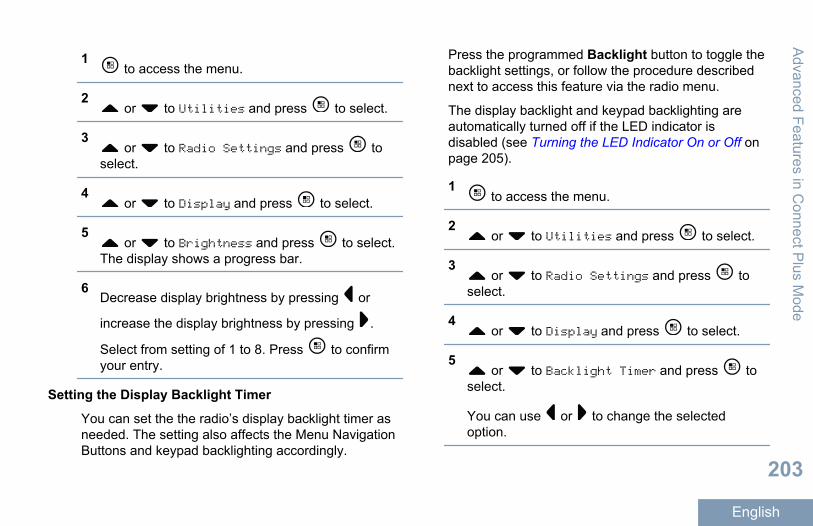
1 to access the menu.
2 or to Utilities and press to select.
3 or to Radio Settings and press to
select.
4 or to Display and press to select.
5 or to Brightness and press to select.
The display shows a progress bar.
6Decrease display brightness by pressing or
increase the display brightness by pressing .
Select from setting of 1 to 8. Press to confirmyour entry.
Setting the Display Backlight Timer
You can set the the radio’s display backlight timer asneeded. The setting also affects the Menu NavigationButtons and keypad backlighting accordingly.
Press the programmed Backlight button to toggle thebacklight settings, or follow the procedure describednext to access this feature via the radio menu.
The display backlight and keypad backlighting areautomatically turned off if the LED indicator isdisabled (see Turning the LED Indicator On or Off onpage 205).
1 to access the menu.
2 or to Utilities and press to select.
3 or to Radio Settings and press to
select.
4 or to Display and press to select.
5 or to Backlight Timer and press to
select.
You can use or to change the selectedoption.
Advanced Features in C
onnect Plus M
ode
203
English

Locking and Unlocking the Keypad
You can lock your radio’s keypad to avoid inadvertentkey entry.
To lock/unlock your radio’s keypad.Option Steps
Lockingthe Key-pad
1 to access the menu.
2 or to Utilities and
press to select.3 or to Radio Settings
and press to select.4 or to Keypad Lock and
press to select.
You can also use or tochange the selected option.
Unlockingthe Key-pad
Press followed by .
After the keypad is locked, the display showsKeypad Locked and returns to the Home screen.
After the keypad is unlocked, the display showsKeypad Unlocked and returns to the Homescreen.
Language
You can set your radio display to be in your requiredlanguage.
1 to access the menu.
2 or to Utilities and press to select.
3 or to Radio Settings and press to
select.
4 or to Languages and press to select.
5 or to the required language and press
to enable. appears beside selected language.Adv
ance
d Fe
atur
es in
Con
nect
Plu
s M
ode
204
English

Turning the LED Indicator On or Off
You can enable and disable the LED Indicator ifneeded.
1 to access the menu.
2 or to Utilities and press to select.
3 or to Radio Settings and press to
select.
4 or to LED Indicator and press to
select.
You can also use or to change the selectedoption.
5Press to enable/disable the LED Indicator.
The display shows beside Enabled.
The disappears from beside Enabled.
Identifying Cable Type
You can select the type of cable your radio uses.
1 to access the menu.
2 or to Utilities and press to select.
3 or to Radio Settings and press to
select.
4 or to Cable Type and press to select.
You can also use or to change the selectedoption.
5 The current cable type is indicated by a .
Voice Announcement
This feature enables the radio to audibly indicate thecurrent Zone or Channel the user has just assigned,or programmable button press. This audio indicatorcan be customized per customer requirements. Thisis typically useful when the user is in a difficultcondition to read the content shown on the display.
1 to access the menu.
Advanced Features in C
onnect Plus M
ode
205
English
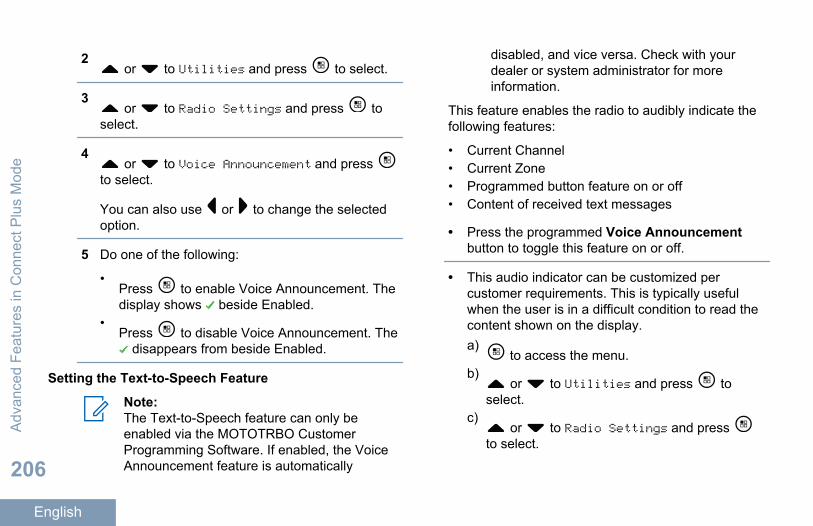
2 or to Utilities and press to select.
3 or to Radio Settings and press to
select.
4 or to Voice Announcement and press
to select.
You can also use or to change the selectedoption.
5 Do one of the following:
•Press to enable Voice Announcement. Thedisplay shows beside Enabled.
•Press to disable Voice Announcement. The
disappears from beside Enabled.
Setting the Text-to-Speech Feature
Note:The Text-to-Speech feature can only beenabled via the MOTOTRBO CustomerProgramming Software. If enabled, the VoiceAnnouncement feature is automatically
disabled, and vice versa. Check with yourdealer or system administrator for moreinformation.
This feature enables the radio to audibly indicate thefollowing features:
• Current Channel• Current Zone• Programmed button feature on or off• Content of received text messages
• Press the programmed Voice Announcementbutton to toggle this feature on or off.
• This audio indicator can be customized percustomer requirements. This is typically usefulwhen the user is in a difficult condition to read thecontent shown on the display.a)
to access the menu.b)
or to Utilities and press toselect.
c) or to Radio Settings and press
to select.
Adv
ance
d Fe
atur
es in
Con
nect
Plu
s M
ode
206
English

d) or to Voice Announce and press
to select.e) or to Messages or Program Button
and press to select.
You can also use or to change theselected option.
appears beside the selected setting.
Wallpaper Mode
Your radio displays the Wallpaper background onhome screen. The user can select from 5 defaultwallpapers.
1 to access the menu.
2 or to Utilities and press to select.
3 or to Radio Settings and press to
select.
4 or to Display and press to select.
5 or to Wallpaper and press to select.
You can also use or to change the selectedoption.
Screen Saver Mode
The screen saver feature allows the radio to saveradio battery time. A Screen Saver Pre Durationis used to track the radio activities before enteringscreen saver mode.
Radio starts Screen Saver Pre Duration uponpower up. Radio enters into screen saver mode whenScreen Saver Pre Duration timer expires, theradio exits screen saver mode and responds torelated transaction normally upon any user input andover the air transaction.
Radio restarts Screen Saver Pre Duration uponany user input and over the air transaction. Afterbeing in Screen Saver mode for 5 seconds, radioenters keypad lock state automatically. When anyaudio or Bluetooth accessory is connected, batterysaver mode is enabled, radio enters screen savermode.
Advanced Features in C
onnect Plus M
ode
207
English
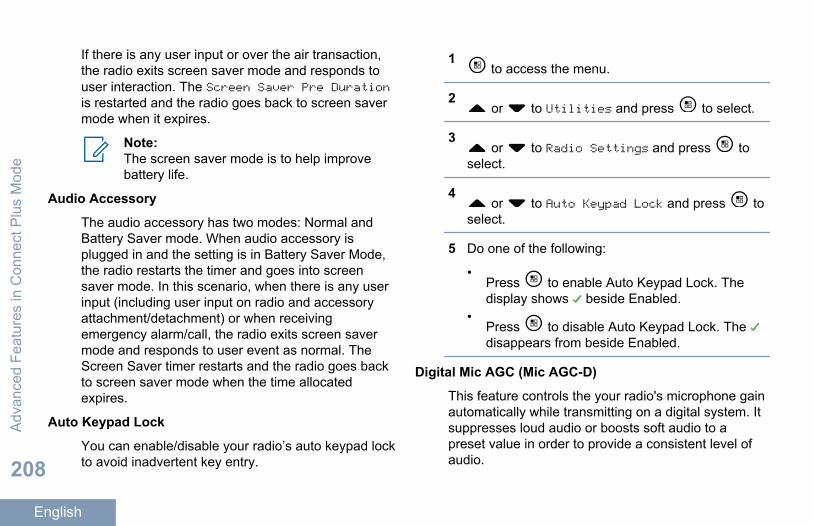
If there is any user input or over the air transaction,the radio exits screen saver mode and responds touser interaction. The Screen Saver Pre Durationis restarted and the radio goes back to screen savermode when it expires.
Note:The screen saver mode is to help improvebattery life.
Audio Accessory
The audio accessory has two modes: Normal andBattery Saver mode. When audio accessory isplugged in and the setting is in Battery Saver Mode,the radio restarts the timer and goes into screensaver mode. In this scenario, when there is any userinput (including user input on radio and accessoryattachment/detachment) or when receivingemergency alarm/call, the radio exits screen savermode and responds to user event as normal. TheScreen Saver timer restarts and the radio goes backto screen saver mode when the time allocatedexpires.
Auto Keypad Lock
You can enable/disable your radio’s auto keypad lockto avoid inadvertent key entry.
1 to access the menu.
2 or to Utilities and press to select.
3 or to Radio Settings and press to
select.
4 or to Auto Keypad Lock and press to
select.
5 Do one of the following:
•Press to enable Auto Keypad Lock. Thedisplay shows beside Enabled.
•Press to disable Auto Keypad Lock. The disappears from beside Enabled.
Digital Mic AGC (Mic AGC-D)
This feature controls the your radio's microphone gainautomatically while transmitting on a digital system. Itsuppresses loud audio or boosts soft audio to apreset value in order to provide a consistent level ofaudio.
Adv
ance
d Fe
atur
es in
Con
nect
Plu
s M
ode
208
English

1 to access the menu.
2 or to Utilities and press to select.
3 or to Radio Settings and press to
select.
You can also use or to change the selectedoption.
4 or to Mic AGC-D and press to select.
5 Do one of the following:
•Press to enable Mic AGC-D. The displayshows beside Enabled.
•Press to disable Mic AGC-D. The disappears from beside Enabled.
Intelligent Audio
Your radio can automatically adjust its audio volumeto overcome background noise in the environment,inclusive of all stationary and non-stationary noise
sources. This feature is a Receive-only feature anddoes not affect Transmit audio.
Note:This feature is not applicable during aBluetooth session.
1 to access the menu.
RadioCon-trol
Steps
Menu 1 to access the menu.
2 or to Radio Settings and
press to select.3 or to Radio Settings and
press to select.4 or to Intelligent Audio
and press to select.
Advanced Features in C
onnect Plus M
ode
209
English

RadioCon-trol
Steps
Note:
You can also use or tochange the selected option.
5 Do one of the following:
•Press to enable Intelligent Au-dio. The display shows besideEnabled.
•Press to disable IntelligentAudio. The disappears from be-side Enabled.
2 or to Utilities and press to select.
3 or to Radio Settings and press to
select.
4 or to Intelligent Audio and press
to select.
5 Do one of the following:
•Press to enable Intelligent Audio. Thedisplay shows beside Enabled.
•Press to disable Intelligent Audio. The disappears from beside Enabled.
See Authorized Accessories List on page 353 forrecommended Bluetooth-enabled audio accessorieswith in-built Automatic Volume Control for similarperformance.
Turning the Acoustic Feedback Suppressor Feature Onor Off
This feature allows you to minimize acoustic feedbackin received calls.
1 to access the menu.
2 or to Utilities and press to select.
3 or to Radio Settings and press to
select.
Adv
ance
d Fe
atur
es in
Con
nect
Plu
s M
ode
210
English

4 or to AF Suppressor and press to
select.
You can also use or to change the selectedoption.
5 Do one of the following.
•Press to enable Acoustic FeedbackSuppressor. The display shows besideEnabled.
•Press to disable Acoustic FeedbackSuppressor. The disappears from besideEnabled.
Text Entry Configuration
You can configure the following settings for enteringtext on your radio:
• Word Predict• Word Correct• Sentence Cap• My Words
Your radio supports the following text entry methods:
• Numbers• Symbols• Predictive or Multi-Tap• Language (If programmed)
Note:
Press at any time to return to the
previous screen or long press to returnto the Home Screen. The radio exits thecurrent screen once the inactivity timerexpires.
Word Predict
Your radio can learn common word sequences thatyou often enter. It then predicts the next word youmay want to use after you enter the first word of acommon word sequence into the text editor.
1 to access the menu.
2 or to Utilities and press to select.
3 or to Radio Settings and press to
select.
Advanced Features in C
onnect Plus M
ode
211
English

4 or to Text Entry and press to select.
5 or to Word Predict and press to
select.
You can also use or to change the selectedoption.
6 Do one of the following:
•Press to enable Word Predict. The displayshows beside Enabled.
•Press to disable Word Predict. The disappears from beside Enabled.
Word Correct
Supplies alternative word choices when the wordentered into the text editor is not recognized by the in-built dictionary.
1 to access the menu.
2 or to Utilities and press to select.
3 or to Radio Settings and press to
select.
4 or to Text Entry and press to select.
5 or to Word Correct and press to
select.
You can also use or to change the selectedoption.
6 Do one of the following:
•Press to enable Word Correct. The displayshows beside Enabled.
•Press to disable Word Correct. The disappears from beside Enabled.
Sentence Cap
Automatically enables capitalization for the first letterin the first word for every new sentence.
1 to access the menu.
Adv
ance
d Fe
atur
es in
Con
nect
Plu
s M
ode
212
English

2 or to Utilities and press to select.
3 or to Radio Settings and press to
select.
4 or to Text Entry and press to select.
5 or to Sentence Cap and press to
select.
6 Do one of the following:
•Press to enable Sentence Cap. The displayshows beside Enabled.
•Press to disable Sentence Cap. The disappears from beside Enabled.
Viewing Custom Words
You can add your own custom words into your radio’sin-built dictionary. Your radio maintains a list tocontain these words.
1 to access the menu.
2 or to Utilities and press to select.
3 or to Radio Settings and press to
select.
4 or to Text Entry and press to select.
5 or to My Words and press to select.
6 or to List of Words and press to
select.Display shows the list of custom words.
Editing Custom Word
You can edit the custom words saved in your radio.
1 to access the menu.
2 or to Utilities and press to select.
Advanced Features in C
onnect Plus M
ode
213
English

3 or to Radio Settings and press to
select.
4 or to Text Entry and press to select.
5 or to My Words and press to select.
6 or to List of Words and press to
select.Display shows the list of custom words.
7 or to the required word and press to
select.
8 or to Edit and press to select.
9 Use the keypad to edit your custom word.
Press to move one space to the left. Press or
the key to move one space to the right.
Press the key to delete any unwanted
characters. Long press to change text entry
method. Press once your custom word iscompleted.
The display shows transitional mini notice, confirmingyour custom word is being saved.
If the custom word is saved, a tone sounds and thedisplay shows positive mini notice.
If the custom word is not saved, a low tone soundsand the display shows negative mini notice.
Adding Custom Word
You can add your own custom words into your radio’sin-built dictionary.
1 to access the menu.
2 or to Utilities and press to select.
3 or to Radio Settings and press to
select.
4 or to Text Entry and press to select.
Adv
ance
d Fe
atur
es in
Con
nect
Plu
s M
ode
214
English

5 or to My Words and press to select.
6 or to Add New Word and press to
select.Display shows the list of custom words.
7 Use the keypad to edit your custom word.
Press to move one space to the left. Press or
the key to move one space to the right.
Press the key to delete any unwanted
characters. Long press to change text entry
method. Press once your custom word iscompleted.
The display shows transitional mini notice, confirmingyour custom word is being saved.
If the custom word is saved, a tone sounds and thedisplay shows positive mini notice.
If the custom word is not saved, a low tone soundsand the display shows negative mini notice.
Deleting a Custom Word
You can delete the custom words saved in your radio.
1 to access the menu.
2 or to Utilities and press to select.
3 or to Radio Settings and press to
select.
4 or to Text Entry and press to select.
5 or to My Words and press to select.
6 or to the required word and press to
select.
7 or to Delete and press to select.
8 Choose one of the following.
•At Delete Entry?, press to select Yes.The display shows Entry Deleted.
Advanced Features in C
onnect Plus M
ode
215
English

• or to No and press to return to the
previous screen.
Deleting All Custom Words
You can delete all custom words from your radio’s in-built.
1 to access the menu.
2 or to Utilities and press to select.
3 or to Radio Settings and press to
select.
4 or to Text Entry and press to select.
5 or to My Words and press to select.
6 or to Delete All and press to select.
7 Choose one of the following.
•At Delete Entry?, press to select Yes.The display shows Entry Deleted.
• or to No and press to return to the
previous screen.
Accessing General Radio Information
Your radio contains information on the following:
• Battery• Degree of Tilt (Accelerometer)• Radio Model Number Index• Option Board Over-the-Air (OTA) Codeplug CRC• Site Number• Site Info• Radio Alias and ID• Firmware and Codeplug Versions• Open-Source Software Information
Press at any time to return to the previous
screen or long press to return to the Homescreen. The radio exits the current screen once theinactivity timer expires.
Adv
ance
d Fe
atur
es in
Con
nect
Plu
s M
ode
216
English

Accessing the Battery Information
Displays information on your radio battery.
1 to access the menu.
2 or to Utilities and press to select.
3 or to Radio Info and press to select.
4 or to Battery Info and press to
select.
The display shows the battery information.
For IMPRES batteries ONLY: The display readsRecondition Battery if the battery requiresreconditioning in an IMPRES charger. After thereconditioning process, the display then shows thebattery information.
Checking the Radio Model Number Index
This index number identifies your radio’s model-specific hardware. Your radio system administratormay ask for this number when preparing a newOption Board codeplug for your radio.
1 to access the menu.
2 or to Utilities and press to select.
3 or to Radio Info and press to select.
4 or to Model Index and press to
select.The display shows the Model Number Index.
Checking the CRC of the Option Board OTACodeplug File
Follow the instructions below if your radio systemadministrator asks you to view the Option Board OTACodeplug File CRC (Cyclic Redundancy Check). Thismenu option only appears if the Option Boardreceived its last codeplug update OTA.
1 to access the menu.
2 or to Utilities and press to select.
Advanced Features in C
onnect Plus M
ode
217
English

3 or to Radio Info and press to select.
4 or to OB OTA CPcrc and press to
select.The display shows some letters and numbers.Communicate this information to your radiosystem administrator exactly as shown.
Displaying the Site ID (Site Number)
Note:If you are not currently registered at a site, thedisplay shows Not Registered.
The radio briefly shows the Site ID as it registers witha Connect Plus site. Following registration, the radiodoes not generally indicate the Site number. Todisplay the registered Site number, do the following:
1 to access the menu.
2 or to Utilities and press to select.
3 or to Radio Info and press to select.
4 or to Site Number and press to
select.The display shows the Network ID and the SiteNumber.
Checking the Site Info
Note:If you are not currently registered at a site, thedisplay shows Not Registered.
The Site Info feature provides information that can beuseful to a service technician. It consists of thefollowing information:
• Repeater number of current Control Channelrepeater.
• RSSI: Last signal strength value measured fromControl Channel repeater.
• Neighbor List sent by Control Channel repeater(five numbers separated by commas).
If you are requested to use this feature, please reportthe displayed information exactly as it appears on thescreen.
1 to access the menu.
Adv
ance
d Fe
atur
es in
Con
nect
Plu
s M
ode
218
English

2 or to Utilities and press to select.
3 or to Radio Info and press to select.
4 or to Site Info and press to select.
The display shows the Site Info.
Checking the Radio ID
This feature displays the ID of your radio.
Follow the procedure described next to access thisfeature via the radio screen.
1 to access the menu.
2 or to Utilities and press to select.
3 or to Radio Info and press to select.
4 or to My ID and press to select.
The display shows the radio ID.
Checking the Firmware Version and CodeplugVersion
Displays the firmware version on your radio.
1 to access the menu.
2 or to Utilities and press to select.
3 or to Radio Info and press to select.
4 or to Versions and press to select.
The display a list with the following information:
• (Radio) Firmware Version• (Radio) Codeplug Version• Option Board Firmware Version• Option Board Frequency Version• Option Board Hardware Version• Option Board Codeplug Version
Checking for Updates
Connect Plus provides the ability to update certainfiles (Option Board Codeplug, Network FrequencyFile and Option Board Firmware File) over-the-air.
Advanced Features in C
onnect Plus M
ode
219
English
Note:Check with the dealer or network administratorto determine whether this feature has beenenabled for your radio.
Any display Connect Plus radio has the ability toshow its current Option Board OTA Codeplug CRC,Frequency File version or Option Board firmware fileversion via a menu option. In addition, display radiosthat have been enabled for over-the-air file transfercan display the version of a "pending file". A "pendingfile" is a Frequency File or Option Board firmware filethat the Connect Plus radio knows about via systemmessaging, but the radio has not yet collected all ofthe file’s packets. If a display Connect Plus radio hasa pending file, the menu provides options to:
• See the version number of the pending file.• See what percentage of packets has been
collected so far.• Request the Connect Plus radio to resume
collecting file packets.
If the radio is enabled for Connect Plus over-the-airfile transfer, there may be times when the radioautomatically joins a file transfer without first notifyingthe radio user. While the radio is collecting filepackets, the LED rapidly blinks red and the radio
displays the High Volume Data icon on the HomeScreen status bar.
Note:The Connect Plus radio cannot collect filepackets and receive calls at the same time. Ifyou wish to cancel the file transfer, press andrelease the PTT button. This causes the radioto request a call on the selected ContactName, and it will also cancel the file transferfor that radio until the process resumes at alater time.
There are several things that can make the filetransfer process start again. The first example appliesto all over-the-air file types. The other examples applyonly to the Network Frequency File and Option BoardFirmware File:
• The radio system administrator re-initiates theover-the-air file transfer.
• The Option Board's pre-defined timer expires,which causes the Option Board to automaticallyresume the process of collecting packets.
• The timer has not yet expired, but the radio userrequests the file transfer to resume via the menuoption.
Adv
ance
d Fe
atur
es in
Con
nect
Plu
s M
ode
220
English
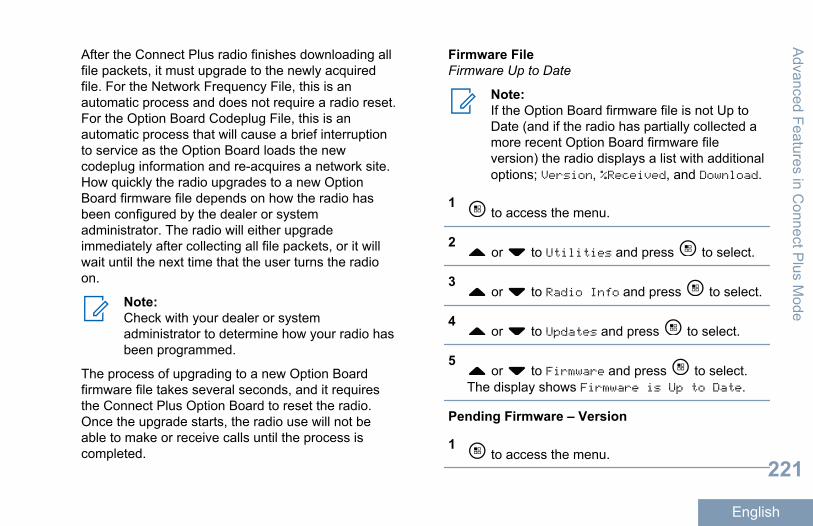
After the Connect Plus radio finishes downloading allfile packets, it must upgrade to the newly acquiredfile. For the Network Frequency File, this is anautomatic process and does not require a radio reset.For the Option Board Codeplug File, this is anautomatic process that will cause a brief interruptionto service as the Option Board loads the newcodeplug information and re-acquires a network site.How quickly the radio upgrades to a new OptionBoard firmware file depends on how the radio hasbeen configured by the dealer or systemadministrator. The radio will either upgradeimmediately after collecting all file packets, or it willwait until the next time that the user turns the radioon.
Note:Check with your dealer or systemadministrator to determine how your radio hasbeen programmed.
The process of upgrading to a new Option Boardfirmware file takes several seconds, and it requiresthe Connect Plus Option Board to reset the radio.Once the upgrade starts, the radio use will not beable to make or receive calls until the process iscompleted.
Firmware FileFirmware Up to Date
Note:If the Option Board firmware file is not Up toDate (and if the radio has partially collected amore recent Option Board firmware fileversion) the radio displays a list with additionaloptions; Version, %Received, and Download.
1 to access the menu.
2 or to Utilities and press to select.
3 or to Radio Info and press to select.
4 or to Updates and press to select.
5 or to Firmware and press to select.
The display shows Firmware is Up to Date.
Pending Firmware – Version
1 to access the menu.
Advanced Features in C
onnect Plus M
ode
221
English

2 or to Utilities and press to select.
3 or to Radio Info and press to select.
4 or to Updates and press to select.
5 or to Firmware and press to select.
6 or to Version and press to select.
If there is a pending Option Board firmware file,the display shows the pending firmware versionnumber.
If there is a pending Option Board firmware file,the display shows Firmware is Up to Date.
Pending Firmware – % Received
1 to access the menu.
2 or to Utilities and press to select.
3 or to Radio Info and press to select.
4 or to Updates and press to select.
5 or to Firmware and press to select.
6 or to %Received and press to select.
The screen displays the percentage of firmwarefile packets collected so far.
Note:When at 100%, the radio needs to bepower cycled Off and then On to initiate thefirmware upgrade.
Pending Firmware – Download
If the Connect Plus radio has previously left an OTAOption Board Firmware File Transfer with a partialfile, the unit automatically rejoins the file transfer (ifstill ongoing) when an internal timer expires. If youwant the unit to rejoin an ongoing Option BoardFirmware File transfer prior to expiration of thisinternal timer, use the Download option as describedbelow.
Adv
ance
d Fe
atur
es in
Con
nect
Plu
s M
ode
222
English

1 to access the menu.
2 or to Utilities and press to select.
3 or to Radio Info and press to select.
4 or to Updates and press to select.
5 or to Firmware and press to select.
6 or to Download and press to select.
The display shows the following:
Download Available Start Download
No Download Availa-ble
Download not availa‐ble
7 Do one of the following:
•Select Yes and press to start the download.
•Select No and press to return to theprevious menu.
Frequency FileFrequency File Up to Date
Note:If the Frequency File is not Up to Date (and ifthe radio has partially collected a more recentfrequency file version) the radio displays a listwith additional options; Version, %Received,and Download.
1 to access the menu.
2 or to Utilities and press to select.
3 or to Radio Info and press to select.
4 or to Frequency and press to select.
The display shows Freq. File is Up to Date.
Frequency File Pending – Version
1 to access the menu.
2 or to Utilities and press to select.
Advanced Features in C
onnect Plus M
ode
223
English
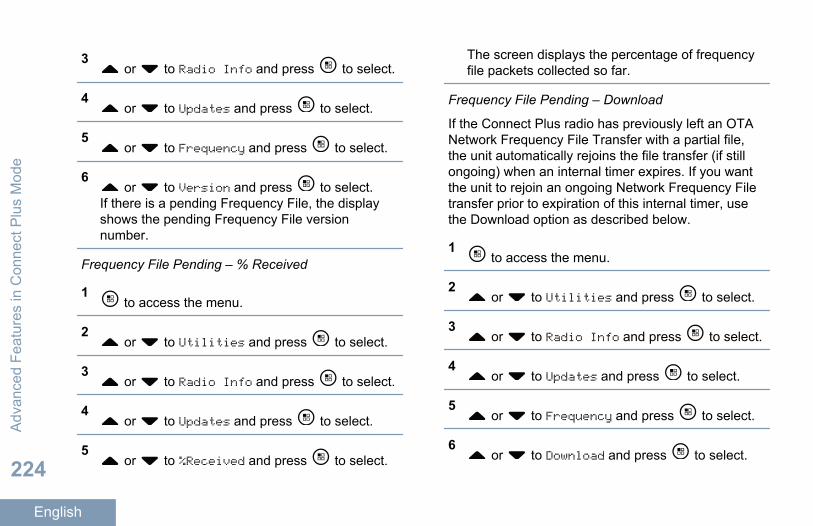
3 or to Radio Info and press to select.
4 or to Updates and press to select.
5 or to Frequency and press to select.
6 or to Version and press to select.
If there is a pending Frequency File, the displayshows the pending Frequency File versionnumber.
Frequency File Pending – % Received
1 to access the menu.
2 or to Utilities and press to select.
3 or to Radio Info and press to select.
4 or to Updates and press to select.
5 or to %Received and press to select.
The screen displays the percentage of frequencyfile packets collected so far.
Frequency File Pending – Download
If the Connect Plus radio has previously left an OTANetwork Frequency File Transfer with a partial file,the unit automatically rejoins the file transfer (if stillongoing) when an internal timer expires. If you wantthe unit to rejoin an ongoing Network Frequency Filetransfer prior to expiration of this internal timer, usethe Download option as described below.
1 to access the menu.
2 or to Utilities and press to select.
3 or to Radio Info and press to select.
4 or to Updates and press to select.
5 or to Frequency and press to select.
6 or to Download and press to select.
Adv
ance
d Fe
atur
es in
Con
nect
Plu
s M
ode
224
English

Download CurrentlyUnavailable
Download not avail‐able
Download CurrentlyAvailable
Start Download
7 Do one of the following:
• Select Yes and press to start the download.• Select No and press to return to the previous
menu.
Advanced Features in C
onnect Plus M
ode
225
English

Other Systems
Oth
er S
yste
ms
226
English

Other Systems
Push-To-Talk (PTT) ButtonThe PTT button serves two basic purposes.
• While a call is in progress, the PTT button allowsthe radio to transmit to other radios in the call. Themicrophone is activated when the PTT button ispressed.
• While a call is not in progress, the PTT button isused to make a new call.
You hear a continuous Talk Prohibit Tone if your callis interrupted, for example when the radio receives anEmergency call. You should release the PTT button.
Programmable ButtonsDepending on the duration of a button press, yourdealer can program the programmable buttons asshortcuts to radio functions.
Short press Pressing and releasing rapidly.
Long press Pressing and holding for theprogrammed duration.
Note:See Emergency Operation on page 292 formore information on the programmed durationof the Emergency button.
Assignable Radio FunctionsThe following radio functions can be assigned to theprogrammable buttons.
Actions Provides access to theprogrammable action list of aCustomer ProgrammingSoftware (CPS).
Audio Ambience Allows the user to select anenvironment the radio isoperating in.
Audio Profiles Allows the user to select thepreferred audio profile.
Audio Toggle Toggles audio routingbetween the internal radio
Other S
ystems
227
English

speaker and the speaker ofwired accessory.
Bluetooth® AudioSwitch
Toggles audio routingbetween internal radiospeaker and externalBluetooth-enabled accessory.
Contacts Provides direct access to theContacts list.
Call Alert Provides direct access to thecontacts list for you to select acontact to whom a Call Alertcan be sent.
Call Log Selects the call log list.
ChannelAnnouncement
Plays zone and channelannouncement voicemessages for the currentchannel.
Display RadioAlias
Displays the name of theradio.
Emergency Depending on theprogramming, initiates orcancels an emergency.
Indoor Location Toggles Indoor Location on oroff.
Intelligent Audio Toggles intelligent audio on oroff.
Job Tickets Allows the user to view andact upon job tickets.
Manual Dial Initiates a Private Call bykeying in any subscriber ID.
Manual SiteRoam[5]
Starts the manual site search.
Mic AGC Toggles the internalmicrophone automatic gaincontrol (AGC) on or off.
Monitor Monitors a selected channelfor activity.
Notifications Provides direct access to theNotifications list.
Nuisance ChannelDelete[5]
Temporarily removes anunwanted channel, except forthe Selected Channel, fromthe scan list. The SelectedChannel refers to the selected
Oth
er S
yste
ms
228
English

zone or channel combinationof the user from which scan isinitiated.
One Touch Access Directly initiates a predefinedPrivate, Phone or Group Call,a Call Alert or a Quick Textmessage.
Option BoardFeature
Toggles option boardfeature(s) on or off for optionboard-enabled channels.
PermanentMonitor[5]
Monitors a selected channelfor all radio traffic untilfunction is disabled.
Phone Provides direct access to thePhone Contacts list.
Power BatteryIndicator
Displays the current status ofthe battery level.
Privacy Toggles privacy on or off.
Radio Alias and ID Provides radio alias and ID.
Radio Check Determines if a radio is activein a system.
Radio Enable Allows a target radio to beremotely enabled.
Radio Disable Allows a target radio to beremotely disabled.
Remote Monitor Turns on the microphone of atarget radio without it givingany indicators.
Repeater/Talkaround[5]
Toggles between using arepeater and communicatingdirectly with another radio.
Ring Alert Type Provides access to the RingAlert Type Setting.
Reset HomeChannel
Sets a new home channel.
Silence HomeChannel Reminder
Mutes the Home ChannelReminder.
Scan [6] Toggles scan on or off.
Site Info Displays the current site nameand ID of Capacity Plus-Multi-Site.
Other S
ystems
229
English
Plays site announcementvoice messages for thecurrent site when VoiceAnnouncement is enabled.
Site Lock[5] When toggled on, the radiosearches the current site only.When toggled off, the radiosearches other sites inaddition to the current site.
Telemetry Control Controls the Output Pin on alocal or remote radio.
Text Message Selects the text messagemenu.
Vibrate Style Configures the vibrate style.
Voice Interrupt Interrupts the audio from atransmitting radio to free thechannel.
Transmit InterruptRemote Dekey
Stops an ongoing interruptiblecall to free the channel.
Trill Enhancement Toggles trill enhancement onor off.
Unassigned Unassigned programmablebutton.
VoiceAnnouncement
Toggles voice announcementon or off.
Voice OperatingTransmission(VOX)
Toggles VOX on or off.
Wi-Fi Toggles Wi-Fi on or off.
Zone Selection Allows selection from a list ofzones.
5 Not applicable in Capacity Plus.6 Not applicable in Capacity Plus--Single Site
Oth
er S
yste
ms
230
English

Assignable Settings or Utility FunctionsThe following radio settings or utility functions can beassigned to the programmable buttons.
Tones/Alerts Toggles all tones and alerts on oroff.
Brightness Depending on the programming,adjusts the brightness level usingthe manual brightness mode or autobrightness control.
Display Mode Toggles the day/night display modeon or off.
Keypad Lock Toggles keypad between locked andunlocked.
Wallpaper Radio displays backgroundWallpaper on the home screen.
Accessing Programmed FunctionsFollow the procedure to access programmedfunctions in your radio.
1 Do one of the following:
• Short or long press the programmed button.Proceed to Step 3.
•Press to access the menu.
2 Press or to the menu function, and press
to select a function or enter a sub-menu.
3 Do one of the following:
•Press to return to the previous screen.
•Long press to return to the Homescreen.
Your radio automatically exits the menu after aperiod of inactivity and returns to the Homescreen.
Status IndicatorsThis chapter explains the icons, LED indicators, andaudio tones used in the radio.
IconsThe Liquid Crystal Display (LCD) of your radio showsthe radio status, text entries, and menu entries. The
Other S
ystems
231
English

following are the icons that appear on the radiodisplay.Call IconsThe following icons appear on the display during acall. These icons also appear in the Contacts list toindicate alias or ID type.
Bluetooth PCCall
Indicates a Bluetooth PC Call inprogress.In the Contacts list, it indicates aBluetooth PC Call alias (name)or ID (number).
Dispatch Call
The Dispatch Call contact type isused to send a text message toa dispatcher PC through a third-party Text Message Server.
Group Call/AllCall
Indicates a Group Call or All Callin progress.In the Contacts list, it indicates agroup alias (name) or ID(number).
Indicates a Phone Call as GroupCall or All Call in progress.
Phone Call asGroup/All Call
In the Contacts list, it indicates agroup alias (name) or ID(number).
Phone Call asPrivate Call
Indicates a Phone Call asPrivate Call in progress.In the Contacts list, it indicates aphone alias (name) or ID(number).
Private Call
Indicates a Private Call inprogress.In the Contacts list, it indicates asubscriber alias (name) or ID(number).
Non-IPPeripheralIndividual call
Indicates a Non-IP Peripheralindividual call in progress.In the Contacts list, it indicates asubscriber alias (name) or ID(number).
Indicates a Non-IP Peripheralgroup call in progress.In the Contacts list, it indicates agroup alias (name) or ID(number).
Oth
er S
yste
ms
232
English

Non-IPPeripheralGroup call
Option BoardIndividual Call
Indicates an Option Boardindividual call in progress.In the Contacts list, it indicates asubscriber alias (name) or ID(number).
Option BoardGroup Call
Indicates an Option Board groupcall in progress.In the Contacts list, it indicates agroup alias (name) or ID(number).
Display IconsThe following icons appear on the status bar at thetop of the radio display. The icons are arranged leftmost in order of appearance or usage, and arechannel-specific.
All Tones Disabled
No ring tones available.
Battery
The number of bars (0 – 4)shown indicates the chargeremaining in the battery.Blinks when the battery islow.
Battery ChargingStatus
Shows battery chargingstatus.
BluetoothConnected
The Bluetooth feature isenabled. The icon stays litwhen a remote Bluetoothdevice is connected.
Bluetooth NotConnected
The Bluetooth feature isenabled but there is noremote Bluetooth deviceconnected.
Call Log
Radio call log.
Other S
ystems
233
English

Contact
Radio contact is available.
Emergency
Radio is in Emergencymode.
High Volume Data
Radio is receiving highvolume data and channel isbusy.
Indoor LocationAvailable[10]
Indoor location status is onand available.
Indoor LocationUnavailable[10]
Indoor location status is onbut unavailable due toBluetooth disabled orBeacons Scan suspendedby Bluetooth.
Message
Incoming message.
Monitor
Selected channel is beingmonitored.
Notification
Notification List has one ormore missed events.
Option Board
The Option Board isenabled. (Option boardenabled models only)
Option Board Non-Function
The Option Board isdisabled.
Over-the-AirProgramming DelayTimer
Indicates time left beforeautomatic restart of radio.
The number of barsdisplayed represents the
Oth
er S
yste
ms
234
English

Received SignalStrength Indicator(RSSI)
radio signal strength. Fourbars indicate the strongestsignal. This icon is onlydisplayed while receiving.
Ring Only
Ringing mode is enabled.
Scan[7]
Scan feature is enabled.
Scan- Priority 1[7]
Radio detects activity onchannel/group designatedas Priority 1.
Scan- Priority 2[7]
Radio detects activity onchannel/group designatedas Priority 2.
Secure
The Privacy feature isenabled.
Radio is signed in to theremote server.
Sign In
Sign Out
Radio is signed out of theremote server.
Silent Ring
Silent ring mode is enabled.
Site Roaming[8]
The site roaming feature isenabled.
Talkaround[7]
In the absence of arepeater, radio is currentlyconfigured for direct radio toradio communication.
Unsecure
The Privacy feature isdisabled.
Vibrate
Vibrate mode is enabled.
Other S
ystems
235
English
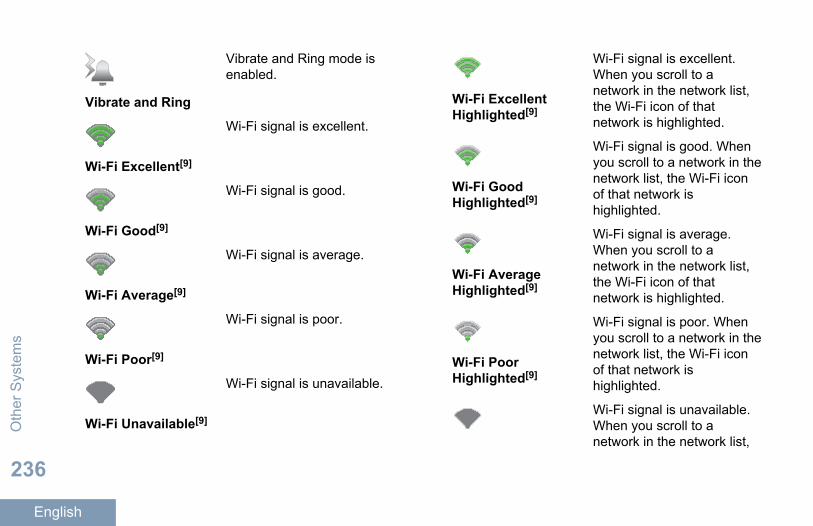
Vibrate and Ring
Vibrate and Ring mode isenabled.
Wi-Fi Excellent[9]
Wi-Fi signal is excellent.
Wi-Fi Good[9]
Wi-Fi signal is good.
Wi-Fi Average[9]
Wi-Fi signal is average.
Wi-Fi Poor[9]
Wi-Fi signal is poor.
Wi-Fi Unavailable[9]
Wi-Fi signal is unavailable.
Wi-Fi ExcellentHighlighted[9]
Wi-Fi signal is excellent.When you scroll to anetwork in the network list,the Wi-Fi icon of thatnetwork is highlighted.
Wi-Fi GoodHighlighted[9]
Wi-Fi signal is good. Whenyou scroll to a network in thenetwork list, the Wi-Fi iconof that network ishighlighted.
Wi-Fi AverageHighlighted[9]
Wi-Fi signal is average.When you scroll to anetwork in the network list,the Wi-Fi icon of thatnetwork is highlighted.
Wi-Fi PoorHighlighted[9]
Wi-Fi signal is poor. Whenyou scroll to a network in thenetwork list, the Wi-Fi iconof that network ishighlighted.
Wi-Fi signal is unavailable.When you scroll to anetwork in the network list,
Oth
er S
yste
ms
236
English

Wi-Fi UnavailableHighlighted[9]
the Wi-Fi icon of thatnetwork is highlighted.
Mini Notice IconsThe following icons appear momentarily on thedisplay after an action to perform a task is taken.
Failed Transmission(Negative)
Failed action taken.
SuccessfulTransmission (Positive)
Successful action taken.
Transmission inProgress (Transitional)
Transmitting. This isseen before indication forSuccessful Transmissionor Failed Transmission.
Sent Item IconsThe following icons appear at the top right corner ofthe display in the Sent Items folder.
or In Progress
The text message to asubscriber alias or ID ispending transmission,followed by waiting foracknowledgement.The text message to a groupalias or ID is pendingtransmission.
or The text message has beenread.
7 Not applicable in Capacity Plus8 Not applicable in Capacity Plus--Single-Site9 Only applicable for SL7550e/SL7590e/SL7580e
10 Only applicable for models with the latest software and hardware.
Other S
ystems
237
English

Individual or GroupMessage Read
or Individual or GroupMessage Unread
The text message has notbeen read.
or Send Failed
The text message cannot besent.
or Sent Successfully
The text message has beensuccessfully sent.
Job Tickets Icons
All Jobs
Indicates all jobs listed.
New Jobs
Indicates new jobs.
TonesThe following are the tones that sound through on theradio speaker.
High Pitched Tone
Low Pitched Tone
Audio TonesAudio tones provide you with audible indications ofthe status, or response to data received on the radio.
Continuous Tone
A monotone sound. Soundscontinuously until termination.
Periodic Tone
Sounds periodically dependingon the duration set by the radio.Tone starts, stops, and repeatsitself.
Repetitive Tone
A single tone that repeats itselfuntil it is terminated by the user.
Momentary Tone
Sounds only once for a durationset by the radio.O
ther
Sys
tem
s
238
English

Indicator TonesIndicator tones provide you with audible indications ofthe status after an action to perform a task is taken.
Positive Indicator Tone
Negative Indicator Tone
IP Site ConnectThis feature allows your radio to extend conventionalcommunication beyond the reach of a single site byconnecting to different available sites by using anInternet Protocol (IP) network. This is a conventionalmulti-site mode.
When the radio moves out of range from one site andinto the range of another, the radio connects to therepeater of the new site to send or receive calls ordata transmissions. This is done either automaticallyor manually depending on your settings.
In an automatic site search, the radio scans throughall available sites when the signal from the currentsite is weak or when the radio is unable to detect anysignal from the current site. The radio then locks on tothe repeater with the strongest Received SignalStrength Indicator (RSSI) value.
In a manual site search, the radio searches for thenext site in the roam list that is currently in range butwhich may not have the strongest signal and locks onto the repeater.
Note:Each channel can only have either Scan orRoam enabled, not both at the same time.
Channels with this feature enabled can be added to aparticular roam list. The radio searches the channelsin the roam list during the automatic roam operationto locate the best site. A roam list supports amaximum of 16 channels, including the selectedchannel.
Note:You cannot manually add or delete an entry inthe roam list. Check with your dealer orsystem administrator for more information.
Capacity PlusCapacity Plus--Single Site
Capacity Plus-Single Site is a single-site trunkingconfiguration of the MOTOTRBO radio system, whichuses a pool of channels to support hundreds of usersand up to 254 Groups. This feature allows your radio
Other S
ystems
239
English

to efficiently utilize the available number ofprogrammed channels while in Repeater Mode.
You hear a negative indicator tone if you try to accessa feature not applicable to Capacity Plus-Single Sitevia a programmable button press.
Your radio also has features that are available inconventional digital mode, IP Site Connect, andCapacity Plus. However, the minor differences in theway each feature works does not affect theperformance of your radio.
Check with your dealer or system administrator formore information on this configuration.
Capacity Plus--Multi-SiteCapacity Plus-Multi-Site is a multi-channel trunkingconfiguration of the MOTOTRBO radio system,combining the best of both Capacity Plus and IP SiteConnect configurations.
Capacity Plus--Multi-Site allows your radio to extendtrunking communication beyond the reach of a singlesite, by connecting to different available sites whichare connected via an Internet Protocol (IP) network. Italso provides an increase in capacity by efficientlyutilizing the combined available number of
programmed channels supported by each of theavailable sites.
When the radio moves out of range from one site andinto the range of another, it connects to the new site'srepeater to send or receive calls/data transmissions.Depending on your settings, this is doneautomatically or manually.
If the radio is set to do this automatically, it scansthrough all available sites when the signal from thecurrent site is weak or when the radio is unable todetect any signal from the current site. It then lockson to the repeater with the strongest Received SignalStrength Indicator (RSSI) value.
In a manual site search, the radio searches for thenext site in the roam list that is currently in range (butwhich may not have the strongest signal) and lockson to it.
Any channel with Capacity Plus--Multi-Site enabledcan be added to a particular roam list. The radiosearches these channels during the automatic roamoperation to locate the best site.
Oth
er S
yste
ms
240
English

Note:You cannot manually add or delete an entry tothe roam list. Check with your dealer orsystem administrator for more information.
Similar to Capacity Plus--Single Site, icons of featuresnot applicable to Capacity Plus--Multi-Site are notavailable in the menu. You hear a negative indicatortone if you try to access a feature not applicable toCapacity Plus--Multi-Site via a programmable buttonpress.
Zone and Channel SelectionsThis chapter explains the operations to select a zoneor channel on your radio.
A zone is a group of channels. Your radio supports upto 1000 channels and 250 zones, with a maximum of160 channels per zone.
Transmissions are sent and received on a channel.Each channel may have been programmed differentlyto support different groups of users or supplied withdifferent features.
Selecting ZonesFollow the procedure to select the required zone onyour radio.
1 Do one of the following:
• Press the programmed Zone Selection button.Proceed to Step 3.
•Press to access the menu.
2Press or to Zone. Press to select.The display shows and the current zone.
3Press or to the required zone. Press to select.The display shows <Zone> Selectedmomentarily and returns to the selected zonescreen.
Other S
ystems
241
English
Selecting ChannelsFollow the procedure to select the required channelon your radio after you have selected a zone.
While on the Home Screen press on thenavigation disc to access the Channel List.The active channel is displayed and indicated by a
.
CallsThis chapter explains the operations to receive,respond to, make, and stop calls.
You can select a subscriber alias or ID, or group aliasor ID after you have selected a channel by using oneof these features:
Alias Search This method is used for Group,Private and All Calls only with akeypad microphone
Contacts List This method provides directaccess to the Contacts list.
Manual Dial (viaContacts)
This method is used for Privateand Phone Calls only with akeypad microphone.
ProgrammedNumber Keys
This method is used for Group,Private, and All Calls only with akeypad microphone.
Note:You can only have onealias or ID assigned to anumber key, but you canhave more than onenumber key associatedto an alias or ID. All thenumber keys on akeypad microphone canbe assigned. See Assigning Entries toProgrammable NumberKeys on page 66 formore information.
ProgrammedOne TouchAccess Button
This method is used for Group,Private, and Phone Calls only.O
ther
Sys
tem
s
242
English
Note:You can only have oneID assigned to a OneTouch Access buttonwith a short or longprogrammable buttonpress. Your radio canhave multiple OneTouch Access buttonsprogrammed.
ProgrammableButton
This method is used for PhoneCalls only.
Group CallsYour radio must be configured as part of a group toreceive a call from or make a call to the group ofusers.Responding to Group CallsFollow the procedure to respond to Group Calls onyour radio.
When you receive a Group Call:
• The green LED blinks.• The first line of the display shows the caller alias
and the RSSI icon.
• The second line displays the group alias and theGroup Call icon (in Digital mode only).
• Your radio unmutes and the incoming call soundsthrough the speaker.
1 Do one of the following:
• If the Channel Free Indication feature isenabled, you hear a short alert tone themoment the transmitting radio releases thePTT button, indicating the channel is free foryou to respond. Press the PTT button torespond to the call.
• If the Transmit Interrupt Remote Dekey featureis enabled, press the PTT button to stop anongoing interruptible call and free the channelfor you to respond.
The green LED lights up.
2 Do one of the following:
• Wait for the Talk Permit Tone to end and speakclearly into the microphone if enabled.
• Wait for the PTT Sidetone to end and speakclearly into the microphone if enabled.
3 Release the PTT button to listen.
Other S
ystems
243
English
The call ends when there is no voice activity for apredetermined period.
Making Group CallsFollow the procedure to make Group Calls on yourradio.
1 Do one of the following:
• Select a channel with the active group alias orID.
• Press the programmed One Touch Accessbutton.
2 Press the PTT button to make the call.The green LED lights up. The first text line showsthe Group Call icon and alias.
3 Do one of the following:
• Wait for the Talk Permit Tone to end and speakclearly into the microphone if enabled.
• Wait for the PTT Sidetone to end and speakclearly into the microphone if enabled.
4 Release the PTT button to listen.The green LED lights up when the target radioresponds. The display shows the Group Call icon,
and alias or ID, and the transmitting radio alias orID.
5 If the Channel Free Indication feature is enabled,you hear a short alert tone the moment thetransmitting radio releases the PTT button,indicating the channel is free for you to respond.Press the PTT button to respond to the call.The call ends when there is no voice activity for apredetermined period. The radio returns to thescreen you were on prior to initiating the call.
Making Group Calls by Using the Contacts ListFollow the procedure to make Group Calls on yourradio by using the Contacts list.
1Press to access the menu.
2Press or to Contacts. Press to select.
3 Press or to the required alias or ID. Press
to select.
4 Press the PTT button to make the call.The green LED lights up.
Oth
er S
yste
ms
244
English
The first line displays the subscriber alias or ID.The second line displays Private Call and thePrivate Call icon.
5 Wait for the Talk Permit Tone to end and speakclearly into the microphone if enabled.
6 Release the PTT button to listen.The green LED lights up when the target radioresponds. The display shows the transmitting userID.
7 If the Channel Free Indication feature is enabled,you hear a short alert tone the moment thetransmitting radio releases the PTT button,indicating the channel is free for you to respond.Press the PTT button to respond to the call.The call ends when there is no voice activity for apredetermined period.You hear a short tone. The display shows CallEnded.
Making Group Calls by Using the ProgrammableNumber KeyFollow the procedure to make Group Calls on yourradio by using the programmable number key.
1 Long press the programmed number key to thepredefined alias or ID when you are on the Homescreen.If a number key is assigned to an entry in aparticular mode, this feature is not supported whenyou long press the number key in another mode.A negative indicator tone sounds if the number keyis not associated to an entry.
2 Press the PTT button to make the call.The green LED lights up. The display shows theGroup Call icon at the top right corner. The firsttext line shows the caller alias. The second textline displays either the call status for a Private Callor All Call for All Call.
3 Wait for the Talk Permit Tone to end and speakclearly into the microphone if enabled.
4 Release the PTT button to listen.The green LED lights up when the target radioresponds. The display shows the destination alias.
5 If the Channel Free Indication feature is enabled,you hear a short alert tone the moment thetransmitting radio releases the PTT button,
Other S
ystems
245
English

indicating the channel is free for you to respond.Press the PTT button to respond to the call.The call ends when there is no voice activity for apredetermined period. The radio returns to thescreen you were on before initiating the call.
See Assigning Entries to Programmable NumberKeys on page 66 for more information.
Private Calls A Private Call is a call from an individual radio toanother individual radio.
There are two ways to set up a Private Call. The firsttype sets up the call after performing a radiopresence check, while the second type sets up thecall immediately. Only one of these types can beprogrammed to your radio by your dealer.
If your radio is programmed to perform a radiopresence check prior to setting up the Private Calland the target radio is not available:
• A tone sounds.• The display shows a negative mini notice.• The radio returns to the menu prior to initiating the
radio presence check.
See Privacy on page 312 for more information.
Responding to Private Calls Follow the procedure to respond to Private Calls onyour radio.
When you receive a Private Call:
• The green LED blinks.• The first line shows the subscriber alias or ID, and
the RSSI icon.• The second line displays Private Call and the
Private Call icon.• Your radio unmutes and the incoming call sounds
through the speaker.
1 Do one of the following:
• If the Channel Free Indication feature isenabled, you hear a short alert tone themoment the transmitting radio releases thePTT button, indicating the channel is free foryou to respond. Press the PTT button torespond to the call.
• If the Transmit Interrupt Remote Dekey featureis enabled, press the PTT button to stop anongoing interruptible call and free the channelfor you to respond.
Oth
er S
yste
ms
246
English
The green LED lights up.
2 Wait for the Talk Permit Tone to end and speakclearly into the microphone if enabled.
3 Release the PTT button to listen.The call ends when there is no voice activity for apredetermined period. The display shows CallEnded.
Making Private Calls Your radio must be programmed for you to initiate aPrivate Call. You hear a negative indicator tone whenyou initiate the call when this feature is not enabled.Follow the procedure to make Private Calls on yourradio.
1 Do one of the following:
• Select a channel with the active subscriberalias or ID.
• Press the programmed One Touch Accessbutton.
2 Press the PTT button to make the call.
If you release the PTT button while the radio issetting up the call, it exits without any indicationand returns to the previous screen.The green LED lights up. The display shows thePrivate Call icon, the subscriber alias, and callstatus.
3 Wait for the Talk Permit Tone to end and speakclearly into the microphone if enabled.
4 Release the PTT button to listen.The green LED blinks when the target radioresponds.
5 If the Channel Free Indication feature is enabled,you hear a short alert tone the moment thetransmitting radio releases the PTT button,indicating the channel is free for you to respond.Press the PTT button to respond to the call.The call ends when there is no voice activity for apredetermined period. The display shows CallEnded.
Other S
ystems
247
English

Making Private Calls by Using the Contacts List Follow the procedure to make Private Calls on yourradio by using the Contacts list.
1Press to access the menu.
2Press or to Contacts. Press to select.
3 Press or to the required alias or ID. Press
to select.
4 Press the PTT button to make the call.If you release the PTT button while the radio issetting up the call, it exits without any indicationand returns to the previous screen.The green LED lights up. The display shows thedestination alias.
5 Wait for the Talk Permit Tone to end and speakclearly into the microphone if enabled.
6 Release the PTT button to listen.The green LED blinks when the target radioresponds. The display shows the transmitting useralias or ID.
7 If the Channel Free Indication feature is enabled,you hear a short alert tone the moment thetransmitting radio releases the PTT button,indicating the channel is free for you to respond.Press the PTT button to respond to the call.The call ends when there is no voice activity for apredetermined period. A tone sounds. The displayshows Call Ended.
Making Private Calls by Using the Alias Search You can also use alias or alphanumeric search toretrieve the required subscriber alias. This feature isonly applicable while in Contacts. If you release thePTT button while the radio is setting up the call, itexits without any indication and returns to theprevious screen. Your radio may be programmed toperform a radio presence check before setting up thePrivate Call. If the target radio is not available, youhear a short tone and see Party Not Available onthe display; the radio returns to the menu beforeinitiating the radio presence check. Follow theprocedure to make Private Calls on your radio byusing the alias search.
Oth
er S
yste
ms
248
English

Note:
Press button or to exit alias search.If you release the PTT button while the radio issetting up the call, it exits without anyindication and returns to the previous screen.
1Press to access the menu.
2Press or to Contacts. Press to select.The display shows the entries in alphabeticalorder.
3 Enter the first character of the required alias.The display shows a blinking cursor.
4 Enter the rest of the characters of the requiredalias.The alias search is case-insensitive. If there aretwo or more entries with the same name, thedisplay shows the entry listed first in the list.The first text line shows the characters youentered. The following text lines show theshortlisted search results.
5 Press the PTT button to make the call.
The green LED lights up. The display shows thedestination ID, call type, and Private Call icon.
6 Wait for the Talk Permit Tone to end and speakclearly into the microphone if enabled.
7 Release the PTT button to listen.The green LED blinks when the target radioresponds.
8 If the Channel Free Indication feature is enabled,you hear a short alert tone the moment thetransmitting radio releases the PTT button,indicating the channel is free for you to respond.Press the PTT button to respond to the call.The call ends when there is no voice activity for apredetermined period. A tone sounds. The displayshows Call Ended.
Making Private Calls by Using the Manual Dial Follow the procedure to make Private Calls on yourradio by using the manual dial.
1Press to access the menu.
2Press or to Contacts. Press to select.
Other S
ystems
249
English
3Press or to Manual Dial. Press toselect.
4Press or to Radio Number. Press toselect.
5 Do one of the following:
•Enter the subscriber ID, and press toproceed.
• Edit the previously dialed subscriber ID, and
press to proceed.
6 Press the PTT button to make the call.The green LED lights up. The display shows thedestination alias.
7 Wait for the Talk Permit Tone to end and speakclearly into the microphone if enabled.
8 Release the PTT button to listen.The green LED lights up when the target radioresponds. The display shows the transmitting useralias or ID.
9 If the Channel Free Indication feature is enabled,you hear a short alert tone the moment thetransmitting radio releases the PTT button,indicating the channel is free for you to respond.Press the PTT button to respond to the call.The call ends when there is no voice activity for apredetermined period. A tone sounds. The displayshows Call Ended.
Making Private Calls by Using the ProgrammableNumber KeyFollow the procedure to make Private Calls on yourradio by using the programmable number key.
1 Long press the programmed number key to thepredefined alias or ID when you are on the Homescreen.If a number key is assigned to an entry in aparticular mode, this feature is not supported whenyou long press the number key in another mode.A negative indicator tone sounds if the number keyis not associated to an entry.
2 Press the PTT button to make the call.The green LED lights up. The display shows thePrivate Call icon at the top right corner. The first
Oth
er S
yste
ms
250
English

text line shows the caller alias. The second textline shows the call status.
3 Wait for the Talk Permit Tone to end and speakclearly into the microphone if enabled.
4 Release the PTT button to listen.The green LED blinks when the target radioresponds. The display shows the destination alias.
5 If the Channel Free Indication feature is enabled,you hear a short alert tone the moment thetransmitting radio releases the PTT button,indicating the channel is free for you to respond.Press the PTT button to respond to the call.The call ends when there is no voice activity for apredetermined period. A tone sounds. The radioreturns to the screen you were on before initiatingthe call.
See Assigning Entries to Programmable NumberKeys on page 66 for more information.
All CallsAn All Call is a call from an individual radio to everyradio on the channel. An All Call is used to makeimportant announcements, requiring full attention
from the user. The users on the channel cannotrespond to an All Call.Receiving All Calls
When you receive an All Call:
• A tone sounds.• The green LED blinks.• The display shows the caller ID information and
RSSI icon at the top right corner.• The first text line shows the All Call icon and All
Call.• Your radio unmutes and the incoming call sounds
through the speaker.
The radio returns to the screen before receiving theAll Call when the call ends.
An All Call does not wait for a predetermined periodbefore ending.
If the Channel Free Indication feature is enabled, youhear a short alert tone when the transmitting radioreleases the PTT button, indicating the channel isfree for you to use. You cannot respond to an All Call.
Note:The radio stops receiving the All Call if youswitch to a different channel while receiving
Other S
ystems
251
English

the call. You are not able to continue with anymenu navigation or editing until the call endsduring an All Call.
Making All Calls Your radio must be programmed for you to make anAll Call. Follow the procedure to make All Calls onyour radio.
1 Select a channel with the active All Call groupalias or ID.
2 Press the PTT button to make the call.The green LED lights up. The display shows theGroup Call icon and All Call.
3 Wait for the Talk Permit Tone to end and speakclearly into the microphone if enabled.Users on the channel cannot respond to an AllCall.
Making All Calls by Using the ProgrammableNumber KeyFollow the procedure to make All Calls on your radioby using the programmable number key.
1 Long press the programmed number key assignedto the predefined alias or ID when you are on theHome screen.If a number key is assigned to an entry in aparticular mode, this feature is not supported whenyou long press the number key in another mode.A negative indicator tone sounds if the number keyis not associated to an entry.
2 Press the PTT button to make the call.The green LED lights up.The first text line showsthe caller alias. The second text line shows the callstatus.
3 Wait for the Talk Permit Tone to end and speakclearly into the microphone if enabled.
4 Release the PTT button to listen.The green LED lights up when the target radioresponds. The display shows the destination alias.
5 If the Channel Free Indication feature is enabled,you hear a short alert tone the moment thetransmitting radio releases the PTT button,indicating the channel is free for you to respond.Press the PTT button to respond to the call.
Oth
er S
yste
ms
252
English

The call ends when there is no voice activity for apredetermined period. The radio returns to thescreen you were on prior to initiating the call.
See Assigning Entries to Programmable NumberKeys on page 66 for more information.
Phone Calls Making Phone Calls Follow the procedure to make Phone Calls on yourradio.
1 Press the programmed One Touch Accessbutton to the predefined alias or ID.If the entry for the One Touch Access button isempty, a negative indicator tone sounds. If theaccess code is not preconfigured in the ContactList, the display shows Access Code:.
2Enter the access code, and press to proceed.The access or deaccess code cannot be morethan 10 characters.
3 Press the PTT button to make the call.The green LED lights up. The display shows thePhone Call icon at the top right corner. The first
text line shows the subscriber alias. The secondtext line shows the call status.
If the call is successful:
• The DTMF Tone sounds.• You hear the dialing tone of the telephone
user.• The first text line shows the subscriber alias.• The display continues to show the Phone Call
icon at the top right corner.
If the call is unsuccessful:
• A tone sounds.• The display shows Phone Call Failed and
then, Access Code:.• If the access code has been preconfigured in
the Contacts list, your radio returns to thescreen you were on before initiating the call.
4 Press the PTT button to respond to the call.
5 Release the PTT button to listen.
6 Enter extra digits with the keypad if requested by
the call, and press to proceed.
Other S
ystems
253
English

If the call ends while you are entering the extradigits requested by the call, your radio returns tothe screen you were on before initiating the call.The DTMF Tone sounds. Your radio returns to theprevious screen.
7Press to end the call.
8 Do one of the following:
• If the deaccess code was not preconfigured,enter the deaccess code when the display
shows De-Access Code:, and press toproceed.
The radio returns to the previous screen.
• Press the programmed One Touch Accessbutton.
If the entry for the One Touch Access buttonis empty, a negative indicator tone sounds.
The DTMF Tone sounds and the display showsEnding Phone Call.
If the call ends successfully:
• A tone sounds.
• The display shows Call Ended.
If the call fails to end, the radio returns to thePhone Call screen. Repeat the last two steps orwait for the telephone user to end the call.
When the telephone user ends the call, a tonesounds and the display shows Call Ended.
Making Phone Calls by Using the Contacts List Follow the procedure to make Phone Calls on yourradio by using the Contacts list.
1Press to access the menu.
2Press or to Contacts. Press to select.The display shows the entries in alphabeticalorder.
3 Press or to the required alias or ID. Press
to select.When you press the PTT button while on thePhone Contacts screen:
• A negative indicator tone sounds.
Oth
er S
yste
ms
254
English

• The display shows Press OK to PlacePhone Call.
If the selected entry is empty:
• A negative indicator tone sounds.• The display shows Phone Call Invalid #.
4Press or to Call Phone. Press toselect.The display shows Access Code: if the accesscode was not preconfigured.
5Enter the access code, and press to proceed.The access or deaccess code cannot be morethan 10 characters.The first text line shows Calling. The second textline shows the subscriber alias or ID, and thePhone Call icon.
If the call is successful:
• The DTMF Tone sounds.• You hear the dialing tone of the telephone
user.• The first text line shows the subscriber alias or
ID, and the RSSI icon.
• The second text line shows Phone Call, andthe Phone Call icon.
If the call is unsuccessful:
• A tone sounds.• The display shows Phone Call Failed and
then, Access Code:.• Your radio returns to the screen you were on
prior to initiating the call if the access code hasbeen preconfigured in the Contacts list.
6 Press the PTT button to respond to the call.The RSSI icon disappears.
7 Release the PTT button to listen.
8 Enter extra digits with the keypad if requested by
the call, and press to proceed.If the call ends while you are entering the extradigits requested by the call, your radio returns tothe screen you were on prior to initiating the call.The DTMF Tone sounds. Your radio returns to theprevious screen.
9Press to end the call.
Other S
ystems
255
English
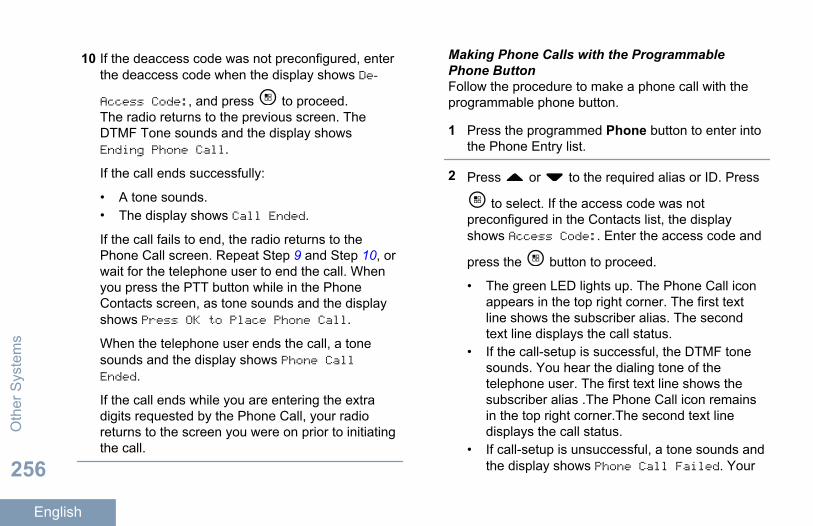
10 If the deaccess code was not preconfigured, enterthe deaccess code when the display shows De-
Access Code:, and press to proceed.The radio returns to the previous screen. TheDTMF Tone sounds and the display showsEnding Phone Call.
If the call ends successfully:
• A tone sounds.• The display shows Call Ended.
If the call fails to end, the radio returns to thePhone Call screen. Repeat Step 9 and Step 10, orwait for the telephone user to end the call. Whenyou press the PTT button while in the PhoneContacts screen, as tone sounds and the displayshows Press OK to Place Phone Call.
When the telephone user ends the call, a tonesounds and the display shows Phone CallEnded.
If the call ends while you are entering the extradigits requested by the Phone Call, your radioreturns to the screen you were on prior to initiatingthe call.
Making Phone Calls with the ProgrammablePhone Button Follow the procedure to make a phone call with theprogrammable phone button.
1 Press the programmed Phone button to enter intothe Phone Entry list.
2 Press or to the required alias or ID. Press
to select. If the access code was notpreconfigured in the Contacts list, the displayshows Access Code:. Enter the access code and
press the button to proceed.
• The green LED lights up. The Phone Call iconappears in the top right corner. The first textline shows the subscriber alias. The secondtext line displays the call status.
• If the call-setup is successful, the DTMF tonesounds. You hear the dialing tone of thetelephone user. The first text line shows thesubscriber alias .The Phone Call icon remainsin the top right corner.The second text linedisplays the call status.
• If call-setup is unsuccessful, a tone sounds andthe display shows Phone Call Failed. Your
Oth
er S
yste
ms
256
English

radio returns to the Access Code input screen.If the access code was preconfigured in theContacts list, the radio returns to the screenyou were on prior to initiating the call.
3 Press the PTT button to talk. Release the PTTbutton to listen.
4 To enter extra digits, if requested by the PhoneCall: Do one of the following:
• Press any keypad key to begin the input of theextra digits. The first line of the display showsExtra Digits:. The second line of the displayshows a blinking cursor. Enter the extra digits
and press the button to proceed. TheDTMF tone sounds and the radio returns to theprevious screen.
• Press One Touch Access button. The DTMFtone sounds. If the entry for the One TouchAccess button is empty, a negative indicatortone sounds.
5Press to end the call. If deaccess code wasnot preconfigured in the Contacts list, the first lineof the display shows De- Access Code:. The
second line of the display shows a blinking cursor.
Enter the deaccess code and press the buttonto proceed.
• The DTMF tone sounds and the display showsEnding Phone Call.
• If the end-call-setup is successful, a tonesounds and the display shows Call Ended.
• If the end-call-setup is unsuccessful, your radioreturns to the Phone Call screen. Repeat Step 3 and 5 or wait for the telephone user to endthe call.
• When you press PTT button while in the PhoneContacts screen, a tone sounds and thedisplay shows Press OK to Place PhoneCall.
• When the telephone user ends the call, a tonesounds and the display shows Phone CallEnded.
• If the call ends while you are entering the extradigits requested by the Phone Call, your radioreturns to the screen you were on prior toinitiating the call.
Other S
ystems
257
English

Note:
During channel access, press todismiss the call attempt and a tone sounds.
During the call, when you press OneTouch Access button with the deaccesscode preconfigured or enter the deaccesscode as the input for extra digits, your radioattempts to end the call.
Note:The access or deaccess code cannot bemore than 10 characters.
Dual Tone Multi FrequencyThe Dual Tone Multi Frequency (DTMF) featureallows the radio to operate in a radio system with aninterface to the telephone systems.
You can turn off the DTMF tone by disabling all radiotones and alerts. See Turning Radio Tones/Alerts Onor Off on page 104 for more information.
Responding to Phone Calls as Private CallsFollow the procedure to respond to Phone Calls asPrivate Calls on your radio.
When you receive a Phone Call as a Private Call:
• The display shows the Phone Call icon at the topright corner.
• The display shows Phone Call.• The green LED blinks.• Your radio unmutes and the incoming call sounds
through the speaker.
1 Press the PTT button to respond to the call.
2 Release the PTT button to listen.
3Press to end the call.The display shows Ending Phone Call.
Note:If Phone Call capability is not enabled inyour radio, the radio is not able toterminate a phone call as a private call.The telephone user must end the call. Therecipient user is only allowed to talkbackduring the call.
If the call ends successfully:
• A tone sounds.• The display shows Call Ended.
Oth
er S
yste
ms
258
English

If the call fails to end, the radio returns to thePhone Call screen. Repeat Step 3 or wait for thetelephone user to end the call.
Responding to Phone Calls as Group CallsFollow the procedure to respond to Phone Calls asGroup Calls on your radio.
When you receive a Phone Call as a Group Call:
• The display shows the Phone Call icon at the topright corner.
• The display shows Phone Call.• The green LED blinks.• Your radio unmutes and the incoming call sounds
through the speaker.
1 Press the PTT button to respond to the call.
2 Release the PTT button to listen.
3Press to end the call.The display shows Ending Phone Call.
Note:If Phone Call capability is not enabled inyour radio, the radio is not able toterminate a phone call as a group call. The
telephone user must end the call. Therecipient user is only allowed to talkbackduring the call.
If the call ends successfully:
• A tone sounds.• The display shows Call Ended.
If the call fails to end, the radio returns to thePhone Call screen. Repeat Step 3 or wait for thetelephone user to end the call.
Responding to Phone Calls as All CallsWhen you receive a Phone Call as an All Call, thereceiving radio is unable to talkback or respond. Therecipient user is also not allowed to end the All Call.
When you receive a Phone Call as an All Call:
• The display shows the Phone Call icon at the topright corner.
• The display shows either All Call, Site AllCall, or Multi Site Call depending on thetype of configuration and Phone Call.
• The green LED blinks.• Your radio unmutes and the incoming call sounds
through the speaker.
Other S
ystems
259
English
Stopping Radio Calls This feature allows you to stop an ongoing Group orPrivate Call to free the channel for transmission. Forexample, when a radio experiences a “stuckmicrophone” condition where the PTT button isinadvertently pressed by the user. Your radio must beprogrammed to allow you to use this feature. Followthe procedure to stop calls on your radio.
1 Press the programmed Transmit InterruptRemote Dekey button.The display shows Remote Dekey.
2 Wait for acknowledgment.If successful:
• A positive indicator tone sounds.• The display shows Remote Dekey Success.
If an interruptible call is stopped via this feature:
• The display shows Call Interrupted.• A negative indicator tone sounds on the
interrupted radio until the PTT button isreleased.
If unsuccessful:
• A negative indicator tone sounds.
Note:Check with your dealer or systemadministrator for more information.
Advanced FeaturesThis chapter explains the operations of the featuresavailable in your radio.
Note:Your dealer or system administrator may havecustomized your radio for your specific needs.Check with your dealer or systemadministrator for more information.
TalkaroundThis feature allows you to continue communicationwhen your repeater is not operating, or when yourradio is out of range from the repeater but withintalking range of other radios.
The talkaround setting is retained even after poweringdown.
Note:This feature is not applicable in CapacityPlus--Single-Site, Capacity Plus--Multi-Site,
Oth
er S
yste
ms
260
English

and Citizens Band channels that are in thesame frequency.
Toggling Between Repeater and TalkaroundModesFollow the procedure to toggle between Repeater andTalkaround modes on your radio.
1 Do one of the following:
• Press the programmed Repeater/Talkaroundbutton. Skip the following steps.
•Press to access the menu.
2Press or to Utilities. Press toselect.
3Press or to Radio Settings. Press to select.
4Press or to Talkaround. Press toselect.If enabled, appears besides Enabled. Ifdisabled, disappears beside Enabled.
The screen automatically returns to the previousscreen.
Monitor FeatureThe monitor feature is used to make sure that achannel is clear before transmitting.
Note:This feature is not applicable in CapacityPlus--Single-Site and Capacity Plus--Multi-Site.
Monitoring Channels
1 Press and hold the programmed Monitor button.The Monitor icon appears on the display and theLED lights up solid yellow.
If there is activity on the monitored channel:
• The display shows the Monitor icon.• You hear radio activity or total silence.• The yellow LED lights up.
You hear a “white noise” if the monitored channelis free.
2 Press the PTT button to talk. Release the PTTbutton to listen.
Other S
ystems
261
English
Permanent MonitorThe Permanent Monitor feature is used tocontinuously monitor a selected channel for activity.Turning Permanent Monitor On or OffFollow the procedure to turn Permanent Monitor on oroff on your radio.
Press the programmed Permanent Monitorbutton.
When the radio enters the mode:
• An alert tone sounds.• The yellow LED lights up.• The display shows Permanent Monitor On
and the Monitor icon.
When the radio exits the mode:
• An alert tone sounds.• The yellow LED turns off.• The display shows Permanent Monitor Off.
Home Channel ReminderThis feature provides a reminder when the radio isnot set to the home channel for a period of time.
If this feature is enabled via the CPS, when your radiois not set to the home channel for a period of time,the following occurs periodically:
• The Home Channel Reminder tone andannouncement sound.
• The first line of the display shows Non.• The second line shows Home Channel.
Muting the Home Channel ReminderWhen the Home Channel Reminder occurs, you cantemporarily mute the reminder.
Press the Silence Home Channel Reminderprogrammable button.The first line of the display shows HCR and thesecond line shows Silenced.
Setting New Home ChannelsWhen the Home Channel Reminder occurs, you canset a new home channel.
1 Do one of the following:
• Press the Reset Home Channelprogrammable button to set the currentchannel as the new Home Channel. Skip thefollowing steps.
Oth
er S
yste
ms
262
English

The first line of the display shows the channelalias and the second line shows New Home Ch.
•Press to access the menu.
2Press or to Utilities. Press toselect.
3Press or to Radio Settings. Press to select.
4Press or to Home Channel. Press toselect.
5 Press or to the desired new home channel
alias. Press to select.The display shows beside the selected homechannel alias.
Radio Check This feature allows you to determine if another radiois active in a system without disturbing the radio user.No audible or visual notification is shown on the
target radio. Your radio must be programmed to allowyou to use this feature.Sending Radio Checks Follow the procedure to send radio checks on yourradio.
1 Press the programmed Radio Check button.
2 Press or to the required alias or ID. Press
to select.The display shows a transitional mini notice,indicating the request is in progress. The greenLED lights up.
Wait for acknowledgment.
If you press when the radio is waiting foracknowledgment, a tone sounds, the radio terminatesall retries, and exits Radio Check mode.
If successful:
• A positive indicator tone sounds.• The display shows a positive mini notice.
If unsuccessful:
• A negative indicator tone sounds.
Other S
ystems
263
English

• The display shows a negative mini notice.
The radio returns to the subscriber alias or ID screen.
Sending Radio Checks by Using the Contacts List
Follow the procedure to send radio checks on yourradio by using the Contacts list.
1Press to access the menu.
2Press or to Contacts. Press to select.
3 Press or to the required alias or ID. Press
to select.
4Press or to Radio Check. Press toselect.The display shows a transitional mini notice,indicating the request is in progress. The greenLED lights up.
5 Wait for acknowledgment.
If you press when the radio is waiting foracknowledgement, a tone sounds, the radio
terminates all retries, and exits Radio Checkmode.If successful:
• A positive indicator tone sounds.• The display shows a positive mini notice.
If unsuccessful:
• A negative indicator tone sounds.• The display shows a negative mini notice.
The radio returns to the subscriber alias or IDscreen.
Sending Radio Checks by Using the Manual Dial Follow the procedure to send radio checks on yourradio by using the manual dial.
1Press to access the menu.
2Press or to Contacts. Press to select.
3Press or to Manual Dial. Press toselect.O
ther
Sys
tem
s
264
English
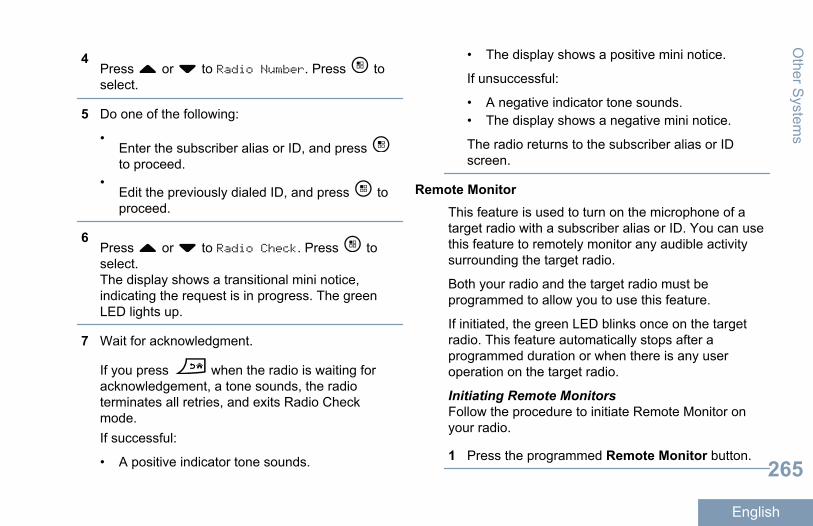
4Press or to Radio Number. Press toselect.
5 Do one of the following:
•Enter the subscriber alias or ID, and press to proceed.
•Edit the previously dialed ID, and press toproceed.
6Press or to Radio Check. Press toselect.The display shows a transitional mini notice,indicating the request is in progress. The greenLED lights up.
7 Wait for acknowledgment.
If you press when the radio is waiting foracknowledgement, a tone sounds, the radioterminates all retries, and exits Radio Checkmode.If successful:
• A positive indicator tone sounds.
• The display shows a positive mini notice.
If unsuccessful:
• A negative indicator tone sounds.• The display shows a negative mini notice.
The radio returns to the subscriber alias or IDscreen.
Remote MonitorThis feature is used to turn on the microphone of atarget radio with a subscriber alias or ID. You can usethis feature to remotely monitor any audible activitysurrounding the target radio.
Both your radio and the target radio must beprogrammed to allow you to use this feature.
If initiated, the green LED blinks once on the targetradio. This feature automatically stops after aprogrammed duration or when there is any useroperation on the target radio.
Initiating Remote MonitorsFollow the procedure to initiate Remote Monitor onyour radio.
1 Press the programmed Remote Monitor button.
Other S
ystems
265
English
2 Press or to the required alias or ID. Press
to select.The display shows a transitional mini notice,indicating the request is in progress. The greenLED lights up.
3 Wait for acknowledgment.If successful:
• A positive indicator tone sounds.• The display shows a positive mini notice.• The audio from the monitored radio starts
playing for a programmed duration, and thedisplay shows Rem. Monitor. Once the timerexpires, an alert tone sounds, and the LEDturns off.
If unsuccessful:
• A negative indicator tone sounds.• The display shows a negative mini notice.
Initiating Remote Monitors by Using the ContactsListFollow the procedure to initiate Remote Monitor onyour radio by using the Contacts list.
1Press to access the menu.
2Press or to Contacts. Press to select.
3 Press or to the required alias or ID. Press
to select.
4Press or to Remote Mon.. Press toselect.The display shows a transitional mini notice,indicating the request is in progress. The greenLED lights up.
5 Wait for acknowledgment.If successful:
• A positive indicator tone sounds.• The display shows a positive mini notice.• The audio from the monitored radio starts
playing for a programmed duration, and thedisplay shows Rem. Monitor. Once the timerexpires, an alert tone sounds, and the LEDturns off.
If unsuccessful:
Oth
er S
yste
ms
266
English

• A negative indicator tone sounds.• The display shows a negative mini notice.
Initiating Remote Monitors by Using the ManualDialFollow the procedure to initiate Remote Monitor onyour radio by using the manual dial.
1Press to access the menu.
2Press or to Contacts. Press to select.
3Press or to Manual Dial. Press toselect.
4Press or to Radio Number. Press toselect.
5 Do one of the following:
•Enter the subscriber alias or ID, and press to proceed.
•Edit the previously dialed ID, and press toproceed.
6Press or to Remote Mon.. Press toselect.The display shows a transitional mini notice,indicating the request is in progress. The greenLED lights up.
7 Wait for acknowledgment.If successful:
• A positive indicator tone sounds.• The display shows a positive mini notice.• The audio from the monitored radio starts
playing for a programmed duration, and thedisplay shows Rem. Monitor. Once the timerexpires, an alert tone sounds, and the LEDturns off.
If unsuccessful:
• A negative indicator tone sounds.• The display shows a negative mini notice.
Scan ListsScan lists are created and assigned to individualchannels or groups. Your radio scans for voiceactivity by cycling through the channel or group
Other S
ystems
267
English

sequence specified in the scan list for the currentchannel or group.
Your radio can support up to 250 scan lists, with amaximum of 16 members in a list.
You can add, delete, or prioritize channels by editinga scan list.
You can attach a new scan list to your radio via FrontPanel Programming.
The Priority icon appears on the left of the memberalias, if set, to indicate whether the member is on aPriority 1 or Priority 2 channel list. You cannot havemultiple Priority 1 or Priority 2 channels in a scan list.There is no Priority icon if priority is set to None.
Note:This feature is not applicable in Capacity Plus.
Setting Active Scan ListsFollow the procedure to set an active scan list.
1Press to access the menu.
2Press or to Scan.Press to select.
3Press or to Set Active List. Press to select.
4Press or to the required list. Press toselect.
The list selected is your active scan list.Viewing Entries in the Scan ListFollow the procedure to view the entries in the Scanlist on your radio.
1Press to access the menu.
2Press or to Scan. Press to select.
3Press or to View/Edit List. Press to select.
4 Press or to view each member on the list.
Oth
er S
yste
ms
268
English

Viewing Entries in the Scan List by Using theAlias SearchFollow the procedure to view entries in the Scan liston your radio by using the alias search.
1Press to access the menu.
2Press or to Scan. Press to select.
3Press or to View/Edit List. Press to select.
4 Enter the first character of the required alias.The display shows a blinking cursor.
5 Enter the rest of the characters of the requiredalias.The alias search is case-insensitive. If there aretwo or more entries with the same name, thedisplay shows the entry listed first in the list.The first text line shows the characters youentered. The following text lines show theshortlisted search results.
Adding New Entries to the Scan ListFollow the procedure to add new entries to the Scanlist on your radio.
1Press to access the menu.
2Press or to Scan. Press to select.
3Press or to View/Edit List. Press to select.
4Press or to Add Member. Press toselect.
5 Press or to the required alias or ID. Press
to select.
6 Press or to the required priority level.
Press to select.The display shows a positive mini notice and then,Add Another?.
7 Do one of the following:
Other S
ystems
269
English

• Press or to Yes to add another entry.
Press to select. Repeat Step 5 and Step 6.• Press or to No to save the current list.
Press to select.
Deleting Entries from the Scan ListFollow the procedure to delete entries on your radiofrom the Scan list.
1Press to access the menu.
2Press or to Scan. Press to select.
3Press or to View/Edit List. Press to select.
4 Press or to the required alias or ID. Press
to select.
5Press or to Delete. Press to select.The display shows Delete Entry?.
6 Do one of the following:
• Press or to Yes to delete the entry.
Press to select.
The display shows a positive mini notice.• Press or to No to return to the previous
screen. Press to select.
7 Repeat Step 4 to Step 6 to delete other entries.
8Long press to return to the Home screenafter deleting all required aliases or IDs.
Deleting Entries from the Scan List by Using theAlias SearchFollow the procedure to delete entries from the Scanlist on your radio by using the alias search.
1Press to access the menu.
2Press or to Scan. Press to select.
3Press or to View/Edit List. Press to select.
Oth
er S
yste
ms
270
English

4 Enter the first character of the required alias.The display shows a blinking cursor.
5 Enter the rest of the characters of the requiredalias.The alias search is case-insensitive. If there aretwo or more entries with the same name, thedisplay shows the entry listed first in the list.The first text line shows the characters youentered. The following text lines show theshortlisted search results.
6Press to select.
7Press or to Delete. Press to select.The display shows Delete Entry?.
8 Do one of the following:
• Press or to Yes to delete the entry.
Press to select.
The display shows a positive mini notice.
• Press or to No to return to the previous
screen. Press to select.
9 Repeat Step 3 to Step 7 to delete other entries.
10Long press to return to the Home screenafter deleting all required aliases or IDs.
ScanYour radio cycles through the programmed scan listfor the current channel looking for voice activity whenyou start a scan.
Note:This feature is not applicable in Capacity Plus.
The LED blinks yellow and the scan icon appears onthe status bar.
There are two ways of initiating scan:
Main ChannelScan (Manual)
Your radio scans all the channelsor groups in your scan list. Onentering scan, your radio may,depending on the settings,automatically start on the last
Other S
ystems
271
English

scanned active channel or group,or on the channel where scan wasinitiated.
Auto Scan(Automatic)
Your radio automatically startsscanning when you select achannel or group that has AutoScan enabled.
Turning Scan On or OffFollow the procedure to turn scan on or off on yourradio.
Note:While scanning, the radio only accepts data(e.g. text message, location, or PC data) ifreceived on its Selected Channel.
1Press to access the menu.
2Press or to Scan. Press to select.
3 Do one of the following:
•Press or to Turn On. Press toselect.
•Press or to Turn Off. Press toselect.
If scan is enabled:
• The display shows Scan On and Scan icon.• The yellow LED blinks.
If scan is disabled:
• The display shows Scan Off.• The Scan icon disappears.
Responding to Transmissions During ScanningDuring scanning, your radio stops on a channel orgroup where activity is detected. The radio stays onthat channel for a programmed duration known ashang time. Follow the procedure to respond totransmissions during scanning on your radio.
1 If the Channel Free Indication feature is enabled,you hear a short alert tone the moment thetransmitting radio releases the PTT button,indicating the channel is free for you to respond.Press the PTT button during hang time.The green LED lights up.O
ther
Sys
tem
s
272
English
2 Wait for the Talk Permit Tone to end and speakclearly into the microphone if enabled.
3 Release the PTT button to listen.The radio returns to scanning other channels orgroups if you do not respond within the hang time.
Deleting Nuisance ChannelsIf a channel continually generates unwanted calls ornoise, termed as Nuisance Channel, you cantemporarily remove the unwanted channel from thescan list. This capability does not apply to the channeldesignated as the Selected Channel. Follow theprocedure to delete nuisance channels on your radio.
1 When your radio locks on to an unwanted ornuisance channel, press the programmedNuisance Channel Delete button until you hear atone.A nuisance channel can only be deleted by usingthe programmed Nuisance Channel Deletebutton. This feature is not accessible through themenu.
2 Release the Nuisance Channel Delete button.The nuisance channel is deleted.
Restoring Nuisance ChannelsFollow the procedure to restore nuisance channels onyour radio.
Do one of the following:
• Turn the radio off and then power it on again.• Stop and restart a scan via the programmed
Scan button or menu.• Change the channel using the Channel Up/
Down button.
Contacts SettingsContacts provides address book capabilities on yourradio. Each entry corresponds to an alias or ID thatyou use to initiate a call. The entries arealphabetically sorted.
Each entry, depending on context, associates withthe different call types: Group Call, Private Call, AllCall, PC Call, or Dispatch Call.
PC Call and Dispatch Call are data-related. They areonly available with the applications. Refer to the dataapplications documentation for further details.
Additionally, Contacts menu allows you to assigneach entry to a programmable number key or more
Other S
ystems
273
English

on a keypad microphone. If an entry is assigned to anumber key, your radio can perform a quick dial onthe entry.
Note:You see a checkmark before each number keythat is assigned to an entry. If the checkmarkis before Empty, you have not assign anumber key to the entry.
Your radio supports a maximum of 1,000 Contacts listmembers.
Each entry within Contacts displays the followinginformation:
• Call Type• Call Alias• Call ID
Note:
You can add, or edit subscriber IDs for theDigital Contacts list. Deleting subscriber IDscan only be performed by your dealer.
If the Privacy feature is enabled on a channel,you can make privacy-enabled Group Calls,Private Calls, and All Calls on that channel.Only target radios with the same Privacy Key,
or the same Key Value and Key ID as yourradio will be able to decrypt the transmission.
Making a Call Alias SearchYou can also use alias or alphanumeric search toretrieve the required subscriber alias. This feature isonly applicable while in Contacts.
Note:
Press or to exit alias search. If yourelease the PTT button while the radio issetting up the call, it exits without anyindication and returns to the previous screen.Your radio may be programmed to perform aradio presence check prior to setting up thePrivate Call. If the target radio is not available,you hear a short tone and see negative mininotice on the display. The radio returns to themenu prior to initiating the radio presencecheck.
1Press to access the menu.
2Press or to Contacts. Press to select.The entries are alphabetically sorted.
Oth
er S
yste
ms
274
English
3 Key in the first character of the required alias. Ablinking cursor appears.
4 Use the keypad to type the required alias. Press to move one space to the left. Press .
Press the The first line of the display showsthe characters you keyed in. The next lines of thedisplay show the short listed search results. Thealias search is case-insensitive. If there are two ormore entries with the same name, the radiodisplays the entry that is listed first in the Contactslist.
5 Press the PTT button to make the call. The LEDlights up solid green. The display shows thedestination alias.
6 Wait for the Talk Permit Tone to finish (if enabled),and speak clearly into the microphone.
7 Release the PTT button to listen. When the targetradio responds, the LED blinks green, the radiounmutes and the response sounds through theradio’s speaker.
8 If the Channel Free Indication feature is enabled,you hear a short alert tone the moment thetransmitting radio releases the PTT button,indicating the channel is free for you to respond.Press the PTT button to respond. If there is novoice activity for a predetermined period of time,the call ends. The display shows Call Ended.
Making All Calls by Using the Alias Search You can also use alias or alphanumeric search toretrieve the required subscriber alias. This feature isonly applicable while in Contacts. If you release thePTT button while the radio is setting up the call, itexits without any indication and returns to theprevious screen. If the target radio is not available,you hear a short tone and see Party NotAvailable on the display; the radio returns to themenu prior to initiating the radio presence check.Follow the procedure to make All Calls on your radioby using the alias search.
Note:
Press button or to exit alias search.If you release the PTT button while the radio issetting up the call, it exits without anyindication and returns to the previous screen.
Other S
ystems
275
English

1Press to access the menu.
2Press or to Contacts. Press to select.The display shows the entries in alphabeticalorder.
3 Enter the first character of the required alias.The display shows a blinking cursor.
4 Enter the rest of the characters of the requiredalias.The alias search is case-insensitive. If there aretwo or more entries with the same name, thedisplay shows the entry listed first in the list.The first text line shows the characters youentered. The following text lines show theshortlisted search results.
5 Press the PTT button to make the call.The green LED lights up. The display shows thedestination ID, call type, and Group Call icon.
6 Wait for the Talk Permit Tone to end and speakclearly into the microphone if enabled.
7 Release the PTT button to listen.The green LED blinks when the target radioresponds.
8 If the Channel Free Indication feature is enabled,you hear a short alert tone the moment thetransmitting radio releases the PTT button,indicating the channel is free for you to respond.Press the PTT button to respond to the call.The call ends when there is no voice activity for apredetermined period. A tone sounds. The displayshows Call Ended.
Making Private Calls by Using the Alias Search You can also use alias or alphanumeric search toretrieve the required subscriber alias. This feature isonly applicable while in Contacts. If you release thePTT button while the radio is setting up the call, itexits without any indication and returns to theprevious screen. Your radio may be programmed toperform a radio presence check before setting up thePrivate Call. If the target radio is not available, youhear a short tone and see Party Not Available onthe display; the radio returns to the menu beforeinitiating the radio presence check. Follow the
Oth
er S
yste
ms
276
English

procedure to make Private Calls on your radio byusing the alias search.
Note:
Press button or to exit alias search.If you release the PTT button while the radio issetting up the call, it exits without anyindication and returns to the previous screen.
1Press to access the menu.
2Press or to Contacts. Press to select.The display shows the entries in alphabeticalorder.
3 Enter the first character of the required alias.The display shows a blinking cursor.
4 Enter the rest of the characters of the requiredalias.The alias search is case-insensitive. If there aretwo or more entries with the same name, thedisplay shows the entry listed first in the list.
The first text line shows the characters youentered. The following text lines show theshortlisted search results.
5 Press the PTT button to make the call.The green LED lights up. The display shows thedestination ID, call type, and Private Call icon.
6 Wait for the Talk Permit Tone to end and speakclearly into the microphone if enabled.
7 Release the PTT button to listen.The green LED blinks when the target radioresponds.
8 If the Channel Free Indication feature is enabled,you hear a short alert tone the moment thetransmitting radio releases the PTT button,indicating the channel is free for you to respond.Press the PTT button to respond to the call.The call ends when there is no voice activity for apredetermined period. A tone sounds. The displayshows Call Ended.
Making Group Calls by Using the Alias Search You can also use alias or alphanumeric search toretrieve the required subscriber alias. This feature is
Other S
ystems
277
English

only applicable while in Contacts. If you release thePTT button while the radio is setting up the call, itexits without any indication and returns to theprevious screen. If the target radio is not available,you hear a short tone and see Party NotAvailable on the display; the radio returns to themenu prior to initiating the radio presence check.Follow the procedure to make Group Calls on yourradio by using the alias search.
Note:
Press button or to exit alias search.If you release the PTT button while the radio issetting up the call, it exits without anyindication and returns to the previous screen.
1Press to access the menu.
2Press or to Contacts. Press to select.The display shows the entries in alphabeticalorder.
3 Enter the first character of the required alias.The display shows a blinking cursor.
4 Enter the rest of the characters of the requiredalias.The alias search is case-insensitive. If there aretwo or more entries with the same name, thedisplay shows the entry listed first in the list.The first text line shows the characters youentered. The following text lines show theshortlisted search results.
5 Press the PTT button to make the call.The green LED lights up. The display shows thedestination ID, call type, and Group Call icon.
6 Wait for the Talk Permit Tone to end and speakclearly into the microphone if enabled.
7 Release the PTT button to listen.The green LED blinks when the target radioresponds.
8 If the Channel Free Indication feature is enabled,you hear a short alert tone the moment thetransmitting radio releases the PTT button,indicating the channel is free for you to respond.Press the PTT button to respond to the call.
Oth
er S
yste
ms
278
English

The call ends when there is no voice activity for apredetermined period. A tone sounds. The displayshows Call Ended.
Making Phone Calls by Using the Alias Search You can also use alias or alphanumeric search toretrieve the required subscriber alias. This feature isonly applicable while in Contacts. If you release thePTT button while the radio is setting up the call, itexits without any indication and returns to theprevious screen. If the target radio is not available,you hear a short tone and see Party NotAvailable on the display; the radio returns to themenu prior to initiating the radio presence check.Follow the procedure to make Phone Calls on yourradio by using the alias search.
Note:
Press button or to exit alias search.If you release the PTT button while the radio issetting up the call, it exits without anyindication and returns to the previous screen.
1Press to access the menu.
2Press or to Contacts. Press to select.
The display shows the entries in alphabeticalorder.
3 Enter the first character of the required alias.The display shows a blinking cursor.
4 Enter the rest of the characters of the requiredalias.The alias search is case-insensitive. If there aretwo or more entries with the same name, thedisplay shows the entry listed first in the list.The first text line shows the characters youentered. The following text lines show theshortlisted search results.
5 Press the PTT button to make the call.The green LED lights up. The display shows thedestination ID, call type, and Phone Call icon.
6 Wait for the Talk Permit Tone to end and speakclearly into the microphone if enabled.
7 Release the PTT button to listen.The green LED blinks when the target radioresponds.
Other S
ystems
279
English
8 If the Channel Free Indication feature is enabled,you hear a short alert tone the moment thetransmitting radio releases the PTT button,indicating the channel is free for you to respond.Press the PTT button to respond to the call.The call ends when there is no voice activity for apredetermined period. A tone sounds. The displayshows Call Ended.
Assigning Entries to Programmable Number Keys
Follow the procedure to assign entries toprogrammable number keys on your radio.
1Press to access the menu.
2Press or to Contacts. Press to select.
3 Press or to the required alias or ID. Press
to select.
4Press or to Program Key. Press toselect.
5 Do one of the following:
• If the desired number key has not beenassigned to an entry, press or to the
desired number key. Press to select.• If the desired number key has been assigned
to an entry, the display shows The Key isAlready Assigned and then, the first text lineshows Overwrite?. Do one of the following:
Press or to Yes. Press to select.
The radio sounds a positive indicator tone andthe display shows Contact Saved and apositive mini notice.
Press or to No to return to the previousstep.
Removing Associations Between Entries andProgrammable Number Keys Follow the procedure to remove the associationsbetween entries and programmable number keys onyour radio.
1 Do one of the following:
Oth
er S
yste
ms
280
English

• Long press the programmed number key to therequired alias or ID. Proceed to Step 4.
•Press to access the menu.
2Press or to Contacts. Press to select.
3 Press or to the required alias or ID. Press
to select.
4Press or to Program Key. Press toselect.
5Press or to Empty. Press to select.The first text line shows Clear from all keys.
6Press or to Yes. Press to select.
Note:When an entry is deleted, the associationbetween the entry and its programmednumber key(s) is removed.
A positive indicator tone sounds. The displayshows Contact Saved.
The screen automatically returns to the previousmenu.
Adding New ContactsFollow the procedure to add new contacts on yourradio.
1Press to access the menu.
2Press or to Contacts. Press to select.
3Press or to New Contact. Press toselect.
4 Press or to select contact type Radio
Contact or Phone Contact. Press to select.
5 Enter the contact number with the keypad, and
press to proceed.
6 Enter the contact name with the keypad, and
press to proceed.
Other S
ystems
281
English

7 Press or to the required ringer type. Press
to select.A positive indicator tone sounds. The displayshows a positive mini notice.
Sending Messages to a ContactFollow the procedure to send a message to a contact.
1Press to access the menu.
2Press or to Contacts. Press toselect.
3Press or to New Contact. Press toselect.
4 Press or to the required contact type,either Radio Contact or Phone Contact. Press
to select.
5Press or to the required alias. Press toselect.
6Press or to Send Message. Press toselect.
7Press to send the message.
Call Indicator SettingsActivating or Deactivating Call Ringers for CallAlertsFollow the procedure to activate or deactivate callringers for Call Alerts on your radio.
1Press to access the menu.
2Press or to Utilities. Press toselect.
3Press or to Radio Settings. Press to select.
4Press or to Tones/Alert. Press toselect.O
ther
Sys
tem
s
282
English
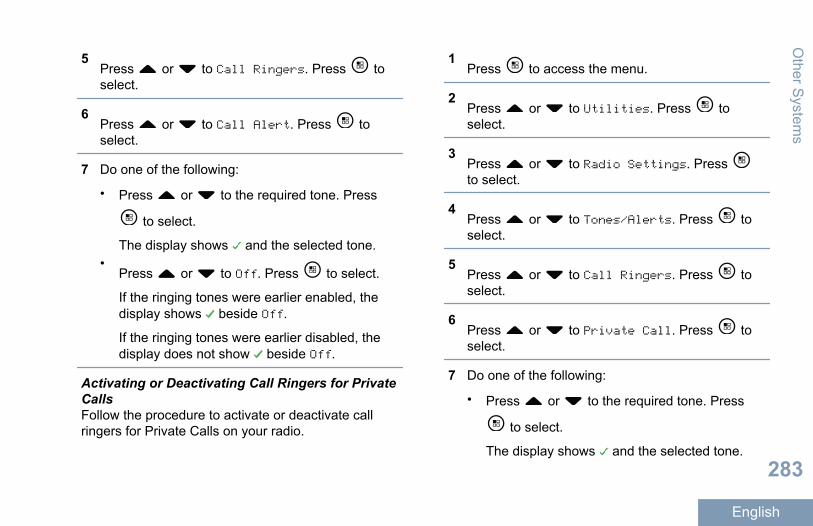
5Press or to Call Ringers. Press toselect.
6Press or to Call Alert. Press toselect.
7 Do one of the following:
• Press or to the required tone. Press
to select.
The display shows and the selected tone.•
Press or to Off. Press to select.
If the ringing tones were earlier enabled, thedisplay shows beside Off.
If the ringing tones were earlier disabled, thedisplay does not show beside Off.
Activating or Deactivating Call Ringers for PrivateCalls Follow the procedure to activate or deactivate callringers for Private Calls on your radio.
1Press to access the menu.
2Press or to Utilities. Press toselect.
3Press or to Radio Settings. Press to select.
4Press or to Tones/Alerts. Press toselect.
5Press or to Call Ringers. Press toselect.
6Press or to Private Call. Press toselect.
7 Do one of the following:
• Press or to the required tone. Press
to select.
The display shows and the selected tone.
Other S
ystems
283
English
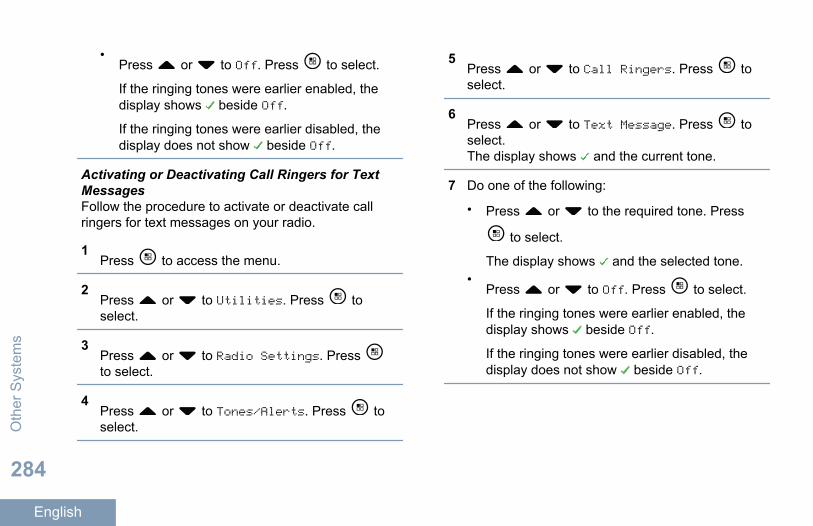
•Press or to Off. Press to select.
If the ringing tones were earlier enabled, thedisplay shows beside Off.
If the ringing tones were earlier disabled, thedisplay does not show beside Off.
Activating or Deactivating Call Ringers for TextMessages Follow the procedure to activate or deactivate callringers for text messages on your radio.
1Press to access the menu.
2Press or to Utilities. Press toselect.
3Press or to Radio Settings. Press to select.
4Press or to Tones/Alerts. Press toselect.
5Press or to Call Ringers. Press toselect.
6Press or to Text Message. Press toselect.The display shows and the current tone.
7 Do one of the following:
• Press or to the required tone. Press
to select.
The display shows and the selected tone.•
Press or to Off. Press to select.
If the ringing tones were earlier enabled, thedisplay shows beside Off.
If the ringing tones were earlier disabled, thedisplay does not show beside Off.
Oth
er S
yste
ms
284
English
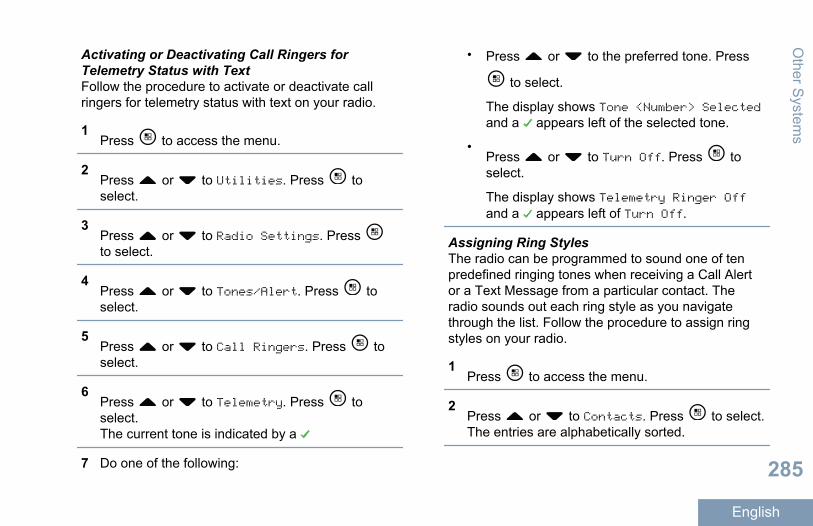
Activating or Deactivating Call Ringers forTelemetry Status with TextFollow the procedure to activate or deactivate callringers for telemetry status with text on your radio.
1Press to access the menu.
2Press or to Utilities. Press toselect.
3Press or to Radio Settings. Press to select.
4Press or to Tones/Alert. Press toselect.
5Press or to Call Ringers. Press toselect.
6Press or to Telemetry. Press toselect.The current tone is indicated by a
7 Do one of the following:
• Press or to the preferred tone. Press
to select.
The display shows Tone <Number> Selectedand a appears left of the selected tone.
•Press or to Turn Off. Press toselect.
The display shows Telemetry Ringer Offand a appears left of Turn Off.
Assigning Ring StylesThe radio can be programmed to sound one of tenpredefined ringing tones when receiving a Call Alertor a Text Message from a particular contact. Theradio sounds out each ring style as you navigatethrough the list. Follow the procedure to assign ringstyles on your radio.
1Press to access the menu.
2Press or to Contacts. Press to select.The entries are alphabetically sorted.
Other S
ystems
285
English
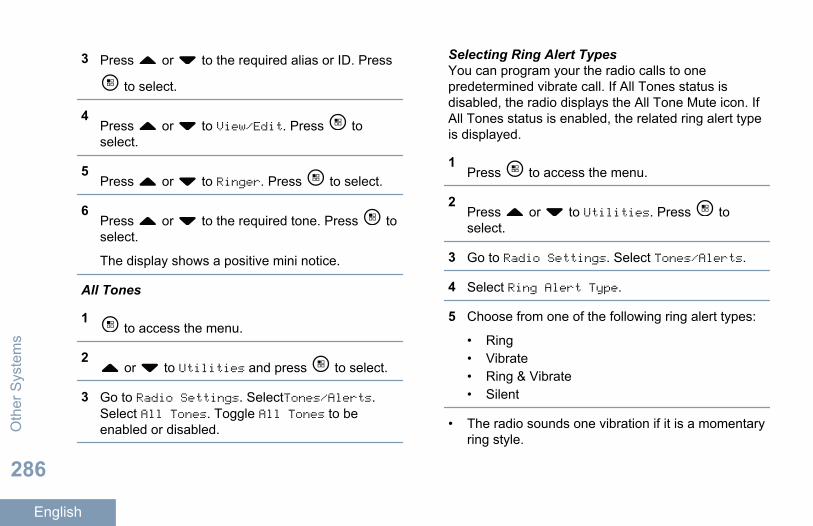
3 Press or to the required alias or ID. Press
to select.
4Press or to View/Edit. Press toselect.
5Press or to Ringer. Press to select.
6Press or to the required tone. Press toselect.
The display shows a positive mini notice.
All Tones
1 to access the menu.
2 or to Utilities and press to select.
3 Go to Radio Settings. SelectTones/Alerts.Select All Tones. Toggle All Tones to beenabled or disabled.
Selecting Ring Alert TypesYou can program your the radio calls to onepredetermined vibrate call. If All Tones status isdisabled, the radio displays the All Tone Mute icon. IfAll Tones status is enabled, the related ring alert typeis displayed.
1Press to access the menu.
2Press or to Utilities. Press toselect.
3 Go to Radio Settings. Select Tones/Alerts.
4 Select Ring Alert Type.
5 Choose from one of the following ring alert types:
• Ring• Vibrate• Ring & Vibrate• Silent
• The radio sounds one vibration if it is a momentaryring style.
Oth
er S
yste
ms
286
English

• The radio vibrates repetitively if it is a repetitivering style.
• When set to Ring & Vibrate, the radio sounds aspecific ring tone if there is any incoming radiotransaction (i.e. Call Alert, Message or Job Ticket).It sounds like a good key tone or missed call. If thenotification list is not empty, the radio repeats avibration every 5 minutes.
Configuring Vibrate Style
Note:The programmed Vibrate Style button isassigned by your dealer or systemadministrator. Check with your dealer orsystem administrator to determine how yourradio has been programmed.
You can configure the vibrate style by performing oneof the following actions.
• Press the programmed Vibrate Style button toaccess the Vibrate Style menu.a) Press or to Short, Medium, or Long
and press to select.
• Access this feature via the menu.
a)Press to access the menu.
b)Press or to Utilities and press to select.
c) Press or to Radio Settings and
press to select.d) Press or to Tones/Alerts and press
to select.e) Press or to Vibrate Style and press
to select.f) Press or to Short, Medium, or Long
and press to select.
Escalating Alarm Tone VolumeThe radio can be programmed to continually alert,when a radio call remains unanswered. This is doneby automatically increasing the alarm tone volumeover time. This feature is known as Escalert.
Other S
ystems
287
English

Call Log FeaturesYour radio keeps track of all recent outgoing,answered, and missed Private Calls. The call logfeature is used to view and manage recent calls.
Missed Call Alerts may be included in the call logs,depending on the system configuration on your radio.You can perform the following tasks in each of yourcall lists:
• Store Alias or ID to Contacts• Delete Call• Delete All Calls• View Details
Viewing Recent CallsFollow the procedure to view recent calls on yourradio.
1Press to access the menu.
2Press or to Call Log. Press to select.
3Press or to the preferred list. Press toselect.
The options are Missed, Answered, and Outgoinglists.The display shows the most recent entry.
4 Press or to view the list.You can start a Private Call with the alias or ID thedisplay is currently showing by pressing the PTTbutton.
Responding to Missed CallsWhenever a call is missed, your radio displays amissed call message in the notification list. Thedisplay shows Missed Calls.
Do one of the following:
•Press to view the missed call ID.
The missed call log list appears on display.•
Press to store or delete the entry.
Oth
er S
yste
ms
288
English

Storing Aliases or IDs from the Call List Follow the procedure to store aliases or IDs on yourradio from the Call list.
1Press to access the menu.
2Press or to Call Log. Press to select.
3Press or to the required list. Press toselect.
4 Press or to the required alias or ID. Press
to select.
5Press or to Store. Press to select.The display shows a blinking cursor.
6 Enter the rest of the characters of the required
alias. Press to select.You can store an ID without an alias.The display shows a positive mini notice.
Deleting Calls from the Call ListFollow the procedure to delete calls on your radiofrom the Call list.
1Press to access the menu.
2Press or to Call Log. Press to select.
3Press or to the required list. Press toselect.If the list is empty:
• A tone sounds.• The display shows List Empty.
4 Press or to the required alias or ID. Press
to select.
5Press or to Delete Entry?. Press toselect.
6 Do one of the following:
•Press to select Yes to delete the entry.
Other S
ystems
289
English

The display shows Entry Deleted.•
Press or to No. Press to select.
The radio returns to the previous screen.
Viewing Details from the Call List Follow the procedure to view details on your radiofrom the Call list.
1Press to access the menu.
2Press or to Call Log. Press to select.
3Press or to the required list. Press toselect.
4 Press or to the required alias or ID. Press
to select.
5Press or to View Details. Press toselect.The display shows the details.
Call Alert OperationCall Alert paging enables you to alert a specific radiouser to call you back when they are able to do so.
This feature is applicable for subscriber aliases or IDsonly and is accessible through the menu viaContacts, manual dial, or a programmed One TouchAccess button.
Making Call AlertsFollow the procedure to make Call Alerts on yourradio.
1 Press the programmed One Touch Accessbutton.The display shows Call Alert and thesubscriber alias or ID. The green LED lights up.
2 Wait for acknowledgment.If the Call Alert acknowledgment is received, thedisplay shows a positive mini notice.
If the Call Alert acknowledgment is not received,the display shows a negative mini notice.
Oth
er S
yste
ms
290
English
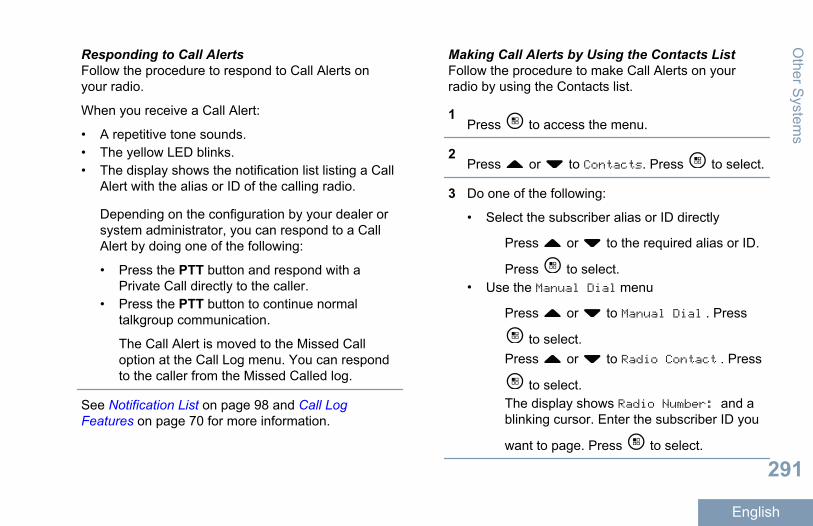
Responding to Call AlertsFollow the procedure to respond to Call Alerts onyour radio.
When you receive a Call Alert:
• A repetitive tone sounds.• The yellow LED blinks.• The display shows the notification list listing a Call
Alert with the alias or ID of the calling radio.
Depending on the configuration by your dealer orsystem administrator, you can respond to a CallAlert by doing one of the following:
• Press the PTT button and respond with aPrivate Call directly to the caller.
• Press the PTT button to continue normaltalkgroup communication.
The Call Alert is moved to the Missed Calloption at the Call Log menu. You can respondto the caller from the Missed Called log.
See Notification List on page 98 and Call LogFeatures on page 70 for more information.
Making Call Alerts by Using the Contacts ListFollow the procedure to make Call Alerts on yourradio by using the Contacts list.
1Press to access the menu.
2Press or to Contacts. Press to select.
3 Do one of the following:
• Select the subscriber alias or ID directly
Press or to the required alias or ID.
Press to select.• Use the Manual Dial menu
Press or to Manual Dial . Press
to select.Press or to Radio Contact . Press
to select.The display shows Radio Number: and ablinking cursor. Enter the subscriber ID you
want to page. Press to select.
Other S
ystems
291
English

4Press or to Call Alert. Press toselect.The display shows Call Alert and thesubscriber alias or ID. The green LED lights up.
5 Wait for acknowledgment.If the Call Alert acknowledgment is received, thedisplay shows a positive mini notice.
If the Call Alert acknowledgment is not received,the display shows a negative mini notice.
Emergency OperationAn Emergency Alarm is used to indicate a criticalsituation. You are able to initiate an Emergency atany time even when there is activity on the currentchannel.
Your dealer can set the duration of a button press forthe programmed Emergency button, except for longpress, which is similar with all other buttons:
Short Press Duration between 0.05 seconds and0.75 seconds.
Long Press Duration between 1.00 second and3.75 seconds.
The Emergency button is assigned with theEmergency On/Off feature. Check with your dealer forthe assigned operation of the Emergency button.
Note:
If short press the Emergency button isassigned to turn on the Emergency mode,then long press the Emergency button isassigned to exit the Emergency mode.
If long press the Emergency button isassigned to turn on the Emergency mode,then short press the Emergency button isassigned to exit the Emergency mode.
Your radio supports three Emergency Alarms:
• Emergency Alarm• Emergency Alarm with Call• Emergency Alarm with Voice to Follow
In addition, each alarm has the following types:
Regular Radio transmits an alarm signal andshows audio and/or visual indicators.
Silent Radio transmits an alarm signal withoutany audio or visual indicators. Radioreceives calls without any sound through
Oth
er S
yste
ms
292
English

the speaker, until the programmed hotmic transmission period is over and/oryou press the PTT button.
SilentwithVoice
Radio transmits an alarm signal withoutany audio or visual indicators, but allowincoming calls to sound through thespeaker. If hot mic is enabled, theincoming calls sound through thespeaker after the programmed hot mictransmission period is over. Theindicators only appear once you pressthe PTT button.
Note:Only one of the Emergency Alarms above canbe assigned to the programmed Emergencybutton.
Sending Emergency AlarmsThis feature allows you to send an Emergency Alarm,a non-voice signal, which triggers an alert indicationon a group of radios. Follow the procedure to sendEmergency Alarms on your radio.
Your radio does not display any audio or visualindicators during Emergency mode when it is set toSilent.
1 Press the programmed Emergency On button.You see the following:
• The display shows Tx Alarms and thedestination alias.
The green LED lights up. The Emergency iconappears.
Note:If programmed, the Emergency Searchtone sounds. This tone is muted when theradio transmits or receives voice, and stopswhen the radio exits Emergency mode.The Emergency Search tone can beprogrammed via the CPS.
2 Wait for acknowledgment.If successful:
• The Emergency tone sounds.• The green LED blinks.• The display shows Alarm Sent.
If unsuccessful after all retries have beenexhausted:
• A tone sounds.• The display shows Alarm Failed.
Other S
ystems
293
English

The radio exits the Emergency Alarm mode andreturns to the Home screen.
Sending Emergency Alarms with CallThis feature allows you to send an Emergency Alarmwith Call to a group of radios. Uponacknowledgement by a radio within the group, thegroup of radios can communicate over a programmedEmergency channel.
Follow the procedure to send Emergency Alarms withcall on your radio.
1 Press the programmed Emergency On button.You see the following:
• The display shows Sending Alarm, whichalternates with your radio ID.
The green LED lights up. The Emergency iconappears.
Note:If programmed, the Emergency Searchtone sounds. This tone is muted when theradio transmits or receives voice, and stopswhen the radio exits Emergency mode.The Emergency Search tone can be
programmed by your dealer or systemadministrator.
2 Wait for acknowledgment.If successful:
• The Emergency tone sounds.• The green LED blinks.• The display shows Alarm Sent.
3 Press the PTT button to make the call.The green LED lights up. The display shows theGroup Call icon.
4 Wait for the Talk Permit Tone to end and speakclearly into the microphone if enabled.
5 Release the PTT button to listen.The display shows the caller and group aliases.
6 If the Channel Free Indication feature is enabled,you hear a short alert tone the moment thetransmitting radio releases the PTT button,indicating the channel is free for you to respond.Press the PTT button to respond to the call.
7 Press the Emergency Off button to exit theEmergency mode.
Oth
er S
yste
ms
294
English

The radio returns to the Home screen.
Sending Emergency Alarms with Voice to Follow This feature allows you to send an Emergency Alarmwith Voice to Follow to a group of radios. Your radiomicrophone is automatically activated, allowing you tocommunicate with the group of radios withoutpressing the PTT button. This activated microphonestate is also known as hot mic.
If your radio has Emergency Cycle Mode enabled,repetitions of hot mic and receiving period are madefor a programmed duration. During Emergency CycleMode, received calls sound through the speaker.
If you press the PTT button during the programmedreceiving period, you hear a prohibit tone, indicatingthat you should release the PTT button. The radioignores the PTT button press and remains inEmergency mode.
If you press the PTT button during hot mic, andcontinue to press it after the hot mic duration expires,the radio continues to transmit until you release thePTT button.
If the Emergency Alarm request fails, the radio doesnot retry to send the request, and enters the hot micstate directly.
Note:Some accessories may not support hot mic.Check with your dealer or systemadministrator for more information.
Follow the procedure to send Emergency Alarms withvoice to follow on your radio.
1 Press the programmed Emergency On button.You see the following:
• The display shows Tx Alarm and thedestination alias.
The green LED lights up. The Emergency iconappears.
2 Once the display shows Alarm Sent, speakclearly into the microphone.
The radio automatically stops transmitting when:
• The cycling duration between hot mic andreceiving calls expires, if Emergency CycleMode is enabled.
• The hot mic duration expires, if EmergencyCycle Mode is disabled.
Other S
ystems
295
English

Receiving Emergency AlarmsFollow the procedure to receive Emergency Alarmson your radio.
When you receive an Emergency Alarm:
• A tone sounds.• The red LED blinks.• The display shows the Emergency icon, and the
Emergency caller alias or if there is more than onealarm, all emergency caller aliases are displayedin an Alarm List.
1 Do one of the following:
•If only one alarm, press to view moredetails.
• If more than one alarm, press or to the
required alias, and press to view moredetails.
2Press to view the action options.
3Press and select Yes to exit the Alarm list.
4Press to access the menu.
5 Select Alarm List to revisit the Alarm list.
Responding to Emergency AlarmsFollow the procedure to respond to EmergencyAlarms on your radio.
1Press or to the required alias or ID.
2 If the Channel Free Indication feature is enabled,you hear a short alert tone the moment thetransmitting radio releases the PTT button,indicating the channel is free for you to respond.Press the PTT button to transmit non-emergencyvoice to the same group the Emergency Alarmtargeted.The green LED lights up. Your radio remains inthe Emergency mode.
3 Wait for the Talk Permit Tone to end and speakclearly into the microphone if enabled.
4 Release the PTT button to listen.When the emergency initiating radio responds:
• The green LED blinks.
Oth
er S
yste
ms
296
English

• The display shows the Group Call icon and ID,transmitting radio ID, and the Alarm list.
Emergency voice can only be transmitted by theemergency initiating radio. All other radios, includingthe emergency receiving radio, transmit non-emergency voice.Exiting Emergency Mode After Receiving theEmergency AlarmFollow the procedure to exit Emergency mode afterreceiving Emergency alarm.
Delete the alarm items.
Deleting an Alarm Item from the Alarm ListFollow the procedure to delete the alarm items fromthe Alarm List, to exit Emergency mode.
1Press to access the menu.
2Press or to Alarm List. Press toselect.
3 Press or to the required alarm item. Press
to select.
4Press or to Delete. Press to select.
Reinitiating Emergency ModeThis feature is only applicable to the radio sendingthe Emergency Alarm. Follow the procedure toreinitiate Emergency mode on your radio.
Do one of the following:
• Change the channel while the radio is inEmergency mode.
The radio exits the Emergency mode, andreinitiates Emergency, if Emergency Alarm isenabled on the new channel.
• Press the programmed Emergency On buttonduring an Emergency initiation or transmissionstate.
The radio exits this state, and reinitiatesEmergency.
Exiting Emergency Mode After Sending theEmergency AlarmThis feature is only applicable to the radio sendingthe Emergency Alarm.
Your radio exits Emergency mode when:
Other S
ystems
297
English

• An acknowledgment is received (for EmergencyAlarm only).
• All retries to send the alarm have been exhausted.• Your radio is turned off.
Note:Your radio does not reinitiate theEmergency mode automatically when it ispowered up again.
Follow the procedure to exit Emergency mode onyour radio.
Do one of the following:
• Press the programmed Emergency Off button.• Change the channel to a new channel that has
no emergency system configured.
The display shows No Emergency.
Man Down
Note:This feature is applicable to SL7550e/SL7590e/SL7580e only.
This feature prompts an emergency to be raised ifthere is a change in the motion of the radio, such as
the tilt of the radio, motion and/or the lack of motionfor a predefined time.
Following a change in the motion of the radio for aprogrammed duration, the radio pre-warns the uservia an audio indicator indicating that a change inmotion is detected.
If there is still no acknowledgment by the user beforethe predefined reminder timer expires, the radioinitiates an Emergency Alarm or an Emergency Call.You can program the reminder timer via CPS.
Turning the Man Down Feature On or Off
Note:
This feature is applicable to SL7550e/SL7590e/SL7580e only. The programmedMan Down button and Man Down settings areassigned via CPS. Check with your dealer orsystem administrator to determine how yourradio has been programmed.
If you disable the Man Down feature, theprogrammed alert tone sounds repeatedly untilthe Man Down feature is enabled. A devicefailure tone sounds when the Man Downfeature fails while powering up. The device
Oth
er S
yste
ms
298
English
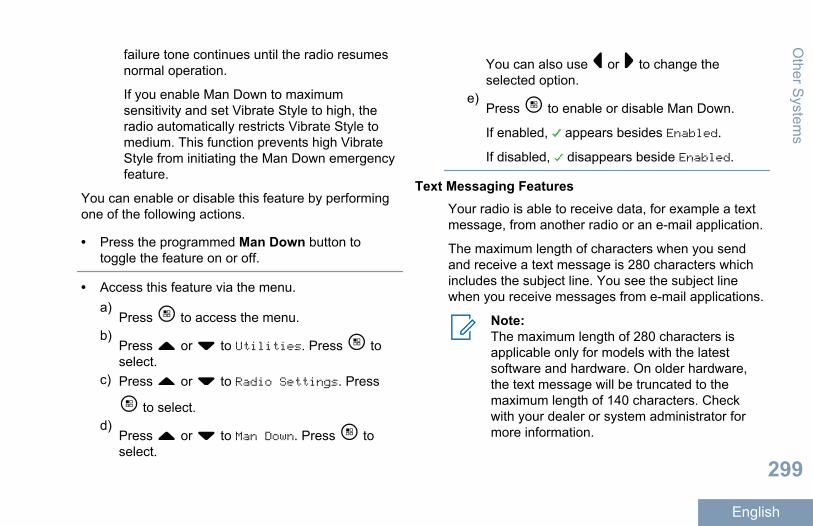
failure tone continues until the radio resumesnormal operation.
If you enable Man Down to maximumsensitivity and set Vibrate Style to high, theradio automatically restricts Vibrate Style tomedium. This function prevents high VibrateStyle from initiating the Man Down emergencyfeature.
You can enable or disable this feature by performingone of the following actions.
• Press the programmed Man Down button totoggle the feature on or off.
• Access this feature via the menu.a)
Press to access the menu.b)
Press or to Utilities. Press toselect.
c) Press or to Radio Settings. Press
to select.d)
Press or to Man Down. Press toselect.
You can also use or to change theselected option.
e)Press to enable or disable Man Down.
If enabled, appears besides Enabled.
If disabled, disappears beside Enabled.
Text Messaging Features Your radio is able to receive data, for example a textmessage, from another radio or an e-mail application.
The maximum length of characters when you sendand receive a text message is 280 characters whichincludes the subject line. You see the subject linewhen you receive messages from e-mail applications.
Note:The maximum length of 280 characters isapplicable only for models with the latestsoftware and hardware. On older hardware,the text message will be truncated to themaximum length of 140 characters. Checkwith your dealer or system administrator formore information.
Other S
ystems
299
English
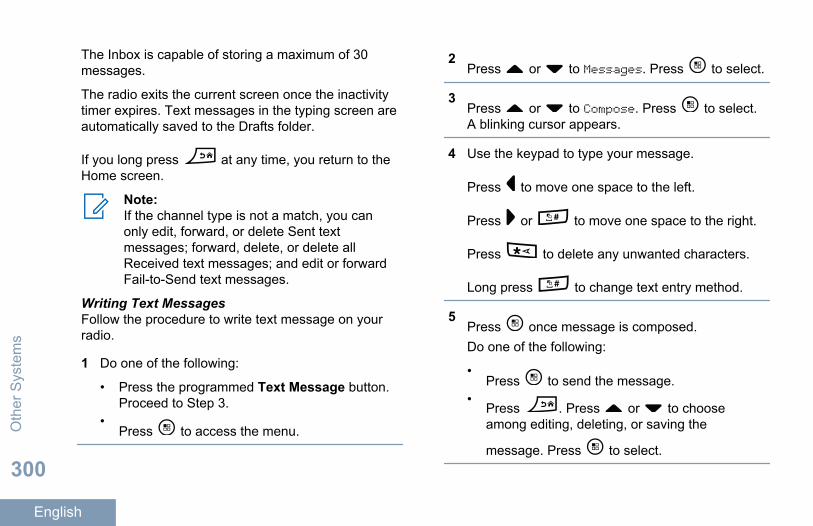
The Inbox is capable of storing a maximum of 30messages.
The radio exits the current screen once the inactivitytimer expires. Text messages in the typing screen areautomatically saved to the Drafts folder.
If you long press at any time, you return to theHome screen.
Note:If the channel type is not a match, you canonly edit, forward, or delete Sent textmessages; forward, delete, or delete allReceived text messages; and edit or forwardFail-to-Send text messages.
Writing Text MessagesFollow the procedure to write text message on yourradio.
1 Do one of the following:
• Press the programmed Text Message button.Proceed to Step 3.
•Press to access the menu.
2Press or to Messages. Press to select.
3Press or to Compose. Press to select.A blinking cursor appears.
4 Use the keypad to type your message.
Press to move one space to the left.
Press or to move one space to the right.
Press to delete any unwanted characters.
Long press to change text entry method.
5Press once message is composed.Do one of the following:
•Press to send the message.
•Press . Press or to chooseamong editing, deleting, or saving the
message. Press to select.
Oth
er S
yste
ms
300
English

Sending Text MessagesFollow the procedure to send text message on yourradio.
It is assumed that you have a newly written textmessage or a saved text message.
Select the message recipient. Do one of thefollowing:
• Press or to the required alias or ID.
Press to select.•
Press or to Manual Dial. Press toselect. The first line of the display shows RadioNumber:. The second line of the display showsa blinking cursor. Key in the subscriber alias or
ID. Press .
The display shows transitional mini notice,confirming your message is being sent.
If successful:
• A tone sounds.• The display shows positive mini notice.
If unsuccessful:
• A low tone sounds.• The display shows negative mini notice.• The message is moved to the Sent Items
folder.• The message is marked with a Send Failed
icon.
Note:For a newly written text message, the radioreturns you to the Resend option screen.
Sending Quick Text Messages Follow the procedure to send predefined Quick Textmessages on your radio to a predefined alias.
1 Do one of the following:
• Press the programmed Text Message button.Proceed to 3.
•Press to access the menu.
2Press or to Messages. Press to select.
3Press or to Quick Text. Press toselect.
Other S
ystems
301
English

4 Press or to the required Quick Text
message. Press to select.If required, use the keypad to edit the message.
5Press once the message is composed.
6 Do the following to select the recipient and sendthe message.a) Press or to the required alias or ID.
Press to select.b)
Press or to Manual Dial. Press toselect.The first line of the display shows RadioNumber: and the second line shows a blinkingcursor.
c)Key in the subscriber alias or ID and press .
The display shows a transitional mini notice,confirming that your message is being sent.
7 Wait for acknowledgment.If successful:
• A positive indicator tone sounds.
• The display shows a positive mini notice.
If unsuccessful:
• A negative indicator tone sounds.• The display shows a negative mini notice.
Saved Text MessagesYou can save a text message to send it at a latertime.
If a PTT button press or a mode change causes theradio to exit the text message writing/editing screenwhile you are in the process of writing or editing a textmessage, your current text message is automaticallysaved to the Drafts folder.
The most recent saved text message is always addedto the top of the Drafts list.
The Drafts folder stores a maximum of ten (10) lastsaved messages. When the folder is full, the nextsaved text message automatically replaces the oldesttext message in the folder.
Viewing Saved Text MessagesFollow the procedure to view saved text message onyour radio.
1 Do one of the following:
Oth
er S
yste
ms
302
English

• Press the programmed Text Message button.Proceed to Step 3.
•Press to access the menu.
2Press or to Messages. Press to select.
3Press or to Drafts. Press to select.
4 Press or to the required message. Press
to select.
Editing Saved Text MessagesFollow the procedure to edit saved text message onyour radio.
1Press while viewing the message.
2Press or to Edit. Press to select.A blinking cursor appears.
3 Use the keypad to type your message.
Press to move one space to the left.
Press or to move one space to the right.
Press to delete any unwanted characters.
Long press to change text entry method.
4Press once message is composed.Do one of the following:
•Press or to Send. Press to sendthe message.
•Press . Press or to choosebetween saving or deleting the message. Press
to select.
Deleting Saved Text Messages from the DraftsFolderFollow the procedure to delete saved text messagefrom drafts on your radio.
1 Do one of the following:
• Press the programmed Text Message button.Proceed to Step 3.
Other S
ystems
303
English
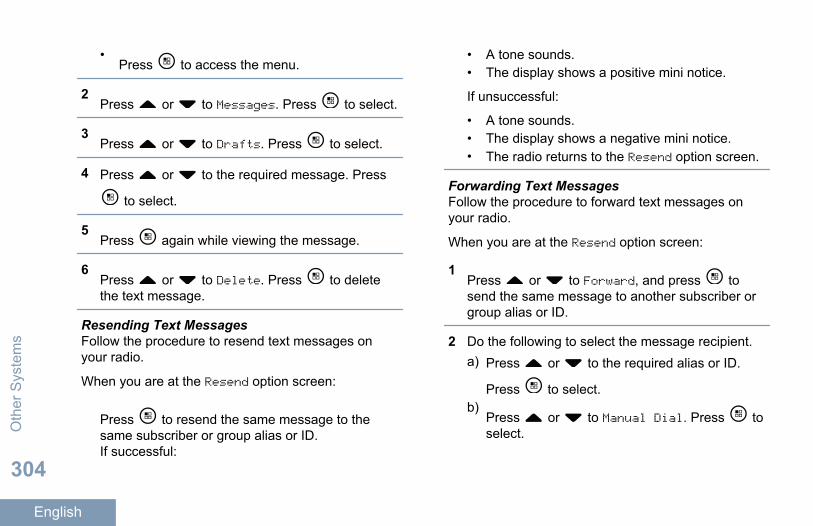
•Press to access the menu.
2Press or to Messages. Press to select.
3Press or to Drafts. Press to select.
4 Press or to the required message. Press
to select.
5Press again while viewing the message.
6Press or to Delete. Press to deletethe text message.
Resending Text MessagesFollow the procedure to resend text messages onyour radio.
When you are at the Resend option screen:
Press to resend the same message to thesame subscriber or group alias or ID.If successful:
• A tone sounds.• The display shows a positive mini notice.
If unsuccessful:
• A tone sounds.• The display shows a negative mini notice.• The radio returns to the Resend option screen.
Forwarding Text Messages Follow the procedure to forward text messages onyour radio.
When you are at the Resend option screen:
1Press or to Forward, and press tosend the same message to another subscriber orgroup alias or ID.
2 Do the following to select the message recipient.a) Press or to the required alias or ID.
Press to select.b)
Press or to Manual Dial. Press toselect.O
ther
Sys
tem
s
304
English

The first line of the display shows RadioNumber: and the second line shows a blinkingcursor.
c)Key in the subscriber alias or ID and press .
The displays shows TextMessage:<Subscriber/Group Alias or ID>,confirming that your message is being sent.
3 Wait for acknowledgment.If successful:
• A tone sounds.• The display shows a positive mini notice.
If unsuccessful:
• A tone sounds.• The display shows a negative mini notice.
Editing Text Messages
Select Edit to edit the message.
Note:If a subject line is present (for messagesreceived from an e-mail application), youcannot edit it.
1Press or to Edit. Press to select.The display shows a blinking cursor.
2 Use the keypad to edit your message.
•Press to move one space to the left.
•Press or to move one space to theright.
•Press to delete any unwantedcharacters.
•Long press to change text entry method.
3Press once message is composed.
4 Do one of the following:
•Press or to Send and press to sendthe message.
•Press or to Save and press to savethe message to the Drafts folder.
•Press to edit the message.
Other S
ystems
305
English

•Press to choose between deleting themessage or saving it to the Drafts folder.
Viewing Sent Text Messages Follow the procedure to view sent text messages onyour radio.
1 Do one of the following:
• Press the programmed Text Message button.Proceed to Step 3.
•Press to access the menu.
2Press or to Messages. Press to select.
3Press or to Sent Items. Press toselect.If the Sent Items folder is empty:
• The display shows List Empty.• A low tone sounds, if the Keypad Tone is
turned on.
4 Press or to the required message. Press
to select.
The display shows a subject line if the message isfrom an e-mail application.
Sending Sent Text Messages Follow the procedure to send a sent text messageson your radio.
When you are viewing a Sent message:
1Press .
2Press or to Resend. Press to select.The display shows a transitional mini notice,confirming your message is being sent.
3 Wait for acknowledgment.If successful:
• A tone sounds.• The display shows a positive mini notice.
If unsuccessful:
• A tone sounds.• The display shows a negative mini notice.O
ther
Sys
tem
s
306
English

• The radio proceeds to the Resend optionscreen. See Resending Text Messages onpage 83 for more information.
Responding to Text Messages Follow the procedure to respond to text messages onyour radio.
When you receive a text message:
• The display shows the Notification list with thealias or ID of the sender.
• The display shows the Message icon.
Note:The radio exits the Text Message alert screenand sets up a Private or Group Call to thesender of the message if the PTT button ispressed.
1 Do one of the following:
•Press or to Read. Press to select.
The display shows the text message. Thedisplay shows a subject line if the message isfrom an e-mail application.
•Press or to Read Later. Press toselect.
The radio returns to the screen you were onprior to receiving the text message.
•Press or to Delete. Press toselect.
2Press to return to the Inbox.
Viewing Text MessagesFollow the procedure to view text messages on yourradio.
1Press to access the menu.
2Press or to Messages. Press to select.
3Press or to Inbox. Press to select.If the Inbox is empty:
• The display shows List Empty.• A tone sounds, if the Keypad Tone is turned
on.
Other S
ystems
307
English
4 Press or to the required message. Press
to select.The display shows a subject line if the message isfrom an e-mail application.
Viewing Telemetry Status Text MessagesFollow the procedure to view a telemetry status textmessage from the inbox.
1Press to access the menu.
2Press or to Messages. Press to select.
3Press or to Inbox. Press to select.
4 Press or to the required message. Press
to select.You cannot reply to a Telemetry Status textmessage.The display shows Telemetry: <Status TextMessage>.
5Long press to return to the Home screen.
Deleting Text Messages from the InboxFollow the procedure to delete text messages fromthe Inbox on your radio.
1 Do one of the following:
• Press the programmed Text Message button.Proceed to Step 3.
•Press to access the menu.
2Press or to Messages. Press to select.
3Press or to Inbox. Press to select.If the Inbox is empty:
• The display shows List Empty.• A tone sounds.
4 Press or to the required message. Press
to select.The display shows a subject line if the message isfrom an e-mail application.
Oth
er S
yste
ms
308
English

5Press to access the sub-menu.
6Press or to Delete. Press to select.
7Press or to Yes. Press to select.The display shows a positive mini notice. Thescreen returns to the Inbox.
Deleting All Text Messages from the Inbox Follow the procedure to delete all text messages fromthe Inbox on your radio.
1 Do one of the following:
• Press the programmed Text Message button.Proceed to Step 3.
•Press to access the menu.
2Press or to Messages. Press to select.
3Press or to Inbox. Press to select.If the Inbox is empty:
• The display shows List Empty.
• A tone sounds.
4Press or to Delete All. Press toselect.
5Press or to Yes. Press to select.The display shows a positive mini notice.
Job TicketsThis feature allows your radio to receive Job Tickets,which are messages from the dispatcher listing outtasks to perform.
You can respond to Job Tickets in order to sort theminto Job Ticket Folders. By default, the folders are“All", "New", "Started", and "Completed".
Your radio supports a maximum of 100 Job Tickets,all of which can be seen in the "All" folder. New JobTickets and Job Tickets with recent change in stateare listed first. Upon reaching the maximum numberof Job Tickets, the next Job Ticket automaticallyreplaces the last Job Ticket in your radio.
Job Tickets are retained even after radio is powereddown and powered up again.
Other S
ystems
309
English

Your radio automatically detects and discards theduplicated Job Tickets with the same subject line.
Accessing the Job Ticket FolderFollow the procedure to access the Job Ticket folder.
1 Do one of the following:
• Press the programmed Job Ticket button.Proceed to Step 3.
•Press to access the menu.
2Press or to Job Tickets. Press toselect.
3Press or to the required folder. Press to select.
4 Press or to the required Job Ticket. Press
to select.
Logging In or Out of the Remote ServerThis feature allows you to log in and log out of theremote server by using your user ID via the menu.
1Press to access the menu.
2Press or to Log In. Press to select.If you are already logged in, menu displays LogOut.
The display shows a transitional mini notice,confirming that you have been logged insuccessfully.
If you have failed to log in, the display shows anegative mini notice.
Sending Job Tickets Using One Job TicketTemplateIf your radio is configured with one Job Tickettemplate, perform the following actions to send theJob Ticket.
1 Use the keypad to type the required room number.
Press to select.
2 or to Room Status. Press to select.O
ther
Sys
tem
s
310
English

3 or to the required option. Press to
select.
4 or to Send. Press to select.
The display shows transitional mini notice,confirming your message is sent.
If the message is not sent, the display showsnegative mini notice.
Sending Job Tickets Using More Than One JobTicket TemplateIf your radio is configured with more than one JobTicket template, perform the following actions to sendthe Job Tickets.
1 or to the required option. Press to
select.
2 or to Send. Press to select.
The display shows transitional mini notice,confirming your message is sent.
If the message is not sent, the display showsnegative mini notice.
Responding to Job Tickets
1Press to access the menu.
2 or to Job Tickets. Press to select.
3 or to the required folder. Press to
select.
4 or to the required job ticket. Press to
select.
5Press once more to access the sub-menu.You can also press the corresponding number key(1–9) to Quick Reply.
6 or to the required job ticket. Press to
select.
The display shows transitional mini notice,confirming your message being sent.
If successful:
• A positive indicator tone sounds.
Other S
ystems
311
English

• The display shows a positive mini notice.
If unsuccessful:
• A negative indicator tone sounds.• The display shows a negative mini notice.
Deleting Job TicketsFollow the procedure to delete job tickets on yourradio.
1 Do one of the following:
• Press the programmed Job Ticket button.Proceed to Step 3
•Press to access the menu.
2 or to Job Tickets. Press to select.
3 or to All. Press to select.
4 or to the required Job Ticket. Press to
select.
5Press again while viewing the Job Ticket.
6 or to Delete. Press to select.
Privacy This feature helps to prevent eavesdropping byunauthorized users on a channel by the use of asoftware-based scrambling solution. The signalingand user identification portions of a transmission arenot scrambled.
Your radio must have privacy enabled on the channelto send a privacy-enabled transmission, although thisis not a necessary requirement for receiving atransmission. While on a privacy-enabled channel,the radio is still able to receive clear or unscrambledtransmissions.
Your radio supports two types of privacy, but only onecan be assigned to your radio. They are:
• Basic Privacy• Enhanced Privacy
To unscramble a privacy-enabled call or datatransmission, your radio must be programmed tohave the same Privacy Key for Basic Privacy, or thesame Key Value and Key ID for Enhanced Privacy asthe transmitting radio.
Oth
er S
yste
ms
312
English

If your radio receives a scrambled call that is of adifferent Privacy Key, or different Key Value and KeyID, you will either hear a garbled transmission forBasic Privacy or nothing at all for Enhanced Privacy.
If the radio has a privacy type assigned, the HomeScreen shows the Secure or Unsecure icon, exceptwhen the radio is sending or receiving an Emergencycall or alarm.
The green LED lights up when the radio istransmitting, and blinks rapidly when the radio isreceiving an ongoing privacy-enabled transmission.
Note:Some radio models may not offer this Privacyfeature, or may have a different configuration.Check with your dealer or systemadministrator for more information.
Multi-Site ControlsThese features are applicable when your currentradio channel is part of an IP Site Connect orCapacity Plus--Multi-Site configuration.Starting Manual Site SearchFollow the procedure to start manual site searchwhen the received signal strength is poor in order toattempt to find a site with better signal.
1 Do one of the following:
• Press the programmed Manual Site Roambutton. Skip the following steps.
•Press to access the menu.
2Press or to Utilities. Press toselect.
3Press or to Radio Settings. Press to select.
4Press or to Site Roaming. Press toselect.
5Press or to Active Search. Press toselect.A tone sounds. The green LED blinks. The displayshows Finding Site.
If the radio finds a new site:
• A positive indicator tone sounds.• The LED turns off.
Other S
ystems
313
English

• The display shows Site <Alias> Found.
If the radio fails to find a new site:
• A negative indicator tone sounds.• The LED turns off.• The display shows Out of Range.
If a new site is within range, but the radio is unable toconnect to it:
• A negative indicator tone sounds.• The LED turns off.• The display shows Channel Busy.
Site Lock On/Off
When toggled on, the radio searches the current siteonly. When toggled off, the radio searches other sitesin addition to the current site.
Press the programmed Site Lock button.
If the Site Lock function is toggled on:
• You hear a positive indicator tone, indicatingthe radio has locked to the current site.
• The display shows Site Locked.
If the Site Lock function is toggled off:
• You hear a negative indicator tone, indicatingthe radio is unlocked.
• The display shows Site Unlocked.
Security This feature allows you to enable or disable any radioin the system. For example, you may want to disablea stolen radio to prevent unauthorized users fromusing it, and enable the radio when it is recovered.
You can enable or disable a radio by using one ofthese features:
• Programmable Button• Contacts List• Manual Dial (via Contacts)
You will not receive an acknowledgment if you press
during Radio Enable or Radio Disableoperation.
Note:Check with your dealer or systemadministrator for more information.
Oth
er S
yste
ms
314
English
Enabling Radios Follow the procedure to enable your radio.
1 Press the programmed Radio Enable button.
2 Press or to the required alias or ID. Press
to select.The display shows Radio Enable and thesubscriber alias or ID. The green LED lights up.
3 Wait for acknowledgment.If successful:
• A positive indicator tone sounds.• The display shows a positive mini notice.
If unsuccessful:
• A negative indicator tone sounds.• The display shows a negative mini notice.
Disabling Radios Follow the procedure to disable your radio.
1 Press the programmed Radio Disable button.
2 Press or to the required alias or ID. Press
to select.The display shows a transitional mini notice,indicating the request is in progress. The greenLED blinks.
3 Wait for acknowledgment.If successful:
• A positive indicator tone sounds.• The display shows a positive mini notice.
If unsuccessful:
• A negative indicator tone sounds.• The display shows a negative mini notice.
Lone WorkerThis feature prompts an emergency to be raised ifthere is no user activity, such as any radio buttonpress or activation of the channel selector, for apredefined time.
Following no user activity for a programmed duration,the radio pre-warns the user via an audio indicatoronce the inactivity timer expires.
Other S
ystems
315
English

If there is still no acknowledgment by the user beforethe predefined reminder timer expires, the radioinitiates an Emergency Alarm.
Only one of the following Emergency Alarms isassigned to this feature:
• Emergency Alarm• Emergency Alarm with Call• Emergency Alarm with Voice to Follow
The radio remains in the emergency state, allowingvoice messages to proceed until action is taken. See Emergency Operation on page 292 for moreinformation on ways to exit Emergency.
Note:Check with your dealer or systemadministrator for more information.
Password Lock FeaturesThis feature allows you to restrict access to the radioby asking for a password when the device is turnedonAccessing Radios by Using PasswordsFollow the procedure to access your radio by using apassword.
1 Enter the current four-digit password.
• Press or to edit the numeric value of
each digit, and press to enter and move tothe next digit.
2Press to enter the password.If successful, the radio powers up.
If unsuccessful:
• After the first and second attempt, the displayshows Wrong Password. Repeat Step 1.
• After the third attempt, the display showsWrong Password and then, Radio Locked. Atone sounds. The yellow LED double blinks.Your radio enters into locked state for 15minutes.
Note:In locked state, your radio responds toinputs from On/Off/Volume Control Knoband programmed Backlight button only.
Oth
er S
yste
ms
316
English

Unlocking Radios in Locked StateYour radio is unable to receive any call, includingemergency calls, in locked state. Follow theprocedure to unlock your radio in locked state.
1 Power up the radio.Your radio restarts the 15-minutes timer for lockedstate.
2 Wait for 15 minutes.Your radio responds only to On/Off button inlocked state.
3 Repeat the steps in Accessing Radios by UsingPasswords on page 90 to access the radio.
Changing PasswordsFollow the procedure to change passwords on yourradio.
1Press to access the menu.
2Press or to Utilities. Press toselect.
3Press or to Radio Settings. Press to select.
4Press or to Passwd Lock. Press toselect.
5 Enter the current four-digit password, and press
to proceed.If the password is incorrect, the display showsWrong Password and automatically returns to theprevious menu.
6Press or to Change PWD. Press toselect.
7Enter a new four-digit password, and press toproceed.
8 Re-enter the new four-digit password, and press
to proceed.If successful, the display shows PasswordChanged.
Other S
ystems
317
English

If unsuccessful, the display shows Passwords DoNot Match.
The screen automatically returns to the previousmenu.
BluetoothThis feature allows you to use your radio with aBluetooth-enabled device (accessory) via a Bluetoothconnection. Your radio supports both Motorola andCOTS (Commercially available Off-The-Shelf)Bluetooth-enabled devices.
Bluetooth operates within a range of 10 meters (32feet) line of sight. This is an unobstructed pathbetween your radio and your Bluetooth-enableddevice. It is not recommended that you leave yourradio behind and expect your Bluetooth-enableddevice to work with a high degree of reliability whenthey are separated.
At the fringe areas of reception, both voice and tonequality will start to sound "garbled" or "broken". Tocorrect this problem, simply position your radio andBluetooth-enabled device closer to each other (withinthe 10-meter defined range) to re-establish clearaudio reception. The Bluetooth function of your radio
has a maximum power of 2.5 mW (4 dBm) at the 10-meter range.
Your radio can support up to three simultaneousBluetooth connections with Bluetooth-enableddevices of unique types. For example, a headset, ascanner, and a PTT-Only Device (POD). Multipleconnections with Bluetooth-enabled devices of thesame type are not supported.
Refer to the user manual of your respectiveBluetooth-enabled device for more details on the fullcapabilities of your Bluetooth-enabled device.
Your radio connects to the Bluetooth-enabled devicewithin range with either the strongest signal strength,or to one which it has connected to before in a priorsession. Do not turn off your Bluetooth-enabled
device or press the home back button duringthe finding and connecting operation as this cancelsthe operation.
Turning Bluetooth On and Off
1Press to access the menu.O
ther
Sys
tem
s
318
English
2Press or to Bluetooth. Press toselect.
3Press or to My Status. Press toselect.The display shows On and Off. The current statusis indicated by a .
4 Do one of the following:
•Press or to On. Press to select. Thedisplay shows beside On.
•Press or to Off. Press to select.The display shows beside Off.
Connecting to Bluetooth Devices
Turn on your Bluetooth-enabled device and place it inpairing mode.
1Press to access the menu.
2Press or to Bluetooth. Press toselect.
3Press or to Devices. Press to select.
4 Do one of the following:
• Press or to the required device. Press
to select.• Press or to Find Devices to locate
available devices. Press or to the
required device. Press to select.
5Press or to Connect. Press to select.Your Bluetooth-enabled device may requireadditional steps to complete the pairing. Refer tothe user manual of your Bluetooth-enabled device.The display shows Connecting to <Device>.
Wait for acknowledgment.
If successful:
• A positive indicator tone sounds.• The display shows <Device> Connected and the
Bluetooth Connected icon.• The display shows beside the connected device.
Other S
ystems
319
English

If unsuccessful:
• A negative indicator tone sounds.• The display shows Connecting Failed.
Connecting to Bluetooth Devices in DiscoverableMode
Turn on your Bluetooth-enabled device and place it inpairing mode.
1Press to access the menu.
2Press or to Bluetooth. Press toselect.
3Press or to Find Me. Press to select.The radio can now be found by other Bluetooth-enabled devices for a programmed duration. Thisis called Discoverable Mode.
Wait for acknowledgment.
If successful:
• A positive indicator tone sounds.• The display shows <Device> Connected and the
Bluetooth Connected icon.
• The display shows beside the connected device.
If unsuccessful:
• A negative indicator tone sounds.• The display shows Connecting Failed.
Disconnecting from Bluetooth Devices
1Press to access the menu.
2Press or to Bluetooth. Press toselect.
3Press or to Devices. Press to select.
4Press or to the required device. Press to select.
5Press or to Disconnect. Press toselect.The display shows Disconnecting from<Device>.
Wait for acknowledgment.
Oth
er S
yste
ms
320
English

• A tone sounds.• The display shows <Device> Disconnected and
the Bluetooth Connected icon disappears.• The disappears beside the connected device.
Switching Audio Route between Internal RadioSpeaker and Bluetooth DeviceFollow the procedure to toggle audio routing betweeninternal radio speaker and external Bluetooth device.
Press the programmed Bluetooth Audio Switchbutton.
The display shows one of the following results:
• A tone sounds. The display shows Route Audioto Radio.
• A tone sounds. The display shows Route Audioto Bluetooth.
Viewing Device DetailsFollow the procedure to view the device details onyour radio.
1Press to access the menu.
2Press or to Bluetooth. Press toselect.
3Press or to Devices. Press to select.
4Press or to the required device. Press to select.
5Press or to View Details. Press toselect.
Editing Device NameFollow the procedure to edit the name of availableBluetooth-enabled devices.
1Press to access the menu.
2Press or to Bluetooth. Press toselect.
3Press or to Devices. Press to select.
Other S
ystems
321
English

4Press or to the required device. Press to select.
5Press or to Edit Name. Press toselect.
6Enter a new device name. Press to select.The display shows Device Name Saved.
Deleting Device NameYou can remove a disconnected device from the listof Bluetooth-enabled devices.
1Press to access the menu.
2Press or to Bluetooth. Press toselect.
3Press or to Devices. Press to select.
4Press or to the required device. Press to select.
5Press or to Delete. Press to select.The display shows Device Deleted.
Adjusting Bluetooth Mic Gain ValuesAllows control of microphone gain value in connectedBluetooth-enabled devices.
1Press to access the menu.
2Press or to Bluetooth. Press toselect.
3Press or to BT Mic Gain. Press toselect.
4 Press or to the BT Mic Gain type and the
current values. To edit values, press to select.
5 Press or to increase or to decrease values.
Press to select.
Oth
er S
yste
ms
322
English

Permanent Bluetooth Discoverable Mode
Note:The Permanent Bluetooth Discoverable Modemust be enabled by the dealer or systemadministrator. If enabled, Bluetooth is notdisplayed in the Menu and you cannot use anyBluetooth programmable button features.
Other Bluetooth-enabled devices can locate yourradio, but the devices cannot connect to the radio.The Permanent Bluetooth Discoverable Modeenables dedicated devices to use your radio positionin the process of Bluetooth-based location.
Indoor Location
Note:Indoor Location feature is applicable formodels with the latest software and hardware.Check with your dealer or systemadministrator for more information.
Indoor Location can be used to keep track of radiousers location while indoors. When Indoor Location isactivated, the radio is in a limited discoverable mode.Dedicated beacons are used to locate the radio anddetermine its position.
Turning Indoor Location On or Off
You can turn on or turn off Indoor Location byperforming one of the following actions.
• Access this feature via the menu.a)
Press to access the menu.a)
Press or to Bluetooth and press to select.
a) Press or to Indoor Location and
press to select.b)
Press to turn on Indoor Location.The display shows Indoor Location On. Youhear a good key tone.
One of the following scenarios occurs.
• If successful, the Indoor Location Availableicon appears on the Home screen display.
• If unsuccessful, the display shows TurningOn Failed. You hear a bad key tone.
c)Press to turn off Indoor Location.The display shows Indoor Location Off.You hear a good key tone.
Other S
ystems
323
English

One of the following scenarios occurs.
• If successful, the Indoor Location Availableicon disappears on the Home screendisplay.
• If unsuccessful, the display shows TurningOff Failed. You hear a bad key tone.
• Access this feature via the programmed button.a) Long press the programmed Indoor Location
button to turn on Indoor Location.The display shows Indoor Location On. Youhear a positive tone.
One of the following scenarios occurs.
• If successful, the Indoor Location Availableicon appears on the Home screen display.
• If unsuccessful, the display shows TurningOn Failed. If unsuccessful, you hear anegative tone.
b) Press the programmed Indoor Location buttonto turn off Indoor Location.The display shows Indoor Location Off.You hear a positive tone.
One of the following scenarios occurs.
• If successful, the Indoor Location Availableicon disappears on the Home screendisplay.
• If unsuccessful, the display shows TurningOff Failed. If unsuccessful, you hear anegative tone.
Accessing Indoor Location Beacons Information
Displays information on Indoor Location Beacons.
1Press to access the menu.
2Press or to Bluetooth and press toselect.
3 Press or to Indoor Location and press
to select.
4Press or to Beacons and press toselect.
The display shows the beacons information.Oth
er S
yste
ms
324
English
Notification ListYour radio has a Notification list that collects all yourunread events on the channel, such as unread textmessages, telegrams, missed calls and call alerts.
The display shows the Notification icon when theNotification list has one or more events.
The list supports a maximum of 40 unread events.When the list is full, the next event automaticallyreplaces the oldest event. After the events are read,they are removed from the Notification list.
For text messaging and missed call/call alertnotification events, the maximum number are 30 textmessages and 10 missed calls/call alerts. Thismaximum number depends on individual feature (jobtickets or text messages or missed calls/ call alerts)list capability.
Accessing Notification ListFollow the procedure to access the Notification list onyour radio.
1Press to access the menu.
2Press or to Notification. Press toselect.
3Press or to the required event. Press to select.
4Long press to return to the Home screen.
Over-the-Air Programming Your dealer can remotely update your radio via Over-the-Air Programming (OTAP) without physicalconnection. Additionally, some settings can also beconfigured via OTAP.
When your radio undergoes OTAP, the green LEDblinks.
When your radio receives high volume data:
• The display shows the High Volume Data icon.• The channel becomes busy.• A negative tone sounds if you press the PTT
button.
When OTAP completes, depending on theconfiguration:
Other S
ystems
325
English

• A tone sounds. The display shows UpdatingRestarting. Your radio restarts by powering offand on again.
• You can select Restart Now or Postpone. Whenyou select Postpone, your radio returns to theprevious screen. The display shows the OTAPDelay Timer icon until the automatic restartoccurs.
When your radio powers up after automatic restart:
• If successful, the display shows Sw UpdateCompleted.
• If unsuccessful, the display shows Sw UpdateFailed.
See Checking Software Update Information on page112 for the updated software version.
Transmit Inhibit
Transmit inhibit feature allow users to block alltransmission from the radio.
Note:Bluetooth and Wi-Fi features are available inTransmit Inhibit mode.
Enabling Transmit Inhibit
Perform one of the following actions:
•Press or to Tx Inhibit and press to select.
• Press the Transmit Inhibit programmablebutton.
The display shows Tx Inhibit On. You hear apositive indicator tone, indicating that transmission isinhibited.
Note:The status of the Transmit Inhibit does notchange after the radio powers up.
Disabling Transmit Inhibit
Perform one of the following actions:
•Press or to Tx Inhibit and press to select.
• Press the Transmit Inhibit programmablebutton.O
ther
Sys
tem
s
326
English

The display shows Tx Inhibit Off. You hear anegative indicator tone to indicate transmission isback to normal operation.
Wi-Fi Operation
Wi-Fi® is a registered trademark of Wi-Fi Alliance®.
Note:This feature is applicable to SL7550e/SL7590e/SL7580e only.
This feature allows you to setup and connect to a Wi-Fi® network. Wi-Fi supports updates for radiofirmware, codeplug, and resources such as languagepacks and voice announcement.
Turning Wi-Fi On or Off
Note:This feature is applicable to SL7550e/SL7590e/SL7580e only.
The programmed Wi-Fi On or Off button isassigned by your dealer or systemadministrator. Check with your dealer orsystem administrator to determine how yourradio has been programmed.
You can turn on or turn off Wi-Fi® by performing oneof the following actions.
• Press the programmed Wi-Fi On or Off button.Voice Announcement sounds Turning On Wi-Fi orTurning Off Wi-Fi.
• Access this feature via the menu.a)
Press to access the menu.b)
Press or to WiFi and press toselect.
c) Press or to WiFi Status and press
to select.
Press to turn on Wi-Fi. The display shows beside Enabled.
Press to turn off Wi-Fi. The disappearsfrom beside Enabled.
If Wi-Fi is enabled and a low capacity battery is used,an alert screen is displayed upon power up with thefollowing notice.
• Low Capacity Battery!
• Tx power restricted to 2W and Wi-Fidisabled.
Other S
ystems
327
English
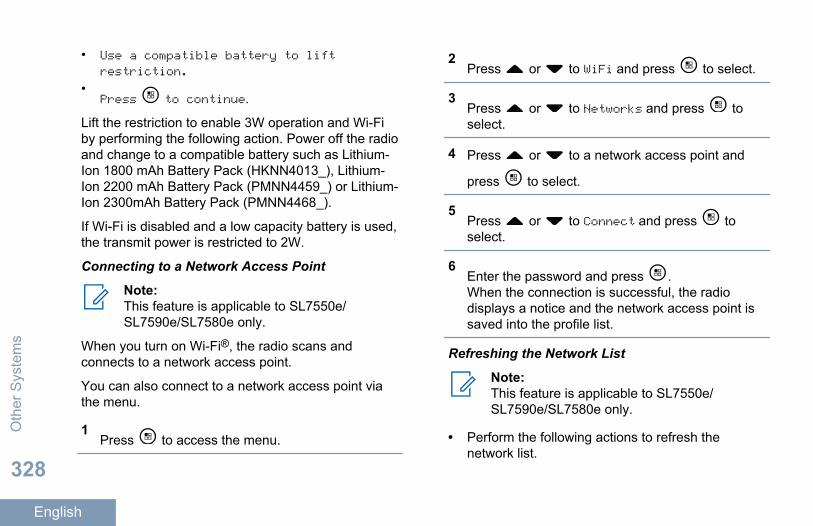
• Use a compatible battery to liftrestriction.
•Press to continue.
Lift the restriction to enable 3W operation and Wi-Fiby performing the following action. Power off the radioand change to a compatible battery such as Lithium-Ion 1800 mAh Battery Pack (HKNN4013_), Lithium-Ion 2200 mAh Battery Pack (PMNN4459_) or Lithium-Ion 2300mAh Battery Pack (PMNN4468_).
If Wi-Fi is disabled and a low capacity battery is used,the transmit power is restricted to 2W.
Connecting to a Network Access Point
Note:This feature is applicable to SL7550e/SL7590e/SL7580e only.
When you turn on Wi-Fi®, the radio scans andconnects to a network access point.
You can also connect to a network access point viathe menu.
1Press to access the menu.
2Press or to WiFi and press to select.
3Press or to Networks and press toselect.
4 Press or to a network access point and
press to select.
5Press or to Connect and press toselect.
6Enter the password and press .When the connection is successful, the radiodisplays a notice and the network access point issaved into the profile list.
Refreshing the Network List
Note:This feature is applicable to SL7550e/SL7590e/SL7580e only.
• Perform the following actions to refresh thenetwork list.
Oth
er S
yste
ms
328
English

a)Press to access the menu.
b)Press or to WiFi and press toselect.
c)Press or to Networks and press toselect.When you enter the Networks menu, the radioautomatically refreshes the network list.
• If you are already in the Networks menu, performthe following action to refresh the network list.a)
Press or to Refresh and press toselect.
The radio refreshes and displays the latestnetwork list.
Adding a Network
Note:This feature is applicable to SL7550e/SL7590e/SL7580e only.
If a preferred network is not in the available networklist, perform the following actions to add a network.
1Press to access the menu.
2Press or to WiFi and press to select.
3Press or to Networks and press toselect.
4Press or to Add Network and press toselect.
5 Enter the Service Set Identifier (SSID) and press
.
6Press or to Open and press to select.
7Enter the password and press .The radio displays to indicate that the networkis successfully saved.
Other S
ystems
329
English

Viewing Details of Network Access Points
Note:This feature is applicable to SL7550e/SL7590e/SL7580e only.
Perform the following actions to view details ofnetwork access points.
1Press to access the menu.
2Press or to WiFi and press to select.
3Press or to Networks and press toselect.
4 Press or to a network access point and
press to select.
5Press or to View Details and press to select.
For a connected network access point, the ServiceSet Identifier (SSID), Security Mode, MediaAccess Control (MAC) address, and InternetProtocol (IP) address are displayed.
For a non-connected network access point, theService Set Identifier (SSID) and Security Modeare displayed.
Removing Network Access Points
Note:This feature is applicable to SL7550e/SL7590e/SL7580e only. Enterprise networkaccess points that are added via CPS can onlybe removed via CPS.
Perform the following actions to remove networkaccess points from the profile list.
1Press to access the menu.
2Press or to WiFi and press to select.
3Press or to Networks and press toselect.
4 Press or to the selected network access
point and press to select.Oth
er S
yste
ms
330
English

5Press or to Remove and press toselect.
6Press or to Yes and press to select.The radio displays to indicate that the selectednetwork access point is successfully removed.
UtilitiesThis chapter explains the operations of the utilityfunctions available in your radio.Locking or Unlocking the KeypadFollow the procedure to lock or unlock the keypad ofyour radio.
1 Do one of the following:
•Press followed by . Skip the followingsteps.
•Press to access the menu.
2Press or to Utilities. Press toselect.
3Press or to Radio Settings. Press to select.
4Press or to Keypad Lock. Press toselect.
• If the keypad is locked, the display showsKeypad Locked.
• If the keypad is unlocked, the display showsKeypad Unlocked.
The radio returns to the Home screen.
Turning Keypad Tones On or OffFollow the procedure to turn keypad tones on or offon your radio.
1Press to access the menu.
2Press or to Utilities. Press toselect.
3Press or to Radio Settings. Press to select.
Other S
ystems
331
English
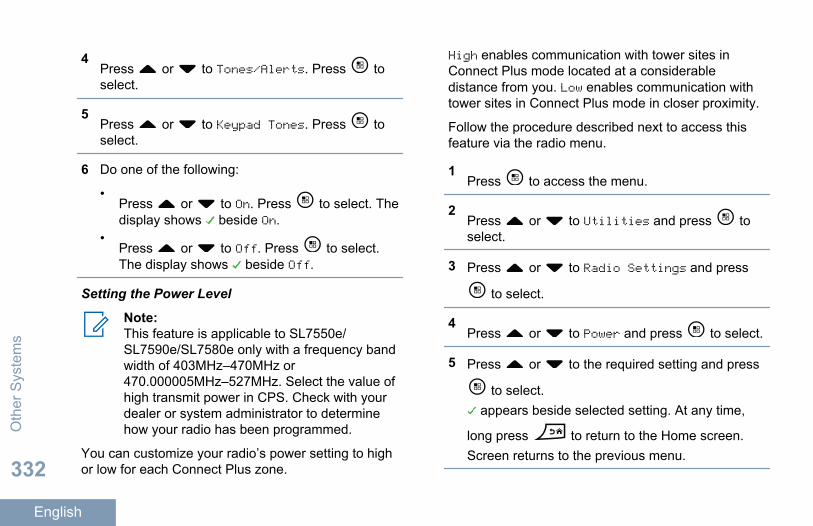
4Press or to Tones/Alerts. Press toselect.
5Press or to Keypad Tones. Press toselect.
6 Do one of the following:
•Press or to On. Press to select. Thedisplay shows beside On.
•Press or to Off. Press to select.The display shows beside Off.
Setting the Power Level
Note:This feature is applicable to SL7550e/SL7590e/SL7580e only with a frequency bandwidth of 403MHz–470MHz or470.000005MHz–527MHz. Select the value ofhigh transmit power in CPS. Check with yourdealer or system administrator to determinehow your radio has been programmed.
You can customize your radio’s power setting to highor low for each Connect Plus zone.
High enables communication with tower sites inConnect Plus mode located at a considerabledistance from you. Low enables communication withtower sites in Connect Plus mode in closer proximity.
Follow the procedure described next to access thisfeature via the radio menu.
1Press to access the menu.
2Press or to Utilities and press toselect.
3 Press or to Radio Settings and press
to select.
4Press or to Power and press to select.
5 Press or to the required setting and press
to select. appears beside selected setting. At any time,
long press to return to the Home screen.Screen returns to the previous menu.
Oth
er S
yste
ms
332
English

Turning Option Board On or OffOption board capabilities within each channel can beassigned to programmable buttons. Follow theprocedure to turn option board on or off on your radio.
Press the programmed Option Board button.
Turning Voice Operating Transmission On or OffFollow the procedure to turn Voice OperatingTransmission (VOX) on or off on your radio.
1 Do one of the following:
• Press the programmed VOX button. Skip thesteps below.
•Press to access the menu.
2Press or to Utilities. Press toselect.
3Press or to Radio Settings. Press to select.
4Press or to VOX. Press to select.
5 Do one of the following:
•Press or to On. Press to select. Thedisplay shows beside On.
•Press or to Off. Press to select.The display shows beside Off.
Turning Radio Tones/Alerts On or OffYou can enable and disable all radio tones and alerts,if needed, except for incoming Emergency alert tone.Follow the procedure to turn tones and alerts on or offon your radio.
1 Do one of the following:
• Press the programmed Tones/Alerts button.Skip the steps below.
•Press to access the menu.
2Press or to Utilities. Press toselect.
3Press or to Radio Settings. Press to select.
Other S
ystems
333
English

4Press or to Tones/Alerts. Press toselect.
5Press or to All Tones. Press toselect.
6Press to enable or disable all tones and alerts.If enabled, appears besides Enabled.
If disabled, disappears beside Enabled.
Setting Tones/Alerts Volume Offset LevelsThis feature adjusts the volume of the tones or alerts,allowing it to be higher or lower than the voicevolume. Follow the procedure to set the tones andalerts volume offset levels on your radio.
1Press to access the menu.
2Press or to Utilities. Press toselect.
3Press or to Radio Settings. Press to select.
4Press or to Tones/Alerts. Press toselect.
5Press or to Vol. Offset. Press toselect.
6 Press or to the required volume offsetlevel.A feedback tone sounds with each correspondingvolume offset level.
7 Do one of the following:
•Press to select. The required volume offsetlevel is saved.
•Press to exit. The changes arediscarded.
Turning Talk Permit Tone On or OffFollow the procedure to turn Talk Permit Tone on oroff on your radio.
1Press to access the menu.
Oth
er S
yste
ms
334
English
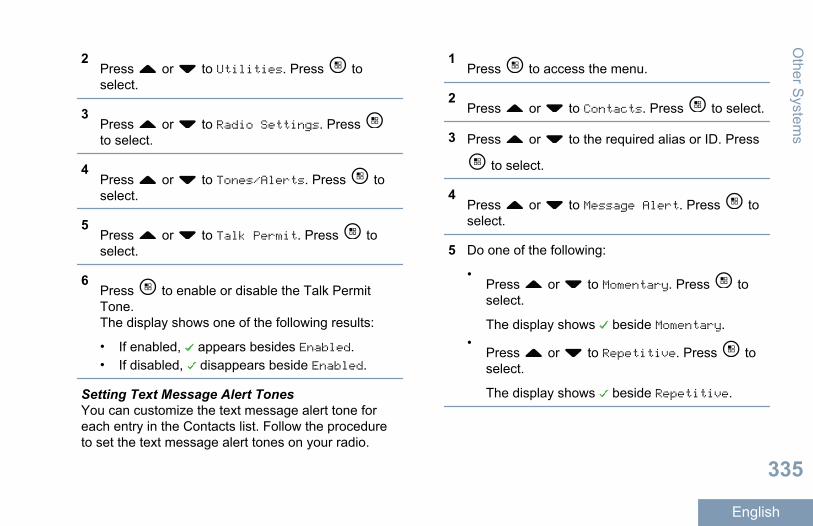
2Press or to Utilities. Press toselect.
3Press or to Radio Settings. Press to select.
4Press or to Tones/Alerts. Press toselect.
5Press or to Talk Permit. Press toselect.
6Press to enable or disable the Talk PermitTone.The display shows one of the following results:
• If enabled, appears besides Enabled.• If disabled, disappears beside Enabled.
Setting Text Message Alert TonesYou can customize the text message alert tone foreach entry in the Contacts list. Follow the procedureto set the text message alert tones on your radio.
1Press to access the menu.
2Press or to Contacts. Press to select.
3 Press or to the required alias or ID. Press
to select.
4Press or to Message Alert. Press toselect.
5 Do one of the following:
•Press or to Momentary. Press toselect.
The display shows beside Momentary.•
Press or to Repetitive. Press toselect.
The display shows beside Repetitive.
Other S
ystems
335
English

Displaying WallpaperYour radio displays the Wallpaper background onhome screen. You can select from five defaultwallpapers.
1Press to access the menu.
2Press or to Utilities. Press toselect.
3Press or to Radio Settings. Press to select.
4Press or to Display. Press to select.
5Press or to Wallpaper. Press toselect.You can also use or to change theselected option.
Screen Saver ModeThe screen saver feature allows the radio to saveradio battery time.
A Screen Saver Pre Duration is used to track theradio activities before entering screen saver mode.
The radio starts Screen Saver Pre Duration uponpower up and enters into screen saver mod. Whenthe Screen Saver Pre Duration timer expires, theradio exits screen saver mode and responds torelated transaction normally upon any user input andover-the-air transaction.
The radio restarts Screen Saver Pre Duration uponany user input and over-the-air transaction. Afterbeing in Screen Saver mode for 5 seconds, the radioenters keypad lock state automatically. When anyaudio or Bluetooth accessory is connected, batterysaver mode is enabled, the radio enters screen savermode.
If there is any user input or over-the-air transaction,the radio exits screen saver mode and responds tothe user interaction. The Screen Saver Pre Durationis restarted and the radio goes back to screen savermode when it expires.
Oth
er S
yste
ms
336
English
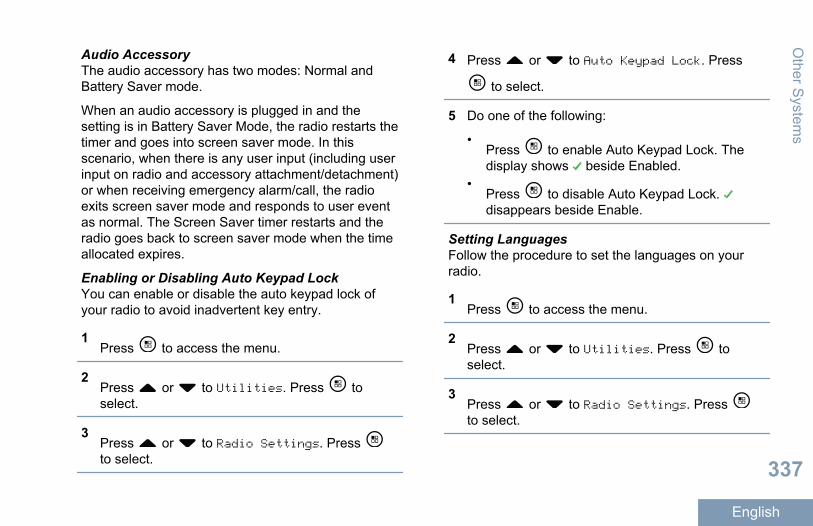
Audio AccessoryThe audio accessory has two modes: Normal andBattery Saver mode.
When an audio accessory is plugged in and thesetting is in Battery Saver Mode, the radio restarts thetimer and goes into screen saver mode. In thisscenario, when there is any user input (including userinput on radio and accessory attachment/detachment)or when receiving emergency alarm/call, the radioexits screen saver mode and responds to user eventas normal. The Screen Saver timer restarts and theradio goes back to screen saver mode when the timeallocated expires.
Enabling or Disabling Auto Keypad LockYou can enable or disable the auto keypad lock ofyour radio to avoid inadvertent key entry.
1Press to access the menu.
2Press or to Utilities. Press toselect.
3Press or to Radio Settings. Press to select.
4 Press or to Auto Keypad Lock. Press
to select.
5 Do one of the following:
•Press to enable Auto Keypad Lock. Thedisplay shows beside Enabled.
•Press to disable Auto Keypad Lock. disappears beside Enable.
Setting LanguagesFollow the procedure to set the languages on yourradio.
1Press to access the menu.
2Press or to Utilities. Press toselect.
3Press or to Radio Settings. Press to select.
Other S
ystems
337
English

4Press or to Languages. Press toselect.
5 Press or to the required language. Press
to select.The display shows beside the selectedlanguage.
Turning LED Indicators On or OffFollow the procedure to turn the LED indicators on oroff on your radio.
1Press to access the menu.
2Press or to Utilities. Press toselect.
3Press or to Radio Settings. Press to select.
4Press or to LED Indicator. Press toselect.
5Press to enable or disable the LED indicator.The display shows one of the following results:
• If enabled, appears besides Enabled.• If disabled, disappears beside Enabled.
Turning Voice Announcement On or OffThis feature enables the radio to audibly indicate thecurrent zone or channel the user has just assigned, orthe programmable button the user has just pressed.This is typically useful when the user has difficultyreading the content shown on the display. This audioindicator can be customized according to customerrequirements. Follow the procedure to turn VoiceAnnouncement on or off on your radio.
1 Do one of the following:
• Press the programmed Voice Announcementbutton. Skip the following steps.
•Press to access the menu.
2Press or to Utilities. Press toselect.O
ther
Sys
tem
s
338
English

3Press or to Radio Settings. Press to select.
4 Press or to Voice Announcement. Press
to select.
5Press to enable or disable VoiceAnnouncement.
• If enabled, appears besides Enabled.• If disabled, disappears beside Enabled.
Text-to-SpeechThe Text-to-Speech feature can only be enabled byyour dealer or system administrator. If Text-to-Speechis enabled, the Voice Announcement feature isautomatically disabled. If Voice Announcement isenabled, then the Text-to-Speech feature isautomatically disabled.
This audio indicator can be customized per customerrequirements. This feature is typically useful when theuser is in a difficult condition to read the contentshown on the display.
Setting Text-to-SpeechFollow the procedure to set the Text-to-Speechfeature.
1Press to access the menu.
2Press or to Utilities. Press toselect.
3Press or to Radio Settings. Press to select.
4 Press or to Voice Announcement. Press
to select.
5 Press or to any of the following features.
Press to select.The available features are as follows:
• All
• Messages
• Job Tickets
• Channel
• Zone
Other S
ystems
339
English

• Program Button
appears beside the selected setting.
Text Entry ConfigurationYour radio allows you to configure different text.
You can configure the following settings for enteringtext on your radio:
• Word Predict• Word Correct• Sentence Cap• My Words
Your radio supports the following text entry methods:
• Numbers• Symbols• Predictive or Multi-Tap• Language (If programmed)
Note:
Press at any time to return to the
previous screen or long press to returnto the Home Screen. The radio exits thecurrent screen once the inactivity timerexpires.
Enabling or Disabling Word PredictWord Predict: Your radio can learn common wordsequences that you often enter. It then predicts thenext word you may want to use after you enter thefirst word of a common word sequence into the texteditor.
1Press to access the menu.
2Press or to Utilities. Press toselect.
3Press or to Radio Settings. Press to select.
4Press or to Text Entry. Press toselect.
5Press or to Word Predict. Press toselect.
6 Do one of the following:Oth
er S
yste
ms
340
English

•Press or to Text Entry. Press toselect.
• Press to enable the Word Predict. If enabled, appears besides Enabled.
• Press to disable the Word Predict. If disabled, disappears beside Enabled.
Enabling or Disabling Word CorrectSupplies alternative word choices when the wordentered into the text editor is not recognized by the in-built dictionary.
1Press to access the menu.
2Press or to Utilities. Press toselect.
3Press or to Radio Settings. Press to select.
4Press or to Text Entry. Press toselect.
5Press or to Word Correct. Press toselect.
6 Do one of the following:
•Press or to Word Correct. Press to select.
• Press to enable Word Correct. If enabled, appears besides Enabled.
• Press to disable Word Correct. If disabled, disappears beside Enabled.
Enabling or Disabling Sentence CapAutomatically enables capitalization for the first letterin the first word for every new sentence.
1Press to access the menu.
2Press or to Utilities. Press toselect.
3Press or to Radio Settings. Press to select.
Other S
ystems
341
English
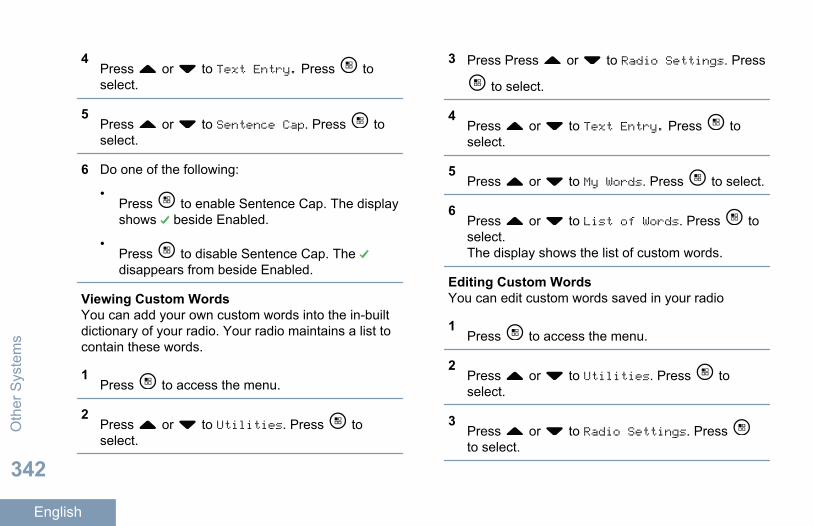
4Press or to Text Entry. Press toselect.
5Press or to Sentence Cap. Press toselect.
6 Do one of the following:
•Press to enable Sentence Cap. The displayshows beside Enabled.
•Press to disable Sentence Cap. The disappears from beside Enabled.
Viewing Custom WordsYou can add your own custom words into the in-builtdictionary of your radio. Your radio maintains a list tocontain these words.
1Press to access the menu.
2Press or to Utilities. Press toselect.
3 Press Press or to Radio Settings. Press
to select.
4Press or to Text Entry. Press toselect.
5Press or to My Words. Press to select.
6Press or to List of Words. Press toselect.The display shows the list of custom words.
Editing Custom WordsYou can edit custom words saved in your radio
1Press to access the menu.
2Press or to Utilities. Press toselect.
3Press or to Radio Settings. Press to select.
Oth
er S
yste
ms
342
English

4Press or to Text Entry. Press toselect.
5Press or to My Words. Press to select.
6Press or to List of Words. Press toselect.Display shows the list of custom words.
7Press or to the required word. Press to select.
8Press or to Edit. Press to select.
9 Use the keypad to edit your custom word.
•Press to move one space to the left.
•Press key to move one space to the right.
•Press the key to delete any unwantedcharacters.
•Long press to change text entry method.
10Press once your custom word is completed.
The display shows transitional mini notice, confirmingyour custom word is being saved.
• If the custom word is saved, a tone sounds andthe display shows positive mini notice.
• If the custom word is not saved, a low tone soundsand the display show negative mini notice.
Adding Custom WordsYou can add custom words into the in-built radiodictionary.
1Press to access the menu.
2Press or to Utilities. Press toselect.
3Press or to Radio Settings. Press to select.
4Press or to Text Entry. Press toselect.
Other S
ystems
343
English
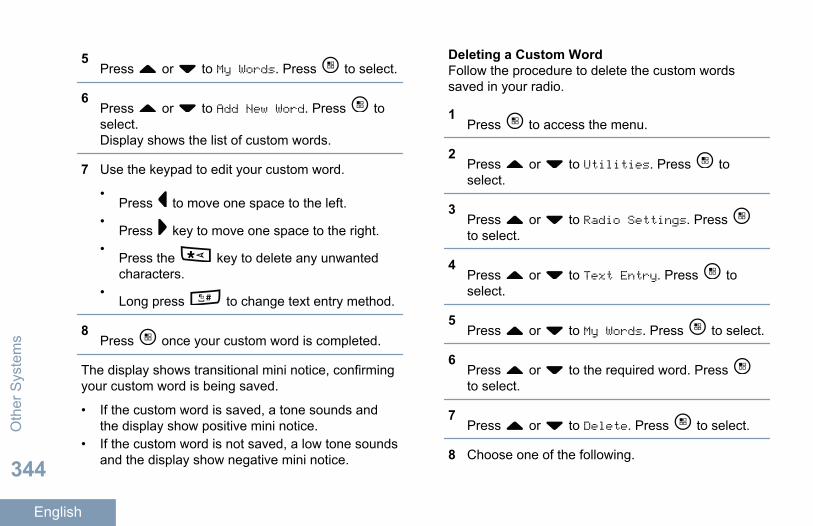
5Press or to My Words. Press to select.
6Press or to Add New Word. Press toselect.Display shows the list of custom words.
7 Use the keypad to edit your custom word.
•Press to move one space to the left.
•Press key to move one space to the right.
•Press the key to delete any unwantedcharacters.
•Long press to change text entry method.
8Press once your custom word is completed.
The display shows transitional mini notice, confirmingyour custom word is being saved.
• If the custom word is saved, a tone sounds andthe display show positive mini notice.
• If the custom word is not saved, a low tone soundsand the display show negative mini notice.
Deleting a Custom WordFollow the procedure to delete the custom wordssaved in your radio.
1Press to access the menu.
2Press or to Utilities. Press toselect.
3Press or to Radio Settings. Press to select.
4Press or to Text Entry. Press toselect.
5Press or to My Words. Press to select.
6Press or to the required word. Press to select.
7Press or to Delete. Press to select.
8 Choose one of the following.
Oth
er S
yste
ms
344
English
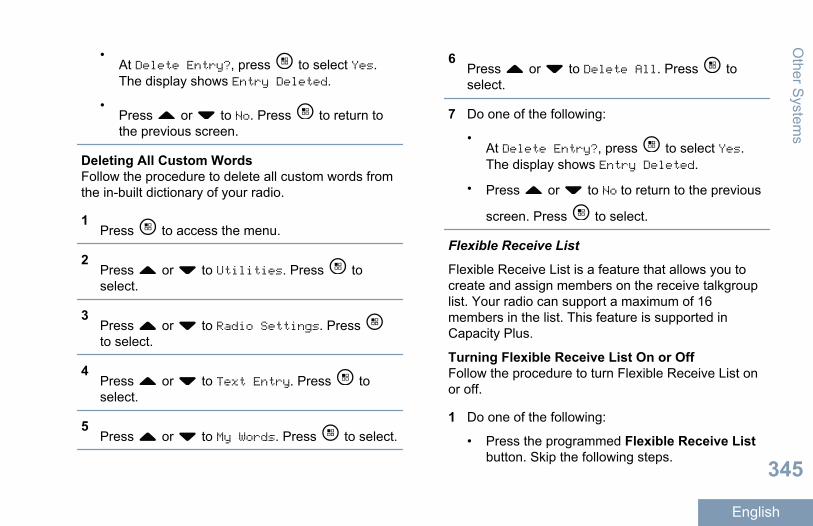
•At Delete Entry?, press to select Yes.The display shows Entry Deleted.
•Press or to No. Press to return tothe previous screen.
Deleting All Custom WordsFollow the procedure to delete all custom words fromthe in-built dictionary of your radio.
1Press to access the menu.
2Press or to Utilities. Press toselect.
3Press or to Radio Settings. Press to select.
4Press or to Text Entry. Press toselect.
5Press or to My Words. Press to select.
6Press or to Delete All. Press toselect.
7 Do one of the following:
•At Delete Entry?, press to select Yes.The display shows Entry Deleted.
• Press or to No to return to the previous
screen. Press to select.
Flexible Receive List
Flexible Receive List is a feature that allows you tocreate and assign members on the receive talkgrouplist. Your radio can support a maximum of 16members in the list. This feature is supported inCapacity Plus.
Turning Flexible Receive List On or OffFollow the procedure to turn Flexible Receive List onor off.
1 Do one of the following:
• Press the programmed Flexible Receive Listbutton. Skip the following steps.
Other S
ystems
345
English
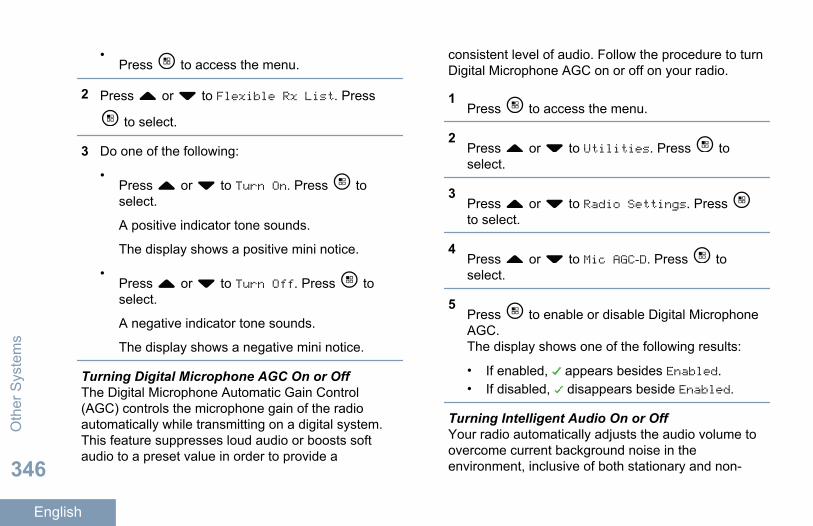
•Press to access the menu.
2 Press or to Flexible Rx List. Press
to select.
3 Do one of the following:
•Press or to Turn On. Press toselect.
A positive indicator tone sounds.
The display shows a positive mini notice.
•Press or to Turn Off. Press toselect.
A negative indicator tone sounds.
The display shows a negative mini notice.
Turning Digital Microphone AGC On or OffThe Digital Microphone Automatic Gain Control(AGC) controls the microphone gain of the radioautomatically while transmitting on a digital system.This feature suppresses loud audio or boosts softaudio to a preset value in order to provide a
consistent level of audio. Follow the procedure to turnDigital Microphone AGC on or off on your radio.
1Press to access the menu.
2Press or to Utilities. Press toselect.
3Press or to Radio Settings. Press to select.
4Press or to Mic AGC-D. Press toselect.
5Press to enable or disable Digital MicrophoneAGC.The display shows one of the following results:
• If enabled, appears besides Enabled.• If disabled, disappears beside Enabled.
Turning Intelligent Audio On or OffYour radio automatically adjusts the audio volume toovercome current background noise in theenvironment, inclusive of both stationary and non-
Oth
er S
yste
ms
346
English
stationary noise sources. This is a receive-onlyfeature and does not affect transmission audio.Follow the procedure to turn Intelligent Audio on or offon your radio.
Note:This feature is not applicable during aBluetooth session.
1 Do one of the following:
• Press the programmed Intelligent Audiobutton. Skip the steps below.
•Press to access the menu.
2Press or to Utilities. Press toselect.
3 Press or to Intelligent Audio. Press
to select.
4 Do one of the following:
•Press or to On. Press to select. Thedisplay shows beside On.
•Press or to Off. Press to select.The display shows beside Off.
Turning Acoustic Feedback Suppressor On or Off The feature allows you to minimize acoustic feedbackin received calls. Follow the procedure to turnAcoustic Feedback Suppressor on or off on yourradio.
1 Do one of the following:
• Press the programmed AF Suppressor button.Skip the following steps.
•Press to access the menu.
2Press or to Utilities. Press toselect.
3Press or to Radio Settings. Press to select.
4Press or to AF Suppressor. Press toselect.
5 Do one of the following:
Other S
ystems
347
English

•Press to enable Acoustic FeedbackSuppressor.
•Press to disable Acoustic FeedbackSuppressor.
If enabled, appears besides Enabled. Ifdisabled, disappears beside Enabled.
Turning Trill Enhancement On or OffYou can enable this feature when you are speaking ina language that contains many words with alveolartrill (rolling “R”) pronunciations. Follow the procedureto turn Trill Enhancement on or off on your radio.
1 Do one of the following:
• Press the programmed Trill Enhancementbutton. Skip the steps below.
•Press to access the menu.
2Press or to Utilities. Press toselect.
3Press or to Radio Settings. Press to select.
4Press or to Trill Enhance. Press toselect.
5 Do one of the following:
•Press or to On. Press to select. Thedisplay shows beside On.
•Press or to Off. Press to select.The display shows beside Off.
Setting Audio AmbienceFollow the procedure to set the audio ambience onyour radio according to your environment.
1Press to access the menu.
2Press or to Utilities. Press toselect.O
ther
Sys
tem
s
348
English
3Press or to Radio Settings. Press to select.
4Press or to Audio Ambience. Press to select.
5Press or to the required setting. Press to select.The settings are as follows.
• Choose Default for the default factorysettings.
• Choose Loud to increase speaker loudnesswhen using in noisy surroundings.
• Choose Work Group to reduce acousticfeedback when using with a group of radiosthat are near to each other.
The display shows beside the selected setting.
Setting Audio ProfilesFollow the procedure to set audio profiles on yourradio.
1Press to access the menu.
2Press or to Utilities. Press toselect.
3Press or to Radio Settings. Press to select.
4Press or to Audio Profiles. Press to select.
5Press or to the required setting. Press to select.The settings are as follows.
• Choose Default to disable the previouslyselected audio profile and return to the defaultfactory settings.
• Choose Level 1, Level 2, or Level 3 foraudio profiles intended to compensate fornoise-induced hearing loss that is typical foradults over 40 years of age.
• Choose Treble Boost, Mid Boost, or BassBoost for audio profiles that align with yourpreference for tinnier, more nasal, or deepersounds.
Other S
ystems
349
English

• Default
• Level 1, Level 2, or Level 3• Treble Boost, Mid Boost, or Bass Boost
The display shows beside the selected setting.
Viewing RSSI ValuesFollow the procedure to view RSSI values on yourradio.
When you are at the Home screen:
1Press three times and immediately press , allin five seconds.The display shows the current Received SignalStrength Indicator (RSSI) values.
2Long press to return to the Home screen.
Received Signal Strength IndicatorThis feature allows you to view the Received SignalStrength Indicator (RSSI) values.
The display shows the RSSI icon at the top rightcorner. See Display Icons on page 233 for moreinformation on the RSSI icon.
General Radio InformationYour radio contains information on various generalparameters.
The general information of your radio are as follows.
• Battery information.• Radio alias and ID.• Firmware and Codeplug versions.• Software update.• Open-Source Software information• Site information.• Received Signal Strength Indicator
Note:You return to the previous screen when you
press , and to the Home screen when
you long press , at any time. The radioexits the current screen once the inactivitytimer expires.
Checking Radio Alias and IDFollow the procedure to check the radio alias and IDon your radio.
1 Do one of the following:
Oth
er S
yste
ms
350
English
• Press the programmed Radio Alias and IDbutton. Skip the steps below.
A positive indicator tone sounds.•
Press to access the menu.
You can press the programmed Radio Alias andID button to return to the previous screen.
2Press or to Utilities. Press toselect.
3Press or to Radio Info. Press toselect.
4Press or to My ID. Press to select.The first text line shows the radio alias. Thesecond text line shows the radio ID.
Checking Firmware and Codeplug VersionsFollow the procedure to check the firmware andcodeplug versions on your radio.
1Press to access the menu.
2Press or to Utilities. Press toselect.
3Press or to Radio Info. Press toselect.
4Press or to Versions. Press to select.The display shows the current firmware andcodeplug versions.
Checking Software Update InformationThis feature shows the date and time of the latestsoftware update carried out via OTAP or Wi-Fi. Followthe procedure to check the software updateinformation on your radio.
1Press to access the menu.
2Press or to Utilities. Press toselect.
3Press or to Radio Info. Press toselect.
Other S
ystems
351
English

4Press or to SW Update. Press toselect.The display shows the date and time of the latestsoftware update.
Software Update menu is only available after at leastone successful OTAP or Wi-Fi session. See Over-the-Air Programming on page 99 for more information.
Oth
er S
yste
ms
352
English
Authorized Accessories List
Authorized A
ccessories List
353
English

Authorized Accessories List
Antennas• 420 – 445 MHz Stubby Antenna (PMAE4076_)• 438 – 470 MHz Stubby Antenna (PMAE4077_)• 403 – 425 MHz Stubby Antenna (PMAE4078_)• 450 – 490 MHz Stubby Antenna Kit (PMAE4091_)• 480 – 527 MHz Stubby Antenna Kit (PMAE4092_)• 806 – 870 MHz Stubby Antenna (PMAF4017_)• 896 – 941 MHz Stubby Antenna (PMAF4018_)• Antenna Mounting Kit, pack of ten screws and
plugs (PMLN6040_)
Batteries• Lithium-Ion 1800 mAh Battery Pack
(HKNN4013_).• Lithium-Ion 1370 mAh Battery Pack
(PMNN4425_)[11]
• BT100x Lithium-Ion 2300mAh Battery Pack(PMNN4468_)
Cables• Micro USB Programming Cable (PMKN4128_)
Carry Devices• Carry Holder (PMLN5956_)• Nylon Wrist Strap (PMLN6074_)• Soft Leather Accessory Carry Case with 1.5-Inch
Quick Disconnect Swivel Clip (PMLN7040_)
Chargers• Multi-Unit Charger, US Plug (PMLN5916_)• Micro USB Charger, US Plug (PMPN4009_)• Micro USB Single-Unit Plug-In Charger
(SPN5547_)• Micro USB Power Supply Adaptor, AC/DC Switch
Mode, Wall Cube, 5 W, 100 V – 240 V, US/JapanPlug (PS000042A11) [12]
• Micro USB Power Supply, 5 V 1 A, US/NA Plug(25009298001) [12]
• SL Series Tri-Unit Charger (PMLN6358_)
11 Not applicable to the 800/900 band.
Aut
horiz
ed A
cces
sorie
s Li
st
354
English

• Micro USB Travel Charger/Vehicular ChargerCigarette Lighter Adapter with Coil Cord(PMPN4066_) [12]
Miscellaneous Accessories• 1370 mAH Battery Cover (PMLN6000_)• 1800 mAH Battery Cover (PMLN6001_)• Screen Protector, Clear (single pack contains one
unit) (AY000269A01_) [13]
12 Your radio is compatible with the accessories listed here. Contact your dealer for details.13 Your radio is compatible with the accessories listed here. Contact your dealer for details.
Authorized A
ccessories List
355
English

Limited WarrantyMOTOROLA COMMUNICATION PRODUCTS
I. WHAT THIS WARRANTY COVERS AND FORHOW LONG:
MOTOROLA SOLUTIONS, INC. (“MOTOROLA”)warrants the MOTOROLA manufacturedCommunication Products listed below (“Product”)against defects in material and workmanship undernormal use and service for a period of time from thedate of purchase as scheduled below:
SL Series Digital Porta-ble Radios
24 Months
Product Accessories (Ex-cluding Batteries andChargers)
12 Months
MOTOROLA, at its option, will at no charge eitherrepair the Product (with new or reconditioned parts),replace it (with a new or reconditioned Product), orrefund the purchase price of the Product during thewarranty period provided it is returned in accordance
with the terms of this warranty. Replaced parts orboards are warranted for the balance of the originalapplicable warranty period. All replaced parts ofProduct shall become the property of MOTOROLA.
This express limited warranty is extended byMOTOROLA to the original end user purchaser onlyand is not assignable or transferable to any otherparty. This is the complete warranty for the Productmanufactured by MOTOROLA. MOTOROLAassumes no obligations or liability for additions ormodifications to this warranty unless made in writingand signed by an officer of MOTOROLA.
Unless made in a separate agreement betweenMOTOROLA and the original end user purchaser,MOTOROLA does not warrant the installation,maintenance or service of the Product.
MOTOROLA cannot be responsible in any way forany ancillary equipment not furnished by MOTOROLAwhich is attached to or used in connection with theProduct, or for operation of the Product with anyancillary equipment, and all such equipment isexpressly excluded from this warranty. Because eachsystem which may use the Product is unique,MOTOROLA disclaims liability for range, coverage, or
Lim
ited
War
rant
y
356
English
operation of the system as a whole under thiswarranty.
II. GENERAL PROVISIONSThis warranty sets forth the full extent ofMOTOROLA'S responsibilities regarding the Product.Repair, replacement or refund of the purchase price,at MOTOROLA’s option, is the exclusive remedy.THIS WARRANTY IS GIVEN IN LIEU OF ALLOTHER EXPRESS WARRANTIES. IMPLIEDWARRANTIES, INCLUDING WITHOUT LIMITATION,IMPLIED WARRANTIES OF MERCHANTABILITYAND FITNESS FOR A PARTICULAR PURPOSE,ARE LIMITED TO THE DURATION OF THISLIMITED WARRANTY. IN NO EVENT SHALLMOTOROLA BE LIABLE FOR DAMAGES INEXCESS OF THE PURCHASE PRICE OF THEPRODUCT, FOR ANY LOSS OF USE, LOSS OFTIME, INCONVENIENCE, COMMERCIAL LOSS,LOST PROFITS OR SAVINGS OR OTHERINCIDENTAL, SPECIAL OR CONSEQUENTIALDAMAGES ARISING OUT OF THE USE ORINABILITY TO USE SUCH PRODUCT, TO THEFULL EXTENT SUCH MAY BE DISCLAIMED BYLAW.
III. STATE LAW RIGHTS:SOME STATES DO NOT ALLOW THE EXCLUSIONOR LIMITATION OF INCIDENTAL ORCONSEQUENTIAL DAMAGES OR LIMITATION ONHOW LONG AN IMPLIED WARRANTY LASTS, SOTHE ABOVE LIMITATION OR EXCLUSIONS MAYNOT APPLY.
This warranty gives specific legal rights, and theremay be other rights which may vary from state tostate.
IV. HOW TO GET WARRANTY SERVICEYou must provide proof of purchase (bearing the dateof purchase and Product item serial number) in orderto receive warranty service and, also, deliver or sendthe Product item, transportation and insuranceprepaid, to an authorized warranty service location.Warranty service will be provided by MOTOROLAthrough one of its authorized warranty servicelocations. If you first contact the company which soldyou the Product (e.g., dealer or communicationservice provider), it can facilitate your obtainingwarranty service. You can also call MOTOROLA at1-800-927-2744 US/Canada.
Limited W
arranty
357
English
V. WHAT THIS WARRANTY DOES NOTCOVER
1 Defects or damage resulting from use of theProduct in other than its normal and customarymanner.
2 Defects or damage from misuse, accident, water,or neglect.
3 Defects or damage from improper testing,operation, maintenance, installation, alteration,modification, or adjustment.
4 Breakage or damage to antennas unless causeddirectly by defects in material workmanship.
5 A Product subjected to unauthorized Productmodifications, disassembles or repairs (including,without limitation, the addition to the Product ofnon-MOTOROLA supplied equipment) whichadversely affect performance of the Product orinterfere with MOTOROLA's normal warrantyinspection and testing of the Product to verify anywarranty claim.
6 Product which has had the serial number removedor made illegible.
7 Rechargeable batteries if:
• any of the seals on the battery enclosure ofcells are broken or show evidence oftampering.
• the damage or defect is caused by charging orusing the battery in equipment or service otherthan the Product for which it is specified.
8 Freight costs to the repair depot.9 A Product which, due to illegal or unauthorized
alteration of the software/firmware in the Product,does not function in accordance withMOTOROLA’s published specifications or the FCCcertification labeling in effect for the Product at thetime the Product was initially distributed fromMOTOROLA.
10 Scratches or other cosmetic damage to Productsurfaces that does not affect the operation of theProduct.
11 Normal and customary wear and tear.
VI. PATENT AND SOFTWARE PROVISIONSMOTOROLA will defend, at its own expense, any suitbrought against the end user purchaser to the extentthat it is based on a claim that the Product or partsinfringe a United States patent, and MOTOROLA willpay those costs and damages finally awarded against
Lim
ited
War
rant
y
358
English

the end user purchaser in any such suit which areattributable to any such claim, but such defense andpayments are conditioned on the following:
1 MOTOROLA will be notified promptly in writing bysuch purchaser of any notice of such claim,
2 MOTOROLA will have sole control of the defenseof such suit and all negotiations for its settlementor compromise, and
3 Should the Product or parts become, or inMOTOROLA’s opinion be likely to become, thesubject of a claim of infringement of a UnitedStates patent, that such purchaser will permitMOTOROLA, at its option and expense, either toprocure for such purchaser the right to continueusing the Product or parts or to replace or modifythe same so that it becomes non-infringing or togrant such purchaser a credit for the Product orparts as depreciated and accept its return. Thedepreciation will be an equal amount per year overthe lifetime of the Product or parts as establishedby MOTOROLA.
MOTOROLA will have no liability with respect to anyclaim of patent infringement which is based upon thecombination of the Product or parts furnishedhereunder with software, apparatus or devices not
furnished by MOTOROLA, nor will MOTOROLA haveany liability for the use of ancillary equipment orsoftware not furnished by MOTOROLA which isattached to or used in connection with the Product.The foregoing states the entire liability ofMOTOROLA with respect to infringement of patentsby the Product or any parts thereof.
Laws in the United States and other countriespreserve for MOTOROLA certain exclusive rights forcopyrighted MOTOROLA software such as theexclusive rights to reproduce in copies and distributecopies of such MOTOROLA software. MOTOROLAsoftware may be used in only the Product in whichthe software was originally embodied and suchsoftware in such Product may not be replaced,copied, distributed, modified in any way, or used toproduce any derivative thereof. No other useincluding, without limitation, alteration, modification,reproduction, distribution, or reverse engineering ofsuch MOTOROLA software or exercise of rights insuch MOTOROLA software is permitted. No license isgranted by implication, estoppel or otherwise underMOTOROLA patent rights or copyrights.
Limited W
arranty
359
English

VII. GOVERNING LAWThis Warranty is governed by the laws of the State ofIllinois, U.S.A.
Lim
ited
War
rant
y
360
English

BackCover_HalfLetter_P299C.fm Page 1 Friday, July 5, 2013 2:40 PM

BackCover_HalfLetter_P299C.fm Page 2 Friday, July 5, 2013 2:40 PM
MOTOROLA, MOTO, MOTOROLA SOLUTIONS and the Stylized M logo are trademarks or registered trademarks of Motorola Trademark Holdings, LLC and are used under license. All other trademarks are the property of their respective owners. © 2013 and 2016 Motorola Solutions, Inc. All rights reserved. May 2016
www.motorolasolutions.com/mototrbo
*68009554001*68009554001-LD