mod user manual - gps central v1_1.pdfkeep your hands free. switch off in hospitals and around...
TRANSCRIPT

Page 1 MOD User Manual | January 2012 | © 2012 Recon Instruments Inc | All rights reserved | www.reconinstruments.com MOD User Manual

Page 2 MOD User Manual | January 2012 | © 2012 Recon Instruments Inc | All rights reserved | www.reconinstruments.com
MOD is shipped with the following:
• Micro-opticdisplayandbatterypack.This snaps into your goggles.
• AC Adapters. Two types of adapters (North American and European) are availableforchargingthebatteryonthemicro-opticdisplay.
• MicroUSBcable.Thisletsyouconnect MOD to an AC adapter or to your computer for charging.
• Bluetooth remote control. Use this to control displays.
• Gogglestrap.Thisattachestheremote control to your goggle.
• Wriststrap.Thisattachestheremotecontroltoyourwrist,jacket,backpack,orbelt.
What’sinthebox

Page 3 MOD User Manual | January 2012 | © 2012 Recon Instruments Inc | All rights reserved | www.reconinstruments.com
Follow these safety guidelines:
ROAD SAFETY COMES FIRST.Toavoiddistraction,turnoffMODbeforeyoudrive.Neverusetheremotecontrollerwhiledriving:keepyourhandsfree.
SWITCH OFF IN HOSPITALS AND AROUND MEDICAL DEVICES. Wireless devices can cause interference with medical equipment.KeepMODturnedoffaroundmedicalequipment.Followanyrestrictionspostedinhospitalsandhealthcenters.Ifyouwearapacemaker,checkwiththemanufactureron
SWITCH OFF IN AIRCRAFT. KeepMODturnedoffaroundhelicoptersoraircraft.Followanyrestrictionspostedinhelipadsand airports.
SWITCH OFF NEAR BLASTING.KeepMODturnedoffinareaswhereblastingisinprogress.
SWITCH BEFORE REFUELLING.KeepMODturnedoffatgasstations,refuellingareasorinareaswherefuelandvolatilechemicals such as propane are stored.
SafetyInformation

Page 4 MOD User Manual | January 2012 | © 2012 Recon Instruments Inc | All rights reserved | www.reconinstruments.com
• IfyouexperiencenauseaoreyestrainwhenusingMOD,takeabreakforseveral minutes.
• Avoid wearing eyeglasses under your goggles.
Vision Tips

Page 5 MOD User Manual | January 2012 | © 2012 Recon Instruments Inc | All rights reserved | www.reconinstruments.com
1. Remove the lens from the goggle frame.Seeinstructionsprovidedbythe goggle manufacturer.
2. On the frame of your goggles, remove theprotectivebadgefromtheleftside of the frame. This will reveal slots forMODtobeinserted.
3. Next,insertMODintothegoggleframe as follows: with the goggles facing you, snap the MOD micro opticsdisplayunitintotheleftinnercorneroftheframe.Next,insertthebatterypackintotherightcorner.
4. PushtheMODcableintothegroovesothatitfitstightly.
5. Ifthecableistooshort,tugitgentlyso the white stripes appear. If the cableistoolong,pushitbackin.
6. Insertthelensbackintothegoggles.Takecarenottotouchorsmudge the lens.
Follow these steps to snap MOD into your goggles. Note: only use goggles that are Recon-Ready®.Our2011ReconReady™partnersincludeUvex®,Briko®,Zeal®,andAlpina®.TolearnmoreaboutRecon-Readygoggles,goto:www.ReconReady.com
Snap MOD into goggles

Page 6 MOD User Manual | January 2012 | © 2012 Recon Instruments Inc | All rights reserved | www.reconinstruments.com
To charge MOD using an AC adapter:
1. AssembletheACadapterbyinsertingtheNorthAmerican or European plug. Insert the large plug of the USBcableintotheadapterport.
2. RemovetheclearplasticcapthatcoverstheMODUSBport.
3. Insert the smaller plug into MOD’s USB port. Tip: the portcovershowsatinyimageofaUSBcable.Checkthattheplug’s7Lletteringappearsontheoutsideofthe goggle.
4. Plug the adapter into a power outlet. As soon as MOD beginscharging,aredlightappearsdirectlyabovetheUSB port.
5. Aftertheredlightdisappears,disconnecttheadapter.RemovetheUSBcablefromMOD.
6. SealtheUSBportwiththeplasticcap,thentightlypushdown on the USB cover to ensure no rain, snow or ice affectstheport.
Charge up MOD
To ensure that MOD is fully charged, follow these steps using the MOD AC adapter and microUSBcable.TheMODpowerbutton(besidetheUSBport)mustbeturnedoffwhilerecharging.

Page 7 MOD User Manual | January 2012 | © 2012 Recon Instruments Inc | All rights reserved | www.reconinstruments.com
Charge up MOD
To charge MOD using your PC or Mac computer:
1. TurnonyourPCorMac.MakesurethecomputerisNOTinstandbymode.
2. PlugthemicroUSBcable’ssmallerendintoMOD’smicro USB port.
3. PlugtheUSBcable’slargerendintotheUSBportinyourPCorMac.AssoonasMODbeginscharging,aredlightappearsdirectlyabovetheUSBport.
4. Aftertheredlightdisappears,navigateto“safelyremove or eject the hardware” using your PC or Mac beforeyoudisconnecttheUSBcablefromMOD.Thendisconnect the adapter.
5. SealtheUSBportwiththeplasticcap,thentightlypushdown on the USB cover to ensure no rain, snow or ice affectstheport.
Ifthebatterywasdrainedaftertheunitleftthefactory,itcantakeupto3hoursforthe batterytobecomefullychargedalthoughyoucanachievean80%chargewithinanhourinoptimalconditions.

Page8 MOD User Manual | January 2012 | © 2012 Recon Instruments Inc | All rights reserved | www.reconinstruments.com
MOD is factory-paired (synchronized) with the remote controllershippedinthebox.
Toperforma“pair”check,follow these steps:
1. OnMOD,pressdownthepowerbuttonfor 3 seconds.
2. Ontheremotecontroller,pressanybuttonandwaitforabluelighttoflash.Thisconfirmstheremoteisconnected to MOD.
Youcanalsocheckforconnectivitybyholdingthegogglestoyoureyesandcheckingthestatusbarthatappearsonthedashboard.Theremotestatusindicatoriconontheleft-handsideshouldbeblue.
Checktheremotecontroller

Page 9 MOD User Manual | January 2012 | © 2012 Recon Instruments Inc | All rights reserved | www.reconinstruments.com
Toattachthewriststrap:
1. Slip either end of the Velcro strap (rough side facing out) into the remote’s handle. Tip: insert the strap at a diagonal, and either pull or push it through the handle.
2. Alignthe“V”oftheVelcrostrapwiththe edge of the controller. Push down untilyouhearaclick.
3. Stretch the strap and insert the other endoftheVelcrostraprepeatingsteps 1 and 2.
4. AttachVelcroaroundthecuffofyourgloveorjacketandpullitforasnugfit.Or,usethestraponajacketbeltorbackpack.
Attachastrap

Page 10 MOD User Manual | January 2012 | © 2012 Recon Instruments Inc | All rights reserved | www.reconinstruments.com
Attachastrap
Toattachthegogglestrap:
1. Slip either end of the Velcro strap (rough side facing out) into the remote’s handle. Tip: insert the strap at a diagonal, and either pull or push it through the handle.
2. Align the strap with the edge of the controller.Pushdownuntilyouhearaclick.
3. Stretch the strap aand insert the other end of the Velcro strap repeatingsteps1and2.
To remove either strap from the remote handles:
OpentheplasticendsoftheVelcrostrapusingafingernailorslimobjectsuchasanailfile.
WARNING: Avoid applying pressure to the handles of the remote controller. Velcro straps should neverbeattachedtoheavyobjectssuchasbackpacksorsnowboardcarrierbags.

Page 11 MOD User Manual | January 2012 | © 2012 Recon Instruments Inc | All rights reserved | www.reconinstruments.com
Follow these steps to create a free account on HQ Online. HQ Online is Recon Instruments’ online community where you can upload your stats, runs and highlights as well as compete for prizes.
Create an HQ account
1. GototheHQOnlinewebsiteat http://hqonline.reconinstruments.com
2. Clickonthesign-uphyperlink.IntheSIGNUPFORM,enterthefollowingandclickSUBMIT.
• Your name.Enteryourfirstname,analiasoranickname.
• Your email address. Enter a valid, unique email address. All accountsettingsarelinkedtoyouremail.(Ifyoudecidetocreateasecondaccount,forexample,forafamilymember,youcannot reuse the same email address.)
• A password.Enteraminimumofsixcharacters.
3. Checkyouremailforamessagefrom [email protected].
4. Activateyouraccountbyclickingthelinkforaccountactivation(on the last line of the message).
5. When the HQ Online home page appears, login using the email addressandpasswordinstep2.ALoginSuccessfulconfirmationmessage appears.

Page 12 MOD User Manual | January 2012 | © 2012 Recon Instruments Inc | All rights reserved | www.reconinstruments.com
ReconHQisafreeapplicationforyourPCorMacthatallowsyoutodownloadstatisticsandinformationcollectedonMODdirectlytoyourcomputer.ThisapplicationneedstobeinstalledonyourcomputertoallowyoutodownloaddatafromMOD.
Download Recon HQ
What You Need• AnInternetconnection• A PC or Mac
PC Requirements• IntelPentium4orhigherprocessor• 1GB of RAM• Screenresolutionof1024x768or
greater• USB2.0portforconnectionwith
Recon goggles• WindowsXPServicePack2orlater,
Windows Vista, or Windows 7
Mac Requirements• Intel Core Duo or higher processor• USB2.0portforconnectionwith
Recon goggles• Internetconnectionforconnection
with Google Maps• Mac OS X v10.6 or later
To download and install Recon HQ to your computer:
1. Clickthislink: www.reconinstruments.com/support/downloads
2. ClickonINSTALLNOW.
3. Followthedownloadinstructions.
ForinstructionsonhowtodownloadMOD data to your computer, see the sectionDOWNLOADINGMODDATATOYOUR COMPUTER.

Page 13 MOD User Manual | January 2012 | © 2012 Recon Instruments Inc | All rights reserved | www.reconinstruments.com
Whenthisscreenappears,pressanybuttonontheremoteto launch MOD.
Remotecontrollerbuttons
• Press to select an app, see a menu, orchooseanoption
• Presstoexitascreenormenu Pressrepeatedlytoexitanapp
• Presstonavigateverticalmenus,zoomorpaninmaps
• Presstonavigateverticalmenus,zoomorpaninmaps
• Press to navigate horizontal menus, zoom or pan in maps
• Press to navigate horizontal menus, zoom or pan in maps
MODQuickreference

Page 14 MOD User Manual | January 2012 | © 2012 Recon Instruments Inc | All rights reserved | www.reconinstruments.com
MODQuickreference
MOD Icons
Useiconstoaccessfunctions.Tonavigate,press or Tochooseafunction,press .Toexit,press
STATS HISTORY.Accessaccumulatedstatistics.
JUMPS.Viewairtime,distance,heightanddrop.
CHRONO HISTORY. Viewstopwatch-timedactivityrecords.
PREFERENCES. Changebrightnesslevel,time,language,and units of measure. Clear data from the display.
Statusbar1. GPS Indicator
2. Time
3. Remoteconnectionindicator
4. Batterychargeindicator
1
2
3
4

Page 15 MOD User Manual | January 2012 | © 2012 Recon Instruments Inc | All rights reserved | www.reconinstruments.com
MODQuickreference
(RED BLINKING) Searching signal
(GREENBLINKING)Partialcoverage
(GREEN SOLID) Full GPS signal
(RED SOLID) No remote found
(RED BLINKING) Searching for remote
(SOLID BLUE) Connected remote
Moreoptionshidden
Currently selected feature
DisplayoffmodeDisplayoffmodesavesthebatterywhenthedisplayisnotneeded.MODwillcontinuetorecordyourdataandstatisticswhileindisplayoffmode.Simplypressanybuttontore-activatethedisplayandcontinuewhereyouleftoff.
Turndisplayoff:
• Press on the remote controller.
• When the DISPLAY OFF screen appears, press
Turn display back on:
• Pressanybuttonontheremotecontroller.
Status Indicators
DISPLAY OFF

Page 16 MOD User Manual | January 2012 | © 2012 Recon Instruments Inc | All rights reserved | www.reconinstruments.com
Performancenotifications
MODQuickreference
3912 m
MAX km/h
3912 m
m
1200VRT
3912 m3500ALT m
3912 m3.73AIR s
Thesepopupsareautomaticallydisplayedforafewseconds:
MAX:Appearseachtimeyoutopyourmaximum speed for the day.
ALT: Appearswheneveryourmaximumaltitude increasesby500mor1500ft.
VRT:Appearswheneveryoureachaverticaldropof 500mor1500ft.
AIR: Appearseachtimeyoujumpformorethan.6seconds.

Page 17 MOD User Manual | January 2012 | © 2012 Recon Instruments Inc | All rights reserved | www.reconinstruments.com
SystemnotificationsThesepopupsareautomaticallydisplayedforafewseconds:
BatteryCritical/GracefulShutdown:Thebatteryhasalmostzerocharge.RechargeMODassoonaspossible.MOD shuts down to ensure your data is saved.
Memory Full: Assoonaspossible,performadownloadand then select DELETE AFTER DOWNLOAD. Refer to the section,DownloadingMODDatatoyourComputer.
Auto shutdownMODautomaticallyshutsdownafterahalf-hourofnomovement.
TurnMODbackon:
• PressandholddowntheMODpowerbutton.
MODQuickreference

Page18 MOD User Manual | January 2012 | © 2012 Recon Instruments Inc | All rights reserved | www.reconinstruments.com
MODFeaturesandfunctions
Overview
STATSHISTORY.Viewfourdashboardsshowingmetricsincluding your speed, distance.
JUMPS.Viewairtime,distance,heightanddrop.
CHRONOHISTORY.Viewstopwatch-timedactivityrecordstotrackyourprogressintrainingandtimedevents.
PREFERENCES.Changebrightnesslevel,time,language,andunits of measure. Clear data from the display.
RECOMOD®offerscomprehensiveperformance-monitoringandcondition-monitoringthatincorporatesGPStechnologyandsensorintegrationtoprovideapowerfulworkoutandtrainingtoolforalpineactivities.

Page 19 MOD User Manual | January 2012 | © 2012 Recon Instruments Inc | All rights reserved | www.reconinstruments.com
MODFeaturesandfunctions
SPEED. MOD displays your speed as a dial and as digits. The dial turns red at high speeds to warn you to slow down.
ALT.MODdisplaysthedistanceabovesea-levelcalculatedautomaticallyusingGPSdata.NOTE:Thisvaluerequiresastrong GPS signal.
VRT.MODdisplaysthetotalverticaldistance(descent)recorded since the start of the day. MOD records your ascentwhetheryoutravelledbygondola,chairlift,oronsnowboard.
TMP. MOD displays the current temperature.
DST. MOD displays the total distance travelled across land (up, down and sideways) during the current session.
DashboardKeeptrackofthemostimportantmetricsincludingyourspeedanddistanceaswellasgeoconditionsimportanttobackcountryactivities.Choosefromfourdashboardstyles:
IMPORTANTNOTE:ThefirsttimeyouuseMOD,valuesinthedashboardwillbeatzeroexceptfortemperatureandaltitude(elevationabovesealevel).WhileMODacquiresGPSdata,dashescanappear.Headtoanopenareaandwaitfiveminutes.
2473 m
3912 m
TMP
8539 m
To navigate. Press tonavigatetothedashboardyouwant.

Page 20 MOD User Manual | January 2012 | © 2012 Recon Instruments Inc | All rights reserved | www.reconinstruments.com
MODFeaturesandfunctions
StopwatchUsethestopwatchforclockinganytimedactivity.
• Tostartthetimer.Press inanydashboard.Digitschangecolour from grey to yellow.
• Tostopthetimer.Press .ThistimeissavedinarecordinCHRONO HISTORY.
• Tocleartimeddataandresetthecountertozero.Press. This resets the displayed counter to zero.
8539 m8539 m

Page 21 MOD User Manual | January 2012 | © 2012 Recon Instruments Inc | All rights reserved | www.reconinstruments.com
MODFeaturesandfunctions
Clockatimedactivity(jog,cycle,skiorboard)
1. Startmovinginanopenareaunobstructedbytrees,polesorcliffs.
2. Watchdialbarslightupandchangecolourasyouincreasespeed.
Clockatimedactivity(jog,cycle,skiorboard)
1. Press to start the stopwatch.
2. Press tostop.Checkchronodatainyellow.
Trackairtime.Tossyourgoggles.
1. Press untilyouseeLASTJUMP.
2. Review your jump stats.
3. Press toexitCHRONOHISTORY
2473 m
8539 m8539 m
Air TimeDistanceHeightDrop
LAST JUMP #31
TestthedashboardFollowthesestepstogetfamiliarnavigatingandusingtheremotecontroller.

Page 22 MOD User Manual | January 2012 | © 2012 Recon Instruments Inc | All rights reserved | www.reconinstruments.com
Chrono
Usethisfunctiontoreviewstopwatchdata.Allstopwatchrecordsaresavedhere.AccessCHRONOHISTORYfromtheiconmenutoviewandmanagetimedactivitydata.Thisviewshowsnodata.Untilyoustartusingthestopwatch,nohistorywillappearhere.Recordsappearinchronoorder.Eachrecordshowsauniquenumberforeasyreference.
TofindandselectCHRONOHISTORY:
• Press untilthestopwatchiconishighlighted.Press to select CHRONO HISTORY.
• Press to see lists of saved records
Toselect,flagordeleterecords:
• Press toselectarecordforflaggingordeletion.FlaggingarecordwillhighlightitinReconHQsoftwareafteryoudownloaddata.Deletingarunwilldeleteitfrom MOD memory and from CHRONO HISTORY.
• Press and tonavigatebetweenDeleteand Flag. Press when Delete or Flag is highlighted.
LAST RECORD
0:06:34.72
CHRONO HISTORY
14 15 16 17
0:06:34.430:07:21.160:06:46.320:06:34.43

Page 23 MOD User Manual | January 2012 | © 2012 Recon Instruments Inc | All rights reserved | www.reconinstruments.com
Stats history
TofindandselectSTATSHISTORY:
Press untilSTATSHISTORYisdisplayed.Press to select it. Press and tonavigatebetweenthesefourdisplays.
STATS HISTORY show these highlights:
• LASTRUN:MODidentifiesyourcurrent(latest)run.
• MaxSpeed:MODdisplaysthetopspeedyou’veachievedduringthe last run.
• Vertical:MODdisplaysthetotalaccumulateddistancetravelledverticallydownwardsduringthelastrun.
• Distance: Total Distance Travelled across land (Up, down, and sideways) during the last run.
STATS HISTORYLAST RUNMax SpeedVerticalDistance
107#7
736 m2105 m
ChooseSTATSHISTORYtoseefourpagesofstatisticsincludingperformancestats(maximums,minimums,averages,andtotals),distances,elevations,andmountainconditions.

Page 24 MOD User Manual | January 2012 | © 2012 Recon Instruments Inc | All rights reserved | www.reconinstruments.com
Stats history
PERFORMANCESTATSshowmilestonesforspeeds,activitylength,andairtime:
• Max Speed: MOD displays the top speed for the day or since you last reset your stats.
• AvgSpeed:MOD displays the average speed recorded for the day or since you last reset your stats.
• Long:MODdisplaysthelongesttimedactivityrecordedinChrono/Stopwatchduringthedayorsinceyoulastresetyour stats.
• Short: MODdisplaystheshortesttimedactivityrecordedinChrono/Stopwatchduringthedayorsinceyoulastresetyour stats.
• Last Air: MODdisplaysyourlatestjump’sairtime.
• Max Air:MODdisplaysthehighestairtimerecordedthedayor since you last reset your stats.
87 Km/h34 Km/h
Max Speed Avg Speed Long Short Last AirMax Air
2:46.534:18.20
1.33 s1.52 s

Page 25 MOD User Manual | January 2012 | © 2012 Recon Instruments Inc | All rights reserved | www.reconinstruments.com
Stats history
2053 m2721 m1647 m13 Runs
3214 m
Current MaxTotal
Total
ELEVATIONSTATSshowyouraltitude,downwarddistancesandtotal distances.
• CurrentAltitude:MODdisplaysthecurrentaltitude.Thisisupdated every 30 seconds.
• MaximumAltitude:MODdisplaysthehighestaltitudefortheday or since you last reset your stats.
• TotalVerticalDistanceTravelled:MODdisplaysthetotalverticaldistanceaccumulatedduringthedayorsinceyoulastreset your stats.
• TotalVerticalRuns:MODdisplaysthetotalverticalrunsaccumulatedbeforetravellingupwards(onalift)duringtheday or since you last reset your stats.
• Total Distance Travelled: MOD displays the total accumulated distance travelled (including ramps, paths, magic carpets, parkinglots)duringthedayorsinceyoulastresetyourstats.

Page 26 MOD User Manual | January 2012 | © 2012 Recon Instruments Inc | All rights reserved | www.reconinstruments.com
Stats history
Min
32 18.385122 36.875
N W CurrentMax
- 2 C
-11 C 5 C
MOUNTAIN STATS show GPS coordinates and temperature stats.
• CurrentLatitude/Longitude:MODdisplaysyourcurrentcoordinates(latitudinalandlongitudinal)usingGPSdata.
• Current Temperature: MOD displays an updated temperature every 30 seconds.
• MaximumTemperature:MODdisplaysthehighesttemperature for the day or since you last reset your stats.
• Minimum Temperature: MOD displays the lowest temperature for the day or since you last reset your stats.

Page 27 MOD User Manual | January 2012 | © 2012 Recon Instruments Inc | All rights reserved | www.reconinstruments.com
JUMPSTATStracksyourairtime,verticalandhorizontaldistancesanddropsusinginertialsensors(GPS,Altimeter,andAccelerometer).MODautomaticallykeepstrackofjumps,slides,drops or moves where you are in the air for at least 0.6 seconds whetheryouareonskis,onaboard,kite,blades,oronabike.
• Press to navigate to JUMP STATS. Press to select it.
• Press toswitchbetweenLASTJUMPandBESTJUMPstats.
JUMP STATS
Air Time: MOD measures (in seconds) the moment you are no longertouchingthegrounduntilimpact.
Distance: MOD displays your horizontal distance travelled while you areairborne.
Height:MODdisplaysyourverticaldistancebetweentakeoffandthe highest point of the jump.
Drop:MODdisplaysyourverticaldistancebetweenthehighestpoint of the jump and the landing.
BEST JUMP:Thisisyourbestjumpoftheday(basedonmaximumairtime).
Jump stats
Air TimeDistanceHeightDrop
LAST JUMP #31

Page28 MOD User Manual | January 2012 | © 2012 Recon Instruments Inc | All rights reserved | www.reconinstruments.com
MODdisplaysfourpreferencesmenuoptionstochoosefrom:Brightness, Set Time, Reset Stats, and Set Units. Press tonavigatebetweenthem.
How to access PREFERENCES:
• Press toaccesstheiconbar.Press repeatedly untilPREFERENCESisdisplayed.
• Press to select PREFERENCES. Press to navigate betweenBrightness,SetTime,ResetStats,andSetUnits.
Preferences
Day 8Begin 10.26 AMFW version 2.0
PREFERENCES

Page 29 MOD User Manual | January 2012 | © 2012 Recon Instruments Inc | All rights reserved | www.reconinstruments.com
Set BrightnessMODhasthreebrightnesssettings:3fordirectsunlight,2forovercastconditions,and1fordarkareasornightskiing.Bydefault,MODissettomaximumbrightness(3).
Theredtriangleshowsthecurrentsetting.
Howtosetbrightness:
1. Press to select Brightness.
2. Press tonavigatetothesettingyouwant.
3. Press toconfirmyourselection.Press toexit.
Preferences
BrightnessSet TimeSet UnitsSet Language
Medium Brightness

Page 30 MOD User Manual | January 2012 | © 2012 Recon Instruments Inc | All rights reserved | www.reconinstruments.com
Settime• Usethisfunctiontosettheclockforthetimezone
youarein.AlthoughMODsetstheclocktoGreenwichMeanTime(GMT)assoonasitlocksonasignal;theclockisNOTadjustedfortimezones.
• Youcanalsoswitchbetween12-houror24-hourtimemodes.
Tosettime:
1. Press to navigate to Set Time. Press to select it.
2. Press to navigate to the hour or to the minutes.
3. Press and to adjust the hour or minutes. Press to save.
4. Tochangetimemode,press to reach 24HR. Press and toswitchbetween12HRand24HRtimemodes.
5. Press to save. Press toexit.
Preferences
BrightnessSet TimeSet UnitsSet Language
12HR

Page 31 MOD User Manual | January 2012 | © 2012 Recon Instruments Inc | All rights reserved | www.reconinstruments.com
Set unitsTo switch from metric to Imperial units (or vice versa):
1. Press to navigate to Set Units.
2. Press to select Set Units.
3. Press and totogglebetweenUS/ImperialandMetric.
4. Press to select. Press toexit.
Preferences
MetricUS / Imperial

Page 32 MOD User Manual | January 2012 | © 2012 Recon Instruments Inc | All rights reserved | www.reconinstruments.com
Set LanguageTo switch from English to French:
1. Press to navigate to Set Language. Press to select it.
2. Press and totogglebetweenFrenchandEnglish.
3. Press to select. Press toexit.
Preferences
BrightnessSet TimeSet UnitsSet Language

Page 33 MOD User Manual | January 2012 | © 2012 Recon Instruments Inc | All rights reserved | www.reconinstruments.com
Reset StatsResettingclearsdisplayedstatsincludingLastRun,Performance,Elevation,MountainstatsandJumpsandChronorecords.Notethatareset does not wipe the data stored in MOD.
NOTE:WheneverMODisturnedoffforsixormorehours,itperformsanautomaticreset.
To reset your stats:
1. Press to navigate to Reset Stats. Press to select it.
2. Press and to select YES.
Press to select NO. Press toexit.
Preferences
Reset Stats
Save and reset stats?

Page 34 MOD User Manual | January 2012 | © 2012 Recon Instruments Inc | All rights reserved | www.reconinstruments.com
Downloading MOD data to your computer
To download data from MOD:
1. TurnMODoffbyholdingdownthepowerbuttonfor2seconds.
2. AttachtheUSBcableshippedwithMODLivetoyourcomputerandtoMOD.PlugthemicroUSBcable’ssmaller end into the micro USB port located under the protectivecoverontherightsideofthegoggles.PlugtheUSBcable’slargerendintotheUSBportinyourPCor Mac.
Tip:IfyourcomputerdoesnotrecognizeMODtryreinsertingtheUSBcable.
NOTE: Recon HQ must be installed on your Mac or PC.
3. ClickDOWNLOADwhenthepromptDOWNLOADTRIPSFROM GOGGLE appears.
IMPORTANT NOTE: Never disconnect while data is beingtransferredfromMODtoyourPCorMac.
4. Afteryoudownload,besuretoreplacetheplasticcapon MOD’s USB port cover to ensure no water, snow or ice damages the port.
PerformadownloadtoReconHQsoftwaretoshareMODstatsandhighlightsonHQOnline.ToclearspaceonMOD,downloaddataaftereveryfivedaysofuse.TIP:Ifyourbatteryhasbeendrainingquickly,performadownloadtoensurenodataislost.

Page 35 MOD User Manual | January 2012 | © 2012 Recon Instruments Inc | All rights reserved | www.reconinstruments.com
Viewing MOD DataRecon HQ overlays run data collected from MOD onto Google mapimagessoyoucanplayback,store,andre-liveyourMODactivity.UseReconHQtologallactivitythroughoutthecourseoftheseasonsoyoucanidentifyperformancehighlights,rememberyourfavouritetracks,trailsandruns.
Sharing MOD DataAfteryoudownloadyourMODdata,youcanuploadthebestmomentstoHQOnlineaswellasFacebookandTwitter.
MOD data
Page 36 MOD User Manual | January 2012 | © 2012 Recon Instruments Inc | All rights reserved | www.reconinstruments.com
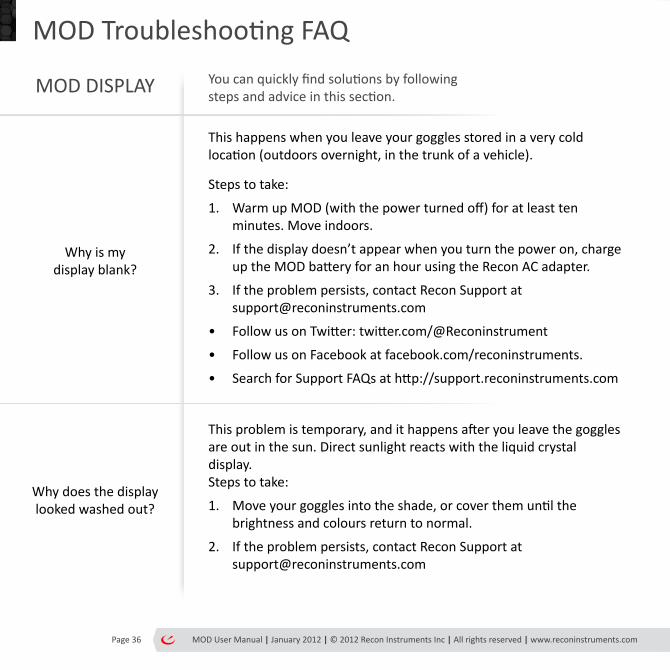
MODTroubleshootingFAQYoucanquicklyfindsolutionsbyfollowing stepsandadviceinthissection.MOD DISPLAY
Why is my displayblank?
This happens when you leave your goggles stored in a very cold location(outdoorsovernight,inthetrunkofavehicle).
Stepstotake:
1. WarmupMOD(withthepowerturnedoff)foratleasttenminutes. Move indoors.
2. If the display doesn’t appear when you turn the power on, charge uptheMODbatteryforanhourusingtheReconACadapter.
3. Iftheproblempersists,contactReconSupportat [email protected]
• FollowusonTwitter:twitter.com/@Reconinstrument
• FollowusonFacebookatfacebook.com/reconinstruments.
• SearchforSupportFAQsathttp://support.reconinstruments.com
Why does the display lookedwashedout?
Thisproblemistemporary,andithappensafteryouleavethegogglesare out in the sun. Direct sunlight reacts with the liquid crystal display. Stepstotake:
1. Moveyourgogglesintotheshade,orcoverthemuntilthebrightnessandcoloursreturntonormal.
2. Iftheproblempersists,contactReconSupportat [email protected]

Page 37 MOD User Manual | January 2012 | © 2012 Recon Instruments Inc | All rights reserved | www.reconinstruments.com
MODTroubleshootingFAQ
Why is the display hardtoread?
MOD DISPLAY
MOD’sdefaultbrightnesssettingisn’tforindooruse,nightskiingordarkenvironments.UsethePreferencesmenutochangethebrightnesssetting.MODwillcontinuerecordingevenwhenthedisplayisturnedoff.
Why can’t I see the edgeofthedisplay?
Youneedtoadjusttheheadofthemicro-opticdisplayinthelowerright-handcornerofthegoggleframe.Tiltorrotateit.Ortightenthestrap of your goggle.
Why is my display solidredorgreen?
MODhasalooseorbrokenconnection.Itcanhappenafterabadcrash that damages MOD components.
Steps to take:
1. HolddownthePowerbutton,waitafewminutes,andthenpressthisbuttonagain.
2. Try recharging MOD.
3. Ifthisdoesnotwork,contactReconSupport.

Page38 MOD User Manual | January 2012 | © 2012 Recon Instruments Inc | All rights reserved | www.reconinstruments.com
MOD DISPLAY
MODTroubleshootingFAQ
Why does my display showaredicon?
ArediconmeansthereisnoconnectionbetweenMODandtheremote controller. Whenever the remote controller is more than ten feetawayfromMOD,theconnectionislost.IfyouareusingMODwithadifferentremotecontroller,arediconmeansthatMODisn’tpaired with the remote.
Stepstotake:
1. BringMODintocloseproximitytotheremotecontroller. Pressanybuttonontheremotecontrollerandwaitfortheicontoturnblue.
2. Trytore-pairtheremotecontroller.SeetheinstructionsinPairing a Remote Controller later in this guide.
Why does my display show the RECON
logo instead of the dashboard?
ThishappenswhenyouturnMODbackonafteritispoweredoff.Waitafewsecondsforthedashboardtoappear,orrestartMOD.

Page 39 MOD User Manual | January 2012 | © 2012 Recon Instruments Inc | All rights reserved | www.reconinstruments.com
MODTroubleshootingFAQ
IMPORTANTNOTE:MODcanlosedataorloseitsconnectiontotheremotecontrollerduetoelectromagneticinterference.Sourcesofinterference include transmission towers, two-way radios, wireless devices,industrialdevicesoperatingonRFfrequencyaswellasmotionsensors,remotecontrols,andmicrowaveovens.stepsandadviceinthissection.
Why is the speed valuewrong?
MOD uses GPS technology to determine speed. When you turn on MOD, you need to wait ten minutes for it to acquire satellite data.
GPStechnologyworksbestinopenspaceswitha360degreeviewoftheskywhichgivesaccesstoatleastthreesatellites.Beinginavalley,besideatree,buildingorrockfacecanblockMODfromgettingGPScoverage. AvoidusingMODinsidebuildingsandgondolasornearsolidobstructionssuchastreesandrockfacescaninterruptGPScoverageandcauseincorrectdatatoappear.
Stepstotake:
1. Changelocation.Movetoanopenlocationwithaclearviewofthesky.Ifyouareinavalleyorgulley,movetohigherground.
2. Wait for the GPS indicator icon to show two or three green signals.
3. Ifchanginglocationdoesnothelp,restartMODbyturningthepoweroffandonagain.
4. If you can’t get a GPS signal, contact Recon Support.
MOD DATA

Page 40 MOD User Manual | January 2012 | © 2012 Recon Instruments Inc | All rights reserved | www.reconinstruments.com
MOD DATA
MODTroubleshootingFAQ
Why does the speedometer show
“--”insteadofnumbers?
WhileMODiswaitingforaGPSsignal,thedashboardspeedometerdisplays“--”untilitcancalculateavalidspeedfromGPSdata.
Steps to take:
1. Changelocation.Movetoanopenlocationwithaclearviewofthesky.Ifyouareinavalleyorgulley,movetohigherground.
2. Wait a few minutes for the GPS indicator icon to show two or three green signals.
3. RestartMODbyturningthepoweroffandonagain.
4. Iftheproblemcontinues,contactwww.reconinstruments.com/support for support
Why is the altitudewrong?
MODcalculatesaltitudeusingacombinationofairpressure and GPS data.
When MOD is not moving, data from the air pressure sensor is changedtomatchtheGPSreading.Stormsaffectairpressure,causingthealtitudetodecrease.Inclearweather,altitudedatawillincrease.
Steps to take:
1. Ifyouhavebeensittingorstandinginanopenareaformorethanahalfhour,turnMODoffandon.
2. Waittenminutes,andturnMODbackon.

Page 41 MOD User Manual | January 2012 | © 2012 Recon Instruments Inc | All rights reserved | www.reconinstruments.com
MOD DATA
MODTroubleshootingFAQ
Why are my statisticswrong?
MODusesGPStechnologytodeterminestatistics.YourlocationaffectstheGPScoverage,forexample,beinginavalley,besideatree,buildingorrockface.
Steps to take:
1. Changelocation.Movetoanopenlocationwithaclearviewofthesky.Ifyouareinavalleyorgulley,movetohigherground.
2. Wait for the GPS indicator icon to show two or three green signals.
3. Ifchanginglocationdoesnothelp,restartMODbyturningthepoweroffandonagain.
4. Ifyourstatisticsarestillincorrect,resetthemusingthePreferences menu.
Whydoestheclockshowthewrongtime?
IfthisisthefirsttimeyouareusingMOD,theclockwillshowGreenwichTime.Youneedtosettheclockforyourowntimezone.
MODshutsofftheclockwhenthebatterylevelisalmostdrained.
Toresetthetime,seePreferencessectionearlierinthisguide.

Page 42 MOD User Manual | January 2012 | © 2012 Recon Instruments Inc | All rights reserved | www.reconinstruments.com
MOD DATA
MODTroubleshootingFAQ
Why is the temperaturewrong?
MOD’stemperaturesensortakessometimetoadjusttotheambientair temperature. The thermometer is located inside the wireless remote.IfyouarewearingMODinsideapocketorjacket,thetemperaturewillbehigherthanyoursurroundings.
Steps to take:
1. Weartheremoteonyourwrist,goggleoutsideyourjacketinsteadofkeepinginaninsidepocket.
2. Wait a few minutes for MOD’s temperature sensor to adjust.
Why can’t I get the stopwatchtostart?
Try to reset the stopwatch.
Steps to take:
1. Press once.Thetimerissetto0:00:00andthenumbersturn grey.
2. To start the counter, press again.Thetimerstartscountingandthenumbersturnyellow.

Page 43 MOD User Manual | January 2012 | © 2012 Recon Instruments Inc | All rights reserved | www.reconinstruments.com
MOD BATTERY
MODTroubleshootingFAQ
Why can’t I get afullcharge?
Steps to take:
• CheckthatyouareusingtheReconACadapterandUSBcableincludedintheMODbox.CheckthattheACcablesaysReconInstruments.
• TurnMODoffbeforeyourecharge.
• TurnonyourPCorMac;makesureitisnotinstandbymode.CheckthattheportonyourPCorMacisaUSB2.0port (notakeyboardport).
• Duringrecharging,checkthattheredlightabovetheUSBportappears.ThisshowsthatMODisstillcharging.
Whydoesmybatterydrainsoquickly?
Extremelylowtemperaturescanaccountforaquickdrain.
At-10°C(14°F),afullychargedbatterylastsbetween6to8hours.
Ifthetemperaturedipsbelow-20°C(-4°F),thechargewon’tlast as long.
Tipstoprolongbatterylife:
• AvoidusingMODattemperaturesbelow-20°C(-4°F).
• TurnoffthepowerwhenyouarenotusingMOD.
• Use the DISPLAY OFF feature when you are not using MOD.
• Turnthebrightnessdownto1or2.
Page 44 MOD User Manual | January 2012 | © 2012 Recon Instruments Inc | All rights reserved | www.reconinstruments.com
MOD BATTERY
SUPPORT
MODTroubleshootingFAQ
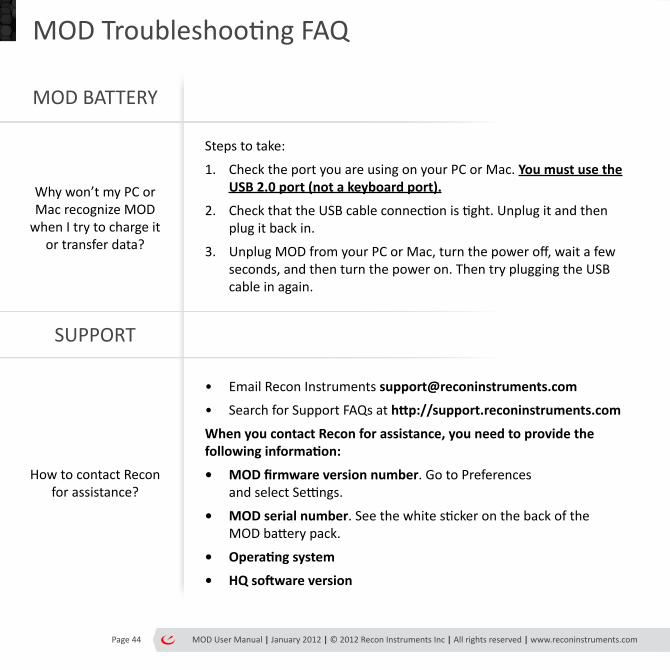
Why won’t my PC or Mac recognize MOD
when I try to charge it ortransferdata?
Stepstotake:
1. ChecktheportyouareusingonyourPCorMac.You must use the USB2.0port(notakeyboardport).
2. CheckthattheUSBcableconnectionistight.Unplugitandthenplugitbackin.
3. UnplugMODfromyourPCorMac,turnthepoweroff,waitafewseconds, and then turn the power on. Then try plugging the USB cableinagain.
How to contact Recon forassistance?
• Email Recon Instruments [email protected]
• Search for Support FAQs at http://support.reconinstruments.com
WhenyoucontactReconforassistance,youneedtoprovidethefollowinginformation:
• MODfirmwareversionnumber. Go to Preferences andselectSettings.
• MOD serial number.SeethewhitestickeronthebackoftheMODbatterypack.
• Operatingsystem
• HQsoftwareversion

Page 45 MOD User Manual | January 2012 | © 2012 Recon Instruments Inc | All rights reserved | www.reconinstruments.com
STORAGE AND TRAVELLING
TIPS
CLEANING TIPS
MOD Care
Handle MOD with the same care as a smartphone, iPod, or MP3 player.
• MakesurethatMODispoweredoff.
• PackMODinaseparatecompartmentawayfromsharpor hardobjects.DonotplaceitemsdirectlyontopofMOD.
• Avoid leaving MOD in direct sunlight.
• AvoidleavingMODinsubzerotemperatures.
• Keep MOD out of water.
• Store MOD and its accessories away from the reach of small children.
• Useadelicatetooltoclearawayiceanddebrisfromtheremotecontrollerbuttons.
• Avoidtouchingtheopticlens.
• Alwaysuseasoftcleaningclothorlenscloth.
Page 46 MOD User Manual | January 2012 | © 2012 Recon Instruments Inc | All rights reserved | www.reconinstruments.com
Battery
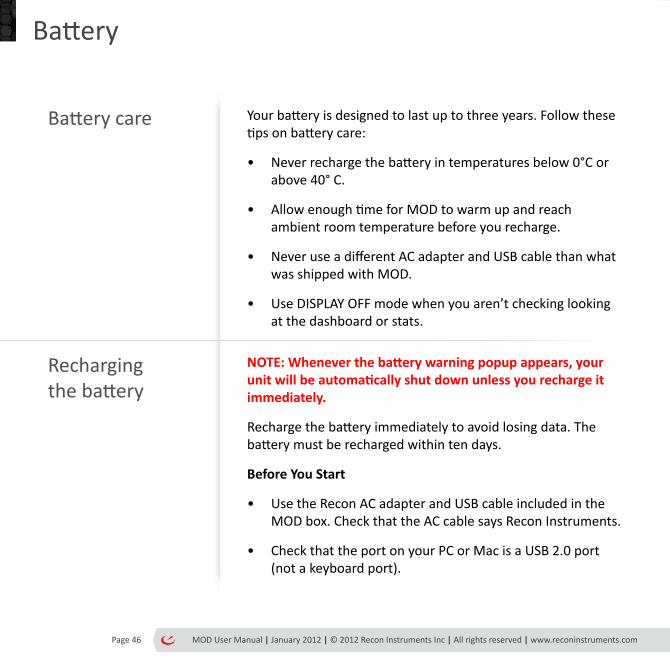
Batterycare Yourbatteryisdesignedtolastuptothreeyears.Followthesetipsonbatterycare:
• Neverrechargethebatteryintemperaturesbelow0°Corabove40°C.
• AllowenoughtimeforMODtowarmupandreachambientroomtemperaturebeforeyourecharge.
• NeveruseadifferentACadapterandUSBcablethanwhatwas shipped with MOD.
• UseDISPLAYOFFmodewhenyouaren’tcheckinglookingatthedashboardorstats.
Recharging thebattery
NOTE:Wheneverthebatterywarningpopupappears,yourunitwillbeautomaticallyshutdownunlessyourechargeitimmediately.
Rechargethebatteryimmediatelytoavoidlosingdata.Thebatterymustberechargedwithintendays.
BeforeYouStart
• UsetheReconACadapterandUSBcableincludedintheMODbox.CheckthattheACcablesaysReconInstruments.
• CheckthattheportonyourPCorMacisaUSB2.0port(notakeyboardport).

Page 47 MOD User Manual | January 2012 | © 2012 Recon Instruments Inc | All rights reserved | www.reconinstruments.com
Battery
TochargeusingaPCorMac:
1. Makesureyourcomputeristurnedon,andnotinstand-bymode.
2. MakesureMODisturnedoff.IfMODison,holddowntheMODpowerbuttonfor2seconds.ConnecttheUSBcableshipped with MOD. Plug the micro USB cable’ssmallerendintothemicroUSBportlocatedundertheprotectivecoveron the right side of the goggles. Plug the USBcable’slargerendintotheUSBportin your PC or Mac. Tip: If your computer doesnotrecognizeMOD,tryreinsertingtheUSBcable.
3. CheckthataredlightabovetheUSBport appears. This shows that MOD is charging.TheredUSBportlightturnsoffwhen MOD is charged.
Tochargeusingapoweroutlet:
1. ConnecttheUSBcableshippedwithMOD.PlugthemicroUSBcable’ssmallerend into the micro USB port located undertheprotectivecoverontherightside of the goggles
2. PlugtheUSBcable’slargerendintoeither the North American or European AC adapter shipped with your unit.
3. Plug the AC adapter into a wall outlet.
4. CheckthataredlightabovetheUSBport appears. This shows that MOD is charging.KeepcharginguntiltheredUSBportlightturnsoff(whichindicatesMODis fully charged).

Page48 MOD User Manual | January 2012 | © 2012 Recon Instruments Inc | All rights reserved | www.reconinstruments.com
Remote
ReplacingtheremotebatteryTheremotecontrollerusesasingle3-voltCR2032battery.Replace it every 3 years.
Toreplacethebattery:
1. Usingacoinorflatheadscrewdriver,turncounterclockwiseuntilyoureachtheunlocksymbol.
2. Removethebackcover.
3. Insertareplacementbattery.
4. Replacethebackcover.
5. Usingacoinorflatheadscrewdriver,turnthecoverclockwiseuntilthearrowalignswiththeclosedlocksymbol.

Page 49 MOD User Manual | January 2012 | © 2012 Recon Instruments Inc | All rights reserved | www.reconinstruments.com
Remote
CheckingwhichremoteispairedPresstheleftorrightbuttonontheremote.CheckMOD’sdisplay to see if it responds. Note that the remote controller statusindicatorshouldbeblue.
Unpairing a remote controllerFollow these steps when you intend to use your remote controllerwithadifferentRECONproductoryouarereturningthe MOD unit or the remote.
To unpair the remote:
1. HolddowntheMODpowerbuttonfor3seconds.
2. Presstherightandleftarrowbuttonsontheremotesimultaneouslyuntiltheremote’sorangelightflashes.

Page 50 MOD User Manual | January 2012 | © 2012 Recon Instruments Inc | All rights reserved | www.reconinstruments.com
Remote
Pairing a remote controllerFollow these steps when you unpaired a remote controller bymistake,performedafactoryreset,boughtorborrowedareplacement MOD or MOD Live unit.
To pair the remote controller with MOD:
1. Lookonthebackoftheremotecontrollerfortheserialnumberprintedonawhitelabel.NotetheIDnumber.
2. IfMODisturnedon,turnoffthepowerbutton,waitforafewseconds,andthenturnthepowerbuttonbackon.WaitfortheprompttopresstheMODpowerbutton.ThispromptmayshowoneormoreremoteIDnumbers.
3. PresstheMODpowerbuttontonavigatetotheremoteIDthat corresponds to your remote controller. Each press of thepowerbuttonwilltakeyoudowntothenextIDonthelist.
4. Waitforthecountertoreach0,andthenpressanybuttonon the remote.
5. Waitforabluelighttoflashontheremote.
6. Checkthattheremoteispairedbylookingatthestatusbar.Theremoteconnectionindicatoriconshouldturnblue.
Itcantake10secondsfortheremoteindicatortoturnblue.

Page 51 MOD User Manual | January 2012 | © 2012 Recon Instruments Inc | All rights reserved | www.reconinstruments.com
Regulatory Compliance
FCCComplianceClassBDigitalDevice
Thisequipmenthasbeentestedandfound to comply with the limits for a
Class B digital device, pursuant to part 15 of the FCC Rules. These limits are designed to provide reasonableprotectionagainstharmfulinterferenceinaresidentialinstallation.Thisequipmentgenerates, uses and can radiate radio frequency energy and, if not installed and used in accordance withtheinstructions,maycauseharmfulinterferencetoradiocommunications.However,there is no guarantee that interference will not occurinaparticularinstallation.Ifthisequipmentdoes cause harmful interference to radio or televisionreception,whichcanbedeterminedbyturningtheequipmentoffandon,theuserisencouragedtotrytocorrecttheinterferencebyone or more of the following measures:
• Reorient or relocate the receiving antenna.
• Increasetheseparationbetweentheequipment and receiver.
• Connect the equipment into an outlet on a circuitdifferentfromthattowhichthereceiveris connected.
• Consultthedealeroranexperiencedradio/TVtechnician for help.
Changesormodificationsnotexpresslyapprovedbythepartyresponsibleforcompliancecouldvoidthe user’s authority to operate the equipment.
FCCDeclarationofConformity
MOD(FCCID:ZW5006)andRecon-ReadyRemote(ZW5001)complywithFCCstandardCRF47Part15subpartBandsubpartC–section15.249.Operationissubjecttothefollowingtwoconditions:
1. This device may not cause harmful interference, and
2. This device must accept any interference received, including interference that may cause undesiredoperation.
Industry Canada Compliance
MODandRecon-ReadyRemotewerecertifiedwithICnumbers9717A-006and9717A-001,respectively.
These devices comply with Industry Canada licence-exemptRSSstandard(s).Operationissubjecttothefollowingtwoconditions:(1)thisdevicemaynotcause interference, and (2) this device must accept any interference, including interference that may causeundesiredoperationofthedevice.
Cet appareil est conforme avec les normes de l’Industrie Canada-sans les standards RSS (s). L’utilisationestsoumiseauxdeuxconditionssuivantes: (1) cet appareil ne peut pas provoquer d’interférences et (2) cet appareil doit accepter toute interférence, y compris les interférences qui peuventcauserunmauvaisfonctionnementdel’appareil.

Page 52 MOD User Manual | January 2012 | © 2012 Recon Instruments Inc | All rights reserved | www.reconinstruments.com
TechnicalSpecifications
Processing
• ARM® 9 core 96MHz
Sensing
• GlobalPositioningSystem(GPS)Receiver
• Single-axisGyroscope
• Tri-axialAccelerometer
• Temperature sensor
• Barometric pressure sensor
Capacity
• Memory: 3.5 MB
• 4 days of recording
GPSReceiver
• 65-Channel Ultra Low Power GPS IC
• Cold start of 2-3 minutes in typical outdoor environment
• Multipathdetectionandsuppression
PortsandConnectivity
• Micro-USB 2.0 (5-pin) port for data transfer and charging
• Bluetooth® Low Energy (BTLE) wireless user interface remote control
System Requirements
• WindowsPC:IntelPentium4orhigher,Windows XP, Vista, 7 or higher
• Mac: Intel Core Duo or higher, Mac OS X v10.6 or later
Languages
• English
• French
EnvironmentalConsiderations
• RoHS compliant
• Brominatedflame-retardant-free
• Mercury-free

Page 53 MOD User Manual | January 2012 | © 2012 Recon Instruments Inc | All rights reserved | www.reconinstruments.com
TechnicalSpecifications
Environment/Mechanical
• Weight of the unit ~65 Grams (~2.3oz)
• Storage Temperature range -20°C to 60°C (-4°F to 140°F)
• OperatingTemperaturerange -20°Cto30°C(-4°Fto86°F)
• Vibrationresistance 4.4grms5Hzto2000Hz
• Shock/dropresistance 40g,15-23ms,½sine(1mverticaldrop)
• Enclosure Water Resistant enclosure, IP65
Power requirements
• Primarysupplyvoltage 3.7LithiumPolymerRechargeable
• ChargeTime 1hourfastchargeto80%capacity,3hourstofull
• Batterysizeandlife 1200mAHr/6Hours
DisplayandVirtualImage
• Displayresolution WQVGA-428X240
• Display Type LCD Microdisplay
• Virtual image size 11 ” Diagonal from 5 feet away
• Diagonal FOV 10°
• Color Depth 16 Bit
• Brightness&Contrastcontrol 4modebrightness,withvideochainsleepmode
• MaxHorizontalfieldofview 8°VerticalFOV:6°HorizontalFOV

Page 54 MOD User Manual | January 2012 | © 2012 Recon Instruments Inc | All rights reserved | www.reconinstruments.com
WarrantyinformationLIMITED WARRANTY FOR RECON PRODUCTSThesetermsandconditionsapplytoYourpurchaseoftheGPS-enabledmodule(the“Product”)marketedbyReconInstrumentsInc.(“Recon”).Anyreferencebelowtotheterm“You”referstotheoriginalbuyerofanyProduct.
1. StatutoryWarranties. This LimitedWarranty sets out Recon’s responsibilities as to theProduct. Nothing in thisLimitedWarrantyaffectsanyrightsYoumayhaveasaconsumerunderapplicablelawsthatcannotbedisclaimedor waived, and does not disclaim any statutory or implied rights that Recon cannot disclaim. The laws of certain jurisdictionsorstatesmaystatethatthemanufacturermaynotexcludeorlimitaspectsofitsliabilitytotheconsumer,and,insuchcircumstances,theexclusionsandlimitationsofliabilityinthisLimitedWarrantywillonlyapplytoyoutotheextentpermittedunderapplicablelaws.
2. Warranty Terms. a. ReconwarrantstoYouthattheProductwillbefreefromdefectsinmaterialsandworkmanshipundernormalusefortwo(2)yearfromtheoriginaldateofpurchasebyYou(the“Warranty Period”). The Limited Warranty is not transferablebyYou.AllsubsequentpurchasersacquiretheProduct“asis”withoutbenefitofthisLimitedWarranty.WhereYoupurchasedtheProductfromRecon’swebsiteorotheronlinevendorsthedateofpurchaseisthedateofthepurchaseinvoiceissuedtoYoubyReconorsuchonlinevendorsbyemail.WhereyoupurchasedtheProductfromanauthorizedresellerataphysicallocation,thedateofpurchaseisthedateoftheinvoiceissuedtoyouatthephysicallocation.
b. IntheeventRecondeterminesthattheProductisdefective,Reconmayinitsabsoluteandsolediscretion:i. repairthedefectivepartoftheProductfreeofchargewithneworrefurbishedparts;ii. replacethedefectiveProductwithacomparableneworrefurbishedproduct;oriii. in the event that Recon is unable to repair or replace the Product as provided under (i) or (ii), pay aproportionaterefundofthepurchasepriceYoupaidfortheProduct.
c. WheretheProduct is repairedorreplacedduringtheWarrantyPeriod,exceptasotherwiseprohibitedbyapplicablelaws,thewarrantyfortherepairedorreplacedProduct,asapplicable,willexpireupontheexpirationoftheoriginalWarrantyPeriod.AnywarrantyserviceorsupportunderthisLimitedWarrantyisconditioneduponYourreturnoftheProducttoReconoritsauthorizedserviceprovider.WheretherehasbeenareplacementoftheProduct,theProductoritsparts,asprovidedpursuanttotheLimitedWarranty,becomesYourpropertyandtheProductbeingreplacedbecomesRecon’sproperty.Wherethereisarefund,YouwillreturntheProducttoReconandsuchProductbecomesRecon’sproperty.
3. Exclusions. The Limited Warranty does not apply:a. tonormalwearandtear;b. iftheProductoranyitspartsisopened,disassembled,orrepairedbysomeonenotauthorizedbyRecon;c. iftheProductwasnotpurchasedfromReconoritsauthorizedretailersaslistedonRecon’swebsite,assuchlistmaybeamendedfromtimetotimebyRecon;

Page 55 MOD User Manual | January 2012 | © 2012 Recon Instruments Inc | All rights reserved | www.reconinstruments.com
d. todamagescausedbymisuse,moistureorliquids,proximityorexposuretoheat,accident,abuse,neglect,misapplication,Yourfailuretoabidebytheuse,safety,andmaintenanceinstructionscontainedinthepackagingoftheProduct,including,withoutlimitation,afailuretofollowsuchinstructionsregardinguseoftheProductwithanyotherequipment,peripherals,oraccessories(e.g.goggles)authorizedbyRecontobeusedwiththeProduct,orrepairsormodificationsmadebyanyoneotherthanReconoritsauthorizedserviceproviders;
e. tophysicaldamagetothesurfaceoftheProduct;f. toanyProductwheretheserialnumberhasbeenremovedorthathasbeendamagedorrendereddefectiveasaresultofmisuse,abuse,contamination, improperor inadequatemaintenanceorcalibration,orotherexternalcauses;
g. toanyequipmentotherthantheProduct;h. tomalfunctionordefectsresultingfromtheuseoftheProduct inconjunctionwithaccessories,products,services or ancillary or peripheral equipment not expressly approved or provided by Recon, and where it isdeterminedbyReconthatsuchmalfunctionordefectisnotthefaultoftheProductitself;and
i. toanysoftware,whetherornotsuppliedbyRecon.PleasereviewtheProductuse,maintenance,andsafetyinstructionscontainedinthepackaging,aswellastheusermanualonlineatwww.reconinstruments.com.Returns,repairs,orreplacementsofpartsand/orProductsmaybesubjecttoshipping,handling,replacementand/orrestockingfees.RecondoesnotwarrantthattheoperationoftheProductwillbeuninterruptedorerror-free.
4. ReturningtheProduct.ReconistheproviderofthisLimitedWarranty.Recon’swarrantycontactinformationcanbefound at www.reconinstruments.com. You may need to provide a proof of purchase of the Product, in the form of thepurchaseinvoicesenttoYoubyReconoraninvoicefromanauthorizedreselleroftheProduct,toevidencethatYou are the original purchaser of the Product. In the event You return the Product to Recon outside of the Warranty Period, Recon’s standard repair terms and charges may apply. Recon may limit the Limited Warranty to the country whereReconoritsresellersoldtheProducttoYou.Youmayberesponsibleforshipping,handling,orothercostsifYou request warranty services not in the country of original purchase.
5. DataRecovery.YouacknowledgeandagreethatReconwillnotberesponsibleforanydata,software,application,orinformationthatmaybedamaged,lost,ordestroyedduringthecourseofevaluating,repairing,orreplacingtheProduct.ThisLimitedWarrantyalsodoesnotcoverbackup,recovery,andreinstallationofYourdataontheProduct.
6. ExclusiveRemedies.RepairorreplacementoftheProductasprovidedforinthisLimitedWarrantyistheexclusiveremedyprovidedtoYouunderthisLimitedWarranty.Totheextentpermittedbyapplicablelaws,thisLimitedWarrantyisinlieuofallotherwarrantiesorconditions,expressorimplied.EXCEPTASSETOUTINTHISLIMITEDWARRANTYAND AS PERMITTED BY APPLICABLE LAWS, RECON SPECIFICALLY DISCLAIMS ALL REPRESENTATIONS, WARRANTIES, ENDORSEMENTS, AND CONDITIONS OF ANY KIND, EXPRESS OR IMPLIED, INCLUDING, WITHOUT LIMITATION, ANY WARRANTIES OF TITLE OR NON-INFRINGEMENT AND ANY IMPLIED REPRESENTATIONS, WARRANTIES AND CONDITIONS OF FITNESS FOR A PURPOSE, MERCHANTABILITY, MERCHANTABLE QUALITY, SATISFACTORY QUALITY,
Warrantyinformation

Page 56 MOD User Manual | January 2012 | © 2012 Recon Instruments Inc | All rights reserved | www.reconinstruments.com
WarrantyinformationDURABILITY, OR ARISING FROM A COURSE OF DEALING OR USAGE OF TRADE. SOME JURISDICTIONS OR STATES DO NOT ALLOW EXCLUSIONS OF IMPLIED WARRANTIES, AND SO THE LIMITATION IN THIS SECTION 6 MAY NOT APPLY TO YOU. YOU MAY HAVE OTHER RIGHTS THAT VARY FROM STATE TO STATE OR JURISDICTION TO JURISDICTION.
7. LimitationofLiability.a. RECON, ITS OFFICERS, DIRECTORS, AGENTS, EMPLOYEES, LICENSORS, SUPPLIERS, SERVICE PROVIDERS, RESELLERS,ANDDISTRIBUTORS(COLLECTIVELY,“RECON” IN THIS SECTION 7) WILL IN NO WAY BE LIABLE TO YOU FOR ANY INDIRECT, ECONOMIC, SPECIAL, COMMERCIAL, INCIDENTAL, EXEMPLARY OR CONSEQUENTIAL DAMAGES (INCLUDING, WITHOUT LIMITATION, LOST PROFITS, LOSS OF BUSINESS REVENUE OR EARNINGS, LOST DATA, LOSS OFOPPORTUNITY, ANDDAMAGES CAUSED BYDELAYSORA FAILURE TO REALIZE EXPECTED SAVINGS) ARISINGFROMORINCONNECTIONWITHTHEUSEORPERFORMANCEOFTHEPRODUCT,EVENIFSUCHPERSON/ENTITIESIS/AREAWAREOFTHEPOSSIBILITYOFSUCHDAMAGES.
b. IN NO EVENT SHALL RECON’S LIABILITY UNDER THIS LIMITED WARRANTY TO YOU OR TO ANY THIRD PARTY CLAIMING THROUGH YOU OR ON YOUR BEHALF EXCEED THE PURCHASE PRICE OF THE PRODUCT THAT YOU PURCHASED OR THE COST OF REPAIRING OR REPLACING THE PRODUCT, WHICHEVER IS GREATER.
c. THE LIMITATIONS OF LIABILITY SET OUT IN SECTIONS 7(A) AND 7(B) ABOVE IS INTENDED TO APPLY AND DOES APPLY TO ANY DAMAGES, LOSSES, OR LIABILITY HOWEVER CAUSED, REGARDLESS OF THE THEORY OF LIABILITY (CONTRACT, TORT, NEGLIGENCE, OR OTHERWISE) AND EVEN IF RECON HAS BEEN ADVISED OF THE POSSIBILITY OF SUCH DAMAGES, EXCEPT WITH RESPECT TO LIABILITY FOR DEATH, BODILY INJURY, OR LIABILITY FOR INTENTIONAL OR GROSS NEGLIGENT ACT OR OMISSIONS, FOR WHICH NO LIMIT APPLIES. SOME JURISDICTIONS OR STATE DO NOT ALLOW THE EXCLUSION OR LIMITATION OF INCIDENTAL OR CONSEQUENTIAL DAMAGES, SO THE LIMITATIONS OR EXCLUSIONS ABOVE MAY NOT APPLY TO YOU.
d. THE LIMITATIONS AND EXCLUSIONS IN THIS SECTION 7 APPLY TO THE FULL EXTENT THEY ARE NOT PROHIBITED BY APPLICABLE LAW WITHOUT THE POSSIBILITY OF CONTRACTUAL WAIVER.
8. Privacy.InformationaboutYouthatReconreceivesorcollects(including,withoutlimitation,Yourpersonalcontactinformationandfinancialinformationsuchascreditcardinformation)willbeused,processed,transferred,stored,anddisclosedinaccordancewithRecon’sprivacypolicy(availableathttp://www.reconinstruments.com/corporate/legal/privacy-statement) for thepurposeof resolvingproblemswith theProductandtoprovideandperformtheservicesrelatingtothewarrantydescribedinthisLimitedWarranty.
9. DisputeResolution.a. Arbitration.Anyandalldisputes,controversyorclaimsarisingoutoforinconnectionwithorinrelationtothisLimitedWarrantyorthebreachthereof,includinganyquestionregardingitsexistence,validity,performanceorterminationandanytortorothercommonlaworstatutoryclaimarisingoutoforrelatingtoitsnegotiation,executionorperformance(collectively,the“Dispute”),willbereferredtoandfinallyresolvedbybindingarbitration,withthelosingpartypayingallcostsofarbitration(includingreasonablelegalfeesandexpenses)tobeconductedbyasinglearbitratorinVancouver,BritishColumbia,pursuanttotheprovisionsoftheCommercialArbitrationAct

Page 57 MOD User Manual | January 2012 | © 2012 Recon Instruments Inc | All rights reserved | www.reconinstruments.com
(BritishColumbia)andanyamendmentsthereto,andthedeterminationofsucharbitratorwillbefinalandbindinguponYouandRecon.ThearbitrationwillbeconductedintheEnglishlanguage.Ajudgmentontheawardofthearbitratormaybeenteredintoanycourthavingjurisdictionoverthepartyorpartiesagainstwhomanawardmaybe issuedandeachofYouandReconagrees toandherebywaivesanydefencesagainst theenforceabilityandexecutionofanysuch judgmentawardedbythearbitratorascontemplated inthisLimitedWarranty. Judgmentontheawardofanarbitratormaybeenteredbyanycourthavingjurisdictionoverthepersonorpropertyofthepersonagainstwhomenforcementofthejudgmentissought.Wherearbitrationisprohibitedbyapplicablelaws,youandReconherebyagreetotheexclusivejurisdictionofthecourtsoftheprovinceofBritishColumbia,CanadawithrespecttoanyDisputesrelatingtothisLimitedWarranty.
b. Anyarbitratorwillbeappointed,pursuanttoSubsection9(a)above,byagreementbetweenYouandReconor,indefaultofagreement,sucharbitratorwillbeappointedbyaJudgeoftheSupremeCourtofBritishColumbiasittingintheCourtsofVancouver,upontheapplicationofeithersuchparty.
c. InanyarbitrationproceedingbetweenYouandRecon,itisagreedthatthepartieswillbeentitledtodiscoverytothesameextentpermittedbytheSupremeCourtofBritishColumbiaasifthematterwerebeingadjudicatedinsuch Court.
d. Youherebywaiveallrightstoatrialbyjurywithrespecttoanyclaimsandissuesrelatingtoorarisingoutofthis Limited Warranty.
10. Attornment.Youwaive(a)anyrighttoobjecttovenueorjurisdictionbasedoninconvenientforumorforanyotherreason;and(b)anystatutoryorotherrightpursuanttothelawsofthejurisdictioninwhichtheYouareresidenttohaveacourtcaseorarbitralhearingrelatingtothisLimitedWarrantyadjudicatedorresolvedinthatjurisdiction.Anyruleofinterpretation,laworregulationthatprovidesthatthelanguageofacontractwillbeinterpretedagainstthedrafterwillnotapplytothisLimitedWarranty.
11. GoverningLaw.ThisLimitedWarrantywillbegovernedbyandinterpretedinaccordancewiththelawsoftheProvinceofBritishColumbiaandthefederallawsofCanadaasifmadeandperformedbyandbetweenpartiessituateinsuchprovinceandwithoutregardtotheconflictoflawrulesthatwouldapplyadifferentbodyoflaw.
12. Severability. Each provision of this LimitedWarranty is declared to be a separate and distinct promiseandtobeseparable fromallothersuchseparateanddistinctpromises. Ifanypromise,provisionorpart thereofisdeterminedbyacourtofcompetent jurisdictionorotherconstituted legalauthoritytobevoid,unenforceableorunreasonableinwholeorinpart, itwillnotbedeemedtoaffectorimpairtheenforceabilityorvalidityofanyotherpromiseorprovisioninthisLimitedWarrantyoranypartthereofandthesaidcourtorotherconstitutedlegalauthority will have the authority to limit such promise or provision as it deems proper.
13. Waiver.ThefailurebyRecontoinsistonstrictcompliancewithanyprovisionofthesetermsandconditionswillnotbedeemedtobeawaiverofsuchprovision,andawaiverofanyprovisionofthesetermsandconditionsatanyonetimeortimeswillnotbedeemedtobeawaiverforanyothertime.ThefailureofRecontoassertitsrightsinatimelyfashionforanyofitsrightsorremediesunderthesetermsandconditionswillnotbeinterpretedasa
Warrantyinformation

Page58 MOD User Manual | January 2012 | © 2012 Recon Instruments Inc | All rights reserved | www.reconinstruments.com
novationorawaiverofanysubsequentorcontinuingbreachandwillnotservetomodify,alterorrestricttherightofRecontoassertanyrightsatanytimethereafter
14. EnglishLanguage.Excepttotheextentprohibitedbyapplicablelaw,YouacknowledgeandagreethatthatthisLimitedWarrantyandanyandallrelateddocumentsbedrawnupinEnglish.
15. Updates and Supplementary Terms. This LimitedWarrantymay be updated or supplemented by Reconfromtimetotime.ForProductspurchasedinspecificcountries,uniquetermsmayreplaceormodifythisLimitedWarranty ifsopostedonRecon’swebsite.All termsthatarenotchangedbytheseuniquecountryterms(ifany)remainunchangedandineffect.PleasevisitRecon’swebsitetoobtainthelatestversionof,orsupplementsoranycountry-unique terms to, this Limited Warranty.
Warrantyinformation