microscopes are instruments designed to produce magnified visual or photographic images of small...
TRANSCRIPT

• Microscopes are instruments designed to produce magnified visual or photographic images of small objects.
The microscope must accomplish three tasks1. produce a magnified image of the specimen 2. separate the details in the image, 3. render the details visible to the human eye or camera.
Microscopy - an introduction

• Microscopes increase resolution - minimum distance two points can be apart and still be distinguished as two separate points

History of the Microscope
• 1590 –first compound microscope by Hans and Zacharias Janssen of Holland

History of the Microscope
• 1655 – Robert Hooke used a compound microscope to observe pores in cork–He called them “cells”


History of the Microscope
• Antoine van Leeuwenhoek
–1st to see single-celled organisms in pond water

Scale

MicroscopeOne or more lenses that make an enlarged image of an
object.

Eyepiece
Body Tube
Revolving NosepieceArm
Objective Lens
StageStage Clips
Coarse Focus
Fine Focus
Base
Diaphragm
Light

Simple Microscope• Light passes through only 1 lens.
• Example: magnifying glass

Compound Microscope• Lets light pass through an object and then
through two or more lenses.

Stereoscopic Microscope
• Gives a three dimensional view of an object. (Examples: insects and leaves)
• Used for dissections

Electron microscopes – use a beam of electrons instead of a beam of light to
magnify the image

Electron Microscopes• can achieve 3D images using electrons

The Scanning Electron Microscope
• produces a 3-dimensional image of specimen’s surface features
spider head of a butterfly

Scanning electron microscopy (SEM)Types of specimens:
-Whole organisms
-Natural tissue surfaces
-Exposed tissue structure
A flea magnified 50 000 X
What is this?

ScanningElectronMicroscope

Transmission electron microscopy (TEM).
• Allows the observation of molecules within cells
• Allows the magnification of objects in the order of 100, 000’s.
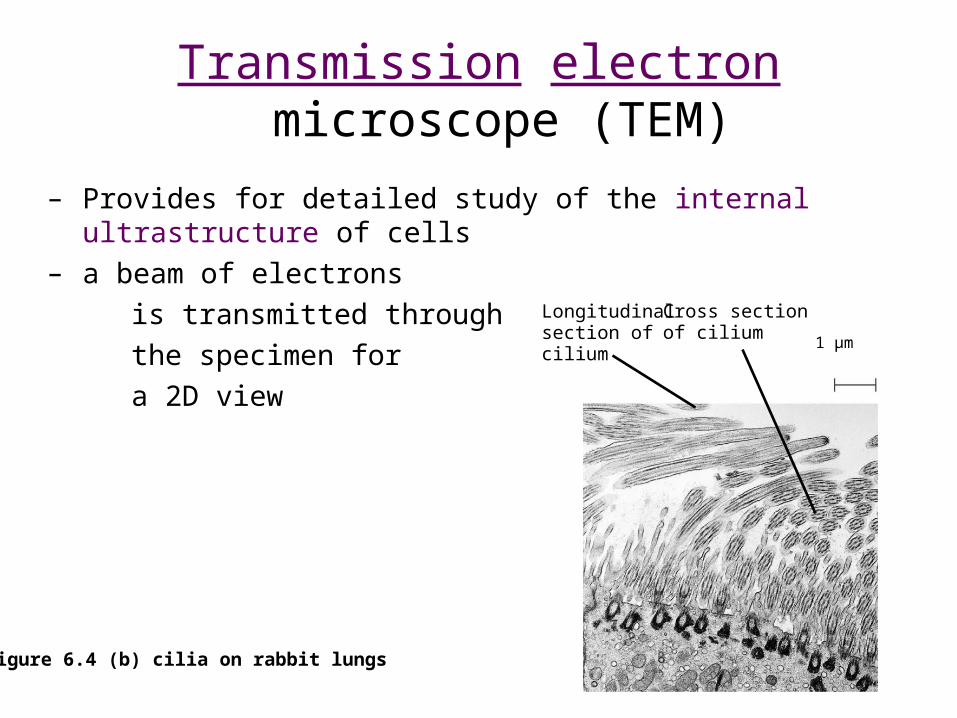
Transmission electron microscope (TEM)
– Provides for detailed study of the internal ultrastructure of cells– a beam of electrons
is transmitted through
the specimen for
a 2D view
Longitudinalsection ofcilium
Cross sectionof cilium
1 µm
Figure 6.4 (b) cilia on rabbit lungs

Transmission electron microscope
Chloroplast from a tobacco leaf H1N1 virus

Confocal Laser Scanning Microscope (CLSM)
• laser beam used to illuminate spots on specimen
• computer compiles images created from each point to generate a 3-dimensional image
• used on specimens that are too thick for a light microscope

A, B, C pollen grains: Scanning electron microscope D pollen grains: Confocal Laser Scanning Microscope E pollen grains: Transmission electron microscope F pollen grains: Light microscope G Mixed pollen grains (bright field light microscope, stained) H pollen grains confocal laser scanning microscope


Magnification Your microscope has 3 magnifications: Scanning, Low and High. Each objective lens will have written the magnification. In addition to this, the ocular lens (eyepiece) has a magnification.


Look at the following micrographs (a picture made by a microscope) and try to determine what the object is!


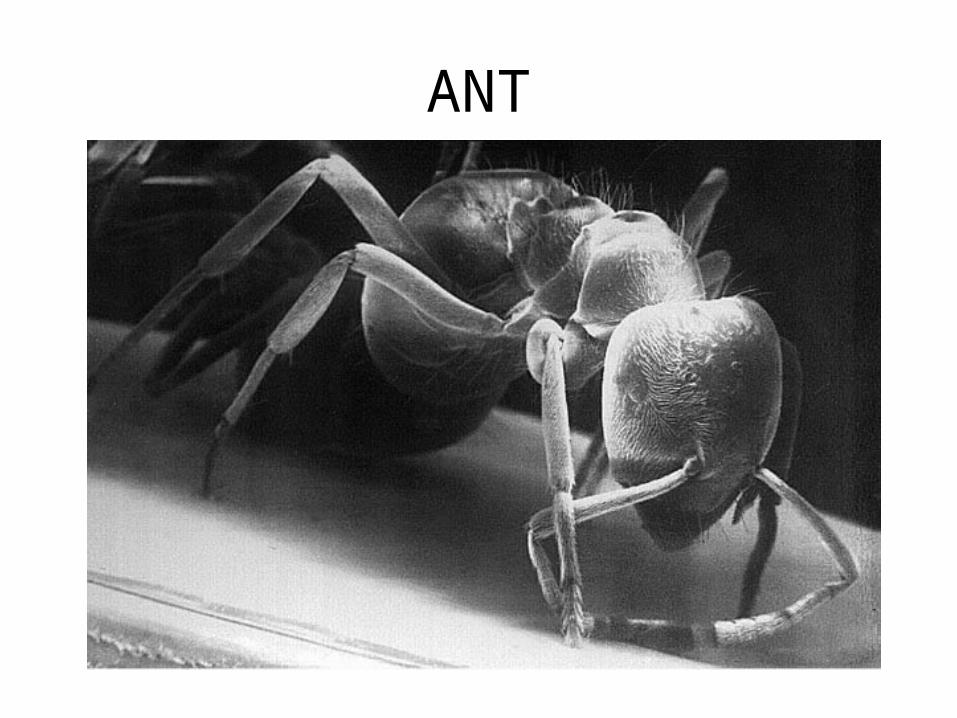
ANT

BLACK FLY

MOSQUITO
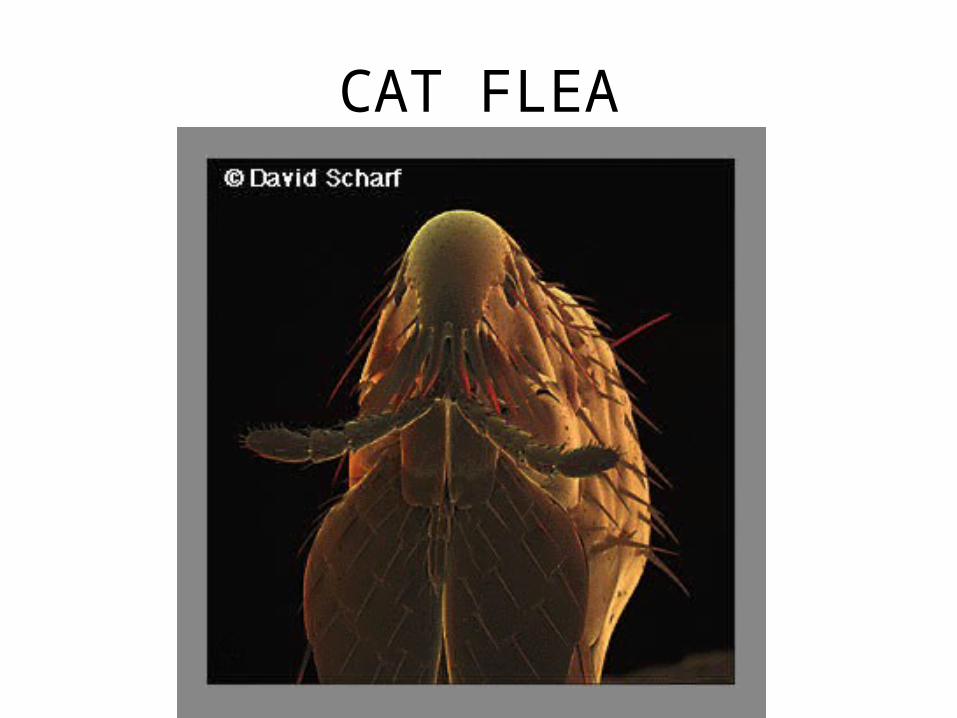
CAT FLEA

MITE FEEDING
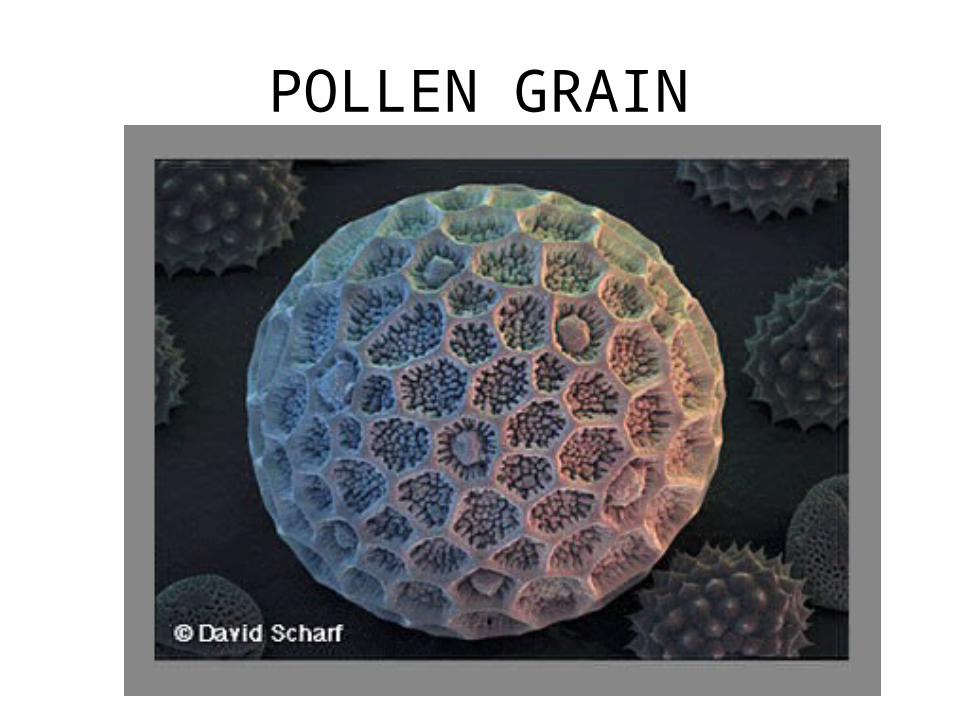
POLLEN GRAIN
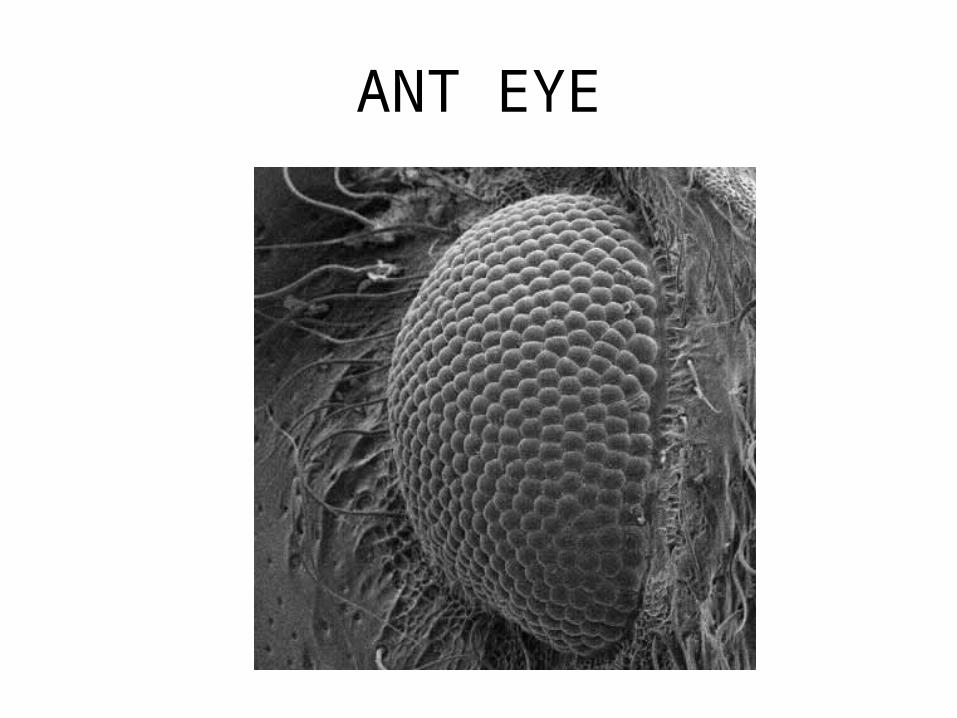
ANT EYE

APHID ON A LEAF

EYELASHES

DOG FLEA

H1N1 VIRUS

•Always carry with 2 hands•Only use lens paper for cleaning•Do not force knobs to turn•Always store covered •Keep objects clear of desk and cords
The Light Microscope
Guidelines for Use

General Procedures
1. Make sure all backpacks and junk are out of the aisles and off the tops of desks. 2. Plug your microscope in to the extension cords. Each row of desks uses the same cord.
3. Store with cord wrapped around microscope and the scanning objective clicked into place. 4. Carry by the base and arm with both hands.

Focusing Specimens1. Always start with the scanning objective.
Odds are, you will be able to see something on this setting. Use the Coarse Knob to focus, image may be small at this magnification, but you won't be able to find it on the higher powers without this first step.
Do not use stage clips, try moving the slide around until you find something.

2. Once you've focused on Scanning, switch to Low Power. Use the Coarse Knob to refocus. Again, if you haven't focused on this level, you will not be able to move to the next level.
3. Now switch to High Power. (If you have a thick slide, or a slide without a cover, do NOT use the high power objective). At this point, ONLY use the Fine Adjustment Knob to focus specimens.
Recap1. Scanning --> use coarse knob2. Low power --> use coarse knob3. High power --> use fine knob
DO NOT SKIP STEPS!!!!

•Your slide MUST be focused on low power before attempting this step•Click the nosepiece to the longest objective•Do NOT use the Coarse Focusing Knob, this could crack the slide or the lens•Use the Fine Focus Knob to bring the slide into focus
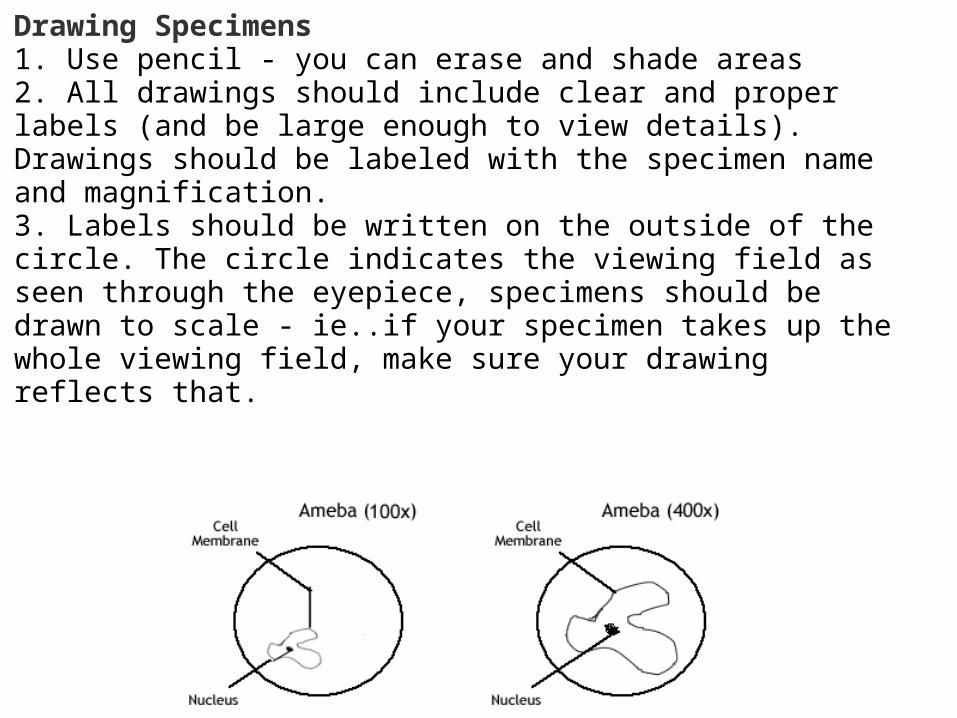
Drawing Specimens1. Use pencil - you can erase and shade areas2. All drawings should include clear and proper labels (and be large enough to view details). Drawings should be labeled with the specimen name and magnification.3. Labels should be written on the outside of the circle. The circle indicates the viewing field as seen through the eyepiece, specimens should be drawn to scale - ie..if your specimen takes up the whole viewing field, make sure your drawing reflects that.

TroubleshootingOccasionally you may have trouble with working your microscope. Here are some common problems and solutions.
1. Image is too dark!Adjust the diaphragm, make sure your light is on.
2. There's a spot in my viewing field, even when I move the slide the spot stays in the same place!Your lens is dirty. Use lens paper, and only lens paper to carefully clean the objective and ocular lens. The ocular lens can be removed to clean the inside. The spot is probably a spec of dust.
3. I can't see anything under high power!Remember the steps, if you can't focus under scanning and then low power, you won't be able to focus anything under high power. Start at scanning and walk through the steps again.
4. Only half of my viewing field is lit, it looks like there's a half-moon in there!You probably don't have your objective fully clicked into place..