media system plus navi system · arona6f0012720db | ibiza owner’s manual inglés 6f0012720db...
TRANSCRIPT

MEDIA SYSTEM PLUSNAVI SYSTEM
ARONA | IBIZAOwner’s manual
6F0012720DB
Ingl
és 6
F001
2720
DB
(11
.17)
SEAT S.A. is permanently concerned about continuous development of its types and models. For this reason we ask you to under-stand, that at any given time, changes regarding shape, equipment and technique may take place on the car delivered. For this reason no right at all may derive based on the data, drawings and descriptions in this current handbook.
All texts, illustrations and standards in this handbook are based on the status of information at the time of printing. Except for error or omission, the information included in the current handbook is valid as of the date of closing print.
Re-printing, copying or translating, whether total or partial is not allowed unless SEAT allows it in written form.
SEAT reserves all rights in accordance with the “Copyright” Act.
All rights on changes are reserved.
❀ This paper has been manufactured using bleached non-chlorine cellulose.
© SEAT S.A. - Reprint: 15.11.17
About this manual
This manual contains information, recommen-dations, advice and warnings related to your radio system. The other publications in the vehicle documentation contain further infor-mation of which you should be aware for your own safety and for that of your passengers.
Ensure that the onboard documentation is kept in the vehicle at all times. This is espe-cially important when lending or selling the vehicle to another person.
This manual contains a description of the equipment supplied with the vehicle at the time of press. Some of the units described herein will not be available until a later date or is only available in certain markets.
The illustrations are intended as a general guide and may vary from the equipment fitted in your vehicle in some details.
The screen colour and the colour of the infor-mation displayed on it can vary according to vehicle model.
Directions and positions of components (e.g. right, left, front, rear) are always relative to the direction of travel of the vehicle unless other-wise stated.
The audiovisual material only is intended to help users to understand certain car function-alities better. It does not replace the instruc-tion manual. Please use the instruction manu-al to obtain more comprehensive information and indications.
The equipment marked with an aster-isk* is fitted as standard only in certain versions, and is only supplied as op-tional extras for some versions, or are only offered in certain countries.
® All registered marks are indicated with ®. Although the copyright symbol does not appear, it is a copyrighted mark.
>> The section is continued on the follow-ing page.
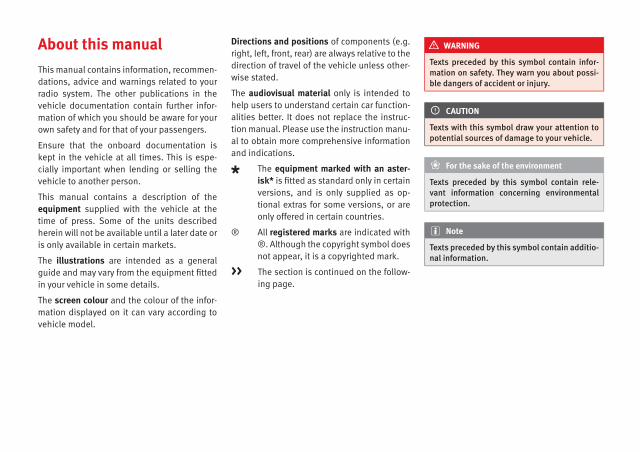
WARNING
Texts preceded by this symbol contain infor-mation on safety. They warn you about possi-ble dangers of accident or injury.
CAUTION
Texts with this symbol draw your attention to potential sources of damage to your vehicle.
For the sake of the environment
Texts preceded by this symbol contain rele-vant information concerning environmental protection.
Note
Texts preceded by this symbol contain additio-nal information.

Related videos
General instructions and settings ››› page 8 Navigation ››› page 37
Radio mode ››› page 17Telephone management system(PHONE)
››› page 53
Media mode ››› page 25 Full Link ››› page 66


Table of Contents
Table of ContentsOverview . . . . . . . . . . . . . . . . . . . . . . . . . . . . . 4Unit overview . . . . . . . . . . . . . . . . . . . . . . . . . . . 4Main menus . . . . . . . . . . . . . . . . . . . . . . . . . . . . 5
Introduction . . . . . . . . . . . . . . . . . . . . . . . . . . 7Safety instructions relating to the Infotain-ment system . . . . . . . . . . . . . . . . . . . . . . . . . . . . 7General instructions for use . . . . . . . . . . . . . . . 8Voice control . . . . . . . . . . . . . . . . . . . . . . . . . . . . 13
Audio and Media Mode . . . . . . . . . . . . . . . . 17Radio Mode . . . . . . . . . . . . . . . . . . . . . . . . . . . . 17Media mode . . . . . . . . . . . . . . . . . . . . . . . . . . . . 25
Navigation* . . . . . . . . . . . . . . . . . . . . . . . . . . . 37Navigation, entry and control . . . . . . . . . . . . . . 37Navigation settings . . . . . . . . . . . . . . . . . . . . . . 48
Vehicle Menu . . . . . . . . . . . . . . . . . . . . . . . . . 50Introduction to using the menu (Vehicle) . . 50Consumers . . . . . . . . . . . . . . . . . . . . . . . . . . . . . 50Driving data . . . . . . . . . . . . . . . . . . . . . . . . . . . . 50Ecotrainer* . . . . . . . . . . . . . . . . . . . . . . . . . . . . . 51Vehicle status . . . . . . . . . . . . . . . . . . . . . . . . . . . 52
Telephone management system(PHONE) . . . . . . . . . . . . . . . . . . . . . . . . . . . . . . 53Introduction to the telephone managementsystem . . . . . . . . . . . . . . . . . . . . . . . . . . . . . . . . 53Description of the telephone managementsystem . . . . . . . . . . . . . . . . . . . . . . . . . . . . . . . . 56
Full Link* . . . . . . . . . . . . . . . . . . . . . . . . . . . . . 66Full Link technology description . . . . . . . . . . . . 66
Setup . . . . . . . . . . . . . . . . . . . . . . . . . . . . . . . . . 75Menu and system settings . . . . . . . . . . . . . . . . 75Sound and volume settings . . . . . . . . . . . . . . . 76
Other important information . . . . . . . . . . 78Legal information . . . . . . . . . . . . . . . . . . . . . . . . 78Abbreviations . . . . . . . . . . . . . . . . . . . . . . . . . . . 78
Index . . . . . . . . . . . . . . . . . . . . . . . . . . . . . . . . . 79
3

Overview
Overview
Unit overview
Fig. 1 Overview of the controls (this configuration depends on the version).
1 ››› page 172 ››› page 83 ››› page 37
4 ››› page 255 ››› page 666 ››› page 9
7 ››› page 98 ››› page 539 ››› page 50
10 ››› page 1311 ››› page 1212 ››› page 5
4

Overview
Main menus
Fig. 2 Summary of the menus. »
5

Overview
Radio ››› page 17
RADIO main menu ››› page 17RDS radio data services ››› page 18Digital radio mode ››› page 19Memory buttons ››› page 20Storing station logos ››› page 21Select, tune and store stations ››› page 21Scan function ››› page 22TP traffic news ››› page 22Settings ››› page 23
Media ››› page 25
Data and file storage devices ››› page 25Playing order ››› page 27 ››› page 27Changing the media source ››› page 29Changing tracks ››› page 29Selecting an album by its cover ››› page 30Selecting of a track from a list of tracks ››› page 30Database view ››› page 31Inserting or ejecting a CD ››› page 32Memory card ››› page 32External data storage device connected to the USB port››› page 33External audio source connected to the AUX-IN multime-dia socket ››› page 34External audio source with Bluetooth® ››› page 34Images ››› page 35Settings ››› page 35 ››› page 36
Telephone ››› page 53
Pairing ››› page 55Bluetooth® ››› page 54Function buttons ››› page 57Entering a number ››› page 59Phonebook ››› page 60Short messages (SMS) ››› page 61Call list ››› page 62Speed dial buttons ››› page 62Settings ››› page 63
Navigation ››› page 37
New destination ››› page 38Route options ››› page 39 ››› page 40My destinations ››› page 41Points of interest (POI) ››› page 42View ››› page 43Split screen ››› page 43Map display ››› page 44Traffic reports and dynamic route guidance to the desti-nation (TRAFFIC) ››› page 45Predictive navigation ››› page 46Importing vCards ››› page 46Importing Personal POI ››› page 46Navigation with images ››› page 47Traffic signs ››› page 47Route guidance in Demo mode ››› page 47Settings ››› page 48
Traffic ››› page 45
TP Traffic Information station (Traffic Program)››› page 22Traffic reports and dynamic route guidance to the desti-nation (TRAFFIC) ››› page 45
Vehicle ››› Booklet Instruction Manual
Consumers ››› page 50Driving data ››› page 50Ecotrainer ››› page 51Vehicle status ››› page 52
Full Link ››› page 66
Requirements ››› page 68Activation of Full Link ››› page 69Pairing portable devices ››› page 70MirrorLink® ››› page 71Apple CarPlay™ ››› page 72Android Auto™ ››› page 72Frequently asked questions ››› page 74
Images ››› page 35
Sound ››› page 76
Settings ››› page 75
6

Introduction
Introduction
Safety instructions relating to the In-fotainment system
Travelling on today's roads requires the driv-er's full attention at all times.
Only operate the radio and its various func-tions when the traffic situation really permitsthis.
WARNING
● Before starting the trip, you should famili-arise yourself with the different radio func-tions.
● High audio volume may represent a dangerto you and to others.
● Adjust the volume in a way that you candistinguish surrounding noise, for example,horns and sirens, etc.
● Changes to the Infotainment system set-tings should be made when the car is stop-ped, or by a passenger.
WARNING
Distracting the driver in any way can lead toan accident and cause injuries. Operating theInfotainment system can distract your atten-tion from the traffic.
● Always drive carefully and responsibly.
● Select volume settings that allow you toeasily hear signals from outside the vehicleat all times (e.g. emergency services sirensand horns).
● Hearing may be impaired if using too high avolume setting, even if only for short periodsof time.
WARNING
The volume level may suddenly change whenyou switch audio source or connect a new au-dio source.
● Lower the base volume before connectingor switching audio sources.
WARNING
The driving recommendations and traffic indi-cations shown on the navigation system maydiffer from the current traffic situation.
● Traffic signs and traffic regulations havepriority over the recommendations and dis-plays provided by the navigation system.
● Adjust your vehicle speed and driving styleto suit visibility, weather, road and trafficconditions.
WARNING
Connecting, inserting or removing a data me-dium while driving can distract your attentionfrom the traffic and cause an accident.
WARNING
Connecting leads for external devices mayobstruct the driver.
● Arrange the connecting leads so that theydo not obstruct the driver.
WARNING
External devices that are loose or not proper-ly secured could move around the passengercompartment during a sudden driving orbraking manoeuvre or an accident and causedamage or injury.
● Never place or fit external devices to thedoors, windscreen, steering wheel, dash pan-el, the backs of the seats, on top of or nearthe area marked “AIRBAG” or between theseareas and the occupants. External devicescan cause serious injury in an accident, espe-cially when the airbags inflate.
WARNING
The armrest may obstruct the driver's armmovements, which could cause an accidentand severe injuries.
● Always keep the armrest closed while thevehicle is in motion.
WARNING
Opening a CD player's housing can lead to in-juries from invisible laser radiation.
● Have CD players repaired only by a quali-fied workshop. »
7

Introduction
CAUTION
The Infotainment system can be damaged bythe incorrect insertion of a data storage de-vice or the insertion of an incompatible datastorage device.
● When inserting a data storage device, makesure it is correctly positioned ››› page 25.
● Applying force may irreparably damage thememory card slot locking mechanism.
● Only use compatible memory cards.
● When inserting and removing CDs, alwayshold them at right angles to the front of theCD drive without tilting so as not to scratchthem.
● If a CD is inserted while another is alreadyin the unit or being ejected, the CD drive maybe irreparably damaged. Always wait untilthe data medium is completely ejected.
CAUTION
Any foreign objects stuck to a data storagedevice and non-round media may damage theCD player.
● Only clean, standard 12-cm CDs should beused.
– Do not affix stickers or other items to thedata medium. Stickers may peel off anddamage the drive.
– Do not use printable data media. Printedlabels and coverings may peel off anddamage the CD drive.
– Do not insert 8-cm single CDs or irregu-larly shaped CDs.
– Do not insert DVD-Plus discs, Dual Discsor Flip Discs, as these are thicker thannormal CDs.
CAUTION
The vehicle loudspeakers may be damaged ifthe volume is too high or the sound is distor-ted.
General instructions for use
Introduction
Fig. 3 Related video
If the setup is changed, this may change thedisplay on the screen and in some cases, theInfotainment system may behave in a mannerdifferent to that described in this manual.
Note
● Lightly pressing the buttons or brieflypressing the touchscreen is sufficient to op-erate the Infotainment system.
● Not all listed function buttons and func-tions described may be available due to thedevice software used in your market. Theequipment is not faulty if a function button ismissing from the screen.
● Due to country-specific legislation, certainfunctions may not be available on the screenwhen the vehicle is travelling above a certainspeed.
● Using a mobile telephone in the vehiclemay cause noise from the vehicle loudspeak-ers.
● Restrictions on the use of devices usingBluetooth® technology may apply in somecountries. For further information, contact thelocal authorities.
● On some vehicles with ParkPilot, the vol-ume of the audio source is automatically low-ered when reverse gear is selected. You canchange settings for lowering the volume inthe Sound setup menu ››› page 76.
Diagram of the menus
The Infotainment system touchscreen››› Fig. 1 2 can be used to select the differ-ent main menus.
8

Introduction
Press the Infotainment button ››› Fig. 1 12
to open the menus summary ››› page 5.
The display of the touchscreen's main menu››› Fig. 1 2 can be switched between “grid”and “carousel” via the Settings menu››› page 75.
Infotainment system rotary knobs andbuttons
Rotary/push knobs
The left-hand rotary knob ››› Fig. 1 6 is thevolume control or the on/off button.
The right-hand rotary knob ››› Fig. 1 7 is thesetup button.
Infotainment buttons
The Infotainment buttons are used by press-ing them or pressing and holding.
Switch on and Switch off
To manually switch the Infotainment systemon and off, briefly press the rotary knob ››› Fig. 1 6 .
When switching on, the system starts-up withthe last set volume, provided that this doesnot exceed the preset maximum start-up vol-ume ››› page 76, Sound and volume set-tings.
The unit will switch off automatically whenthe key is removed from the ignition or whenthe on/off button is pressed (depending onthe equipment fitted or the vehicle). If the In-fotainment system is switched on again, itwill switch off automatically after approxi-mately 30 minutes (switch-off delay).
Note
● The Infotainment system is a part of the ve-hicle. It cannot be used in any other vehicle.
● If the battery has been disconnected, theignition must be activated before switchingon the Infotainment system.
Change base volume
Increasing or decreasing the volume or mut-ing the sound
Increasing the volume: Turn the volume con-trol clockwise or move the left thumbwheelon the multifunction steering wheel upward ››› Booklet Instruction Manual.
Lowering the volume: Turn the volume con-trol anti-clockwise or move the left thumb-wheel on the multifunction steering wheeldownward ››› Booklet Instruction Manual.
Changes in volume are indicated by a volumebar on the screen. The volume can be control-led using the steering wheel controls. In this
case, the changes in volume are displayed onthe instrument panel by a volume bar.
It is possible to preset certain volume set-tings and adjustments ››› page 76, Soundand volume settings.
Muting the Infotainment system sound
● Turn the volume control anti-clockwiseuntil it displays .
Muting the Infotainment system sound stopsthe media source that is playing The screendisplays .
Note
If the base volume has been considerably in-creased to play a certain audio source, lowerthe volume again before switching to anotheraudio source.
9

Introduction
Operation of the function buttons andthe instructions on the screen
Fig. 4 View of some of the function buttonson the screen.
Fig. 5 Sound setup menu
The Infotainment system comes equippedwith a touchscreen ››› page 4 2 .
Active areas of the screen that call up a cer-tain function are called “function buttons”.
These buttons are operated by briefly press-ing the screen or by pressing and holding.
The function buttons appear in the instruc-tions with the label “function button” and abutton symbol inside a rectangle .
Function buttons start functions or open sub-menus. The currently selected menu is dis-played in the title bar ››› Fig. 4 A of the sub-menus.
Inactive (grey) function buttons cannot be se-lected.
Increase or decrease the size of the imagesdisplayed on the screen
The size of the navigation map image››› page 37 and, for example, photos whenviewing images ››› page 25 can be enlargedor reduced. To do so, enlarge or reduce theimage displayed by moving two fingers.
Overview of screen and function buttons
Display and function buttons: operation and ef-fect
AThe title bar shows the selected menu and,where applicable, other function buttons.
B Press it to open another menu.
Display and function buttons: operation and ef-fect
C
The scroll bar is shown on the right and itssize depends on the entries in the list. Movethe bar on the screen by pressing lightly andwithout lifting the finger, see ››› page 11,Open list entries and search lists.
D
Movable cursor: Move the cursor around thescreen by pressing lightly and without liftingthe finger.
OR: To move the cursor to a particular posi-tion, press that spot on the screen.
Fixed crosshair: Press the up, down, left andright arrows to move the sound according to
preference. The cursor D will move.
OR: Press the central button to centre thestereo sound in the centre of the passengercompartment
Press it on some lists to move up a level,one by one.
BACK Press to return from the submenus one at atime to the main menu or to undo the en-tries made.
When pressed, a pop-up window opens (op-tions window) which displays other setupoptions.
/ Some functions or messages are accompa-nied by a check box and are activated ordeactivated by pressing said check box.
OK Press to confirm an entry or a selection.
10

Introduction
Display and function buttons: operation and ef-fect
× Press to close a pop-up window or an inputwindow.
/ Press them to change the setup adjustmentsone at a time.
Move the slider around the screen by press-ing it lightly and without lifting your finger.
Open list entries and search lists
Fig. 6 Entries on a setup menu list.
The entries on a list can be activated bypressing them on the screen directly or by us-ing the adjustment button ››› Fig. 1 7 .
Mark list entries using the setup button andopen them
● Turn the setup button to mark the entrieson the list with a rectangle one by one andcontinue searching the list in this manner.
● Press the setup button to activate themarked entry on the list.
Search lists (scrolling the screen)
The scroll bar is shown on the right and itssize depends on the entries in the list››› Fig. 6 1 .
● Briefly press the screen above or below thescroll marker.
● OR: Place a finger over the scroll markerand without lifting it, move it around thescreen. Lift your finger off the screen whenyou reach the desired position.
● OR: Place your finger in the centre of thescreen and without lifting it, move it aroundthe screen. Lift your finger off the screenwhen you reach the desired position.
Input masks with on-screen keypad
Fig. 7 Input window with on-screen keypad.
Input windows with on-screen keypad areused for functions such as entering an entryname, selecting a destination address or en-tering a search term for searching long lists.
The function buttons listed below are notavailable in all countries or for all topics.
Subsequent chapters only explain thosefunctions that differ from those in the screenshown in the figure.
The input line with cursor is located in thetop bar of the screen. All inputs are displayedhere.
Input windows for “free text input”
In the input masks for open text, you may en-ter letters, numbers and special characters inany combination. »
11

Introduction
Input windows for selecting a saved entry(e.g. selection of a destination address)
It is only possible to select a sequence of let-ters, numbers and special characters thatmatches a stored entry.
Suggestions for matching destinations ap-pear depending on the characters entered inthe input line ››› Fig. 7 4 . In the case of com-pound names, it is necessary to enter aspace.
If there are fewer than 99 selectable entries,the number of remaining entries is displayedafter the input line 3 . Pressing this functionbutton displays these remaining entries in alist.
Overview of the function buttons
Icon and function text: operation and effect
Lettersand dig-its
Press them to copy them into the input line.
1
Press to change the keypad to another lan-guage. Keypad languages can be selectedfrom the menu system setup››› page 75.
2 Press to show symbols on the keypad.
3Displays the number and opens the list ofremaining selectable entries that match theentered text.
Icon and function text: operation and effect
4Scroll bar, the size of which depends on thenumber of matching entries.
5
Hold and press to display a pop-up windowwith the special characters based on saidletter. Press the desired character to enter it.Some special characters can be written outinstead (e.g. “AE” for “Ä”).
Press to enter a space.
Press to delete characters in the input linefrom right to left.
Press and hold to delete several characters.
BACK Press to close the input window.
Proximity sensor3 Valid for: Navi System
The Infotainment system is equipped with anintegrated proximity sensor ››› page 4 11 .
The image on the screen changes from dis-play mode to automatic operation when yourhand moves toward it. In operation mode,the function buttons are automatically high-lighted to facilitate their use.
Additional displays and display op-tions
The displays appearing on the screen mayvary depending on the settings, and may dif-fer from those described here.
The status bar on the screen can display, forexample, the current time and outside tem-perature.
All displays can be viewed only after com-pletely restarting the Infotainment system.
Initial configuration wizard
Fig. 8 Initial configuration wizard
The initial configuration wizard will help youto set up your Infotainment system the firsttime you switch it on.
Every time you switch on the Infotainmentsystem, the initial setup screen will appear
12

Introduction
››› Fig. 8 if any parameters have not been setor if the NEVER function button has not beenpressed.
Functionbutton
Function
CLOSE
Closes the Configuration Wizard, and themain menu or last mode in which youused the Infotainment system will ap-pear. The next time you switch on thesystem, the Configuration Wizard willstart up again.
NEVER
Disables the possibility of changing thesettings of the Infotainment system. Ifyou want to perform the initial systemsetup, you must enter via System set-up and select Configuration Wiz-ard ››› page 75.
START Starts up the Configuration Wizard.
APress to configure the time and date (if ithas a navigation system it will be config-ured automatically with the GPS).
BPress to search and store to memory theradio stations that have the best recep-tion at that moment.
CPress to link your mobile telephone tothe Infotainment system.
D a)Press to select your home address usingyour current position or by manually en-tering an address.
Functionbutton
Function
PREVIOUS NEXT
To go to the previous or next parameterto set.When a parameter has been set, the onlyway to reset it is from the main menu,clicking on it, and not using the Previ-ous/Next buttons.When setting any parameter, a confirma-tion mark will appear on it .
FINISH
Once one or more settings have been ap-plied, click on this in the main menu ofthe wizard to confirm and finalize thesettings.If there are any parameters you have notset, the next time you connect the Info-tainment system, the Initial Configura-tion Wizard will start up.
a) Only valid for Navi System.
Voice control
Operation
Fig. 9 Voice control: main screen (model dis-played: Navi System)
Many radio, media, telephone and navigationfunctions may be performed through voicecommands.
The Infotainment system's voice control willonly be available for the language selected inSystem setup ››› page 75.
Setup of voice control ››› page 15.
Start and stop the voice control
● To activate the voice control, briefly pressthe button on the multi-function steeringwheel or on the infotainment system.
● When you activate voice control, a tone willbe heard for the start of the dialogue and thevoice control main screen will be displayed, »
13

Introduction
››› Fig. 9, (the main screen will appear in theformat selected in Voice control settings››› page 15). The spoken instructions willguide you through the following “dialogue”.
● Pronounce the desired order and follow theinstructions of the “dialogue”. A function canoften be activated with different spoken com-mands. If in doubt, try giving a command orsay Help.
● When an action is performed (e.g. calling acontact), the voice control automatically de-activates and must be reactivated againwhen needed. There are certain commandsafter which the voice control does not endand waits with What do you wish to donow?.
● To finish voice control manually, eitherpress and hold the button until the corre-sponding confirmation signal is heard, orgive two quick presses on the button orpress the function button in the top rightcorner of the screen.
● Voice control can also be ended by givingthe following orders: “End Voice Control” or“Cancel”.
Help with voice control
Listening to Help when using voice control forthe first time is recommended.
● Switch on the speech control system .
● Give the Help command in the languageestablished in the System setup, and fol-
low the dialogue instructions. The Help com-mand can also be spoken followed by the in-fotainment system function, for example,“Help with the navigation”.
Interaction with the dialogue mode
Icons in the top left corner:
The system is expecting a commandfrom the user.
The system has recognised a commandand will act shortly.
The system is sending a spoken com-mand and confirms the command given.
The system is in pause mode. (max. 3minutes).
Hide or show the voice control menu››› Fig. 9.
Operation during the dialogue
While the infotainment system transmits aspoken indication, the display will show thesymbol .
● The announcement can be stopped bypressing the upper left icon on the screen orthe button and voice recognition for theuser will resume.
IMPORTANT: The system will ONLY recognisea command when the symbol is displayedas “active” on the display or touch screen.
/
If you make a mistake when giving a com-mand or give an incomplete command, and ithas no effect, you can repeat the command.The symbol remains active.
● Briefly press the button to repeat thecommand.
Instructions for voice control
For optimum functioning of the voice control,follow these instructions:
● Speak slowly and clearly, as far as possi-ble. The system will not recognise words thatare not pronounced clearly, or words and fig-ures in which syllables are omitted.
● Telephone numbers must be given digit bydigit or in blocks of numbers in ones, tens orhundreds.
● Speak at a normal volume, without exag-gerated intonation or long pauses.
● Avoid noise from the exterior and nearby(for example, conversations inside the vehi-cle). Close all doors, windows and the slidingroof.
● Do not aim the air from the diffusers at theroof of the passenger compartment.
● If you are driving very fast, speak a littlelouder.
When you activate voice control you are tak-en to the main screen ››› Fig. 9 where the
14

Introduction
main commands and the modes in whichsystem works are shown.
From here, you can tell the system whichmode you want to activate or directly give avoice command.
When you select any of the modes (Naviga-tion, Telephone, Radio, Media, Voice control)a menu will appear listing the main com-mands and, in each one, brief explanationsto help understand how they work.
Voice control (RADIO)
LISTEN TO THE RADIO Listen to the radio
SELECT STATIONStation NAME STATION 1
Set station
SELECT FREQUENCYFrequency 87.9
Set frequency
CHANGING BANDSBand FM
Change band
Voice control (MEDIA)
SELECT A SOURCEPlay CD
Listen to CD
SELECTING MUSICSelect track / album / ar-tist / genre
Voice control (PHONE)
CALL CONTACTS
Call Forename SurnameLandline
Call Forename SurnameMobile
CALL NUMBERSCall 01234
Call number
CALL LISTShow all calls
Missed calls
REDIAL Redial
CALL MAILBOX Call mailbox
SMS Read out text message
SERVICE Assistance call
INFORMATION Information call
Voice control (NAV)*
ENTER AN ADDRESS
Enter address
Navigate to City, Street,Number
HOME ADDRESS Home address
LAST DESTINATIONS Last destinations
NAVIGATE TO CONTACTSNavigate to Forename Sur-name
ROUTE GUIDANCEStart route guidance
Route information
Voice control
VOICE CONTROL
Pardon?
Back
Main menu
Cancel voice control
Pause voice control
HELPHelp
What can I say?
PUSH-TO-TALK
Note
Voice control is unavailable during parkingmanoeuvres
Voice control settings
● Press the Infotainment button ››› Fig. 1 12 to open the main menuSystemsettings.
● Press the function button Settings to accessthe system setup.
● Press the function button Voice control . »
15

Introduction
When you close a menu, the changes willtake effect automatically.
Function button: function
Example commands (infotainment system) : View voice com-mand examples on the infotainment system screen.
Example commands (instrument cluster) a): View voice com-mand examples on the instrument panel.
Voice control session start tone : when you activate voicecontrol a signal will be emitted. Press to deactivate thesignal.
Voice control session end tone : when you deactivate voicecontrol a signal will be emitted. Press to deactivate thesignal.
Input tone in voice dialogue : the input tone to confirm acommand is activated.
End tone in voice dialogue : the end tone to confirm a com-mand is deactivated.
a) Available depending on equipment.
16

Audio and Media Mode
Audio and Media Mode
Radio Mode
Related video
Fig. 10 Radio mode
RADIO main menu
Fig. 11 RADIO main menu.
Fig. 12 Radio mode: station list (FM).
Press the Infotainment button ››› Fig. 1 1
to open the RADIO main menu ››› Fig. 11.
RADIO main menu function buttons
Function button: function
1
To change the group of memory buttonsslide a finger over the memory buttonsfrom left to right or vice-versa
BAND Allows you to select the frequency band.
STATIONLIST
Opens the list of currently receivable ra-dio stations ››› page 21.
MANUAL Allows you to select the frequency man-ually ››› page 21.
VIEWAllows you to select the informationshown on the screen ››› page 20. Thefunction button is only available in DABmode.
Function button: function
SETTINGSOpens the setup menu of the active fre-quency band (FM, AM or DAB)››› page 23.
/
Selects the previous or next stored sta-tion (or available station). Adjustment ofthe arrow buttons in the Settings menu(FM, AM, DAB).
1 to 18 Memory buttons ››› page 20.
SCAN Stops the scan function (only visiblewhen the function is under way).
Information and possible icons
Display: Meaning
A
View the frequency or the name of the sta-tion and, where applicable, the radio text.The name of the radio station and the radiotext will only be displayed if equipped withRDS and if it is active ››› page 18.
RDS Off The RDS radio data service is deactivated.
TP Traffic news is available ››› page 22.
No stations with traffic news are available.
The radio station is stored on a memorybutton.
AF off The tracking of alternative frequencies isdisabled. »
17

Audio and Media Mode
Note
● The availability of AM and DAB bands de-pends on the country and/or equipment. Inthe event that the AM and DAB bands are notavailable, the BAND function button text willnot be shown.
● Bear in mind that being underground, intunnels, in areas with tall buildings or moun-tains can interfere with radio signals.
● Foil or metal-coated stickers attached tothe windows may affect reception on vehicleswith a window aerial.
RDS radio data services (FM band)
Fig. 13 Standard representation: FM stationlist menu
The RDS (Radio Data System) offers addition-al information in FM such as the visualisationof the station name, automatic station track-
ing (AF), text emitted by radio (Radio Text),traffic reports (TP) and station types (PTY).
Depending on the country and the unit inquestion, the RDS can be deactivated in theFM setup menu ››› page 23.
Without RDS it is not possible to use radiodata services.
Name of the station and automatic stationtracking
If equipped with the RDS function, the namesof the stations can be displayed in the mainRADIO menu and in the FM station list.
FM radio stations may occasionally or contin-uously broadcast different content on differ-ent regional frequencies under the same sta-tion name (e.g. Station 3).
By default, automatic station tracking alwaysswitches to the currently selected station'sfrequency that offers the best reception, asthe vehicle travels from one area to the next.As a result, this may cause the regional sig-nal to be lost.
Automatic frequency changing and automaticstation tracking can be deactivated in FMsetup ››› page 23.
Setting a station name
In some cases the name of the station is toolong. This text may be blocked/unblocked bypressing on the station name for 3 seconds
until hearing an audible signal (a dot will ap-pear/disappear on the left and right of thestation name).
Radio text
Some RDS-enabled stations also broadcastadditional text information known as radiotext.
Radio Text is displayed in the upper half ofthe screen above the memory buttons››› Fig. 11 A .
The Radio Text display can be deactivated inFM setup ››› page 23.
Station list order
Stations that are available at a certain timeare displayed on the station list screen (STA-TION LIST function button). This list maybe ordered by station group, by genre or al-phabetically ››› Fig. 13.
Note
● Radio stations are responsible for the con-tent of the information they transmit.
● Due to matters of infrastructure, RDS func-tions may be limited in certain countries, andyou may not be able to receive traffic an-nouncements, automatic station tracking (AF)or programme types (PTY).
18

Audio and Media Mode
Digital radio mode (DAB, DAB+ andaudio DMB)*
Fig. 14 Display of memory buttons in DABmode.
Fig. 15 Display of station information in DABmode.
The DAB radio receiver supports the DAB,DAB+ and DMB-Audio broadcasting stand-ards.
In Europe, digital radio is transmitted viaband III frequencies (from 174 MHz to240 MHz).
The frequencies are referred to as “channels”and each one has a channel name(e.g. 12 A).
Several available DAB stations are combinedinto one channel in an “ensemble”.
Starting Digital radio mode
● From the RADIO main menu press the BAND
function button and select DAB .
The DAB radio station that was last selectedwill be played if it can still be received at thecurrent location.
The selected DAB station is displayed in theupper bar of the screen; the group of selec-ted stations is displayed below ››› Fig. 14.
Additional DAB stations
Some DAB stations temporarily or perma-nently offer additional stations, (for example,for broadcasting sports events).
DAB stations containing additional stationsare identified in the station list by means ofthe symbol .
Selecting additional stations
From the main screen Press the name of the mainstation
Press the memory button ofthe main station
From the station list Select the additional stationfrom the list
The DAB main menu shows the name of theadditional selected station on the rightalongside the abbreviated name of the mainDAB station.
The additional stations cannot be stored.
Automatic station tracking
DAB is currently not available in all areas. Inareas without DAB, is displayed in DAB ra-dio mode.
If reception of the currently selected DAB sta-tion is lost (e.g. no DAB reception available),the Infotainment system attempts to find thestation and tune to it on the other availablefrequency bands. If the station still cannot befound, the radio will be muted. Automaticstation tracking can be activated in the DABsettings in the following modes ››› page 24:
● DAB - DAB station tracking: The radio at-tempts to tune into the same station on analternative DAB frequency. Automatic stationtracking only works if both DAB stationstransmit the same station identifier or the »
19

Audio and Media Mode
DAB signal indicates the corresponding otherDAB station.
● Automatic DAB - FM switching: The radioattempts to tune into the same station on theFM frequency band. Automatic station track-ing only works if the DAB station and the FMstation transmit the same station identifier orthe DAB signal indicates the correspondingFM station. Once the corresponding FM sta-tion has been found, “FM” is displayed afterthe station name. When reception for the cor-responding DAB station returns, after a shorttime the unit will switch back to DAB modeand “FM” will no longer be displayed.
● Switch to a similar station: This allowsservice providers to indicate alternative sta-tions with similar content. This way, if the ra-dio loses reception of a DAB station and can-not find an alternative frequency for it on FMor DAB, there is a possibility of tuning in to astation with similar content.
Radio text
Some stations also broadcast additional textinformation known as radio text.
Radio text is displayed in the upper half ofthe screen above the memory buttons››› Fig. 14 or on the Station information or Ra-dio text screens of the Screen view menu››› page 20.
The radio text display can be deactivated inDAB settings ››› page 24.
Slideshow
Some stations broadcast images for addi-tional visual information.
These images are displayed as a slideshowon the Station information or Slideshow screensof the Screen view menu ››› page 20.
The slideshow can be viewed in full screen bypressing on the current image.
Screen view menu
The function buttons refer to the menu thatappears when the View button is pressed››› Fig. 14.
Function button: function
Preset list : Memory buttons display ››› Fig. 14.
Station information : Simultaneous display of radio text andslideshows instead of the memory buttons ››› Fig. 15.
Radio text : Radio text is displayed instead of memorybuttons.
Slideshow : The slideshows are displayed in full screen.
Note
● Not all DAB stations broadcast radio textand slideshows.
Memory buttons
Fig. 16 RADIO main menu.
In the RADIO main menu, you can store sta-tions from all available frequency wave-lengths on the numbered function buttons.These function buttons are called “memorybuttons”.
Functions of the memory buttons
Selecting thestation from thememory but-tons
Press the memory button corre-sponding to the desired station.
The stored stations can only beplayed by pressing the correspond-ing memory button provided it canbe received at your current location.
20

Audio and Media Mode
Functions of the memory buttons
Switching be-tween memorybanks
Move your finger over the screenfrom left to right or vice-versa.
OR: Press one of the function buttons››› Fig. 16 A
The memory buttons are displayed inthree memory banks.
Storing the sta-tion on thememory but-tons
See: Storing stations ››› page 22.
Storing the sta-tion logo on thememory but-tons
A station logo can be assigned to thestations stored on the memory but-tons ››› page 21.
Storing station logos
Store automatically (only in FM and DABmode)
When a station is stored the station logo isautomatically assigned.
If there are 2 or more logos in the database,it gives the option to choose the correct one.
Store manually
The station logos can be imported from acompatible data medium (for example, mem-ory card or memories with USB port).
● Press the function button SETTINGS andthen Station logos .
● Press the station button where you wish tostore the logo of a station.
● Select the source where the logo is stored(for example, SD card 1 ). We recommend sav-ing logos in the memory unit’s root directory.
● Select the station logo.
● Repeat the process to assign other logos;press the infotainment button ››› Fig. 1 1
to return to the RADIO main menu.
● If you wish to change the logo of a memorybutton that already has one assigned to it, itmust first be deleted from the button in ques-tion.
Note
Not all stations are stored in the databaseand therefore it is not always possible to as-sign logos automatically.
Select, tune and store stations
Selecting stations
Select stationswith the arrowbuttons
Press either the function button or ››› Fig. 11.
This will change between availablestations ››› page 23.
Selecting stations
Selecting sta-tions from thestation list
Press the STATION LIST ››› Fig. 11 func-tion button to open the station list.
Search through the list and press therequired station to select it.
To close the station list, press theBACK function button ››› Fig. 12.
The station list closes automaticallyafter a period of inactivity.
Manually tuning in a station frequency.
Viewing the fre-quency dial
Press the MANUAL function button››› Fig. 11.
Changing thefrequency insteps
Turn the adjustment knob.
OR: Press the + or – keys on the di-al that appears on the screen.
Browsing thefrequency bandquickly
Press and hold one of the arrow but-tons on the left of the multifunctionsteering wheel. After releasing the ar-row button, the unit automaticallytunes to the next available radio sta-tion.
OR: Place your finger on the slider inthe frequency range and drag it tomove the button. »
21

Audio and Media Mode
Manually tuning in a station frequency.
Hiding the fre-quency band
Briefly press the adjustment knob››› Fig. 1 7 .
Manual frequency selection is alsoclosed if you select a station with amemory button. If no operation isperformed, the frequency range willdisappear after a period of inactivity.
Storing stations
Storing the sta-tion that is cur-rently being lis-tened to.
Press and hold the desired memorybutton ››› Fig. 11 until an audible sig-nal is heard.
The station tuned in will be stored onthis memory button.
Storing a sta-tion on the listof stations
Press the STATION LIST ››› Fig. 11 func-tion button to open the station list.
The stations that are already storedon a memory button are marked onthe station list with the symbol ››› Fig. 12.
Select the desired station by press-ing and holding it on the screen. Ascreen will appear to store the sta-tion on the memory buttons.
Press the memory button where thestation is to be stored.
An audible signal is heard and thestation is stored on the memory but-ton. To continue storing other sta-tions from the list, repeat the proc-ess.
Storing stations
Deleting storedstations
All the stored stations can be deletedtogether or separately from the FM,AM, DAB Setup menu››› page 23.
SCAN function
When the scan function is active, all availa-ble stations on the current frequency bandare played in sequence for approximately 5seconds each.
Starting and stopping the scan function
Starting the scanfunction
Press the SETTINGS function buttonand then select SCAN .
Stopping thescan function
Press the function button tostop the scan function at the stationthat is currently playing.
Manually selecting a station withthe memory buttons or changing thescreen also stops the scan function.
Traffic news (TP)
Traffic information tracking with the TP func-tion is only possible if the station is availa-ble. The stations with the traffic informationfunction are indicated in the RADIO main
menu and in the list of stations by the TPsymbol ››› Fig. 11 and ››› Fig. 12.
Some stations that do not broadcast theirown traffic information support the TP func-tion by broadcasting traffic warnings fromother stations (EON).
Switching the TP function on and off
● Using the Setup (FM, AM, DAB) menu,activate or deactivate theTraffic programme (TP) by pressing it
››› page 23.
Active TP function and station selection
Traffic warnings are played in Audio mode.
If a station is selected without the TP func-tion in FM mode, the radio tries to find sta-tions with this function in the background. Ifno station is found, this will be indicated half
way up the left of the screen .
In AM mode or media mode, the unit will al-ways automatically tune to a traffic news sta-tion in the background, provided that one isavailable. This procedure may take sometime, depending on the situation.
Incoming traffic announcement
In active Audio mode, an incoming traffic an-nouncement will play automatically.
During the traffic announcement, a pop-upwindow is displayed and the radio changes,
22

Audio and Media Mode
depending on the case, to the traffic newsstation (EON).
The media mode is paused and the volume isadjusted to the preset level ››› page 76.
The volume of the traffic announcement canbe modified with the volume control . Theadjusted volume setting will be applied tosubsequent announcements.
● Press the Cancel function button to end thecurrent traffic announcement. The TP functionremains switched on.
● OR: Press the Deactivate function button toend the current traffic warning and perma-nently deactivate the TP function. This can bereactivated in the Settings menu.
Setup (FM, AM, DAB)
FM setup
Select the FM frequency band by pressingthe Infotainment button .
OR:Press the BAND function button and se-lect the FM frequency band.
Press the SETTINGS function button to openthe FM Settings menu.
Function button: function
Sound : Sound settings ››› page 76.
Function button: function
Scan : Scan function. When the scan function is active,all available stations on the current frequency band areplayed in sequence for approximately 5 seconds each››› page 22.
Seek mode : To adjust settings for the buttons with the ar-rows and . This setting applies to all frequencybands (FM, AM and DAB).
Preset list : All stored stations on the selected fre-quency band can be browsed with the arrow but-tons.
Station list : All available stations on the selected fre-quency band can be browsed with the arrow but-tons.
Traffic programme (TP) : The TP function (traffic news sta-tion tracking) is active ››› page 22.
Delete presets : To delete all or some of the stored sta-tions.
Station logos : To manually assign or delete the storedstation logos to and from the memory buttons››› page 21.
Radio text : Radio Text is active ››› page 18, Radio text.
Advanced settings a): Setup of the RDS (radio data system).
Autostore station logos a): Logos can be automaticallyassigned to the stations stored on the memory but-tons if they are available in the Infotainment sys-tem. Also see ››› page 21.
Region for station logo a): Allows you to select the re-gion (country) in which the vehicle is located. Thisoptimises the automatic assignment of stationlogos. The option also allows the system to selectthe region automatically.
Function button: function
Alternative frequency (AF) a): The automatic stationtracking is active. With the checkbox deactiva-ted, the RDS regional function button remains inac-tive (grey).
Radio Data System (RDS) a): The Radio Data System(RDS) is deactivated ››› page 18. If the checkboxis deactivated, the traffic news station functions(TP), Radio Text, station name and programme typewill not be available.
RDS Regional a): Setting automatic station tracking byRDS ››› page 18.
Fixed : The unit only switches to alternative fre-quencies for the selected station if the same re-gional service is being broadcast.
Automatic : the unit always switches to the sta-tion's frequency that currently offers the bestreception. As a result, regional programmesmay be interrupted.
a) This depends on the country and unit in question.
AM Setup
Select the AM frequency band by pressingthe Infotainment button .
OR: Press the BAND function button and se-lect the AM frequency band.
Press the SETTINGS function button to openthe AM Settings menu.
Function button: function
Sound : Sound settings ››› page 76. »23

Audio and Media Mode
Function button: function
Scan : Scan function. When the scan function is active,all available stations on the current frequency band areplayed in sequence for approximately 5 seconds each››› page 22.
Seek mode : To adjust settings for the buttons with the ar-rows and . This setting applies to all frequencybands (FM, AM and DAB).
Preset list : All stored stations on the selected fre-quency band can be browsed with the arrow but-tons.
Station list : All available stations on the selected fre-quency band can be browsed with the arrow but-tons.
Traffic programme (TP) : The TP function (traffic news sta-tion tracking) is active ››› page 22.
Delete presets : To delete all or some of the stored sta-tions.
Station logos : To assign the logos to the stations storedon the memory buttons ››› page 21.
DAB Settings
Select the DAB frequency band by pressingthe Infotainment button .
OR: Press the BAND function button and se-lect the DABfrequency band.
Press the SETTINGS function button to openthe DAB Settings menu.
Function button: function
Sound : Sound settings ››› page 76.
Scan : Scan function. When the scan function is active,all available stations on the current frequency band areplayed in sequence for approximately 5 seconds each››› page 22.
Seek mode : To adjust settings for the buttons with the ar-rows and . This setting applies to all frequencybands (FM, AM and DAB).
Preset list : All stored stations on the selected fre-quency band can be browsed with the arrow but-tons.
Station list : All available stations on the selected fre-quency band can be browsed with the arrow but-tons.
Traffic programme (TP) : The TP function (traffic news sta-tion tracking) is active ››› page 22.
Delete presets : To delete all or some of the stored sta-tions.
Station logos : To assign the logos to the stations storedon the memory buttons ››› page 21.
Radio text : Radio Text is active ››› page 18, Radio text.
Advanced settings : DAB services setup.
Autostore station logos a): The station logos are auto-matically assigned when the radio stations are stor-ed to the memory buttons ››› page 21.
DAB traffic announcements : DAB traffic announce-ments are played in the same way as TP traffic an-nouncements in all operating modes.
Function button: function
Other DAB announcements : DAB announcements(news, sport, weather, warnings etc.) will interruptthe current DAB radio mode.
DAB-DAB station tracking : automatic station trackingwithin the DAB frequency range is activated.
Automatic DAB - FM switching : switching to FM fre-quency band is allowed for automatic station track-ing.
a) This depends on the country and unit in question.
24

Audio and Media Mode
Media mode
Introduction
Fig. 17 Related video
“Media sources” are audio sources contain-ing audio files on various different data stor-age devices (e.g. CD, memory card, external
MP3 player). These audio files can be playedby the Infotainment system via their corre-sponding drives or audio input sockets (inter-nal CD drive, memory card slot, AUX-IN multi-media socket etc.).
Copyright
Audio and video files on data storage devicesare usually protected by intellectual propertyrights, as per the corresponding national andinternational laws. Be aware of the current le-gal provisions!
Note
● MPEG-4 HE-AAC audio coding technologyand patents are licensed from Fraunhofer IIS.
● This product is subject to certain intellectu-al property rights and copyrights owned bythe Microsoft Corporation. The use or distri-bution of this type of technology outside thisproduct requires a licence from Microsoft oran authorised Microsoft company.
● The infotainment system only plays undam-aged compatible audio files; other files areignored.
● Consult the list of supported devices on theSEAT website.
Requirements for data storage devices and files
Factory-fitted CD drives conform to safetyclass 1 according to DIN IEC 76 (CO)6/ VDE 0837.
The infotainment system only accepts stand-ard 12-cm CDs and memory cards with these
dimensions: 32 mm x 24 mm x 2.1 mm or1.4 mm.
The supported file formats listed are collec-tively referred to below as “audio files”. A CD
containing audio files of these types is refer-red to as an “audio data CD”. »
25

Audio and Media Mode
Data storage device Requirements for playing in the unit
Optical discs:
– audio CD (up to 80 min).– CD-ROM, CD-R, CD-RW with audio data up to a maximum of 700 MB (megabytes) using ISO9660 Level 1 and 2, Joliet or UDF 1.02, 1.5, 2.01 file system.
Memory cards:
– SD and MMC in the file system must be FAT12, FAT16, FAT32 or VFAT (max. 2 GB).– SDHC (max. 32 GB) and SDXC (max. 2 TB (terabytes) in exFAT and NTFS file systems.
USB data storage device:
– Devices compliant with USB 2.0 and 3.0 specifications.– FAT16, FAT32, exFAT and NTFS file systems.
– iPods™a), iPads™a) and iPhones™a) of various generations.– MTP players with the “PlaysForSure” or “ReadyForVista” logo.
– Digital Audio specification.– MP2 (.mp2) and MP3 (.mp3) files with bit rates of between 32 and 320 kbit/s orvariable bit rate.– WAV (.wav) files.– WMA (.wma) files up to 10 mono/stereo without copy protection and bit rates of upto 384 kbit/s.– AAC (.m4a, .m4b and .aac) files without copy protection– OGG-Vorbis 1 (.ogg) files with bit rates of up to 256 kbit/s.– FLAC (.flac) files.
– Playlists in the formats M3U, PLS, ASX and WPL.– Playlists must not exceed 20 kB or have more than 1000 entries.– Filenames and paths that do not exceed 256 characters.– For memory cards, a maximum of 4000 files and a maximum of 1000 files per di-rectory.
Playing audio files via the AUX-IN socket. – The external audio source must meet a series of playback conditions ››› page 34.
Audio file playback via Bluetooth®b). – The external media player must be compatible with the A2DP Bluetooth® profile››› page 34.
a) iPod™, iPad™ and iPhone™ are registered trademarks of Apple Inc.b) Bluetooth® is a registered trademark of Bluetooth® SIG, Inc.
Read and bear in mind the manufacturer's in-struction manual for the external data stor-age device.
Restrictions and instructions
Contamination, exposure to high tempera-tures and mechanical damage may render adata medium unusable. Please observe themanufacturer's instructions.
Variations in the quality of data media pro-duced by different manufacturers can lead toproblems during playback.
Please observe copyright laws.
The unit may be unable to read individualtracks or the entire data medium due to thedata medium configuration or the devicesand programs used for recording. Informa-tion about the best ways to create audio files
and data media (compression rate, ID3 tagetc.) can be found on the Internet.
The reading time may vary considerably de-pending on the condition of the data medium(copying and deleting actions), folder struc-ture and file type.
Playlists only determine a certain playing or-der. There are no files stored in a playlist. Theunit will not play a playlist if the files are not
26

Audio and Media Mode
stored on the data medium at the locationsreferred to by the playlist (relative file paths).
A cover can only be displayed when the namestarts with “Cover”, “Folder” or “Album”.
Note
● Do not use memory card adapters.
● SEAT assumes no liability for any deteriora-tion or loss of files on data storage devices.
Playing order of files and folders
Fig. 18 Possible structure on an audio dataCD
The audio files stored on data storage de-vices are often organised by means of folders and playlists to determine a certainplaying order.
Tracks, folders and playlists on a data stor-age device are sorted by name in alphanu-meric order.
The image shows a standard CD with audiodata which contains tracks , folders andsubfolders ››› Fig. 18.
In this case, the tracks are played in thismanner1):
Tracks 1 and 2 in the CD's root direc-tory
Tracks 3 and 4 in the first folder F1 inthe CD's root directory
Track 5 in the first subfolder F1.1 of thefolder F1
Track 6 in the first subfolder F1.1.1 ofthe subfolder F1.1
Track 7 in the second subfolder F1.2 ofthe folder F1
Tracks 8 and 9 in the second folder F2
Note
● The play order can be modified by selectingdifferent playback modes ››› page 28.
● Playlists are not played automatically, in-stead they have to be specifically selected viathe track selection menu ››› page 30.
1.
2.
3.
4.
5.
6.
1) In the Media Settings menu, the Mix/Repeat including subfolders function must be acti-
vated ››› page 35.27

Audio and Media Mode
MEDIA main menu
Fig. 19 MEDIA main menu.
Using the MEDIA main menu, different mediasources can be selected and played.
● Press the Infotainment button ››› Fig. 1 4 to open the MEDIA main menu››› Fig. 19.
It will continue playing the last media sourceselected from the same point.
The media source being played is indicatedon the dropdown list when pressing theSOURCE function button ››› Fig. 19.
If there is no available media source, the ME-DIA main menu is displayed.
MEDIA main menu function buttons
Function button: function
SOURCE
Indicates the media source being played.Press to select another media source››› page 29.
CD : Internal CD drive ››› page 32.
SD CARD 1 , SD CARD 2 : SD memory card››› page 32.
USB 1 , USB 2 : External data storage de-vice connected to the USB port ››› page 33.
AUX : External audio source connected tothe AUX-IN multimedia socket››› page 34.
BT AUDIO : Bluetooth® audio ››› page 34.
SELEC-TION Opens the track list ››› page 30.
/ Changes track in Media mode or fast for-ward/rewind ››› page 29.
Playback stops. The function buttonchanges to .
Playback is resumed. The function but-ton changes to .
SETTINGS Opens the Media Settings menu››› page 35.
Function button: function
REPEAT
Repeat all tracks.
Repeats all the tracks that are on thesame memory level as the track beingplayed at that moment. If in the MediaSettings menu Mix/Repeat including subfolders is activated,
it also includes the subfolders››› page 35.
REPEAT
The current track will be repeated.
MIX
Random play.
Includes all the tracks that are on thesame memory level as the track beingplayed at that moment. If in the MediaSettings menu Mix/Repeat including subfolders is activated,
it also includes the subfolders››› page 35.
Messages and symbols on the MEDIA mainmenu
Display: Meaning
A
Displays information about the artist name,album name and song title (CD text , ID3tag on compressed audio files).
Audio CD: displays track information. If nodata is available, it only displays Trackand the number corresponding to the posi-tion it occupies on the data storage device.
28

Audio and Media Mode
Display: Meaning
B
Viewing the album cover: If there are vari-ous covers within the same folder/album,the system only displays one of them.It prioritizes displaying the covers in the fol-lowing manner:1. Cover embedded in the file(s).2. Image in file folder.3. Default icon for the connected device.
C
The playing time so far and time remainingin minutes and seconds. In the case of au-dio files with variable bit rates (VBR) the re-maining time may vary.
TPa)The TP function is active and can be tunedin ››› page 22.
a)There is no traffic news station available››› page 22.
a) Depends on the market and unit in question.
Note
● When the media source is inserted, playingwill not start automatically; it is necessary forthe user to select the source. Nor will the me-dia source change when it is ejected.
Change the media source
Fig. 20 MEDIA mode: change media source.
● From the MEDIA main menu, press the ››› Fig. 1 4 Infotainment button repeatedlyto cycle through the available media sources.
● OR:From the MEDIA main menu, press theSOURCE function button ››› Fig. 20 and select
the desired media source.
In the pop-up window, the Media sources notselected are shown as deactivated (in grey).
When a Media source that has already beenplayed is selected again, playback is re-sumed from the point at which it was stop-ped.
Optionally selectable media playback sour-ces
Function button: Media source
CD Internal CD drive ››› page 32.
Function button: Media source
SD CARD 1SD memory card ››› page 32.
SD CARD 2 *
USB 1 External data storage device connectedto the USB port ››› page 33.USB 2 *
AUXExternal audio source connected to theAUX-IN multimedia socket ››› page 34.
BT AUDIO Bluetooth® audio ››› page 34.
Note
The Media source can be changed in the Tracklist view ››› page 30.
Changing track in the MEDIA mainmenu
Fig. 21 MEDIA main menu. »
29

Audio and Media Mode
It is possible to browse through the tracks ofthe Media source that is currently playing us-ing the arrow buttons.
It is not possible to exit a playlist or start theplayback of a playlist using the arrow but-tons. Both actions must be performed man-ually from the track selection menu››› page 31.
Controlling playback via the MEDIA mainmenu
Action Function
Briefly press the func-tion button once.
Goes to the start of the cur-rent track. If the track hasbeen playing for less than 3seconds, it skips to the be-ginning of the previoustrack.
Quickly press the func-tion button twice.
If the track has been play-ing for more than 3 sec-onds, it skips to the begin-ning of the previous track;from the first track it skipsto the last track on the datastorage device beingplayed.
Briefly press the func-tion button once.
Goes to the next track. Itchanges from the previoustrack to the first track of thedata storage device beingplayed.
Press and hold the function button.
Fast rewind.
Action Function
Press and hold the function button.
Fast forward.
Slide your finger horizon-tally across the screen.
Changes to the previ-ous/next track, respectingthe same playing times aswhen changing tracks withthe or buttons.
Selecting an album by its cover
Fig. 22 Selecting by cover.
When pressing the current cover››› Fig. 21 1 , it displays all the album coversavailable in the active media source››› Fig. 22.
It is possible to browse through all the al-bums by sliding the covers left or right, byusing the bottom horizontal slide bar, or byusing the adjustment knob ››› Fig. 1 7 .
The selection by cover view will close afterapproximately 5 seconds of inactivity and willreturn to the main Media menu.
Selection of a track from a list oftracks
Fig. 23 Media mode: list of folders on a me-dia source.
Fig. 24 Media mode: list of tracks on a Mediasource.
30

Audio and Media Mode
Opening a track list
● From the MEDIA main menu, press theSELECTION ››› Fig. 21 function button to open
the track list. The track that is currently play-ing is highlighted ››› Fig. 24.
● Search through the track list and press thedesired track.
If there is information available on the track,the track is displayed (for audio CDs) or thename of the file (MP3), rather than Track +number.
Overview of the function buttons on the tracklist
Function button: function
AOpen the Sources menu. Select anotherMedia source by pressing it.
B
Indicates the media source being explored.If pressed it goes to the root folder of thedevice indicated on the icon.
CD : Internal CD drive ››› page 32.
SD CARD 1 , SD CARD 2 *: SD memory card››› page 32.
USB 1 , USB 2 *: External data storage deviceconnected to the USB port ››› page 33.
BT AUDIO : External media player connectedby Bluetooth® ››› page 34.
AUX : Audio source connected to the AUX-INsocket ››› page 34
Function button: function
CPress the function button to open the topfolder of the media source.
Starts playback of the first track.
Repeat all tracks.
Repeats all the tracks that are on the samememory level as the track being played atthat moment. If in the Media Settingsmenu Mix/Repeat including subfolders is acti-vated, it also includes the subfolders››› page 35.
Random play.
Includes all the tracks that are on the samememory level as the track being played atthat moment. If in the Media Settingsmenu Mix/Repeat including subfolders is acti-vated, it also includes the subfolders››› page 35.
CLOSE × To close the track list.
Note
The tracks, folders and playlists can also beselected by turning the setup button, and canbe played or opened by pressing it.
Database view
Fig. 25 Media mode: database view
From the track list, press theShow database view option. The content of the
current Media source will be displayed classi-fied by Playlists , Artists , Albums , Genres ,Tracks and Videos ››› Fig. 23.
To return to the folder view, press theShow folder view option from the SELECTION
Menu.
31

Audio and Media Mode
Inserting or ejecting a CD
Fig. 26 Slots for data storage devices in theglove compartment.
The driver should refrain from operating theunit while the vehicle is in motion. Insert orchange the data storage device before mov-ing off!
The CD drive can play audio CDs and audiodata CDs.
Inserting a CD
● Hold the CD with the printed side facing up.
● Push the CD into the slot ››› Fig. 26 3 tothe point where it is drawn in automatically.
Ejecting a CD
● Press button 1 .
● The CD in the drive will be ejected andmust be removed within approximately10 seconds.
If the CD is not removed within the 10 sec-onds, it is automatically retracted for securityreasons without activating the CD mode.
Unreadable or defective CD
If the data on an inserted CD cannot be reador a defective CD is inserted, the correspond-ing warning appears on screen.
Depending on the unit, unreadable CDs areejected 3 times automatically and insertedagain to initiate another three attempts be-fore said message is displayed.
Note
● Uneven road surfaces and strong vibrationscan cause playback to jump.
● When the temperature inside the unit is toohigh, loading and playback of CDs is disa-bled.
● If after inserting a number of different CDsand receiving the CD drive error everytime, contact a qualified workshop.
Insert or eject a memory card
Depending on the features and the country,the vehicle may have one or two slots for SDcards.
Inserting a memory card
Insert the compatible memory card, bevellededge first and with the label face up (con-tacts face down), into slot ››› Fig. 26 2 , untilproperly inserted.
If a memory card cannot be inserted, makesure it is positioned correctly and is compati-ble with the unit.
Removing a memory card
The inserted memory cards must be preparedfor removal.
● From the main Media menu, press theSETTINGS button to open the Media Set-tings menu or press the infotainment but-ton ››› Fig. 1 9 and then press Settings , toopen the System settings menu.
● Press the Remove safely function button. Adropdown menu appears with the followingoptions: SD1 Card, SD2 Card*, USB1 andUSB2*. After correctly ejecting the memorycard from the system, the function button be-comes inactive (grey colour).
● Press the inserted memory card. The mem-ory card “jumps” to the eject position.
● Remove the memory card.
Unreadable memory card
If a memory card is inserted and the datacannot be read, the relevant warning ap-pears.
32

Audio and Media Mode
External data storage device connec-ted to USB port
Depending on the features and the country,the vehicle may have one or two USB connec-tions. For their location consult the ››› BookletInstruction Manual.
Audio files on an external data storage de-vice connected to the USB port can beplayed and controlled via the Infotainmentsystem.
Where this manual refers to external datastorage devices, this means USB mass stor-age devices containing supported audiofiles, such as MP3 players, iPods™ and USBsticks.
Only supported audio files are displayed andplayed. Other files are ignored.
Further operation of the external data medi-um (changing track, selecting tracks andplayback modes) is described in the appro-priate chapters of this manual ››› page 25.
Instructions and restrictions
Compatibility with Apple™ devices and othermedia players depends on the unit.
The USB port supplies the usual USB volt-age of 5 volts for a USB connection.
External hard disks with a capacity greaterthan 32 GB must be reformatted for theFAT32 file system in some circumstances. You
will find the necessary software and informa-tion on the Internet.
Take into account all other instructions andlimitations regarding requirements for mediasources ››› page 25.
iPod™, iPad™ and iPhone™
Depending on the country and the equip-ment, iPods™, iPads™ or iPhones™ can beconnected using the device's USB cable tothe USB port of the vehicle and used asaudio sources.
After connecting an iPod™, iPad™ oriPhone™, the specific list views of the iPodare displayed in the upper selection level( Playlists, Artists, Albums, Tracks, Podcasts etc.).
Possible error messages after connecting anexternal data storage device
Error mes-sage
Cause Procedure
The deviceis notcompatible
The externaldata carriercannot beplayed or com-munication isnot possiblewith the adapt-er cable beingused.
Check the connec-tion and make surethe external datastorage device isworking correctly.If possible, updatethe external datastorage device soft-ware.
Error mes-sage
Cause Procedure
The devicedoes notwork
Communicationfault.
Check the connec-tion and make surethe external datamedium is workingcorrectly.
Due to the large number of different data storage devi-ces and various iPod™, iPad™ and iPhone™ genera-tions available, it is not possible to guarantee fault-freeoperation of all functions described here.
Disconnecting
Any connected data storage devices must beprepared before their disconnection in orderto remove them.
● From the main Media menu, press theSETTINGS button to open the Media Set-tings menu or press the infotainment but-ton ››› Fig. 1 12 and then press Settings , toopen the System settings menu.
● Press the Remove safely function button. Adropdown menu appears with the followingoptions: SD1 Card, SD2 Card*, USB1 andUSB2*. After correctly ejecting the data stor-age device from the system, the function but-ton becomes inactive (grey colour).
● Now the data storage device can be discon-nected. »
33

Audio and Media Mode
Note
● Do not connect an external media player atthe same time to play music via Bluetooth®
and via the USB port with the Infotain-ment system, as this could cause playbacklimitations.
● If the external player is an Apple™ device,it cannot be simultaneously connected byUSB and by Bluetooth®.
● If a connected device is not recognised, dis-connect all the connected devices and tryconnecting the device again.
● Do not use memory card adaptors, USB ex-tension cords or USB hubs!
External audio source connected tothe AUX-IN multimedia socket
Depending on the equipment and countrythere may be an AUX-IN multimedia socket››› Booklet Instruction Manual.
In order to connect the external audio sourceto the AUX-IN socket, a suitable cable is re-quired with a 3.5 mm jack that is inserted in-to the AUX-IN socket of the vehicle.
The connected external audio source isplayed over the vehicle speakers and cannotbe controlled via the Infotainment systemcontrols.
The connection of an external audio source isindicated by AUX on the screen.
Connecting an external audio source to theAUX-IN multimedia socket
● Lower the base volume on the Infotainmentsystem.
● Connect the external audio source to theAUX-IN multimedia socket.
● Start playback on the external audiosource.
● In the MEDIA main menu, press the SOURCE
function button and select AUX .
The output volume of the connected externalaudio source should be adjusted to the vol-ume of the other audio sources ››› page 76.
Information on operating an external audiosource connected to the AUX-IN multimediasocket
Operation Effect
Selection of another au-dio source from the Info-tainment system.
The external audio sourcecontinues to run in thebackground.
Stopping playback on theexternal audio source.
The infotainment systemremains in the AUX menu.
Disconnecting the plugfrom the AUX-IN multime-dia socket.
The infotainment systemremains in the AUX menu.
Note
● Please read and observe the manufactur-er's instruction manual for the external audiosource.
● Interference noise may be heard if the ex-ternal audio source is powered from the 12-volt power socket of the vehicle.
Connecting an external audio sourcevia Bluetooth®
Bluetooth® Audio mode allows you to listento audio files being played on a Bluetooth®
audio source (e.g., a mobile telephone) con-nected via Bluetooth® (audio playback byBluetooth®) over the vehicle speakers.
Conditions
● The Bluetooth® audio source must supportthe A2DP Bluetooth® profile.
● In the Bluetooth settings menu, the Bluetooth Audio (A2DP/AVRCP) function must
be activated ››› page 63.
Starting Bluetooth® audio transfer
● Activate Bluetooth® visibility on the exter-nal Bluetooth® audio source (e.g., mobile tel-ephone).
● Lower the base volume on the Infotainmentsystem.
34

Audio and Media Mode
● In the MEDIA main menu, press the SOURCE
function button and select BT audio .
● Press Search for new device in order to con-nect an external Bluetooth® audio source forthe first time ››› page 54.
● OR: Select a Bluetooth® external audiosource from the list.
● Please refer to the instructions on thescreen of the Infotainment system and on theBluetooth® audio source regarding the restof the procedure.
You may still need to manually start playbackon the Bluetooth® source.
When playback on the Bluetooth® audiosource is stopped, the Infotainment systemremains in Bluetooth® Audio mode.
Controlling playback
The extent to which the Bluetooth® audiosource can be controlled via the Infotainmentsystem depends on the connected Blue-tooth® audio source.
The available functions will depend on theBluetooth® Audio profile that the connectedexternal player supports.
With media players that support the AVRCPBluetooth® profile, playback on the Blue-tooth® audio source can be automaticallystarted or stopped when the unit is switchedto Bluetooth® Audio mode or to a differentaudio source. In addition, it is possible to
view or change the track via the Infotainmentsystem.
Note
● Due to the large number of possible Blue-tooth® audio sources, it is not possible toguarantee fault-free operation of all descri-bed functions.
● Always switch off the warning and servicetones on a connected Bluetooth® audiosource, e.g. key tones on a mobile telephone,to prevent possible interference noise andmalfunctions.
● Depending on the external player connec-ted, the response time of the system canvary.
● Do not connect an external media player toplay music via Bluetooth® and via the USBport ››› page 33 at the same time with theInfotainment system, as this could causeplayback limitations.
● If the external player is an Apple™ device,it cannot be simultaneously connected byUSB and by Bluetooth®.
Media Settings
● Select the MEDIA main menu by pressingthe Infotainment button ››› Fig. 1 4
● Press the SETTINGS function button to openthe Media Settings menu.
Function button: function
Sound : Sound settings ››› page 76.
Mix/Repeat including subfolders : Subfolders will be inclu-ded in the selected playback mode ››› page 25.
Bluetooth : Bluetooth® settings ››› page 63
Remove safely : In order to prepare the external data stor-age devices for their removal or disconnection. See also››› page 32, Insert or eject a memory card and››› page 33, External data storage device connected toUSB port .
Traffic programme (TP) : The TP function (traffic news sta-tion tracking) is active ››› page 22.
Images
Fig. 27 Images main menu.
Using the Images menu, image files can beviewed (e.g. photos) individually or as a sli-deshow. »
35

Audio and Media Mode
The image files must be stored on a compati-ble data storage device (e.g., a CD or an SDcard).
● Press the Infotainment button ››› Fig. 1 12 and then press the Images func-tion button.
● Press the SOURCE function button to selectthe source where the pictures in question arelocated.
Function button: function
SOURCE Viewing and selecting the source.
SELEC-TION Opens a list of image files.
The image viewed was obtained via GPS lo-calisation and upon pressing this functionbutton, the navigator menu opens to start aroute to this destination.
/ Rotate the view of the image to the left orthe right.
Reset the view of the image.
To stop the playback of a slideshow. The function button changes to .
To continue the playback of a slideshow.The function button changes to .
Function button: function
/
To change to the PREVIOUS or NEXT im-age.
The same function can be performed bysliding your finger horizontally across thescreen.
SET-TINGS Open the Image settings menu.
Enlarging or reducing the view
To enlarge or reduce the view of the imagedisplayed:
● Turn the adjustment knob.
● OR: Stretch or reduce the image on thescreen using 2 fingers.
Rotating the view/image
To rotate an image, in addition to the buttonsprovided for this ( / ), you can also presson the screen (e.g. with your thumb) and,while continuing to press with your thumb,slide another finger (e.g. your index finger)around it like a compass either clockwise (torotate the image to the right) or anti-clock-wise (to turn the image to the left). This willrotate the image 90° with respect to its cur-rent position.
Requirements for viewing images
Image files Maximum resolution
BMP 4MP
JPEG 4MP (Progressive Mode)
JPG 64MP
GIF 4MP
PNG 4MP
Image settings
Open the Image settings menu
● In the Images main menu, press theSETTINGS function button.
Function button: function
Image view : To adjust the viewing format of the image.
Automatic: The images are shown in scale in rela-tion to the size of the screen (the image may not bedisplayed in its entirety).
Full: The full images are displayed on the screen.
Display time : To adjust the display time of the imagesduring a slideshow.
Repeat slideshow : The active slideshow will be repeatedindefinitely.
36

Navigation*
Navigation*
Navigation, entry and control
Introduction
Fig. 28 Related video
General information
The current vehicle position is determined bymeans of the GPS satellite system (Global Po-sitioning System). Sensors in the vehiclemeasure distances that have been driven.The measurement values are compared withthe detailed map data and the road informa-tion stored therein. Traffic reports, if any, willalso be taken into account in the route calcu-lation (dynamic route guidance››› page 45). Using all the data available,the Infotainment system calculates the opti-mum route to the destination.
The destination is defined by entering an ad-dress or a point of interest, e.g. a petrol sta-tion or hotel.
Spoken instructions and visual guidance onthe navigation unit and on the instrumentpanel will direct you to your destination.
Depending on the country, some infotain-ment system functions can no longer be se-lected when the vehicle is travelling above acertain speed. This is not a malfunction, butsimply a legal requirement.
Navigation messages
When the Infotainment system is unable toreceive any data from GPS satellites (due to adense tree canopy, underground car park),navigation can still continue using the vehi-cle sensors.
Possible navigation limitations
In areas that are not or are only partially digi-tised on the data storage device (e.g. insuffi-cient definition of one-way streets and roadcategories), the Infotainment system will stillattempt to provide route guidance.
If navigation data are unavailable or incom-plete, the navigation system may be unableto determine the exact vehicle position. As aresult, the navigation may not be as exact asusual.
Navigation area and updating of navigationdata
Roads and streets are subject to constantchange (e.g. new roads, changes to streetnames and building numbers). Therefore, ifthe navigation data is not updated, then er-
rors or inaccuracies may occur during guid-ance.
SEAT recommends updating navigation dataon a regular basis. Up to date navigation da-ta can be acquired at a SEAT dealer.
Use navigation data from a memorycard.
The SD card is initially to be found inserted inSD card slot 2.
To update navigation data visit our website:www.seat.com.
● Insert the memory card ››› page 32.
● Do not remove the memory card while test-ing. Wait for the testing icon to disappear.
If the inserted memory card contains validnavigation data, the following message ap-pears: “The source contains a validnavigation database”. It is now possibleto navigate with the memory card data. Whenthe memory card is no longer needed by thehardware, it will be prepared for removal››› page 32.
Note
● The inserted memory card must be pre-pared before it is ejected››› page 32. »
37

Navigation*
● Press the Infotainment button ››› Fig. 1 12 ; then press Settings to openthe System settings menu.
● Navigation is not possible without the SDcard.
● Do not remove the memory card while thenavigation data is in use. This could damagethe memory card!
● The navigation memory card may not beused as memory for other files. The infotain-ment system will not recognise the filessaved.
● SEAT recommends only using original SEATmemory cards to use navigation data. Theuse of other memory cards could limit its op-eration.
Navigation main menu
Fig. 29 Navigation main menu
The navigation functions are only enabledwhen navigation data for the current area areavailable on the Infotainment system.
The Navigation main menu allows you to se-lect a new destination, call up a previouslyused or stored destination and search forpoints of interest.
Opening the main Navigation menu
● Press the Infotainment system button ››› Fig. 1 3 to open the last menu that wasopen in navigation.
● If the main Navigation menu is not dis-played, press the Infotainment button ››› Fig. 1 3 again until the main Navigationmenu appears.
● OR: Press the function button to return,menu by menu, to the main Navigationmenu.
Function buttons and messages on the mainNavigation menu
Function button: function
A The split screen is displayed ››› page 43.
BMessages and function buttons on the map dis-play ››› page 44.
NEW DESTINATION : To enter a new destination››› page 38.
ROUTE : During route guidance ››› page 40.
Function button: function
MY DESTS. : To activate or manage stored destinations››› page 41.
POI : Search for points of interest (car parks, fuel sta-tions and restaurants) within a particular search area››› page 42.
VIEW : To modify or activate or deactivate the splitscreen and show POI ››› Fig. 29 A ››› page 43.
SETTINGS : Open the Navigation Settings menu››› page 48.
New destination (enter destination)
Fig. 30 Search screen.
● In the Navigation main menu, press theNew destination function button.
● Press the Options function button and se-lect the required type of destination
38

Navigation*
(Search, Address, POI on the route orOn map).
● Using voice control*, if you say Town, streetand number, without pauses, and then theinstruction “Start Route Guidance” a route tothe given destination will start.
Search
Search for addresses and Points of Interestusing the keypad to enter them ››› Fig. 30.
For cities, post codes and points of interest,the full details must be entered. You can alsosearch for points of interest by names or cat-egories. When necessary, enter the name ofthe city to refine the search.
››› Fig. 30
AAllows you to select a search that is local oralong the route.
BPress to open the cursor buttons (, ), whichallow you to move within the text.
Address
After entering a country and a town, you canstart navigating towards the centre of the se-lected town.
When narrowing down the destination ad-dress, please note that every entry restrictsthe available range of subsequent selections.For instance, if the street you are looking foris not in the postcode area you have selected
in a previous window, you will not be able tofind the street at the street selection stage.
Function button: function
Country : To select the desired country.
City : To enter the desired city or postcode.
Street : To enter the desired street name.
House number : To enter the desired house number.
Junction : To select the desired intersection.
Last destinations : Open the My destinations menu››› page 41.
Start : Start route guidance to the selected address.
Using the
● Select the destination on the map or enterit using GPS coordinates and confirm withOK .
Function button: function
Save : To save the selected point of interest in the desti-nation memory ››› page 41.
Edit : To edit a destination or to enter another destina-tion.
Route options : To adjust route options, see NavigationSetup ››› page 48.
Start : Starts guided navigation to the selected point ofinterest.
After starting route guidance
Fig. 31 Route calculation.
After starting route guidance, the route to thefirst destination will be calculated.
The calculation will be performed in accord-ance with the data selected in the Routeoptions menu ››› page 48.
After starting route guidance, three alterna-tive routes will be suggested depending onthe selected setup ››› Fig. 31. These 3 routescorrespond to the selectable route options:Economical, Fast and Short.
Route criteria: Meaning
Blue route: Economical route, the route is calculated bytaking into consideration economic factors.
Red route: Fastest route to the destination, even if it isnecessary to make a deviation. »
39

Navigation*
Route criteria: Meaning
Orange route: Shortest route to the destination, even if itresults in longer travelling time. The route may have un-conventional sections such as secondary roads.
● Select the desired route by pressing it.
The setting for the route criteria in the Routeoptions menu is changed accordingly.
If no route is selected, then route guidancestarts automatically after about one minuteusing the setting selected in the Route op-tions.
Navigation announcements (audible recom-mendations for the driver)
Once the route has been calculated, the sys-tem gives the first navigation announcement.Up to 3 navigation announcements are givenbefore a turn, e.g. “Prepare to turn left”,“Turn left in 300 metres” and “Now turn left”.
● Press the adjustment knob ››› Fig. 1 7 tolisten to the last audible navigation instruc-tion.
The distances indicated largely depend onthe type of road and the speed at which youare driving. For instance, navigation an-nouncements are given much earlier on mo-torways than on urban roads.
Appropriate navigation announcements arealso given on multi-lane roads, branching
roads and at roundabouts, for example: “Atthe roundabout, take the second exit.”
A navigation announcement informs youwhen you have reached your “destination”.
A navigation announcement informing youthat you have reached the “destination area”is given if the exact destination cannot bereached because it is located in a non-digi-tised area. It also indicates the cardinal pointand the distance to the previously defineddestination. Navigation resumes “offroad”.
During dynamic route guidance, you receiveinformation about reported traffic congestionon the route. An additional navigation an-nouncement is given if the route is recalcula-ted due to traffic congestion.
During a navigation announcement, you canchange its volume using the button››› Fig. 1 6 up to a predefined minimum ormaximum volume. The following navigationrecommendations will then be made at theadjusted volume.
For other adjustments to the navigation rec-ommendations, see Navigation an-nouncements settings. ››› page 48.
Note
If you miss a turning during route guidanceand are currently unable to turn back, keepon driving until the navigation system offersa new route.
Note
The quality of the navigation recommenda-tions given by the Infotainment system de-pends on the navigation data available andany reported traffic problems.
Route
In the Navigation main menu, press theRoute function button.
The Route function button is only displayedwith route guidance activated.
Function button: function
Stop route guidance : Aborts current route guidance.
Enter destination : To enter a new destination or a newstopover ››› page 38.
Congestion ahead : To exclude a section (of 0.2 to 10 km inlength) from the current route, e.g. to avoid congestion.To cancel the exclusion, press the Route function buttonand then Cancel congestion .
Route details : View route information for current route.
40

Navigation*
My destinations (destination memory)
Fig. 32 List of stored routes.
The stored destinations can be selected fromthe My destinations menu.
● Press the My dests. function button in themain Navigation menu.
● Select the desired function button.Store position , Routes , Destinations ,Last destinations or Home address .
Store position
● By pressing the Store position function but-ton, the vehicle's current position is storedas a Flagged destination in the destina-tion memory.
To permanently store the saved position as aFlagged destination, it must be re-named in the destination memory. Otherwisethe stored position will be overwritten thenext time a flagged destination is stored.
● Mark the Flagged destination in thedestination memory.
● Press the Store function button.
The name can be changed in the following in-put window. Press the function button tostore the destination.
Routes
In the Route mode, you can define variousdestinations (final destination and stop-overs).
The starting point of a route is always thecurrent vehicle position determined by the In-fotainment system. The destination is theend point of a route. Stopover destinationsare driven to before the destination.
● In the Navigation main menu, press theMy Dests. function button.
● Press the Routes function button. Theroutes stored previously will appear››› Fig. 32.
If you have not stored any routes or want tocreate a new route, press the New route func-tion button and then follow the instructionsas for a new destination, before pressingStore .
Pressing on a stored route brings up the fol-lowing function buttons:
Function button: function
Delete : To delete a stored route.
Edit : To edit and store a route.
Start : To start route guidance.
Function buttons and indications in the Newroute or Edit route menu
Function button or message: function or meaning
Stopover.
Destination.
... Estimated time of arrival at destination.
... Calculated distance to destination.
... Travelling time.
... Distance to the next stopover.
Press on the destination to display the function but-tons.
Delete destination.
To start guidance direct to the selecteddestination. Destinations that come be-fore the selected destination are ignor-ed.
To open the detailed view of the destina-tion in question. »
41

Navigation*
Available function buttons.
New dest. To add a new destination to the tour.
Destina-tions
To add a new destination from My des-tinations to the tour.
Storing To store the created tour in the tourmemory.
Start To start route guidance.
Calculate To update calculated distance and esti-mated arrival time.a)
Stop To stop route guidance to the active des-tination.b)
To move a stopover or a destination toanother position on the list. Press anddrag to move the destination.
a) This function button is only displayed with route guidance ac-tivated and when a destination has been added to the tour.b) This function button is only displayed with route guidance ac-tivated.
Last destinations
View of destinations for which a route has al-ready been started.
My destinations
● Press the Options function button and se-lect the desired function button.
Function button: function
Destination memory : View of destinations stored manuallyand from imported vCards ››› page 46, ImportingvCards (electronic business cards).
Favourites : View of destinations stored as favourites.
Contacts : View of entries in the phonebook that have astored address (postal address).
Home address
Only one address or position can be storedas the home address at any one time. Thestored home address can be edited or over-written.
If a home address has already been stored,route guidance will be started to the storedhome address.
If a home address has not yet been stored,an address can be assigned as the home ad-dress.
Assigning the home address for the first time:
Position : Press to store the vehicle's current position asthe home address.
Address : Press to enter the home address manually.
Editing the home address:
The home address can be edited in the Navigationsettings menu ››› page 48.
Points of interest (POI)
Fig. 33 Points of interest on the map.
The points of interest saved in the navigationdata memory are divided into different pointof interest categories. Each point of interestcategory is assigned a symbol for display onthe map.
If a database of points of interest has beenimported into the Infotainment system,››› page 46, Importing Personal POI the cat-egory Personal POI is also shown.
In the Map settings menu, the categoriesof points of interest to display on the mapcan be configured ››› page 48. Up to 10 cat-egories of points of interest can be selected.
42

Navigation*
Selecting a point of interest on the map
Function button: function
1There are several points of interest in the area.Press this symbol to open a list of points of inter-est.
2The only point of interest in this zone. Press thesymbol to open the detailed view of the point ofinterest.
Fast search for a POI
In the Navigation main menu, press the POI
function button and the three main catego-ries will appear. Alternatively, enter the nameof the point of interest to be searched usingthe new destination keypad, or pressSearch nearby on the map. ››› table on
page 44.
View
In the Navigation main menu, press the View
function button.
Function button: function
2D Map display in two dimensions (conven-tional).
Function button: function
3D
Map display in three dimensions (bird'seye view).
Buildings are also displayed in three di-mensions. The places of interest andwell-known buildings are shown in detailand in colour.
a) To display the destination on the map.
a) To display the route on the map.
Auto / Day /Night
To change between day and night format.
Split screenPress to display the split screen››› page 43.
POI Display points of interest on the map.
a) This function button is only displayed with route guidance ac-tivated.
Split screen
Fig. 34 Split screen displayed.
The split screen ››› Fig. 34 A may display anyof the information described below:
● Press on the name of the split screen to se-lect a display option.
Function button: function
Audio : Indicates the selected audio source.
Compass : Displays a compass with the current travellingdirection and indicates the current position of the vehi-cle (street name).
Manoeuvre : Displays a list of the next manoeuvres, POIsor TMCs on the route and pressing them brings up addi-tional information
Most frequent routes a): Information on the user's most fre-quent routes. »
43

Navigation*
Function button: function
Position : current vehicle position in coordinates and GPSstatus (satellite reception).
a) This function button is only shown when route guidance isnot active or when predictive route guidance is active.
Press the function button to close the splitscreen.
At any moment during navigation, pressinginside the map will make a pop-up menu ap-pear with the following functions:
Function button: function
Street name or coordinates : shows the details of the pointselected on the map.
Only when you press on an icon on the map:
POI : name of the point of interest (when only oneappears on the map).
Group of POIs : more points of interest (when youpress on the map on various POIs grouped togeth-er).
Favourite : name of the favourite.
Home : Home address.
Start route guidance : starts guidance directly.
Add stopover destination : only when you have an activeroute.
Search nearby : enters in the search menu, but only for thearea around the point selected on the map.
Function button: function
Demo mode start (only when demo mode is active)
Map display
Fig. 35 Messages and function buttons onthe map display.
Function buttons and messages on the mapdisplay.
To activate function buttons and , pressfunction button .
Function button: function
To select automatic scaling. If the functionis active, the symbol is displayed in blue.
Current altitude indicator.
View map scale. Turn the setup button ormove your fingers together/apart on thetouchscreen to change the scale of the map.
Function button: function
It can mute or repeat the last announce-ment, or can change the announcement vol-ume.
To change the orientation of the map (north-facing or direction of travel). This function isonly available in 2D mode.
To centre the vehicle position on the map.
To centre the destination on the map. Thisfunction button is only displayed if eitherDisplay destination on map or Display routeon the map is selected ››› page 43.
Briefly zooms in on the map. After a fewseconds, it automatically returns to the lastselected scale.
Road signs: Depending on the vehicle's equipment,the road signs stored in the navigation data are dis-played ››› page 47.
44

Navigation*
Traffic reports and dynamic routeguidance (TRAFFIC)
Fig. 36 Traffic reports
The Infotainment system constantly receivestraffic reports (TMC/TMCpro) in the back-ground, provided a TMC traffic news stationcan be received at the current location. Thestation being listened to does not have to bethe traffic news station.
TMC traffic reports are displayed on the mapwith symbols ››› page 45, Traffic reports onmap (selection) and are required for dynamicroute guidance ››› page 45, Dynamic routeguidance.
List of available traffic reports
● Press the Infotainment button ››› Fig. 1 12 and then press the TRAFFIC func-tion button.
Dynamic route guidance
In order for dynamic route guidance to func-tion, Dynamic route must be activated inthe route options ››› page 48.
If during route guidance a traffic report is re-ceived that affects the route being travelled,an alternative route will be searched for if theInfotainment system calculates that time canbe saved.
If it calculates that time will not be saved us-ing the alternative route, it will continue onthe route with the traffic congestion. An an-nouncement will be made in each case.
Shortly before arriving at the announced con-gested traffic, it will be announced onceagain.
Avoiding congestion by following the instruc-tions of a traffic report does not always savetime as the alternate roads may be at astandstill. The quality of the dynamic routeguidance depends on the information con-tained in the traffic reports.
The remainder of the route to be travelledmay be manually excluded to cause a newroute calculation ››› page 40.
Traffic reports on map (selection)
Symbol: Meaning
: Traffic congestion
Symbol: Meaning
: Traffic jam
: Accident
: Slippery road surface (ice or snow)
: Slippery road surface
: Danger
: Road works
: Strong wind
: Road closed to traffic
During route guidance, traffic congestion thatdoes not affect the route calculated is dis-played in grey.
The extent of the traffic congestion along theroute calculated is shown by a red line.
Any incidents that affect the route calculatedand have caused the route to be recalculatedare displayed in orange.
The position of a symbol indicates the startof the traffic congestion if it is clearly definedin the traffic report.
45

Navigation*
Predictive navigation
Fig. 37 Predictive navigation
When you activate Predictive navigation, thesystem detects and stores in the backgroundroutes that are frequently followed, withoutthem being active destination routes. Thisfunction has no navigation announcementsunless the user requires them, getting themby pressing the adjustment knob ››› Fig. 1 7 .
● On the main screen of the Navigationmenu, in the pop-up window, press theFrequent routes button. To display frequently
followed routes press the Show on map button››› Fig. 37.
Importing vCards (electronic businesscards)
Importing vCards to the destination memory
● Insert the data storage device with the stor-ed vCards or connect it to the Infotainmentsystem ››› page 25.
● Press the SETTINGS function button in themain Navigation menu.
● In the Navigation settings menu,press the Import destinations function button.
● Select the data carrier with the vCardssaved in the list.
● Press Import all vCards from this folder .
● Confirm the import notice with the OK
function button.
The saved vCards will now be in the destina-tion memory ››› page 41 and may be used fornavigation.
Note
Only one address per vCard can be imported.In the event any vCards have multiple ad-dresses, only the main address will be impor-ted.
Importing Personal POI
Importing the Personal POI to a points of in-terest destination memory
● Insert the data storage device with the stor-ed Personal POI or connect it to the Infotain-ment system ››› page 25.
● Press the Infotainment button ››› Fig. 1 3 and then select Settings .
● In the Settings menu, press theManage memory function button.
● Press Update my POIs and then press Update
and Next to import the Personal POIs.
● Confirm the import notification with the OK
function button.
The stored Personal POI are now in the pointsof interest destination memory ››› page 42and can be used for navigation purposes.
The stored Personal POI can be deleted in theNavigation Settings menu››› page 48.
46

Navigation*
Navigation with images
Fig. 38 Images main menu.
Selecting an image and starting route guid-ance
Bear in mind the requirements and formats ofthe compatible images ››› page 25.
● Insert the data storage device with the stor-ed images or connect it to the Infotainmentsystem.
● Press the Infotainment button ››› Fig. 1 12 and then select Images .
● Press the SOURCE ››› Fig. 38 function buttonand select the data storage device where theimages are stored.
● Select the desired image.
● If the image displayed was taken using GPSlocalisation, the function button will ap-pear. Press to start guidance to a destination.
Road sign indicators
The road sign indicators must be active in theNavigation Setup menu ››› page 48.
If road signs for the road being travelled arestored in the navigation data, the system canshow them on the map display (e.g. a speedrestriction).
Please bear in mind how recent the naviga-tion data is and the limitations of the system››› page 37 !
Traffic sign recognition
Some vehicles are also equipped with a cam-era for traffic sign recognition. If traffic signrecognition is installed in the vehicle and ac-tivated, the recognised traffic signs and addi-tional information are displayed in the mapview.
Read and take note of the information and in-dications provided by the traffic sign recogni-tion system in the vehicle ››› Booklet Instruc-tion Manual.
Route guidance in demo mode
If demo mode is activated in the Naviga-tion Settings menu ››› page 48, an ad-ditional pop-up window opens when youstart route guidance.
● Pressing the Demo mode function buttonstarts a “virtual route guidance” to the desti-nation you have entered.
● If you press the Normal function button, a“real route guidance” starts.
The sequence of events and the operations invirtual route guidance are similar to those inreal route guidance.
Virtual route guidance is repeated when youreach the fictitious destination and alwaysstarts again from the starting point if notaborted beforehand.
If the starting point for demo mode has beendefined manually in the Navigation Set-tings menu, virtual route guidance will startfrom the position set.
A manually entered starting point is overwrit-ten with the current vehicle location if the ve-hicle moves off.
Note
Disable demo mode after use, otherwise youwill be prompted to choose between virtualand normal route guidance each time youstart route guidance.
47

Navigation*
Navigation settings
Settings
● Press the SETTINGS function button in themain Navigation menu.
Function button: function
Route options : To make adjustments to route calculation.
Suggest 3 alternative routes : After starting route guid-ance, 3 alternative routes are suggested ››› page 39.
Route : Select the route type.
Economical : The route is calculated by taking intoconsideration economic factors.
Fast : The fastest route to the destination.
Short : shortest route to the destination, even if itresults in a longer travelling time.
Most frequent routes : Information on the user's mostfrequent routes.
Dynamic route : Dynamic route guidance is activatedwhen a TMC is received ››› page 45.
Avoid motorways and highways : Motorways will be ex-cluded from the calculation whenever possible.
Avoid ferries and motorail trains : Ferries and motorailtrains will not be considered in the calculation of theroute whenever possible.
Avoid toll roads : Toll roads will be excluded from thecalculation whenever possible.
Avoid tunnels : Tunnels will be excluded from the cal-culation whenever possible.
Function button: function
Avoid routes requiring toll stickers : Routes requiring tollstickers will be excluded from the calculation when-ever possible.
Show available toll stickers a): To mark the available tollstickers on the list ( Avoid routes requiring toll stickers
must be active).Roads requiring toll stickers that have been markedas having said toll sticker will be taken into accountin the calculation of the route.
Include trailer : Calculate the route and arrival timefor the vehicle with a trailer.
Map : To make adjustments to the visual display of themap.
Show road signs : The road signs stored in the naviga-tion data for the road being travelled will be dis-played during route guidance ››› page 47.
Lane guidance : During route guidance, when drivingand turning on multi-lane roads, an additional dis-play is shown with lane guidance. This will only ap-pear if there is information in the database for thearea being driven in.
Show favourites : The stored destinations are shownon the map as favourites ().
Show POI
Select categories for POI : To select which point of in-terest categories are displayed on the map››› page 42.
Show brand logos for POIs : View of category logosof the selected points of interest (e.g. view of pet-rol station logos).
Function button: function
Manage memory : To modify saved destinations.
Sort contacts : To select the sequential order of the en-tries in the phonebook that have (postal) addresses,see also ››› page 41.
Define home address : To assign or edit a home address,see also ››› page 42.
Delete my points of interest (POI) : To delete the points ofinterest stored in the destination memory ››› page 46.
Update my POIs : To update the stored points of interest››› page 46.
Import destinations (SD/USB) : To import electronic busi-ness cards (vCards) into the destination memory››› page 46.
Delete user data : To delete the stored destinations(e.g., the Last destinations or the Destina-tion memory).
Navigation announcements : To make adjustments to naviga-tion announcements.
Volume : To adjust the volume for driving recommen-dations.
Entertainment fading (nav. announcements) : Adjusting thevolume of the active audio source during navigationinstructions.
No voice guidance during call : No audible driving in-structions will be given during a telephone conversa-tion.
Note: My POIs : Audible announcement when nearinga point of interest.
Fuel options : To make adjustments relating to fuel.
48

Navigation*
Function button: function
Select preferred fuel station : The selected petrol stationmark will be shown before other points of interest inthe search.
Fuel warning : The warning to refuel is active.
If the fuel level reaches the reserve level, the corre-sponding warning is generated which permits thesearch for petrol stations.
Version information : Information on the stored navigationdata.
Maximum speeds : Shows the speed limits, depending onthe road, for the current country.
Advanced settings : To make advanced adjustments to thenavigation.
Time display : displayed during route guidance.
Estimated time of arrival : The estimated time of arrivalat the final destination is displayed.
Duration : The estimated travelling time to the finaldestination is displayed.
Status line : displayed during route guidance.
Destination : The distance calculated to final desti-nation is displayed.
Next stopover : The calculated distance until nextstopover is displayed.
Note: National border crossed : Displays the speed lim-its of the country in question when crossing the bor-der.
Demo mode : When Demo mode is activated androute guidance is started, virtual guidance to the en-tered destination can be initiated ››› page 47.
Function button: function
Define demo mode starting point : if demo mode is acti-vated, a fictitious starting point for virtual routeguidance can be defined when the vehicle is sta-tionary.
a) This function depends on the country.
49

Vehicle Menu
Vehicle Menu
Introduction to using the menu (Ve-hicle)
By pressing button ››› Fig. 1 9 of the info-tainment system you will access its mainmenu with the following options:
● VIEW
● MINIPLAYER, in the top right corner (Radioor Media function)
● PREVIOUS-NEXT (to change screen)
● SETTINGS ››› Booklet Instruction Manual,chapter System setup (CAR)
With the function button VIEW you can ac-cess the following information:
● CONSUMERS
● DRIVING DATA
● ECOTRAINER*
● VEHICLE STATUS
Consumers
Fig. 39 Convenience consumers.
By pressing the CONSUMERS button, informa-tion on the status of the vehicle's main con-sumption devices is obtained. It is shown viaa consumption indicator bar in l/h (gal/h)1).
Driving data
Fig. 40 Driving data.
The onboard computer is equipped with 3memories that work automatically. In thesememories you can see the distance travelled,average speed, time passed, average con-sumption and autonomy of the vehicle.
1. Since start
Indicates and stores the values of the journeycompleted and the consumption from whenthe ignition is switched on to when it isswitched off.
2. Since refuelling
Display and storage of the values for the jour-ney and the consumption. By refuelling, thememory will be erased automatically.
1) In the case of Gas (CNG) vehicles, the units are inkg/h.
50

Vehicle Menu
3. Long-term
The memory records the values for a specificnumber of partial trips, up to a total of 19hours and 59 minutes or 99 hours and 59 mi-nutes, or 1999.9 km (or miles) for 9999 km(or miles), depending on the model of instru-ment panel.
When one of these values is reached (de-pending on the version of the instrumentpanel), the memory is automatically deletedand it starts counting from 0 again.
Ecotrainer*
Fig. 41 CAR Menu Ecotrainer.
Fig. 42 Driving style symbols.
Open ECOTRAINER menu
● When the vehicle is stopped, press the in-fotainment button ››› Fig. 1 9 .
● Press the VIEW function button and thenselect ECOTRAINER.
If the corresponding equipment is available,the ECOTRAINER will provide information ondriving style. The information on driving styleis only evaluated and displayed when mov-ing forward.
∅ ECO points: Driving style display
This indicates the driving style since startingthe vehicle on a scale of 0 to 100. The higherthe score displayed, the more efficient thedriving style. To see more information, pressthe display. It shows statistics for the last 30minutes of driving since starting the vehicle.If the car has not yet been driven for 30 mi-
nutes, it shows values from the last trip ingrey.
∅ l/100 km: Average fuel consumption
Shows the average fuel consumption. Thevalue is calculated by using the kilometrescovered since starting the vehicle. To seemore information, press the display. It showsstatistics for the last 30 minutes of drivingsince starting the vehicle. If the car has notyet been driven for 30 minutes, it shows val-ues from the last trip in grey.
ECO tips: Tips on how to save fuel
By pressing the ECO tips function button, youcan view tips on how to save fuel. These tipscan only be viewed when the vehicle is stop-ped.
Evaluation of efficient driving style
The efficiency of the driving style is reflectedby different elements on the display.
Display ››› Fig. 41: Meaning
1Different symbols are shown on the left of the col-umns that report on the current driving style ››› ta-ble on page 52.
2
The white column is an indication of where the ef-ficiency graph begins (from left to right).It shows the position of the evaluation that is cur-rently being performed. »
51

Vehicle Menu
Display ››› Fig. 41: Meaning
3
Bars to represent acceleration.The position of the car represents the acceleration.If speed is constant, the car remains in the centralarea. When accelerating or braking, the car movesforward or backward respectively.
4
Columns to show driving style efficiency.On the horizon, the columns represent the effi-ciency of the driving style in a retrospective man-ner and move from left to right every five secondsor so. The higher the height of the columns, themore efficient the driving style.The colour of the sky represents the average of thelast three minutes. The colour changes from grey(less efficient) to blue (more efficient).
Symbols ››› Fig. 42: Meaning
AForesight when driving. If sudden changes of ac-celeration occur, driving style efficiency is re-duced.
B Gear-change indicator.
CThe current vehicle speed is having a negative im-pact on fuel consumption.
D Ecological driving style.
Vehicle status
Fig. 43 Standard representation: vehicle sta-tus.
Fig. 44 Standard representation: vehicle sta-tus.
Press the Vehicle status button to access infor-mation on the Vehicle status messagesand Start-Stop System. The Vehicle sta-tus messages are displayed ››› Fig. 43, in ad-dition to being specified on the correspond-ing button.
Depending on the parts affected by thesemessages, they will be indicated in differentcolours (depending on their significance) inthe vehicle display.
To access the Tyre Pressure Monitor-ing System you must press the Previous orNext buttons.
From this same menu, using the button SET , the tyre pressures are stored.
Note
The values that appear in the figures››› Fig. 39, ››› Fig. 40, ››› Fig. 43 and ››› Fig. 44are indicative and may vary depending on thefeatures.
52

Telephone management system (PHONE)
Telephone management sys-tem (PHONE)
Introduction to the telephonemanagement system
General information
Fig. 45 Related video
The Telephone functions described belowcan be used through the Infotainment systemif there is a mobile telephone connected to itvia Bluetooth® ››› page 55.
In order for the mobile telephone to be ableto connect to the Infotainment system the tel-ephone must be equipped with Bluetooth®.
If there is no mobile telephone connected tothe Infotainment system, the telephone man-agement system will not be available.
The instructions shown on the screen for thetelephone menus will depend on the mobiletelephone used. There may be variations.
Only use compatible Bluetooth® devices. Forfurther information on compatible Blue-
tooth® products, ask your nearest SEAT deal-er or check on the internet.
Use the instruction manual of the mobile tel-ephone and of any accessories.
If you detect any operating issues betweenyour mobile telephone and the Infotainmentsystem, restart your mobile by switching it offand on again.
You may experience poor reception or may becut off in areas where the signal is weak.
Most electronic devices are shielded againstHF (high-frequency) signals. In any case, theelectronic equipment may not be protectedfrom the HF signals of the telephone man-agement system. This may cause interfer-ence.
WARNING
Speaking by telephone and operating the mo-bile telephone whilst driving can distract youfrom the road and cause an accident.
● Always drive carefully and responsibly.
● Select volume settings that allow you toeasily hear signals from outside the vehicleat all times (e.g. emergency services sirensand horns).
● In areas of little or no coverage or, in somecases, in a tunnel, garage or underpass, yourcall may be cut off and you may not be able tomake even emergency calls.
WARNING
If a mobile telephone is not secured or is in-correctly secured in the vehicle, it could movearound the passenger compartment in theevent of a sudden driving manoeuvre or emer-gency stop, resulting in injury.
● While the vehicle is in motion, always se-cure the mobile telephone properly outsidethe airbag deployment zone.
WARNING
Mobile telephones may interfere with and al-ter the correct operation of pacemakers ifthey are carried directly over them.
● Maintain a minimum distance of at least20 centimetres between the aerials of themobile telephone and the pacemaker, as mo-bile phones may affect the functioning ofpacemakers.
● Do not carry your switched-on mobile tele-phone in your breast pocket directly over thepacemaker.
● If you suspect interference, switch off themobile telephone immediately.
CAUTION
High speeds, poor weather or road conditionsand the quality of reception can all affect thequality of a telephone conversation in the ve-hicle. »
53

Telephone management system (PHONE)
Note
● Restrictions on the use of devices usingBluetooth® technology may apply in somecountries. For further information, contact thelocal authorities.
● If you wish to connect a device to the tele-phone management system via Bluetooth®
technology, consult the safety warnings in itsinstruction manual. Only use compatibleBluetooth® devices.
Areas where special regulations apply
Switch off the mobile telephone and the mo-bile’s Bluetooth® function in places with arisk of explosion. In the majority of cases,these places are signposted, but not alwaysclearly ››› in General information onpage 53. They include, for example:
● the vicinity of chemical pipelines and tanks
● The lower decks of boats and ferries.
● In the proximity of vehicles that run on liq-uid gas (such as propane or butane).
● places where the air is laden with chemi-cals or particles such as flour, dust or metalpowder.
● all other places where the vehicle enginemust be switched off.
WARNING
Switch off the mobile phone in areas with arisk of explosion! The mobile telephone canautomatically connect to the mobile tele-phone network again if it loses the Blue-tooth® connection to the telephone manage-ment system.
CAUTION
In areas where special regulations apply orthe use of mobile telephones is prohibited,both the telephone and the telephone man-agement system must be switched off. Theradiation produced by the mobile telephonewhen switched on may interfere with sensi-tive technical and medical equipment, possi-bly resulting in a malfunction or damage tothe equipment.
Bluetooth®
Bluetooth® technology allows a mobile tele-phone to be connected to your vehicle's tele-phone management system. In order to usethe telephone management system with amobile telephone with Bluetooth® technolo-gy, it is first necessary to pair them.
Some Bluetooth® mobile telephones detectand automatically connect when turning onthe ignition if a connection has been previ-ously established. For this to take place thetelephone must be switched on and its Blue-
tooth® function activated, and there must beno active Bluetooth® connection with otherdevices.
Bluetooth® connections are free.
Bluetooth® is a registered trademark ofBluetooth® SIG, Inc.
Bluetooth profiles®
When a mobile phone is connected to the tel-ephone management system, a data ex-change takes place via one of the Bluetooth®
profiles.
● Bluetooth® hands-free profile (HFP): If amobile telephone is connected to the tele-phone manager through the HFP, calls can bemade wirelessly through the hands-free de-vice. This function also requires other Blue-tooth® profiles such as the phonebookdownload.
● Audio profile (A2DP): Bluetooth® profile fortransmitting audio with stereo quality. Thisfunction can also connect other additionalBluetooth profiles for managing and control-ling playback.
● Message profile (MAP): Bluetooth® profileto access mobile device messages.
Note
To prevent them from being heard throughthe speakers, the button and mobile tele-phone alert tones must be disconnected.
54

Telephone management system (PHONE)
Where necessary, disconnect the headsetfrom the mobile telephone you wish to con-nect to the system.
Pair and connect a mobile telephoneto the Infotainment system
In order to manage a mobile telephone viathe Infotainment system, it is necessary topair both devices once.
For your safety, we recommend you make thelink when the vehicle is stationary. In somecountries it is not possible to perform thepairing with the vehicle running.
Conditions
You must guarantee the following setup inthe mobile phone and the Infotainment sys-tem:
● The ignition must be switched on.
● The Bluetooth® function of the mobile tele-phone and the Infotainment system must beactive as well as visibility.
● The keypad lock on the mobile telephonemust be deactivated.
Follow instructions in the manual for the mo-bile telephone.
After turning on the ignition, the visibility ofthe Bluetooth® function activates.
During the pairing process it is necessary toenter data via the mobile telephone's key-pad. To do so, the mobile telephone must beready.
Starting mobile telephone pairing
● Make sure the mobile device's Bluetooth®
function is activated and visible.
● Press the infotainment button ››› Fig. 1 8 .
● Press the Find telephone function button andthen Results .
OR:● Press the infotainment button ››› Fig. 1 8
● Press the SETTINGS function button.
● Press the Select mobile phone function buttonand then Results .
OR:● Press the infotainment button ››› Fig. 1 8
● Press the SETTINGS function button.
● Press the Bluetooth function button.
● Press the Find devices function button andthen Results .
OR:● Connect from the mobile device itself.
The name of the Bluetooth® function of yourInfotainment system will be displayed on themain PHONE screen and you can edit thisname via the Bluetooth settings menu››› page 63
The search process can take up to 1 minute.On the screen, the system will dynamicallyupdate the names of the Bluetooth® devicesfound.
As soon as the search is completed, thenames of the Bluetooth® devices found aredisplayed on-screen.
● In the Infotainment system, select the mo-bile telephone to which you want to connectfrom the list of Bluetooth® devices found. Incertain circumstances, it is possible that tofinish the connection between the two devi-ces, you must enter additional data in themobile telephone and Infotainment system.
● If necessary, confirm the link to the mobiletelephone.
● Use your mobile telephone to enter andconfirm your PIN code, as indicated in thedisplay of the infotainment system.
OR:● Compare the PIN code shown on the dis-play of the Infotainment system with thatshown on the mobile telephone. If theymatch, confirm on both devices. »
55

Telephone management system (PHONE)
The infotainment system and the mobile tele-phone will now be connected to each other.
When the pairing has been finalized correct-ly, the PHONE main menu will appear. Thephonebook and call lists stored in the mobilephone will be loaded once the requests havebeen accepted in the mobile phone. The du-ration of the loading process depends on theamount of data stored on the mobile tele-phone. After loading, the data will be availa-ble on the Infotainment system.
Pairing and connection of mobile telephones
You can pair up to 20 mobile telephones tothe Infotainment system, but there can onlybe two mobile phones simultaneously con-nected as hands-free, and a third device asBT audio at any time.
When the Infotainment system is switchedon, it automatically connects to the last con-nected mobile telephone. If it is not possibleto connect to this mobile telephone, the tele-phone management system will try to auto-matically connect to the next mobile tele-phone on the list of paired devices.
The maximum range of the Bluetooth® is ap-proximate. 10 metres. The active Bluetooth®
connection disconnects if this distance is ex-ceeded. The connection is automatically re-established as soon as the device is onceagain within Bluetooth® range.
If the maximum number of paired devices isreached and you wish to pair another one tothe system, it will automatically replace theone least used recently. If you wish to replaceit with another one, the user must erase it be-forehand. To do so:
● Press the Setup button on the device whilein telephone mode.
● Press the function button Bluetooth settings .
● Activate the Paired devices function button.
● In the list of paired devices, press the function button next to the mobile telephoneto be deleted and then press Delete to con-firm the process.
Note
● It may be necessary to confirm the phone-book data transfer request on the mobile tel-ephone.
● Check that there are no requests pendingacceptance in your mobile phone. If there are,this could block some of the functions in thePHONE menu.
Description of the telephonemanagement system
Introduction
Some functions and setup can only be per-formed when the vehicle is stopped and arenot available on all mobile telephones.
With the help of the telephone manager, upto 2 mobile telephones can be connected tothe Infotainment system via the Bluetooth®
function (for example, one used as a Blue-tooth audio player and another as a hands-free phone).
Note
● Using a mobile telephone inside the vehiclemay provoke noise in the speakers.
● Some networks may not recognise all lan-guage characters or offer all services.
56

Telephone management system (PHONE)
PHONE main menu
Fig. 46 PHONE main menu (view of the 8"screen).
Assign a user profile
The data from the phonebook, the call listsand the stored speed dial buttons are as-signed to a user profile and remain stored onthe telephone management system. This in-formation will be available every time the mo-bile telephone is connected to the telephonemanagement system.
After the first connection, it will take a fewminutes for the data from the phonebook ofthe linked mobile phone to be available inthe Infotainment system. The next time thatthe mobile telephone is connected (e.g. onthe next journey) the phonebook is updatedautomatically.
If any entries in the mobile phonebook havebeen modified while connected, a manualupdate of the phonebook data can be initi-
ated from the User profile settingsmenu ››› page 63.
Telephone management can store a maxi-mum of 4 user profiles for mobile tele-phones. If you wish to link/connect anothermobile phone, the oldest user profile will au-tomatically be replaced.
Telephone management system function but-tons
● Press the Infotainment button ››› Fig. 1 8 to open the PHONE main menu.
Function button: function
1Name of connected mobile telephone.Press the icon to the left to connect orpair with another mobile telephone.
2Speed dial buttons, to which telephonenumbers from the phonebook may be as-signed respectively ››› page 62.
3
Change to another connected telephone:Allows user to change between connec-ted telephones as hands-free. This but-ton will only be visible when there aretwo telephones connected as hands-free.The active user profile corresponds to thetelephone appearing on the screen.
DIALNUMBER
To open the number pad and enter a tele-phone number ››› page 59.
CONTACTS To open the phonebook of the connectedmobile telephone ››› page 60.
Function button: function
SMS To open the menu for SMS messages››› page 61.
CALLS To open call lists of the connected mobiletelephone ››› page 62.
SETTINGS To open the Telephone settingsmenu ››› page 63.
57

Telephone management system (PHONE)
Display and symbols of the telephonemanagement system
Fig. 47 Active call.
Fig. 48 Multiple calls.
Display: Meaning ››› Fig. 47
AName of the mobile network operator (provid-er) to which the mobile telephone is connec-ted.
Display: Meaning ››› Fig. 47
BView of stored telephone number or name. Ifthe name stored in the phonebook has an as-signed photo, it can be displayed ››› page 63.
Press to accept a call.
Press to end a call.
OR: Press to reject an incoming call.
Press to mute or to reactivate the ring tone dur-ing an incoming call.
Press to mute the microphone during an activecall and to reactivate it.
This button keeps the call active. While the callis on hold the listener will not hear the conver-sation. To reactivate it, press the call acceptbutton . To reject it, press the reject button.
Press to add a participant to the active call››› Fig. 48 C .
Charge status of a mobile telephone connec-ted via “Hands-free profile” (HFP) Bluetooth®.
Strength of coverage signal received by themobile telephone.
Private mode
Private mode can only be activated during anactive call.
To activate private mode:
● Settings menu.
● Uncheck the checkbox: Hands-free telephone .
With the private mode activated the activeaudio and microphone become that of themobile phone connected to the hands-free.When deactivated, the audio reverts to thevehicle's audio system. This configuration isonly applicable to the active call, so for sub-sequent calls, the audio will revert by defaultto vehicle's audio system.
Multiple calls
The telephone management system allowsthe user to interact with a maximum of threecalls on the screen.
Only one of the calls may be active.
Simultaneous calls
The user can merge various calls into a con-ference call by pressing the button. To dothis there must be at least two calls. Once theconference call has begun, the user can addup to a maximum of 5 participants.
Once the conference call has been set up, theuser can consult the list of participants bypressing the Simultaneous calls image››› Fig. 48 C .
Depending on the mobile device, you canhang up the call with one of the conferencecall participants or remove them from it whilekeeping them on a separate call.
58

Telephone management system (PHONE)
WARNING
Remember that the driver must not operatethe mobile telephone while driving.
Note
Multiple call and simultaneous call functionsare subject to the services associated withthe user's SIM card.
Enter telephone number menu
Fig. 49 Enter telephone number menu.
Open the Enter telephone numbermenuPress the DIAL NUMBER function button fromthe PHONE main menu.
Possible functions
Enter telephonenumber
Entering a phone number with thekeypad.
Press the function button tomake a call.
Select a contactfrom the list
Enter the first letters of the contactto find using the keypad. The avail-able entries appear in the phone-book.
Select the desired contact from thephonebook to make the call.
Redial
Press button 1 ››› Fig. 49 and thelast number dialled will be shownon the display. To make a call,press the 1 button again.
Enter the countrycode
To enter a country code, instead ofthe first two digits (internationalaccess code e.g. “00”) you can en-ter the character “+”.
Press the 0 button for approx. 2seconds to add the +.
Assistance call
Press the function button to obtainhelp in the event of breakdown.For this the network of SEAT deal-erships is available to you withtheir Mobile Service.
Information call Press the function button to obtaininformation on the SEAT brand andthe additional services contractedrelated to traffic and travel.
Possible functions
Call mailbox
Press the Voicemail function but-ton to make the call.
OR: Press the function buttonfor approx. 2 seconds to make thecall.
If the number for the mailbox hasnot yet been stored, enter it andconfirm with OK .
Note
Breakdown service and information calls canincur an additional cost on your telephonebill.
59
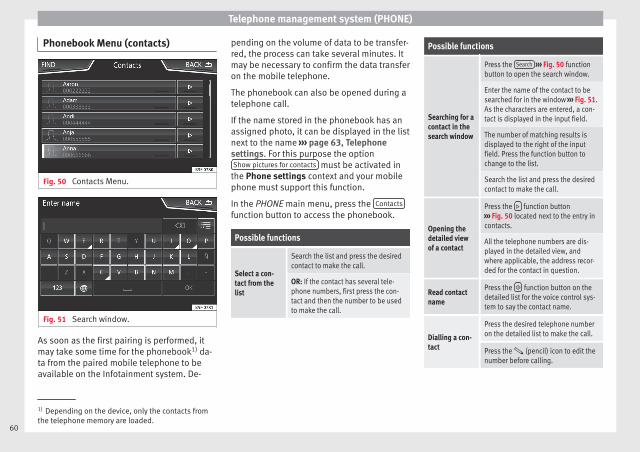
Telephone management system (PHONE)
Phonebook Menu (contacts)
Fig. 50 Contacts Menu.
Fig. 51 Search window.
As soon as the first pairing is performed, itmay take some time for the phonebook1) da-ta from the paired mobile telephone to beavailable on the Infotainment system. De-
pending on the volume of data to be transfer-red, the process can take several minutes. Itmay be necessary to confirm the data transferon the mobile telephone.
The phonebook can also be opened during atelephone call.
If the name stored in the phonebook has anassigned photo, it can be displayed in the listnext to the name ››› page 63, Telephonesettings. For this purpose the optionShow pictures for contacts must be activated in
the Phone settings context and your mobilephone must support this function.
In the PHONE main menu, press the Contacts
function button to access the phonebook.
Possible functions
Select a con-tact from thelist
Search the list and press the desiredcontact to make the call.
OR: If the contact has several tele-phone numbers, first press the con-tact and then the number to be usedto make the call.
Possible functions
Searching for acontact in thesearch window
Press the Search ››› Fig. 50 functionbutton to open the search window.
Enter the name of the contact to besearched for in the window ››› Fig. 51.As the characters are entered, a con-tact is displayed in the input field.
The number of matching results isdisplayed to the right of the inputfield. Press the function button tochange to the list.
Search the list and press the desiredcontact to make the call.
Opening thedetailed viewof a contact
Press the function button››› Fig. 50 located next to the entry incontacts.
All the telephone numbers are dis-played in the detailed view, andwhere applicable, the address recor-ded for the contact in question.
Read contactname
Press the function button on thedetailed list for the voice control sys-tem to say the contact name.
Dialling a con-tact
Press the desired telephone numberon the detailed list to make the call.
Press the (pencil) icon to edit thenumber before calling.
1) Depending on the device, only the contacts fromthe telephone memory are loaded.
60

Telephone management system (PHONE)
Possible functions
Send an SMSto a contact
Press the function button in thedetailed list.
Starting routeguidance tothe address ofa contacta)
If the address details of a contacthave been stored, route guidance canbe started for the address of the con-tact. Press the address data on thedetailed view to start route guidance.
a) A system with a navigation function is required.
Note
If you edit the number before calling, this willonly be used for the call and will not be stor-ed in the phonebook.
Short messages menu (SMS)
Fig. 52 Short messages menu (Text messag-es).
If the mobile phone connected to the HFPprofile also supports the SMS profile, a newfunction button will appear in the top left-hand corner of the PHONE menu, which willallow SMS messages to be received, viewedand sent by the Infotainment system.
The proper operation of the functions men-tioned above will depend on the compatibili-ty of the connected mobile telephone.
Buttons on the Short messages (SMS) menu
● From the PHONE main menu, press theSMS function button.
Function button: function
New text mes-sage
To write and send a text message (in-cludes the possibility of accessingtemplates with predefined messag-es).
Inbox To open the received text messagesfolder.
Outbox To open the outbox folder. This iswhere any unsent text messages arestored.
Sent To open the sent text messages fold-er.
Drafts To select a stored unsent message.
Send contactdetails
To send the details of a contact fromthe phonebook.
Possible function buttons for the submenus
Function button: function
ReadIn order for the speech controlsystem to play the text message.
Options Open the Options menu.
Reply with tem-plate
To select a text template from alist.
Delete currenttext message
Deletes the text message fromthe Inbox.
Display tele-phone number
Displays the sender's telephonenumber.
Forward To forward a text message.
ReplyTo reply to an incoming text mes-sage.
Enter number
To enter a telephone number or toselect a recipient from the phone-book.
Press the Recipients function but-ton to select multiple recipients.
RecipientsTo select multiple recipients fromthe phonebook.
Delete To delete a text message.
61

Telephone management system (PHONE)
Call Menu (call lists)
Fig. 53 Call lists menu.
● In the PHONE main menu, press the Calls
function button.
● Press the FILTER function button.
● Select the desired call list: All , Missed ,Dialled or Received .
If a phone number has been stored in thephonebook, the call list will display the namestored instead of the number.
If the name stored in the phonebook has anassigned photo, it can be displayed in thecall list next to the name ››› page 63.
Possible displays in the Calls menu
Display: Meaning
Missed calls : Displays the numbers of missed and
unanswered calls.
Display: Meaning
Dialled numbers : Indicates the numbers dialled on
the mobile telephone and on the Infotainmentsystem telephone management system.
Received calls : Indicates the numbers of the calls
received on the mobile telephone and on the Info-tainment system telephone management system.
Note
The availability of the call lists will depend onthe mobile phone used.
Phonebook shortcut menus
Fig. 54 Phonebook shortcuts.
The speed dial buttons ››› Fig. 54 1 mayeach be used to store a telephone numberfrom the phonebook.
If the name stored in the phonebook has anassigned photo, it can be displayed on thespeed dial button ››› table on page 62.
All the speed dial buttons must be manuallyedited and will be assigned to a user profile.Up to 12 contacts can be added to the quickdial buttons.
Possible functions
Assigning speeddial buttons
Press a free speed dial button fromthe PHONE main menu.
Select the desired contact from thelist. If the selected contact hasseveral telephone numbers, selectthe desired number.
Editing assignedspeed dial but-tons
Press and hold a used speed dialbutton in the PHONE main menuuntil the Contacts menu opens.
Select the desired contact from thelist. If the selected contact hasseveral telephone numbers, selectthe desired number.
To close the Contacts menu with-out applying the changes, pressthe BACK function button.
Deleting assignedspeed dial but-tons
The telephone numbers stored inthe speed dial buttons can be de-leted in the menu User profilesettings > Manage favour-ites ››› table on page 63.
62

Telephone management system (PHONE)
Possible functions
Dialling withspeed dial but-tons
Briefly press an assigned speed di-al button from the PHONE mainmenu to call the telephone numberthat has been stored on it.
Note
The contacts stored on the speed dial buttonsDO NOT update automatically. If a contactstored on a speed dial button is modified onthe mobile telephone, the speed dial buttonwill need to be reassigned.
Telephone settings
Press the SETTINGS function button from thePHONE main menu.
Function button: function
Select mobile phone : From the list, select the mobile tele-phone to be connected to the hands-free profile with theInfotainment system.
OR: Press Find telephone to connect a new mobile tele-phone.
Bluetooth : Open the Bluetooth settings menu››› page 63.
User profile : Open the User profile settings menu››› page 63.
Bluetooth® settings
In the PHONE main menu, press the SETTINGS
function button and then the Bluetooth func-tion button.
Function button: function
Bluetooth : Press to deactivate Bluetooth®. Disconnectsall active connections.
Visibility : Activation and deactivation of Bluetooth® visi-bility.
Visible : Bluetooth® visibility is active.
Hidden : Bluetooth® visibility is deactivated. Blue-tooth® visibility must be active for the externalpairing of a Bluetooth® device with the Infotain-ment system. If you have a Bluetooth® audio de-vice active and playing, visibility is automaticallyset to Hidden.
Name : Viewing and changing the name the Bluetooth®
of the Infotainment system. This will be the name dis-played to other Bluetooth® devices.
Paired devices : Displays paired devices. To disconnectand connect Bluetooth® devices and Bluetooth® pro-files.
Find devices : Search for visible Bluetooth® devices withinthe range of the Infotainment system. The maximumrange is approx. 10 metres.
Bluetooth audio (A2DP/AVRCP) : This function must be ac-tive if it is necessary to connect an external audio sourcevia Bluetooth® to the Infotainment system. ››› page 34.
User profile settings
In the PHONE main menu, press the SETTINGS
function button and then the User profile func-tion button.
Function button: function
Manage favourites : Editing speed dial buttons.
Speed dial button in use: Press to delete the storednumber.
Speed dial button free: Press to assign a numberfrom the phonebook to the speed dial button inquestion.
Mailbox number : To enter or edit the voicemail number.
Sort by : To set the order of appearance of the entries inthe phonebook (Forename and surname or vice-versa).
Import contacts : Press to import the phonebook of theconnected telephone, or to update the imported phone-book.
Reminder: remember your mobile phone : If there is alreadyan active Bluetooth® connection with another mobiletelephone when turning off the ignition, the followingmessage appears: “Remember your mobilephone”.
Show pictures for contacts a): If phonebook contacts havebeen stored with a photograph, it can be displayed onthe speed dial buttons, on the call lists and in the pho-nebook.
a) Depending on the mobile phone. »
63

Telephone management system (PHONE)
Note
Some telephones need to be restarted to re-download the most recent contacts added.
Connectivity Box* / Wireless Charger*
Fig. 55 Centre console: Connectivity Box
The Connectivity Box includes different func-tions that will help to use your mobile device.
They are the “Wireless Charger” and the “Mo-bile Signal Amplifier”.
The Wireless Charger only features the “Wire-less Charger” function.
“Wireless Charger”
The “Wireless Charger” allows mobile devi-ces with Qi1) technology to be charged with-out a cable.
To charge your mobile phone wirelessly:
● Place your mobile device with Qi technolo-gy1) in the middle of the pad with the screenfacing up ››› Fig. 55.
When you do so, make sure there are no ob-jects between the pad and the mobile phone.
The mobile phone will start charging auto-matically. For further information aboutwhether your mobile device uses Qi technolo-gy, please check your mobile phone's usermanual or visit the SEAT website.
“Mobile Signal Amplifier”
The “Mobile Signal Amplifier” allows you toreduce the radiation in your vehicle and en-joy better reception.
For safety reasons, it is recommended thatyou pair the radio and the mobile device us-ing Bluetooth® and place the mobile phoneon the Connectivity Box pad, so as to havebetter reception without having to handle themobile phone.
To establish a connection with the vehicle'sexternal aerial:
● Place your mobile device in the middle ofthe pad with the screen facing up ››› Fig. 55.
When you do so, make sure there are no ob-jects between the pad and the mobile phone.
Your mobile phone will automatically beready to make use of the external aerial.
WARNING
The mobile phone may heat up due to thewireless charging. Think about the tempera-ture of your device before you pick it up, andtake care when removing it.
Note
● Your mobile device must support the Qiwireless inductive charging interface stand-ard for proper operation.
● If your mobile phone has a cover or a pro-tective casing, this may affect the Connectivi-ty Box functions.
● There must be no metallic objects betweenthe pad and the mobile device that might af-fect the wireless charging or the connectionwith the external aerial.
1) Qi technology allows you to charge your mobilephone wirelessly.
64

Telephone management system (PHONE)
● The charging time and the temperaturevary in accordance with the device used.
● To avoid malfunction, ensure that the mo-bile phone is correctly placed on the pad.
● The maximum charging capacity is 5 W.
● Qi technology does not allow you to chargemore than one mobile device simultaneously.
● No improvement in the transmission quali-ty can be guaranteed if there is more thanone mobile phone on the pad.
● You are advised to keep the engine runningto guarantee proper wireless charging of yourdevice.
● When a telephone with Qi technology isconnected by USB, the charging will be per-formed through the medium specified byeach mobile device manufacturer.
65

Full Link*
Full Link*
Full Link technology descrip-tion
Introduction
Fig. 56 Related video
The Full Link system provides a way of bring-ing together technologies that allow commu-nication between the Infotainment Systemand mobile devices:
● MirrorLink®
● Android Auto™
● Apple CarPlay™
Data Transfer
This communication can allow data to beread and/or written.
From the SETTINGS menu,Data transfer for SEAT apps , there is a checkbox
to activate/deactivate the function and adropdown menu called Operation via apps
which controls the level of interaction be-
tween the apps and the system ››› table onpage 75: Deactivate, Confirm and Allow.
Interfaces
To access the Full Link system, press the info-tainment button ››› Fig. 1 5 or press theinfotainment button ››› Fig. 1 12 and thenpress Full Link .
The connection to Full Link is made through aUSB interface.
WARNING
If a mobile terminal is not secured or is incor-rectly secured in the vehicle, it could movearound the passenger compartment in theevent of a sudden driving manoeuvre, emer-gency stop or accident, resulting in injury.
● While driving, mobile terminals must be se-curely fastened in position, outside the air-bag deployment zones, or safely stowedaway.
WARNING
Any applications that are not suitable or exe-cute incorrectly may cause damage to the ve-hicle, accidents and serious injuries.
● SEAT recommends the use of the Apps thatSEAT provides for this vehicle.
● To make full use of SEAT Apps, you must ac-tivate the option Setup, “Data transfer forSEAT apps” ››› page 75.
● The interaction level of the Apps on thesystem must be: ALLOW.
● Protect the mobile terminal with its appli-cations from improper use.
● Never make modifications to the applica-tions.
● Consult the instruction manual for the mo-bile terminal.
WARNING
The use of applications while driving can dis-tract your attention from the traffic. Distract-ing the driver in any way can lead to an acci-dent and cause injuries.
● Always drive carefully and responsibly.
CAUTION
● In areas where special regulations apply orthe use of mobile terminals is forbidden, themobile terminal must be switched off at alltimes. The radiation produced by the mobileterminal when switched on may interfere withsensitive technical and medical equipment,possibly resulting in malfunction or damageto the equipment.
● SEAT cannot be held liable for any damagecaused to the vehicle as a result of the use ofapplications that are of poor quality or aredefective, the inadequate programming ofthe applications, the insufficient coverage ofthe network, the loss of data during trans-mission or the improper use of mobile termi-nals.
66

Full Link*
Note
● Use of Full Link technology may result inhigh consumption of your 3G/4G data plan.
● SEAT recommends having a high batterycharge on the device when connected to FullLink.
● SEAT recommends that to use Full Link, the“Date and time” should be correctly config-ured ››› page 75.
● SEAT applications are designed to commu-nicate with the vehicle and interact with it viathe Full Link connection, therefore its func-tionality is linked to the mobile device beingconnected via USB.
● You can find further information on thetechnical requirements, compatible devices,suitable applications and availability atwww.seat.com or at SEAT dealers.
Is Full Link blocked?
Fig. 57 Message on Infotainment systemscreen.
To unblock this feature, you must obtain theaccessory from your SEAT dealer. Otherwise,a message like this will appear on the screenwhenever you select the feature ››› Fig. 57.
67

Full Link*
Requirements for Full Link
Fig. 58 Full Link Requirements
A Full Link Activated: If you do not have Full Link in your vehicle you can acquire it as an accessory at your Authorised Service.
B Compatible Phones. Go to the MirrorLink®, Android Auto™ or Apple CarPlay™ websites to confirm whether your phone is compatible with the system.
– Check smartphone compatibility: www.mirrorlink.com/phones– MirrorLink® 1.1 or higher– Some of the apps certified by SEAT or the CCC must be installed on the device.
– Check smartphone compatibility. Android Auto™: www.android.com/auto/– Android 5.0 (Lollipop) or higher– Install Android Auto™ app
Apple CarPlay
– Check smartphone compatibility. Apple CarPlay™: www.apple.com/ios/carplay/– iPhone 5 or higher and iOS 7.1 or higher– Turn on the SIRI personal assistant (see phone settings)
C USB cable connecting car to phone: use the USB cable approved and supplied by the phone's official distributor.
68

Full Link*
Activation of Full Link
Fig. 59 Full Link Setup
Data connection via Wi-Fi or SIM is not nec-essary to establish the connection betweenthe smartphone and Full Link.
Data connection via Wi-Fi or SIM is necessaryto enable all of the app features1).
Proceed as follows to use Full Link:
● Switch on the Infotainment system
● Connect the smartphone to the vehicle'sUSB port using a USB cable ››› Booklet In-struction Manual.
● In the main menu for the Full Link setup,select Activate data transfer for SEAT apps››› Fig. 59:
Finally, a message will appear stating thatdata transfer will commence when the deviceis connected. Please note that data is trans-ferred over connections between your vehicleand mobile device. Press OK. Once selected,the technology compatible with your devicecan be used.
Note
Depending on your smartphone, it may haveto be unlocked for the connection to occur.
What should I do if it does not con-nect?
Restart the mobile device
Check the USB cable visually.Make sure that the USB cable is not damaged. Checkthat both connections (USB/micro USB) are not dam-aged or worn.
Visually check thatthe USB ports areproperly connected.Check that the vehi-cle and device USBconnections are notdamaged and/orworn.
Clean the USB ports (device andvehicle).
Try another compatible mobiledevice.
Have the USB port replaced at aSEAT Authorised Service.
Have the mobile device re-paired or replace it.
Try another compatible mobile device.
1) Using the data connection to transfer the smart-phone apps to Full Link may involve additionalcharges. Please check the charges with your opera-tor.
69

Full Link*
Pairing of portable devices supportingthe MirrorLink®, Android Auto™and/or Apple CarPlay™ technologies
Fig. 60 Full Link menu
Fig. 61 Full Link menu
Carousel
When you enter the Full Link context for thefirst time, the technologies available for pair-ing the portable device are displayed.
Once the device connects via USB, the sys-tem will offer you the technologies availablefor establishing a connection with your mo-bile phone.
In the event of simultaneous connections be-tween two devices with different operatingsystems, a choice will be presented for whichone to make the connection with ››› Fig. 61.
View of the device list
iPhone™ devices only support Apple Car-Play™.
There are some Android devices that supportMirrorLink® and Android Auto™.
Bear in mind that once the device is connec-ted it will not be available as an audiosource.
Full Link setup
Function button: function
Data transfer for SEAT apps : allows the exchange of infor-mation between the vehicle and applications authorisedby SEAT.
Last Mode
If a session using one technology ends with-out the disconnection being made from theInfotainment system (simply by disconnect-ing the cable) then when the device is nextconnected to it, the session will start withoutthe user being required to take any action1).
Information
Consult the mobile device manual.
Depends on each technology:
Availability in a country
Third party applications
For further information:
MirrorLink®:www.mirrorlink.com
Apple CarPlay™:www.apple.com/ios/carplay
Android Auto™:www.android.com/auto
Note
● In order to use Android Auto™ technologyit is necessary to download the AndroidAuto™ application, located on GooglePlay™.
1.
2.
1) Unless the device requires the screen to be un-locked in order to establish the connection.
70

Full Link*
● Only compatible applications can be used,in accordance with the technology connected.
MirrorLink®
Fig. 62 Function buttons in the general viewof compatible applications.
Fig. 63 Other MirrorLink function buttons.
MirrorLink® is a protocol which enables com-munication between a portable device andthe Infotainment system via USB.
Using it makes it possible to display andmanage the content and functions displayedon the portable device on the Infotainmentsystem screen.
To avoid distracting the driver while driving,only specially adapted applications can beused ››› in Introduction on page 66.
Requirements
In order to use MirrorLink®, the following re-quirements must be met:
● The mobile device must be compatible withMirrorLink®.
● The mobile device must be connected tothe Infotainment system via USB.
● Depending on the mobile device used, asuitable application must be installed for theuse of MirrorLink® on the device.
Initiating the connection
● In order to initiate the connection with themobile device, it is simply necessary to con-nect it to the Infotainment system via theUSB connection.
● A pop-up screen will appear, which will re-quest that you accept the device.
Function buttons and possible messages
Function button: function
Full Link To return to the Full Link main menu.
CLOSE APPSPress to close the open apps. Thenpress the apps to be closed or theClose all function button to close all
the open applications.
1 : 1 Press to change to the mobile devicescreen.
SETTINGS To open the Full Link setup
››› Fig. 63 1Press to return to the MirrorLink®
main menu.
››› Fig. 63 2Press to display all the function but-tons in the lower or upper right-handmargin of the screen.
››› Fig. 63 / Allows buttons 1 and 2 to be hid-den or shown.››› Fig. 1 12
MirrorLink® setup
Function button: function
Screen orientation : On those devices that support this fea-ture, it is possible to select the following types of screendisplay orientation:
Landscape
Portrait
Rotated 180° : Allows you to rotate the image providedby the device by 180°. »
71

Full Link*
Function button: function
Activate MirrorLink pop-up windows: Allows MirrorLink®
pop-up windows in applications that support it.
Apple CarPlay™*3 Valid for compatible iPhone™ mobile telephones.Also, iPhone™ mobile telephones only support Ap-ple CarPlay™
Apple CarPlay™ is a protocol which enablescommunication between a mobile telephoneand the Infotainment system via USB.
This makes it possible to display and operatethe mobile telephone on the Infotainmentsystem screen.
Requirements
In order to use Apple CarPlay™, the followingrequirements must be met:
● The mobile device must be compatible withApple CarPlay™.
● The mobile device must be connected tothe Infotainment system via USB.
● Make sure that you do not have AppleCarPlay™ restricted on your mobile device,at: Settings > General > Restrictions > CarPlay >ON.
Initiating the connection
In order to initiate the connection with themobile device, it is simply necessary to con-nect it to the Infotainment system via theUSB connection.
● A pop-up screen will appear, which will re-quest that you accept the device.
● If you start the session using AppleCarPlay™ technology, it will not be possibleto pair another device via Bluetooth®. Thefollowing message will appear in the mainPHONE menu:
Please disconnect Apple CarPlayfirst, before you can connectanother mobile telephone.
Holding down the button will start theApple™ voice “engine”.
To return to the basic contents of the Infotain-ment system, press the SEAT icon.
Android Auto™*3 Valid for compatible Android mobile phones.
Android Auto™ is a protocol which enablescommunication between a portable deviceand the Infotainment system via USB.
This makes it possible to display and operatethe mobile telephone on the Infotainmentsystem screen.
Requirements
In order to use Android Auto™, the followingrequirements must be met:
● The mobile device must be compatible withAndroid Auto™.
● The mobile device must be connected tothe Infotainment system via USB.
● The Android Auto™ application should al-ready be downloaded and installed on themobile device.
Initiating the connection
In order to initiate the connection with themobile device, it is simply necessary to con-nect it to the Infotainment system via theUSB connection, and to be sure to follow theinstructions of the device being paired.
● The first connection to Android Auto™must be done while the vehicle is stationary.
● Once the first pop-up window about accept-ing data transfer between the car and the de-vice has been accepted, a message will ap-pear requesting that you check your mobiledevice for the confirmations needed to pair itwith the Infotainment system.
● If you are initiating the session usingAndroid Auto™ technology via USB, the mo-bile telephone connects automatically viaBluetooth® to the Infotainment system tele-phone and it will not be possible to pair an-other mobile telephone via Bluetooth®.
72

Full Link*
Holding down the button will start theAndroid™ voice “engine”.
To return to the basic contents of the Infotain-ment system, press the Return to SEATbutton.
Note
Some mobile devices require a change in theUSB connection mode in order to use AndroidAuto™.
● Make sure that your mobile is in “MediaTransfer Protocol (MTP)” mode before it isconnected by USB to the Infotainment sys-tem.
Note
Android Auto™ requires the use of Google™services, as well as certain basic applicationsof the Android system.
● Make sure that you always have Google™services updated in order to use this technol-ogy.
73

Full Link*
Frequently asked questions about Full Link
What is the connection method? USB cable.
Will the USB cable be supplied with the vehicle? No. The USB cable supplied with the device should be used.
Is navigation possible? Navigation is possible in each one of the Full Link technologies if the technology is available in yourcountry and if you have the Navigation app.
What is the difference between using the Full Link system navigator (viatelephone) instead of another navigator?
Advantages: daily updates.Disadvantages: data consumption, reception problems.
Can I send voice messages? With certified apps, such as SEAT ConnectApp, you can answer but not send.
What apps will be visible as I am driving? Depending on the technology:– for MirrorLink®: apps certified by SEAT and the CCC,– for Android Auto™: the Apps selected by Google™,– for Apple CarPlay™: the Apps selected by Apple™.
Where can I find compatible Apps? The compatible apps are shown at the following links:www.mirrorlink.comwww.android.com/auto/www.apple.com/ios/carplay/
Where can I download the apps? From Google Play™ for Android Auto™/MirrorLink® and from the Apple Store™ for Apple CarPlay™.
If Full Link stops working, where can I have it repaired? If the problem is in the car, you should go to the dealer. If the problem is in the mobile device, you shouldsee your mobile telephone vendor.
Will WhatsApp be certified? This depends on the technology.
Is MirrorLink® available in my country? Yes, MirrorLink® is available in all the countries and regions where SEAT operates.
What are the differences between MirrorLink®, Android Auto™ and AppleCarPlay™?
MirrorLink® is not compatible with Android Auto™ or Apple CarPlay™, since they are different technolo-gies. They all coexist in Full Link, although Android Auto™ is designed for mobile devices with the An-droid™ operating system, and Apple CarPlay™ for iPhone.
Can MirrorLink® be installed in a previous SEAT model? No, that is not possible.
Where can I find more information about Full Link? If in doubt, please refer to the Innovation/Connectivity sections of our website: www.seat.es orwww.seat.com, or send your query to [email protected]
74

Setup
Setup
Menu and system settings
Main menu System settings
››› table on page 1
The selection of possible settings will de-pend on the country, the unit in question andthe vehicle equipment.
● Press the Infotainment button ››› Fig. 1 12 and then press the SETTINGS
function button.
● To adjust the settings for a certain function,press the appropriate function button in themain menu. Changes are automatically stor-ed when a menu is closed.
Function button: function
Screen : To perform screen setup.
Menu : To select the main menu display mode.
Switch off screen (in 10 seconds) : If this function is ac-tive and the Infotainment system is not in use, thescreen will switch off after approximately 10 sec-onds. Pressing the screen or pressing one of the Info-tainment system buttons will switch the screen backon.
Brightness : To select the brightness level of thescreen.
Function button: function
Touchscreen tone : Confirmation tone for pressing afunction button is activated.
Menu button tone : Activates/deactivates the soundof the Infotainment buttons.
Proximity sensor : The proximity sensor is active. Alsosee ››› page 12, Proximity sensor.
Show clock in standby mode : In standby mode, the cur-rent time is shown on the Infotainment system dis-play.
Date and time : To alter the time and date.
Clock time source : To select the time source (GPS ormanual).
GPS : The date and time can be selected using theTime zone function button. In this case, the Date
and Time function buttons for manually enteringthe data will not be active.
Manually : The date and time can be manually ad-justed using the Date and Time function buttons.
Time : To manually alter the time.
Time zone : To change to the desired time zone.
Time format : To select the time display format (12- or24-hour clock).
Date : To adjust the current time.
Date format : To select the display format for the date(DD.MM.YYYY, YY-MM-DD or MM-DD-YY).
Language : To select the desired language for the textsand announcements in the voice control system.
Function button: function
Additional keypad languages : To select the additional key-pad languages.
Units : To set the measurement units for the vehicle dis-plays.Distance, vehicle speed, temperature, volume,consumption and pressure.
Mobile device data transfer
Data transfer for SEAT apps : Allows the exchange of infor-mation between the vehicle and SEAT applications.These are not personal data.
Operation via apps : Changes the level of interactionwith the applications.
Deactivate : Limits specific functions that require ahigher level of security.Confirm : Allows 100% functionality of the App but
with certain actions relating to the Infotainmentsystem requiring confirmation.Allow : Allows the execution of all the available
functions from the App.
Voice control : To perform the voice control setup››› page 13.
Remove safely : To eject the data storage device (SD card1/SD card 2/USB) from the system. After correctly eject-ing the data storage device from the system, the func-tion button becomes inactive (grey colour).
Factory settings : When resetting factory settings, all en-tries and changes made are deleted, depending on theselected setup.
Bluetooth : To perform Bluetooth® settings ››› page 63. »
75

Setup
Function button: function
System information : Viewing system information (devicenumber, hardware and software versions).
Update : To update navigation data ››› page 37 Do notremove the memory card while the navigation data isbeing installed.
Copyright : Copyright information.
Configuration wizard : Open the wizard to configure the ini-tial setup of the Infotainment system.
Note
For the proper functioning of the Infotain-ment system it is important that the date andtime set in the vehicle are correct.
Sound and volume settings
Making settings
The selection of possible settings will de-pend on the country, the unit in question andthe vehicle equipment.
● Press the infotainment button ››› Fig. 1 12 .
● Press the Sound function button to openthe main Sound settings menu.
● Press the function button on the mainmenu corresponding to one where changes
are to be made. All settings are applied in-stantaneously.
Overview of screen and function buttons
Function button: function
Volume : To adjust the volume settings.
Announcements : To set the playback volume of an-nouncements, for example traffic announcements.
Navigation announcements : To adjust the playback vol-ume of audible driving recommendations.
Voice control : To set the volume for voice controlplayback.
Maximum switch-on volume : To set the maximumswitch-on volume of the equipment.
Speed-dependent volume adjustment (GALA) : To deter-mine the level of adjustment for speed-dependentvolume. The audio volume will increase automati-cally as vehicle speed increases.
Entertainment fading while parking : To adjust the desireddecrease in volume with ParkPilot activated.
Entertainment fading (nav. announcements) : Adjusts theplayback volume during a navigation announce-ment.
AUX volume : To set the playback volume of the au-dio sources connected via the AUX-IN multi-mediasocket (Low, Medium or High). Also see››› page 76, Overview of screen and function but-tons.
Function button: function
Bluetooth audio : To set the playback volume of theaudio sources connected via Bluetooth® (Low, Me-dium or High). Also see ››› page 76, Overview ofscreen and function buttons.
Equaliser : To adjust the characteristics of the sound.
Balance - Fader : To adjust the distribution of the sound.The cursor indicates the current distribution of thesound inside the passenger compartment. To modify thedistribution of the sound, briefly press the passengercompartment view for the desired position or use the ar-row keys to change it gradually. To focus the distributionof sound in the centre of the passenger compartment,press the central function button located between thearrows.
Sound focus : Optimises the sound in the passenger com-partment.
Touchscreen tone : Confirmation tone for pressing a func-tion button is activated.
No voice guidance during call : No audible driving instruc-tions will be given during a telephone conversation.
Adjust the playback volume for external au-dio sources
If you need to increase the playback volumefor the external audio source, first lower thebase volume on the Infotainment system.
If the sound from the external audio source istoo low, increase the output volume on theexternal audio source. If this is not enough,change the input volume to medium or high.
76

Setup
If the sound from the connected external au-dio source is too loud or distorted, lower theoutput volume on the external audio source.If this is not sufficient, set the input volumeto Medium or Quiet.
77

Other important information
Other important information
Legal information
ECE
SEAT hereby declares that the unit is in com-pliance with the essential requirements andother relevant provisions of Directive1999/5/EC (CE 0700).
Abbreviations
A2DP Technology included by many manufactur-ers to transmit audio signals via Bluetooth®
(Advanced Audio Distribution Profile).
AM Modulation of the wave amplitude (mediumwave, MW)
AUX-IN Additional audio input (Auxiliary Input)
AVRCP Technology included by many manufactur-ers for the remote management of audiosources via Bluetooth® (Audio Video Re-mote Control Profile).
DAB Digital transmission standard for digital ra-dio (Digital Audio Broadcasting)
DIN Deutsches Institut fur Normung (German in-dustry standard).
DRM Digital Rights Management
DTMF Dial tone with dual tone multiple frequency
EON Assistance for other radio transmission net-works (Enhanced Other Network)
FM Frequency modulation (ultra-short wave,UKW)
GPS Global Positioning System.
GSM Global System for Mobile Communications
HFP Hands-Free Profile.
IMEI Serial number for univocally identifying GSMdevices (International Mobile Station Equip-ment Identity).
MP3 Audio file compression format.
PIN Personal identification number.
RDS Radio data system.
SMS Short Message Service.
TMC Traffic reports for dynamic navigation (TrafficMessage Channel)
TP Traffic reports function in Radio mode (Traf-fic programme).
USB Universal Serial Bus
VBR Variable bit rate.
WMA Audio file compression format.
78

Index
Index
AAfter starting route guidance . . . . . . . . . . . . . . . . 39AM . . . . . . . . . . . . . . . . . . . . . . . . . . . . . . . . . . . . . . 17Android Auto™ . . . . . . . . . . . . . . . . . . . . . . . . . . . . 70Apple CarPlay™ . . . . . . . . . . . . . . . . . . . . . . . . . . . 70Areas where special regulations apply . . . . . . . . . 54AUX-IN . . . . . . . . . . . . . . . . . . . . . . . . . . . . . . . . . . . 34
AUX-IN multimedia socket . . . . . . . . . . . . . . . . . 34external audio source . . . . . . . . . . . . . . . . . . . . . 34
AUX-IN multimedia socket . . . . . . . . . . . . . . . . . . . 34Avoid congestion . . . . . . . . . . . . . . . . . . . . . . . . . . 45
BBase volume . . . . . . . . . . . . . . . . . . . . . . . . . . . . . . . 9
change . . . . . . . . . . . . . . . . . . . . . . . . . . . . . . . . . 9sound suppression (mute) . . . . . . . . . . . . . . . . . . 9
Bluetoothconnect audio source . . . . . . . . . . . . . . . . . . . . . 34profiles . . . . . . . . . . . . . . . . . . . . . . . . . . . . . . . . 54select Bluetooth audio . . . . . . . . . . . . . . . . . . . . 29settings . . . . . . . . . . . . . . . . . . . . . . . . . . . . . . . . 63
Buttons . . . . . . . . . . . . . . . . . . . . . . . . . . . . . . . . . . 10
CCall lists . . . . . . . . . . . . . . . . . . . . . . . . . . . . . . . . . 62Call mailbox . . . . . . . . . . . . . . . . . . . . . . . . . . . . . . 59CAR Menu
operating . . . . . . . . . . . . . . . . . . . . . . . . . . . . . . . 50CD
inserting and ejecting . . . . . . . . . . . . . . . . . . . . 32mode . . . . . . . . . . . . . . . . . . . . . . . . . . . . . . . . . . 32select . . . . . . . . . . . . . . . . . . . . . . . . . . . . . . . . . . 29
Check boxes . . . . . . . . . . . . . . . . . . . . . . . . . . . . . . 10
Communication between the Infotainment sys-tem and mobile devices . . . . . . . . . . . . . . . . . . . 66
Connectivity Box . . . . . . . . . . . . . . . . . . . . . . . . . . . 64Controls . . . . . . . . . . . . . . . . . . . . . . . . . . . . . . . . . . . 4Copyright . . . . . . . . . . . . . . . . . . . . . . . . . . . . . . . . 25
information . . . . . . . . . . . . . . . . . . . . . . . . . . . . . 76Cursor . . . . . . . . . . . . . . . . . . . . . . . . . . . . . . . . . . . 11
DDAB . . . . . . . . . . . . . . . . . . . . . . . . . . . . . . . . . . . . . 17
see: RADIO . . . . . . . . . . . . . . . . . . . . . . . . . . . . . 19Delayed switch off (waiting time) . . . . . . . . . . . . . . 9Delete
all entries . . . . . . . . . . . . . . . . . . . . . . . . . . . . . . 75user entries . . . . . . . . . . . . . . . . . . . . . . . . . . . . . 75
Delete data . . . . . . . . . . . . . . . . . . . . . . . . . . . . . . . 75Delete entries . . . . . . . . . . . . . . . . . . . . . . . . . . . . . 75Demo mode
navigation . . . . . . . . . . . . . . . . . . . . . . . . . . . . . . 47Destination memory . . . . . . . . . . . . . . . . . . . . . . . . 41Dial number . . . . . . . . . . . . . . . . . . . . . . . . . . . . . . 59Dial (telephone number) . . . . . . . . . . . . . . . . . . . . 59Display
use . . . . . . . . . . . . . . . . . . . . . . . . . . . . . . . . . . . . 10Dynamic route guidance . . . . . . . . . . . . . . . . . . . . 45
EEjecting
see: CD . . . . . . . . . . . . . . . . . . . . . . . . . . . . . . . . 32EON . . . . . . . . . . . . . . . . . . . . . . . . . . . . . . . . . . . . . 22Explosion risk areas
telephone . . . . . . . . . . . . . . . . . . . . . . . . . . . . . . 54External audio source . . . . . . . . . . . . . . . . . . . . . . 34
adjust the playback volume . . . . . . . . . . . . . . . . 76Bluetooth audio . . . . . . . . . . . . . . . . . . . . . . . . . 34MEDIA-IN . . . . . . . . . . . . . . . . . . . . . . . . . . . . . . . 33
External data storage deviceMEDIA-IN . . . . . . . . . . . . . . . . . . . . . . . . . . . . . . . 33USB . . . . . . . . . . . . . . . . . . . . . . . . . . . . . . . . . . . 33
FFactory settings . . . . . . . . . . . . . . . . . . . . . . . . . . . 75Favourites (phonebook shortcuts)
see PHONE . . . . . . . . . . . . . . . . . . . . . . . . . . . . . 62FM . . . . . . . . . . . . . . . . . . . . . . . . . . . . . . . . . . . . . . 17Frequency wavelength
AM . . . . . . . . . . . . . . . . . . . . . . . . . . . . . . . . . . . . 17change . . . . . . . . . . . . . . . . . . . . . . . . . . . . . . . . 17DAB . . . . . . . . . . . . . . . . . . . . . . . . . . . . . . . . . . . 17FM . . . . . . . . . . . . . . . . . . . . . . . . . . . . . . . . . . . . 17
Full Link . . . . . . . . . . . . . . . . . . . . . . . . . . . . . . . . . . 66pairing . . . . . . . . . . . . . . . . . . . . . . . . . . . . . . . . . 70setup . . . . . . . . . . . . . . . . . . . . . . . . . . . . . . . . . . 70
Function buttons . . . . . . . . . . . . . . . . . . . . . . . . . . 10main menu Images . . . . . . . . . . . . . . . . . . . . . . . 35MEDIA main menu . . . . . . . . . . . . . . . . . . . . . . . 28RADIO main menu . . . . . . . . . . . . . . . . . . . . . . . 17
GGALA . . . . . . . . . . . . . . . . . . . . . . . . . . . . . . . . . . . . 76
IIgnition switched off
delayed switch off (waiting time) . . . . . . . . . . . . 9Images
display . . . . . . . . . . . . . . . . . . . . . . . . . . . . . . . . . 35main menu . . . . . . . . . . . . . . . . . . . . . . . . . . . . . 35settings . . . . . . . . . . . . . . . . . . . . . . . . . . . . . . . . 36
Infotainment system buttons . . . . . . . . . . . . . . . . . 9Input mask . . . . . . . . . . . . . . . . . . . . . . . . . . . . . . . 11Interference from a mobile telephone . . . . . . . . . . 8Introduction . . . . . . . . . . . . . . . . . . . . . . . . . . . . . . . 7iPad . . . . . . . . . . . . . . . . . . . . . . . . . . . . . . . . . . . . . 33
79

Index
iPhone . . . . . . . . . . . . . . . . . . . . . . . . . . . . . . . . . . . 33iPod . . . . . . . . . . . . . . . . . . . . . . . . . . . . . . . . . . . . . 33
KKeypad . . . . . . . . . . . . . . . . . . . . . . . . . . . . . . . . . . 11
LLowering the volume . . . . . . . . . . . . . . . . . . . . . . . . 8
MMain menu
images . . . . . . . . . . . . . . . . . . . . . . . . . . . . . . . . . 35MEDIA . . . . . . . . . . . . . . . . . . . . . . . . . . . . . . . . . 28PHONE . . . . . . . . . . . . . . . . . . . . . . . . . . . . . . . . . 57RADIO . . . . . . . . . . . . . . . . . . . . . . . . . . . . . . . . . 17settings . . . . . . . . . . . . . . . . . . . . . . . . . . . . . . . . 75sound . . . . . . . . . . . . . . . . . . . . . . . . . . . . . . . . . 76
Map displaychange . . . . . . . . . . . . . . . . . . . . . . . . . . . . . . . . 43function buttons . . . . . . . . . . . . . . . . . . . . . . . . . 44
MEDIAAUX-IN multimedia socket . . . . . . . . . . . . . . . . . 34bit rate . . . . . . . . . . . . . . . . . . . . . . . . . . . . . . . . . 25Bluetooth audio . . . . . . . . . . . . . . . . . . . . . . . . . 34CD mode . . . . . . . . . . . . . . . . . . . . . . . . . . . . . . . 32CD with audio data . . . . . . . . . . . . . . . . . . . . . . . 25change media source . . . . . . . . . . . . . . . . . . . . . 29changing track . . . . . . . . . . . . . . . . . . . . . . . . . . 29copyright . . . . . . . . . . . . . . . . . . . . . . . . . . . . . . . 25Defective CD . . . . . . . . . . . . . . . . . . . . . . . . . . . . 32external data storage device connected to
USB port . . . . . . . . . . . . . . . . . . . . . . . . . . . . . 33fast forward . . . . . . . . . . . . . . . . . . . . . . . . . . . . . 29function buttons . . . . . . . . . . . . . . . . . . . . . . . . . 28insert a memory card . . . . . . . . . . . . . . . . . . . . . 32inserting and ejecting a CD . . . . . . . . . . . . . . . . 32iPod, iPad and iPhone . . . . . . . . . . . . . . . . . . . . 33
main menu . . . . . . . . . . . . . . . . . . . . . . . . . . . . . 28MEDIA-IN . . . . . . . . . . . . . . . . . . . . . . . . . . . . . . . 33media mode . . . . . . . . . . . . . . . . . . . . . . . . . . . . 25media source selection menu . . . . . . . . . . . . . . 29memory card unreadable . . . . . . . . . . . . . . . . . . 32messages and symbols . . . . . . . . . . . . . . . . . . . 28MP3 files . . . . . . . . . . . . . . . . . . . . . . . . . . . . . . . 25notes . . . . . . . . . . . . . . . . . . . . . . . . . . . . . . . . . . 28playing order . . . . . . . . . . . . . . . . . . . . . . . . . . . . 27playlists . . . . . . . . . . . . . . . . . . . . . . . . . . . . . . . . 26play modes . . . . . . . . . . . . . . . . . . . . . . . . . . . . . 28prepare a memory card for removal . . . . . . . . . 32random play (Mix) . . . . . . . . . . . . . . . . . . . . . . . 28remove a memory card . . . . . . . . . . . . . . . . . . . . 32repeat function (Repeat) . . . . . . . . . . . . . . . . . . 28requirements . . . . . . . . . . . . . . . . . . . . . . . . . . . 25restrictions . . . . . . . . . . . . . . . . . . . . . . . . . . . . . 26rewind . . . . . . . . . . . . . . . . . . . . . . . . . . . . . . . . . 29scan (SCAN) . . . . . . . . . . . . . . . . . . . . . . . . . . . . 28select data storage device . . . . . . . . . . . . . . . . . 29select track . . . . . . . . . . . . . . . . . . . . . . . . . . . . . 30settings . . . . . . . . . . . . . . . . . . . . . . . . . . . . . . . . 35track information . . . . . . . . . . . . . . . . . . . . . . . . 28track list . . . . . . . . . . . . . . . . . . . . . . . . . . . . . . . . 30Unreadable CD . . . . . . . . . . . . . . . . . . . . . . . . . . 32WMA files . . . . . . . . . . . . . . . . . . . . . . . . . . . . . . 25
Media playback sources . . . . . . . . . . . . . . . . . . . . 29CD . . . . . . . . . . . . . . . . . . . . . . . . . . . . . . . . . . . . 29SD card . . . . . . . . . . . . . . . . . . . . . . . . . . . . . . . . 29select . . . . . . . . . . . . . . . . . . . . . . . . . . . . . . . . . . 29USB . . . . . . . . . . . . . . . . . . . . . . . . . . . . . . . . . . . 29
Media sourcesBluetooth audio . . . . . . . . . . . . . . . . . . . . . . . . . 29
Memory buttons . . . . . . . . . . . . . . . . . . . . . . . . . . . 20Memory card
insert . . . . . . . . . . . . . . . . . . . . . . . . . . . . . . . . . . 32prepare a memory card for removal . . . . . . . . . 32
remove . . . . . . . . . . . . . . . . . . . . . . . . . . . . . . . . 32select . . . . . . . . . . . . . . . . . . . . . . . . . . . . . . . . . . 29unreadable . . . . . . . . . . . . . . . . . . . . . . . . . . . . . 32
Messagesnavigation . . . . . . . . . . . . . . . . . . . . . . . . . . . . . . 37
MirrorLink . . . . . . . . . . . . . . . . . . . . . . . . . . . . . . . . 71Mobile signal amplifier . . . . . . . . . . . . . . . . . . . . . 64Mute . . . . . . . . . . . . . . . . . . . . . . . . . . . . . . . . . . . . . 9My destinations . . . . . . . . . . . . . . . . . . . . . . . . . . . 41
NNavigation announcements . . . . . . . . . . . . . . . . . 40Navigation data
data update . . . . . . . . . . . . . . . . . . . . . . . . . . . . 37NAV (navigation) . . . . . . . . . . . . . . . . . . . . . . . . . . 37
after starting route guidance . . . . . . . . . . . . . . . 39areas not fully digitalised . . . . . . . . . . . . . . . . . 37avoid congestion . . . . . . . . . . . . . . . . . . . . . . . . 45change destination . . . . . . . . . . . . . . . . . . . . . . 40change view . . . . . . . . . . . . . . . . . . . . . . . . . . . . 43compass display . . . . . . . . . . . . . . . . . . . . . . . . . 43congestion ahead . . . . . . . . . . . . . . . . . . . . . . . . 40contacts . . . . . . . . . . . . . . . . . . . . . . . . . . . . . . . . 41data update . . . . . . . . . . . . . . . . . . . . . . . . . . . . 37demo mode . . . . . . . . . . . . . . . . . . . . . . . . . . . . . 47destination memory . . . . . . . . . . . . . . . . . . . . . . 41display traffic disruptions . . . . . . . . . . . . . . . . . 45dynamic route guidance . . . . . . . . . . . . . . . 40, 45entering destination . . . . . . . . . . . . . . . . . . . . . . 38entering the home address . . . . . . . . . . . . . . . . 42enter new destination . . . . . . . . . . . . . . . . . . . . 39enter stopover . . . . . . . . . . . . . . . . . . . . . . . . . . . 40exclude section . . . . . . . . . . . . . . . . . . . . . . . . . . 40fast search for a POI . . . . . . . . . . . . . . . . . . . . . . 43function buttons . . . . . . . . . . . . . . . . . . . . . . . . . 38importing Personal POI . . . . . . . . . . . . . . . . . . . 46importing vCards . . . . . . . . . . . . . . . . . . . . . . . . 46
80

Index
list of driving manoeuvres . . . . . . . . . . . . . . . . . 43map display . . . . . . . . . . . . . . . . . . . . . . . . . . . . 44map, select the destination on the map . . . . . . 39messages and symbols . . . . . . . . . . . . . . . . . . . 38my destinations . . . . . . . . . . . . . . . . . . . . . . 41, 42navigation announcements . . . . . . . . . . . . . . . . 40navigation area . . . . . . . . . . . . . . . . . . . . . . . . . . 37navigation main menu . . . . . . . . . . . . . . . . . . . . 38navigation messages . . . . . . . . . . . . . . . . . . . . . 37opening the main menu . . . . . . . . . . . . . . . . . . . 38points of interest . . . . . . . . . . . . . . . . . . . . . . . . 42possible limitations . . . . . . . . . . . . . . . . . . . . . . 37road sign indicators . . . . . . . . . . . . . . . . . . . . . . 47route information . . . . . . . . . . . . . . . . . . . . . . . . 40route list . . . . . . . . . . . . . . . . . . . . . . . . . . . . . . . 40search . . . . . . . . . . . . . . . . . . . . . . . . . . . . . . . . . 39settings . . . . . . . . . . . . . . . . . . . . . . . . . . . . . . . . 48split screen . . . . . . . . . . . . . . . . . . . . . . . . . . . . . 43stop route guidance . . . . . . . . . . . . . . . . . . . . . . 40store position . . . . . . . . . . . . . . . . . . . . . . . . . . . 41TRAFFIC . . . . . . . . . . . . . . . . . . . . . . . . . . . . . . . . 45traffic reports . . . . . . . . . . . . . . . . . . . . . . . . . . . 45
OOn-screen keypad . . . . . . . . . . . . . . . . . . . . . . . . . 11Online traffic information . . . . . . . . . . . . . . . . . . . 45Operation
additional displays . . . . . . . . . . . . . . . . . . . . . . . 12changing the volume . . . . . . . . . . . . . . . . . . . . . . 9function buttons . . . . . . . . . . . . . . . . . . . . . . . . . 10general instructions for use . . . . . . . . . . . . . . . . . 8Infotainment system buttons . . . . . . . . . . . . . . . . 9input . . . . . . . . . . . . . . . . . . . . . . . . . . . . . . . . . . 11input mask . . . . . . . . . . . . . . . . . . . . . . . . . . . . . 11on-screen keypad . . . . . . . . . . . . . . . . . . . . . . . . 11PHONE . . . . . . . . . . . . . . . . . . . . . . . . . . . . . . 53, 56RADIO . . . . . . . . . . . . . . . . . . . . . . . . . . . . . . . . . 17
rotary knobs . . . . . . . . . . . . . . . . . . . . . . . . . . . . . 9search lists . . . . . . . . . . . . . . . . . . . . . . . . . . . . . 11slider . . . . . . . . . . . . . . . . . . . . . . . . . . . . . . . . . . 11slide (screen) . . . . . . . . . . . . . . . . . . . . . . . . . . . 11sound suppression (mute) . . . . . . . . . . . . . . . . . . 9switch on and switch off . . . . . . . . . . . . . . . . . . . 9touchscreen . . . . . . . . . . . . . . . . . . . . . . . . . . . . 10voice control . . . . . . . . . . . . . . . . . . . . . . . . . . . . 13
PPersonal POI
importing . . . . . . . . . . . . . . . . . . . . . . . . . . . . . . 46PHONE
A2DP . . . . . . . . . . . . . . . . . . . . . . . . . . . . . . . . . . 54areas where special regulations apply . . . . . . . 54bluetooth profiles . . . . . . . . . . . . . . . . . . . . . . . . 54bluetooth settings . . . . . . . . . . . . . . . . . . . . . . . 63call lists . . . . . . . . . . . . . . . . . . . . . . . . . . . . . . . . 62call mailbox . . . . . . . . . . . . . . . . . . . . . . . . . . . . . 59connect and disconnect the telephone man-
agement system . . . . . . . . . . . . . . . . . . . . . . . 63connection via the Infotainment system . . . . . . 55contacts . . . . . . . . . . . . . . . . . . . . . . . . . . . . . . . . 60description of the function . . . . . . . . . . . . . . . . 54dial . . . . . . . . . . . . . . . . . . . . . . . . . . . . . . . . 59, 60display and symbols . . . . . . . . . . . . . . . . . . . . . 58enter telephone number . . . . . . . . . . . . . . . . . . 59explosion risk areas . . . . . . . . . . . . . . . . . . . . . . 54favourites (phonebook shortcuts) . . . . . . . . . . . 62general information . . . . . . . . . . . . . . . . . . . . . . 53GSM network . . . . . . . . . . . . . . . . . . . . . . . . . . . 54HFP . . . . . . . . . . . . . . . . . . . . . . . . . . . . . . . . . . . 54main menu . . . . . . . . . . . . . . . . . . . . . . . . . . . . . 57mobile telephone pairing . . . . . . . . . . . . . . . . . 55pairing of mobile telephone . . . . . . . . . . . . . . . 55pairing via the Infotainment system . . . . . . . . . 55phonebook . . . . . . . . . . . . . . . . . . . . . . . . . . . . . 60
settings . . . . . . . . . . . . . . . . . . . . . . . . . . . . . . . . 63short messages (SMS) . . . . . . . . . . . . . . . . . . . . 61telephone management system . . . . . . . . . 53, 56user profile settings . . . . . . . . . . . . . . . . . . . . . . 63voice control . . . . . . . . . . . . . . . . . . . . . . . . . . . . 13
Phonebook shortcutsee PHONE . . . . . . . . . . . . . . . . . . . . . . . . . . . . . 62
Physical buttonssee: Infotainment system buttons . . . . . . . . . . . . 9
Playexternal data storage device (USB) . . . . . . . . . . 33MEDIA . . . . . . . . . . . . . . . . . . . . . . . . . . . . . . . . . 28RADIO . . . . . . . . . . . . . . . . . . . . . . . . . . . . . . . . . 17SD card . . . . . . . . . . . . . . . . . . . . . . . . . . . . . . . . 28
PlaybackAUX-IN . . . . . . . . . . . . . . . . . . . . . . . . . . . . . . . . . 34CD . . . . . . . . . . . . . . . . . . . . . . . . . . . . . . . . . . . . 32
Playingtrack . . . . . . . . . . . . . . . . . . . . . . . . . . . . . . . . . . . 30
POIimporting . . . . . . . . . . . . . . . . . . . . . . . . . . . . . . 46
Points of interest . . . . . . . . . . . . . . . . . . . . . . . . . . 42Pop-up windows . . . . . . . . . . . . . . . . . . . . . . . . . . . 10Predictive navigation . . . . . . . . . . . . . . . . . . . . . . . 46
QQuick reference guide . . . . . . . . . . . . . . . . . . . . . . . 7
RRADIO . . . . . . . . . . . . . . . . . . . . . . . . . . . . . . . . . . . 17
additional DAB services . . . . . . . . . . . . . . . . . . . 19additional DAB stations . . . . . . . . . . . . . . . . . . . 19AM setup . . . . . . . . . . . . . . . . . . . . . . . . . . . . . . . 23change frequency . . . . . . . . . . . . . . . . . . . . . . . . 17DAB display . . . . . . . . . . . . . . . . . . . . . . . . . . . . . 19DAB operation . . . . . . . . . . . . . . . . . . . . . . . . . . . 19DAB preset list . . . . . . . . . . . . . . . . . . . . . . . . . . 19
81

Index
DAB Radio Text . . . . . . . . . . . . . . . . . . . . . . . . . . 19DAB settings . . . . . . . . . . . . . . . . . . . . . . . . . . . . 24DAB station information . . . . . . . . . . . . . . . . . . . 19DAB station tracking in FM . . . . . . . . . . . . . . . . . 19DAB transmission standards . . . . . . . . . . . . . . . 19EON . . . . . . . . . . . . . . . . . . . . . . . . . . . . . . . . . . . 22FM setup . . . . . . . . . . . . . . . . . . . . . . . . . . . . . . . 23information and symbols . . . . . . . . . . . . . . . . . . 17main menu . . . . . . . . . . . . . . . . . . . . . . . . . . . . . 17memory buttons . . . . . . . . . . . . . . . . . . . . . . . . . 20radio mode . . . . . . . . . . . . . . . . . . . . . . . . . . . . . 17radio text (RDS) . . . . . . . . . . . . . . . . . . . . . . . . . . 18RDS . . . . . . . . . . . . . . . . . . . . . . . . . . . . . . . . . . . 18SCAN function . . . . . . . . . . . . . . . . . . . . . . . . . . . 22select stations . . . . . . . . . . . . . . . . . . . . . . . . . . 21setting a station name . . . . . . . . . . . . . . . . . . . . 18settings . . . . . . . . . . . . . . . . . . . . . . . . . . . . . . . . 23station list . . . . . . . . . . . . . . . . . . . . . . . . . . . . . . 21station names display . . . . . . . . . . . . . . . . . . . . 18station tracking by RDS . . . . . . . . . . . . . . . . . . . 18store station logos . . . . . . . . . . . . . . . . . . . . . . . 20store stations . . . . . . . . . . . . . . . . . . . . . . . . . . . 21TP (traffic news) . . . . . . . . . . . . . . . . . . . . . . . . . 22traffic announcement (INFO) . . . . . . . . . . . . . . . 22traffic news (TP) . . . . . . . . . . . . . . . . . . . . . . . . . 22tune stations . . . . . . . . . . . . . . . . . . . . . . . . . . . . 21tune the frequency of the stations . . . . . . . . . . 21
Radio text (RDS) . . . . . . . . . . . . . . . . . . . . . . . . . . . 18Random play (Mix) . . . . . . . . . . . . . . . . . . . . . . . . . 28RDS . . . . . . . . . . . . . . . . . . . . . . . . . . . . . . . . . . . . . 18
automatic station tracking . . . . . . . . . . . . . . . . . 18regional RDS . . . . . . . . . . . . . . . . . . . . . . . . . . . . 18TP (traffic news) . . . . . . . . . . . . . . . . . . . . . . . . . 22
Repeat . . . . . . . . . . . . . . . . . . . . . . . . . . . . . . . . . . . 28Repeat function (Repeat) . . . . . . . . . . . . . . . . . . . . 28Requirements for
data storage devices and files . . . . . . . . . . . . . . 25
Reset factory settings . . . . . . . . . . . . . . . . . . . . . . 75Road sign indicators . . . . . . . . . . . . . . . . . . . . . . . 47Rotary knobs . . . . . . . . . . . . . . . . . . . . . . . . . . . . . . . 9Route guidance
demo mode . . . . . . . . . . . . . . . . . . . . . . . . . . . . . 47dynamic . . . . . . . . . . . . . . . . . . . . . . . . . . . . . . . . 45
SSafety Instructions
Infotainment system . . . . . . . . . . . . . . . . . . . . . . 7SCAN
MEDIA . . . . . . . . . . . . . . . . . . . . . . . . . . . . . . . . . 28radio . . . . . . . . . . . . . . . . . . . . . . . . . . . . . . . . . . 22
SCAN functionRADIO . . . . . . . . . . . . . . . . . . . . . . . . . . . . . . . . . 22
Scan (SCAN)MEDIA . . . . . . . . . . . . . . . . . . . . . . . . . . . . . . . . . 28
SD Cardsee: memory card . . . . . . . . . . . . . . . . . . . . . . . . 32
Search . . . . . . . . . . . . . . . . . . . . . . . . . . . . . . . . . . . 39Search lists . . . . . . . . . . . . . . . . . . . . . . . . . . . . . . . 11Settings
bluetooth . . . . . . . . . . . . . . . . . . . . . . . . . . . . . . 63DAB . . . . . . . . . . . . . . . . . . . . . . . . . . . . . . . . . . . 24default setting . . . . . . . . . . . . . . . . . . . . . . . . . . 75factory settings . . . . . . . . . . . . . . . . . . . . . . . . . . 75images . . . . . . . . . . . . . . . . . . . . . . . . . . . . . . . . . 36main menu . . . . . . . . . . . . . . . . . . . . . . . . . . . . . 75Media . . . . . . . . . . . . . . . . . . . . . . . . . . . . . . . . . 35menu and system settings . . . . . . . . . . . . . . . . . 75navigation . . . . . . . . . . . . . . . . . . . . . . . . . . . . . . 48PHONE . . . . . . . . . . . . . . . . . . . . . . . . . . . . . . . . . 63radio . . . . . . . . . . . . . . . . . . . . . . . . . . . . . . . . . . 23sound . . . . . . . . . . . . . . . . . . . . . . . . . . . . . . . . . 76system . . . . . . . . . . . . . . . . . . . . . . . . . . . . . . . . . 75user profile settings . . . . . . . . . . . . . . . . . . . . . . 63
voice control . . . . . . . . . . . . . . . . . . . . . . . . . . . . 15volume . . . . . . . . . . . . . . . . . . . . . . . . . . . . . . . . 76
SetupAM . . . . . . . . . . . . . . . . . . . . . . . . . . . . . . . . . . . . 23FM . . . . . . . . . . . . . . . . . . . . . . . . . . . . . . . . . . . . 23
Short messages (SMS) . . . . . . . . . . . . . . . . . . . . . . 61Show clock . . . . . . . . . . . . . . . . . . . . . . . . . . . . . . . 75Slider . . . . . . . . . . . . . . . . . . . . . . . . . . . . . . . . . . . . 11Slide (screen) . . . . . . . . . . . . . . . . . . . . . . . . . . . . . 11SMS . . . . . . . . . . . . . . . . . . . . . . . . . . . . . . . . . . . . . 61Sound distribution (Balance and Fader) . . . . . . . . 76Sound settings (bass and treble) . . . . . . . . . . . . . 76Sound suppression . . . . . . . . . . . . . . . . . . . . . . . . . 9Sound suppression (mute) . . . . . . . . . . . . . . . . . . . 9Special features
displays . . . . . . . . . . . . . . . . . . . . . . . . . . . . . . . . 12lowering the volume . . . . . . . . . . . . . . . . . . . . . . . 8store station logos . . . . . . . . . . . . . . . . . . . . . . . 20
Speed-dependent volume . . . . . . . . . . . . . . . . . . . 76Split screen
NAV (navigation) . . . . . . . . . . . . . . . . . . . . . . . . . 43Station
select . . . . . . . . . . . . . . . . . . . . . . . . . . . . . . . . . . 21setting a station name . . . . . . . . . . . . . . . . . . . . 18store . . . . . . . . . . . . . . . . . . . . . . . . . . . . . . . . . . 21tune . . . . . . . . . . . . . . . . . . . . . . . . . . . . . . . . . . . 21
Station logosstore . . . . . . . . . . . . . . . . . . . . . . . . . . . . . . . . . . 20store automatically . . . . . . . . . . . . . . . . . . . . . . . 20
Station names . . . . . . . . . . . . . . . . . . . . . . . . . . . . 18Stations
SCAN function . . . . . . . . . . . . . . . . . . . . . . . . . . . 22Station search . . . . . . . . . . . . . . . . . . . . . . . . . . . . 22Station tracking . . . . . . . . . . . . . . . . . . . . . . . . . . . 18Switch off . . . . . . . . . . . . . . . . . . . . . . . . . . . . . . . . . 9Switch on . . . . . . . . . . . . . . . . . . . . . . . . . . . . . . . . . 9
82

Index
TText entry . . . . . . . . . . . . . . . . . . . . . . . . . . . . . . . . 11Things to note
AUX mode . . . . . . . . . . . . . . . . . . . . . . . . . . . . . . 34TMCpro traffic reports . . . . . . . . . . . . . . . . . . . . . . 45TMC traffic reports . . . . . . . . . . . . . . . . . . . . . . . . . 45TP (traffic news)
activate and deactivate . . . . . . . . . . . . . . . . . . . 22EON . . . . . . . . . . . . . . . . . . . . . . . . . . . . . . . . . . . 22
TP (Traffic programme)traffic announcement (INFO) . . . . . . . . . . . . . . . 22
Track list . . . . . . . . . . . . . . . . . . . . . . . . . . . . . . . . . 30Traffic announcement (INFO) . . . . . . . . . . . . . . . . . 22Traffic news
see: TP (traffic news) . . . . . . . . . . . . . . . . . . . . . 22Traffic reports . . . . . . . . . . . . . . . . . . . . . . . . . . . . . 45
online . . . . . . . . . . . . . . . . . . . . . . . . . . . . . . . . . 45on the map . . . . . . . . . . . . . . . . . . . . . . . . . . . . . 45symbols . . . . . . . . . . . . . . . . . . . . . . . . . . . . . . . . 45TMC/TMCpro . . . . . . . . . . . . . . . . . . . . . . . . . . . . 45
Traffic sign recognition . . . . . . . . . . . . . . . . . . . . . 47
UUnit buttons . . . . . . . . . . . . . . . . . . . . . . . . . . . . . . . 9Unit buttons overview . . . . . . . . . . . . . . . . . . . . . . . 4Unit overview . . . . . . . . . . . . . . . . . . . . . . . . . . . . . . 4USB
connect an external data storage device . . . . . 33disconnect . . . . . . . . . . . . . . . . . . . . . . . . . . . . . 33error messages . . . . . . . . . . . . . . . . . . . . . . . . . . 33faults . . . . . . . . . . . . . . . . . . . . . . . . . . . . . . . . . . 33select . . . . . . . . . . . . . . . . . . . . . . . . . . . . . . . . . . 29unreadable . . . . . . . . . . . . . . . . . . . . . . . . . . . . . 33
USB port iPad management . . . . . . . . . . . . . . . . . . . . . . . 33iPhone management . . . . . . . . . . . . . . . . . . . . . 33
USB portiPod management . . . . . . . . . . . . . . . . . . . . . . . 33
Usecheck boxes . . . . . . . . . . . . . . . . . . . . . . . . . . . . 10
User profilesettings . . . . . . . . . . . . . . . . . . . . . . . . . . . . . . . . 63
VvCards
importing . . . . . . . . . . . . . . . . . . . . . . . . . . . . . . 46Vehicle Menu . . . . . . . . . . . . . . . . . . . . . . . . . . . . . 50View
NAV (navigation) . . . . . . . . . . . . . . . . . . . . . . . . . 43Virtual buttons
see: Function buttons . . . . . . . . . . . . . . . . . . . . . 10Voice control . . . . . . . . . . . . . . . . . . . . . . . . . . . . . . 13
languages available . . . . . . . . . . . . . . . . . . . . . . 13Volume
announcements . . . . . . . . . . . . . . . . . . . . . . . . . 76base volume . . . . . . . . . . . . . . . . . . . . . . . . . . . . . 9change . . . . . . . . . . . . . . . . . . . . . . . . . . . . . . . . . 9set for external audio sources . . . . . . . . . . . . . . 76speed-dependent volume adjustment (GALA) . 76
Volume distribution (Balance and Fader) . . . . . . . 76
WWaiting time . . . . . . . . . . . . . . . . . . . . . . . . . . . . . . . 9Wireless Charger . . . . . . . . . . . . . . . . . . . . . . . . . . 64Wireless charging . . . . . . . . . . . . . . . . . . . . . . . . . . 64
83


SEAT S.A. is permanently concerned about continuous development of its types and models. For this reason we ask you to under-stand, that at any given time, changes regarding shape, equipment and technique may take place on the car delivered. For this reason no right at all may derive based on the data, drawings and descriptions in this current handbook.
All texts, illustrations and standards in this handbook are based on the status of information at the time of printing. Except for error or omission, the information included in the current handbook is valid as of the date of closing print.
Re-printing, copying or translating, whether total or partial is not allowed unless SEAT allows it in written form.
SEAT reserves all rights in accordance with the “Copyright” Act.
All rights on changes are reserved.
❀ This paper has been manufactured using bleached non-chlorine cellulose.
© SEAT S.A. - Reprint: 15.11.17
About this manual
This manual contains information, recommen-dations, advice and warnings related to your radio system. The other publications in the vehicle documentation contain further infor-mation of which you should be aware for your own safety and for that of your passengers.
Ensure that the onboard documentation is kept in the vehicle at all times. This is espe-cially important when lending or selling the vehicle to another person.
This manual contains a description of the equipment supplied with the vehicle at the time of press. Some of the units described herein will not be available until a later date or is only available in certain markets.
The illustrations are intended as a general guide and may vary from the equipment fitted in your vehicle in some details.
The screen colour and the colour of the infor-mation displayed on it can vary according to vehicle model.
Directions and positions of components (e.g. right, left, front, rear) are always relative to the direction of travel of the vehicle unless other-wise stated.
The audiovisual material only is intended to help users to understand certain car function-alities better. It does not replace the instruc-tion manual. Please use the instruction manu-al to obtain more comprehensive information and indications.
The equipment marked with an aster-isk* is fitted as standard only in certain versions, and is only supplied as op-tional extras for some versions, or are only offered in certain countries.
® All registered marks are indicated with ®. Although the copyright symbol does not appear, it is a copyrighted mark.
>> The section is continued on the follow-ing page.
WARNING
Texts preceded by this symbol contain infor-mation on safety. They warn you about possi-ble dangers of accident or injury.
CAUTION
Texts with this symbol draw your attention to potential sources of damage to your vehicle.
For the sake of the environment
Texts preceded by this symbol contain rele-vant information concerning environmental protection.
Note
Texts preceded by this symbol contain additio-nal information.

MEDIA SYSTEM PLUSNAVI SYSTEM
ARONA | IBIZAOwner’s manual
6F0012720DB
Ingl
és 6
F001
2720
DB
(11
.17)