masker with poser5 tutorial
DESCRIPTION
Step by step tutorial for "MASKER 1.0 for V3/M3".TRANSCRIPT

MASKERwith Poser5Tutorial
User Guide

1. Double click on Masker 1.0 icon on your Desktop or select “Start/Programs/ZEW Programs/ZEW Masker 1.0/Masker 1.0” from your Start menu.
2. Select Render -> Options from main menu.
3. Select Auto Search button to specify Poser5 path location automaticly.
2
MASKER with Poser5 Tutorial
1. Step by step tutorial
2
3

4. Select path to Poser5 from the list.
5. Select OK button.
6. If you see below seting select OK button.
7. Now you may add masks to your project. You may mix all masks from MASKER Library.
3
4
5
6

4
8. Select Auto Search button, from skin preview window, to find Unimesh head skin texture for background.
9. Select Unimesh head skin texture from the list.
10. Select OK button.
8
9
10
MASKER with Poser5 Tutorial

11. Select RENDER button. Now will be created MAT file in Poser5.
11. Open Poser5 with installed DAZ Victoria3.
5
11

6
12. Load Victoria3 from Poser5 Figures library.
13. This model is loaded without skin texture, so you need to first add skin texture to Victoria3 figure.
13
12
MASKER with Poser5 Tutorial
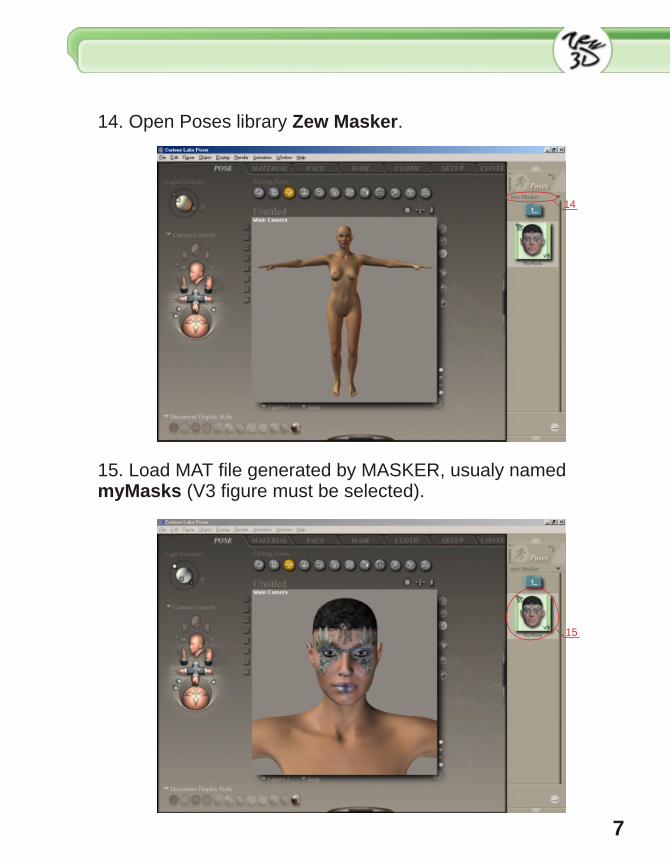
14. Open Poses library Zew Masker.
15. Load MAT file generated by MASKER, usualy named myMasks (V3 figure must be selected).
7
15
14

8
16. Now Victoria is ready for posing and render.
MASKER with Poser5 Tutorial