manual elaboración de engranaje
TRANSCRIPT
1
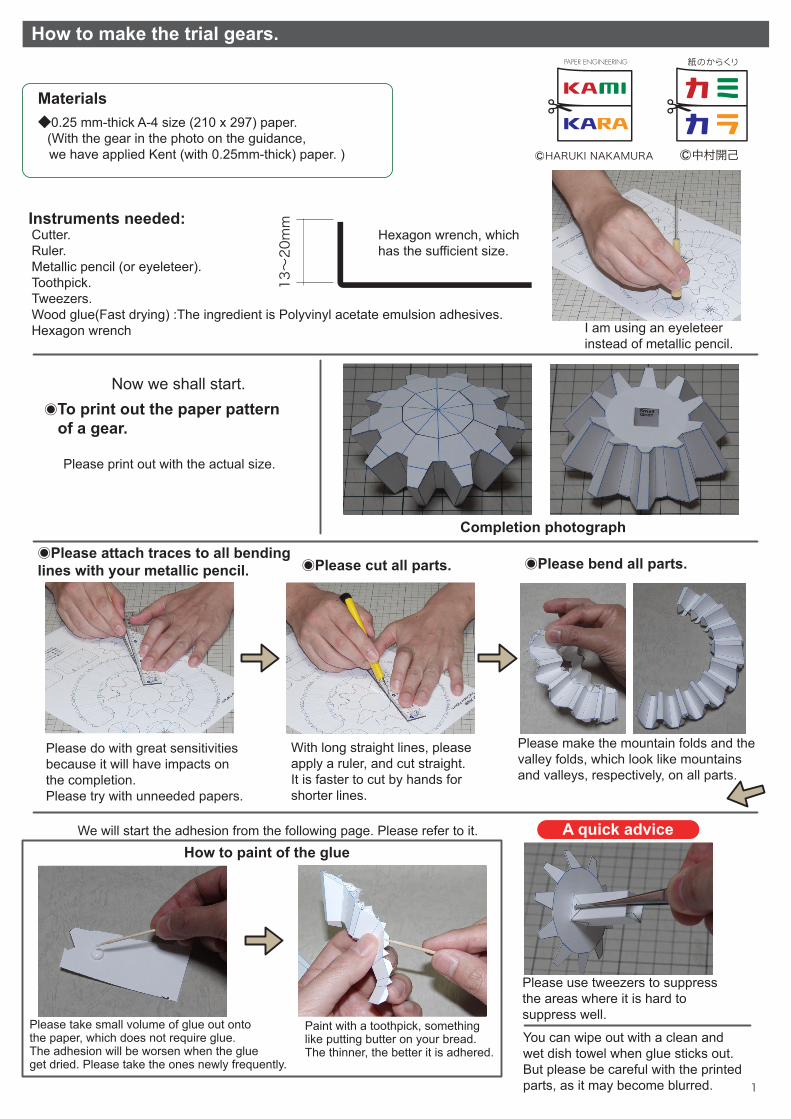
13~20mm
Cutter.Ruler.Metallic pencil (or eyeleteer).Toothpick.Tweezers.Wood glue(Fast drying) :The ingredient is Polyvinyl acetate emulsion adhesives.Hexagon wrench
◆0.25 mm-thick A-4 size (210 x 297) paper. (With the gear in the photo on the guidance, we have applied Kent (with 0.25mm-thick) paper. )
Materials
Instruments needed:
I am using an eyeleteerinstead of metallic pencil.
Hexagon wrench, whichhas the sufficient size.
Now we shall start. ◉To print out the paper pattern of a gear.
Please take small volume of glue out ontothe paper, which does not require glue. The adhesion will be worsen when the glueget dried. Please take the ones newly frequently.
Please do with great sensitivitiesbecause it will have impacts onthe completion. Please try with unneeded papers.
◉Please attach traces to all bendinglines with your metallic pencil.
With long straight lines, pleaseapply a ruler, and cut straight. It is faster to cut by hands forshorter lines.
◉Please cut all parts. ◉Please bend all parts.
Please make the mountain folds and thevalley folds, which look like mountainsand valleys, respectively, on all parts.
We will start the adhesion from the following page. Please refer to it.
How to paint of the glue
Paint with a toothpick, somethinglike putting butter on your bread. The thinner, the better it is adhered.
How to make the trial gears.
Please use tweezers to suppressthe areas where it is hard tosuppress well.
A quick advice
Please print out with the actual size.
Completion photograph
You can wipe out with a clean andwet dish towel when glue sticks out.But please be careful with the printedparts, as it may become blurred.

2
12
Paste the margin of the partwritten as Pi-1.
Paste the margin ’A’s one another. Please be careful with the position.
Please be careful with the position.Paste the margin written as Pi-2.Please note that this is a valley fold.
The area with ★on the backside.
Apply glue to the backside of it.
Apply glue to the backside of it.
First of all, paste the margin ‘S’. Then, apply the glue to all partsof the margin with ‘ ’ marks,and paste.
Fix with the side 1 precisely, andthen, fix with the side 2.
Paste the margin ’★’s one another.
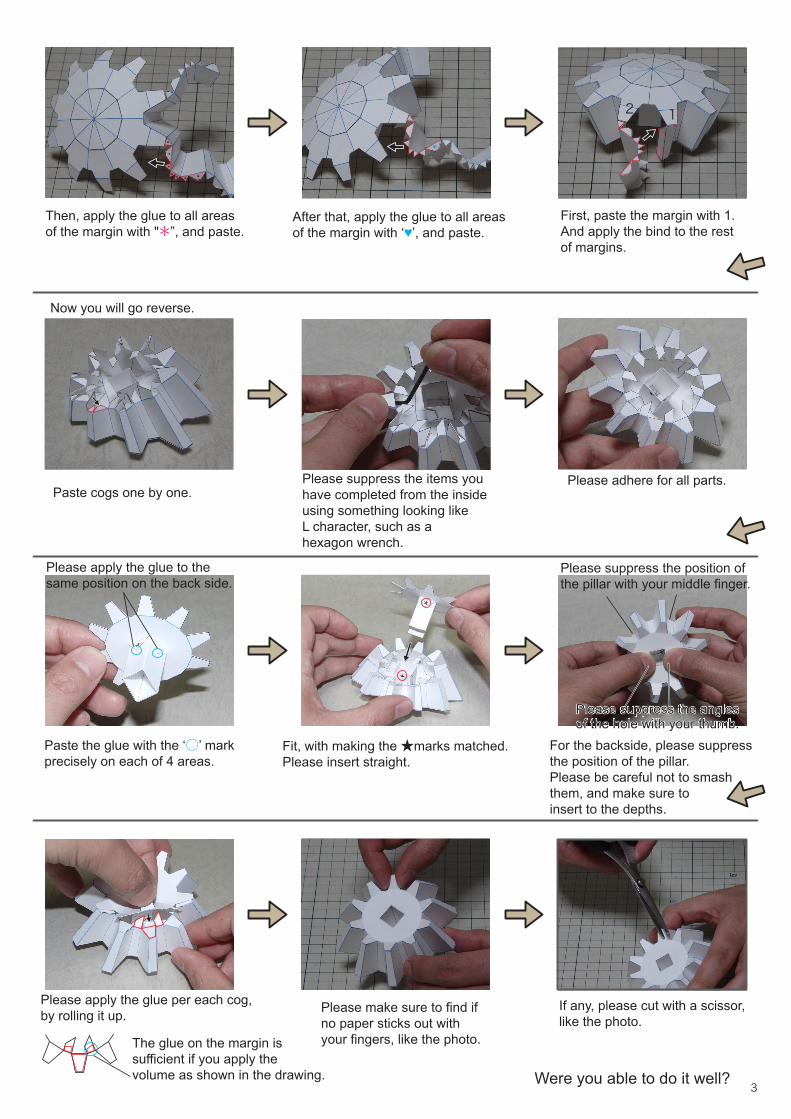
3
12
♥
Then, apply the glue to all areasof the margin with "*”, and paste.
After that, apply the glue to all areasof the margin with ‘♥’, and paste.
First, paste the margin with 1.And apply the bind to the restof margins.
Now you will go reverse.
Paste cogs one by one.Please suppress the items youhave completed from the insideusing something looking likeL character, such as ahexagon wrench.
Please apply the glue to thesame position on the back side.
Paste the glue with the ‘○’ markprecisely on each of 4 areas.
Please adhere for all parts.
Fit, with making the ★marks matched. Please insert straight.
For the backside, please suppressthe position of the pillar.Please be careful not to smashthem, and make sure toinsert to the depths.
Please suppress the position ofthe pillar with your middle finger.
Please suppress the anglesof the hole with your thumb.Please suppress the anglesof the hole with your thumb.
If any, please cut with a scissor, like the photo.
Please make sure to find ifno paper sticks out withyour fingers, like the photo. The glue on the margin is
sufficient if you apply thevolume as shown in the drawing.
Please apply the glue per each cog, by rolling it up.
Were you able to do it well?