maat • drmeter mkii — user manual
TRANSCRIPT

DRMeter MkIIUser Manual
MAAT Inc.

MAAT Incorporated
101 Cooper St
Santa Cruz CA 95060 USA
More unique and essential tools and tips at:www.maat.digital

Table of Contents
Installation & Setup ................................................................................. 7
Licensing .................................................................................................................................... 7
Online Activation .........................................................................................................................................................................8
Offline Activation ........................................................................................................................................................................8
Quick Start ............................................................................................ 10
Introduction .......................................................................................... 10
Another Metering Tool? .......................................................................................................... 10
The Evolution of Metering ....................................................................... 12
Who Needs DR Metering These Days? .....................................................................................12
Evolution of DR ........................................................................................................................13
DR Basics .............................................................................................. 14
Pitfalls of DR measurement .....................................................................................................14
Interpreting DR measurements ...............................................................................................14
DRM2 Features ....................................................................................... 14
Main ....................................................................................................................................... t14
Unique Features ...................................................................................................................... 15
Additional Functions ............................................................................................................... 15
The Interface ......................................................................................... 16
Description of Functionality .................................................................... 17
[1] D–t button (Dynamic Mode) ...............................................................................................17
Mode 1 — DR ..............................................................................................................................................................................17
Mode 2 — PSR ............................................................................................................................................................................18
Mode 3 — LRA ............................................................................................................................................................................18
[1.1] Numeric Display .................................................................................................................................................................18
[1.2] D–MODE Bar Graph ..........................................................................................................................................................19
Friedemann´s User Tip #1 ........................................................................................................................................................ 20
[2] L-MODE button (Loudness Mode) ..................................................................................... 20
[2.1] Numeric Loudness Displays ............................................................................................................................................21
[2.1] L–MODE Bar Graphs ......................................................................................................................................................... 22
[2.2 & 2.3] Display Thresholds (Back Panel) ......................................................................................................................... 22
Friedemann´s User Tip #2 ........................................................................................................................................................ 23
[3] Integrated DRi & LUi/LUFSi ................................................................................................ 23
Friedemann’s User Tip #3 ........................................................................................................................................................ 23
[3.1] Play/Pause ...........................................................................................................................................................................24
[3.2] Auto Mode ..........................................................................................................................................................................24
Integrated Measurements ...................................................................................................... 25
[3.3] Gate ..................................................................................................................................................................................... 25
Friedemann’s User Tip #4 — for Advertising Clients ........................................................................................................ 26
[3.4] Gate Enable (Back Panel) ................................................................................................................................................ 26
[3.5] DR ........................................................................................................................................................................................ 26
[4] True Peak ............................................................................................................................ 27
True Peak Numeric Display ..................................................................................................................................................... 28
True Peak Bar Graph ................................................................................................................................................................. 28
Limiters ....................................................................................................................................................................................... 29
[4.1] True Peak Enable (Back Panel) ....................................................................................................................................... 29
[5] True Peak Threshold .......................................................................................................... 29
[6] 0 LU/Target Loudness ........................................................................................................ 29
[6.1] Relative Scale .................................................................................................................................................................... 30
[6.2] Absolute and Relative Switch (Back Panel) ................................................................................................................ 30
[6.1 & 6.2] Absolute Versus Relative ...................................................................................................................................... 30
[6.3] Relative Scale +9 & +18 ....................................................................................................................................................31
[7] -18 ㏈FS Reference ............................................................................................................. 32

Page 5 of 55
[8] LINK .................................................................................................................................... 33
[9] RESET .................................................................................................................................. 33
[10] Digital Silence .................................................................................................................. 33
[11] AAC .................................................................................................................................... 33
[12] Dynamic Deviation ........................................................................................................... 34
Dynamic Deviation Examples .................................................................................................................................................37
More about Dynamic Deviation .............................................................................................................................................37
Drag & Drop with DRO2 .......................................................................................................... 38
Native Standalone Version ....................................................................... 39
In Use ....................................................................................................................................... 39
Back Panel Setup ................................................................................... 40
[13] Back Panel ........................................................................................................................ 40
[14] Scale Range ...................................................................................................................... 40
[15] UI Size ............................................................................................................................... 40
[16] Tool Tips ........................................................................................................................... 40
[17] Horizontal/Vertical Mode ................................................................................................ 40
[18] Preset Management ......................................................................................................... 40
Preset Files ..................................................................................................................................................................................41
[19] Info Tab ............................................................................................................................. 41
LUFS/LKFS terminology .......................................................................................................... 41
Specifications ........................................................................................ 41
System Requirements ............................................................................................................. 42
Supported Platforms ............................................................................................................... 42
Supported Sample Rates......................................................................................................... 42
Supported Hosts ..................................................................................................................... 42
Updates ................................................................................................ 42

Page 6 of 55
Support ................................................................................................ 42
License Central ........................................................................................................................ 42
In Use ............................................................................................................................................................................................43
Controls ........................................................................................................................................................................................43
Preferences ................................................................................................................................................................................. 44
Share The Love ....................................................................................... 44
Credits .................................................................................................. 45
Appendix 1 — GPLs ................................................................................ 47
About This Manual ................................................................................. 55

Page 7 of 55
Installation & Setup
When preparing for installation of your MAAT DRMeter MkII and DRMeter MkII Standalone, we recommend that you quit all applica-tions prior to proceeding. Also, after downloading the installer and pri-or to installation, let any anti–malware measures you may have running scan the installer. Then, temporarily disable all anti–malware measures once scanning is complete.
To install, simply double click on the downloaded Installer for your particular operating system. The installation process will guide you through the install procedure. If you have an older OS version, restart-ing your host may be required. Don’t forget to reënable anti–malware measures or simply restart your host.
LicensingMAAT software is licensed through our dongle–free, cloud–based license control framework. If your hosts are net–connected, our licenses “float,” making it easy to move from one machine to another. All you have to do is close all MAAT stuff on one machine before you open anything on another. If you’re going to use the laptop in an environment where Internet is spotty or non–existent, you can also go offline tempo-rarily for up to 30 days.
To license your MAAT purchase, open yours or instantiate an example in your preferred plug–in host. When licensing, we recommend you open a new session in your DAW just for this purpose.
Figure 1: The initial Activation dialog
Page 8 of 55
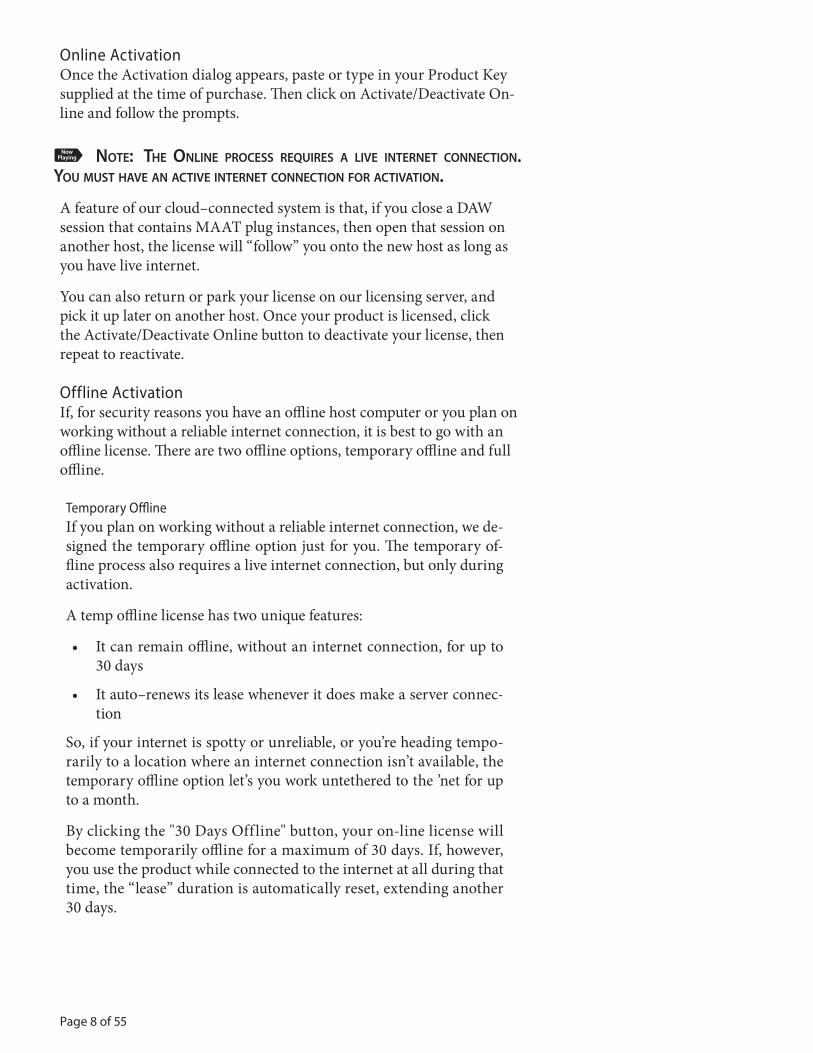
Online ActivationOnce the Activation dialog appears, paste or type in your Product Key supplied at the time of purchase. Then click on Activate/Deactivate On-line and follow the prompts.
࿏ Note: the oNliNe process requires a live iNterNet coNNectioN. You must have aN active iNterNet coNNectioN for activatioN.
A feature of our cloud–connected system is that, if you close a DAW session that contains MAAT plug instances, then open that session on another host, the license will “follow” you onto the new host as long as you have live internet.
You can also return or park your license on our licensing server, and pick it up later on another host. Once your product is licensed, click the Activate/Deactivate Online button to deactivate your license, then repeat to reactivate.
Offline ActivationIf, for security reasons you have an offline host computer or you plan on working without a reliable internet connection, it is best to go with an offline license. There are two offline options, temporary offline and full offline.
Temporary OfflineIf you plan on working without a reliable internet connection, we de-signed the temporary offline option just for you. The temporary of-fline process also requires a live internet connection, but only during activation.
A temp offline license has two unique features:
• It can remain offline, without an internet connection, for up to 30 days
• It auto–renews its lease whenever it does make a server connec-tion
So, if your internet is spotty or unreliable, or you’re heading tempo-rarily to a location where an internet connection isn’t available, the temporary offline option let’s you work untethered to the ’net for up to a month.
By clicking the "30 Days Off line" button, your on-line license will become temporarily offline for a maximum of 30 days. If, however, you use the product while connected to the internet at all during that time, the “lease” duration is automatically reset, extending another 30 days.

Page 9 of 55
Figure 2: The 30 Days Offline activation option
Full OfflineThis will license your MAAT product without the need to periodi-cally contact our licensing server. If you anticipate working without the internet for more than a month at a time or, for security purposes, your studio machine is “air gapped” and has no internet, take a mo-ment to surrender your on-line license, and replace it with an offline version.
Note: A full off line license does need to be explicitly re-newed once a year.
To prepare for offline activation, you will need:
1. Your Product Key!
2. Some method to move your License Confirmation file to the offline host machine.
That latter requirement can be accomplished in any number of ways, but a USB flash drive is often readily available and most conve-nient. You will also need your Product Key that was supplied to you via e–mail when you purchased your MAAT product.

Page 10 of 55
The offline activation process starts with generating a License Re-quest, with a “maatr” file extension, which is submitted on–line to our server or via e–mail to MAAT Support <[email protected]>. A License Confirmation file, with a “maatc” extension, will be returned to you, which will activate your product.
To proceed, click on the Activate/Deactivate Offline button, and fol-low the prompts.
In a year’s time, 365 days from the date the maatr file is created, a full offline license must be renewed using the same maatr/maatc method.
Quick Start
A Quick Start guide is installed in the same directory as this user manu-al. An on-line version is also available for viewing as you learn your way around DRM2 or as a reference while working.
https://www.maat.digital/support/#manuals
Introduction
It’s been a long journey to bring this second generation DR Dynamic Range meter to life. We’ve done a lot of research and development in order to create an intuitive and useful multi–measurement tool. DRMe-ter MkII fills a gap in the landscape of modern audio metering, exceed-ing current metering solutions with practical audio visualization and parameters.
DRMeter MkII is the big brother of the DRMeter. In turn, DRMeter is the successor of the original TT Dynamic Range Meter. Offering all modern mandated metering standards, DRM2 is compliant with BS.1770, A/85 and R 128, making it your unique metering tool for most all scenarios, from music, drama, commercials and spoken word to post and broadcast.
DRMeter MkII is the first Loudness meter designed for general use and specifically for music production. It’s the only meter that displays chan-nel–specific Loudness trends and events by augmenting the mandated joint measurement with classic L/R metering. DRMeter MkII is also the first plug–in to offer official integrated DRi dynamic range measure-ments!
With this product, MAAT also premiers the Dynamic Deviation™ func-tion, an intuitive approach to comparing current dynamic density to Target Loudness. DRM2 is also the first Loudness meter to display both Relative and Absolute scales simultaneously.
Another Metering Tool?Do we really need yet another metering tool? Here are five good reasons:

Page 11 of 55
1. It’s the first and only EBU R 128–compliant Loudness Meter with fully integrated DR, our well respected real time, esti-mated DR bar graph. We have also incorporated an integrat-ed DR algorithm, so you can measure official DRi values while mixing or mastering.
2. Modern mastering comes with the challenge of leveling for mul-tiple audio distribution platforms, each with different Loudness normalization standards. DRMeter MkII makes it easy for you to adjust Loudness regardless of delivery method or platform. This includes a convenient integrated AAC function, which al-lows you to meter and monitor “round trip” through an iTunes–like codec at the push of a button.
3. With DRM2, you can monitor Short–term or Momentary Loud-ness per channel while seeing the R128–compliant average val-ue as well. Other Loudness meters measure just a single Short–term and Momentary Loudness value representing both left and right channels for a good reason; ease of interchangeability, es-pecially for multichannel programs. The huge disadvantage of this approach is that the user misses the visualization of energy distribution between left and right channel as we all are used to seeing with old skool “stereo” meters.
4. DRM2 is a highly comprehensive and intuitive design. Easier to interpret, this makes DRMeter MkII the ideal tool to grasp an inclusive concept of mandated BS. 1770–based metering.
5. In the tradition of the DRMeter, we deliver optimum ballistics and low fatigue visuals tightly coupled to perceived audio. We have reduced the UI (user interface) complexity so you can re-ally focus on the important stuff without being distracted by tons of gratuitous visual bling.
We are grateful for the broad acceptance and appreciation of our aim to support higher fidelity and conscientious use of dynamics modification. Thank you for your support and keep at it for a more dynamic and vital musical listening experience. In a world of slowly fading Loudness Wars, unfortunately there are still too many distorted and unpleasant music releases.
Please read on! We know, most manuals suck, but consider reading this tome as an important step to getting the best out of your purchase. Why? Because we’re sharing years of experience in the field of metering and psy-choacoustics with you. More importantly, metering works best in combi-nation with knowledgeable interpretation. You need to understand there are challenges to effective metering. Using the right metric in the right situation allows you to get the full benefit of interpretation based on your program material.

Page 12 of 55
If you are more of a visual learner, watch our videos! You’ll find them linked on the product page of our site. To follow the manual, install the plug–in first so you can check each functions as you read. We also recom-mend printing out or opening the Quick Start guide so you can see all the functions and related numbers at a glance. Don’t forget to have fun with this tool!
— Friedemann Tischmeyer, along with the MAAT& Pleasurize Music Foundation teams
The Evolution of Metering
Since the invention of the initial DR meter, things have improved in the global audio metering marketplace. We now have world standards for True Peak, Loudness and Dynamic measurement, defined in ITU BS 1770 and applied in practice courtesy of the European Broadcasting Union’s R 128 and the Advanced Television Systems Committee’s A/85 standards. Though designed for broadcast audio, this has had a huge impact on the whole world of production and distribution, not only broadcasting. In fact, we now have reliable and predictable algorithms and parameters, interchangeable between studio facilities and countries.
It has brought “Loudness Normalization” into the world of global music distribution! That, in turn, has lead to the slow creeping death of the Loudness Wars. However, like all proper zombie hunters, we must re-main vigilant!
Throughout this manual, you’ll learn to deal with all basic parameters of the new world of metering, including Loudness Units, Short–term and Momentary Loudness, True Peak Level, and Loudness Range.
Who Needs DR Metering These Days?We had to ask ourselves, “Does the world really need the DRMeter anymore?” The clear answer is, as we to say in California, “Fer sure, dude!” Why? Because LRA or Loudness Range, as specified in BS.1770-4, aims to reflect the dynamics of broadband material being distributed by television broadcasters. The LRA algorithm excludes the top 5% of the dynamic band, which is uninteresting for broadcasters working with generous headroom. However, that same top 5% of the whole dynamic range capacity of a system is essential for music as that content happens almost exclusively in this upper 5% region. Integrated DR is the only algorithm for measuring the dynamic integrity of music releases.
Wait! During the last few years, you can find plenty of meters show-ing PLR or Peak–to–Loudness Ratio, the difference between Peak and Loudness values. Would PLR be a good alternative? Nope, because PLR reflects the Peak–to–Loudness Ratio all the time. If you have a song with an acoustic guitar intro and a very dynamic interlude, but with a chorus smashed against the ceiling, the PLR would show us a moderately high value due to the dynamic intro and interlude. This is solved with DRMe-ter MkII as you can actually measure the lack of dynamic range as you hear it.

Page 13 of 55
Do we need the DR value for Loudness normalization of music playlists? Nope, not anymore as an existing integrated Loudness metric, Program Loudness, is the proper algorithm of choice for that function. By “inte-grated,” we are using engineering shorthand for “integrated over time,” where the measurement duration extends over an entire program, from beginning to end. That may be 15 or 30 seconds for an advertisement, or 30 or 60 minutes for a whole show. Sometimes, Program Loudness is referred to as Integrated Loudness or LUi.
Spotify, YouTube, TIDAL, Pandora and many other streaming music platforms are working with Program Loudness, along with TV broad-casters worldwide plus an increasing number of traditional radio broad-casters and OTT or “Over–The–Top” streaming providers like Netflix and HBO. iTunes Music and iTunes Match use a proprietary algorithm which is pretty close to Integrated Loudness mentioned above. We really don’t need another player in the field of Loudness normalization, which brings us to our original subject; the DR Dynamic Range algorithm!
Evolution of DRFriedemann Tischmeyer, MAAT co–founder and creator of the Pleasur-ize Music Foundation, invented the DR system as a way of measuring and comparing dynamic density in pop recordings. This was during the height of the “Loudness Wars” that had started in the late 1970s when AM radio stations were striving to be perceptually louder than their competition. This “louder than everyone else” mentality eventually resulted in the life being crushed out of pop music.
The original TT Dynamic Range Meter was the first implementation of the DR algorithm. DR uses a different algorithm from “R128” or A/85, and is designed to provide meaningful measurement and comparison of pop music releases since they have suffered the most, dynamically speaking, from the Loudness Wars. Tischmeyer later became a mem-ber of the EBU’s ploud group that developed the R 128 standard. While R 128 was originally developed for the automatic control of subjective loudness for “interstitials,” usually advertisements, DR provides an repeatable, interchangeable, easy to understand integer number that rep-resents the dynamic density or amount of dynamic range compression applied to a clip, song or album.
DR has become a de facto standard in the industry. It is used by engi-neers, producers and audiophiles to better understand how much the dynamic range of popular music mixes are “crushed” with the use of dynamic range modification tools. The original TT DR also created a database representing the DR values for over 10,000 tracks and albums. The database is used for provenance and comparison purposes across the industry and by consumers.
Note that the DR algorithm is MAAT’s intellectual property, and we have never licensed another company to produce a DR product. Beware of bogus and inaccurate impostors!

Page 14 of 55
DR Basics
Pitfalls of DR measurementWhat are DR’s shortcomings? Basically, the problem is psychoacoustic. The simple fact is that the absence of transients in some acoustic per-formances will reflect a very low DR, despite not having compressed dynamic range or hard clipping. Let’s say we have a singer accompanied by a string ensemble playing legato notes. The singer is belting out loud legato notes and we will see almost zero dynamic as this kind of sound event is dense by nature. Plus, the absence of transients can’t create a space between peak and average loudness. Some audiophile music pro-ducers have complained about the inability of DRMeter to reflect this in a fair manner. Sorry, but DR was never intended to measure the dy-namic density of classical a capella music! It’s one of several genres that don’t lend themselves to meaningful metering. In fact, there simply is no completely universal and accurate algorithm available at present. Here’s the thing: any metering must be interpreted by a skilled user. With some “seat time” using DRMeter MkII, that skilled user will be you!
Interpreting DR measurementsThe aim of the DRMeter is to offer the best possible algorithm to display the dynamic integrity or dynamic density, with emphasis on main-stream pop and rock music. DR measurements are very precise with low values of DR, from DR2 to DR8, and gradually get more imprecise with increasing values due to psychoacoustic effects, physical laws and other factors. So, here’s our recommendation for metering interpretation:
• Given two mixes from the same genre, it’s highly likely that a DR10 example has more dynamics, lower dynamic density and less compression than a DR8 mix.
• Always judge DR values within a specific genre and the specific material you are measuring.
• With dance and similar genres, which typically have a limited amount of dynamic changes, an increase from DR4 to DR6 can be an insanely huge improvement. You would have a very hard time creating a DR14 EDM master, which wouldn’t make sense anyway, while a DR14 jazz master makes perfect sense.
• Depending on the genre and source material, a DR10 master can sound awesome in terms of dynamics, and sometimes it just isn’t appropriate to attempt a DR14 version.
DRM2 Features
Main• Measurements always run in the background, and all metrics
are stored until reset
Page 15 of 55
• DR: MAAT’s DR dynamic range standard
• D-MODE: DR, PSR, LRA
• L-MODE: RMS, Momentary Loudness, Short–term Loudness
• Integrated: DRi, LUi (Program Loudness)
• DRMeter MkII is highly configurable, with multiple metering modes visible simultaneously
• Plug–in and “Standalone” native versions included
Unique Features• DRMeter MkII is the first Loudness meter designed for general
use and specifically for music production.
• It’s the only Loudness meter that displays channel–specific trends and events by augmenting the mandated mono measurement with clas-sic L/R metering.
• DRMeter MkII is also the first plug–in to offer official DR, spe-cifically DRi, integrated dynamic range measurement like our DROffline utility!
• DRM2 premiers the Dynamic Deviation™ function, an intui-tive presentation of current dynamic density compared to Tar-get Loudness.
• DRM2 is also the first Loudness meter with DualVu™, display-ing both Relative and Absolute scales simultaneously.
Additional Functions• R 128–compliant True Peak measurement
• AAC mode measures and monitors signal through a round trip, iTunes–style AACplus encoding cycle
• Adjustable, user defined target Loudness
• Adjustable, user defined maximum True Peak Threshold
• Dynamic Deviation — the difference in LU needed to match user defined target Loudness
• LUFS/LU Mode, LU Mode with +9 and +18 scaling
• LINK mode — links left and right channel Dynamic Display together to show average of L+R
• Play and Pause control for integrated measurement
• 3 automatic modes for integrated measurement: AUTO ON, AUTO RESET OFF, AUTO OFF

Page 16 of 55
• Gate On/Off for downward compatibility
• Gate indicator — shows when the Gate is active for LU integrat-ed measurements
• RESET Button
• Minus infinity (-∞ ㏈) input indicators
• Alternative horizontal window mode [in future free update]
• Adjustable color thresholds for peak and Loudness bar graphs
• Factory & user presets
• optional -30dB zoom scale
• 5 different UI sizes for any display size
• TP disable option = SPPM or legacy Sample Peak Program Metering
• Includes DR2rt native standalone real time metering application
The Interface
DRMeter’s user interface (UI) may lack the eye candy associated with some products. For a pro user in a dimly lit room, who’s face is pointer toward a display all day, the UI is designed to convey maximum infor-mation with minimum visual fatigue.
Figure 2: DRMeter MkII’s user interface

Page 17 of 55
Figure 4: DRMeter MkII’s back panel & user preferences
An on–line version of the Quick Start guide, which you can view while reading, is available here. It includes keyed illustrations similar to fig-ures 1 and 2 above.
Description of Functionality
[1] D–t button (Dynamic Mode)D-MODE stands for "Dynamic Mode" and lets you toggle between these Dynamic and Loudness Range measurement algorithms, displayed in the broader center bar graph [1.2] and in the corresponding numeric field [1.1] above center bar graph in order of appearance:
D-MODE Numeric Field [1.1] Bar Graph [1.2]Mode 1. DR current values current valuesMode 2. PSR current values current values
Mode 3. LRA
cumulative values
current values
Mode 1 — DRDR-MODE shows the DR Dynamic Range value introduced by the Pleasurize Music Foundation with the TT Dynamic Range Meter in 2009. DRM2’s implementation officially aligns with the original DR standards.

Page 18 of 55
Mode 2 — PSRThe PSR Mode is complaint with the AES e-Brief 373, presented at the 143rd AES Convention in New York in October 2017. It shows the ratio between SPPM (Sample Peak) and Short-term Loudness (according to R128). As opposed to DR, PSR offers no complementary integrated option.
Mode 3 — LRAThe LRA or Loudness Range implementation of the DRMeter MkII is one of the most precise implementation you can find on the metering market and fulfills the EBU requirements with excellence. Note that LRA is cumulative by definition. If you measure a complete song you will always get 100% the same numeric results displayed [1.1] as you would get from a good offline LRA meter.
If you want to compare different readings you can toggle between the three D-MODES without disrupting measurement or resetting the val-ues, unless you:
a. stop and restart playback or
b. click on RESET [9]
[1.1] Numeric DisplayThe central numeric display toggles between:
1. current or approximate DR
2. current PSR (SPPM Peak–to–Short–term Loudness Ratio)
3. LRA (R128 Loudness Range)
Note that, by definition, LRA is cumulative.
The numeric D-MODE display [1.1], with one decimal place, shows current values of DR and PSR but not in LRA Mode. In LRA Mode 3, a summed average value for left and right channel is shown, according to the R128 standard. As mentioned above, the LRA algorithm is cu-mulative. Therefore the “CURRENT” label, under numeric display 1.1, disappears in LRA Mode 3.
In DR Mode 1 and PSR Mode 2, you can toggle between individual and average channel values by enabling LINK mode [8]. Being the current, ongoing DR value, it’s only an estimate of the actual DRi. For official DR values, always use either the DRi function [3] for the whole program. Better still, our DROffline and DROffline MkII utilities allow you to rapidly batch measure entire songs (files) or albums (directories). DROf-fline MkII is specifically designed to work as a companion to DRMeter MkII, with drag and drop integration.
The integer DRi is be measured all the time in the background and promoted to the integer DR value field [3.5] as soon you stop play-back. Keep in mind that only entire measured songs can display

Page 19 of 55
the official DR value. The integrated Mode [3] is independent of the D-MODE.
[1.2] D–MODE Bar GraphThe Bar Graph display changes according to the chosen D-MODE. If the LINK mode is inactivate, and you’re in Mode 1 (DR) or Mode 2 (PSR), you’ll see two bars, side by side, for the left and right channels respec-tively. In Mode 3 (LRA), as with the numeric display, you’re presented with one common bar graph representing a summed average value for left and right channel for the sake of compliance. In Mode 1 (DR), the Dynamic Range bar changes color from green, indicating reasonable dynamic density, through orange or medium density, to red or hyper–compressed dynamic density, as seen in previous versions of DRMeter.
The concept of the central bar graph is to give the user a right brain feel for the dynamics carried by program material, and was first introduced to the world of audio engineering by PMF and MAAT founder Friede-mann Tischmeyer. The DR bar graph is dedicated to giving the user an intuitive sense of the degree of dynamic processing through dynamic range reduction tools like compressors and limiters. The algorithm works with a modified Peak to RMS Loudness Ratio formula.
This is important to understand: Bear in mind that a strong legato forte voice, by its very nature, exhibits very low DR/PSR values, due of the absence of peaks contrasting overall loudness, even if its dynamic range has not been reduced. Likewise, a super distorted guitar also shows low DR/PSR values. Not to belabor the point (okay, we are going to any-way!), but meter reading requires knowledgeable and informed interpre-tation!
The PSR algorithm is an approach to standardize the commonplace crest factor metric. Many meters, with diverse and non–standard al-gorithms, are one the market. These non–compliant products increase confusion in the already complex world of audio metering. To shed some light in the darkness, let s delve into a bit of background on PLR or Peak to Loudness Ratio.
For quite some time, PLR was the term used to describe what today is presented as PSR. Lacking a definition of “peak,” the problem was one of standardization. When one says peak, do they mean sample peak (SPPM), True Peak (TP), or QPPM quasi–peak program metering? Equally confusing; what is the meaning of “loudness?” Is it RMS with or without a weighting filter, and with which not standardized formula is it calculated? Or, is it short-term or momentary Loudness? Time passed and confusion increased until the folks from the Broadcasting industry decided to standardize “Loudness,” defining it as the TP–to–integrat-ed Loudness Ratio. So, if everything works out well and you don t run into an outdated meter, you may find a PLR meter displaying the ratio between True Peak and integrated program Loudness as measured in LUFSi.
Page 20 of 55
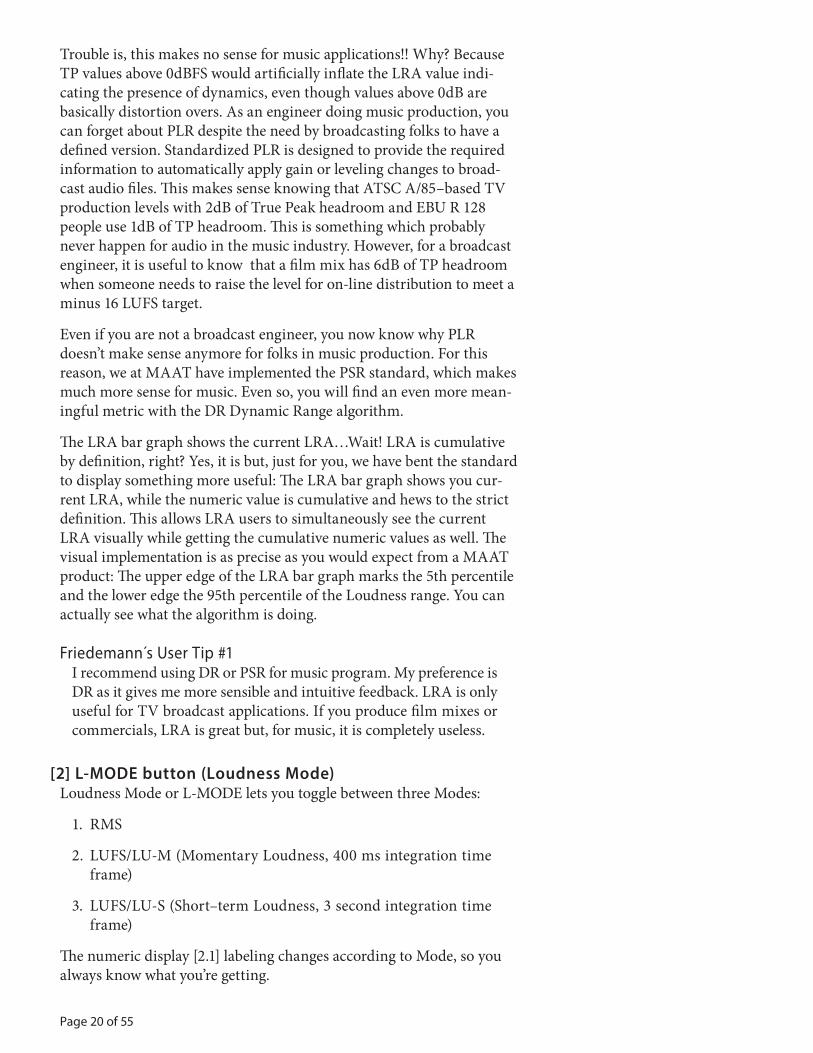
Trouble is, this makes no sense for music applications!! Why? Because TP values above 0dBFS would artificially inflate the LRA value indi-cating the presence of dynamics, even though values above 0dB are basically distortion overs. As an engineer doing music production, you can forget about PLR despite the need by broadcasting folks to have a defined version. Standardized PLR is designed to provide the required information to automatically apply gain or leveling changes to broad-cast audio files. This makes sense knowing that ATSC A/85–based TV production levels with 2dB of True Peak headroom and EBU R 128 people use 1dB of TP headroom. This is something which probably never happen for audio in the music industry. However, for a broadcast engineer, it is useful to know that a film mix has 6dB of TP headroom when someone needs to raise the level for on-line distribution to meet a minus 16 LUFS target.
Even if you are not a broadcast engineer, you now know why PLR doesn’t make sense anymore for folks in music production. For this reason, we at MAAT have implemented the PSR standard, which makes much more sense for music. Even so, you will find an even more mean-ingful metric with the DR Dynamic Range algorithm.
The LRA bar graph shows the current LRA…Wait! LRA is cumulative by definition, right? Yes, it is but, just for you, we have bent the standard to display something more useful: The LRA bar graph shows you cur-rent LRA, while the numeric value is cumulative and hews to the strict definition. This allows LRA users to simultaneously see the current LRA visually while getting the cumulative numeric values as well. The visual implementation is as precise as you would expect from a MAAT product: The upper edge of the LRA bar graph marks the 5th percentile and the lower edge the 95th percentile of the Loudness range. You can actually see what the algorithm is doing.
Friedemann´s User Tip #1I recommend using DR or PSR for music program. My preference is DR as it gives me more sensible and intuitive feedback. LRA is only useful for TV broadcast applications. If you produce film mixes or commercials, LRA is great but, for music, it is completely useless.
[2] L-MODE button (Loudness Mode)Loudness Mode or L-MODE lets you toggle between three Modes:
1. RMS
2. LUFS/LU-M (Momentary Loudness, 400 ms integration time frame)
3. LUFS/LU-S (Short–term Loudness, 3 second integration time frame)
The numeric display [2.1] labeling changes according to Mode, so you always know what you’re getting.
Page 21 of 55
RMS & Loudness Units
We’ve mentioned RMS several times…“RMS” measurements aren’t as universal as you may think. There is no standard, so you’ll find RMS meters with no weighting filters, with unique weighting filters, and even with different measurement algorithms, leading to deviations of up to 3 decibels. For that reason, the ITU has established the B.S. 1770-4 (revision 4) standard, for uniform interchange between studios and continents. This is basically the reason for the invention of the term LU or Loudness Unit. Actually, a 1 LU step size equals 1 ㏈. The reason for the new term is mainly to indicate that we are in the new world of Loud-ness metering. Notice, Loudness with a capital “L.” In this manual, we will use capital Loudness to indicate R128-related Loudness, while lower case loudness carries the old skool connotation.
When we talk about LU, everybody knows “Aha, it’s about B.S. 1770 or R 128 or A/85.” By the way, R 128 and A/85 both reference B.S. or Broadcast Standard 1770. R 128 and A/85 are the recommendation for putting 1770 into practice; R 128 for Europe and A/85 for the US and a lot of other countries. Basically, the aim of the new Loudness standard is to replace RMS with Short–term Loudness, Momentary Loudness, and Integrated Loudness. RMS is so yesterday, while LU is today and tomor-row!
The R 128 standard stipulates that LU is to be displayed as a single average value, regardless of whether you’re measuring a mono, stereo, or surround program. This is done for the sake of simplicity and ease of data interchange. This has its benefits but, in practice, this also causes a problem!
Audio engineers got used to seeing an RMS reading for each channel to monitor energy balance between left and right when working in stereo, or multiple channels when in surround. Yes, you could use a Balance Meter, like our free 2BusControl, or a goniometer like our MAATgo or free GŌN.
Engineers have gotten accustomed to individual channel readouts and, frankly, it’s useful for identifying trends and problem spots. For this reason, DRMeter MkII offers both: RMS, LUFS-M, and LUFS-S as a summed mono numeric value, with one measurement for both channels that conforms to the standard, and as independent numeric maximum values for LUFS-M and LUFS-S. This allows you to make a smooth transition from RMS to LU without changing your habits. You can also get a feel for the differences between the particular algorithms, and transfer years of experience with RMS into the world of LU. Plus, we let you stick to your habit of using individual channel bar graphs as indicators of left–right energy distribution. With DRM2, you can instantly see if your kick suddenly has a left emphasis due to a bogus plug–in setting, an unbalanced FX return or a bad calibrated piece of hardware inserted into the signal path.

Page 22 of 55
[2.1] Numeric Loudness DisplaysYou’ve got three numeric Loudness displays: The left for the left channel, the right for the right channel and the center one for the average of both channels, complying with R128 requirements and because it’s certainly useful. The units change according to the L-MODE chosen, and values are displayed with one decimal place.
This is what the numeric fields tell you:
L-MODE Left & Right Center 1 (RMS) current RMS current average of channels
(mono or L+R/2) 2 (Momentary) Max. Momentary current Momentary L+R/2 3 (Short–term) Max. Short–term current Short–term L+R/2
As soon you stop playback the R128-compliant maximum value (L+R/2) will be displayed in the center numeric field, because with no playback going on, you don t need the current value any more. The display label changes accordingly to avoid confusion. The displayed (L+R/2) max val-ue is 100% EBU compliant and can be reliably used for broadcast deliv-erables such as commercials and trailers, where max values are relevant.
On the back panel [6.2], you can toggle between absolute LUFS mea-surements and relative LU. The three numeric Loudness displays [2.1], LUFS or LU, as well as the integrated LUi/LUFSi display [3] change accordingly to your set choice. Keep in mind that relative (LU) values are always displayed relative to your set Target Loudness [6], hence the “relative” term. You can reset numeric Loudness values [2.1] by stopping and restarting playback or by clicking the global reset button [9].
[2.1] L–MODE Bar GraphsThe two wider inner bar graphs show Loudness values visually. All bar graphs are equipped with a hold function to allow smooth, eye–friendly meter readings.
[2.2 & 2.3] Display Thresholds (Back Panel)These defaults define the thresholds where color transitions occur for the L–MODE bar graphs.
[2.2] L-MODE 1 RMS sets the transition thresholds between red/yel-low and yellow/green for the RMS bar graph. The default for RMS is -8dB for red/yellow and -18dB for yellow/green. You can change these transition thresholds to your liking, though values cannot overlap. Overlapping causes yellow to disappear. Minus 18dB RMS for the green/yellow transition makes sense as it reminds you that this value equals 0VU in the analog domain, and is a sweet spot to hit your DAC when you insert analog gear into your signal processing chain.
[2.3] L-MODEs 2 & 3 allow you to set the color transition between red and yellow between -1 and -12 LUFS. Minus 8 is the default. The

Page 23 of 55
color transition between yellow and green is defined by the Target Loudness [6]. Therefore it is ghosted because it’s a mirror of the Tar-get Loudness [6] setting.
Friedemann´s User Tip #2The wealth of different information available with DRM2 makes it important to understand what you need in a particular situation. RMS is basically just available for educational purposes. You can compare it to Momentary and Short–term so you get a better sense of the new Loudness metering paradigm.
Momentary is basically designed for EBU broadcast engineers who are required to mix live TV with a maximum tolerance of +/- 1 LU relative to target Loudness. Therefore, they need a Loudness meter which reacts fast. Due to the shorter integration time window of 400 m,s it’s useful for those live broadcast applications. Producers who need to deliver commercials and trailers to TV broadcast sta-tions may need to read maximum values. Depending on the TV station’s specifications, it is most likely Max. Momentary, but some-times also Max. Short-term. Delivery standards vary from station to station.
Conclusion for music producing engineers: You can ignore Max. Mo-mentary and Max. Short–term stuff as well as Momentary Loudness in general. Simply focus on Short–term for your current Loudness estimation and for the sake of simplicity.
[3] Integrated DRi & LUi/LUFSiIndependent of your D–MODE or L-MODE of choice, you can toggle between two integrated measurements (DRi & LUi) by clicking on the small horizontal integrated bar somewhere on the center dynamic bar graph. Clicking on either “DRi” or “LUFSi/LUi” toggles between algo-rithms. Combining any of the D-MODES with an L-MODE of choice and one of the integrated MODES allows you to focus on the metrics you really need. Don’t worry about loosing your measurement as you switch, we always measure all metrics all the time in the background, so you can jump from one measurement method to another for compari-son.
Note again that the DRi/LUi Mode is independent of the D-MODE, which controls what is displayed on the center bar graph [1.2]. By com-bining DR on the center bar graph (D-MODE 1) and LUi metering, you can configure your meter for most production situations. The integer DR number will be displayed as a result of the DRi measurement in the background in field 3.5 as soon you stop playback, or when you are in LUi Mode.
Friedemann’s User Tip #3This is actually my favorite combination. By having D-MODE in DR Mode, I get the dynamic information I want and, by having in-tegrated MODE in LUi, I can see the deviation between Short–term

Page 24 of 55
Loudness on the bar graphs (L-MODE in Short–term) and integrat-ed Loudness. This combination is great for on-line distribution via YouTube, Spotify, Apple Music and the like. The more macro–dy-namics a song has, the more deviation appears between Short–term and integrated Loudness. So, this configuration shows me all this instantly. I know folks, metering is a beast but believe me, metering is like a language. If you speak metering fluently, this will have a positive impact on all areas of audio production. Even if you are more on the artistic engineering side, I encourage you to dig deeper into metering and look out for my upcoming tutorials on that topic. Learning to fluently speak “metering” empowers you in the same way learning a new language opens up a whole world of possibility.
࿏ Note: lui relative to target loudNess caN be toggled with lufsi, absolute to full scale, bY use of the lu/lufs switch [6.2] oN the back paNel.
[3.1] Play/PauseThe Play/Pause buttons are for integrated measurements; DRi & LUi. The Play and Pause controls tell you when DRi and LUi is currently measuring or is paused by lighting up accordingly. By default, they work in AUTO ON Mode [3.2], so that the Play [3.1] button lights steadily when you start playback, while the Pause button lights up when you stop playback, pausing measurement automatically. You can take control by clicking Pause manually during playback to stop measurement. Stop-ping the measurement by hitting Pause may help if you want to measure something which runs in a loop. In AUTO ON mode, the measurement starts and stops automatically and resets automatically with the next play starting from zero. A pulsing Play button indicates that Play is armed and “waiting” for playback to start.
[3.2] Auto ModeYou have three different AUTO MODE options:
1. AUTO ON (Default),
2. AUTO RESET OFF, and
3. AUTO OFF
The three different modes are set by clicking on the AUTO button’s label and cycling through the states. The displayed status represents the active state.
1. AUTO ON is the default: integrated metering starts automatically, stops automatically, and resets automatically with the next start.
2. AUTO RESET OFF will disable the automatic reset after pause, when you start playback again. As with AUTO ON, but without automatic reset so that you can continue metering after pausing playback. This is useful when you check longer content and want to continue measure-
Page 25 of 55
ment after pausing. Keep in mind that you need to reset manually by clicking the Reset button [9] to start a fresh metering cycle if desired.
3. AUTO OFF deactivates AUTO MODE almost completely, so that you are just measuring integrated values when you manually start playback. In AUTO OFF mode, the measurement pauses automatically when playback is stopped, but will not reset so that you can continue measure-ment. Integrated measurement starts when you click the Play button, and the meter will wait for a non–zero input to start metering as soon as signal is detected. You can stop measurement by either clicking the Pause button or simply stopping playback.
Integrated MeasurementsIf you want to take a precise DRi/LUi averaged measurement of a partic-ular program, song or A–to–B section, you have to reset the plug–in be-fore starting the measurement in case you are in AUTO RESET OFF or AUTO OFF mode. You can do that by clicking the global reset button.
࿏ Note: for 100% accurate aNd official dri or iNtegrated dr values as with our droffliNe utilitY, You must measure the whole pro-gram/soNg/album from start to eNd! this is also the case for 100% accurate lui measuremeNts as well.
[3.3] GateThe Gate indicator is applicable only in the LUi Mode, and indicates whether the R128 Gate is active or not. The Gate indicator has a deep implication, as two stacked gates are part of the R128 integrated Loud-ness measurement standard. The higher amplitude, relative Gate is set to -10 LU.
R128 GatesR128 specifies two gates as part of measurement. These gates has ab-solutely no effect on the audio signal! The aim of the Gates is to eliminate “background loudness events” for the purpose of better Loudness normalization results.
As with a noise gate, the collective R128 Gate removes lower ampli-tude audio that may skew integrated Loudness measurements. The gating temporarily pauses Loudness measurement when the signal falls below the threshold. Regarding the “two stacked gates” men-tioned above, in addition to the second, -10 relative Gate, R128 also includes a -70 LUFS Absolute Gate which is the first Gate stage and removes extremely low amplitude signals, like analog noise, from being included in the measurement before the second relative Gate is applied. You can learn more about this in upcoming tutorials on our site.
The Gate architecture is very complex, where there is no 100% clear threshold between the Gate On/Gate Off indicator. Rather, it’s a dy-

Page 26 of 55
namic transition between on and off states. We have decided to let the Gate indicate when even a single block is dropped or gated, which may have little impact on the overall measurement result. Only when the Gate indicator is constantly illuminated are all blocks dropped from integrated Loudness evaluation. This has a stronger effect on the integrated measurement, because fully gated sections are fully ex-cluded from integrated Loudness calculations.
When you compare the conservative Gate indicator of the DRM2 with Gate indicator of other Loudness meters, you may observe different behaviors. This is owing to the fact that the indicator is not standard-ized, and is a matter of interpretation by each plug–in designer.
Friedemann’s User Tip #4 — for Advertising ClientsFor those of you producing commercials for broadcast, winning the loudness wars might be something your clients requests. The trick is this:
Arrange your sound bed in a way that the Gate is barely off by rais-ing the level so that the Gate indicator just extinguishes. This “saves” Loudness for the show itself, where you can try to win the loudness battle by “banking” or saving your Loudness budget for very loud events. With this approach, your average meets 0 LU or -23 LUFS. When the Gate is off, you won’t collect “Loudness credits” because the Gated values are excluded from the integrated Loudness calcu-lation.
Fortunately, the EBU’s ploud group, the guys that built the R128 standard, introduced Maximum Momentary and Maximum Short–term Loudness for short form program, usually commercials, which allows a maximum of +3 LU Short–term Loudness (= -20 LUFS) and a maximum of +8 LU Momentary Loudness within your com-mercial as described in R128s1. Rules may vary from station to sta-tion but, in general, this avoids an outright loudness war between commercials and stations. By the way, we’ve specifically added the Max. Short–term and Max. Momentary measurements for those of you doing commercial work, so you’ll get the optimum control over these parameters.
[3.4] Gate Enable (Back Panel)Gated measurement can be disable in the user preferences. This is for completeness and downward compatibility , as some international re-gions only partially conform to R128 or A/85.
[3.5] DRAssuming you measure an entire track or album from top to tail, this will display the official, integer DR value.
DRi or integrated DR: The audio engineering world knows various terms for metering a particular segment or duration from A to B: It is called Program (Loudness), integrated, or cumulative. All terms de-

Page 27 of 55
scribe the same thing: The cumulative measurement of a time span of a source. If you measure a song from top to tail in this way, you’ll have the same “official” DR value as if you had measured the song with our DROffline utility.
We opted for the term “integrated” to give it a meaningful name, and to make the plug–in compatible when measuring the official DR value as measured from top to tail. If you print a song in real time, this feature makes sense. If you are done with the mastering and have no time left, it doesn’t make sense to measure a whole song in real time with the plug–in. For those situations, you’re faster doing a batch measurement with DROffline.
However, all integrated program measurements have one thing in com-mon: They get less responsive to actual changes the longer you measure. If you measure a 20 minute song in real time, the DRi display becomes less responsive the longer the meter runs. It adds value on top of value, and calculates a new total average all the time. You just need to be aware of that when you use the integrated Modes.
Conclusion: It’s useful for printing and when you want to get a reliable sense of the official, actual DRi value of your master during production.
[4] True PeakFirst, let’s start with some general information about the advantages of True Peak or TP measurement versus classical SPPM or Sample Peak Program measurement. In contrast to SPPM, TP will detect and display “inter-sample overs,” trains of samples that, when converted from the digital domain back into analog, may result in amplitudes in excess of a 0 ㏈FS sample and potentially an overload of the DAC’s output stage. Legacy DACs and many modern DACs will clip the output circuitry during an inter-sample over event, result in unintended distortion.
Figure 5: A True Peak example
The above illustration shows an intact waveform in the left channel, and a momentarily clipped right channel. With a properly designed DAC,

Page 28 of 55
this clip would be inaudible. In the real world, many consumer DACs would handle this event rather poorly.
Our CTO, Dr. Christoph Musialik, mentions that, “Normally, today’s digital reconstruction filters (also known as anti–image filters) have no problems with overs.” This assumes the designer doesn’t “go by the book” during design and testing, which is assuming a level of expertise that’s often missing from MI and pro audio hardware design. Musial-ik continues, “If a filter is correctly calculated and the input signal has been properly sampled or generated before, the DAC automatically handles intermediate values which can be much higher than the input samples. However, there’s an additional problem; the Gibbs Phenomena (ringing associated with the sampling process itself) which produces values slightly greater than 1.0 (full scale) and need to be compensated for by proper (internal) scaling.”
True Peak Numeric DisplayDRMeter MkII’s numeric display shows maximum TP values with 0.1 ㏈ resolution with an extended range to +3 ㏈. As mentioned previously, you can individually reset the numeric peak displays by clicking in any numeric field, or globally by using RESET.
If the input exceeds the user’s TP threshold setting, numeric values will appear in red. That visual warning indicator persists even if the input falls back below threshold. Any reset will return the numeric display to green. The user configurable threshold can be specified in the back pan-el setup menu [5.1] or just by dragging the TP handle [5]. Values in 0.1 increments are accepted, from -2 ㏈TP, conforming to A/85, up to 0.0 ㏈. -1 ㏈TP is the default value conforming to the R128 standard. This threshold is also the TP Threshold defining the top end of your Dynam-ic Margin™. For more information, see section [12] Dynamic Deviation below.
As with the rest of DRM2, we adhere to BS.1770, so True Peak uses 4x oversampling at the baseband rates of 44.1 and 48 kHz, and 2x over-sampling for 88.2 and 96 kHz. For 4x and 8x AES rates; 176.4, 192, 352.8 and 384 kHz, we pass the data through directly to the metering algo-rithm.
True Peak Bar GraphWhile the numeric display gives you the convenience of monitoring your maximum True Peak values, the bar graph continuously shows you what’s going on, letting you spot trends. The Peak Hold function of the bar graphs gives you a persistent display of where you are with your peaks. The bar graph’s tick marks, from 0 to +3, are red to indicate the amplitude may need your attention.
LimitersRemember, DRM2 is not a limiter, but it does tell you when to work on your limiter setup! It makes sense to set your limiter’s output ceiling ac-cording to the set TP Threshold of DRMeter MkII. Be aware that DRM2

Page 29 of 55
can show TP values higher than your set output ceiling, even for a high-class brick-wall limiter. This does NOT mean that something is wrong with the DRM2. It means that you’ve hit the limiter too hard, you need to work on the settings of the limiter or, go get another more reliable true peak limiter if required. For this reason, it s good to have a reliable meter like the DRM2 at hand.
As R128 requires indication of a single maximum True Peak value and we have decided to give you two individual peak meters for stereo, the DRMeter MkII highlights the higher peak value as soon playback stops so that your eye can catch the salient maximum True Peak according to R128 recommendations. As soon playback continues, the meter reverts to showing you channel–specific trends as usual.
[4.1] True Peak Enable (Back Panel)Though we recommend that you leave True Peak enabled, there may be cases where you need to reserve CPU capability. Disable True Peak to conserve your CPU’s capacity. For educational purpose, it’s useful to observe the different behaviors of TP versus SPPM metering.
[5] True Peak ThresholdThe True Peak Threshold display also acts as a “handle” or control, and is linked to the TP Threshold control [5.1] user preference on the back panel. Drag the handle to change the setting, or use the back panel field by clicking to open the drop down choice of available values.
[6] 0 LU/Target LoudnessThe Target Loudness hairline also acts as a handle or control, and is linked to the Target Loudness Threshold user preference [6] on the back panel. As with TP Threshold, drag the handle to change the setting or use the back panel field by clicking to open the drop down choice of available values.
As you would expect, the Target Loudness reference hairline changes according to the Target Level you’ve set, and the Relative Scale moves accordingly. When Target Level is set to -23 LUFS, you are in R128–compliant mode because -23 LUFS is R128’s mandated target Loudness. Broadcast engineers are happy to work within the “Loudness Normal-ization Paradigm” so that they have a comfortable amount of dynamic headroom when mixing for broadcast. For those of you in that group, in Europe specifically, this should be your orientation to meet target Loud-ness specs. American broadcast engineers will opt for a Target Loudness of -24 LUFS as mandated by A/85. In both settings, -23 LUFS for R128 and -24 LUFS for A/85, the green/yellow threshold for the Loudness bar graph is fixed to -23 or -24 LUFS, which equals 0 LU on the Relative Scale in the world of R128.
The Target Loudness control handle sets your Target Loudness accord-ing to the media for which you’re mixing or mastering. Have a look

Page 30 of 55
at our presets to learn more about target Loudness values for various deliver platforms.
Target Loudness defines the lower limit of your Dynamic Margin, the distance or scope between your Target Loudness and the maximum True Peak Threshold you’ve set. Your set Dynamic Margin is the refer-ence value for positive or negative deviations displayed in the Dynamic Deviation field.
[6.1] Relative ScaleFor your convenience, the yellow/golden Relative Scale is displayed all the time, independent from LU/LUFS Scale setting [6.2] on the back panel. The Relative Scale helps you to read deviations relative to your set Target Loudness.
[6.2] Absolute and Relative Switch (Back Panel)When you are in LUFS Mode [6.2], the white outside numbers to the left and right of the bar graphs are your reference because LU equals dB. LUFS is LU referring to Full Scale and is therefore called absolute scale. Switching to LU puts the meter in “Relative Mode,” which means that values deviating from your set target Loudness are displayed as positive or negative variance. The golden/yellow Relative Scale [6.1], inside of both Loudness bar graphs provides visual orientation. In Relative Mode, your target Loudness always equals 0. The Absolute/Relative Switch [6.2] affects how the integrated LUFS/LU values [3] and the three numeric Loudness fields on the bottom [2.1] are displayed.
࿏ Note: to reduce coNfusioN, the drmeter mkii alwaYs displaYs lu/lufs correctlY oN respective labels. we recommeNd usiNg the rela-tive scale to ease the traNsitioN iNto a target loudNess miNd set.
[6.1 & 6.2] Absolute Versus RelativeDoing the math in Absolute Mode, you’re always thinking in absolute terms referenced to full scale. When working in Relative Mode, you’re oriented more toward the way of Loudness normalization thinking because your relevant Loudness values will be displayed relative to your set Target Loudness.
If DRMeter MkII is set to LUFS on the back panel, the Program Loud-ness meter [3] will display values in LUFS referenced to full scale; an absolute measurement. If you set it to LU, you enter a relative measure-ment paradigm, causing Program Loudness to be displayed as a positive or negative deviation from your set Target Loudness.
Absolute vs Relative ExamplesTwo examples…Let’s say you’ve set your Target Loudness to -12 LUFS and LUi displays -1 (LU). This would tell you that you need one LU or one decibel more Loudness to match your Target Loudness. It also tells you that your current Program Loudness is -13 LUFS.

Page 31 of 55
Here’s another: When your LUi value shows +2.5, you know that You-Tube will dial down gain by 2.5 ㏈ to match their Loudness normaliza-tion standard. Again, bear in mind that you are required to measure a song from start to end to get valid results of the integrated LU met-rics!
LUFS/LU Versus LUFSi/LUi terminologyLUFS vs. LU always distinguishes between an absolute reference to full scale, or a relative reference to a Target Loudness. Integrated Loudness is usually labeled as “integrated” or “i”. You will also find many other labeling versions on different metering products, includ-ing EBU-I, integrated, int, i, I, Program Loudness, et cetera.
During your engineering work, it’s important to distinguish between Short–term LU-S and LUi. However, as soon you change the context and speak about the Loudness of a program or a song, one usual-ly talks about “LUFS.” You would say, “This song has minus (NN) LUFS.” When we do speak about LUFS in the context of a song or program, we always speak about Program Loudness or Integrated Loudness; your choice. This would never be a Short–term Loudness value, because Short–term Loudness is always used only during pro-duction, and doesn’t “escape” from your studio or control room. An-other way to think of this is that Short–term is just to see your current Loudness values in the studio as you craft content. As soon your song or commercial leaves the studio, and you speak about LUFS stuff, you’re really talking about integrated Program Loudness, as nobody uses Short–term Loudness to describe the overall Loudness of a pro-gram.
[6.3] Relative Scale +9 & +18For the sake of simplicity in the admittedly complex world of metering, we have reduced complexity as far as possible. As mentioned previously, by switching from LUFS to LU on the back panel, you enter the “fun world” of the new Loudness normalization paradigm. This is a change in mindset as you start to think, mix and master within the confines of Target Loudness instead of pushing everything against the ceiling. The EBU defines two relative scales or scale ranges, which should be visible on any compliant meter. They are called +9 and +18, and they define a positive deviation of +9 or +18 LU from Target Loudness.
With some available Loudness meters, even a +18 scale would be insuffi-cient if your meter is set to a Target Loudness of -23 LUFS and you were mastering Death Magnetic (Sorry Andy, but that product is a standout example). The problem is that even the +18 scale would not accommo-date that album’s Loudness.
Our R128–compatible metering concept is different from most others in that it’s more intuitive and translates easier from the old paradigm into the new world of Loudness metering. This is mainly because you see the whole spectrum from +3 ㏈ True Peak down to -48 ㏈/LU on the white absolute scale, outside of the peak bar graphs. It’s always present to give

Page 32 of 55
you an absolute reference. At the same time, you see the Relative Scale relative to the Absolute Scale and not detached from the Absolute Scale as it is the case for most Loudness meters on the market.
As the DRMeter MkII is designed to translate better to musical appli-cations than other Loudness meters, it allows you to define your own Target Loudness down to crazy low values such as -5 LUFS which, by the way, is not a recommended setting!
Setting a mindful Target Loudness should be the first step when work-ing with DRMeter MkII. For this reason, we picked +9 as the default rel-ative scale, though you can opt for +18 on the back panel. If your Target Loudness is smaller than the scale of choice, such as a Target Loudness of -8 LUFS, any overflowing or out of range numbers will not be visi-ble. The +18 Scale makes sense for Broadcasters with Target Loudness between -24 LUFS (ATSC) or -23 LUFS (EBU).
[7] -18 ㏈FS ReferenceIt’s not random that minus 18 ㏈ has this subtle visual green tick when L-MODE is set to RMS. When you are aware of proper gain staging during the recording processes and using outboard analog gear, you probably know that -18 ㏈RMS equals 0VU in the analog domain. When you setup a microphone, you may use this indication line for setting level, automatically gain staging different sources in a useful manner. If you use analog gear in mastering, it’s always good to hit your converter at the sweet spot where it sounds best. You can use this visual marker to recognize whether your signal is too quiet or hot, and adjust gain accordingly. Be aware that this assumes that your analog gear and DA/AD chain is calibrated.
Hugh Robjohns states in a Sound On Sound article: “The basic idea is to treat -18 ㏈FS as the equivalent of the 0VU mark on an analogue sys-tem’s meter, and that’s where the average signal level should hover most of the time.” The EBU (European Broadcasting Union) standard align-ment, officially called R68, specifies 0 ㏈u analog as equal to -18 ㏈FS for professional gear.
࿏ be aware that the greeN -18db rms tick mark refers to l-mode set to rms! if l-mode is set to short–term or momeNtarY loudNess, the greeN iNdicator is iNvisible to avoid additioNal distractioN.
Momentary and Short–term Loudness also translate to approximate-ly -18 LUFS equals 0VU, at least on a 1kHz sine. Lower frequency test tones vary due to the inherent K-Weighting filter applied to Momentary and Short–term Loudness measurements.
[8] LINKThe LINK button controls the visual presentation of the DR bar graph [1.2]. LINK combines the central left and right individual DR bar graphs into one summed graph so it’s less fatiguing to track visually. This also
Page 33 of 55
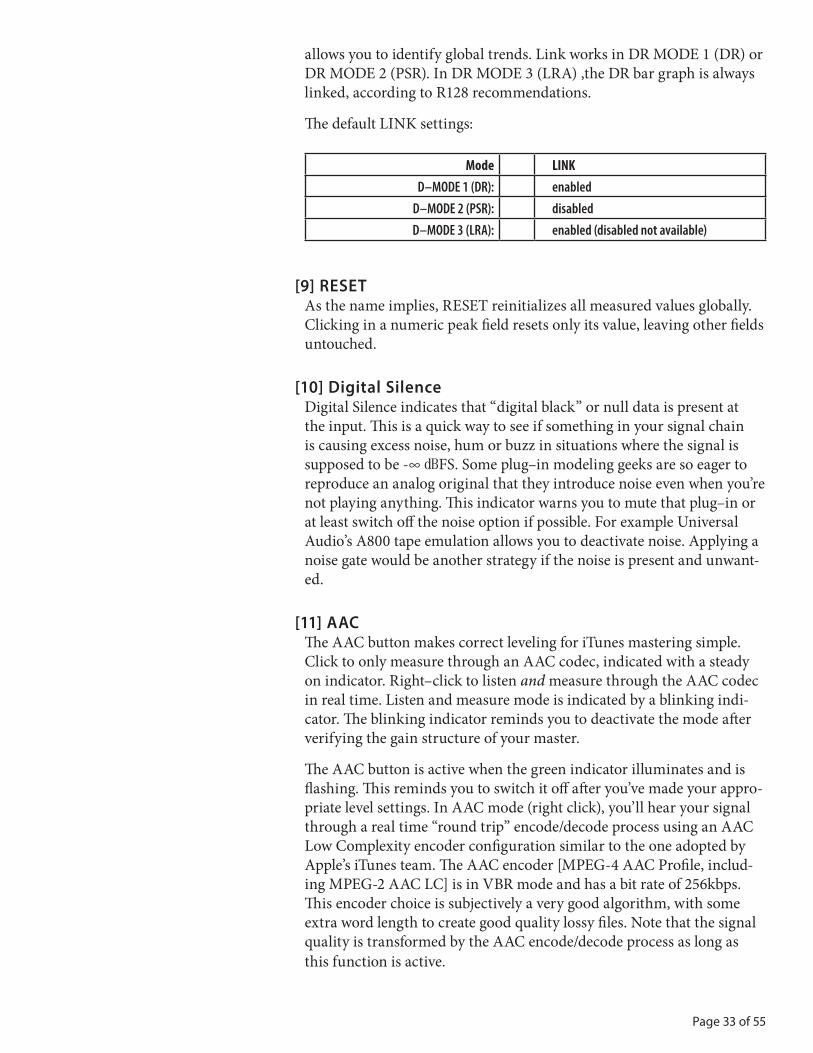
allows you to identify global trends. Link works in DR MODE 1 (DR) or DR MODE 2 (PSR). In DR MODE 3 (LRA) ,the DR bar graph is always linked, according to R128 recommendations.
The default LINK settings:
Mode LINKD–MODE 1 (DR): enabled
D–MODE 2 (PSR): disabledD–MODE 3 (LRA): enabled (disabled not available)
[9] RESETAs the name implies, RESET reinitializes all measured values globally. Clicking in a numeric peak field resets only its value, leaving other fields untouched.
[10] Digital SilenceDigital Silence indicates that “digital black” or null data is present at the input. This is a quick way to see if something in your signal chain is causing excess noise, hum or buzz in situations where the signal is supposed to be -∞ ㏈FS. Some plug–in modeling geeks are so eager to reproduce an analog original that they introduce noise even when you’re not playing anything. This indicator warns you to mute that plug–in or at least switch off the noise option if possible. For example Universal Audio’s A800 tape emulation allows you to deactivate noise. Applying a noise gate would be another strategy if the noise is present and unwant-ed.
[11] AACThe AAC button makes correct leveling for iTunes mastering simple. Click to only measure through an AAC codec, indicated with a steady on indicator. Right–click to listen and measure through the AAC codec in real time. Listen and measure mode is indicated by a blinking indi-cator. The blinking indicator reminds you to deactivate the mode after verifying the gain structure of your master.
The AAC button is active when the green indicator illuminates and is flashing. This reminds you to switch it off after you’ve made your appro-priate level settings. In AAC mode (right click), you’ll hear your signal through a real time “round trip” encode/decode process using an AAC Low Complexity encoder configuration similar to the one adopted by Apple’s iTunes team. The AAC encoder [MPEG-4 AAC Profile, includ-ing MPEG-2 AAC LC] is in VBR mode and has a bit rate of 256kbps. This encoder choice is subjectively a very good algorithm, with some extra word length to create good quality lossy files. Note that the signal quality is transformed by the AAC encode/decode process as long as this function is active.
Page 34 of 55
࿏ Note: due to limitatioN of the embedded sample rate coNverter, this fuNctioN works oNlY with 44.1 to 96 khz projects.
The AAC button grays out and bypasses any AAC processing at sam-ple frequencies higher than 96 kHz. Also note that iTunes–compliant masters are not allowed to show positive True Peak values anywhere in a song or album!
Due to the encoding algorithm, peak values in AAC mode will be increased, and will be reflected accordingly in TP Meter readings. This allows you to have 100% peak level control while producing iTunes–compatible LPCM masters.
iTunes–Specific Mastering AdviceA -0.5 ㏈TP threshold is recommended for general work as long as we live in the current insanely loudness–driven head space. Regarding iTunes mastering; to deliver compatible masters with exceptional sonic quality, activate the AAC button [11] and make sure to stay at least below -0.1 ㏈TP. If your source material has not been harmed by prior aggressive peak clipping, you’ll get great sounding, trans-parent results. For best iTunes and multi–format mastering, always go back to the most transparent source you can get in order to avoid damage to consecutive peak samples.
The AAC button is not designed to export AAC files, because the AAC delivery is a LPCM file in a specific format (CAF). The sole pur-pose is seamless leveling of iTunes masters within your workflow.
࿏ beware! remember that You must switch the aac buttoN off be-fore aNY reNderiNg!
࿏ lateNcY! for sample rates above 44.1khz, the aac fuNctioN iN-troduces a lateNcY due to the eNcodiNg/decodiNg rouNd trip aNd src calculatioNs. with aac off, drmeter mkii works with zero lateNcY.
[12] Dynamic DeviationThe DRMeter MkII allows you to navigate within the “gravitation field” between peak and Loudness normalization by setting a personal Target Loudness level and a True Peak Threshold, which is what quality-con-scious engineers must do as we transition from a Loudness War men-tality to mindful mastering practices. We’ll go into more detail about Target Loudness and True Peak Threshold settings later in this manual.
Dynamic Deviation shows you positive or negative differences relative to the Dynamic Margin™ which you have defined on the back panel or by setting TP Threshold [5] and target Loudness [6] via respective handles on the front UI. Dynamic Margin is bracketed by the True Peak Thresh-old at the top, and Target Loudness. Specifically, Dynamic Margin = Target Loudness minus TP Threshold.
The use of deviation is significant. Positive or green values indicate more

Page 35 of 55
dynamic content than the predefined Dynamic Margin, while negative or red values indicate less dynamic content. Note that Dynamic Devia-tion does not distinguish whether you have upwards headroom in peak regions or downwards headroom in Target Loudness areas.
To obtain valid Dynamic Deviation values, follow these steps:
1. Insert a limiter prior to your DRM2 instance, and adjust the limiter’s output ceiling according to the set TP Threshold. The limiter’s output ceiling and TP Threshold should be equal.
2. Play the loudest part of your song and pre–adjust peak structure so that occasionally the TP Threshold will be hit.
3. Set “Dynamic Margin” by defining TP Threshold and Target Loud-ness. Control handles for both are on the front panel or settable directly on the back panel.
4. Set D-MODE to Short–term Loudness. This gives you a good estimate of your Loudness structure in conjunction with set Target Loudness.
5. Play the track’s loudest part in a loop. Negative or red values indicate the amount of Dynamic Margin which is over–utilized when referenced to your set Target Loudness. A red -2 LU means that your song is about 2 LU louder than your set Target Loudness. Positive or green values in-dicate that you have not reached the set Target Loudness. +2 LU means that your master is currently 2 LU more dynamic than your set Loud-ness goal.
6. Use a brick wall limiter and adjust input level and output ceiling while monitoring your maximum peak values and the Short–term bar graphs. The Dynamic Deviation value will guide you towards the proper leveling strategy. Use loudness compensated A/B to make meaningful judgments, and increase “Dynamic Margin” via lower Target Loudness if you feel that your master lacks dynamic integrity.
7. Hit RESET on DRM2 after you’ve made limiter adjustments to your peak structure.
Here is a starting example; If your True Peak Threshold, the point at which your TP numeric display and bar graph turns red, is set to minus 0.5 ㏈TP and your Target Loudness is set to minus 12 LUFS, you have Dynamic Margin of 11.5 LU (12 LUFS Target Loudness minus 0.5 TP headroom = 11.5). To work with the Dynamic Deviation function, you need to decide two applicable values:
a) What Loudness Normalization standard are you targeting? Dif-ferent music distribution platforms, such as YouTube, Spotify, iTunes Music and TIDAL, each have their own particulars.
b) What Target Loudness would be a good choice for your mas-tering project? This is a matter of experience, combined with a cluster of factors including;
- Genre–specific Loudness trends
Page 36 of 55
- Loudness potential of your mix
- What the main distribution channels are for your clients
- How Loudness–driven or fidelity–conscious is your client?
If you master music in the EM genre and DJs and clubs are a key part of the marketing for a particular project, your customer may aim for less dynamics and a higher target Loudness level. To escape the loudness insanity of EM and club music, we recommend measuring a few of your favorite music releases and back off from there by one to two LU. That’s all…If your favorite music shows an average Integrated Loudness (LUi) of -6 LUFS, you will arrive at far more transparent results by setting your Dynamic Margin to 7.5 LU. Set the TP Threshold to -0.5 ㏈ and Target Loudness to -8 LUFS. The small decrease in dynamic density will increase the sound quality drastically while allowing DJs to compensate for the Loudness difference of 1.5 to 2 LU by simply moving their level matching fader up a tiny bit!
For all mainstream pop and rock music releases, it’s a good starting point to take YouTube’s Loudness Normalization standard of -12 LUFS as a reference. By setting TP threshold to -0.5 ㏈, you will prevent un-wanted distortion. Plus, a Target Loudness of -12 LUFS gives you 11.5 LU of Dynamic Margin to work within.
࿏ Note! to get the best use of the dYNamic deviatioN feature, You Need to coNtrol the dYNamics with a traNspareNt brick wall limiter iN-serted prior to the drm2 iNstaNce!
Make sure to set the Output Ceiling of your limiter to the same value as the True Peak Threshold setting in DRMeter MkII. If DRM2’s TP Threshold is set to -0.5 ㏈, your limiter’s output should also be set to -0.5 ㏈. Control your peaks first! If DRMeter MkII shows max peak values below the set threshold, raise the input gain of your limiter so that the highest peaks of the loudest part of the song hit the -0.5 ㏈ ceiling of the meter. If they hit the -0.5 ㏈ ceiling all the time, your signal is too hot and you need to back off the input amplitude feeding the limiter. If you’re rarely hitting the -0.5 ㏈ ceiling, you may lose some Loudness potential. This has to be adjusted carefully in conjunction with focused, loudness compensated A/B listening. After you have controlled the peak structure of your master, you’re ready to use the Dynamic Deviation function in the most meaningful way.
Experienced mastering engineers control and manage final Loudness at the end of their processing chain by fine tuning limiter and clip settings when looping the louder parts of a song. This means that Dynamic Deviation comes into play when you are all set with your mastering processing, and you start focusing on making mindful Loudness deci-sions based on what is typically the chorus of a particular song. We have to point out that working with Dynamic Deviation on low amplitude intros, bridges or interludes is meaningless for making decisions about
Page 37 of 55
dynamic density.
࿏ beware! watch out for deviatioN betweeN short–term loudNess aNd iNtegrated loudNess with coNteNt coNtaiNiNg a lot of macro–dY-Namics:
When making final leveling decisions, change the L-MODE to Short–term to have the best control. Songs with low or no macro–dynamics (relatively constant energy throughout the song) have almost equal Short–term Loudness and integrated Loudness values because no longer portions with less energy will let the LUi decrease over the whole song. But a song with lots of macro–dynamics (e.g. a song with a pianissimo intro and other parts with less energy than your chorus) will show lower LUi values which can be up to 4 or more LU lower than the Short–term Loudness on the loudest part of the song. In such cases you may need to allow the Short–term Loudness to exceed set target Loudness so that finally the integrated Loudness hits your set target Loudness. To get a feeling for this Short–term - integrated deviation you should use the integrated LUi Mode over a longer duration of a macro dynamic song.
For program material with a lot of macro–dynamics, Dynamic Devia-tion works less reliably.
Dynamic Deviation ExamplesThe Dynamic Deviation algorithm takes your set Dynamic Margin as a reference, and subtracts your LU-S value minus your True Peak headroom to 0 ㏈TP.
A Positive Dynamic Deviation Example
If Dynamic Deviation indicates +3 LU, you know that you need to reduce dynamics by 3 ㏈ to fit into your set Loudness Target. You can do that by either addressing the dynamic range from the “top down” through peak limiting, or from the “bottom up” through RMS-style compression or other similar techniques. Positive Dynamic Deviation is indicated in green with a leading plus symbol. A Negative Dynamic Deviation ExampleIf Dynamic Deviation shows -2.2 LU, you know that you should back off your limiting/compression by 2.2 ㏈ to stay within your set Target Loudness. It indicates that you are wasting “Dynamic Potential” as your master is already too loud in relation to your set Loudness Tar-get. Negative Dynamic Deviation is indicated in red with a leading minus symbol.
More about Dynamic DeviationIn order to use Dynamic Deviation in a skillful and meaningful man-ner, you need to get a sense of appropriate Loudness targets for different music genres. We live in an ever improving world regarding dynamic density, as more and more music distributors apply Loudness normal-ization. Automatic Loudness normalization defeats very high dynamic density tracks by reducing the gain of high density tracks to below those

Page 38 of 55
with lower density. What was intended to be louder now become quieter!
The psychoacoustic advantage of masters with lower dynamic density will turn against overly loud tracks as distribution and streaming plat-forms reduce the playback level of material louder than -12 to -16 LUFS, or whatever the particularly target Loudness is for that platform. This is a gradual process and will require delicacy, diplomacy and patience on your part.
For more background information, please take a look at the PDF, “The Concept of Dynamic Deviation,” available here or in the Learn More section of our web site.
Drag & Drop with DRO2If you own a copy of the companion MAAT product, DROffline MkII, you can drag a file from your file system onto a DRM2 instance, and that action will launch DROffline MkII and begin a measurement. If DRO2 is already running, one of two scenarios unfold, based on your Operating System…
macOS: The existing instance will begin measuring, and the Log will appear when measurement is finished.
Windows: A new DRO2 instance will open and measurement will begin. The Log will appear when measurement is finished. You may want to quit DRO2 each time you plan on using the drag & drop measurement feature.
Sometimes the DRMeter MkII interface may disappear into the back-ground when a file browser window is clicked on. This behavior may change with different DAWs & Operating Systems. To be able to drag and drop an audio file onto the DRMeter MkII user interface when this happens:
1. In your file browser, click and hold an audio file to begin the drag gesture.
2. While holding the mouse button down, press the Alt key in Windows or the ⌘ (Command) key in macOS, and then tap the Tab key until you cycle back to your DAW application.
3. The DRMeter MkII interface should reappear in view. Simply take the file that is being dragged and drop it onto the plug-in’s user interface.
Alternatively, you can drag the DRM2 UI outside of your DAW’s visible confines so it stays in sight when you click on another window such as a file browser.
Native Standalone Version
The bundled native version of DRM2, MAAT DRMeter MkII.app, is

Page 39 of 55
identical to the plug–in versions with the exception of a Preferences menu for macOS and Audio Setup button at top for Windows. The standalone real time app can be found in the Applications:MAAT folder on macOS, and the Program Files\MAAT folder on Windows.
Setting for the standalone version include I/O, sample rate and buffer size selection. The input selector has a simple, signal presence meter, while the output has an associated Test button. The Test function sends a 440 Hz tone to the designated output port.
Sample rate choices are dictated by your input’s capabilities. There is also an audio input mute check box to prevent feedback. This preference is enabled by default on launch when the designated input and output are the same.
In UseThere are several ways to provide an input to DRMeter MkII Stand-alone, depending on your audio interface. Some hardware drivers have a “loopback” ability. Dig into the documentation on your favorite inter-face for more information on loopback.
Another approach is to use a virtual audio driver which, in the Win-dows world, is often referred to as a “virtual soundcard.” Being only a driver, this class of product provides audio routing to and from a vir-tual (software–only) device. For Windows, we recommend VB-Audio’s HIFI-CABLE & ASIO-Bridge, a “donationware” virtual soundcard. See:
https://vb-audio.com/Cable/#DownloadASIOBridge
Although that product is cross–platform, for macOS we recommend Existential Audio’s free BlackHole:
https://existential.audio/blackhole/
Figure 7: DRM2 Standalone’s Preferences window showing routing through a virtual driver
For example, the output of your DAW is routed to the virtual driver. In this case, that’s BlackHole. In Figure 7 above using a laptop, DRMeter MkII Standalone’s input is set to be the virtual driver, while its output

Page 40 of 55
feeds the host’s default output/DAC, what would normally be the DAW’s output.
Back Panel Setup
[13] Back PanelClicking on the MAAT logo opens the “back panel” user preferences.
[14] Scale RangeThe default scale range is from +3 to -48dB. The presence of input sig-nals below -48 are indicated by the -∞ or digital black indicator [10] be-low the bar graph, which lights as soon input signal exceeds -∞. Switch-ing to the -30dB scale lets you zoom in on louder content. This scale is useful for music work due to its usually higher amplitude. For broadcast applications, we recommend the -48dB scale.
[15] UI SizeFrom the user preferences, the size of the user interface can be switched to one of five sizes: You can also change the UI size by right-clicking on the front UI on the outside frame.
XS 236 x 720S 270 x 824M 301 x 920L 341 x 1040
XL 393 x 1200
[16] Tool TipsThis preference is checked by default, and enables tool tips, or hot help, if you hover your cursor over a particular function or field for longer than 2 seconds.
[17] Horizontal/Vertical ModeThis preference adapts the user interface to your layout and DAW prefer-ences. It switches or alternates between portrait/vertical orientation, or landscape/horizontal.
[18] Preset ManagementOn top of the general preset functions of any plug–in, you find sixteen factory presets to allow you direct access to configurations for different working situations and applications.

Page 41 of 55
Figure 6: Factory Presets
The Preset section is equipped with common functions. Use the arrow buttons, to the left and right of a preset’s name, to toggle between pre-sets. Use the LOAD button to open a particular preset from the preset folder. The SAVE button opens the preset directory and adds a leading number to the end of the existing preset name to avoid unwanted saving of an existing preset. You can rename the new preset to your liking and save or you can remove the number added to the preset in order to over-write an existing preset.
Preset FilesDRMeter MkII saves your presets with a “drm2p” file extension, for both macOS and Windows.
[19] Info TabBesides reference information and version number, you will find useful links to the manual and further knowledge sources as well as buttons to activate or deactivate your license.
LUFS/LKFS terminologyLUFS are sometimes also known as LKFS, which is the American termi-nology for LUFS. They are technically identical.
Specifications
Reference input level -18 ㏈FS
Reference output level -18 ㏈FS

Page 42 of 55
System Requirements• Mac: macOS 10.8 and newer, 64 bit only
• Win: Windows 7 and newer, 32 & 64 bit
• Pro Tools 10.3.10 and newer
• 4GB RAM minimum
Supported Platforms• AAX, AU, VST2/3 Mac, VST2/3 Win
Supported Sample Rates• 44.1 to 384 kHz
Supported HostsAbleton Live, Cubase, Logic, Nuendo, Pro Tools, Sequoia, Studio One, Wavelab
Updates
Please always use the latest version of the software! You can find your current version on the Info Tab of the back panel. You can download the latest version simply by visiting:
https://maat.digital/support/#installers
For optimal security and stability, you should always stay up to date with Operating System revisions, and we keep up with compatibility changes to our products. We also continue to optimize for reduced CPU load, and this very user manual gets its own improvements.
To stay up to date with the latest version and product releases, please subscribe to our occasional newsletter. You’ll find a opt–in form on our Contact page, or sign up for a copy of our free and very handy 2BusCon-trol plug–in which will also subscribe you. Don’t worry, we know you are busy so we only send out an average of 10 or 12 mailings a year.
Support
For product support, please visit:
https://www.maat.digital/support
License CentralLicense Central, located in MAAT’s Shared directory, is a free utility that validates, repairs and logs your MAAT licenses. It also displays what MAAT products you have installed and assists in downloading both updates and demos.

Page 43 of 55
License Central lists all of our products, and shows you:
• If a product is installed and what licenses you have [CLOUD, SUBSCRIPTION, TRIAL, OFFLINE and TEMP OFFLINE]
• What versions are installed, and version installers are available for download
It also provides:
• A one–click download of an update or a demo
• A button to activate or deactivate any of your licenses
• A copyable list of all your Product Keys
• One–click generation of the MAAT diagnostic report
It also fixes license issues automagically.
In UseWhen you launch License Central, it scans your host computer and then attempts to match up each product found with a Product Key on our license server. That scanning happens in real time, and the process is shown as a progress bar. When quitting, this process happens in reverse.
Once all the licenses are validated, a list on the left displays all MAAT products, including License Central. Products that are not installed are grayed out, and installed products are displayed in high contrast. To the right of each product entry is a check mark, which indicated that the product is licensed.
Selecting a product entry displays information about the installed ver-sion and if an update is available for download.
ControlsThere are two persistent buttons along the top. At upper left is Check for Updates, which refreshes the list of installed products, and pings our server again for currently available versions to download. It also recre-ates your Product Key list.
At upper right, the Activate/Deactivate button brings up the familiar blue and orange MAAT license window, allowing you to deactivate or return your license to the Cloud, and to switch to a 30 day temporary offline license. If you have requested a 365 day full offline license, use the Create License Request function in the MAAT license window, and have received your “.maatc” confirmation file, you can also take your license offline. Finally, you can also paste in a Product Key to activate a new license.
Note: Switching to 30 day temp offline requires that your license be already activated. 365 day full off line li-censes require a license confirmation file as supplied by MAAT’s support department.
Page 44 of 55
If any product is out of date, a third Download Update button will ap-pear when that product is selected. This button is an express method for updating you MAAT products.
At bottom left of the License Central window is an Auto–Refresh check box, which is selected by default. Deselecting that will prevent License Central from frequently scanning your host for changes including new installs. It starts a scan every 3 seconds, waiting for completion of that scan, then begins a new 3 second countdown before starting the next scan. If you find that License Central is interrupting you workflow while scanning, then disable Auto–Refresh.
PreferencesIn License Central, the Preferences’ gear icon brings up the Preferences window with four tabs.
PathsFor those who set up alternate directories for the management of their plug–ins in a DAW, two alternate plug–in paths can be de-fined. These directories will be also included when License Central searches.
KeysThis tab lists all of your Product Keys that are known to our license server. Please take a moment to copy all of your Product Keys, paste them into a text or word processor file, and print out a hard copy. Your Product Keys are your proof of purchase and, without them, your purchase will not work and we cannot provide product support.
TroubleshootingThe Troubleshooting tab has one button, which generates a Diagnos-tics Report. This report, automatically written to the Desktop, gath-ers useful, non–personal information about your machine’s state that our support team can use to diagnose any problems.
InfoAs with all our products, the Info tab lists credits, copyright informa-tion, and the version number you are running.
Share The Love
Would you like to help us in our quest for better sound quality? Help support MAAT by sharing the love…Like us on Facebook!
https://www.facebook.com/maatdigital/
and Twitter too:
https://twitter.com/maat_digital
Please tell your friends and colleagues about us. We really appreciate it, and thank you for supporting better quality audio.

Page 45 of 55
Credits
DRMeter MkII overall concept
Friedemann (Mr. T) “I pity the fool!” Tischmeyer
Plug–in concept & design, DSP algorithms, & project management
MAAT Inc.
Programming
Agent Tad Nicol, MAAT Inc.

Page 46 of 55
Page 47 of 55
Appendix 1 — GPLs
FFmpeg, incorporated into DRMeter MkII, is licensed under the GNU Lesser General Public License (LGPL) version 2.1 or later.
GNU GENERAL PUBLIC LICENSE
Version 3, 29 June 2007Copyright (C) 2007 Free Software Foundation, Inc. <https://fsf.org/>Everyone is permitted to copy and distribute verbatim copies of this license document, but changing it is not allowed.PreambleThe GNU General Public License is a free, copyleft license for software and other kinds of works.The licenses for most software and other practical works are designed to take away your freedom to share and change the works. By contrast, the GNU General Public License is intended to guarantee your freedom to share and change all versions of a program--to make sure it remains free software for all its users. We, the Free Software Foundation, use the GNU General Public License for most of our software; it applies also to any other work released this way by its authors. You can apply it to your programs, too.When we speak of free software, we are referring to freedom, not price. Our General Public Licenses are designed to make sure that you have the freedom to distribute copies of free software (and charge for them if you wish), that you receive source code or can get it if you want it, that you can change the software or use pieces of it in new free programs, and that you know you can do these things.To protect your rights, we need to prevent others from denying you these rights or asking you to surrender the rights. Therefore, you have certain responsibilities if you distribute copies of the software, or if you modify it: responsibilities to respect the freedom of others.For example, if you distribute copies of such a program, whether gratis or for a fee, you must pass on to the recipients the same free-doms that you received. You must make sure that they, too, receive or can get the source code. And you must show them these terms so they know their rights.Developers that use the GNU GPL protect your rights with two steps:(1) assert copyright on the software, and (2) offer you this License giving you legal permission to copy, distribute and/or modify it.For the developers’ and authors’ protection, the GPL clearly explains that there is no warranty for this free software. For both users’ and authors’ sake, the GPL requires that modified versions be marked as changed, so that their problems will not be attributed erro-neously to authors of previous versions.Some devices are designed to deny users access to install or run modified versions of the software inside them, although the man-ufacturer can do so. This is fundamentally incompatible with the aim of protecting users’ freedom to change the software. The sys-tematic pattern of such abuse occurs in the area of products for individuals to use, which is precisely where it is most unacceptable. Therefore, we have designed this version of the GPL to prohibit the practice for those products. If such problems arise substantially in other domains, we stand ready to extend this provision to those domains in future versions of the GPL, as needed to protect the freedom of users.Finally, every program is threatened constantly by software patents. States should not allow patents to restrict development and use of software on general-purpose computers, but in those that do, we wish to avoid the special danger that patents applied to a free program could make it effectively proprietary. To prevent this, the GPL assures that patents cannot be used to render the program non-free.The precise terms and conditions for copying, distribution and modification follow.TERMS AND CONDITIONS0. Definitions.“This License” refers to version 3 of the GNU General Public License.“Copyright” also means copyright-like laws that apply to other kinds of works, such as semiconductor masks.“The Program” refers to any copyrightable work licensed under this License. Each licensee is addressed as “you”. “Licensees” and “recipients” may be individuals or organizations.To “modify” a work means to copy from or adapt all or part of the work in a fashion requiring copyright permission, other than the making of an exact copy. The resulting work is called a “modified version” of the earlier work or a work “based on” the earlier work.A “covered work” means either the unmodified Program or a work based on the Program.To “propagate” a work means to do anything with it that, without permission, would make you directly or secondarily liable for infringement under applicable copyright law, except executing it on a computer or modifying a private copy. Propagation includes copying, distribution (with or without modification), making available to the public, and in some countries other activities as well.To “convey” a work means any kind of propagation that enables other parties to make or receive copies. Mere interaction with a user through a computer network, with no transfer of a copy, is not conveying.An interactive user interface displays “Appropriate Legal Notices” to the extent that it includes a convenient and prominently visible feature that (1) displays an appropriate copyright notice, and (2) tells the user that there is no warranty for the work (except to the

Page 48 of 55
extent that warranties are provided), that licensees may convey the work under this License, and how to view a copy of this License. If the interface presents a list of user commands or options, such as a menu, a prominent item in the list meets this criterion.1. Source Code.The “source code” for a work means the preferred form of the work for making modifications to it. “Object code” means any non-source form of a work.A “Standard Interface” means an interface that either is an official standard defined by a recognized standards body, or, in the case of interfaces specified for a particular programming language, one that is widely used among developers working in that language.The “System Libraries” of an executable work include anything, other than the work as a whole, that (a) is included in the normal form of packaging a Major Component, but which is not part of that Major Component, and (b) serves only to enable use of the work with that Major Component, or to implement a Standard Interface for which an implementation is available to the public in source code form. A “Major Component”, in this context, means a major essential component (kernel, window system, and so on) of the specific operating system (if any) on which the executable work runs, or a compiler used to produce the work, or an object code interpreter used to run it.The “Corresponding Source” for a work in object code form means all the source code needed to generate, install, and (for an exe-cutable work) run the object code and to modify the work, including scripts to control those activities. However, it does not include the work’s System Libraries, or general-purpose tools or generally available free programs which are used unmodified in performing those activities but which are not part of the work. For example, Corresponding Source includes interface definition files associated with source files for the work, and the source code for shared libraries and dynamically linked subprograms that the work is specifi-cally designed to require, such as by intimate data communication or control flow between those subprograms and other parts of the work.The Corresponding Source need not include anything that users can regenerate automatically from other parts of the Corresponding Source.The Corresponding Source for a work in source code form is that same work.2. Basic Permissions.All rights granted under this License are granted for the term of copyright on the Program, and are irrevocable provided the stated conditions are met. This License explicitly affirms your unlimited permission to run the unmodified Program. The output from run-ning a covered work is covered by this License only if the output, given its content, constitutes a covered work. This License acknowl-edges your rights of fair use or other equivalent, as provided by copyright law.You may make, run and propagate covered works that you do not convey, without conditions so long as your license otherwise remains in force. You may convey covered works to others for the sole purpose of having them make modifications exclusively for you, or provide you with facilities for running those works, provided that you comply with the terms of this License in conveying all material for which you do not control copyright. Those thus making or running the covered works for you must do so exclusively on your behalf, under your direction and control, on terms that prohibit them from making any copies of your copyrighted material outside their relationship with you.Conveying under any other circumstances is permitted solely under the conditions stated below. Sublicensing is not allowed; section 10 makes it unnecessary.3. Protecting Users’ Legal Rights From Anti-Circumvention Law.No covered work shall be deemed part of an effective technological measure under any applicable law fulfilling obligations under article 11 of the WIPO copyright treaty adopted on 20 December 1996, or similar laws prohibiting or restricting circumvention of such measures.When you convey a covered work, you waive any legal power to forbid circumvention of technological measures to the extent such circumvention is effected by exercising rights under this License with respect to the covered work, and you disclaim any intention to limit operation or modification of the work as a means of enforcing, against the work’s users, your or third parties’ legal rights to forbid circumvention of technological measures.4. Conveying Verbatim Copies.You may convey verbatim copies of the Program’s source code as you receive it, in any medium, provided that you conspicuously and appropriately publish on each copy an appropriate copyright notice; keep intact all notices stating that this License and any non-per-missive terms added in accord with section 7 apply to the code; keep intact all notices of the absence of any warranty; and give all recipients a copy of this License along with the Program.You may charge any price or no price for each copy that you convey, and you may offer support or warranty protection for a fee.5. Conveying Modified Source Versions.You may convey a work based on the Program, or the modifications to produce it from the Program, in the form of source code under the terms of section 4, provided that you also meet all of these conditions: a) The work must carry prominent notices stating that you modified it, and giving a relevant date. b) The work must carry prominent notices stating that it is released under this License and any conditions added under section 7. This requirement modifies the requirement in section 4 to “keep intact all notices”. c) You must license the entire work, as a whole, under this License to anyone who comes into possession of a copy. This License will therefore apply, along with any applicable section 7 additional terms, to the whole of the work, and all its parts, regardless of how

Page 49 of 55
they are packaged. This License gives no permission to license the work in any other way, but it does not invalidate such permission if you have separately received it. d) If the work has interactive user interfaces, each must display Appropriate Legal Notices; however, if the Program has interactive interfaces that do not display Appropriate Legal Notices, your work need not make them do so.A compilation of a covered work with other separate and independent works, which are not by their nature extensions of the covered work, and which are not combined with it such as to form a larger program, in or on a volume of a storage or distribution medium, is called an “aggregate” if the compilation and its resulting copyright are not used to limit the access or legal rights of the compilation’s users beyond what the individual works permit. Inclusion of a covered work in an aggregate does not cause this License to apply to the other parts of the aggregate.6. Conveying Non-Source Forms.You may convey a covered work in object code form under the terms of sections 4 and 5, provided that you also convey the ma-chine-readable Corresponding Source under the terms of this License, in one of these ways: a) Convey the object code in, or embodied in, a physical product (including a physical distribution medium), accompanied by the Corresponding Source fixed on a durable physical medium customarily used for software interchange. b) Convey the object code in, or embodied in, a physical product (including a physical distribution medium), accompanied by a written offer, valid for at least three years and valid for as long as you offer spare parts or customer support for that product model, to give anyone who possesses the object code either (1) a copy of the Corresponding Source for all the software in the product that is covered by this License, on a durable physical medium customarily used for software interchange, for a price no more than your reasonable cost of physically performing this conveying of source, or (2) access to copy the Corresponding Source from a network server at no charge. c) Convey individual copies of the object code with a copy of the written offer to provide the Corresponding Source. This alternative is allowed only occasionally and noncommercially, and only if you received the object code with such an offer, in accord with subsec-tion 6b. d) Convey the object code by offering access from a designated place (gratis or for a charge), and offer equivalent access to the Cor-responding Source in the same way through the same place at no further charge. You need not require recipients to copy the Corre-sponding Source along with the object code. If the place to copy the object code is a network server, the Corresponding Source may be on a different server (operated by you or a third party) that supports equivalent copying facilities, provided you maintain clear directions next to the object code saying where to find the Corresponding Source. Regardless of what server hosts the Corresponding Source, you remain obligated to ensure that it is available for as long as needed to satisfy these requirements. e) Convey the object code using peer-to-peer transmission, provided you inform other peers where the object code and Correspond-ing Source of the work are being offered to the general public at no charge under subsection 6d.A separable portion of the object code, whose source code is excluded from the Corresponding Source as a System Library, need not be included in conveying the object code work.A “User Product” is either (1) a “consumer product”, which means any tangible personal property which is normally used for per-sonal, family, or household purposes, or (2) anything designed or sold for incorporation into a dwelling. In determining whether a product is a consumer product, doubtful cases shall be resolved in favor of coverage. For a particular product received by a particular user, “normally used” refers to a typical or common use of that class of product, regardless of the status of the particular user or of the way in which the particular user actually uses, or expects or is expected to use, the product. A product is a consumer product regardless of whether the product has substantial commercial, industrial or non-consumer uses, unless such uses represent the only significant mode of use of the product.“Installation Information” for a User Product means any methods, procedures, authorization keys, or other information required to install and execute modified versions of a covered work in that User Product from a modified version of its Corresponding Source. The information must suffice to ensure that the continued functioning of the modified object code is in no case prevented or inter-fered with solely because modification has been made.If you convey an object code work under this section in, or with, or specifically for use in, a User Product, and the conveying occurs as part of a transaction in which the right of possession and use of the User Product is transferred to the recipient in perpetuity or for a fixed term (regardless of how the transaction is characterized), the Corresponding Source conveyed under this section must be ac-companied by the Installation Information. But this requirement does not apply if neither you nor any third party retains the ability to install modified object code on the User Product (for example, the work has been installed in ROM).The requirement to provide Installation Information does not include a requirement to continue to provide support service, warran-ty, or updates for a work that has been modified or installed by the recipient, or for the User Product in which it has been modified or installed. Access to a network may be denied when the modification itself materially and adversely affects the operation of the network or violates the rules and protocols for communication across the network.Corresponding Source conveyed, and Installation Information provided, in accord with this section must be in a format that is pub-licly documented (and with an implementation available to the public in source code form), and must require no special password or key for unpacking, reading or copying.7. Additional Terms.“Additional permissions” are terms that supplement the terms of this License by making exceptions from one or more of its condi-tions. Additional permissions that are applicable to the entire Program shall be treated as though they were included in this License, to the extent that they are valid under applicable law. If additional permissions apply only to part of the Program, that part may be
Page 50 of 55
used separately under those permissions, but the entire Program remains governed by this License without regard to the additional permissions.When you convey a copy of a covered work, you may at your option remove any additional permissions from that copy, or from any part of it. (Additional permissions may be written to require their own removal in certain cases when you modify the work.) You may place additional permissions on material, added by you to a covered work, for which you have or can give appropriate copyright permission.Notwithstanding any other provision of this License, for material you add to a covered work, you may (if authorized by the copyright holders of that material) supplement the terms of this License with terms: a) Disclaiming warranty or limiting liability differently from the terms of sections 15 and 16 of this License; or b) Requiring preservation of specified reasonable legal notices or author attributions in that material or in the Appropriate Legal Notices displayed by works containing it; or c) Prohibiting misrepresentation of the origin of that material, or requiring that modified versions of such material be marked in reasonable ways as different from the original version; or d) Limiting the use for publicity purposes of names of licensors or authors of the material; or e) Declining to grant rights under trademark law for use of some trade names, trademarks, or service marks; or f) Requiring indemnification of licensors and authors of that material by anyone who conveys the material (or modified versions of it) with contractual assumptions of liability to the recipient, for any liability that these contractual assumptions directly impose on those licensors and authors.All other non-permissive additional terms are considered “further restrictions” within the meaning of section 10. If the Program as you received it, or any part of it, contains a notice stating that it is governed by this License along with a term that is a further restric-tion, you may remove that term. If a license document contains a further restriction but permits relicensing or conveying under this License, you may add to a covered work material governed by the terms of that license document, provided that the further restric-tion does not survive such relicensing or conveying.If you add terms to a covered work in accord with this section, you must place, in the relevant source files, a statement of the addi-tional terms that apply to those files, or a notice indicating where to find the applicable terms.Additional terms, permissive or non-permissive, may be stated in the form of a separately written license, or stated as exceptions; the above requirements apply either way.8. Termination.You may not propagate or modify a covered work except as expressly provided under this License. Any attempt otherwise to prop-agate or modify it is void, and will automatically terminate your rights under this License (including any patent licenses granted under the third paragraph of section 11).However, if you cease all violation of this License, then your license from a particular copyright holder is reinstated (a) provisionally, unless and until the copyright holder explicitly and finally terminates your license, and (b) permanently, if the copyright holder fails to notify you of the violation by some reasonable means prior to 60 days after the cessation.Moreover, your license from a particular copyright holder is reinstated permanently if the copyright holder notifies you of the vio-lation by some reasonable means, this is the first time you have received notice of violation of this License (for any work) from that copyright holder, and you cure the violation prior to 30 days after your receipt of the notice.Termination of your rights under this section does not terminate the licenses of parties who have received copies or rights from you under this License. If your rights have been terminated and not permanently reinstated, you do not qualify to receive new licenses for the same material under section 10.9. Acceptance Not Required for Having Copies.You are not required to accept this License in order to receive or run a copy of the Program. Ancillary propagation of a covered work occurring solely as a consequence of using peer-to-peer transmission to receive a copy likewise does not require acceptance. However, nothing other than this License grants you permission to propagate or modify any covered work. These actions infringe copyright if you do not accept this License. Therefore, by modifying or propagating a covered work, you indicate your acceptance of this License to do so.10. Automatic Licensing of Downstream Recipients.Each time you convey a covered work, the recipient automatically receives a license from the original licensors, to run, modify and propagate that work, subject to this License. You are not responsible for enforcing compliance by third parties with this License.An “entity transaction” is a transaction transferring control of an organization, or substantially all assets of one, or subdividing an organization, or merging organizations. If propagation of a covered work results from an entity transaction, each party to that transaction who receives a copy of the work also receives whatever licenses to the work the party’s predecessor in interest had or could give under the previous paragraph, plus a right to possession of the Corresponding Source of the work from the predecessor in interest, if the predecessor has it or can get it with reasonable efforts.You may not impose any further restrictions on the exercise of the rights granted or affirmed under this License. For example, you may not impose a license fee, royalty, or other charge for exercise of rights granted under this License, and you may not initiate litigation (including a cross-claim or counterclaim in a lawsuit) alleging that any patent claim is infringed by making, using, selling, offering for sale, or importing the Program or any portion of it.

Page 51 of 55
11. Patents.A “contributor” is a copyright holder who authorizes use under this License of the Program or a work on which the Program is based. The work thus licensed is called the contributor’s “contributor version”. A contributor’s “essential patent claims” are all patent claims owned or controlled by the contributor, whether already acquired or hereafter acquired, that would be infringed by some manner, permitted by this License, of making, using, or selling its contributor version, but do not include claims that would be infringed only as a consequence of further modification of the contributor version. For purposes of this definition, “control” includes the right to grant patent sublicenses in a manner consistent with the requirements of this License.Each contributor grants you a non-exclusive, worldwide, royalty-free patent license under the contributor’s essential patent claims, to make, use, sell, offer for sale, import and otherwise run, modify and propagate the contents of its contributor version.In the following three paragraphs, a “patent license” is any express agreement or commitment, however denominated, not to enforce a patent (such as an express permission to practice a patent or covenant not to sue for patent infringement). To “grant” such a patent license to a party means to make such an agreement or commitment not to enforce a patent against the party.If you convey a covered work, knowingly relying on a patent license, and the Corresponding Source of the work is not available for anyone to copy, free of charge and under the terms of this License, through a publicly available network server or other readily accessible means, then you must either (1) cause the Corresponding Source to be so available, or (2) arrange to deprive yourself of the benefit of the patent license for this particular work, or (3) arrange, in a manner consistent with the requirements of this License, to extend the patent license to downstream recipients. “Knowingly relying” means you have actual knowledge that, but for the patent license, your conveying the covered work in a country, or your recipient’s use of the covered work in a country, would infringe one or more identifiable patents in that country that you have reason to believe are valid.If, pursuant to or in connection with a single transaction or arrangement, you convey, or propagate by procuring conveyance of, a covered work, and grant a patent license to some of the parties receiving the covered work authorizing them to use, propagate, mod-ify or convey a specific copy of the covered work, then the patent license you grant is automatically extended to all recipients of the covered work and works based on it.A patent license is “discriminatory” if it does not include within the scope of its coverage, prohibits the exercise of, or is conditioned on the non-exercise of one or more of the rights that are specifically granted under this License. You may not convey a covered work if you are a party to an arrangement with a third party that is in the business of distributing software, under which you make payment to the third party based on the extent of your activity of conveying the work, and under which the third party grants, to any of the parties who would receive the covered work from you, a discriminatory patent license (a) in connection with copies of the covered work conveyed by you (or copies made from those copies), or (b) primarily for and in connection with specific products or compilations that contain the covered work, unless you entered into that arrangement, or that patent license was granted, prior to 28 March 2007.Nothing in this License shall be construed as excluding or limiting any implied license or other defenses to infringement that may otherwise be available to you under applicable patent law.12. No Surrender of Others’ Freedom.If conditions are imposed on you (whether by court order, agreement or otherwise) that contradict the conditions of this License, they do not excuse you from the conditions of this License. If you cannot convey a covered work so as to satisfy simultaneously your obligations under this License and any other pertinent obligations, then as a consequence you may not convey it at all. For example, if you agree to terms that obligate you to collect a royalty for further conveying from those to whom you convey the Program, the only way you could satisfy both those terms and this License would be to refrain entirely from conveying the Program.13. Use with the GNU Affero General Public License.Notwithstanding any other provision of this License, you have permission to link or combine any covered work with a work licensed under version 3 of the GNU Affero General Public License into a single combined work, and to convey the resulting work. The terms of this License will continue to apply to the part which is the covered work, but the special requirements of the GNU Affero General Public License, section 13, concerning interaction through a network will apply to the combination as such.14. Revised Versions of this License.The Free Software Foundation may publish revised and/or new versions of the GNU General Public License from time to time. Such new versions will be similar in spirit to the present version, but may differ in detail to address new problems or concerns.Each version is given a distinguishing version number. If the Program specifies that a certain numbered version of the GNU General Public License “or any later version” applies to it, you have the option of following the terms and conditions either of that numbered version or of any later version published by the Free Software Foundation. If the Program does not specify a version number of the GNU General Public License, you may choose any version ever published by the Free Software Foundation.If the Program specifies that a proxy can decide which future versions of the GNU General Public License can be used, that proxy’s public statement of acceptance of a version permanently authorizes you to choose that version for the Program.Later license versions may give you additional or different permissions. However, no additional obligations are imposed on any au-thor or copyright holder as a result of your choosing to follow a later version.15. Disclaimer of Warranty.THERE IS NO WARRANTY FOR THE PROGRAM, TO THE EXTENT PERMITTED BY APPLICABLE LAW. EXCEPT WHEN OTHERWISE STATED IN WRITING THE COPYRIGHT HOLDERS AND/OR OTHER PARTIES PROVIDE THE PROGRAM “AS IS” WITHOUT WARRANTY OF ANY KIND, EITHER EXPRESSED OR IMPLIED, INCLUDING, BUT NOT LIMITED TO,

Page 52 of 55
THE IMPLIED WARRANTIES OF MERCHANTABILITY AND FITNESS FOR A PARTICULAR PURPOSE. THE ENTIRE RISK AS TO THE QUALITY AND PERFORMANCE OF THE PROGRAM IS WITH YOU. SHOULD THE PROGRAM PROVE DEFEC-TIVE, YOU ASSUME THE COST OF ALL NECESSARY SERVICING, REPAIR OR CORRECTION.16. Limitation of Liability.IN NO EVENT UNLESS REQUIRED BY APPLICABLE LAW OR AGREED TO IN WRITING WILL ANY COPYRIGHT HOLD-ER, OR ANY OTHER PARTY WHO MODIFIES AND/OR CONVEYS THE PROGRAM AS PERMITTED ABOVE, BE LIABLE TO YOU FOR DAMAGES, INCLUDING ANY GENERAL, SPECIAL, INCIDENTAL OR CONSEQUENTIAL DAMAGES ARIS-ING OUT OF THE USE OR INABILITY TO USE THE PROGRAM (INCLUDING BUT NOT LIMITED TO LOSS OF DATA OR DATA BEING RENDERED INACCURATE OR LOSSES SUSTAINED BY YOU OR THIRD PARTIES OR A FAILURE OF THE PROGRAM TO OPERATE WITH ANY OTHER PROGRAMS), EVEN IF SUCH HOLDER OR OTHER PARTY HAS BEEN AD-VISED OF THE POSSIBILITY OF SUCH DAMAGES.17. Interpretation of Sections 15 and 16.If the disclaimer of warranty and limitation of liability provided above cannot be given local legal effect according to their terms, reviewing courts shall apply local law that most closely approximates an absolute waiver of all civil liability in connection with the Program, unless a warranty or assumption of liability accompanies a copy of the Program in return for a fee. END OF TERMS AND CONDITIONS How to Apply These Terms to Your New ProgramsIf you develop a new program, and you want it to be of the greatest possible use to the public, the best way to achieve this is to make it free software which everyone can redistribute and change under these terms.To do so, attach the following notices to the program. It is safest to attach them to the start of each source file to most effectively state the exclusion of warranty; and each file should have at least the “copyright” line and a pointer to where the full notice is found. <one line to give the program’s name and a brief idea of what it does.> Copyright (C) <year> <name of author> This program is free software: you can redistribute it and/or modify it under the terms of the GNU General Public License as published by the Free Software Foundation, either version 3 of the License, or (at your option) any later version. This program is distributed in the hope that it will be useful, but WITHOUT ANY WARRANTY; without even the implied warran-ty of MERCHANTABILITY or FITNESS FOR A PARTICULAR PURPOSE. See the GNU General Public License for more details. You should have received a copy of the GNU General Public License along with this program. If not, see <https://www.gnu.org/li-censes/>. Also add information on how to contact you by electronic and paper mail.If the program does terminal interaction, make it output a short notice like this when it starts in an interactive mode: <program> Copyright (C) <year> <name of author> This program comes with ABSOLUTELY NO WARRANTY; for details type show w’. This is free software, and you are welcome to redistribute it under certain conditions; type show c’ for details.The hypothetical commands show w’ and show c’ should show the appropriate parts of the General Public License. Of course, your program’s commands might be different; for a GUI interface, you would use an “about box”.You should also get your employer (if you work as a programmer) or school, if any, to sign a “copyright disclaimer” for the program, if necessary. For more information on this, and how to apply and follow the GNU GPL, see <https://www.gnu.org/licenses/>.The GNU General Public License does not permit incorporating your program into proprietary programs. If your program is a subroutine library, you may consider it more useful to permit linking proprietary applications with the library. If this is what you want to do, use the GNU Lesser General Public License instead of this License. But first, please read <https://www.gnu.org/licenses/why-not-lgpl.html>. based on the Library. Defining a subclass of a class defined by the Library is deemed a mode of using an inter-face provided by the Library.A “Combined Work” is a work produced by combining or linking an Application with the Library. The particular version of the Library with which the Combined Work was made is also called the “Linked Version”.The “Minimal Corresponding Source” for a Combined Work means the Corresponding Source for the Combined Work, exclud-ing any source code for portions of the Combined Work that, considered in isolation, are based on the Application, and not on the Linked Version.The “Corresponding Application Code” for a Combined Work means the object code and/or source code for the Application, in-cluding any data and utility programs needed for reproducing the Combined Work from the Application, but excluding the System Libraries of the Combined Work.1. Exception to Section 3 of the GNU GPL.You may convey a covered work under sections 3 and 4 of this License without being bound by section 3 of the GNU GPL.2. Conveying Modified Versions.If you modify a copy of the Library, and, in your modifications, a facility refers to a function or data to be supplied by an Application that uses the facility (other than as an argument passed when the facility is invoked), then you may convey a copy of the modified version:

Page 53 of 55
a) under this License, provided that you make a good faith effort to ensure that, in the event an Application does not supply the func-tion or data, the facility still operates, and performs whatever part of its purpose remains meaningful, orb) under the GNU GPL, with none of the additional permissions of this License applicable to that copy.3. Object Code Incorporating Material from Library Header Files.The object code form of an Application may incorporate material from a header file that is part of the Library. You may convey such object code under terms of your choice, provided that, if the incorporated material is not limited to numerical parameters, data structure layouts and accessors, or small macros, inline functions and templates (ten or fewer lines in length), you do both of the following: a) Give prominent notice with each copy of the object code that the Library is used in it and that the Library and its use are covered by this License.b) Accompany the object code with a copy of the GNU GPL and this license document.4. Combined Works.You may convey a Combined Work under terms of your choice that, taken together, effectively do not restrict modification of the portions of the Library contained in the Combined Work and reverse engineering for debugging such modifications, if you also do each of the following: a) Give prominent notice with each copy of the Combined Work that the Library is used in it and that the Library and its use are covered by this License.b) Accompany the Combined Work with a copy of the GNU GPL and this license document.c) For a Combined Work that displays copyright notices during execution, include the copyright notice for the Library among these notices, as well as a reference directing the user to the copies of the GNU GPL and this license document.d) Do one of the following:0) Convey the Minimal Corresponding Source under the terms of this License, and the Corresponding Application Code in a form suitable for, and under terms that permit, the user to recombine or relink the Application with a modified version of the Linked Version to produce a modified Combined Work, in the manner specified by section 6 of the GNU GPL for conveying Corresponding Source.1) Use a suitable shared library mechanism for linking with the Library. A suitable mechanism is one that (a) uses at run time a copy of the Library already present on the user’s computer system, and (b) will operate properly with a modified version of the Library that is interface-compatible with the Linked Version.e) Provide Installation Information, but only if you would otherwise be required to provide such information under section 6 of the GNU GPL, and only to the extent that such information is necessary to install and execute a modified version of the Combined Work produced by recombining or relinking the Application with a modified version of the Linked Version. (If you use option 4d0, the Installation Information must accompany the Minimal Corresponding Source and Corresponding Application Code. If you use option 4d1, you must provide the Installation Information in the manner specified by section 6 of the GNU GPL for conveying Corresponding Source.)5. Combined Libraries.You may place library facilities that are a work based on the Library side by side in a single library together with other library facili-ties that are not Applications and are not covered by this License, and convey such a combined library under terms of your choice, if you do both of the following: a) Accompany the combined library with a copy of the same work based on the Library, uncombined with any other library facilities, conveyed under the terms of this License.b) Give prominent notice with the combined library that part of it is a work based on the Library, and explaining where to find the accompanying uncombined form of the same work.6. Revised Versions of the GNU Lesser General Public License.The Free Software Foundation may publish revised and/or new versions of the GNU Lesser General Public License from time to time. Such new versions will be similar in spirit to the present version, but may differ in detail to address new problems or concerns.Each version is given a distinguishing version number. If the Library as you received it specifies that a certain numbered version of the GNU Lesser General Public License “or any later version” applies to it, you have the option of following the terms and conditions either of that published version or of any later version published by the Free Software Foundation. If the Library as you received it does not specify a version number of the GNU Lesser General Public License, you may choose any version of the GNU Lesser Gener-al Public License ever published by the Free Software Foundation.If the Library as you received it specifies that a proxy can decide whether future versions of the GNU Lesser General Public License shall apply, that proxy’s public statement of acceptance of any version is permanent authorization for you to choose that version for the Library.
Page 54 of 55
BSD 3-Clause “New” or “Revised” License
BSD 3-Clause License
Copyright (c) 2018, Roland RabienAll rights reserved.
Redistribution and use in source and binary forms, with or withoutmodification, are permitted provided that the following conditions are met:
* Redistributions of source code must retain the above copyright notice, this list of conditions and the following disclaimer.
* Redistributions in binary form must reproduce the above copyright notice, this list of conditions and the following disclaimer in the documentation and/or other materials provided with the distribution.
* Neither the name of the copyright holder nor the names of its contributors may be used to endorse or promote products derived from this software without specific prior written permission.
THIS SOFTWARE IS PROVIDED BY THE COPYRIGHT HOLDERS AND CONTRIBUTORS “AS IS”AND ANY EXPRESS OR IMPLIED WARRANTIES, INCLUDING, BUT NOT LIMITED TO, THEIMPLIED WARRANTIES OF MERCHANTABILITY AND FITNESS FOR A PARTICULAR PURPOSE AREDISCLAIMED. IN NO EVENT SHALL THE COPYRIGHT HOLDER OR CONTRIBUTORS BE LIABLEFOR ANY DIRECT, INDIRECT, INCIDENTAL, SPECIAL, EXEMPLARY, OR CONSEQUENTIALDAMAGES (INCLUDING, BUT NOT LIMITED TO, PROCUREMENT OF SUBSTITUTE GOODS ORSERVICES; LOSS OF USE, DATA, OR PROFITS; OR BUSINESS INTERRUPTION) HOWEVERCAUSED AND ON ANY THEORY OF LIABILITY, WHETHER IN CONTRACT, STRICT LIABILITY,OR TORT (INCLUDING NEGLIGENCE OR OTHERWISE) ARISING IN ANY WAY OUT OF THE USEOF THIS SOFTWARE, EVEN IF ADVISED OF THE POSSIBILITY OF SUCH DAMAGE.

Page 55 of 55
About This Manual
This manual was written in Adobe InDesign 15.1.1, and is set in Robert Slimbach’s Minion Pro and Myriad Pro. The cover page is set in Aldo Novarese’s modernist geometric Eurostyle.
This documentation, as well as the software described in it, is furnished under license and may only be used or copied in accordance with the terms of such license. The information in this manual is furnished for informa-tional use only, is subject to change without notice, and should not be construed as a commitment by MAAT Incorporated. MAAT Incorporated assumes no responsibility or liability for any errors or inaccuracies that may appear in this document.
Except as permitted by such license, no part of this publication may be reproduced, stored in a retrieval sys-tem, or transmitted, in any form or by any means, electronic, mechanical, recording, or otherwise, without the prior written permission of MAAT Incorporated.
Notice of Liability The author and publisher have made every effort to ensure the accuracy of the information herein. However, the information contained in this document is provided without warranty, either express or implied. Nei-ther the authors, MAAT Incorporated, nor its dealers or distributors will be held liable for any damages to be caused either directly or indirectly by the instructions contained in this book, or by the software or hardware products described herein.
MAAT INCORPORATED MAKES NO WARRANTIES, EXPRESS OR IMPLIED, INCLUDING WITHOUT LIMITATION THE IMPLIED WARRANTIES OF MERCHANTABILITY AND FITNESS FOR A PARTIC-ULAR PURPOSE, REGARDING THE SOFTWARE. MAAT INCORPORATED DOES NOT WARRANT, GUARANTEE, OR MAKE ANY REPRESENTATIONS REGARDING THE USE OR THE RESULTS OF THE USE OF THE MAAT INCORPORATED SOFTWARE IN TERMS OF ITS CORRECTNESS, ACCURA-CY, RELIABILITY, CURRENTNESS, OR OTHERWISE. THE ENTIRE RISK AS TO THE RESULTS AND PERFORMANCE OF THE MAAT INCORPORATED SOFTWARE IS ASSUMED BY YOU. THE EXCLU-SION OF IMPLIED WARRANTIES IS NOT PERMITTED BY SOME STATES. THE ABOVE EXCLUSION MAY NOT APPLY TO YOU.
IN NO EVENT WILL MAAT INCORPORATED, ITS DIRECTORS, OFFICERS, EMPLOYEES, OR AGENTS BE LIABLE TO YOU FOR ANY CONSEQUENTIAL, INCIDENTAL, OR INDIRECT DAMAGES (INCLUD-ING DAMAGES FOR LOSS OF BUSINESS PROFITS, BUSINESS INTERRUPTION, LOSS OF BUSINESS INFORMATION, AND THE LIKE) ARISING OUT OF THE USE OR INABILITY TO USE THE MAAT INCORPORATED SOFTWARE EVEN IF MAAT HAS BEEN ADVISED OF THE POSSIBILITY OF SUCH DAMAGES. BECAUSE SOME STATES DO NOT ALLOW THE EXCLUSION OR LIMITATION OF LIA-BILITY FOR CONSEQUENTIAL OR INCIDENTAL DAMAGES, THE ABOVE LIMITATIONS MAY NOT APPLY TO YOU.
©2018 – 2021 MAAT Incorporated — All rights reserved.
MAAT, DRMeter, DR2, DRMeter MkII and the MAAT logo are trademarks of MAAT Incorporated. All other company or product names are either trademarks or registered trademarks of their respective owners. iTunes is a trademark and servicemark of Apple Incorporated
210907-5.9