introduction - yd-fsm.weebly.com
TRANSCRIPT

1
Introduction
1) JDK Releases:
Table 1. Java versions (ref: https://www.java.com/releases)
Version Release Date
19 2022-09-20
18 2022-03-15
17 LTS 2021-09-14
16 2021-03-16
15 2020-09-15
14 2020-03-17
13 2019-09-19
12 2019-03-19
11 LTS 2018-09-25
10 2018-03-20
9 2017-09-21
8 LTS 2014-03-18
7 LTS 2011-07-11
6 LTS 2006-12-12
5 2004-09-30
1.4 2002-02-13
1.3 2000-05-08
1.2 1998-12-04
1.0 1996-01-23
2) Integrated Development Environments
Advantages:
- Syntax highlighting
- Code completion
- Error detection
- Fast compilation and execution
- Easy debugging
Examples:
- Netbeans IDE: free, requires an installed Java JDK, has integrated swing UI designer
- Eclipse IDE: free, has integrated Java JDK, supports WindowBuilder extension
- IntelliJ IDEA IDE: free, requires an installed Java JDK, has integrated swing UI designer
- Visual Studio Code + Java Extension Pack: free, requires an installed Java JDK

2
3) Java GUIs
- AWT (Abstract Windowing Toolkit) – since JDK 1.0
o Uses native control
o Appearance/behavior depends on platform
- Swing – since JDK 1.2
o Implemented completely in Java (light weight)
- JavaFX – since JDK 8
o Written as a native library
o Provided on a wide variety of devices
- SWT (Standard Widget Toolkit)
o Eclipse
Objective: Learn how to create desktop applications using Java

3
Chapter 1: Object-Oriented Programming and Java
1) Object-Oriented Programming (OOP)
There are two types of programming languages:
- Procedural languages: the source code is composed of several methods acting on the data
- Object-oriented programming (OOP) languages: the source code is composed of data (the
objects) controlling access to the methods.
Languages, such as C++ support both procedural and object-oriented programming.
Java is an Object-oriented programming (OOP) language that requires:
- Implementation of the class
- Instantiation of the class: creation of the object
- Execution of the methods through the object
2) OOP mechanisms
OOP languages provide 3 mechanisms to implement the object-oriented model:
- Encapsulation: this mechanism binds together the code and the data it manipulates. The
encapsulation is a protective wrapper that prevents the code and data from being arbitrarily
accessed by other code defined outside the wrapper. Access to the code and data inside the
wrapper is tightly controlled through a well-defined interface.
In Java, the basis of encapsulation is the class
- Inheritance: this is the process by which one object acquires the properties of another
object. Without the use of inheritance, each object would need to define all of its
characteristics explicitly. However, by using the inheritance, an object needs only to define
the additional attributes. It can inherit its general attributes from its parent. Thus, it is the
inheritance mechanism that makes it possible for one object to be a specific instance of a
more general case.
- Polymorphism: this mechanism allows one function to be used differently depending on the
provided parameters. Polymorphism in Java can be performed by two different ways:
o Method Overriding: the subclass redefines the method of the superclass
o Method Overloading: multiple methods with the same name but with different
signatures (parameters).

4
3) Classes and objects
The class is the container of the code (instructions) and data (variables). When you write a program
in an object-oriented language, you don’t define actual objects. You define classes of objects.
Classes are used to instantiate the objects: an instance of a class is an object.
Example:
Person p1 = new Person();
Person is the class and p1 is the object.
4) Simple Java program
In Java, the name of a source file must be the name of the class followed by the extension “.java”.
For example, the file name of the following class should be “Person.java”:
// call this file Person.java
public class Person {
// the program begins with a call to main().
public static void main(String[] args) {
System.out.println("Hello Person");
}
}
5) Inheritance
Inheritance is a powerful mechanism that means when you write a class you only have to specify how
that class is different from some other class, while also giving you dynamic access to the information
contained in those other classes.
With inheritance, all classes are arranged in a strict hierarchy:
Figure 1. Class Hierarchy

5
Inheritance:
− Superclass: Parent class
− Subclass: Child class
Inheritance – syntax:
<modifier> class <name> extends <superclass>{
}
Example:
// Superclass
public class Employee {
protected String name;
protected double salary;
protected Date birthDate;
public Employee(){
// ...
}
public String toString() {
// ...
}
}
// Subclass
public class Manager extends Employee {
private String department;
public Manager(){
// ...
}
public String toString() {
// ...
}
}
The subclass:
- Inherits the data and methods of the parent class
- Does not inherit the constructors of the parent class
- Can add new variables
- Can add new methods
- Can override inherited methods

6
Invoking Parent Class Constructors using “super” keyword:
public class Employee {
protected String name;
protected double salary;
protected Date birthDate;
public Employee(String name, double salary, Date birthDate) {
this.name = name;
this.salary = salary;
this.birthDate = birthDate;
}
}
public class Manager extends Employee {
private String department;
public Manager(String name, double salary, Date birthDate, String dep){
super(name, salary, bityhDate);
this.department = dep;
}
}
Overriding Methods:
public class Employee {
protected String name;
protected double salary;
protected Date birthDate;
public Employee() {
// ...
}
public String toString() {
return "Name: " + name + " Salary: " + salary
+ " Birth Date:" + birthDate;
}
}
public class Manager extends Employee {
private String department;
public Manager() {
// ...
}
@Override
public String toString() {
return "Name: " + name + " Salary: " + salary
+ " Birth Date:" + birthDate + " department: " + department;
}
}
7
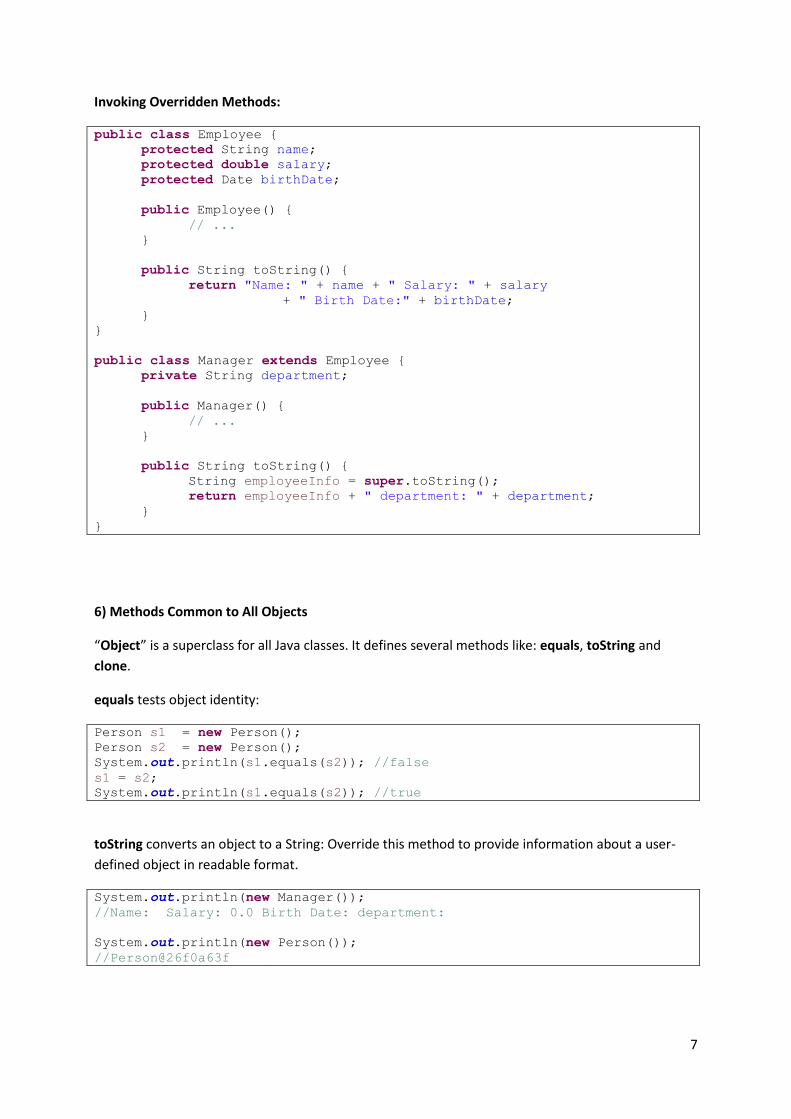
Invoking Overridden Methods:
public class Employee {
protected String name;
protected double salary;
protected Date birthDate;
public Employee() {
// ...
}
public String toString() {
return "Name: " + name + " Salary: " + salary
+ " Birth Date:" + birthDate;
}
}
public class Manager extends Employee {
private String department;
public Manager() {
// ...
}
public String toString() {
String employeeInfo = super.toString();
return employeeInfo + " department: " + department;
}
}
6) Methods Common to All Objects
“Object” is a superclass for all Java classes. It defines several methods like: equals, toString and
clone.
equals tests object identity:
Person s1 = new Person();
Person s2 = new Person();
System.out.println(s1.equals(s2)); //false
s1 = s2;
System.out.println(s1.equals(s2)); //true
toString converts an object to a String: Override this method to provide information about a user-
defined object in readable format.
System.out.println(new Manager());
//Name: Salary: 0.0 Birth Date: department:
System.out.println(new Person());
//Person@26f0a63f

8
7) Interfaces and Abstract Classes
Interfaces:
- The interface contains method declarations and may contain constants
- All the methods are public
- Interfaces cannot be instantiated
- The implementer classes should implement all the methods declared in the interface
- A class can extend a single class but may implement any number of interfaces
Example:
interface Driveable {
public void start();
public void forward();
public void turn(double angle);
public void stop();
}
class Bicycle implements Driveable {
@Override
public void start() {
System.out.println("The bicycle has been started");
}
@Override
public void forward() {
System.out.println("The bicycle moves forward");
}
@Override
public void turn(double angle) {
System.out.println("The bicycle turns " + angle + " degrees");
}
@Override
public void stop() {
System.out.println("The bicycle has been stopped");
}
}
Interface instantiation:
Driveable bicycle = new Driveable(); // false
Driveable bicycle = new Driveable() {
public void start() {}
public void forward() {}
public void turn(double angle) {}
public void stop() {}
};

9
Select the correct statements:
Driveable a;
Driveable b = new Driveable();
Driveable t[] = new Driveable[ 3 ];
public void drive( Driveable d ) {}
Abstract Classes:
- May contain abstract and implemented methods as well
- May contain data
- Cannot be instantiated
- Are designed for subclassing
public abstract class Shape {
protected double area;
public abstract void draw();
public void printName() {
System.out.println("My name is Shape");
}
}
public class Square extends Shape{
private double size;
public Square( double size ){
this.size = size;
this.area = size * size;
}
public void draw() {
System.out.println("I am a square");
}
}
A class can extends how many abstract classes?
8) Nested Classes
When: If a class is used only inside of another class
Helper classes
10
Chapter 2: Packages, Standard Library and Exceptions
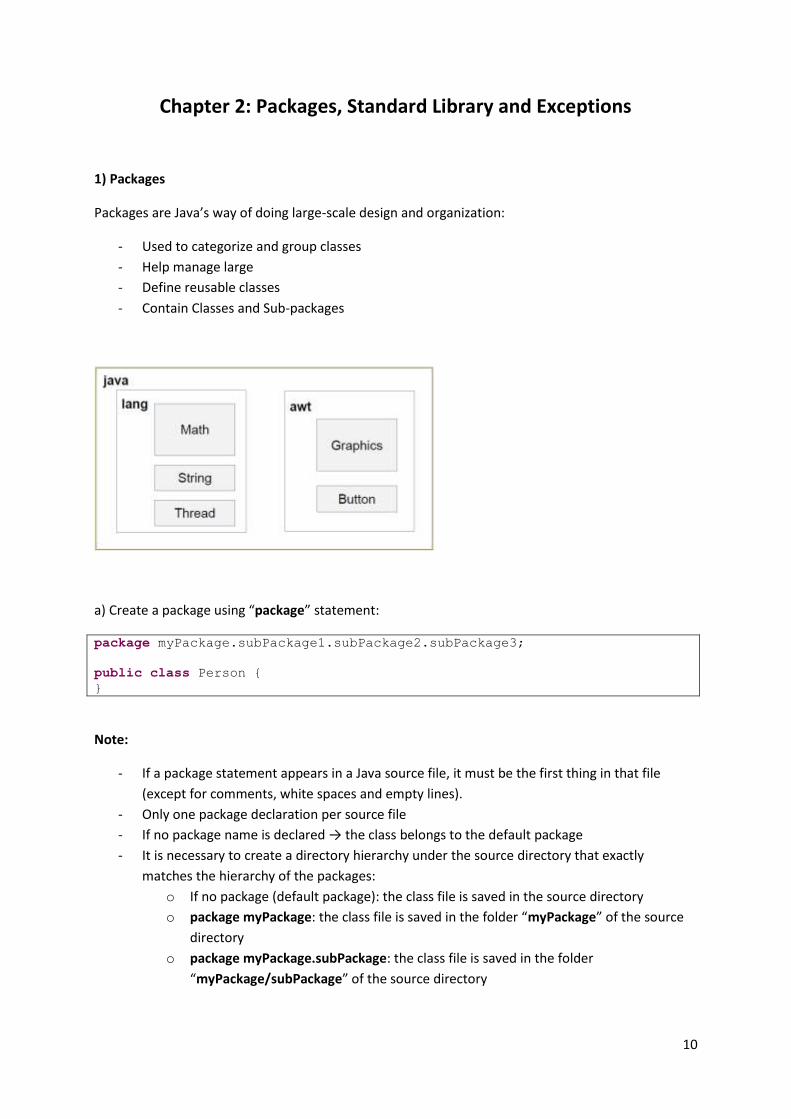
1) Packages
Packages are Java’s way of doing large-scale design and organization:
- Used to categorize and group classes
- Help manage large
- Define reusable classes
- Contain Classes and Sub-packages
a) Create a package using “package” statement:
package myPackage.subPackage1.subPackage2.subPackage3;
public class Person {
}
Note:
- If a package statement appears in a Java source file, it must be the first thing in that file
(except for comments, white spaces and empty lines).
- Only one package declaration per source file
- If no package name is declared → the class belongs to the default package
- It is necessary to create a directory hierarchy under the source directory that exactly
matches the hierarchy of the packages:
o If no package (default package): the class file is saved in the source directory
o package myPackage: the class file is saved in the folder “myPackage” of the source
directory
o package myPackage.subPackage: the class file is saved in the folder
“myPackage/subPackage” of the source directory

11
b) Import package
//import all classes of package javax.swing
import javax.swing.*;
//only import class Math of package java.lang
import java.lang.Math;
public class Person {
}
The “import” statement:
- is preceded by “package” statement if any
- precedes all class declarations
- tells the compiler where to find the class or classes
2) Standard Library
Documentation: https://docs.oracle.com/en/java/javase/17/docs/api/index.html
Modules:
a) java.base: Defines the foundational APIs of the Java SE Platform.
- java.io: Provides for system input and output through data streams, serialization and
the file system.
- java.lang: Provides classes that are fundamental to the design of the Java
programming language.
- java.math: Provides classes for performing arbitrary-precision integer arithmetic
(BigInteger) and arbitrary-precision decimal arithmetic (BigDecimal).
- java.net: Provides the classes for implementing networking applications.
- javax.net: Provides classes for networking applications.
- java.security: Provides the classes and interfaces for the security framework.
- java.util: Contains the collections framework, some internationalization support
classes, a service loader, properties, random number generation, string parsing and
scanning classes, base64 encoding and decoding, a bit array, and several
miscellaneous utility classes.
- etc.
b) java.desktop: Defines the AWT and Swing user interface toolkits, plus APIs for accessibility,
audio, imaging, printing, and JavaBeans.
- java.awt: Contains all of the classes for creating user interfaces and for painting
graphics and images.
- javax.swing: Provides a set of "lightweight" (all-Java language) components that, to
the maximum degree possible, work the same on all platforms.
- javax.print: Provides the principal classes and interfaces for the Java Print Service
API.
- etc.
c) java.sql: Defines the JDBC API.

12
d) java.xml: Defines the Java API for XML Processing (JAXP), the Streaming API for XML (StAX),
the Simple API for XML (SAX), and the W3C Document Object Model (DOM) API.
3) Exceptions
When executing Java code, different errors can occur: coding errors made by the programmer, errors
due to wrong input, or other unexpected things.
When an error occurs, Java will normally stop and generate an error message. The technical term for
this is: Java will throw an exception (throw an error).
a) Example:
public class AddArguments {
public static void main(String[] args) {
int sum = 0;
for (int i = 0; i < args.length; i++) {
sum += Integer.parseInt(args[i]);
}
System.out.println("Sum: " + sum);
}
}
Correct execution :
java AddArguments 1 2 3
Sum: 6
Wrong execution:
java AddArguments 1 foo 2 3
Exception in thread "main" java.lang.NumberFormatException: For input string: "foo"
at java.lang.NumberFormatException.forInputString(NumberFormatException.java:65)
at java.lang.Integer.parseInt(Integer.java:580)
at java.lang.Integer.parseInt(Integer.java:615)
at addarguments.AddArguments.main(AddArguments.java:line_number)
Java Result: 1
Note:
- If an exception is not handled in a method, it is thrown to the caller of that method
- If the exception gets back to the main method and is not handled there, the program is
terminated abnormally.
b) Exception handling: try, catch, and finally

13
Example 1:
public class AddArguments {
public static void main(String[] args) {
try {
int sum = 0;
for (int i = 0; i < args.length; i++) {
sum += Integer.parseInt(args[i]);
}
System.out.println("Sum: " + sum);
} catch (NumberFormatException e) {
System.err.println("Non-numeric argument");
}
}
}
Example 2:
public class AddArguments {
public static void main(String[] args) {
int sum = 0;
for (int i = 0; i < args.length; i++) {
try {
sum += Integer.parseInt(args[i]);
} catch (NumberFormatException e) {
System.err.println("Non-numeric argument:" + args[i]);
}
}
System.out.println("Sum: " + sum);
}
}
The try-catch statement
try{
// critical code block
// code that might throw exceptions
} catch( MyException1 e1 ){
// code to execute if a MyException1 is thrown
} catch( MyException2 e2 ){
// code to execute if a MyException1 is thrown
} catch ( Exception e3 ){
// code to execute if any other exception is thrown
}
Closing resources: The finally clause
try{
connectDB();
doTheWork();
} catch( AnyException e ){
logProblem( e );
} finally {
disconnectDB();
}
Note: The code in the finally block is always executed (even in case of return statement)
14
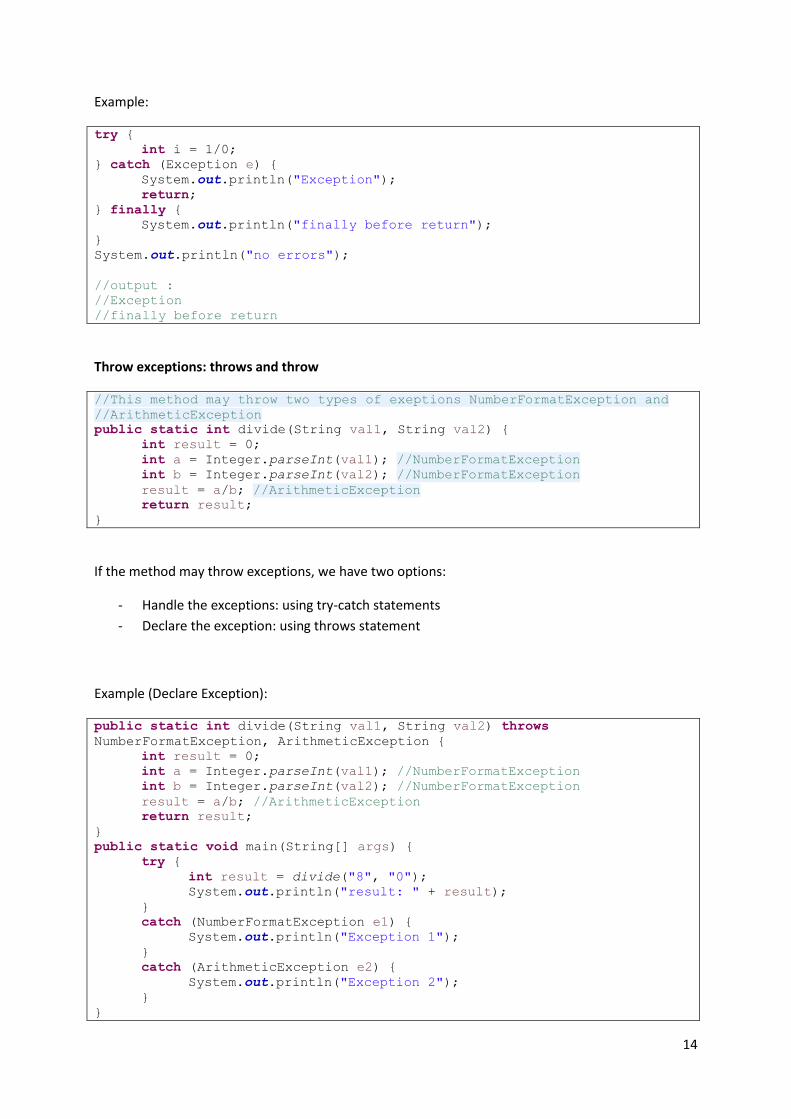
Example:
try {
int i = 1/0;
} catch (Exception e) {
System.out.println("Exception");
return;
} finally {
System.out.println("finally before return");
}
System.out.println("no errors");
//output :
//Exception
//finally before return
Throw exceptions: throws and throw
//This method may throw two types of exeptions NumberFormatException and
//ArithmeticException
public static int divide(String val1, String val2) {
int result = 0;
int a = Integer.parseInt(val1); //NumberFormatException
int b = Integer.parseInt(val2); //NumberFormatException
result = a/b; //ArithmeticException
return result;
}
If the method may throw exceptions, we have two options:
- Handle the exceptions: using try-catch statements
- Declare the exception: using throws statement
Example (Declare Exception):
public static int divide(String val1, String val2) throws
NumberFormatException, ArithmeticException {
int result = 0;
int a = Integer.parseInt(val1); //NumberFormatException
int b = Integer.parseInt(val2); //NumberFormatException
result = a/b; //ArithmeticException
return result;
}
public static void main(String[] args) {
try {
int result = divide("8", "0");
System.out.println("result: " + result);
}
catch (NumberFormatException e1) {
System.out.println("Exception 1");
}
catch (ArithmeticException e2) {
System.out.println("Exception 2");
}
}

15
c) User-defined exceptions
class UndefinedOperationException extends Exception {
public UndefinedOperationException() {
super();
}
}
public static int getOperation(String op) throws
UndefinedOperationException{
if (op.equals("plus")) {
return 1;
}
else if (op.equals("div")) {
return 2;
}
else {
throw new UndefinedOperationException();
}
}
Exemple :
String prenom;
//On initialise reponse à O pour oui
char reponse = 'O';
//Notre objet Scanner, n'oubliez pas l'import de java.util.Scanner !
Scanner sc = new Scanner(System.in);
//Tant que la réponse donnée est égale à 'O' (oui)
while (reponse == 'O')
{
//On affiche une instruction
System.out.println("Donnez un prénom : ");
//On récupère le prénom saisi
prenom = sc.nextLine();
//On affiche notre phrase avec le prénom
System.out.println("Bonjour " +prenom+ ", comment vas-tu ?");
//On demande si la personne veut faire un autre essai
System.out.println("Voulez-vous réessayer ? (O/N)");
//On récupère la réponse de l'utilisateur
reponse = sc.nextLine().charAt(0);
}
System.out.println("Au revoir…");
16
Chapter 3: Graphical User Interface (GUI) Programming
1) JFrame
A JFrame is a top-level window with a title and a border.
The size of the frame includes any area designated for the border.
The dimensions of the border area may be obtained using the getInsets method.
Since the border area is included in the overall size of the frame, the border effectively obscures a
portion of the frame, constraining the area available for rendering and/or displaying subcomponents
to the rectangle which has an upper-left corner location of (insets.left, insets.top), and has a size of
width - (insets.left + insets.right) by height - (insets.top + insets.bottom).
Constructors:
- JFrame() : Constructs a new frame that is initially invisible.
- JFrame(String title) : Creates a new, initially invisible Frame with the specified title.
Methods:
- public void setLayout(LayoutManager manager): Sets the LayoutManager.
- public String getTitle(): Gets the title of the frame.
- public void setTitle(String title): Sets the title for this frame to the specified string.
- public void setIconImage(Image image): Sets the image to be displayed as the icon for this
window.
- public void setMenuBar(MenuBar mb): Sets the menu bar for this frame to the specified
menu bar.
- public void setResizable(boolean resizable): Sets whether this frame is resizable by the user.
- public void setSize(int width, int height): Resizes this component so that it has width width
and height height.
- public void setBounds(int x, int y, int width, int height): Moves and resizes this component.
The new location of the top-left corner is specified by x and y, and the new size is specified
by width and height.
- public void setMinimumSize(Dimension minimumSize): Sets the minimum size of this
window to a constant value.
- public void pack(): Causes this Window to be sized to fit the preferred size and layouts of its
subcomponents.
- public void setVisible(boolean b): Shows or hides this Window depending on the value of
parameter b.

17
- public void setContentPane(Container contentPane): Sets the contentPane property. the
content pane is the main container in all frames.
- public Container getContentPane(): Returns the contentPane object for this frame.
- public Component add(Component comp): Appends the specified component to the end of
this container. Returns the component argument.
- public Component add(Component comp, int index): Adds the specified component to this
container at the given position. Returns the component argument. Possible values of
“index”: BorderLayout.CENTER, BorderLayout.EAST, BorderLayout.WEST,
BorderLayout.NORTH, BorderLayout.SOUTH.
- public void setDefaultCloseOperation(int operation): Sets the operation that will happen by
default when the user initiates a "close" on this frame. The default value is HIDE_ON_CLOSE.
You must specify one of the following choices:
o WindowConstants.DO_NOTHING_ON_CLOSE: don't do anything.
o WindowConstants.HIDE_ON_CLOSE: hide the frame.
o WindowConstants.DISPOSE_ON_CLOSE: hide and dispose the frame without
stopping the application (unless there is no more code to execute).
o WindowConstants.EXIT_ON_CLOSE: Stop the entire application using the System exit
method.
Example 1: The application is stopped if the two frames are closed
public static void main(String[] args) {
JFrame myFrame = new JFrame("frame 1");
myFrame.setSize(200, 100);
myFrame.setVisible(true);
myFrame.setDefaultCloseOperation(WindowConstants.DISPOSE_ON_CLOSE);
JFrame myFrame2 = new JFrame("frame 2");
myFrame2.setSize(200, 100);
myFrame2.setVisible(true);
myFrame2.setDefaultCloseOperation(WindowConstants.DISPOSE_ON_CLOSE);
}
Example 2: The application is stopped if any frame is closed
public static void main(String[] args) {
JFrame myFrame = new JFrame("frame 1");
myFrame.setSize(200, 100);
myFrame.setVisible(true);
myFrame.setDefaultCloseOperation(WindowConstants.EXIT_ON_CLOSE);
JFrame myFrame2 = new JFrame("frame 2");
myFrame2.setSize(200, 100);
myFrame2.setVisible(true);
myFrame2.setDefaultCloseOperation(WindowConstants.EXIT_ON_CLOSE);
}

18
2) LayoutManager
https://docs.oracle.com/javase/tutorial/uiswing/layout/visual.html
LayoutManager is a Java interface that is implemented by classes that know how to lay out
Containers.
a) BorderLayout
Every frame is initialized to use a BorderLayout.
A BorderLayout places components in up to five areas: top, bottom, left, right, and center. All extra
space is placed in the center area.
Constructors:
- BorderLayout(): Constructs a new border layout with no gaps between components.
- BorderLayout(int hgap, int vgap): Constructs a border layout with the specified gaps
between components.
Example:
public static void main(String[] args) {
JFrame myFrame = new JFrame("frame 1");
myFrame.setLayout(new BorderLayout()); //useless
myFrame.add(new JButton("NORTH"), BorderLayout.NORTH);
myFrame.add(new JButton("EAST"), BorderLayout.EAST);
myFrame.add(new JButton("CENTER"), BorderLayout.CENTER);
myFrame.add(new JButton("WEST"), BorderLayout.WEST);
myFrame.add(new JButton("SOUTH"), BorderLayout.SOUTH);
myFrame.pack();
myFrame.setVisible(true);
myFrame.setDefaultCloseOperation(WindowConstants.EXIT_ON_CLOSE);
}
Result:
Note: not necessary to fill the 5 regions. Fill only the required regions and the others remain empty.
How to use BorderLayout: https://docs.oracle.com/javase/tutorial/uiswing/layout/border.html

19
b) GridLayout
GridLayout simply makes a bunch of components equal in size and displays them in the requested
number of rows and columns.
Constructors
- GridLayout(): Creates a grid layout with a default of one column per component, in a single
row.
- GridLayout(int rows, int cols): Creates a grid layout with the specified number of rows and
columns. The rows with the value zero meaning any number of rows. The columns with the
value zero meaning any number of columns.
- GridLayout(int rows, int cols, int hgap, int vgap): Creates a grid layout with the specified
number of rows and columns. The rows with the value zero meaning any number of rows.
The columns with the value zero meaning any number of columns.
Example:
public static void main(String[] args) {
JFrame myFrame = new JFrame("frame 1");
myFrame.setLayout(new GridLayout(0, 2)); //any rows, 2 cols
myFrame.add(new JLabel("First name"));
myFrame.add(new JTextField());
myFrame.add(new JLabel("Last Name"));
myFrame.add(new JTextField());
myFrame.add(new JLabel("email"));
myFrame.add(new JTextField());
myFrame.add(new JLabel("All fields are required"));
myFrame.add(new JLabel());
myFrame.add(new JButton("OK"));
myFrame.pack();
myFrame.setVisible(true);
myFrame.setDefaultCloseOperation(WindowConstants.EXIT_ON_CLOSE);
}
Result:

20
Note: to fix the component height, it is possible to add the component to a panel and to add the
panel to the north (or south) zone of the frame.
Example:
public static void main(String[] args) {
JFrame myFrame = new JFrame("frame 1");
JPanel myPanel = new JPanel();
myPanel.setLayout(new GridLayout(0, 2)); //any rows, 2 cols
myPanel.add(new JLabel("First name"));
myPanel.add(new JTextField());
myPanel.add(new JLabel("Last Name"));
myPanel.add(new JTextField());
myPanel.add(new JLabel("email"));
myPanel.add(new JTextField());
myPanel.add(new JLabel("All fields are required"));
myPanel.add(new JLabel());
myPanel.add(new JButton("OK"));
myFrame.add(myPanel, BorderLayout.NORTH);
myFrame.pack();
myFrame.setVisible(true);
myFrame.setDefaultCloseOperation(WindowConstants.EXIT_ON_CLOSE);
}
Result:

21
How to Use GridLayout: https://docs.oracle.com/javase/tutorial/uiswing/layout/grid.html
c) BoxLayout
https://docs.oracle.com/javase/tutorial/uiswing/layout/box.html
d) CardLayout
https://docs.oracle.com/javase/tutorial/uiswing/layout/card.html
e) FlowLayout
https://docs.oracle.com/javase/tutorial/uiswing/layout/flow.html
f) GridBagLayout
https://docs.oracle.com/javase/tutorial/uiswing/layout/gridbag.html
g) GroupLayout
https://docs.oracle.com/javase/tutorial/uiswing/layout/group.html
h) SpringLayout
https://docs.oracle.com/javase/tutorial/uiswing/layout/spring.html
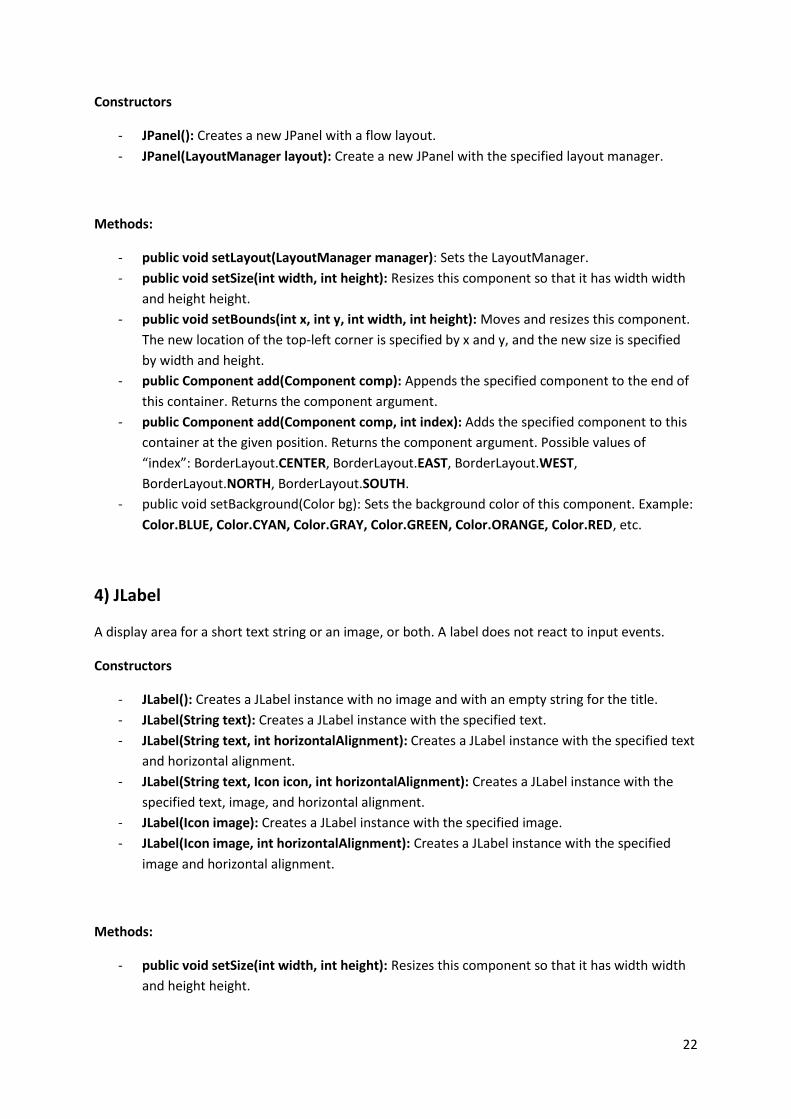
3) JPanel
JPanel is a container.
22
Constructors
- JPanel(): Creates a new JPanel with a flow layout.
- JPanel(LayoutManager layout): Create a new JPanel with the specified layout manager.
Methods:
- public void setLayout(LayoutManager manager): Sets the LayoutManager.
- public void setSize(int width, int height): Resizes this component so that it has width width
and height height.
- public void setBounds(int x, int y, int width, int height): Moves and resizes this component.
The new location of the top-left corner is specified by x and y, and the new size is specified
by width and height.
- public Component add(Component comp): Appends the specified component to the end of
this container. Returns the component argument.
- public Component add(Component comp, int index): Adds the specified component to this
container at the given position. Returns the component argument. Possible values of
“index”: BorderLayout.CENTER, BorderLayout.EAST, BorderLayout.WEST,
BorderLayout.NORTH, BorderLayout.SOUTH.
- public void setBackground(Color bg): Sets the background color of this component. Example:
Color.BLUE, Color.CYAN, Color.GRAY, Color.GREEN, Color.ORANGE, Color.RED, etc.
4) JLabel
A display area for a short text string or an image, or both. A label does not react to input events.
Constructors
- JLabel(): Creates a JLabel instance with no image and with an empty string for the title.
- JLabel(String text): Creates a JLabel instance with the specified text.
- JLabel(String text, int horizontalAlignment): Creates a JLabel instance with the specified text
and horizontal alignment.
- JLabel(String text, Icon icon, int horizontalAlignment): Creates a JLabel instance with the
specified text, image, and horizontal alignment.
- JLabel(Icon image): Creates a JLabel instance with the specified image.
- JLabel(Icon image, int horizontalAlignment): Creates a JLabel instance with the specified
image and horizontal alignment.
Methods:
- public void setSize(int width, int height): Resizes this component so that it has width width
and height height.

23
- public void setBounds(int x, int y, int width, int height): Moves and resizes this component.
The new location of the top-left corner is specified by x and y, and the new size is specified
by width and height.
- public void setText(String text): Defines the single line of text this component will display. If
the value of text is null or empty string, nothing is displayed.
- public String getText(): Returns the text string that the label displays.
5) JButton
Constructor
- JButton(): Creates a button with no set text or icon.
- JButton(String text): Creates a button with text.
- JButton(String text, Icon icon): Creates a button with initial text and an icon.
- JButton(Icon icon): Creates a button with an icon.
Methods:
- public void setSize(int width, int height): Resizes this component so that it has width width
and height height.
- public void setBounds(int x, int y, int width, int height): Moves and resizes this component.
The new location of the top-left corner is specified by x and y, and the new size is specified
by width and height.
- public void setText(String text): Defines the single line of text this component will display. If
the value of text is null or empty string, nothing is displayed.
- public String getText(): Returns the text string that the label displays.
- public void addActionListener(ActionListener l): Adds an ActionListener to the button.
Example:
JButton btnOK = new JButton("OK");
btnOK.addActionListener(new ActionListener() {
public void actionPerformed(ActionEvent e) {
JOptionPane.showMessageDialog(null, "Hello");
}
});
6) JTextField
JTextField is a lightweight component that allows the editing of a single line of text.
Constructors
- JTextField(): Constructs a new TextField.

24
- JTextField(String text): Constructs a new TextField initialized with the specified text.
Methods:
- public void setSize(int width, int height): Resizes this component so that it has width width
and height height.
- public void setBounds(int x, int y, int width, int height): Moves and resizes this component.
The new location of the top-left corner is specified by x and y, and the new size is specified
by width and height.
- public void setText(String text): Defines the single line of text this component will display. If
the value of text is null or empty string, nothing is displayed.
- public String getText(): Returns the text string that the label displays.
7) JTextArea
A JTextArea is a multi-line area that displays plain text.
Constructors
- JTextArea(): Constructs a new TextArea.
- JTextArea(int rows, int columns): Constructs a new empty TextArea with the specified
number of rows and columns.
- JTextArea(String text): Constructs a new TextArea with the specified text displayed.
- JTextArea(String text, int rows, int columns): Constructs a new TextArea with the specified
text and number of rows and columns.
Methods:
- public void setSize(int width, int height): Resizes this component so that it has width width
and height height.
- public void setBounds(int x, int y, int width, int height): Moves and resizes this component.
The new location of the top-left corner is specified by x and y, and the new size is specified
by width and height.
- public void setText(String text): Defines the single line of text this component will display. If
the value of text is null or empty string, nothing is displayed.
- public String getText(): Returns the text string that the label displays.
8) L’arbre (JTree)
a) JTree
La classe JTree permet de présenter des données sous une forme hiérarchique arborescente.
Un arbre doit avoir un nœud racine.
25
Les données d’un arbre sont gérées par un modèle (càd un objet implémentant l’interface
TreeModel).
La classe JTree possède plusieurs constructeurs, telles que:
- public JTree();
- public JTree(TreeNode rootNode);
- public JTree(TreeModel model);
TreeNode est une interface. DefaultMutableTreeNode est un exemple de classe qui
implémente l’interface TreeNode.
TreeModel est une interface. DefaultTreeModel est un exemple de classe qui implémente
l’interface TreeModel.
Lorsqu'une instance de JTree est créée avec le constructeur sans paramètres, l'arbre obtenu
contient des données par défaut.
Exemple 1 :
public static void main(String args[]) {
JFrame frame = new JFrame();
frame.setTitle("JTree");
frame.setSize(300, 200);
JTree tree = new JTree();
frame.add(tree, BorderLayout.CENTER);
frame.setDefaultCloseOperation(WindowConstants.EXIT_ON_CLOSE);
frame.setVisible(true);
}
Résultat :

26
b) JScrollPane
Le défilement (horizontal et/ou vertical) est nécessaire lorsque le contenu d’un arbre
dépasse la dimension de l’arbre.
JScrollPane est un conteneur qui fournit la possibilité de créer un défilement horizontal ou
vertical ou les deux à la fois. Exemple de création d’une barre de défilement :
public static void main(String args[]) { JFrame frame = new JFrame(); frame.setTitle("JTree"); frame.setSize(300, 200); JTree tree = new JTree(); JScrollPane treePane = new JScrollPane(tree); frame.add(treePane, BorderLayout.CENTER); frame.setDefaultCloseOperation(WindowConstants.EXIT_ON_CLOSE); frame.setVisible(true); }
Résultat :
c) Nœud
27
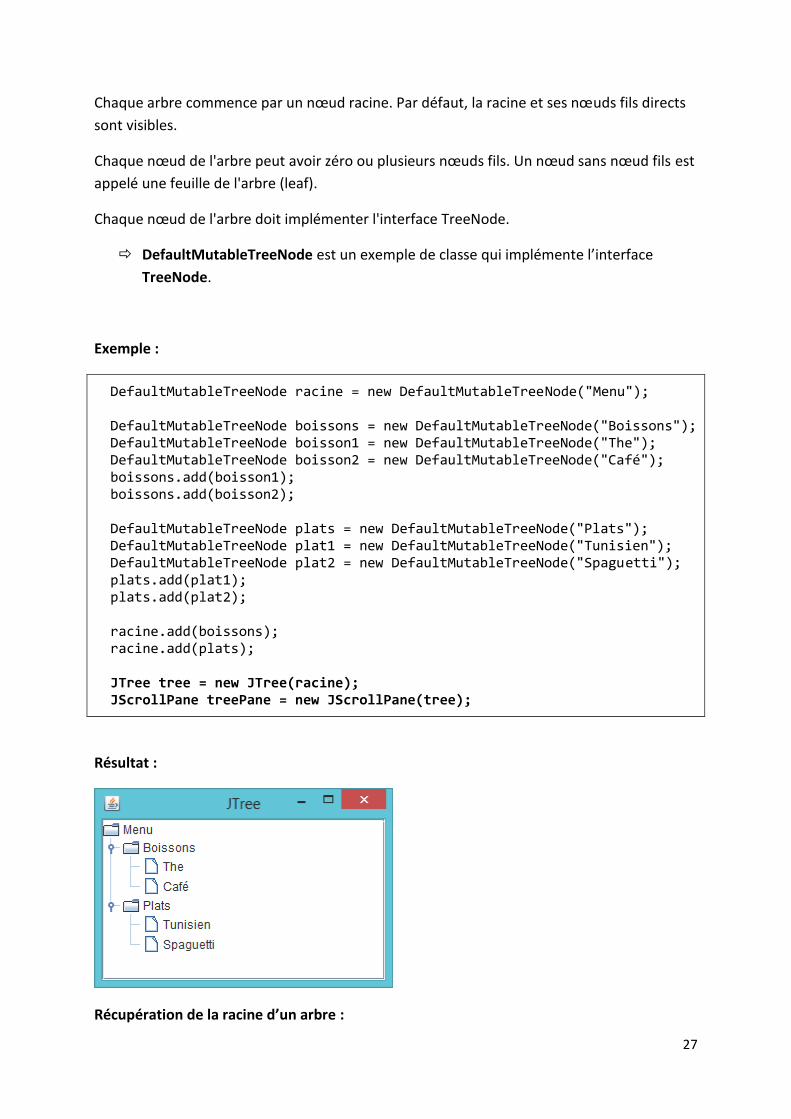
Chaque arbre commence par un nœud racine. Par défaut, la racine et ses nœuds fils directs
sont visibles.
Chaque nœud de l'arbre peut avoir zéro ou plusieurs nœuds fils. Un nœud sans nœud fils est
appelé une feuille de l'arbre (leaf).
Chaque nœud de l'arbre doit implémenter l'interface TreeNode.
DefaultMutableTreeNode est un exemple de classe qui implémente l’interface
TreeNode.
Exemple :
DefaultMutableTreeNode racine = new DefaultMutableTreeNode("Menu"); DefaultMutableTreeNode boissons = new DefaultMutableTreeNode("Boissons"); DefaultMutableTreeNode boisson1 = new DefaultMutableTreeNode("The"); DefaultMutableTreeNode boisson2 = new DefaultMutableTreeNode("Café"); boissons.add(boisson1); boissons.add(boisson2); DefaultMutableTreeNode plats = new DefaultMutableTreeNode("Plats"); DefaultMutableTreeNode plat1 = new DefaultMutableTreeNode("Tunisien"); DefaultMutableTreeNode plat2 = new DefaultMutableTreeNode("Spaguetti"); plats.add(plat1); plats.add(plat2); racine.add(boissons); racine.add(plats); JTree tree = new JTree(racine); JScrollPane treePane = new JScrollPane(tree);
Résultat :
Récupération de la racine d’un arbre :

28
Puisque la manipulation des nœuds d’un arbre se fait par le modèle de données, la
récupération du nœud racine se fait aussi à l’intermédiaire du modèle de données.
Exemple :
DefaultMutableTreeNode racine = (DefaultMutableTreeNode) tree.getModel().getRoot();
Constructeurs de DefaultMutableTreeNode :
- public DefaultMutableTreeNode() : Créer un nœud sans objet associé. Cette
association pourra être faite avec la méthode setUserObject()
- public DefaultMutableTreeNode(Object userObject) : Créer un nœud en précisant
l'objet qui lui sera associé et qui pourra avoir des nœuds fils
- public DefaultMutableTreeNode(Object userObject, boolean allowsChildren) : Créer
un nœud dont le booléen précise s'il pourra avoir des fils
Méthodes de DefaultMutableTreeNode :
- Méthodes de lecture de données :
o Enumeration children() : retourne une collection des nœuds fils
o boolean getAllowsChildren() : retourne un booléen qui précise si le nœud
peut avoir des nœuds fils
o TreeNode getChildAt(int index) : retourne le nœud fils correspondant à
l'index fourni en paramètre
o int getChildCount() : retourne le nombre de nœuds fils directs du nœud
o int getIndex(TreeNode child) : retourne l'index du nœud passé en paramètre
o TreeNode getParent() : retourne le nœud père
o boolean isLeaf() : retourne un booléen qui précise si le nœud est une feuille
- Méthodes de modification :
o void add(MutableTreeNode child)
o void insert(MutableTreeNode child, int index)
o void remove(int index)
o void remove(MutableTreeNode node)
o void removeAllChildren()
o void removeFromParent()
o void setParent(MutableTreeNode parent)
o void setUserObject(Object userObject)
Les méthodes de modification agissent sur un ou plusieurs nœuds fils :

29
Ces méthodes agissent simplement sur la structure du modèle de données
Elles ne provoquent pas un affichage des changements durant l’exécution de
l’application
Pour provoquer un affichage, il faut utiliser les méthodes du modèle
(DefaultTreeModel)
Exemple :
JButton btnAjouter = new JButton("Ajouter"); btnAjouter.addActionListener(new ActionListener(){ public void actionPerformed(ActionEvent evt) { DefaultMutableTreeNode racine = (DefaultMutableTreeNode) tree.getModel().getRoot(); DefaultMutableTreeNode Sandwichs = new DefaultMutableTreeNode("Sandwichs"); DefaultMutableTreeNode Sandwich1 = new DefaultMutableTreeNode("Thon"); DefaultMutableTreeNode Sandwich2 = new DefaultMutableTreeNode("Kebab"); Sandwichs.add(Sandwich1); Sandwichs.add(Sandwich2); racine.add(Sandwichs); } });
Résultat : l’appuie sur le bouton « Ajouter » modifie la structure du modèle en ajoutant le
nœud « Sandwichs » dans la racine de l’arbre, mais cette modification n’est pas visible à
l’utilisateur.
Afin de rendre la modification visible, il faut appeler une méthode d’affichage du
modèle.
d) Modèle de données
La classe JTree ne gère pas directement chaque nœud mais utilise un objet dédié de type
TreeModel pour la gestion des nœuds.
DefaultTreeModel est un exemple de classe qui implémente l’interface TreeModel et
qui permet de gérer les différents nœuds de l'arbre.

30
Lorsqu’on utilise le constructeur ayant un TreeNode en paramètre, une instance de la classe
DefaultTreeModel est créée avec la racine fournie en paramètre du constructeur de la
classe JTree.
Une autre solution permet de créer une instance de la classe DefaultTreeModel et de la
passer en paramètre du constructeur de la classe JTree.
Exemple :
DefaultMutableTreeNode racine = new DefaultMutableTreeNode("Menu"); DefaultMutableTreeNode boissons = new DefaultMutableTreeNode("Boissons"); DefaultMutableTreeNode boisson1 = new DefaultMutableTreeNode("The"); DefaultMutableTreeNode boisson2 = new DefaultMutableTreeNode("Café"); boissons.add(boisson1); boissons.add(boisson2); DefaultMutableTreeNode plats = new DefaultMutableTreeNode("Plats"); DefaultMutableTreeNode plat1 = new DefaultMutableTreeNode("Tunisien"); DefaultMutableTreeNode plat2 = new DefaultMutableTreeNode("Spaguetti"); plats.add(plat1); plats.add(plat2); racine.add(boissons); racine.add(plats); DefaultTreeModel treeModel = new DefaultTreeModel(racine); JTree tree = new JTree(treeModel); JScrollPane treePane = new JScrollPane(tree);
La méthode getModel() de la classe JTree permet d'obtenir une référence sur l'instance de
la classe TreeModel qui représente le modèle de données :
DefaultTreeModel treeModel = (DefaultTreeModel) tree.getModel();
La classe DefaultTreeModel propose plusieurs méthodes pour ajouter ou supprimer un
nœud :
- void insertNodeInto(MutableTreeNode child, MutableTreeNode parent, int index)

31
- void removeNodeFromParent(MutableTreeNode parent)
- void reload() : rafraichir toute l'arborescence à partir du modèle
- void reload(TreeNode node) : rafraichir toute l'arborescence à partir du nœud
précisé en paramètre
Exemple :
JButton btnAjouter = new JButton("Ajouter"); btnAjouter.addActionListener(new ActionListener(){ public void actionPerformed(ActionEvent evt) { DefaultTreeModel treeModel = (DefaultTreeModel) tree.getModel(); DefaultMutableTreeNode racine = (DefaultMutableTreeNode) treeModel.getRoot(); DefaultMutableTreeNode Sandwichs = new DefaultMutableTreeNode("Sandwichs"); DefaultMutableTreeNode Sandwich1 = new DefaultMutableTreeNode("Thon"); DefaultMutableTreeNode Sandwich2 = new DefaultMutableTreeNode("Kebab"); Sandwichs.add(Sandwich1); Sandwichs.add(Sandwich2); racine.add(Sandwichs); treeModel.reload(); //treeModel.insertNodeInto(Sandwichs, racine, racine.getChildCount()); } });
Résultat : l’appuie sur le bouton « Ajouter » permet d’ajouter le nœud « Sandwichs » dans
la racine de l’arbre, cette modification est visible à l’utilisateur.
e) Exemples
i) Parcourir tous les nœuds d’un arbre
Ajouter
32
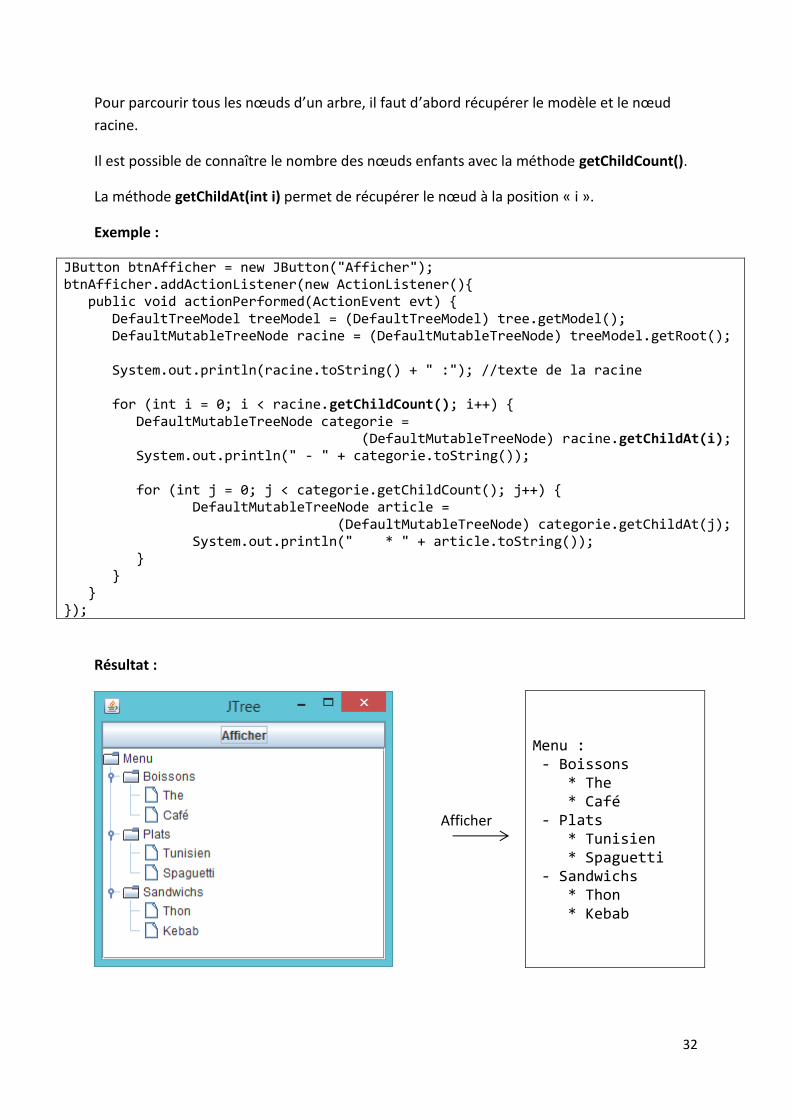
Pour parcourir tous les nœuds d’un arbre, il faut d’abord récupérer le modèle et le nœud
racine.
Il est possible de connaître le nombre des nœuds enfants avec la méthode getChildCount().
La méthode getChildAt(int i) permet de récupérer le nœud à la position « i ».
Exemple :
JButton btnAfficher = new JButton("Afficher"); btnAfficher.addActionListener(new ActionListener(){ public void actionPerformed(ActionEvent evt) { DefaultTreeModel treeModel = (DefaultTreeModel) tree.getModel(); DefaultMutableTreeNode racine = (DefaultMutableTreeNode) treeModel.getRoot(); System.out.println(racine.toString() + " :"); //texte de la racine for (int i = 0; i < racine.getChildCount(); i++) { DefaultMutableTreeNode categorie = (DefaultMutableTreeNode) racine.getChildAt(i); System.out.println(" - " + categorie.toString()); for (int j = 0; j < categorie.getChildCount(); j++) { DefaultMutableTreeNode article = (DefaultMutableTreeNode) categorie.getChildAt(j); System.out.println(" * " + article.toString()); } } } });
Résultat :
Afficher
Menu : - Boissons * The * Café - Plats * Tunisien * Spaguetti - Sandwichs * Thon * Kebab
33
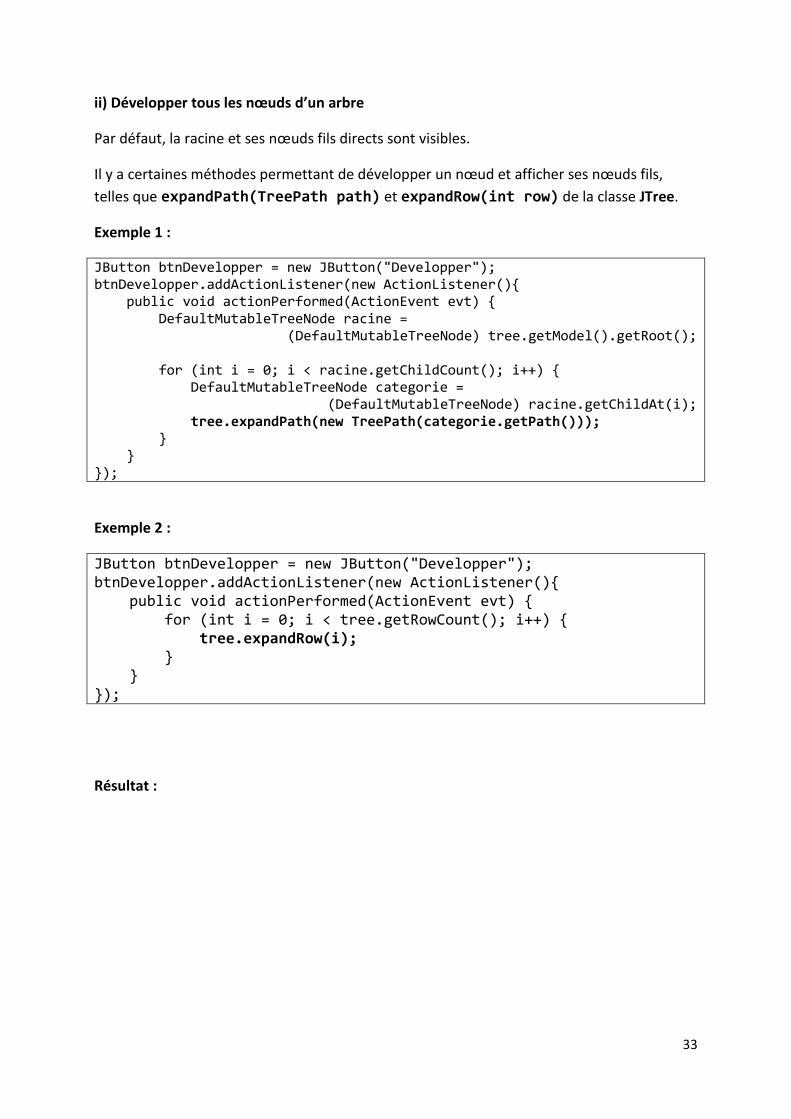
ii) Développer tous les nœuds d’un arbre
Par défaut, la racine et ses nœuds fils directs sont visibles.
Il y a certaines méthodes permettant de développer un nœud et afficher ses nœuds fils,
telles que expandPath(TreePath path) et expandRow(int row) de la classe JTree.
Exemple 1 :
JButton btnDevelopper = new JButton("Developper"); btnDevelopper.addActionListener(new ActionListener(){ public void actionPerformed(ActionEvent evt) { DefaultMutableTreeNode racine = (DefaultMutableTreeNode) tree.getModel().getRoot(); for (int i = 0; i < racine.getChildCount(); i++) { DefaultMutableTreeNode categorie = (DefaultMutableTreeNode) racine.getChildAt(i); tree.expandPath(new TreePath(categorie.getPath())); } } });
Exemple 2 :
JButton btnDevelopper = new JButton("Developper"); btnDevelopper.addActionListener(new ActionListener(){ public void actionPerformed(ActionEvent evt) { for (int i = 0; i < tree.getRowCount(); i++) { tree.expandRow(i); } } });
Résultat :

34
iii) Développer un nœud en particulier
Pour développer un nœud en particulier, on peut utiliser la méthode
expandPath(TreePath path) de la classe JTree comme suit :
DefaultMutableTreeNode plats = (DefaultMutableTreeNode) racine.getChildAt(1); tree.expandPath(new TreePath(plats.getPath()));
iv) Supprimer tous les nœuds d’un arbre
Pour supprimer tous les nœuds d’un arbre, il faut :
1) appeler la méthode removeAllChildren() du nœud racine pour supprimer tous ses
nœuds fils
2) appeler la méthode reload() du modèle pour rafraichir l’arbre et appliquer la
suppression
Exemple :
JButton btnSupprimer = new JButton("Supprimer Tous"); btnSupprimer.addActionListener(new ActionListener(){ public void actionPerformed(ActionEvent evt) { DefaultTreeModel treeModel = (DefaultTreeModel) tree.getModel(); DefaultMutableTreeNode racine = (DefaultMutableTreeNode) treeModel.getRoot(); racine.removeAllChildren(); treeModel.reload(); } });
développer

35
Résultat :
v) Insertion d’un nœud dans une position en particulier
Exemple :
JButton btnInserer = new JButton("Inserer"); btnInserer.addActionListener(new ActionListener(){ public void actionPerformed(ActionEvent evt) { DefaultTreeModel treeModel = (DefaultTreeModel) tree.getModel(); DefaultMutableTreeNode racine = (DefaultMutableTreeNode) treeModel.getRoot(); DefaultMutableTreeNode Sandwichs = new DefaultMutableTreeNode("Sandwichs"); DefaultMutableTreeNode Sandwich1 = new DefaultMutableTreeNode("Thon"); DefaultMutableTreeNode Sandwich2 = new DefaultMutableTreeNode("Kebab"); Sandwichs.add(Sandwich1); Sandwichs.add(Sandwich2); racine.insert(Sandwichs, 1); treeModel.reload(); //treeModel.insertNodeInto(Sandwichs, racine, 1); } });
Résultat :
Supprimer

36
vi) Ajout de données invisible dans un nœud
Un nœud peut avoir un nom visible à l’utilisateur et d’autres données cachées qui sont
nécessaires pour l’application. Par exemple, l’article « Café » peut avoir un tarif qui permet
de calculer le coût d’une commande.
Afin d’ajouter des données à un nœud, il faut construire une classe contenant les
informations suivantes :
- Toutes les données du nœud sous forme de variables
- La méthode « public String toString() » qui retourne le nom du nœud
Exemple :
private class InfoArticle { public String nom; public double tarif; public String description; public InfoArticle(String nom, double tarif, String description) { this.nom = nom; this.tarif = tarif; this.description = description; } public String toString() { return nom; } }
Inserer

37
Création d’un nœud :
DefaultMutableTreeNode boissons = new DefaultMutableTreeNode("Boissons"); DefaultMutableTreeNode boisson1 = new DefaultMutableTreeNode(new InfoArticle("Thé", 2, "Thé vert")); DefaultMutableTreeNode boisson2 = new DefaultMutableTreeNode(new InfoArticle("Café", 3.5, "Café crème")); boissons.add(boisson1); boissons.add(boisson2);
Lecture des données :
public void afficherTarif() { DefaultTreeModel treeModel = (DefaultTreeModel) tree.getModel(); DefaultMutableTreeNode racine = (DefaultMutableTreeNode) treeModel.getRoot(); DefaultMutableTreeNode boissons = (DefaultMutableTreeNode) racine.getChildAt(0); DefaultMutableTreeNode boisson1 = (DefaultMutableTreeNode) boissons.getChildAt(0); InfoArticle infoArticle = (InfoArticle) boisson1.getUserObject(); System.out.println("Tarif du " + infoArticle.nom +" : "+ infoArticle.tarif +"DT"); }
Résultat :
Tarif du Thé : 2.0DT
vii) Gestion des évènements d’un arbre
TreeSelectionListener arbreListener = new TreeSelectionListener () { public void valueChanged(TreeSelectionEvent e) { DefaultMutableTreeNode node = (DefaultMutableTreeNode) tree.getLastSelectedPathComponent(); if (node == null) { return; } if (node.isLeaf()) { InfoArticle info = (InfoArticle) node.getUserObject(); String nom = info.nom; double tarif = info.tarif; System.out.println("Tarif du " + nom + " : " + tarif + "DT"); } } }; tree.addTreeSelectionListener(arbreListener);

38
9) JTable
a) The JTable class
https://docs.oracle.com/en/java/javase/17/docs/api/java.desktop/javax/swing/JTable.html
The JTable is used to display and edit regular two-dimensional tables of cells.
More info: https://docs.oracle.com/javase/tutorial/uiswing/components/table.html
JTables are typically placed inside of a JScrollPane.
Constructors:
- JTable(): Constructs a default JTable that is initialized with a default data model.
- JTable(int numRows, int numColumns): Constructs a JTable with numRows and
numColumns of empty cells using DefaultTableModel.
- JTable(Object[][] rowData, Object[] columnNames): Constructs a JTable to display
the values in the two dimensional array, rowData, with column names,
columnNames.
- JTable(TableModel dm): Constructs a JTable that is initialized with dm as the data
model.
TableModel est une interface. DefaultTableModel est un exemple de classe qui implémente
l’interface TableModel.
Example 1 (without TableModel)
public static void main(String[] args) {
String[] columnNames = {"Prenom", "Nom", "Telephone"};
Object[][] tableData = {
{"Kathy", "Smith", "0123456789"},
{"John", "Doe", "0123456789"},
{"Sue", "Black", "0123456789"},
{"Joe", "Brown", "0123456789"}
};
JTable tableEtudiants = new JTable(tableData, columnNames);
JScrollPane tableScrollPane = new JScrollPane(tableEtudiants);
JFrame myFrame = new JFrame("frame 1");
myFrame.add(tableScrollPane, BorderLayout.CENTER);
myFrame.setSize(400, 500);
myFrame.setVisible(true);
myFrame.setDefaultCloseOperation(WindowConstants.EXIT_ON_CLOSE);
}

39
Example 2 (with TableModel)
public static void main(String[] args) {
String[] columnNames = {"Prenom", "Nom", "Telephone"};
Object[][] tableData = {
{"Kathy", "Smith", "0123456789"},
{"John", "Doe", "0123456789"},
{"Sue", "Black", "0123456789"},
{"Joe", "Brown", "0123456789"}
};
DefaultTableModel dtm = new DefaultTableModel(tableData, columnNames);
JTable tableEtudiants = new JTable(dtm);
JScrollPane tableScrollPane = new JScrollPane(tableEtudiants);
JFrame myFrame = new JFrame("frame 1");
myFrame.add(tableScrollPane, BorderLayout.CENTER);
myFrame.setSize(400, 500);
myFrame.setVisible(true);
myFrame.setDefaultCloseOperation(WindowConstants.EXIT_ON_CLOSE);
}
b) DefaultTableModel
Constructor:
- DefaultTableModel(): Constructs a default DefaultTableModel which is a table of
zero columns and zero rows.
- DefaultTableModel(Object[][] data, Object[] columnNames): Constructs a
DefaultTableModel and initializes the table by passing data and columnNames to the
setDataVector method.
Methods:
- void addRow(Object[] rowData): Adds a row to the end of the model.
- int getColumnCount(): Returns the number of columns in this data table.
- String getColumnName(int column): Returns the column name.
- int getRowCount(): Returns the number of rows in this data table.
- Object getValueAt(int row, int column): Returns an attribute value for the cell at row
and column.
- void insertRow(int row, Object[] rowData): Inserts a row at row in the model.
- void removeRow(int row): Removes the row at row from the model.
- void setRowCount(int rowCount): Sets the number of rows in the model.

40
Example 1: add row to JTable
public static void main(String[] args) {
String[] columnNames = {"Prenom", "Nom", "Telephone"};
DefaultTableModel dtm = new DefaultTableModel(new Object[0][0], columnNames);
JTable table = new JTable(dtm);
JScrollPane tableScrollPane = new JScrollPane(table);
JFrame myFrame = new JFrame("frame 1");
JButton btn = new JButton("Ajouter ligne");
btn.addActionListener(new ActionListener() {
@Override
public void actionPerformed(ActionEvent e) {
DefaultTableModel dtm = (DefaultTableModel) table.getModel();
dtm.addRow(new Object[] {"new", "row", "0123456789"});
}
});
myFrame.add(btn, BorderLayout.NORTH);
myFrame.add(tableScrollPane, BorderLayout.CENTER);
myFrame.setSize(400, 500);
myFrame.setVisible(true);
myFrame.setDefaultCloseOperation(WindowConstants.EXIT_ON_CLOSE);
}
Example 2: delete all rows
public static void main(String[] args) {
String[] columnNames = {"Prenom", "Nom", "Telephone"};
Object[][] tableData = {
{"Kathy", "Smith", "0123456789"},
{"John", "Doe", "0123456789"},
{"Sue", "Black", "0123456789"},
{"Joe", "Brown", "0123456789"}
};
DefaultTableModel dtm = new DefaultTableModel(tableData, columnNames);
JTable table = new JTable(dtm);
JScrollPane tableScrollPane = new JScrollPane(table);
JFrame myFrame = new JFrame("frame 1");
JButton btn = new JButton("Supprimer tous");
btn.addActionListener(new ActionListener() {
@Override
public void actionPerformed(ActionEvent e) {
DefaultTableModel dtm = (DefaultTableModel) table.getModel();
dtm.setRowCount(0);
//while (dtm.getRowCount() > 0) {dtm.removeRow(0);}
}
});

41
myFrame.add(btn, BorderLayout.NORTH);
myFrame.add(tableScrollPane, BorderLayout.CENTER);
myFrame.setSize(400, 500);
myFrame.setVisible(true);
myFrame.setDefaultCloseOperation(WindowConstants.EXIT_ON_CLOSE);
}
9) Menus
A menu provides a space-saving way to let the user choose one of several options. A menu is
created using the following classes:
- JMenuBar: creates a menu bar. We add JMenu objects to the menu bar to obtain a
menu.
- JMenu: a button of the menu bar that displays a popup window containing
JMenuItem objects.
- JMenuItem: an item in a JMenu.
- JSeparator: an horizontal line used as a divider between menu items that breaks
them up into logical groupings.
a) JMenuBar
Constructor:
- JMenuBar(): Creates a new menu bar.
Window menu
JMenuBar
JMenu
JMenuItem
JSeparator
42
Methods:
- JMenu add(JMenu c): Appends the specified menu to the end of the menu bar.
- JMenu getMenu(int index): Returns the menu at the specified position in the menu
bar.
- void remove(int index): Removes the component, specified by index, from this
container.
- void removeAll(): Removes all the components from this container.
b) JMenu
Constructor
- JMenu(): Constructs a new JMenu with no text.
- JMenu(String s): Constructs a new JMenu with the supplied string as its text.
- JMenu(String s, boolean b): Constructs a new JMenu with the supplied string as its
text and specified as a tear-off menu or not.
Methods:
- JMenuItem add(JMenuItem menuItem): Appends a menu item to the end of this
menu.
- void addSeparator(): Appends a new separator to the end of the menu.
- void setText(String text): Sets the button's text.
- String getText(): Returns the button's text.
- JMenuItem getItem(int pos): Returns the JMenuItem at the specified position.
- void remove(int pos): Removes the menu item at the specified index from this menu.
- void remove(JMenuItem item): Removes the specified menu item from this menu.
- void removeAll(): Removes all menu items from this menu.
c) JMenuItem
Constructors:
- JMenuItem(): Creates a JMenuItem with no set text or icon.
- JMenuItem(String text): Creates a JMenuItem with the specified text.
- JMenuItem(String text, int mnemonic): Creates a JMenuItem with the specified text
and keyboard mnemonic.
- JMenuItem(String text, Icon icon): Creates a JMenuItem with the specified text and
icon.
- JMenuItem(Icon icon): Creates a JMenuItem with the specified icon.

43
Methods:
- void addActionListener(ActionListener l): Adds an ActionListener to the button.
d) Examples
Example 1: Create a window menu
public static void main(String[] args) {
JFrame frame = new JFrame("Test Menu");
JMenuBar menuBar = new JMenuBar ();
// Create File menu
JMenu fileMenu = new JMenu("File");
JMenuItem menuItem = new JMenuItem("New", 'N');
fileMenu.add(menuItem);
menuItem = new JMenuItem("Open", 'O');
fileMenu.add(menuItem);
menuItem = new JMenuItem("Save", 'S');
fileMenu.insertSeparator(1);
fileMenu.add(menuItem);
menuItem = new JMenuItem("Quit");
fileMenu.add(menuItem);
// Create Help menu
JMenu helpMenu = new JMenu("Help");
menuItem = new JMenuItem("About");
helpMenu.add(menuItem);
menuItem = new JMenuItem("Version");
helpMenu.add(menuItem);
menuBar.add(fileMenu);
menuBar.add(helpMenu);
frame.setJMenuBar(menuBar);
frame.setDefaultCloseOperation(JFrame.EXIT_ON_CLOSE);
frame.setSize(250, 200);
frame.setVisible(true);
}
Result:
44
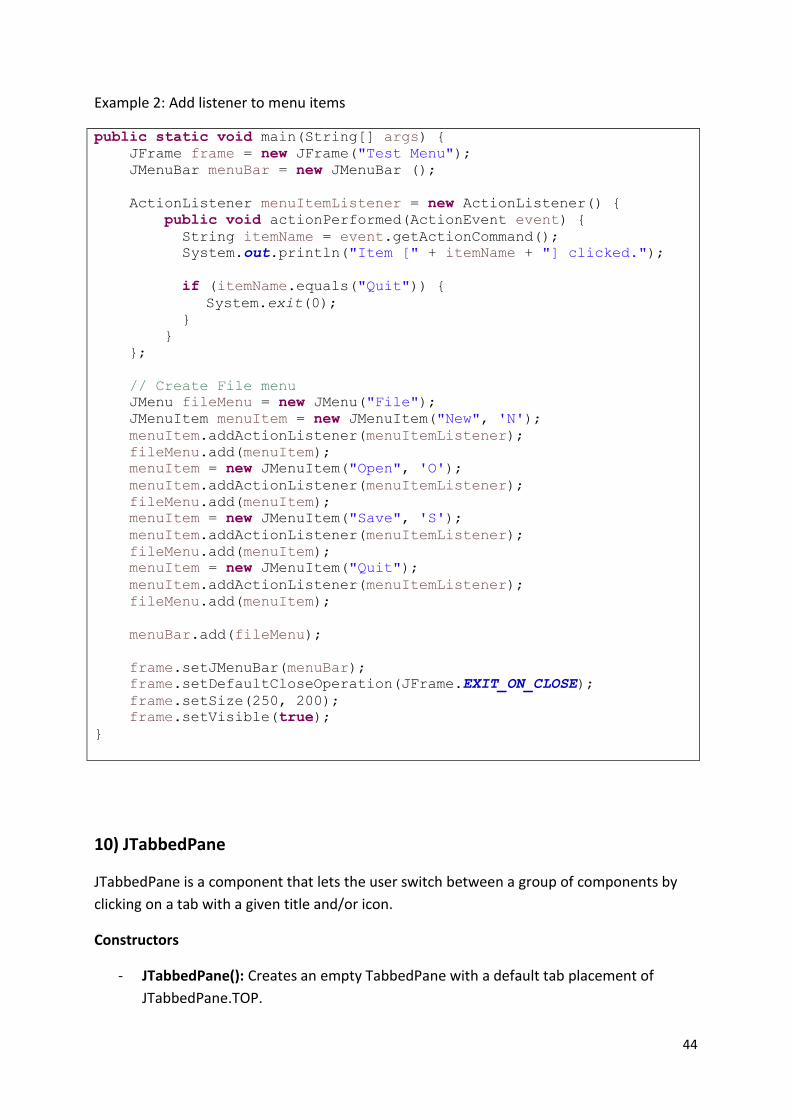
Example 2: Add listener to menu items
public static void main(String[] args) {
JFrame frame = new JFrame("Test Menu");
JMenuBar menuBar = new JMenuBar ();
ActionListener menuItemListener = new ActionListener() {
public void actionPerformed(ActionEvent event) {
String itemName = event.getActionCommand();
System.out.println("Item [" + itemName + "] clicked.");
if (itemName.equals("Quit")) {
System.exit(0);
}
}
};
// Create File menu
JMenu fileMenu = new JMenu("File");
JMenuItem menuItem = new JMenuItem("New", 'N');
menuItem.addActionListener(menuItemListener);
fileMenu.add(menuItem);
menuItem = new JMenuItem("Open", 'O');
menuItem.addActionListener(menuItemListener);
fileMenu.add(menuItem);
menuItem = new JMenuItem("Save", 'S');
menuItem.addActionListener(menuItemListener);
fileMenu.add(menuItem);
menuItem = new JMenuItem("Quit");
menuItem.addActionListener(menuItemListener);
fileMenu.add(menuItem);
menuBar.add(fileMenu);
frame.setJMenuBar(menuBar);
frame.setDefaultCloseOperation(JFrame.EXIT_ON_CLOSE);
frame.setSize(250, 200);
frame.setVisible(true);
}
10) JTabbedPane
JTabbedPane is a component that lets the user switch between a group of components by
clicking on a tab with a given title and/or icon.
Constructors
- JTabbedPane(): Creates an empty TabbedPane with a default tab placement of
JTabbedPane.TOP.

45
- JTabbedPane(int tabPlacement): Creates an empty TabbedPane with the specified
tab placement of either: JTabbedPane.TOP, JTabbedPane.BOTTOM,
JTabbedPane.LEFT, or JTabbedPane.RIGHT.
Methods:
- Component add(String title, Component component): Adds a component with the
specified tab title.
- void addTab(String title, Component component): Adds a component represented
by a title and no icon.
- void addTab(String title, Icon icon, Component component): Adds a component
represented by a title and/or icon, either of which can be null.
- void insertTab(String title, Icon icon, Component component, String tip, int index):
Inserts a new tab for the given component, at the given index, represented by the
given title and/or icon, either of which may be null.
- void remove(int index): Removes the tab and component which corresponds to the
specified index.
- void remove(Component component): Removes the specified Component from the
JTabbedPane.
- void removeAll(): Removes all the tabs and their corresponding components from
the tabbedpane.
- Component getTabComponentAt(int index): Returns the tab component at index.
- Component getSelectedComponent(): Returns the currently selected component for
this tabbedpane.
- int getTabCount(): Returns the number of tabs in this tabbedpane.
Example:
public static void main(String[] args) {
JFrame frame = new JFrame("Test Menu");
JTabbedPane tabbedPane = new JTabbedPane();
JPanel panel1 = new JPanel();
panel1.setBackground(Color.CYAN);
tabbedPane.add("Tab 1", panel1);
JPanel panel2 = new JPanel();
panel2.setBackground(Color.BLUE);
tabbedPane.addTab("Tab 2", panel2);
frame.add(tabbedPane);
frame.setDefaultCloseOperation(JFrame.EXIT_ON_CLOSE);
frame.setSize(250, 200);
frame.setVisible(true);
}

46
Result:
47
Input/Output Fundamentals
The Java language provides a simple model for input and output (I/O). All I/O is performed
by writing to and reading from streams of data. The data may exist in a file or an array, be
piped from another stream, or even come from a port on another computer. The flexibility
of this model makes it a powerful abstraction of any required input and output.
The main I/O classes are located in the java.io package.
1. The File Class
Link: https://docs.oracle.com/en/java/javase/17/docs/api/java.base/java/io/File.html
The File class is Java's representation of a file or directory path name. The File class contains
several methods for working with the path name, deleting and renaming files, creating new
directories, listing the contents of a directory, and determining several common attributes of
files and directories.
Constructors
- File(File parent, String child): Creates a new File instance from a parent abstract
pathname and a child pathname string.
- File(String pathname): Creates a new File instance by converting the given pathname
string into an abstract pathname.
- File(String parent, String child): Creates a new File instance from a parent pathname
string and a child pathname string.
- File(URI uri): Creates a new File instance by converting the given file: URI into an
abstract pathname.
You create a File object by passing a String that represents the name of a file, the name of a
folder or another File object. For example,
File a = new File("/usr/local/bin/info.txt");
defines an abstract file name for the info.txt file in directory /usr/local/bin. This is
an absolute file name. It gives all path information necessary to find the file.
You can also create a file object as follows:
File b = new File("bin/info.txt");

48
This is a relative file name, because it requires some necessary path information, which will
be filled in by the VM. By default, the VM will use the directory in which the application was
executed as the "current path". If the application is executed from directory /usr/local,
the file will be found.
The above examples use UNIX-like file names. We can create similar File objects for
Windows files as follows:
File c = new File("c:\\windows\\system\\info.txt");
File d = new File("system\\info.txt");
Note the double backslashes. Because the backslash is a Java String escape character, you
must type two of them to represent a single, "real" backslash.
Java allows both types of slash to be used on any platform, and translates it appropriately.
This means that you could type:
File e = new File("c:/windows/system/info.txt");
You can create files by specifying two parameters: the parent folder (String or File), and the
name of the file in the parent folder. Examples (h and i refer to the same file):
File g = new File("c:/windows/system");
File h = new File(g, "info.txt");
File i = new File("c:/windows/system", "info.txt");
Method Summary:
File methods providing information on the current state of the file:
- boolean canRead(): Returns true if the file is readable
- boolean canWrite(): Returns true if the file is writeable
- boolean exists(): Returns true if the file exists
- boolean isAbsolute(): Returns true if the file name is an absolute path name
- boolean isDirectory(): Returns true if the file name is a directory
- boolean isFile(): Returns true if the file name is a "normal" file
- boolean isHidden(): Returns true if the file is marked "hidden"
- long lastModified(): Returns a long indicating the last time the file was
modified
- long length(): Returns the length of the contents of the file
- boolean setReadOnly(): Marks the file read-only (returns true if succeeded)
- void setLastModified(long time): Explicitly sets the modification time of a file

49
File methods to get the file name, or part of it:
- Boolean equals(Object object): Compares the file names to see if they are
identical
- String getAbsolutePath(): Resolves the absolute file name for this File
- String getName(): Returns the name for the file without any preceding path
information.
- String getParent(): Returns the path to the file name, without the actual file
name.
- String getPath(): returns the path used to construct this object.
File methods to alter the file system (creating, deleting, and renaming files):
- boolean createNewFile(): Creates a new file with this abstract file name.
Returns true if the file was created, false if the file already existed.
- boolean delete(): Deletes the file specified by this file name.
- void deleteOnExit(): Sets up processing to delete this file when the VM exits.
- boolean mkdir(): Creates this directory. All parent directories must already
exist.
- boolean mkdirs(): Creates this directory and any parent directories that do
not exist.
- boolean renameTo(File file): Renames the file.
File methods to find the roots available on the file system and the files in a directory:
- String[] list(): Returns an array of Strings that represent the names of the files
contained within this directory. Returns null if the file is not a directory.
- File[] listFiles(): Similar to list(), but returns an array of File objects.
- File[] listRoots(): Returns an array of Files that represent the root directories
for the current platform.
2) I/O Classes
Java's I/O classes are divided into two main groups, based on whether you want text or
binary I/O:
- Reader and Writer classes handle text I/O.
- InputStream and OutputStream classes handle binary I/O.
Any time you see "Reader" or "Writer" as part of a Java I/O class name, you should
immediately think "text I/O". Anytime you see "Stream" as part of the class name, think
"binary I/O".
These classes (Reader, Writer, InputStream and OutputStream) are abstract; you cannot
create an instance of them, but they provide the base implementation details for all other
I/O classes.
50
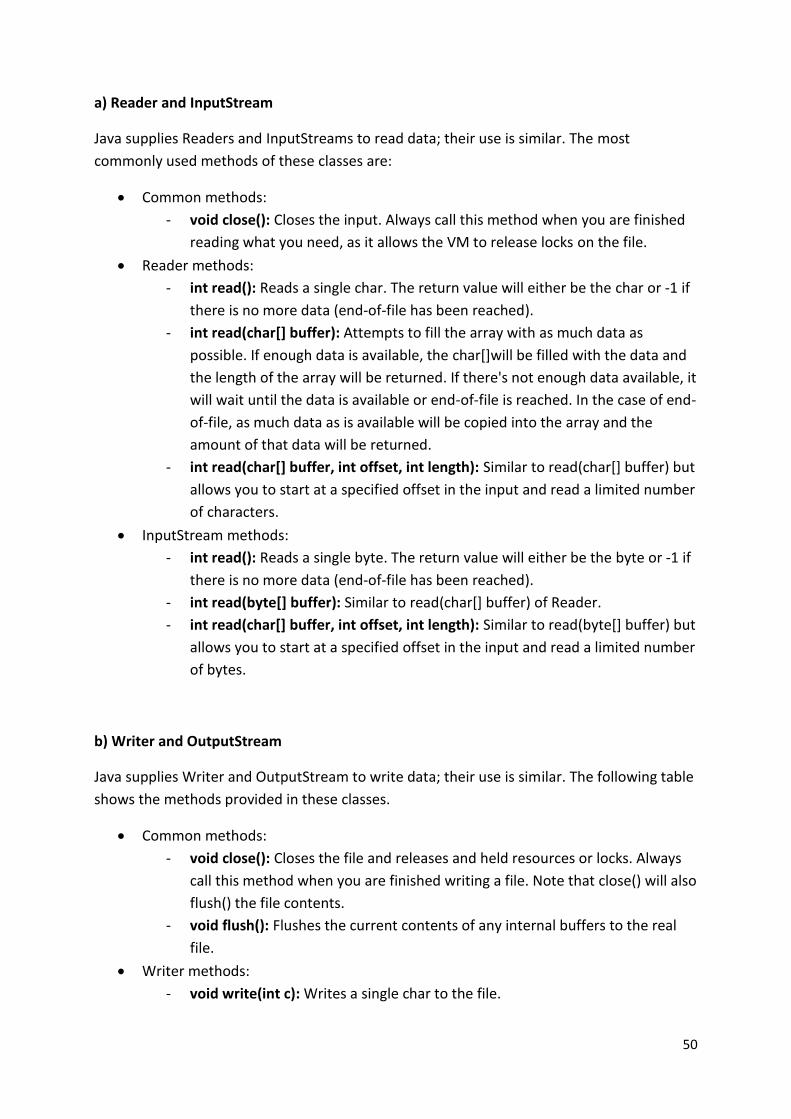
a) Reader and InputStream
Java supplies Readers and InputStreams to read data; their use is similar. The most
commonly used methods of these classes are:
Common methods:
- void close(): Closes the input. Always call this method when you are finished
reading what you need, as it allows the VM to release locks on the file.
Reader methods:
- int read(): Reads a single char. The return value will either be the char or -1 if
there is no more data (end-of-file has been reached).
- int read(char[] buffer): Attempts to fill the array with as much data as
possible. If enough data is available, the char[]will be filled with the data and
the length of the array will be returned. If there's not enough data available, it
will wait until the data is available or end-of-file is reached. In the case of end-
of-file, as much data as is available will be copied into the array and the
amount of that data will be returned.
- int read(char[] buffer, int offset, int length): Similar to read(char[] buffer) but
allows you to start at a specified offset in the input and read a limited number
of characters.
InputStream methods:
- int read(): Reads a single byte. The return value will either be the byte or -1 if
there is no more data (end-of-file has been reached).
- int read(byte[] buffer): Similar to read(char[] buffer) of Reader.
- int read(char[] buffer, int offset, int length): Similar to read(byte[] buffer) but
allows you to start at a specified offset in the input and read a limited number
of bytes.
b) Writer and OutputStream
Java supplies Writer and OutputStream to write data; their use is similar. The following table
shows the methods provided in these classes.
Common methods:
- void close(): Closes the file and releases and held resources or locks. Always
call this method when you are finished writing a file. Note that close() will also
flush() the file contents.
- void flush(): Flushes the current contents of any internal buffers to the real
file.
Writer methods:
- void write(int c): Writes a single char to the file.
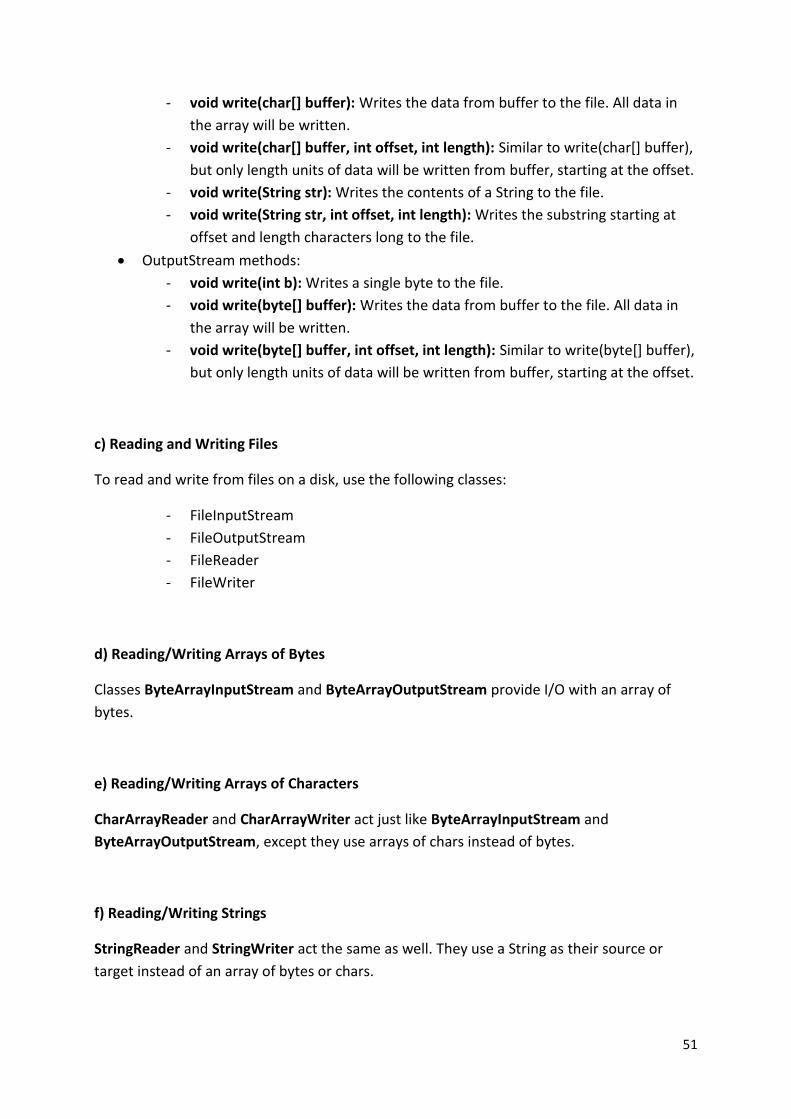
51
- void write(char[] buffer): Writes the data from buffer to the file. All data in
the array will be written.
- void write(char[] buffer, int offset, int length): Similar to write(char[] buffer),
but only length units of data will be written from buffer, starting at the offset.
- void write(String str): Writes the contents of a String to the file.
- void write(String str, int offset, int length): Writes the substring starting at
offset and length characters long to the file.
OutputStream methods:
- void write(int b): Writes a single byte to the file.
- void write(byte[] buffer): Writes the data from buffer to the file. All data in
the array will be written.
- void write(byte[] buffer, int offset, int length): Similar to write(byte[] buffer),
but only length units of data will be written from buffer, starting at the offset.
c) Reading and Writing Files
To read and write from files on a disk, use the following classes:
- FileInputStream
- FileOutputStream
- FileReader
- FileWriter
d) Reading/Writing Arrays of Bytes
Classes ByteArrayInputStream and ByteArrayOutputStream provide I/O with an array of
bytes.
e) Reading/Writing Arrays of Characters
CharArrayReader and CharArrayWriter act just like ByteArrayInputStream and
ByteArrayOutputStream, except they use arrays of chars instead of bytes.
f) Reading/Writing Strings
StringReader and StringWriter act the same as well. They use a String as their source or
target instead of an array of bytes or chars.
52
g) Remote I/O
Remote I/O is accomplished by sending data across a network connection. Java provides
several networking classes in the package “java.net”. You can open a connection using
Socket or ServerSocket, then open an InputStream to read received data and OutputStream
to send requests. Other classes are available to open connections and read/write remote
files.
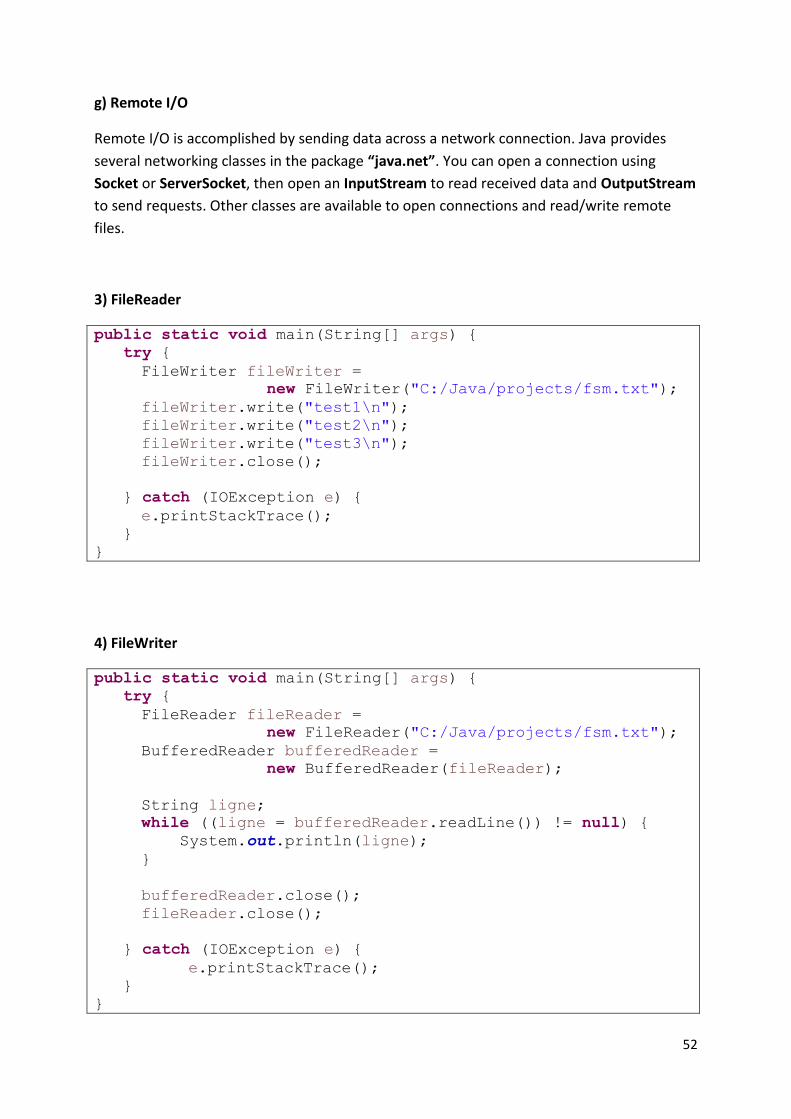
3) FileReader
public static void main(String[] args) {
try {
FileWriter fileWriter =
new FileWriter("C:/Java/projects/fsm.txt");
fileWriter.write("test1\n");
fileWriter.write("test2\n");
fileWriter.write("test3\n");
fileWriter.close();
} catch (IOException e) {
e.printStackTrace();
}
}
4) FileWriter
public static void main(String[] args) {
try {
FileReader fileReader =
new FileReader("C:/Java/projects/fsm.txt");
BufferedReader bufferedReader =
new BufferedReader(fileReader);
String ligne;
while ((ligne = bufferedReader.readLine()) != null) {
System.out.println(ligne);
}
bufferedReader.close();
fileReader.close();
} catch (IOException e) {
e.printStackTrace();
}
}

53
5) Using Object Serialization
Similar to primitive value input and output, object values can be written to binary files as
well. Writing an object value to an output stream is known as "serializing" that object.
The Java core API defines interfaces ObjectInput and ObjectOutput. These interfaces define
the readObject() and writeObject() methods, the core of Java object serialization. Two
classes, ObjectInputStream and ObjectOutputStream implement these interfaces.
Another interface, Serializable, is used to "mark" a class as one that can be handled via
writeObject() and readObject(). Note that Serializable defines no methods; it is simply a
"tag" to indicate that a class may be serialized.
Example of Serializing an object:
public static void main(String[] args) {
// Serialization
try {
Vector data = new Vector();
data.add("hello");
data.add(2);
data.add(true);
//Saving of object in a file
FileOutputStream file =
new FileOutputStream("C:/Java/projects/file.bin");
ObjectOutputStream out = new ObjectOutputStream(file);
// Method for serialization of object
out.writeObject(data);
out.close();
file.close();
} catch(IOException ex) {
System.out.println("We have an IOException");
}
}
Example of Deserializing an object:

54
public static void main(String[] args) {
// Deserialization
Try {
Vector data;
// Reading the object from a file
FileInputStream file =
new FileInputStream("C:/Java/projects/file.bin");
ObjectInputStream in = new ObjectInputStream(file);
// Method for deserialization of object
data = (Vector)in.readObject();
in.close();
file.close();
System.out.println("value 1 = " + data.get(0));
System.out.println("value 2 = " + data.get(1));
System.out.println("value 3 = " + data.get(2));
} catch(IOException ex) {
System.out.println("We have an IOException");
} catch(ClassNotFoundException ex) {
System.out.println("We have ClassNotFoundException");
}
}

55
Les chaines de caractères
a) Découpage d’une chaine de caractères
La méthode « split() » permet de découper une chaine de caractères
Exemple 1 :
String str1 = "Monastir:Sahline:Ksar Hellal"; String[] noms = str1.split(":"); for (int i = 0; i < noms.length; i++) { System.out.println(noms[i]); }
Résultat :
Monastir Sahline Ksar Hellal
Exemple 2 :
String str2 = "Monastir,0km,30000 habitants:Sahline,5km,10000 habitants:Ksar Hellal,19km,25000 habitants"; String[] villes = str2.split(":"); for (int i = 0; i < villes.length; i++) { String[] infos = villes[i].split(","); System.out.println(infos[0] + " :"); for (int j = 1; j < infos.length; j++) { System.out.println(" - " + infos[j]); } }
Résultat :
Monastir : - 0km - 30000 habitants Sahline : - 5km - 10000 habitants Ksar Hellal : - 19km - 25000 habitants
56
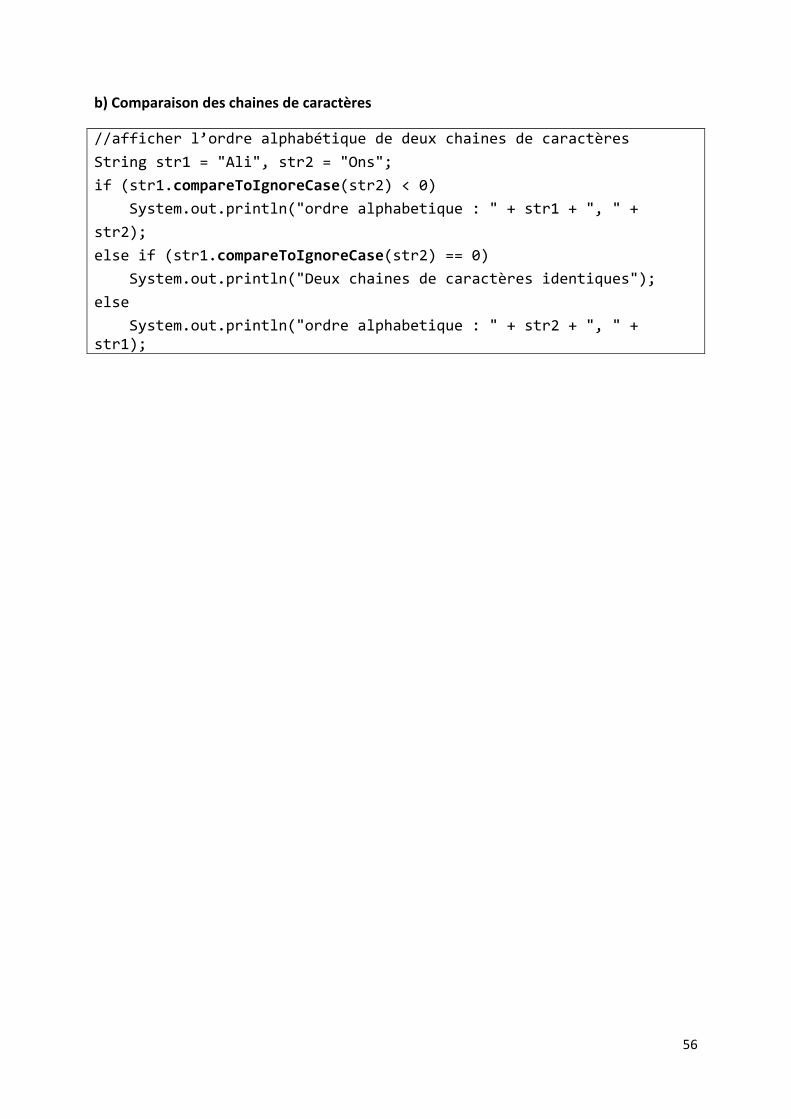
b) Comparaison des chaines de caractères
//afficher l’ordre alphabétique de deux chaines de caractères
String str1 = "Ali", str2 = "Ons";
if (str1.compareToIgnoreCase(str2) < 0)
System.out.println("ordre alphabetique : " + str1 + ", " +
str2);
else if (str1.compareToIgnoreCase(str2) == 0)
System.out.println("Deux chaines de caractères identiques");
else
System.out.println("ordre alphabetique : " + str2 + ", " + str1);

57
Java JDBC
1) Introduction
The Java API for Database connectivity is called JDBC (Java DataBase Connectivity). This API
consists of two packages:
- java.sql: referred to as the JDBC core API
- javax.sql: referred to as the JDBC Optional Package API
The java.sql package contains API for the following:
Making a connection with a database via the DriverManager facility
o DriverManager class -- makes a connection with a driver
o SQLPermission class -- provides permission when code running within a
Security Manager, such as an applet, attempts to set up a logging stream
through the DriverManager
o Driver interface -- provides the API for registering and connecting drivers
based on JDBC technology ("JDBC drivers"); generally used only by the
DriverManager class
o DriverPropertyInfo class -- provides properties for a JDBC driver; not used by
the general user
Sending SQL statements to a database
o Statement interface -- used to send basic SQL statements
o PreparedStatement interface -- used to send prepared statements or basic
SQL statements (derived from Statement)
o CallableStatement interface -- used to call database stored procedures
(derived from PreparedStatement)
o Connection interface -- provides methods for creating statements and
managing connections and their properties
o Savepoint interface -- provides savepoints in a transaction
Retrieving and updating the results of a query
o ResultSet interface
Standard mappings for SQL types to classes and interfaces in the Java programming
language
o Array interface -- mapping for SQL ARRAY
o Blob interface -- mapping for SQL BLOB
o Clob interface -- mapping for SQL CLOB
o Date class -- mapping for SQL DATE
o NClob interface -- mapping for SQL NCLOB
o Ref interface -- mapping for SQL REF

58
o RowId interface -- mapping for SQL ROWID
o Struct interface -- mapping for SQL STRUCT
o SQLXML interface -- mapping for SQL XML
o Time class -- mapping for SQL TIME
o Timestamp class -- mapping for SQL TIMESTAMP
o Types class -- provides constants for SQL types
o Custom mapping an SQL user-defined type (UDT) to a class in the Java
programming language
o SQLData interface -- specifies the mapping of a UDT to an instance of this
class
o SQLInput interface -- provides methods for reading UDT attributes from a
stream
o SQLOutput interface -- provides methods for writing UDT attributes back to a
stream
Metadata
o DatabaseMetaData interface -- provides information about the database
o ResultSetMetaData interface -- provides information about the columns of a
ResultSet object
o ParameterMetaData interface -- provides information about the parameters
to PreparedStatement commands
Exceptions
o SQLException -- thrown by most methods when there is a problem accessing
data and by some methods for other reasons
o SQLWarning -- thrown to indicate a warning
o DataTruncation -- thrown to indicate that data may have been truncated
o BatchUpdateException -- thrown to indicate that not all commands in a batch
update executed successfully
2) Classes
a) DriverManager
This is the basic service for managing a set of JDBC drivers. This class will attempt to load the
driver classes.
Applications no longer need to explicitly load JDBC drivers using Class.forName(). Existing
programs which currently load JDBC drivers using Class.forName() will continue to work
without modification.
Methods:
- static Connection getConnection(String url): Attempts to establish a connection to
the given database URL.
59
- static Connection getConnection(String url, Properties info): Attempts to establish a
connection to the given database URL.
- static Connection getConnection(String url, String user, String password): Attempts
to establish a connection to the given database URL.
b) Connection
This class corresponds to a connection (session) with a specific database. SQL statements are
executed and results are returned within the context of a connection.
A Connection object's database is able to provide information describing its tables, its
supported SQL grammar, its stored procedures, the capabilities of this connection, and so
on. This information is obtained with the getMetaData method.
Methods:
- Statement createStatement(): Creates a Statement object for sending SQL
statements to the database.
- PreparedStatement prepareStatement(String sql): Creates a PreparedStatement
object for sending parameterized SQL statements to the database.
- void setAutoCommit(boolean autoCommit): Sets this connection's auto-commit
mode to the given state.
- void commit(): Makes all changes made since the previous commit/rollback
permanent and releases any database locks currently held by this Connection object.
- void close(): Releases this Connection object's database and JDBC resources
immediately instead of waiting for them to be automatically released.
c) Statement
This is the object used for executing a static SQL statement and returning the results it
produces.
Methods:
- ResultSet executeQuery(String sql): Executes the given SQL statement, which returns
a single ResultSet object.
- int executeUpdate(String sql): Executes the given SQL statement, which may be an
INSERT, UPDATE, or DELETE statement or an SQL statement that returns nothing.
- boolean execute(String sql): Executes the given SQL statement, which may return
multiple results.
- void close(): Releases this Statement object's database and JDBC resources
immediately instead of waiting for this to happen when it is automatically closed.
60
d) PreparedStatement
This is an object that represents a precompiled SQL statement.
A SQL statement is precompiled and stored in a PreparedStatement object. This object can
then be used to efficiently execute this statement multiple times.
Methods:
- void setInt(int parameterIndex, int x): Sets the designated parameter to the given
Java int value.
- void setString(int parameterIndex, String x): Sets the designated parameter to the
given Java String value.
- void setTimestamp(int parameterIndex, Timestamp x): Sets the designated
parameter to the given java.sql.Timestamp value.
- ResultSet executeQuery(): Executes the SQL query in this PreparedStatement object
and returns the ResultSet object generated by the query.
- Int executeUpdate(): Executes the SQL statement in this PreparedStatement object,
which must be an SQL Data Manipulation Language (DML) statement, such as
INSERT, UPDATE or DELETE; or an SQL statement that returns nothing.
- boolean execute(): Executes the SQL statement in this PreparedStatement object,
which may be any kind of SQL statement.
- void close(): Releases this Statement object's database and JDBC resources
immediately instead of waiting for this to happen when it is automatically closed.
e) ResultSet
A table of data representing a database result set, which is usually generated by executing a
statement that queries the database.
A ResultSet object maintains a cursor pointing to its current row of data. Initially the cursor is
positioned before the first row. The next method moves the cursor to the next row, and
because it returns false when there are no more rows in the ResultSet object, it can be used
in a while loop to iterate through the result set.
A default ResultSet object is not updatable and has a cursor that moves forward only. Thus,
you can iterate through it only once and only from the first row to the last row. It is possible
to produce ResultSet objects that are scrollable and/or updatable.

61
Methods:
- boolean next(): Moves the cursor forward one row from its current position.
- int getInt(int columnIndex): Retrieves the value of the designated column in the
current row of this ResultSet object as an int in the Java programming language.
- int getInt(String columnLabel): Retrieves the value of the designated column in the
current row of this ResultSet object as an int in the Java programming language.
- String getString(int columnIndex): Retrieves the value of the designated column in
the current row of this ResultSet object as a String in the Java programming
language.
- String getString(String columnLabel): Retrieves the value of the designated column
in the current row of this ResultSet object as a String in the Java programming
language.
- Timestamp getTimestamp(int columnIndex): Retrieves the value of the designated
column in the current row of this ResultSet object as a java.sql.Timestamp object in
the Java programming language.
- Timestamp getTimestamp(String columnLabel): Retrieves the value of the
designated column in the current row of this ResultSet object as a java.sql.Timestamp
object in the Java programming language.
f) SQLException
An exception that provides information on a database access error or other errors.
Each SQLException provides several kinds of information:
- a string describing the error. This is used as the Java Exception message, available via
the method getMesasge.
- a "SQLstate" string, which follows either the XOPEN SQLstate conventions or the
SQL:2003 conventions. The values of the SQLState string are described in the
appropriate spec. The DatabaseMetaData method getSQLStateType can be used to
discover whether the driver returns the XOPEN type or the SQL:2003 type.
- an integer error code that is specific to each vendor. Normally this will be the actual
error code returned by the underlying database.
- a chain to a next Exception. This can be used to provide additional error information.
- the causal relationship, if any for this SQLException.
3) Examples

62
import java.sql.*;
public class MyDatabaseManager {
public static void main(String[] args) {
//port number is optional in database server url
String MYSQL_SERVER_URL = "jdbc:mysql://localhost:3306/";
String DB_URL = "jdbc:mysql://localhost:3306/MyStore";
//?serverTimezone=UTC
String USERNAME = "root";
String PASSWORD = "";
Connection connection = null;
Statement statement = null;
try {
//First, connect to MYSQL server and create the database
//if not created
connection = DriverManager.getConnection(MYSQL_SERVER_URL,
USERNAME, PASSWORD);
statement = connection.createStatement();
statement.executeUpdate("CREATE DATABASE IF NOT EXISTS MyStore");
connection.close();
statement.close();
//Second, connect to the database and create the table "users"
//if not created
connection = DriverManager.getConnection(DB_URL,
USERNAME, PASSWORD);
statement = connection.createStatement();
String sql = "CREATE TABLE IF NOT EXISTS users ("
+ "id INT( 10 ) NOT NULL PRIMARY KEY AUTO_INCREMENT,"
+ "name VARCHAR(200) NOT NULL,"
+ "email VARCHAR(200) NOT NULL UNIQUE,"
+ "phone VARCHAR(200),"
+ "address VARCHAR(200),"
+ "created_at TIMESTAMP DEFAULT CURRENT_TIMESTAMP"
+ ")";
statement.executeUpdate(sql);
statement.close();
// Insert row into the table using static SQL statement
String sqlInsert =
"INSERT INTO users (name, email, phone, address) " +
"VALUES ('Ali Dridi', '[email protected]', '97123456'," +
"'Tunis, Tunisia')";
statement = connection.createStatement();
int rows = statement.executeUpdate(sqlInsert);
if (rows > 0) {
System.out.println("Row added successfully");
}
statement.close();
// Insert row into the table using precompiled SQL statement
String sqlInsert2 =
"INSERT INTO users (name, email, phone, address) " +
"VALUES (?, ?, ?, ?)";
PreparedStatement preparedStatement =
connection.prepareStatement(sqlInsert2);

63
preparedStatement.setString(1, "Ons Abid");
preparedStatement.setString(2, "[email protected]");
preparedStatement.setString(3, "22123456");
preparedStatement.setString(4, "Sousse, Tunisia");
int addedRows = preparedStatement.executeUpdate();
if (addedRows > 0) {
System.out.println("Row added successfully");
}
preparedStatement.setString(1, "Amine Heni");
preparedStatement.setString(2, "[email protected]");
preparedStatement.setString(3, "55111222");
preparedStatement.setString(4, "Mahdia, Tunisia");
addedRows = preparedStatement.executeUpdate();
if (addedRows > 0) {
System.out.println("Row added successfully");
}
preparedStatement.close();
// read all rows from table users
statement = connection.createStatement();
ResultSet resultSet =
statement.executeQuery("SELECT * FROM users");
while(resultSet.next()) {
int id = resultSet.getInt(1);
String name = resultSet.getString(2);
String email = resultSet.getString(3);
String phone = resultSet.getString("PHONE");
String address = resultSet.getString("address");
Timestamp createdAt =
resultSet.getTimestamp("created_AT");
System.out.println("User id=" + id + ":");
System.out.println(" Name = " + name);
System.out.println(" email = " + email);
System.out.println(" phone = " + phone);
System.out.println(" address = " + address);
System.out.println(" createdAt= " + createdAt);
}
statement.close();
// get user count from table users
statement = connection.createStatement();
statement.executeQuery("SELECT COUNT(*) FROM users");
int numUsers = 0;
if (resultSet.next()) {
numUsers = resultSet.getInt(1);
}
System.out.println(numUsers + " users found");
statement.close();
// Update row using prepared statement
String sqlUpdate =
"UPDATE users SET phone = ? WHERE id = ?";
preparedStatement =
connection.prepareStatement(sqlUpdate);
preparedStatement.setString(1, "99111222");
preparedStatement.setInt(2, 1);

64
int updatedRows = preparedStatement.executeUpdate();
System.out.println(updatedRows + " updated rows");
preparedStatement.close();
// Update all rows using static SQL statement
statement = connection.createStatement();
updatedRows = statement.executeUpdate(
"UPDATE users SET address = 'Monastir, Tunisia'");
System.out.println(updatedRows + " updated rows");
statement.close();
//delete row
String sqlDelete = "DELETE FROM users WHERE id = ?";
preparedStatement = connection.prepareStatement(sqlDelete);
preparedStatement.setInt(1, 1);
int deleteRows = preparedStatement.executeUpdate();
System.out.println(deleteRows + " deleted rows");
preparedStatement.close();
// read all rows from table users
statement = connection.createStatement();
resultSet = statement.executeQuery("SELECT * FROM users");
while(resultSet.next()) {
int id = resultSet.getInt(1);
String name = resultSet.getString(2);
String email = resultSet.getString(3);
String phone = resultSet.getString("PHONE");
String address = resultSet.getString("address");
Timestamp createdAt =
resultSet.getTimestamp("created_AT");
System.out.println("User id=" + id + ":");
System.out.println(" Name = " + name);
System.out.println(" email = " + email);
System.out.println(" phone = " + phone);
System.out.println(" address = " + address);
System.out.println(" createdAt= " + createdAt);
}
statement.close();
//delete all rows
statement = connection.createStatement();
deleteRows = statement.executeUpdate("DELETE FROM users");
System.out.println(deleteRows + " deleted rows");
statement.close();
connection.close();
} catch (SQLException sqlEx) {
sqlEx.printStackTrace();
}
}
}