integrated library system -...
TRANSCRIPT

Integrated Library System
User’s
Guide
Getting Started with Acquisitions

VIRTUA ILS – INTEGRATED LIBRARY SYSTEM
Getting Started with Acquisitions Version 43.1
January 2004
Copyright 1999-2004 VTLS Inc. All Rights Reserved. Virtua and the Virtua Design marks are used under license from Sega Corporation.
1701 Kraft Drive Blacksburg, Virginia 24060
U. S. A. Phone 540.557.1200
Fax 540.557.1210 E-mail: [email protected]

Getting Started with Acquisitions (v. 43.1)
PROPRIETARY INFORMATION OF VTLS INC. Virtua ILS – Integrated Library System
i
Table of Contents
TABLE OF FIGURES V
1. INTRODUCTION TO ACQUISITIONS 1
1.1 USING THIS GUIDE 1 1.2 OVERVIEW OF THE ACQUISITIONS SUBSYSTEM 3 1.2.1 FEATURES AND FUNCTIONALITY 3 1.3 KEY GLOBAL ASPECTS 4 1.3.1 AVAILABILITY OF ACQUISITIONS STATUSES IN THE OPAC 4 1.3.1.1 The Role of the Acquisitions Statuses Tab in the OPAC 5 1.3.1.2 Aspects of the Statuses Tab 6 1.3.1.3 Tasks to Perform from the Statuses Tab 7 1.3.1.4 Relinking Acquisitions Statuses to a New Bibliographic Record 7 1.3.2 RECORD LOCKING 9 1.3.3 CURRENCIES PARAMETER 10 1.3.3.1 Aspects of Currency Functionality 11 1.3.3.2 Tooltip Currency Converter 12 1.4 PARAMETER SETTINGS 13 1.4.1 ACQUISITIONS PARAMETERS 13 1.4.2 USER PROFILE PARAMETERS 14
2. GETTING ORIENTED 16
2.1 VIEWING THE VIRTUA MAIN WINDOW 16 2.1.1 ACQUISITIONS MENU 17 2.1.2 ACQUISITIONS TOOLBAR 24
3. WORKING WITH FUND ACCOUNTS 25
3.1 OVERVIEW OF THE FUND ACCOUNTING MODULE 25 3.1.1 FLEXIBILITY IN WORKING WITH ACCOUNTS 26 3.1.2 AUDIT TRAIL 26 3.1.3 HIERARCHICAL ACCOUNT STRUCTURE 27 3.1.3.1 Types of Accounts 28 3.1.3.2 Aspects of Management Accounts 28 3.1.3.3 Aspects of Spending Accounts 29 3.1.4 UNDERSTANDING ACCOUNT LIMITATIONS AND RESTRICTIONS 29 3.1.4.1 Adjusting Encumbrances and Expenditures 29 3.1.4.2 Record Locking During Updates 30

ii Getting Started with Acquisitions (v. 43.1)
Virtua ILS – Integrated Library System PROPRIETARY INFORMATION OF VTLS INC.
3.1.5 ABOUT FISCAL YEARS 30 3.1.5.1 Moving from One Year to the Next 30 3.2 WORKING WITH THE ACCOUNT MANAGEMENT WINDOW 32 3.2.1 REFRESHING THE WINDOW 33 3.3 ADDING ACCOUNTS 33 3.3.1 ADDING A ROOT MANAGEMENT ACCOUNT 34 3.3.2 INACTIVE FIELDS ON THE ADD ACCOUNT WINDOW 37 3.3.3 ADDING A SECOND ROOT MANAGEMENT ACCOUNT 38 3.3.4 ADDING ADDITIONAL ACCOUNTS 40 3.4 MODIFYING AN ACCOUNT 45 3.5 VIEWING AN ACCOUNT 48 3.6 DELETING AN ACCOUNT 50 3.6.1 SYSTEM CHECKS 50 3.7 MANAGING ACCOUNTS 52 3.7.1 TRANSFERRING FUNDS ACROSS ACCOUNTS 52 3.7.1.1 System Checks 55 3.7.2 ALLOCATING FUNDS TO AN ACCOUNT 56 3.7.3 REMOVING FUNDS FROM AN ACCOUNT 59 3.8 COPYING THE EXISTING ACCOUNT STRUCTURE 59
4. WORKING WITH VENDOR RECORDS 60
4.1 INTRODUCTION TO VENDOR RECORDS 60 4.2 CREATING A VENDOR RECORD 61 4.3 WORKING WITH THE CREATE NEW VENDOR WINDOW 63 4.3.1 ACTIVE CHECK BOX 63 4.3.2 COMMAND BUTTONS 63 4.3.3 CONTACT INFO TAB 64 4.3.3.1 Names Area 64 4.3.3.2 Address Area 64 4.3.4 ACQUISITIONS INFO TAB 66 4.3.4.1 Orders Area 67 4.3.4.2 Claims Area 67 4.3.4.3 Other Area 68 4.3.4.4 Blocks Area 68 4.3.4.5 Vendor Policies Area 68 4.3.5 EDIFACT TAB 69 4.3.5.1 Shipping Methods Area 70 4.3.5.2 EDIFACT Fields Area 70 4.3.5.3 Customer Accounts Area 71 4.3.6 NOTES TAB 72 4.3.6.1 Notes Area 73 4.3.6.2 Additional Fields Area 73 4.3.6.3 Command Buttons in Both Areas 74 4.4 VIEWING A VENDOR RECORD 74 4.5 UPDATING A VENDOR RECORD 75 4.5.1 RECORD LOCKING 76

Getting Started with Acquisitions (v. 43.1)
PROPRIETARY INFORMATION OF VTLS INC. Virtua ILS – Integrated Library System
iii
4.6 DELETING A VENDOR RECORD 77
5. GETTING STARTED WITH PURCHASE ORDERS 78
5.1 INTRODUCTION TO PURCHASE ORDERS 78 5.1.1 IMPORTANT THINGS TO KNOW ABOUT PURCHASE ORDERS 79 5.2 UNDERSTANDING PURCHASE ORDER TYPES 80 5.3 UNDERSTANDING PURCHASE ORDER PAYMENT TYPES 82 5.3.1 STANDARD PAYMENT TYPE 82 5.3.2 PREPAID PAYMENT TYPE 82 5.3.2.1 Creating Prepaid Orders 82 5.3.3 DEPOSIT/DONATION PAYMENT TYPE 83 5.4 UNDERSTANDING PURCHASE ORDER STATUSES 84 5.4.1 PREDEFINED ORDER STATUSES 84 5.4.2 STATUS FLOW 85 5.4.3 ORDER STATUS VS. ORDER LINE ITEM STATUS 85
6. WORKING WITH ACQUISITIONS NOTES 86
6.1 INTRODUCTION TO ACQUISITIONS NOTES 86 6.2 VIEWING THE ACQUISITIONS NOTES WINDOW 87 6.2.1 ASPECTS OF THE ACQUISITIONS NOTES WINDOW 88 6.3 ADDING OR EDITING A NOTE 89 6.4 DELETING A NOTE 90 6.5 WORKING WITH FAMILY PRIORITY NOTES 91 6.5.1 VIEWING FAMILY PRIORITY NOTES 91 6.5.2 MODIFYING OR DELETING FAMILY PRIORITY NOTES 92
7. WORKING WITH THE TITLE SELECTION LIST 93
7.1 INTRODUCTION TO TITLE SELECTION 93 7.2 ADDING A TITLE TO THE TITLE SELECTION LIST 94 7.3 REVIEWING/UPDATING TITLE INFORMATION 96 7.3.1 EDITING FIELDS STORED IN THE MARC RECORD 98 7.3.2 UPDATING THE STATUS 98 7.4 DELETING A TITLE FROM THE TITLE SELECTION LIST 99 7.5 CREATING AN ORDER FROM THE TITLE SELECTION LIST 100
8. APPENDIX A - CHANGES TO THIS USER’S GUIDE 103
8.1 VERSION 42.4 – VERSION 43.0 103 8.1.1 MODIFIED SECTIONS 103 8.1.2 NEW SECTIONS 103 8.2 VERSION 43.0 – VERSION 43.1) 103

iv Getting Started with Acquisitions (v. 43.1)
Virtua ILS – Integrated Library System PROPRIETARY INFORMATION OF VTLS INC.
INDEX 105

Getting Started with Acquisitions (v. 43.1)
PROPRIETARY INFORMATION OF VTLS INC. Virtua ILS – Integrated Library System
v
Table of Figures
Figure 1-1. Acquisitions Status Information as Viewed in the Client ______________________________ 5 Figure 1-2. Acquisitions Status Information as Viewed in the iPortal _____________________________ 6 Figure 1-3. Dragging and Dropping a Bibliographic Title _____________________________________ 8 Figure 1-4. Currencies Window – Virtua Profiler ___________________________________________ 10 Figure 1-5. Tooltip Currency Converter___________________________________________________ 12 Figure 1-6. Acquisitions Tab – Virtua Profiler ______________________________________________ 14 Figure 1-7. User Permissions Window – Virtua Profiler ______________________________________ 15 Figure 2-1. The Virtua Menu Bar and Toolbars _____________________________________________ 16 Figure 2-2. Acquisitions Menu __________________________________________________________ 17 Figure 2-3. Orders Submenu____________________________________________________________ 17 Figure 2-4. Receipts Submenu___________________________________________________________ 18 Figure 2-5. Invoices Submenu___________________________________________________________ 19 Figure 2-6. Vouchers Submenu__________________________________________________________ 19 Figure 2-7. Credits Submenu ___________________________________________________________ 20 Figure 2-8. Subscriptions Submenu ______________________________________________________ 21 Figure 2-9. Accounts Submenu __________________________________________________________ 21 Figure 2-10 Claims Submenu ___________________________________________________________ 22 Figure 2-11. Acquisitions Menu - Title Selection List_________________________________________ 22 Figure 2-12. Acquisitions Menu - SICI Check-in ____________________________________________ 23 Figure 2-13. Acquisitions Menu - New Vendor______________________________________________ 23 Figure 2-14 Acquisitions Toolbar ________________________________________________________ 24 Figure 3-1. Account Management Window - Tree Structure ___________________________________ 27 Figure 3-2. Account Management Window_________________________________________________ 32 Figure 3-3. Account Management Window_________________________________________________ 34 Figure 3-4. Add Account Window - Root Management Account ________________________________ 35 Figure 3-5. Information Window_________________________________________________________ 36 Figure 3-6. Account Management Window - Management Account Added ________________________ 37 Figure 3-7. Account Management Window - Root Account ____________________________________ 38 Figure 3-8. Add Account Window - Second Root Account _____________________________________ 39 Figure 3-9. Account Management Window - Second Root Account ______________________________ 40 Figure 3-10. Error Message ____________________________________________________________ 41 Figure 3-11. Account Management Window - Hierarchy Expanded _____________________________ 42 Figure 3-12. Add Account Window - Spending Account_______________________________________ 43 Figure 3-13. Account Management Window (Additional Account Added) _________________________ 44 Figure 3-14. Account Management Window________________________________________________ 46 Figure 3-15. Modify Account Window ____________________________________________________ 47 Figure 3-16. View Account Window ______________________________________________________ 49 Figure 3-17. Information Window - Account Deletion ________________________________________ 51 Figure 3-18. Information Window - Account Deletion ________________________________________ 51 Figure 3-19. Information Window - Account Deletion ________________________________________ 51 Figure 3-20. Warning _________________________________________________________________ 52 Figure 3-21. Information Window - Account Deletion ________________________________________ 52 Figure 3-22 Fund Transfer Window ______________________________________________________ 54 Figure 3-23. Fund Transfer Window _____________________________________________________ 55 Figure 3-24 Information Window - Fund Transfer Completed__________________________________ 56 Figure 3-25. Account Management Window________________________________________________ 57 Figure 3-26 Account Allocation Window __________________________________________________ 58 Figure 4-1. Create New Vendor Window __________________________________________________ 62 Figure 4-2. Create New Vendor Window - Acquisitions Info Tab _______________________________ 66

vi Getting Started with Acquisitions (v. 43.1)
Virtua ILS – Integrated Library System PROPRIETARY INFORMATION OF VTLS INC.
Figure 4-3. Create New Vendor Window - EDIFACT Tab _____________________________________ 69 Figure 4-4. Create New Vendor Window - Notes Tab ________________________________________ 72 Figure 4-5. View Vendor Window________________________________________________________ 75 Figure 4-6. Locked Record Message______________________________________________________ 76 Figure 6-1. Acquisitions Notes Window ___________________________________________________ 88 Figure 6-2. Edit Note Dialog Box ________________________________________________________ 89 Figure 7-1. Title Selection List __________________________________________________________ 93 Figure 7-2. Add Title Selection Window ___________________________________________________ 95 Figure 7-3. Title Selection List __________________________________________________________ 96 Figure 7-4. Title Selection List __________________________________________________________ 96 Figure 7-5. Update Title Selection Window ________________________________________________ 97 Figure 7-6. Selection List Pull-down Menu ________________________________________________ 99 Figure 7-7. Record Update Failed Message ________________________________________________ 99 Figure 7-8. Title Selection List _________________________________________________________ 100 Figure 7-9. Add PO Request Dialog Box _________________________________________________ 101 Figure 7-10. Add Order Window _______________________________________________________ 101

Getting Started with Acquisitions (v. 43.1)
PROPRIETARY INFORMATION OF VTLS INC. Virtua ILS – Integrated Library System
1
1. Introduction to Acquisitions Disclaimer: The Virtua Acquisitions subsystem is designed to provide information about library acquisitions and accounting transactions. It is NOT designed to be an accounting system. Information provided by the Acquisitions subsystem should be checked against data provided by the accounting system used by your institution.
he Getting Started with Virtua Acquisitions Guide introduces you to the Acquisitions subsystem of the Virtua™ ILS – Integrated Library System. This guide is one of two user’s guides for the Acquisitions subsystem. It
describes the main features of the subsystem, briefly touches on parameters, and orients you to the menus and toolbar. In addition, the guide goes into detail about setting up your fund accounts and vendor records, which you must do before you create your first purchase order. Finally, the guide discusses some important global aspects of purchase orders and covers functionality regarding Acquisitions notes and the Title Selection List. The second guide for the Acquisitions subsystem, the Virtua Acquisitions User’s Guide, describes the workflows, features, and functionality for the current release of the Virtua ILS software. It provides step-by-step instructions for using the subsystem to acquire items for your institution, from creating and sending purchase orders, to receiving and invoicing items, to making payments. Note: From this point on, we will refer to the Virtua ILS – Integrated Library System as simply Virtua or the Virtua system in this guide. This introduction covers the following topics: ⇒ Using This Guide ⇒ Overview of the Acquisitions Subsystem ⇒ Key Global Aspects ⇒ Parameter Settings
1.1 Using This Guide The Getting Started with Virtua Acquisitions Guide covers four types of information: • Key global aspects of the subsystem.
T
2 Getting Started with Acquisitions (v. 43.1)
Virtua ILS – Integrated Library System PROPRIETARY INFORMATION OF VTLS INC.
• Features that must be in place and parameters that must be set before adding the first purchase order.
• General information about Virtua purchase orders. • Specific information about notes, which can play a role at every stage of the
Acquisitions workflow. The first chapter contains an overview of the Acquisitions subsystem and information about key global aspects and parameters. We recommend that you read Chapter 1 carefully. The information about record locking, Acquisitions Statuses tab in the OPAC, and currencies is very important and is NOT covered anywhere else in the Acquisitions guides. To understand the Acquisitions functions that are available on the Virtua menu bar and toolbar, read Chapter 2, “Getting Oriented.” Chapter 3 and Chapter 4 cover two aspects that are at the heart of Acquisitions functionality: fund accounts and vendor records, both of which must be in place before you can start ordering items. For an overview of the functionality surrounding purchase orders, read Chapter 5. To understand how to use notes efficiently and effectively throughout the Acquisitions process, read Chapter 6. Chapter 7 discusses our implementation of the Title Selection List. This guide assumes you have already read the Virtua Getting Started Primer, which offers an overview of Virtua, an explanation of terminology and keyboard functions, the procedure for setting up and connecting to servers, a description of the Virtua menu bar and toolbars, tips on customizing the system, and a description of the online help system. To get the most from this guide, we recommend that you also be familiar with two Virtua Profiler guides: Virtua Profiler/Introduction and Global Settings User’s Guide and Virtua Profiler/Acquisitions Parameters User’s Guide. To locate specific information in this guide, use the hyperlinked page numbers in the table of contents and table of figures or the hyperlinked section headings at the beginning of each chapter. If you are using a paper copy, use the index. Your comments about using this guide are welcome. Please see the Reader’s Comment Form in the back of the guide. Note: The Getting Started with Virtua Acquisitions Guide assumes that you are familiar with your Windows® operating system.

Getting Started with Acquisitions (v. 43.1)
PROPRIETARY INFORMATION OF VTLS INC. Virtua ILS – Integrated Library System
3
1.2 Overview of the Acquisitions Subsystem The Virtua Acquisitions subsystem lets you manage all the major processes involved in collection development while allowing you the flexibility to tailor the subsystem to meet your needs. Even though your data may reside on more than one server, the Virtua server provides a consistent, logical view of acquisitions and serials data. Via passwords, profiles, and permissions set in the Virtua Profiler, your library can control user access to different functions and thus protect the confidential nature of acquisitions data. Virtua Acquisitions boasts a variety of features and functionality that facilitate the acquisitions process. Support for an open accounting structure, a variety of order types, repetitive and integrated workflows, distributions to individual libraries or groups of libraries, MARC and EDI standards, library address records, reminders, family priority notes, and pre-defined templates contribute to an accommodating work environment. Because the workflows of Acquisitions and Serials often intersect, we have tightly integrated the data flow between the two subsystems. This integration includes ordering, tracking, renewing, and paying for Serial orders and Multivolume Series orders. Via automatic reminders that cut across both subsystems, the software monitors and expedites claims for both monographs and serial titles. In addition to integrating the functions of Acquisitions and Serials, Virtua integrates the functions of both subsystems with the Online Public Access Catalog subsystem and Cataloging subsystem, where your staff will be performing tasks related to Acquisitions functions, especially with regards to bibliographic and holdings records.
1.2.1 Features and Functionality The following list of key features summarizes the functionality available in Virtua Acquisitions. • Flexibility to localize operations. • Variety of order types and order payment types. • Library-configurable hierarchical account structure. • A record-locking facility to prevent editing while a record is in use by another user. • Association of Acquisitions address records with circulation location names (via an
Acquisitions parameter setting).

4 Getting Started with Acquisitions (v. 43.1)
Virtua ILS – Integrated Library System PROPRIETARY INFORMATION OF VTLS INC.
• Filtering by log-in location via an Acquisitions parameter setting. • Support for a titles selection list organized by category, where titles that the library
intends to order can be managed. • A Vendor Editor that facilitates creating and editing vendor records, which can
store vendor information in an easily accessible format. • Flexible workflows that support both repetition and integration as well as efficient
serial renewals. • A Distribution Groups workflow that supports centralized functionality, allowing
libraries to manage the ordering and receiving of items for multiple library locations.
• Support for industry standards such as EDIFACT, which is one type of implementation of EDI standards (not fully implemented).
• Support for the MARC 21 Format for Holdings Data. • Support for SAP and system-calculated taxes such as VAT. • System security based on a user permissions matrix set in the Virtua Profiler. • Pre-defined reports via InfoStation®, Virtua’s Web-reporting subsystem. • Ad hoc reports via the Ad Hoc Reporting facility. • Three types of reminders. • Seamless integration between acquisitions, serials, searching, and cataloging
functions. • Availability of Acquisitions statuses in the OPAC. • Context-sensitive, pop-up help.
1.3 Key Global Aspects Before starting to use Virtua Acquisitions, it is important to be aware of three key aspects that have a global impact on the functionality of the subsystem.
1.3.1 Availability of Acquisitions Statuses in the OPAC Statuses and other information about Acquisitions records are readily accessible in the OPAC for any bibliographic record with which Acquisitions records are associated. Virtua maintains this information on the (Acquisitions) Statuses tab, which is available on the View Bibliographic Record window. The Statuses tab contains information about the Order Status, Receipt Status, Invoice Status, Payment Status, and Credit Status of a selected acquisition. On the Statuses tab, not only can you view a variety of Acquisitions information, but you can also view or update individual records associated with each type of status.

Getting Started with Acquisitions (v. 43.1)
PROPRIETARY INFORMATION OF VTLS INC. Virtua ILS – Integrated Library System
5
Note: The Statuses tab is for Acquisitions information only. Do not confuse it with the Status tab that appears on the Item Information window and that contains information about the availability of an item.
1.3.1.1 The Role of the Acquisitions Statuses Tab in the OPAC The Statuses tab on the View Bibliographic Record window displays Acquisitions status data linked to the bibliographic record and allows you to access individual Acquisitions records for viewing or updating. As soon as a purchase order is saved to the database, Virtua updates the View Bibliographic Record window to display this tab. Virtua continues to update the tab at each stage of the acquisitions process. In the end, the tab gives you an overview of the status of the purchase order at every point in the workflow. To display the Statuses tab, 1. Search the OPAC for the desired bibliographic record. 2. Navigate to the View Bibliographic Record window. 3. Click the Statuses tab (Figure 1-1), which will exist if any type of order has been
placed for this title.
Figure 1-1. Acquisitions Status Information as Viewed in the Client

6 Getting Started with Acquisitions (v. 43.1)
Virtua ILS – Integrated Library System PROPRIETARY INFORMATION OF VTLS INC.
Note that the Chameleon iPortal displays on the Full record screen (Figure 1-2) Acquisitions status data, but only for the purchase order/line item pair.
Figure 1-2. Acquisitions Status Information as Viewed in the iPortal
For information about configuring the iPortal to display Acquisitions status data, see the Chameleon iPortal Configuration Guide.
1.3.1.2 Aspects of the Statuses Tab The Statuses tab is divided into six main blocks of data. Two blocks establish the unique purchase order and line item combination that is associated with the bibliographic record. These two blocks are… • Order ID/Line Pairs - This pull-down list box contains the purchase order
number and order line item number combinations that are linked to this title. • Order Status Information - This field displays details about the purchase order
and line item displayed in the Order ID/Line Pairs field. Each of the other four blocks displays status details that are associated with the current purchase order/line item pair. The data in these four blocks change dynamically in relation to the purchase order/line item pair as it moves through the acquisitions process. The four blocks are… Receipt Status Information Invoice Status Information Payment Status Information Credit Status Information (not yet implemented)
Getting Started with Acquisitions (v. 43.1)
PROPRIETARY INFORMATION OF VTLS INC. Virtua ILS – Integrated Library System
7
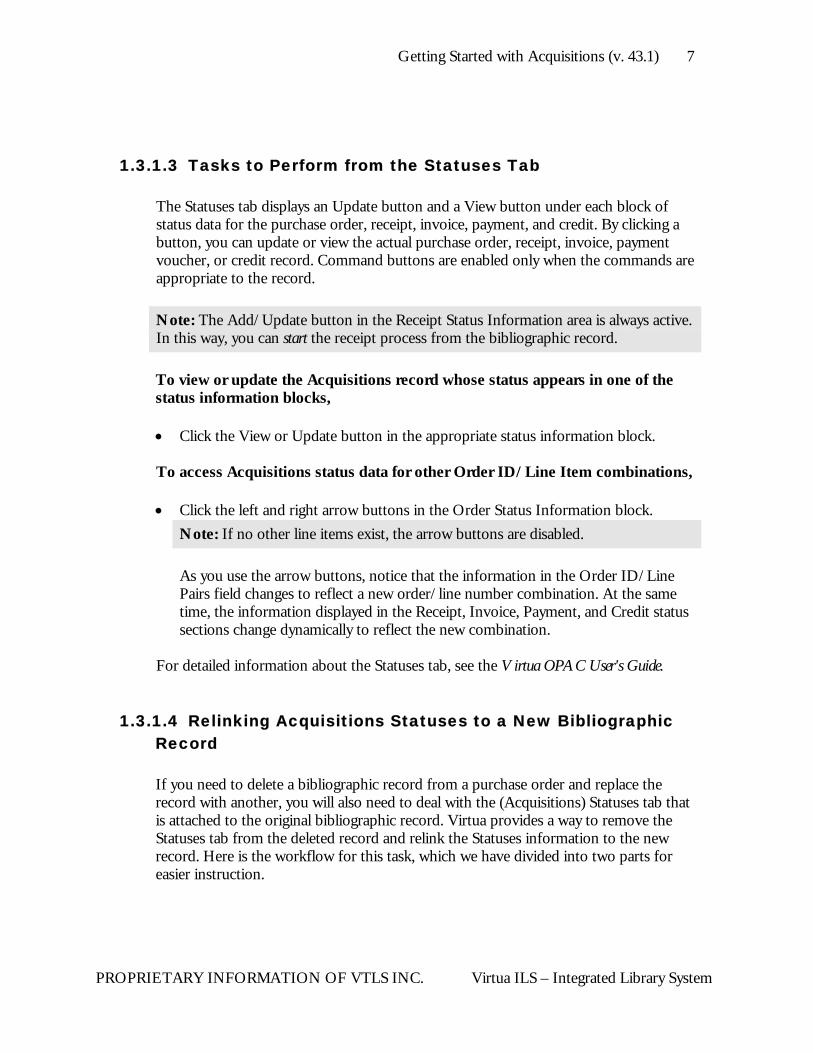
1.3.1.3 Tasks to Perform from the Statuses Tab The Statuses tab displays an Update button and a View button under each block of status data for the purchase order, receipt, invoice, payment, and credit. By clicking a button, you can update or view the actual purchase order, receipt, invoice, payment voucher, or credit record. Command buttons are enabled only when the commands are appropriate to the record. Note: The Add/Update button in the Receipt Status Information area is always active. In this way, you can start the receipt process from the bibliographic record. To view or update the Acquisitions record whose status appears in one of the status information blocks, • Click the View or Update button in the appropriate status information block. To access Acquisitions status data for other Order ID/Line Item combinations, • Click the left and right arrow buttons in the Order Status Information block.
Note: If no other line items exist, the arrow buttons are disabled.
As you use the arrow buttons, notice that the information in the Order ID/Line Pairs field changes to reflect a new order/line number combination. At the same time, the information displayed in the Receipt, Invoice, Payment, and Credit status sections change dynamically to reflect the new combination.
For detailed information about the Statuses tab, see the Virtua OPAC User's Guide.
1.3.1.4 Relinking Acquisitions Statuses to a New Bibliographic Record If you need to delete a bibliographic record from a purchase order and replace the record with another, you will also need to deal with the (Acquisitions) Statuses tab that is attached to the original bibliographic record. Virtua provides a way to remove the Statuses tab from the deleted record and relink the Statuses information to the new record. Here is the workflow for this task, which we have divided into two parts for easier instruction.

8 Getting Started with Acquisitions (v. 43.1)
Virtua ILS – Integrated Library System PROPRIETARY INFORMATION OF VTLS INC.
To move the (Acquisitions) Statuses tab to a new bibliographic record, PART I 1. On the Virtua menu bar, click Acquisitions. 2. Choose Orders, and then choose Update.
The Order window appears (either in Update or View mode, depending on whether the order has been transmitted or not).
3. Highlight the line item to be updated. 4. Click the Edit Item (or View) button.
The Order Line Editor appears. 5. On the Order Line Editor, click the Bibliographic Information tab. PART II 1. Search the OPAC for the record to which you want to move the order line item. 2. On the View Record window, click the Full tab. 3. Drag and drop the bibliographic data on to the Bibliographic Information tab
(Figure 1-3).
Figure 1-3. Dragging and Dropping a Bibliographic Title
4. Click the Save button on the Order Line Editor.

Getting Started with Acquisitions (v. 43.1)
PROPRIETARY INFORMATION OF VTLS INC. Virtua ILS – Integrated Library System
9
On the Order window, the new bibliographic title appears in place of the old one. 5. Save the updated purchase order. An Acquisitions Statuses tab for the purchase order will now be attached to the new bibliographic record. At this point, if appropriate, you can access the old bibliographic record and delete it from the database.
1.3.2 Record Locking Virtua offers a record-locking feature, which protects an Acquisitions record from being modified by two or more users simultaneously. The software protects the following types of records: Record Type Locked for the Following Functions Purchase order records
Update, Delete, Cancel
Receipt records
Not locked. The linked purchase order is locked instead during the Receipt function
Invoice records
Update, Delete
Credit records
Update, Delete
Vendor records
Edit mode
If you try to access a locked record for any purpose other than viewing, the client will display an Error message. Virtua also locks an account when you access the Modify Account window by clicking the Modify button on the Account Management window. In this way, no other user can access that account to modify it. If you are modifying a child account, the immediate parent account is also locked until the modification is complete. Note: Virtua automatically removes a lock after a user completes the task on a record. If the lock is NOT automatically removed, Virtua offers a way to remove the lock manually in the Virtua Profiler (for details, see the parameters in the Virtua Profiler/Introduction and Global Settings User’s Guide).

10 Getting Started with Acquisitions (v. 43.1)
Virtua ILS – Integrated Library System PROPRIETARY INFORMATION OF VTLS INC.
1.3.3 Currencies Parameter The Currencies parameter plays a crucial and complex role in Virtua Acquisitions. A home, or base, currency must exist for each Virtua site. Your library was given the opportunity to choose its home currency during the installation of Virtua. Once the home currency is set for a system, you cannot change it (and thereby recalculate all the conversion factors based on it) except by running a script called AcqConvertCurrency.sql (see the System Management: Acquisitions User's Guide for details.) After running the script, it is important that you restart the client in order for the tooltip currency converter to work correctly. The home monetary unit always has the exchange value of 1, and other currencies are valuated against it by means of a conversion factor. Besides a home currency, Virtua also manipulates non-home, or arbitrary, currencies. All the ISO currency codes that Virtua uses and ONE global default format for these currencies are installed with the system. Your library will need to set the exchange rates and edit aspects of the format for each currency you will be using. To set exchange rates and edit the format of each currency, access the Currencies parameter (Figure 1-4), which is on the Global Settings tab in the Virtua Profiler. For details, see the Virtua Profiler/Introduction and Global Settings User’s Guide.
Figure 1-4. Currencies Window – Virtua Profiler
Be aware that if you… • change the home currency, • connect to a database that has a different home currency than that of the old
connection,

Getting Started with Acquisitions (v. 43.1)
PROPRIETARY INFORMATION OF VTLS INC. Virtua ILS – Integrated Library System
11
-OR- • change the conversion factor of a currency in the Currencies parameter in the
Virtua Profiler… you must close your Virtua client connection and then restart it so that it recognizes the new currency.
1.3.3.1 Aspects of Currency Functionality In Virtua Acquisitions, all currency values for fund accountsthat is, encumbrances, allocations, and expendituresmust be in the home currency. If you change a currency rate in the Profiler and the change entails a new conversion factor, the software will update encumbrances and derivatives of encumbrances, such as free balance, only if you answer "Yes" to the Profiler prompt that asks if you want to save changes and re-encumber accounts. Note that you will not be able to perform Acquisitions transactions until Acquisitions data is updated to reflect the change. Currency values for purchase orders, claims, invoices and payment vouchers can be in an arbitrary currency. Although the currency may differ between an order and the invoice, it must be the same between an invoice and the payment voucher. The arbitrary currency value used for purchase orders, claims, invoices, and payment vouchers is pulled from the vendor record. If the vendor record does not specify an arbitrary currency, the system will use the home currency. For a voucher without invoices or a credit record, Virtua uses the home currency by default, but you can choose another currency from a pull-down menu. Virtua allows only ONE currency per purchase order, invoice, credit memo, or payment voucher. When exchange rates change, the software does NOT update arbitrary currency values on existing order and invoice records. But if the value of the currency changes between the time the order is placed and the time the order is invoiced, the value of the invoice will be updated upon saving. Encumbrances are updated in turn. If the order is only partially invoiced, the invoice will reflect the currency change when the order is invoiced in full. Example: When an exchange rate changes at the invoice stage, the software updates the account encumbrance for the order. The order record itself, however, continues to show the original order amount.

12 Getting Started with Acquisitions (v. 43.1)
Virtua ILS – Integrated Library System PROPRIETARY INFORMATION OF VTLS INC.
Note: When a change to an exchange rate is made, • The system logs an entry in the audit trail. • No Acquisitions transactions will be allowed until Acquisitions accounts have been
re-encumbered (Note the Re-encumber button on the Currencies parameter window).
1.3.3.2 Tooltip Currency Converter Your library will execute most of its Acquisitions transactions using the home currency. But it is likely that your library will also create purchase orders, invoices, and payment vouchers using arbitrary currencies. For your convenience, Virtua offers the Tooltip Currency Converter, which gives you a quick and immediate translation of foreign currency values into the home currency. Once you have determined the rate of exchange for each foreign currency used by your system, the Tooltip Currency Converter can calculate the currency conversions for you.
1.3.3.2.1 Using the Tooltip Currency Converter To activate the Tooltip Currency Converter, • Position your mouse pointer over the value in any currency field in Acquisitions,
such as the Line Total in the Add Invoice header (Figure 1-5).
A pop-up tooltip appears, displaying the numerical value in the base currency, for example: Home Currency Value: $66.00 USD
Figure 1-5. Tooltip Currency Converter

Getting Started with Acquisitions (v. 43.1)
PROPRIETARY INFORMATION OF VTLS INC. Virtua ILS – Integrated Library System
13
1.3.3.2.2 Aspects of the Tooltip Currency Converter • The Tooltip Currency Converter always translates from a foreign currency into the
base currency. • If the value in the currency field is already in the base currency, the tooltip displays
the same value. • If the value in the currency field is for a currency that has not been assigned an
exchange rate, the software assumes an exchange rate of 1 and displays the same value.
1.4 Parameter Settings Via the Virtua Profiler, your library will need to set up three types of parameters before using Acquisitions functions: • The Currencies parameter under Global Settings (see the section “Currencies
Parameter” in this guide) • Acquisitions parameters • User Profiles Global Settings parameters affect the Virtua system as a whole; Acquisitions parameters affect the entire Acquisitions subsystem; and the User Profile parameters apply to users or groups of users for all Virtua subsystems.
1.4.1 Acquisitions Parameters On the Acquisitions tab in the Virtua Profiler (Figure 1-6) you can set parameters and define default values for various aspects of Virtua Acquisitions. When you launch Virtua, the client will download these parameters from the server so that they will be available for your session.

14 Getting Started with Acquisitions (v. 43.1)
Virtua ILS – Integrated Library System PROPRIETARY INFORMATION OF VTLS INC.
Figure 1-6. Acquisitions Tab – Virtua Profiler
For details about each of these parameters, see the Virtua Profiler/Acquisitions Parameters User’s Guide.
1.4.2 User Profile Parameters In the Virtua Profiler you can set User Profile (Permissions) parameters (Figure 1-7) to allow or deny specific groups of users access to almost every function of Virtua Acquisitions from adding, viewing, and modifying accounts to creating, viewing and updating orders; transmitting claims; applying credits; and selecting and paying invoices.

Getting Started with Acquisitions (v. 43.1)
PROPRIETARY INFORMATION OF VTLS INC. Virtua ILS – Integrated Library System
15
Figure 1-7. User Permissions Window – Virtua Profiler
For details about user permissions, see the Virtua Profiler/Introduction and Global Settings User’s Guide.

16 Getting Started with Acquisitions (v. 43.1)
Virtua ILS – Integrated Library System PROPRIETARY INFORMATION OF VTLS INC.
2. Getting Oriented
fter you connect to a server and log in to the Virtua client, the Virtua main window appears, displaying a main menu bar and four toolbars by default. In this chapter our discussion of the drop-down menus and toolbars deals only
with those options most pertinent to a user of the Acquisitions subsystem. We will leave the discussion of other menus and toolbars to the appropriate Virtua user’s guides. This chapter covers the following topic: ⇒ Viewing the Virtua Main Window
2.1 Viewing the Virtua Main Window The menu bar in Virtua’s main window initially offers eight pull-down menus (Figure 2-1).
Figure 2-1. The Virtua Menu Bar and Toolbars
As an Acquisitions user, you will be most concerned with the functions available on the Acquisitions menu. For tips on navigating the menu bar using the keyboard and using menu shortcuts, see the Virtua Getting Started Primer.
A

Getting Started with Acquisitions (v. 43.1)
PROPRIETARY INFORMATION OF VTLS INC. Virtua ILS – Integrated Library System
17
2.1.1 Acquisitions Menu The Acquisitions drop-down menu (Figure 2-2) displays eleven selections: Orders, Receipts, Invoices, Vouchers, Credits, Subscriptions, Accounts, Claims, Title Selection List, SICI Check-in, and New Vendor. We discuss each selection in detail below.
Figure 2-2. Acquisitions Menu • Orders - Provides a submenu from which you can choose seven functions:
Add, View, Update, Delete, Cancel, Copy, and Send Orders.
Figure 2-3. Orders Submenu
♦ Add - Lets you create a new purchase order. ♦ View - Lets you view an existing purchase order. ♦ Update - Lets you edit an existing purchase order. ♦ Delete - Lets you delete an existing purchase order once certain conditions are
met.

18 Getting Started with Acquisitions (v. 43.1)
Virtua ILS – Integrated Library System PROPRIETARY INFORMATION OF VTLS INC.
♦ Cancel - Lets you cancel a transmitted purchase order—as long as it has not been fully received—or selected line items.
♦ Renew - Lets you renew an invoiced serial subscription without having to create a new purchase order.
♦ Copy - Lets you copy a purchase order in order to resubmit it or submit it to a new vendor.
♦ Send Orders - Lets you submit one or multiple purchase orders to a vendor. For details about the functions on the Orders submenu, see the Virtua Acquisitions User’s Guide.
• Receipts - Provides a submenu from which you can choose two functions:
Add/Update and View.
Figure 2-4. Receipts Submenu
♦ Add/Update - Lets you add a new receipt or edit an existing receipt. ♦ View - Lets you view an existing receipt. For details about the functions on the Receipts submenu, see the Virtua Acquisitions User’s Guide.
• Invoices - Provides a submenu from which you can choose six functions: Add,
Add EDI, View, Update, Delete, and Pay.

Getting Started with Acquisitions (v. 43.1)
PROPRIETARY INFORMATION OF VTLS INC. Virtua ILS – Integrated Library System
19
Figure 2-5. Invoices Submenu
♦ Add - Lets you create a new invoice. ♦ Add EDI – (Not yet available) ♦ View - Lets you view an existing invoice. ♦ Update - Lets you edit an existing invoice. ♦ Delete - Lets you delete an existing invoice once certain conditions are met. ♦ Pay - Lets you pay one or more invoices once certain permissions are satisfied.
For details about the functions on the Invoices submenu, see the Virtua Acquisitions User’s Guide.
• Vouchers - Provides a submenu from which you can choose two functions: New
and View.
Vouchers submenu
Figure 2-6. Vouchers Submenu

20 Getting Started with Acquisitions (v. 43.1)
Virtua ILS – Integrated Library System PROPRIETARY INFORMATION OF VTLS INC.
♦ New - Lets you create a new voucher. ♦ View - Lets you view an existing voucher.
For details about the functions on the Vouchers submenu, see the Virtua Acquisitions User’s Guide.
• Credits - Provides a submenu from which you can choose four functions: New,
View, Update, and Delete.
Figure 2-7. Credits Submenu
♦ New - Lets you create a new credit. ♦ View - Lets you view an existing credit. ♦ Update - Lets you edit an existing credit. ♦ Delete - Lets you delete an existing credit once certain conditions are met.
For details about the functions on the Credits submenu, see the Virtua Acquisitions User’s Guide.
• Subscriptions - Provides a submenu from which you can choose one function:
Serials Reminders.

Getting Started with Acquisitions (v. 43.1)
PROPRIETARY INFORMATION OF VTLS INC. Virtua ILS – Integrated Library System
21
Figure 2-8. Subscriptions Submenu
♦ Serials Reminders –Lets you view Acquisitions (and Serials) reminders by
location and/or a defined or default date range via the General Reminders Request dialog box.
For details about the function on the Subscriptions submenu, see the Virtua Acquisitions User’s Guide.
• Accounts - Provides a submenu from which you can choose two functions: Setup
and Fund Transfer.
Figure 2-9. Accounts Submenu
♦ Setup - Lets you add a new account. Also lets you delete, update, view, and
allocate existing accounts once certain conditions are met. ♦ Fund Transfer - Lets you transfer funds between existing accounts once
certain conditions are met.

22 Getting Started with Acquisitions (v. 43.1)
Virtua ILS – Integrated Library System PROPRIETARY INFORMATION OF VTLS INC.
For details about the functions on the Accounts submenu, see the chapter “Managing Fund Accounts in this guide.”
• Claims - Provides a submenu from which you can choose one function: Transmit
Claims.
Figure 2-10 Claims Submenu
♦ Transmit Claims – Lets you transmit all outstanding claims that have been
linked to orders.
For details about the function on the Claims submenu, see the Virtua Acquisitions User’s Guide.
• Title Selection List – Provides a submenu from which you can choose two
functions: Add and Review.
Figure 2-11. Acquisitions Menu - Title Selection List

Getting Started with Acquisitions (v. 43.1)
PROPRIETARY INFORMATION OF VTLS INC. Virtua ILS – Integrated Library System
23
♦ Add – Displays the Add Title Selection window where you can add the specifications for a new title.
♦ Review – Displays the Title Selection List window, which displays all the current titles on the list and gives you command buttons to add to, delete from, or update the list and to create an order.
For details about managing a title selection list, see the chapter “Working with the Title Selection List” in this guide.
• SICI Check-in – This menu item is a Serials function rather than an Acquisitions
function. It displays the SICI (Serial Item and Contribution Identifier) Check-in window. For details about the function on the SICI Check-in submenu, see the Virtua Serials User’s Guide.
Figure 2-12. Acquisitions Menu - SICI Check-in
• New Vendor – Displays the Create New Vendor window where you can add a
new vendor record and save it to the database.
Figure 2-13. Acquisitions Menu - New Vendor

24 Getting Started with Acquisitions (v. 43.1)
Virtua ILS – Integrated Library System PROPRIETARY INFORMATION OF VTLS INC.
For details about creating a new vendor record, see the chapter “Working with Vendor Records” in this guide.
2.1.2 Acquisitions Toolbar Virtua’s Acquisitions toolbar (Figure 2-14) offers six icons for easy access to a variety of functions. Each icon has a label, or tooltip. To see the tooltip, place your mouse over the icon and wait a second. A description of the icon appears.
Figure 2-14 Acquisitions Toolbar
Add Purchase Order
Add/Update Receipts
Add Invoice
New Voucher
New Credit
Serials Reminders

Getting Started with Acquisitions (v. 43.1)
PROPRIETARY INFORMATION OF VTLS INC. Virtua ILS – Integrated Library System
25
3. Working with Fund Accounts
efore you start using Virtua Acquisitions to order material, you need to make sure that the database is properly prepared to handle the requirements of the subsystem. One of the first things you need to do is establish the fund
accounting structure. This chapter covers the following topics: ⇒ Overview of the Fund Accounting Module ⇒ Working with the Account Management Window ⇒ Adding Accounts ⇒ Modifying an Account ⇒ Viewing an Account ⇒ Deleting an Account ⇒ Managing Accounts ⇒ Copying the Existing Account Structure
3.1 Overview of the Fund Accounting Module The Acquisitions fund accounting module lets you monitor your budgets, encumbrances, and expenditures via a hierarchical structure of different types and levels of accounts. Virtua performs the process of encumbering and disencumbering funds and adjusting fund balances automatically and dynamically in response to the creation of orders, cancellation of orders, application of credits, and payment of invoices. The fund accounting module… • Stores data in the system so that each transaction can be reconstructed against any
budget created in the system. • Monitors and tracks all transactions in the Acquisitions transaction log (accessible
only via a report). • Constructs a detailed audit trail of transactions that are involved with or related to
the fund accounts (accessible only via a report).
B

26 Getting Started with Acquisitions (v. 43.1)
Virtua ILS – Integrated Library System PROPRIETARY INFORMATION OF VTLS INC.
3.1.1 Flexibility in Working with Accounts At the account level, Virtua Acquisitions allows you to… • Set up unlimited levels of accounts and sub-accounts, including more than one
root account. • Create and maintain more than one hierarchy of accounts, each reflecting a
separate budget within the same fiscal year. • Have multiple fiscal years co-existing and operating simultaneously in the system. • Have an account span more than one fiscal year and have payment span multiple
years (i.e., you do not have to close out an account in one fiscal year in order to open or pay out of the same account in a new fiscal year).
• Keep a fiscal year open even as the next fiscal year begins. If you want, you can close out each year separately.
Note: Via a server-side utility, which you run from the command line, you have two other options for your accounts: 1) You can transfer the existing account structure and existing allocations from one fiscal year to another, and 2) You can transfer encumbrances and outstanding orders from one fiscal year to another. For more information, see the section “About Fiscal Years” in this guide.
3.1.2 Audit Trail Virtua Acquisitions supports standard accounting practices that will allow your library to reconcile its acquisition records with the records of the purchasing office. This support comes in the form of a transaction log and an audit trail. The audit trail tracks financial transactions in the Acquisitions subsystem. These fund transactions have to do with the following: • Allocations • Encumbrances • Disencumbrances • Deposits • Expenditures • Transfers • Currency exchange rate changes InfoStation offers the Acquisitions Audit Trail report, which will generate a list of Acquisitions transactions that meet the fund account and date range criteria that you specify for the report configuration.

Getting Started with Acquisitions (v. 43.1)
PROPRIETARY INFORMATION OF VTLS INC. Virtua ILS – Integrated Library System
27
All other transactions in Acquisitions such as creating purchase orders, adding receipts, adding invoices, and making payments are logged in the Acquisitions transaction log. You can access this data via an ad hoc report (see the Ad Hoc Reporting Reference Guide). By using data from both the audit trail and the transaction log, your library has a historical record of all transactions and fund activity.
3.1.3 Hierarchical Account Structure
Figure 3-1. Account Management Window - Tree Structure
The Virtua Acquisitions fund accounting structure is hierarchical and is represented by a “tree” on the Account Management window. There is no limit to the depth or width of the hierarchy. Here are some important features to keep in mind: • Your library or location can define the tree structure of its fund accounting system.
The tree structure is based on the “parent” account-“child” account concept. You can have as many parent-child relationships as necessary. Each parent account can be linked to an unlimited number of child accounts.
• Your library or location can maintain separate and mutually exclusive fund account trees within the hierarchical structure. For example, your library can create and maintain one tree representing the total budget and another representing the actual working budget.

28 Getting Started with Acquisitions (v. 43.1)
Virtua ILS – Integrated Library System PROPRIETARY INFORMATION OF VTLS INC.
• You can set up some accounts as single tier and other accounts as multiple tier. • You can transfer funds between accounts within the same tree or between different
trees.
3.1.3.1 Types of Accounts Two basic types of accounts exist: • Management Accounts • Spending Accounts. Management Accounts are “parent” distribution accounts. You distribute funds from Management Accounts to other Management Accounts and to “child” Spending Accounts. Spending Accounts receive all their fund allocations from Management Accounts. • You can add original funds only to a Management Account. Once money is in a
parent account, you can distribute or allocate it to accounts that are lower in the hierarchy.
• You can spend funds—for example, to pay for purchase order line items—only
from a Spending Account.
3.1.3.2 Aspects of Management Accounts • A Management Account must exist at the root level, which is the highest level of
the hierarchy. This root Management Account is the first level you create and represents the entire budget amount. In Figure 3-1, Library Budget represents the root Management Account. You can create additional Management Accounts as needed. In Figure 3-1, Wilson Library, Garcia Research Library, and Memorial Archives represent other Management Accounts.
• Expenditures are not charged directly to any Management Account (except when it is a single root account), but rather to Spending Accounts that are linked to the Management Account. The value in the Expenditure field for a Management Account reflects expenditures from ALL linked Spending Accounts.
• Any number of Management Accounts can be linked to any one fiscal year.

Getting Started with Acquisitions (v. 43.1)
PROPRIETARY INFORMATION OF VTLS INC. Virtua ILS – Integrated Library System
29
3.1.3.3 Aspects of Spending Accounts • Funds can be expended only from a Spending Account. When you charge a
purchase order line item to an account, you are charging it to a Spending Account. In Figure 3-1, WL - General Collection and GRL - General Collection are Spending Accounts.
• Encumbrance totals of Spending Accounts are updated as orders are completed and/or modified. The value in the Encumbrance field for a Management Account reflects encumbrances from ALL linked Spending Accounts.
• Processing invoices and payments may affect the account encumbrance totals of all Spending Accounts that are indicated on the purchase order, invoice, or payment voucher.
• The sum total of all Management and Spending account allocations can never exceed the total allocation in the Management Account that exists at the root level of the account hierarchy.
3.1.4 Understanding Account Limitations and Restrictions You should be aware of the limitations and restrictions that Acquisitions imposes on accounts. Aside from the restrictions your library imposes on users via the Virtua Profiler, there are two other restricted areas: • Adjustments to encumbrances and expenditures. • Modifications to fund accounts.
3.1.4.1 Adjusting Encumbrances and Expenditures Normally, you cannot manually modify encumbrances and expenditures. Virtua automatically adjusts encumbrances and expenditures as transactions occur, such as approving purchase order line items or paying an invoice. You can, however, modify the percentages allowed for over-encumbrance and/or over-expenditure. If the percentage specified has been reached, the system issues a message. At that point, you can access the Spending Account in question, display the Modify Account window, and adjust the value in the % Over-encumbrance field or % Over-expenditure field (see the section “Adding a New Management Account”). To cancel an encumbrance, • Cancel the associated order.

30 Getting Started with Acquisitions (v. 43.1)
Virtua ILS – Integrated Library System PROPRIETARY INFORMATION OF VTLS INC.
To adjust an expenditure, • Create an internal credit memo. For information about canceling orders and creating credit memos, see the Virtua Acquisitions User’s Guide.
3.1.4.2 Record Locking During Updates When you go to modify an account by clicking the Modify button on the Account Management window, the system places a lock on the account. If you are modifying a child account, the immediate parent account is also locked. This means that another user can view the fund account but not make any changes to it. After modification, clicking the Close button updates the fund account and releases the lock.
3.1.5 About Fiscal Years Before working with fund accounts, it is important to understand how Virtua deals with fiscal years. All fiscal years, including a default fiscal year, must be set up in the Acquisitions parameters in the Virtua Profiler. There is no limit to the number of fiscal years that your library can set up and maintain. The fiscal years defined in the Profiler appear in descending order in the pull-down list box on the Account Management window. An account with the same name and number can exist in multiple fiscal years. Furthermore, you can set up multiple fiscal years within one calendar year. This is possible because in the Fiscal Years parameter, you can assign alphanumerical labels to fiscal years. Any fiscal year that has orders outstanding remains active until all orders are satisfied or otherwise canceled. Once all orders are satisfied, you can disable all accounts in a fiscal year.
3.1.5.1 Moving from One Year to the Next Virtua offers the utility fyRollover.exe, which lets you move outstanding Acquisitions transactions from one fiscal year to the next. Before you run the program, you must do the following:

Getting Started with Acquisitions (v. 43.1)
PROPRIETARY INFORMATION OF VTLS INC. Virtua ILS – Integrated Library System
31
• Set up the new fiscal year in the Acquisitions parameters in the Virtua Profiler. -AND-
• Export various tables. You must run fyRollover.exe from the server command line for every library location. This program automatically rolls over encumbrances of outstanding orders, encumbrances of partially paid invoices, and credits that have not been fully used in any fiscal year. Note: • You do not have to close out one fiscal year in order to set up a new fiscal year. • FyRollover.exe pays no attention to purchase order types during the rollover
process. This is because purchase orders are linked only indirectly to fiscal years via line item accounts. FyRollover.exe is only concerned with moving encumbrances and credits from one fiscal year to another.
When you execute fyRollover.exe, the program will ask you a number of questions about the type of rollover you want. You will be able to determine whether you want to continue using the current account structure and current allocations, in which case the account structure will be copied. As part of the rollover process, you can choose to complete the closeout process on the old fiscal year by disabling accounts and the fiscal year itself. Fiscal years that have been closed out will NOT appear in the client although they will remain in the Fiscal Year parameter marked as disabled. The program generates a log file fyRollover.log, which includes the user ID, date and time, user’s responses to system prompts, and any errors that may have occurred. In addition, the acquisitions transaction log (acq_transaction_log database table) will track the changes that occurred during the rollover. In the transaction log each entity that was rolled over will be accompanied by an appropriate action, such as “105 – account disabled during fyRollover” or “215 – purchase order line rolled over.” For details about running fyRollover.exe and about the acquisitions transaction log, see the System Management: Acquisitions User's Guide.

32 Getting Started with Acquisitions (v. 43.1)
Virtua ILS – Integrated Library System PROPRIETARY INFORMATION OF VTLS INC.
3.2 Working with the Account Management Window After you have defined fiscal years in the Fiscal Years parameter in the Virtua Profiler, you are ready to set up your fund account structure. You will want to start by becoming familiar with the Account Management window (Figure 3-2).
Figure 3-2. Account Management Window
The Account Management window displays the hierarchy of your accounts for a given fiscal year. When you open the Account Management window, the account structure may be compressed. A “+” sign displayed before an account name indicates that the account hierarchy is compressed and that additional accounts exist at lower levels. To see the next lower level of the hierarchy, • Click the “+,” which then changes to a “-.” To see a fully expanded account structure, • Click the “+” sign at each account level where it appears. On the Account Management window you can access a variety of functions having to do with manipulating fund accounts. The window displays the following command buttons. We discuss their functions later in this chapter.

Getting Started with Acquisitions (v. 43.1)
PROPRIETARY INFORMATION OF VTLS INC. Virtua ILS – Integrated Library System
33
• Refresh • Add • Delete • Modify • View • Allocate • Fund Transfer • Close
3.2.1 Refreshing the Window Regular use of the Refresh button on the Account Management window will guarantee that you are viewing the most current account information. This may be information that you have added or edited or that another user has added or edited. Although only one user can be adding or modifying a particular account at any one time, multiple users can be working with fund accounts simultaneously. If one user on one machine adds, modifies, or deletes account information while another user on another machine is doing the same thing, the two users cannot see each other’s changes on the Account Management window until they click the Refresh button. To refresh the Account Management window at any time, • Click the Refresh button. Any additions, deletions, or revisions another user has made concurrent with your session will appear on the window.
3.3 Adding Accounts In this chapter we discuss how to add a root management account and additional accounts.

34 Getting Started with Acquisitions (v. 43.1)
Virtua ILS – Integrated Library System PROPRIETARY INFORMATION OF VTLS INC.
3.3.1 Adding a Root Management Account The first step in creating an account structure for the new fiscal year is to define a Management Account at the root level, which is the top level of the fund hierarchy. After creating the first Management Account, you can add other Management Accounts and Spending Accounts as needed. Our instructions below deal with adding the root Management Account. To add the first Management Account, 1. On the Virtua menu bar, click Acquisitions. 2. Choose Accounts, and then choose Setup.
The Account Management window appears (Figure 3-3).
Figure 3-3. Account Management Window
3. Select the appropriate fiscal year from the pull-down list box labeled Fiscal Year.
-OR- Accept the default fiscal year that is displayed in the box. The default is specified in the Fiscal Years parameter.
4. Click the Add button.
The Add Account window appears (Figure 3-4).

Getting Started with Acquisitions (v. 43.1)
PROPRIETARY INFORMATION OF VTLS INC. Virtua ILS – Integrated Library System
35
Figure 3-4. Add Account Window - Root Management Account
5. Type the required data for the new Management Account. Some fields are inactive,
and we discuss these in the section “Inactive Fields on the Add Account Window.” • Account name: An alphanumeric name, which is case sensitive and up to 35
characters long. This field is required. The name appears on all windows that access the fund accounts such as Order Line Item, Fund Accounts, and Credits.
• Account number: An alphanumeric ID, which is case sensitive and up to 35 characters long. This field is required. The system uses this number to associate the account name with the account throughout Acquisitions.
• Parent Account Number: The account number for the parent Management Account. If you are adding a root account, the parent account number will be 0.

36 Getting Started with Acquisitions (v. 43.1)
Virtua ILS – Integrated Library System PROPRIETARY INFORMATION OF VTLS INC.
Note: Any other root Management Accounts that you set up must also be assigned 0 as the parent account number so that the system recognizes it as a root in the account structure.
• Fund Code: An alphanumeric ID, which is case sensitive and up to 35 characters long. The Fund Code lets you group accounts that may be related in an account hierarchy. It will appear on the Order Line Editor window in the Virtua client.
• Status: Enabled or Disabled—the only two valid statuses for Management accounts. Choose Enabled when you want to begin expending against a Spending Account. If the account is disabled and you try to access it, the system will issue a message that the account is unavailable.
• Allocation: The total amount of funds appropriated for this Management Account for this fiscal year. The field accepts up to 10 digits to the left of the decimal point. You can add allocations directly to any Management Account or via a fund transfer from another Management Account (see the section “Transferring Funds Across Accounts”).
• Percent of Over-encumbrance: The amount an account can be over-encumbered expressed as a percentage. For example, if the over-encumbrance is set at 50 percent, then 150 percent of the allocation can be encumbered.
• Percent of Over-expenditure: The amount an account can be over-expended expressed as a percentage. For example, if the over-expenditure is set at 50 percent, then 150 percent of the allocation can be expended.
6. Click the OK button.
The data is saved. If you have entered all data correctly, the system confirms that the account has been added and displays an Information window (Figure 3-5):
Figure 3-5. Information Window
7. Click the OK button on the Information window.
The Account Management window (Figure 3-6) displays the new information.

Getting Started with Acquisitions (v. 43.1)
PROPRIETARY INFORMATION OF VTLS INC. Virtua ILS – Integrated Library System
37
Figure 3-6. Account Management Window - Management Account Added
Now you can continue to add other accounts or close the Account Management window.
3.3.2 Inactive Fields on the Add Account Window When you add a Management Account, several fields on the Add Account window will be inactive. Those fields are… • Fiscal Year: A number up to 9 digits long. The field is populated from the fiscal
year selected in the Account Management window. • Base Currency: The home currency, which was selected by your library at
installation. The home currency is used with all your fund accounts and cannot be changed. (Via the Virtua Profiler, you can make other currencies available for use by Virtua in Acquisitions transactions.)
• Encumbrance: The total amount encumbered for this Management Account AND all its Spending Accounts. Once purchase order line items placed against these accounts are approved, the amount of committed funds will display in the window. The amount will increase as other purchase order line items are added and approved and decreased as invoices are paid.
• Expenditure: The total amount expended against all the Spending Accounts linked to this Management Account. This amount displays on the Modify Account and View Account windows once payments have been processed.

38 Getting Started with Acquisitions (v. 43.1)
Virtua ILS – Integrated Library System PROPRIETARY INFORMATION OF VTLS INC.
• Deposit Replenish:(not yet available) The dollar amount that represents the threshold level at which the system alerts you that funds are low in this deposit account.
• Deposit: (not yet available) The amount sent to the vendor in advance to be used for future orders.
• Distribution: The sum in dollars of all the money distributed from this Management Account to one or more Spending or Management accounts. Once funds are transferred or allocated, an amount will display in this field.
• Free Balance: The sum of all the free balances of Spending Accounts linked to this Management Account plus the amount of the Available Balance.
• Available Balance: The amount available for distribution and fund transfers from the Management Account to Spending Accounts.
3.3.3 Adding a Second Root Management Account Your library may need to see two different views of its accounting structure for each fiscal year. Virtua Acquisitions accommodates this need by allowing you to set up two separate root accounts. For example, one view might be of the total budget and the other of the actual working budget. To add a second root management account, 1. Display the Account Management window (Figure 3-7).
Figure 3-7. Account Management Window - Root Account

Getting Started with Acquisitions (v. 43.1)
PROPRIETARY INFORMATION OF VTLS INC. Virtua ILS – Integrated Library System
39
2. Click the Add button.
The Add Account window appears. 3. Complete the appropriate fields as described in “Adding a Root Management
Account.” Figure 3-8 is an example. Notice that the Parent Account Number for this second root account must be 0, just as it was for the first root account.
Figure 3-8. Add Account Window - Second Root Account
4. Click the OK button.
The data is saved. The system confirms that the account has been added. The Add Account window closes, displaying the Account Management window.
5. Click the Refresh button to view the modified tree (Figure 3-9).

40 Getting Started with Acquisitions (v. 43.1)
Virtua ILS – Integrated Library System PROPRIETARY INFORMATION OF VTLS INC.
Figure 3-9. Account Management Window - Second Root Account
Now you can continue to add other accounts or close the Account Management window.
3.3.4 Adding Additional Accounts Once the root account is in place, you can begin to create additional accounts. These accounts may be Management Accounts or Spending Accounts, depending on where they are positioned in the account hierarchy. • If an account has a parent but no children, Virtua treats it as a Spending Account. • If an account has a parent but also has children, Virtua treats it as a Management
Account. You cannot add an account to a parent account that already has links to purchase orders, purchase order header fees, payments, or non-internal credits. If you try to do so, the software will display an Error message (Figure 3-10).

Getting Started with Acquisitions (v. 43.1)
PROPRIETARY INFORMATION OF VTLS INC. Virtua ILS – Integrated Library System
41
Figure 3-10. Error Message
Virtua displays an error because once an account is encumbered (by virtue of being associated with an order), Virtua considers the account a Spending Account. And you cannot add another account to a Spending Account. To add an additional account to the account hierarchy, 1. On the Virtua menu bar, click Acquisitions. 2. Choose Accounts, and then choose Setup.
The Accounts Management window appears (Figure 3-11).
3. Select the appropriate fiscal year from the Fiscal Year pull-down list box. The window displays the hierarchy of all accounts belonging to that fiscal year, if any have been set up yet. If the tree is compressed, click one or more “+” signs to expand it.
42 Getting Started with Acquisitions (v. 43.1)
Virtua ILS – Integrated Library System PROPRIETARY INFORMATION OF VTLS INC.
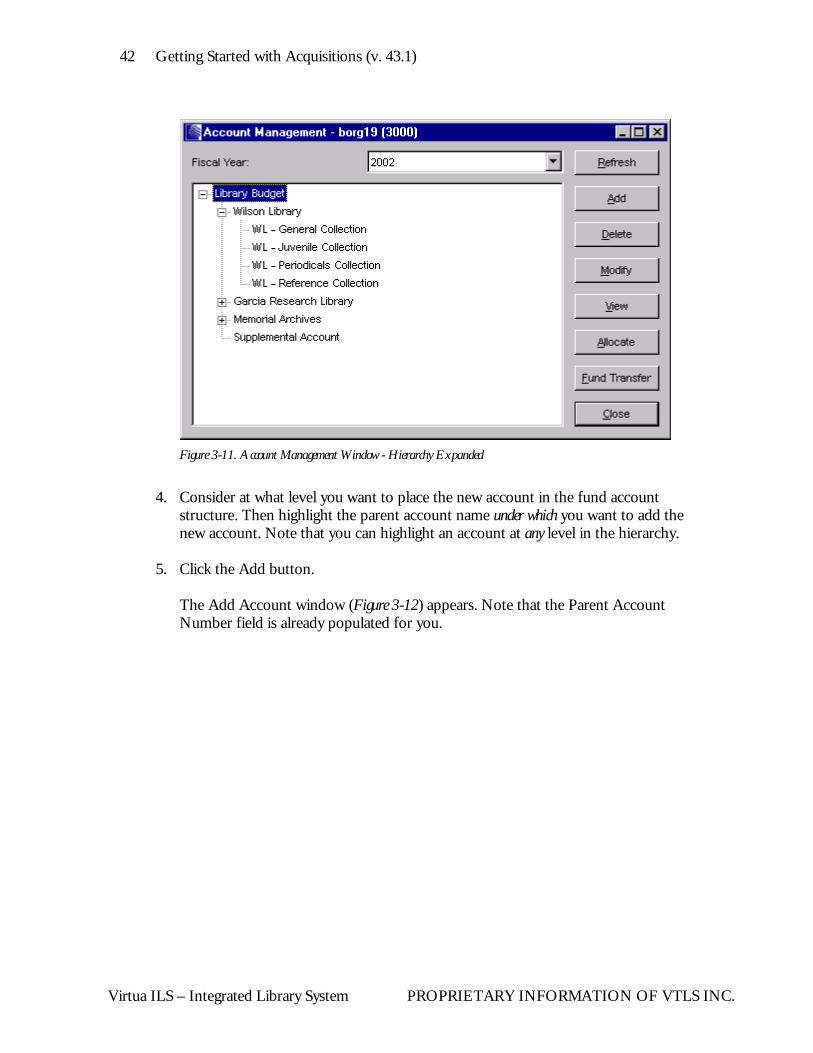
Figure 3-11. Account Management Window - Hierarchy Expanded
4. Consider at what level you want to place the new account in the fund account
structure. Then highlight the parent account name under which you want to add the new account. Note that you can highlight an account at any level in the hierarchy.
5. Click the Add button.
The Add Account window (Figure 3-12) appears. Note that the Parent Account Number field is already populated for you.

Getting Started with Acquisitions (v. 43.1)
PROPRIETARY INFORMATION OF VTLS INC. Virtua ILS – Integrated Library System
43
Figure 3-12. Add Account Window - Spending Account
6. Type the required data for the new account. The active and inactive fields are the
same as those that appear when you add a root Management Account (see the section “Adding a Root Management Account”).
7. Click the OK button.
The data is saved. The system confirms that the account has been added. The Add Account window closes, displaying the Account Management window.
8. Click the Refresh button.
The Account Management window (Figure 3-13) displays the new fund account (in our example, WL - Special Collection) in the hierarchy.

44 Getting Started with Acquisitions (v. 43.1)
Virtua ILS – Integrated Library System PROPRIETARY INFORMATION OF VTLS INC.
Figure 3-13. Account Management Window (Additional Account Added)
If the account you added is a Spending Account, as in our example, Virtua will calculate the values in a number of fields differently than for a Management Account. The fields that are handled differently are… • Allocation: The amount of funds allocated to this account from the parent
account. • Encumbrance: The encumbrance linked directly to this account. Once purchase
order line items placed against this account are approved, the amount of committed funds will display in the window.
• Expenditure: The expenditure linked directly to this account. Once payments are processed, the amount expended will display on the Modify Account and View Account windows.
• Distribution: Not calculated for a Spending Account because Spending Accounts are not distribution accounts.
• Free Balance: The amount left after subtracting encumbrances and expenditures from the allocation for this account.
• Available Balance: The amount left after subtracting encumbrances and expenditures from the allocation for this account. Note: When you add an account, the software checks to see if the parent account has enough free balance to support the new account’s allocation. If there are insufficient funds, the system displays an Error message.

Getting Started with Acquisitions (v. 43.1)
PROPRIETARY INFORMATION OF VTLS INC. Virtua ILS – Integrated Library System
45
3.4 Modifying an Account Once an account exists, you can modify the account as long as the total allocations at the lower levels of the account hierarchy do not exceed the original appropriation to the root Management Account. Note that because fund accounts are associated with particular locations, you can modify only those accounts available at the log-in location for your session. Account fields you can modify using the Modify function: • Account Name • Fund Code • Status • Percentage of over-encumbrance or over-expenditure All other Account fields cannot be modified at all or cannot be modified directly. Below, we list those fields along with the reasons that you cannot modify them. • Account Number: You can change this value only by setting up a new account
with a new number and deleting the old account. • Parent Account Number: This number represents a link in the account hierarchy
that cannot be changed on the Modify Account window. • Fiscal Year: This value comes from the Fiscal Year selection in the Account
Management window. • Base Currency: All accounts must use the home currency. • Allocation: You can change this amount only by using the Allocate function,
which you can access on the Modify Account window. • Encumbrance: The system updates this amount automatically as purchase order
line items, invoices, and payments are placed against this account. • Expenditure: The system adjusts this amount automatically when you modify an
invoice or apply a refund or credit. You can reapply funds to the original account by using a formal credit memo from the vendor. Or you can issue an internal credit that you have created locally.
• Deposit Replenish: (not yet available) • Deposit: (not yet available) • Distribution: You can change this amount for a Management Account by using
the Fund Transfer function, which you can access on the Modify Account window. • Free Balance: The system calculates this amount automatically. • Available Balance: The system calculates this amount automatically.
46 Getting Started with Acquisitions (v. 43.1)
Virtua ILS – Integrated Library System PROPRIETARY INFORMATION OF VTLS INC.
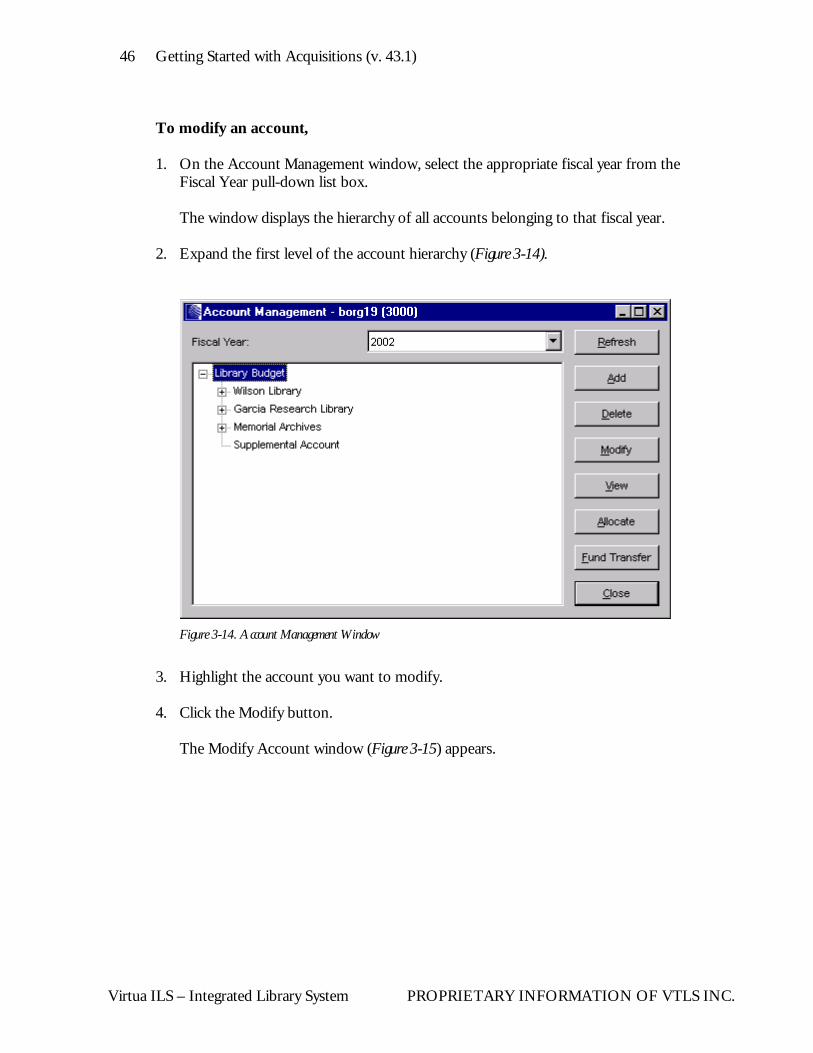
To modify an account, 1. On the Account Management window, select the appropriate fiscal year from the
Fiscal Year pull-down list box.
The window displays the hierarchy of all accounts belonging to that fiscal year. 2. Expand the first level of the account hierarchy (Figure 3-14).
Figure 3-14. Account Management Window
3. Highlight the account you want to modify. 4. Click the Modify button.
The Modify Account window (Figure 3-15) appears.

Getting Started with Acquisitions (v. 43.1)
PROPRIETARY INFORMATION OF VTLS INC. Virtua ILS – Integrated Library System
47
Figure 3-15. Modify Account Window
5. Edit the account name, status, % over-encumbrance, and % over-expenditure as
needed. Note: You CANNOT modify the following fields on this window: Account Number, Parent Account Number, Fiscal Year, Allocation, Encumbrance, Expenditure, Deposit Replenish, Deposit, Distribution, Free Balance and Available Balance. They are grayed out.
6. Allocate funds to or remove funds from this account by clicking the Allocate
button, which displays the Account Allocation window. (For details, see the section “Allocating Funds to an Account” or “Removing Funds from an Account.”)
7. Transfer funds to another account by clicking the Fund Transfer button. (For
details, see the section “Transferring Funds Across Accounts.”) 8. Save your changes by clicking the OK button.

48 Getting Started with Acquisitions (v. 43.1)
Virtua ILS – Integrated Library System PROPRIETARY INFORMATION OF VTLS INC.
The software generates an entry in the transaction log. The log records the transaction and operator ID and stamps the entry with a time and date.
After you modify an account on the Modify Account window, click the Refresh button on the Account Management window so that it will display the updated information.
3.5 Viewing an Account To view an account, 1. On the Account Management window (Figure 3-14), highlight an account and click
the View button. -OR- Double-click the account name in the tree. The View Account window (Figure 3-16) appears.

Getting Started with Acquisitions (v. 43.1)
PROPRIETARY INFORMATION OF VTLS INC. Virtua ILS – Integrated Library System
49
Figure 3-16. View Account Window
2. Review the information as needed. 3. Choose to…
• Close the View Account window without making changes by clicking the Cancel button. -OR-
• Modify the account information by clicking the Modify button.

50 Getting Started with Acquisitions (v. 43.1)
Virtua ILS – Integrated Library System PROPRIETARY INFORMATION OF VTLS INC.
3.6 Deleting an Account You can delete a fund account, but only under certain conditions. The software will not let you delete an account if any of the following are linked to the account: • Child accounts at lower levels of the hierarchy. • Outstanding orders or partially received orders. • Outstanding encumbrances or expenditures. • Outstanding invoices, outstanding credits, or payments. To delete an account, 1. On the Account Management window (Figure 3-14), expand the account tree and
highlight the account you want to delete. 2. Click the Delete button.
The software performs system checks, which we discuss below.
3.6.1 System Checks When you click the Delete button, the system verifies that for this account NONE of the following exist: • Outstanding purchase orders. • Outstanding purchase order line items. • Outstanding receipts - i.e., items that show a status of partially received, not yet
received, or received-unsatisfactorily. • Outstanding invoices. • Outstanding credits. • Payments. • Outstanding claims. Based on the type of transaction that is outstanding, the system will display an appropriate message, examples of which are shown below.
Getting Started with Acquisitions (v. 43.1)
PROPRIETARY INFORMATION OF VTLS INC. Virtua ILS – Integrated Library System
51
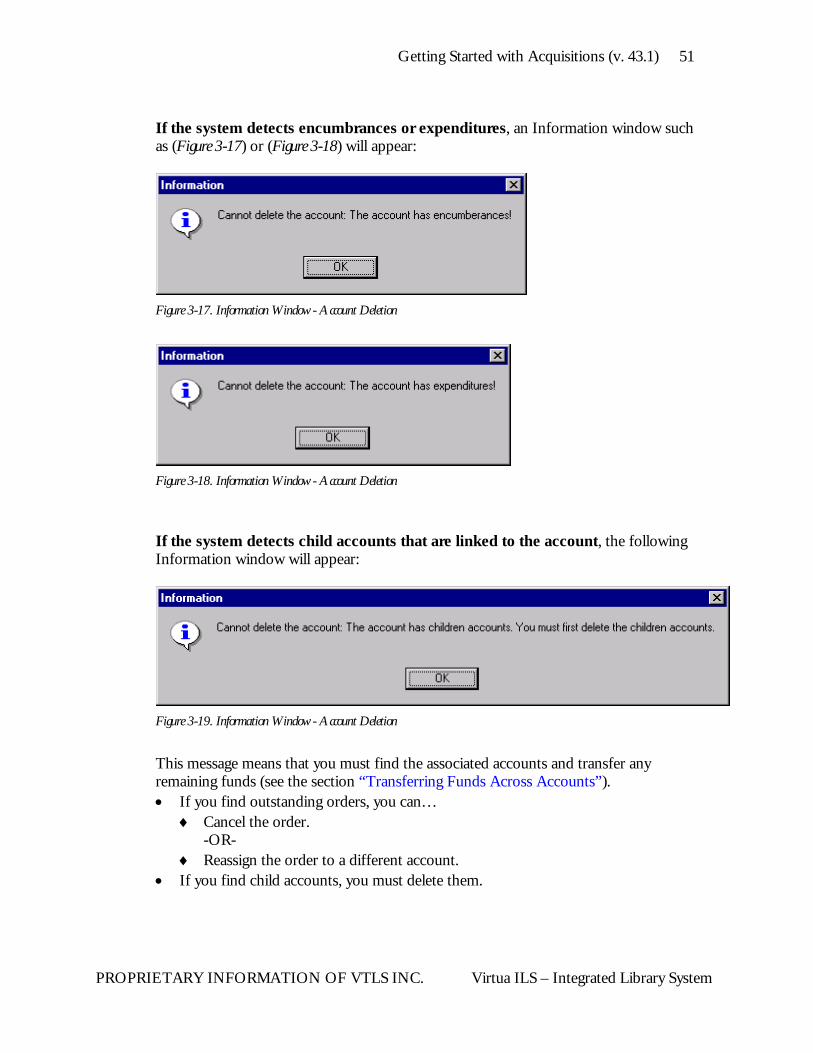
If the system detects encumbrances or expenditures, an Information window such as (Figure 3-17) or (Figure 3-18) will appear:
Figure 3-17. Information Window - Account Deletion
Figure 3-18. Information Window - Account Deletion
If the system detects child accounts that are linked to the account, the following Information window will appear:
Figure 3-19. Information Window - Account Deletion
This message means that you must find the associated accounts and transfer any remaining funds (see the section “Transferring Funds Across Accounts”). • If you find outstanding orders, you can…
♦ Cancel the order. -OR-
♦ Reassign the order to a different account. • If you find child accounts, you must delete them.

52 Getting Started with Acquisitions (v. 43.1)
Virtua ILS – Integrated Library System PROPRIETARY INFORMATION OF VTLS INC.
If the system detects NO problems with deleting the account, the following warning will appear:
Figure 3-20. Warning
If you click the Yes button, the software will increase the allocation of the parent account by the amount remaining in the account and deletes the account. The following confirmation will appear.
Figure 3-21. Information Window - Account Deletion
The deletion generates an entry in the audit trail log. The audit trail records the transaction and operator ID and stamps the entry with a time and date. After you delete an account, click the Refresh button on the Account Management window so that it displays the updated information.
3.7 Managing Accounts
3.7.1 Transferring Funds Across Accounts Allocations and existing balances can be transferred between two fund accounts in the same fiscal year or in different fiscal years no matter where the accounts exist in the hierarchy. To transfer funds, you need the following information:

Getting Started with Acquisitions (v. 43.1)
PROPRIETARY INFORMATION OF VTLS INC. Virtua ILS – Integrated Library System
53
• Amount being transferred. • Name of the source fund account. • Name of the target fund account. • The fiscal year for both funds. After you enter the source and target accounts, which can be Management or Spending accounts, the software determines whether there is enough free balance in the source account to accommodate the transfer request. It also verifies that all the accounts involved in the transfer are enabled. Note: • You cannot transfer funds that will over-encumber the source account. • You can transfer only the free balance or some portion of the free balance. • To reflect the transfer, the software logs an entry that includes the operator ID and
time/date stamp in the audit trail. • The transfer may affect distributions and allocations of parent or child accounts
that are not directly involved in the transfer. To transfer funds across accounts, 1. On the Virtua menu bar, click Acquisitions. 2. Choose Accounts, and then choose Fund Transfer.
The Fund Transfer window (Figure 3-22) appears, displaying fields for source account and target (destination) account information. Note: If you are already on the Account Management window or the Modify Account window, you can access the transfer function by clicking the Fund Transfer button.

54 Getting Started with Acquisitions (v. 43.1)
Virtua ILS – Integrated Library System PROPRIETARY INFORMATION OF VTLS INC.
Figure 3-22 Fund Transfer Window
3. Select a fiscal year in the Fiscal Year pull-down list box. 4. Expand the account tree and highlight the account that is to be the source account.
The Set As Source and Set As Target buttons become enabled.
5. Click the Set As Source Account button. The account information appears in the Source Account Information area on the right side of the window. The software automatically populates the Fiscal Year field.
6. In the account list box, highlight the account that is to be the target account. 7. Click the Set As Target Account button.
The account information appears in the Target Account Information area on the right side of the window. The software automatically populates the Fiscal Year field.
8. In the Transfer Amount field, type the amount that you want to transfer. At this point, the Fund Transfer window should look something like Figure 3-23. Notice that the Base Currency field is read-only.

Getting Started with Acquisitions (v. 43.1)
PROPRIETARY INFORMATION OF VTLS INC. Virtua ILS – Integrated Library System
55
Figure 3-23. Fund Transfer Window
9. Click the Save button.
The Fund Transfer window closes, and the software performs system checks, which we discuss below.
3.7.1.1 System Checks After you save the source and target account information, the software does a series of checks, which we list below. If it finds any discrepancies, it will display an Error message. The software… • Determines if the accounts involved are enabled. • Determines whether there is enough free balance in the source account to
accommodate the transfer request. • Reallocates the funds as requested. • Logs an entry in the audit trail to reflect the transfer. The entry includes the
operator ID and a time/date stamp. If the transfer passes the checks, the folowing Information window will appear:

56 Getting Started with Acquisitions (v. 43.1)
Virtua ILS – Integrated Library System PROPRIETARY INFORMATION OF VTLS INC.
Figure 3-24 Information Window - Fund Transfer Completed
To complete the process, click OK.
3.7.2 Allocating Funds to an Account Occasionally, a library may receive unexpected funds in its fiscal budget, such as gifts, bequeathals, and endowments. Allocating these additional funds is a two-step process, which serves as a double check for accounting purposes. First, they must be added to a Management Account, and then they can be allocated to Spending Accounts. To allocate funds to accounts, 1. On the Virtua menu bar, click Acquisitions. 2. Choose Accounts, and then choose Setup.
The Account Management window (Figure 3-25) appears.

Getting Started with Acquisitions (v. 43.1)
PROPRIETARY INFORMATION OF VTLS INC. Virtua ILS – Integrated Library System
57
Figure 3-25. Account Management Window
3. Select a fiscal year. 4. Highlight the account to which you want to allocate funds. Note: The Allocate
button is disabled until you select an account. 5. Click the Allocate button.
The Account Allocation window (Figure 3-26) appears, displaying all the field data for the selected account.
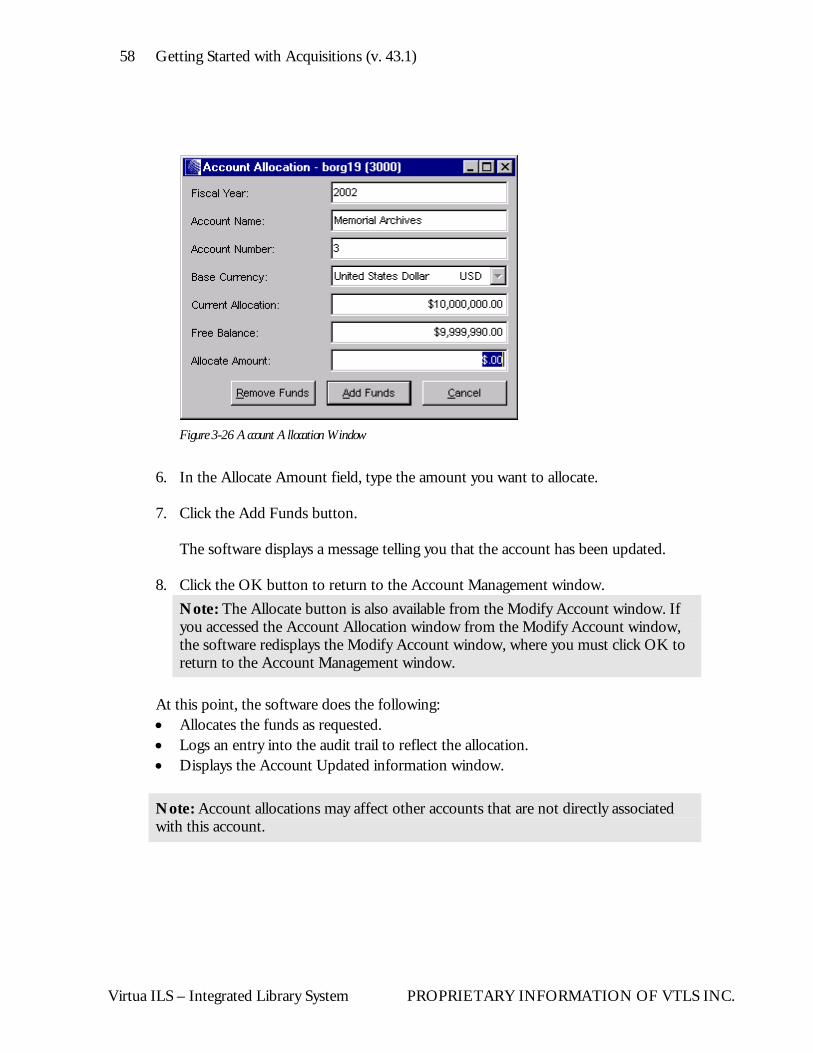
58 Getting Started with Acquisitions (v. 43.1)
Virtua ILS – Integrated Library System PROPRIETARY INFORMATION OF VTLS INC.
Figure 3-26 Account Allocation Window
6. In the Allocate Amount field, type the amount you want to allocate. 7. Click the Add Funds button.
The software displays a message telling you that the account has been updated.
8. Click the OK button to return to the Account Management window. Note: The Allocate button is also available from the Modify Account window. If you accessed the Account Allocation window from the Modify Account window, the software redisplays the Modify Account window, where you must click OK to return to the Account Management window.
At this point, the software does the following: • Allocates the funds as requested. • Logs an entry into the audit trail to reflect the allocation. • Displays the Account Updated information window. Note: Account allocations may affect other accounts that are not directly associated with this account.

Getting Started with Acquisitions (v. 43.1)
PROPRIETARY INFORMATION OF VTLS INC. Virtua ILS – Integrated Library System
59
3.7.3 Removing Funds from an Account To remove funds from an account, 1. On the Account Management or Modify Account window, click the Allocate
button.
The Account Allocation window appears (Figure 3-26).
2. In the Allocate Amount field, type the amount to be removed.
3. Click the Remove Funds button.
The software displays a message, telling you that the account has been updated. 4. Click the OK button to return to the Account Management or Modify Account
window.
3.8 Copying the Existing Account Structure Using the Virtua utility fyRollover.exe, your library can copy an account structure from one year to the next. This ability is especially useful when the account hierarchy is complicated. After you copy an account structure and save it to a new fiscal year, you have the choice of setting all account balances to zero. You can then roll over existing funds or add new allocations. For more information about the rollover utility, see the System Management: Acquisitions User’s Guide.

60 Getting Started with Acquisitions (v. 43.1)
Virtua ILS – Integrated Library System PROPRIETARY INFORMATION OF VTLS INC.
4. Working with Vendor Records
endors are a primary component of the Virtua Acquisitions subsystem. When you create a purchase order, you must specify the vendor to whom the order will be sent. It follows that vendor records must exist in the database before
you can start ordering items. The Vendor Editor provides an easy way to create, view, and edit these records. This chapter covers the following: ⇒ Introduction to Vendor Records ⇒ Creating a Vendor Record ⇒ Working with the Create New Vendor Window ⇒ Viewing a Vendor Record ⇒ Updating a Vendor Record ⇒ Deleting a Vendor Record
4.1 Introduction to Vendor Records Vendor records give your library an efficient way of maintaining information about all the vendors from whom you acquire materials. They also provide the data the software needs to… • Display elements such as the vendor name and vendor ID in default fields. • Trigger specific actions such as claims and reclaims. • Monitor the validity of transactions. Vendor records store information about such things as vendor language and performance, discount rates, transmission method, order and claim intervals, and payment currency. Some data elements are required and others are not. Among the vendor record’s many attributes are fields to… • Define multiple addresses. • Store policy information. • Store EDIFACT information. • Store notes of any length.
V

Getting Started with Acquisitions (v. 43.1)
PROPRIETARY INFORMATION OF VTLS INC. Virtua ILS – Integrated Library System
61
Once vendor records are in the database, the software automatically creates the link between them and associated purchase orders when the orders are saved. Once this link is set, you do not need to re-key this information anywhere else in the acquisitions process. Note: Every field in the former 2709 MARC format vendor record has been preserved for use in the new vendor record that is available in this software release. Although you cannot copy individual vendor records, you CAN copy the vendor tables in the database.
4.2 Creating a Vendor Record To create a vendor record, you need to access the Create New Vendor window. To create a vendor record, 1. On the Virtua menu bar, click Acquisitions. 2. Choose New Vendor.
The Create New Vendor window opens (Figure 4-1), displaying four tabs: Contact Info, Acquisitions Info, EDIFACT, and Notes.

62 Getting Started with Acquisitions (v. 43.1)
Virtua ILS – Integrated Library System PROPRIETARY INFORMATION OF VTLS INC.
Figure 4-1. Create New Vendor Window
3. Complete each field as needed on each tab of the vendor record. 4. Click the Save button.
The record is saved to the database and the following things occur: • Virtua automatically assigns to the record a vendor ID, which appears
immediately in the title bar of the window. To find this record again for viewing or editing, you can do a control number search using this ID.
• The title of the window changes from Create New Vendor window to View Vendor window.
• At the bottom of the window, the Delete button becomes active and the Save button changes to Edit.

Getting Started with Acquisitions (v. 43.1)
PROPRIETARY INFORMATION OF VTLS INC. Virtua ILS – Integrated Library System
63
5. Exit the View Vendor window by clicking the Close button.
4.3 Working with the Create New Vendor Window In this section, we discuss the elements of the Create New Vendor window (Figure 4-1).
4.3.1 Active Check Box The Active check box at the bottom of the Create New Vendor window serves as a flag, indicating whether the vendor is active or not. Deactivating a vendor is an alternative to deleting a vendor that the system will not let you delete because it is linked to an Acquisitions order. To indicate that the vendor is active, • Select the Active check box. If a vendor is flagged as inactive (i.e., the Active check box is NOT checked), orders cannot be created for the vendor. Existing orders for that vendor may be completed, however.
4.3.2 Command Buttons There are four command buttons at the bottom of the Create New Vendor window: • Delete – Deletes the vendor record. This button is disabled in add mode.
Note: You cannot delete a vendor record if it is linked to any existing Acquisitions orders.
• Save – Saves the vendor record being edited. This button is replaced by the Edit button in view mode. Note: You cannot save a vendor record in which a… ♦ Shipping method that is in use has been deleted. ♦ Customer account that is linked to an order has been deleted.
• Edit – Lets you edit the vendor record. This button is visible in view mode and is replaced by the Save button in other modes.

64 Getting Started with Acquisitions (v. 43.1)
Virtua ILS – Integrated Library System PROPRIETARY INFORMATION OF VTLS INC.
• Close – Closes the vendor record only after you answer “yes” to the prompt: “Closing the window will discard any changes. Are you sure you want to close?”
4.3.3 Contact Info Tab The Contact Info tab (Figure 4-1) on the Create New Vendor window has two main data areas: name fields and address tabs.
4.3.3.1 Names Area The Name area contains the following elements related to the vendor name: • Primary (required) – Contains the primary name of the vendor, which will be the
name displayed on any associated Acquisitions record. • Alternates (optional) – Displays any alternate names or abbreviations for the
vendor. Because each alternate name will be searchable via a vendor browse and will appear in any vendor selection list as if it were a separate vendor, this element makes vendor selection easier. But once an Acquisitions record (such as an order) is saved, the software will display only the primary vendor name regardless of which alternate name was originally selected.
• Edit alternate – Lets you edit a selected alternate name or type a new alternate name.
• URL (optional) – Displays the URL for the vendor’s web page, if any. • Delete button – Deletes the selected alternate name and selects the next name in
the Alternates list. If no next name exists, it selects the previous one. • New button – De-selects any alternate names, clears the Edit alternate box, and
places the cursor there so that you can type a new alternate name. • Save button – Saves any alternate name that is in the Edit alternate box and places
it in the Alternates field. The new name will overwrite any selected alternate name. (Note that you can also press Enter to save the name.)
4.3.3.2 Address Area In the address area you can define six vendor addresses for six different types of vendor contact. Each address has its own page tab containing the same fields. All address fields are optional. When accessed, the Vendor Editor will display by default the first address that is not blank. For example, if the Order address and Claim address are blank, but the Payment address is not, the editor will display the Payment address.

Getting Started with Acquisitions (v. 43.1)
PROPRIETARY INFORMATION OF VTLS INC. Virtua ILS – Integrated Library System
65
The types of addresses that you can enter are… • Order address – Used by the system to transmit order letters. • Claim address – Used by the system to print claim letters. • Payment address – Used by the system to print payment vouchers. • Returns address – Used for returns (although currently, Virtua does not use this
address.) • Other address – May be used by your staff as an alternate address. • Default address – Used by the system when one of the other addresses is missing.
For example, if the Order address is missing, order letters will print with this address.
Each address tab has the following fields: • Contact – Name of person used for the “Attention:” line for this mailing address. • Email – E-mail address, which Virtua uses for the electronic transmission of data,
that corresponds to this mailing address. For orders, if an e-mail address is present and e-mail is the default method of transmission, Virtua will automatically insert the e-mail address in the E-mail Records dialog box during the Send Orders function.
• Address – Three lines of the mailing address, not including city and state. • City – City of the mailing address. • County/Parish – County or parish of the mailing address. • State/Province – State or province of the mailing address. • Postal/Zip – Postal code or U.S. ZIP code of the mailing address. • Country – Country of the mailing address. • Telephone – Telephone number. • Fax – Fax number.

66 Getting Started with Acquisitions (v. 43.1)
Virtua ILS – Integrated Library System PROPRIETARY INFORMATION OF VTLS INC.
4.3.4 Acquisitions Info Tab The Acquisitions Info tab (Figure 4-2) on the Create New Vendor window has five main data areas: Orders, Claims, Other, Blocks, and Vendor policies. The tab contains the vendor information used by Acquisitions workflows.
Figure 4-2. Create New Vendor Window - Acquisitions Info Tab

Getting Started with Acquisitions (v. 43.1)
PROPRIETARY INFORMATION OF VTLS INC. Virtua ILS – Integrated Library System
67
4.3.4.1 Orders Area The Orders area contains order-related fields. • Transmission method – Method of transmitting orders to this vendor. The
default is Print. ♦ Print – Printed order letter. ♦ Email – E-mailed order letter. The default e-mail address is taken from the E-
mail field of the Order address. ♦ EDIFACT via FTP – FTPed EDIFACT file. ♦ EDIFACT and Print – FTPed EDIFACT file and printed order letter.
• Lead time – Number of days (0 to 999) after the order date that the order is expected to arrive. The default is 30. Virtua uses this field to calculate the order due date.
• Cancellation period – Number of days (0 to 999) after the order date that the vendor will cancel the order if it isn’t filled. Zero means the vendor will never cancel the order. The default is 45. Virtua does not currently use this field.
• Order currency – Default currency used by orders for this vendor. The selection is taken from the currency list set up in the Virtua Profiler. The default value is the home currency.
Note: If you specify an EDIFACT transmission method and the Vendor Type specified on the EDIFACT tab is not an EDIFACT type, the Vendor Editor will automatically set Vendor Type to Normal EDIFACT.
4.3.4.2 Claims Area The Claims area contains claim-related fields. • Transmission method – Method of transmitting claims to this vendor. The
default is Print, which is the only method currently available. • Claim interval – Number of days (0 to 999) after the due date that an order
should be claimed for the vendor. The default is 30. • Maximum claims – Maximum number of claims (0 to 99) the vendor can have.
The default is 15. • Reclaim interval – Number of days (0 to 99) after a claim that a reclaim should be
issued. Zero means that a reclaim will never be issued. The default is 45. • Historical claim count (Read-only) – Total number of claims placed against the
vendor.

68 Getting Started with Acquisitions (v. 43.1)
Virtua ILS – Integrated Library System PROPRIETARY INFORMATION OF VTLS INC.
4.3.4.3 Other Area The Other area contains other miscellaneous fields. • Discount – Discount rate, expressed as a percentage, which Virtua applies to all
orders for this vendor. The default is 0. • Invoice currency – Default currency used by invoices for this vendor. The
selection is taken from the currency list set up in the Virtua Profiler. The default value is the base currency.
• Language – Three-character language code for the vendor’s language. The default is eng (English). This field determines which language template file that Virtua will use when printing order and claim letters.
• Payment currency – Currency used by payments for this vendor. The selection is taken from the currency list set up in the Virtua Profiler. The default value is the home currency.
4.3.4.4 Blocks Area (Not currently used by Virtua. Available for information purposes only.) The Blocks area contains five vendor blocks: • Too many claims • Poor performance • Ordering denied • Funds limit reached • Other.
4.3.4.5 Vendor Policies Area (Not currently used by Virtua. Available for information purposes only.) The Vendor policies area contains settings describing vendor policies regarding orders. • Back order if – Description of the vendor’s automatic back order policy, if any.
♦ No policy ♦ Never ♦ If the item is not published ♦ If the item is out of stock ♦ If the item is out of stock or not published
• Minimum number of items per order – A number (0 - 999) that describes the minimum number of items that can be on an order.

Getting Started with Acquisitions (v. 43.1)
PROPRIETARY INFORMATION OF VTLS INC. Virtua ILS – Integrated Library System
69
4.3.5 EDIFACT Tab The EDIFACT tab (Figure 4-3) on the Create New Vendor window has three main data areas: Shipping Methods, EDIFACT fields, and Customer Accounts. The tab contains the information used in Virtua’s support for EDIFACT. For information about EDIFACT, see the Virtua Acquisitions User’s Guide.
Figure 4-3. Create New Vendor Window - EDIFACT Tab

70 Getting Started with Acquisitions (v. 43.1)
Virtua ILS – Integrated Library System PROPRIETARY INFORMATION OF VTLS INC.
4.3.5.1 Shipping Methods Area The Shipping Methods area contains a comprehensive list of shipping methods from which you can make selections for the current vendor. Left and right arrows allow you to select and de-select methods. Up and down arrows allow you to sort the methods for display on the Order window. Note: Besides the default value of “No method specified,” there must be at least ONE shipping method listed in the Use Shipping Methods box.
• Available shipping methods – List of all shipping methods that the system makes available, minus the ones already placed in the Use Shipping Methods list. This list is sorted by EDIFACT code.
• Use shipping methods – List of methods used by this vendor. To move a shipping method from one list to another, • Use the right or left arrow.
-OR- • Double-click a list item.
-OR- • Select a list item and then press ENTER. To move a shipping method up or down in the Use Shipping Methods list, • Use the up and down arrows.
-OR- • Select a list item and then press CTRL+UP Arrow or CTRL+DOWN Arrow on
your keyboard.
4.3.5.2 EDIFACT Fields Area The EDIFACT fields area contains fields for use in Virtua’s support of EDIFACT.
• Vendor Type – Type of vendor for EDIFACT purposes. ♦ EDIFACT not supported (default) – Vendor does not support EDIFACT. You
cannot transmit EDIFACT orders and claims for this vendor.
Note: If this value is selected, the other fields in the EDIFACT area are disabled.
♦ Normal EDIFACT – Vendor supports the generic EDIFACT format used by Virtua.

Getting Started with Acquisitions (v. 43.1)
PROPRIETARY INFORMATION OF VTLS INC. Virtua ILS – Integrated Library System
71
♦ Blackwell – Vendor is Blackwell (or another vendor that requires the same EDIFACT format that Blackwell uses.)
♦ YBP – Vendor is YBP (or another vendor that requires the same EDIFACT format that YBP uses.)
• EDIFACT User ID – User ID assigned to the customer by the vendor. Currently, this field is used to identify an FTP user for Blackwell EDIFACT only. If the Vendor Type is Blackwell, the field is required.
• SAN – Vendor’s Standard Address Number. This field is required for all Vendor Types except “EDIFACT not supported.” If the vendor has a SAN, select the check box and type the number. If the vendor does not have a SAN, leave the check box unchecked.
• Agency – Agency that issued the SAN. If the SAN check box is checked, this field is enabled; otherwise, it is disabled. ♦ 9 – EAN ♦ 31B – US SBN Agency ♦ 91 – Assigned by vendor ♦ 92 – Assigned by library
4.3.5.3 Customer Accounts Area The Customer Accounts area contains the list of account IDs assigned to the customer by the vendor. Account IDs are used in EDIFACT transmissions. The vendor assigns a customer any number of account IDs, and the customer then assigns a name to each ID for easier reference. When linking a customer account ID to an order, you can choose from the list of names.
• Delete – Deletes the selected account and selects the previous one in the list, or the next one if there is no previous one.
• New – De-selects any selected account and clears the ID and name fields so that you can type a new account.
• ID – Contains the vendor-assigned account ID. • Name – Contains the library-defined name of the account. • Save – Saves the account ID and name. If an account is already selected in the list, it
saves over the selected account.

72 Getting Started with Acquisitions (v. 43.1)
Virtua ILS – Integrated Library System PROPRIETARY INFORMATION OF VTLS INC.
4.3.6 Notes Tab The Notes tab (Figure 4-4) on the Create New Vendor window has two main data areas: Notes and Additional fields. The Notes area contains messages directed to the vendor. The Additional fields area contains extra fields relating to the vendor and can be used as a “catch-all” storage area. Both areas provide New, Delete, and Save buttons.
Figure 4-4. Create New Vendor Window - Notes Tab

Getting Started with Acquisitions (v. 43.1)
PROPRIETARY INFORMATION OF VTLS INC. Virtua ILS – Integrated Library System
73
4.3.6.1 Notes Area The Notes area contains for each note the note type, three possible flags, and the text. • Type – Type of note, which determines where the note will appear. Available types
are Order, Claim, Invoice, Payment, Receipt, and Credit. (Return and General are also available, but currently no functionality is attached to them).
• Print Note – Check box, which determines if the note will be printed during the appropriate print operation. Order notes will print with order letters, Claim notes with claim letters, Payment notes with vouchers, and Receipt notes with receipts. Currently, this flag is ignored for other types of notes.
• Public (not yet implemented) – Check box, which determines if the note will display to the public during circulation transactions.
• Alert – Check box, which determines if the note will pop up in an alert at the appropriate time, i.e., during ordering claiming, invoicing, receiving, or crediting.
• Note – Text of the note.
4.3.6.2 Additional Fields Area The Additional fields area lets you add extra information, consisting of a label and field text, related to the vendor. • Label – The field label, such as a tag number. • Field – Text, such as subfield data. Additional fields were designed for two purposes: • To attach locally-defined attributes to the vendor. • To store all un-migrated MARC fields after a migration of 2709 vendor records to
the new vendor format. The tag number will be used as the field label, and the tag data (with subfield indicators converted to the dollar sign ‘$’) will be placed in the field text. Example: The data in vendor tag 301 (Academic Organizational Information) is not migrated. After a migration, the tag and data might appear in the Additional fields as… Field Label – 301 Field Text – $b Virginia Tech $c College of Engineering
The information in the Additional fields is accessible by reporting tools such as Virtua Ad Hoc Reporting.

74 Getting Started with Acquisitions (v. 43.1)
Virtua ILS – Integrated Library System PROPRIETARY INFORMATION OF VTLS INC.
4.3.6.3 Command Buttons in Both Areas
• Delete – Deletes the selected note/field and selects the previous one in the list, or the next one if there is no previous one.
• New – De-selects any selected note/field and clears all text box fields so that you can type a new note/field.
• Save – Saves the note/field. If a note/field is already selected in the list, it saves over the selected one.
4.4 Viewing a Vendor Record There are two ways to access a vendor record in View mode. To access a vendor record in View mode, • Perform a control number search using the vendor ID.
-OR- • Perform a browse search using the vendor name, and then double-click the name
on the Browse window. The View Vendor window appears (Figure 4-5).

Getting Started with Acquisitions (v. 43.1)
PROPRIETARY INFORMATION OF VTLS INC. Virtua ILS – Integrated Library System
75
Figure 4-5. View Vendor Window
You can click any tab on the window to view the contents. All fields are grayed out. The Delete, Edit, and Close buttons for the window are active. All other command buttons are inactive.
4.5 Updating a Vendor Record To update a vendor record, 1. Perform a vendor search (see the previous section) to display the View Vendor
window. 2. On the View Vendor window (Figure 4-5), click the Edit button. At this point…
• The software locks the record.

76 Getting Started with Acquisitions (v. 43.1)
Virtua ILS – Integrated Library System PROPRIETARY INFORMATION OF VTLS INC.
• All the editing controls on the window become active. • A Save button replaces the Edit button.
3. Update the fields as needed. 4. Click the Save button. If you do not want to save your changes, click the Close button. Before closing the window, the software will ask you if you want to save your changes. Click No.
4.5.1 Record Locking When you click the Edit button on the View Vendor window, the software automatically locks the record to prevent another user from modifying the record. If you try to access a record that is in Edit mode, Virtua will display an error message (Figure 4-6), containing the following information: • The type of record that is locked and its specific identification number, for
example, “vendor 18.” • Which user type has locked the record. • A date/time stamp indicating when the record was locked.
Figure 4-6. Locked Record Message
When you Close the record, Virtua automatically removes the lock. If, for some reason, a lock is not removed, you can close your client connection and relaunch the client to remove it.

Getting Started with Acquisitions (v. 43.1)
PROPRIETARY INFORMATION OF VTLS INC. Virtua ILS – Integrated Library System
77
4.6 Deleting a Vendor Record A vendor record can be deleted from the database, if it is not in use. If a vendor record is linked to any existing acquisitions orders, you cannot delete it, but you can deactivate it by de-selecting the Active Check Box (see the section “Active Check Box” in this guide). To delete a vendor record, 1. Display the View Vendor window. 2. Click the Delete button.
The software issues a warning: “Vendor in use may only be deactivated, not deleted. Are you sure you want to delete this vendor?”
3. Click Yes to proceed with the deletion. The software checks to see if the vendor record is associated with a purchase order. If it is, you will not be able to delete the record.

78 Getting Started with Acquisitions (v. 43.1)
Virtua ILS – Integrated Library System PROPRIETARY INFORMATION OF VTLS INC.
5. Getting Started with Purchase Orders
he purchase order is at the heart of an acquisitions workflow. In Virtua, the Order window lets you build the order record. The ordering process supports a variety of order types, order payment types, statuses, and
currencies. It is also flexible enough to be used in a centralized or distributed acquisitions environment. In this chapter we present an overview of several aspects of Virtua purchase orders. For information about creating and sending purchase orders, see the Virtua Acquisitions User’s Guide. This chapter covers the following topics: ⇒ Introduction to Purchase Orders ⇒ Understanding Purchase Order Types ⇒ Understanding Purchase Order Payment Types ⇒ Understanding Purchase Order Statuses
5.1 Introduction to Purchase Orders To acquire an item from a vendor, you must create a purchase order, which is a request for one or more copies of one or more line items. In Virtua, the main purchase order functions consist of adding, viewing, updating, deleting, canceling, copying and sending orders. Two things affect the workflow of a purchase order: • Purchase order type as indicated by the order header type • Purchase order payment type The header type determines whether the purchase order as a whole is a… • Monograph order • Serial order, or • COG (Catch-all Order Group) order.
T

Getting Started with Acquisitions (v. 43.1)
PROPRIETARY INFORMATION OF VTLS INC. Virtua ILS – Integrated Library System
79
The order payment type determines how the purchase order as a whole is paid. If the payment type is… • Standard, it is paid via the normal workflows of receiving, invoicing, and paying. • Prepaid, it is paid before it is received. • Deposit/Donation, it may require no payment except for fees.
5.1.1 Important Things to Know about Purchase Orders Before working with purchase orders, you should be aware of the following aspects of order functionality in Virtua: • Before a purchase order can be created, a bibliographic record for each purchase
order line item must exist in the database or in a local file on your PC. The bibliographic records can be imported from an external source or created from scratch using the MARC Editor. Your library can determine the minimal contents of this record by setting up a library-defined workform, or template.
• When you add and save a purchase order that overencumbers an account, the
purchase order window stays open so that you can modify the account information on the order before trying to save it again.
• When you access a purchase order to update, cancel, or delete it, the software
places a lock on the order record. When you access records during receiving and invoicing functions, the software also places a lock on the linked purchase order.
• Only after you save an order and send it to the server does the system check if the
order number is a duplicate. If it is, the server returns an error and you will be able to enter another order number and continue the order transaction.

80 Getting Started with Acquisitions (v. 43.1)
Virtua ILS – Integrated Library System PROPRIETARY INFORMATION OF VTLS INC.
5.2 Understanding Purchase Order Types The process of creating a purchase order and adding it to the database involves a number of steps. The steps will differ according to the type of order you are creating. Virtua supports five basic types of orders. In addition, Virtua supports Rush orders and the receipt of gifts and deposits. Virtua lets you designate Rush orders with a check box on the Order window and a radio button on the Send Orders window. The receipt of gift orders and legal deposits is handled via functionality in the Cataloging subsystem, which calls for the creation of a bibliographic record that stores information about the acquisitions source and method in the 541 tag. For details, see the Virtua Cataloging User’s Guide. Currently, you cannot add, modify, or delete any of the five basic order types that Virtua supports. After you create an order, the Statuses tab on the View Bibliographic Record window in the OPAC will display the order type along with other purchase order/line item data. Purchase Order Types • Monograph – An order for a single item or group of items where the line items
on the order are not necessarily related. With Monographic orders, your library knows exactly what it is purchasing.
• Serial – An order for a serial that lets you enter enumeration and chronology
information for each line item so that you can monitor the subscription period of each line item as the basis for subscription renewal. With Serial orders, your library knows exactly what it is purchasing and for what length of time. Once a purchase order for a serial subscription has been invoiced, you can renew it without creating a new purchase order as long as you do not need to add new items to the order. Note: To create Serial orders, you must first specify sublocations in the Acquisitions Libraries parameter in the Virtua Profiler.
• Catch-all Order Group (COG) – Certain criteria define the three types of
purchase orders that fall under the “Catch-all Order Group.” The criteria are as follows: ♦ You do not need to create a bibliographic record for the “master” title of, say,
a Standing order.
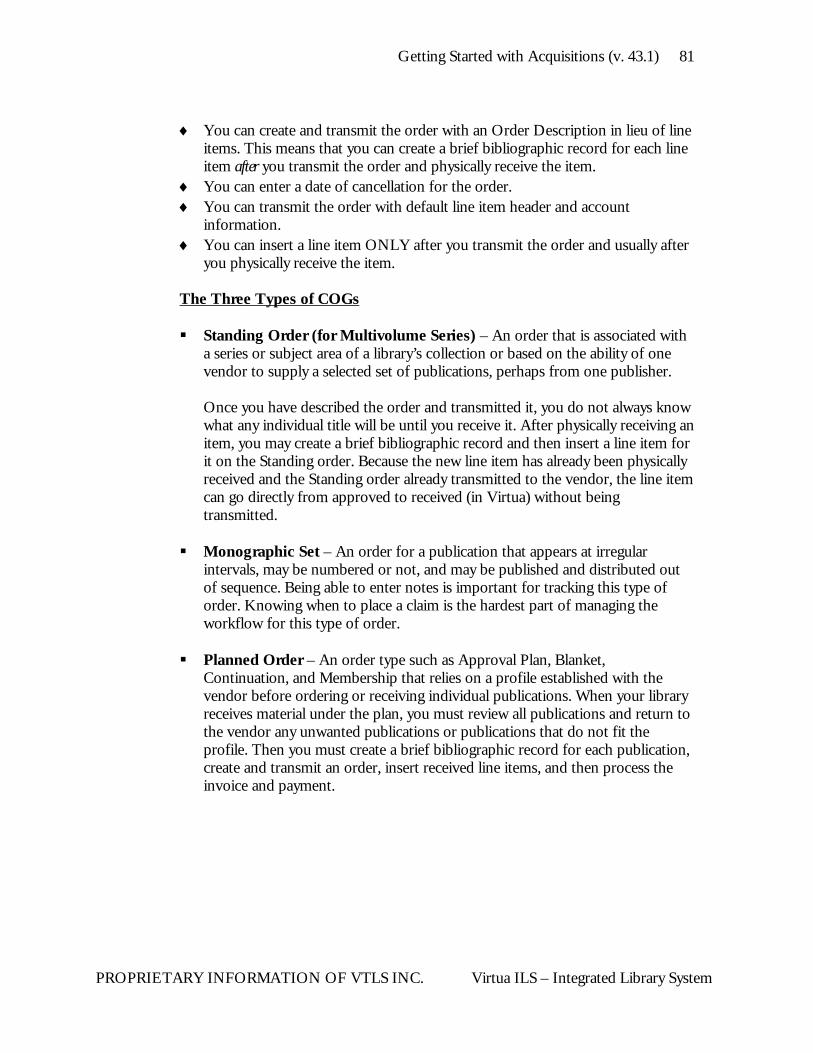
Getting Started with Acquisitions (v. 43.1)
PROPRIETARY INFORMATION OF VTLS INC. Virtua ILS – Integrated Library System
81
♦ You can create and transmit the order with an Order Description in lieu of line items. This means that you can create a brief bibliographic record for each line item after you transmit the order and physically receive the item.
♦ You can enter a date of cancellation for the order. ♦ You can transmit the order with default line item header and account
information. ♦ You can insert a line item ONLY after you transmit the order and usually after
you physically receive the item. The Three Types of COGs Standing Order (for Multivolume Series) – An order that is associated with
a series or subject area of a library’s collection or based on the ability of one vendor to supply a selected set of publications, perhaps from one publisher.
Once you have described the order and transmitted it, you do not always know what any individual title will be until you receive it. After physically receiving an item, you may create a brief bibliographic record and then insert a line item for it on the Standing order. Because the new line item has already been physically received and the Standing order already transmitted to the vendor, the line item can go directly from approved to received (in Virtua) without being transmitted.
Monographic Set – An order for a publication that appears at irregular intervals, may be numbered or not, and may be published and distributed out of sequence. Being able to enter notes is important for tracking this type of order. Knowing when to place a claim is the hardest part of managing the workflow for this type of order.
Planned Order – An order type such as Approval Plan, Blanket, Continuation, and Membership that relies on a profile established with the vendor before ordering or receiving individual publications. When your library receives material under the plan, you must review all publications and return to the vendor any unwanted publications or publications that do not fit the profile. Then you must create a brief bibliographic record for each publication, create and transmit an order, insert received line items, and then process the invoice and payment.

82 Getting Started with Acquisitions (v. 43.1)
Virtua ILS – Integrated Library System PROPRIETARY INFORMATION OF VTLS INC.
5.3 Understanding Purchase Order Payment Types Virtua Acquisitions supports three types of purchase order payments: • Standard • Prepaid • Deposit/Donation In the OPAC, for your easy reference, the payment type for a given order line item appears on the Statuses tab on the View Bibliographic Record window.
5.3.1 Standard Payment Type You can create a purchase order of any type using the payment type of Standard. After you create such an order, you can perform the tasks of receiving, invoicing, and paying individual line items. Most purchase orders that you create will be of this payment type, and the workflow that we present in the Virtua Acquisitions User’s Guide assumes that Standard is the payment type.
5.3.2 Prepaid Payment Type You can create a purchase order of any type using the payment type of Pre-paid. A prepaid order and a standard order are essentially the same except for the workflow. Currently, the workflow for a prepaid order is not fully implemented. Because the concept of prepaid exists at the purchase order level only, we briefly describe the process here rather than in the Virtua Acquisitions User’s Guide.
5.3.2.1 Creating Prepaid Orders To create a prepaid order, 1. Create a payment voucher for the proposed order, being sure to de-select the check
box Create from Available Invoices. 2. Create a note in the voucher that indicates that the order is prepaid. 3. Transmit the payment voucher to the vendor, who will record the prepayment. 4. Create and transmit the order with a payment type of prepaid to the vendor.

Getting Started with Acquisitions (v. 43.1)
PROPRIETARY INFORMATION OF VTLS INC. Virtua ILS – Integrated Library System
83
5.3.3 Deposit/Donation Payment Type We developed the Deposit/Donation payment type specifically for libraries that want to be able to track and report on purchase order items that have been deposited or donated. Below, we give you an overview of how this payment type works, but you will need to refer to the Virtua Acquisitions User’s Guide for the details involved at each step. 1. Create a no cost order with the payment type of Deposit/Donation. 2. Perform the tasks of receiving and—if fees are attached—invoicing and paying the
order. 3. Configure the purchase order letter to be a thank-you letter or letter of
acknowledgment. 4. Print and send the letter. Note: You can assign the Deposit/Donation payment type to any type of order, but the functionality that we describe below regarding the Subject Code will be in effect for holdings records only. To make full use of the Deposit/Donation payment type for Serial orders, you will also want to take the following two steps: • Set up library-defined Subject Codes in the Acquisitions parameters in the Virtua
Profiler. These codes can describe each type of item your library orders. They can be used to distinguish a donated item (coded DON, for example) from a deposited item (coded DEP, for example).
• On the Order Line Editor window, assign the appropriate Subject Code to each
line item on the newly created Serial order. The system will automatically add that item’s Subject Code to subfield $m of the 941 tag of the holdings record for that item.
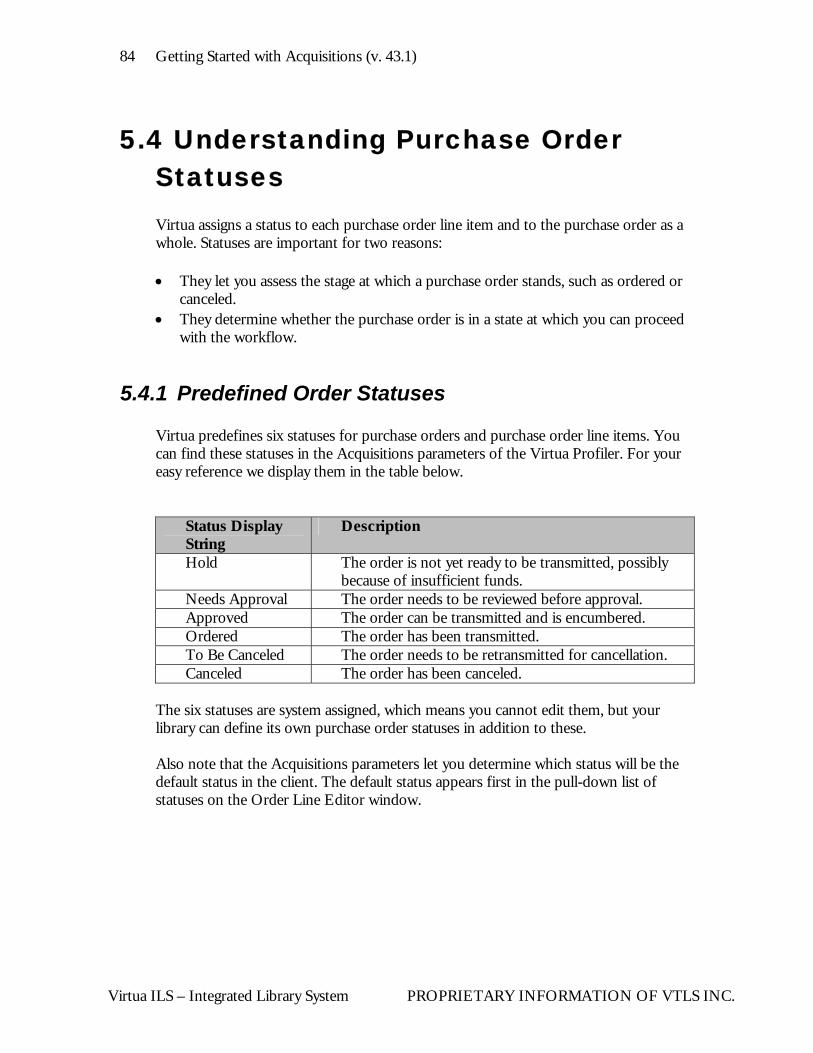
84 Getting Started with Acquisitions (v. 43.1)
Virtua ILS – Integrated Library System PROPRIETARY INFORMATION OF VTLS INC.
5.4 Understanding Purchase Order Statuses Virtua assigns a status to each purchase order line item and to the purchase order as a whole. Statuses are important for two reasons: • They let you assess the stage at which a purchase order stands, such as ordered or
canceled. • They determine whether the purchase order is in a state at which you can proceed
with the workflow.
5.4.1 Predefined Order Statuses Virtua predefines six statuses for purchase orders and purchase order line items. You can find these statuses in the Acquisitions parameters of the Virtua Profiler. For your easy reference we display them in the table below.
Status Display String
Description
Hold The order is not yet ready to be transmitted, possibly because of insufficient funds.
Needs Approval The order needs to be reviewed before approval. Approved The order can be transmitted and is encumbered. Ordered The order has been transmitted. To Be Canceled The order needs to be retransmitted for cancellation. Canceled The order has been canceled.
The six statuses are system assigned, which means you cannot edit them, but your library can define its own purchase order statuses in addition to these. Also note that the Acquisitions parameters let you determine which status will be the default status in the client. The default status appears first in the pull-down list of statuses on the Order Line Editor window.

Getting Started with Acquisitions (v. 43.1)
PROPRIETARY INFORMATION OF VTLS INC. Virtua ILS – Integrated Library System
85
5.4.2 Status Flow The chart below illustrates the flow that is permitted from one order status to another.
From/To Hold Needs Approval
Approved Ordered To Be Canceled
Canceled
Hold Needs Approval
Approved Ordered To Be Canceled
Canceled
The chart displays rows and columns labeled with all the order statuses. To determine the status flow for a given status, start with a status in the shaded column on the left side of the chart, say Ordered. Now move right along the row until you reach the first check mark. The column with the check mark indicates the status to which the first status can move according to the required purchase order workflow. So the status Ordered can flow only to the status To Be Canceled.
5.4.3 Order Status vs. Order Line Item Status The status of individual line items and the status value that appears in the header of the purchase order are interdependent. The status in the header takes into account ALL line item statuses and is calculated such that it is the least advanced, or most restrictive, of the line item statuses. For example, if a purchase order has five line items, one of which has a status of Hold and four of which have the status of Approved, the status of the entire purchase order would be Hold. As we noted above, we ship predefined order line item statuses with the Virtua Profiler. Here they are in order of least restrictive to most restrictive. • Hold • Needs Approval • Approved • To Be Canceled • Canceled • Ordered

86 Getting Started with Acquisitions (v. 43.1)
Virtua ILS – Integrated Library System PROPRIETARY INFORMATION OF VTLS INC.
6. Working with Acquisitions Notes
irtua Acquisitions provides an extensive notes function, which is available at every step in the acquisitions process. Because notes are so pervasive and give you a way to extend Virtua's functionality by means of detailed explanations
of special or complex orders, we describe the feature in this guide as part of your orientation to the Acquisitions subsystem. This chapter covers the following topics: ⇒ Introduction to Acquisitions Notes ⇒ Viewing the Acquisitions Notes Window ⇒ Adding or Editing a Note ⇒ Deleting a Note ⇒ Working with Family Priority Notes
6.1 Introduction to Acquisitions Notes The notes function provides an Acquisitions Notes window where you can add, edit, view, and delete notes attached to Acquisitions records and line items. A Notes button is available on the following windows in the workflow: • Order • Order Line Editor • Receipts • Invoice • Credit • Payment Voucher • Voucher Without Invoices When you create a note to be attached to an active record, you also have the option of making the note available for viewing from a related acquisitions record and/or transmitting the note to the vendor. When the active record is associated with notes, the software signals you in four ways, depending on the type of note, by displaying an… • “Alert” to indicate that family priority notes are associated with the record. • Asterisk (*) on the Notes button to indicate that notes exist for the record. • Asterisk (*) preceding a line item in the list box to indicate that notes exist for the
line item.
V

Getting Started with Acquisitions (v. 43.1)
PROPRIETARY INFORMATION OF VTLS INC. Virtua ILS – Integrated Library System
87
• Asterisk (*) on the Line Notes button (Invoice window only) to indicate that notes are associated with a line item.
On the Acquisitions Notes window… • You can view, add, modify, or delete notes that are attached directly to the active
record. These notes appear at the bottom of the Acquisitions Notes window.
• You can only view the notes linked indirectly to the record. These notes appear at the top of the Acquisitions Notes window. Note: To add, modify, or delete a note that is linked indirectly to the active record, you must access the record that “owns” that note.
6.2 Viewing the Acquisitions Notes Window
To view the Acquisitions Notes window, 1. On any Acquisitions record window, highlight a line item. 2. Click the Notes button.
The Acquisitions Notes window appears (Figure 6-1).

88 Getting Started with Acquisitions (v. 43.1)
Virtua ILS – Integrated Library System PROPRIETARY INFORMATION OF VTLS INC.
Figure 6-1. Acquisitions Notes Window
6.2.1 Aspects of the Acquisitions Notes Window The Acquisitions Notes window is divided into two notes fields: Family Priority Notes and Notes. In our description of the two types of notes below, we use the example of a note attached to a purchase order line item. Family Priority Notes The top section of the window displays the Date, Note Type, and Note Text for any Family Priority Notes that are 1) linked indirectly to the purchase order line item and 2) flagged Priority. Because these are priority notes, they will be attached to any Receipt, Invoice, or Credit record for the order line item. Notes The bottom section of the window displays the Priority (Flag), Date, and Note Text for the Note that is attached directly to the purchase order line item.

Getting Started with Acquisitions (v. 43.1)
PROPRIETARY INFORMATION OF VTLS INC. Virtua ILS – Integrated Library System
89
Buttons The Acquisitions Notes window provides five command buttons to let you add, edit, delete, save, or cancel a note. Only the Add and Cancel buttons are enabled when you first display the Acquisitions Notes window (Figure 6-1) to add notes. Resizing You can resize the Acquisitions Notes window. Just place your mouse cursor at the boundary of the window. When the cursor changes to a horizontal or vertical arrow, hold down the left mouse button and drag the edge of the window. In this way, you can make the Notes fields large enough so that you do not have to scroll.
6.3 Adding or Editing a Note You can add and/or edit notes that are attached directly to the active record. These types of notes appear at the bottom of the Acquisitions Notes window. To add or edit a note directly attached to the active record or line item, 1. On the Acquisitions Notes window, click the Add or Edit button.
The Edit Note dialog box appears (Figure 6-2).
Figure 6-2. Edit Note Dialog Box
2. In the Note Text field, type a new note, or edit an existing note.

90 Getting Started with Acquisitions (v. 43.1)
Virtua ILS – Integrated Library System PROPRIETARY INFORMATION OF VTLS INC.
3. To assign the note priority, select the Priority Note check box. Flagging a note as a
priority means that it will appear in the Family Priority Notes area of the Acquisitions Notes window when notes for related records are accessed.
4. To transmit the note to the vendor, select the check box Transmit to Vendor. In
this way, when you transmit the order, the note will print along with the purchase order. If you transmit the order using EDIFACT, the note will be transmitted in EDIFACT standard format along with the order.
Note: The Transmit to Vendor check box is available only when you access notes from the Order or the Order Line Editor window.
5. Click the Save button.
Your note appears in the bottom note field of the updated Acquisitions Notes window. The note is not saved to the database until the Acquisitions record itself is saved. If you click the Cancel button on the record itself, any notes you added will also be canceled.
6.4 Deleting a Note To delete a note directly attached to the active record or line item, 1. On the Acquisitions Notes window, highlight a note in the bottom note field. 2. Click the Delete button.
The software asks you to confirm the deletion. 3. Click the Yes button.
The note is removed from the display area.

Getting Started with Acquisitions (v. 43.1)
PROPRIETARY INFORMATION OF VTLS INC. Virtua ILS – Integrated Library System
91
6.5 Working with Family Priority Notes
6.5.1 Viewing Family Priority Notes You can only view those notes that are 1) linked indirectly to an active record and 2) flagged Priority. These notes are the Family Priority Notes, which appear at the top of the Acquisitions Notes window. An asterisk on the Notes button will indicate whether a priority note is available. For example, if there are priority notes attached directly to an invoice that is linked to a purchase order you are updating, the Notes button on the Order window will display an asterisk. If you click the button, the system will display those notes in the Family Priority Notes area of the Acquisitions Notes window. Similarly, if you are on the Invoice window and a priority note is attached directly to a purchase order linked to the invoice record, the Notes button on the Invoice window will display an asterisk. Clicking the button will display the note in the Family Priority Notes area of the Acquisitions Notes window. In the following table we list the rules that govern viewing priority notes on other records.

92 Getting Started with Acquisitions (v. 43.1)
Virtua ILS – Integrated Library System PROPRIETARY INFORMATION OF VTLS INC.
The Family Priority notes in the Acquisitions Notes window accessed from… This Window: Includes These Priority Notes: Purchase Order header Invoice header notes of invoices linked to
the purchase order.
Order Line Editor window Receipt notes, Invoice line item notes, and Credit notes linked to the purchase order line item.
Receipt window Purchase order line item notes, Purchase order header notes, Invoice line item notes, and Credit notes linked to the purchase order/line item.
Invoice window (header) Purchase order header notes and Payment notes linked to the invoice.
Invoice window (line item) Purchase order line item notes, Receipt notes, and Credit notes linked to the invoice line item.
Select Invoices for Payment window Invoice header notes and Credit notes linked to the voucher.
6.5.2 Modifying or Deleting Family Priority Notes To modify or delete Family Priority notes, you must first access the record that “owns” that note and then display the Acquisitions Notes window. To modify or delete a Family Priority note, 1. Display the “owning” record. 2. Click the Notes button. 3. On the Acquisitions Notes window, highlight the note that you want to edit or
delete. 4. Click the Edit button or Delete button as required. 5. In the Edit Note dialog box, modify the note, and then click the Save button.
-OR- Confirm that you wish to delete the Note.

Getting Started with Acquisitions (v. 43.1)
PROPRIETARY INFORMATION OF VTLS INC. Virtua ILS – Integrated Library System
93
7. Working with the Title Selection List
he Title Selection List (Figure 7-1) is a list of titles requested by staff or patrons for addition to the library’s collection. If a title on the list is given the status Approved, the library intends to order it. In fact, a staff member can
create a purchase order for the title directly from the Title Selection List. The list is available from the Acquisitions menu on the Virtua menu bar. Access to and management of the list is restricted via permissions and an Acquisitions parameter.
Figure 7-1. Title Selection List
This chapter covers the following topics: ⇒ Introduction to Title Selection ⇒ Adding a Title to the Title Selection List ⇒ Reviewing/Updating Title Information ⇒ Deleting a Title from the Title Selection List ⇒ Creating an Order from the Title Selection List
7.1 Introduction to Title Selection Before creating a Title Selection List, you will need to set two Acquisitions parameters in the Virtua Profiler: • Title Selection List Categories
T

94 Getting Started with Acquisitions (v. 43.1)
Virtua ILS – Integrated Library System PROPRIETARY INFORMATION OF VTLS INC.
• Title Selection List User Roles In the Title Selection List Categories parameter, you will define categories by which requested titles will be added and sorted. In the Title Selection List User Roles parameter, you will determine for each user in your system which categories of titles on the list they will have access to and whether they have permission be a reviewer of those titles (see the Virtua Profiler/Acquisitions Parameters User’s Guide for details). The Title Selection List gives you the ability to do the following: • Add a title for which the system will automatically create a bibliographic record.
Note: The design of the Title Selection List assumes that patrons will add their requests for titles via their patron account in the Chameleon iPortal.
• Mask the new record in the OPAC. • Review the existing titles in the list and sort them alphabetically. • Update title information and change the status. • Delete a title. • Create an order that automatically contains a selected title as a purchase order line
item. In addition, you can flag the system to do the following: • If a title is rejected or ordered, send an e-mail to the requestor. • When a title is ordered, place a hold on the item for the requestor. We will discuss these functions in the following sections.
7.2 Adding a Title to the Title Selection List To add a title to the Title Selection List, 1. On the Virtua menu bar, choose Acquisitions, and then choose Title Selection List. 2. On the submenu, choose Add.
The Add Title Selection window appears (Figure 7-2).

Getting Started with Acquisitions (v. 43.1)
PROPRIETARY INFORMATION OF VTLS INC. Virtua ILS – Integrated Library System
95
Figure 7-2. Add Title Selection Window
3. Type the information about the title in the fields provided. Hint: Three fields are
labeled with an asterisk (*): Category, Title, and Author. These fields are required. All others are optional. Note: • The Category pull-down list contains the categories that your library defined in
the Title Selection List Categories parameter. • The Vendor pull-down list contains all the active vendors that are configured
in your system. 4. If you want this title to be masked in the OPAC, select the Masked check box.
Note: Whether the Masked check box is, by default, selected or not depends on the Masked New Records setting in Cataloging Options (see the Virtua Cataloging User’s Guide for details).
5. Click the Save button to save your work and exit the window.
-OR- Click the Repeat button to save your work and then continue to add another title on the Add Title Selection window.

96 Getting Started with Acquisitions (v. 43.1)
Virtua ILS – Integrated Library System PROPRIETARY INFORMATION OF VTLS INC.
The software automatically creates a bibliographic record for the title (if one does not already exist), and places the title and related information on the Title Selection List (Figure 7-3).
Figure 7-3. Title Selection List
7.3 Reviewing/Updating Title Information To review and update an existing title on the Title Selection List, 1. On the Virtua menu bar, choose Acquisitions, and then choose Title Selection List. 2. On the submenu, choose Review.
The Title Selection List appears (Figure 7-4). Simultaneously, a new menu item, Selection List, appears on the Virtua main menu bar.
Figure 7-4. Title Selection List
3. Select the title that you want to update.

Getting Started with Acquisitions (v. 43.1)
PROPRIETARY INFORMATION OF VTLS INC. Virtua ILS – Integrated Library System
97
4. Click the Update button.
The Update Title Selection window appears (Figure 7-5).
Figure 7-5. Update Title Selection Window
5. Edit any of the following fields: Vendor, Quantity, Status, Notes, Masked check
box, E-mail check box, and Hold check box. Note: • The fields that are grayed out and therefore uneditable are stored in the
bibliographic record. To edit these fields, open the record in the MARC Editor.
• If you do not have Reviewer permission for the current category of titles, the Status field will also be grayed out (see the section “Updating the Status,” below).
6. If you want the requestor to receive a system-generated e-mail regarding the status
of the order, select the E-mail check box. An e-mail is sent when an order for the title is transmitted or when the title has been set to status Rejected.

98 Getting Started with Acquisitions (v. 43.1)
Virtua ILS – Integrated Library System PROPRIETARY INFORMATION OF VTLS INC.
7. If you want the system to automatically place a hold on the title for the requestor,
select the Hold check box. The hold is placed when the order is transmitted. 8. Click the Save button.
7.3.1 Editing Fields Stored in the MARC Record Via the Update function, you cannot edit fields that are stored in the bibliographic record for the title. If you want to edit those fields, you can do so easily by following these steps: 1. Make the Title Selection List the active window. 2. Right click on the window.
-OR- On the Virtua menu bar, click Selection List.
3. On the pop-up or pull-down menu, choose Bib Record. 4. On the View Bibliographic Record, click the Edit button. The record appears in the MARC Editor.
7.3.2 Updating the Status If you have Reviewer permission, you can update the Status field on the Update Title Selection window or directly on the Title Selection List. To update the Status field on the Update Title Selection window, 1. Click the arrow in the Status pull-down list box. 2. Choose one of three statuses:
• Approved – Indicates that the title is approved for ordering. • Rejected – Indicates that the title will not be ordered. • Review (default) – Indicates that the title is in the process of being reviewed.
To update the Status field directly on the Title Selection List, 1. Right click on the window.
-OR- On the Virtua menu bar, click Selection List (Figure 7-6).

Getting Started with Acquisitions (v. 43.1)
PROPRIETARY INFORMATION OF VTLS INC. Virtua ILS – Integrated Library System
99
Figure 7-6. Selection List Pull-down Menu
2. On the pop-up or pull-down menu, choose one of the three statuses listed.
If you do not have Reviewer permission, the system will display the following message.
Figure 7-7. Record Update Failed Message
Otherwise, the Status column on the Title Selection List will display the status change.
7.4 Deleting a Title from the Title Selection List To delete a title from the Title Selection List, 1. On the Virtua menu bar, choose Acquisitions, and then choose Title Selection List. 2. On the submenu, choose Review.
The Title Selection List appears (Figure 7-4).

100 Getting Started with Acquisitions (v. 43.1)
Virtua ILS – Integrated Library System PROPRIETARY INFORMATION OF VTLS INC.
3. Select the title that you want to delete. 4. Click the Delete button.
The title is removed from the list.
7.5 Creating an Order from the Title Selection List If you have Reviewer permission, the Create Order button on the Title Selection List will be enabled. This button will let you create a purchase order, using a selected title on the list as a purchase order line item. To create a purchase order directly from the Title Selection List, 1. On the Title Selection List, select a title that you want to order (Figure 7-8).
Figure 7-8. Title Selection List
2. Click the Create Order button.
The Add PO Request dialog box appears (Figure 7-9).

Getting Started with Acquisitions (v. 43.1)
PROPRIETARY INFORMATION OF VTLS INC. Virtua ILS – Integrated Library System
101
Figure 7-9. Add PO Request Dialog Box
3. Complete the fields on the dialog box, and then click the Retrieve button.
The Add Order window appears, displaying the selected title as a purchase order line item (Figure 7-10).
Figure 7-10. Add Order Window

102 Getting Started with Acquisitions (v. 43.1)
Virtua ILS – Integrated Library System PROPRIETARY INFORMATION OF VTLS INC.
4. Complete the fields on the purchase order (for details, see the Virtua Acquisitions
User’s Guide). Once the order is transmitted, the software removes the title from the Title Selection List.

Getting Started with Acquisitions (v. 43.1)
PROPRIETARY INFORMATION OF VTLS INC. Virtua ILS – Integrated Library System
103
8. Appendix A - Changes to this User’s Guide
8.1 Version 42.4 – Version 43.0
8.1.1 Modified Sections Section 1.4: “Parameter Settings” – A new screen capture of the list of the Acquisitions in the Virtua Profiler shows two new parameters, Title Selection List Categories and Title Selection List User Roles, and other changes in the list since the previous release. Section 2.1.1: “Acquisitions Menu” – The menu contains a new option: Title Selection List.
8.1.2 New Sections
Chapter 7: “Working with the Title Selection List”
8.2 Version 43.0 – Version 43.1 In the 43.1 version of the guide, we corrected textual errors and made the following addition to the documentation. • FyRollover.exe pays no attention to purchase order types during the rollover
process. This is because purchase orders are linked only indirectly to fiscal years via line item accounts. FyRollover.exe is only concerned with moving encumbrances and credits from one fiscal year to another.

104 Getting Started with Acquisitions (v. 43.1)
Virtua ILS – Integrated Library System PROPRIETARY INFORMATION OF VTLS INC.
(This page intentionally blank)

Getting Started with Acquisitions (v. 43.1)
PROPRIETARY INFORMATION OF VTLS INC. Virtua ILS – Integrated Library System
105
Index
A
Account Allocation window · 47 Account Allocation window (fig) · 58 Account Management window
refreshing · 33 working with · 32
Account Management window (fig) · 27, 32, 34, 46 additional account added · 44 hierarchy expanded · 42 root Management Account added · 37 second root Management Account added · 40
Account Name field · 35 Account Number field · 35 account numbers
changing · 45 accounting structure
copying · 59 setting up · 34
accounts · See fund accounts Accounts submenu · 21 acknowledgments, generating · 83 AcqConvertCurrency.sql · 10 Acquisitions Audit Trail report · 26 Acquisitions Info tab, description of · 66 Acquisitions menu · 17 Acquisitions notes · See notes Acquisitions Notes window
aspects of · 88 viewing · 87
Acquisitions Notes window (fig) · 88 Acquisitions parameters · See parameters Acquisitions records
accessing in the OPAC · 5 Acquisitions reminders · See reminders acquisitions selection list · See Title Selection List Acquisitions statuses
relinking · 7 viewing · 4 viewing in the client · 5 viewing in the iPortal · 6
Acquisitions Statuses tab · See Statuses tab Acquisitions toolbar (fig) · 24 Acquisitions toolbar, description of · 24 acquisitions transaction log · 31 Active check box on vendor records · 63 Ad Hoc Reporting · 4 Ad Hoc Reporting Reference Guide · 27 Add Account window
aspects for Spending Accounts · 44 aspects of for Spending Accounts · 43 description of active fields · 35 description of inactive fields · 37
Root Management Account (fig) · 35 second root Management Account (fig) · 39
Add Account window (fig) · 43 Add EDI function · 19 Add Funds button
Account, Allocation window · 58 Add Invoices function · 19 Add Invoices icon · 24 Add Order window (fig) · 102 Add Orders function · 17 Add PO Request dialog box (fig) · 101 Add Purchase Order icon · 24 Add Title Selection window
Masked check box · 95 required fields · 95
Add Title Selection window (fig) · 95 Add/Update Receipts function · 18 Add/Update Receipts icon · 24 adding
a second root Management Account · 38 additional accounts · 40 bibliographic records · 79 notes · 89 root Management Accounts · 34 title to Title Selection List · 94 vendor records · 61
Additional Fields area on vendor records · 73 accessible for reports · 73
address fields on vendor records · 64 Agency field · 71 Allocate Amount field · 58, 59 Allocate button · 47, 57, 59
points of access · 58 allocating funds · 56 Allocation field · 36 Approval Plan orders · 81 arbitrary currencies · 10 asterisks, denoting the existence of notes · 86, 91 audit trail · 25, 26
logging allocations · 58 changes to exchange rates · 12 fund deletions · 52 fund transfers · 53, 55
Available Balance field · 38, 44, 45
B
back order if... · 68 base currency · 37, 45. See home currency Base Currency field, fund accounts · 37 bibliographic records, prerequisite for orders · 79 Blanket orders · 81 Blocks area on vendor records · 68

106 Getting Started with Acquisitions (v. 43.1)
Virtua ILS – Integrated Library System PROPRIETARY INFORMATION OF VTLS INC.
buttons Acquisitions Notes window · 89 Create New Vendor window · 63 Notes tab/Create New Vendor window · 74
C
Cancel Orders function · 18 cancellation period, orders · 67 Chameleon iPortal Configuration Guide · 6 changes in documentation · 103 changes to the guide · 103 check on duplicate order numbers · 79 claim interval, specifying · 67 claims
maximum number of · 67 transmission method
designation of · 67 print · 67
Claims area on vendor records · 67 Claims submenu · 22 COG orders · 80
types of · 81 command buttons · See buttons Contact Info tab, description of · 64 Continuation orders · 81 Copy Orders function · 18 copying
account structure · 59 vendor tables · 61
Create New Vendor window · 23 Acquisitions Info tab (fig) · 66 Contact Info tab (fig) · 62 EDIFACT tab (fig) · 69 Notes tab (fig) · 72
Create New Vendor windw availability of context-sensitive help · 62 working with · 63
Create Order button · 100 creating
Prepaid purchase orders · 82 vendor records · 61
Credits submenu · 20 currencies
arbitrary vs. home · 10, 11 changing the base · 10 connecting to a database using a different base · 10 functionality in Acquisitions · 11 invoice · 68 management of in Acquisitions · 10 may differ between order and invoice · 11 orders · 67 payment · 68 recalculating conversion factors · 10 restart client after change · 11 when changes occur · 11
Currencies parameter · 10 Currencies parameter window (fig) · 10 currency converter · See tooltip currency converter Customer Accounts area on vendor records · 71
D
deactivating vendor records · 63 Delete button
Account Management window · 50 Acquisitions Notes window · 90 Create New Vendor window · 63
Delete Credits function · 20 Delete Invoices function · 19 Delete Orders function · 17 deleting
Acquisitions notes · 90 Family Priority notes · 92 fund accounts · 50 title from Title Selection List · 99 vendor records · 63, 77
Deposit field · 38, 45 Deposit Replenish field · 38, 45 Deposit/Donation payment type and Serial orders · 83 Deposit/Donation purchase order payment type · 83 deposits and gifts · 80 disclaimer · 1 discount rate, specifying · 68 disencumbrances · 26 Distribution field · 38, 44, 45 Distribution Groups workflow · 4 drag-and-drop tool, using to insert data on the
Bibliographic Information tab · 8 duplicate order numbers, system check · 79
E
EDI standards · 4 EDIFACT fields on vendor records · 70 EDIFACT standard, support for · 4 EDIFACT tab, description of · 69 EDIFACT transmissions, notes for · 90 EDIFACT User ID field · 71 Edit Notes dialog box (fig) · 89 e-mail address, automatic insertion of · 65 E-mail check box · 97 Encumbrance field · 37, 44 encumbrances
adjusting · 29 canceling · 29 total of child accounts reflected on parent record · 29
exchange rates changes to · 12 setting · 10
Expenditure field · 37, 44

Getting Started with Acquisitions (v. 43.1)
PROPRIETARY INFORMATION OF VTLS INC. Virtua ILS – Integrated Library System
107
expenditures adjusting · 29 total of child accounts reflected on parent record · 28
F
Family Priority notes creating · 90 deleting · 92 modifying · 92 rules for viewing · 92 viewing · 91
Family Priority Notes area, Acquisitions Notes window · 88
features of Acquisitions, overview · 3 Fiscal Year field · 37 fiscal years
aspects of · 34 closing · 31 managing multiple · 26 no limitation on number of · 30 overview · 30 rolling over · 30 set in Virtua Profiler · 37
Fiscal Years parameter · 30, 32, 34 Free Balance field · 38, 44, 45 functionality of Acquisitions, overview · 3 fund accounts
adding a second root Management Account · 38 adding additional accounts · 40 adding root Management Accounts · 34 adjusting encumbrances/expenditures · 29 allocating funds · 56 aspects of setup · 26 deleting · 50 differences in adding Spending vs. Management
accounts · 44 disabling · 31 hierarchical nature of · 27 library definable aspects of · 25 limitations and restrictions · 29 locked for modification · 9, 30 Management Accounts, defined · 28 managing · 52 overview · 25 relationship to log-in location · 45 removing funds · 59 restrictions on adding additional · 40 restrictions on deleting · 50 Spending Accounts, defined · 29 system checks during a deletion · 50 transferring between · 28, 52 types of · 28 updating · 45 viewing · 48 working with · 25
Fund Code field · 36 Fund Transfer button · 47, 53 Fund Transfer function · 21, 53 Fund Transfer window (fig) · 54, 55 funds
allocating · 56 removing · 59 system checks after transferring · 55
fyRollover.exe · 31, 59 fyRollover.log · 31
G
getting oriented · 16 gifts and deposits · 80 Global Settings parameters · 10
H
historical claim count · 67 Hold check box · 98 home currency · 10
I
Information window account deletion (fig) · 51, 52 fund transfer (fig) · 56
Information window - account deletion (fig) · 51 InfoStation · 4, 26 integration of subsystems · 3 introduction to Acquisitions · 1 invoice currency, specifying · 68 Invoices submenu · 18 ISO currency codes · 10
K
key global aspects · 4
L
language of vendor, specifying · 68 lead time, orders · 67 locked record message (fig) · 76 locked records · See record locks locks on records · 9, 30
purchase orders · 79 releasing manually · 9
log-in location

108 Getting Started with Acquisitions (v. 43.1)
Virtua ILS – Integrated Library System PROPRIETARY INFORMATION OF VTLS INC.
accounts filtered by · 45
M
Management Account number · 35 Management Accounts, aspects of · 28 managing accounts · 52 MARC 21 Format for Holdings Data · 4 Masked check box · 95 Masked New Records setting · 95 maximum claims, specifying · 67 Membership orders · 81 menu bar · 16 mod locks · See locks on records Modify Account window (fig) · 47 modifying · See updating Monograph orders · 80 Monographic Set orders · 81
claiming · 81 multivolume series, orders for · 81
N
Name area on vendor records · 64 New Credits function · 20 New Credits icon · 24 New Vendor function · 23 New Vouchers function · 20 New Vouchers icon · 24 no cost purchase order · 83 non-home currencies · See arbitrary currencies notes
adding/editing · 89 assigning priority · 90 canceling · 90 deleting · 90 deleting priority notes · 92 introduction to · 86 modifying priority notes · 92 rules for viewing Family Priority notes · 92 saving · 90 transmitting to vendor · 90 viewing the Acquisitions Notes window · 87 ways system indicates their existence · 86 working with · 86
Notes area Acquisitions Notes window · 88 vendor records · 73
Notes button, availability of · 86 Notes tab (vendor record), description of · 72
O
order due date, calculation of · 67 Order Types · 80 orders
cancellation period · 67 currency · 67 lead time · 67 transmission method
designation of · 67 EDIFACT via FTP · 67 e-mail · 67 print · 67
Orders area on vendor records · 67 Orders submenu · 17 Other area on vendor records · 68 over-encumbering an account, effects of · 79 over-encumbrance · 36 over-expenditure · 36 overview, features and functionality of Acquisitions · 3
P
parameters for currencies · 10 for releasing locked records · 9 for subject codes · 83 for user profiles · 14 setting for Acquisitions · 13 setting for user profiles · 13
Parent Account Number field · 35, 42 Pay Invoices function · 19 payment currency, specifying · 68 payment types · See purchase order payment types Percent of Over-encumbrance field · 36 Percent of Over-expenditure field · 36 Planned orders · 81 Prepaid purchase order payment type · 82 Prepaid purchase orders, creating · 82 Priority flag for notes · 88 Priority Note check box · 90 priority notes
assigning · 90 deleting · 92 modifying · 92 rules for viewing · 92 viewing those linked to related records · 91
purchase order payment types Deposit/Donation · 83 display in the OPAC · 82 Prepaid · 82 Standard · 82
purchase order statuses Approved · 84, 85 Canceled · 84, 85

Getting Started with Acquisitions (v. 43.1)
PROPRIETARY INFORMATION OF VTLS INC. Virtua ILS – Integrated Library System
109
determining the defaults · 84 flow · 85 Hold · 84, 85 least restrictive vs most restrictive · 85 list of predefined · 84 Needs Approval · 84, 85 order vs. line item · 85 Ordered · 84, 85 To Be Canceled · 84, 85 user assigned vs. system assigned · 84
purchase order types · 80 description of · 80 display in the OPAC · 80
purchase orders creating from Title Selection List · 100 getting started with · 78 no cost for deposits/donations · 83 types of · 80 understanding payment types · 82 understanding statuses · 84 understanding types of
Monograph · 80 Monographic Set · 81 Planned · 81 Serial · 80 Standing · 81
R
rates of exchange · See exchange rates Receipts submenu · 18 receipts, adding from the Statuses tab · 7 reclaim interval, specifying · 67 record locking · 9, 30
purchase orders · 79 record locks · 76
removing · 76 Refresh button, Account Management window · 33 refreshing account information · 33 relinking Acquisitions statuses · 7 reminders function · See Serials Reminders function Remove Funds button, Account Allocation window · 59 removing funds · 59 renew subscription function · See SubscriptionRenewal
Action Orders function repetitive workflows · 4 requesting titles for purchase · 93 Reviewer permission · 97 rollovers · See fiscal years root accounts · See Management Accounts Rush orders · 80
S
SAN field · 71
SAP · 4 Save button
Account Management fund transfer · 55 Edit Note dialog box · 90, 92
saving purchase orders · 79 vendor records · 63
Selection List menu option · 96 Selection List pull-down menu (fig) · 99 Send Orders function · 17, 18 sending, notes to vendor · 90 Serial orders · 80
and the Deposit/Donation payment type · 83 prerequisite for creating · 80 renewing · 80
Serials Reminders function · 21 Serials Reminders icon · 24 Set As Source Account button · 54 Set As Target Account button · 54 Setup Accounts function · 21 Shipping Methods area on vendor records · 70 shipping methods, specifying · 70 SICI Check-in function · 23 SICI Check-in window · 23 Spending Accounts, aspects of · 29 Standard Address Number · 71 Standard purchase order payment type · 82 Standing orders · 81 Status field
fund accounts · 36 Title Selection List · 98
statuses · See also purchase order statuses order · 85 order line item · 85 order vs. line item · 85 purchase orders · 84 viewing for Acquisitions records · 4
Statuses tab · 80, 82 Add/Update receipt button · 7 aspects of · 6 displaying · 5 on the View Bibliographic Record window · 4, 5 performing tasks on · 7 relinking to a new bib record · 7 Update buttons · 7 View Record window (fig) · 6 vs. Status tab · 4
statuses, viewing in the iPortal · 6 subject codes
role in deposits/donations · 83 setting up in the Virtua Profiler · 83
SubscriptionRenewalAction Orders function · 18 Subscriptions submenu · 20 system checks, deletion of fund accounts · 50 System Management: Acquisitions User’s Guide · 59 System Management: Acquisitions User's Guide · 10, 31

110 Getting Started with Acquisitions (v. 43.1)
Virtua ILS – Integrated Library System PROPRIETARY INFORMATION OF VTLS INC.
T
thank you letters, generating · 83 Title Selection List
adding a title · 94 creating an order · 100 deleting a title · 99 introduction to · 93 related e-mail functionality · 98 related hold request functionality · 98 reviewing · 96 summary of functionality · 94 updating · 96 updating the status · 98 working with · 93
Title Selection List (fig) · 93, 96, 100 Title Selection List Categories parameter · 93 Title Selection List function · 22 Title Selection List User Roles parameter · 94 Title Selection List/Add function · 23 Title Selection List/Review function · 23 toolbar · See Acquisitions toolbar toolbar icons
Add Invoice · 24 Add Purchase Order · 24 Add/Update Receipts · 24 New Credit · 24 New Voucher · 24 Serials Reminders · 24
tooltip currency converter · 10, 12 using · 12
Tooltip Currency Converter (fig) · 12 transaction log · 25
logging fund modifications · 48 transferring funds across accounts · 52 transmission method · See orders or claims. See orders
or claims EDIFACT via FTP and print · 67
Transmit Claims function · 22 Transmit to Vendor check box · 90 types of
fund accounts · 28 purchase order payments · 82 purchase orders · 80
U
Update Credits function · 20 Update Invoices function · 19 Update Orders function · 17 Update Title Selection window
fields to edit · 97 Update Title Selection window (fig) · 97 updating
account numbers · 45
fund accounts · 45 Title Selection List · 96
MARC record fields · 98 Title Selection List status · 98 vendor records · 75
User Profile parameters · 14 user’s guide, using · 1
V
VAT · 4 vendor blocks, designation of · 68 Vendor Editor · 4 vendor ID, system assigned · 62 Vendor Policies area on vendor records · 68 vendor records
Acquisitions Info tab · 66 Active check box · 63 Additional Fields area · 73 address fields · 64 Blocks area · 68 Claims area · 67 command buttons · 63 Contract Info tab · 64 copying vendor tables · 61 creating · 61 Customer Accounts area · 71 deactivating · 63 deleting · 63, 77 EDIFACT Fields area · 70 EDIFACT tab · 69 introduction to · 60 locking · 76 Name area · 64 Notes area · 73 Notes tab · 72 Order area · 67 Other area · 68 saving · 63 Shipping Methods area · 70 updating · 75 Vendor Policies area · 68 viewing · 74 working with · 60
Vendor Type (EDIFACT) field · 70 View Account window (fig) · 49 View Bibliographic Record window, Statuses tab · 5 View Credits function · 20 View Invoices function · 19 View Orders function · 17 View Receipts function · 18 View Vendor window (fig) · 75 View Vouchers function · 20 viewing
fund accounts · 48 vendor records · 74

Getting Started with Acquisitions (v. 43.1)
PROPRIETARY INFORMATION OF VTLS INC. Virtua ILS – Integrated Library System
111
Virtua Acquisitions User’s Guide · 1 Virtua Ad Hoc Reporting · 73 Virtua Cataloging User’s Guide · 95 Virtua Cataloging User's Guide · 80 Virtua Getting Started Primer · 2, 16 Virtua ILS—Integrated Library System · 1 Virtua main window · 16 Virtua OPAC User's Guide · 7 Virtua Profiler
Acquisitions tab (fig) · 14 removing record locks · 9 using to set up parameters · 13
Virtua Profiler/Acquisitions Parameters User’s Guide · 14, 94
Virtua Profiler/Acquisitions Parameters User's Guide · 2 Virtua Profiler/Introduction and Global Settings User's
Guide · 2, 9, 10, 15 Virtua Statistics and Reporting · See InfoStation Vouchers submenu · 19
W
Warning account deletion (fig) · 52
workflows repetitive · 4

112 Getting Started with Acquisitions (v. 43.1)
Virtua ILS – Integrated Library System PROPRIETARY INFORMATION OF VTLS INC.
(This page intentionally blank)

Getting Started with Acquisitions (v. 43.1)
PROPRIETARY INFORMATION OF VTLS INC. Virtua ILS – Integrated Library System
113
Reader’s Comment Form Getting Started with Virtua Acquisitions Guide VTLS Inc. welcomes your comments and suggestions on the quality and usefulness of this publication. We will consider your input for future revisions of the guide. Did you find any errors? If so, please indicate the chapter, section, and page number. __________________________________________________________________________________________________________________________________________________________________________________________________________________________________________ Is the information clearly presented? If not, please indicate where we need improvement. __________________________________________________________________________________________________________________________________________________________________________________________________________________________________________ Do you need more information? If so, where? __________________________________________________________________________________________________________________________________________________________________________________________________________________________________________ Are our examples correct? Helpful? Do you need more examples? __________________________________________________________________________________________________________________________________________________________________________________________________________________________________________ What features did you like about the guide? __________________________________________________________________________________________________________________________________________________________________________________________________________________________________________ Have you any other suggestions for improvement? __________________________________________________________________________________________________________________________________________________________________________________________________________________________________________ Please send your comments to:
Documentation Manager VTLS Inc. 1701 Kraft Drive Blacksburg, VA 24060 U.S.A. Fax: 540/557/1210 E-mail: [email protected]
Thank you for helping us improve our documentation.