instructions to login google classroom and google meet
TRANSCRIPT

Issued by Public Relations Office & Information Technology
Stella Maris College (Autonomous), Chennai - 86
STELLA MARIS COLLEGE
(AUTONOMOUS)
CHENNAI-600 086
Tel : 044 – 28110121
Email : [email protected]
Web : stellamariscollege.edu.in
Instructions to Login Google Classroom and Google Meet
The following document gives systematic guidelines for students to access Google
Classroom & Google Meet.
GOOGLE CLASSROOM
Instructions to login to Google Classroom using the email-ID provided by the
College on a Desktop
Step 1: Enter the email id provided by the college and click on next.
*Reference: Google Support
Step 2: Enter the shared password and click next

Issued by Public Relations Office & Information Technology
Stella Maris College (Autonomous), Chennai - 86
Please note: the password shared is a one-time password. Please change the password and make
note of it.
Step 3: If there is a welcome message, review it and click Accept.
Step 4: Click I’m A Student
Step 5: Click Get Started
Issued by Public Relations Office & Information Technology
Stella Maris College (Autonomous), Chennai - 86
Switch to a different account
If you’re signed in to multiple accounts you need to switch to the official emailed
account that is provided by the College.
Instruction to Switch to Different Account:
Step 1: At the top, click your profile image or initial.
Step 2: Select the account.
How to join Google Classroom from the mobile app?
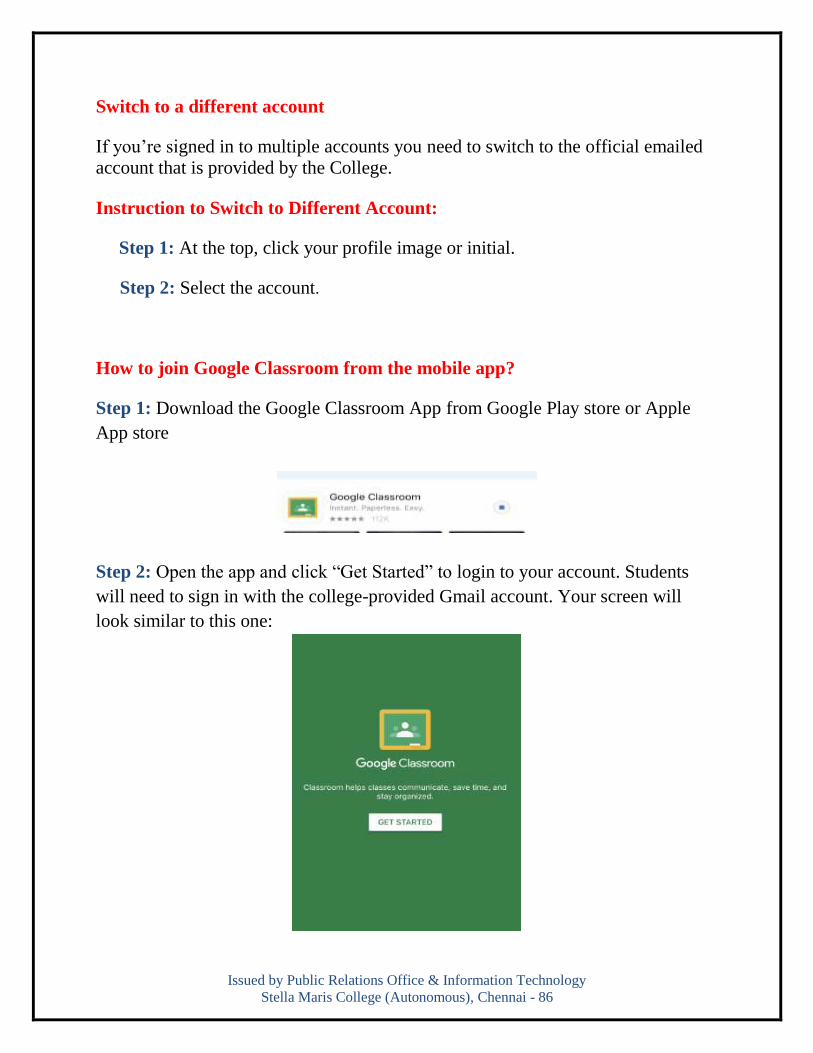
Step 1: Download the Google Classroom App from Google Play store or Apple
App store
Step 2: Open the app and click “Get Started” to login to your account. Students
will need to sign in with the college-provided Gmail account. Your screen will
look similar to this one:
Issued by Public Relations Office & Information Technology
Stella Maris College (Autonomous), Chennai - 86
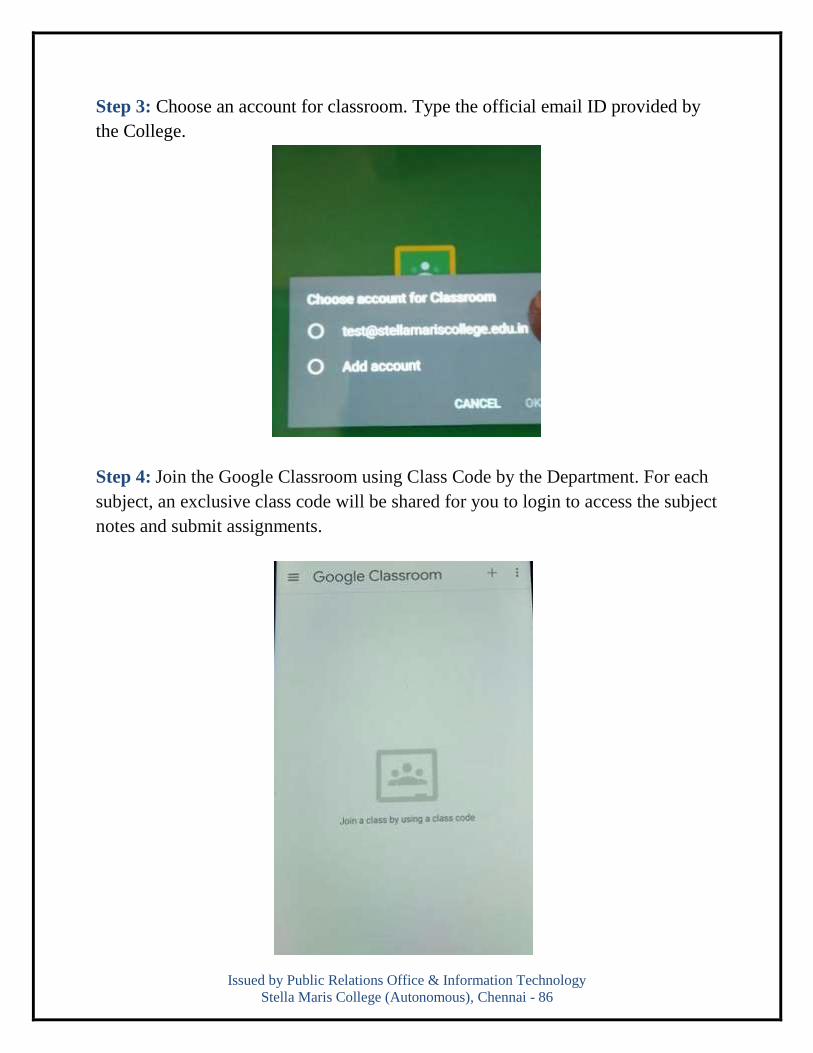
Step 3: Choose an account for classroom. Type the official email ID provided by
the College.
Step 4: Join the Google Classroom using Class Code by the Department. For each
subject, an exclusive class code will be shared for you to login to access the subject
notes and submit assignments.
Issued by Public Relations Office & Information Technology
Stella Maris College (Autonomous), Chennai - 86
GOOGLE MEET
Instruction to login to Google Meet using the Mail-id provided by the College
on a Desktop
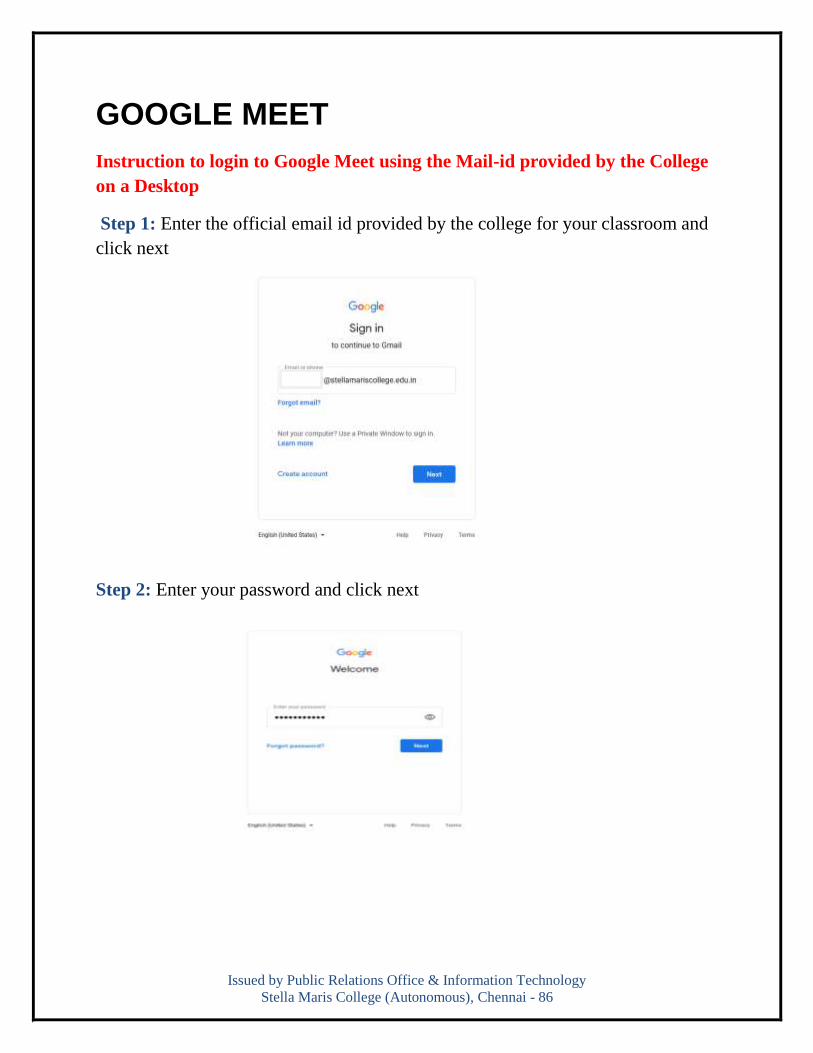
Step 1: Enter the official email id provided by the college for your classroom and
click next
Step 2: Enter your password and click next
Issued by Public Relations Office & Information Technology
Stella Maris College (Autonomous), Chennai - 86
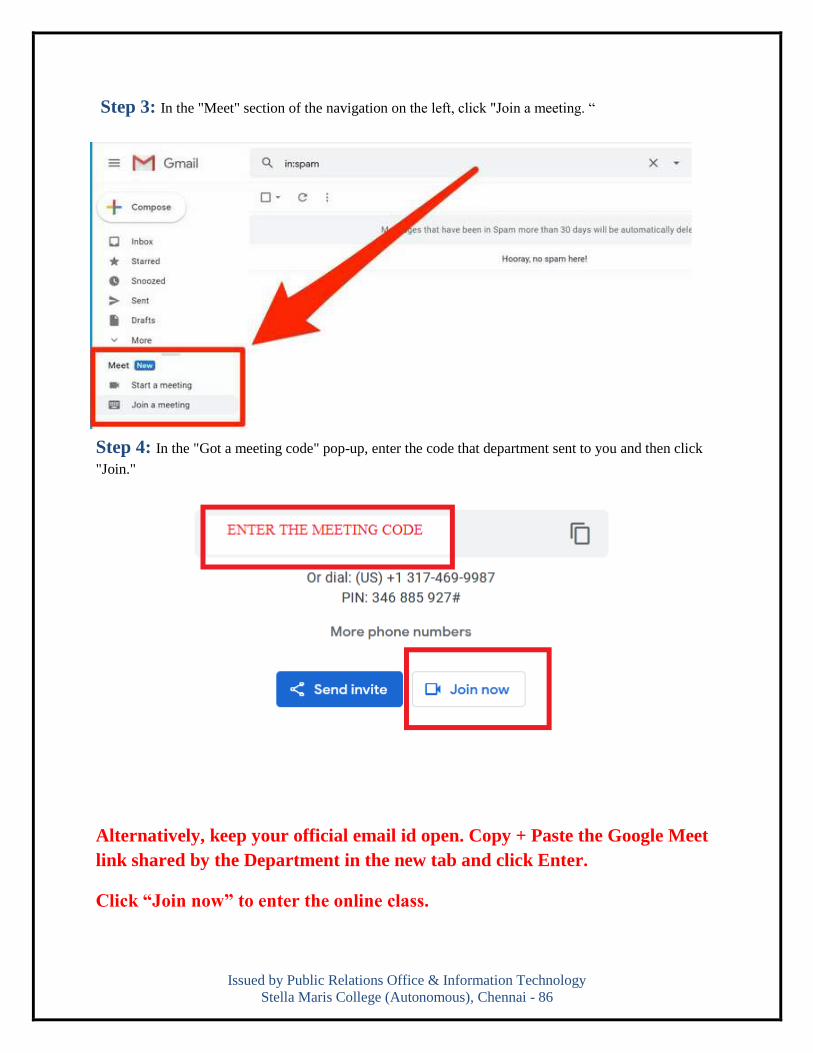
Step 3: In the "Meet" section of the navigation on the left, click "Join a meeting. “
Step 4: In the "Got a meeting code" pop-up, enter the code that department sent to you and then click
"Join."
Alternatively, keep your official email id open. Copy + Paste the Google Meet
link shared by the Department in the new tab and click Enter.
Click “Join now” to enter the online class.
Issued by Public Relations Office & Information Technology
Stella Maris College (Autonomous), Chennai - 86
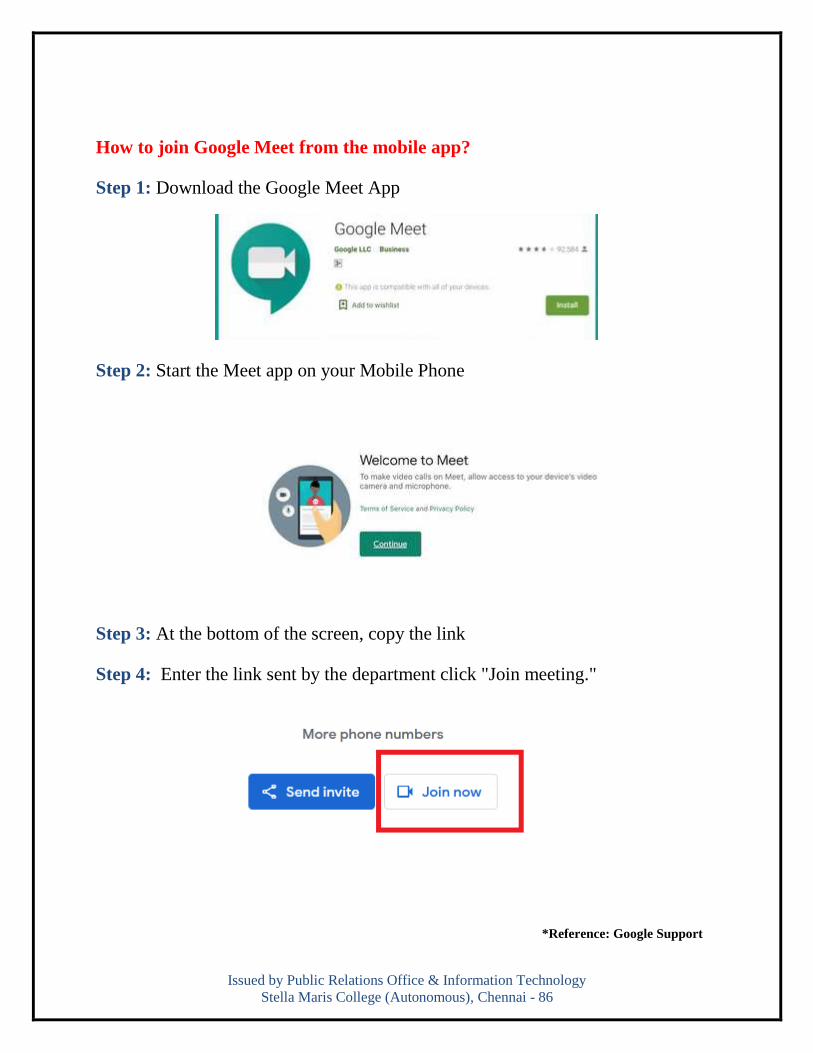
How to join Google Meet from the mobile app?
Step 1: Download the Google Meet App
Step 2: Start the Meet app on your Mobile Phone
Step 3: At the bottom of the screen, copy the link
Step 4: Enter the link sent by the department click "Join meeting."
*Reference: Google Support
Issued by Public Relations Office & Information Technology
Stella Maris College (Autonomous), Chennai - 86
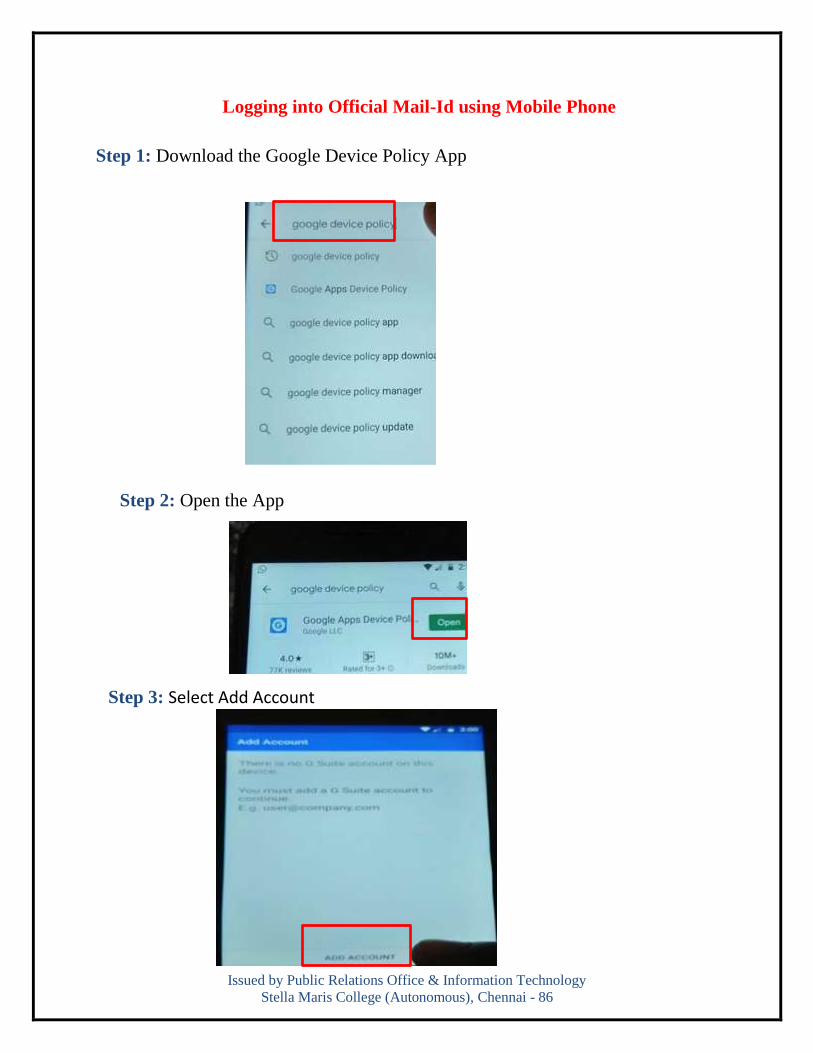
Logging into Official Mail-Id using Mobile Phone
Step 1: Download the Google Device Policy App
Step 2: Open the App
Step 3: Select Add Account
Issued by Public Relations Office & Information Technology
Stella Maris College (Autonomous), Chennai - 86
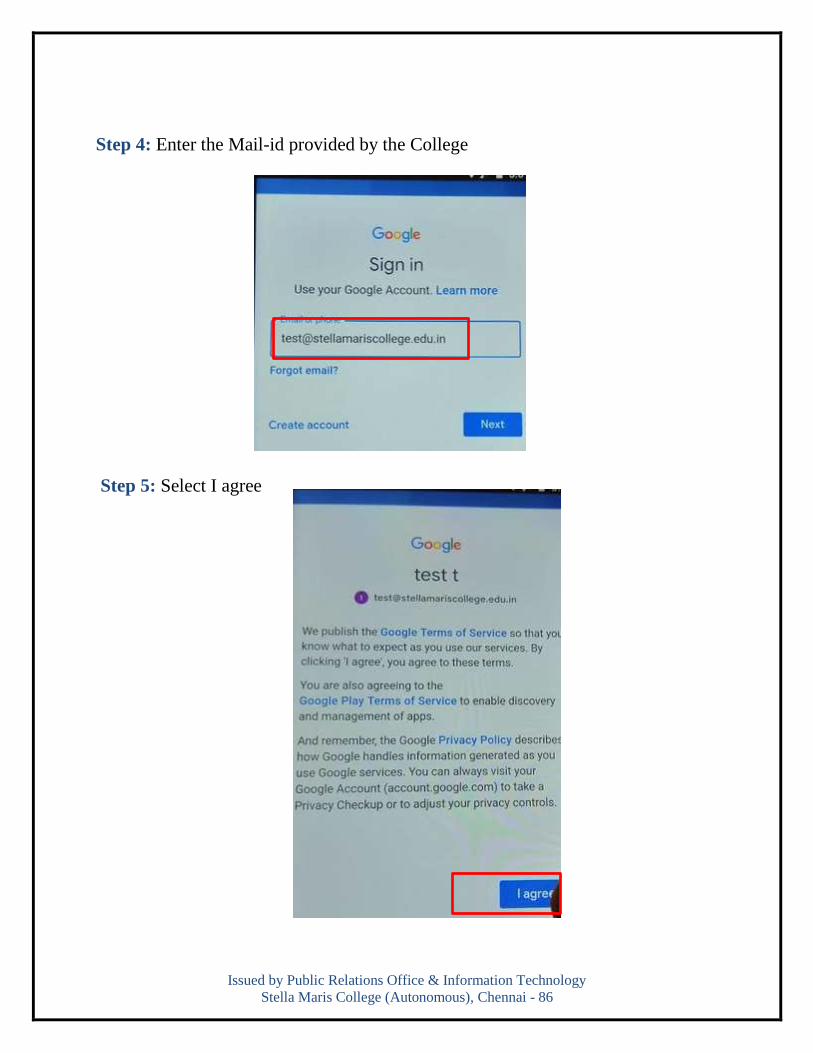
Step 4: Enter the Mail-id provided by the College
Step 5: Select I agree

Issued by Public Relations Office & Information Technology
Stella Maris College (Autonomous), Chennai - 86
Step 6: Enter the Password
Step 7: Click on Activate this device administrator
Issued by Public Relations Office & Information Technology
Stella Maris College (Autonomous), Chennai - 86
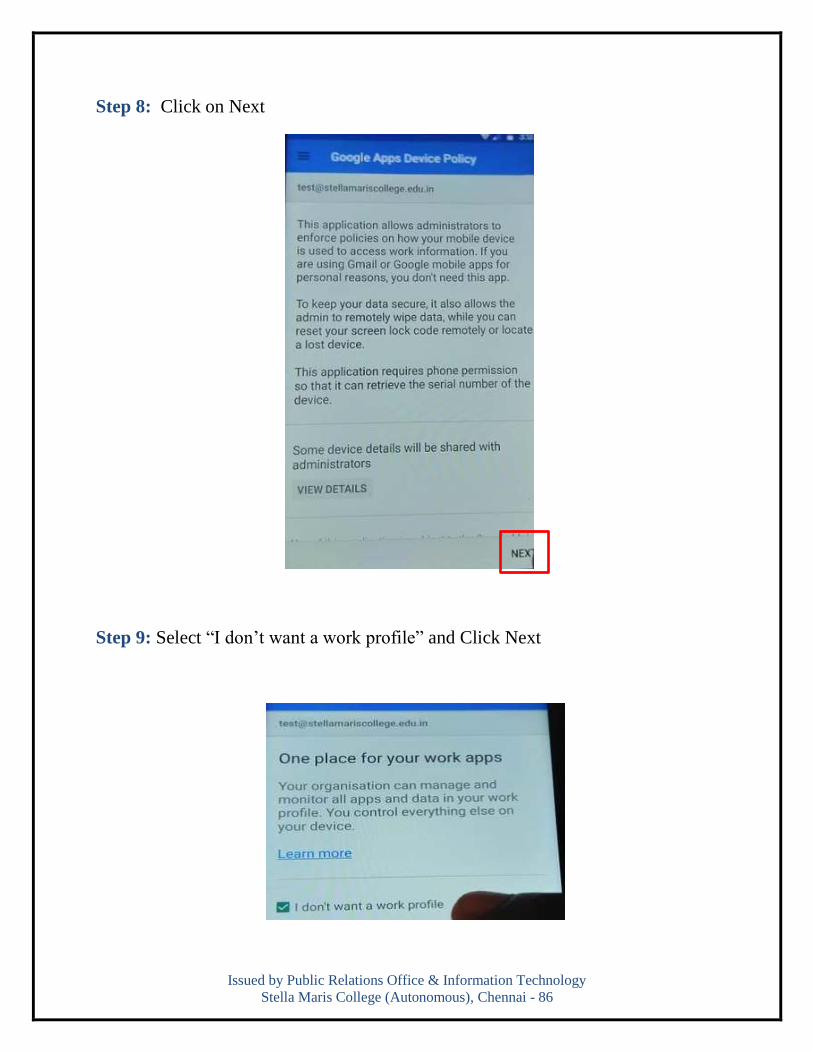
Step 8: Click on Next
Step 9: Select “I don’t want a work profile” and Click Next
Issued by Public Relations Office & Information Technology
Stella Maris College (Autonomous), Chennai - 86
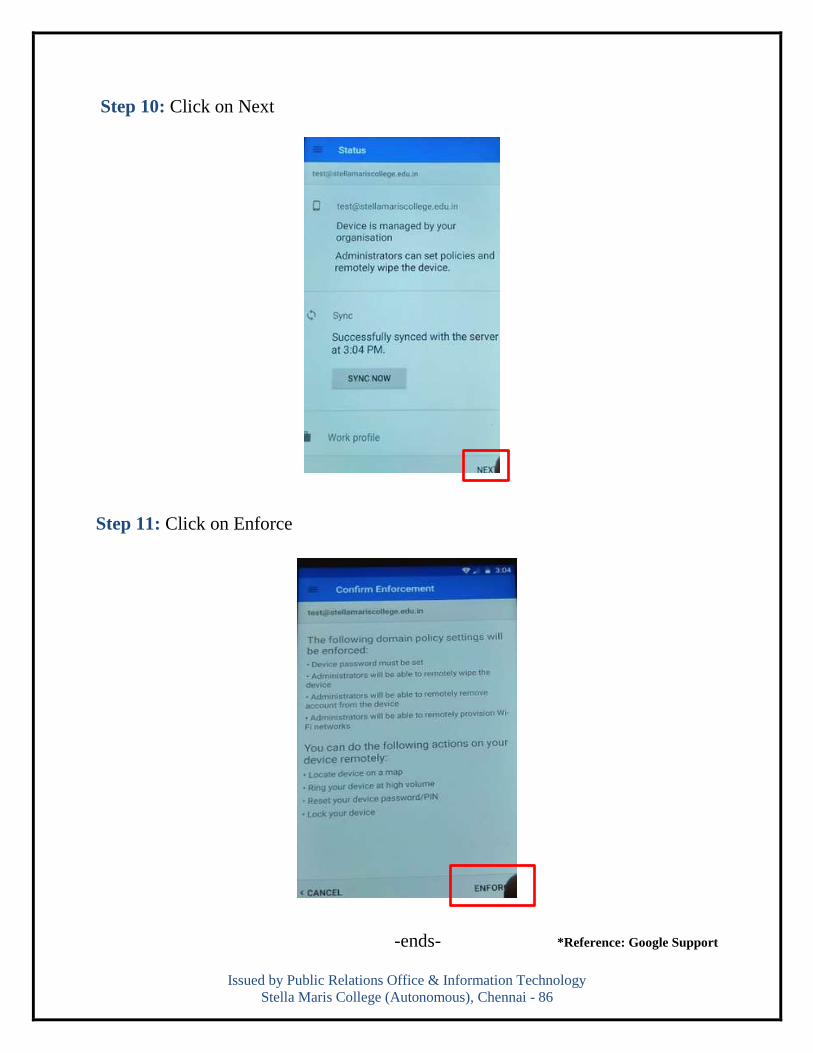
Step 10: Click on Next
Step 11: Click on Enforce
-ends- *Reference: Google Support