instructions heavy-duty plant strapper · thank you for your purchase of the heavy-duty plant...
TRANSCRIPT
HGTG
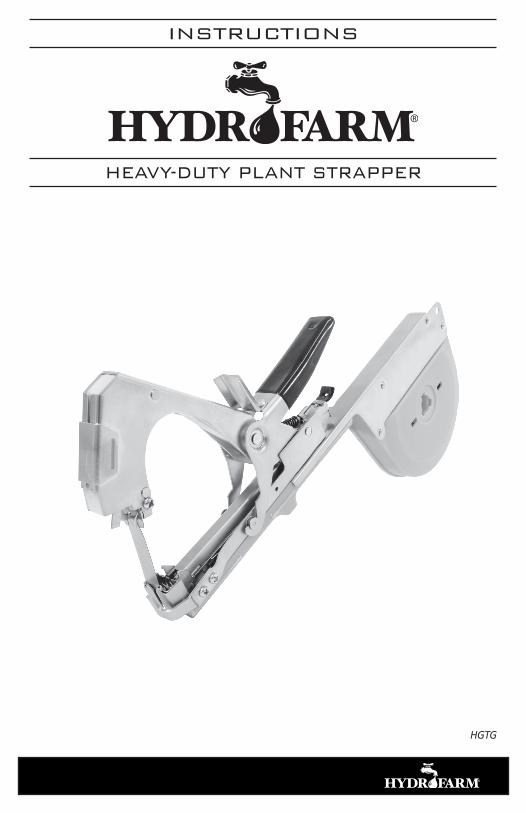
INSTRUCTIONS
HEAVY-DUTY PLANT STRAPPER
www.Hydrofarm.com2
INSTRUCTIONS
OVERVIEW
Thank you for your purchase of the Heavy-Duty Plant Strapper. The Plant Strapper is a hand tool used to secure branches or vines to stakes, trellises, or other support structures (“staking”). Once you have become familiarized with how it works, it can greatly increase the speed and efficiency of your staking efforts. The Plant Strapper can be used to support a wide variety of plants, including grapes, tomatoes, cucumbers, peppers, and many others.
The Heavy-Duty Plant Strapper uses common vinyl (PVC/PE) plant tape. It attaches branches and vines to supporting structures by creating a loop of tape around both, then stapling the tape into a closed loop and cutting the loop free. You can operate the Plant Strapper with one hand.
The tape roll box accepts standard plant tape widths of ½" and ¼". All critical moving parts are made of rugged steel construction.
OPERATION
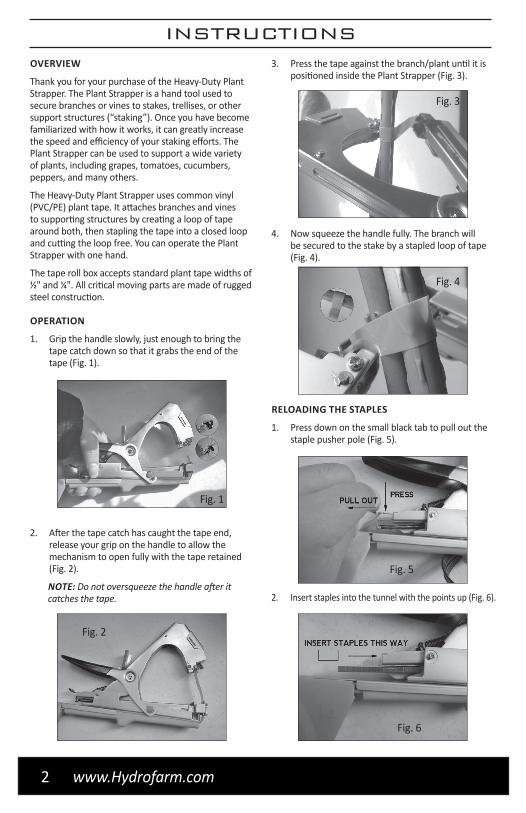
1. Grip the handle slowly, just enough to bring the tape catch down so that it grabs the end of the tape (Fig. 1).
2. After the tape catch has caught the tape end, release your grip on the handle to allow the mechanism to open fully with the tape retained (Fig. 2).
NOTE: Do not oversqueeze the handle after it catches the tape.
3. Press the tape against the branch/plant until it is positioned inside the Plant Strapper (Fig. 3).
4. Now squeeze the handle fully. The branch will be secured to the stake by a stapled loop of tape (Fig. 4).
RELOADING THE STAPLES
1. Press down on the small black tab to pull out the staple pusher pole (Fig. 5).
2. Insert staples into the tunnel with the points up (Fig. 6).
Fig. 1
Fig. 2
Fig. 6
Fig. 5
Fig. 4
Fig. 3

3
3. Push the staple pusher pole back into the tunnel (Fig. 7). The staples are now loaded.
RELOADING THE TAPE
NOTE: The Heavy-Duty Plant Strapper is sold preloaded with staples and a roll of tape.
1. Open the tape roll cover by lifting up on its tab while pressing down on the center button. Place a new roll of tape into the tape roll box (Fig. 8).
2. Open the tape tunnel and thread the tape end through the tunnel and tape guide mechanism as shown in Fig. 9. Tape should be directed inward after emerging from the tape gun. Close the tape roll cover and tunnel.
INSTRUCTIONS
MAINTENANCE
Changing the blade
• Press the staples box downward 10 to expose the blade (Fig. 10).
• Pull out the old blade with needle-nose pliers (Fig.11).
• Insert a new blade into the same place with the needle-nose pliers.NOTE: You will find a spare replacement blade stored inside the tape box lid, as well as a replacement spring in the corner of the tape roll box. Each blade will stay sharp for at least two years.
REMOVING STUCK STAPLES
• Remove any stuck staples with a precision (watch/eyeglasses repair) screwdriver (Fig. 12).
Fig. 7
Fig. 8
Fig. 9
Fig. 10
Fig. 11
Fig. 12

www.Hydrofarm.com4
MODE D’EMPLOIAPERÇU
Nous vous remercions d’avoir acheté l’attacheuse à usage intensif. L’attacheuse est un outil manuel utilisé pour fixer les branches ou plantes grimpantes aux tuteurs, treillages ou à tout autre structure de support (“tuteurage”). Après vous être familiarisé avec, elle vous permettra d’accroître la rapidité et l’efficacité de vos opérations de tuteurage. L’attacheuse peut être utilisée pour supporter un grand nombre de plantes, notamment les raisins, les tomates, les concombres, les poivrons et bien d’autres.
L’attacheuse à usage intensif fonctionne avec un ruban à plante ordinaire en vinyle (PVC/PE). Elle permet de relier les branches et plantes grimpantes aux structures de support à l’aide d’une boucle de ruban, de la refermer, de l’agrafer, puis de la couper. Vous pouvez utiliser l’attacheuse d’une seule main.
Le compartiment à bobine permet d’utiliser un ruban à plante standard de ½” (1,27 cm) et ¼” (0,635 cm) de large. Toutes les pièces mobiles critiques sont conçues en acier robuste.
UTILISATION
1. Serrez la poignée lentement en appliquant une pression suffisante afin de rapprocher la capture de ruban et d’accrocher l’extrémité de celui-ci (fig. 1).
2. Après avoir accroché la capture à l’extrémité du ruban, relâchez la pression de la poignée afin d’ouvrir entièrement le mécanisme muni du ruban (fig. 2).REMARQUE : ne comprimez pas trop la poignée après avoir accroché le ruban.
3. Appuyez le ruban contre la branche/plante afin de la positionner à l’intérieur de l’attacheuse (fig. 3).
4. Comprimez la poignée à fond. La branche est fixée au tuteur avec une boucle de ruban agrafée (fig. 4).
RECHARGE DES AGRAFES
1. Appuyez sur la petite languette noire pour extraire l’axe poussoir des agrafes (fig. 5).
2. Insérez les agrafes dans le canal, pointes vers le haut (fig. 6).
Fig. 1
Fig. 2
Fig. 6
Fig. 5
Fig. 4
Fig. 3

5
MODE D’EMPLOI3. Renfoncez l’axe poussoir dans le canal (fig. 7). Les
agrafes sont alors chargées.
RECHARGE DU RUBAN
REMARQUE: l’attacheuse à usage intensif est vendue avec des agrafes et une bobine de ruban.
1. Ouvrez le couvercle de la bobine de ruban en soulevant la languette et en appuyant sur le bouton central. Placez une nouvelle bobine de ruban dans le compartiment à bobine (fig. 8).
2. Ouvrez le canal de ruban, puis insérez le ruban dans le canal et le mécanisme de guidage conformément à la fig. 9. Refermez le couvercle de la bobine et le canal.
MAINTENANCE
Remplacement de la lame
• Poussez le compartiment à agrafes vers le bas afin de découvrir la lame (fig. 10).
• Retirez la lame usagée à l’aide d’une pince à bec fin (fig. 11).
• Insérez une lame neuve à la même position avec la pince à bec fin.
REMARQUE: vous trouverez une lame de rechange à l’intérieur du couvercle du compartiment à ruban, ainsi qu’un ressort de rechange dans le coin du compartiment à bobine. Chaque lame restera acérée pendant au moins deux ans.
EXTRACTION DES AGRAFES BLOQUÉES
• Retirez l’agrafe bloquée à l’aide d’un tournevis de précision (pour réparer les montres/lunettes) (fig. 12).
Fig. 7
Fig. 8
Fig. 9
Fig. 10
Fig. 11
Fig. 12

www.Hydrofarm.com6
INSTRUCCIONESINFORMACIÓN GENERAL
Gracias por elegir esta máquina atadora para plantas. Es una herramienta utilizada para sujetar arbustos o plantas trepadoras a tutores, enrejados y otras estructuras de soporte. En cuanto el usuario se familiarice con el modo de funcionamiento de la máquina, se aumentará considerablemente la velocidad y eficiencia de la sujeción. La máquina atadora puede utilizarse para una gran variedad de plantas, lo que incluye vides, tomateras, plantas de pepinos y pimientos y muchas más.
La máquina atadora resistente utiliza cinta adhesiva común (PVC/PE) para plantas. Sujeta los arbustos y vides a estructuras de soporte al colocar cinta adhesiva alrededor de ambos y, después, graparla y cortar la cinta sobrante. Es posible manejar la máquina atadora con una sola mano.
El compartimento para la cinta adhesiva es compatible con cinta de 1,27 y 0,6 cm de ancho. Todas las piezas móviles esenciales están fabricadas en acero resistente.
FUNCIONAMIENTO
1. Sujete el mango con suavidad, únicamente para que el dispositivo coja el extremo de la cinta (Fig. 1).
2. Después de sujetar el extremo de la cinta, suelte ligeramente el mango para permitir que el mecanismo se abra por completo con la cinta sujeta (Fig. 2).
NOTA: No apriete excesivamente el mango después de sujetar la cinta adhesiva.
3. 3. Presione la cinta contra la planta hasta que ésta se coloque dentro de la máquina atadora (Fig. 3).
4. Ahora apriete el mango con fuerza. La planta estará sujeta al tutor mediante una vuelta de cinta adhesiva (Fig. 4).
RECARGA DE GRAPAS
1. Presione la pequeña pestaña negra para extraer el compartimento para grapas (Fig. 5).
2. Introduzca las grapas en el orificio con las puntas hacia arriba (Fig. 6).
3. Empuje el compartimento para pilas hasta que se introduzca por completo en el orificio (Fig. 7). Las grapas ya están cargadas.
Fig. 1
Fig. 2
Fig. 6
Fig. 5
Fig. 4
Fig. 3

7
INSTRUCCIONESRECARGA DE CINTA ADHESIVA
NOTA: La máquina atadora resistente se comercializa con grapas y un rollo de cinta adhesiva incluidos.
1. Levante la pestaña de la cubierta del compartimento para cinta adhesiva a la vez que pulsa el botón central para abrirla. Coloque un nuevo rollo de cinta adhesiva en el compartimento (Fig. 8).
2. Abra el orificio con forma de túnel e introduzca el extremo de la cinta adhesiva por el mismo y por el mecanismo de guía para la cinta como se muestra en la Fig. 9. Cierre la cubierta del compartimento para la cinta y el túnel.
MANTENIMIENTO
Cambio de cuchilla
• Presione el compartimento para grapas hacia abajo para dejar expuesta la cuchilla (Fig. 10).
• Retire la cuchilla con unas pinzas de punta (Fig.11).
• Introduzca una nueva cuchilla en el mismo lugar con la ayuda de unas pinzas de punta.
NOTA: YEncontrará una cuchilla de repuesto en el interior de la tapa del compartimento para cinta adhesiva; y un muelle de repuesto en una de las esquinas del compartimento para cinta adhesiva. Cada cuchilla permanece afilada durante, al menos, dos años.
REMOVING STUCK STAPLES
• Retire las grapas con un destornillador pequeño o utensilio similar (Fig. 12).
Fig. 7
Fig. 8
Fig. 9
Fig. 10
Fig. 11
Fig. 12
8 www.Hydrofarm.comwww.Hydrofarm.com
WARRANTY
LIMITED WARRANTYHydrofarm warrants the HGTG to be free from defects in materials and workmanship. The warranty term is for one year beginning on the date of purchase. Misuse, abuse, or failure to follow instructions is not covered under this warranty. Hydrofarm will, at our discretion, repair or replace the HGTG covered under this warranty if it is returned to the original place of purchase. To request warranty service, please return the HGTG, with original sales receipt and original packaging, to your place of purchase. The purchase date is based on your original sales receipt.
GARANTÍA LIMITADAHydrofarm garantiza que HGTG no presenta defectos en los materiales ni la fabricación. La vigencia de la garantía es un año que comienza en la fecha de compra. Esta garantía no cubre el uso erróneo, el abuso o el incumplimiento de las instrucciones. Hydrofarm, según si criterio, reparará o sustituirá HGTG incluido en esta garantía si se devuelve al centro original de compra. Para solicitar el servicio de garantía, devuelva HGTG, con el tique de compra y el embalaje originales, a su centro de compra. La fecha de compra se basa en su tique de compra original.
GARANTIE LIMITÉE Hydrofarm garantit que HGTG ne présente pas de défauts de matériel ni de fabrication. La garantie est en vigueur un an à partir de la date d’achat. Cette garantie ne couvre pas l’utilisation incorrecte, l’abus ou le non respect de la notice. Hydrofarm, selon ses critères, réparera ou remplacera HGTG couvert par cette garantie s’il est renvoyé au centre original d’achat. Pour demander le service de garantie, renvoyer HGTG, avec le ticket d’achat et l’emballage originaux, au centre d’achat. La date d’achat est indiquée sur le ticket d’achat original.
HGTG Heavy Duty Plant Strapper Instructions - rev. June 16, 2016 11:07 AM