installing patch set update using em12c - wordpress.com
TRANSCRIPT

Installing Patch Set Update using EM12c Author: Rob Zoeteweij Date: 22-‐2-‐2012 http://oemgc.wordpress.com The integration between EM12c and My Oracle Support provides us with a constant inside on available and relevant patches. Based on this integration we can access all patch information in MOS instantly from Enterprise Manager and create a Patch Plan, Analyse included Patches and start the actual deployment to multiple Targets. In this paper we will see that the installation of a Patch Set Update using EM12c is as easy as 1,2,3
Figure 1 Patch Recommendations in Console Home page
Assuming you have configured the integration between EM12c and My Oracle Support, the Enterprise Summary Page will keep track of any Patch Recommendations if any. As you can see in this example there are several recommendations available. Let’s take a closer look by selecting the All Recommendations link
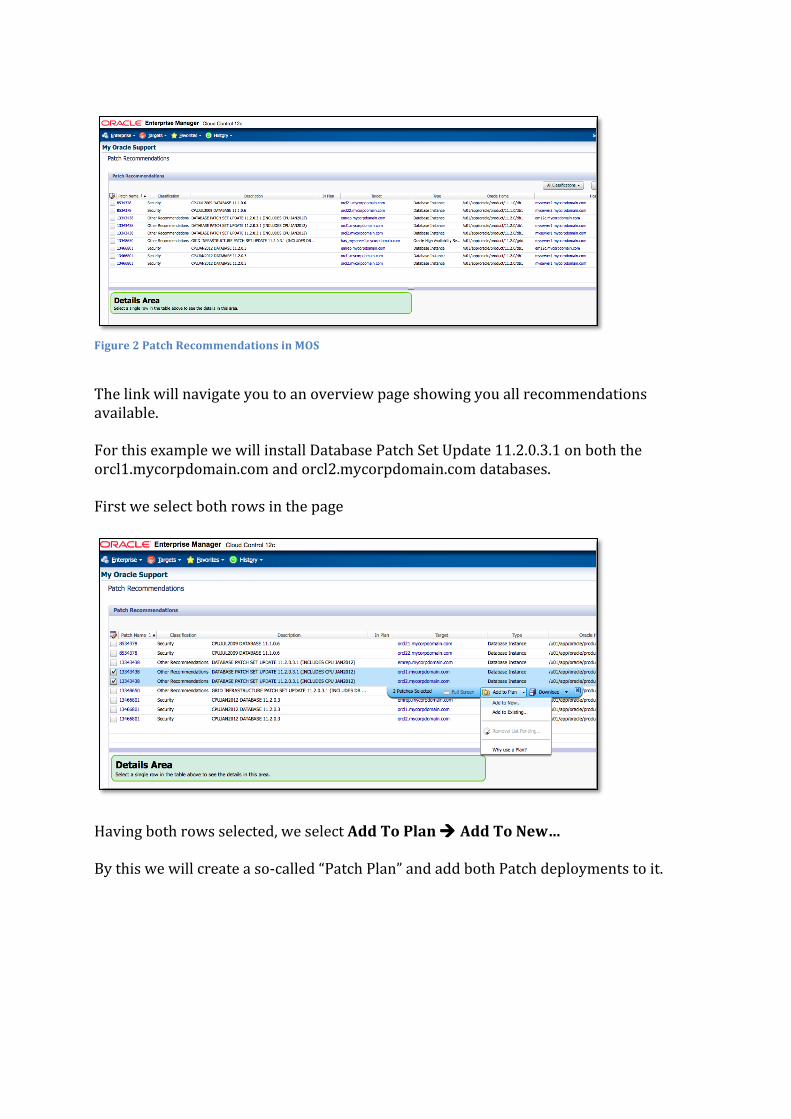
Figure 2 Patch Recommendations in MOS
The link will navigate you to an overview page showing you all recommendations available. For this example we will install Database Patch Set Update 11.2.0.3.1 on both the orcl1.mycorpdomain.com and orcl2.mycorpdomain.com databases. First we select both rows in the page
Having both rows selected, we select Add To Plan à Add To New… By this we will create a so-‐called “Patch Plan” and add both Patch deployments to it.

We will name the Plan “MyPatchPlan1” and press [Create Plan]
The right upper part of the page shows the message “Plan MyPatchPlan1 has been created” and includes the link View Plan
Figure 3 Patch Plan overview in My Oracle Support
This link will take you to the overview page of the Patch Plan you have created. If we want can add additional Patches to the plan by pressing [Add Patch…], but for this example we will limit the plan to the currently selected Patches. Press [Next]

We will leave the Stage Location as is We have selected “Oracle Home Preferred Credentials” to make sure the correct values will be used and selected:
• NC-‐HOST-‐ORACLE • NC-‐HOST-‐ROOT
Press [Next]
The system indicates that we need to perform a Validation of this plan so we press [Analyze]

The message bar shows “Analysis In Progress” and the link Show Detailed Progress Selecting this link would take you to a detailed overview of the progress of the Analysis of the Patch Plan
Then after analysis has been completed successful, the page will show the message “Ready for Deployment”. Press [Next]

Next a review page is shown We will now press [Deploy] to activate the actual deployment of the patches
The “Deployment in Progress” message bar includes the Show Detailed Progress link allowing you to view the exact steps being run by the OMS.
Figure 4 Detailed overview of the Patch deployment
Figure 5 Both Databases orcl1 and orcl2 put in Blackout during the deployment of the Patch

When taking a look at the Database Overview Page we will notice that both Databases orcl1 and orcl2 are put in Blackout by the Deployment Procedure.
After some time the Deployment Pages show the message that the deployment was successful.
Notice that the bottom of the page shows the Save as Template link Selecting this link allows you to create a Patch Template that can be reused later for applying the same patch to other Targets
Press [Create Template]
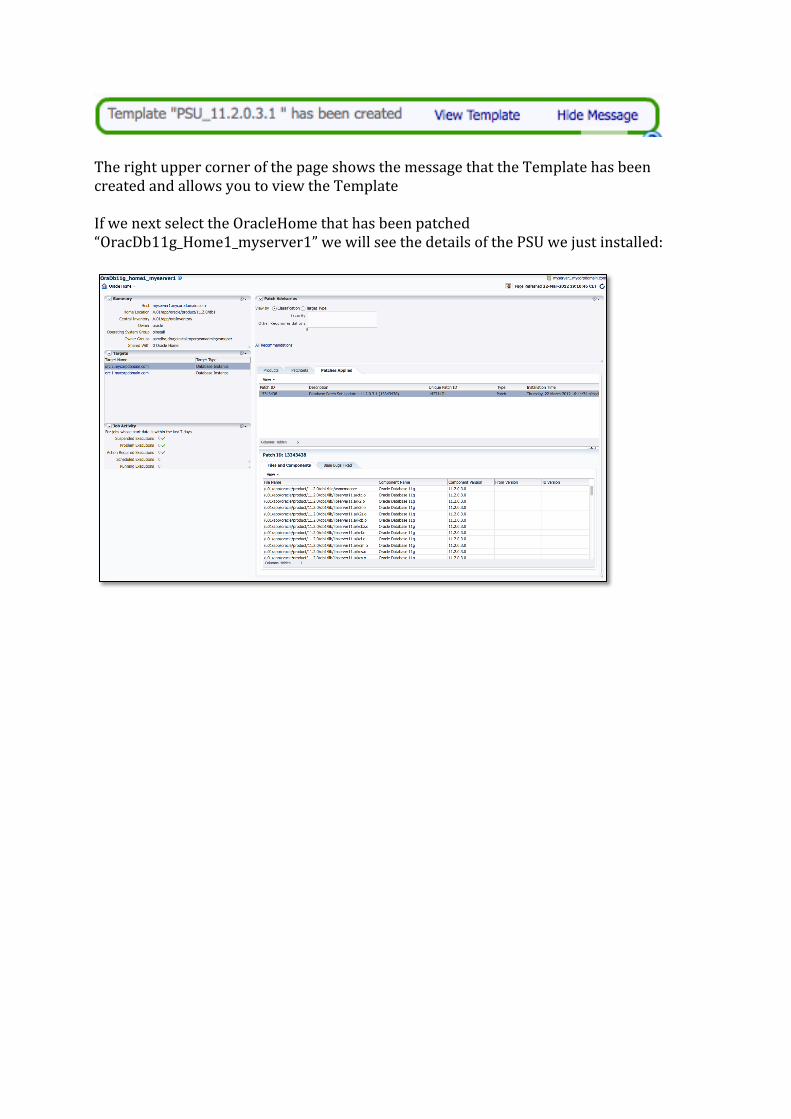
The right upper corner of the page shows the message that the Template has been created and allows you to view the Template If we next select the OracleHome that has been patched “OracDb11g_Home1_myserver1” we will see the details of the PSU we just installed: