installation guide porsc he 987.1 boxster / cayman long ... · pictured left: locate the oxygen...
TRANSCRIPT

Disclaimer: This installation guide is intended to clarify the install of your new Soul Performance headers. Please read this guide in full before beginning installation. Do take proper precautions
and safety measures when working on your vehicle and perform this work at your own risk
Pictured Left: Start by raising your car and removing the rear wheels. Then remove the tire shield from the fender wells (two 10mm bolts and one T-25 Torx bolts) on both sides (it is not absolutely necessary to remove the wheels and tire covers, it will however make the install much easier.)
o (1) Driver Side Headero (1) Passenger Side Headero (2) 3-Bolt Flange Gasketso (2) 6-Bolt Manifold Gasketso (6) M10 Boltso (6) M10 Wiz Nutso (6) Flat Washers
Smoke Tested ___________________________
Packing Sign Off ___________________________
Shipped on ___/___/______
I nsta l lat ion G u i de P o r s c h e 9 8 7 . 1 B o x s t e r / C a y m a n L o n g T u b e S t r e e t H e a d e r s
2
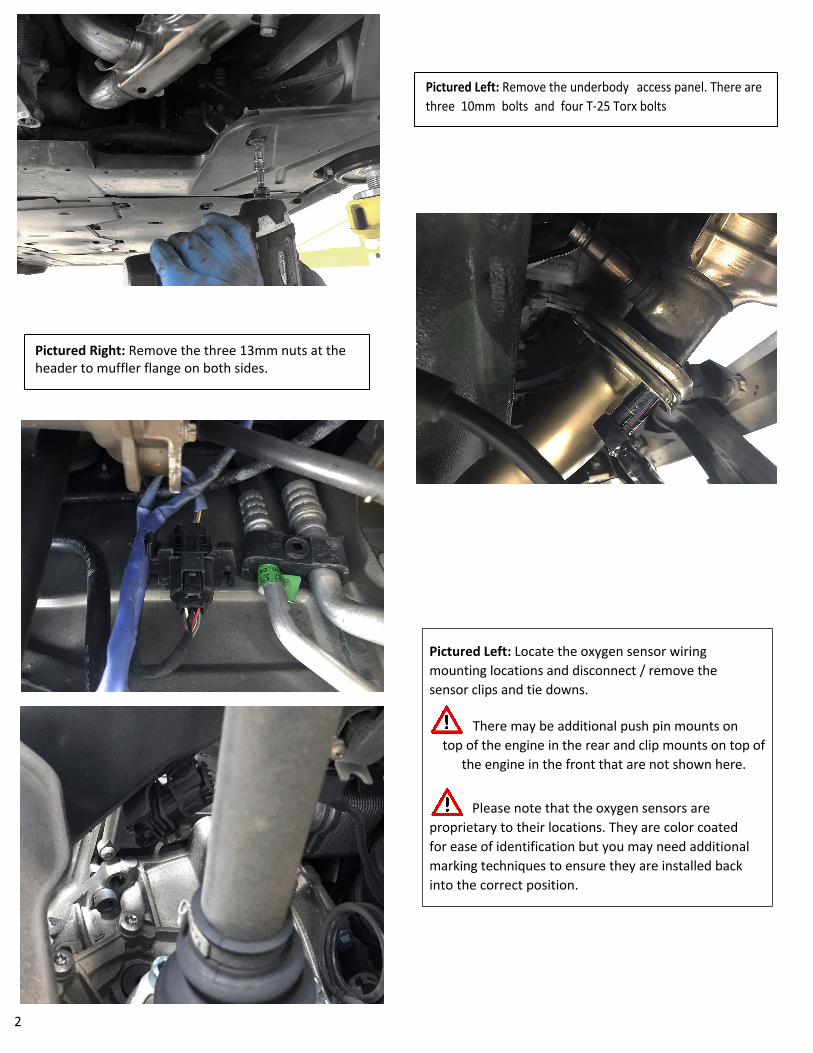
Pictured Left: Remove the underbody access panel. There are three 10mm bolts and four T-25 Torx bolts
Pictured Right: Remove the three 13mm nuts at the header to muffler flange on both sides.
Pictured Left: Locate the oxygen sensor wiring mounting locations and disconnect / remove the sensor clips and tie downs.
There may be additional push pin mounts on top of the engine in the rear and clip mounts on top of
the engine in the front that are not shown here.
Please note that the oxygen sensors are proprietary to their locations. They are color coated for ease of identification but you may need additional marking techniques to ensure they are installed back into the correct position.

3
Pictured Left: Remove the 13mm bolts from the header flanges. There are six per side, keep them in a safe location as you will be re-using these.
Pictured Right: After removing the factory headers, with them on the ground use a 22mm wrench to remove the oxygen sensors. This may take some time / patience / heat.
Pictured Left: Coat the oxygen sensors with an anti-seize of your choice
Pictured Right: Install the oxygen sensors into their respective positions and torque to specification (Competition Headers pictured)
4
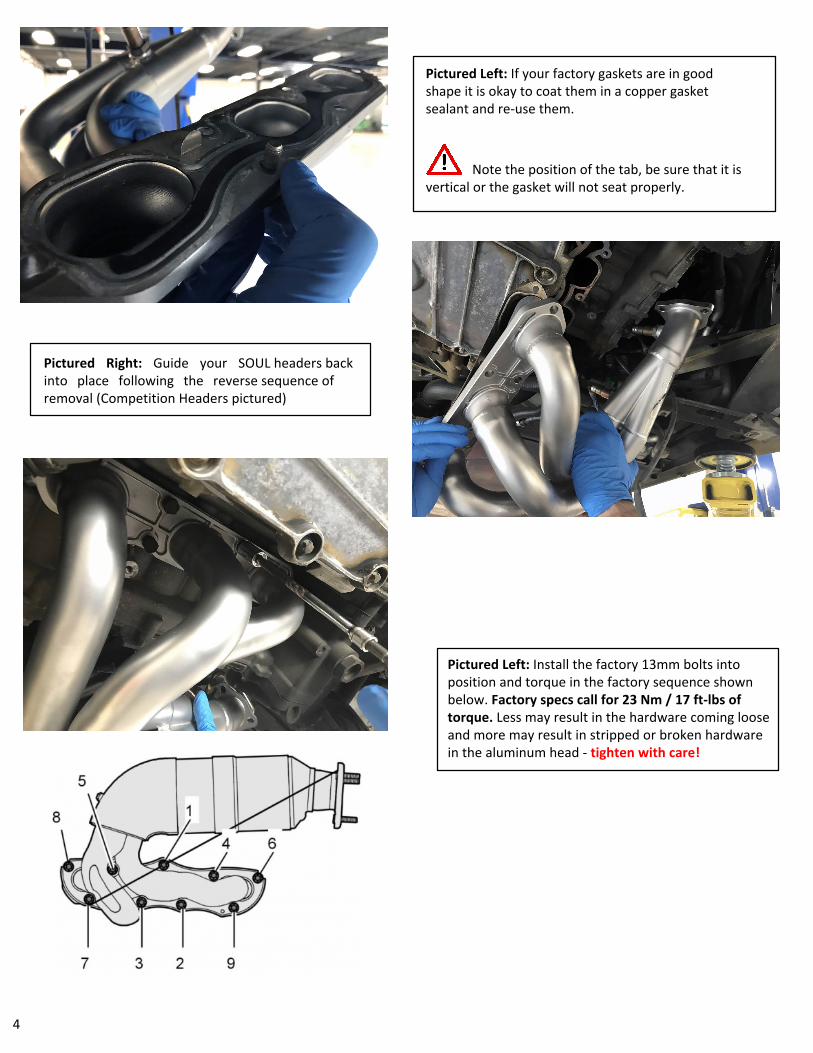
Pictured Left: If your factory gaskets are in good shape it is okay to coat them in a copper gasket sealant and re-use them.
Note the position of the tab, be sure that it is vertical or the gasket will not seat properly.
Pictured Right: Guide your SOUL headers back into place following the reverse sequence of removal (Competition Headers pictured)
Pictured Left: Install the factory 13mm bolts into position and torque in the factory sequence shown below. Factory specs call for 23 Nm / 17 ft-lbs of torque. Less may result in the hardware coming loose and more may result in stripped or broken hardware in the aluminum head - tighten with care!
5
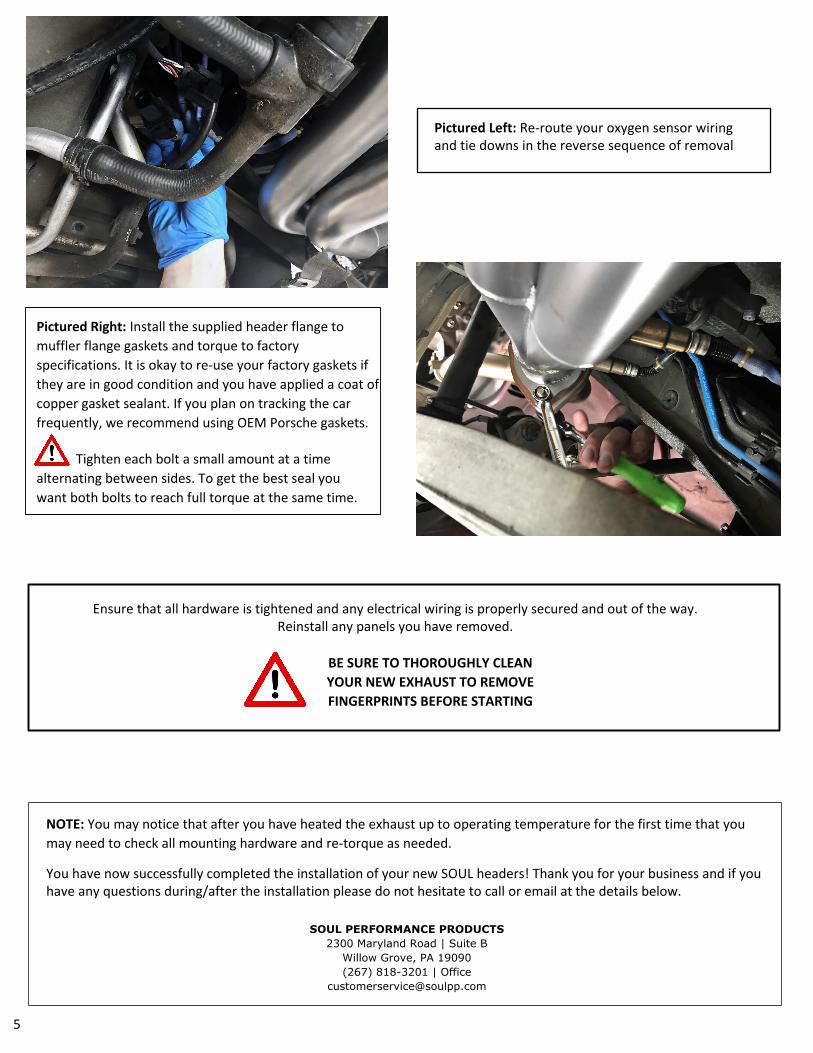
Pictured Left: Re-route your oxygen sensor wiring and tie downs in the reverse sequence of removal
Pictured Right: Install the supplied header flange to muffler flange gaskets and torque to factory specifications. It is okay to re-use your factory gaskets if they are in good condition and you have applied a coat of copper gasket sealant. If you plan on tracking the car frequently, we recommend using OEM Porsche gaskets.
Tighten each bolt a small amount at a time alternating between sides. To get the best seal you want both bolts to reach full torque at the same time.
Ensure that all hardware is tightened and any electrical wiring is properly secured and out of the way. Reinstall any panels you have removed.
BE SURE TO THOROUGHLY CLEAN YOUR NEW EXHAUST TO REMOVE FINGERPRINTS BEFORE STARTING
NOTE: You may notice that after you have heated the exhaust up to operating temperature for the first time that you may need to check all mounting hardware and re-torque as needed.
You have now successfully completed the installation of your new SOUL headers! Thank you for your business and if you have any questions during/after the installation please do not hesitate to call or email at the details below.
SOUL PERFORMANCE PRODUCTS2300 Maryland Road | Suite B
Willow Grove, PA 19090 (267) 818-3201 | Office