initial poster planning
TRANSCRIPT
Initial Poster Planning Calum Dewane Bayford

Hue and saturation Hue and saturation means colour. Hue is a technical term for colour and saturation is the depth of the colour a high saturation being a bright clear colour and a low saturation being a dim washed out colour. In my own horror poster I could change the eye colour of my antagonist using the hue and saturation. I could make the antagonists eye colour dark or use a colour associated with horror such as red or black. I could also use hue and saturation to change the skin tone of my antagonist to give them a dead ghostly look. Also using dodge and burn tools can help me lighten and darken the saturation of colours on the poster.
Filters and tints
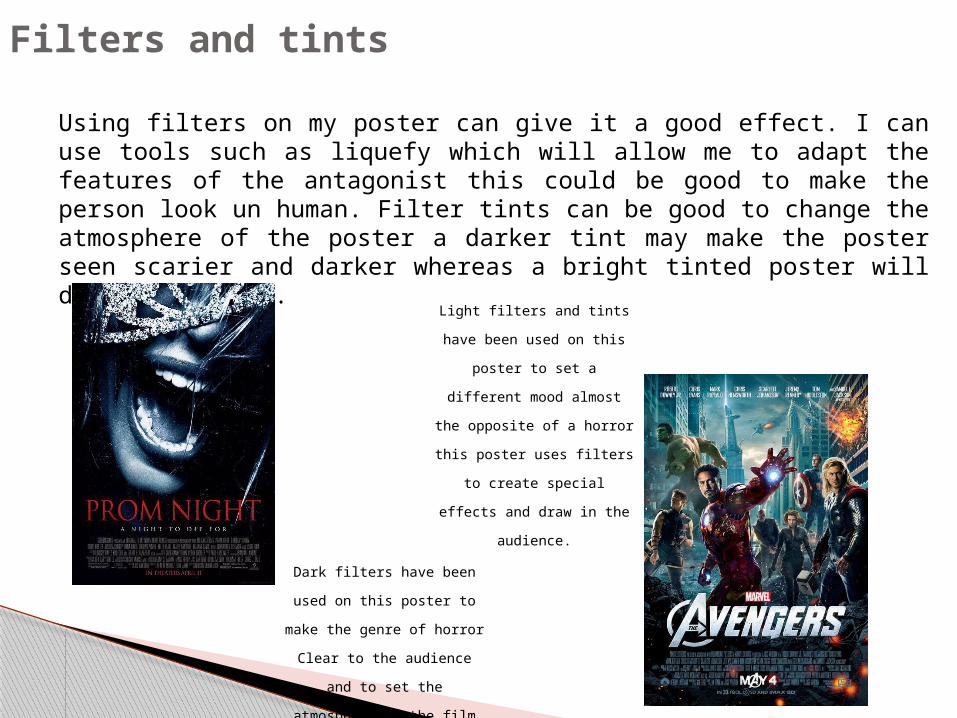
Using filters on my poster can give it a good effect. I can use tools such as liquefy which will allow me to adapt the features of the antagonist this could be good to make the person look un human. Filter tints can be good to change the atmosphere of the poster a darker tint may make the poster seen scarier and darker whereas a bright tinted poster will do the opposite.
Dark filters have been used
on this poster to make the
genre of horror
Clear to the audience and to
set the atmosphere of the
film
Light filters and tints have
been used on this poster to
set a different mood almost
the opposite of a horror this
poster uses filters to create
special effects and draw in
the audience.

Editing tools Tools such as the clone stamp and the spot healing tool can be used on the ‘Hero’ of the film the tool can make them look healthy and give them a ‘glow’ which can be in contrast with the antagonist which can have scares and facial defects to make them appear scarier and distance them from humanity. In horrors antagonists normally have a mask or will have a facial disfiguration, this is commonly used as it makes the antagonist distanced from the audience. Scars cuts and burns can be applied using masks and layer filters. The dodge and burn tool can also be used to create facial effects on the skin and eyes. Images can be blended on using the masking tool with a light brush with low opacity.
Layers Layers can be used to create depth within the poster and stop it looking flat. Layers can be used to organise images in order so that they can be placed on top and beneath each other. Working in layers is important in Photoshop as it allows the images and text to be moved in front and behind each other and can create 3D layered effects.

Depth of field Depth of field can be used to centre the audiences focus on to a certain part of the poster. Shallow and deep focus can be used to blue parts of the images out in Photoshop this applies to the order of layers from front to back. On the trailer deep focus and shallow focus can be created using lens length F stop and focus. Focus pulls can be created using a camera for a trailer.
Shallow focus Deep focus

Shot types There are different types of camera shots that can be used in the trailer, such as over the shoulder shot which can be used with a focus pull. Also Arc shots and tracking shots can be used to create suspense and can be useful for a horror trailer. Looking room is also important when filming my trailer as I will need to adjust the camera and the actors to make sure their in the right place and are in shot. I can use the rule of thirds to help with this.