ibm spectrum scale audit logging with varonis …€¦ · creating the special varonis user within...
TRANSCRIPT
IBM Spectrum Scale Audit Logging With Varonis DatAdvantage
by
John T Olson, PhD
Spectrum Scale Development
January 10, 2017

Version Information
Version Number Description of Change Date
1.0 Initial publication October 23, 2016
1.1 Update term used for unified fileand object
October 25, 2016
1.2 Fixed typo in command toenable file access in object
November 1, 2016
1.3 Made clearer the types of POSIXoperations that are described in
the tables
November 7, 2016
1.4 Updated results when usingSMB package contained inSpectrum Scale 4.2.2.1 and
altered method to testNFS/ganesha file update to not
use the vi editor
January 10, 2017
2

Table of ContentsIntroduction................................................................................................................................................4Overview of Varonis Capabilities Within Spectrum Scale........................................................................4Environment Setup.....................................................................................................................................4
Long Running Example Setup..............................................................................................................5Prerequisites..........................................................................................................................................7
Updating the Windows Server Registry...........................................................................................7Creating the Special Varonis User Within Active Directory............................................................7Installation and Configuration of SQL on the Windows Server.......................................................8Creating and Sharing SSH Keys.......................................................................................................8
Spectrum Scale Node Configuration and Agent Installation.....................................................................8Local User and Group Configuration....................................................................................................9Creation of the Administrative Exports...............................................................................................10
Installation of Varonis Agent....................................................................................................................10Installation of DatAdvantage and Management Console.........................................................................12
Creating the Active Directory Domain................................................................................................13Creating the AD Walk Domain............................................................................................................13Additional Configuration....................................................................................................................14Adding the Monitored File Server.......................................................................................................14Completing the Varonis Setup Wizard................................................................................................15Completing Installation of Varonis Agents..........................................................................................15Installation of Management Console...................................................................................................16
Tuning Varonis DatAdvantage for Spectrum Scale.................................................................................17Interpretation of Common Operations.....................................................................................................17
NFS/Ganesha Exports.........................................................................................................................18SMB Exports.......................................................................................................................................19Object Exports.....................................................................................................................................20
Appendix A – Definitions of Common Terms.........................................................................................21
3
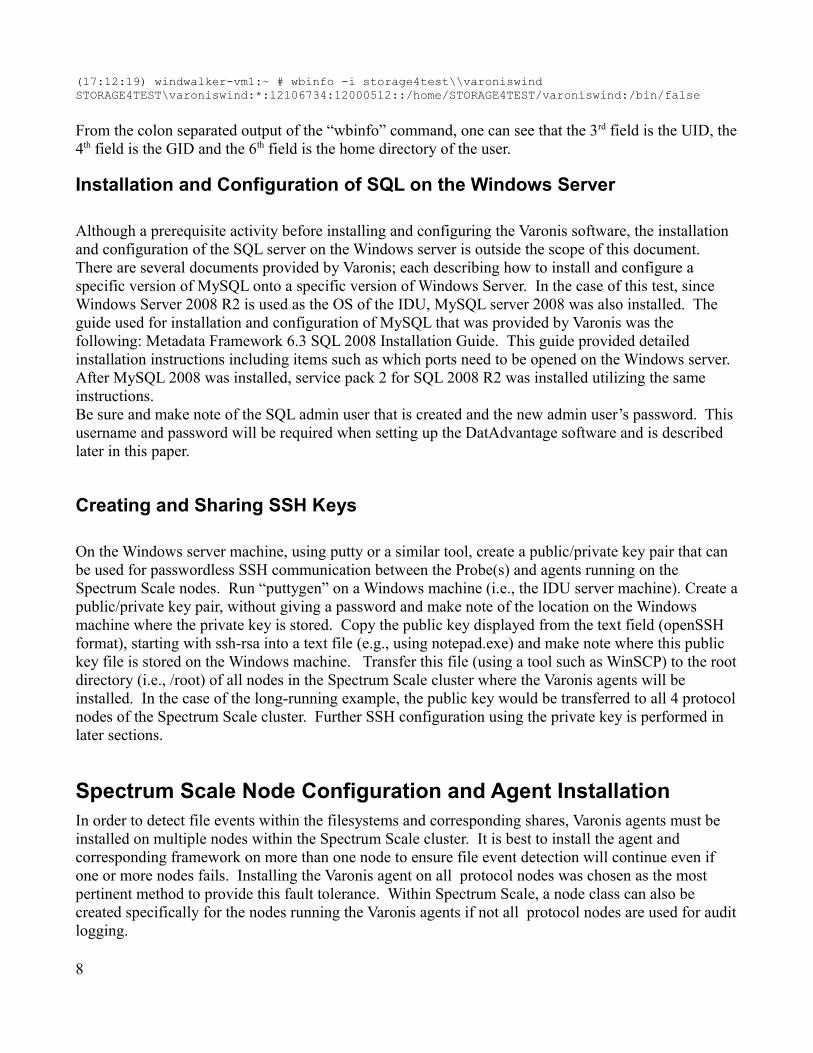
IntroductionIBM Spectrum Scale™ is a scalable, parallel file system that can be used for many purposes. With the advent of industry and government regulations, there are now requirements to log certain filesystem activities such as file creation, deletion, renaming, etc. This paper shows the integration of Varonis DatAdvantage for the purpose of logging file activity within Spectrum Scale protocol shares.
The goal of this paper is to instruct a user how to install the appropriate Varonis agents on Spectrum Scale protocol nodes and integrate them with an external DatAdvantage infrastructure. Throughout thispaper, terms specific to audit logging using Varonis software will be exercised. At the end of the paper is an appendix describing each of these terms and in some cases how they are specifically used with Spectrum Scale.
Overview of Varonis Capabilities Within Spectrum ScaleAlthough Varonis software can perform a myriad of activities, there are some limitations with how the default agents can currently be used within Spectrum Scale. The Varonis software actually shines with SMB shares. Later in the paper, it is shown that through the use of administrative SMB shares, the Varonis software is able to detect filesystem activity in ganesha (NFS) and object shares.
The results which are shown at the end of this paper convey that major file operations can be detected in ganesha, unified file and object and SMB shares. Major file operations constitute file creation, deletion and directory creation and deletion. Standard object shares (where unified file and object is not used) are nearly impossible to determine what operations occurred due to the way objects are storedand replicated within OpenStack Swift. This is the only type of Spectrum Scale share that would be deemed non-traceable through the Varonis agents. All other types of shares provide at least limited file activity tracing.
In addition to major file operations, POSIX permission operations (e.g., through the command line chmod UNIX command) and ACL operations were attempted on ganesha and SMB shares. POSIX permission operations were not detected on ganesha shares and POSIX permission operations were not attempted on SMB shares. ACL operations were not attempted on ganesha shares, but were attempted and detected on SMB shares.
Environment SetupThe installation and setup examples utilized throughout this paper assume a Spectrum Scale version 4.2.2.1 cluster running on RHEL 7.1 OS. In this paper the Varonis agent software is installed on protocol nodes that interface with one or more Probes, running on nodes external to the Spectrum Scalecluster.
The version of Varonis software utilized throughout this document is 6.3.50.37 Beta. Root access is required for installation of the agent on the protocol nodes of the Spectrum Scale cluster. Administratoraccess is required for installation of the DatAdvantage software and console on the external Windows
4

server.
In order to detect and log file system activity, special administrative exports are required for each file system. This also necessitates the use of Active Directory as the file authentication method for the Spectrum Scale cluster.
In summary, there are a set of steps that must be performed in order to utilize Varonis DatAdvantage based audit logging utilizing the default, Varonis agents. Each of the following steps is described in detail in later sections of this paper:
1. Installation Prerequisites1. Updating the Windows Server Registry2. Creating the Special Varonis User Within Active Directory3. Installation and Configuration of SQL on the Windows Server4. Creating and Sharing SSH Keys
2. Spectrum Scale Node Configuration and Agent Installation1. Local User and Group Configuration2. Creation of the Administrative Exports3. Installation of Varonis Agent
3. Installation of DatAdvantage and Management Console1. Creating the Active Directory Domain2. Creating the AD Walk Domain3. Additional Configuration4. Adding the Monitored File Server5. Completing the Varonis Set up Wizard6. Completing Installation of Varonis Agents7. Installation of Management Console
4. Tuning Varonis DatAdvantage for Spectrum Scale
Long Running Example Setup
Throughout this section and the sections that follow, a long-running example will be used to show the installation and configuration in a real world system. The Spectrum Scale cluster used throughout this example is comprised of 6 nodes: 2 NSD nodes and 4 protocol nodes. The Varonis agent and associated configuration will be performed on all 4 protocol nodes.
Outside of the Spectrum Scale cluster is the Windows Server which runs the Varonis software. This Windows Server has SQL installed and configured on it as well as the Varonis software comprised of the DatAdvantage software and Management Console.
Although the Varonis software allows for multiple probes and collectors spread out among multiple Windows servers, the example for the purposes of this paper utilizes single Windows Server which actsas the IDU server and Probe. Illustration 1 details the example system used throughout the paper.
5

6Illustration 1: Configuration of Example System Used Throughout

Prerequisites
Before installing the Varonis DatAdvantage software on the external Windows server, a registry parameter must be set, and SQL must be installed and configured on the Windows server. In addition, aspecial user must be created in the authentication server for the type of authentication being utilized (in this case Active Directory is used). Finally, SSH keys must be created and shared properly for passwordless access between the Varonis Probe(s) and agents running on the Spectrum Scale nodes. Each of the prerequisite actions will be described in the sections that follow.
Updating the Windows Server Registry
Before installing SQL on the Windows server, the IRP stack size must be checked to ensure it is at a minimum required level. A simple way to do this is to run the following command from the Windows Power Shell and set it at the suggested value (shown below):
Reg add HKLM\System\CurrentControlSet\Services\lanmanserver\parameters /v IRPStackSize /t REG_DWORD /d 0x1e
After changing the registry value, the Windows server must be restarted.
Creating the Special Varonis User Within Active Directory
In order to be able to detect filesystem activity, administrative exports located at filesystem mount points are created. These exports must have an owner associated with them that is allowed to view all subdirectory content owned by any authenticated users. For this reason a special user is created within the authentication server that is a member of the appropriate administrative groups. For our purposes, we are utilizing Active Directory authentication and will therefore create the special user within the Active Directory server. The choice of name is arbitrary, and the name chosen for this example was: varoniswind. The important thing is that this user gets added to the following groups: Domain Users, Domain Admins and Administrators. In addition, extensions need to be enabled; specifically UNIX attributes. The NIS Domain needs to be the same as the Active Directory domain. When this is performed a UID, login shell and home directory are automatically created. The last thing is to ensure that the Primary group name/GID is set to Domain Admins.
Once the special Varonis user has been added to the Active Directory server as specified above, the UID, login shell, home directory, etc. can be verified to ensure they have been created. To perform verification, login as root to any of the protocol nodes within the Spectrum Scale cluster and run a command similar to the following:
wbinfo -i <Domain>\\<User_Name>
In the case of the long running example, the command and the corresponding output would be the following:
7
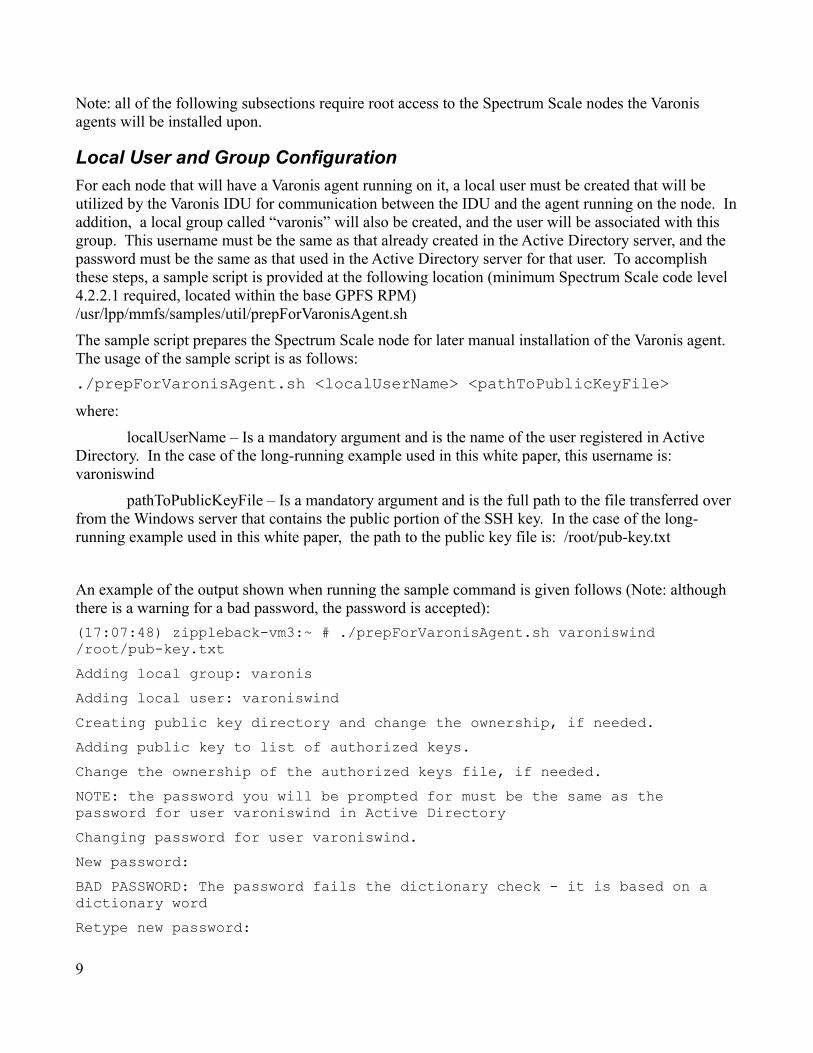
(17:12:19) windwalker-vm1:~ # wbinfo -i storage4test\\varoniswindSTORAGE4TEST\varoniswind:*:12106734:12000512::/home/STORAGE4TEST/varoniswind:/bin/false
From the colon separated output of the “wbinfo” command, one can see that the 3rd field is the UID, the4th field is the GID and the 6th field is the home directory of the user.
Installation and Configuration of SQL on the Windows Server
Although a prerequisite activity before installing and configuring the Varonis software, the installation and configuration of the SQL server on the Windows server is outside the scope of this document. There are several documents provided by Varonis; each describing how to install and configure a specific version of MySQL onto a specific version of Windows Server. In the case of this test, since Windows Server 2008 R2 is used as the OS of the IDU, MySQL server 2008 was also installed. The guide used for installation and configuration of MySQL that was provided by Varonis was the following: Metadata Framework 6.3 SQL 2008 Installation Guide. This guide provided detailed installation instructions including items such as which ports need to be opened on the Windows server. After MySQL 2008 was installed, service pack 2 for SQL 2008 R2 was installed utilizing the same instructions.Be sure and make note of the SQL admin user that is created and the new admin user’s password. This username and password will be required when setting up the DatAdvantage software and is described later in this paper.
Creating and Sharing SSH Keys
On the Windows server machine, using putty or a similar tool, create a public/private key pair that can be used for passwordless SSH communication between the Probe(s) and agents running on the Spectrum Scale nodes. Run “puttygen” on a Windows machine (i.e., the IDU server machine). Create apublic/private key pair, without giving a password and make note of the location on the Windows machine where the private key is stored. Copy the public key displayed from the text field (openSSH format), starting with ssh-rsa into a text file (e.g., using notepad.exe) and make note where this public key file is stored on the Windows machine. Transfer this file (using a tool such as WinSCP) to the rootdirectory (i.e., /root) of all nodes in the Spectrum Scale cluster where the Varonis agents will be installed. In the case of the long-running example, the public key would be transferred to all 4 protocolnodes of the Spectrum Scale cluster. Further SSH configuration using the private key is performed in later sections.
Spectrum Scale Node Configuration and Agent InstallationIn order to detect file events within the filesystems and corresponding shares, Varonis agents must be installed on multiple nodes within the Spectrum Scale cluster. It is best to install the agent and corresponding framework on more than one node to ensure file event detection will continue even if one or more nodes fails. Installing the Varonis agent on all protocol nodes was chosen as the most pertinent method to provide this fault tolerance. Within Spectrum Scale, a node class can also be created specifically for the nodes running the Varonis agents if not all protocol nodes are used for auditlogging.
8
Note: all of the following subsections require root access to the Spectrum Scale nodes the Varonis agents will be installed upon.
Local User and Group Configuration
For each node that will have a Varonis agent running on it, a local user must be created that will be utilized by the Varonis IDU for communication between the IDU and the agent running on the node. Inaddition, a local group called “varonis” will also be created, and the user will be associated with this group. This username must be the same as that already created in the Active Directory server, and the password must be the same as that used in the Active Directory server for that user. To accomplish these steps, a sample script is provided at the following location (minimum Spectrum Scale code level 4.2.2.1 required, located within the base GPFS RPM) /usr/lpp/mmfs/samples/util/prepForVaronisAgent.sh
The sample script prepares the Spectrum Scale node for later manual installation of the Varonis agent. The usage of the sample script is as follows:
./prepForVaronisAgent.sh <localUserName> <pathToPublicKeyFile>
where:
localUserName – Is a mandatory argument and is the name of the user registered in Active Directory. In the case of the long-running example used in this white paper, this username is: varoniswind
pathToPublicKeyFile – Is a mandatory argument and is the full path to the file transferred over from the Windows server that contains the public portion of the SSH key. In the case of the long-running example used in this white paper, the path to the public key file is: /root/pub-key.txt
An example of the output shown when running the sample command is given follows (Note: although there is a warning for a bad password, the password is accepted):
(17:07:48) zippleback-vm3:~ # ./prepForVaronisAgent.sh varoniswind /root/pub-key.txt
Adding local group: varonis
Adding local user: varoniswind
Creating public key directory and change the ownership, if needed.
Adding public key to list of authorized keys.
Change the ownership of the authorized keys file, if needed.
NOTE: the password you will be prompted for must be the same as the password for user varoniswind in Active Directory
Changing password for user varoniswind.
New password:
BAD PASSWORD: The password fails the dictionary check - it is based on a dictionary word
Retype new password:
9

passwd: all authentication tokens updated successfully.
Setting password of varoniswind to not expire.
Updating bash profile of local user: varoniswind
Changing the mode bit of the SMB verification command so it is run by everyone as owner.
Be sure and repeat the steps above for every Spectrum Scale node that will have a Varonis agent installed upon it.
Creation of the Administrative Exports
As previously mentioned, administrative exports are created for every file system that is to be monitored within the Spectrum Scale cluster. For each filesystem a share is created that has the option of the Active Directory user created previously being an admin user, and that this user is also allowed full permissions to the share. To accomplish this, assume that there are 2 filesystems to be monitored in the long-running example with the following filesystem mount points: /gpfs/fs0 and /gpfs/fs1
From any of the 4 protocol nodes within the Spectrum Scale cluster, run the following commands to create the exports associated with the 2 filesystems (there is no need to create an additional ACL to allow full control because that is the default):
(12:19:57) zippleback-vm1:~ # mmsmb export add auditAdminfs0Share /gpfs/fs0--option "admin users=storage4test\varoniswind"
mmsmb export add: The SMB export was created successfully.
(12:32:53) zippleback-vm1:~ # mmsmb export add auditAdminfs1Share /gpfs/fs1--option "admin users=storage4test\varoniswind"
mmsmb export add: The SMB export was created successfully.
You can view the created exports with the command: mmsmb export list
Installation of Varonis Agent
Special care must be taken when installing the Varonis agent because each build of the agent is associated with a specific type (Ubuntu, SLES, RHEL, etc.) of Linux and version. Before installing theagent, verify the kernel version and type of kernel by viewing the results of running: uname -r
To continue with the long running example, the result of running the aforementioned command is:
(13:55:52) zippleback-vm1:~ # uname -r
3.10.0-229.el7.x86_64
10

Based on the result above and knowing that all 4 protocol nodes have the same OS type and version, the Varonis agent to install on each node is: Varonis-Linux-RedHat-RHEL7-SMP-3.10.0-229-x86-64-6.3.181.pkg.tar
Manual Agent Installation (perform these steps on all nodes on which the agent is to be installed):
1. Copy the Varonis-Linux-...tar to the target machine.
2. Extract the archive
3. Run the install script (vrns_install.sh) as root.
4. Update the configured value of ‘uidCacheSize’ to 1024.
5. Reload the Varonis driver
The output from performing the above steps on one of the four nodes follows:
(14:49:49) zippleback-vm1:~ # tar xvf Varonis-Linux-RedHat-RHEL7-SMP-3.10.0-229-x86-64-6.3.181.pkg.tar
Varonis-6.3.181-1.x86_64.rpm
vrns_install.sh
vrns_uninstall.sh
INSTALL.txt
README.txt
vrns_diag.sh
vrns_rootstat.sh
vrns_addmember.sh
(14:51:37) zippleback-vm1:~ # ./vrns_install.sh
Driver loaded.
Varonis package is installed.
Return code: 0
(14:52:55) zippleback-vm1:~ # vi /opt/varonis/varonis_drv.conf
(14:55:27) zippleback-vm1:~ # cat /opt/varonis/varonis_drv.conf | grep uidCacheSize
uidCacheSize=1024
(14:56:03) zippleback-vm1:~ # /opt/varonis/vrns_drv_adm.sh reload
Driver configuration reloaded.
11

Installation of DatAdvantage and Management ConsoleBefore installing DatAdvantage and the management console, ensure that all prerequisites have been met. This includes sections outlined in this paper as well as the latest information in the installation guides provided by Varonis. It’s important that the guide used matches the OS type and version. Thereare different instructions when installing SQL server on Windows server 2008 versus Windows server 2012.
Because there are a myriad of different types of configurations possible, a simple configuration was chosen for the examples used throughout this paper. In this configuration a single Windows 2008 R2 server is the IDU and also acts as the only Probe. There are no Collectors in this example set up.
To begin the installation, complete the following steps:
1. Double-click on the setup binary file and then choose next to continue.
2. Scroll through and read the license agreement and then choose to agree to the agreement followed by a clicking next.
3. As this is a new installation, choose install and then click next.
4. For Product Selection, choose “DatAdvantage” and “Reports” and then click on next. Note thatwhen “DatAdvantage” is selected, several other options will automatically be selected. You want to ensure that only the options that are allowed based on the Varonis software license purchased are selected and this may mean unselecting automatically selected options.
5. If the Existing Products window is shown, select No to represent that no existing DatAdvantageor DataPrivilege software is already installed.
6. In the IDU Server Selector window, for authentication, keep the defaults which includes the type of authentication as SQL Authentication. The only entries that need to be made are the IDU database username and password and these were created back when the SQL database was installed. After entering these 2 fields, click next.
7. In the License Configuration window, Auto Registration is selected by default. Enter the customer email associated with the Varonis software purchase as well as the serial number that was provided. After these fields have been entered, click Register.
8. Verify the product values that are associated with the registered email address and serial numberand ensure they are the same products that were chosen previously in the product selection step.If errors are encountered because unlicensed products were selected previously, go back to the Product Selection window and ensure only licensed Varonis products are selected and repeat thesubsequent steps to this point.
9. After verifying the product values, click next.
10. In the Probe Server Selector, since a single Windows 2008 R2 server is used in the setup example used throughout this paper, the selection at the top that the Probe service and database configuration is the same as IDU is appropriate. Click next.
11. For the mail settings, enter an appropriate “from” email address and an address to send alerts. Inaddition, the SMTP server must be set up to allow forwarding of the emails from the IDU server. Do not select, “Use SMTP credentials.” Click next.
12. Installation will occur from the Deployment Progress windows. Select Install.
12

13. After the software installation has completed, click Next to proceed to the Domain Trusts input where the software will be configured.
NOTE: a total of 2 domains will be added with the first corresponding to standard Active Directory andthe 2nd to facilitate the administrative exports created earlier. Each domain configuration has been separated into its own subsection that follows.
Creating the Active Directory Domain
In order to fill out the Domain Properties for the Domain Type of Active Directory, perform the following steps:
1. In the Domain Trusts window, click the add button to add a new domain type
2. For the Domain Type, choose Active Directory
3. In the main Domain Properties window, on the left side choose General.
4. The domain name is the fully qualified domain name for the Active Directory service. In the case of the long-running example this would be: storage4test.tuc.stglabs.ibm.com
5. Any one of the Domain controllers can be used for the Domain Controller name. In the case of the long-running example this could be: STORAGE4TESTDC1
6. Do NOT check mark the force option unless your situation requires it.
7. Leave the AD provider and Group types with the defaults. If RFC 2307 is required for your setup, check it.
8. Under the Domain User Credentials, the username needs to be in the form: domain\user and the user would be the Active Directory user that was originally created and also used as a local user when setting up the Varonis agents on the Spectrum Scale nodes. In the case of the long-running example, this would be: storage4test\varoniswind
9. Enter the password for the user specified in the previous step and then click Install.
Creating the AD Walk Domain
Just as special administrative shares have been created to allow traversing the directory trees, a domain must also be created to facilitate this. The following steps must be taken when creating the AD Walk Domain:
1. In the Domain Trusts window, click the add button to add a new domain type
2. For the Domain Type, choose Samba
3. For the Server, choose one of the nodes that has the Varonis agents installed on it (its fully qualified DNS name). Otherwise, if there is a DNS name that represents the static IP addressesof all of the nodes that have the Varonis agents installed, use it. In the case of the long-running example, this could be: zippleback-vm1.tuc.stglabs.ibm.com
4. For the Authentication, choose SSH-keys
13

5. For the Username, choose a non-domain qualified username (i.e., the local username that was utilized when prepping the nodes before installing the Varonis agent). In the case of the long-running example, this would be: varoniswind
6. For the SSH file, click the “...” button to bring up a dialogue to choose the private key file that was generated earlier in the process.
7. For the last field that allows a user password to be input, leave this field blank.
8. Click the Install button to save this domain information.
Additional Configuration
To move to the next screen of the setup wizard, click the next button and the Collectors screen will be shown. Since one Windows 2008 R2 server serves the purpose of the IDU server and all probes, there are no collectors in the case of the long-running example. Therefore, just click next.
Adding the Monitored File Server
The next step in the Varonis Setup Wizard is to add the monitored file servers. Since a single SpectrumScale cluster will be treated as a single file server with multiple filesystems, a single monitored fileserver will be added here. To add the monitored fileserver, perform the following actions:
1. In the Monitored File Servers window, click the Add button.
2. Click on the tab on the left labeled Common and provide the following details:
1. The Probe should be filled in based on information already provided in a previous step where it was stated the probe server and IDU server were the same. If it is not, use the name of the IDU server because in this example they are the same. For the long-running example, the Probe name is: VARONIS-VM1
2. There are no collectors in this example set up, therefore that value is left at No Collector.
3. For the file server name, it is recommended to use the same name that was used when creating the AD Walk Domain. In the case of the long-running example, this name would be: zippleback-vm1.tuc.stglabs.ibm.com
4. In the lower part of the dialogue window, under File Server Type, for the entry labeled “Select file server type,” select UNIX SMB. NOTE: this will change some of the entries inthis dialog window. This is expected.
5. In this section for FileWalk Credentials, for Authentication, choose SSH-keys.
6. For the Username, use the domain qualified, Active Directory name. In the case of the long-running example this would be: storage4test\varoniswind
7. For the SSH file, click on the “...” button to choose the location of the private key to be used (the same private key file used when setting up the File Walk domain). A warning will be given stating that the key is already set. Ignore this warning and provide the full path to the file again.
8. For the user password, enter the password for the user in Active Directory (which is also thepassword for the local version of the user). Note: leave the box checked for, “Add this user
14

account.”
9. This step should install the filter agent (make sure to NOT Select “Do not install or upgrade the filter agent on this server”).
10. Click on the Agent Deployment link and the Agent Deployment Options window appears.
1. Check “Use FileWalk credentials”
2. Add IP addresses of nodes where the agent was installed to “Physical Machines” (NOTE: enter one IP address at a time and click the "Add" button). In the case of the long-running example, the IP addresses of all 4 protocol nodes where the Varonis agent was manually installed earlier.
3. Click the OK button
11. Click on the tab on the left labeled Shares (NOTE: there will be some delay).
12. Choose the administrative shares created earlier and add them to the Registered Shares section. In the case of the long-running example, choose auditadminfs0share and auditadminfs1share.
13. Click on the tab on the left labeled Configuration.
14. For the UNIX Domain, specify the Samba domain specified previously.
15. The Shadow Database Installation information should already be filled in and can be left alone.
16. Click the “Install” button to finish configuration of the File Server and facilitate sending the appropriate version of the Varonis agent to all of the physical machines previously specified in the Agent Deployment window. NOTE: a warning will be displayed that the root user is required for installation of the Varonis agent on each of the physical machines and this warning gives the location of the package in the /tmp/ directory on each of the physical machines (protocol nodes within the Spectrum Scale cluster). Click OK to remove the warning.
17. After some time, the Installed status will reach 100% and configuration can proceed. Click next to proceed from the Monitored File Server configuration.
Completing the Varonis Setup Wizard
At this point, the configuration information needed for installing and configuring Varonis DatAdvantage has been completed. Click Finish to exit the wizard.
Completing Installation of Varonis Agents
The last step in configuring the File Server generated a warning that root access to each of the physical machines was required to complete agent set up. For each of the IP addresses registered as physical machines when setting up the File Server (the Spectrum Scale nodes running the Varonis agents), perform the following actions:
1. Log into the physical server as the root user and navigate to the /tmp directory.
15

2. Under the /tmp directory, navigate to the subdirectory that was mentioned in the warning when completing configuration of the File Server. The subdirectory should be of the form VaronisInstall.<AD_Domain>.<Varonis_user>. In the case of the long running example, the subdirectory is named: VaronisInstall.storage4test.varoniswind
3. Within the subdirectory, un-tar the agent file and run the “vrns_install.sh” file. A message will state that the Varonis package is already installed (this is as expected).
An example of running each of the above steps for one of the physical machines follows:
(10:47:03) zippleback-vm1:~ # cd /tmp/VaronisInstall.storage4test.varoniswind/
(10:47:26) zippleback-vm1:/tmp/VaronisInstall.storage4test.varoniswind # tar xvf Varonis-Linux-RedHat-RHEL7-SMP-3.10.0-229-x86-64-6.3.181.pkg.tar
Varonis-6.3.181-1.x86_64.rpm
vrns_install.sh
vrns_uninstall.sh
INSTALL.txt
README.txt
vrns_diag.sh
vrns_rootstat.sh
vrns_addmember.sh
(10:47:44) zippleback-vm1:/tmp/VaronisInstall.storage4test.varoniswind # ./vrns_install.sh
0
Varonis package is already installed.
Return code: 0
Installation of Management Console
The Management Console can be used to interact with multiple IDU installations. In the case of this paper and the long-running example, the management console is installed on the IDU server. To begin installation of the Management Console, navigate to the directory where the Management Console software is located and double-click on Varonis.ManagementConsole.Setup and complete the followingsteps:
1. Accept the license agreement and click next.
2. If any changes are needed on the location of the program or what features to install, perform those as needed. Then click next.
3. Click install and the software will be installed.
4. Finally, click finish to complete the installation.
5. Perform the initial File Walk of the directory structures by completing the following steps
16

(Note: this will traverse the entire directory structure for all filesystems and may take some time):
1. In the Management Console, on the left side, expand File Servers and select the File Server that was configured previously.
2. On the right side of the screen, select the File Server Jobs tab.
3. Select the File Walk job associated with the File Server that was configured.
4. In the same tab, near the top, click on Run Job.
5. After the job completes, the Current Status will show as Idle and the Last Run Date will be filled out.
Tuning Varonis DatAdvantage for Spectrum ScaleThere are areas within the Spectrum Scale file systems where it may not be desirable to log all file related events. These areas are normally configuration areas that hold information regarding the shares themselves along with providing the ability for failover between nodes for different protocols, etc. There are 2 specific directories that should typically be ignored within Spectrum Scale due to the high volume of activity in these directories.
In order to ignore certain subdirectories within file systems in Spectrum Scale perform the following actions:
1. Open the DatAdvantage GUI and ensure that the Work Area view is being shown.
2. Expand the Filer Server so that the file systems, and the directories underneath the file systemsare showing. Note: there can be a delay after the File Walk job has completed before the File Server can be expanded to view the file systems. You may need to close the DatAdvantage GUI and wait several minutes before attempting the step again.
3. Right-click on the “ces” directory and choose Stop Monitoring. A confirmation window will appear and you must click yes.
4. If the object protocol is enabled and unified file and object is also enabled, find the directory with the name, “ibmobjectizer” and right-click on it and choose Stop Monitoring. Again, a confirmation window will appear and you must click yes.
Depending on the requirements of the audit log, it may be necessary to perform the above actions on other directories as well. A candidate directory that may need to be ignored is the “.snapshots” directory because it holds read-only copies of files. Consult with the Spectrum Scale administrator anddocumentation to determine if there are other directories that should be ignored with regard to audit logging.
Interpretation of Common OperationsTo determine whether or not a particular action is detected by the Varonis software, the DatAdvantage GUI with the “Log” tab selected was utilized. This log provides a chronological listing of all detected events and includes what user performed the operation, what object and path was affected by the event
17
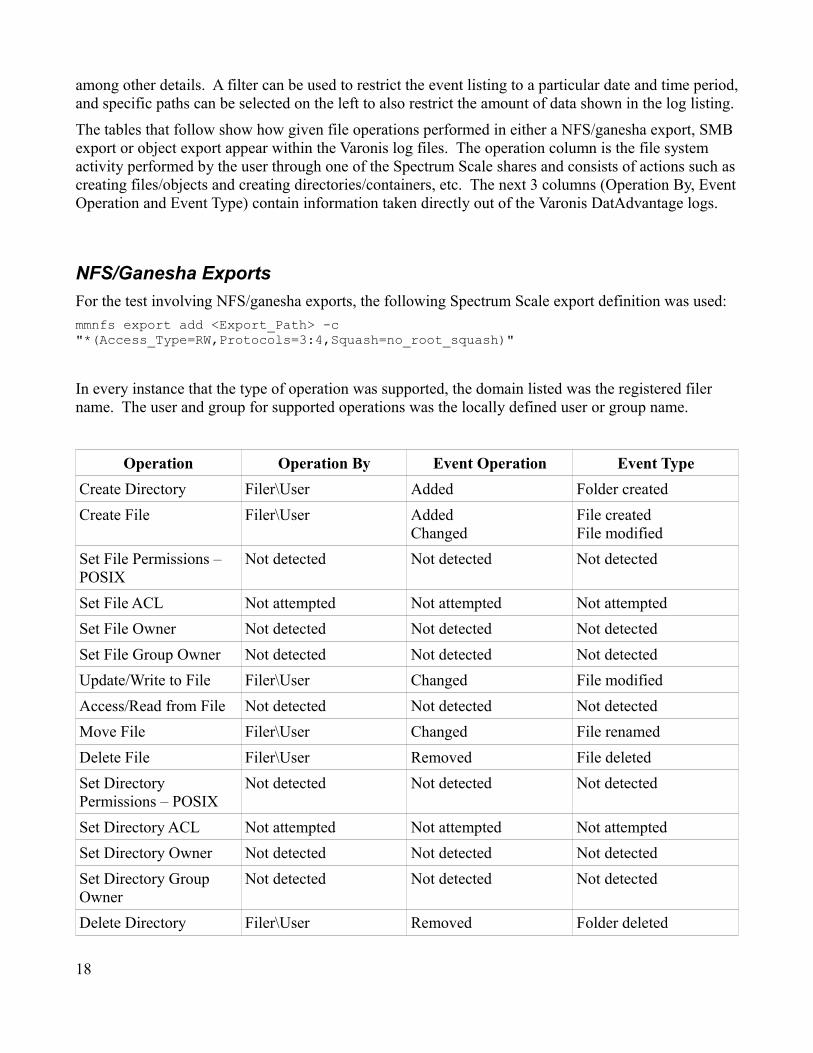
among other details. A filter can be used to restrict the event listing to a particular date and time period,and specific paths can be selected on the left to also restrict the amount of data shown in the log listing.
The tables that follow show how given file operations performed in either a NFS/ganesha export, SMB export or object export appear within the Varonis log files. The operation column is the file system activity performed by the user through one of the Spectrum Scale shares and consists of actions such ascreating files/objects and creating directories/containers, etc. The next 3 columns (Operation By, EventOperation and Event Type) contain information taken directly out of the Varonis DatAdvantage logs.
NFS/Ganesha Exports
For the test involving NFS/ganesha exports, the following Spectrum Scale export definition was used:
mmnfs export add <Export_Path> -c "*(Access_Type=RW,Protocols=3:4,Squash=no_root_squash)"
In every instance that the type of operation was supported, the domain listed was the registered filer name. The user and group for supported operations was the locally defined user or group name.
Operation Operation By Event Operation Event Type
Create Directory Filer\User Added Folder created
Create File Filer\User AddedChanged
File createdFile modified
Set File Permissions – POSIX
Not detected Not detected Not detected
Set File ACL Not attempted Not attempted Not attempted
Set File Owner Not detected Not detected Not detected
Set File Group Owner Not detected Not detected Not detected
Update/Write to File Filer\User Changed File modified
Access/Read from File Not detected Not detected Not detected
Move File Filer\User Changed File renamed
Delete File Filer\User Removed File deleted
Set Directory Permissions – POSIX
Not detected Not detected Not detected
Set Directory ACL Not attempted Not attempted Not attempted
Set Directory Owner Not detected Not detected Not detected
Set Directory Group Owner
Not detected Not detected Not detected
Delete Directory Filer\User Removed Folder deleted
18

SMB Exports
For the test involving SMB exports, the following Spectrum Scale export definition was used:
mmsmb export add <Export_Name> <Export_Path> --option browseable=yes
For all operations that were successful, the operation is performed by the Active Directory authenticated user.
Operation Operation By Event Operation Event Type
Create Directory Domain\user Added Folder created
Create File Domain\user AddedChanged
File createdFile modified
Set File Permissions – POSIX
Not attempted Not attempted Not attempted
Set File ACL Domain\user Accessed File opened
Set File Owner Domain\user Changed File permissions changed
Set File Group Owner Domain\user Changed File permissions changed
Update/Write to File Domain\user AccessedChanged
File openedFile modified
Access/Read from File Domain\user Accessed File opened
Move File Domain\user ChangedChanged
File renamedFile modified
Delete File Domain\user Removed File deleted
Set Directory Permissions – POSIX
Not attempted Not attempted Not attempted
Set Directory ACL Not detected Not detected Not detected
Set Directory Owner Domain\user Changed Folder permissions changed
Set Directory Group Owner
Domain\user Changed Folder permissions changed
Delete Directory Domain\user Removed Folder deleted
19

Object Exports
For object, there are 2 types of exports available: (1) the standard object export where all data and configuration is contained within a single independent fileset and (2) unified file and object exports where objects are mapped to files and containers are mapped to directories based on a policy defined for the specific object export. Due to the nature of how information is saved for the standard object export, there is no discernible one-to-one mapping between the object operation performed by the client and the log messages contained within DatAdvantage. This is evidenced by the fact that in testing 7 standard object operations, 68 events were logged in the DatAdvantage log. Therefore, the information provided in the following table only accounts for the unified object and file operations.
For unified file and object, the following Spectrum Scale object export definitions were used in testing:Unified file and object was enabled by performing:mmobj file-access enable
The actual Spectrum Scale unified file and object policy used was a standard unified file and object policy with no compression or other attributes for the policy:mmobj policy create <Policy_Name> --enable-file-access
In every instance that the type of operation was supported, the domain listed was the registered filer name. The user for supported operations was always swift.
Operation Operation By Event Operation Event Type
Create Container Filer\swift Added Folder created
Create Object* Filer\swift AddedChangedChanged
File createdFile modifiedFile permissions changed
Get Object Filer\swift Accessed File opened
Delete Object Filer\swift Removed File deleted
Delete Container Filer\swift Removed Folder deleted
* Because of the nature of Spectrum Scale unified file and object, 3 operations are performed when an object is created.
20

Appendix A – Definitions of Common Terms
• AD – Active Directory – a directory service developed for Windows domain networks• Agent – Varonis software that resides on filer nodes and for the purposes of Spectrum Scale
allow detection of filesystem activity.• Collector – An optional server that acts as an interface between a monitor file server and its
probe.• DatAdvantage – Varonis software suite that encompasses the detection of file events,
permissions, etc. For Spectrum Scale, this is the primary software responsible for keeping trackof file events through logging and the creation of reports.
• ganesha – (sometimes referred to as NFS-ganesha) a user-mode file server for NFS supported inSpectrum Scale
• IDU – Intelligent Data Unit – one of these servers always exists and this acts as the “brain” of the Varonis DatAdvantage deployment
• Probe – stores the preprocessed data gathered from the file servers, and monitor the performance of the agents deployed on the file server nodes.
• SQL – Structured Query Language – the language used for querying structured databases. For the purposes of this paper, a specific SQL database (Windows SQL) is utilized.
• Unified file and object – object implementation in Spectrum Scale that allows objects to be mapped to filesystem entities and vice versa.
21