hpc on aws alces flight & cfncluster - amazon s3 · hpc on aws - alces flight & cfncluster...
TRANSCRIPT
HPC on AWS
Alces Flight & CfnCluster Version 3.0
HPC on AWS - Alces Flight & CfnCluster
© 2016 Amazon Web Services, Inc. and its affiliates. All rights reserved. 2
Copyright © 2016 Amazon Web Services, Inc. and its affiliates.
All rights reserved.
This work may not be reproduced or redistributed, in whole or in part, without prior written permission from Amazon Web Services, Inc.
Commercial copying, lending, or selling is prohibited.
For corrections or feedback on the course, please email us at
For all other questions, please email us at [email protected].
HPC on AWS - Alces Flight & CfnCluster
© 2016 Amazon Web Services, Inc. and its affiliates. All rights reserved. 3
Table of Contents Introduction.....................................................................................................................................5Overview......................................................................................................................................................5TechnicalKnowledgePrerequisites..................................................................................................5TopicsCovered..........................................................................................................................................5
SignintotheAWSManagementConsole...............................................................................6UsingyourAWSaccounttosignintotheAWSManagementConsole....................................6CreatinganAmazonEC2KeyPair.......................................................................................................6
Module1–AlcesFlight.................................................................................................................6CreatingademonstrationAlcesFlightcluster................................................................................7Loggingintoyourcluster.......................................................................................................................8AlcesGridware...........................................................................................................................................9InstallingRStudio...................................................................................................................................10RemoteDesktopandAlcesSession..................................................................................................10RunningRStudio.....................................................................................................................................11
Module2-InstallingandconfiguringCfnCluster.............................................................12InstallingCfnCluster..............................................................................................................................12ConfiguringCfnCluster..........................................................................................................................13Manuallychangingourconfiguration.............................................................................................14Creatingandinspectingourfirstcluster........................................................................................14Loggingintothemasternode.............................................................................................................15RunningourfirstMPIjob.....................................................................................................................17Sharedstorage.........................................................................................................................................17BootstrappingyourownsoftwareonclusterswithCfnCluster..............................................18
Module3-BootstrappingLandsat-utilonCfnCluster....................................................18UpdatingourclusterforLandsat-util..............................................................................................19Bootstrappingthelandsat-utilcommandlineutilityacrossourcluster............................20UsingLandsat-util...................................................................................................................................22Testinglandsat-utilwithasingleLandsatscene.....................................................................................22UsingLandsat-utilsearch...................................................................................................................................23
AppendixA–Terminatingyourcluster..............................................................................23AppendixB-UsingSpotinstances(optional)...................................................................24Summary........................................................................................................................................24AdditionalResources............................................................................................................................25

HPC on AWS - Alces Flight & CfnCluster
© 2016 Amazon Web Services, Inc. and its affiliates. All rights reserved. 4
HPC on AWS - Alces Flight & CfnCluster
© 2016 Amazon Web Services, Inc. and its affiliates. All rights reserved. 5
Introduction Overview In this lab you will use Alces Flight or CfnCluster to build your own on-demand High Performance Computing (HPC) clusters on AWS.
In the case of Alces Flight you’ll learn how to quickly create your own cluster and then install and run scientific computing applications on it. In the CfnCluster modules you’ll learn more about the underlying “plumbing” of your cluster on AWS including how to update your own personal cluster, resize it, change the CPU architecture, and then finally bootstrap some sample applications on it. You can optionally also experiment with spot instances in your cluster to reduce cost.
You can think of this lab as a “Choose Your Own Adventure”. You don’t need to work through both the Alces Flight and CfnCluster modules. To help you choose which module you might be more interested in, use the following as a guide:
1. If you’re more interested in getting started with scientific computing applications and using software in a cluster on AWS, choose Module 1 – Alces Flight
2. If you’re more interested in how HPC on AWS works and exploring different configuration options for installing different schedulers, or having more control over the network interconnects used across the cluster, choose Module 2 - Installing and configuring CfnCluster
If you’re interested in both, start wherever you like!
Technical Knowledge Prerequisites To successfully complete this lab, you should be familiar with the following:
• Basic HPC/HTC and cluster computing concepts • Basic Amazon EC2 and AWS CloudFormation concepts • Familiarity using Linux from the command line • Command line text editing tools such as Vim • Compiling source code using open source tool chains like gcc, cpp, and Make
Topics Covered This lab will take you through source code management techniques and automated testing, including:
• Creating clusters using Alces Flight and CfnCluster
• Using Alces ClusterWare including Gridware to install and manage scientific computing applications across your Alces Flight cluster
• Configuring your CfnCluster cluster and updating existing clusters
• Auto scaling the cluster based on the length of the job queue
• Running sample application(s) on the cluster
• Using spot instances in your cluster

HPC on AWS - Alces Flight & CfnCluster
© 2016 Amazon Web Services, Inc. and its affiliates. All rights reserved. 6
Sign in to the AWS Management Console Using your AWS account to sign in to the AWS Management Console Welcome to this self-paced lab! The first step is for you to sign in to Amazon Web Services.
1. In this lab we are going to use your existing AWS account. Prior to the lab you will have been given an IAM user with a username and password, and a URL to the AWS IAM console login screen.
a. Browse to that URL and use the username and password credentials to login into the AWS console.
2. AWS Region – all the work you do today will be in a single AWS region. Select the region you wish to work in, e.g. ‘ap-southeast-2’ for Sydney.
Creating an Amazon EC2 Key Pair 1. Browse to the EC2 console 2. In the left hand navigation menu, under the ‘Network & Security’ section, click Key Pairs 3. Click the Create Key Pair button 4. Give your Key Pair a unique name, e.g. adrian-hpc 5. Click the Create button
The EC2 console will now download the private key for your newly created key pair.
Before we can use the private key we’ll need to update the permissions on it. To do this type: chmod 0400 mykeypair.pem
Don’t lose this and store is in a safe place! It effectively authenticates you when using AWS programmatically. You don’t want someone else impersonating you or using your credentials. We’ll be using this private key later in the labs.
Module 1 – Alces Flight Alces Flight provides a fully-featured HPC environment that you can launch in a matter of minutes. It can make use of On-Demand or Spot Instances and comes complete with a job scheduler and hundreds of HPC applications that are all set up and ready to run. Some of the applications include built-in collaborative features such as shared graphical views.
HPC on AWS - Alces Flight & CfnCluster
© 2016 Amazon Web Services, Inc. and its affiliates. All rights reserved. 7
In this module we’ll use Alces Flight to create your very own personal on-demand HPC cluster on AWS. Alces Flight is available via the AWS Marketplace, but we’ll be using AWS CloudFormation to create our cluster. If you’re interested in using the AWS Marketplace, please refer to the excellent Alces Flight documentation on Getting started as quickly as possible.
Creating a demonstration Alces Flight cluster Alces provides a CloudFormation template which enables most of the features we’re interested in by default. This template is publicly available (and open source), https://s3-ap-southeast-2.amazonaws.com/scico-labs/templates/demo_vpc.json
We’re going to use this template to create our first cluster. To do this:
1. Click on the URL above, and download the template to your local computer. This will be saved as a file demo_vpc.json
2. In your web browser, go to the AWS CloudFormation console 3. Click the Create Stack button 4. In the “Choose a template” section, select Upload a template to Amazon S3 and click
Choose File 5. Browse to the location where you downloaded the template (remember the file will be
called “demo_vpc.json”), and select that file 6. Click the Next button
The next screen gives you an opportunity to change the behaviour of your template by using CloudFormation parameters. We’re going to make a few minor changes here.
1. In the Stack name field enter a unique name for your HPC cluster. E.g. use your first name, something like “adrian-first-cluster”. Then, in the Parameters section, for:
2. the ComputeAutoscaling field, enter 1 3. the InitialNodes field, enter 2 4. the KeyPair field, select your keypair you created earlier
Then, click the Next button
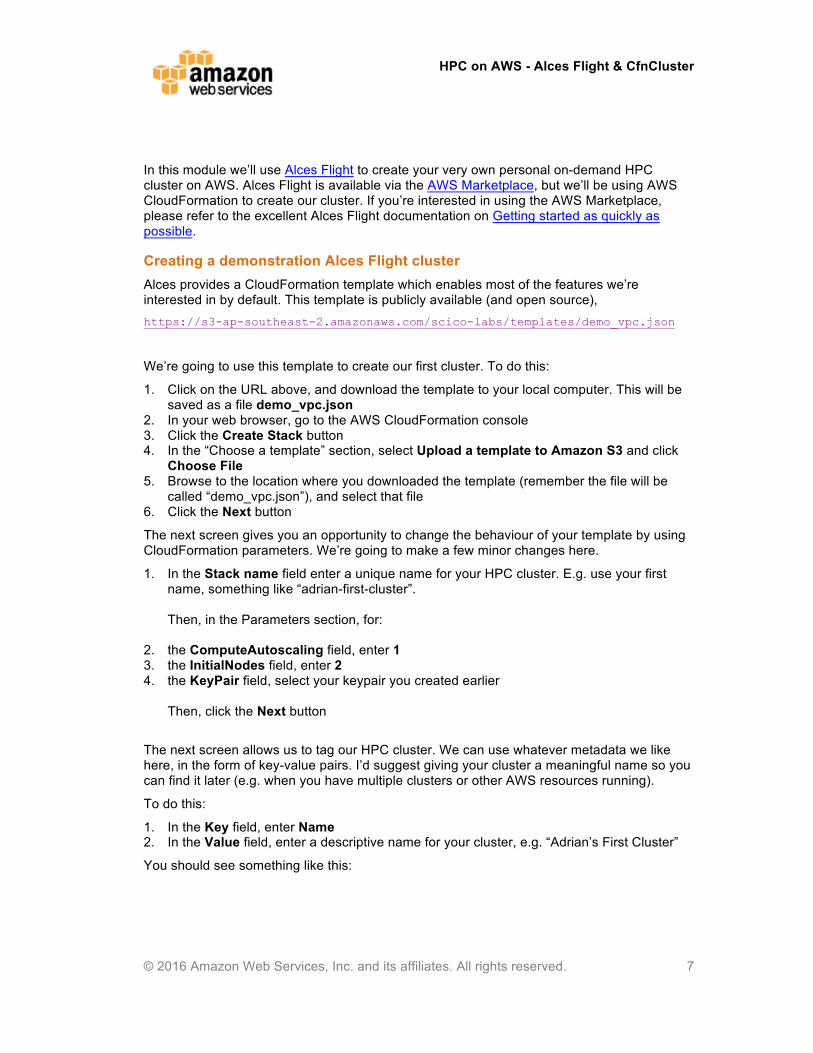
The next screen allows us to tag our HPC cluster. We can use whatever metadata we like here, in the form of key-value pairs. I’d suggest giving your cluster a meaningful name so you can find it later (e.g. when you have multiple clusters or other AWS resources running).
To do this:
1. In the Key field, enter Name 2. In the Value field, enter a descriptive name for your cluster, e.g. “Adrian’s First Cluster”
You should see something like this:
HPC on AWS - Alces Flight & CfnCluster
© 2016 Amazon Web Services, Inc. and its affiliates. All rights reserved. 8
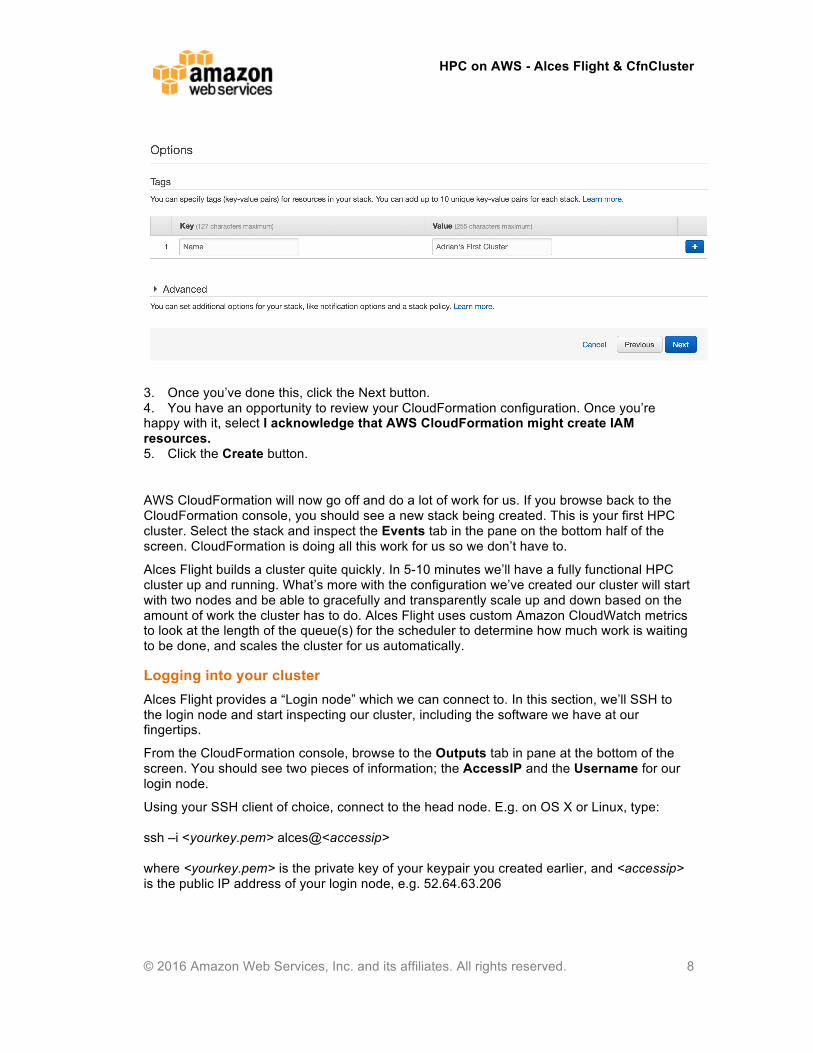
3. Once you’ve done this, click the Next button. 4. You have an opportunity to review your CloudFormation configuration. Once you’re happy with it, select I acknowledge that AWS CloudFormation might create IAM resources. 5. Click the Create button.
AWS CloudFormation will now go off and do a lot of work for us. If you browse back to the CloudFormation console, you should see a new stack being created. This is your first HPC cluster. Select the stack and inspect the Events tab in the pane on the bottom half of the screen. CloudFormation is doing all this work for us so we don’t have to.
Alces Flight builds a cluster quite quickly. In 5-10 minutes we’ll have a fully functional HPC cluster up and running. What’s more with the configuration we’ve created our cluster will start with two nodes and be able to gracefully and transparently scale up and down based on the amount of work the cluster has to do. Alces Flight uses custom Amazon CloudWatch metrics to look at the length of the queue(s) for the scheduler to determine how much work is waiting to be done, and scales the cluster for us automatically.
Logging into your cluster Alces Flight provides a “Login node” which we can connect to. In this section, we’ll SSH to the login node and start inspecting our cluster, including the software we have at our fingertips.
From the CloudFormation console, browse to the Outputs tab in pane at the bottom of the screen. You should see two pieces of information; the AccessIP and the Username for our login node.
Using your SSH client of choice, connect to the head node. E.g. on OS X or Linux, type: ssh –i <yourkey.pem> alces@<accessip> where <yourkey.pem> is the private key of your keypair you created earlier, and <accessip> is the public IP address of your login node, e.g. 52.64.63.206
HPC on AWS - Alces Flight & CfnCluster
© 2016 Amazon Web Services, Inc. and its affiliates. All rights reserved. 9
Once logged in, you should see a prompt like the following:
Let’s validate that our cluster is configured properly. To do this, we’ll check how many nodes the default scheduler knows about. To do this, type: qhost
at the command prompt. You should see two nodes in your cluster. The scheduler is aware of how many CPUs each node has, as well as the amount of memory available to the cluster. This is as it should be.
When the you put many jobs in the queue, Alces Flight will scale the cluster for you, adding nodes and making the scheduler aware of them so it can use the extra compute capacity as it comes online. This all happens without any intervention on your part, and very quickly, typically in minutes of jobs being put on the queue. Remember, Alces Flight does this for you automatically according to rules you set. Compare this to the physical world and how you’d work with a shared cluster. This kind of elastic HPC architecture is very powerful!
You can of course also control how large your cluster will grow and prevent it from exceeding some arbitrary upper bound. Some researchers do this to limit how much their cluster will cost even if there’s lots of work to be done. The choice is up to you.
Alces Gridware One of the most powerful feature of Alces Flight is the range of scientific computing software and libraries available at your fingertips. Alces Gridware provides over 750 commonly used scientific computing software packages and libraries, and automates the installation of them for you.
Type the following on the command line of your cluster, and browse through the options: alces gridware list
Perhaps you’re interested in doing computational fluid dynamics, and want to use OpenFOAM. We can search for piece of software to see if Gridware knows about it, by typing: alces gridware list openfoam
It turns out that Gridware knows about four different versions of OpenFOAM. Gridware will let you install any or all of these. You can have multiple verison of the same software installed, and use them on your cluster as you see fit.

HPC on AWS - Alces Flight & CfnCluster
© 2016 Amazon Web Services, Inc. and its affiliates. All rights reserved. 10
Installing RStudio RStudio is a very popular open source user interface for R. We’ll install this on our login node. Normally, you certainly wouldn’t install a GUI tool on your login node like this, but this is our own personal cluster, so we can use it however we wish!
To install RStudio, search for a version you wish to install: alces gridware list rstudio
We’re going to install version 0.99.902. To do this, type: alces gridware install main/apps/rstudio/0.99.902
Alces Gridware will find a number of dependencies that it needs to install before it can install RStudio. Accept these dependences if asked and continue with the installation.
The entire installation will only take a few minutes. This is certainly faster than doing these tasks manually.
Remote Desktop and Alces Session To run a GUI like RStudio we need a way to connect to a desktop session on our login node. Alces Flight supports this via the alces session component of Alces ClusterWare. The alces session command creates and manages VNC sessions on our login node for us.
To see what sessions are available on our cluster type: alces session avail
You should see at least two session types available. We’ll use Gnome. To start a Gnome session type: alces session start gnome
After a few moments, you’ll see the alces session command return some important information for us. For example, you’ll see something similar to the following: VNC server started:
Identity: d0ad1efa-57c9-11e6-825a-0665f4122b75
Type: gnome
Host: 52.64.63.206
Port: 5901
Display: 1
Password: VhT4k57x
Websocket: 41361
HPC on AWS - Alces Flight & CfnCluster
© 2016 Amazon Web Services, Inc. and its affiliates. All rights reserved. 11
Depending on your client, you can connect to the session using:
vnc://alces:[email protected]:5901
52.64.63.206:5901
52.64.63.206:1
If prompted, you should supply the following password: VhT4k57x
You’ll need a VNC client installed on your computer to use this information. For example, you may choose to use VNC Viewer. This works on OS X, Linux, Windows, and a number of other operating systems.
If you use VNC Viewer, you can use the second session connection string above to connect to your cluster, e.g. 52.64.63.206:5901
If you’re using OS X, you don’t need to download a VNC client, you can just use Finder -> Go -> Connect to server, and then connect to the server directly by using the first session connection string, e.g. vnc://alces:[email protected]:5901
Connecting to our login node like this using VNC lets us share a single session. We might use this to collaborate across a research group, all interacting concurrently in the same desktop environment. We can of course have separate private sessions too.
Running RStudio Now we’ve logged into our login node and we have a graphical user interface and desktop environment, let’s try running RStudio.
1. Browse to the Applications menu at the top left of your desktop session, and click it 2. On the menu that appears you should see Terminal. Click that to open a terminal
session. 3. In your terminal session type:
rstudio You should have seen an error. The problem is we haven’t loaded the environment to know about our newly installed package. This is easily fixed. Type the following in your terminal session: module load apps/rstudio and then try running RStudio again, by typing:
HPC on AWS - Alces Flight & CfnCluster
© 2016 Amazon Web Services, Inc. and its affiliates. All rights reserved. 12
rstudio
4. If everything worked correctly, you should see RStudio launch on your desktop session.
We’re not going to attempt to teach you how to write scientific computing applications in R in this lab, but let us know if you’re interested in a course like that!
You can play around with RStudio if you like. For example, RStudio bundles a number of demos. Type: demo(recursion)
or, demo(graphics)
at the prompt in RStudio if you want to start having a play.
Once you’ve finished, close RStudio and your VNC session.
Module 2 - Installing and configuring CfnCluster In this module we’ll install and configure the CfnCluster command line tool.
Installing CfnCluster CfnCluster is implemented using Python, and so we use the Python installer, pip to install it.
If you have a working version of Python on your laptop you could install the CfnCluster CLI tool there and do all of your work from your local machine. In this lab however, we’ll use EC2 to provide a working Python environment and install CfnCluster there. This has the added advantage that we have a single server accessible from wherever we like, which we can then use to control the clusters we create with CfnCluster.
To start our ‘CfnCluster controller’ EC2 instance:
1. Browse to the EC2 console 2. Click the Launch instance button 3. Use the Quick Start wizard and select the Amazon Linux AMI (usually at the top of the
list) 4. Select the t2.micro instance, and click the Next: Configure Instance Details button 5. Select the relevant VPC network that you want to deploy this instance into. Make sure
that you also select the correct subnet inside the relevant VPC. In this lab we will launch our instance in a public subnet so that it’s publicly accessible to us.
6. Because we want this instance to be publicly accessible instance, in the Auto-assign Public IP field, select Enable
7. Click the Next: Add Storage button 8. Click the Next: Tag Instance button 9. At the tag instance screen, enter some meaningful metadata. Make the name of your
instance unique. E.g. for the key Name enter Adrian’s CfnCluster controller 10. Select the ‘Next: Configure Security Group’ button
a. Ensure that you have SSH open from a suitable IP address or IP address range b. In the Security group name field, enter a unique name, e.g. adrian-cfncluster-
controller 11. Select the Review and Launch button 12. Select the Launch button

HPC on AWS - Alces Flight & CfnCluster
© 2016 Amazon Web Services, Inc. and its affiliates. All rights reserved. 13
13. Choose the EC2 keypair you want to use and select the Launch instances button. This keypair should have been created for you before you started the lab. If you are uncertain about this, please ask your lab instructor.
You’ll need to wait several minutes for your new EC2 instance to start. You can tell that your instance is ready when all EC2 instance status checks are green.
We now want to SSH to our EC2 server. To do this:
1. Use the private key from the EC2 keypair you used when you started the server. 2. Run the following ssh command line:
ssh –i private_key.pem ec2-user@hostname where private_key.pem is the full path to the private key and hostname is the ip address or DNS name of the EC2 controller node you’ve just created and started.
Once you’ve connected to your EC2 controller node we want to install the CfnCluster CLI tool.
1. First, let’s update Linux packages. This will pull down security updates and other enhancements. To do this, run: sudo yum -y update
2. Now we’ll install the latest version of CfnCluster. To do this, run: sudo pip install cfncluster
3. You’ll see the output of pip as it finds dependencies for CfnCluster and installs these and the CfnCluster command line tool.
4. Once that is complete, test that CfnCluster is installed correctly by typing: cfncluster -h
5. If CfnCluster was installed correctly, you should see a description of what CfnCluster does and various flags and positional arguments you can use to control it.
Configuring CfnCluster CfnCluster can provide some sane defaults whenever we ask it to automate creating, updating or deleting one of our clusters. To initialize these defaults, we run a configuration wizard and supply the default configuration we want to use. We can go back later and expand upon this configuration or change it completely if we wish.
To create the initial configuration for CfnCluster:
1. Type the following in your shell: cfncluster configure
2. This will start a simple wizard that will ask you for default configuration items. Complete this wizard paying particular attention to the following items:

HPC on AWS - Alces Flight & CfnCluster
© 2016 Amazon Web Services, Inc. and its affiliates. All rights reserved. 14
For example: Cluster Template: Give your cluster template a name, like hpc-lab AWS Access Key ID: Use the value supplied to you for this lab AWS Secret Access Key ID: Use the value supplied to you for this lab AWS Region ID: Use the value ap-southeast-2 for this VPC Name: Use the value supplied to you for this lab Key Name: Use the name you gave to your key pair when you created it earlier, e.g. adrian-hpc VPC ID: Use the value supplied to you for this lab Master Subnet ID: Use the value supplied to you for this lab
Manually changing our configuration Once this is complete, a configuration file will have been created in your home directory.
1. Check that this is the case by running: cat ~/.cfncluster/config
2. This should show your newly created default configuration for CfnCluster. Make a note of this as we’ll be modifying this throughout the lab.
We want to make one immediate change to our CfnCluster configuration, and that it to use Ubuntu as our base operating system.
Using your favourite text editor (mine is Vim, but you may prefer nano), open your CfnCluster config file. E.g.
vim ~/.cfncluster/config
Navigate to your cluster configuration section and underneath that section add the following line: base_os = ubuntu1404 and save your configuration file and exit your editor.
Creating and inspecting our first cluster Now that we have the CfnCluster command line tool installed and configured, we want to test that it works. To do this we’ll use the default configuration and create a small test cluster. This will help us find any issues with our configuration or with our AWS account and permissions.
To create a cluster, use the create command.
1. We want to give your cluster a unique name. So instead of typing: cfncluster create firstcluster try typing the following from your shell or terminal session:

HPC on AWS - Alces Flight & CfnCluster
© 2016 Amazon Web Services, Inc. and its affiliates. All rights reserved. 15
cfncluster create <yourname>-firstcluster where <yourname> is replaced with your name, e.g. adrian-firstcluster
2. This will use the configuration we’ve created and pass that to the CloudFormation template used to create our cluster.
3. Inspect the output from the CfnCluster command in your shell or terminal session.
4. Go back to the AWS Console, and browse to the CloudFormation console. You should see a new CloudFormation stack being created. Select the stack and inspect the Events and Resources tab. Lots of work is being done to start building a cluster. Thankfully that work has been automated. The adventurous might want to look at the Template tab for the CloudFormation stack too. This is the template used by CfnCluster to completely automate creating and bootstrapping the cluster with software for you to use. You are free to inspect and even modify this template to do whatever you need. In fact, CfnCluster is open source and is really a reference implementation provided for you. It’s not the only way HPC clusters can be implemented or run on AWS. If you want to look at how CfnCluster was built, browse to https://github.com/awslabs/cfncluster.
Our first cluster might take 10-15 minutes to create. While you’re waiting for your cluster to be provisioned, grab a coffee or read your favourite science journal or perhaps https://aws.amazon.com/blogs/aws/. Automation is a wonderful thing.
Logging into the master node One of the outputs of the CloudFormation template, but also the CfnCluster command is the address of the master node on the cluster. We’ll want to log into that to inspect the cluster a little more closely and schedule jobs to be run on the cluster.
1. To log into the master node, type the following: ssh –i private_key.pem ubuntu@hostname Where private_key.pem is your private key you used earlier, and hostname is the public DNS name or public IP address of your master node. To find the public IP address for yoru master node, select your CfnCluster stack in the CloudFormation console, and click the Outputs tab. Use the value for the MasterPublicIP key. Note: The use of the ‘ubuntu’ username. We’re not using ‘ec2-user’ here as we’re running Ubuntu across our CfnCluster cluster. The default scheduler installed on our new cluster is the Son of Grid Engine (SGE). SGE lets us inspect the cluster and look at member nodes, statistics of jobs in the queue as well as submit new jobs on the queue.
2. To look at the cluster configuration and members from the schedulers perspective, run the following on the master node: qhost
HPC on AWS - Alces Flight & CfnCluster
© 2016 Amazon Web Services, Inc. and its affiliates. All rights reserved. 16
You’ll notice that we have two nodes in our cluster. They’re not very impressive (they’re just t2.micro instances by default), but we can already start doing work in parallel across both nodes.
3. To look at the jobs scheduled on the cluster run the following: qstat As you can see there’s not much going on. Let’s run our first job.
4. Our first job will be very simple indeed. It will just sleep for 30 seconds and then print a Hello world message including the hostname of the host the job was run on.
5. On the master node, open your favorite test editor, e.g. Vim and create the following file, and save it as hello_hostname.sh #!/bin/bash sleep 30 echo "Hello World from $(hostname)" Alternatively, you can download a copy of this script from S3. To do this, execute the following commands: cd /shared wget https://s3-ap-southeast-2.amazonaws.com/scico-labs/scripts/hello_hostname.sh
6. Submit your job using “qsub” and make sure it runs. To do this, type: qsub hello_hostname.sh
7. Check that the job has finished by running “qstat” again. You’ll see the job sitting in the queue for 30 seconds while the sleep command completes. Once the job has completed you’ll see two files, a hello_hostname.sh.e1 and hello_hostname.sh.o1. If there are errors, these messages will go into hello_hostname.e1. This should be empty for you. Standard out messages will go into our $HOME directory by default, and we’ll see an output file called hello_hostname.sh.o1. To check this, type: cat ~/hello_hostname.sh.o1 You should see output like this: Hello World from ip-172-31-11-38 This is all pretty basic, but we’re just checking that our cluster and scheduler is installed and configured correctly.
HPC on AWS - Alces Flight & CfnCluster
© 2016 Amazon Web Services, Inc. and its affiliates. All rights reserved. 17
Running our first MPI job
Now we’ll try something a bit more interesting. We’ll build a very simple MPI job and submit that to the cluster. We have two nodes in our cluster, so our MPI job will just ask each node to do some work and we’ll see the output on the master node.
1. Again, using your favorite text editor create the following file: #!/bin/bash # #$ -j y #$ -pe mpi 2 #$ -S /bin/bash # mpirun -np 2 hostname and save it as mpi_hello_hostname.sh Alternatively, you can download a copy of this script from S3. To do this, execute the following commands: cd /shared wget https://s3-ap-southeast-2.amazonaws.com/scico-labs/scripts/mpi_hello_hostname.sh
2. You can then submit this job using “qsub” again: qsub mpi_hello_hostname.sh
3. If you want to check the status of job, run the qstat command again, and make sure the job has completed.
4. Once the job completes you’ll see an output file created, mpi_hostname.sh.o1 or you if run the job multiple times you’ll see mpi_hostname.sh.o2 or mpi_hostname.sh.o3 and so on. Inspect this file by typing: cat ~/mpi_hostname.sh.o1
5. If you see the hostnames of the other cluster members, things have worked! You’ve just run your first job on your own cluster.
There’s much more we can do with our cluster now that we’ve shown it to be working correctly. We’ll explore more sophisticated tasks later in the lab. Feel free to start experimenting on your own.
Shared storage Many HPC environments rely on a shared filesystem presented to members of the cluster. This shared filesystem is often used to synchronise around or share state amongst cluster members. CfnCluster implements this by attaching additional block storage to the master
HPC on AWS - Alces Flight & CfnCluster
© 2016 Amazon Web Services, Inc. and its affiliates. All rights reserved. 18
node and exporting that via NFS to the cluster members. You could imagine using the Elastic File Service to do the same thing, or even your own storage services.
If you ssh to one of the compute nodes in your cluster and run: df –k
you should see shared storage mounted, probably on /shared (if you’ve used the default CfnCluster configuration).
Bootstrapping your own software on clusters with CfnCluster CfnCluster comes with lots of useful and interesting software and libraries already installed and configured such as OpenMPI, R, Python etc. However, you almost certainly want to install your own software libraries and other binaries. In fact, you may wish to have a number of cluster definitions that run completely different operating environments for your users.
There are different ways of ensuring the software you wish to run is available to all cluster members.
1. CfnCluster can bootstrap software into the cluster when the cluster is created from an HTTP endpoint such as S3. The CfnCluster documentation describes this and gives example CfnCluster configurations to do this. Refer to the documentation for more detail on how to do this, http://cfncluster.readthedocs.org/en/latest/.
2. Another method is to make sure the data and binaries you wish to share across the cluster are available on the shared filesystem, e.g. /shared.
3. Another option is to modify the AMI that is used by the CfnCluster CloudFormation template when it is creating the launch configuration for the auto scaling group responsible for the compute nodes in the cluster. This isn’t the preferred method, as you would then need to maintain the entire server image (AMI when patches are released for CfnCluster. It is possible though, and if you’re already delivering your own software via baking AMIs (for example as an output from an automated continuous deployment pipeline), you might wish to do this.
Module 3 - Bootstrapping Landsat-util on CfnCluster As part of the AWS Open Data program, AWS hosts and makes the Landsat-8 satellite imagery data repository available to anyone who wants to use it. This is stored on S3, and is available via a simple RESTful API. Making this freely and openly available is hugely powerful for researchers or other interested parties who can’t justify their own means to store and access more than 1PB of satellite imagery at scale. The AWS Open Data program does this for lots of other data sets of interest to researchers; such as the NEXRAD ocean data set from NOAA, the Human Cancer Genome Atlas (TCGA) dataset, and many, many others. For more information see, http://aws.amazon.com/opendata.
Landsat-util is a commonly used open source tool to make it easy to interact with, search, download and process Landsat-8 satellite imagery data stored on S3. In this part of the lab we’ll build a new HPC cluster based on CfnCluster, and bootstrap the relevant libraries and software we need to use landsat-util effectively. We’ll then show you how to get started with some very simple applications of landsat-util to do satellite imagery processing at scale. The purpose of this part of the lab isn’t to show you how to do ocean or atmospheric research, or land capability modelling, or any of the many other interesting research applications with a
HPC on AWS - Alces Flight & CfnCluster
© 2016 Amazon Web Services, Inc. and its affiliates. All rights reserved. 19
dataset like Landsat-8. We’re just trying to show you some of the tools you can use easily on AWS to do interesting work at scale that would otherwise be difficult or costly to do without access to on-demand clusters on AWS.
To learn more about the landsat-util command line utility, refer to the official documentation at http://landsat-util.readthedocs.io/en/latest/.
Updating our cluster for Landsat-util Let’s get a bit more serious about our cluster. We want to do more meaningful work on it, and for that we’ll require more compute infrastructure.
One of the powerful features of AWS is that we have many different EC2 instances types available depending on the job we want to perform. For CPU intensive computation we can use the c3 or c4 instance family. For memory intensive work we can use memory optimized instances like those in the r3 family.
We’re going to upgrade our cluster to use one of the latest Intel Xeon processors and add more nodes while we’re at it. You can add as many cores as you like, but let’s build a 4 node cluster with 32 vCPUs per node. This will give us 128 vCPUs or approximately 64 physical hyperthreaded cores to do work (remember a vCPU is a hardware hyperthread).
This is actually quite a small cluster in the big scheme of things, but we can easily scale it up to hundreds or even thousands of cores if we need to, or we can have as many 128 vCPU clusters as we need in parallel.
To do this:
1. On your CfnCluster controller EC2 instance (not your master node!), and using your favourite editor, update your CfnCluster configuration: vim ~/.cfncluster/config
2. In your cluster configuration add the following configuration lines: compute_instance_type = c3.2xlarge
initial_queue_size = 4
max_queue_size = 10
maintain_initial_size = true
3. Save the CfnCluster configuration file and exit the editor. Your cluster configuration section should look something like this now: [cluster hpc-lab]
vpc_settings = public
key_name = your_key
base_os = ubuntu1404
compute_instance_type = c3.2xlarge

HPC on AWS - Alces Flight & CfnCluster
© 2016 Amazon Web Services, Inc. and its affiliates. All rights reserved. 20
initial_queue_size = 4
max_queue_size = 10
maintain_initial_size = true
[OPTIONAL: For those of you who want to try a more advanced topic, refer to the CfnCluster documentation on placement groups as well as the general EC2 documentation on placement groups, and make your compute nodes in your cluster launch in their own EC2 placement group.
Put very simply, EC2 placement groups control how EC2 instances are physically placed and located in a datacenter. This is often important for HPC workloads because bandwidth and latency between nodes can materially affect performance of the entire cluster. By controlling the physical placement of EC2 instances using placement groups we reduce latency and provide 10Gbps interconnects between cluster members. While low latency interconnects isn’t important for ‘embarrassingly parallel’ data processing tasks like working on many satellite imagery assets using Landsat-util, or performing image processing on light-sheet microscopy images, we want to at least let you know about this capability so you can use it for other jobs like MPI based software architectures where it could make a much large difference in the performance of your software on a cluster.]
Bootstrapping the landsat-util command line utility across our cluster To bootstrap landsat-util we’re going to need a simple shell script that takes care of installing all the software dependencies for us and then finally installing the landsat-util command line tool. We could build this ourselves and test it on a host that corresponded to the same runtime environment on our cluster, or we could use one that has already been build and tested for Ubuntu 12.04.
Have a look at the script at: https://s3-ap-southeast-2.amazonaws.com/scico-labs/scripts/bootstrap-landsat-util.sh
This script updates the host it’s running on, and then installs some python dependencies required for the landsat-util command line tool. It then installs landsat-util, and finally install ImageMagick which we may want to use to do some additional image resizing or other post-processing work.
To use this simple bootstrapping mechanism, we need to make one more change to our cluster configuration before we’re ready to update the cluster.
1. Again, open ~/.cfncluster/config and navigate to your cluster configuration section of the file. Add the following line: post_install = https://s3-ap-southeast-2.amazonaws.com/scico-labs/scripts/bootstrap-landsat-util.sh
2. Save your cfncluster configuration file and exit the editor. Your cluster configuration section should look something like this now:
HPC on AWS - Alces Flight & CfnCluster
© 2016 Amazon Web Services, Inc. and its affiliates. All rights reserved. 21
[cluster hpc-lab]
vpc_settings = public
key_name = your_key
base_os = ubuntu1404
compute_instance_type = c3.2xlarge
initial_queue_size = 4
max_queue_size = 10
maintain_initial_size = true
post_install = https://s3-ap-southeast-2.amazonaws.com/scico-labs/scripts/bootstrap-landsat-util.sh
We’re now going to update the running cluster with our new configuration. To do this, type the following making sure to use your cluster name you created earlier: cfncluster update <yourname>-firstcluster If you can’t remember what you called your CfnCluster cluster, you can list your clusters by typing: cfncluster list
3. That’s it! This will apply our changes to our cluster configuration in place.
The changes we’ve described in our configuration here are quite disruptive. To change the instance type, CnfCluster (or more accurately, CloudFormation with the help of the Auto Scaling service) will tear down or terminate the existing instances and replace them with new ones based on the new instance type, the next time a scaling event occurs. If you want to force this to happen immediately, a simple way is to terminate your existing Compute nodes in your cluster. Be sure to terminate your Compute nodes and not the Compute nodes belonging to someone else. You’ll see the old nodes terminate and new ones replace them. These new nodes will be running on the new instance type. Think about this for a moment though, not only have we upgraded our cluster effortlessly, we’ve also showed that we have a self-healing cluster. This is starting to get interesting. You can either watch CfnCluster do this via your shell or terminal session, or browse back to the CloudFormation console and watch progress there. One good use case for doing cluster upgrades this way is when AWS releases a new instance family based on a new Intel CPU architecture. Cluster upgrades to move to a new CPU architecture have never been so easy!
HPC on AWS - Alces Flight & CfnCluster
© 2016 Amazon Web Services, Inc. and its affiliates. All rights reserved. 22
Using Landsat-util Testing landsat-util with a single Landsat scene We’ll first build a simple shell script that we can run as a job on our cluster to test that we have landsat-util configured properly. The following bash script performs a simple operation on a Landsat-8 scene, and eventually writes some data back to our shared filesystem.
Create this shell script in your /shared filesystem and give it a suitable name.
For example,
$ vim /shared/landsat-scene-1.sh
#!/bin/bash
landsat download LC80090452014008LGN00 --bands 432
landsat process ~/landsat/downloads/LC80090452014008LGN00.tar.bz --bands 351 --pansharpen
convert -separate ~/landsat/processed/LC80090452014008LGN00/LC80090452014008LGN00_bands_351_pan.TIF /shared/LC80090452014008LGN00_B10.png
rm -f ~/landsat/downloads/LC80090452014008LGN00.tar.bz
rm -rf ~/landsat/processed/LC80090452014008LGN00
Alternatively, you can download a copy of this script from S3. To do this, execute the following commands: cd /shared
wget https://s3-ap-southeast-2.amazonaws.com/scico-labs/scripts/landsat-scene-1.sh
We can now put this job on our queue and let the scheduler distribute the work to one of our compute nodes. To do this, qsub the job script with:
qsub /shared/landsat-scene-1.sh
We can then check the status of the queue with:
qstat
HPC on AWS - Alces Flight & CfnCluster
© 2016 Amazon Web Services, Inc. and its affiliates. All rights reserved. 23
You’ll notice your job eventually has a ‘r’ or running status, and that one of the compute nodes is running it. A simple scene like this takes about 5 minutes to process. If we wanted to process 10s, 100s or 1000s of these scenes, we’d almost certainly want more compute infrastructure. This is what CfnCluster can give us easily.
Using Landsat-util search Landsat-util provides a search function to search across the Landsat-8 scenes dataset. The beauty of landsat-util search is that it returns a JSON result set to us of all scenes that match our search criteria.
Landsat-util search gives us a number of dimensions to search on. For example, we can search by latitude and longitude, or by address.
Run landsat-util search and have a look at some of the result sets. Feel free to experiment by building different job scripts to process those files. You could even parameterize the simple script we used above to generalize processing a scene independent of scene.
A more robust way to scale Landsat-util processing on CfnCluster would be to write a very simple driver program to take a JSON result set from a Landsat-util search, perform some validation on the result set like counting the number of results, and then automating the build of a job definition and then finally enqueuing the job definition for each scene for processing on the cluster.
We haven’t provided this driver program for you, but if you’ve finished the lab with time to spare, choose your favourite language (e.g. Python), and have a go at building something like that. If you complete this task let your lab guide know. We’d love to chat to you about your approach and ideas here.
Appendix A – Terminating your cluster One of the powerful things about using AWS for large scale processing is that cost is incurred only while you’re running compute or using storage. CfnCluster gives us the ability to create a new cluster very quickly (often less than 15 minutes), and build shared storage on our Master node from a snapshot.
In many cases, you don’t need to leave your cluster running. You can simply snapshot the EBS volume attached to your Master node, and then terminate the cluster. The next time you need another cluster or want to pick up where you left off, you can simply update your CfnCluster configuration to use the EBS snapshot when building shared storage, and create a new cluster.
EBS snapshots can be shared between AWS accounts, and can even be moved easily between AWS regions. Collaborators in other parts of the world (e.g. the UK, EU, US or throughout Asia) who want to validate or use the work you’ve performed can easily do so in a region closer to them. Simply share an EBS snapshot with them.
As a way of finishing our lab we’ll terminate our cluster. We won’t snapshot our EBS volume in this case, as we don’t want to store our work for future use, but we could easily do this first.
To terminate your cluster, SSH back to your CfnCluster controller instance, and issue the command: cfncluster delete <myclustername>
HPC on AWS - Alces Flight & CfnCluster
© 2016 Amazon Web Services, Inc. and its affiliates. All rights reserved. 24
This is all we need to do. CloudFormation will now tear down all the infrastructure we used when the cluster was build, and completely clean up our environment. This will also have the side effect of stopping any further cost for our cluster being accrued.
Once you have issued this command, you can close all your work. Your job is done. This is what we affectionately refer to as “Turning the supercomputer off when we leave the room”.
Appendix B - Using Spot instances (optional) We can also modify our cluster to use Spot instances rather than on-demand EC2 instances. As discussed earlier, this can realize some significant cost savings, especially on large clusters.
To change our cluster to use Spot instances, we modify the cluster configuration and add at least these two configuration lines:
cluster_type = spot
spot_price = 1.00
We then update our cluster:
cfncluster update test
CfnCluster will tear down our existing cluster, and make a bid for spot instances on our behalf. In this case, we’ll bid a maximum of $1.00 / hr (USD) for each of the instances in our cluster. Chances are very good that the spot price for our chosen instance type will be below that, so our spot request should be satisfied fairly quickly and our cluster created. Remember we won’t necessarily be paying $1.00 / hr for each instance, we’ll pay the current spot price. If the current spot price is $0.42 / hr, then we’ll pay that for each instance in our cluster.
It’s also very important to understand that if the spot price varies and rises above our bid, then we’ll lose our compute nodes. If you’re using spot instances widely in your HPC cluster(s), make sure you have a mechanism to check whether or not your spot instances are going to be taken away in the cluster, and if so checkpoint the current job so they can be restarted where you left off.
It’s also worth pointing out that it can sometimes take longer to provision spot instances than on-demand instances. Experiment with Spot and different bidding strategies for the instance type you want to use and see how you fare.
Summary Congratulations! You’ve created and used your own HPC cluster, updated it to use larger instance types, used EC2 placement groups, and then installed your own software on it. You may have even started experimenting with spot instances. This is starting to get useful!
HPC on AWS - Alces Flight & CfnCluster
© 2016 Amazon Web Services, Inc. and its affiliates. All rights reserved. 25
You can extend these concepts and use the CfnCluster documentation (http://cfncluster.readthedocs.org/en/latest/) to continue your HPC adventures on AWS.
Your AWS account team would also love to hear about your use case and what you’re looking to do with AWS.
Have fun, and remember, don’t forget to the turn the supercomputer off when you leave the room!
Additional Resources Getting started with HPC on AWS https://aws.amazon.com/hpc/getting-started/ Scientific Computing at AWS https://aws.amazon.com/scico The ‘Intro to HPC on AWS’ whitepaper https://d0.awsstatic.com/whitepapers/Intro_to_HPC_on_AWS.pdf
The latest CfnCluster documentation http://cfncluster.readthedocs.org/en/latest/
For feedback, suggestions, or corrections, please email Adrian White at [email protected]