how to install and finish sheetrock® gypsum panel, · pdf filerepair kit 8 the s heetrock...
TRANSCRIPT
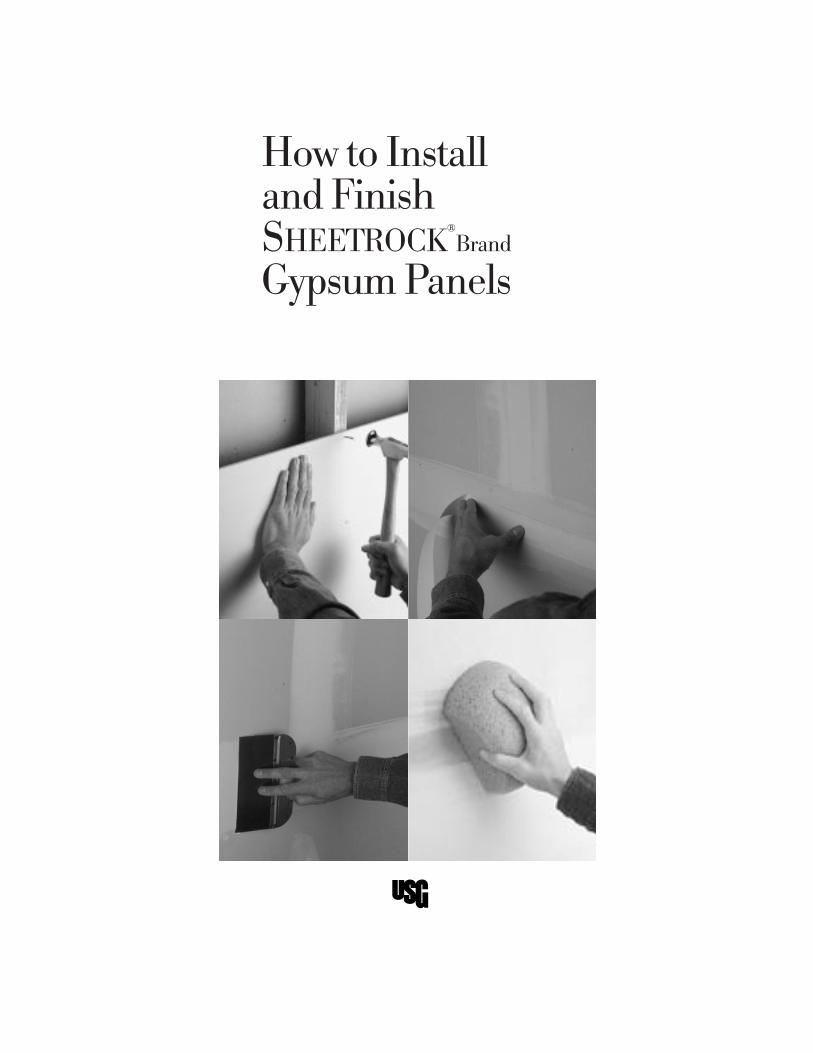
How to Installand FinishSHEETROCK
®
Brand
Gypsum Panels

The best way to obtainsmooth interior surfaceswith SHEETROCK
®Brand
Gypsum Panels is toproperly plan the job—determiningmaterials andapplication method,measuring surfacesand estimatingquantities, obtainingand using the propertools.

Selecting Materials1 SHEETROCK® Brand Regular Gypsum Panels have long edges tapered on
the face side to form a shallow recess to receive joint compound andtape. Made in four thicknesses: 5/89, 1/29, 3/89 and 1/49. (The 1/49thick panel should not be applied as a single layer but only to coverexisting wall and ceiling surfaces.)
2 SHEETROCK® Brand Gypsum Panels—Water Resistant provide a water-resistant base for the adhesive application of ceramic and plastic tileand plastic-faced wall panels. Not recommended for ceilings withframing spacing greater than 129 o.c., for single-layer resilient attachment where tile is to be applied or in remodeling unless applieddirectly to studs.
3 SHEETROCK® Brand Gypsum Panels—FIRECODE® Core, combine all theadvantages of regular panels with additional resistance to fire expo-sure. Consult local building codes for fire resistance requirements.
4 SHEETROCK® Brand Foil Back Gypsum Panels provide an effective vaporretarder for walls and ceilings when required. Not to be used in highmoisture areas.
5 SHEETROCK® Brand Interior Ceiling Panels—Sag-Resistant meet theneed for a lower-weight ceiling board, offering excellent sag-resis-tance, even when wet-textured.
5
Planning the Job
3
1
2
4
3

Application Products Type W Bugle HeadScrews attach single-layer gypsum panels towood framing. Screwsprovide greater holdingpower than wallboardnails, minimize popping andhelp prevent damage to thepanel.
1 DUR-A-BEAD™ Corner Bead is agalvanized steel reinforcementfor protecting external corners.
2 SHEETROCK® Brand No. 200-BMetal Trim is an L-shapedcasing that provides protectionand a neat finished appearancearound window and door open-ings.Available for 1/29 and 5/89gypsum panels.
3 SHEETROCK™ Brand Paper FacedMetal Bead and Trim providessuperior resistance to edgecracking and nail pops.Available in numerous stylesand sizes, including 90° andbullnose profiles.
Finishing Products4 SHEETROCK® Brand Joint Tape is a
high strength paper tape whichis lightly precreased for cornerapplication and designedspecifically for use withSHEETROCK Joint Compounds toprovide optimum performance.
5 SHEETROCK® Brand All PurposeReady Mixed Joint Compound isused for embedding tape,finishing coats, fill coats overmetal corner bead, trim andfasteners.
6 SHEETROCK® Brand LightweightAll Purpose Ready Mixed JointCompound (PLUS 3™) offers allthe benefits of SHEETROCK BrandAll Purpose Ready Mixed JointCompound with three exclusiveadvantages: less weight, lessshrinkage and easier sanding.Only two coats required overmetal corner bead and trim;sands easily; bonds well.
7 SHEETROCK® Brand LightweightSetting-Type Joint Compound(EASY SAND™ 20, 45 or 90) is aneasy-mixing, smooth-applying,quick-hardening, easy-sandingjoint compound with low shrink-age and superior bonding. Idealfor patching projects.
Planning the Job
®
®
®
��y{�y�y�y
2
5
6
4
3
4

Repair Kit8 The SHEETROCK® Brand Drywall
Repair Kit furnishes everythingyou need (except the drywall)for professional repair of holes:1-lb. bag EASY SAND 90 SettingCompound; 59 SHEETROCK®
Brand Fiberglass Drywall Tape;120-grit sandpaper; plasticspreader; 4 drywall repair clips;8 drywall screws; and DrywallRepair Instruction Sheet.
9 The SHEETROCK® Brand All-in-One Drywall Repair Kit containsthe full contents of theSHEETROCK Brand Drywall RepairKit plus a 1/29x59x89 piece ofSHEETROCK Brand Gypsum Panel.
Decorating Products10 SHEETROCK® Brand First Coat is a
flat latex paint specially formu-lated to provide an excellent first(prime) coat over gypsum pan-els. Equalizes surface porosityand texture differences.Minimizes decorating problems.Not intended as a finish coat.
SHEETROCK® Brand Wall andCeiling Texture finish is a ready-mixed texture which applieseasily and provides customdesigns and patterns for interiorsurfaces.
Horizontal or Vertical ApplicationPanels may be applied horizon-tally (long dimension acrossstuds or joists) or vertically (longdimension parallel to studs orjoists). Horizontal applicationusing 128 panel lengths is idealfor walls because linear footageof joints is minimized. If possi-ble, span the entire wall or ceil-ing from corner to corner. Tominimize joints, use the longest-length panels available and off-set all end joints in adjacentrows.
WALLS
CEILINGS
®
®
®
��y{�y�y�y
8
9
1
7
10
5

Tools Needed• Fasteners
– Wallboard nails For 1/49, 3/89 and 1/29thick panels: 1-1/49 nails.For 5/89 thick panels: 1-3/89 nails.
– 1-1/49 Type W bugle headscrews; screw gun or elec-tric drill with special bit.
• Panel adhesive
• Caulk gun
• 48 straightedge or wallboardT-square
• Utility knife and extra blades
• Metal tape measure
• Marking pencil
• Portable work light, extensioncord
• Dropcloths
• Keyhole saw or sabre saw
• Tin snips
• 59, 89 and 109 wide joint-fin-ishing knives
• Wallboard hammer
• Mud pan to hold compound
• Mud mixer
• 150-grit sandpaper or 220-grit mesh cloth
• Dust mask
• Safety glasses
• Sponge (small-celledpolyurethane)
• Stepladder
• Panel lifter
• Scaffolding
Measuring and EstimatingQuantitiesTo find out how many panelsyou will need, measure thelength and height then multiplyto determine square footage foreach wall. Subtract the squarefootage of all large openingssuch as doorways and picturewindows; don’t bother withsmall openings such as electri-cal boxes and pipe fittings. Dothe same for the ceiling. Totalthe figures and use the table onpage 7 to calculate the numberof panels needed.
Read all instructions throughbefore installing gypsum panelsso you know what you have to doand how much time you will need.
Planning the Job
6

Gypsum Panel Coverage CalculatorSize of Panels
No. of Panels 48x88 48x108 48x128
10 320 sq. ft. 400 sq. ft. 480 sq. ft.
11 352 440 528
12 384 480 576
13 416 520 624
14 448 560 672
15 480 600 720
16 512 640 768
17 544 680 816
18 576 720 864
19 608 760 912
20 640 800 960
21 672 840 1008
22 704 880 1056
23 736 920 1104
24 768 960 1152
25 800 1000 1200
26 832 1040 1248
27 864 1080 1296
28 896 1120 1344
29 928 1160 1392
30 960 1200 1440
31 992 1240 1488
Use the following table to determine the maximum frame spacing fordirect application of gypsum panels to wood framing.
Frame Spacing for Single-Layer Applicationboard application max. framethickness location method(1) spacing o.c. in.
3/89 ceiling(2)(3) perpendicular(3) 16
sidewall parallel or perpendicular 16
1/29 ceiling(4) parallel(3) 16
perpendicular 24(5)
sidewall parallel or perpendicular 24
5/89 ceiling(4) parallel(3) 16
perpendicular 24
sidewall parallel or perpendicular 24
For SHEETROCK Brand Interior Ceiling Panels—Sag-Resistantboard application max. framethickness location method(1) spacing o.c. in.
1/29 ceilings parallel or perpendicular 24
(1) Long edge position relative to framing.(2) Not recommended below unheated spaces.(3) Not recommended if water-based texturing material is to be applied.(4) SHEETROCK Brand Gypsum Panels— Water Resistant are not recommended for ceiling where framing is
greater than 129 o.c. for single-layer resilient application where tile is to be supplied.(5) Max. spacing 169 o.c. if water-based texturing material to be applied.
7

To estimate the quantity of fasteners, compound and tape you willneed, use the table below.
Fastener/Compound/Tape CalculatorWith this amount Use this amount ofof SHEETROCK Brand Use this amount of Or this amount of SHEETROCK BrandGypsum Panels wallboard nails(1) Type W Screws(2) Joint Tape
sq.ft lb. lb. ft.
100 0.6 0.3 37
200 1.1 0.6 74
300 1.6 0.9 111
400 2.1 1.2 148
500 2.7 1.4 185
600 3.2 1.6 222
700 3.7 1.9 259
800 4.2 2.2 296
900 4.8 2.4 333
1000 5.3 2.7 370
Use this amount of Use this amount of SHEETROCK BrandSHEETROCK Brand Lightweight All
With this amount of All Purpose Purpose Ready Use this amount ofSHEETROCK Brand Ready Mixed Mixed Joint SHEETROCK BrandGypsum Panels Joint Compound(3) Compound (PLUS 3)(3) First Coat
sq. ft. lb. gal. gal.
100 14 0.9 0.3
200 28 1.9 0.6
300 41 2.8 0.9
400 55 3.8 1.1
500 69 4.7 1.4
600 83 5.6 1.7
700 97 6.6 2.0
800 110 7.5 2.3
900 124 8.5 2.6
1000 138 9.4 2.9
(1) Spaced 79 on ceiling; 89 on wall. Reduce by 50% for adhesive/nail-on application.(2) Spaced 129 on ceiling; 169 on wall.(3) Coverage figures shown here approximate the amount of joint compound needed to treat the flat joints,
inside corners and outside corners using metal corner bead, in a typical room. Coverage can vary widelydepending upon factors such as condition of substrate, tools used, application methods and other jobfactors.
Planning the Job
8

Preparing the Panels
1 MarkingPlace panel with light-coloredface paper side up. Measureand mark panel size desired.
2 CuttingLine up straightedge with themarks and hold firmly againstthe panel. Draw pencil line asguide for scoring. Score throughpaper and lightly into the core.
To break the panel core,securely grasp the board edgeson both sides of the score lineand snap board with a quick,firm movement.
Use utility knife with sharp bladefor scoring. Complete cutting byrunning knife through backpaper for the length of the paneland snapping back to face.
After cutting the panel, smooththe cut edge with sandpaperwrapped around a block ofwood such as a piece of 2x4lumber. Be sure to keep edge assquare as possible.Always weara dust mask when sanding.
TipGypsum panels are heavy andmay bend or snap under theirown weight. Be sure panels are properly supported prior toscoring.
9

3 CutoutsFor openings such as an electrical outlet or switch box,measure across from the pointwhere the side edge of thepanel will rest to the near andfar sides of the installed box.Then measure from the pointwhere the top or the bottomedge of the panel will fall to thetop and bottom of the box.
Trace the outline of the electricalbox at the appropriate positionon the gypsum panel.
Cut with keyhole or sabre saw.
4 FramingPrior to panel attachment,inspect framing to ensure thatthe face of the framing isstraight.Warped or crookedframing should be repaired orreplaced.
5 Nail AttachmentPanel must be held tight toframing. Nail center of panelfirst, perimeter last. Space nails maximum of 79 apart on ceil-ings, 89 on walls and at least3/89 from ends and edges ofpanels.
Seat nail so head is in a shallowdimple formed by last blow ofdrywall hammer.
Attaching The Panels
10

TipsFor 1/49, 3/89 and 1/29 thickpanels, use 1-1/49 wallboardnails. For 5/89 panels, use 1-3/89 wallboard nails.
Drive nails in straight, not at anangle. Do not overdrive orcountersink nails. This results in breaking the face paper orfracturing the gypsum core. If anail happens to go in crooked,hold the panel tight against theframing and drive a second nailin about 29 from the nail thatpunctured the paper. Then drivethe first nail in below the surfaceof the board.
Double-nailing reduces the like-lihood of nail pops. It is highlyrecommended for ceilings. Drivefirst nails 129 o.c. along framingin the field of the board and sec-ond nails about 29 from the first.Fasten the perimeter 79 o.c. forceilings and 89 o.c. for walls.
6 Screw AttachmentSpace screws maximum of 129apart on ceilings, 169 on wallsand at least 3/89 from ends andedges of panels. Sink screws tojust below the panel surface,leaving the paper intact.
Use an electric screwgun equip-ped with an adjustable screwdepth control head and Phillipsbit. If an electric drill is used, becareful not to overdrive screws.
11

TipOn 3/89, 1/29 and 5/89 thickpanels, use 1-1/49 Type WBugle Head Screws for superiorholding power and high resis-tance to popping due to woodshrinkage.
7 Adhesive AttachmentSelect the proper adhesive forspecific job requirements. Makesure that framing is clean,sound and free from oil, dirt orcontamination.Apply adhesiveand nails per instructions onadhesive cartridge. Do not usejust adhesive to secure panels.
8 CeilingsApply ceilings first. Becausepanels are difficult to maneuverover one’s head, it’s best tohave a helper or two. Fastenpanels to all joists and perimeterframing. Space nails maximum79 apart along framing, screws129 apart, starting in the centerof the panel and working towardthe perimeter. Double-nailing isrecommended to reduce nailpops.
TipMake T-braces consisting of1x4’s nailed to 2x4 uprights thatare 1/29 longer than floor-to-ceiling height.Wedge T-bracesbetween floor and panel tosupport panel while drivingfasteners to ensure firm contactwith joists. The preferredmethod is to use a panel liftertool (available at many buildingmaterial rental outlets). See the table ”Frame Spacing forSingle-Layer Application” onpage 7 for application onceilings.
Attaching The Panels
12

9 WallsApply panels horizontally orvertically to framing. If appliedhorizontally, install top row first.Position first panel tight againstthe installed ceiling panel andfasten to studs. Space nailsmaximum 89 apart alongframing, screws 169 apart,starting in the center of thepanel and working toward theperimeter. Cut panels accuratelyso that they do not have to beforced into place. Continuearound the room.
Apply lower row of panels sothat tapered edges meet withthose of top row.Vertical jointsshould be staggered.Avoidvertical joints directly above orbelow a window, door or otheropening for best decoratingresults.
Tips Use a panel lifter tool to helpinstall bottom panels.A fillerstrip may be needed to bring thewall to ceiling height. Put thefiller strip at the bottom of thewall, cut edge down.The bottomjoint usually is hidden by thebaseboard.
To join panels at an insidecorner, butt the second panelagainst the first and fasten theend of the second to a stud.
To join panels at an outsidecorner, lap the end of the second board over the end ofthe first. Make sure panels abutneatly—do not overlap orextend the end of the secondboard beyond the first. Fastenboth panel ends to their com-mon stud.
13

10 Corners a. Method 1—DUR-A-BEAD CornerReinforcement Using DUR-A-BEAD CornerReinforcement, apply it to allexterior corners of walls, soffitsand window returns. Hold beadfirmly against corner and nailbead through small holes every99 on each flange. Make surethat nails penetrate framingmembers. Drive all nails belownose of corner bead and tightlyinto flange so that joint com-pound will cover smoothly andevenly. Be careful not to dentthe metal. Screw attachment isnot recommended.
Install USG Metal Trim wheregypsum panels butt windows orconcrete block. Nail trim every99 through small holes in flange.Make sure that nails penetrateframing members.
Tips The easiest way to trim a cornerbead to the correct length is tocut through the flanges with tinsnips one flange at a time, bendand snap.
Force bead onto corner beingcareful that the flanges don’tspread beyond 90° angle,making it hard to cover themwith joint compound.
b. Method 2—SHEETROCK BrandPaper Faced Metal Bead and TrimMeasure length of corner andcut trim to length with metalsnips. For vertical wall installa-tions, cut the corner trim 1/29(12.7 mm) shorter than the wallheight.
Using a 49 taping knife, applyready-mixed SHEETROCK BrandJoint Compound (Taping,All-Purpose, or Lightweight All-Purpose) or Setting-TypeSHEETROCK Brand JointCompound (DURABOND™ or EASY
SAND) to drywall slightly beyondwhere the edge of the trim willbe. Helpful Hint: For this step,application of the compoundoften works best if the com-pound is thinned slightly withwater. Add water in small incre-ments (for one gallon of com-pound, add water in 2 oz. incre-ments) and mix with compound.
Attaching The Panels
14

Be careful not to overthincompound. (For outsidecorners, extend compoundapproximately 29 or 50 mmfrom the corner on each side;for inside corners, extend 1-1/29 or 38 mm from the othercorner on each side.)
Place trim on wall and press intoposition. Corner bead should bealigned tight to ceiling. Embedtrim by running the knife over itwith even pressure at a 45°angle.
Use the knife (or a dampsponge) to remove excesscompound, eliminating any airbubbles under the paper.Allowto dry.
Using a 69 taping knife for outside corners (49 for insidecorners), apply another coat ofjoint compound (EASY SAND,Topping,All-Purpose, orLightweight All-Purpose). Keepthis coat as smooth as possible.Feather out 59 to 69 (125 to 150mm) from the nose of the trimon each side for outside corners(19 or 25 mm past previous coatfor inside corners). Let dry. Sandsides lightly where needed.
Use an 89 or larger finishingknife for outside corners (49-69knife for inside corners) to applya finishing coat of the sameready-mixed or setting-typecompound. Feather compound89 (200 mm) from nose of trimfor outside corners (19 [25 mm]past previous coat for insidecorners). Let dry. Sand andprime.
15

11 First Coat, Flat JointsStart with butt joints.Apply aneven coat of thinned joint compound for the length of thejoint with a 59 finishing knife.
Center and lightly press tapeinto wet joint compound withfingers. Draw 59 knife firmlyalong joint to tightly embedtape. Be sure there is sufficientjoint compound under tape toprevent blistering of the tape.
While embedding the tape,remove excess joint compoundfrom edge and apply as a thincoat over the tape.
To reinforce tapered joints, fol-low same procedure. Tapeshould overlap tape applied tobutt joints.
Tips For best results, apply mediumpressure and hold knife at a 45°angle to panel.
To apply joint compound neatly,dip the knife sideways into thepan so you load only half thewidth of the blade. For bestresults, joint compound shouldbe thinned slightly with water foreasier application.Add water insmall increments (for one gallonof compound, add water in 2 oz.increments).
45
Finishing the Panels
16

Keep the blade clean, especiallyof dried bits of compound, toavoid leaving scratches in thewet joint compound as you drawthe knife over it. Discard anycompound containing dried bitsof material. Clean blade bydrawing it over edge of pan.
While embedding tape, draw theknife slowly along the length ofthe tape to provide an even distribution of joint compound.Don’t worry about a few groovesor streaks in the joint com-pound. They will be coveredover in the subsequent coats.
12 First Coat, Inside CornersUse a 59 joint finishing knife to apply thin layer of jointcompound on both sides ofcorner. Extend compoundslightly beyond area to becovered by tape.
Fold tape along center creaseand lightly press into positionwith your fingers.
Tightly embed tape as withother joints.
17

13 First Coat, FastenersFor each fastener depression,apply joint compound with 59knife.Holding the blade almostflush with the panel, draw the jointcompound across a fastener headand the dimple surrounding it.
Then raise the knife blade to amore upright position andscrape off excess with a secondstroke at a right angle to the firststroke. Compound should belevel with panel surface.
TipTo determine if fasteners areproperly seated prior to finish-ing, draw clean knife over eachfastener. If metallic ring occurs,drive fastener below surface,being careful not to break paper.
14 First Coat, Outside Corners andMetal TrimApply joint compound with 89knife onto one flange of the corner bead.Work down theentire length of the bead. Holdknife at 45° angle and smoothcompound—one edge of kniferiding the metal, the other on thesurface of the panel. Compoundshould extend onto panel a minimum of 49. Repeat applica-tion for other flange. Use sameapplication method for metaltrim.
TipAfter filling first flange, themetal corner edge may havesome lumps of joint compound.To remove, run 89 blade up thebead while also moving it to theside. In this way, the compoundis continuously moved aside asit is scraped off.
Finishing the Panels
18

15 Second Coat, Flat Joints andFastenersAllow first coat to dry overnight.Scrape off bumps, ridges andother imperfections with knife.Be careful not to damage surface.
Apply joint compound to taperedjoints using an 89 knife thelength of the joint.
Apply pressure to knife edgefarthest from the joint and liftthe other edge just slightlyabove surface. Draw knife downjoint. Repeat for opposite edge.This technique is called feather-ing. Joint compound shouldextend beyond first coat for atotal width of 79 or 89.
Apply a 79-89 coat of jointcompound to each side of buttjoints and feather. Compoundshould extend beyond first coatfor a total width of 149.
Apply a second coat tofasteners in same manner asfirst coat.
16 Second Coat, Inside CornersAllow first coat to dry overnight.Apply joint compound on oneside using a 59 knife for thelength of the corner. Scrape offany compound that laps ontothe second side. Feather outbeyond first coat and allow todry.After first side is dry, applycompound on other side andfeather.
19

17 Second Coat, Outside Corners andMetal TrimAllow first coat to dry overnight.Apply second coat with 89 knife,feathering slightly beyond firstcoat.
18 Third Coat, Flat Joints andFastenersAllow second coat to dryovernight. If necessary, removeimperfections with knife orsandpaper.Apply a thin finishingcoat with a 109 knife to the flatjoints and a 59 knife to the fas-tener heads. Press knife firmlyso joint compound fills depres-sions but does not significantlyadd to thickness. Feather edgesat least 29 beyond second coat.
TipsDo not sand unless it isnecessary. If you do sand, usefine-grit sandpaper and becareful not to scuff the gypsumpanel paper to minimize surfacetouch-up requirements. For bestresults, compound should beused as thick as possible on fillcoats and thinned with water forfinish coats.
Before applying the final coat,check to see if tapered joints arelevel with surface. Hold the 109blade across the joint, straightout from the wall. If the bladecan be rocked across the joint,the joint is humped. It must behidden by feathering the finalcoat out as far as possible.
Finishing the Panels
20

When applying earlier coats,minor depressions and grooveswere not a problem. However,do not leave any during theapplication of this final coat orthey will mar the finished sur-face.
19 Third Coat, Outside Corners andMetal TrimAllow second coat to dry over-night. Sand lightly if necessary.Apply third coat with 109 knife,feathering slightly beyond sec-ond coat. A third coat is typicallynot required if SHEETROCK BrandLightweight All Purpose ReadyMixed Joint Compound (PLUS 3)is used.
20 SandingAllow third coat to dry overnight.Lightly sand imperfections infinished joints, corners and overfastener heads. Carefullyremove sanding dust with dampsponge.
TipUse a fine-grit sandpaperwrapped around a block ofwood so you don’t dig into thejoint compound.Avoid roughen-ing the surface paper whensanding. If you do roughen it byaccident, repair the damage byapplying a little joint compoundwith a 59 knife.
21

Wet SandingWhen only minimal sanding isneeded, try wet sanding with asponge. It eliminates dust anddoes not scuff the surfacepaper. Use a small-celledpolyurethane sponge similar inappearance to carpet padding.Saturate sponge and wring toprevent dripping. Rub joints toremove high spots, using as fewstrokes as possible. Clean thesponge frequently during use.
21 Storage and CleanupBefore storing unused jointcompound, clean sides and lidof container so no dried com-pound falls into the mixture.Level joint compound surfacewith knife and cover containertightly. If storing for a long time,cover surface of joint compoundwith approximately 1/29 of cleanwater and cover container. Donot store in direct sunlight orwhere freezing conditions mayoccur. Pour off water beforereusing joint compound. Cleantools with warm, soapy water.
Decorating The Panels22 Priming
Prior to painting, applySHEETROCK Brand First Coat or aflat latex paint as a prime coat.Follow the manufacturer’s recommendations. For bestresults, use a high quality rollerwith 1/89 to 1/49 nap.
Tip Keep the roller wet during appli-cation and do not rework theprimer once it’s applied.Overworking the primer maythin or remove underlying com-pound.
23 Painting and TexturingAfter prime coat is dry, applySHEETROCK Brand Wall andCeiling Texture or a good qualityinterior paint. Follow the recom-mendations on the container.
Finishing the Panels
22

Repairing Damaged Panels
When repairing damaged pan-els, the ideal products to use areEASY SAND 90 Joint Compounddescribed on page 4 under“Finishing Products” and theSHEETROCK Brand Drywall RepairKit described on page 5 under“Repair Kit.”
1 Patching Dents, Holes, PoppedNails and Cracksa. To repair a dent, sand andthen fill with joint compound. Letharden.Add second coat if nec-essary. Sand and prime whendry.
b. To repair a small hole orcrack, trim any loose piecesfrom the damaged area andwipe it clean. Fill with joint com-pound, using a putty knife. Letharden.Add second coat if necessary. Sand and primewhen dry.
c. To repair a popped nail, driveand dimple new nail 1-1/29from popped nail. Drive anddimple popped nail. Cover withjoint compound. Sand andprime when dry.
2 Patching Medium HolesTrim any loose pieces from thedamaged area using a knife andwipe it clean.
a.Apply generous amounts ofjoint compound around edgesand coat the perimeter of hole.
b. Crisscross two or three stripsof joint tape over opening andembed tape in joint compound.Let harden.
23
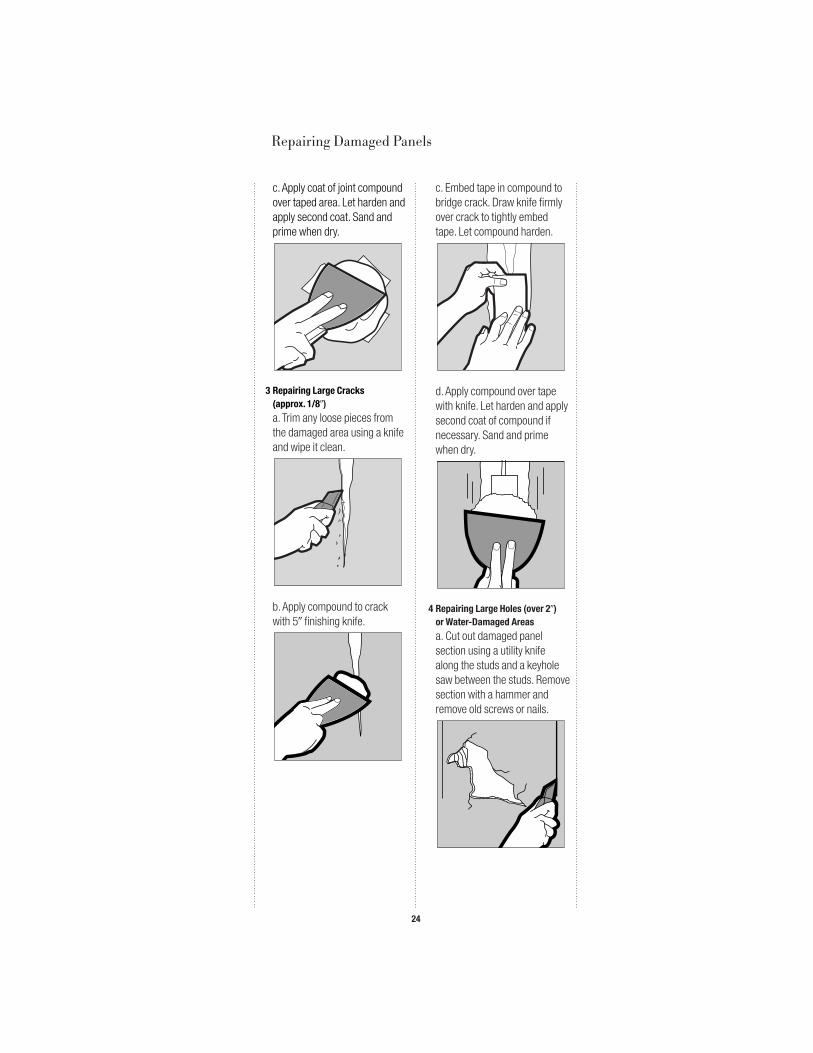
c.Apply coat of joint compoundover taped area. Let harden andapply second coat. Sand andprime when dry.
3 Repairing Large Cracks (approx. 1/89)a. Trim any loose pieces fromthe damaged area using a knifeand wipe it clean.
b.Apply compound to crackwith 59 finishing knife.
c. Embed tape in compound tobridge crack. Draw knife firmlyover crack to tightly embedtape. Let compound harden.
d.Apply compound over tapewith knife. Let harden and applysecond coat of compound ifnecessary. Sand and primewhen dry.
4 Repairing Large Holes (over 29) or Water-Damaged Areasa. Cut out damaged panel section using a utility knifealong the studs and a keyholesaw between the studs. Removesection with a hammer andremove old screws or nails.
Repairing Damaged Panels
24

b. Slip drywall repair clips ontothe edge of the damaged wall.Position screws about 3/49 infrom the edge and centeredbetween the tabs. This will lineup the screws with perforationsin the clips. Screw through wallinto each drywall repair clip.
c. Measure and cut new drywallpanel section to fit damagedarea. Screw through new dry-wall into each drywall repairclip. Screw into drywall, posi-tioning screw opposite screwholding clip and about 3/49 fromedge.
d. Remove tabs from each dry-wall repair clip. Apply compoundand tape to all four sectionsides. Do not overlap tape.Applysecond and third coats of jointcompound, allowing each coatto harden before applying nextcoat and feathering out fromprevious coats. Sand and primewhen dry.
5 Torn Gypsum Panel Face Papera. Peel and remove loose facepaper.
b.Apply a skim coat of jointcompound with a joint-finishingknife to damaged area andfeather to get a smooth finish.Let dry and apply second coat ifnecessary. Sand and primewhen dry.
25

Trademarks:The following trademarks used herein areowned by USG Corporation or its sub-sidiaries: SHEETROCK, USG, DUR-A-BEAD,DURABOND, QUIK & EASY, EASY SAND, FIRECODE
and PLUS 3.
Note:All products described here may not beavailable in all geographic markets. Consultyour local United States Gypsum Companydealer for information.
Notice:We shall not be liable for incidental and con-sequential damages, directly or indirectlysustained, nor for any loss caused by appli-cation of these goods not in accordance withcurrent printed instructions or for other thanthe intended use. Our liability is expresslylimited to replacement of defective goods.Any claim shall be deemed waived unlessmade in writing to us within thirty (30) daysfrom date it was or reasonably should havebeen discovered.
United States Gypsum Company125 South Franklin StreetP.O. Box 806278Chicago, IL 60680-4124A Subsidiary of USG Corporation
©2000, United States Gypsum Company,J371/rev.4/00 Printed in U.S.A.
(800) USG-4YOU (874-4968)http://www.usg.com