hhmi biotechnology guide (pdf) - howard hughes medical institute
TRANSCRIPT
Use HHMI Resources to Teach: Biotechnology and Related Laboratory Techniques 1
UUUssseee HHHooowwwaaarrrddd HHHuuuggghhheeesss MMMeeedddiiicccaaalll
IIInnnssstttiiitttuuuttteee RRReeesssooouuurrrccceeesss tttooo TTTeeeaaaccchhh:::
BBBiiiooottteeeccchhhnnnooolllooogggyyy aaannnddd RRReeelllaaattteeeddd
LLLaaabbbooorrraaatttooorrryyy TTTeeeccchhhnnniiiqqquuueeesss
Prepared by
Ann Brokaw
AP Biology/Biology Teacher Rocky River High School
Rocky River, Ohio
Last updated: January, 2013
2013
Use HHMI Resources to Teach: Biotechnology and Related Laboratory Techniques 2
Use Howard Hughes Medical Resources to Teach: Biotechnology and Other Related Laboratory Techniques
Table of Contents Page From the Author 2 Introduction 3
Genetic Engineering 4 Polymerase Chain Reaction (PCR) 6 DNA Sequencing 7 Microarray 9 Appendix A: Transgenic Fly Virtual Lab 13 Appendix B: Bacterial Identification Virtual Lab 20
From the Author With the pace of current research, the biological sciences change incredibly fast, particularly in the fields of molecular genetics and biotechnology. Therefore, as a veteran biology teacher, I am constantly looking for resources that include up-to-date research, prompt students to process material, help reinforce textbook material, and stimulate discussions and explorations of current biological topics. For these reasons, I routinely use HHMI’s BioInteractive website and Holiday Lectures on Science DVDs in my classroom to highlight and strengthen my day-to-day coverage of material. These resources are accurate, user-friendly, free of charge, and easily accessible; all key elements for successful classroom implementation. They have greatly enhanced my teaching methods in the classroom, my students’ ability to understand the material, and our shared knowledge about current findings in Biology. The video clips, animations, and lecture chapters enhance formal classroom lecture material increasing student understanding and assisting student visualization of the subject matter, particularly at the molecular level, where many students struggle. Furthermore, the interactive click-and-learns, virtual museum, and classroom activities are used to introduce or complement curricular objectives. Finally, the virtual lab series is an excellent set of computer laboratory simulations. This curriculum guide assists in filtering through the vast available resources and organizes the material according to biotechnology laboratory techniques. Please do not hesitate to contact me with any questions or suggestions. Most sincerely, Ann Brokaw Rocky River High School Rocky River, Ohio [email protected]
Use HHMI Resources to Teach: Biotechnology and Related Laboratory Techniques 3
Introduction The amount of resources accessible to teachers from various organizations and the internet can be overwhelming. Furthermore, finding the time to process these resources and develop them into solid classroom-ready activities and lessons is difficult. This guide provides teacher-ready curriculum ideas utilizing Howard Hughes Medical Institute (HHMI) resources, including the BioInteractive website features and the Holiday Lectures on Science DVDs, to enhance classroom instruction of molecular genetics, specifically related to biotechnology. This curriculum guide organizes HHMI resources in the following categories: genetic engineering, polymerase chain reaction (PCR), DNA sequencing, and microarrays. The resources include animations, video clips, interactive click-and-learn activities, virtual labs, and lectures specific to the topic. In addition, Appendices A and B include classroom-ready student worksheets for two virtual labs related to biotechnology. The following is a brief overview of the material covered in each part.
Genetic Engineering
This section looks at recombinant DNA, transgenic technology, and somatic cell nuclear transfer. The recombinant DNA resource addresses the roles of restriction enzymes, bacterial DNA, and DNA ligase in the field of genetic engineering. The transgenic technology section includes a discussion of how transgenic organisms are engineered and current research in the field. Also included is a virtual lab illustrating transgenic organisms. (See also Appendix A.) The section on somatic cell nuclear transfer explains the technology involved in the production of genetically identical cells and organisms.
Polymerase Chain Reaction
When the polymerase chain reaction (PCR) was first discovered, the face of biological research instantly changed. Experiments that took numerous days, and sometimes weeks or months to complete, now took just hours. The resources included here are great illustrations showing the basics of PCR, including discussions of the cycles, primers, enzymes, and overall purpose of the process. In addition, a virtual lab illustrates the use of PCR in the laboratory setting. (See also Appendix B.)
DNA Sequencing
As with PCR, the Human Genome Project changed molecular genetics research from day one. These resources explain various approaches to DNA sequencing that have been used through the years both in basic research and in conjunction with the Human Genome Project.
Microarrays
Microarrays enable researchers to measure the activity of thousands of genes simultaneously, and they have a broad range of applications in current biological research. This collection of resources explores the basics of how a microarray is made, how one is analyzed, and current uses of microarrays in research.
Use HHMI Resources to Teach: Biotechnology and Related Laboratory Techniques 4
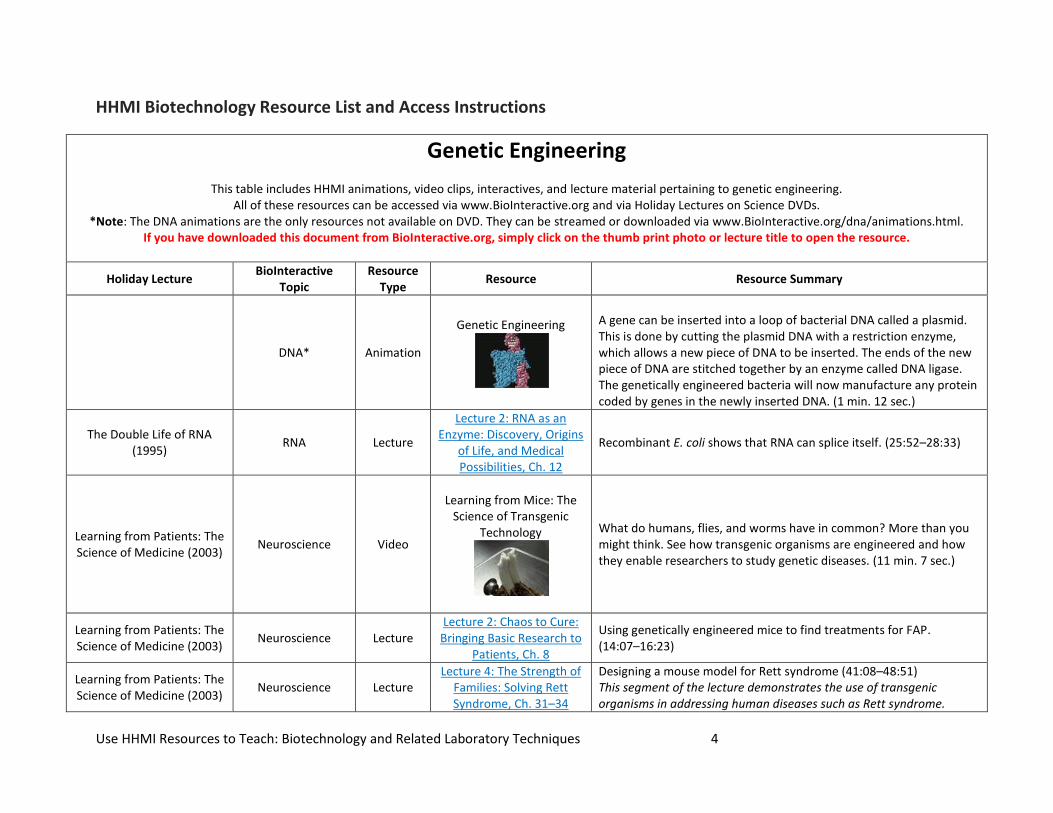
HHMI Biotechnology Resource List and Access Instructions
Genetic Engineering
This table includes HHMI animations, video clips, interactives, and lecture material pertaining to genetic engineering. All of these resources can be accessed via www.BioInteractive.org and via Holiday Lectures on Science DVDs.
*Note: The DNA animations are the only resources not available on DVD. They can be streamed or downloaded via www.BioInteractive.org/dna/animations.html. If you have downloaded this document from BioInteractive.org, simply click on the thumb print photo or lecture title to open the resource.
Holiday Lecture BioInteractive
Topic Resource
Type Resource Resource Summary
DNA* Animation
Genetic Engineering
A gene can be inserted into a loop of bacterial DNA called a plasmid. This is done by cutting the plasmid DNA with a restriction enzyme, which allows a new piece of DNA to be inserted. The ends of the new piece of DNA are stitched together by an enzyme called DNA ligase. The genetically engineered bacteria will now manufacture any protein coded by genes in the newly inserted DNA. (1 min. 12 sec.)
The Double Life of RNA (1995)
RNA Lecture
Lecture 2: RNA as an Enzyme: Discovery, Origins
of Life, and Medical Possibilities, Ch. 12
Recombinant E. coli shows that RNA can splice itself. (25:52–28:33)
Learning from Patients: The Science of Medicine (2003)
Neuroscience Video
Learning from Mice: The
Science of Transgenic Technology
What do humans, flies, and worms have in common? More than you might think. See how transgenic organisms are engineered and how they enable researchers to study genetic diseases. (11 min. 7 sec.)
Learning from Patients: The Science of Medicine (2003)
Neuroscience Lecture Lecture 2: Chaos to Cure:
Bringing Basic Research to Patients, Ch. 8
Using genetically engineered mice to find treatments for FAP. (14:07–16:23)
Learning from Patients: The Science of Medicine (2003)
Neuroscience Lecture Lecture 4: The Strength of
Families: Solving Rett Syndrome, Ch. 31–34
Designing a mouse model for Rett syndrome (41:08–48:51) This segment of the lecture demonstrates the use of transgenic organisms in addressing human diseases such as Rett syndrome.

Use HHMI Resources to Teach: Biotechnology and Related Laboratory Techniques 5
Holiday Lecture BioInteractive
Topic Resource
Type Resource
Resource Summary
Clockwork Genes: Discoveries in Biological
Time (2000) Biological Clocks Lecture
Lecture 4: The Mammalian Timekeeper, Ch. 5–9
Genetic approaches in mice: the model mammalian system. (7:25–16:34) These chapters present an example of how transgenic mice are used to screen and analyze genes for mutants.
Clockwork Genes: Discoveries in Biological
Time (2000) Biological Clocks Lecture
Lecture 4: The Mammalian Timekeeper, Ch. 11–14
Positional-cloning analysis to map the Clock gene. (17:26–24:07) This lecture clip discusses positional-cloning as a technique to use in conjunction with transgenic mice to map genes.
Clockwork Genes: Discoveries in Biological
Time (2000) Biological Clocks Lecture
Lecture 4: The Mammalian Timekeeper, Ch. 24–25
Tau mutant in the golden hamster. (35:10–38:28) These chapters provide an example of how transgenic mice are used to identify genetic mutants.
Clockwork Genes: Discoveries in Biological
Time (2000) Biological Clocks
Virtual Lab
The Transgenic Fly Virtual Lab
This lab will familiarize you with the science and techniques used to make transgenic flies. Transgenic organisms, which contain DNA that is inserted experimentally, are used to study many biological processes. In this lab, you will create a transgenic fly to study circadian rhythms. The fly glows only when a certain gene involved in circadian rhythms is activated. After making the glowing fly, you will use it to explore basic principles of circadian biology and genetics. (See Appendix A for a classroom-ready worksheet for students.)
Potent Biology: Stem Cells, Cloning, and Regeneration
(2006) Stem Cells Lecture
Lecture 2: Adult Stem Cells and Regeneration,
Ch. 35–38
Muscular dystrophy overwhelms stem cell capacity. (42:41–49:30) This lecture material provides an example of how transgenic mice are used in current human disease research.
Potent Biology: Stem Cells, Cloning, and Regeneration
(2006) Stem Cells Video
Somatic Cell Nuclear Transfer
Somatic cell nuclear transfer (SCNT) is performed by looking through a microscope and using small glass pipettes to handle human eggs and to remove and transfer nuclei from one cell to another. SCNT is used to produce clones of cells with the same genetic background as the donor nucleus. (1 min. 59 sec.)
Potent Biology: Stem Cells, Cloning, and Regeneration
(2006) Stem Cells Lecture
Lecture 3: Coaxing Embryonic Stem Cells,
Ch. 4–12
Stem cells and cloning. (4:28–19:34) This 15-minute lecture clip explains the use of somatic cell nuclear transfer in stem-cell research today.
Potent Biology: Stem Cells, Cloning, and Regeneration
(2006) Stem Cells Lecture
Lecture 3: Coaxing Embryonic Stem Cells,
Ch. 29–34
Challenges in studying degenerative diseases. (37:41–46:52) This lecture clip illustrates the use of somatic cell nuclear transfer in research pertaining to human degenerative disease.
The Meaning of Sex: Genes and Gender (2001)
Sex Determination Lecture Lecture 4: Sexual
Evolution: From X to Y, Ch. 19–27
Deletions on the Y chromosome are a leading cause of male infertility. (31:50–44:59) This 13-minute segment discusses causes of male infertility and the use of intracytoplasmic sperm injection as a remedy.
Use HHMI Resources to Teach: Biotechnology and Related Laboratory Techniques 6
Polymerase Chain Reaction (PCR) This table includes HHMI animations, video clips, interactives, and lecture material pertaining to the polymerase chain reaction (PCR).
All of these resources can be accessed via www.BioInteractive.org and via Holiday Lectures on Science DVDs. *Note: The DNA animations are the only resources not available on DVD. They can be streamed or downloaded via www.BioInteractive.org/dna/animations.html.
If you have downloaded this document from BioInteractive.org, simply click on the thumb print photo or lecture title to open the resource.
Holiday Lecture BioInteractive
Topic Resource
Type Resource Resource Summary
DNA* Animation
Polymerase Chain
Reaction
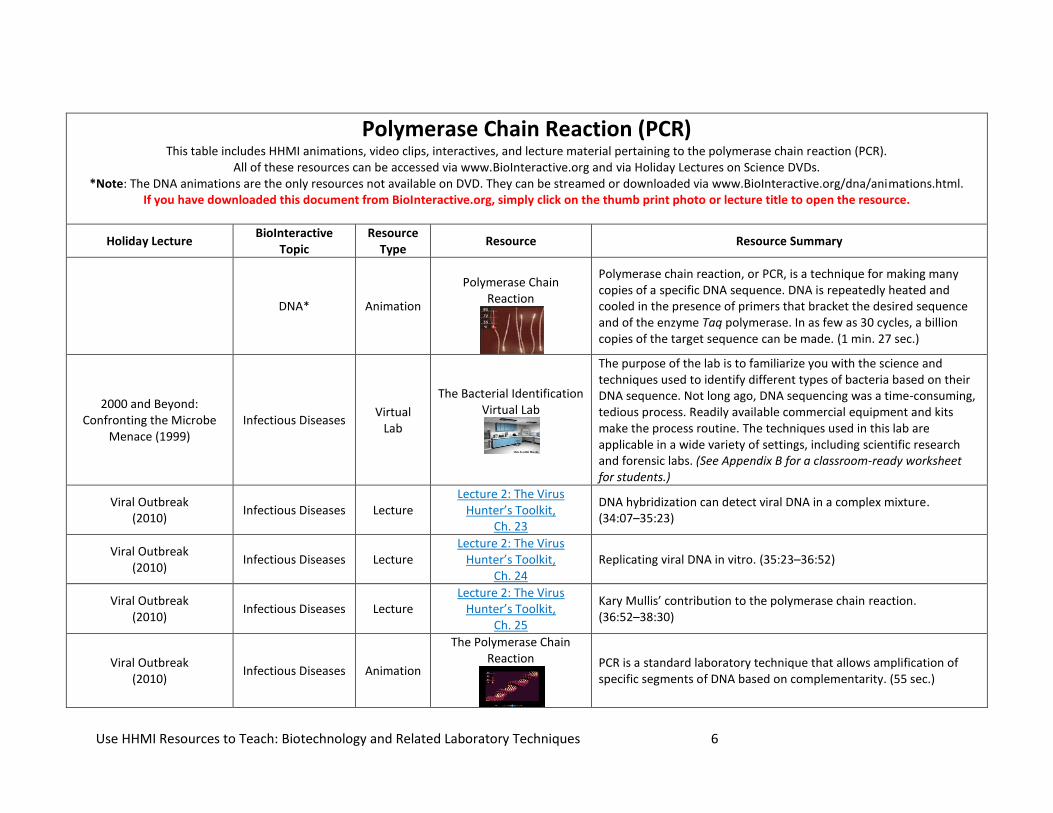
Polymerase chain reaction, or PCR, is a technique for making many copies of a specific DNA sequence. DNA is repeatedly heated and cooled in the presence of primers that bracket the desired sequence and of the enzyme Taq polymerase. In as few as 30 cycles, a billion copies of the target sequence can be made. (1 min. 27 sec.)
2000 and Beyond: Confronting the Microbe
Menace (1999) Infectious Diseases
Virtual Lab
The Bacterial Identification Virtual Lab
The purpose of the lab is to familiarize you with the science and techniques used to identify different types of bacteria based on their DNA sequence. Not long ago, DNA sequencing was a time-consuming, tedious process. Readily available commercial equipment and kits make the process routine. The techniques used in this lab are applicable in a wide variety of settings, including scientific research and forensic labs. (See Appendix B for a classroom-ready worksheet for students.)
Viral Outbreak (2010)
Infectious Diseases Lecture Lecture 2: The Virus
Hunter’s Toolkit, Ch. 23
DNA hybridization can detect viral DNA in a complex mixture. (34:07–35:23)
Viral Outbreak (2010)
Infectious Diseases Lecture Lecture 2: The Virus
Hunter’s Toolkit, Ch. 24
Replicating viral DNA in vitro. (35:23–36:52)
Viral Outbreak (2010)
Infectious Diseases Lecture Lecture 2: The Virus
Hunter’s Toolkit, Ch. 25
Kary Mullis’ contribution to the polymerase chain reaction. (36:52–38:30)
Viral Outbreak (2010)
Infectious Diseases Animation
The Polymerase Chain Reaction
PCR is a standard laboratory technique that allows amplification of specific segments of DNA based on complementarity. (55 sec.)
Use HHMI Resources to Teach: Biotechnology and Related Laboratory Techniques 7
Holiday Lecture BioInteractive
Topic Resource
Type Resource Resource Summary
Viral Outbreak (2010)
Infectious Diseases Lecture Lecture 3: Fighting Viruses
in the Lab and Beyond, Ch. 25–26
An RT-PCR (reverse transcriptase PCR) test to identify dengue subtypes. (38:38–42:52)
Viral Outbreak (2010)
Infectious Diseases Lecture Lecture 3: Fighting Viruses
in the Lab and Beyond, Ch. 33
Q&A: How long does manual PCR take? (54:32–56:01)
DNA Sequencing This table includes HHMI animations, video clips, interactives, and lecture material pertaining to DNA sequencing.
All of these resources can be accessed via www.BioInteractive.org and via Holiday Lectures on Science DVDs. *Note: The DNA animations are the only resources not available on DVD. They can be streamed or downloaded via www.BioInteractive.org/dna/animations.html.
If you have downloaded this document from BioInteractive.org, simply click on the thumb print photo or lecture title to open the resource.
Holiday Lecture BioInteractive
Topic Resource
Type Resource Resource Summary
Scanning Life’s Matrix: Genes, Proteins, and Small
Molecules (2002)
Genomics and Chemical Genetics
Lecture Lecture 1: Reading Genes
and Genomes, Ch. 3 Interview with Dr. Eric Lander. (3:46–6:18) Dr. Lander is one of the original scientists involved in the Human Genome Project.
Scanning Life’s Matrix: Genes, Proteins, and Small
Molecules (2002)
Genomics and Chemical Genetics
Lecture Lecture 1: Reading Genes and Genomes, Ch. 11–15
Genetic basis of cystic fibrosis and the Human Genome Project. (18:46–25:04) This lecture clip reviews the history of the Human Genome Project and the various historical methods of DNA sequencing.
Scanning Life’s Matrix: Genes, Proteins, and Small
Molecules (2002)
Genomics and Chemical Genetics
Lecture Lecture 1: Reading Genes and Genomes, Ch. 22–24
How big is the human genome? (33:08–41:00) These chapters include information on the size of the human genome, a comparative example to demonstrate the size, and how researchers find genes within the genome.
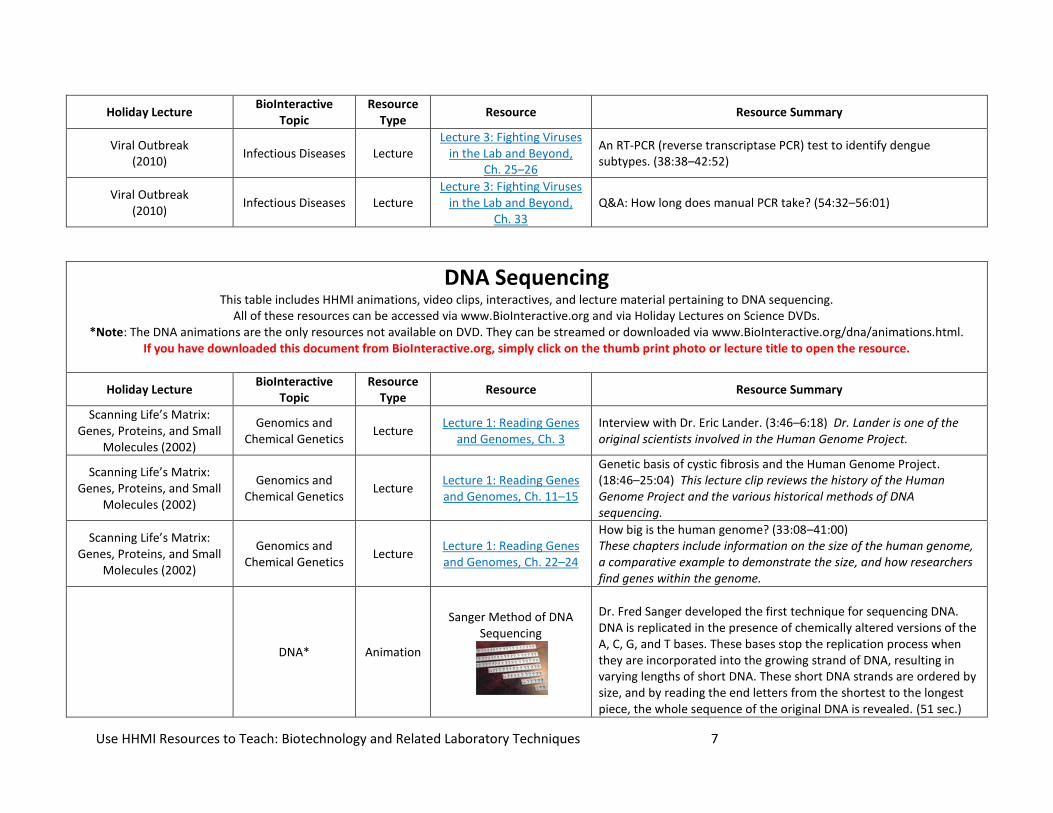
DNA* Animation
Sanger Method of DNA Sequencing
Dr. Fred Sanger developed the first technique for sequencing DNA. DNA is replicated in the presence of chemically altered versions of the A, C, G, and T bases. These bases stop the replication process when they are incorporated into the growing strand of DNA, resulting in varying lengths of short DNA. These short DNA strands are ordered by size, and by reading the end letters from the shortest to the longest piece, the whole sequence of the original DNA is revealed. (51 sec.)
Use HHMI Resources to Teach: Biotechnology and Related Laboratory Techniques 8
Holiday Lecture BioInteractive
Topic Resource
Type Resource Resource Summary
DNA* Animation
Human Genome
Sequencing
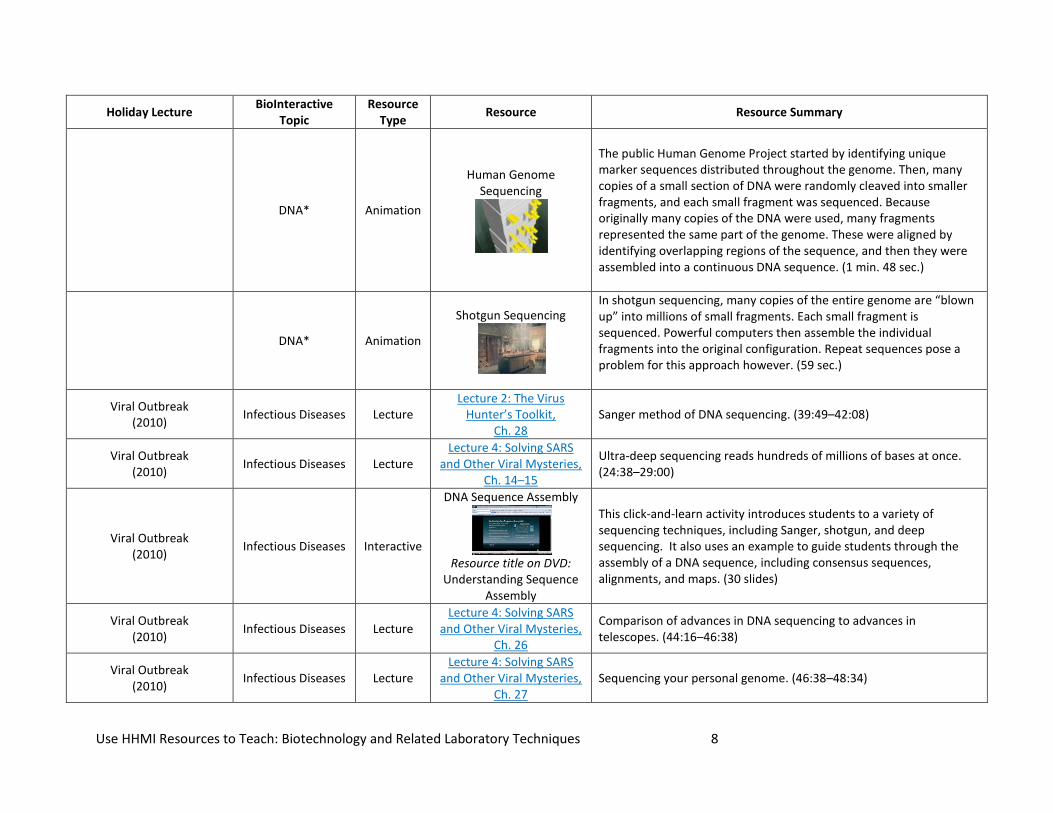
The public Human Genome Project started by identifying unique marker sequences distributed throughout the genome. Then, many copies of a small section of DNA were randomly cleaved into smaller fragments, and each small fragment was sequenced. Because originally many copies of the DNA were used, many fragments represented the same part of the genome. These were aligned by identifying overlapping regions of the sequence, and then they were assembled into a continuous DNA sequence. (1 min. 48 sec.)
DNA* Animation
Shotgun Sequencing
In shotgun sequencing, many copies of the entire genome are “blown up” into millions of small fragments. Each small fragment is sequenced. Powerful computers then assemble the individual fragments into the original configuration. Repeat sequences pose a problem for this approach however. (59 sec.)
Viral Outbreak (2010)
Infectious Diseases Lecture Lecture 2: The Virus
Hunter’s Toolkit, Ch. 28
Sanger method of DNA sequencing. (39:49–42:08)
Viral Outbreak (2010)
Infectious Diseases Lecture Lecture 4: Solving SARS
and Other Viral Mysteries, Ch. 14–15
Ultra-deep sequencing reads hundreds of millions of bases at once. (24:38–29:00)
Viral Outbreak (2010)
Infectious Diseases Interactive
DNA Sequence Assembly
Resource title on DVD:
Understanding Sequence Assembly
This click-and-learn activity introduces students to a variety of sequencing techniques, including Sanger, shotgun, and deep sequencing. It also uses an example to guide students through the assembly of a DNA sequence, including consensus sequences, alignments, and maps. (30 slides)
Viral Outbreak (2010)
Infectious Diseases Lecture Lecture 4: Solving SARS
and Other Viral Mysteries, Ch. 26
Comparison of advances in DNA sequencing to advances in telescopes. (44:16–46:38)
Viral Outbreak (2010)
Infectious Diseases Lecture Lecture 4: Solving SARS
and Other Viral Mysteries, Ch. 27
Sequencing your personal genome. (46:38–48:34)
Use HHMI Resources to Teach: Biotechnology and Related Laboratory Techniques 9
Holiday Lecture BioInteractive
Topic Resource
Type Resource Resource Summary
Viral Outbreak (2010)
Infectious Diseases Lecture Lecture 4: Solving SARS
and Other Viral Mysteries, Ch. 28
Sequencing all the microbes associated with humans. (48:34–50:01)
Viral Outbreak (2010)
Infectious Diseases Lecture Lecture 4: Solving SARS
and Other Viral Mysteries, Ch. 29
Q&A: Are there other sequencing technologies? (50:01–51:33)
Microarray This table includes HHMI animations, video clips, interactives, and lecture material pertaining to microarrays. All of these resources can be accessed via www.BioInteractive.org and via Holiday Lectures on Science DVDs.
*Note: The DNA animations are the only resources not available on DVD. They can be streamed or downloaded via www.BioInteractive.org/dna/animations.html. If you have downloaded this document from BioInteractive.org, simply click on the thumb print photo or lecture title to open the resource.
Holiday Lecture BioInteractive
Topic Resource
Type Resource Resource Summary
Potent Biology: Stem Cells, Cloning, and Regeneration
(2006) Stem Cells Video
DNA Gene Chip
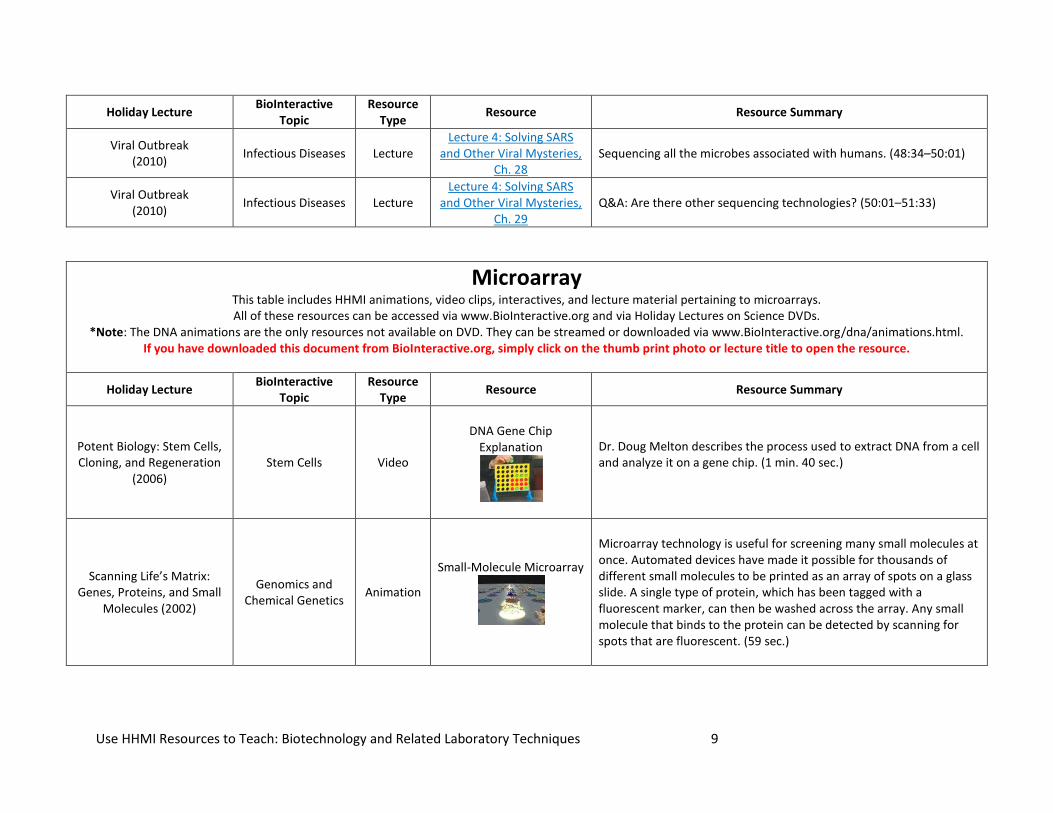
Explanation
Dr. Doug Melton describes the process used to extract DNA from a cell and analyze it on a gene chip. (1 min. 40 sec.)
Scanning Life’s Matrix: Genes, Proteins, and Small
Molecules (2002)
Genomics and Chemical Genetics
Animation
Small-Molecule Microarray
Microarray technology is useful for screening many small molecules at once. Automated devices have made it possible for thousands of different small molecules to be printed as an array of spots on a glass slide. A single type of protein, which has been tagged with a fluorescent marker, can then be washed across the array. Any small molecule that binds to the protein can be detected by scanning for spots that are fluorescent. (59 sec.)
Use HHMI Resources to Teach: Biotechnology and Related Laboratory Techniques 10
Holiday Lecture BioInteractive
Topic Resource
Type Resource Resource Summary
Scanning Life’s Matrix: Genes, Proteins, and Small
Molecules (2002)
Genomics and Chemical Genetics
Lecture Lecture 4: Chemical
Genomics: New Tools for Medicine, Ch. 12–15
Finding new small-molecule probes with a small molecule microarray. (17:17–22:46) This segment reviews small-molecule microarrays, limitations of this type of microarray, and an animation to illustrate how it works.
Scanning Life’s Matrix: Genes, Proteins, and Small
Molecules (2002)
Genomics and Chemical Genetics
Animation
Gene Chip Manufacturing
Dr. Eric Lander describes the process used to manufacture gene chips. Gene chips, also called DNA microarrays, have a broad range of applications in current research, including enabling researchers to measure the activity of thousands of genes simultaneously. (1 min. 56 sec.)
Scanning Life’s Matrix: Genes, Proteins, and Small
Molecules (2002)
Genomics and Chemical Genetics
Interactive
How to Analyze DNA Microarray Data
Resource title on DVD:
Analyzing Microarray Data
DNA microarrays, or gene chips, are an important new technology for genomic research. Learn how researchers use computing to analyze and interpret the huge datasets generated by microarray experiments. (26 slides)
Scanning Life’s Matrix: Genes, Proteins, and Small
Molecules (2002)
Genomics and Chemical Genetics
Lecture Lecture 3: Human
Genomics: A New Guide for Medicine, Ch. 22–24
The discovery of two kinds of leukemia. (35:47–41:17) These chapters explain how microarrays are made and how they are used in current human disease research.
Scanning Life’s Matrix: Genes, Proteins, and Small
Molecules (2002)
Genomics and Chemical Genetics
Lecture Lecture 3: Human
Genomics: A New Guide for Medicine, Ch. 25–28
Using microarrays to detect the activities of all the genes in a tumor. (41:17–49:14) This material pertains to leukemia-specific research and the role of microarrays in that research.
Scanning Life’s Matrix: Genes, Proteins, and Small
Molecules (2002)
Genomics and Chemical Genetics
Lecture Lecture 3: Human
Genomics: A New Guide for Medicine, Ch. 33
Q&A: Are DNA microchips reusable? (54:54–56:39)
Scanning Life’s Matrix: Genes, Proteins, and Small
Molecules (2002)
Genomics and Chemical Genetics
Interactive
Microarray Manufacturing Technology
Resource title on DVD: Making a Microarray
How both gene chips and microarray slides are created. (2 slides)
Use HHMI Resources to Teach: Biotechnology and Related Laboratory Techniques 11
Holiday Lecture BioInteractive
Topic Resource
Type Resource Resource Summary
Potent Biology: Stem Cells, Cloning, and Regeneration
(2006) Stem Cells Lecture
Lecture 1: Understanding Embryonic Stem Cells,
Ch. 14–15
Demo: Using a DNA chip to study gene expression. (19:57–23:42) Includes a discussion regarding genes being turned on and off at each step of differentiation.
Scanning Life’s Matrix: Genes, Proteins, and Small
Molecules (2002)
Genomics and Chemical Genetics
Animation
Microarrayer in Action
How a microarraying robot delivers hundreds of small molecules to a series of slides. (1 min. 59 sec.)
Scanning Life’s Matrix: Genes, Proteins, and Small
Molecules (2002)
Genomics and Chemical Genetics
Lecture Lecture 3: Human
Genomics: A New Guide for Medicine, Ch. 32
Q&A: Wouldn’t DNA variation confound the microarray detector mechanism? (53:31–54:54)
Viral Outbreak (2010)
Infectious Diseases Lecture Lecture 2: The Virus
Hunter’s Toolkit, Ch. 29
PCR and sequencing for viral diagnostics. (42:08–42:51)
Viral Outbreak (2010)
Infectious Diseases Lecture Lecture 2: The Virus
Hunter’s Toolkit, Ch. 30
Virochip designed to represent all known viruses. (42:51–43:49)
Viral Outbreak (2010)
Infectious Diseases Lecture Lecture 2: The Virus
Hunter’s Toolkit, Ch. 31
Evolutionary conserved sequences can identify unknown viruses. (43:49–46:56)
Viral Outbreak (2010)
Infectious Diseases Animation
Running a Sample of a
Virochip
A sample is put on a Virochip microarray and results are compared to databases of all known viral sequences. (2 min. 9 sec.)
Viral Outbreak (2010)
Infectious Diseases Interactive
Virochip DNA Microarray
Resource title on DVD:
Virochip Microarray Explained
This interactive click-and-learn activity takes the student through a progression of slides that introduce the concepts behind the Virochip microarray. Next, the student is guided through an inquiry portion of the activity to run samples, make predictions, and draw conclusions. Finally, the students venture into a higher-level inquiry activity with samples and predictions included. (31 slides)
Use HHMI Resources to Teach: Biotechnology and Related Laboratory Techniques 12
Holiday Lecture BioInteractive
Topic Resource
Type Resource Resource Summary
Viral Outbreak (2010)
Infectious Diseases Lecture Lecture 2: The Virus
Hunter’s Toolkit, Ch. 33
Using the Virochip to identify viral pathogens. (49:11–49:52)
Viral Outbreak (2010)
Infectious Diseases Lecture Lecture 2: The Virus
Hunter’s Toolkit, Ch. 34
Q&A: How do you interpret the complicated pattern of Virochip output? (49:52–51:35)
Viral Outbreak (2010)
Infectious Diseases Lecture Lecture 2: The Virus
Hunter’s Toolkit, Ch. 36
Q&A: How would you analyze a mixed sample of two viruses on a Virochip? (52:53–53:57)
Viral Outbreak (2010)
Infectious Diseases Lecture Lecture 2: The Virus
Hunter’s Toolkit, Ch. 37
Q&A: Does Virochip analyze both RNA and DNA viruses? (53:57–54:56)
Viral Outbreak (2010)
Infectious Diseases Lecture Lecture 4: Solving SARS
and Other Viral Mysteries, Ch. 4–10
SARS: A global epidemic. (3:52–18:16)
Viral Outbreak (2010)
Infectious Diseases Lecture Lecture 4: Solving SARS
and Other Viral Mysteries, Ch. 12–17
Proventricular dilatation disease (PDD): mysterious parrot disease. (19:45–32:15)
Viral Outbreak (2010)
Infectious Diseases Lecture Lecture 4: Solving SARS
and Other Viral Mysteries, Ch. 22–25
Finding novel viruses in a Nicaraguan cohort. (36:05–44:16)
Viral Outbreak (2010)
Infectious Diseases Lecture Lecture 4: Solving SARS
and Other Viral Mysteries, Ch. 31
Q&A: Can DNA chips be used to identify diverse HIV types? (52:38–53:36)
Use HHMI Resources to Teach: Biotechnology and Related Laboratory Techniques 13
Appendix A: The Transgenic Fly Virtual Lab
Howard Hughes Medical Institute: BioInteractive Virtual Lab Transgenic Fly Lab
Prepared by Ann Brokaw, Rocky River High School
Introduction
1. Go to www.hhmi.org/biointeractive/vlabs/ 2. Scroll down and click on The Transgenic Fly Virtual Lab 3. Maximize the screen if you wish
Making Transgenic Flies Instructions: Answer the following questions in the spaces provided.
1. What is the purpose of this virtual lab? What are transgenic organisms used for in research?
2. Click on “more on experimental design.” What gene will you be studying as a graduate student in this lab?
3. What is the role of a promoter (regulatory region) of a gene?
4. What occurs when the appropriate signals turn on the promoter?
5. What is the role of a reporter gene?
6. Why is the luciferase gene such a popularly used reporter gene in experiments?
7. Won’t it be interesting to turn an ordinary fruit fly into a fly that glows? However, the light produced has no practical function for your fly. What does the light produced illustrate to you in this transgenic organism?
8. In summary, transgenic _______________ flies will produce light in a pattern that reflects the _________________________________ activity of the _______________ gene.
9. List the basic steps and sub steps of the lab procedure: 1. ________________________________________________
a. b. c. d. e. f.
Use HHMI Resources to Teach: Biotechnology and Related Laboratory Techniques 14
2. ________________________________________________ a. b.
10. What does the period gene normally control for the fly?
11. What can a mutation in the period gene alter?
12. In this lab, the period gene is linked to the luciferase gene. Why? What does this elegant model
allow us to do? Click to Enter the Lab (Click the window on the left-hand side of the screen to enter the lab)
As you enter the lab, follow the instructions in the lab (left-hand window) and answer the following questions pertaining to each part from the information Notebook window on the right.
Part 1: Prepare DNA that Will Be Incorporated Into the Fly Genome
1. What is “construct DNA”?
2. Click on “learn more about the technical details of DNA preparation.” Where is the promoter of the period gene?
3. If the construct DNA’s promoter is activated, what will occur and what will be produced?
4. How are DNA sequences “put together” in the laboratory?
5. The construct DNA contains a gene that confers the red eye trait. What is the significance of this “clever device” built into the construct DNA? What does it enable us to check for?
6. The embryos normally develop white eyes. If the embryos incorporate the new DNA, they will pass the gene on to their progeny. What color eyes will the progeny have?
7. At this point, if you wish to perform a BLAST sequence analysis of the construct DNA, click on
the appropriate link. (This is not a required portion of the virtual lab.)
8. Be sure to watch the virtual lab animation and follow the instructions in the virtual lab window on the left.
9. After being filled, what does the glass needle contain?
10. What is the purpose of the pump to which the glass needle is attached?
Use HHMI Resources to Teach: Biotechnology and Related Laboratory Techniques 15
11. Be sure to answer all virtual quiz questions as they appear on your screen. Submit them for grading. Look over your results, and review the questions that were answered incorrectly.
Part 2: Prepare Embryos for Injection 1. Why is it important to use embryos that are less than 30 minutes old?
2. What is a germ cell? Where are germ cells found in fly embryos?
3. If the DNA integrates properly into the germ cells, the adult fly will contain _________________ that contain _____________________________.
4. After mating, these flies can then produce progeny that will contain ______________________.
5. Click and review the lab equipment used in this experiment.
6. Be sure to proceed through the virtual lab in the window on the left.
7. Be sure to answer all virtual quiz questions as they appear on your screen. Submit them for grading. Look over your results, and review the questions that were answered incorrectly.
Part 3: Inject Fly Embryos With DNA
1. The DNA is injected into which end of the embryo? __________________
2. Explain why there are such low embryo survival rates in this type of experiment. (Include all reasons.)
3. What are “transformant progeny”?
4. Be sure to proceed through the virtual lab in the window on the left.
5. How much time does it take for the embryos to reach adulthood?
6. Be sure to answer all virtual quiz questions as they appear on your screen. Submit them for grading. Look over your results, and review the questions that were answered incorrectly.
Part 4: Breed Flies
1. The adult flies are white eyed. Does this mean there are no transgenic flies?
Use HHMI Resources to Teach: Biotechnology and Related Laboratory Techniques 16
2. Your task now is to mate these adults with noninjected white-eyed flies. What do you expect from this mating?
3. What do you expect all of their cells to contain? What color will their eyes be?
4. Be sure to proceed through the virtual lab in the window on the left.
5. What occurs during the first 2–3 days in the vial?
6. Be sure to answer all virtual quiz questions as they appear on your screen. Submit them for grading. Look over your results, and review the questions that were answered incorrectly.
Part 5: Select Transgenic Progeny
1. When looking at the progeny, what is the visible marker?
2. Be sure to proceed through the virtual lab in the window on the left.
3. What does the CO2 do to the flies?
4. Did your experiment work? _____
5. If you answered “No” to #4 above, answer question #7, and then proceed to Part 6.
If you answered “Yes” to #4 above, answer question #6, and then proceed to Part 6.
6. What are four reasons why the experiment might have failed? a.
b.
c.
d.
7. None of your flies had red eyes. The ability to troubleshoot an experiment is a vital skill in
research. What are a few possible explanations of what went wrong?
Use HHMI Resources to Teach: Biotechnology and Related Laboratory Techniques 17
Part 6: Examine Light Output From Transgenic Adults 1. What was your original hypothesis at the beginning of the experiment?
2. What is luciferin? What is its function?
3. How often are light emissions measured in this experiment?
4. Be sure to proceed through the virtual lab in the window on the left.
5. Analyze the graph before clicking on it. What initial conclusions can be drawn from it?
6. Be sure to answer all virtual quiz questions as they appear on your screen. Submit them for grading. Look over your results, and review the questions that were answered incorrectly.
7. Conclusions: During what time of day did light emissions peak? And trough?
Use Transgenic Flies Experiment Selection
1. In the virtual lab window to the left, select Experiment 1 to begin this portion of the virtual lab. You must complete all three experiments in order, along with the accompanying questions that follow.
2. Once you have selected an experiment, click to select the hypothesis that you think is the correct one for that experiment.
3. Proceed through the following questions pertaining to the experiment that you are completing.
Again, you must complete all three experiments and related questions in order. Experiment 1: Measure per-luc Gene Expression While Keeping Lights Off
1. What is your hypothesis?
2. According to the Methods, what is the variable you are manipulating in this experiment?
3. Be sure to proceed through the virtual lab in the window on the left.
4. Analyze the graph before clicking on it. What initial conclusions can be drawn from it?
Use HHMI Resources to Teach: Biotechnology and Related Laboratory Techniques 18
5. What is the purpose of days 1–5?
6. Click on the graph and complete the Graph Analysis for Experiment 1.
7. Print the data window if you wish.
8. Be sure to answer all virtual quiz questions as they appear on your screen. Submit them for grading. Look over your results, and review the questions that were answered incorrectly.
9. Is your hypothesis correct or incorrect?
10. Explain the conclusion of Experiment 1 in your own words. (Scroll to bottom of screen.)
Experiment 2: Measure per-luc Gene Expression While Changing Light On/Off Times
1. What is your hypothesis?
2. According to the Methods, what is the variable you are manipulating in this experiment?
3. Be sure to proceed through the virtual lab in the window on the left.
4. Analyze the graph before clicking on it. What initial conclusions can be drawn from it?
5. Click on the graph and complete the Graph Analysis for Experiment 2.
6. Print the data window if you wish.
7. Be sure to answer all virtual quiz questions as they appear on your screen. Submit them for grading. Look over your results, and review the questions that were answered incorrectly.
8. Is your hypothesis correct or incorrect?
9. Explain the conclusion of Experiment 2 in your own words. (Scroll to bottom of screen.) Experiment 3: Examine Different Fly Body Parts for per-luc Gene Expression
1. What is your hypothesis?
2. Be sure to proceed through the virtual lab in the window on the left.

Use HHMI Resources to Teach: Biotechnology and Related Laboratory Techniques 19
3. Analyze the graphs before clicking on them. What initial conclusions can be drawn from each? a. Head:
b. Leg:
c. Wing:
4. What is the purpose of the following: a. Days 1–2:
b. Days 3–7:
c. Days 8–10:
5. Click on the wing graph and complete the Graph Analysis for Experiment 3.
6. Print the data window if you wish.
7. Be sure to answer all virtual quiz questions as they appear on your screen. Submit them for grading. Look over your results, and review the questions that were answered incorrectly.
8. Is your hypothesis correct or incorrect?
9. Explain the conclusion of Experiment 3 in your own words. (Scroll to bottom of screen.)
10. After completing all three experiments, proceed to the next section.
Virtual Transgenic Fly Lab: Conclusion
1. What are the three main conclusions that can be drawn from the three different experiments? Experiment 1:
Experiment 2:
Experiment 3:
2. Click on “View Lab Status and Quiz Summaries.”
3. Print the “Lab Status and Quiz Summaries,” write your name on it, and turn it in to your instructor. (Staple the data analysis sheets to this packet if you printed them as you completed the three experiments.)
Use HHMI Resources to Teach: Biotechnology and Related Laboratory Techniques 20
Appendix B: The Bacterial Identification Virtual Lab
Howard Hughes Medical Institute: BioInteractive Virtual Lab Bacterial Identification Lab
Prepared by Ann Brokaw, Rocky River High School
Introduction 1. Go to www.hhmi.org/biointeractive/vlabs/. 2. Scroll down and click on The Bacterial Identification Lab. 3. Maximize the screen if you wish.
Instructions: Answer the following questions in the spaces provided.
1. What is the overall purpose of this virtual lab?
2. What are the four basic steps involved in this bacterial identification lab? a. b. c. d.
3. To what does “16S rDNA” refer, and how does it relate to this lab and to different species of
bacteria? Click to Enter the Lab (Click the window on the left-hand side of the screen to enter the lab.)
As you enter the lab, follow the instructions in the lab (left-hand window) and answer the following questions pertaining to each part using the information Notebook window on the right.
Part 1: Sample Preparation
1. As the pathology lab technician, what is your task in this virtual lab?
2. Extracting DNA involves what initial step? _______________________________. This step utilizes proteolytic enzymes, which need to be disposed of before proceeding. How do you dispose of the enzymes?
3. After removing the enzymes, what happens to the cellular debris and how?
4. Where is the DNA once the cellular debris is centrifuged? _______________________________
5. What is supernatant? ______________________________________________ What type of tube is the supernatant transferred to? __________
Use HHMI Resources to Teach: Biotechnology and Related Laboratory Techniques 21
Part 2: PCR Amplification 1. What does PCR stand for? What is the purpose of PCR?
2. How is the desired portion of DNA obtained?
3. Step 1: Add Master Mix a. What does the Master Mix contain?
b. What are primers?
c. Once the primers bind, what occurs next?
d. What does “highly conserved” mean?
e. Why is this important in this lab?
f. What does “highly variable” mean?
g. Why is this important in this lab?
h. What is missing in the negative control tube?
i. What is present in the positive control that is not in the negative control?
4. Step 2: Run PCR a. Be sure to watch the virtual lab animation before proceeding to the following
questions.
b. What is the name of each step of a cycle, the temperature of each, and time? i. ___________________________________
ii. ___________________________________ iii. ___________________________________
c. Define “melt” (also called Denature):
d. Define “anneal”:
e. Define “extend”:
Use HHMI Resources to Teach: Biotechnology and Related Laboratory Techniques 22
f. After 8 cycles, how many copies of the desired DNA have been synthesized? _______
g. After 29 cycles?___________________ Part 3: PCR Purification
1. Approximately how long is the 16s rDNA (bp)? ___________
2. Running an electrophoresis gel at this point is very useful. Why?
3. The gel should contain three lanes. What should you see in each lane after running the gel? a. b. c.
4. The gel is not run in this virtual lab. In order to purify the PCR product, you use a
microconcentrator column. (Proceed through the virtual lab steps.) What should the final collection tube contain?
Part 4: Sequencing Preparation
1. Click on “Learn about cycle sequencing before proceeding.” What is cycle sequencing? (From the first two paragraphs, take notes on this technique in the space provided.) What is the significance of the fluorescently tagged dideoxynucleotides?
2. One problem that arises in this technique is that replication must start at the same place on the target DNA each time. How is this problem avoided?
3. (Click to go back to Part 4.) Where do scientists obtain primers to be used in PCR and in this technique?
4. What do the green and blue tubes contain?
5. Be sure to watch the virtual lab animation before proceeding to Part 5.
Part 5: DNA Sequencing
1. What does each of the tubes contain?
2. What remains to be done?
Use HHMI Resources to Teach: Biotechnology and Related Laboratory Techniques 23
3. What is gel electrophoresis?
4. How do DNA molecules move in relation to charge? Why?
5. What is the purpose of the laser beam? Why is its purpose significant?
6. Be sure to watch the virtual lab animation before proceeding to Part 6.
Part 6: DNA Sequence Analysis
1. Click on “Learn about the science behind sequence matching.” What is the ultimate goal of this analysis?
2. What is “homology”?
3. A comprehensive database is needed for this analysis as well as an adequate program for searching the database. BLAST is one such program, because it offers a good combination of what?
4. What is the major assumption when drawing evolutionary relationships between organisms based on DNA sequences?
5. Click to go back to Part 6 and click on “Learn more about BLAST search results.” Explain what the “Score (bits)” means on an actual BLAST search result.
6. What does an E-value of 3 or less represent?
7. Click to go back to part 6 and proceed through the instructions in the right-hand notebook window. Hints: “Ctrl A” will select all the data in the pop-up window, “Ctrl C” will copy it, and “Ctrl V” will paste it into the NCBI website (large yellow box at top of the blast search page).
8. When the blast results appear, scroll down below the color key to the significant alignments, and then go back to the virtual lab window (left) and follow the instructions.
9. What is the scientific name of the bacteria you sequenced? _________________________
Use HHMI Resources to Teach: Biotechnology and Related Laboratory Techniques 24
10. Write a brief description of this bacterium in the space provided.
11. After completing Sample A, perform DNA sequence analysis on three of the other five samples. Write in the letter of the samples you choose, the scientific name of the bacteria (after doing a BLAST search), and a brief description of each.
Sample Letter
Bacteria Scientific Name
Brief Description