google tag managertag+manager.pdfblitmetricscom google tag manager v2.6 8 setting up google...
TRANSCRIPT
GUIDE
Google Tag Manager
blitzmetrics.com | Google Tag Manager V2.6
Go
ogle Tag M
anager
Total Completion TimePros: 37 min – 1hr 52 minBeginners: +4 hrs
blitzmetrics.com | Google Tag Manager V2.6 1
Creating Your Google Tag Manager AccountSteps 1-4 take 5 minutes. Step 5 can take 1 hour.
Setting Up Your First Facebook Custom AudienceSteps 1-10 take 10 minutes.
Setting Up Google Analytics with Google Tag ManagerSteps 1-6 take 5 minutes.
Setting Up Google AdWords Remarketing with Google Tag ManagerSteps 1-10 take 10 minutes.
Publishing Your Google Tag Manager ContainerSteps 1-3 take 2 minutes.
Setting Up Facebook Conversion TrackingSteps 1-9 take 10 minutes.
Setting Up Google AdWords Conversion TrackingSteps 1-11 take 10 minutes.
Google Tag Manager TipsTotal Completion Time: 37 min. – 1hr 52 min.
*These times are based on complexity and assuming the user is a trained analyst performing these tasks. If these
kind of tasks are new to you, then assume the completion time to take up to 4 hours.
blitzmetrics.com | Google Tag Manager V2.6 2
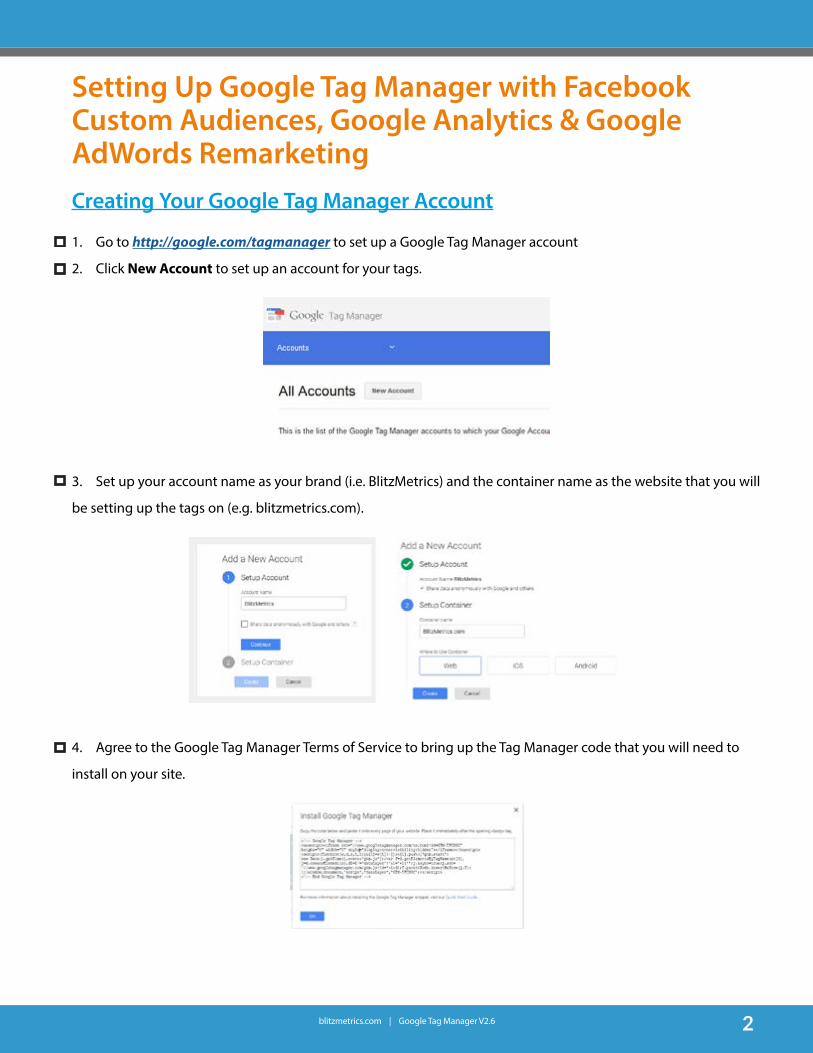
Creating Your Google Tag Manager Account
1. Go to http://google.com/tagmanager to set up a Google Tag Manager account
2. Click New Account to set up an account for your tags.
3. Set up your account name as your brand (i.e. BlitzMetrics) and the container name as the website that you will
be setting up the tags on (e.g. blitzmetrics.com).
4. Agree to the Google Tag Manager Terms of Service to bring up the Tag Manager code that you will need to
install on your site.
Setting Up Google Tag Manager with Facebook Custom Audiences, Google Analytics & Google AdWords Remarketing
blitzmetrics.com | Google Tag Manager V2.6 3
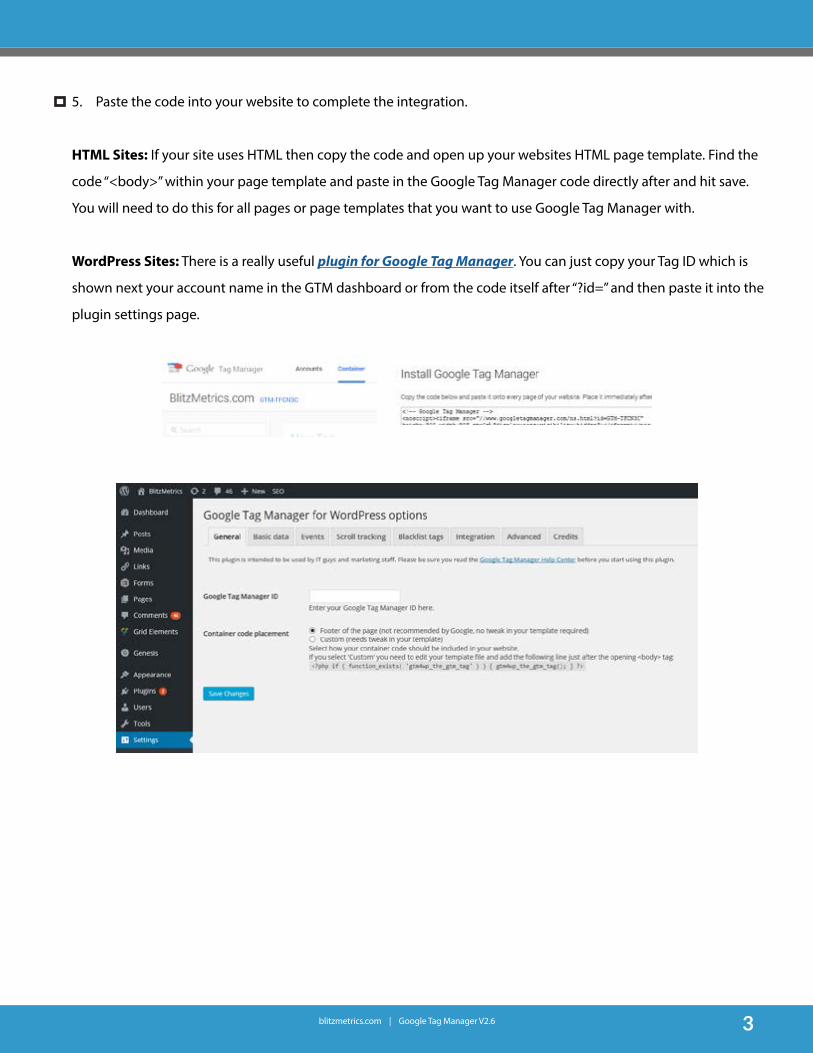
5. Paste the code into your website to complete the integration.
HTML Sites: If your site uses HTML then copy the code and open up your websites HTML page template. Find the
code “<body>” within your page template and paste in the Google Tag Manager code directly after and hit save.
You will need to do this for all pages or page templates that you want to use Google Tag Manager with.
WordPress Sites: There is a really useful plugin for Google Tag Manager. You can just copy your Tag ID which is
shown next your account name in the GTM dashboard or from the code itself after “?id=” and then paste it into the
plugin settings page.
blitzmetrics.com | Google Tag Manager V2.6 4
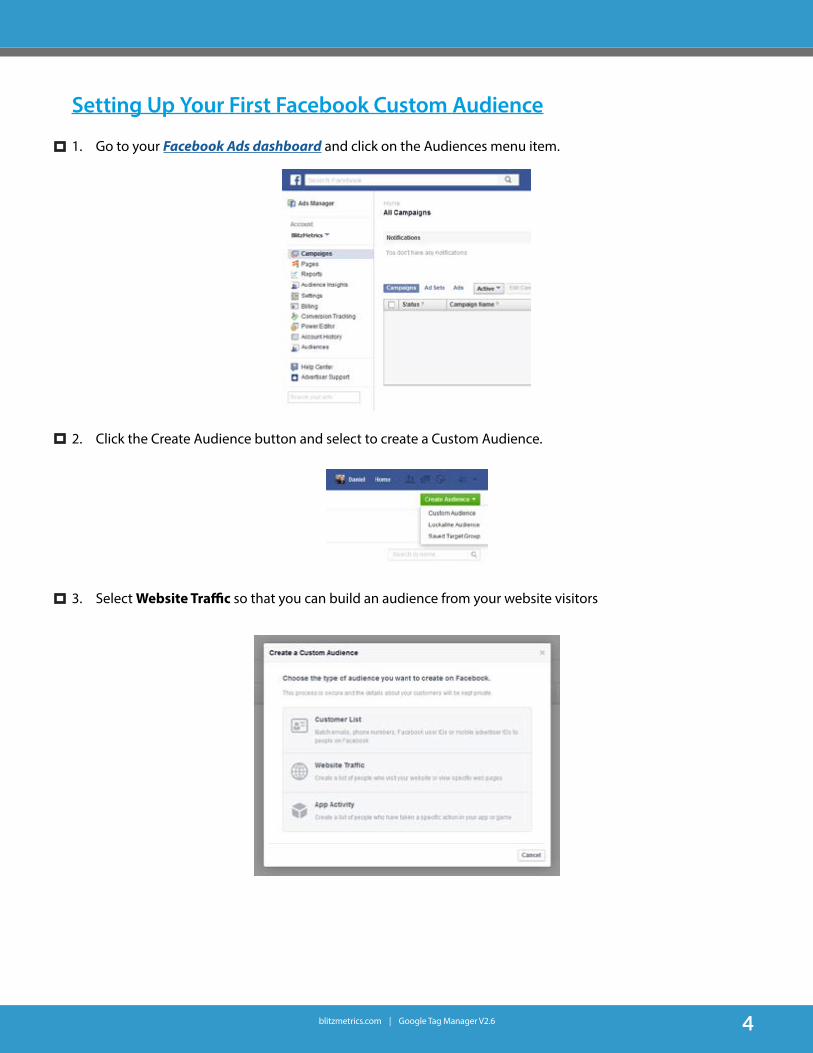
Setting Up Your First Facebook Custom Audience
1. Go to your Facebook Ads dashboard and click on the Audiences menu item.
2. Click the Create Audience button and select to create a Custom Audience.
3. Select Website Traffic so that you can build an audience from your website visitors
blitzmetrics.com | Google Tag Manager V2.6 5
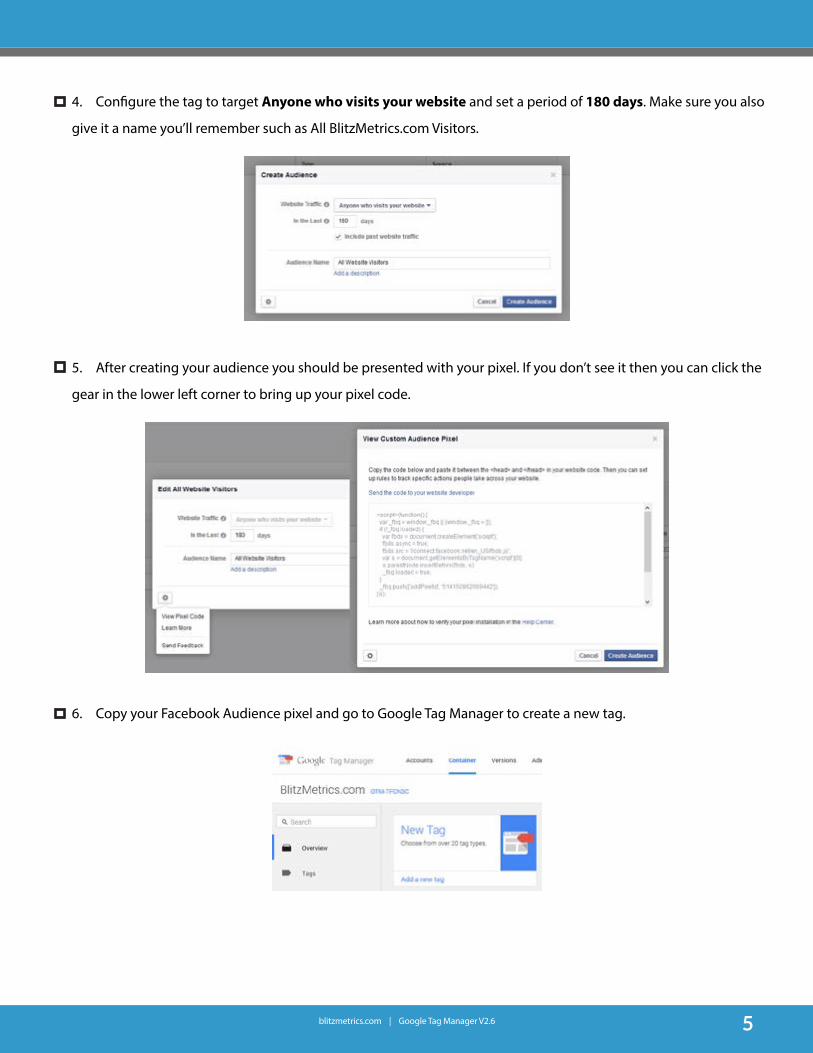
4. Configure the tag to target Anyone who visits your website and set a period of 180 days. Make sure you also
give it a name you’ll remember such as All BlitzMetrics.com Visitors.
5. After creating your audience you should be presented with your pixel. If you don’t see it then you can click the
gear in the lower left corner to bring up your pixel code.
6. Copy your Facebook Audience pixel and go to Google Tag Manager to create a new tag.
blitzmetrics.com | Google Tag Manager V2.6 6
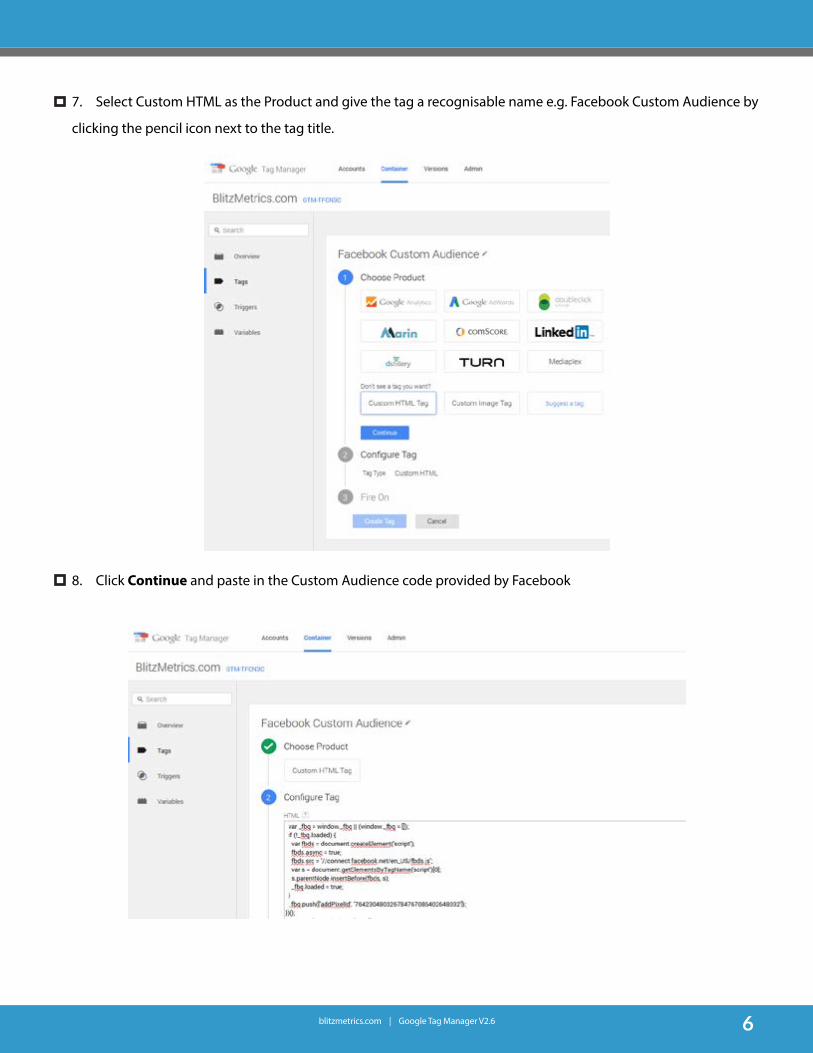
7. Select Custom HTML as the Product and give the tag a recognisable name e.g. Facebook Custom Audience by
clicking the pencil icon next to the tag title.
8. Click Continue and paste in the Custom Audience code provided by Facebook
blitzmetrics.com | Google Tag Manager V2.6 7
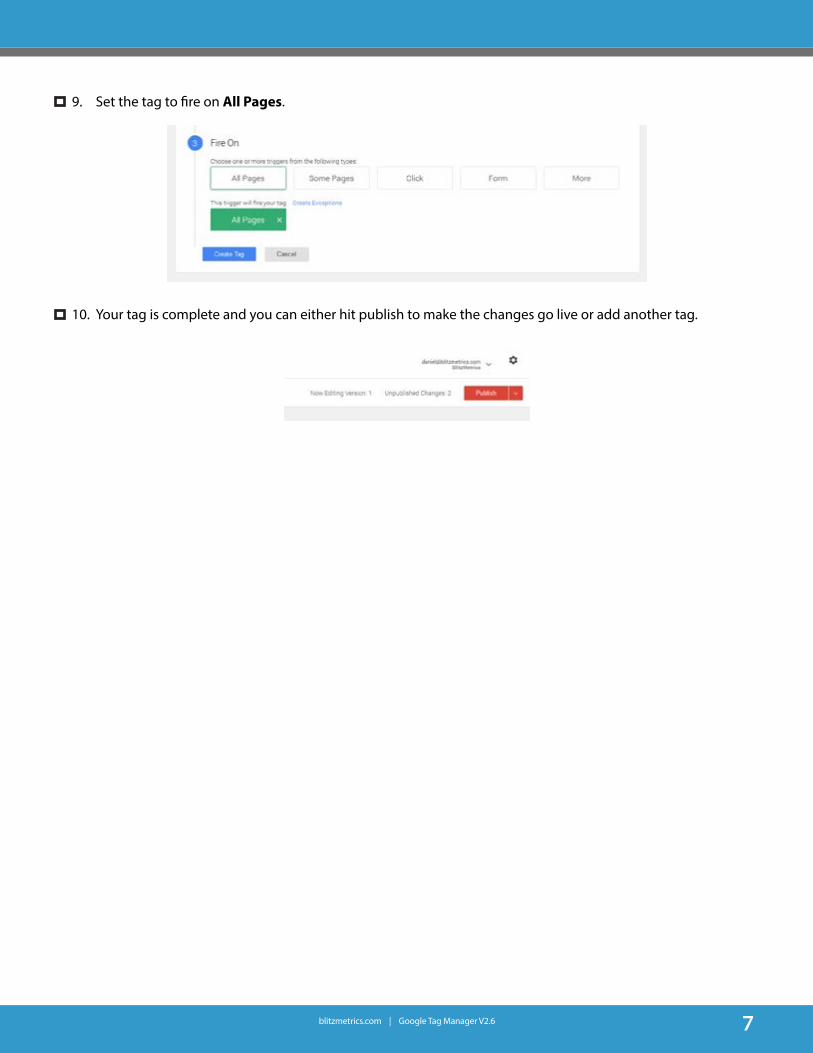
9. Set the tag to fire on All Pages.
10. Your tag is complete and you can either hit publish to make the changes go live or add another tag.
blitzmetrics.com | Google Tag Manager V2.6 8
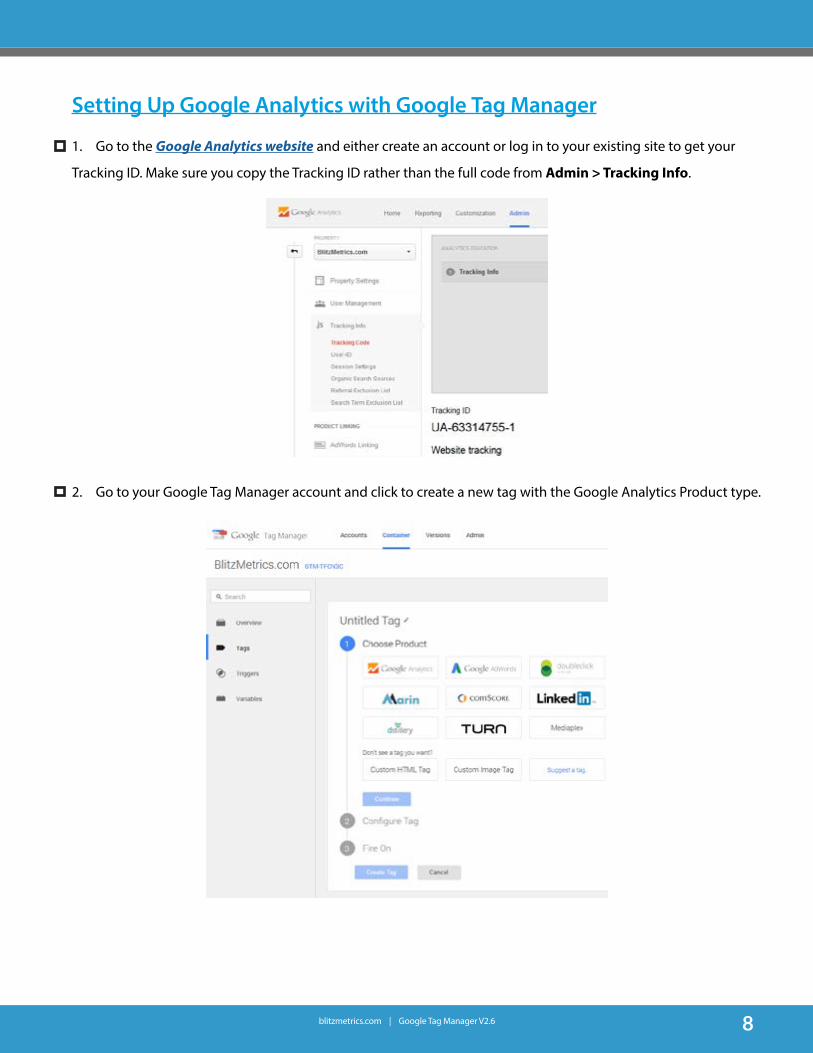
Setting Up Google Analytics with Google Tag Manager
1. Go to the Google Analytics website and either create an account or log in to your existing site to get your
Tracking ID. Make sure you copy the Tracking ID rather than the full code from Admin > Tracking Info.
2. Go to your Google Tag Manager account and click to create a new tag with the Google Analytics Product type.
blitzmetrics.com | Google Tag Manager V2.6 9
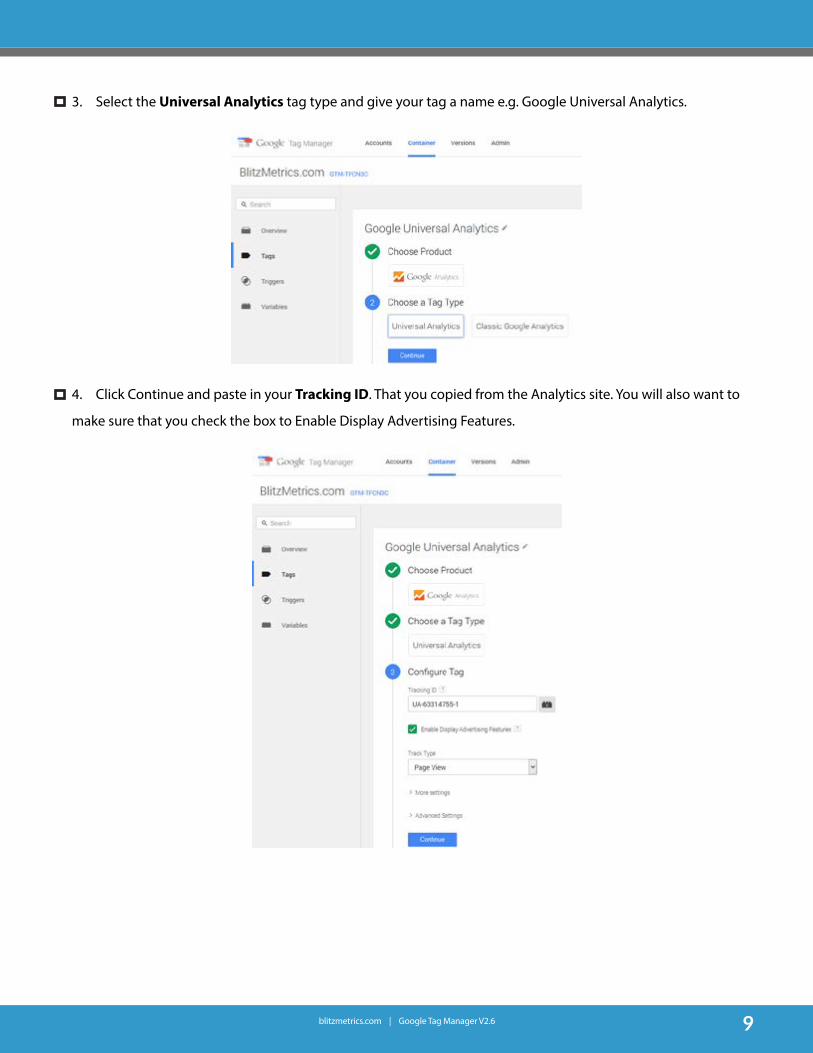
3. Select the Universal Analytics tag type and give your tag a name e.g. Google Universal Analytics.
4. Click Continue and paste in your Tracking ID. That you copied from the Analytics site. You will also want to
make sure that you check the box to Enable Display Advertising Features.
blitzmetrics.com | Google Tag Manager V2.6 10
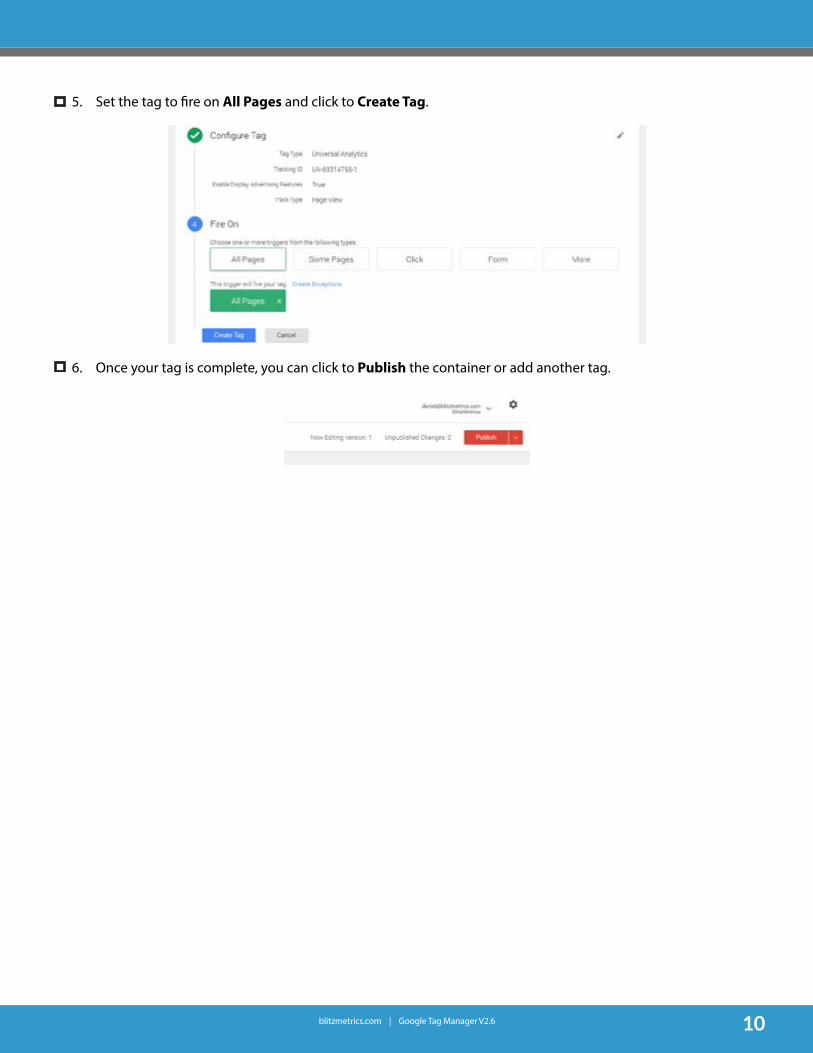
5. Set the tag to fire on All Pages and click to Create Tag.
6. Once your tag is complete, you can click to Publish the container or add another tag.
blitzmetrics.com | Google Tag Manager V2.6 11
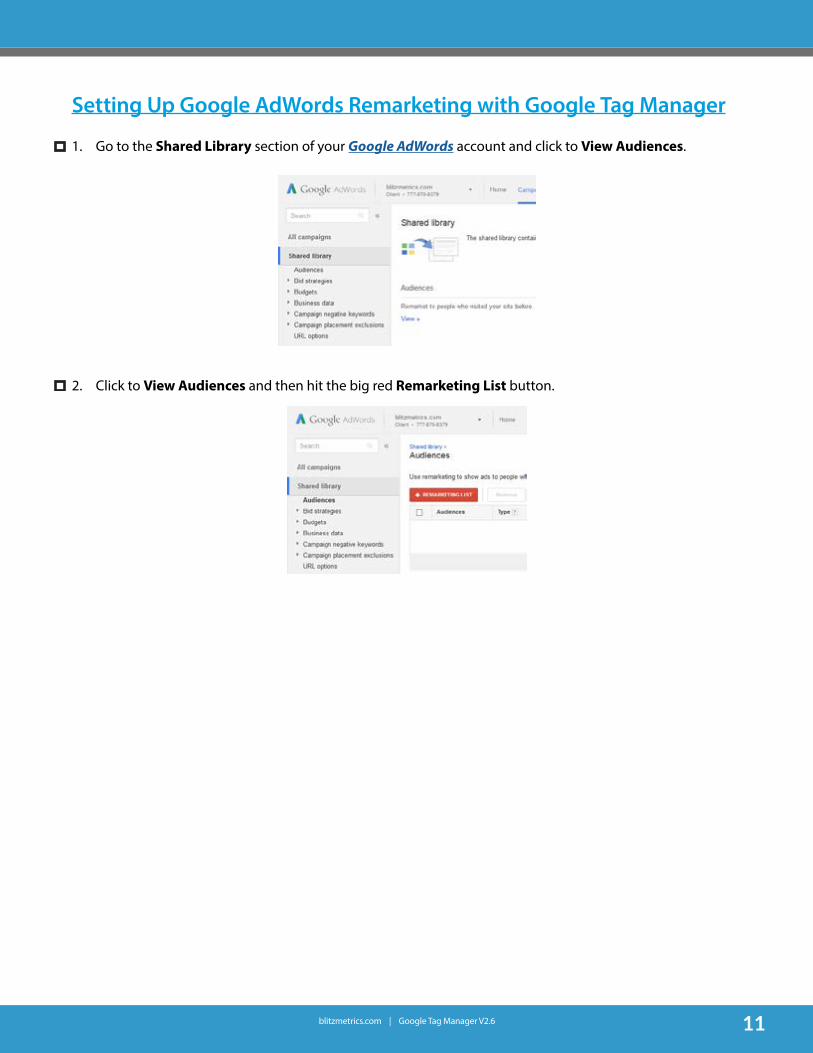
Setting Up Google AdWords Remarketing with Google Tag Manager
1. Go to the Shared Library section of your Google AdWords account and click to View Audiences.
2. Click to View Audiences and then hit the big red Remarketing List button.
blitzmetrics.com | Google Tag Manager V2.6 12
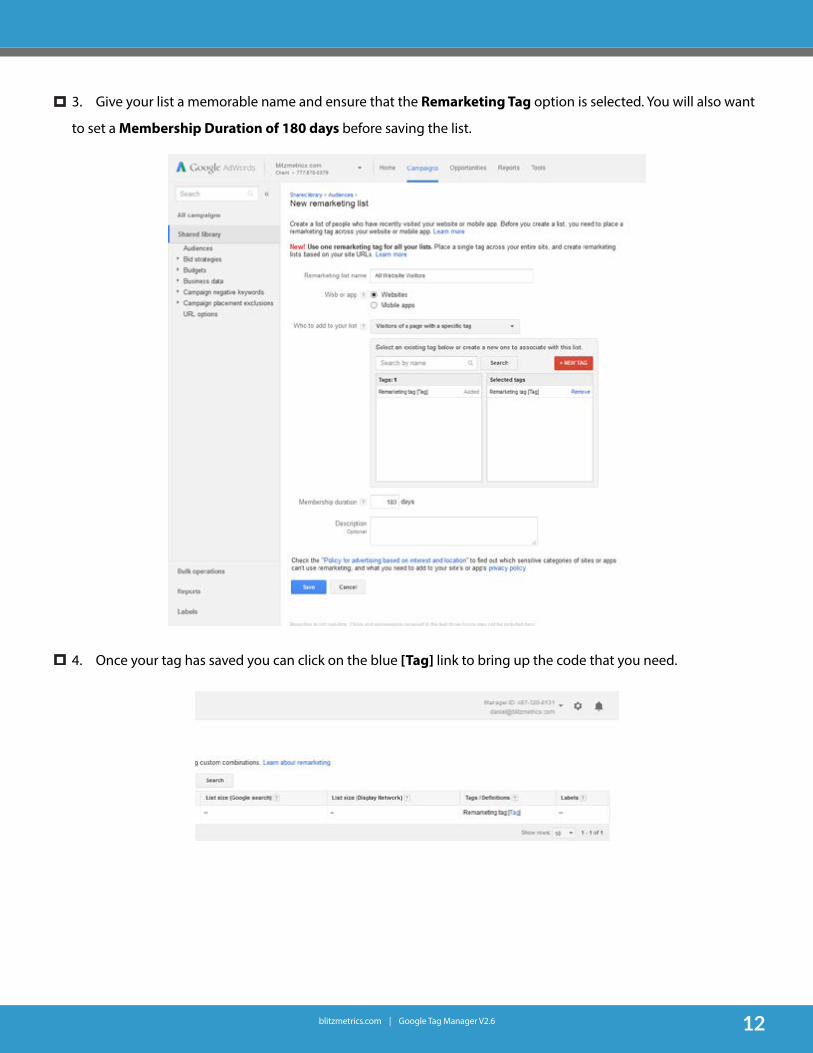
3. Give your list a memorable name and ensure that the Remarketing Tag option is selected. You will also want
to set a Membership Duration of 180 days before saving the list.
4. Once your tag has saved you can click on the blue [Tag] link to bring up the code that you need.
blitzmetrics.com | Google Tag Manager V2.6 13
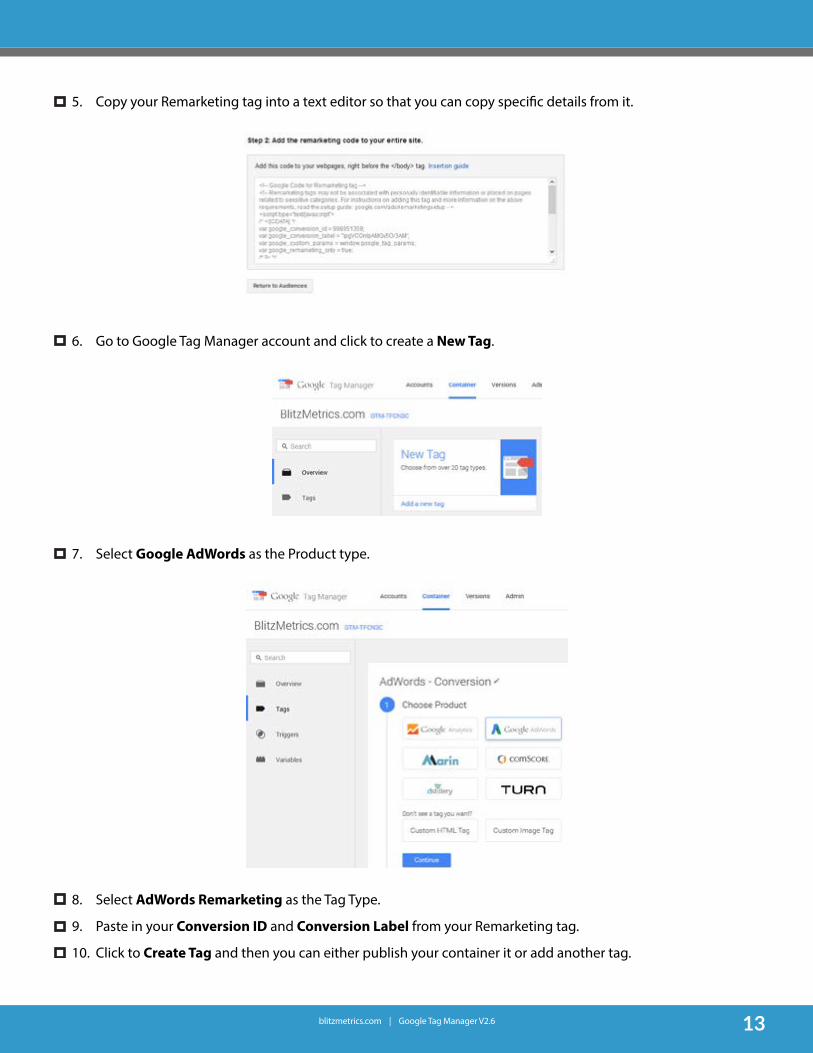
5. Copy your Remarketing tag into a text editor so that you can copy specific details from it.
6. Go to Google Tag Manager account and click to create a New Tag.
7. Select Google AdWords as the Product type.
8. Select AdWords Remarketing as the Tag Type.
9. Paste in your Conversion ID and Conversion Label from your Remarketing tag.
10. Click to Create Tag and then you can either publish your container it or add another tag.
blitzmetrics.com | Google Tag Manager V2.6 14
Publishing Your Google Tag Manager Container
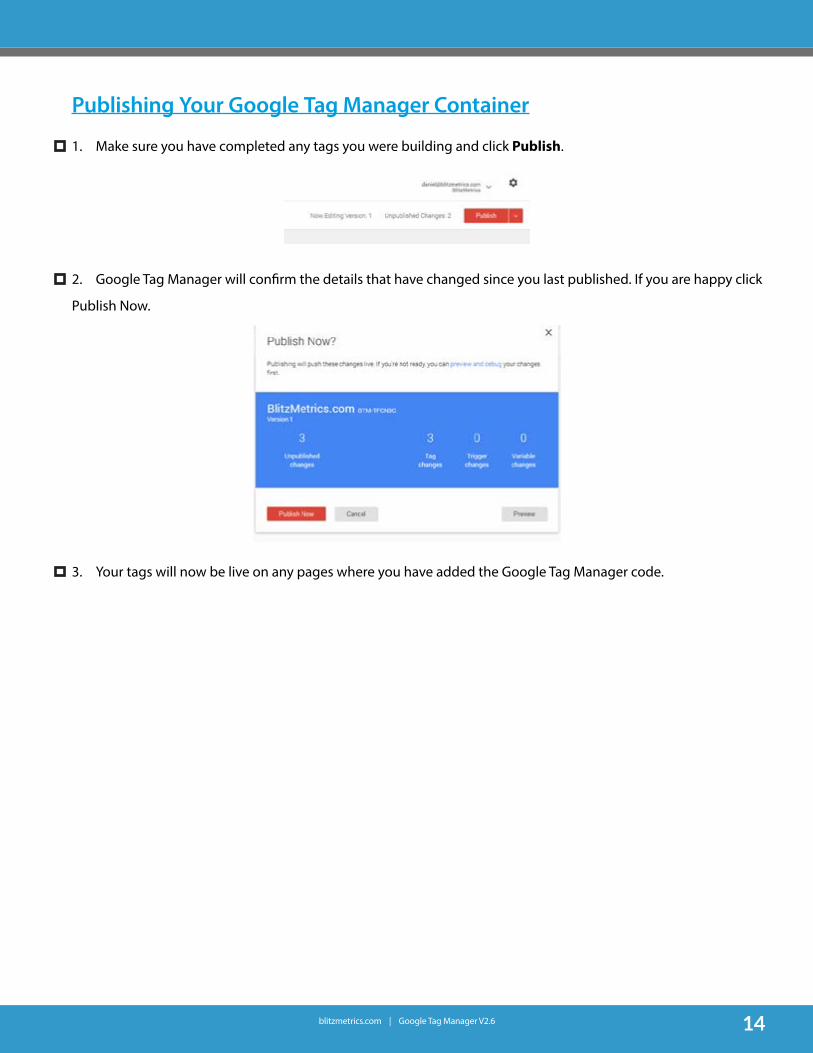
1. Make sure you have completed any tags you were building and click Publish.
2. Google Tag Manager will confirm the details that have changed since you last published. If you are happy click
Publish Now.
3. Your tags will now be live on any pages where you have added the Google Tag Manager code.
blitzmetrics.com | Google Tag Manager V2.6 15
Setting Up Facebook Conversion Tracking
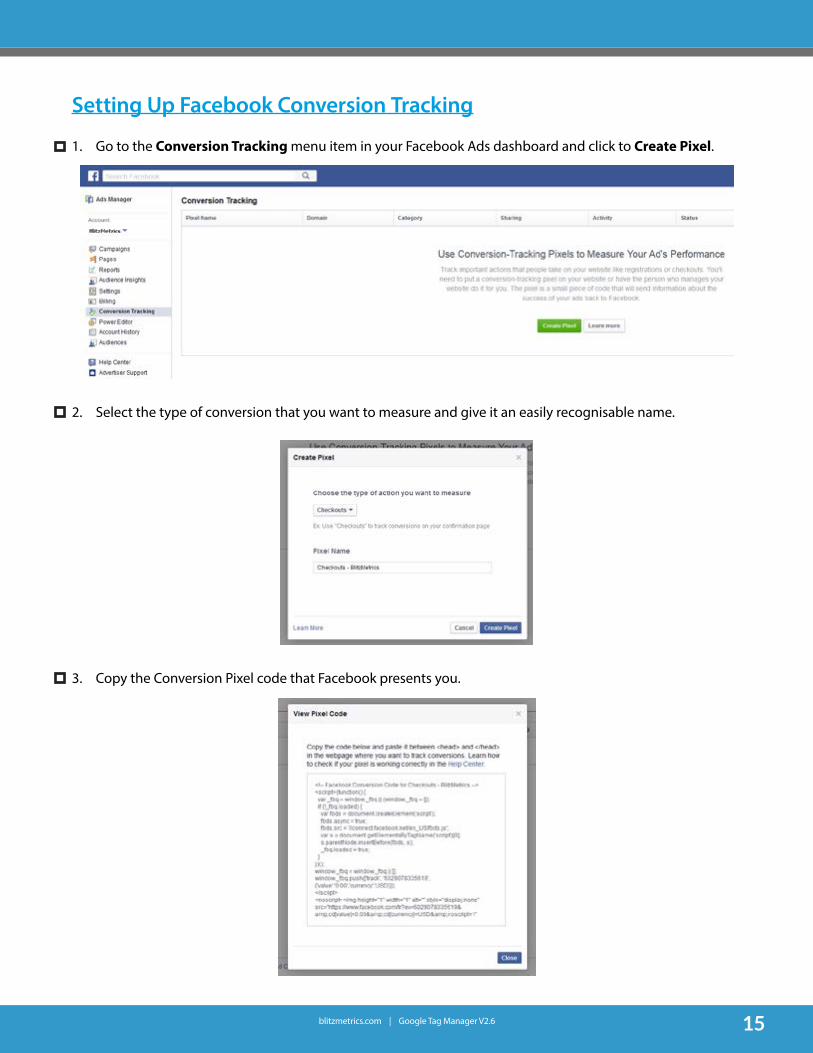
1. Go to the Conversion Tracking menu item in your Facebook Ads dashboard and click to Create Pixel.
2. Select the type of conversion that you want to measure and give it an easily recognisable name.
3. Copy the Conversion Pixel code that Facebook presents you.
blitzmetrics.com | Google Tag Manager V2.6 16
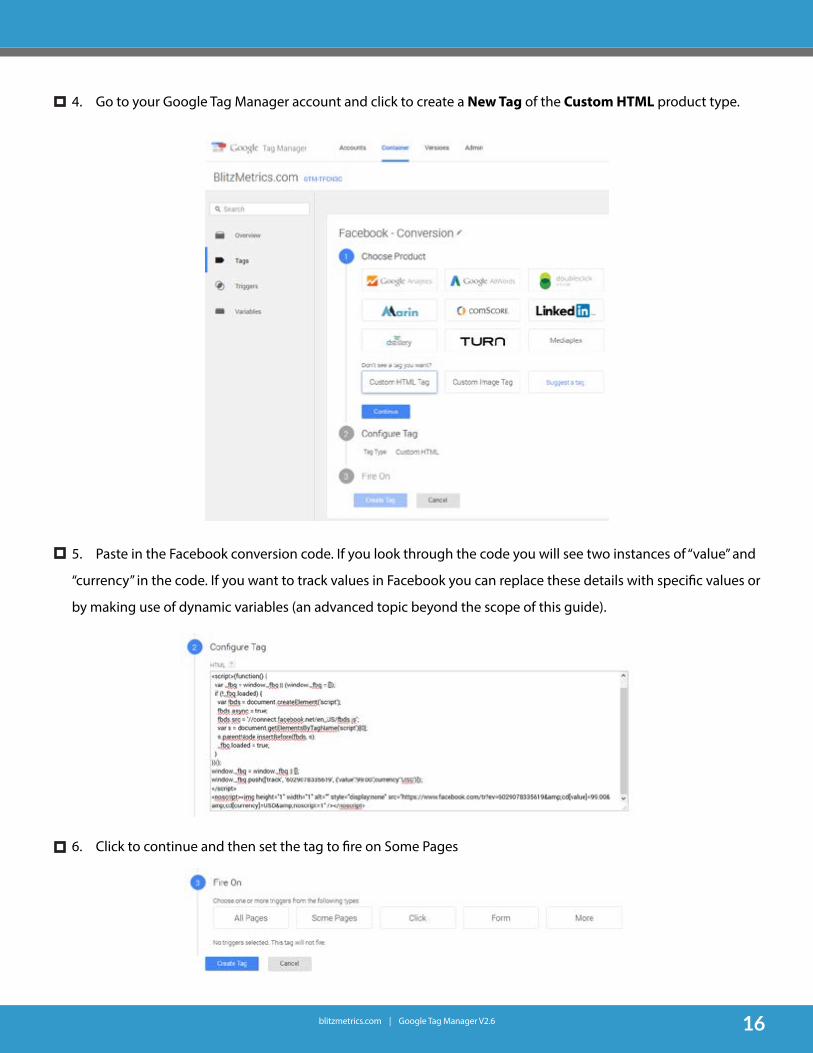
4. Go to your Google Tag Manager account and click to create a New Tag of the Custom HTML product type.
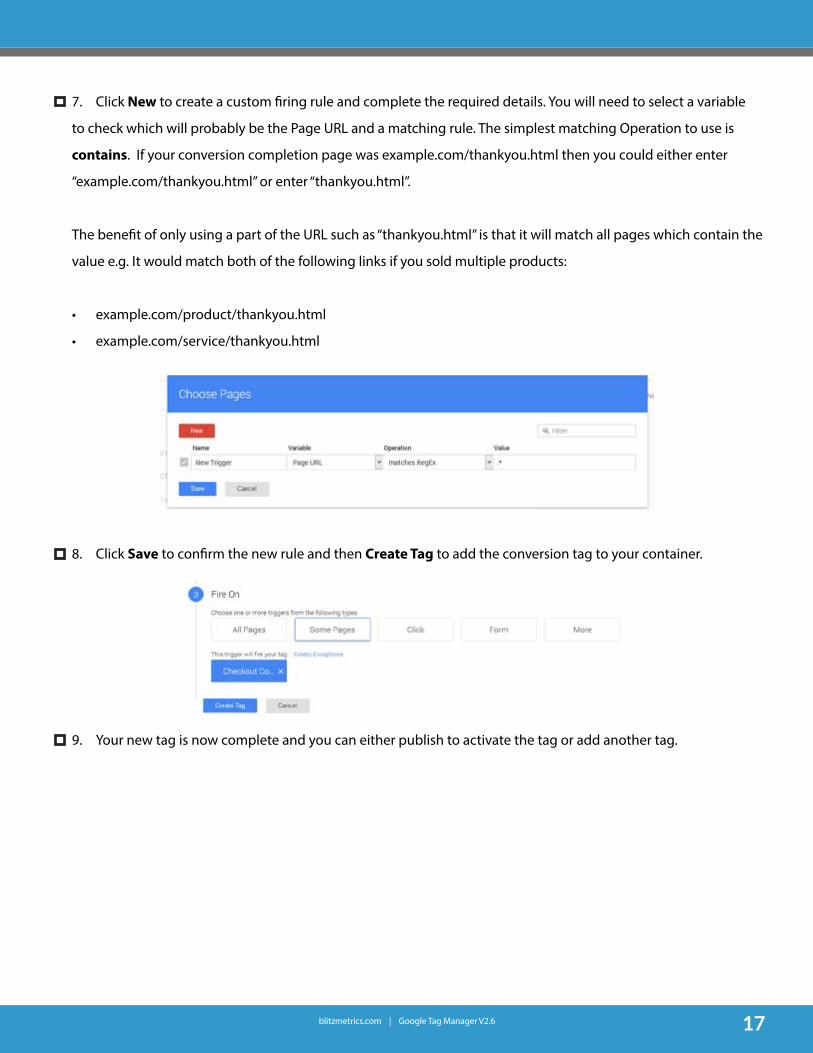
5. Paste in the Facebook conversion code. If you look through the code you will see two instances of “value” and
“currency” in the code. If you want to track values in Facebook you can replace these details with specific values or
by making use of dynamic variables (an advanced topic beyond the scope of this guide).
6. Click to continue and then set the tag to fire on Some Pages
blitzmetrics.com | Google Tag Manager V2.6 17
7. Click New to create a custom firing rule and complete the required details. You will need to select a variable
to check which will probably be the Page URL and a matching rule. The simplest matching Operation to use is
contains. If your conversion completion page was example.com/thankyou.html then you could either enter
“example.com/thankyou.html” or enter “thankyou.html”.
The benefit of only using a part of the URL such as “thankyou.html” is that it will match all pages which contain the
value e.g. It would match both of the following links if you sold multiple products:
• example.com/product/thankyou.html
• example.com/service/thankyou.html
8. Click Save to confirm the new rule and then Create Tag to add the conversion tag to your container.
9. Your new tag is now complete and you can either publish to activate the tag or add another tag.
blitzmetrics.com | Google Tag Manager V2.6 18
Setting Up Google AdWords Conversion Tracking
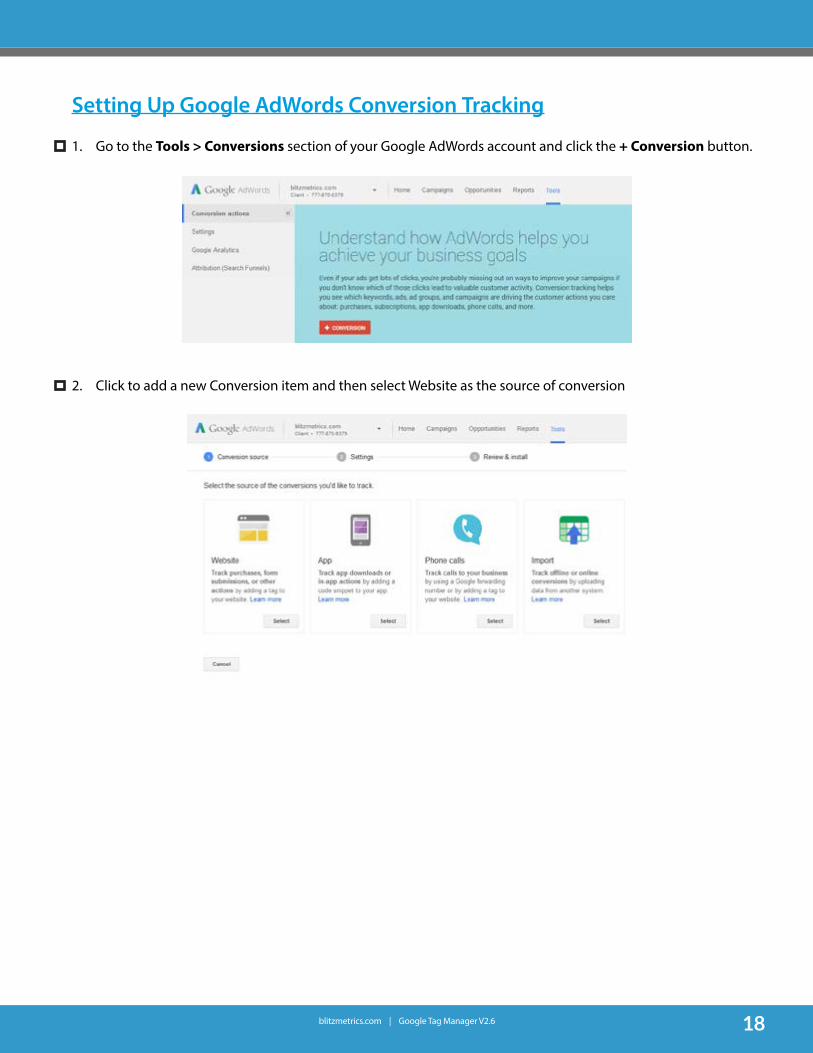
1. Go to the Tools > Conversions section of your Google AdWords account and click the + Conversion button.
2. Click to add a new Conversion item and then select Website as the source of conversion
blitzmetrics.com | Google Tag Manager V2.6 19
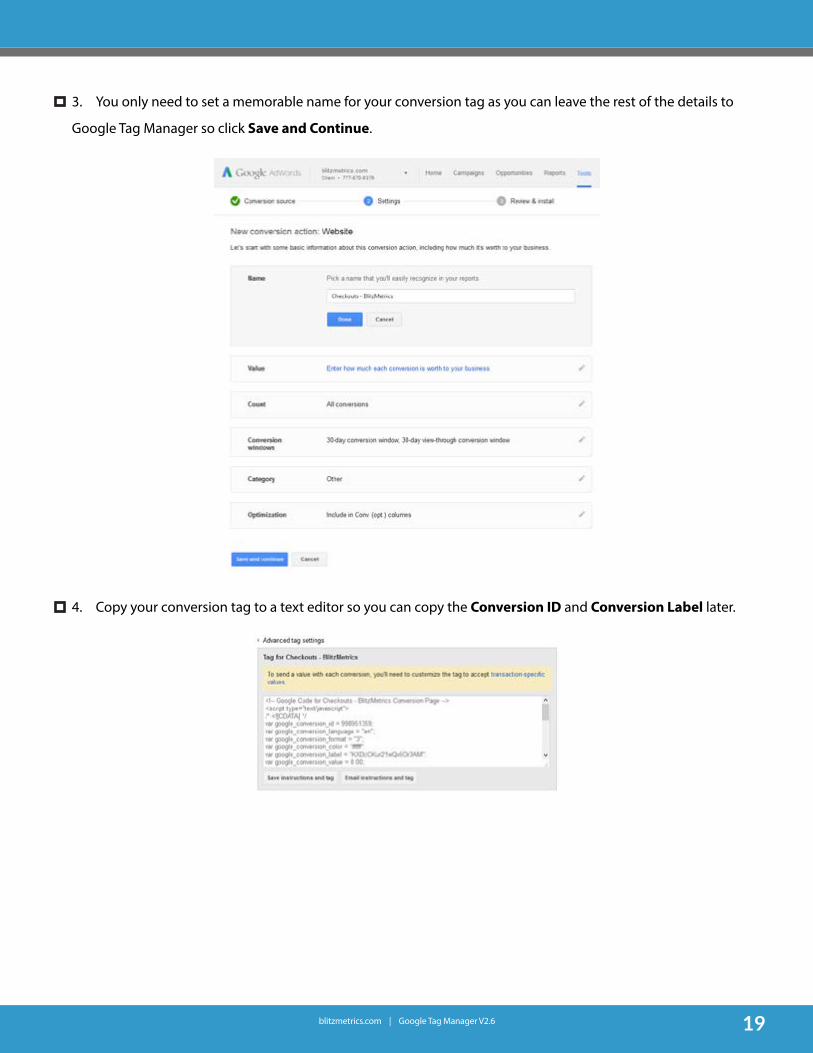
3. You only need to set a memorable name for your conversion tag as you can leave the rest of the details to
Google Tag Manager so click Save and Continue.
4. Copy your conversion tag to a text editor so you can copy the Conversion ID and Conversion Label later.
blitzmetrics.com | Google Tag Manager V2.6 20
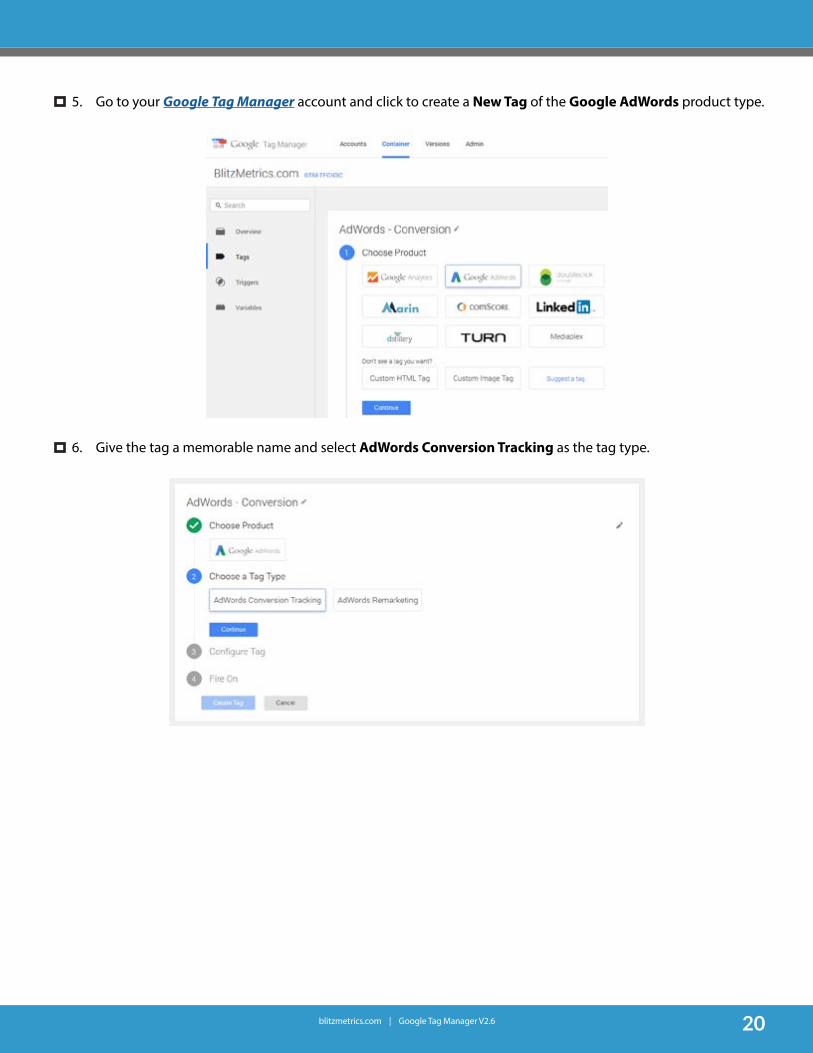
5. Go to your Google Tag Manager account and click to create a New Tag of the Google AdWords product type.
6. Give the tag a memorable name and select AdWords Conversion Tracking as the tag type.
blitzmetrics.com | Google Tag Manager V2.6 21
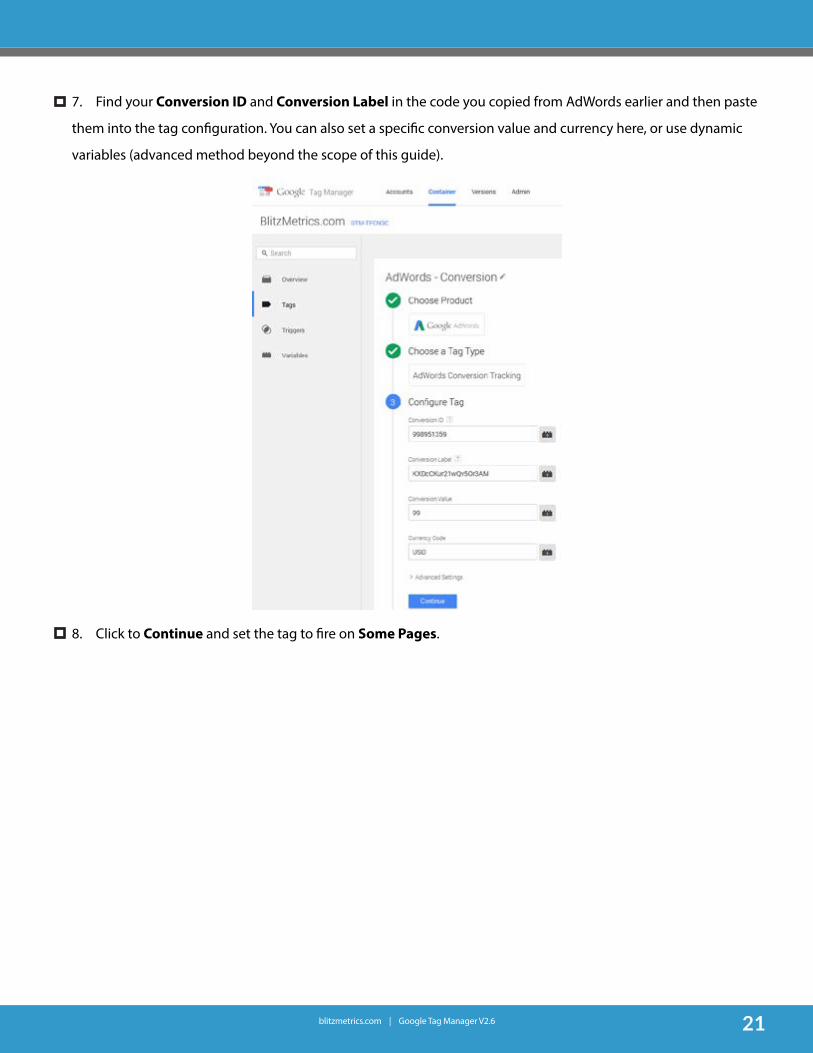
7. Find your Conversion ID and Conversion Label in the code you copied from AdWords earlier and then paste
them into the tag configuration. You can also set a specific conversion value and currency here, or use dynamic
variables (advanced method beyond the scope of this guide).
8. Click to Continue and set the tag to fire on Some Pages.
blitzmetrics.com | Google Tag Manager V2.6 22
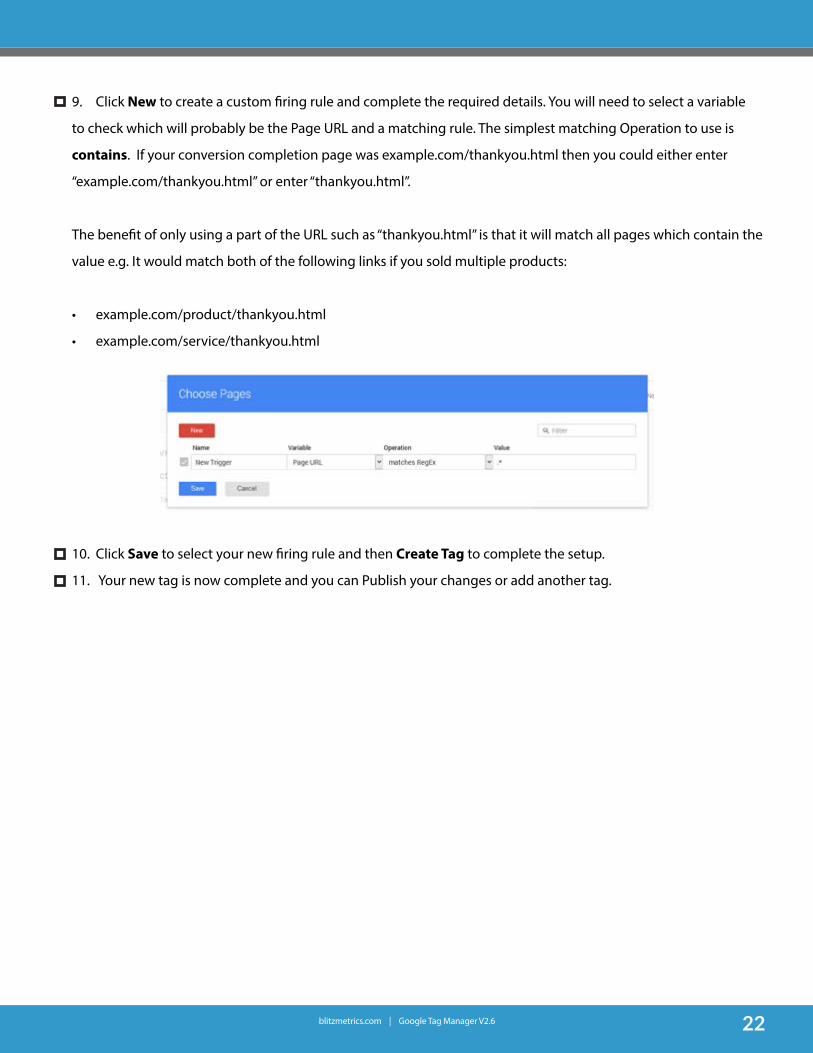
9. Click New to create a custom firing rule and complete the required details. You will need to select a variable
to check which will probably be the Page URL and a matching rule. The simplest matching Operation to use is
contains. If your conversion completion page was example.com/thankyou.html then you could either enter
“example.com/thankyou.html” or enter “thankyou.html”.
The benefit of only using a part of the URL such as “thankyou.html” is that it will match all pages which contain the
value e.g. It would match both of the following links if you sold multiple products:
• example.com/product/thankyou.html
• example.com/service/thankyou.html
10. Click Save to select your new firing rule and then Create Tag to complete the setup.
11. Your new tag is now complete and you can Publish your changes or add another tag.

blitzmetrics.com | Google Tag Manager V2.6 23
Google Tag Manager Tips
Version Control
Once you publish a container the existing version goes live onto your website and the version shown in your
Google Tag Manager editor becomes a draft. You can then edit this draft freely until you next hit Publish without
changing the code that is being served on your live site.
Managing Users
If you need to add more users to your Google Tag Manager account such as an agency or web developer then you
can do this in just a few click.
1. Go to the Admin section of your Google Tag Manager account and click User Management.
2. Click New to add new user and then enter the email address of the person you would like to invite.
blitzmetrics.com | Google Tag Manager V2.6 24
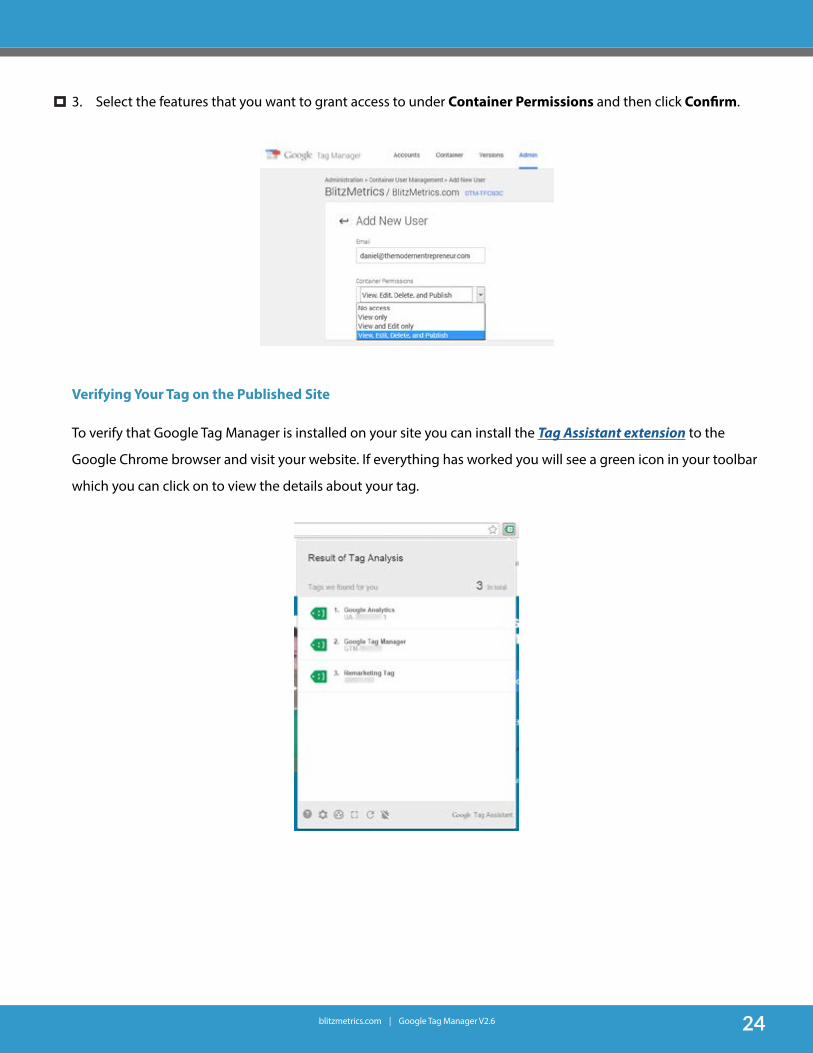
3. Select the features that you want to grant access to under Container Permissions and then click Confirm.
Verifying Your Tag on the Published Site
To verify that Google Tag Manager is installed on your site you can install the Tag Assistant extension to the
Google Chrome browser and visit your website. If everything has worked you will see a green icon in your toolbar
which you can click on to view the details about your tag.

blitzmetrics.com | Google Tag Manager V2.6 25
You have completed the Google Tag Manager Guide!
Would you rather have this done for you for $500?Go HERE to have us implement it for you!
What’s next?Set up plumbing
Set goals
Create content
Target audiences
Create ads
Optimize on campaigns (once a week)