general installation guidelines - roof … installation guidelines ... hcontrol hybrid must not be...
TRANSCRIPT

General information
GENERAL INSTALLATION GUIDELINES
HYBRIS is installed with the embossed copper colour film facing the inside (warm side) of the building.
HYBRIS can be installed in timber frame (roof or wall) and at floor or ceiling level of the loft. It can be in direct contact with building components but its thermal efficiency will be improved with a minimum 20mm air gap on both sides (e.g. service void).
HYBRIS can be combined with other ACTIS hybrid products in order to comply with building regulations. It can also be installed with traditional insulation products such as foam board and insulated plasterboard.
Installation precautionsHYBRIS must be used in conjunction with a breather membrane or roofing felt.
• HYBRIS is usually associated with an independent and continuous vapour control layer such as HCONTROL HYBRID which will also ensure air tightness. Continuity of the vapour control layer is necessary between rafters and wall perimeters
HYBRIS must not be in contact with a chimney, fire or any source of ingnition. The product must be isolated from a chimney with a fire resitant material.
CUTTINGHYBRIS is very easy to cut manually on a flat surface with an ACTIS cutter, an insulation knife or with an electrical alligator saw.
We recommend cutting HYBRIS as follows:
• 40mm wider than rafters and studs distance
• 20mm longer than distance between the top and the bottom rail
SINGLE LAYER APPLICATIONIt is necessary to obtain a tight friction-fit within the rafters or studs.
For a pitched roof application it will also be necessary to staple the copper coloured film to the rafter.
VIEW ACTIS HYBRID VIDEOS ON
-1-
HYBRIS STEP BY STEP INSTALLATION
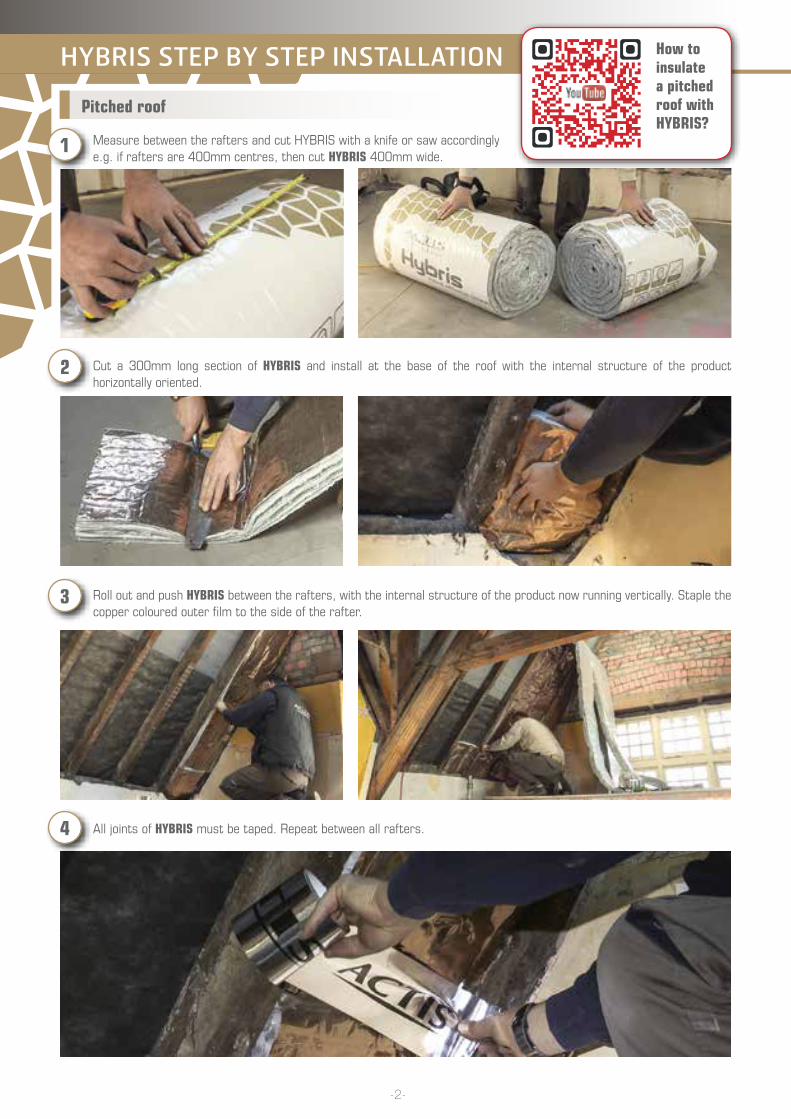
Measure between the rafters and cut HYBRIS with a knife or saw accordingly e.g. if rafters are 400mm centres, then cut HYBRIS 400mm wide.
Cut a 300mm long section of HYBRIS and install at the base of the roof with the internal structure of the product horizontally oriented.
Roll out and push HYBRIS between the rafters, with the internal structure of the product now running vertically. Staple the copper coloured outer film to the side of the rafter.
All joints of HYBRIS must be taped. Repeat between all rafters.
1
2
3
4
How to insulate a pitched roof with HYBRIS?
Pitched roof
-2-
HYBRIS STEP BY STEP INSTALLATION
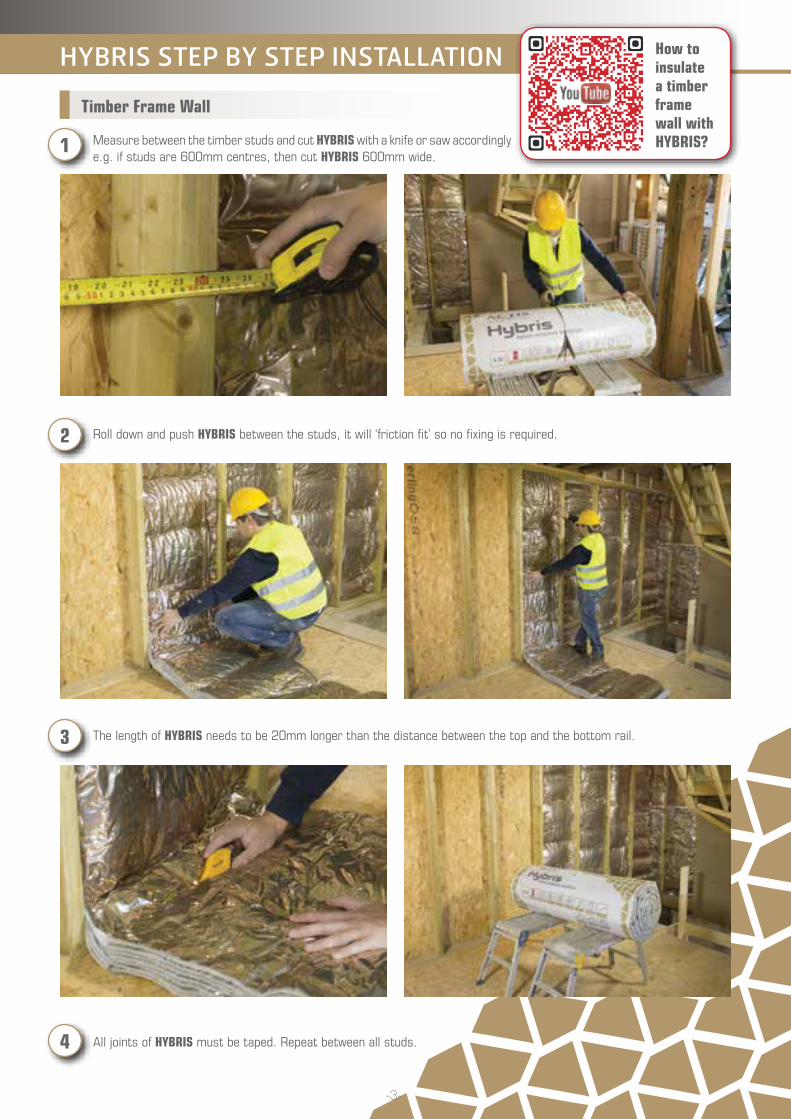
Measure between the timber studs and cut HYBRIS with a knife or saw accordingly e.g. if studs are 600mm centres, then cut HYBRIS 600mm wide.
Roll down and push HYBRIS between the studs, it will ‘friction fit’ so no fixing is required.
The length of HYBRIS needs to be 20mm longer than the distance between the top and the bottom rail.
All joints of HYBRIS must be taped. Repeat between all studs.
1
2
3
4
How to insulate a timber frame wall with HYBRIS?
Timber Frame Wall
-3-
General information
Installation precautions
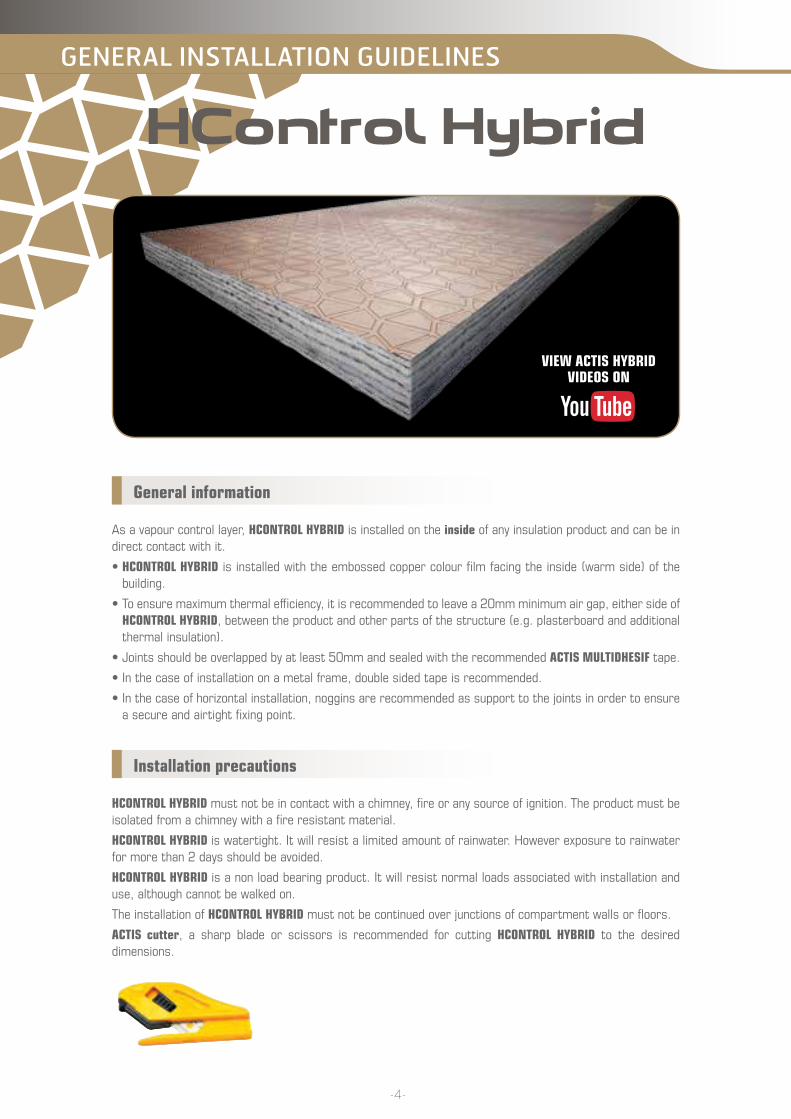
As a vapour control layer, HCONTROL HYBRID is installed on the inside of any insulation product and can be in direct contact with it.
• HCONTROL HYBRID is installed with the embossed copper colour film facing the inside (warm side) of the building.
• To ensure maximum thermal efficiency, it is recommended to leave a 20mm minimum air gap, either side of HCONTROL HYBRID, between the product and other parts of the structure (e.g. plasterboard and additional thermal insulation).
• Joints should be overlapped by at least 50mm and sealed with the recommended ACTIS MULTIDHESIF tape.
• In the case of installation on a metal frame, double sided tape is recommended.
• In the case of horizontal installation, noggins are recommended as support to the joints in order to ensure a secure and airtight fixing point.
HCONTROL HYBRID must not be in contact with a chimney, fire or any source of ignition. The product must be isolated from a chimney with a fire resistant material.
HCONTROL HYBRID is watertight. It will resist a limited amount of rainwater. However exposure to rainwater for more than 2 days should be avoided.
HCONTROL HYBRID is a non load bearing product. It will resist normal loads associated with installation and use, although cannot be walked on.
The installation of HCONTROL HYBRID must not be continued over junctions of compartment walls or floors.
ACTIS cutter, a sharp blade or scissors is recommended for cutting HCONTROL HYBRID to the desired dimensions.
GENERAL INSTALLATION GUIDELINES
VIEW ACTIS HYBRID VIDEOS ON
-4-
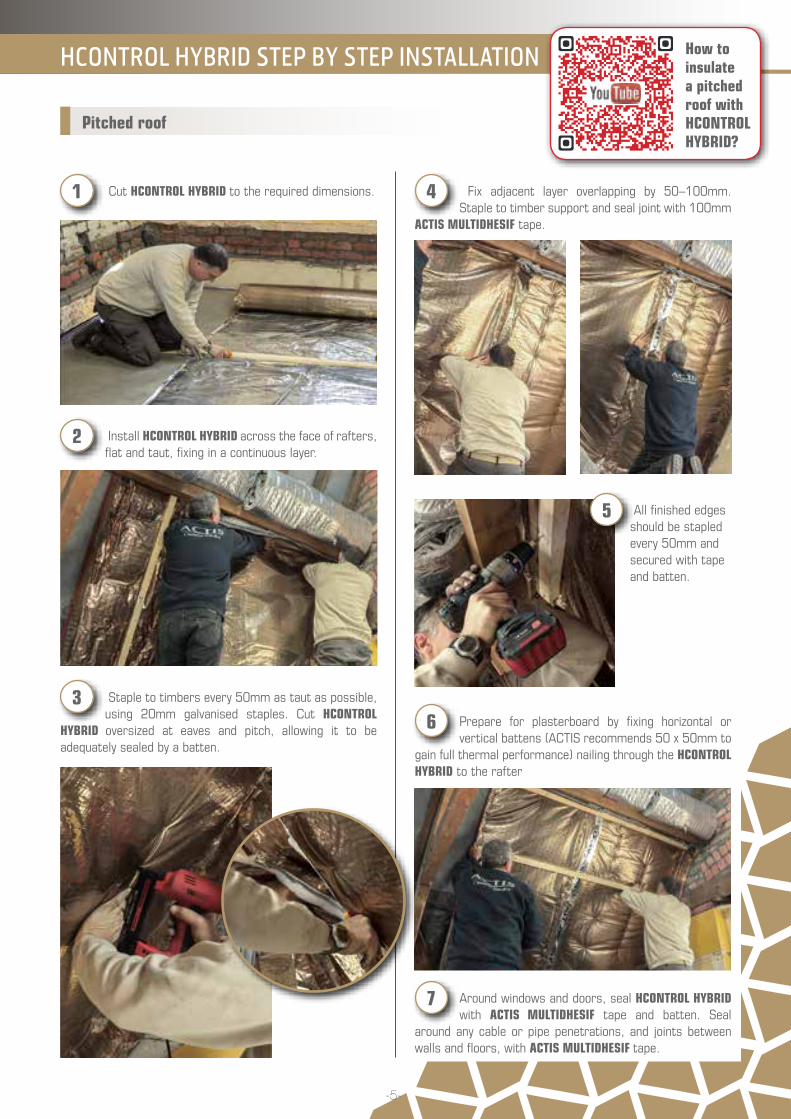
1 Cut HCONTROL HYBRID to the required dimensions.
’
2 Install HCONTROL HYBRID across the face of rafters, flat and taut, fixing in a continuous layer.
3 Staple to timbers every 50mm as taut as possible, using 20mm galvanised staples. Cut HCONTROL
HYBRID oversized at eaves and pitch, allowing it to be adequately sealed by a batten.
4 Fix adjacent layer overlapping by 50–100mm. Staple to timber support and seal joint with 100mm
ACTIS MULTIDHESIF tape.
All finished edges should be stapled every 50mm and secured with tape and batten.
6 Prepare for plasterboard by fixing horizontal or vertical battens (ACTIS recommends 50 x 50mm to
gain full thermal performance) nailing through the HCONTROL HYBRID to the rafter
7 Around windows and doors, seal HCONTROL HYBRID with ACTIS MULTIDHESIF tape and batten. Seal
around any cable or pipe penetrations, and joints between walls and floors, with ACTIS MULTIDHESIF tape.
5
How to insulate a pitched roof with HCONTROL HYBRID?
HCONTROL HYBRID STEP BY STEP INSTALLATION
Pitched roof
-5-
HCONTROL HYBRID STEP BY STEP INSTALLATION
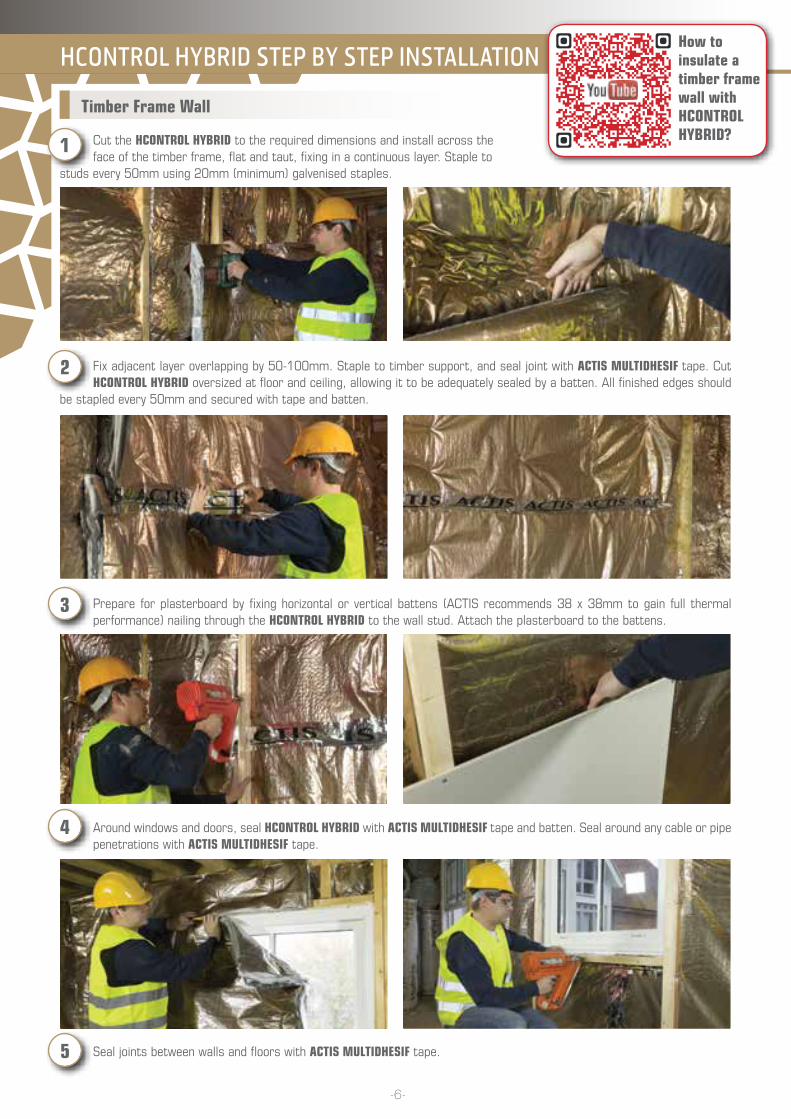
Cut the HCONTROL HYBRID to the required dimensions and install across the face of the timber frame, flat and taut, fixing in a continuous layer. Staple to
studs every 50mm using 20mm (minimum) galvenised staples.
Fix adjacent layer overlapping by 50-100mm. Staple to timber support, and seal joint with ACTIS MULTIDHESIF tape. Cut HCONTROL HYBRID oversized at floor and ceiling, allowing it to be adequately sealed by a batten. All finished edges should
be stapled every 50mm and secured with tape and batten.
Prepare for plasterboard by fixing horizontal or vertical battens (ACTIS recommends 38 x 38mm to gain full thermal performance) nailing through the HCONTROL HYBRID to the wall stud. Attach the plasterboard to the battens.
Around windows and doors, seal HCONTROL HYBRID with ACTIS MULTIDHESIF tape and batten. Seal around any cable or pipe penetrations with ACTIS MULTIDHESIF tape.
Seal joints between walls and floors with ACTIS MULTIDHESIF tape.
1
2
3
4
5
Timber Frame Wall
How to insulate a timber frame wall with HCONTROL HYBRID?
-6-
General information
Installation precautions
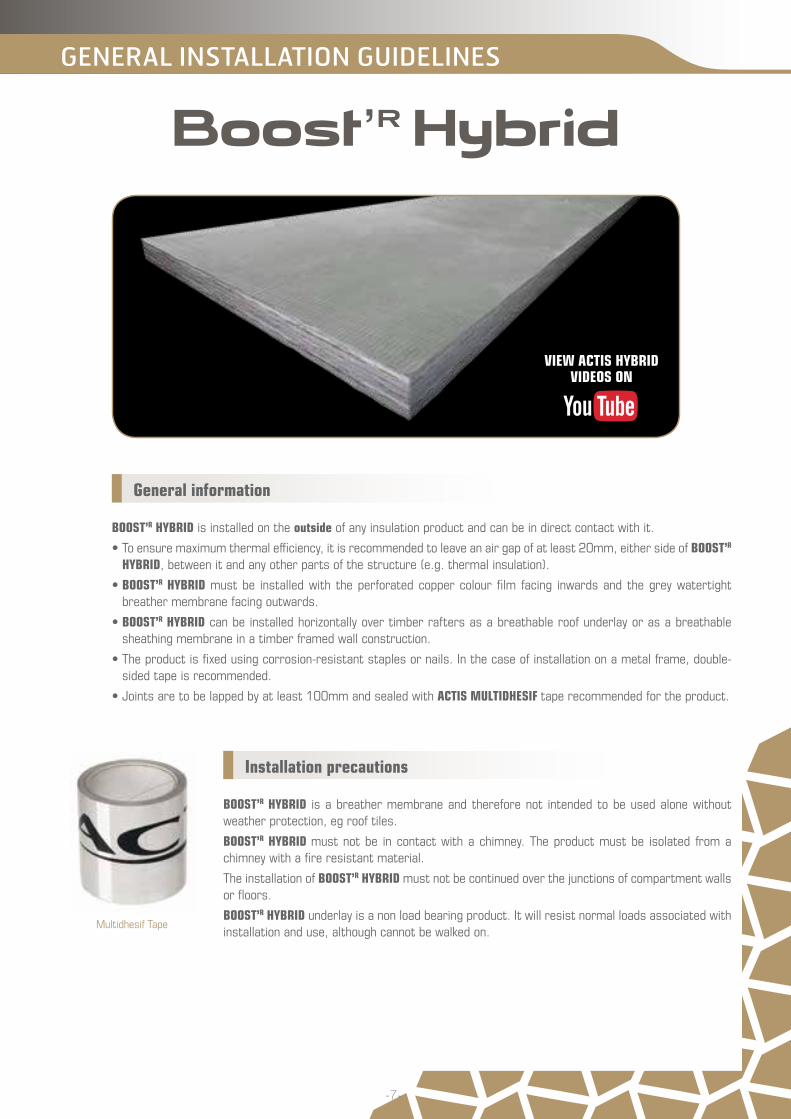
BOOST’R HYBRID is installed on the outside of any insulation product and can be in direct contact with it.
• To ensure maximum thermal efficiency, it is recommended to leave an air gap of at least 20mm, either side of BOOST’R HYBRID, between it and any other parts of the structure (e.g. thermal insulation).
• BOOST’R HYBRID must be installed with the perforated copper colour film facing inwards and the grey watertight breather membrane facing outwards.
• BOOST’R HYBRID can be installed horizontally over timber rafters as a breathable roof underlay or as a breathable sheathing membrane in a timber framed wall construction.
• The product is fixed using corrosion-resistant staples or nails. In the case of installation on a metal frame, double-sided tape is recommended.
• Joints are to be lapped by at least 100mm and sealed with ACTIS MULTIDHESIF tape recommended for the product.
BOOST’R HYBRID is a breather membrane and therefore not intended to be used alone without weather protection, eg roof tiles.
BOOST’R HYBRID must not be in contact with a chimney. The product must be isolated from a chimney with a fire resistant material.
The installation of BOOST’R HYBRID must not be continued over the junctions of compartment walls or floors.
BOOST’R HYBRID underlay is a non load bearing product. It will resist normal loads associated with installation and use, although cannot be walked on.
GENERAL INSTALLATION GUIDELINES
Multidhesif Tape
VIEW ACTIS HYBRID VIDEOS ON
-7-

Pitched Roof
BOOST’R HYBRID is installed horizontally on timber rafters or timber frame wall studs. The product is fixed using corrosion-resistant staples or nails.
Open the roll and lay BOOST’R HYBRID across the face of the timber rafters or boarded roof, fixing in a continuous layer.
’
Staple to the structure every 50mm using 20mm minimum galvenised staples.
Fix 38 x 38mm counter battens in line with rafters, or 50 x 50mm vertical battens if borded roof.
Fix adjacent layer overlapping by 50–100mm, staple to support using
20mm minimum galvanised staples.
Fix horizontal tiling battens to size and gauge in accordance with tile manufacturers requirements.
2
3
41
5
6
BOOST’R HYBRID STEP BY STEP INSTALLATION
Ensure all joints are taped using ACTIS Multidhesif.
How to insulate a pitched roof with BOOST’R HYBRID?
-8-
Timber Frame Wall
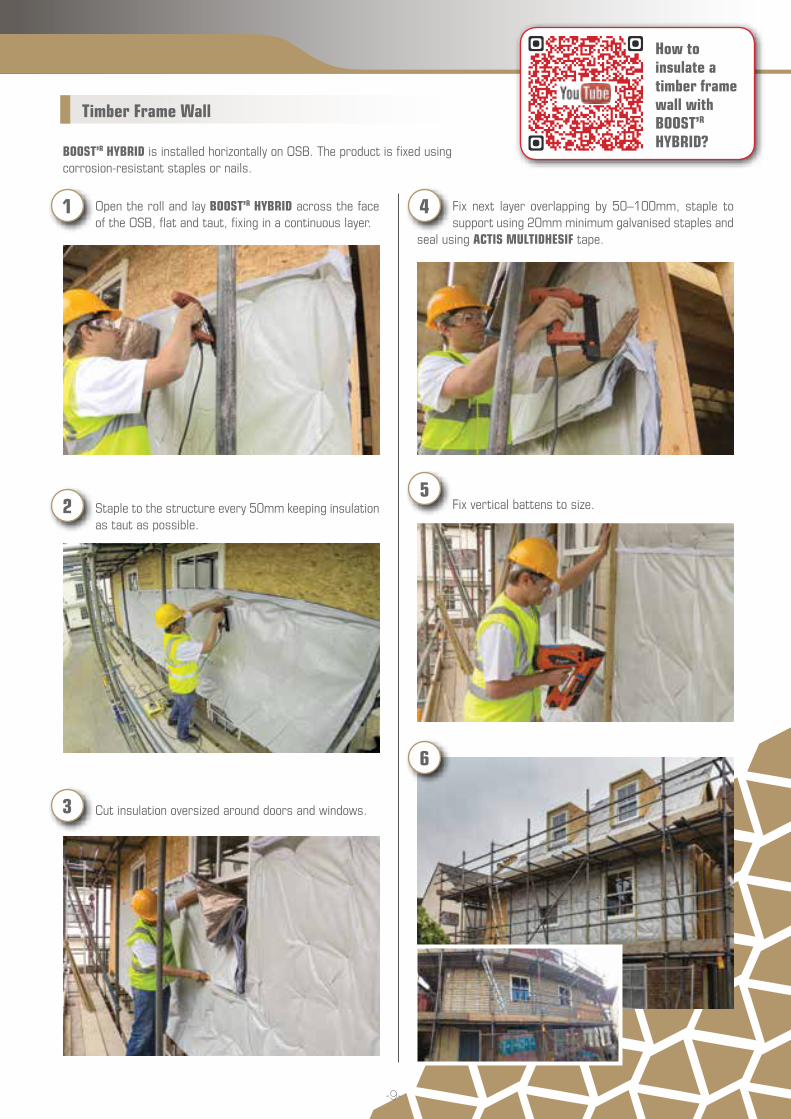
BOOST’R HYBRID is installed horizontally on OSB. The product is fixed using corrosion-resistant staples or nails.
Open the roll and lay BOOST’R HYBRID across the face of the OSB, flat and taut, fixing in a continuous layer.
Staple to the structure every 50mm keeping insulation as taut as possible.
Cut insulation oversized around doors and windows.
Fix next layer overlapping by 50–100mm, staple to support using 20mm minimum galvanised staples and
seal using ACTIS MULTIDHESIF tape.
Fix vertical battens to size.2
3
41
5
6
How to insulate a timber frame wall with BOOST’R HYBRID?
-9-
Reduce condensation risk Wall application
Condensation is most likely to occur where warm moisture laden air is able to pass to the cold side of the insulation and is then prevented from dissipating to the external ambiance.
Please follow the next steps to prevent condensation risk:
1. Ventilation:
• Encourage fresh air circulation by opening a window.
• Remove moisture-laden air mechanically from kitchens, bathrooms, etc. (mechanical and natural ventilation)
2. Install an independent and continuous vapour control layer (HCONTROL HYBRID) to limit the flow of warm air and water vapour through the structure to the cold side of the wall or ceiling.
• The vapour control layer must have a high vapour resistance
• Ensure all joints are well sealed
3. Install a breather membrane (BOOST’R HYBRID) to ensure any water vapour can disperse through the structure.
• In order to avoid a build-up of moisture in the batten space between breather membrane and roof covering, it is good practice to ensure adequate air movement through this air void. This will allow moist air to dissipate into the atmosphere.
4. Avoid thermal bridging: keep the insulation continuous wherever possible and interfacing with existing insulation. Architects should give consideration to this, particularly at the eaves.
PreparationWhere possible, remove the source of moisture within the building. Improve the internal ventilation and airflow, by opening windows or providing mechanical ventilation. Before installing HYBRID solutions, ensure that the surfaces to be covered are firm, clean, dry and smooth.
Junctions of walls The air tightness and thermal continuity must be carefully maintained at all times, especially at the junction of walls and between floor and walls.
To ensure thermal continuity, the insulation in each wall should be cut so that the junction does not create any empty cavities.
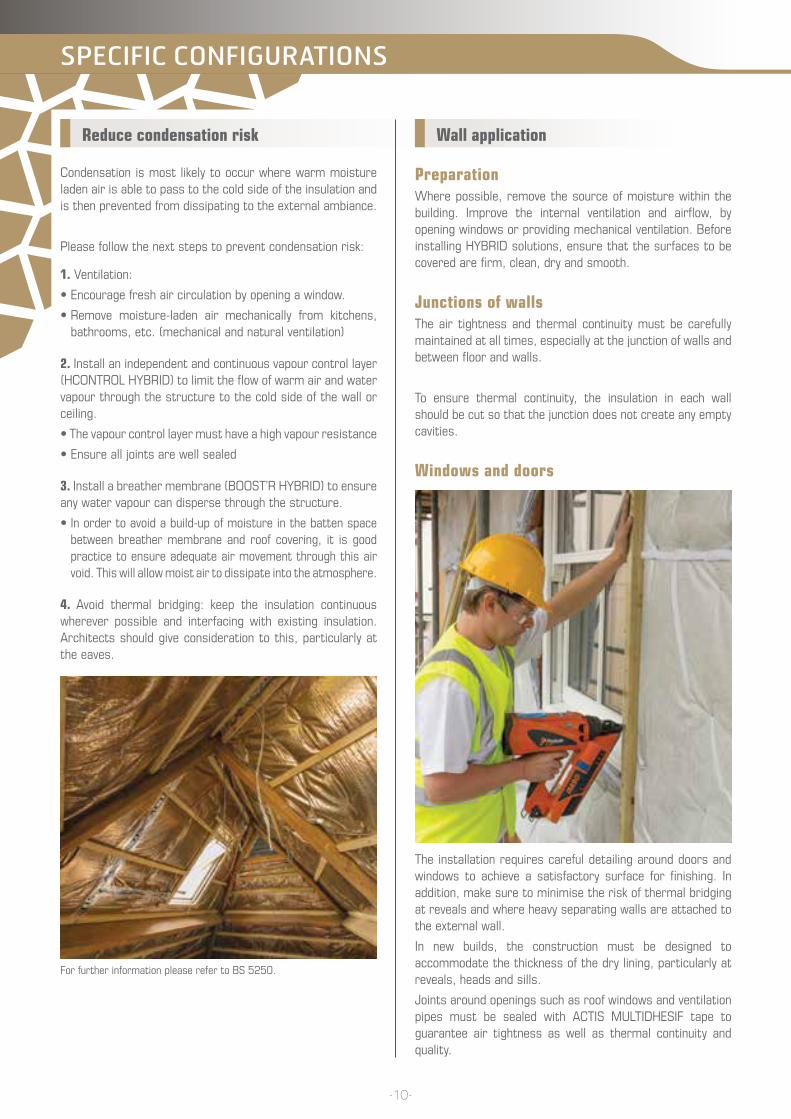
Windows and doors
The installation requires careful detailing around doors and windows to achieve a satisfactory surface for finishing. In addition, make sure to minimise the risk of thermal bridging at reveals and where heavy separating walls are attached to the external wall.
In new builds, the construction must be designed to accommodate the thickness of the dry lining, particularly at reveals, heads and sills.
Joints around openings such as roof windows and ventilation pipes must be sealed with ACTIS MULTIDHESIF tape to guarantee air tightness as well as thermal continuity and quality.
SPECIFIC CONFIGURATIONS
For further information please refer to BS 5250.
-10-
HCONTROL HYBRIDBOOST’R HYBRID
General rule The vapour control layer needs to be continuous and provide a significantly greater vapour resistance than any products installed above it.
Any vapour that does get through the vapour control layer also needs to disperse through the structure, via a breather membrane or effective ventilation.
Ventilation Excess of water vapour contained in the internal ambient air increases the risk of condensation. This can be avoided by using natural or mechanical ventilation:
• encourage fresh air circulation by opening a window
• remove moisture-laden air mechanically from kitchens, bathrooms, etc.
Edges of insulationEnsure all exposed edges are folded under to stop air ingress and visually inspect installed insulation to ensure the finish is as air tight as possible.
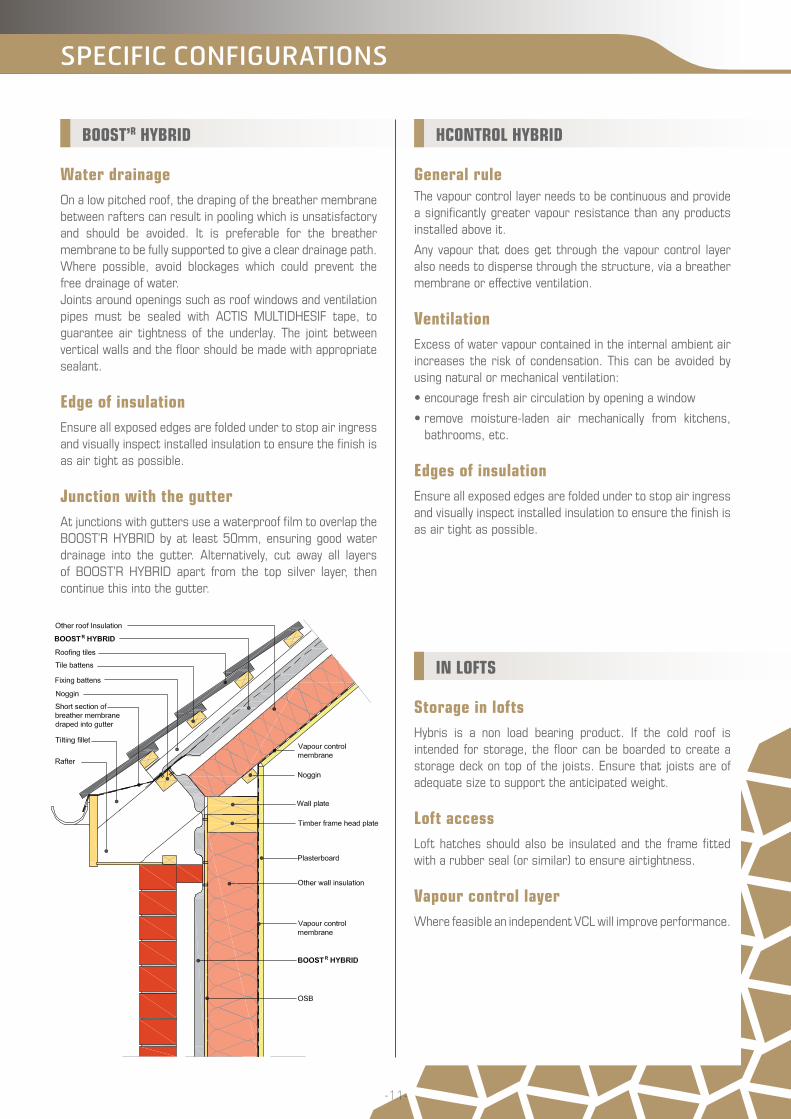
Water drainageOn a low pitched roof, the draping of the breather membrane between rafters can result in pooling which is unsatisfactory and should be avoided. It is preferable for the breather membrane to be fully supported to give a clear drainage path. Where possible, avoid blockages which could prevent the free drainage of water.Joints around openings such as roof windows and ventilation pipes must be sealed with ACTIS MULTIDHESIF tape, to guarantee air tightness of the underlay. The joint between vertical walls and the floor should be made with appropriate sealant.
Edge of insulationEnsure all exposed edges are folded under to stop air ingress and visually inspect installed insulation to ensure the finish is as air tight as possible.
Junction with the gutterAt junctions with gutters use a waterproof film to overlap the BOOST’R HYBRID by at least 50mm, ensuring good water drainage into the gutter. Alternatively, cut away all layers of BOOST’R HYBRID apart from the top silver layer, then continue this into the gutter.
IN LOFTS
Storage in loftsHybris is a non load bearing product. If the cold roof is intended for storage, the floor can be boarded to create a storage deck on top of the joists. Ensure that joists are of adequate size to support the anticipated weight.
Loft accessLoft hatches should also be insulated and the frame fitted with a rubber seal (or similar) to ensure airtightness.
Vapour control layerWhere feasible an independent VCL will improve performance.
SPECIFIC CONFIGURATIONS
Wall application
-11-
ADDITIONAL INFORMATION
Puncture damagesWhere damage has occurred, apply a good-sized patch of insulation over the hole ensuring all edges of the patch are completely sealed with tape. Alternatively, for small puncture damage of less than 25mm, ACTIS MULTIDHESIF tape may be used.
DuctingTo ensure air tightness around ducting, make a small circular hole in HCONTROL HYBRID (smaller than the diameter of the ducting) and introduce small segmental cuts outwards to the edge of the required hole. The vapour barrier can then be sealed to the duct by using the ACTIS MULTIDHESIF tape.
Penetration of the product by services should be kept to a minimum. In timber frame constructions, services can be incorporated behind the dry lining, making chasing of the wall unnecessary.
Thermal bridgesThermal bridges reduce thermal performance and can contribute to condensation and extra energy consumption. Thermal bridging can usually be reduced by ensuring:
• perfectly sealed joints between adjacent insulation layers
• continuous insulation at junction between elements
• overall continuous vapour and air tightness, especially at junctions with walls and windows
• perfectly sealed electric devices (plug, switch, cable) to avoid cold air leakage.
Insulated building zone: Insulated building zones are to be adequately ventilated and maintained at constant internal ambient temperature, of at least 12°C, in order to avoid condensation risks.
Electric devicesThe best situation is where the electrical installation occurs after the installation of insulation and before siding interior finishing.
Fitting sockets, switches and light fixtures should not deteriorate the insulation and must be airtight by sealing with mastic. This is required not only to achieve good airtightness but also to reduce the risk of black marks around the connections.
Any perforation of the independent vapour control layer must be sealed to ensure the initial airtightness (with MULTIDHESIF tape).
ComplianceAll HYBRID products are appropriately CE marked and comply with building regulations when installed according to our guidelines.
SAFETY PRECAUTIONS
-12-
IMPORTANT: in addition to the specific recommendations given by ACTIS below, your ACTIS hybrid products should be installed and used in compliance with (1) good building practice, (2) the most recent editions of any applicable regulations or relevant guidance and (3) any British or European Standards relating to the installation and use of insulation products, particularly in relation to safety precautions.
Fire precautions ACTIS Hybrid products are not fire rated and have Euroclass classification F.
Never expose ACTIS hybrid products to a direct heat source, sparks or a naked flame.
Keep blow torches well away from ACTIS hybrid products, even when using a flame guard or other protective device, and make sure that hot debris and sparks do not make contact with the products.
Fireproof finishes and compartment walls As recommended by current regulatory guidance, do not leave insulation exposed in habitable rooms.
We recommend that ACTIS hybrid products are always covered with a fireproof finish such as plasterboard (see, for example, the fire safety provisions contained in Approved Document B, which provides practical guidance on the fire safety requirements of the Building Regulations 2000 (as amended) in England and Wales; or refer to the relevant provisions in Scotland and Northern Ireland, as amended from time to time).
To ensure that compartment walls achieve the requisite levels of fire resistance, the insulation should not be carried over junctions with such walls (again, please refer to the fire safety provisions contained in Approved Document B noted above, or to any applicable provisions in Scotland and Northern Ireland, as amended from time to time).
Chimneys, flues, heat exchangers and other sources of heat Never use ACTIS hybrid products to insulate a chimney flue, heat exchanger or any other heat source above 80°C. Use a Euroclass A1 non-combustible insulation in compliance with British or European Standards. ACTIS advise leaving a minimum gap of 200 mm between the insulation and chimneys, flues, heat exchangers and all other sources of heat above 80°C.
FOR FURTHER ADVICE FROM ACTIS PLEASE CALL THE TECHNICAL DEPARTMENT ON 01249 462 888.
Downlighters and recess lighting The use of down-lighters or recess lighting in conjunction with ACTIS hybrid products is not recommended. Unless special precautions are taken, this poses an elevated fire risk.
However, if the use of such recess lighting in conjunction with ACTIS hybrid products is desired, encasing the down-lighter appropriately with a non-combustible material may provide adequate fire protection, but in all cases advice should be sought with the relevant Building Control officer who will give guidance on a case by case basis.
Contact between materials and compatibility between products Avoid all contact between ACTIS hybrid products and lead, zinc, copper and its alloys as well as caustic products.
Sun protection When laying ACTIS hybrid products outside, remember that they are highly reflective. Where the products are being installed in bright or sunny weather conditions, appropriate eyewear should be worn (such as sunglasses conforming to the most stringent requirements of BS EN 172, as amended from time to time) and protect against sunburn.
Storage The rolls should be stored in clean, dry conditions, not exposed to sunlight and in such a way that dirt and dust cannot adhere to the product surfaces. The products must be protected from being dropped or crushed by objects. They must not be exposed to open flame or other ignition sources and must be stored away from flammable material such as solvents.
SafetySecurity precautions against falling from a roof are necessary.
During installation extra care should be taken when working in wet conditions due to the increased risk of slipping.
U-Value simulator
Ref :
PZ5
09 (1
0/20
14) –
RC
S C
ARC
ASS
ON
NE
380
986
265
Discover a unique tool to get a quick simulation of your project by scanning the following QR code.
SAFETY PRECAUTIONS
-13-