fun with arduino - cdn.cytron.io · look for arduino ide icon and double click on it raise your...
TRANSCRIPT

UNO EDITION
Fun with ArduinoAN INTRODUCTION TO EMBEDDED SYSTEMs
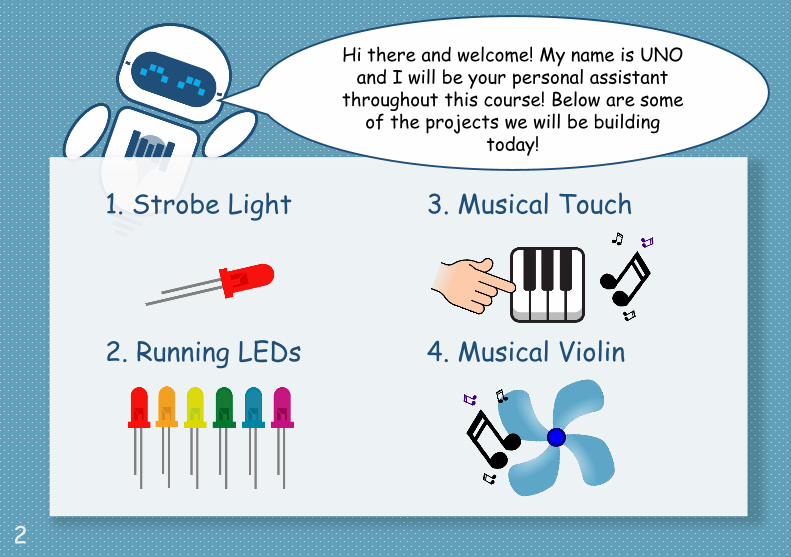
Hi there and welcome! My name is UNO and I will be your personal assistant
throughout this course! Below are some of the projects we will be building
today!
1. Strobe Light
2. Running LEDs
3. Musical Touch
4. Musical Violin
2
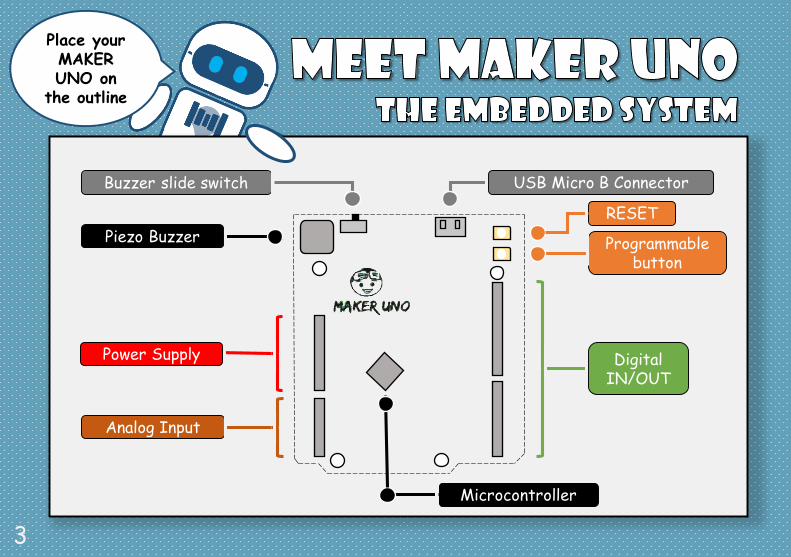
Piezo Buzzer
Buzzer slide switch USB Micro B Connector
RESET
Programmable button
Analog Input
Power Supply Digital IN/OUT
Microcontroller
Place your MAKER UNO on
the outline
3
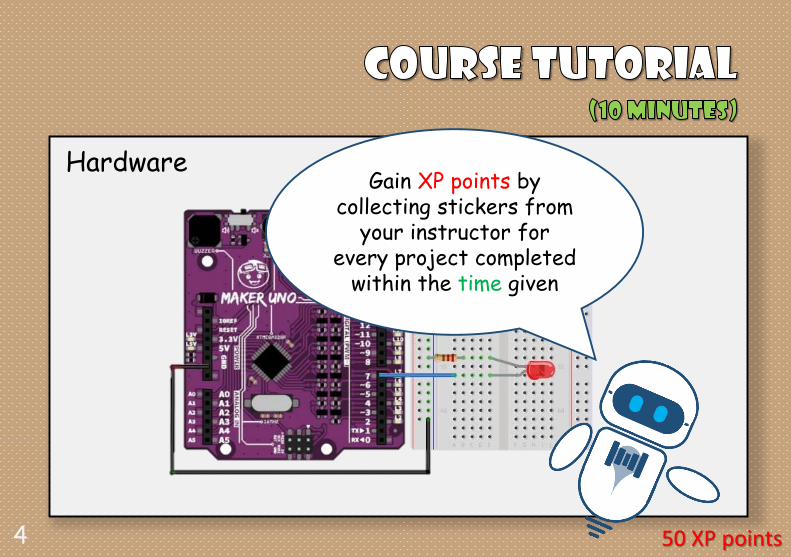
Gain XP points by collecting stickers from
your instructor for every project completed
within the time given
50 XP points
Hardware
4
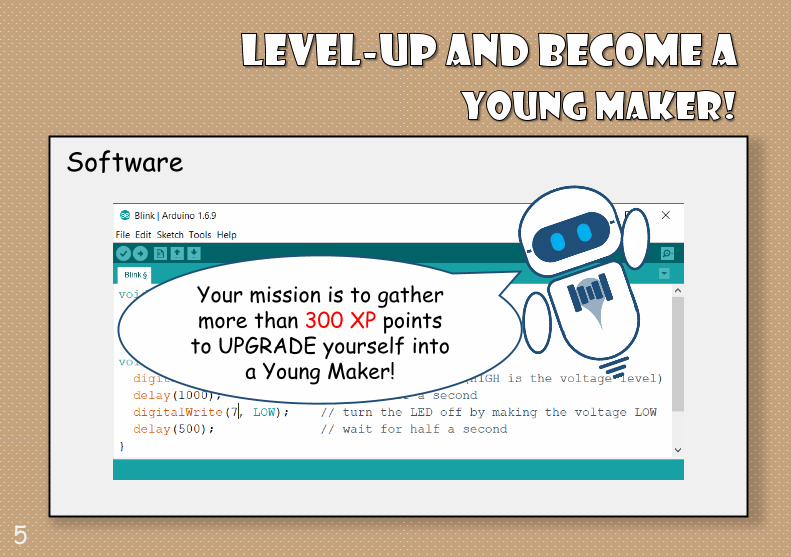
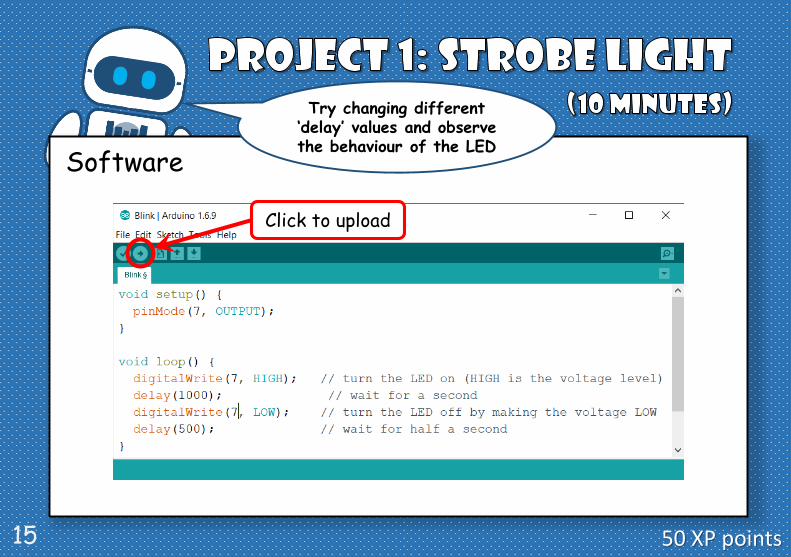
Software
Your mission is to gather more than 300 XP points
to UPGRADE yourself into a Young Maker!
5
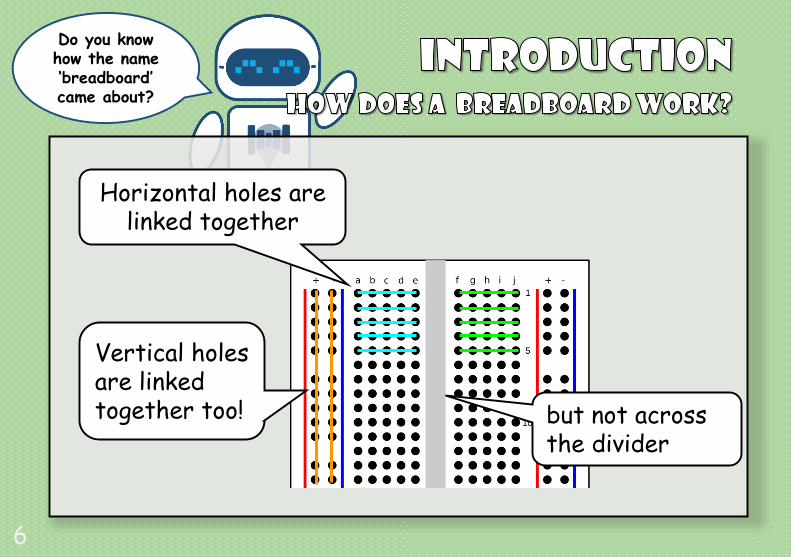
Horizontal holes are linked together
Vertical holes are linked together too! but not across
the divider
Do you know how the name ‘breadboard’ came about?
6
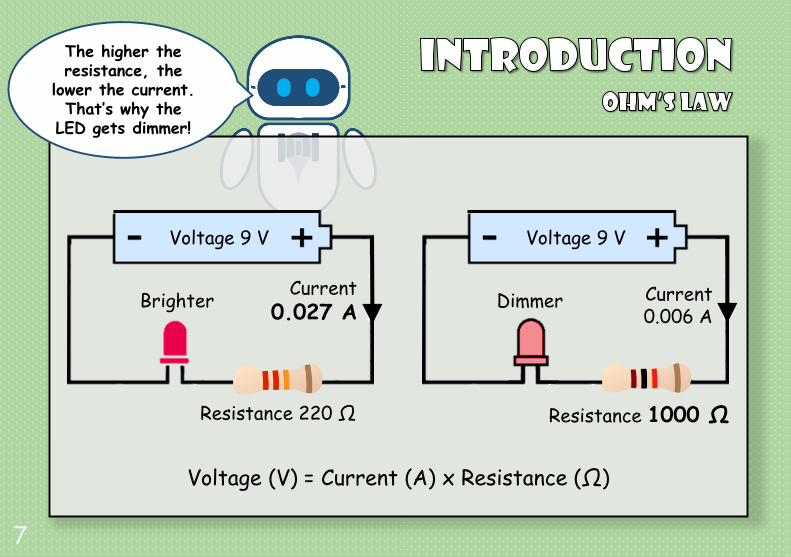
The higher the resistance, the
lower the current. That’s why the
LED gets dimmer!
Voltage 9 V
Resistance 220 Ω Resistance 1000 Ω
Voltage (V) = Current (A) x Resistance (Ω)
Current0.027 A
Current0.006 A
DimmerBrighter
Voltage 9 V
7
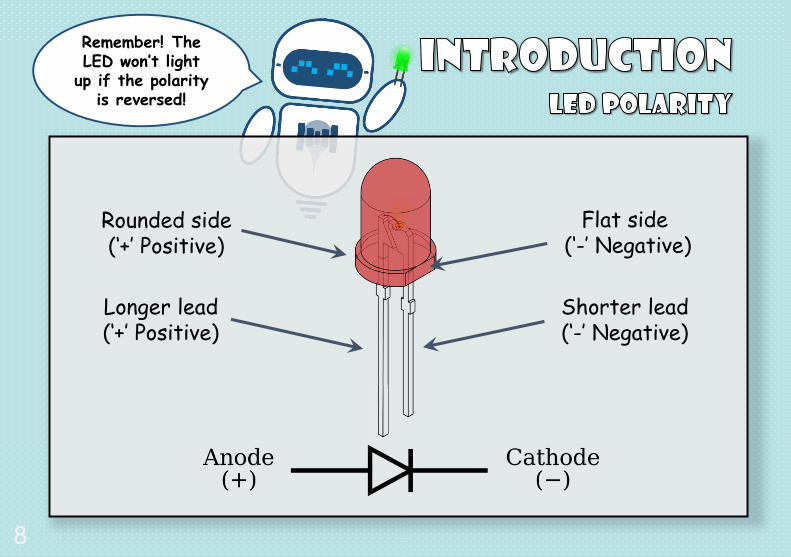
Rounded side (‘+’ Positive)
Flat side(‘-’ Negative)
Shorter lead (‘-’ Negative)
Longer lead (‘+’ Positive)
Remember! The LED won’t light
up if the polarity is reversed!
8
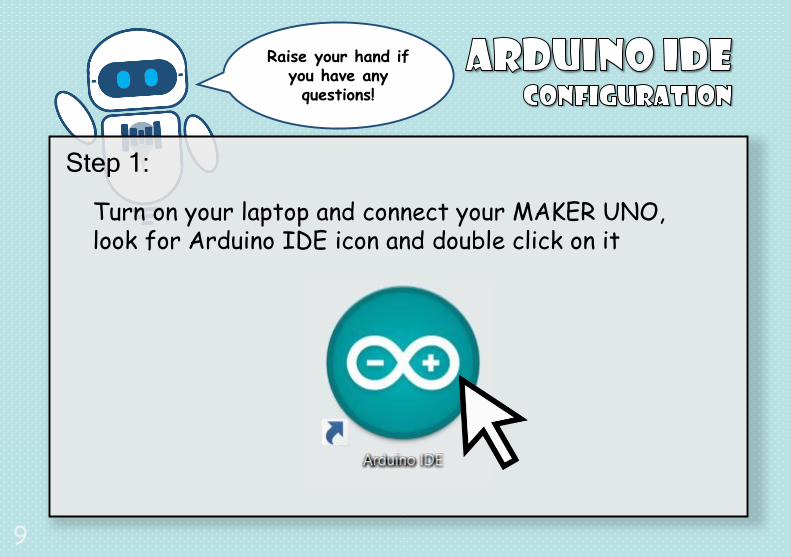
Step 1:
Turn on your laptop and connect your MAKER UNO, look for Arduino IDE icon and double click on it
Raise your hand if you have any questions!
9
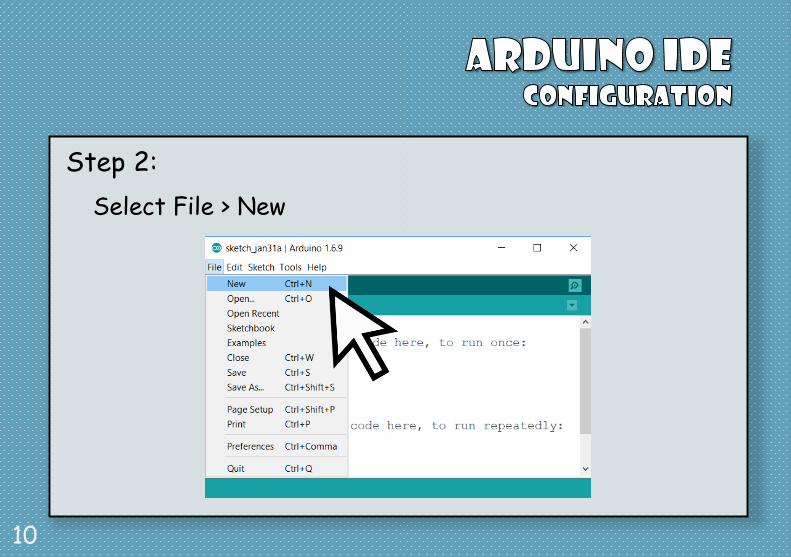
Step 2:
Select File > New
10
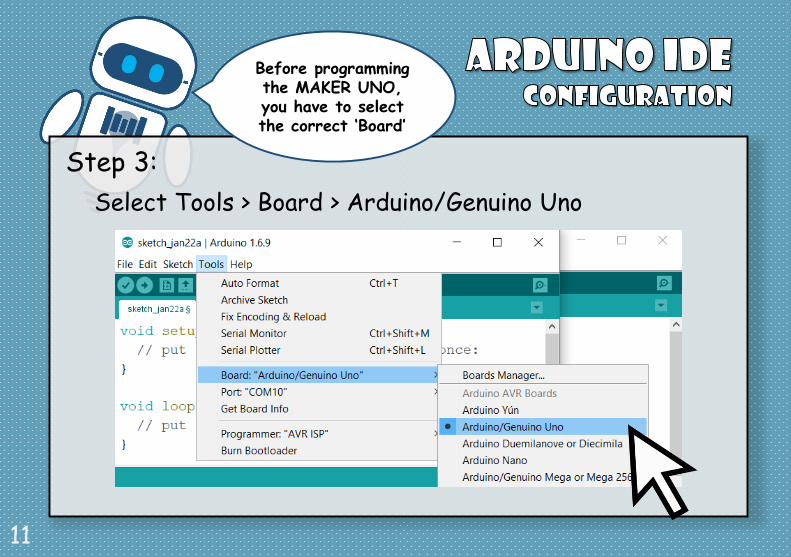
Step 3:
Select Tools > Board > Arduino/Genuino Uno
Before programming the MAKER UNO, you have to select the correct ‘Board’
11
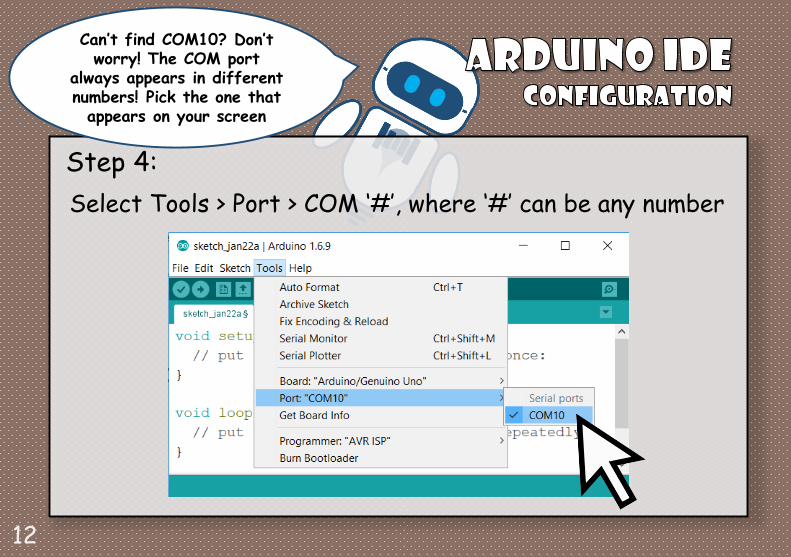
Step 4:
Select Tools > Port > COM ‘#’, where ‘#’ can be any number
Can’t find COM10? Don’t worry! The COM port
always appears in different numbers! Pick the one that
appears on your screen
12

CONGRATULATIONS! YOU HAVE LEARNED HOW
TO CONFIGURE YOUR MAKER UNO ALL BY YOURSELF!
HERE IS 50 XP TO GET YOU STARTED!
Turn to next page to start your mission..
Serious face
ARE YOU READY??
13
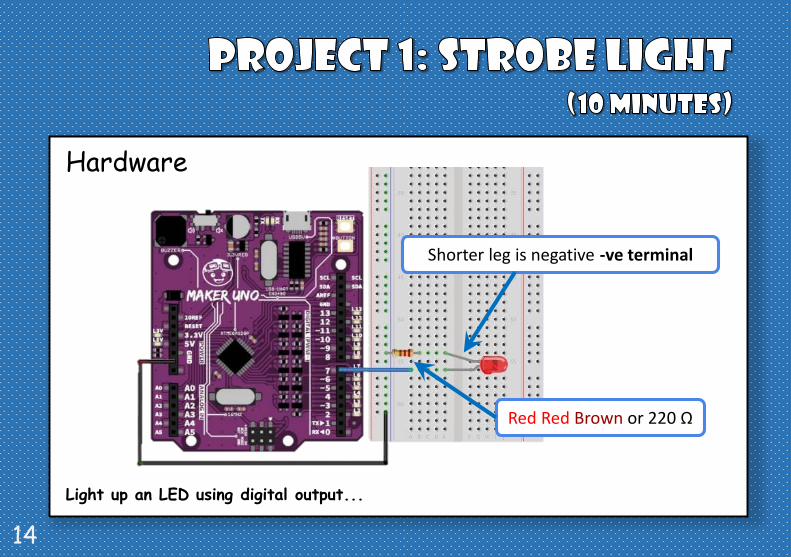
Hardware
Shorter leg is negative -ve terminal
Red Red Brown or 220 Ω
Light up an LED using digital output...
14
Software
Click to upload
50 XP points
Try changing different ‘delay’ values and observe the behaviour of the LED
15
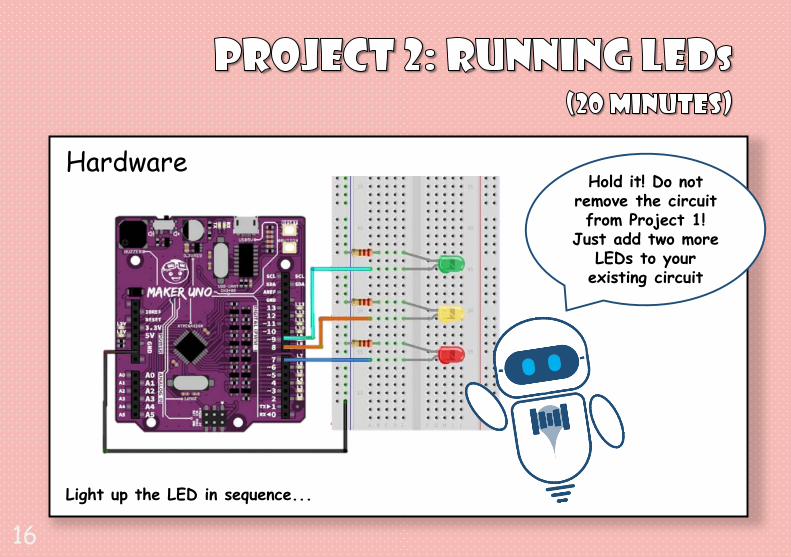
HardwareHold it! Do not
remove the circuit from Project 1!
Just add two more LEDs to your
existing circuit
Light up the LED in sequence...
16
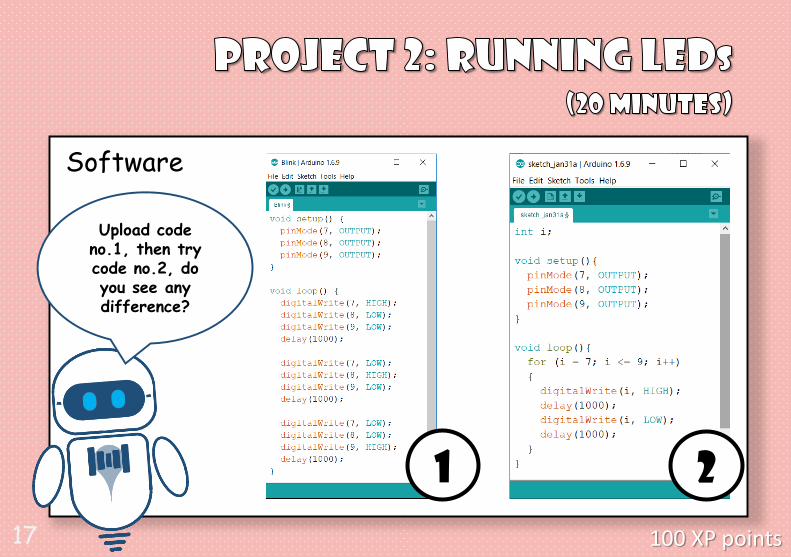
Software
1 2
Upload code no.1, then try code no.2, do you see any difference?
100 XP points17
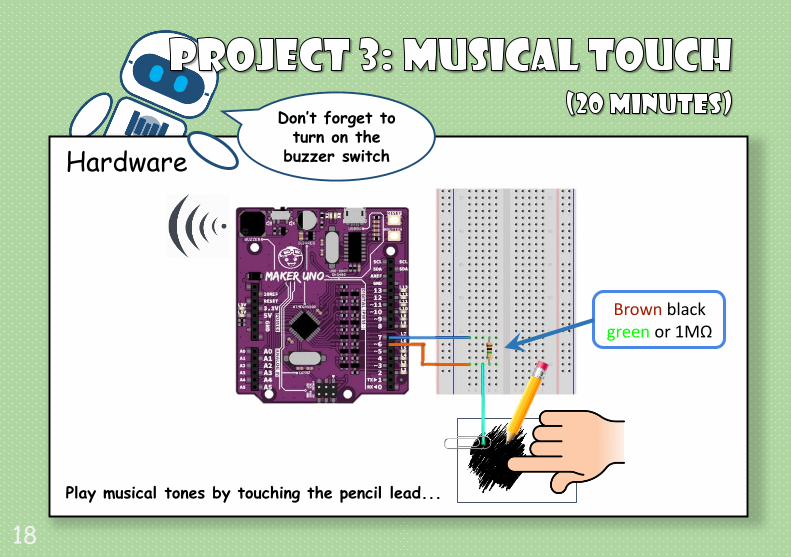
Hardware
Don’t forget to turn on the
buzzer switch
Play musical tones by touching the pencil lead...
Brown blackgreen or 1MΩ
18
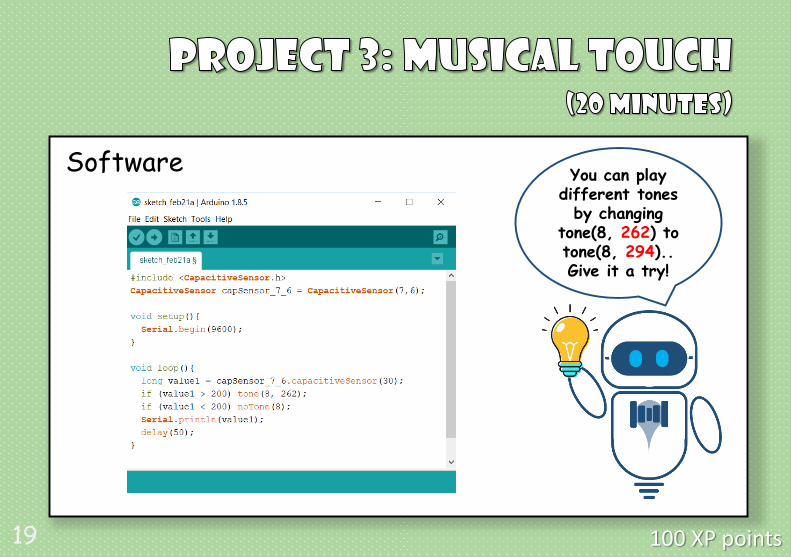
Software
100 XP points
You can play different tones
by changing tone(8, 262) to tone(8, 294).. Give it a try!
19
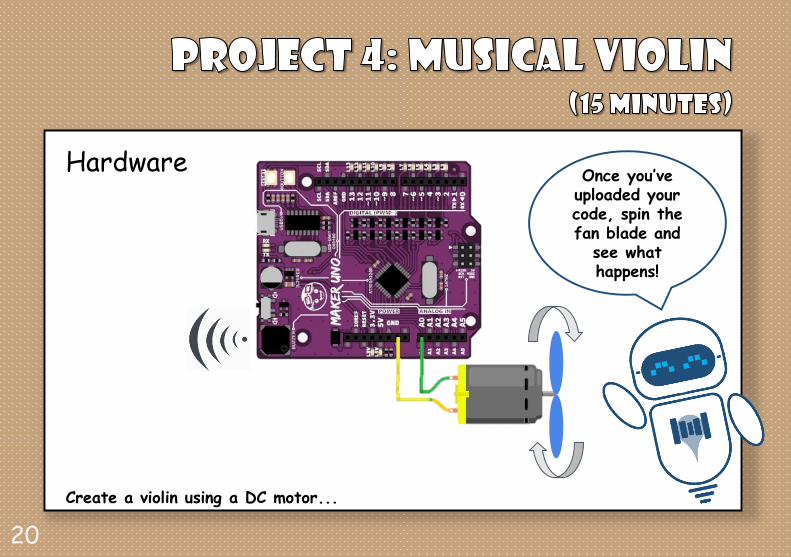
Hardware
Create a violin using a DC motor...
Once you’ve uploaded your code, spin the fan blade and
see what happens!
20
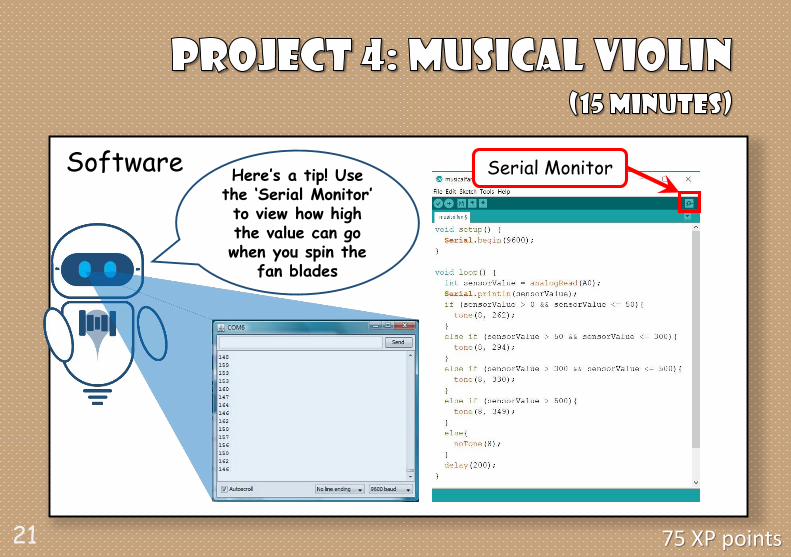
Software
75 XP points
Serial MonitorHere’s a tip! Use the ‘Serial Monitor’ to view how high the value can go when you spin the
fan blades
21
1. How to use a Breadboard
2. How to light up LEDs in sequence
3. How to code using ‘for loop’ and ‘if.. else’ statements
4. How to build an electronic instrument using capacitive
sensor
22

CONGRATULATIONS!YOU HAVE COMPLETED
THE COURSE!
YOU HAVE NOW GAINED THE SKILLS NEEDED TO EXPLORE ON
YOUR OWN! HERE ARE SOME LINKS TO GET YOU STARTED
fritzing.org/projectshackster.io/arduino/projects
instructables.com/howto/arduino/
UPON GATHERING ENOUGH XP POINTS,
I, UNO, DECLARE YOU AS A NEWYOUNG MAKER!
23
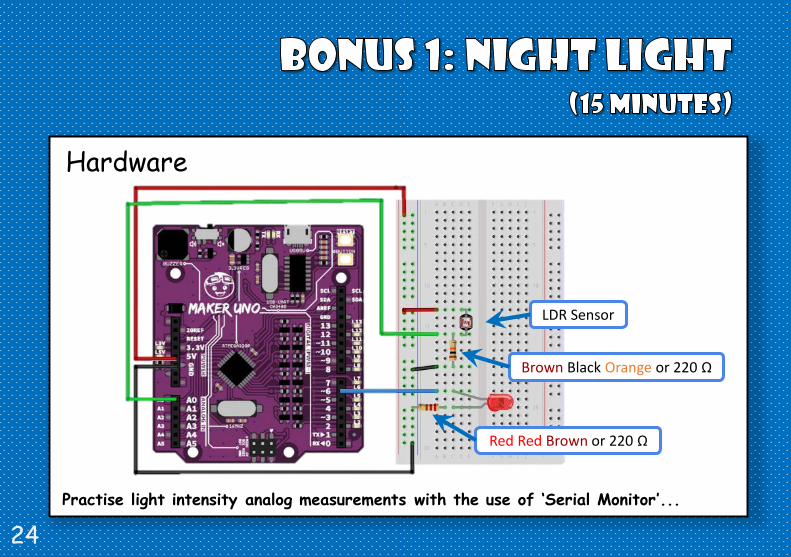
Hardware
Practise light intensity analog measurements with the use of ‘Serial Monitor’...
LDR Sensor
Red Red Brown or 220 Ω
Brown Black Orange or 220 Ω
24
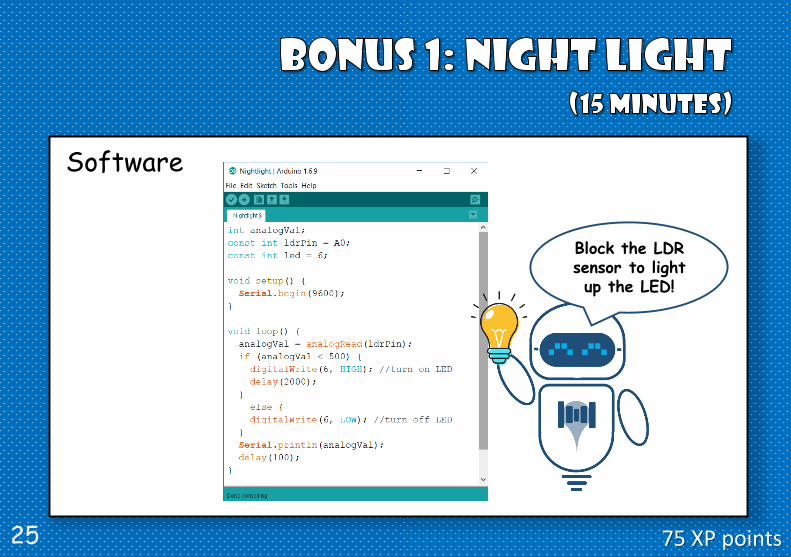
Software
75 XP points
Block the LDR sensor to light up the LED!
25
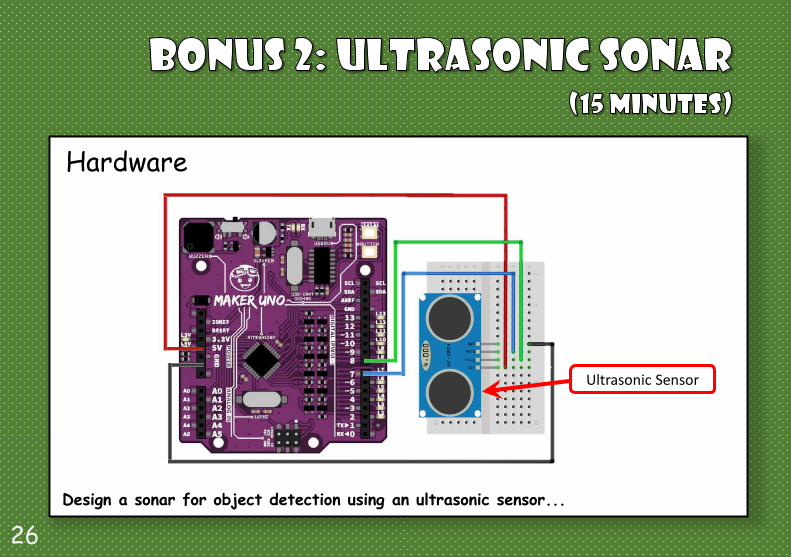
Hardware
Design a sonar for object detection using an ultrasonic sensor...
Ultrasonic Sensor
26
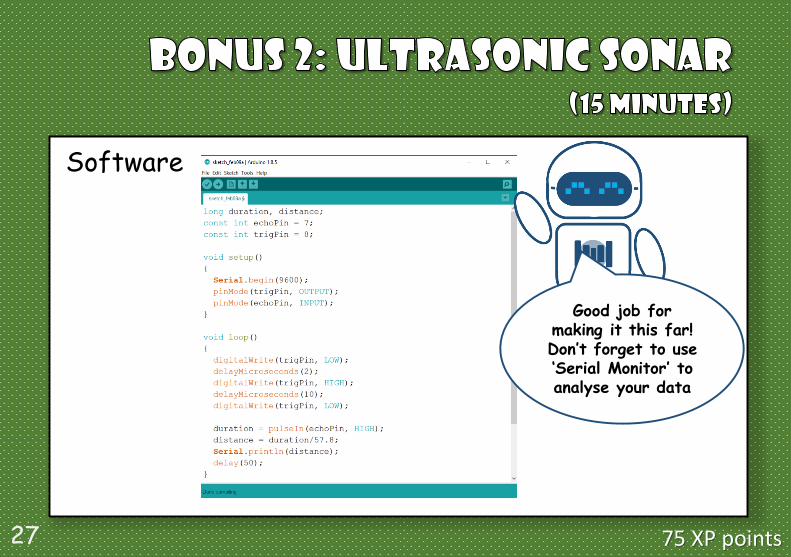
Software
75 XP points
Good job for making it this far! Don’t forget to use ‘Serial Monitor’ to analyse your data
27

www.pscpen.com