first of all, thank you very much for your purchase of...
TRANSCRIPT

First of all, thank you very much for your purchase of Todd’s Seeds Wheatgrass/Cat Grass Seeds. There has been some confusion in the past about the difference between “Cat Grass” and “Wheatgrass”. The bottom line is that there is no difference between cat grass and wheatgrass. The names are interchangeable. Here is a recent explanation we sent to a customer who was concerned that she received wheatgrass seeds when she ordered cat grass seeds:
There are two main types of wheat - hard red winter wheat and soft spring wheat. The experts agree that the best wheat for wheatgrass is hard red winter wheat. Since that's a mouthful, we call it hard red wheat. Seeds are either organic, chemical free, treated, untreated, gmo, non-gmo, heirloom or hybrid (for the most part). Wheatgrass is only grown from one seed, i.e. wheat seed. If you plant the wheat seed in a field, the first thing that grows is wheatgrass. If you let the wheatgrass continue to grow, you will get, well, full size wheat. So, what is cat grass? Cat grass is typically a flax, barley, wheat, or oat plant. Japanese barnyard millet, bluegrass, fescue, and rye are also acceptable alternatives, although rye needs to be carefully watched to prevent ergot, a mold that can produce a hallucinogenic chemical. So, there is no "one" seed that can claim to be the only cat grass. From our many years of experience, wheatgrass or oat grass are the cat's favorite "cat grass". So, when you order "cat grass" from us, and almost all other sellers, you are going to get a hard, red, winter wheat berry (seed). Since we respect your cat as much as we do you, we make sure its organic. Can you eat the wheatgrass grown from the hard, red, winter wheat berries? Yup. Humans do it all the time, though most of them make juice out of the grass. I am attaching a photo taken by my Daughter, of the cat grass she grew from the exact wheat seed you have in your hand. This is what wheatgrass/cat grass looks like. Take care, Todd President, Todd's Seeds

Supplies for Growing Wheatgrass:
You will need:
Organic wheatgrass/cat grass sprouting seeds. Use organic to ensure the best quality, taste and yield of your final sprouts.
Organic potting soil and fertilizer to ensure optimum vitamins and minerals in plant.
Plastic gardening tray with holes. Can be reused over and over again. A 21" x 11" x 2" sized tray will yield about 14-18 ounces of juices (last approximately 2 weeks at 1 ounce a day).
Spray bottle. Essential to ensure that you do not overwater.
Step # 1: Pre-sprout/Germinating We get questions all the time about this pre-sprouting/soaking issue. First, please know that I have never personally soaked my wheatgrass seeds. If you want to, go right ahead and put the seeds into the dirt without soaking. They will grow just fine. However, please make sure to at least RINSE the seeds to clean them prior to planting. Organic wheatgrass seeds are recommended for sprouting to ensure the sweetness of your wheatgrass juice and that it will contain the optimum vitamins and minerals that will boost your health.
1. Pre-sprouting can be important to ensure a good crop. Follow these steps to pre-sprout your wheatgrass seeds to ensure that your crop grows at a much faster rate. If you do not want to pre-sprout, that’s just fine, especially if you are happy with the results. I highly encourage you to try it both ways and see if there is a difference for you.
2. Measure out a bowl of seeds. Amount: estimate enough to fill one layer of seeds on whatever the size of your tray.
3. Rinse the seeds in clean water, drain, and then soak the seeds in a container with about 2-3 times of cool water.
4. Soak for about 8-10 hours. 5. After 8-10 hours, drain the water, then soak them again as in #2 above and soak for another 8
hours. 6. After the second set of 8-10 hours, drain the water, then soak them once more the same for
another 8-10 hours. 7. Check if it has sprouted roots of at least 1/8 of an inch to 1/4 of an inch. Now, sometimes you will
not see this pre-sprout, no matter how long you soak the seeds, so go right ahead and get them into the dirt at this time.
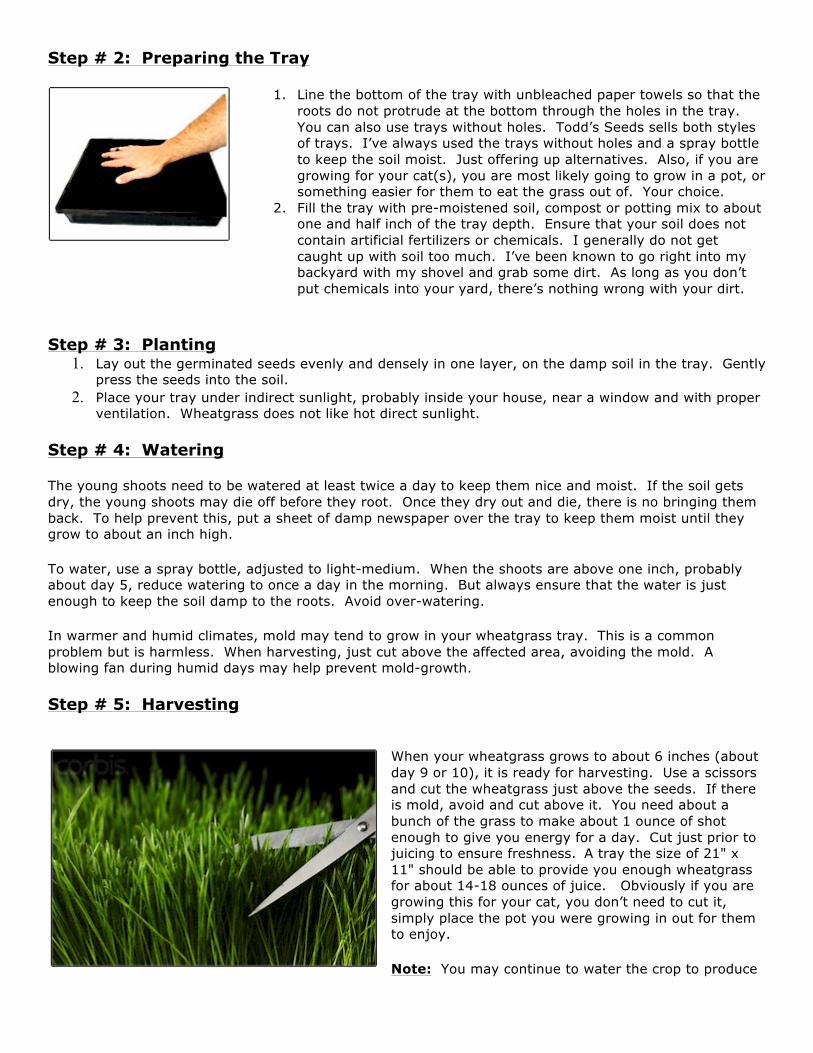
Step # 2: Preparing the Tray
1. Line the bottom of the tray with unbleached paper towels so that the roots do not protrude at the bottom through the holes in the tray. You can also use trays without holes. Todd’s Seeds sells both styles of trays. I’ve always used the trays without holes and a spray bottle to keep the soil moist. Just offering up alternatives. Also, if you are growing for your cat(s), you are most likely going to grow in a pot, or something easier for them to eat the grass out of. Your choice.
2. Fill the tray with pre-moistened soil, compost or potting mix to about one and half inch of the tray depth. Ensure that your soil does not contain artificial fertilizers or chemicals. I generally do not get caught up with soil too much. I’ve been known to go right into my backyard with my shovel and grab some dirt. As long as you don’t put chemicals into your yard, there’s nothing wrong with your dirt.
Step # 3: Planting
1. Lay out the germinated seeds evenly and densely in one layer, on the damp soil in the tray. Gently press the seeds into the soil.
2. Place your tray under indirect sunlight, probably inside your house, near a window and with proper ventilation. Wheatgrass does not like hot direct sunlight.
Step # 4: Watering The young shoots need to be watered at least twice a day to keep them nice and moist. If the soil gets dry, the young shoots may die off before they root. Once they dry out and die, there is no bringing them back. To help prevent this, put a sheet of damp newspaper over the tray to keep them moist until they grow to about an inch high. To water, use a spray bottle, adjusted to light-medium. When the shoots are above one inch, probably about day 5, reduce watering to once a day in the morning. But always ensure that the water is just enough to keep the soil damp to the roots. Avoid over-watering. In warmer and humid climates, mold may tend to grow in your wheatgrass tray. This is a common problem but is harmless. When harvesting, just cut above the affected area, avoiding the mold. A blowing fan during humid days may help prevent mold-growth. Step # 5: Harvesting
When your wheatgrass grows to about 6 inches (about day 9 or 10), it is ready for harvesting. Use a scissors and cut the wheatgrass just above the seeds. If there is mold, avoid and cut above it. You need about a bunch of the grass to make about 1 ounce of shot enough to give you energy for a day. Cut just prior to juicing to ensure freshness. A tray the size of 21" x 11" should be able to provide you enough wheatgrass for about 14-18 ounces of juice. Obviously if you are growing this for your cat, you don’t need to cut it, simply place the pot you were growing in out for them to enjoy. Note: You may continue to water the crop to produce

a second or third crop though they may not be as tender nor grow as tall. But you get extra ounces from it. Otherwise, clean the tray and start a new crop.
Step # 6: Juice and Enjoy To juice wheatgrass, you need a wheatgrass juicer or a gear juicer. A centrifugal juicer is not be able to juice wheatgrass, and you may clog up the strainer in the process as it is very fibrous. Rinse your wheatgrass and juice. Do not take more than one ounce a day if you are not familiar with drinking juices. Wheatgrass juice is such a powerful cleanser that it may cause you some healing reactions.