final cut pro x - department of agricultural education...
TRANSCRIPT
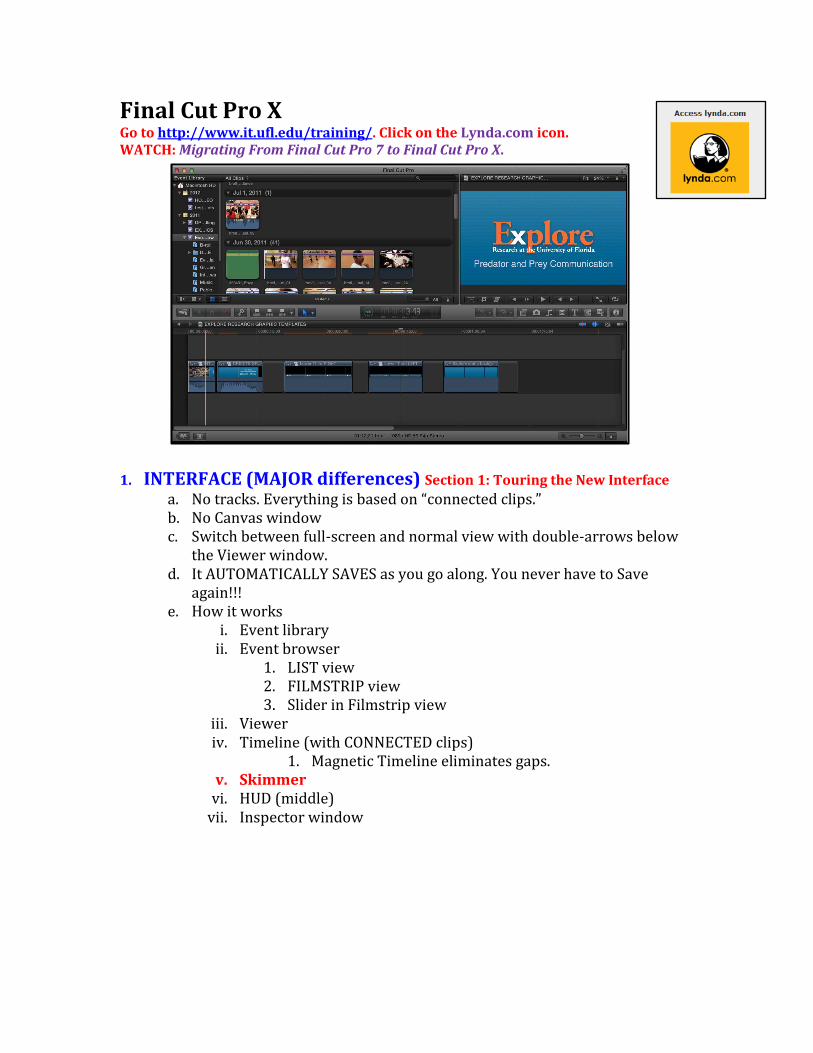
Final Cut Pro X Go to http://www.it.ufl.edu/training/. Click on the Lynda.com icon. WATCH: Migrating From Final Cut Pro 7 to Final Cut Pro X.
1. INTERFACE (MAJOR differences) Section 1: Touring the New Interface
a. No tracks. Everything is based on “connected clips.” b. No Canvas window c. Switch between full-screen and normal view with double-arrows below
the Viewer window. d. It AUTOMATICALLY SAVES as you go along. You never have to Save
again!!! e. How it works
i. Event library ii. Event browser
1. LIST view 2. FILMSTRIP view 3. Slider in Filmstrip view
iii. Viewer iv. Timeline (with CONNECTED clips)
1. Magnetic Timeline eliminates gaps. v. Skimmer
vi. HUD (middle) vii. Inspector window
viii. Project list
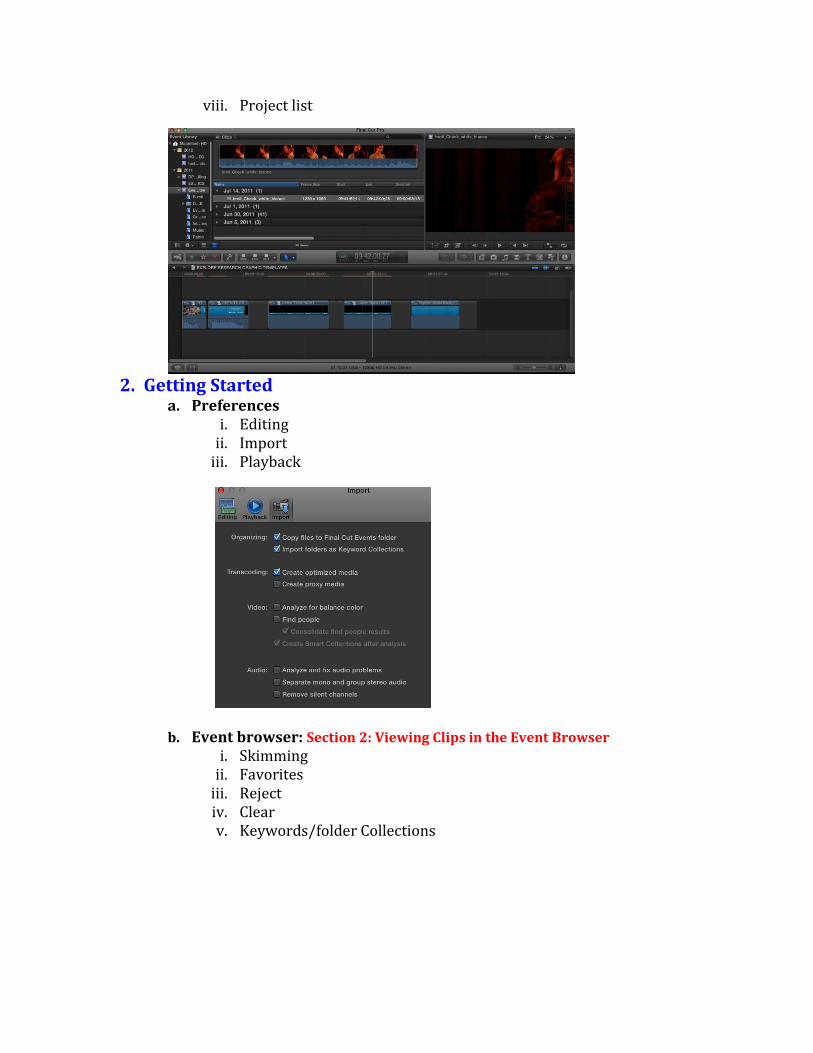
2. Getting Started a. Preferences
i. Editing ii. Import
iii. Playback
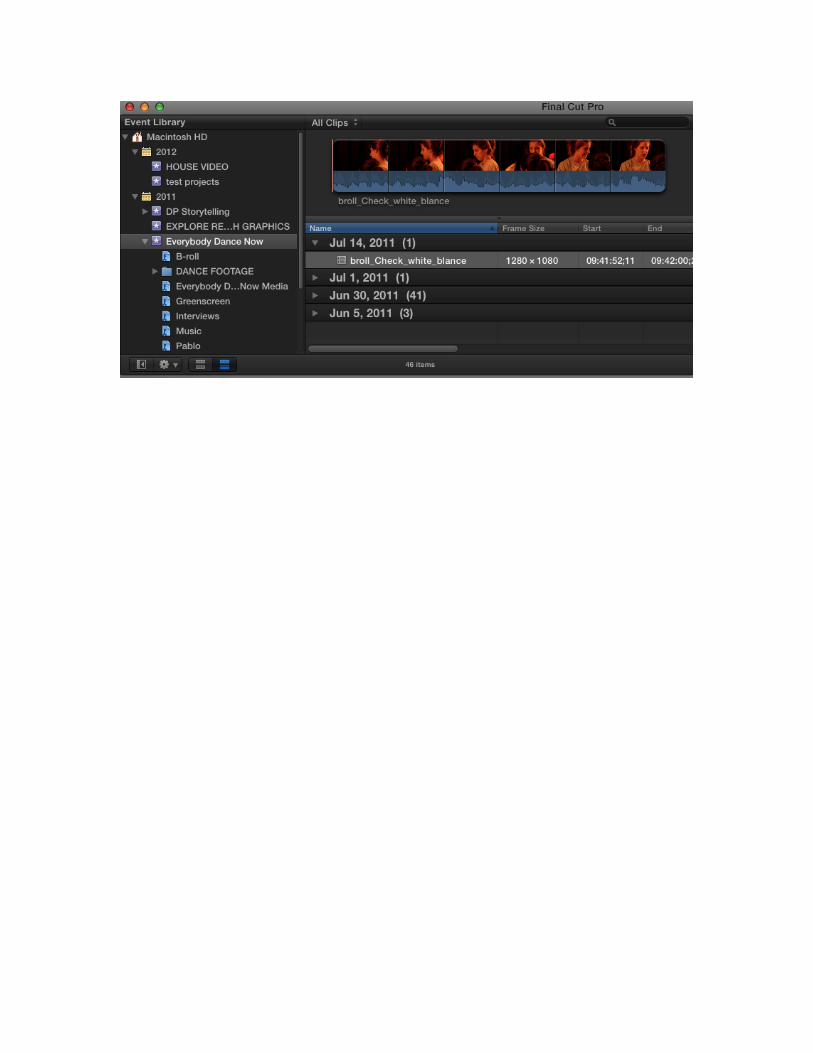
b. Event browser: Section 2: Viewing Clips in the Event Browser
i. Skimming ii. Favorites
iii. Reject iv. Clear v. Keywords/folder Collections

c. Viewer window (combo of Viewer and Canvas) i. Drop-down window (upper right). Safe zone
d. Project library: Section 3: Creating and Managing Projects
i. All projects that you have on your HD. ii. Double-click, opens up the sequence.
iii. Skimming and see the video footage in Viewer window.
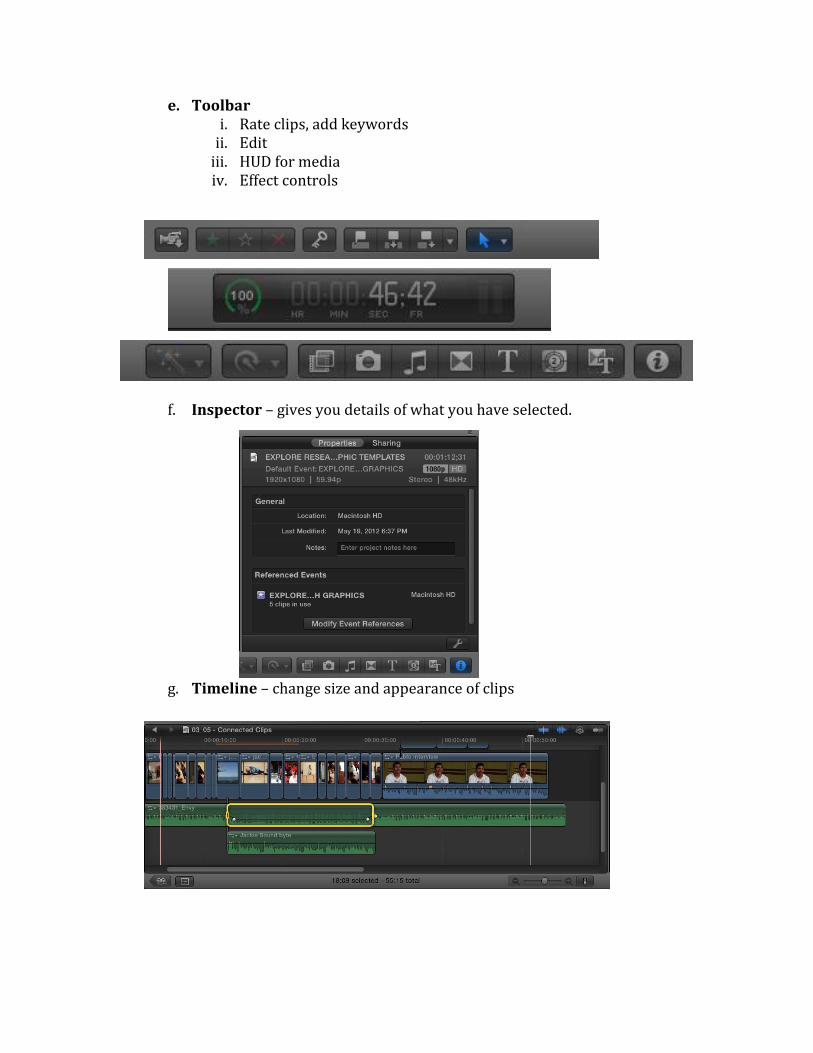
e. Toolbar i. Rate clips, add keywords
ii. Edit iii. HUD for media iv. Effect controls
f. Inspector – gives you details of what you have selected.
g. Timeline – change size and appearance of clips
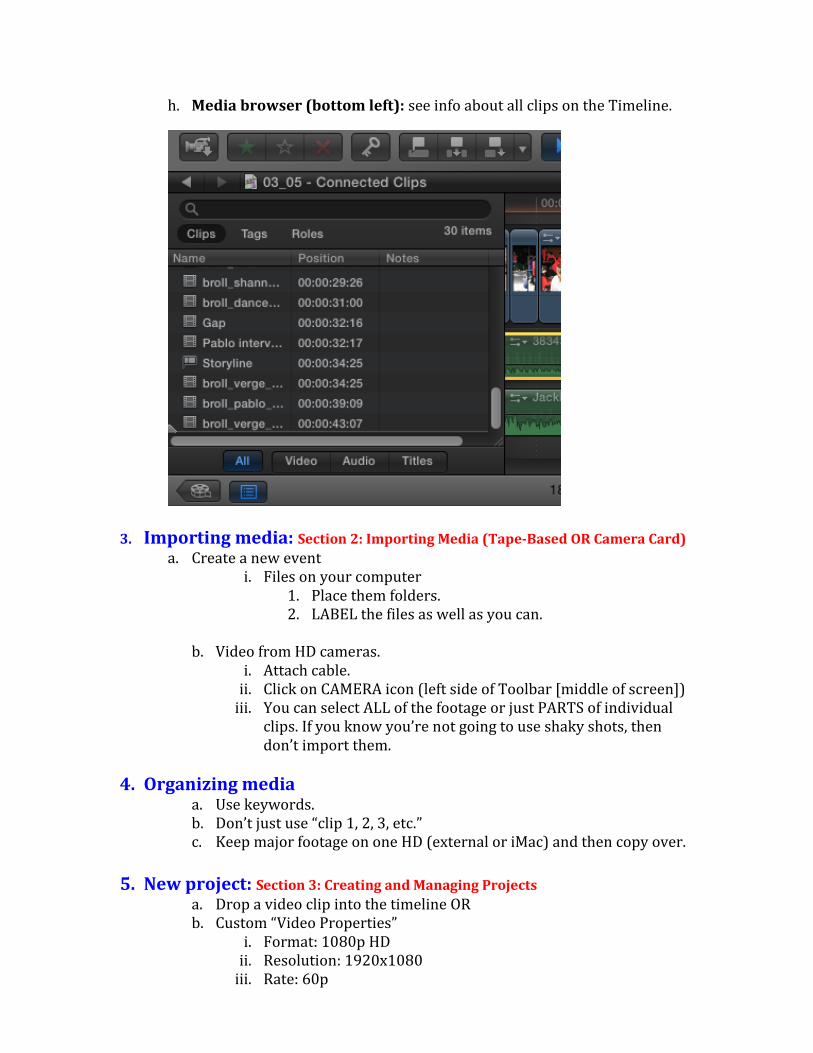
h. Media browser (bottom left): see info about all clips on the Timeline.
3. Importing media: Section 2: Importing Media (Tape-Based OR Camera Card)
a. Create a new event i. Files on your computer
1. Place them folders. 2. LABEL the files as well as you can.
b. Video from HD cameras.
i. Attach cable. ii. Click on CAMERA icon (left side of Toolbar [middle of screen])
iii. You can select ALL of the footage or just PARTS of individual clips. If you know you’re not going to use shaky shots, then don’t import them.
4. Organizing media a. Use keywords. b. Don’t just use “clip 1, 2, 3, etc.” c. Keep major footage on one HD (external or iMac) and then copy over.
5. New project: Section 3: Creating and Managing Projects
a. Drop a video clip into the timeline OR b. Custom “Video Properties”
i. Format: 1080p HD ii. Resolution: 1920x1080
iii. Rate: 60p
c. Audio: i. Stereo (not Surround)
ii. 48kHz iii. Apple ProRes 422
6. BASIC Editing (and shortcut keys) Section 3: Performing Basic Edits in the Primary Storyline
a. IMPORTANT: FCPX does NOT like gaps. Dropping in video, unless you use the POSITION icon – will mean that the footage SNAPS to the last clip in the Timeline.
b. Insert: W c. Append: E d. Connect: Q
i. Connected clips will stay with the clip that it’s connected to.
e. In and out points in the Browser f. Overwrite: D
i. Can choose video, audio, or video and audio to “overwrite.” g. REPLACE clips (replace, replace from start, replace from end)
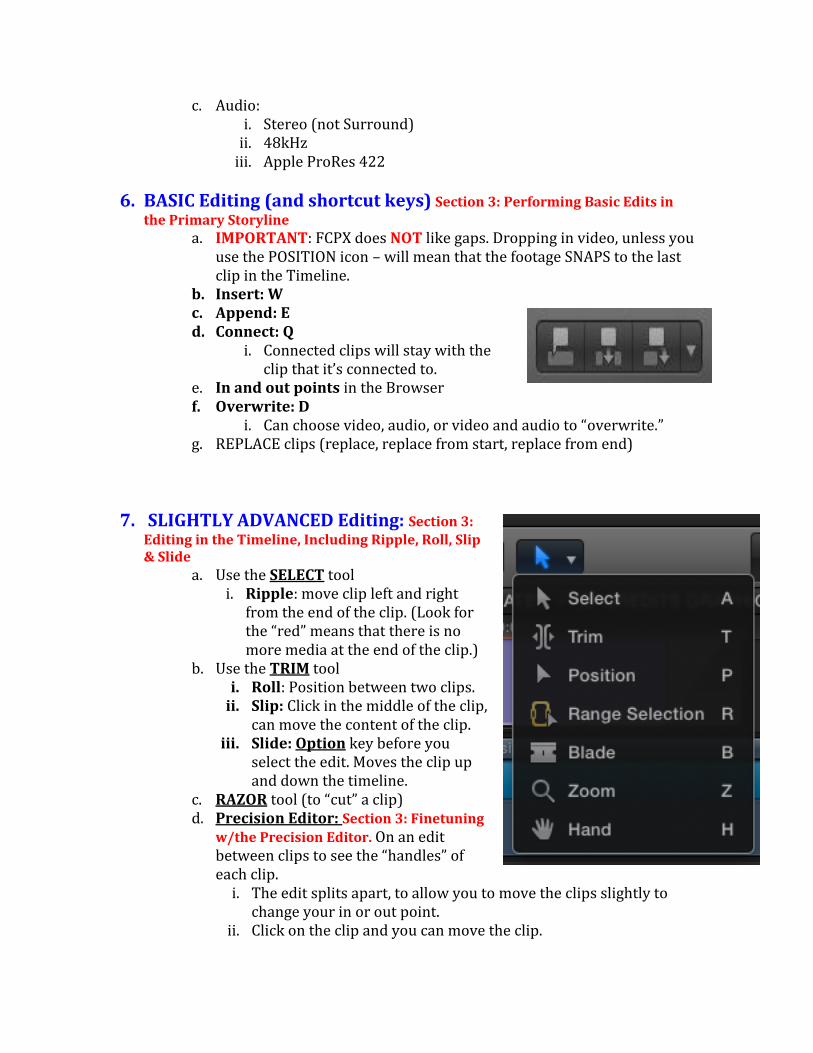
7. SLIGHTLY ADVANCED Editing: Section 3: Editing in the Timeline, Including Ripple, Roll, Slip & Slide
a. Use the SELECT tool i. Ripple: move clip left and right
from the end of the clip. (Look for the “red” means that there is no more media at the end of the clip.)
b. Use the TRIM tool i. Roll: Position between two clips.
ii. Slip: Click in the middle of the clip, can move the content of the clip.
iii. Slide: Option key before you select the edit. Moves the clip up and down the timeline.
c. RAZOR tool (to “cut” a clip) d. Precision Editor: Section 3: Finetuning
w/the Precision Editor. On an edit between clips to see the “handles” of each clip.
i. The edit splits apart, to allow you to move the clips slightly to change your in or out point.
ii. Click on the clip and you can move the clip.
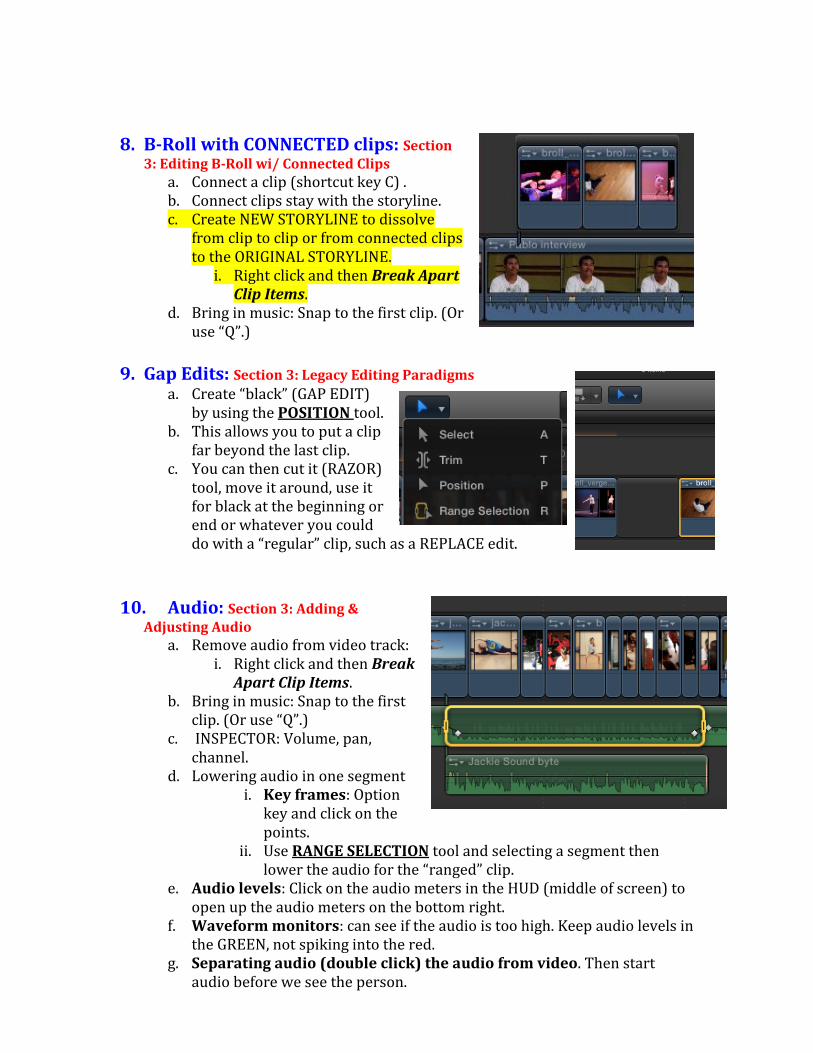
8. B-Roll with CONNECTED clips: Section 3: Editing B-Roll wi/ Connected Clips
a. Connect a clip (shortcut key C) . b. Connect clips stay with the storyline. c. Create NEW STORYLINE to dissolve
from clip to clip or from connected clips to the ORIGINAL STORYLINE.
i. Right click and then Break Apart Clip Items.
d. Bring in music: Snap to the first clip. (Or use “Q”.)
9. Gap Edits: Section 3: Legacy Editing Paradigms
a. Create “black” (GAP EDIT) by using the POSITION tool.
b. This allows you to put a clip far beyond the last clip.
c. You can then cut it (RAZOR) tool, move it around, use it for black at the beginning or end or whatever you could do with a “regular” clip, such as a REPLACE edit.
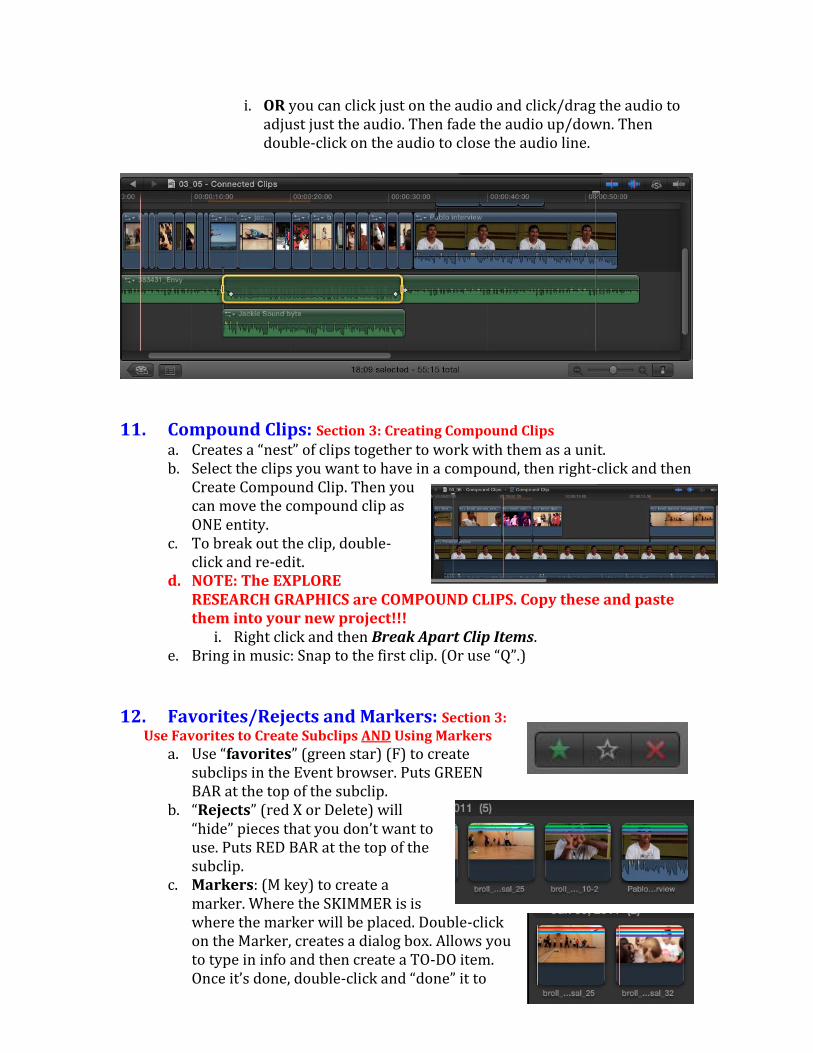
10. Audio: Section 3: Adding &
Adjusting Audio a. Remove audio from video track:
i. Right click and then Break Apart Clip Items.
b. Bring in music: Snap to the first clip. (Or use “Q”.)
c. INSPECTOR: Volume, pan, channel.
d. Lowering audio in one segment i. Key frames: Option
key and click on the points.
ii. Use RANGE SELECTION tool and selecting a segment then lower the audio for the “ranged” clip.
e. Audio levels: Click on the audio meters in the HUD (middle of screen) to open up the audio meters on the bottom right.
f. Waveform monitors: can see if the audio is too high. Keep audio levels in the GREEN, not spiking into the red.
g. Separating audio (double click) the audio from video. Then start audio before we see the person.
i. OR you can click just on the audio and click/drag the audio to adjust just the audio. Then fade the audio up/down. Then double-click on the audio to close the audio line.
11. Compound Clips: Section 3: Creating Compound Clips a. Creates a “nest” of clips together to work with them as a unit. b. Select the clips you want to have in a compound, then right-click and then
Create Compound Clip. Then you can move the compound clip as ONE entity.
c. To break out the clip, double-click and re-edit.
d. NOTE: The EXPLORE RESEARCH GRAPHICS are COMPOUND CLIPS. Copy these and paste them into your new project!!!
i. Right click and then Break Apart Clip Items. e. Bring in music: Snap to the first clip. (Or use “Q”.)
12. Favorites/Rejects and Markers: Section 3:
Use Favorites to Create Subclips AND Using Markers a. Use “favorites” (green star) (F) to create
subclips in the Event browser. Puts GREEN BAR at the top of the subclip.
b. “Rejects” (red X or Delete) will “hide” pieces that you don’t want to use. Puts RED BAR at the top of the subclip.
c. Markers: (M key) to create a marker. Where the SKIMMER is is where the marker will be placed. Double-click on the Marker, creates a dialog box. Allows you to type in info and then create a TO-DO item. Once it’s done, double-click and “done” it to

turn it green or delete the marker.
13. Transitions: Section 4: Adding & Adjusting Transitions
a. Drag/drop the transitions between clips.
b. Use Inspector to make precision changes to the transitions.
c. To transition between CONNECTED clips, you have to create a NEW STORYLINE. Highlight the clips that you want to be in their own storyline and then right-click. Create a new storyline. Then put in transitions.
14. Effects a. Drag/drop the effect onto the clip. b. In the INSPECTOR, adjust the effect. c. You can have as many effects as you
want. d. Use the RANGE SELECTION tool to
choose when you want an effect to come in and when to go out.
15. Titles: Section 4: Creating Titles
a. Use TEXT tool. Open INSPECTOR window to see “Text” tab (at top) so you can edit it.
i. REMEMBER: Most of the actual text for the EXPLORE RESEARCH videos area already “set.” Just make sure that the settings (on another page) are still correct.
16. Motion Effects: Section 4: Applying Motion Effects to Clips a. There is NO WIREFRAME in FCPX. You have to use TRANSFORM in order
to create KEYFRAMES for movement. b. TRIM, CROP, KEN BURNS
i. Trim: “Crops” the image however you want the picture to be (including a square).
ii. Crop: Sets the correct 16:9 ratio iii. Ken Burns: Moves an image from “start” to “end.” NICE effect!
c. To see the keyframes in your clip, click on the “widget” window (top left side of the clip on the Timeline and choose “Show Video Animation.” This shows the keyframes. You can adjust, add, delete, or move keyframes.
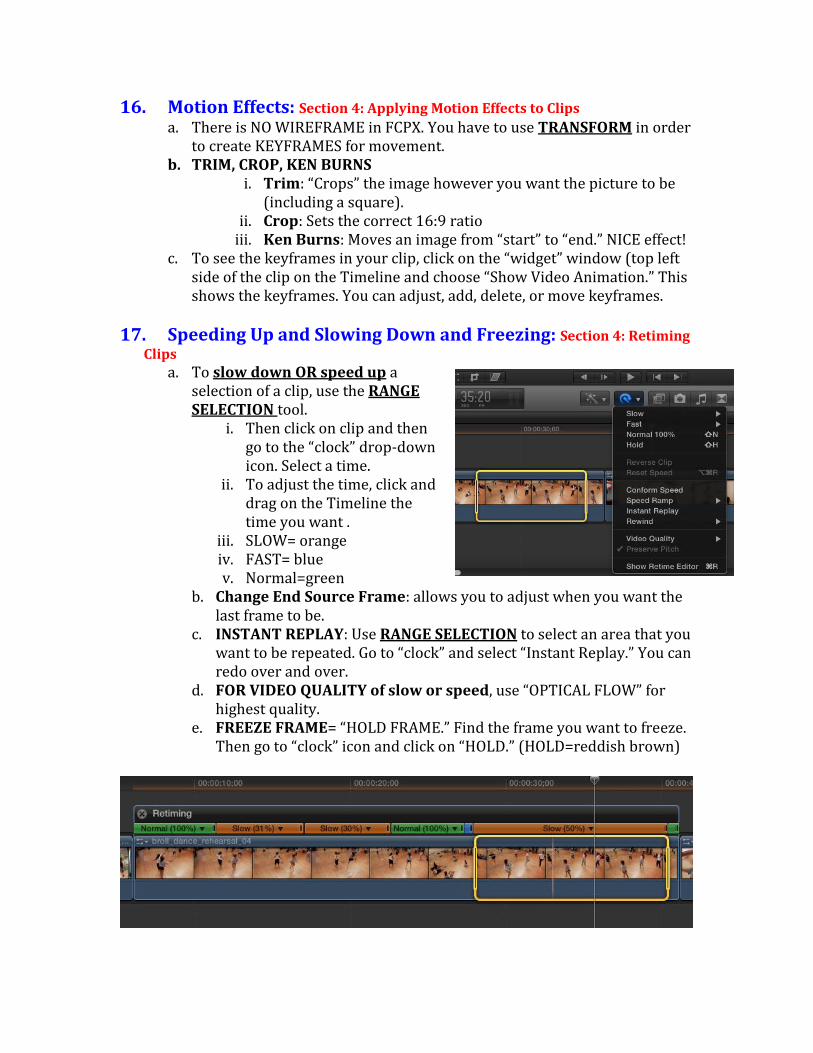
17. Speeding Up and Slowing Down and Freezing: Section 4: Retiming Clips
a. To slow down OR speed up a selection of a clip, use the RANGE SELECTION tool.
i. Then click on clip and then go to the “clock” drop-down icon. Select a time.
ii. To adjust the time, click and drag on the Timeline the time you want .
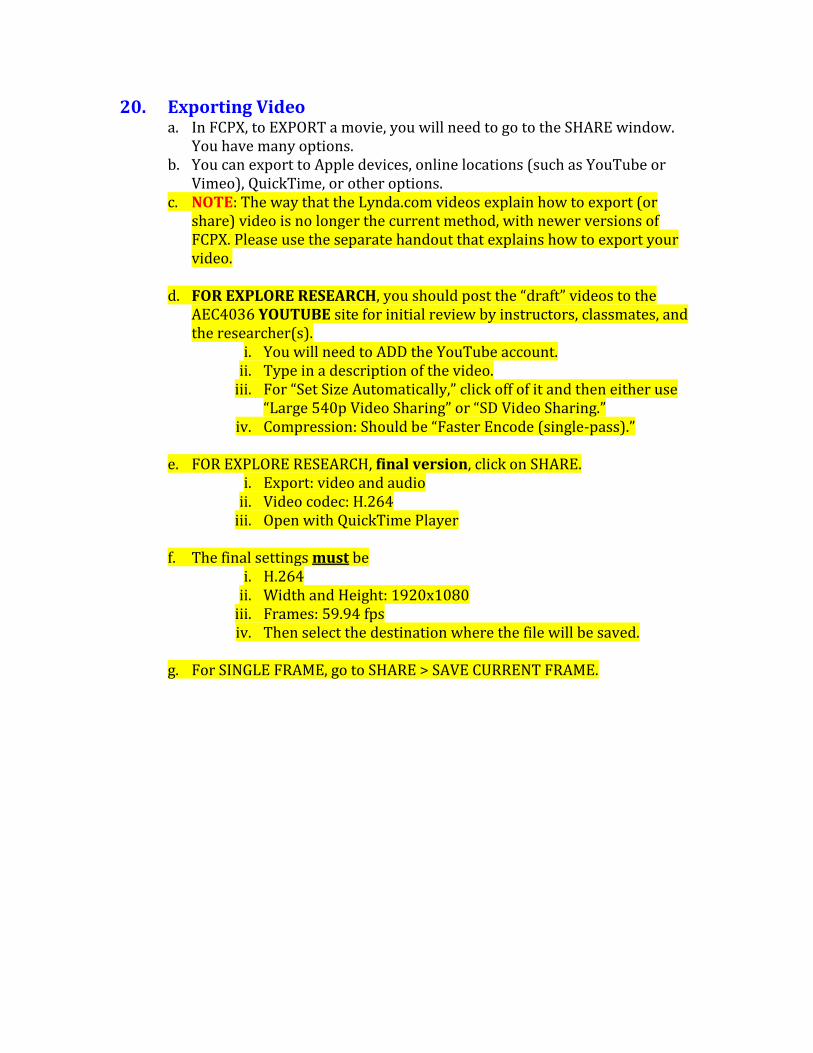
iii. SLOW= orange iv. FAST= blue v. Normal=green
b. Change End Source Frame: allows you to adjust when you want the last frame to be.
c. INSTANT REPLAY: Use RANGE SELECTION to select an area that you want to be repeated. Go to “clock” and select “Instant Replay.” You can redo over and over.
d. FOR VIDEO QUALITY of slow or speed, use “OPTICAL FLOW” for highest quality.
e. FREEZE FRAME= “HOLD FRAME.” Find the frame you want to freeze. Then go to “clock” icon and click on “HOLD.” (HOLD=reddish brown)

18. Working with Photos a. Look at size of image in the List key (Event Browser). b. FCPX will take any image and make it work, scaling an image up or down
so you can see the entire photo. c. Rescale an image: Select the photo in the Timeline. Choose the Inspector.
Go to “Spatial Conform.” You will see a drop-down window: Fit, Fill, None. FCPX chooses FIT automatically, meaning it will scale the image up or down to show as much of the image without cutting anything off. FILL means the image will fill the screen to lose the black on the edges. NONE means that it will go to the actual size of the image. Remember that photos at low resolutions should not be used with FILL.
d. You can also use the Transform to stretch or shrink the photo to the size you want and you can reposition the image. Then click “DONE” (upper right side).
e. TRIM, CROP, KEN BURNS i. Trim: “Crops” the image however you want the picture to be
(including a square). ii. Crop: Sets the correct 16:9 ratio
iii. Ken Burns: Moves an image from “start” to “end.” NICE effect!
19. Color Correction: Section 4: Making Color Corrections a. Need to have INSPECTOR window
open. b. Click on the clip. Then go to
INSPECTOR and color correct. c. You can click on a clip and then
MATCH COLOR to then go to another frame to “match” the color in the clip to. Both will then have the same color.
d. You can also ANALYZE AND FIX in the EVENT BROWSER.
e. You can also use the MAGIC WAND icon (see picture on right) to do color correction.
20. Exporting Video a. In FCPX, to EXPORT a movie, you will need to go to the SHARE window.
You have many options. b. You can export to Apple devices, online locations (such as YouTube or
Vimeo), QuickTime, or other options. c. NOTE: The way that the Lynda.com videos explain how to export (or
share) video is no longer the current method, with newer versions of FCPX. Please use the separate handout that explains how to export your video.
d. FOR EXPLORE RESEARCH, you should post the “draft” videos to the AEC4036 YOUTUBE site for initial review by instructors, classmates, and the researcher(s).
i. You will need to ADD the YouTube account. ii. Type in a description of the video.
iii. For “Set Size Automatically,” click off of it and then either use “Large 540p Video Sharing” or “SD Video Sharing.”
iv. Compression: Should be “Faster Encode (single-pass).”
e. FOR EXPLORE RESEARCH, final version, click on SHARE. i. Export: video and audio
ii. Video codec: H.264 iii. Open with QuickTime Player
f. The final settings must be
i. H.264 ii. Width and Height: 1920x1080
iii. Frames: 59.94 fps iv. Then select the destination where the file will be saved.
g. For SINGLE FRAME, go to SHARE > SAVE CURRENT FRAME.