elastic and inelastic collisions.tdimino/phy141/lab03/lab03b_collisions.pdf · excellent tool for...
TRANSCRIPT

Name _____________________ Date _________
p. 1 of 11 © 2009 PASCO scientific and University of Rochester
Elastic and Inelastic Collisions. Equipment Needed Qty Equipment Needed Qty 1.2 m Track System (ME-9435A) 1 Balance (SE-8707) 1 Photogate/Pulley System (ME-6838) 2 Collision Cart (ME-9454) 2 Background
When objects collide, whether locomotives, shopping carts, or your foot and the sidewalk, the results can be complicated. Yet even in the most chaotic of collisions, as long as there are no external forces acting on the colliding objects, one principle always holds and provides an excellent tool for understanding the dynamics of the collision. That principle is called the conservation of linear momentum. For a collision between two objects in one dimension, conservation of linear momentum is easily stated mathematically by the equation:
m1!v1 +m2
!v2 = m1!!v1 +m2
!!v2
In this equation, v1 and v1’ are the velocities of object 1 before and after the collision and v2 and v2’ are the velocities of object 2 before and after the collision. If external forces, such as friction, are ignored, the sum of the linear momenta of two objects prior to a collision is the same as the sum of the momenta of the objects after the collision. In most cases, the collision time is short and the effect of external forces will be small compared to the effect of the collision force.
For You To Do
For this activity, two photogates will measure the motion of the two carts before and after elastic and inelastic collisions. The Capstone program will calculate the speed for both carts. You will need to take the effects of friction into consideration when you interpret your data. Although we expect that linear momentum is conserved in the collisions we will study, we measure the velocities well before and well after the collisions and need to correct the measured velocities for the effect of friction to determine the velocities right before and right after the collision. By making several measurements of the velocity you should be able to correct for these effects. How? That is up to you to figure out! Discuss it with your partner.

Physics 141, Lab 3, Experiment 2 Student Workbook
p. 2 of 11 © 2009 PASCO scientific and University of Rochester
PART I: Computer Setup 1. Make sure that the ScienceWorkshop interface
is connected to the computer and turned on (look for the green light on the front panel of the interface).
2. Connect the photogates’ stereo phone plugs to Digital Channel 1 and Digital Channel 2 of the interface.
3. Download the setup file Collision.cap.zip for this measurement from the Physics 141 website (select Laboratories -> Lab 3 from the toolbar). The setup file will be downloaded as a zip file. It should be expanded automatically.
4. Open the Capstone program by clicking on the icon in the Dock. 5. After the program opens, select the “Open Experiment” option from either the top toolbar
or the “File” menu and navigate to your desktop to open the document entitled Collisions.cap that was downloaded from the Physics 141 web site.
6. The Capstone document opens with two graph displays that show the velocities measured with both photogates.
7. Before proceeding, select “Save As” from the file menu to ensure that you can save the data you will collect. Use a new filename that clearly identifies this file as belonging to you (e.g. I may use the filename CollisionFW101507.cap.)
8. Make sure that you save your work frequently so that you do not lose any large amount of data if computing problems occur.
PART II: Sensor Calibration and Equipment Setup 1. You do not need to calibrate the
photogate, but make sure that the proper band spacing is used in the setup. We will be using the top pattern of the picket fence for this experiment (see picture). Measure the spacing between the opaque bands on the picket fence. To change the default setting to another value, select “Hardware Setup” from the left toolbar, click on the picture of the photogate and then click on the photogate “Properties” symbol. A window will open that will allow you to change the “Flag Spacing.” Note that the spacing is measured in
Use top pattern

Physics 141, Lab 3, Experiment 2 Student Workbook
p. 3 of 11 © 2009 PASCO scientific and University of Rochester
meters. Enter the correct value for the spacing of the opaque bands on your picket fence and click OK.
2. Connect one support leg to either end of the track (see the picture).
3. Place the Dynamics Track on a horizontal surface. Level the Dynamics Track by placing a cart on the Dynamics Track. If the cart rolls one way or the other, use the adjustable feet at one end of the Dynamics Track to raise or lower that end until the Dynamics Track is level and the cart does not roll one way or the other.
4. Install both photogates on either side of the middle of the track. Make sure that the photogates are set to the appropriate height so that their light beams intercept the top band of the picket fence. Place the carts together at the middle of the track. Position the photogates so that "Gate 1" is beyond the left end of the two carts, and "Gate 2" is beyond the right end of the two carts. Adjust the photogates so that the distance between the gates is a few centimeters greater than the total length of both collision carts. The setup should look similar to the one shown in the picture
PART III: Data Recording
1. Put one of the two carts (cart 2) between the two photogates. This cart will be at rest before the collision. Make sure that there is sufficient room for the collision to take place after the moving cart has passed through the photogate to measure its initial velocity. Also make sure that the magnetic ends of the carts face each other.
2. Begin data recording. 3. Give cart 1 a gentle push; make sure you are not pushing the cart when it moves through the
photogate. Note: make sure that the carts do not come into contact during the collision. 4. End data recording after both carts have moved through the photogates after the collision. 5. After each measurement, before proceeding to the next measurement, immediately analyze
the data you have collected (see the "Analyzing the Data" section). Is linear momentum conserved? Is kinetic energy conserved?

Physics 141, Lab 3, Experiment 2 Student Workbook
p. 4 of 11 © 2009 PASCO scientific and University of Rochester
6. Take a few different measurements with varying initial velocities. 7. Repeat the same series of measurements after changing the mass of one of the carts (take data
with M1 > M2 and with M2 > M1). 8. Reverse the carts so that the Velcro ends of the carts face each other. The collisions will now
be completely inelastic (the carts stick together after the collision).
Velcro ends of collision carts.
9. Repeat the same series of measurements you carried out for elastic collisions (equal and non-
equal masses) with the current configuration. 10. After each measurement, before proceeding to the next measurement, immediately analyze
the data you have collected (see the "Analyzing the Data" section). Is linear momentum conserved? How much kinetic energy is lost in the collision?
Analyzing the Data
1. Find the velocity just before the collision and the velocity just after the collision from the velocity versus time plot. You will need to develop a procedure to extract this information from the data. As a result of friction you will observe a time dependence of the velocity. However, from the observed time dependence of the velocity you can determine what the velocity right before and right after the collision is (note that the two velocity diagrams are shown on a common time axis).
2. Record the information about the velocity on the Laboratory Data Sheets and calculate the various momenta before and after the collision and the kinetic energies before and after the collisions. Is linear momentum conserved? Is kinetic energy conserved?

Physics 141, Lab 3, Experiment 2 Student Workbook
p. 5 of 11 © 2009 PASCO scientific and University of Rochester
Laboratory Data Sheet - Elastic and Inelastic Collisions Data Tables: Elastic Collision M1 = M2
Item
Run #
Mass Cart 1 (kg)
Mass Cart 2 (kg)
Initial Velocity Cart 1 (m/s)
Initial Velocity Cart 2 (m/s)
Final Velocity Cart 1 (m/s)
Final Velocity Cart 2 (m/s)
Initial Momentum Cart 1 (kg m/s)
Initial Momentum Cart 2 (kg m/s)
Final Momentum Cart 1 (kg m/s)
Final Momentum Cart 2 (kg m/s)
Total Initial Momentum (kg m/s)
Total Final Momentum (kg m/s)
Change in momentum (kg m/s)
Initial Kinetic Energy Cart 1 (J)
Initial Kinetic Energy Cart 2 (J)
Final Kinetic Energy Cart 1 (J)
Final Kinetic Energy Cart 2 (J)
Total Initial Kinetic Energy (J)
Total Final Kinetic Energy (J)
Change in Kinetic Energy (J)

Physics 141, Lab 3, Experiment 2 Student Workbook
p. 6 of 11 © 2009 PASCO scientific and University of Rochester
Data Tables: Elastic Collision M1 > M2
Item
Run #
Mass Cart 1 (kg)
Mass Cart 2 (kg)
Initial Velocity Cart 1 (m/s)
Initial Velocity Cart 2 (m/s)
Final Velocity Cart 1 (m/s)
Final Velocity Cart 2 (m/s)
Initial Momentum Cart 1 (kg m/s)
Initial Momentum Cart 2 (kg m/s)
Final Momentum Cart 1 (kg m/s)
Final Momentum Cart 2 (kg m/s)
Total Initial Momentum (kg m/s)
Total Final Momentum (kg m/s)
Change in momentum (kg m/s)
Initial Kinetic Energy Cart 1 (J)
Initial Kinetic Energy Cart 2 (J)
Final Kinetic Energy Cart 1 (J)
Final Kinetic Energy Cart 2 (J)
Total Initial Kinetic Energy (J)
Total Final Kinetic Energy (J)
Change in Kinetic Energy (J)

Physics 141, Lab 3, Experiment 2 Student Workbook
p. 7 of 11 © 2009 PASCO scientific and University of Rochester
Data Tables: Elastic Collision M1 < M2
Item
Run #
Mass Cart 1 (kg)
Mass Cart 2 (kg)
Initial Velocity Cart 1 (m/s)
Initial Velocity Cart 2 (m/s)
Final Velocity Cart 1 (m/s)
Final Velocity Cart 2 (m/s)
Initial Momentum Cart 1 (kg m/s)
Initial Momentum Cart 2 (kg m/s)
Final Momentum Cart 1 (kg m/s)
Final Momentum Cart 2 (kg m/s)
Total Initial Momentum (kg m/s)
Total Final Momentum (kg m/s)
Change in momentum (kg m/s)
Initial Kinetic Energy Cart 1 (J)
Initial Kinetic Energy Cart 2 (J)
Final Kinetic Energy Cart 1 (J)
Final Kinetic Energy Cart 2 (J)
Total Initial Kinetic Energy (J)
Total Final Kinetic Energy (J)
Change in Kinetic Energy (J)

Physics 141, Lab 3, Experiment 2 Student Workbook
p. 8 of 11 © 2009 PASCO scientific and University of Rochester
Data Tables: Inelastic Collision M1 = M2
Item
Run #
Mass Cart 1 (kg)
Mass Cart 2 (kg)
Initial Velocity Cart 1 (m/s)
Initial Velocity Cart 2 (m/s)
Final Velocity Cart 1 (m/s)
Final Velocity Cart 2 (m/s)
Initial Momentum Cart 1 (kg m/s)
Initial Momentum Cart 2 (kg m/s)
Final Momentum Cart 1 (kg m/s)
Final Momentum Cart 2 (kg m/s)
Total Initial Momentum (kg m/s)
Total Final Momentum (kg m/s)
Change in momentum (kg m/s)
Initial Kinetic Energy Cart 1 (J)
Initial Kinetic Energy Cart 2 (J)
Final Kinetic Energy Cart 1 (J)
Final Kinetic Energy Cart 2 (J)
Total Initial Kinetic Energy (J)
Total Final Kinetic Energy (J)
Change in Kinetic Energy (J)

Physics 141, Lab 3, Experiment 2 Student Workbook
p. 9 of 11 © 2009 PASCO scientific and University of Rochester
Data Tables: Inelastic Collision M1 > M2
Item
Run #
Mass Cart 1 (kg)
Mass Cart 2 (kg)
Initial Velocity Cart 1 (m/s)
Initial Velocity Cart 2 (m/s)
Final Velocity Cart 1 (m/s)
Final Velocity Cart 2 (m/s)
Initial Momentum Cart 1 (kg m/s)
Initial Momentum Cart 2 (kg m/s)
Final Momentum Cart 1 (kg m/s)
Final Momentum Cart 2 (kg m/s)
Total Initial Momentum (kg m/s)
Total Final Momentum (kg m/s)
Change in momentum (kg m/s)
Initial Kinetic Energy Cart 1 (J)
Initial Kinetic Energy Cart 2 (J)
Final Kinetic Energy Cart 1 (J)
Final Kinetic Energy Cart 2 (J)
Total Initial Kinetic Energy (J)
Total Final Kinetic Energy (J)
Change in Kinetic Energy (J)
Physics 141, Lab 3, Experiment 2 Student Workbook
p. 10 of 11 © 2009 PASCO scientific and University of Rochester
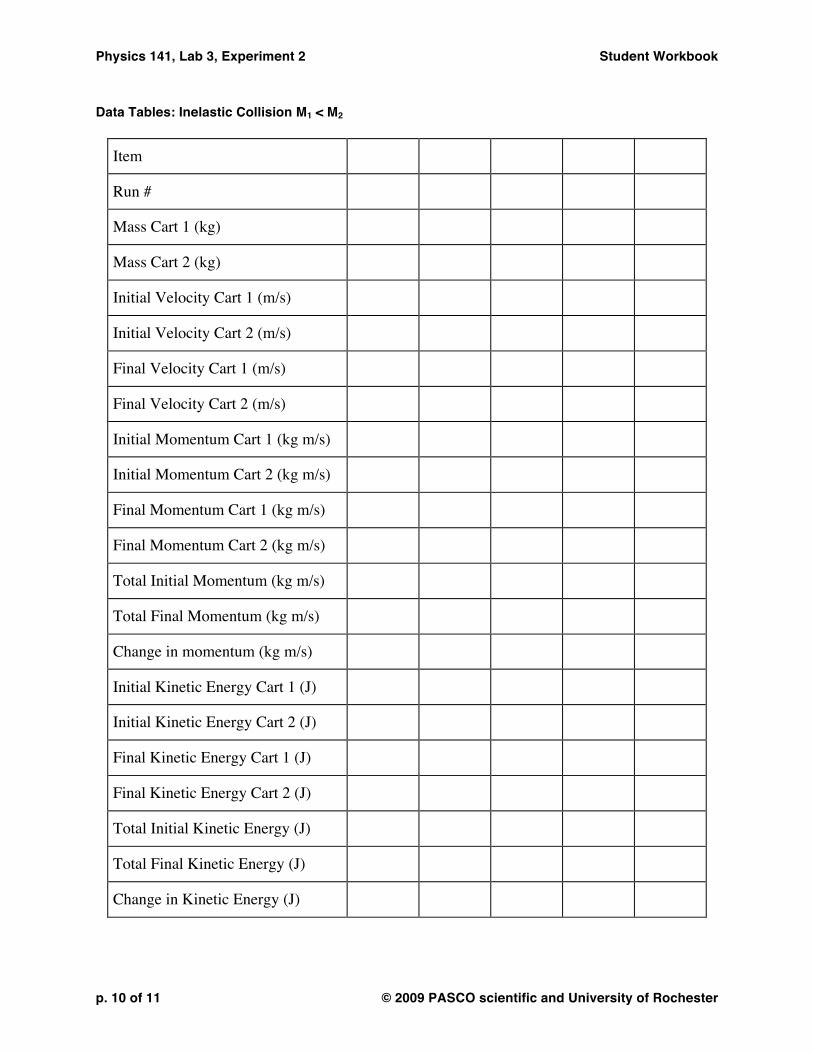
Data Tables: Inelastic Collision M1 < M2
Item
Run #
Mass Cart 1 (kg)
Mass Cart 2 (kg)
Initial Velocity Cart 1 (m/s)
Initial Velocity Cart 2 (m/s)
Final Velocity Cart 1 (m/s)
Final Velocity Cart 2 (m/s)
Initial Momentum Cart 1 (kg m/s)
Initial Momentum Cart 2 (kg m/s)
Final Momentum Cart 1 (kg m/s)
Final Momentum Cart 2 (kg m/s)
Total Initial Momentum (kg m/s)
Total Final Momentum (kg m/s)
Change in momentum (kg m/s)
Initial Kinetic Energy Cart 1 (J)
Initial Kinetic Energy Cart 2 (J)
Final Kinetic Energy Cart 1 (J)
Final Kinetic Energy Cart 2 (J)
Total Initial Kinetic Energy (J)
Total Final Kinetic Energy (J)
Change in Kinetic Energy (J)
Physics 141, Lab 3, Experiment 2 Student Workbook
p. 11 of 11 © 2009 PASCO scientific and University of Rochester
Questions
1. How does the total momentum before the collision compare to the total momentum after
the collision? Is linear momentum conserved in all your collisions? 2. What factors do you think may cause there to be a difference between the momentum
before and the momentum after the collision? Can you correct for these factors?