ebeam education suite version 2 - amazon web...
TRANSCRIPT

eBeam Education Suite
Version 2.2
© Luidia Incorporated, 2011

p2
© 2011 Luidia, Incorporated
Table of Contents
eBeam Education Suite 4Contents 5About... 6Minimum System Requirements 7Setup 8 System Setup 9 eBeam Classic 10 eBeam Edge(TM) 12 The Interactive Stylus 15 Bluetooth Wireless Configuration 17 Your Receiver is Not Detected 19 Calibration 20eBeam Education Menu on the Mac Menu Bar 21 Preferences 22 eBeam Education Palette 23 Hardware Settings 24 Software Update 25eBeam Tool Palette 26 Desktop Tools Palette 26 Screen Annotation 27 Keyboard Viewer 28 Scrapbook 29 Snapshot 29 Screen Annotation Tools Palette 30 Pen Tool 31 Shapes Tool 32 Redo Tool 33 Eraser Tool 34 Mouse Tool 35 Save Tool 36 Undo Tool 37 Highlighter Tool 38 Scrapbook Tools Palette 39 Standard Annotation Toolbar 40 Pen Tool 41 Shape Tool 42 Slide Forward Tool 43 Eraser Tool 44 Select Tool 45 Undo Tool 46 Slide Back Tool 47 Highlighter Tool 48 Slideshow Tools Palette 49 Pen Tool 49 Shapes Tool 50 Slide Forward 51 Eraser Tool 52 Mouse Tool 53 Exit Slideshow Presentation Tool 54 Slide Back 55

p3
© 2011 Luidia, Incorporated
Highlighter Tool 56eBeam Home 57 eBeam Home Shortcuts 58Scrapbook 60 What is a Scrapbook Meeting? 61 Scrapbook Menus 62 Scrapbook Menu 63 File Menu 64 Edit Menu 66 View Menu 68 Page Menu 70 Insert Menu 72 Sharing Menu 73 Window Menu 74 Help Menu 75 Scrapbook Toolbar 76 Playback 79 Scrapbook Elements 81 Background Settings 83 eBeam Inscribe Wireless Tablet 84 Gallery 86 Navigating the Gallery 87 Adding Images to Scrapbook Pages 90 Adding and Removing Links to Folders 91 Favorites 92 eBeam Focus Document Camera 94 Flickr 97 Encyclopædia Britannica 99 Scrapbook Preferences 101 Automatic File Saving 102 Supported File Types 103 Shared Meetings 104 What is a Shared Meeting? 105 Hosting/Sharing a Meeting 106 Joining a Meeting 108 Sending an Invitation 109 Accepting an Email Invitation 110 Proxy Server Setup 111 View Participants 112 Adding a Meeting Server 113 PowerPoint/Keynote Presentations 114 Starting/Ending a PowerPoint Slide Show 115 Starting/Ending a Keynote Slideshow 116

p4
© 2011 Luidia, Incorporated
eBeam Education Suite
eBeam EducationSuite v2.2
Software Guide
About
Browse Help
Shared Meetings

p5
© 2011 Luidia, Incorporated
ContentsHelp Main Page
eBeam Education Suite Help ContentsSetup
eBeam Education Icon on the Mac Menu Bar
eBeam Tool Palette
eBeam Home
Scrapbook
Gallery
Shared Meetings
PowerPoint and Keynote Slideshow Presentations

p6
© 2011 Luidia, Incorporated
About...Help Main Page
About eBeam Education SuiteVersion 2.2
eBeam Education Suite is made up of eBeam Scrapbook, the eBeam Tool Palette andeBeam Home. eBeam Education Suite makes it easy to develop, organize and communicateclassroom information. It includes software applications that allow you to annotate lessonson-the-fly, create and save multi-page brainstorm sessions and mark up content fromoutside applications. eBeam Education Suite is easy to set up and intuitive to use, creating afun learning environment for students and teachers, and enhancing the impact of everylesson plan.
eBeam Scrapbook is a powerful resource that can be used to create lessons, storeannotations and enliven curriculum material.
The eBeam Tool Palette provides quick access to important tools that can be used as a partof Scrapbook, in conjunction with your every day applications or to annotate over your entiredesktop. The tools in the eBeam Tool Palette change depending on the environment that youare working in.
eBeam Home works on top of Scrapbook. It creates a centralized shortcut to the mostcommonly used resources, making the eBeam Education Suite an even more integral part ofeveryday teaching resources.
Copyright 2011 Luidia, Inc. All rights reserved.
The publications included w ith the interactive product are protected by copyright, and all rights are reserved. No partof it may be reproduced or transmitted in any form or by any means for any purpose without express prior writtenconsent from Luidia, except as expressly permitted herein. Information in this document is subject to change withoutnotice and does not represent a commitment on the part of Luidia.
The software described in this publication is furnished under license and may only be used or copied in accordancewith the terms of such license.
Portions of the Scrapbook Gallery ©2011 Luidia, Inc. All Rights Reserved.
Portions of the Scrapbook Gallery ©2005 Mythic Wave Productions, Inc. All Rights Reserved.
2.2
p7
© 2011 Luidia, Incorporated
Minimum System RequirementsHelp Main Page
Minimum System Requirements Mac OS X 10.5 or higher.
1.42 GHz G4 PowerPC
1 GB RAM
120 MB available hard drive space
CD-ROM drive or Internet connection (for software installation)
Internet connection (for participating in shared meetings)
One available USB port or Bluetooth connection
Digital projector attached to computer

p8
© 2011 Luidia, Incorporated
SetupHelp Main Page
SetupMinimum System Requirements
System Setup
Bluetooth Wireless Configuration
Your Receiver is Not Detected
Calibration
eBeam Engage

p9
© 2011 Luidia, Incorporated
System SetupHelp Main Page
System SetupeBeam Classic Setup
eBeam edge(TM) Setup
The Interactive Stylus

p10
© 2011 Luidia, Incorporated
eBeam ClassicHelp Main Page
eBeam Classic Setup
The following describes a typical setup for the eBeam USB or Bluetooth Wireless receiversand related hardware.
Connect your projector to your computer.
Turn on your projector and align/focus the image on the board.
Connect the eBeam USB cable to your eBeam receiver.
Attach the eBeam receiver mounting bracket to the board.
The eBeam package contains the following receiver mounting options.
Suction cups Command adhesive Magnetic mounting bracketsThe eBeam receiver is pre-attached to the suction cup mountingbracket. To detach any of the mounting brackets from the eBeamreceiver, position thumbs at bottom corners of the bracket and pushup; the bracket should easily snap off.
To secure brackets to the receiver, position the desired bracket overthe back of the receiver and snap it into place. To permanently fastenthe receiver, use the clear mounting bracket -- the one without suctioncups. Fasten the receiver to the mounting surface through the holes inthe clear mounting bracket.

p11
© 2011 Luidia, Incorporated
Install the AA battery in your eBeam Stylus.
Connect the eBeam USB cable to your computer USB port.
Insert the eBeam software CD and install.
For additional information on seting up Bluetooth on your computer,see Bluetooth Wireless Configuration.
Launch the eBeam software and calibrate the system.
Finished!

p12
© 2011 Luidia, Incorporated
eBeam Edge(TM)Help Main Page
eBeam Edge(TM) Setup
This section demonstrates the quick setup instructions for the eBeam Edge(TM) receiver. Themost updated eBeam Edge information can be found under the Products tab at http://www.e-beam.com.
Connect your projector to your computer.
Turn on your projector and align/focus the image on the board.
Connect the eBeam USB cable to your eBeam receiver.
Peel the Command Adhesive backing from the receiver.
Hold the receiver and prepare to place it carefully in the indicatedlocation.

p13
© 2011 Luidia, Incorporated
Place the receiver so that it is centered vertically on the board andparallel to the frame.
Press the receiver firmly against the board for best adhesion.
Install the AAA battery in your eBeam Stylus.
Connect the eBeam USB cable to your computer USB port.
Insert the eBeam software CD and install.
Launch the eBeam software and calibrate the system.

p14
© 2011 Luidia, Incorporated
Finished!

p15
© 2011 Luidia, Incorporated
The Interactive StylusHelp Main Page
The Interactive StylusThe Interactive Stylus was created specifically for use with the projection system. TheInteractive Stylus behaves exactly like a mouse attached to your computer.
Model 303 Model 305
The following table shows the different components of the Interactive Stylus and what thosecomponents do.
Model 303 Model 305
Menu
Button
The Menu Button is the equivalent of theControl-click action of your mouse.
Show/Hi
deInteractiv
eTool
sButton
The Show/Hide Interactive ToolsButton shows/hides the current ToolPalette.
PenTip
The Pen Tip performs the same action as aclick button on your mouse.
BatteryCap
The battery cap unscrews counter-clockwise to allow you to insert or replacethe AA battery (Model 303) or AAA battery(Model 305).

p16
© 2011 Luidia, Incorporated

p17
© 2011 Luidia, Incorporated
Bluetooth Wireless ConfigurationHelp Main Page
Bluetooth Wireless ConfigurationWhen you are using a Bluetooth interactive receiver, the first thing you need to do is toestablish a connection between the receiver and your computer. To establish a connection,your computer must have built-in Bluetooth or you need to be using a Bluetooth adaptor.Refer to the Apple Support website for more information. The Bluetooth-enabled eBeamEdge is supported only on Mac OS X 10.5 or higher at this time.
See System Setup to confirm which eBeam receiver you are working with.
eBeam Classic Configuration
eBeam Edge Configuration
eBeam Classic ConfigurationThe following will help you set up your Bluetooth enabled eBeam System 3 on your Mac.
1. Make sure your Bluetooth hardware is connected to your computer, and your eBeamClassic has power. If you are using your computer's built-in Bluetooth, confirm thatit is turned by going to Bluetooth: On from the Bluetooth Icon in the Mac MenuBar.
2. Select Set Up Bluetooth Device from the Bluetooth Icon in the Mac Menu Bar andthe Bluetooth Setup Assistant dialog box will open.
3. From the Bluetooth Setup Assistant dialog box, select your interactive receiver (thedefault name is generally eBeam [xxxxxx]). The type will be detected as Peripheral.Click the Continue button.
4. Select the Passcode Options button and a new floating window will appear.
5. Choose Use a Specific Passcode, enter 1234 and select OK.
6. You will be directed to the original Bluetooth Setup Assistant dialog box. Click Continue.
7. At the final screen select the Quit button.
Your interactive software has now established a connection with your Bluetooth receiver.
eBeam Edge ConfigurationThe following will help you set up your Bluetooth enabled eBeam Edge on your Mac.
1) Plug your eBeam receiver into the power adapter, and plug the adapter into a poweroutlet. Confirm that the light on your receiver is glowing blue.
2) Select System Preferences from the Apple Menu in the Mac Menu Bar and click

p18
© 2011 Luidia, Incorporated
Bluetooth.
3) Verify that On and Discoverable are checked.
4) If your device is not displayed, select “Set Up New Device” / “+”.
5) Highlight your Bluetooth-enabled eBeam device and click Continue. (Your device willbe called eBeam-“XXXX”).
6) Quit the Bluetooth setup and verify that the glowing light on your eBeam receiverflashes four times. Your setup is complete.
p19
© 2011 Luidia, Incorporated
Your Receiver is Not DetectedHelp Main Page
Your Receiver is Not Detected
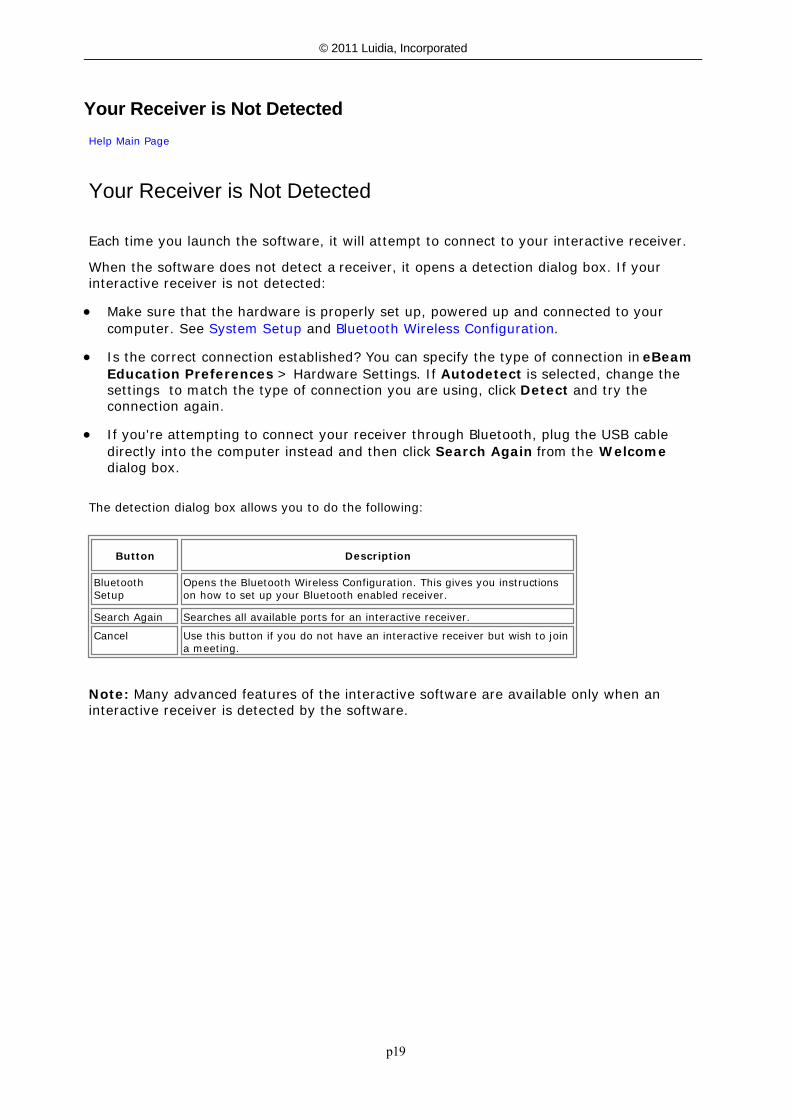
Each time you launch the software, it will attempt to connect to your interactive receiver.
When the software does not detect a receiver, it opens a detection dialog box. If yourinteractive receiver is not detected:
Make sure that the hardware is properly set up, powered up and connected to yourcomputer. See System Setup and Bluetooth Wireless Configuration.
Is the correct connection established? You can specify the type of connection in eBeamEducation Preferences > Hardware Settings. If Autodetect is selected, change thesettings to match the type of connection you are using, click Detect and try theconnection again.
If you're attempting to connect your receiver through Bluetooth, plug the USB cabledirectly into the computer instead and then click Search Again from the Welcomedialog box.
The detection dialog box allows you to do the following:
Button Description
BluetoothSetup
Opens the Bluetooth Wireless Configuration. This gives you instructionson how to set up your Bluetooth enabled receiver.
Search Again Searches all available ports for an interactive receiver.
Cancel Use this button if you do not have an interactive receiver but wish to joina meeting.
Note: Many advanced features of the interactive software are available only when aninteractive receiver is detected by the software.

p20
© 2011 Luidia, Incorporated
CalibrationHelp Main Page
Calibration
When you start eBeam Education Suite, you will be prompted to calibrate if you have notcalibrated previously. Always perform the calibration step unless you are certain theprojector and the interactive receiver have not been moved since the last use.
To calibrate:
1. Set up your system as shown in System Setup.2. When prompted to calibrate, select Yes.You can also select Calibrate Interactive Area from the eBeam Education menu.

p21
© 2011 Luidia, Incorporated
eBeam Education Menu on the Mac Menu Bar Help Main Page
eBeam Education Menu on the Mac Menu BarWhen eBeam Education is running, its icon appears in the Macintosh menu bar at the top ofyour screen.
Select the icon to access the following menu options:
Menu Item Description
eBeam ToolPalette
Shows/hides the eBeam Tool Palette.
Scrapbook Opens Scrapbook.
CalibrateInteractive Area
Initiates the calibration. The receiver must be detected by the software before calibration canbegin.
DetectSystem/ReleaseSystem
If no receiver is detected, it attempts to discover the receiver. If a receiver is detected, itattempts to release connection to the receiver.
Preferences Opens the eBeam Education Preferences box.
About eBeamEducation
Displays the About dialog box for the software.
Help Opens a sub-menu that allows you to access help and also provides links to various registration,software update, and support pages.
Quit Completely closes the software.

p22
© 2011 Luidia, Incorporated
PreferencesHelp Main Page
PreferencesSelect Preferences from the eBeam Education menu to select the following setup optionsand preferences:
eBeam Palette: Set the appearance and behavior of all eBeam Education Tool Palettes. Hardware Settings: Set the communication port and Bluetooth Wireless configuration
options, and access system profile information. Software Update: Set how often to check for updates.

p23
© 2011 Luidia, Incorporated
eBeam Education PaletteHelp Main Page
eBeam Education PaletteThe eBeam Education Palette tab in Preferences allows you to set the appearance andbehavior for all of the Tool Palettes.
Appearance Palette Size: This option allows you to select how big or small the Interactive Tool Palettewill be.
Transparency: This option allows you to select how visible the Interactive Tool Palette willbe. Setting transparency to display the palette faintly is useful during a presentation to keepthe Interactive Tool Palette available, but visually in the background.
Note: If the Interactive Tool Palette becomes too transparent, select the Restore Defaultsbutton to set the transparency back to default.
Features Keep palette in screen area: Keeps the entire palette visible in the screen area. Whenunchecked, you can move the palette so that it is partially off-screen.
Double-click eraser clears screen: While annotating your desktop, allows you todouble-click the Eraser tool and erase all annotations.
RestoreDefaults
The Restore Defaults button causes all Appearance and Features settings to be returned to theirdefault settings.

p24
© 2011 Luidia, Incorporated
Hardware SettingsHelp Main Page
Hardware SettingsThe Hardware Settings tab in Preferences allows you to set up a connection between thesoftware and the hardware and to set hardware preferences.
If your receiver is not detected, see Your Receiver is Not Detected. If you are not usinghardware provided by eBeam, see your OEM hardware setup manual for instructions.
CommunicationPort
Autodetect: If Autodetect is selected, the software will automatically attempt to connect tointeractive hardware on on any available USB port or Bluetooth device.
USB: Allows you to manually specify to connect to the interactive hardware over a USBport.
Bluetooth: Allows you to manually specify which Bluetooth device to connect to.
BluetoothPreferences
Opens the Bluetooth panel of System Preferences, allowing you to add and configure Bluetoothdevices. See Bluetooth Wireless Configuration for more information.
System Profile Opens the System Profiler application which can be used to provide more information toTechnical Support if necessary.

p25
© 2011 Luidia, Incorporated
Software UpdateHelp Main Page
Software UpdateThe Software Update tab in Preferences allows you to check for the latest version of thesoftware.
Select Automatically check for updates to enable an automatic check for updatedsoftware every time the software is launched.
Press the Check Now button to immediately check for a newer version of software.

p26
© 2011 Luidia, Incorporated
eBeam Tool Palette
Desktop Tools PaletteHelp Main Page
Desktop Tools Palette
The Desktop Tools Palette is the main tool palette for the software. All other tool palettesand software features can be accessed from the Desktop Tools Palette.
Screen Annotation
Keyboard Viewer
Scrapbook
Snapshot

p27
© 2011 Luidia, Incorporated
Screen AnnotationHelp Main Page
Screen Annotation
The Screen Annotation Tool launches the Screen Annotation Tools Palette and allows youto annotate your desktop.

p28
© 2011 Luidia, Incorporated
Keyboard ViewerHelp Main Page
Keyboard Viewer
Select the Keyboard Viewer to enter text and choose keys using the Interactive Stylus.Generally used with the Text Tool.

p29
© 2011 Luidia, Incorporated
ScrapbookHelp Main Page
Scrapbook
Select Scrapbook to launch the Scrapbook application. If Scrapbook was minimized,selecting the Scrapbook button will restore the window.
SnapshotHelp Main Page
Snapshot
Snapshot allows you to take a picture of the current screen and save it into Scrapbook.
1. Select the Snapshot button from the Desktop Tools Palette to open the TakeSnapshot dialog box.
2. Select one of the following options:
Capture screen: Captures the entire desktop and saves image to Scrapbook.
Capture a selection: Once the Go button is selected, use the Interactive Stylusto select an area to capture.
The captured image is saved as a new page in Scrapbook.

p30
© 2011 Luidia, Incorporated
Screen Annotation Tools PaletteHelp Main Page
Screen Annotation Tools Palette
The Screen Annotation Tool Palette gives you all of the tools you will need to annotateyour desktop.When you select the Screen Annotation Tool from the Desktop Tools Palette a snapshotis taken of your desktop at that moment and turned into an image that you can write on. Atranslucent frame appears around the border of the screen to indicate that you areannotating the desktop image and not navigating your desktop.
To finish annotating and return to desktop navigation and the Desktop Tools , select theMouse Tool.
Pen Tool
Shapes Tool
Redo Tool
Eraser Tool
Mouse Tool
Save Tool
Undo Tool
Highlighter Tool
p31
© 2011 Luidia, Incorporated
Pen ToolHelp Main Page
Pen Tool
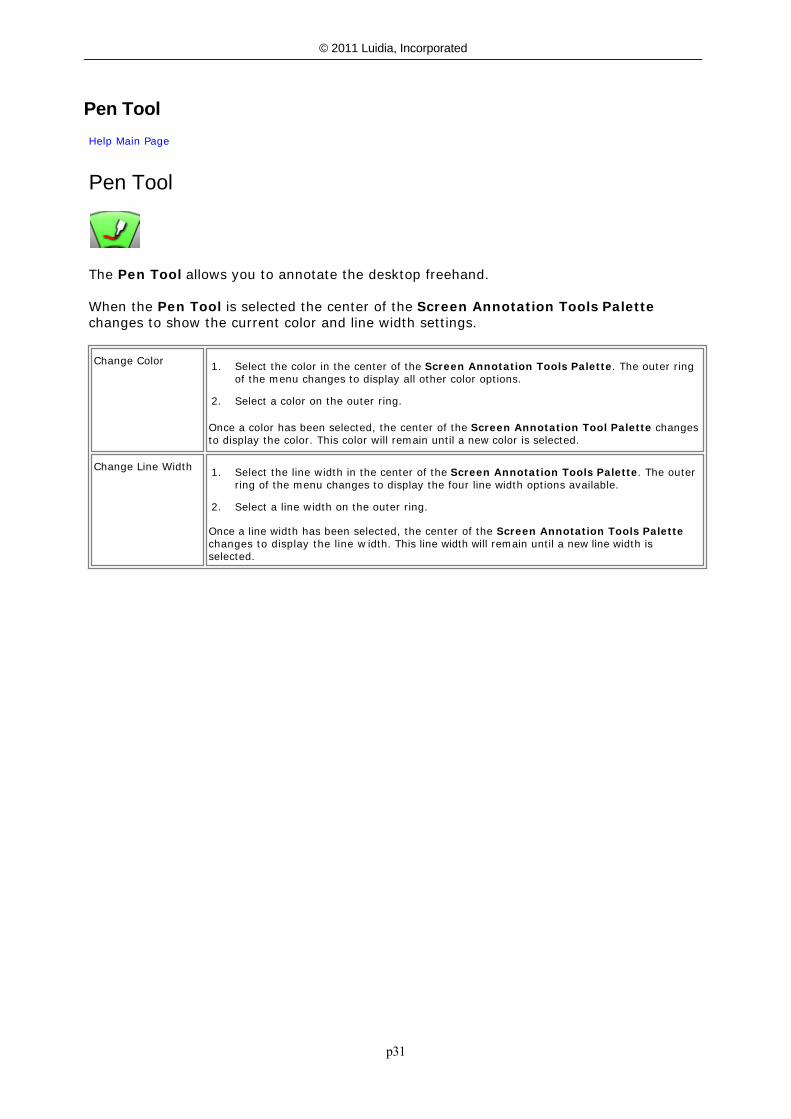
The Pen Tool allows you to annotate the desktop freehand.
When the Pen Tool is selected the center of the Screen Annotation Tools Palettechanges to show the current color and line width settings.
Change Color 1. Select the color in the center of the Screen Annotation Tools Palette. The outer ringof the menu changes to display all other color options.
2. Select a color on the outer ring.
Once a color has been selected, the center of the Screen Annotation Tool Palette changesto display the color. This color will remain until a new color is selected.
Change Line Width 1. Select the line width in the center of the Screen Annotation Tools Palette. The outerring of the menu changes to display the four line width options available.
2. Select a line width on the outer ring.
Once a line width has been selected, the center of the Screen Annotation Tools Palettechanges to display the line w idth. This line width will remain until a new line width isselected.
p32
© 2011 Luidia, Incorporated
Shapes ToolHelp Main Page
Shapes Tool
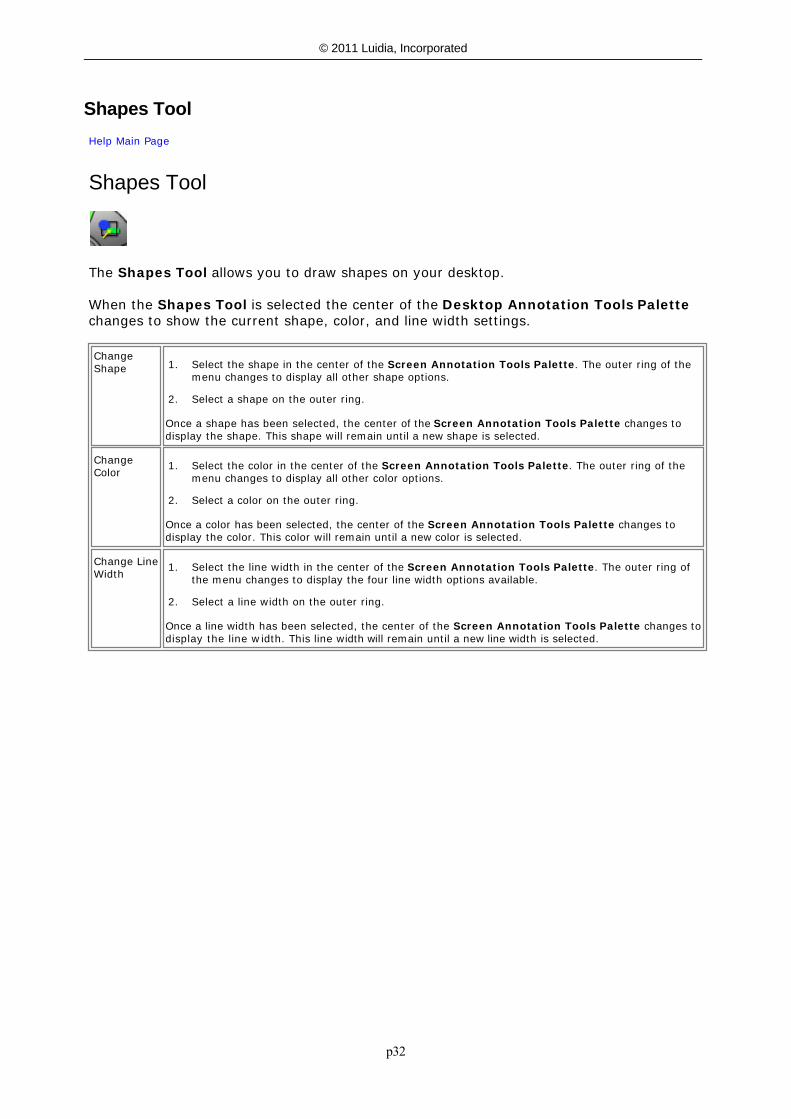
The Shapes Tool allows you to draw shapes on your desktop.
When the Shapes Tool is selected the center of the Desktop Annotation Tools Palettechanges to show the current shape, color, and line width settings.
ChangeShape 1. Select the shape in the center of the Screen Annotation Tools Palette. The outer ring of the
menu changes to display all other shape options.
2. Select a shape on the outer ring.
Once a shape has been selected, the center of the Screen Annotation Tools Palette changes todisplay the shape. This shape will remain until a new shape is selected.
ChangeColor 1. Select the color in the center of the Screen Annotation Tools Palette. The outer ring of the
menu changes to display all other color options.
2. Select a color on the outer ring.
Once a color has been selected, the center of the Screen Annotation Tools Palette changes todisplay the color. This color will remain until a new color is selected.
Change LineWidth 1. Select the line width in the center of the Screen Annotation Tools Palette. The outer ring of
the menu changes to display the four line width options available.
2. Select a line width on the outer ring.
Once a line width has been selected, the center of the Screen Annotation Tools Palette changes todisplay the line width. This line width will remain until a new line width is selected.

p33
© 2011 Luidia, Incorporated
Redo ToolHelp Main Page
Redo Tool
If you previously used the Undo Tool, you can use the Redo Tool to redo the last undoneannotation. If you have used Undo multiple times, you can redo the changes back to thebeginning of the series. Redo is disabled once a new annotation occurs.

p34
© 2011 Luidia, Incorporated
Eraser ToolHelp Main Page
Eraser Tool
The Eraser Tool allows you to erase screen annotation marks made using the ScreenAnnotation Tools Palette.
When the Eraser Tool is selected the center of the Screen Annotation Tools Palettechanges to show the current eraser thickness setting.
Set EraserThickness 1. Select the thickness from the center of the Screen Annotation Tools Palette. The outer
ring of the menu changes to display all four thickness options available.
2. Select a thickness on the outer ring.
Once a thickness has been selected, the center of the Screen Annotation Tools Palette changesto display the thickness. This thickness will remain until a new thickness is selected.

p35
© 2011 Luidia, Incorporated
Mouse ToolHelp Main Page
Mouse Tool
Select the Mouse Tool to exit Screen Annotation and return to the Desktop Tools Palette.

p36
© 2011 Luidia, Incorporated
Save ToolHelp Main Page
Save Tool
Select the Save Tool to save a snapshot of the annotated desktop in Scrapbook as a newpage. You must save the Scrapbook meeting file if you want to keep the page permanently.

p37
© 2011 Luidia, Incorporated
Undo ToolHelp Main Page
Undo Tool
Undo erases the previous annotation. It is possible to select Undo multiple times until thepage is blank.

p38
© 2011 Luidia, Incorporated
Highlighter ToolHelp Main Page
Highlighter Tool
Select the Highlighter Tool to annotate the desktop freehand in a translucent color.
Note: Some highlighter colors may not be visible on some computer backgrounds.
When the Highlighter Tool is selected the center of the Screen Annotation ToolsPalette changes to show the current color and line width settings.
Change Color 1. Select the color in the center of the Screen Annotation Tools Palette. The outerring of the menu changes to display the eight color options available.
2. Select a color on the outer ring.
Once a color has been selected, the center of the Screen Annotation Tools Palettechanges to display the color. This color will remain until a new color is selected.
Change Line Width 1. Select the line width in the center of the Screen Annotation Tools Palette. Theouter ring of the menu changes to display the four line width options available.
2. Select a line width on the outer ring.
Once a line width has been selected, the center of the Screen Annotation ToolsPalette changes to display the line width. This line width will remain until a new linewidth is selected.

p39
© 2011 Luidia, Incorporated
Scrapbook Tools PaletteHelp Main Page
Scrapbook Tools Palette
Scrapbook Tools appear when Scrapbook is the active window. The Scrapbook ToolsPalette gives you the tools you need to create page content. If you select anywhere outsidethe Scrapbook window, the Scrapbook Tools Palette will change to the Desktop ToolsPalette.
The tools on the standard Scrapbook toolbar include:
Pen Tool
Shape Tool
Slide Forward Tool
Eraser Tool
Select Tool
Undo Tool
Slide Back Tool
Highlighter Tool
See Preferences for information on moving, showing, hiding and changing the generalappearance of the Tool Palettes.
p40
© 2011 Luidia, Incorporated
Standard Annotation ToolbarHelp Main Page
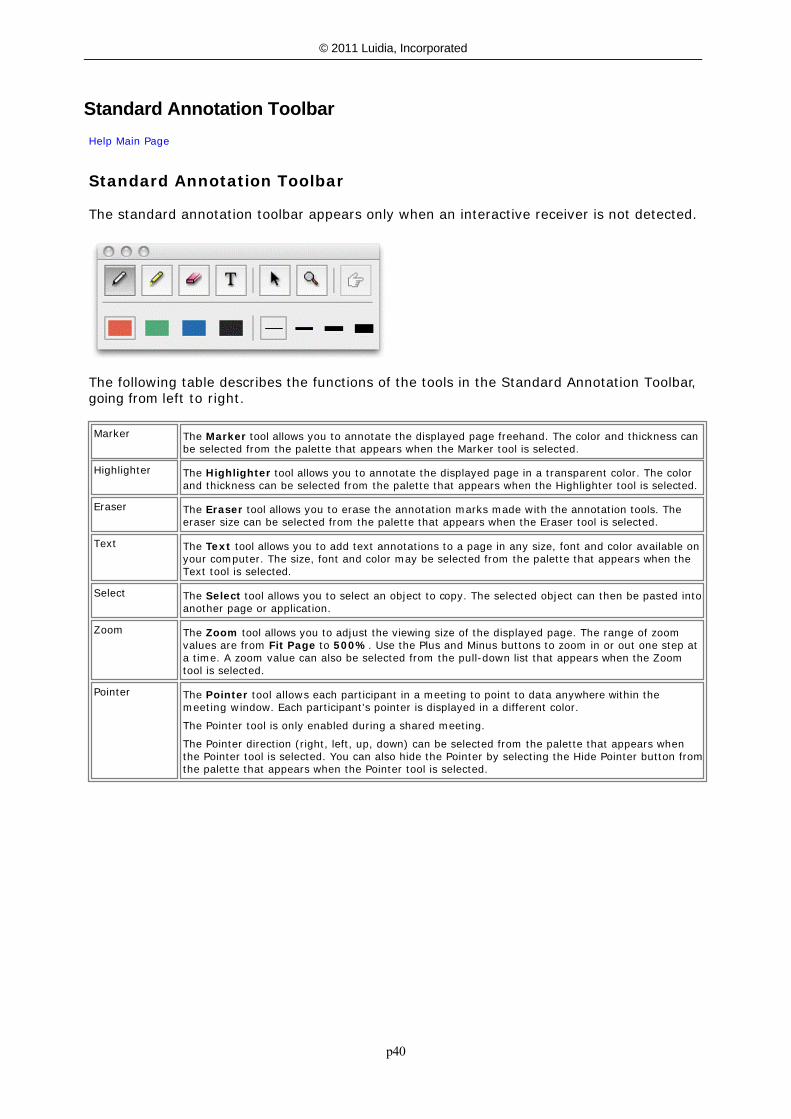
Standard Annotation Toolbar
The standard annotation toolbar appears only when an interactive receiver is not detected.
The following table describes the functions of the tools in the Standard Annotation Toolbar,going from left to right.
Marker The Marker tool allows you to annotate the displayed page freehand. The color and thickness canbe selected from the palette that appears when the Marker tool is selected.
Highlighter The Highlighter tool allows you to annotate the displayed page in a transparent color. The colorand thickness can be selected from the palette that appears when the Highlighter tool is selected.
Eraser The Eraser tool allows you to erase the annotation marks made with the annotation tools. Theeraser size can be selected from the palette that appears when the Eraser tool is selected.
Text The Text tool allows you to add text annotations to a page in any size, font and color available onyour computer. The size, font and color may be selected from the palette that appears when theText tool is selected.
Select The Select tool allows you to select an object to copy. The selected object can then be pasted intoanother page or application.
Zoom The Zoom tool allows you to adjust the viewing size of the displayed page. The range of zoomvalues are from Fit Page to 500%. Use the Plus and Minus buttons to zoom in or out one step ata time. A zoom value can also be selected from the pull-down list that appears when the Zoomtool is selected.
Pointer The Pointer tool allows each participant in a meeting to point to data anywhere within themeeting window. Each participant's pointer is displayed in a different color.
The Pointer tool is only enabled during a shared meeting.
The Pointer direction (right, left, up, down) can be selected from the palette that appears whenthe Pointer tool is selected. You can also hide the Pointer by selecting the Hide Pointer button fromthe palette that appears when the Pointer tool is selected.
p41
© 2011 Luidia, Incorporated
Pen ToolHelp Main Page
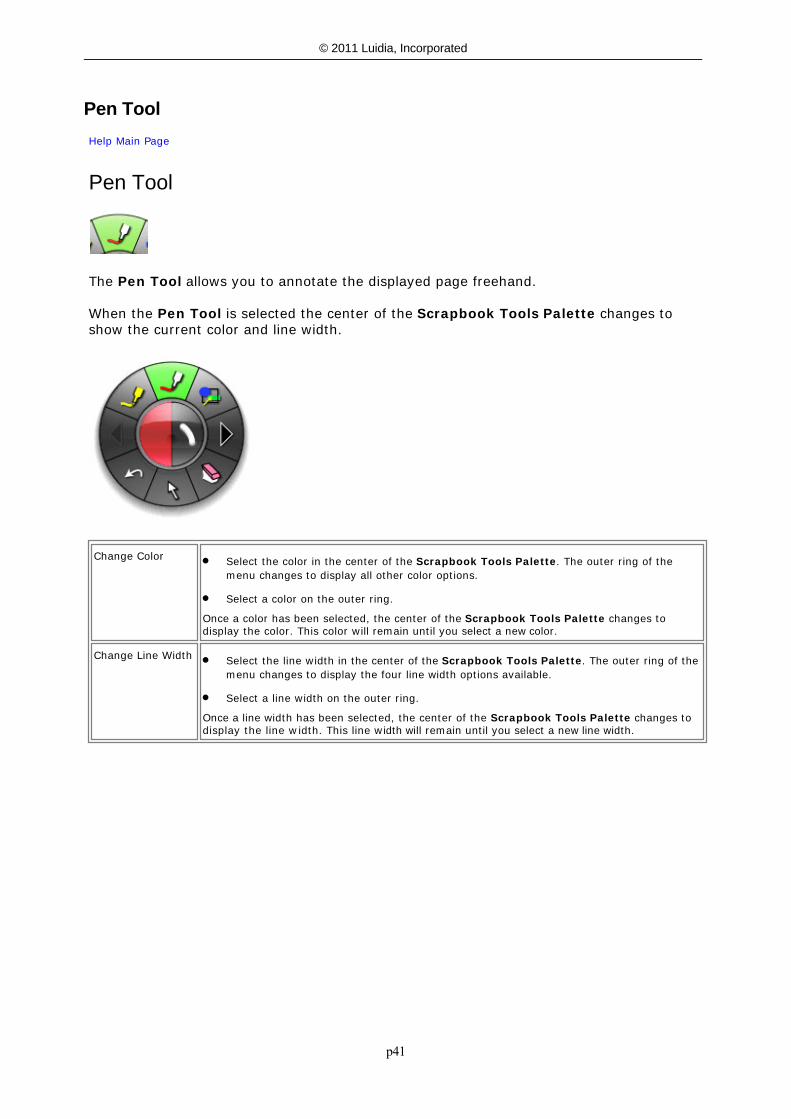
Pen Tool
The Pen Tool allows you to annotate the displayed page freehand.
When the Pen Tool is selected the center of the Scrapbook Tools Palette changes toshow the current color and line width.
Change Color Select the color in the center of the Scrapbook Tools Palette. The outer ring of themenu changes to display all other color options.
Select a color on the outer ring.
Once a color has been selected, the center of the Scrapbook Tools Palette changes todisplay the color. This color will remain until you select a new color.
Change Line Width Select the line width in the center of the Scrapbook Tools Palette. The outer ring of themenu changes to display the four line width options available.
Select a line width on the outer ring.
Once a line width has been selected, the center of the Scrapbook Tools Palette changes todisplay the line width. This line width will remain until you select a new line width.
p42
© 2011 Luidia, Incorporated
Shape ToolHelp Main Page
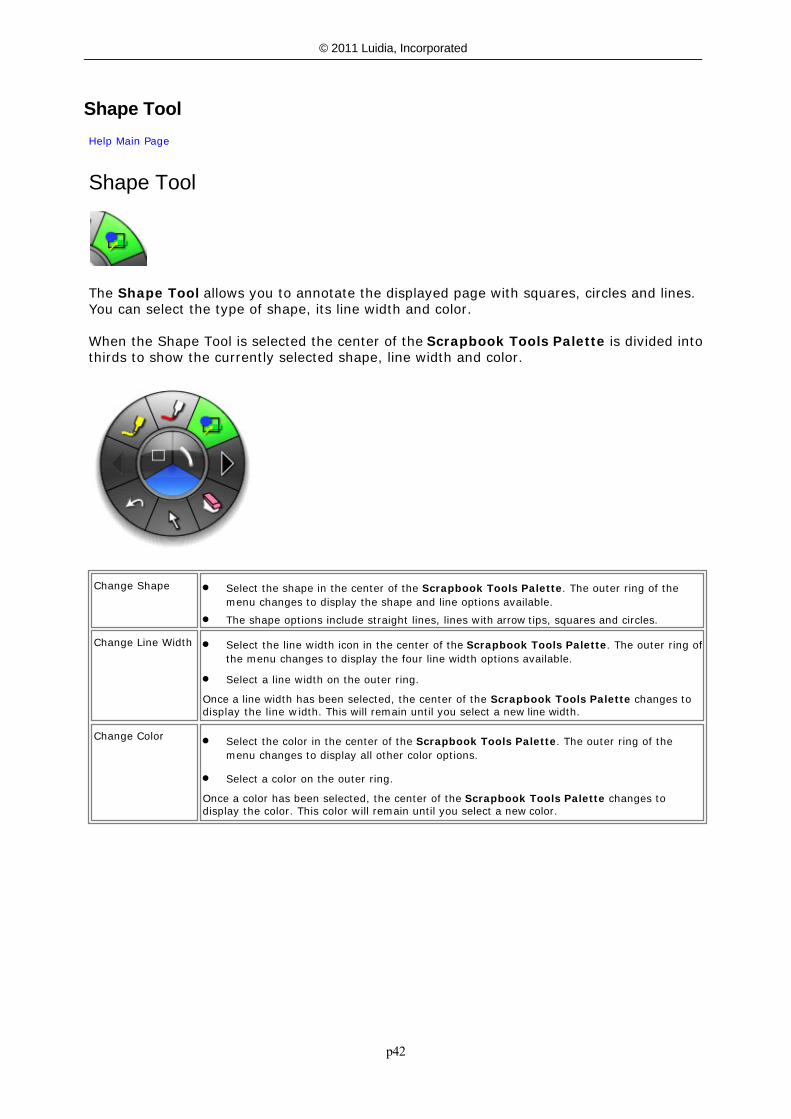
Shape Tool
The Shape Tool allows you to annotate the displayed page with squares, circles and lines.You can select the type of shape, its line width and color.
When the Shape Tool is selected the center of the Scrapbook Tools Palette is divided intothirds to show the currently selected shape, line width and color.
Change Shape Select the shape in the center of the Scrapbook Tools Palette. The outer ring of themenu changes to display the shape and line options available.
The shape options include straight lines, lines with arrow tips, squares and circles.
Change Line Width Select the line width icon in the center of the Scrapbook Tools Palette. The outer ring ofthe menu changes to display the four line width options available.
Select a line width on the outer ring.
Once a line width has been selected, the center of the Scrapbook Tools Palette changes todisplay the line width. This will remain until you select a new line width.
Change Color Select the color in the center of the Scrapbook Tools Palette. The outer ring of themenu changes to display all other color options.
Select a color on the outer ring.
Once a color has been selected, the center of the Scrapbook Tools Palette changes todisplay the color. This color will remain until you select a new color.

p43
© 2011 Luidia, Incorporated
Slide Forward ToolHelp Main Page
Slide Forward Tool
The Slide Forward Tool allows you to move to the next page in the Scrapbook meeting.

p44
© 2011 Luidia, Incorporated
Eraser ToolHelp Main Page
Eraser Tool
The Eraser Tool allows you to erase annotation marks on the displayed Scrapbook page.
When the Eraser Tool is selected the center of the Scrapbook Tools Palette changes toshow the current eraser width. An outer ring displays with the four width selections.
Set EraserThickness
1. Select the thickness from the center of the Scrapbook Tools Palette. The outer ring of themenu changes to display all four thickness options available.
2. Select a thickness on the outer ring.
Once a thickness has been selected, the center of the Scrapbook Tools Palette changes to displaythe thickness. This will remain selected until you select a new thickness.

p45
© 2011 Luidia, Incorporated
Select ToolHelp Main Page
Select Tool
When the Select Tool is selected, the Scrapbook Tools Palette displays.
The Select Tool allows you to select a Scrapbook element on a page to move, rotate orresize. Once you have selected the object, drag points will appear on the graphic object.

p46
© 2011 Luidia, Incorporated
Undo ToolHelp Main Page
Undo Tool
The Undo Tool allows you to undo your palette actions. Each time you click the Undo Tool,Scrapbook will undo one action, starting with the most recent action performed and workingbackwards sequentially.

p47
© 2011 Luidia, Incorporated
Slide Back ToolHelp Main Page
Slide Back Tool
The Slide Back Tool allows you to move to the previous page in the Scrapbook meeting.

p48
© 2011 Luidia, Incorporated
Highlighter ToolHelp Main Page
Highlighter Tool
The Highlighter Tool allows you to annotate the displayed page freehand in a translucentcolor.
Note: Some highlighter colors may not be visible on certain computer backgrounds.
When the Highlighter Tool is selected the center of the Scrapbook Tools Palettechanges to show the current color and line width.
ChangeColor 1. Select the color in the center of the Scrapbook Tools Palette. The outer ring of the menu
changes to display the eight color options available.
2. Select a color on the outer ring.
Once a color has been selected, the center of the Scrapbook Tool Palette displays the color. This colorwill remain until you select a new color.
ChangeLine Width 1. Select the line width in the center of the Scrapbook Tools Palette. The outer ring of the menu
changes to display the four line width options available.
2. Select a line width on the outer ring.
Once a line width has been selected, the center of the Scrapbook Tool Palette changes to display theline width. This line width will remain until you select a new line width.

p49
© 2011 Luidia, Incorporated
Slideshow Tools Palette
Pen ToolHelp Main Page
Pen Tool - PowerPoint and Keynote
The Pen Tool allows you to annotate the displayed PowerPoint/Keynote slide freehand.
When the Pen Tool is selected, the Pen Tool button becomes highlighted and the center ofthe Slideshow Tools Palette changes to show the current color and line width.
Change Color Select the color in the center of the Slideshow Tools Palette. The outer ring of the menuchanges to display all other color options.
Select a color on the outer ring.
Once a color has been selected, the center of the Slideshow Tools Palette changes to displaythe color. This color will remain until you select a new color.
Change Line Width Select the line width in the center of the Slideshow Tools Palette. The outer ring of themenu changes to display the four line width options available.
Select a line width on the outer ring.
Once a line width has been selected, the center of the Slideshow Tools Palette changes todisplay the line width. This line width will remain until you select a new line width.

p50
© 2011 Luidia, Incorporated
Shapes ToolHelp Main Page
Shapes Tool - PowerPoint/Keynote Slideshows
The Shapes Tool allows you to draw shapes on the displayed PowerPoint/Keynote slide.
When the Shapes Tool is selected, the Shapes Tool button becomes highlighted and thecenter of the Slideshow Tools Palette changes to show the current color and line width.
Change Shape Select the shape in the center of the Slideshow Tools Palette. The outer ring of the menuchanges to display all other shape options.
Select a shape on the outer ring.
Once a shape has been selected, the center of the Slideshow Tools Palette changes to displaythe shape. This shape will remain until you select a new shape.
Change Color Select the color in the center of the Slideshow Tools Palette. The outer ring of the menuchanges to display all other color options.
Select a color on the outer ring.
Once a color has been selected, the center of the Slideshow Tools Palette changes to displaythe color. This color will remain until you select a new color.
Change Line Width Select the line width in the center of the Slideshow Tools Palette. The outer ring of themenu changes to display the four line width options available.
Select a line width on the outer ring.
Once a line width has been selected, the center of the Slideshow Tools Palette changes todisplay the line width. This line width will remain until you select a new line width.

p51
© 2011 Luidia, Incorporated
Slide ForwardHelp Main Page
Slide Forward - PowerPoint and Keynote
The Slide Forward Tool allows you to advance the PowerPoint/Keynote presentationforward by one slide.
If you have annotated the current page, your annotations are automatically captured in aScrapbook page.

p52
© 2011 Luidia, Incorporated
Eraser ToolHelp Main Page
Eraser Tool - PowerPoint/Keynote Presentations
The Eraser Tool allows you to erase annotations made to the active page using theSlideshow Tools Palette.

p53
© 2011 Luidia, Incorporated
Mouse ToolHelp Main Page
Mouse Tool - PowerPoint and Keynote
The Slideshow Mouse Tool switches you from annotating a PowerPoint/Keynotepresentation to navigating a PowerPoint/Keynote presentation.
If you have annotated the current page, your annotations are automatically captured in aScrapbook page.

p54
© 2011 Luidia, Incorporated
Exit Slideshow Presentation ToolHelp Main Page
Exit Slideshow Presentation Tool
The Exit Slideshow Presentation Tool causes the presentation to end and the SlideshowTools Palette to change back to the Desktop Tools Palette.

p55
© 2011 Luidia, Incorporated
Slide BackHelp Main Page
Slide Back - PowerPoint and KeynoteThe Slide Back Tool allows you to move the PowerPoint/Keynote presentation back by oneslide.
If you have annotated the current page, your annotations are automatically captured in aScrapbook page.

p56
© 2011 Luidia, Incorporated
Highlighter ToolHelp Main Page
Highlighter Tool - PowerPoint and Keynote
The Highlighter Tool allows you to annotate the displayed slide freehand.
Note: Some highlighter colors may not be visible on some backgrounds.
When the Highlighter Tool is selected, the Highlighter Tool button becomes highlighted andthe center of the Slideshow Tools Palette changes to show the current color and linewidth.
Change Color Select the color in the center of the Slideshow Tools Palette. The outer ring of themenu changes to display the eight color options available.
Select a color on the outer ring.
Once a color has been selected, the center of the Slideshow Tools Palette changes todisplay the color. This color will remain until you select a new color.
Change Line Width Select the line width in the center of the Slideshow Tools Palette. The outer ring ofthe menu changes to display the four line width options available.
Select a line width on the outer ring.
Once a line width has been selected, the center of the Slideshow Tools Palette changesto display the line width. This line width will remain until you select a new line width.
Note: Translucent colors (as seen on screen during annotation) will appear different whensaved into the original PowerPoint file.

p57
© 2011 Luidia, Incorporated
eBeam HomeHelp Main Page
eBeam Education Suite comes with the eBeam Home application. eBeam Home is yourresource for creating a centralized area for shortcuts to the programs and files that you usemost often. The following topics are available for eBeam Home:
To learn about more about working with shortcuts, see eBeam Home Shortcuts.
Launching eBeam HomeYou can launch eBeam Home in the following ways:
Click on the software icon in the eBeam Education Suite software folder installed in the Application Files on your computer.
Select eBeam Home from the eBeam Education Mac Bar Menu.
You can also create a shortcut to eBeam Home on your computer desktop and launch theapplication by clicking this shortcut.
Note: Launching eBeam Home will also launch the eBeam Tool Palette.
Hiding eBeam HomeYou can hide eBeam Home in the following ways:
Click on the close button in the top corner of your eBeam Home Window. Right-click anywhere outside of a shortcut within the eBeam Home Window and select
Close eBeam Home.
Whenever you click on a shortcut in eBeam Home, the eBeam Home Window will hide, andyour application, file or folder will launch. In order to see the eBeam Home Window againyou will need to relaunch it.

p58
© 2011 Luidia, Incorporated
eBeam Home ShortcutsHelp Main Page
eBeam Home ShortcutsThere are nine default shortcuts included in eBeam Home. You can customize theseshortcuts at any time, up to 25 shortcuts. If there are multiple users on your computer,these shortcuts will be saved per user account. The following shortcut topics are availablewith eBeam Home:
Adding a Shortcut Removing a Shortcut Renaming a Shortcut Reordering Shortcuts Broken Shortcuts Restoring Shortcuts Restoring Default Shortcuts
Adding a ShortcutYou can add a shortcut to your eBeam Home Window by either using the Add ShortcutButton, or by dragging your shortcut.
To Use the Add Shortcut Button:
1. Click the Add Shortcut Button from the bottom left corner of your eBeam Home Window,and select Add Hyperlink or Add Shortcut.
2. If you select hyperlink, type or paste the hyperlink you would like to add, and click OK. Ifyou select shortcut, browse for the shortcut you would like to add and select OK.
To Drag the Shortcut: 1. Find the file, folder or webpage that you would like to add as a shortcut.2. Click and drag the the file, folder, or webpage to the eBeam Home Window and release
your cursor anywhere inside the window.
Note: If you already have 25 shortcuts and you try to add another, you will receiver an errordialog box. Click OK to exit the error dialog box, and remove a shortcut before attempting toadd another one.
Removing a ShortcutYou can remove a shortcut from your eBeam Home Window in the following ways:
Right-Click Shortcut1. Right-click on the shortcut in your eBeam Home Window, and select Remove Shortcut.2. Select Yes from the dialog box that appears.
Hover Over Shortcut
1. Hover over the shortcut in your eBeam Home Window and a Remove Icon appears .Click this icon.
2. Select Yes from the dialog box that appears.
Renaming a Shortcut

p59
© 2011 Luidia, Incorporated
You can rename a shortcut at any time. To rename a shortcut:
Right-click on the shortcut and select Rename. Single click on the shortcut text.
The shortcut text will become an editable field. Enter the new shortcut name and clickoutside of the text field or press Enter.
Reordering ShortcutsYou can reorder the shortcuts in your eBeam Home Window at any time. To reorder theshortcuts:1. Press and hold your cursor over a shortcut2. Drag your cursor to the new location and release.
Broken ShortcutsIf you move, rename or delete a file, folder or application that links to an eBeam Homeshortcut, you will create a broken shortcut. Clicking on a broken shortcut will produce anerror dialog box. From this dialog box you can search for the moved or renamed file, folderor application and create a new shortcut.
Restoring ShortcutsIf you replace a file, folder or application that links to an eBeam Home shortcut withoutchanging the name of either the shortcut or the linked file, the broken link will be restoredand your shortcut will work again.
Restoring Default ShortcutsIf you would like to restore the eBeam Home Window to its default set of shortcuts, right-click anywhere within the eBeam Home Window outside of a shortcut and select RestoreDefault Shortcuts. In the dialog box that appears, select which default shortcuts you wouldlike to restore. You can select from: All shortcuts Only those shortcuts that were removed CancelOnce you make your selection, the dialog box will disappear.

p60
© 2011 Luidia, Incorporated
ScrapbookHelp Main Page
ScrapbookScrapbook is a great place to gather ideas, build lessons, record brainstorms and sharedocuments. Anything that you import into it can be shared online in real-time, includingnotes, drawings, PowerPoint or Keynote slides and digital photos. The Scrapbook applicationturns any projection surface into a digital workspace.
What is a Scrapbook Meeting?
Scrapbook Menus
Scrapbook Tools Palette
Scrapbook Toolbar
Playback
Scrapbook Elements
Background Settings
Gallery
Document Camera
Flickr
Encyclopædia Britannica
Scrapbook Preferences
Automatic File Saving
Supported File Types
p61
© 2011 Luidia, Incorporated
What is a Scrapbook Meeting?Help Main Page
What is a Scrapbook Meeting?A meeting is a collection of notes and images stored as pages in a Scrapbook meeting file(*.esb).
A single meeting may have one or more participants who are sitting in one room using theinteractive system to capture notes and diagrams.
A single meeting may also have participants who are located in other locations, such asanother floor in your building, another state or even another country. This process of havingparticipants attend your meeting over the Internet/intranet in real time is called Sharing aMeeting.

p62
© 2011 Luidia, Incorporated
Scrapbook MenusHelp Main Page
Scrapbook Menus
Scrapbook Menu
File Menu
Edit Menu
View Menu
Page Menu
Insert Menu
Sharing Menu
Window Menu
Help Menu

p63
© 2011 Luidia, Incorporated
Scrapbook Menu Help Main Page
Scrapbook Menu Scrapbook Menu options are described below:
AboutScrapbook
Version release information.
Preferences Opens the Scrapbook Preferences dialog box.
Services Access to various Macintosh utility applications.
HideScrapbook
Hides the Scrapbook window.
Hide Others Hides all application windows except Scrapbook.
Show All Shows all open application windows.
QuitScrapbook
Closes Scrapbook, but does not close the eBeam Tool Palette.

p64
© 2011 Luidia, Incorporated
File MenuHelp Main Page
File MenuFile Menu options are described below:
New New creates a new Scrapbook meeting file in its own window. Any previously opened meetingsremain open as separate windows.
To create a new Scrapbook meeting file:
Choose File > New, or
Press Command+N.
A new meeting is created every time Scrapbook opens.
Open Open allows you to open a Scrapbook (*.esb) file or an eBeam Capture (*.wbd) file. To open aScrapbook file:
1. Choose File > Open, or press Command+O.
A standard Open File dialog box appears.
2. Navigate to the desired *.esb file and select that file.
3. Select Open.
Note: Scrapbook will also open *.wbd files created by previous versions of eBeam Software.
Open Recent Open Recent contains a list of previously opened files. Select a file from the list to open the filein Scrapbook.
Close Close quits the current Scrapbook meeting file. It does not close other open Scrapbookmeetings and it does not close the eBeam Tool Palette. If you have not saved your Scrapbook file, you will be prompted to save the file before theScrapbook file is closed.
Save Save allows you to save a Scrapbook (*.esb) file. To save a Scrapbook file:
1. Choose File > Save, or press Command+S.
2. If the file has been saved before, it is saved again under the existing name.
If this is the first time the meeting has been saved, the standard Save As dialog box opens.
Save As Save As allows you to save a new Scrapbook (*.esb) file or to save an existing Scrapbookmeeting file under a new name.
To save a Scrapbook file:
1. Choose File > Save As, or press Command+Shift+S.
2. The Save As dialog box opens.
3. Enter a meeting name and select the folder location.
4. Select Save.
Save a CopyAs...
Save a Copy As allows you to save a Scrapbook (*.esb) meeting file in a different format or arange of Pages.
To save a Scrapbook file:
1. Choose File > Save a Copy As...
The Save a Copy As dialog box appears.
2. Enter a meeting name and select the folder location.
3. Select the Page Range to save by selecting the appropriate button at the bottom of thedialog box:

p65
© 2011 Luidia, Incorporated
All - The default range is All pages. This is the only option available when theScrapbook file has only one page.
Selected - Saves only the selected page.
Range - Allows you to select a range of pages to save.
4. Select Save.
Revert Revert closes the file you are working in and opens the previously saved version of the samefile.
Export Export allows you to save a Scrapbook file as an image file. You can select the image width/height, the image format and a range of pages from the Scrapbook file to export.
1. Choose File > Export or press Command+E
The Export dialog box appears.
2. Specify the image format.
3. Specify the image width/height. The default size is Original. To change the size, select oneof the image sizes provided or select Other to specify your own dimensions.
4. Select a Page Range.
All - The default range is All pages. This is also the only option available when theScrapbook file has only one page.
Selected - Saves only the selected page.
Range - Allows you to select a range of pages to save.
Note: If you choose to export more than one page, each page will save as a separateimage file.
5. Select OK.
6. Enter a meeting name and select the folder location.
7. Select Save.
Page Setup Page Setup opens the Page Setup dialog box. The Page Setup dialog box allows you to chooseprinter, paper size, orientation and scale.
Print Print opens a standard Print dialog box. From here you can select the page range and numberof copies you want to print. The default settings are to print all pages in the file and to print onecopy.
To print the Scrapbook File:
Choose File > Print, or
Press Command+P.

p66
© 2011 Luidia, Incorporated
Edit MenuHelp Main Page
Edit MenuEdit Menu options are described below:
Undo Undo erases the previous annotation. It is possible to perform multiple Undos until allannotations have been erased. Undo applies only to the page that is currently displayed.
To Undo:
Choose Edit > Undo, or
Select the Undo button from the Scrapbook Toolbar, or
Press Command+Z.
Redo Redo allows you to redo the last undone annotation. If you have used Undo multiple times, youcan redo the changes back to the beginning of the series. Redo is disabled once a newannotation occurs. Redo applies only to the page that is currently displayed. To Redo:
Choose Edit > Redo, or
Select the Redo button from the Scrapbook Toolbar, or
Press Command+Shift+Z.
Cut Cut is used to remove Scrapbook elements from a Scrapbook page or to cut text from activetext boxes. These cut elements and text can then be pasted to a new Scrapbook page or anactive text box.
To cut an element from a Scrapbook page:
1. Use the Select Tool to select an object to copy.
2. Choose Edit > Cut, or press Command+X.
3. Paste to another page in Scrapbook or open another application and paste.
To cut text from text box:
1. Highlight the text in the text box.
2. Choose Edit > Cut, or press Command+X.
Copy Copy allows you to copy Scrapbook elements from one Scrapbook page to another Scrapbookpage or application.
To copy an element from a Scrapbook page:
1. Use the Select Tool to select an object to copy.
2. Choose Edit > Copy, or press Command+C.
3. Paste to another page in Scrapbook or open another application and paste.
It is also possible to copy text from within an active Scrapbook text box to paste to anothertext box or to an outside application.
Paste Paste is used to paste Scrapbook elements into a Scrapbook page from either anotherScrapbook page or from your computer's clipboard. It is also used with the Text Tool to cut andpaste text between active Scrapbook text boxes.
To paste an element:
1. Copy the element from a Scrapbook page or an outside object.
2. Select the Scrapbook page.
3. Choose Edit > Paste, or press Command+V.

p67
© 2011 Luidia, Incorporated
To paste text between active Scrapbook text boxes:
1. Copy text from another Scrapbook text box.
2. Choose Edit > Paste, or press Command+V.
Delete Delete the selected object. See the Select Tool for information on selecting an object.
Select All Select All allows you to select all elements in a page as a single object.
To select all:
Choose Edit > Select All, or
Press Command+A.
Bring To Front Move the selected element in front of all other elements.
Send to Back Move the selected element behind all other elements.
Bring Forward Move the selected element one level forward.
Send Backward Move the selected element one level backward.
Font Edit > Font allows you to choose the font, the typeface (Regular, Oblique, Bold, Bold/Oblique)and the font size. At the bottom of the Font dialog box there is a check box for underlining textand a small box with A to open color options.
Special Characters Opens the special characters dialog box. Special characters can be inserted into an active textbox.

p68
© 2011 Luidia, Incorporated
View MenuHelp Main Page
View MenuUtilizing either the horizontal Scrapbook menu bar or the View menu along the top of theScrapbook page, you can choose to view your notes in one of four ways: Page and Thumbnails View: When the Page and Thumbnails View is selected, a
scrolled column of Thumbnails is displayed on the left side of the Scrapbook window,while one full page is displayed on the right side of the Scrapbook window.
Thumbnails View: When the Thumbnails View is selected, only Thumbnails aredisplayed in the Scrapbook window.
Page View: When the Page View is selected, only a single page is displayed in theScrapbook window.
Full Screen View: Full screen view maximizes the current page to full screen size.
View Menu options are described below:
Normal (View Page andThumbnails)
Normal allows you to switch to the Page and Thumbnails View. Switch to the Page andThumbnails View by:
Choosing View > Normal, or
Pressing Command+1, or
Selecting the View Page and Thumbnails (Normal) button from a customizedScrapbook Toolbar.
Page Sorter(Thumbnails)
Page Sorter allows you to switch to the Thumbnails View. Switch to the Thumbnails Viewby:
Choosing View > Page Sorter, or
Pressing Command+2, or
Selecting the Thumbnails View button from a customized Scrapbook Toolbar.
Page Page allows you to switch to the Page View. Switch to the Page View by:
Choosing View > Page, or
Pressing Command+3, or
Selecting the Page View button from a customized Scrapbook Toolbar.
Note: The Page View buttons are not included on the default Toolbar configuration. SeeScrapbook Toolbar for information on how to customize the Scrapbook Toolbar.
Full Screen View Full Screen View maximizes the current page to full screen size. The Scrapbook Toolbarbecomes a floating toolbar that can be closed. The Scrapbook Tools Palette remains inFull Screen View.
To go to full screen:
Choose View > Full Screen, or
Select the Full Screen View button from the Scrapbook Toolbar, or
Press Command+Shift+F.
To return to normal screen size:
Select the Full Screen View button from the Scrapbook Toolbar, or
Press Command+Shift+F, or
Control-select the screen (press the Menu Button on the Interactive Stylus) and

p69
© 2011 Luidia, Incorporated
select Full Screen Off from the menu that appears.
Toolbar (Show/HideToolbars)
Choosing Hide Toolbar causes the Toolbar to disappear.
Choosing Show Toolbar causes the Toolbar to display.
Customize Toolbar Allows you to add or remove buttons from the Scrapbook Toolbar. See Scrapbook Toolbar.
Annotation Tools Shows/hides the annotation toolbar.
Gallery Opens the Gallery window.
Playback Shows/hides the Playback toolbar. See Playback.
To show the Playback toolbar:
Choose View > Playback, or
Press Command+R.
You also can select Play All Pages, Loop and Speed which offers options for speedof play.
eBeam Tool Palette Shows/hides the Tool Palette.
Zoom To Zoom To allows you to zoom in or out on the currently displayed page.
The different zoom options include:
25%, 50%, 100%, 200%, 300%, 500%
The page will remain at the selected zoom value until a new zoom value is chosen.
Zoom In Zoom in on the currently displayed page. Zoom In can also be selected by pressingCommand+.
Zoom Out Zoom out of the currently displayed page. Zoom Out can also be selected by pressingCommand -.
Fit Page Compresses or expands the page to fit into the page display area. Fit Page can also beselected by pressing Command+0.
Actual Size Zooms the page to 100%.

p70
© 2011 Luidia, Incorporated
Page MenuHelp Main Page
Page MenuPage Menu options are described below:
New Page New creates a new blank page in the Scrapbook meeting.
To create a new page:
Choose Page > New, or
Select the New Page button from the Scrapbook Toolbar, or
Press Command+Shift+N
The new page is inserted directly after the displayed/selected page.
Duplicate Duplicate creates a copy of the displayed/selected page and makes the copy the displayed/selectedpage.
To duplicate a page:
1. Select the page to be duplicated.
2. Choose Page > Duplicate, or select Command+D.
The duplicated page is inserted directly after the selected/displayed page.
Note: You can also add the Duplicate Page button to the Scrapbook Toolbar. See ScrapbookToolbar for information on how to customize your toolbar.
Clear Clear clears all annotations from the displayed page.
To clear a page, select the page to be cleared, and:
Choose Page > Clear, or
Select the Clear Page button from the Scrapbook Toolbar.
Delete Page Delete Page deletes the displayed/selected page(s).
To delete one or more Pages:
1. Select the page to be deleted. To select multiple pages, choose multiple thumbnail images byholding down the shift key while selecting them.
2. Choose Page > Delete, select Command+Shift+X, or click the Delete Page button from theScrapbook Toolbar.
Delete All Delete All deletes all Pages from the Scrapbook meeting. All data will be lost.
PreviousPage
Previous Page navigates to the previous page in the Scrapbook meeting. This option is availableonly when the first page in the meeting is not displayed/selected.
To select Previous Page:
Choose Page > Previous Page (Command+Up Arrow), or
Select the Previous Page button from the bottom of the Scrapbook window.
Next Page Next Page navigates to the next page in the Scrapbook meeting. This option is available only whenthe last page in the meeting is not displayed/selected.
To select Next Page:
Choose Page > Next Page (Command+Down Arrow), or
Select the Next Page button from the bottom of the Scrapbook window.
Go To Page... Go To Page brings up a small control panel named Go To Page with controls to choose the pagenumber you wish to navigate to.

p71
© 2011 Luidia, Incorporated
BackgroundSettings
Background Settings allows you to import an image file or screen capture to the background ofthe currently selected page.

p72
© 2011 Luidia, Incorporated
Insert MenuHelp Main Page
Insert MenuInsert Menu options are described below:
Image To insert an image go to Insert > Image and choose the image from your files.
Text To insert a text box, go to Insert > Text and place your mouse in the scrapbook where you wouldlike text to be inserted. If you wish to edit the font, go to Edit > Font. The default text isHelvetica, Regular, Size 36.
Snapshot To take a snapshot of your screen, go to Insert > Snapshot and a dialogue box will open givingyou the option to capture your entire screen or a section of the screen.
Flash To import a Flash image into your Scrapbook page go to Insert > Flash and select the file in theOpen dialog box.Note: You can also insert a Flash image by dragging and dropping the Flash file onto yourScrapbook page.
eBeam FocusViewer
To start the eBeam Focus Viewer, go to Insert > eBeam Focus Viewer and the eBeam FocusViewer window opens displaying live feed from the Document Camera.
Note: You can also launch the eBeam Focus Viewer by clicking the eBeam Focus Viewer buttonfrom the Scrapbook toolbar.
Background To load a background image into your scrapbook, go to Insert > Background and a dialogue boxopens.
All options affect the selected page in Scrapbook.
File Scaling Options:o Do Not Scale: The file is imported into the background with its current dimensions.
This option is not available if the image size is bigger than the page size.o Scale Proportionally: The file is scaled to fit as much of the page as possible while
retaining the aspect ratio.o Scale to Fit: The file is scaled to fit the page completely. The aspect ratio is not
preserved.
Load Image: Opens the standard Open dialog box. To load an image navigate to and selectthe file you want to load into the page background and select OK.
Load from Clipboard: Loads data from the computer's clipboard as the background image. Ifthere is no data in the computer's clipboard, this button is disabled.
Remove Image: Removes the background image from the page. All other elements and textwill remain on the page.
Note: You can also drag a file from your computer's Finder window to the Background Settingsdialog box.

p73
© 2011 Luidia, Incorporated
Sharing MenuHelp Main Page
Sharing MenuSharing Menu options are described below:
Share/JoinMeeting (Shift+Command+M)
Share allows a meeting host to share a Scrapbook meeting over the Internet/intranet. Join allowsinvited participants to log into a shared Scrapbook meeting. The participant will need to know themeeting name and password (if applicable) prior to joining the meeting. While a meeting isshared, this menu option changes to Stop Sharing/Leave Meeting.
Send Invitation Send Invitation allows the meeting host to send e-mail invitations to all invited participants forthe shared Scrapbook meeting.
AllowParticipants toContribute
Allow Participants to Contribute allows the host to decide whether or not to allow theParticipants to add annotations in the shared Scrapbook meeting.
LockParticipants toCurrent Page(also known asSynchronizeParticipants)
Lock Participants to Current Page allows the meeting host to keep participants on the samepage. While on, the host controls which page is displayed.

p74
© 2011 Luidia, Incorporated
Window MenuHelp Main Page
Window MenuWindow Menu options are described below:
Minimize Minimizes the current Scrapbook window.
ZoomWindow
Toggles between a larger and smaller sized Scrapbook window.
Bring All toFront
Brings all elements on the current Scrapbook page to the top layer.

p75
© 2011 Luidia, Incorporated
Help MenuHelp Main Page
Help MenuThe Help Menu options are described below. Through the Help menu, you can access arange of local and online support resources to help you use eBeam products.
Search Accesses the native Mac help for your computer.
ScrapbookHelp
Launches eBeam the Help in a new window.
OnlineSupport
Launches eBeam Product Support web page:
http://www.e-beam.com/support.html
Registration Launches the online product registration page.
http://www.e-beam.com/support/registration.html
CommonQuestions
Launches eBeam Product Support web page:
http://www.e-beam.com/support/faq.html
SoftwareUpdates
Launches eBeam Software Downloads page.

p76
© 2011 Luidia, Incorporated
Scrapbook ToolbarHelp Main Page
Scrapbook Toolbar
Default Scrapbook Toolbar buttons
The Scrapbook Toolbar gives you quick access to commonly used Scrapbook features.
Customizing the Scrapbook Toolbar
The Scrapbook Toolbar is customizable. Some buttons not shown on the default ScrapbookToolbar can be added by using the Customize Toolbar window.
To customize the toolbar:1. Control-select on the toolbar and choose Customize Toolbar
2. Or, from the View menu, select Customize Toolbar. The Customize Toolbar windowdisplays.
3. Drag buttons onto the Toolbar to add, or drag buttons away from the Toolbar toremove.
4. When finished, click Done.
Scrapbook Toolbar Controls
The following buttons are available on the Scrapbook Toolbar.
Normal
Thumbnails
PageOnly (Notshown ondefaultScrapbookToolbar)
You can switch between Scrapbook views by pressing the followingcombination of keys:
Normal (Page and Thumbnails): Command+1
Thumbnails Only: Command+2
Page Only: Command+3
FullScreen
Full Screen maximizes the current page to full screen size. TheScrapbook Toolbar becomes a floating toolbar.
To go to full screen:
Choose View > Full Screen, or
Select the Full Screen button from the Scrapbook Toolbar.
To return to normal screen size:
Select the Full Screen button, or
Control-select the screen (press the Menu Button on the InteractiveStylus).

p77
© 2011 Luidia, Incorporated
NewPage
New creates a new blank page in the Scrapbook meeting.
To create a new page:
Select the New Page button, or
Choose Page > New Page (Command+Shift+N).
The new page is inserted directly after the displayed/selected page.
DuplicatePage (Notshown onthedefaultScrapbookToolbar)
Duplicate creates a copy of the selected page and makes the copy thedisplayed page.
To duplicate a page:
1. Select the page to be duplicated.
2. Select the Duplicate Page button, or choose Page > DuplicatePage (Command+D).
The duplicated page is inserted directly after the selected page.
DeletePage(s)
Delete deletes the selected page(s).
To delete one or more pages:
1. Select the page to be deleted. To select multiple pages, choosemultiple thumbnail images by holding down the shift key whileselecting them.
2. Select the Delete Page button, or choose Page > Delete Page.
ClearPage
Clear clears all annotations from the selected page.
To clear a page:
1. Select the page to be cleared.
2. Select the Clear Page button, or choose Page > Clear Page.
PageSelection
The Page Selection buttons are used to choose w hich page to displayby selecting the page number. From left to right, the Page Selectionbuttons are:
Previous Page
Next Page
You can also select the page number by typing the page number directlyinto the text box and pressing Enter.
Undo Undo erases the previous annotation. It is possible to undo until thepage is blank.
To Undo:
Select the Undo button, or
Choose Edit > Undo (Command+Z).
Redo The Redo Tool allows you to redo the last undone annotation, providedyou had previously used the Undo Tool. If you have used Undo multipletimes, you can redo the changes back to the beginning of the series.Redo is disabled once a new annotation occurs.
To Redo:
Select the Redo button, or
Choose Edit > Redo (Command+Shift+Z)
DeleteObject
Delete Object deletes the selected object.
Share/EndMeeting
Share Meeting allows a meeting host to share a Scrapbook meetingover the Internet/intranet. While a meeting is being shared, this button becomes the End Meetingbutton although it does not change appearance.

p78
© 2011 Luidia, Incorporated
JoinMeeting
Join Meeting allows invited participants to log into a shared Scrapbookmeeting.
Gallery Gallery opens the Image Galleries. You can use the Image Galleries fororganizing images you want to work with in Scrapbook pages.
eBeamFocusViewer
eBeam Focus Viewer opens the eBeam Focus Viewer window, floatingover the Scrapbook window, and displaying a live feed from thecamera.
Zoom Click and hold the zoom button in Toolbar of Scrapbook and the zoommenu drops down. Choose the level of magnification you wish.You can also bring Zoom option down by going to View > Zoom To orZoom In or Zoom Out.

p79
© 2011 Luidia, Incorporated
PlaybackHelp Main Page
Playback
The Playback Toolbar allows you to replay the meeting like a movie. The meeting can thenbe played forward, line by line, and at varying speeds. Playback can be restricted to eitherthe current page or set to play all pages.
The Playback Toolbar can be opened by choosing View > Playback.
Some uses for the Playback Toolbar include:
Viewing the meeting chain of events.
Branching, by replaying a multiple action page to a point where you'd like to branch, thenstopping the session and duplicating the page. The new (duplicated) page will contain thepage data to the selected point, allowing you to explore a new idea from that point in thenew page. The original page remains intact.
The following tools are available on the Playback Toolbar:
Jump toBeginning
Jumps to the beginning of the Scrapbook meeting (if All Pages is checked) or to the beginning of the selected page.
DragControlSlider
Allows you to step through the meeting forward or reverse by using theInteractive Stylus or your mouse to drag the drag bar on the drag line, or toimmediately jump to a specific point in the meeting by dragging the drag bar toa location on the drag line.
Play Replays the entire Scrapbook meeting (if All Pages is checked) or the selectedpage from beginning to end. During playback, the Play button changes to a"Stop" button, allowing you to stop the playback.
Jump to End Jumps to the end of the Scrapbook meeting (if All Pages is checked) or thebeginning of the selected page.
All Pages Sets the number of pages played. If All Pages is checked, selecting Play causesthe entire meeting to be played back. If All Pages is not checked, only thecurrently displayed page is played back.
Loop Option for looping through the entire Scrapbook meeting (if All Pages is checked)or for looping the selected pages.
Play Speed Sets the speed at which the meeting is played. The slowest speed is 0.5x; thefastest speed is 8.0x.

p80
© 2011 Luidia, Incorporated

p81
© 2011 Luidia, Incorporated
Scrapbook ElementsHelp Main Page
Scrapbook Elements
The content of a Scrapbook page is made up of several types of objects known as elements.These elements are annotations, text boxes, image files and Flash files. Each element isselectable using the Select Tool.
The following actions are possible with Scrapbook elements:
Selecting Elements Manipulating Elements (using the Edit Menu) Moving, Rotating and Resizing Elements Ordering Elements
Scrapbook elements are described in the following table.
Element Description
Annotations Annotations are lines drawn on the Scrapbook page using the Pen Tool or Highlighter Tool. Oncedrawn, the line becomes an element that can be moved, rotated, resized, etc.
Text Boxes A text box is an element that displays typed text on the Scrapbook page. Text boxes can bemoved and rotated.
Image Files Image files, such as JPG and GIF images, can be imported into the Scrapbook page as elements.
To import an image file as an element:
Choose View > Gallery, or select the Gallery icon on the Scrapbook Toolbar to open theGallery. The Gallery allows you to import an image file from a directory as a Scrapbookelement or as a Background.
Choose Insert > Image to browse your computer to find an image.
Drag-and-drop the image file from your desktop directly onto the Scrapbook page.
Supported file formats for image files:
Bitmap (*.bmp)
Graphic Files (*.gif, *.jpg, *.png, *.pdf, *.eps, *.tif)
Note:
If you attempt to load a file type that is not supported, the page w ill display a file icon andthe filename but will not attempt to load that file onto the page.
Flash Files Flash file in *.swf (Flash file) and *.flv (Flash movie) formats can be imported into the Scrapbookpage as elements.
Scrapbook will automatically embed play controls into your Flash movie so you can use them w ithyour Select Tool to play, pause, rew ind or fast forward the movie. There is also a progress barwhich you can use to move to any particular point in the playback.
To import Flash into a Scrapbook page:
Choose Insert > Flash and select the file in the Open dialog box, or
Drag-and-drop the Flash file onto your Scrapbook page.
Note:
The entire Flash file w ill be embedded into your Scrapbook file so it can greatly increase yourfile size.
Due to the size of the Flash elements, they are not shared during a shared meeting. Acontainer will appear in the participant page, but video w ill not run.

p82
© 2011 Luidia, Incorporated
Selecting ElementsMost operations on an element require that you select the element first. When anelement is selected it will have drag handles and a rotate handle.
Select an element by choosing the Select Tool and then selecting the element in theScrapbook page. To deselect an element use the Select Tool to select anywhere outsideof the element's bounding box.To select multiple elements draw a rectangle around the elements with the Select Toolor select multiple elements individually while holding the Shift key.
To select all elements on a Scrapbook page at once:
o Select Edit > Select All, or
o Press Command+A on your keyboard.
Moving, Rotating and Resizing ElementsWhen moving or rotating multiple elements at one time, you must first select the elementsusing the Select Tool, then draw a rectangle around the elements to create a temporarygroup.
Move an element on a Scrapbook page by selecting it and dragging it to the new location.
To rotate an element, first select the element and then click and hold the top handle. Themouse cursor will change to circular arrows to indicate that you are ready to rotate theelement. If you are rotating a group of elements you can grab the handle of the group. Dragthe handle clockwise or counter-clockwise to rotate.
To resize an element, first select the element and then click and drag one of the squarehandles. The element will resize as you drag.
o Maintain Aspect Ratio: To maintain the element's aspect ratio while resizing,only drag using a corner drag handle.
o Ignore Aspect Ratio : To resize an element without maintaining the element'saspect ratio, drag using a side drag handle.
Ordering ElementsElements exist on a Scrapbook page in the order that you placed them there. The lastelement added to a page will be on top of and may cover elements added previously. Theorder that elements are displayed in is referred to as the Z-order.
To move an element forward or backward in the Z-order, first you must select the elementusing the Select Tool. Once an element is selected it can be moved in front of or behindother elements by choosing one of the following options from the Edit menu: Bring to Front, Send to Back, Bring Forward or Send Backward.

p83
© 2011 Luidia, Incorporated
Background SettingsHelp Main Page
Background SettingsBackground Settings allow the user to set an image as the background for any Scrapbookpage. Annotations and Scrapbook elements remain visible in front of the background image.Background Settings are displayed to all participants during a shared meeting.
The page background can be set from two locations: Insert > Background Page > Background Settings
See Supported File Formats for information on which file types can be imported byBackground Settings as a background image.
Using Background Settings
The Background Settings dialog box in Scrapbook allows you to import an image file,screen captures or data from the clipboard as a background image on the selected page.
The following table describes the Background Settings dialog box features.
BackgroundSettingsoptions
All options affect the displayed page or selected thumbnail in Scrapbook.
Load Image: Opens the standard Open dialog box. To load an image, navigate to and selectthe file you want to load into the page background, and then select OK.
Load from Clipboard: Loads data from the computer's clipboard as the background image.If there is no data on the computer's clipboard, this button is disabled.
Remove Image: Removes the background image from the page. Any annotations willremain on the page.
File Scaling Options:o Do Not Scale: The file is imported into the background as is. This option is not
available if the image size is bigger than the page size.o Scale Proportionally: The file is scaled to fit as much of the page as possible while
retaining the aspect ratio.o Scale to Fit: The file is scaled to fit the page completely. The aspect ratio is not
preserved.
Drag from Finder: Alternatively, you can drag a file from the Finder to the BackgroundSettings options dialog box.
Supported File Formats for Background Settings: Bitmap (*.bmp) Graphic Files (*.gif, *.jpg, *png, *.pdf, *.eps, *.tif) The open dialog will not allow you to select files whose formats are not supported.

p84
© 2011 Luidia, Incorporated
eBeam Inscribe Wireless Tablet Help Main Page
eBeam Inscribe Wireless TabletThe eBeam Inscribe wireless tablet allows you to make annotations to Scrapbook using thepen, tablet and the Tablet Toolbar.
See the following topics:
Installing the Wireless Tablet Pairing the Tablet Using the Pen Tablet Toolbar
Installing the Wireless Tablet
Installing the wireless tablet is a simple two-step process. 1. Install the driver (included on the installation CD or found at http://www.e-beam.comunder Downloads).2. Pair the tablet to your Mac.
Pairing the TabletPairing the tablet is the process of establishing communication between your Mac and thetablet. You must do this before the tablet will function with your computer.
To pair the tablet1. Plug the USB receiver into a USB port on your Mac. 2. Turn on the wireless tablet by pressing the power button on the top left hand side of the
tablet for at least three seconds. 3. Press the red button on the back of the tablet and the button on the USB receiver
simultaneously. Both the LCD display of the tablet and the blue LED of the receiver willblink.
4. Once the pairing process has finished, the LCD display of the tablet will show 000 to 005.If pairing multiple tablets to a Mac, each tablet will show a unique three digit number.
Note: You can pair up to five different tablets to your Mac.
Using the Pen
Outside of ScrapbookYou can use the wireless tablet and pen to do any of the tasks that you would typicallyperform with a mouse such as locating files, selecting items, launching applications andnavigating your computer's operating system.
Within eBeam ScrapbookYou can use the wireless tablet and pen with the eBeam Tool Palette and Scrapbook tocreate, edit and annotate any Scrapbook page.
Using the PenWhen using the eBeam Inscribe Wireless Tablet, here is what you need to know about usingthe pen:

p85
© 2011 Luidia, Incorporated
Left-click - Pressing the tip of the stylus against the tablet is the equivalent of aclicking your mouse.
Right-click - Pressing the button closest to the tip is the equivalent of pressingControl + clicking your mouse.
Double-click - Pressing the button farthest from the tip is the equivalent ofdouble-clicking your mouse.
Tablet Toolbar
The following table describes the functions of the tools in the Tablet Toolbar, going from leftto right.
Mouse on Desktop/Select inScrapbook
In Scrapbook, use this button to choose the Select Tool. Outside of Scrapbook, usethis button to select the mouse from Desktop Tool.
Color Specific Pen SelectionButtons (red, green, blue,black)
Outside of Scrapbook, use these buttons to annotate the desktop, then save yourdesktop annotations in Scrapbook. If you are in Scrapbook, use these buttons toselect a red, green, blue or black pen to use on a Scrapbook page.
Color Specific HighlighterSelection Buttons (yellow,green)
Outside of Scrapbook, use these buttons to annotate the desktop, then save yourdesktop annotations in Scrapbook. If you are in Scrapbook, use these buttons toselect a yellow or green highlighter tool to use on a Scrapbook page.
Eraser Outside of Scrapbook, use this button to annotate the desktop. If you are inScrapbook, it selects the eraser tool.
Pen, Highlighter and EraserThickness
If the pen, highlighter or eraser tools are selected (on the desktop or in Scrapbook),these buttons change the thickness of the lines. If the pen, highlighter or eraser toolsare not selected, these buttons are disabled.
Undo/Redo Undo cancels the last change on a Scrapbook page. It is possible to undo all changesto return the Scrapbook page to a totally empty state. Undo applies only to thecurrent page. Redo allows you to redo the last change, provided you had previously used the UndoTool. If you have used Undo multiple times, you can redo the changes back to thebeginning of the undo series. Redo is disabled once a new change has been made tothe page. Redo applies only to the current page.
Full Screen in Scrapbook Press this button to either enter or exit full screen mode in Scrapbook. If you are notin Scrapbook the button is inactive.
Scrapbook Direct Press this button to turn Scrapbook Direct on or off. (Not available in this version).

p86
© 2011 Luidia, Incorporated
GalleryHelp Main Page
GalleryWith Scrapbook's Gallery, you have ready access to a great body of imagery with a simpleorganizational structure for managing and accessing everything. You can add graphics andphotographs as Scrapbook elements or as a Scrapbook page background.
Scrapbook's Gallery includes a three-tiered image directory (eBeam GALLERY, MY GALLERYand RESOURCES) used to organize multiple image directories and folders located on yourMac or on your network. It also includes a place to store and reference Favorite images,images taken by the eBeam Focus Document Camera, photos found using the EncyclopædiaBritannica software, and a search capability that accesses the online resource Flickr.
Navigating the Gallery
Adding Images to Scrapbook Pages
Adding and Removing Links to Folders
Favorites
eBeam Focus Document Camera
Flickr
Encyclopædia Britannica

p87
© 2011 Luidia, Incorporated
Navigating the GalleryHelp Main Page
Navigating the GalleryPlease see the following sections to become familiar with the basic organization of theScrapbook Gallery:
Gallery Window Preview Pane Gallery Folder Structure Gallery Toolbar Gallery Thumbnail Size Slider Bar
Accessing the GalleryOpen the Gallery to access its images.
To open the Gallery
You can open the Gallery in one of two ways:
From Scrapbook, select View > Gallery, or
Select the Gallery button from the Scrapbook Toolbar.
Gallery WindowAfter opening the Gallery, a separate Gallery window is displayed floating over the Scrapbookpage. The left panel of the Gallery window contains the three main categories: eBeamGALLERY, MY GALLERY and RESOURCES. Under each category is a list of sub-folders andlinks to folders that contain the Gallery's large collection of images and online image searchpossibilities. Click the arrow next to each main category to expand its contents.
Preview PaneThe Preview Pane displays a preview of any image you select from the Gallery. This includesall images available in Favorites, Document Camera and Flickr. The Gallery is compatiblewith the following image file types:
Bitmap (*.bmp)Graphic Files (*.gif, *.jpg, *.ico, *.emf, *.wmf, *.png)Flash file (*.swf) Flash movie files (*.flv)
Note: You can resize the height and width of the Gallery panels to enlarge the PreviewPane.
Gallery Folder StructureThe Gallery has three main categories: eBeam GALLERY, MY GALLERY, and RESOURCES.If you expand any of these categories, all sub-folders and links for that category will display.
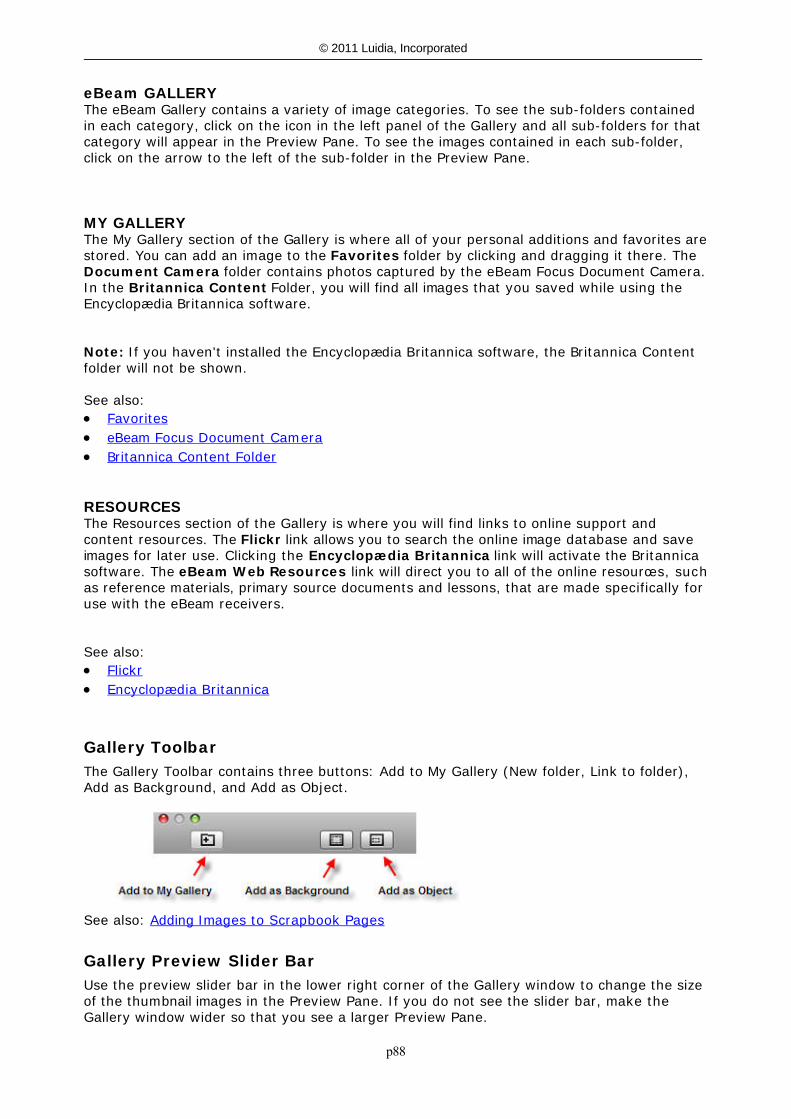
p88
© 2011 Luidia, Incorporated
eBeam GALLERYThe eBeam Gallery contains a variety of image categories. To see the sub-folders containedin each category, click on the icon in the left panel of the Gallery and all sub-folders for thatcategory will appear in the Preview Pane. To see the images contained in each sub-folder,click on the arrow to the left of the sub-folder in the Preview Pane.
MY GALLERYThe My Gallery section of the Gallery is where all of your personal additions and favorites arestored. You can add an image to the Favorites folder by clicking and dragging it there. TheDocument Camera folder contains photos captured by the eBeam Focus Document Camera.In the Britannica Content Folder, you will find all images that you saved while using theEncyclopædia Britannica software.
Note: If you haven't installed the Encyclopædia Britannica software, the Britannica Contentfolder will not be shown.
See also: Favorites eBeam Focus Document Camera Britannica Content Folder
RESOURCESThe Resources section of the Gallery is where you will find links to online support andcontent resources. The Flickr link allows you to search the online image database and saveimages for later use. Clicking the Encyclopædia Britannica link will activate the Britannicasoftware. The eBeam Web Resources link will direct you to all of the online resources, suchas reference materials, primary source documents and lessons, that are made specifically foruse with the eBeam receivers.
See also: Flickr Encyclopædia Britannica
Gallery ToolbarThe Gallery Toolbar contains three buttons: Add to My Gallery (New folder, Link to folder),Add as Background, and Add as Object.
See also: Adding Images to Scrapbook Pages
Gallery Preview Slider BarUse the preview slider bar in the lower right corner of the Gallery window to change the sizeof the thumbnail images in the Preview Pane. If you do not see the slider bar, make theGallery window wider so that you see a larger Preview Pane.

p89
© 2011 Luidia, Incorporated
p90
© 2011 Luidia, Incorporated
Adding Images to Scrapbook PagesHelp Main Page
Adding Images to Scrapbook PagesYou can import an image from the Gallery into a Scrapbook page either as a Scrapbookelement or as a background image. If you import an object as a Scrapbook element, youcan later move, rotate, resize, copy/paste, and edit the object within the Scrapbook page. Ifyou import an object as a background image, the image is imported into the background ofyour scrapbook page and cannot be edited the same way you edit an element. In order tomodify or delete a background, you must do so through Background Settings.
Add an Image as a Scrapbook Element Add an Image as a Scrapbook Page Background
Add an Image as a Scrapbook Element
1. Select a Scrapbook page.2. Search for an image from the Gallery. Once you have located the image you want to
use, highlight it in the Preview Pane.3. Use one of the following methods to add the image as a Scrapbook element:
a. With the image selected in the Preview Pane, select the Add as Object buttonfrom the Gallery Toolbar.
b. Double-click the object in the Preview Pane. c. Use control + click on the object in the Preview Pane, then select Send
[image name] to Scrapbook as image. d. Drag and drop the image into your Scrapbook page.
The object displays on the Scrapbook page as an element (with handles formanipulating the object).
Add an Image as a Scrapbook Background
1. Select a Scrapbook page.2. Select an image from the Gallery. 3. Use one of the following methods to add the image to the Scrapbook background:
a. Select the Add as Background button from the Gallery Toolbar
b. Use control + click on the object in the Preview Pane, then select Send[image name] to Scrapbook as background from the menu.
The object is now shown on your Scrapbook page as a background. The backgroundimage has a default scale setting of Scale Proportionally. To change this setting,select Page > Background Settings.

p91
© 2011 Luidia, Incorporated
Adding and Removing Links to FoldersHelp Main Page
Adding and Removing Links to FoldersIf you would like to access a folder located on your computer or network while viewing theGallery, you can create a link to this location. The link will appear under MY GALLERY.
Add a Link to a Folder
1. From the Gallery, click the Add to My Gallery button. Select Link to folder and anOpen File dialog box will display.
2. Find the folder you would like to link to and highlight it. 3. Click Open, and the folder you highlighted will appear under MY GALLERY. Select it to
view its images in the Preview Pane.
Remove a Link to a Folder
1. Select the linked folder you want to remove by using control + click. 2. Select Delete [folder name]. In the example below, the folder being deleted is
named Pictures.
The folder is removed from MY GALLERY.
Note: Removing a link to a folder does not delete the folder from your computer ornetwork. It deletes only the link from the Gallery.

p92
© 2011 Luidia, Incorporated
FavoritesHelp Main Page
FavoritesThe Favorites folder can help you quickly access the images that you use most often.
Populating the Favorites Folder Using Favorites on Scrapbook Pages
Populating the Favorites FolderThe Favorites folder is there to give you faster access to the images you use regularly. Itdoes not come pre-populated with images.
Add an object to the Favorites folder
1. Select an object in the Preview Pane of the Gallery. 2. Drag and drop your selected object into the Favorites folder. A copy of the object is
saved to your Favorites folder.
Remove a Gallery object from Favorites folder
1. Select the Favorites folder. 2. From the Preview Pane, select the item you want to remove. 3. Press control + click on your selected item and choose Remove [image name]
from Favorites. The object is removed from the Favorites folder.
Using Favorites on Scrapbook PagesYou can use any image from your Favorites folder as an object or background in a Scrapbookpage.
Add a Favorites object as an object in Scrapbook
1. From the Favorites folder, select the object you want to add. 2. With the object selected, use one of the following methods:
a. Click the Add as Object button.
b. Double-click the object in the Preview Pane. c. Control + click on your selected object and choose Send [image name] to
Scrapbook as image. d. Drag and drop your selected object onto your Scrapbook page.
Your Favorites object is now added to your Scrapbook page as an object.
Add a Favorites object as a background in Scrapbook
1. From the Favorites folder, select the object you want to use as a background. 2. With the object selected, use one of the following methods:

p93
© 2011 Luidia, Incorporated
a. Click the Add as Background button.
b. Control + click on your selected object and choose Send [image name] to
Scrapbook as background.
Your Favorites object is now added to your Scrapbook page as a background.
Note: You cannot use a Flash file as a background image. All .flv and .swf files will begrayed out when adding an image as background.

p94
© 2011 Luidia, Incorporated
eBeam Focus Document CameraHelp Main Page
eBeam Focus Document CameraThe eBeam Focus Document Camera (DocCam) allows you to take still images that can beused in Scrapbook. The images are saved in the Gallery as medium resolution .jpeg files, soyou can use them as backgrounds or elements on any Scrapbook page.
Other Ways to Capture Images You can use the eBeam Focus Viewer button to launch any connected or embedded
camera.
You must load any required camera drivers and connect external cameras via USB.
Caution: You cannot acquire images and video using twain drivers. Several commonlyused cameras employ this method and will not launch from the eBeam Education Suite.
See the following topics:
Launching eBeam Focus Viewer Document Camera Folder Resizing the eBeam Focus Viewer Window Capturing Images Deleting and Renaming Images Full Screen Meetings
Launching eBeam Focus Viewer
The eBeam Document Camera works with Mac OS X 10.5 or higher and does not require adriver.1. To use the eBeam Focus Viewer, plug it into a USB port on your Mac.2. From your computer, open Scrapbook. 3. Launch the eBeam Focus Viewer in one of two ways:
a. Select the eBeam Focus Viewer button from the Gallery Toolbar
b. Select Insert > eBeam Focus Viewer. The eBeam Focus Viewer window opens, floating over the Scrapbook window. A live feedfrom the camera displays in the eBeam Focus Viewer window.

p95
© 2011 Luidia, Incorporated
Note: If there is no DocCam connected, the following error message displays: “Your eBeamFocus document camera could not be found. Check connection and try again.”
Document Camera Folder
The Document Camera folder in the Gallery is where the images taken by the DocCam arestored. By default, every image taken by the DocCam is named with a date and time stampin the following format: YYYYMMDD_HHMMSS (YearMonthDay_HourMinuteSecond). See also: Deleting and Renaming Images
Resizing the eBeam Focus Viewer Window
You can resize the eBeam Focus Viewer window by clicking and dragging its lower rightcorner. The DocCam Viewer window size does not affect capture resolution.
Capturing Images
You can use the eBeam DocCam to capture images and either store them in your Gallery oruse them in your Scrapbook pages.
Add a DocCam image as a Scrapbook page Background With the DocCam focused on your desired image and Scrapbook opened to your currentpage, select the Add as Background button from the eBeam Focus Viewer toolbar. Thecurrent still image from the DocCam is added as a background to the Scrapbook page.
Add a DocCam image as a Scrapbook Page ObjectWith the DocCam focused on your desired image and Scrapbook opened to your currentpage, select the Add as Object button from the eBeam Focus Viewer toolbar. The currentstill image from the DocCam is added as an object to the center of your Scrapbook page.
Add a DocCam image to the GalleryWith the DocCam focused on your desired image, select the Add to Gallery button from theeBeam Focus Viewer toolbar. The current still image from the DocCam is added to theDocument Camera folder in the Gallery.

p96
© 2011 Luidia, Incorporated
Deleting and Renaming ImagesTo delete or rename an image captured by the Document Camera, use the Finder on yourMac and go to: Documents > My Scrapbook > Document CameraFrom this folder, you can delete or rename any images that were saved to your Gallery.DocCam images that were used as elements or backgrounds are not available for editing inthis folder.
Full Screen
Turn on Full ScreenSelect the Full Screen button to expand the eBeam Focus Viewer window to view the imagein full screen.
Turn off Full ScreenSelect the Full Screen Off button in the floating Viewer toolbar to exit full screen mode.
Meetings
The DocCam can be used during meetings, but meeting participants cannot see the eBeamFocus Viewer window. Only images from the DocCam that you incorporate into yourScrapbook presentation can be viewed by meeting participants. Additionally meetingparticipants cannot see any flash animations that you add to your Scrapbook presentation.

p97
© 2011 Luidia, Incorporated
FlickrHelp Main Page
FlickrThere are key features from Yahoo's photo sharing site Flickr(TM) integrated into the Galleryso that you can easily search for photos and use them into your Scrapbook pages. You cansave these images for later use by saving them in the Favorites folder.
Search for images to help you prepare for a lesson or to demonstrate a concept in class.Drag these images from the Gallery window directly onto a Scrapbook page.
To begin searching for Flickr content, click on the magnifying glass in the search field in thetop right-hand corner of the Gallery window. Select Flickr from the dropdown menu, type akeyword in the search field, then hit Enter. The Preview Pane displays the search results.
Searching for Images on Flickr Search History
Searching for Images on FlickrUsing the Flickr resource in the Gallery, you can quickly search among millions of images onFlickr.com. To access Flickr, select the Flickr folder from the Gallery and use the search fieldin the upper right corner above the Preview Pane.
Search for images in Flickr
1. Enter a search term in the Flickr search field.
2. Click the magnifying glass icon or press Enter to initiate your search. Images relatingto your search term will appear as thumbnails in the Preview Pane.
Note: To access Flickr through the Gallery, your computer must be connected to theInternet.
Search History
For your convenience, the Flickr search field saves your search history. You can clear thesearch history at any time.
Show the search history
Click the down arrow to the right of magnifying glass in the search field. The search historydisplays in the drop-down list.
Clear the search history

p98
© 2011 Luidia, Incorporated
1. Click the down arrow to the right of the magnifying glass icon. 2. Select Clear. The search history is now cleared.
p99
© 2011 Luidia, Incorporated
Encyclopædia Britannica
We have integrated key features from Encyclopædia Britannica into the Gallery giving youaccess to a wide range of educational content and online resources while navigatingScrapbook. Search for information to incorporate into your presentations or save images inyour Scrapbook meeting file. All images that you save will be stored in the BritannicaContent folder for later use.
Note: You must first install the Encyclopædia Britannica software before you can access allof the resources available in the Encyclopædia Britannica directory. If you have not installedthe software and you click on the Encyclopædia Britannica directory, you will be redirected toLuidia's online registration page where you can register your eBeam Software and request acopy of the Encyclopædia Britannica software.
Accessing Encyclopædia Britannica Britannica Content Folder
Accessing Encyclopædia BritannicaIn order to access Encyclopædia Britannica from the Gallery, you must first install theEncyclopædia Britannica software using the installation CD that came in your box. Once the software is installed, click the Encyclopædia Britannica link under the RESOURCESsection of the Gallery window.
A separate window will open floating over your Gallery giving you information about theBritannica software. Click on the link to start browsing.
Note: Once you launch your Encyclopædia Britannica software, a new folder calledBritannica Content will appear under the MY GALLERY section of the Gallery window.
Britannica Content FolderFor your convenience, you can save any images you find while browsing EncyclopædiaBritannica in your Gallery for later use. These images will be stored in the BritannicaContent folder under the MY GALLERY section of your Gallery.
Save images to your Britannica Content Folder
1. Search for an image in your Encyclopædia Britannica software.
2. When you have found an image you want to keep for later use, press the Save button orcontrol+click the image and select Save Image As.
3. Name the file in the Save dialog box that appears and click the Save button.
Note: If you try to save content other than an image, you will only be given the option toSave As (instead of Save Image As). Click the image you want to save until you are giventhe option to Save Image As. If you save content other than an image, you will only see thesaved file name in the Gallery. The content will not be visible. See Preview Pane for file typesthat are compatible with the Gallery.
Access images in your Britannica Content Folder

p100
© 2011 Luidia, Incorporated
1. Click on the Britannica Content folder in your Gallery. All images that you have added willbe displayed in the Preview Pane.
2. Select the image you would like to use in the Preview Pane.
See Adding Images to Scrapbook Pages for information on how to incorporate these imagesinto your presentation.

p101
© 2011 Luidia, Incorporated
Scrapbook PreferencesHelp Main Page
Scrapbook PreferencesThe Scrapbook Preferences dialog box, found under Scrapbook > Preferences, allowsyou to set preferences and settings specific to Scrapbook. Other options and settings for the Interactive stylus and tablet can be found under the eBeam Education menu >Preferences.
The Scrapbook Preferences dialog contains three tabs:
General: Allows you to set up automatic file saving preferences.
Sharing: Allows you to set up Proxy Server settings. Contact your network administratorfor assistance.
Page Setup: Opens the Page Setup dialog box where you can choose header and footerinformation or add a border for a printed Scrapbook page. You can also change pagenumbering format, adjust meeting name / date / time formats as well as restore defaults.

p102
© 2011 Luidia, Incorporated
Automatic File SavingHelp Main Page
Automatic File SavingThe File Saving feature ensures that you don't lose your meeting data if your computerdies before you save your Scrapbook meeting.
To adjust your automatic file saving settings:
1. Open the Scrapbook Preferences dialog.
2. Select the General tab.
3. Set the following options:
Save Recovery File: Enable or disable automatic file saving bychecking/unchecking this option.
XX Minutes: Choose how often your Scrapbook meeting file will be automaticallysaved by changing the number of minutes. The default file saving setting is every 5minutes.

p103
© 2011 Luidia, Incorporated
Supported File TypesHelp Main Page
Supported File TypesSupported file formats for Save As and Export from the File Menu.
Scrapbook File (*.esb)
Capture File (*.wbd)
PDF (*.PDF)
HTML (*.HTM)
Bitmap (*.BMP)
JPEG (*.JPG)
TIFF (*.TIF)
PNG (*.PNG)

p104
© 2011 Luidia, Incorporated
Shared MeetingsHelp Main Page
Shared MeetingsWhat is a Shared Meeting?
Hosting/Sharing a Meeting
Join a Meeting
Sending an Invitation
Accepting an Email Invitation
Proxy Server Setup
View Participants
Adding a Meeting Server

p105
© 2011 Luidia, Incorporated
What is a Shared Meeting?Help Main Page
What is a Shared Meeting?
A Shared Scrapbook Meeting is a meeting that is broadcast over your local intranet orover the Internet.
At one location, the meeting host uses the interactive system (software and hardware) tobroadcast a meeting over the network (see Hosting/Sharing a Meeting). Remote participantsuse the interactive software or a Web browser to log into the meeting (see Join a Meeting).
The meeting is held in real time, which means that remote participants can see the notesand annotations as they are created. The meeting host can also allow participants the optionto add notes that can be seen by all other meeting participants, including the host.
To allow remote participants to access your shared meeting, the meeting server must belocated on the Internet. Luidia currently hosts a meeting server that may be used by anyeBeam-enabled interactive system user.

p106
© 2011 Luidia, Incorporated
Hosting/Sharing a MeetingHelp Main Page
Hosting/Sharing a Meeting
The following explains how to host/share a meeting over your local intranet or theInternet.
To share a meeting, you must be connected to the interactive hardware. Also, if yournetwork uses a proxy server, see Proxy Server Setup.
You can only host one shared meeting at any time.
Hosting A Shared Meeting
Leaving A Shared Meeting
For meeting host specific tools, see Meeting Host Tools.
Hosting a Shared Meeting
1. Choose Sharing > Share/Join Meeting, then select the Share icon. The MeetingInformation dialog box displays.
2. Under Meeting Information, enter the following:
Meeting Name The meeting name is the name shown in the Join Meeting dialog box. The meeting nameis saved as the default name for all meetings, until you change it. The meeting name canbe up to 20 characters.
Publish Meeting Name Check the Publish meeting name box if you want the name of the meeting to be visibleto network users who are attempting to join the meeting. If you do not publish the name,guests will need to know the full meeting name beforehand and manually type it into the Join Meeting dialog box.
My Name Your name that is displayed to other participants.
Notes Any notes/comments you would like to include.
Password/Confirm/UsePassword
If a password is required, check the Use Password box and type the same password intoboth the Password and Confirm boxes.
The password must be between 6 and 20 characters long.
Send MeetingInvitation
Meeting invitations are e-mail invitations that are sent out using your computer's defaulte-mail client. If Send Meeting Invitation is checked, the Send Invitation dialog boxopens once you select the Share Meeting button. See Sending an Invitation for moreinformation.
Synchronize remoteparticipants whenmeeting starts
Synchronizes remote participants from the start of the meeting, so that all participants areviewing the same page. Synchronize is on by default. See Meeting Host Tools.
Allow participants tocontribute
Specifies at the start of the meeting whether or not remote participants are allowed tocontribute to the shared meeting. See Meeting Host Tools.
3. Under Server Information, select the server that will host the meeting.The pull-down menu lists the default server and any other servers you havepreviously added to your server list. See Adding a Meeting Server for moreinformation.
4. Notify guests of the meeting name, meeting time, and password, if required. See Sending an Invitation for more information.

p107
© 2011 Luidia, Incorporated
5. Select Share.
Your shared meeting is now available on the network using the specified meeting server.
Leaving A Shared MeetingTo leave a shared meeting at any time, select Sharing > Stop Sharing.
Important Note: When the meeting host ends a shared meeting, all participants aredisconnected from the meeting. As the meeting host, make sure the meeting is completelyover before attempting to close the meeting.

p108
© 2011 Luidia, Incorporated
Joining a MeetingHelp Main Page
Using Scrapbook to Join a Meeting1. Open Scrapbook.
2. Choose Sharing > Share/Join Meeting, then select the Join icon.
3. In the dialog box, under the Server heading, select the server that is hosting themeeting. If the pull-down menu does not include the meeting server you want, youcan manually type the server name. You can also add a server to your server list, sothat you can quickly select it on another occasion. See Adding a Meeting Server formore information.
4. Under Meeting Name enter the meeting title. If the meeting appears with a Lockedicon, enter the password. You can also select a meeting from the list of meetingsprovided. The list shows only active meetings that have been published. You can select Refresh to update this list at any time.
5. Under My Name enter your name.
6. In the Notes field, you may enter notes if you wish. Notes entered here are displayednext to your name in the Participants window. See View Participants for moreinformation.
7. Select Join.
To leave a meeting, choose Sharing > Leave Meeting.
Notes:
You can also join a meeting by going to http://www.e-beam.com and select Meetings.
When the meeting host ends a shared meeting, all participants are disconnected from themeeting. Once disconnected, participants can continue to print, save, annotate, andmodify their Scrapbook record of the meeting.
Desktop Tools, Desktop Annotation Tools, and Scrapbook Tools are available only whenthe interactive hardware is detected. If you have joined a meeting through Scrapbookand would like to annotate, you can access the Standard Annotation Toolbar.

p109
© 2011 Luidia, Incorporated
Sending an InvitationHelp Main Page
Sending an InvitationYou can invite others to a shared meeting by sending an e-mail invitation that contains alink or URL to the meeting. In order to send email invitations:1. In the Share Meeting dialog box, check Send Meeting Invitation . If you're already
sharing your meeting, you can go to Sharing > Send Invitation. 2. The Select meeting invitation language dialog box opens. Select the language to be
used for the e-mail invitation and then select Continue. At this point, your e-mailprogram might ask you to select the e-mail profile to be used.
3. A new e-mail with the Meeting Request information opens. Enter the e-mail addressesof the recipients and select Send.
The e-mail invitation includes a link for downloading the latest software and links to enablethe user to join the meeting via their Web browser or the software.
Note: Remote participants cannot send out invitations.

p110
© 2011 Luidia, Incorporated
Accepting an Email InvitationHelp Main Page
Accepting an Email InvitationYou can accept an e-mail invitation in one of the following ways: Double click the HTTP link in the email invitation to automatically launch the meeting in
your browser or copy and paste the link into your web browser. When the meeting loginscreen appears, select the Join button.
In Scrapbook, select the Join button, and manually fill in all of the meeting fields usinginformation provided by the invitation.
See Sending an Invitation for more information.

p111
© 2011 Luidia, Incorporated
Proxy Server SetupHelp Main Page
Proxy Server SetupIf your company uses a proxy server, your computer will not be able to access meetingsover the Internet server (which is outside your company’s firewall) until you enable theproxy server and enter the proxy server settings.
The Preferences dialog box gives you a place to enter settings for an HTTP proxy server.Proxy servers, which act as intermediaries between individual workstations and theInternet, provide security and other administrative functions for companies that use theInternet.
Setting up a proxy server:
1. Choose Scrapbook > Preferences to open the Scrapbook Preferences dialog box.2. Select the Sharing tab.3. Choose Edit Proxy Settings.
You have several options for setting up the proxy server:
Don't Use Proxy Selecting this option indicates that your network does not use a proxy server.
Use system proxy configuration Selecting this option indicates that your computer should use the proxy serversettings previously set up for your computer.
Use manual proxy configuration Selecting this option enables the IP address and Port boxes.
To manually set up the proxy server configuration:
1. Enter the IP address or DNS name of the proxy server.
2. Enter the Port number of the proxy server.
Or to manually set up basic authentication:
1. Enter your User ID.
2. Enter your Password.

p112
© 2011 Luidia, Incorporated
View Participants
Help Main Page
View Participants
View Participants allows you to see information about every participant logged into ashared meeting. To open the View Participants window while participating in a shared meeting, chooseSharing > Participant Window .
The Participants window lists the following information for participants logged into themeeting. Note: Participants logged in through the web viewer are not shown in theParticipants window.
ParticipantName
The name of the participant as entered in the My Name text box in the Join Meeting dialog box.
Interactive/View Only
Write permission is displayed by an icon. When the participant has permission to annotate the meeting,a pen icon is displayed. When the participant does not have permission to annotate the meeting, thepen icon is displayed w ith a line through it.
ConnectedAt
Displays the time the participant connected to the meeting.
IP Address Displays the participant's IP Address.
Notes Displays any notes entered into the Notes field in either the Share Meeting or Join Meeting dialog box.
Meeting Host Tools
The following tools are available only to the meeting host (the person who set up the sharedmeeting).
Set ViewOnly/Interactive
The meeting host can set a participant status to View Only or Interactive. An Interactiveparticipant is able to annotate the page. A view only participant is only able to view thepage. To set a participant status to View Only or Interactive, select the participant in theView Participants window, and then select the Set View Only/Interactive button.
DismissParticipant(s)
Dismiss Participant allows the meeting host to disconnect a participant from the meeting.To dismiss a participant from the meeting, select the participant in the View Participantswindow, and then select the Dismiss Participant button.
SynchronizeParticipants
If the meeting host has selected Synchronize Participants, remote participants are onlyable to view the Page that the host is view ing. However, remote participants are still ableto annotate the page. Synchronize is on by default.

p113
© 2011 Luidia, Incorporated
Adding a Meeting ServerHelp Main Page
Adding a Meeting Server
When you share or join a meeting, you must choose a meeting server. You can enter theserver information each time, or you can create a list of frequently used servers and selectfrom this list whenever you share or join a meeting.
To add a meeting server to your list:
1. Choose Sharing > Join, then select either the Share or Join icon.
2. In the dialog window, under Server Information/Server, select the server buttonnext to the server pull-down list.
3. Select the Add button. A new Meeting Server dialog box opens. Note: As an alternative, it is possible to search your local intranet for meeting serversby selecting the Search button.
4. Enter the server name, the DNS name or IP address of the server you want to add toyour list, and the port number. Note: The default port number is 80.
5. Select OK.
The new server is added to the meeting servers list.

p114
© 2011 Luidia, Incorporated
PowerPoint/Keynote PresentationsHelp Main Page
PowerPoint/Keynote PresentationsStarting/Ending a PowerPoint Slide Show
Starting/Ending a Keynote Slideshow
Slideshow Tools Palette

p115
© 2011 Luidia, Incorporated
Starting/Ending a PowerPoint Slide Show
Help Main Page
Starting/Ending a PowerPoint Slide Show
The integrated PowerPoint Slide Show features allow the user to view, navigate andannotate a PowerPoint presentation, and to then save those updated PowerPoint slides asScrapbook pages.
Starting a PowerPoint Slide ShowMake sure that your eBeam software is active. From within PowerPoint, select a PowerPointpresentation to open. Use one of the following methods to start a slide show of your open PowerPoint presentation:
1. Click the Slide Show button from the PowerPoint Toolbar.2. Control + click on the PowerPoint presentation and choose View Slide Show .3. From Powerpoint select Slide Show > View Slide Show .
The Desktop Tools Palette changes to the Slideshow Tools Palette and you can beginnavigating and annotating your PowerPoint slide show.
Ending a PowerPoint Slide ShowEnd the PowerPoint slide show by selecting the Exit Slideshow Presentation Tool fromthe Slideshow Tools Palette .

p116
© 2011 Luidia, Incorporated
Starting/Ending a Keynote SlideshowHelp Main Page
Starting/Ending a Keynote Slideshow
The integrated Keynote Slideshow features allow the user to view, navigate and annotate aKeynote slideshow and to then save those annotations as Scrapbook pages.
Setting Keynote PreferencesBefore opening a Keynote presentation with eBeam Education, you must first set a fewKeynote preferences.
From within Keynote, select Preferences from the Keynote menu. From the GeneralPreferences dialog box, select Slideshow. Set the following two preferences:
If available, select Allow Exposé, Dashboard and others to use screen .
Select Show pointer when the mouse moves .
Starting a Keynote SlideshowMake sure that your eBeam software is active. From within Keynote, select a Keynotepresentation to open. Use one of the following methods to start a slideshow of your open Keynote presentation:
4. Click the Play button from the Keynote Toolbar.5. Control + click on the Keynote presentation and choose Play Slideshow.6. From Keynote select Play > Play Slideshow .
The Desktop Tools Palette changes to the Slideshow Tools Palette and you can beginnavigating and annotating your Keynote slideshow.
Ending a Keynote SlideshowEnd the Keynote slideshow by selecting the Exit Slideshow Presentation Tool from theSlideshow Tools Palette.

p117
© 2011 Luidia, Incorporated
Index
- T -The eBeam Engage System
- E -eBeam Home Shortcuts 58eBeam Home 57Encyclopædia Britannica 99
- W -Wireless Keyboard
- A -About... 6Accepting an Email Invitation 110Adding a Meeting Server 113Adding and Removing Links to Folders 91Automatic File Saving 102
- B -Background Settings 83Bluetooth receiverBluetooth Wireless Configuration 17Button A
- C -Calibration 20command adhesive 9Contents 5
- D -Desktop Tools Palette
- E -eBeam Focus Document Camera 94eBeam Edge(TM) 12eBeam Focus Document Camera 94

p118
© 2011 Luidia, Incorporated
eBeam Classic 10Edit Menu 66Eraser Tool 34, 44
- F -Favorites 92File Menu 64Flickr 97
- G -Gallery 86
- H -Hardware Settings 24Help Menu 75Highlighter Tool 38, 48Hosting/Sharing a Meeting 106
- I -Insert Menu 72
- E -eBeam Education Menu on the Mac Menu Bar 21eBeam Education Palette 23eBeam Education Suite 4
- J -Joining a Meeting 108
- K -Keyboard Viewer 28
- M -magnetic mounting brackets 9meetingMinimum System Requirements 7Mouse Tool 35
- N -Navigating a PowerPoint Slideshow

p119
© 2011 Luidia, Incorporated
Navigating the Gallery 87
- P -Page Menu 70PenPen Tool 31, 41Playback 79Preferences 22Proxy Server Setup 111
- R -receiver mounting options 9Redo Tool 33
- S -Save Tool 36Scrapbook 29Scrapbook Elements 81Scrapbook Menu 63Scrapbook Menus 60Scrapbook Preferences 101Scrapbook Toolbar 76Scrapbook Tools PaletteScreen Annotation 27Screen Annotation Tools PaletteSelect Tool 45Sending an Invitation 109Shape Tool 42Shapes Tool 32Shared Meetings 104Sharing Menu 73Slide Back Tool 47Slide Forward Tool 43Snapshot 29Software Update 25Standard Annotation Toolbar 40suction cups 9Supported File Types 103System Setup 9
- T -The Interactive Stylus 15
- U -Undo Tool 37USB 9
- V -

p120
© 2011 Luidia, Incorporated
View Menu 68View Participants 112
- W -What is a Scrapbook Meeting? 61What is a Shared Meeting? 105Window Menu 74
- Y -Your Receiver is Not Detected 19