dynamics crm 2013: bring in your contacts
TRANSCRIPT

Import your contacts from wherever you store them:
• Spreadsheets
• Your phoneGettingStartedSeries
1

Microsoft Dynamics CRM 2013 & Microsoft Dynamics CRM Online Fall ’13


Column Name in spreadsheet
(spelling must match exactly)
First Name
Middle Name
Last Name
Business Phone
Mobile Phone
Job Title
Business Street
Business City
Business State
Business Postal Code
Business Country/Region
Email Address


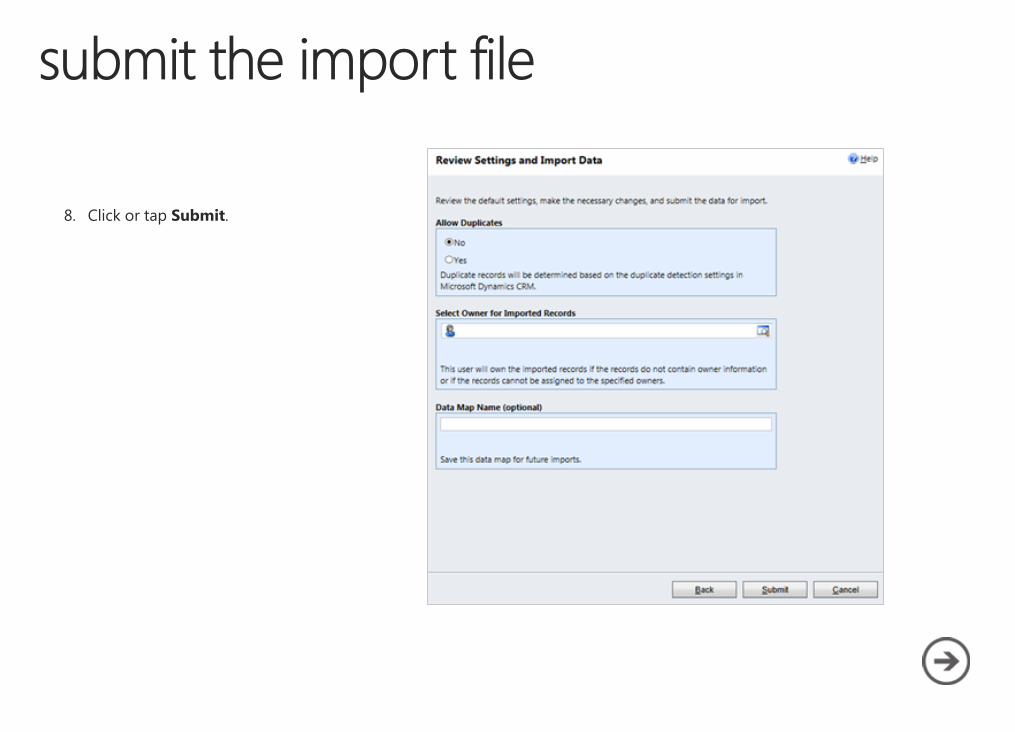
You’ll use the Import Data wizard to import your contacts.
1. If using the Microsoft Dynamics
CRM web app:
On the nav bar, click or tap
Microsoft Dynamics CRM >
Settings. Then click or tap Settings
> Data Management.
Click or tap Imports > Import Data.
–OR–
1. If using CRM for Outlook:
In the Navigation Pane, click or tap
Settings > System > Data
Management.
Click or tap Imports > Import Data.


.

9. To verify that the wizard was successful, click or tap Imports, then review the report. Otherwise, click or tap Finish.

After you run the wizard, check your list of contacts in Microsoft Dynamics CRM to make sure they imported correctly.
1. On the nav bar, click or tap Microsoft Dynamics CRM, and then click or tap your work area (either Sales, Service, or Marketing).
2. Click or tap Contacts.
3. Scroll through the contact list. Check that each person is listed, and verify the contents of the fields for accuracy.

Thanks for reading!
Did this eBook help you? Send us a quick note.
We’d love to know what you think.
Customer Center
Version 6.0.0
