docushare installation guide -...
TRANSCRIPT

DocuShareInstallation Guide

Publication date: February 2011
This document supports DocuShare Release 6.6.1
Prepared by:
Xerox CorporationDocuShare Business Unit3400 Hillview AvenuePalo Alto, California 94304USA
© 2011 Xerox Corporation. All rights reserved. Xerox®, DocuShare®, and Fuji Xerox® are trademarks of Xerox Corporation in the United States and/or other countries. All other trademarks are the property of their respective companies and are recognized as such.

DocuShare Installation Guide iii
Table of Contents
Chapter 1 Before you begin installationDocuShare license information . . . . . . . . . . . . . . . . . . . . . . . . . . . . . . . . . . . . . . . . . . . . . . . . . . . . . 1–1
DocuShare technical support . . . . . . . . . . . . . . . . . . . . . . . . . . . . . . . . . . . . . . . . . . . . . . . . . . . . . . 1–1
System requirements . . . . . . . . . . . . . . . . . . . . . . . . . . . . . . . . . . . . . . . . . . . . . . . . . . . . . . . . . . . . 1–2
Minimum server requirements . . . . . . . . . . . . . . . . . . . . . . . . . . . . . . . . . . . . . . . . . . . . . . . . . . 1–2
DocuShare Web Client requirements (all product editions) . . . . . . . . . . . . . . . . . . . . . . . . . . . . 1–3
DocuShare Education and DocuShare support . . . . . . . . . . . . . . . . . . . . . . . . . . . . . . . . . . . . . 1–3
DocuShare Enterprise supports . . . . . . . . . . . . . . . . . . . . . . . . . . . . . . . . . . . . . . . . . . . . . . . . . 1–4
Information required for DocuShare installation . . . . . . . . . . . . . . . . . . . . . . . . . . . . . . . . . . . . . . . . 1–5
Chapter 2 DocuShare on a Windows platformInstall DocuShare . . . . . . . . . . . . . . . . . . . . . . . . . . . . . . . . . . . . . . . . . . . . . . . . . . . . . . . . . . . . . . . 2–1
Uninstall DocuShare . . . . . . . . . . . . . . . . . . . . . . . . . . . . . . . . . . . . . . . . . . . . . . . . . . . . . . . . . . . . . 2–4
Uninstall SQL Server Express database . . . . . . . . . . . . . . . . . . . . . . . . . . . . . . . . . . . . . . . . . . 2–4
Upgrade DocuShare . . . . . . . . . . . . . . . . . . . . . . . . . . . . . . . . . . . . . . . . . . . . . . . . . . . . . . . . . . . . . 2–5
Update DocuShare software or add a language . . . . . . . . . . . . . . . . . . . . . . . . . . . . . . . . . . . . . . . . 2–9
Chapter 3 DocuShare on a Solaris platformInstall DocuShare . . . . . . . . . . . . . . . . . . . . . . . . . . . . . . . . . . . . . . . . . . . . . . . . . . . . . . . . . . . . . . . 3–1
Uninstall DocuShare . . . . . . . . . . . . . . . . . . . . . . . . . . . . . . . . . . . . . . . . . . . . . . . . . . . . . . . . . . . . . 3–4
Upgrade DocuShare . . . . . . . . . . . . . . . . . . . . . . . . . . . . . . . . . . . . . . . . . . . . . . . . . . . . . . . . . . . . . 3–5
Update DocuShare software or add a language . . . . . . . . . . . . . . . . . . . . . . . . . . . . . . . . . . . . . . . 3–10
Chapter 4 DocuShare on a Linux platformInstall DocuShare . . . . . . . . . . . . . . . . . . . . . . . . . . . . . . . . . . . . . . . . . . . . . . . . . . . . . . . . . . . . . . . 4–1
Uninstall DocuShare . . . . . . . . . . . . . . . . . . . . . . . . . . . . . . . . . . . . . . . . . . . . . . . . . . . . . . . . . . . . . 4–4
Upgrade DocuShare . . . . . . . . . . . . . . . . . . . . . . . . . . . . . . . . . . . . . . . . . . . . . . . . . . . . . . . . . . . . . 4–5
Update DocuShare software or add a language . . . . . . . . . . . . . . . . . . . . . . . . . . . . . . . . . . . . . . . 4–10
Chapter 5 Database configurationOracle . . . . . . . . . . . . . . . . . . . . . . . . . . . . . . . . . . . . . . . . . . . . . . . . . . . . . . . . . . . . . . . . . . . . . . . . 5–1
SQL Server . . . . . . . . . . . . . . . . . . . . . . . . . . . . . . . . . . . . . . . . . . . . . . . . . . . . . . . . . . . . . . . . . . . . 5–3
PostgreSQL. . . . . . . . . . . . . . . . . . . . . . . . . . . . . . . . . . . . . . . . . . . . . . . . . . . . . . . . . . . . . . . . . . . . 5–4
Windows platform . . . . . . . . . . . . . . . . . . . . . . . . . . . . . . . . . . . . . . . . . . . . . . . . . . . . . . . . . . . . 5–4
Solaris platform. . . . . . . . . . . . . . . . . . . . . . . . . . . . . . . . . . . . . . . . . . . . . . . . . . . . . . . . . . . . . . 5–4
Linux platform . . . . . . . . . . . . . . . . . . . . . . . . . . . . . . . . . . . . . . . . . . . . . . . . . . . . . . . . . . . . . . . 5–5
DB2 . . . . . . . . . . . . . . . . . . . . . . . . . . . . . . . . . . . . . . . . . . . . . . . . . . . . . . . . . . . . . . . . . . . . . . . . . . 5–6
Chapter 6 Web server bridgeCreate a bridge to an Apache web server. . . . . . . . . . . . . . . . . . . . . . . . . . . . . . . . . . . . . . . . . . . . . 6–1
Create a bridge to an IIS web server . . . . . . . . . . . . . . . . . . . . . . . . . . . . . . . . . . . . . . . . . . . . . . . . 6–2

Table of Contents
iv DocuShare Installation Guide
Chapter 7 Add-on installationOCR (Optical Character Recognition). . . . . . . . . . . . . . . . . . . . . . . . . . . . . . . . . . . . . . . . . . . . . . . . 7–1
Archive Server. . . . . . . . . . . . . . . . . . . . . . . . . . . . . . . . . . . . . . . . . . . . . . . . . . . . . . . . . . . . . . . . . . 7–3

DocuShare Installation Guide 1–1
Before you begin installation 1
This chapter contains the system requirements and installation information that you need to install or upgrade a DocuShare site. Before you begin an installation, read this chapter to make sure your server meets minimum requirements and that you are prepared with the information required by the install Wizard.
DocuShare license information• If your installation is a 30-day trial version and you want to continue use of DocuShare after the
trial expires, contact a Xerox DocuShare sales representative, call our sales team at 1-800-735-7749 (US and Canada), or email us at [email protected].
• If your installation is a non-trial version of DocuShare, if you are upgrading your site, or you have purchased an add-on, Xerox DocuShare or your DocuShare reseller will provide instructions for obtaining a license.
DocuShare technical supportYour site is covered by DocuShare technical phone support for 30 days from the date you obtained a license. If you require technical assistance, go to the Related Links on your site home page. To purchase extended support, contact DocuShare sales.

System requirements Before you begin installation
1–2 DocuShare Installation Guide
System requirementsNote: Before installing or upgrading, go to docushare.xerox.com for the latest system requirements.
Minimum server requirements
DocuShare and DocuShare Education
Intel or AMD platforms
Windows 2003 Server R2 or SP2 Standard and Enterprise (32 and 64 bit)
Windows 2008 Server SP2 Standard and Enterprise (32 and 64 bit)
Windows 2008 Server R2 SP1 Standard and Enterprise (64 bit)
Red Hat Enterprise Linux ES 5 (32 and 64 bit)
3.0 GHz Intel Pentium 4 or AMD Athlon MP processor or better
3 GB RAM or higher (32 bit) / 4 GB RAM or higher (64 bit)
20 GB of free disk space
Ethernet network interface
Sun SPARC platform
Solaris 10 with current patch clusters
UltraSPARC III processor or better
4 GB RAM or higher
20 GB of free disk space
Ethernet network interface
Virtual server
VMware ESX Server
An average use installation requires for each virtual server; a minimum of 4 GB virtual memory and 40 GB of free disk space for the operating system and DocuShare software.
If a database and stored documents are on the same virtual server; a minimum of 8 GB virtual memory and 200 GB of free disk space.
A high use installation requires for each virtual server; a 64 bit OS, 16 GB virtual memory, and 2 TB of free disk space.
DocuShare Enterprise
Intel or AMD platforms
Windows 2003 Server R2 or SP2 Enterprise (64 bit)
Windows 2008 Server R2 SP1 or SP2 Enterprise (64 bit)
Red Hat Enterprise Linux ES 5 (64 bit)
3.0 GHz Intel Pentium 4 or AMD Athlon MP processor or better

Before you begin installation System requirements
DocuShare Installation Guide 1–3
8 GB RAM or higher
40 GB of free disk space
Ethernet network interface
Sun SPARC Platform
Solaris 10 with current patch clusters
UltraSPARC III processor or better
8 GB RAM or higher
40 GB of free disk space
Ethernet network interface
Virtual Server
VMware ESX Server
An average use installation requires for each virtual server; a minimum of 4 GB virtual memory and 40 GB of free disk space for the operating system and DocuShare software.
If a database and stored documents are on the same virtual server; a minimum of 8 GB virtual memory and 200 GB of free disk space.
A high use installation requires for each virtual server; a 64 bit OS, 16 GB virtual memory, and 2 TB of free disk space.
DocuShare Web Client requirements (all product editions)Web browsers
Microsoft Internet Explorer 6 SP3, 7, or 8
Mozilla Firefox 3.5 or 3.6
Apple Safari 4.0 or 5.0
WebDAV
Windows XP Professional with Office 2003/2007/2010
Apple Mac OS X 10.6
DocuShare Education and DocuShare supportWeb servers
IIS 6 on Windows 2003 Server
IIS 7 or 7.5 on Windows 2008 Server (review the Windows installation to make sure that all of the IIS Application Development and Management Tool components are installed on the server)
SunONE/Sun Java System Web Server 6.1 on Solaris 10
Apache Web Server 2.2.9

System requirements Before you begin installation
1–4 DocuShare Installation Guide
Databases
IBM DB2 (for upgrading customers only)
Microsoft SQL Server 2005 SP3
Microsoft SQL Server 2005 Express Edition
Microsoft SQL Server 2008 R2 or SP2
Oracle 10.2 or 11.2
PostgreSQL 8.4.4
Note: DocuShare requires a database connector for the Microsoft SQL Server and Oracle databases.
LDAP
Sun Java Directory Server Enterprise Edition 6.x
Microsoft Active Directory
DocuShare Enterprise supportsWeb servers
IIS 6 on Windows 2003 Server
IIS 7 or 7.5 on Windows 2008 Server (review the Windows installation to make sure that all of the IIS Application Development and Management Tool components are installed on the server)
SunONE/Sun Java System Web Server 6.1 on Solaris 10
Apache Web Server 2.2.9
Databases
Microsoft SQL Server 2008 SP2 Enterprise Edition
Oracle 11.2
LDAP
Sun Java Directory Server Enterprise Edition 6.x
Microsoft Active Directory
Before you begin installation Information required for DocuShare installation
DocuShare Installation Guide 1–5
Information required for DocuShare installationThe install Wizard asks questions about how you want the site installed. You may accept the defaults, but there is some required information that you should have before starting the installation. After installation, the administrator of the site can change most of the information that was provided during installation.
Information that you need for an installation include:
Web server installation information:
• Windows platform: If you choose to use Microsoft IIS as your web server, load IIS during Windows Server software installation. Choose Tomcat interacts with IIS from the Wizard Web Server Interaction window. This choice installs the DocuShare Tomcat servlet engine and the software that connects the Tomcat engine to the IIS web server. If you choose to install Tomcat with IIS, you need to declare an IIS port number to use if you do not accept the default port number.
If you choose to install a web server other than IIS, you must follow the installation instructions for that web server. The web server must be installed and running before you begin the DocuShare software installation. In this case, choose Tomcat only from the Web Server Interaction window.
Caution: WebDAV does not work if your DocuShare site is set up to use IIS via the Tomcat/IIS bridge connection. Your site must be configured to use an Apache server. See the Web Server Bridge chapter of this guide for information on creating a bridge to an Apache server.
• Refer to the Web Server Bridge section of this guide for instruction on how to edit specific files to create a bridge between your web server and the Tomcat servlet.
Web server options:
• A fully qualified DNS hostname (such as sales.acme.com) or the IP address for the server. You cannot use aliases or WINS names.
• The server root (the default is docushare).
• Whether you want to run the server as HTTP or HTTPS. Choose HTTPS only if you configured your web server for HTTPS service.
Database installation information:
• If you choose to install the default Microsoft SQL Express database, you can accept the default database port number or enter one of your own.
• If you choose to install a different database, refer to the Database Configuration section of this guide for installation information.
Crucial ports and pathnames:
• A designated port for the Tomcat servlet (default port=8080)
• A designated port for the RMI server (default port=1099)
• A designated location for document repository
• A fully qualified DNS name for the SMTP mail server
• A designated port for the SMTP server (default port=25)
• A designated port for the Tomcat Web Bridge (default port=8009)

Information required for DocuShare installation Before you begin installation
1–6 DocuShare Installation Guide
• A designated port for the Tomcat Web servlet (default port=8005)
What type of DocuShare installation you want installed:
• DocuShare with FTP scan feature. This installation installs SMB scan service and an FTP scan service to receive documents. Make sure your site security rules allow the use of FTP.
• DocuShare without FTP scan feature. This installation installs only SMB scan service.
• DocuShare Archive Server. This installation installs the Archive Server software.
What type of user can access the site; Guest (anyone), User (only registered users), or Administrator (only registered administrators).
Who can create new user accounts on the site; Guests, Registered Users, or Administrators.
Who can create new group accounts on the site; Registered Users or Administrators.
The default user level that is assigned to all new user accounts; Read-only, DocuShare User, or CPX User. User levels are license dependent, so the CPX level is available only if your site is licensed for CPX users.
How do you want to display dates; US English (mm/dd/yy) or International English (dd/mm/yy).
A unique site admin password and the email address of the site administrator.
A location on your server where you want the Wizard to install the DocuShare software.
For Windows platforms, decide how you want to control stopping and starting DocuShare; either AutoStart or manually through the Services window.

DocuShare Installation Guide 2–1
DocuShare on a Windows platform 2
Installation logs
The DocuShare installer records all initial installation activity and stores it in InstallLog.txt in the Temp directory of the server. At a command prompt; go to %temp%, then enter >dir to display the logs in Temp. After the installer creates the DocuShare directory, it creates a second DocuShareInstallLog.txt file in the home directory; where it stores the remaining installation information. To save the initial DocuShareInstallLog file, start the installation process in a command prompt window by entering the command: docushare.exe -P docushareLog.cleanUp=false.
Install DocuShare
Before you begin1. Review Chapter 1 of this guide to make sure your server meets the minimum requirements for
DocuShare installation and that you have gathered the information required by the install Wizard.
2. If you have chosen not to install the DocuShare supplied web server, make sure you have installed and configured the web server of your choice, and that web server is running before you begin DocuShare installation.
3. If you have chosen not to install the DocuShare default database, make sure you have installed and configured the database of your choice, and that database is running before you begin DocuShare installation.
4. For an easier installation, we recommend that you install DocuShare on a clean server; one with newly installed operating system software.
5. If you have other instances of DocuShare running on the same server, make sure those instances are running before installing additional instances. Failure to do so can later result in indexing problems and in situations where stopping one instance of DocuShare stops all instances.

Install DocuShare DocuShare on a Windows platform
2–2 DocuShare Installation Guide
Start the installation
Caution: If you have other instances of DocuShare running on the same server, make sure those instances are running before installing additional instances.
1. Log into the server as a Windows server administrator.
2. Launch the DocuShare software install Wizard by doing one of the following:
• If you are installing from a product media: Insert the DocuShare media into the server drive. If the installer does not open automatically, open the media, locate and double-click setup.bat.
• If you downloaded DocuShare from the web: Download the file to a temporary directory on your server and unzip the file. Open the file, locate and double-click docushare.exe.
Be patient; it takes several minutes before the system displays the first install Wizard screen.
3. Follow the onscreen instructions; accept the defaults or enter your own configuration information.
4. Click Next to advance the installation or click Back to return to a previous page to make a change.
Before the installer loads DocuShare, the Wizard allows you to make changes to your choices. After installation, the administrator of the site has the authority to change most of the information that was provided during installation; using either the Admin UI or a command prompt window.
5. In the database configuration window, select a database option then click Next and enter the configuration information for your database.
If you selected the SQL Server Express database, enter a Database User Password (at least eight characters, with a mix of upper/lower case and numbers, select Named Instance to create a new database, and select Install SQL Server Express.
A reboot message appears, at the completion of reboot, restart the DocuShare installation.
6. In the Web Server Interaction window, select how you want the web server to connect with the Tomcat servlet engine.
• Select Tomcat/llS if you installed IIS as part of your operating system software and want to use IIS as your web server.
• Select Tomcat only if you installed a web server other than IIS. At the end of the installation, you will have to manually edit some files to connect the web server to the Tomcat servlet.
Note: If you later want to use IIS as your web server, refer to the Create a bridge to an IIS web server section of this guide.
7. In the Windows service setup window, select Install the DocuShare Windows Service.
Running DocuShare as a service on your Windows server is recommended. If your DocuShare server is in a clustered environment, do not select DocuShare Windows Service AutoStart; the clustered resource group will start DocuShare.
Finish the installation1. When the installation successfully completes, click Finish to close the installer.
2. Remove the product media from the server drive.
3. Reboot the server.

DocuShare on a Windows platform Install DocuShare
DocuShare Installation Guide 2–3
4. If you selected Tomcat only, refer to Web Server Bridge chapter of this guide to edit specific files to create a bridge between your web server and the Tomcat servlet.
5. After the server restarts; if you selected DocuShare with FTP scan feature, use the IIS Manager to disable the IIS FTP service.
6. If you did not set DocuShare to run as an autostart service, do one of the following:
• Enter <DSHome>\bin\start_docushare in a command prompt window to start DocuShare.
• In the Administrative Tool, in the Services application, select and start the DocuShare service.
DocuShare initial startup automatically updates the search indexes; allow five minutes before attempting to connect to the site through a browser.
7. If the site uses SSL and you selected IIS as your web server, follow these instructions to close the Tomcat servlet port to prevent unauthorized access to the Tomcat web servlet though that port.
a. Stop DocuShare by entering the command, stop_docushare.
b. Run the dssetup command and change the status of the Tomcat http port to off.
c. Start DocuShare by entering the command, start_docushare.
d. Reboot the system if you are using IIS.
License the site1. Use a browser to connect to your newly installed site.
• The default URL is http://<fully qualified DNS name>:8080/docushare.
• If DocuShare was installed in the home directory on your web site, the URL is:http://<fully qualified DNS name>:<port>/
• If DocuShare was installed in a subdirectory on your web site, the URL is:http://<fully qualified DNS name>:<port>/virtual web directory name/
• If you installed IIS on your server, then the :<port> component of the URL is not used. For example: http://<fully qualified DNS name>/docushare
• If you installed only Tomcat on your server, then the :<port> component of the URL is 8080 (default).
• If you changed the server root to root during the installation, the /docushare (default) component of the URL is not required. For example, http://<fully qualified DNS name> or http://<fully qualified DNS name>:8080
2. Use the admin password you set during installation and log into the site as admin.
3. On the navigation bar, click Admin Home.
4. From the Administration menu, click Site Management | License.
5. On the License page, locate and write down the Host ID number exactly as displayed.
6. Follow the instructions that Xerox DocuShare or your DocuShare reseller provided to obtain a site license string.
7. When you have the license string, return to the Site Management | License page and enter the string in the License field.
8. Refer to the Administrator Guide for information on post-installation site configuration, such as setting up your site to use SSL.

Uninstall DocuShare DocuShare on a Windows platform
2–4 DocuShare Installation Guide
Uninstall DocuShareIf you select to retain the content store, the uninstall Wizard does not remove the DocuShare directory that includes your DocuShare repository content. To be safe, before uninstalling DocuShare move the repository content to another storage media by using the DocuShare command line utility, dsexport. Refer to the DocuShare Command Line Utilities Guide for details.
Uninstall removes all installed language packs.
Caution: The DocuShare uninstaller only removes DocuShare, not the installed database. You should back up data for all Windows applications sharing the database. If you are using the SQL Server Express database, back up all data to a secure location.
To uninstall DocuShare:
1. In Administrative Tools, select and open the Services application.
2. Select DocuShare, and then select STOP the service.
3. In the Control Panel, select and open the Add/Remove application.
4. Scroll and select DocuShare, click Remove, and then follow the onscreen instructions.
5. After Add/Remove uninstalls DocuShare, manually delete the directory where DocuShare was installed.
Uninstall SQL Server Express databaseThe uninstall Wizard does not remove the installed SQL Server Express database. After you have uninstalled and removed all DocuShare files, follow this procedure to remove the SQL Server Express database files.
Note: Before you begin, refer to the Microsoft website for any updated uninstall instructions.
1. If you have not done so already, back up all data in the database to a secure location.
2. In the Control Panel, select and open the Add/Remove application.
3. Select Microsoft SQL Server 2005, then click Remove.
4. The Component Selection page appears; select Remove SQL Server 2005 instance components.
5. Select Workstation Components.
6. The Confirmation page appears, listing the components to remove.
7. Click Finish to complete the SQL Server Express uninstall.
8. Then the process has completed, you must now remove the SQL Native Client.
9. In the Control Panel, select and open the Add/Remove application.
10. Select Microsoft SQL Native Client, then click Remove.
11. A window appears asking you to confirm the removal of the SQL Native Client, click Yes.
The SQL Server Express software and Native Client are removed from your drive.

DocuShare on a Windows platform Upgrade DocuShare
DocuShare Installation Guide 2–5
Upgrade DocuShareA DocuShare upgrade utility is included with the software install Wizard. The utility can take sites as low as v5.0.3 and upgrade them to the current version of DocuShare.
Installation logs
The DocuShare installer records all initial installation activity and stores it in DocuShareInstallLog.txt in the C:..\Temp directory of your server. After the installer creates the DocuShare directory, it creates a second DocuShareInstallLog.txt file in the home directory where it stores the remaining installation data. To save the initial DocuShareInstallLog file, start the installation process in a command prompt window by entering the command: docushare.exe -P docushareLog.cleanUp=false
Before you start the upgrade procedure A day prior to upgrading the site, inform users that the site will be down
1. Go to Site Management l Site Operations.
2. In the Admin Message field, enter a message telling users when the site will be unavailable and for how long; then select Yes in the Show Admin Message field.
3. Click Apply.
Review the information required for DocuShare software installation presented in Chapter 1. Record all of your current configuration settings so you can enter them in the upgrade Wizard windows.
From the Administration menu, click Site Management | License. On the License page, locate and write down the Host ID number of the server.
Stop all automated or programmatically generated activities; especially those that use the Content Intake Manager, Content Rules, or Scan to DocuShare services.
Close site access
1. Log into the DocuShare site as admin.
2. Go to Site Management l Access Policies.
3. Set the Site Access Authority to Administrator, then click Apply.
4. Go to Site Management l Site Operations.
5. In the Admin Message field, enter a message telling users that the site is going down in ten minutes, select Yes in the Show Admin Message field, then click Apply.
6. After ten minutes, enter the message DocuShare is currently in read-only mode in the Admin Message field.
7. In the System Mode field, select Read Only.
8. In the Show Admin Message field select Yes.
9. Click Apply.
Backup the IDOL database
1. Make sure the target directory exists and is empty before starting backup. The target directory is represented as <exportdir> in the command.
2. Run the command idoltool.bat -s export <exportdir>.
Backup the site database

Upgrade DocuShare DocuShare on a Windows platform
2–6 DocuShare Installation Guide
1. In your database server manager, stop the database.
2. Perform a system backup of your DocuShare site.
3. When the backup is finished, start the database.
The database must be running for the DocuShare Installer to upgrade the database schema.
4. If you are using a Microsoft SQL Server database, run exec sp_fulltext_database enable on the server to enable full text search.
Clear the event queue
1. Go to Site Management l Site Operations.
2. In the System Mode field, select Read Write and select No in the Show Admin Message field; then click Apply.
3. Go to Services and Components | Subscription.
4. Set the Weekly Notification Day to the current day of the week, and set the Weekly Notification Hour and Weekly Notification Minute to five minutes from the current time; then click Apply.
5. Wait ten minutes before proceeding with the upgrade.
This allows the DocuShare notification service to send all subscribed notifications and clear the event queue. Failure to clear the event queue before starting the upgrade results in the lost of all events waiting in the queue.
Stop DocuShare
1. Log into the server as a Windows server administrator.
2. In the Administrator Tool, select and open the Services application, select DocuShare and stop the service.
Close all Windows applications that are currently open on the server.
Start the upgrade1. Launch the DocuShare software install Wizard by doing one of the following:
• If you are installing from a product media: Insert the DocuShare media into the server drive. If the installer does not open automatically, open the media, locate and double-click setup.bat.
• If you downloaded DocuShare from the web: Download the file to a temporary directory on your server and unzip the file. Open the file, locate and double-click docushare.exe.
Note: If you want the installer to save all configuration and upgrade data, start the upgrade in a command prompt window by entering the command line: docushare.exe -P docushareLog.cleanUp=false.
2. When the Upgrade Option window appears, select Upgrade.
Be patient; it takes several minutes for the system to load and start the installer.
3. Follow the onscreen instructions; accept the defaults or enter your own configuration information.
Finish the upgrade1. When the upgrade successfully completes, click Finish to close the installer.
2. Reboot the server.

DocuShare on a Windows platform Upgrade DocuShare
DocuShare Installation Guide 2–7
3. After the server restarts, if you did not set DocuShare to run as an autostart service, do one of the following:
• Enter <DSHome>\bin\start_docushare in a command prompt window to start DocuShare.
• In the Administrative Tool, in the Services application, select and start the DocuShare service.
4. If your DocuShare site uses LDAP over a secure SSL channel, you need to import the SSL certificate into the newly installed dstrust store. Instructions for importing the LDAP SSL Certificate are in the LDAP Active Directory Guide that is located on the Help page of your DocuShare site.
5. The DocuShare Installer stops the IIS service during the upgrade and restarts it at completion. If the installer does not restart the IIS service, open a command prompt window and enter: net start w3svc.
License the site1. Use a browser to connect to your newly upgraded site and login as admin.
2. From the Administration menu, click Site Management | License.
3. On the License page, locate and write down the Host ID number exactly as displayed.
4. Follow the instructions that Xerox DocuShare or your DocuShare reseller provided to obtain a site license string.
5. When you have the license string, return to the Site Management | License page and enter the string in the License field. Do not use your old site license nor a trial license.
Post upgrade tasks1. Reset user levels for all user accounts on your site. If you upgraded from DocuShare 5.x, all user
accounts are now set to the CPX level. You must now activate and set each account to either Read-Only or DocuShare user levels as appropriate.
Refer to the DocuShare Administrator Guide for information on user levels and changing user levels through Account Management l Users l Change User Level.
2. Run database optimization as defined in the DocuShare Administrator Guide database optimization procedures.
3. To access customized VDF and image files, the upgrade installer relocates these files to <DSHome>\DSUpgrade\BackUpDir.0\amber.jar and <DSHome>\DSUpgrade\BackUpDir.0\root.jar.
Note: VDF files customized to work with DocuShare 5.x or older are not upgraded by the installer and do not work with this release of DocuShare. Refer to the DocuShare VDF Reference Guide to migrate your custom VDFs to the current DocuShare release.
4. If you changed the Subscription Notification settings to clear the event queue, go to the Services and Components | Subscription administration page and return the Weekly Notification Day, Hour, and Minute to their values prior to the upgrade.
5. Go to Site Management l Access Policies.
6. Return the Site Access Authority to the pre-upgrade setting, then click Apply.
Index the site
After completing DocuShare upgrade and licensing, index the site and verify that index is working correctly.

Upgrade DocuShare DocuShare on a Windows platform
2–8 DocuShare Installation Guide
Note: If you are upgrading from version 6.5.3, some of the steps below are not required. The steps not required are indicated.
1. Stop DocuShare.
2. In a command window, run <DSHome>\bin\idoltool -s resetserver all y. (Not required for upgrades from 6.5.3.)
Caution: The idoltool -s resetserver all y command clears the IDOL search indexes. Run this immediately before running dsindex index_all.
3. Optional: To increase the allocation of available memory for IDOL on 64-bit Windows, run the appropriate idolsetup.bat command according to the amount of RAM on the server.
• 4–8 GB RAM: <DSHome>\bin\idolsetup.bat ..\config\idol_default.config
• 8–16 GB RAM: <DSHome>\bin\idolsetup.bat ..\config\idol_medium.config
• 16–32 GB RAM: <DSHome>\bin\idolsetup.bat ..\config\idol_large.config
• 32+ GB RAM: <DSHome>\bin\idolsetup.bat ..\config\idol_unlimited.config
Note: At least 6 GB of RAM is recommended on a 64-bit Windows server.
4. Start DocuShare.
5. Run <DSHome>\bin\dsindex index_all. (Not required for upgrades from 6.5.3.)
6. Review the recoverIndex.log file written to <DSHome>\logs directory. The file lists the handles of the documents that could not be content indexed. (Not required for upgrades from 6.5.3.)
7. Run <DSHome>\bin\verifyIndex.bat to verify that the documents in the repository have been indexed. (Not required for upgrades from 6.5.3.)
8. If DocuShare was configured for LDAP, continue with the following steps. If your site does not use LDAP, you are finished with this procedure.
9. If DocuShare was configured for LDAP; start DocuShare, log into DocuShare as admin and go to Admin Home.
10. From the Administration menu, click Account Management | LDAP Accounts | Bind Group.
Note: These last two steps invoke a schema update to replace incorrect schema information with up-to-date attribute values from the LDAP server.
11. On the Bind Group page, set the Keywords LDAP Attribute to cn. Click Apply.
12. On the same Bind Group page, remove the Keywords LDAP Attribute entry. Click Apply.
DocuShare on a Windows platform Update DocuShare software or add a language
DocuShare Installation Guide 2–9
Update DocuShare software or add a languagePatches, updates, and additional languages for DocuShare software are available, and are easily installed using the DocuShare install Wizard.
Before you install software updates or language packs, make sure the selected update is compatible with your version of DocuShare. Go to About DocuShare, on your site home page or in the Administration Menu, to locate your version number.
If you are installing a language, go to Site Management | License. If the language is not listed under Active Language, you must obtain a new license string to use the new language.
If documentation is supplied with an update, read the documentation before starting the installation.
Install a software update or a language1. Log into the DocuShare server as a Windows administrator.
2. In the Windows Administrator Tool, select and open the Services application, select DocuShare and stop the service.
3. Launch the DocuShare software update Wizard by doing one of the following:
• If you are installing from a product media: Insert the DocuShare media into the server drive. If the installer does not open automatically, open the media, locate and double-click dsUpdate.exe.
• If you downloaded software from the web: Download the file to a temporary directory on your server and unzip the file. Open the file, locate and double-click dsUpdate.exe.
Be patient; it takes a few minutes to load and start the installer.
4. Once the install Wizard begins, follow the onscreen instructions. Click Next to proceed or click Back to return to a previous screen.
5. When asked to select an update, check the appropriate update or language and browse to the location of the corresponding update jar file, and then click Add Update.
6. When the installation successfully completes, click Finish to close the installer.
7. In the Windows Administrator Tool, select and open the Services application, select DocuShare and start the service.
8. Use a browser to connect to your site, and log in as an administrator.
9. If your specific update requires a new license (as in the case of adding a language) go to Site Management | License.
10. On the License page, locate and write down the Host ID number exactly as displayed.
11. Follow the instructions that Xerox DocuShare or your DocuShare reseller provided to obtain a site license string.
12. When you have the license string, return to the Site Management | License page and enter the string in the License field.
13. If your specific update was a language installation, refer to the Administrator Guide for information on enabling and selecting default languages for your site.

Update DocuShare software or add a language DocuShare on a Windows platform
2–10 DocuShare Installation Guide

DocuShare Installation Guide 3–1
DocuShare on a Solaris platform 3
Installation logs
The DocuShare installer records all initial installation activity and stores it in DocuShareInstallLog.txt in the /var/tmp directory of your server. After the installer has created the DocuShare directory, it creates a second DocuShareInstallLog.txt file in the home directory; where it stores the remaining installation information. To save the initial DocuShareInstallLog file, start the installation process in a command prompt window by entering the command: ./docushare -P docushareLog.cleanUp=false.
Install DocuShare
Before you begin1. Review Chapter 1 of this guide to make sure your server meets the minimum requirements for
DocuShare installation and that you have gathered the information required by the install Wizard.
2. If you have chosen not to install the DocuShare supplied web server, make sure you have installed and configured the web server of your choice, and that web server is running before you begin DocuShare installation.
3. If you have chosen not to install the DocuShare supplied database, make sure you have installed and configured the database of your choice, and that database is running before you begin DocuShare installation.
4. For an easier installation, we recommend that you install DocuShare on a clean server; one with newly installed operating system software.
5. If you have other instances of DocuShare running on the same server, make sure those instances are running before installing additional instances. Failure to do so can later result in indexing problems and in situations where stopping one instance of DocuShare stops all instances.
Install DocuShare DocuShare on a Solaris platform
3–2 DocuShare Installation Guide
Start the installation
Caution: If you have other instances of DocuShare running on the same server, make sure those instances are running before installing additional instances.
1. Log into the server as a UNIX server administrator (root).
2. Launch the DocuShare software install Wizard by doing one of the following:
• If you are installing from a product media: Insert the DocuShare media into the server drive. If necessary, mount the media as root. Open the media. In the root directory, locate and double-click docushare.
• If you downloaded DocuShare from the web: Download the file to a temporary directory on your server and extract the tar file. Then, in a command prompt window go to <DSHome>/<Solaris>/DocuShare and enter docushare.
Be patient; it takes several minutes before the system displays the first install Wizard screen.
3. Follow the onscreen instructions; accept the defaults or enter your own configuration information.
4. Click Next to advance the installation or click Back to return to a previous page to make a change.
Before the installer loads DocuShare, the Wizard allows you to make changes to your choices. After installation, the administrator of the site has the authority to change most of the information that was provided during installation; using either the Admin UI or a command prompt window.
5. In the database configuration window, select a database option then click Next and enter the configuration information for your database.
If you selected PostgreSQL, enter the Database User Password and select Create Database.
6. In the Web Server Interaction window, select Tomcat only.
7. In the UNIX Account Parameters window, enter the appropriate information.
The default is nobody, which allows any user with an UNIX account to login and start DocuShare.
If you installed scan to DocuShare, you must be logged in as root to start DocuShare and to enable the scan feature. For non-root users to enable the scan to DocuShare feature, the FTP server default port (port 21) must be changed to another port that is above port 1024 (ftpd.conf) and the Xerox Work Centres used for scanning must be able to specify this port.
Finish the installation1. When the installation successfully completes, click Finish to close the installer.
2. Remove the product media from the server drive.
3. Set your UNIX virtual display buffer to operate within an X Windows system.
DocuShare operates in an X Windows environment; set the display buffer to use all of the DocuShare features. In a headless system, an error occurs if the display buffer is not correctly set.
4. In a command prompt window, cd to <DSHome>/bin, then enter ./start_docushare.sh to start DocuShare.
At initial startup, DocuShare automatically updates the search indexes. Wait five minutes before you access the site with a browser.

DocuShare on a Solaris platform Install DocuShare
DocuShare Installation Guide 3–3
Note: To prevent the Search Service from stopping when you exit the shell, use either the start_docushare.sh bg or the start_docushare.sh bg & command to start DocuShare in background mode.
5. If you installed Scan-to-DocuShare via FTP, disable the UNIX FTP service on your UNIX system.
Note: If Scan-via-FTP is installed, you must be root to start DocuShare to enable the scan feature. To enable the Scan-via-FTP feature by non-root users, the FTP server default port (port 21) must be modified to another port above port 1024 (ftpd.conf) and the Xerox Work Centres must be able to specify this port.
a. Log into the server as a UNIX server administrator (root).
b. From the Start menu, select Service Configuration.
c. In the Service Configuration window, de-select wu-ftpd.
License the site1. Use a browser to connect to your newly installed site.
• The default URL is http://<fully qualified DNS name>:8080/docushare.
• If DocuShare was installed in the home directory on your web site, the URL is:http://<fully qualified DNS name>:<port>/
• If DocuShare was installed in a subdirectory on your web site, the URL is:http://<fully qualified DNS name>:<port>/<subdirectory_path>/
• If you installed Apache on your server, then the :<port> component of the URL is not used. For example: http://<fully qualified DNS name>/docushare
• If you installed only Tomcat on your server, then the :<port> component of the URL is 8080 (default).
2. Use the admin password you set during installation and log into the site as admin.
3. On the navigation bar, click Admin Home.
4. From the Administration menu, click Site Management | License.
5. On the License page, locate and write down the Host ID exactly as displayed.
6. Follow the instructions that Xerox DocuShare or your DocuShare reseller provided to obtain a site license string.
7. When you have the license string, return to the Site Management | License page and enter the string in the License field.
8. Refer to the Administrator Guide for information on post-installation site configuration, such as setting up your site to use SSL.

Uninstall DocuShare DocuShare on a Solaris platform
3–4 DocuShare Installation Guide
Uninstall DocuShareUninstall does not remove the DocuShare directory that includes your DocuShare repository content. To be safe, before uninstalling DocuShare move the repository content to another storage media by using the DocuShare command line utility, dsexport. Refer to the DocuShare Command Line Utilities Guide for details.
Uninstall removes all installed language packs.
Caution: The DocuShare uninstaller only removes DocuShare, not the installed database. You should backup data for all Solaris applications sharing the database.
To uninstall DocuShare:
1. Log into the server as a UNIX server administrator (root).
2. Stop the DocuShare server by doing the following:
a. Open a command prompt window
b. Change the directory to <DSHome>/bin
c. Enter ./stop_docushare.sh
3. Change the directory to <DSHome>/_uninst.
4. Enter ./doc_uninstall, then follow the onscreen instructions.
5. After doc_uninstall uninstalls DocuShare, manually delete the directory where DocuShare was installed.

DocuShare on a Solaris platform Upgrade DocuShare
DocuShare Installation Guide 3–5
Upgrade DocuShareA DocuShare upgrade utility is included with the software install Wizard. The utility can take sites as low as v5.0.3 and upgrade them to the current version of DocuShare.
Installation logs
The DocuShare installer records all initial installation activity and stores it in DocuShareInstallLog.txt in the /var/tmp directory of your server. After the installer has created the DocuShare directory, it creates a second DocuShareInstallLog.txt file in the home directory where it stores the remaining installation information. To save the initial DocuShareInstallLog file, start the installation process in a command prompt window by entering the command: ./docushare -P docushareLog.cleanUp=false.
Before you start the upgrade procedure A day prior to upgrading the site, inform users that the site will be down
1. Go to Site Management l Site Operations.
2. In the Admin Message field, enter a message telling users when the site will be unavailable and for how long; then select Yes in the Show Admin Message field.
3. Click Apply.
Review the information required for DocuShare software installation presented in Chapter 1. Record all of your current configuration settings so you can enter them in the upgrade Wizard windows.
From the Administration menu, click Site Management | License. On the License page, locate and write down the Host ID number of the server.
Stop all automated or programmatically generated activities; especially those that use the Content Intake Manager, Content Rules, or Scan to DocuShare services.
Close site access
1. Log into the DocuShare site as admin.
2. Go to Site Management l Access Policies.
3. Set the Site Access Authority to Administrator, then click Apply.
4. Go to Site Management l Site Operations.
5. In the Admin Message field, enter a message telling users that the site is going down in ten minutes, select Yes in the Show Admin Message field, then click Apply.
6. After ten minutes, enter the message DocuShare is currently in read-only mode in the Admin Message field.
7. In the System Mode field, select Read Only.
8. In the Show Admin Message field select Yes.
9. Click Apply.
Backup the IDOL database
1. Make sure the target directory exists and is empty before starting backup. The target directory is represented as <exportdir> in the command.
2. Run the command idoltool.sh -s export <exportdir>.
Backup the site database

Upgrade DocuShare DocuShare on a Solaris platform
3–6 DocuShare Installation Guide
1. In your database server manager, stop the database.
2. Perform a system backup of your DocuShare site.
3. When the backup is finished, start the database.
The database must be running for the DocuShare Installer to upgrade the database schema.
4. If you are using a Microsoft SQL Server database, run exec sp_fulltext_database enable on the server to enable full text search.
Clear the event queue
1. Go to Site Management l Site Operations.
2. In the System Mode field, select Read Write and select No in the Show Admin Message field; then click Apply.
3. Go to Services and Components | Subscription.
4. Set the Weekly Notification Day to the current day of the week, and set the Weekly Notification Hour and Weekly Notification Minute to five minutes from the current time; then click Apply.
5. Wait ten minutes before proceeding with the upgrade.
This allows the DocuShare notification service to send all subscribed notifications and clear the event queue. Failure to clear the event queue before starting the upgrade results in the lost of all events waiting in the queue.
Stop DocuShare
1. Log into the server as a UNIX server administrator (root).
2. In a command prompt window, cd to <DSHome>/bin and enter ./dsservice.sh -shutdown DocuShare to stop the server.
Start the upgrade
To have DocuShare save all configuration and upgrade data, start the upgrade in a Command Prompt window by entering the command line: docushare.exe -P docushareLog.cleanUp=false
1. Log into the server as a UNIX server administrator (root).
2. Launch the DocuShare software install Wizard by doing one of the following:
• If you are installing from a product media: Insert the DocuShare media into the server drive. If necessary, mount the media as root. Open the media. In the root directory, locate and double-click docushare.
• If you downloaded DocuShare from the web: Download the file to a temporary directory on your server and extract the tar file. Then, in a command prompt window go to <DSHome>/<Solaris>/DocuShare and enter docushare.
3. When the Upgrade Option window appears, select Upgrade.
Be patient; it takes several minutes for the system to load and start the installer.
4. Follow the onscreen instructions; accept the defaults or enter your own configuration information.
5. If the Wizard detects that your current IDOL server is 32 bit, it will upgrade IDOL to the 64 bit version and prompt you to reindex the site after upgrading completes. Follow the Index the site procedure that is presented later in these upgrade instructions.
If the Wizard detects that your current IDOL server is 64 bit, it will silently upgrade IDOL to the latest 64 bit version, and you can skip the Index the site procedure.

DocuShare on a Solaris platform Upgrade DocuShare
DocuShare Installation Guide 3–7
Finish the upgrade1. When the upgrade successfully completes, click Finish to close the installer.
2. Remove the product media from the server drive.
3. Set your UNIX virtual display buffer to operate within an X Windows system.
DocuShare operates in an X Windows environment; set the display buffer to use all of the DocuShare features. In a headless system, an error occurs if the display buffer is not correctly set.
4. In a command prompt window, cd to <DSHome>/bin, then enter ./start_docushare.sh to start DocuShare.
At initial startup, DocuShare automatically updates the search indexes. Wait five minutes before you access the site with a browser.
Note: To prevent the Search Service from stopping when you exit the shell, use either the start_docushare.sh bg or the start_docushare.sh bg & command to start DocuShare in background mode.
5. If you installed Scan-to-DocuShare via FTP, disable the UNIX FTP service on your UNIX system.
Note: If Scan-via-FTP is installed, you must be root to start DocuShare to enable the scan feature. To enable the Scan-via-FTP feature by non-root users, the FTP server default port (port 21) must be modified to another port above port 1024 (ftpd.conf) and the Xerox Work Centres must be able to specify this port.
a. Log into the server as a UNIX server administrator (root).
b. From the Start menu, select Service Configuration.
c. In the Service Configuration window, de-select wu-ftpd.
6. If your DocuShare site uses LDAP over a secure SSL channel, you need to import the SSL certificate into the newly installed dsstrust store. Instructions for importing the LDAP SSL Certificate are in the LDAP Active Directory Guide that is located on the Help page of your DocuShare server.
License the site1. Use a browser to connect to your newly upgraded site and login as admin.
2. From the Administration menu, click Site Management | License.
3. On the License page, locate and write down the Host ID number exactly as displayed.
4. Follow the instructions that Xerox DocuShare or your DocuShare reseller provided to obtain a site license string.
5. When you have the license string, return to the Site Management | License page and enter the string in the License field. Do not use your old site license nor a trial license.
Post upgrade tasks1. Reset user levels for all user accounts on your site. If you upgraded from DocuShare 5.x, all user
accounts are now set to the CPX level. You must now activate and set each account to either Read-Only or DocuShare user levels as appropriate.
Refer to the DocuShare Administrator Guide for information on user levels and changing user levels through Account Management l Users l Change User Level.
2. Run database optimization as defined in the DocuShare Administrator Guide database optimization procedures.

Upgrade DocuShare DocuShare on a Solaris platform
3–8 DocuShare Installation Guide
3. To access customized VDF and image files, the upgrade installer relocates these files to <DSHome>\DSUpgrade\BackUpDir.0\amber.jar and <DSHome>\DSUpgrade\BackUpDir.0\root.jar.
Note: VDF files customized to work with DocuShare 5.x or older are not upgraded by the installer and do not work with this release of DocuShare. Refer to the DocuShare VDF Reference Guide to migrate your custom VDFs to the current DocuShare release.
4. If you changed the Subscription Notification settings to clear the event queue, go to the Services and Components | Subscription administration page and return the Weekly Notification Day, Hour, and Minute to their values prior to the upgrade.
5. Go to Site Management l Access Policies.
6. Return the Site Access Authority to the pre-upgrade setting, then click Apply.
Index the site
Note: If the Wizard detects that your current IDOL server is 32 bit, it will upgrade IDOL to the 64 bit version and prompt you to reindex the site after upgrading completes. If the Wizard detects that your current IDOL server is 64 bit, it will silently upgrade IDOL to the latest 64 bit version, and you can skip this procedure.
After completing DocuShare upgrade and licensing, index the site and verify that index is working correctly.
Note: If you are upgrading from version 6.5.3, some of the steps below are not required. The steps not required are indicated.
1. Stop DocuShare.
2. In a command window, run <DSHome>\bin\idoltool -s resetserver all y. (Not required for upgrades from 6.5.3.)
Caution: The idoltool -s resetserver all y command clears the IDOL search indexes. Run this immediately before running dsindex index_all.
3. Optional: To increase the allocation of available memory for IDOL on 64-bit Solaris, run the appropriate idolsetup.sh command according to the amount of RAM on the server.
• 4–8 GB RAM: <DSHome>\bin\idolsetup.sh ..\config\idol_default.config
• 8–16 GB RAM: <DSHome>\bin\idolsetup.sh ..\config\idol_medium.config
• 16–32 GB RAM: <DSHome>\bin\idolsetup.sh ..\config\idol_large.config
• 32+ GB RAM: <DSHome>\bin\idolsetup.sh ..\config\idol_unlimited.config
4. Start DocuShare.
5. Run <DSHome>\bin\dsindex index_all. (Not required for upgrades from 6.5.3.)
6. Review the recoverIndex.log file written to <DSHome>\logs directory. The file lists the handles of the documents that could not be content indexed. (Not required for upgrades from 6.5.3.)
7. Run <DSHome>\bin\verifyIndex.sh to verify that the documents in the repository have been indexed. (Not required for upgrades from 6.5.3.)
8. If DocuShare was configured for LDAP, continue with the following steps. If your site does not use LDAP, you are finished with this procedure.
DocuShare on a Solaris platform Upgrade DocuShare
DocuShare Installation Guide 3–9
9. If DocuShare was configured for LDAP; start DocuShare, log into DocuShare as admin and go to Admin Home.
10. From the Administration menu, click Account Management | LDAP Accounts | Bind Group.
Note: These last two steps invoke a schema update to replace incorrect schema information with up-to-date attribute values from the LDAP server.
11. On the Bind Group page, set the Keywords LDAP Attribute to cn. Click Apply.
12. On the same Bind Group page, remove the Keywords LDAP Attribute entry. Click Apply.

Update DocuShare software or add a language DocuShare on a Solaris platform
3–10 DocuShare Installation Guide
Update DocuShare software or add a languagePatches, updates, and additional languages for DocuShare software are available, and are easily installed using the DocuShare install Wizard.
Before you install software updates or additional languages, make sure the selected update is compatible with your version of DocuShare. Go to About DocuShare, on your site home page or in the Administration Menu, to locate your version number.
If you are installing a language, go to Site Management | License. If the language is not listed under Active Language, you must obtain a new license string to use the new language.
If documentation is supplied with an update, read the documentation before starting the installation.
Install a software update or a language1. Log into the server as a UNIX server administrator (root).
2. In a command prompt window, cd to <DSHome>/bin and enter ./dsservice.sh -shutdown DocuShare to stop the server.
3. If you are downloading software updates or a language package from the web, download the software to a temporary directory on your DocuShare server and unzip and extract the package.
If you are installing the update software or a language package from a CD, insert the CD into the server CD drive. If necessary, mount the CD as root.
4. In the software directory, open the Solaris directory.
5. In the Solaris directory, open the DocuShare directory and double-click dsUpdate to start the update installation Wizard. If you work from a command prompt window, cd to the DocuShare directory and run ./dsUpdate -console to start the installation.
Be patient; it takes a few minutes to load and start the installer.
6. Once the install Wizard begins, follow the onscreen instructions. Click Next to proceed or click Back to return to a previous screen.
7. When asked to select an update, check the appropriate update or language, and then click Add Update.
8. When the installation successfully completes, click Finish to close the installer.
9. In a command prompt window, cd to <DSHome>/bin, then enter ./start_docushare.sh to start DocuShare.
10. Use a browser to connect to your site, and log in as an administrator.
11. If your specific update requires a new license (as in the case of adding a language) go to Site Management | License.
12. On the License page, locate and write down the Host ID number exactly as displayed.
13. Follow the instructions that Xerox DocuShare or your DocuShare reseller provided to obtain a site license string.
14. When you have the license string, return to the Site Management | License page and enter the string in the License field.
15. If your specific update was a language installation, refer to the Administrator Guide for information on enabling and selecting default languages for your site.

DocuShare Installation Guide 4–1
DocuShare on a Linux platform 4
Installation logs
The DocuShare installer records all initial installation activity and stores it in DocuShareInstallLog.txt in the /tmp directory of your server. After the installer has created the DocuShare directory, it creates a second DocuShareInstallLog.txt file in the home directory; where it stores the remaining installation information. To save the initial DocuShareInstallLog file, start the installation process in a command prompt window by entering the command: ./docushare -P docushareLog.cleanUp=false.
Install DocuShare
Before you begin1. Inspect your operating system for, and install if missing, the following Linux software libraries:
• Compat-gcc-34-c++-3.4.6-4
• Compat-libgcc-296-2.96-138
• Compat-gcc-34-3.4.6-4
2. Review Chapter 1 of this guide to make sure your server meets the minimum requirements for DocuShare installation and that you have gathered the information required by the install Wizard.
3. If you have chosen not to install the DocuShare supplied web server, make sure you have installed and configured the web server of your choice, and that web server is running before you begin DocuShare installation.
4. If you have chosen not to install the DocuShare supplied database, make sure you have installed and configured the database of your choice, and that database is running before you begin DocuShare installation.
5. For an easier installation, we recommend that you install DocuShare on a clean server; one with newly installed operating system software.
6. If you have other instances of DocuShare running on the same server, make sure those instances are running before installing additional instances. Failure to do so can later result in indexing problems and in situations where stopping one instance of DocuShare stops all instances.

Install DocuShare DocuShare on a Linux platform
4–2 DocuShare Installation Guide
Start the installation
Caution: If you have other instances of DocuShare running on the same server, make sure those instances are running before installing additional instances.
1. Log into the server as a UNIX server administrator (root).
2. Launch the DocuShare software install Wizard by doing one of the following:
• If you are installing from a product media: Insert the DocuShare media into the server drive. If necessary, mount the media as root. Open the media. In the root directory, locate and double-click docushare.
• If you downloaded DocuShare from the web: Download the file to a temporary directory on your server, then unzip and extract the tar file. Then, in a command prompt window go to <DSHome>/<Linux>/DocuShare and enter docushare.
Be patient; it takes several minutes before the system displays the first install Wizard screen.
3. Follow the onscreen instructions; accept the defaults or enter your own configuration information.
4. Click Next to advance the installation or click Back to return to a previous page to make a change.
Before the installer loads DocuShare, the Wizard allows you to make changes to your choices. After installation, the administrator of the site has the authority to change most of the information that was provided during installation; using either the Admin UI or a command prompt window.
5. In the database configuration window, select a database option then click Next and enter the configuration information for your database.
If you selected PostgreSQL, enter the Database User Password and select Create Database.
6. In the Web Server Interaction window, select Tomcat only.
7. In the UNIX Account Parameters window, enter the appropriate information.
The default is nobody, which allows any user with an UNIX account to login and start DocuShare.
If you installed scan to DocuShare, you must be logged in as root to start DocuShare and to enable the scan feature. For non-root users to enable the scan to DocuShare feature, the FTP server default port (port 21) must be changed to another port that is above port 1024 (ftpd.conf) and the Xerox Work Centres used for scanning must be able to specify this port.
Finish the installation1. When the installation successfully completes, click Finish to close the installer.
2. Remove the product media from the server drive.
3. Set your UNIX virtual display buffer to operate within an X Windows system.
DocuShare operates in an X Windows environment; set the display buffer to use all of the DocuShare features. In a headless system, an error occurs if the display buffer is not correctly set.
4. In a command prompt window, cd to <DSHome>/bin, then enter ./start_docushare.sh to start DocuShare.
At initial startup, DocuShare automatically updates the search indexes. Wait five minutes before you access the site with a browser.

DocuShare on a Linux platform Install DocuShare
DocuShare Installation Guide 4–3
Note: To prevent the Search Service from stopping when you exit the shell, use either the start_docushare.sh bg or the start_docushare.sh bg & command to start DocuShare in background mode.
5. If you installed Scan-to-DocuShare via FTP, disable the UNIX FTP service on your UNIX system.
Note: If Scan-via-FTP is installed, you must be root to start DocuShare to enable the scan feature. To enable the Scan-via-FTP feature by non-root users, the FTP server default port (port 21) must be modified to another port above port 1024 (ftpd.conf) and the Xerox Work Centres must be able to specify this port.
a. Log into the server as a UNIX server administrator (root).
b. From the Start menu, select Service Configuration.
c. In the Service Configuration window, de-select wu-ftpd.
License the site1. Use a browser to connect to your newly installed site.
• The default URL is http://<fully qualified DNS name>:8080/docushare.
• If DocuShare was installed in the home directory on your web site, the URL is:http://<fully qualified DNS name>:<port>/
• If DocuShare was installed in a subdirectory on your web site, the URL is:http://<fully qualified DNS name>:<port>/<subdirectory_path>/
• If you installed Apache on your server, then the :<port> component of the URL is not used. For example: http://<fully qualified DNS name>/docushare
• If you installed only Tomcat on your server, then the :<port> component of the URL is 8080 (default).
2. Use the admin password you set during installation and log into the site as admin.
3. On the navigation bar, click Admin Home.
4. From the Administration menu, click Site Management | License.
5. On the License page, locate and write down the Host ID exactly as displayed.
6. Follow the instructions that Xerox DocuShare or your DocuShare reseller provided to obtain a site license string.
7. When you have the license string, return to the Site Management | License page and enter the string in the License field.
8. Refer to the Administrator Guide for information on post-installation site configuration, such as setting up your site to use SSL.

Uninstall DocuShare DocuShare on a Linux platform
4–4 DocuShare Installation Guide
Uninstall DocuShareUninstall does not remove the DocuShare directory that includes your DocuShare repository content. To be safe, before uninstalling DocuShare move the repository content to another storage media by using the DocuShare command line utility, dsexport. Refer to the DocuShare Command Line Utilities Guide for details.
Uninstall removes all installed language packs.
Caution: The DocuShare uninstaller only removes DocuShare, not the installed database. You should backup data for all Linux applications sharing the database.
To uninstall DocuShare:
1. Log into the server as a UNIX server administrator (root).
2. Stop the DocuShare server by doing the following:
a. Open a command prompt window
b. Change the directory to <DSHome>/bin
c. Enter ./stop_docushare.sh
3. Change the directory to <DSHome>/_uninst.
4. Enter ./doc_uninstall, then follow the onscreen instructions.
5. After doc_uninstall uninstalls DocuShare, manually delete the directory where DocuShare was installed.

DocuShare on a Linux platform Upgrade DocuShare
DocuShare Installation Guide 4–5
Upgrade DocuShareA DocuShare upgrade utility is included with the software install Wizard. The utility can take sites as low as v5.0.3 and upgrade them to the current version of DocuShare.
Installation logs
The DocuShare installer records all initial installation activity and stores it in DocuShareInstallLog.txt in the /tmp directory of your server. After the installer has created the DocuShare directory, it creates a second DocuShareInstallLog.txt file in the home directory where it stores the remaining installation information. To save the initial DocuShareInstallLog file, start the installation process in a command prompt window by entering the command: ./docushare -P docushareLog.cleanUp=false.
Before you start the upgrade procedure A day prior to upgrading the site, inform users that the site will be down
1. Go to Site Management l Site Operations.
2. In the Admin Message field, enter a message telling users when the site will be unavailable and for how long; then select Yes in the Show Admin Message field.
3. Click Apply.
Review the information required for DocuShare software installation presented in Chapter 1. Record all of your current configuration settings so you can enter them in the upgrade Wizard windows.
From the Administration menu, click Site Management | License. On the License page, locate and write down the Host ID number of the server.
Stop all automated or programmatically generated activities; especially those that use the Content Intake Manager, Content Rules, or Scan to DocuShare services.
Close site access
1. Log into the DocuShare site as admin.
2. Go to Site Management l Access Policies.
3. Set the Site Access Authority to Administrator, then click Apply.
4. Go to Site Management l Site Operations.
5. In the Admin Message field, enter a message telling users that the site is going down in ten minutes, select Yes in the Show Admin Message field, then click Apply.
6. After ten minutes, enter the message DocuShare is currently in read-only mode in the Admin Message field.
7. In the System Mode field, select Read Only.
8. In the Show Admin Message field select Yes.
9. Click Apply.
Backup the IDOL database
1. Make sure the target directory exists and is empty before starting backup. The target directory is represented as <exportdir> in the command.
2. Run the command idoltool.sh -s export <exportdir>.
Backup the site database

Upgrade DocuShare DocuShare on a Linux platform
4–6 DocuShare Installation Guide
1. In your database server manager, stop the database.
2. Perform a system backup of your DocuShare site.
3. When the backup is finished, start the database.
The database must be running for the DocuShare Installer to upgrade the database schema.
4. If you are using a Microsoft SQL Server database, run exec sp_fulltext_database enable on the server to enable full text search.
Clear the event queue
1. Go to Site Management l Site Operations.
2. In the System Mode field, select Read Write and select No in the Show Admin Message field; then click Apply.
3. Go to Services and Components | Subscription.
4. Set the Weekly Notification Day to the current day of the week, and set the Weekly Notification Hour and Weekly Notification Minute to five minutes from the current time; then click Apply.
5. Wait ten minutes before proceeding with the upgrade.
This allows the DocuShare notification service to send all subscribed notifications and clear the event queue. Failure to clear the event queue before starting the upgrade results in the lost of all events waiting in the queue.
Stop DocuShare
1. Log into the server as a UNIX server administrator (root).
2. In a command prompt window, cd to <DSHome>/bin and enter ./dsservice.sh -shutdown DocuShare to stop the server.
Start the upgrade
To have DocuShare save all configuration and upgrade data, start the upgrade in a Command Prompt window by entering the command line: docushare -P docushareLog.cleanUp=false
1. Log into the server as a UNIX server administrator (root).
2. Launch the DocuShare software install Wizard by doing one of the following:
• If you are installing from a product media: Insert the DocuShare media into the server drive. If necessary, mount the media as root. Open the media. In the root directory, locate and double-click docushare.
• If you downloaded DocuShare from the web: Download the file to a temporary directory on your server, then unzip and extract the tar file. Then, in a command prompt window go to <DSHome>/<Linux>/DocuShare and enter docushare.
3. When the Upgrade Option window appears, select Upgrade.
Be patient; it takes several minutes for the system to load and start the installer.
4. Follow the onscreen instructions; accept the defaults or enter your own configuration information.
Finish the upgrade1. When the upgrade successfully completes, click Finish to close the installer.
2. Remove the product media from the server drive.

DocuShare on a Linux platform Upgrade DocuShare
DocuShare Installation Guide 4–7
3. Set your UNIX virtual display buffer to operate within an X Windows system.
DocuShare operates in an X Windows environment; set the display buffer to use all of the DocuShare features. In a headless system, an error occurs if the display buffer is not correctly set.
4. In a command prompt window, cd to <DSHome>/bin, then enter ./start_docushare.sh to start DocuShare.
At initial startup, DocuShare automatically updates the search indexes. Wait five minutes before you access the site with a browser.
Note: To prevent the Search Service from stopping when you exit the shell, use either the start_docushare.sh bg or the start_docushare.sh bg & command to start DocuShare in background mode.
5. If you installed Scan-to-DocuShare via FTP, disable the UNIX FTP service on your UNIX system.
Note: If Scan-via-FTP is installed, you must be root to start DocuShare to enable the scan feature. To enable the Scan-via-FTP feature by non-root users, the FTP server default port (port 21) must be modified to another port above port 1024 (ftpd.conf) and the Xerox Work Centres must be able to specify this port.
a. Log into the server as a UNIX server administrator (root).
b. From the Start menu, select Service Configuration.
c. In the Service Configuration window, de-select wu-ftpd.
6. If your DocuShare site uses LDAP over a secure SSL channel, you need to import the SSL certificate into the newly installed dsstrust store. Instructions for importing the LDAP SSL Certificate are in the LDAP Active Directory Guide that is located on the Help page of your DocuShare server.
License the site1. Use a browser to connect to your newly installed site and login as admin.
2. From the Administration menu, click Site Management | License.
3. On the License page, locate and write down the Host ID number exactly as displayed.
4. Follow the instructions that Xerox DocuShare or your DocuShare reseller provided to obtain a site license string.
5. When you have the license string, return to the Site Management | License page and enter the string in the License field. Do not use your old site license nor a trial license.
Post upgrade tasks1. Reset user levels for all user accounts on your site. If you upgraded from DocuShare 5.x, all user
accounts are now set to the CPX level. You must now activate and set each account to either Read-Only or DocuShare user levels as appropriate.
Refer to the DocuShare Administrator Guide for information on user levels and changing user levels through Account Management l Users l Change User Level.
2. Run database optimization as defined in the DocuShare Administrator Guide database optimization procedures.
3. To access customized VDF and image files, the upgrade installer relocates these files to <DSHome>\DSUpgrade\BackUpDir.0\amber.jar and <DSHome>\DSUpgrade\BackUpDir.0\root.jar.

Upgrade DocuShare DocuShare on a Linux platform
4–8 DocuShare Installation Guide
Note: VDF files customized to work with DocuShare 5.x or older are not upgraded by the installer and do not work with this release of DocuShare. Refer to the DocuShare VDF Reference Guide to migrate your custom VDFs to the current DocuShare release.
4. If you changed the Subscription Notification settings to clear the event queue, go to the Services and Components | Subscription administration page and return the Weekly Notification Day, Hour, and Minute to their values prior to the upgrade.
5. Go to Site Management l Access Policies.
6. Return the Site Access Authority to the pre-upgrade setting, then click Apply.
Index the site
After completing DocuShare upgrade and licensing, index the site and verify that index is working correctly.
Note: If you are upgrading from version 6.5.3, some of the steps below are not required. The steps not required are indicated.
1. Stop DocuShare.
2. In a command window, run <DSHome>\bin\idoltool -s resetserver all y. (Not required for upgrades from 6.5.3.)
Caution: The idoltool -s resetserver all y command clears the IDOL search indexes. Run this immediately before running dsindex index_all.
3. Optional: To increase the allocation of available memory for IDOL on 64-bit Linux, run the appropriate idolsetup.sh command according to the amount of RAM on the server.
• 4–8 GB RAM: <DSHome>\bin\idolsetup.sh ..\config\idol_default.config
• 8–16 GB RAM: <DSHome>\bin\idolsetup.sh ..\config\idol_medium.config
• 16–32 GB RAM: <DSHome>\bin\idolsetup.sh ..\config\idol_large.config
• 32+ GB RAM: <DSHome>\bin\idolsetup.sh ..\config\idol_unlimited.config
4. Start DocuShare.
5. Run <DSHome>\bin\dsindex index_all. (Not required for upgrades from 6.5.3.)
6. Review the recoverIndex.log file written to <DSHome>\logs directory. The file lists the handles of the documents that could not be content indexed. (Not required for upgrades from 6.5.3.)
7. Run <DSHome>\bin\verifyIndex.sh to verify that the documents in the repository have been indexed. (Not required for upgrades from 6.5.3.)
8. If DocuShare was configured for LDAP, continue with the following steps. If your site does not use LDAP, you are finished with this procedure.
9. If DocuShare was configured for LDAP; start DocuShare, log into DocuShare as admin and go to Admin Home.
10. From the Administration menu, click Account Management | LDAP Accounts | Bind Group.
Note: These last two steps invoke a schema update to replace incorrect schema information with up-to-date attribute values from the LDAP server.
11. On the Bind Group page, set the Keywords LDAP Attribute to cn. Click Apply.

DocuShare on a Linux platform Upgrade DocuShare
DocuShare Installation Guide 4–9
12. On the same Bind Group page, remove the Keywords LDAP Attribute entry. Click Apply.

Update DocuShare software or add a language DocuShare on a Linux platform
4–10 DocuShare Installation Guide
Update DocuShare software or add a languagePatches, updates, and additional languages for DocuShare software are available, and are easily installed using the DocuShare install Wizard.
Before you install software updates or additional languages, make sure the selected update is compatible with your version of DocuShare. Go to About DocuShare, on your site home page or in the Administration Menu, to locate your version number.
If you are installing a language, go to Site Management | License. If the language is not listed under Active Language, you must obtain a new license string to use the new language.
If documentation is supplied with an update, read the documentation before starting the installation.
Install a software update or a language1. Log into the server as a UNIX server administrator (root).
2. In a command prompt window, cd to <DSHome>/bin and enter ./dsservice.sh -shutdown DocuShare to stop the server.
3. If you are downloading software updates or a language package from the web, download the software to a temporary directory on your DocuShare server and unzip and extract the package.
If you are installing the update software or a language package from a CD, insert the CD into the server CD drive. If necessary, mount the CD as root.
4. In the software directory, open the Linux directory.
5. In the Linux directory, open the DocuShare directory and double-click dsUpdate to start the update installation Wizard. If you work from a command prompt window, cd to the DocuShare directory and run ./dsUpdate -console to start the installation.
Be patient; it takes a few minutes to load and start the installer.
6. Once the install Wizard begins, follow the onscreen instructions. Click Next to proceed or click Back to return to a previous screen.
7. When asked to select an update, check the appropriate update or language; then click Add Update.
8. When the installation successfully completes, click Finish to close the installer.
9. In a command prompt window, cd to <DSHome>/bin, then enter ./start_docushare.sh to start DocuShare.
10. Use a browser to connect to your site, and log in as an administrator.
11. If your specific update requires a new license (as in the case of adding a language) go to Site Management | License.
12. On the License page, locate and write down the Host ID number exactly as displayed.
13. Follow the instructions that Xerox DocuShare or your DocuShare reseller provided to obtain a site license string.
14. When you have the license string, return to the Site Management | License page and enter the string in the License field.
15. If your specific update was a language installation, refer to the Administrator Guide for information on enabling and selecting default languages for your site.

DocuShare Installation Guide 5–1
Database configuration 5
Caution: In many instances, correct installation and configuration of a database requires the expertise of a qualified database administrator.
Oracle
On the Oracle side
Before starting the DocuShare software installation, the Oracle database administrator must:
• Create a DocuShare/Oracle user and a tablespace.
If you choose to use an existing Oracle database or prefer to manually create and define an Oracle tablespace, the following is an example of a typical DocuShare tablespace creation script.
CREATE TABLESPACE <name> DATAFILE <file> SIZE <size> AUTO EXTEND ON NEXT 512K MAXSIZE UNLIMITED EXTENT MANAGEMENT LOCAL AUTOALLOCATE;
• Designate a location on the Oracle system that has the required space for the new tablespace file.
• Set character encoding to AL32UTF8 if the system will be operating with multibyte characters.
• Change the value of nls_length_semantics from byte to char if the system will be operating with multibyte characters. If the value of nls_length_semantics is byte, the max length of DocuShare is different from the max length of DB because 1 multi-byte character in UTF-8 is 3byte.
Connect role
DocuShare 5.x had a Connect role that gave the DocuShare user account the authority to create Oracle connections, table, and sequence privileges. If upgrading from DocuShare 5.x to DocuShare 6, an additional role, CTXAPP, must be granted to Oracle database users. CTXAPP is required by the DocuShare Extensible Database Service (XDB). DocuShare 6 installation automatically grants both Connect and CTXAPP roles to the DocuShare user account.
The database administrator can grant the CTXAPP role to DocuShare users by logging on as either SYSTEM or as a user with DBA privileges and entering:
SQL> GRANT CTXAPP, CREATE SEQUENCE to <DS user>.

Oracle
5–2 DocuShare Installation Guide
For Oracle 10.2.0.4, the Connect role has been stripped of the create table and create sequence privileges.These privileges need to be restored. If an Oracle 9.x or 10.1 database is upgraded to 10.2.0.4, the database administrator needs to make sure that the following roles are present:
• Connect
• Create table
• Create Sequence
• CTXAPP
Grant all of these roles simultaneously by entering:
SQL> GRANT Connect, Create Table, Create Sequence, CTXAPP to <DS User>;
On the DocuShare side
To configure DocuShare to work with Oracle, the install Wizard requires a valid Oracle system account or an account with DBA privileges. The install Wizard uses the Oracle system account to create a new DocuShare/Oracle user account and to designate the new tablespace as the default for the new DocuShare/Oracle account.
When creating the database connection, the install Wizard works in the following order.
1. Creates a new Oracle user account for DocuShare.
2. Creates a new default tablespace for the new Oracle user account.
3. Creates DocuShare tables.
4. Populates the tables with initial data.
If for any reason a step fails, the Wizard stops the installation. Common reasons for stopping the installation include the user account and tablespace the install Wizard creates already exist.
Fields in the install Wizard Oracle database page:
• Database User — the account that DocuShare uses to log into the database
• Database User Password — the password for the Database User account
• Database Port — the port that DocuShare uses to connect to the database
• Tablespace Name — the name of the tablespace where the database stores all DocuShare data
• Indexspace Name — the name of the tablespace where the database stores all DocuShare indices
• Database SID — the unique name of the Oracle database instance
• Database Host Name — the name of the database server
• Create Tablespaces — select if tablespace entered in the Tablespace Name field has not been created, and you want the Wizard to create the tablespace for you
• Create User — select if the user name entered in the Database User field has not been created, and you want the Wizard to create the user account for you

SQL Server
DocuShare Installation Guide 5–3
SQL Server
On the SQL Server side
Before starting the DocuShare software installation, make sure of the following:
• If you install the database on the same server as you install your DocuShare site, set the maximum memory use to 50% of the physical RAM of the server.
On the DocuShare side
Fields in the install Wizard SQL Server database page:
• Database User — the account that DocuShare uses to log into the database
• Database User Password — the password for the Database User account
• Database Port — the port that DocuShare uses to connect to the database
• Database Name — the name of the database used to store DocuShare data
• Database Host Name — the name of the database server
• Database Instance Name — the name of the database instance that you want DocuShare to use
• Use Database Default Instance — select if you want to use the default database instance and leave the Database Instance Name field blank
• Use Database Named Instance — select if you want to use a named database instance and enter that name in the Database Instance Name field
• Create Database — select if a database has not been created and you want the Wizard to create the database for you

PostgreSQL
5–4 DocuShare Installation Guide
PostgreSQL
Windows platform
On the PostgreSQL side
Before starting the DocuShare software installation, the PostgreSQL database administrator must do the following:
• Create a DocuShare/PostgreSQL tablespace by logging into the database server as postgres, and running the command createdb –E UNICODE <DocuShare Database Name>. Give the tablespace a unique name.
• Enable TCP/IP connectivity, unless it was enabled during database software installation.
On the DocuShare side
Note: The install Wizard creates the system user account for the database. If you already have a system user account for PostgreSQL, do not use it for the DocuShare installation. Use the account that the Wizard creates.
To configure DocuShare to work with PostgreSQL, the install Wizard requires the following information:
• Database User — the account that DocuShare uses to log into the database
• Database User Password — the password for the Database User account
• Database Port — the port that DocuShare uses to connect to the database
• Tablespace Name — the name of the tablespace where the database stores all DocuShare data
• Database Host Name — the name of the database server
• Create Database — select if a database has not been created and you want the Wizard to create the database for you
Solaris platform
On the PostgreSQL side
Before starting the DocuShare software installation, the PostgreSQL database administrator must to the following:
• Create a DocuShare/PostgreSQL tablespace by logging into the database server as postgres, and running the command createdb –E UNICODE <DocuShare Database Name>. Give the tablespace a unique name.
• Enable TCP/IP connectivity, unless it was enabled during database software installation.

PostgreSQL
DocuShare Installation Guide 5–5
On the DocuShare side
Note: The install Wizard creates the system user account for the database. If you already have a system user account for PostgreSQL, do not use it for the DocuShare installation. Use the account that the Wizard creates.
To configure DocuShare to work with PostgreSQL, the install Wizard requires the following information:
• Database User — the account that DocuShare uses to log into the database
• Database User Password — the password for the Database User account
• Database Port — the port that DocuShare uses to connect to the database
• Tablespace Name — the name of the tablespace where the database stores all DocuShare data
• Database Host Name — the name of the database server
• Create Database — select if a database has not been created and you want the Wizard to create the database for you
Linux platform
On the PostgreSQL side
Before starting the DocuShare installation, the PostgreSQL database administrator must do the following:
• Create a DocuShare/PostgreSQL tablespace by logging into the database server as postgres, and running the command createdb –E UNICODE <DocuShare Database Name>. Give the tablespace a unique name.
• Enable TCP/IP connectivity, unless it was enabled during database software installation.
On the DocuShare side
Note: The install Wizard creates the system user account for the database. If you already have a system user account for PostgreSQL, do not use it for the DocuShare installation. Use the account that the Wizard creates.
To configure DocuShare to work with PostgreSQL, the install Wizard requires the following information:
• Database User — the account that DocuShare uses to log into the database
• Database User Password — the password for the Database User account
• Database Port — the port that DocuShare uses to connect to the database
• Tablespace Name — the name of the tablespace where the database stores all DocuShare data
• Database Host Name — the name of the database server
• Create Database — select if a database has not been created and you want the Wizard to create the database for you
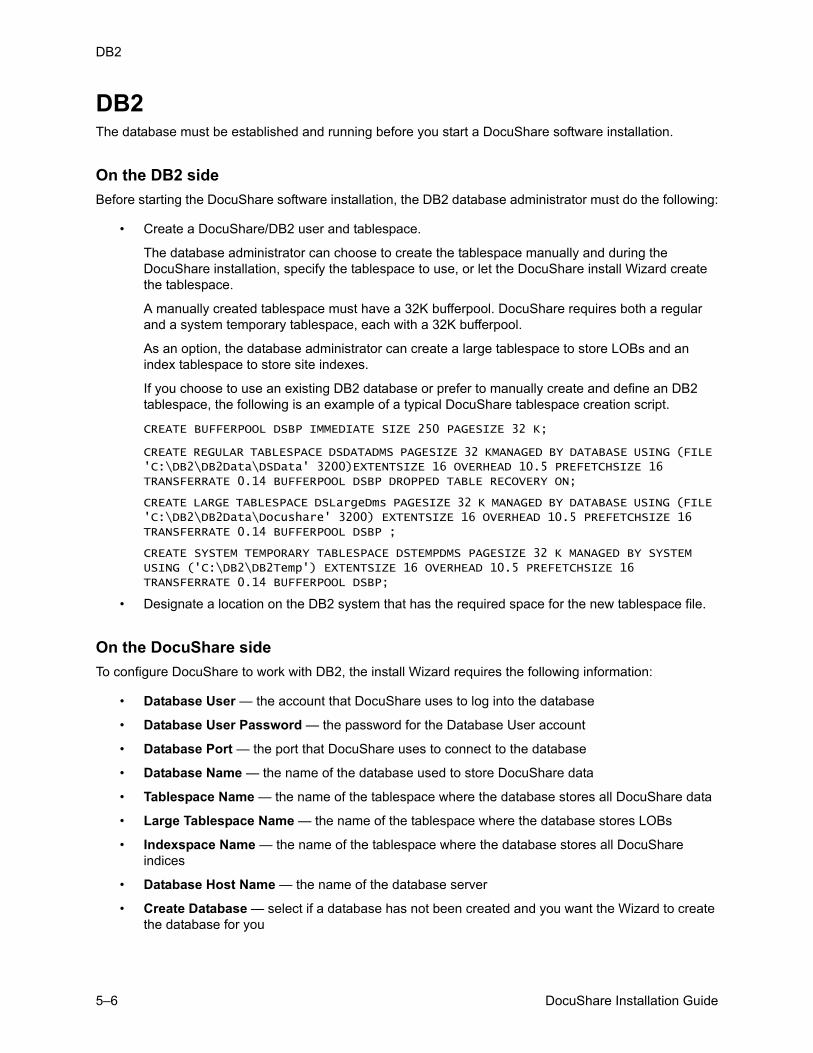
DB2
5–6 DocuShare Installation Guide
DB2The database must be established and running before you start a DocuShare software installation.
On the DB2 side
Before starting the DocuShare software installation, the DB2 database administrator must do the following:
• Create a DocuShare/DB2 user and tablespace.
The database administrator can choose to create the tablespace manually and during the DocuShare installation, specify the tablespace to use, or let the DocuShare install Wizard create the tablespace.
A manually created tablespace must have a 32K bufferpool. DocuShare requires both a regular and a system temporary tablespace, each with a 32K bufferpool.
As an option, the database administrator can create a large tablespace to store LOBs and an index tablespace to store site indexes.
If you choose to use an existing DB2 database or prefer to manually create and define an DB2 tablespace, the following is an example of a typical DocuShare tablespace creation script.
CREATE BUFFERPOOL DSBP IMMEDIATE SIZE 250 PAGESIZE 32 K;
CREATE REGULAR TABLESPACE DSDATADMS PAGESIZE 32 KMANAGED BY DATABASE USING (FILE 'C:\DB2\DB2Data\DSData' 3200)EXTENTSIZE 16 OVERHEAD 10.5 PREFETCHSIZE 16 TRANSFERRATE 0.14 BUFFERPOOL DSBP DROPPED TABLE RECOVERY ON;
CREATE LARGE TABLESPACE DSLargeDms PAGESIZE 32 K MANAGED BY DATABASE USING (FILE 'C:\DB2\DB2Data\Docushare' 3200) EXTENTSIZE 16 OVERHEAD 10.5 PREFETCHSIZE 16 TRANSFERRATE 0.14 BUFFERPOOL DSBP ;
CREATE SYSTEM TEMPORARY TABLESPACE DSTEMPDMS PAGESIZE 32 K MANAGED BY SYSTEM USING ('C:\DB2\DB2Temp') EXTENTSIZE 16 OVERHEAD 10.5 PREFETCHSIZE 16 TRANSFERRATE 0.14 BUFFERPOOL DSBP;
• Designate a location on the DB2 system that has the required space for the new tablespace file.
On the DocuShare side
To configure DocuShare to work with DB2, the install Wizard requires the following information:
• Database User — the account that DocuShare uses to log into the database
• Database User Password — the password for the Database User account
• Database Port — the port that DocuShare uses to connect to the database
• Database Name — the name of the database used to store DocuShare data
• Tablespace Name — the name of the tablespace where the database stores all DocuShare data
• Large Tablespace Name — the name of the tablespace where the database stores LOBs
• Indexspace Name — the name of the tablespace where the database stores all DocuShare indices
• Database Host Name — the name of the database server
• Create Database — select if a database has not been created and you want the Wizard to create the database for you

DB2
DocuShare Installation Guide 5–7
When creating the database connection, the install Wizard works in the following order. If for any reason a step fails, the Wizard aborts the installation. Common reason for aborting the installation include the user account and tablespace the install Wizard creates already exist.
1. Creates a regular tablespace with a 32K bufferpool.
2. Creates a temporary system tablespace with a 32K bufferpool.
3. Creates DocuShare tables.
4. Populates the tables with initial data.

DB2
5–8 DocuShare Installation Guide

DocuShare Installation Guide 6–1
Web server bridge 6
Create a bridge to an Apache web serverIf you choose to use an Apache web server, you must manually create the bridge between the web server and the DocuShare Tomcat servlet.
During DocuShare software installation, the Wizard installs the following Apache files:
• <DSHome>/tomcat/bin/native/apacheX.X/mod_jk.so
• <DSHome>/tomcat/conf/auto/mod_jk.conf
• <DSHome>/tomcat/conf/jk/apacheX.X/httpd.conf
To manually create a bridge between an Apache web server and the DocuShare Tomcat servlet:
1. In your DocuShare directory, open the file <DSHome>/tomcat/conf/jk/apacheX.X/httpd.conf.
2. Copy all of the lines of code that appear in this file.
3. Locate the directory where you installed your Apache software, open the httpd.conf file in that directory, and paste the lines of code into that file.
4. Save the file.
5. Restart Apache.

Create a bridge to an IIS web server
6–2 DocuShare Installation Guide
Create a bridge to an IIS web serverIf, during DocuShare installation, you choose Tomcat only but later decided to use IIS as your web server, you can run the DocuShare IIS Software Bridge Management Tool to create a bridge to IIS.
The IIS Software Bridge Management Tool installs the bridge dll and plugs it into the IIS software. When IIS restarts, the bridge dll loads into IIS memory. As the dll loads into memory, it accesses registry key (HKEY_LOCAL_MACHINE\Software\Apache Software Foundation) to configure runtime settings.
The settings include the logging level, log file locations, the workers.properties file, and the uriworkermap.properties file.
The workers.properties file defines the location of the ajp13 protocol, which in this case would be Tomcat. The uriworkermap.properties file defines the URLs that IIS delegates to the bridge. The install Wizard updates these files to allow the dll to function. Information about more extensive URL mapping or more complicated IIS settings, such as configuring for multiple DocuShare sites, is available on the Apache web site.
There is no need to uninstall your current IIS bridge setup; the Wizard overwrites current settings at http://tomcat.apache.org/connectors-doc/.
To use the IIS Tool to create a bridge to an IIS web server:
1. Navigate to the location of the DocuShare installation files.
2. Navigate to the \Windows\IIS directory and double-click iistool.exe.
This starts the DocuShare IIS Bridge Management Tool Wizard.
3. In the next displayed window, select a location for the bridge installation; then click Next.
4. Enter the appropriate IIS bridge values in the displayed fields.
This includes the Tomcat Bridge Port Number. the IIS Port Number, the DocuShare Root, and the Host DNS Name. Generally, you do not need to change the default values.
5. Click Next.
The tool installs the bridge to the IIS web server.
6. When the Wizard completes installation, click Finished to close the window.
The Wizard restarts IIS.
7. If necessary, remove the media from the server drive.
Note: If you have a problem installing the bridge software, use iistool.exe and install the software to the C:\program files directory.

DocuShare Installation Guide 7–1
Add-on installation 7
OCR (Optical Character Recognition) Obtain a new DocuShare site license that includes OCR. Installing software alone will not enable OCR.
Verify that your server meets the minimum system requirements as are listed on the DocuShare OCR software download page.
Your DocuShare server must have more than one processor and running .NET 2.0 or 3.0.
Installing OCR software1. From your site Help Desk, select Downloads, then select Software Extras for the DocuShare
Platform; this takes you to an external web site.
2. On the web site, select Optional Add-on for DocuShare CPX and then select the Optical Character Recognition download.
3. Download the OCR software package to a temporary directory on your DocuShare server.
4. Unzip the OCR software package to a new folder, in the temporary directory, named OCR.
5. Log into the DocuShare server as a Windows administrator.
6. In the Windows Administrator Tool, select and open the Services application, select DocuShare and stop the service.
7. In the unzipped OCR software directory, open the Win32 directory.
8. In the Win32 directory, open the DocuShare directory and double-click dsUpdate.exe to start the OCR installation Wizard.
Be patient; it takes a few minutes to load and start the installer.
9. Once the install Wizard begins, follow the onscreen instructions. Click Next to proceed or Back to return to a previous screen.
10. When asked, check the OCR Update, browse to and select the ocr.jar file, then click OK.
11. Click Add Update, then click Next.
12. When the installation successfully completes, click Finish to close the installer.
13. In the Windows Administrator Tool, select and open the Services application, select DocuShare and start the service.
14. Use a browser to connect to your site, and log in as an administrator.
15. Go to Site Management l License and enter your new license string.
16. Refer to the DocuShare OCR Guide for instructions on how to use OCR to convert scanned images into searchable document formats.

OCR (Optical Character Recognition)
7–2 DocuShare Installation Guide
Additional languages for OCR
The OCR feature uses the default language of the installed DocuShare site. To use additional languages for OCR, you must have the language packs installed on the site and you must configure the OCR converter.xml file to accept new languages.
To add languages for OCR use:
1. In the DocuShare installation directory, go to /config and open the Converters.xml file.
2. Near the bottom of the open Converters xml file, locate the line <language/>.
3. Edit the line to include the desired languages.
For example; <language/>en,fr,de</language>
4. Save and close the file.

Archive Server
DocuShare Installation Guide 7–3
Archive ServerInstalling Archive Server software is almost identical to installing standard DocuShare software. The only difference is the type of software installation you select; in this case DocuShare Archive Server.
Refer to Chapter 1 of this guide to verify the system requirements and to make sure you have the information required by the install Wizard. System requirements for an Archive Server are the same as those for a standard DocuShare site.
After you have installed the DocuShare Archive Server software, send a license request email to your DocuShare License Administrator or your DocuShare reseller or distributor. When you account is verified, you will be emailed a license string.
Install the Archive Server1. Depending on the platform you are using, refer to that chapter of this guide.
2. Following the Install DocuShare instructions exactly as though you were installing a standard DocuShare site, but when the install Wizard displays the window asking you for the type of installation you want; select DocuShare Archive Server.
Note: The Archive Server must have the same domain name as the DocuShare sites that use the Archive Server.
3. When the installation successfully completes and you have started the service, use a browser to connect to the Archive Server.
4. Follow the standard DocuShare site license procedure to license the Archive Server. Make sure you use the license string that enables Archive Server. Installing software alone does not enable the Archive Server.
5. After licensing, reboot the server.
Configure client sites to use the Archive Server1. To configure any DocuShare site to use the Archive Server, go to Services and Components l
Archive Server of the Admin UI of that site.
2. On the Archive Server page, enter the hostname and port number of the Archive Server. Enter that information in the connection test field to make sure the DocuShare site can connect to the Archive Server.
3. You can also use the Archive Server page to set how often the site polls for documents marked for archiving.
Uninstall the Archive Server1. Depending on the platform you are using, refer to that chapter of this guide.
2. Follow the Uninstall DocuShare instructions exactly as though you were uninstalling a standard DocuShare site.

Archive Server
7–4 DocuShare Installation Guide